Before I start this week's documentation, please find a link for the
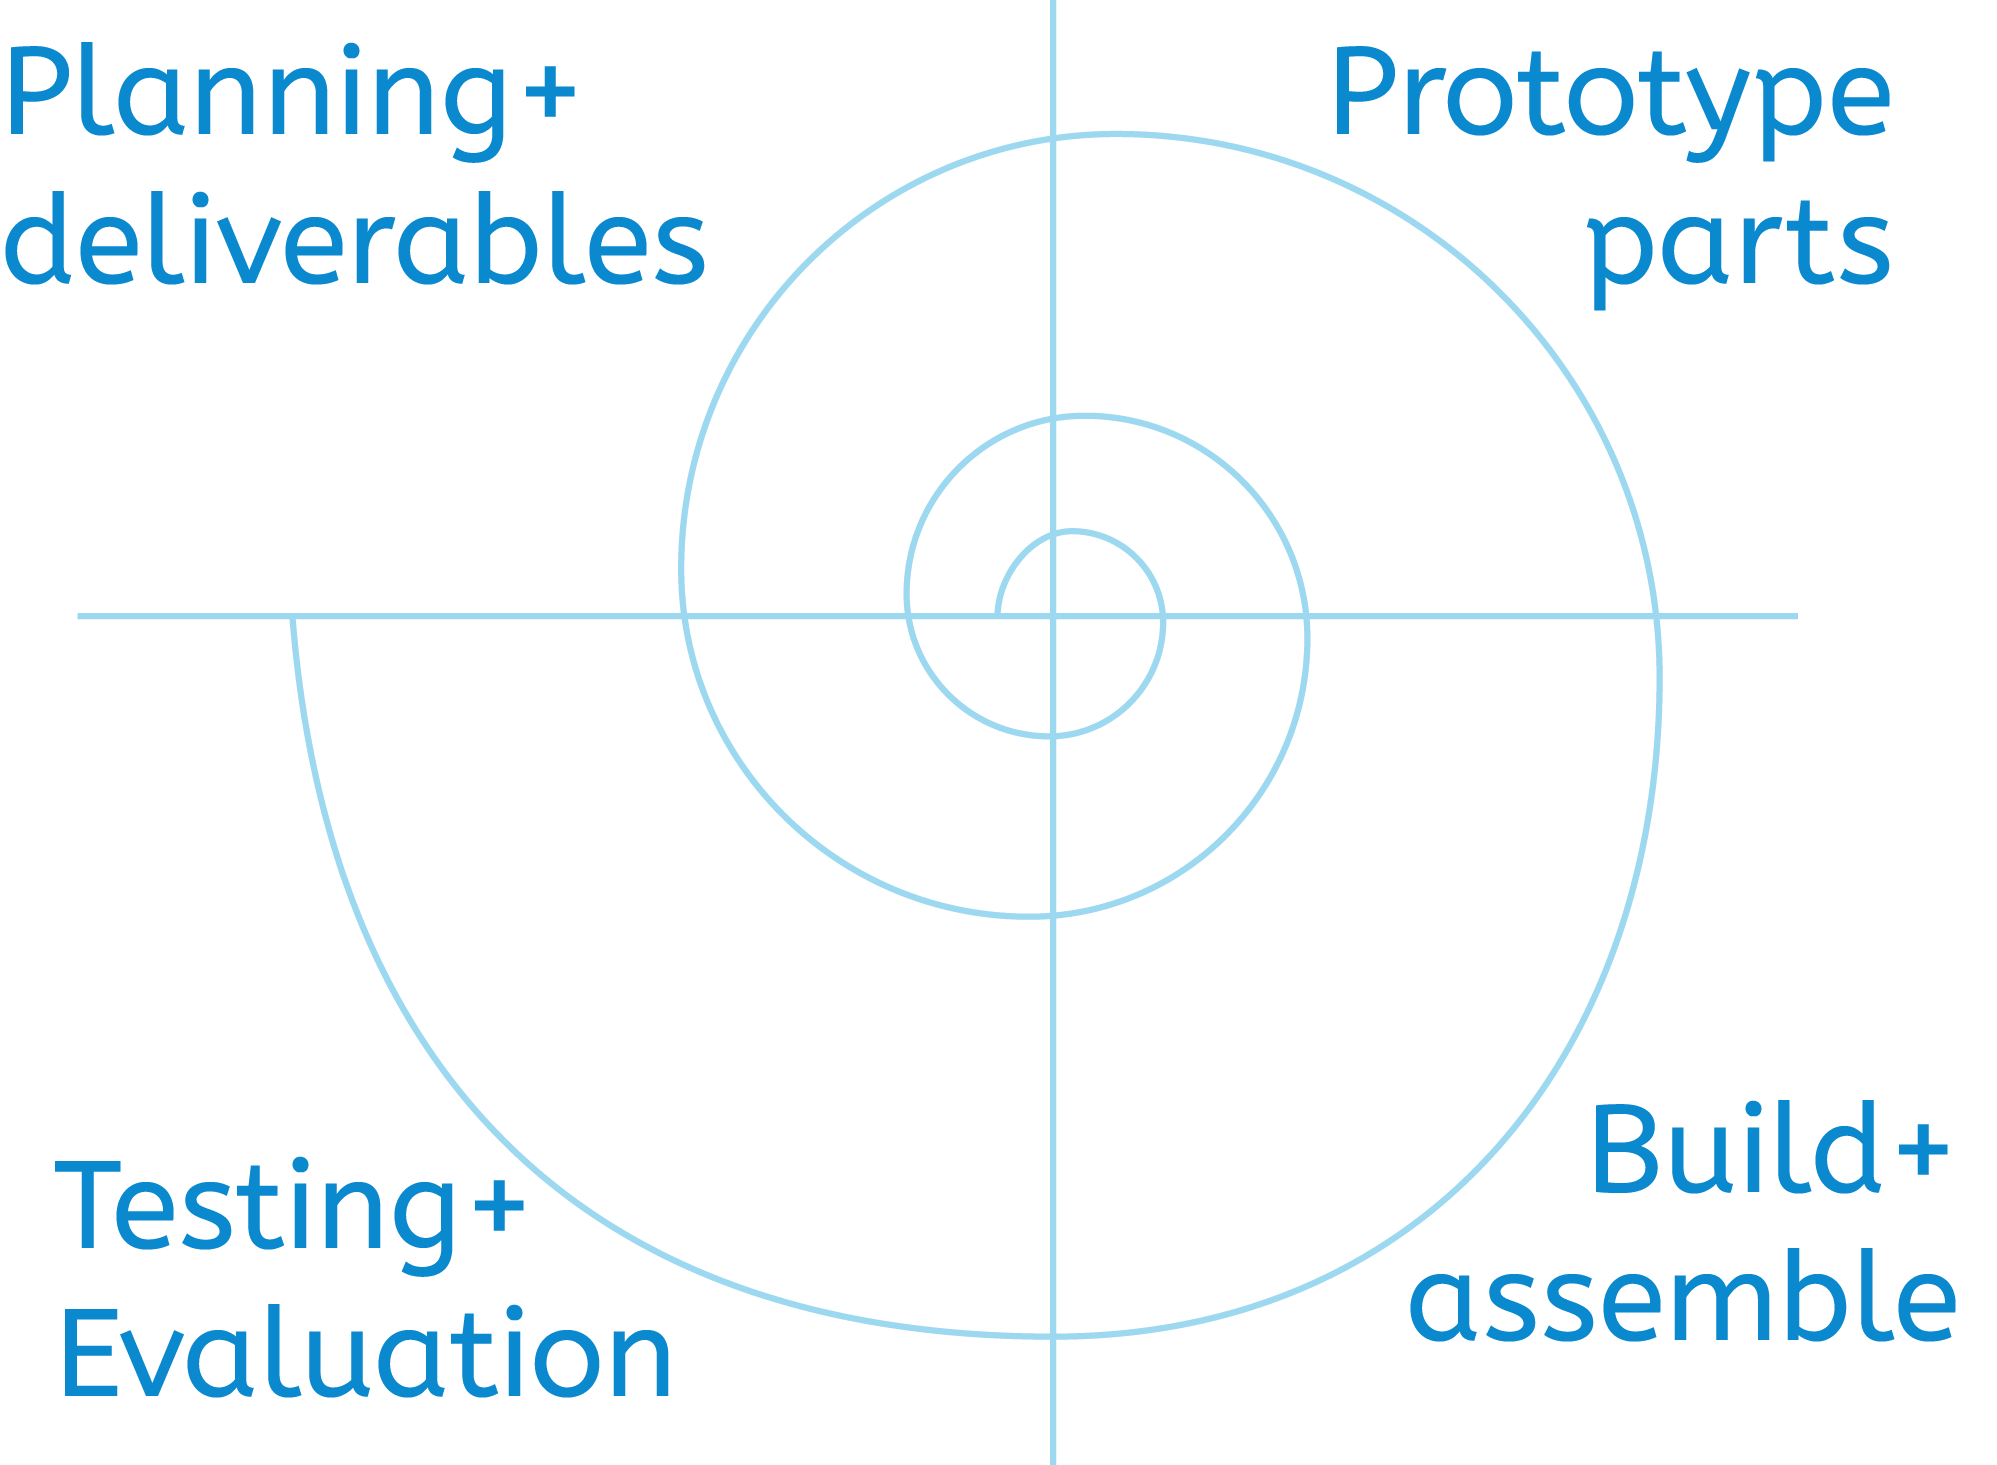
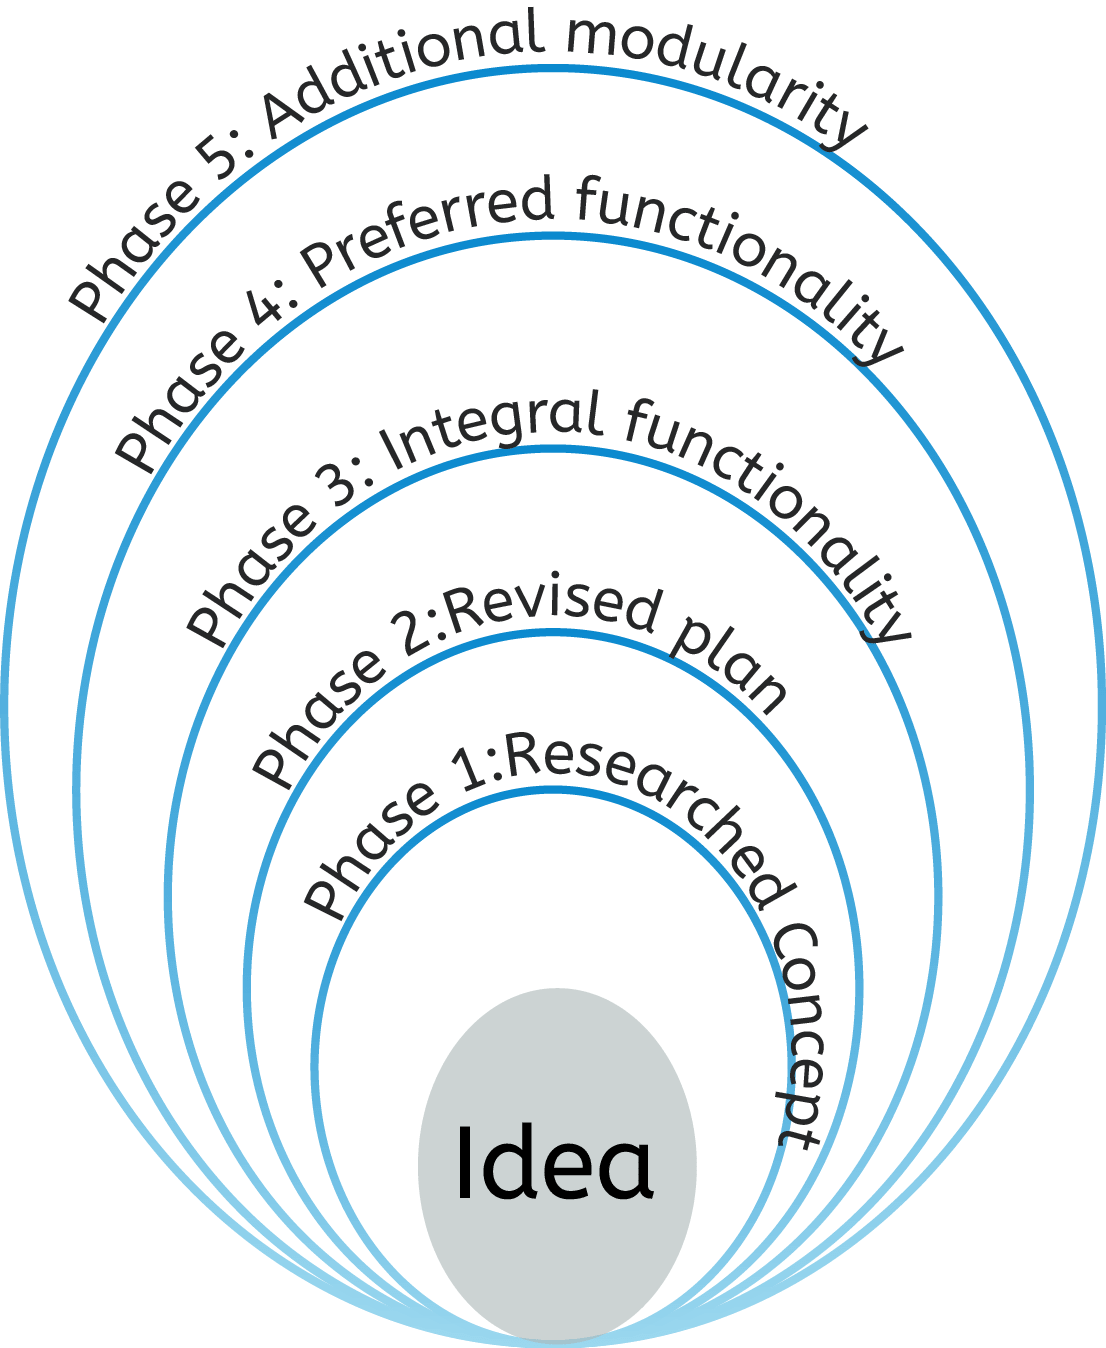
Having come up with an applicable concept for my final project, I set out to plan and organize the progression of each part of the project. With some prior knowledge from my degree with regards project management, and Dr. Gershfeld's recommendation, I decided to split my product into modular projects, each following a spiral development plan of its own. This would ensure the safest route to providing a working prototype and detailed documentation of each step. After reading Boehm's special paper on spiral development , I applied the same concepts shown in the diagram on the left with an approach similar to Dr. Gershfeld's, I named it the clamshell approach due its peculiar shape, seen on the right. For each section a clamshell plan was developed.
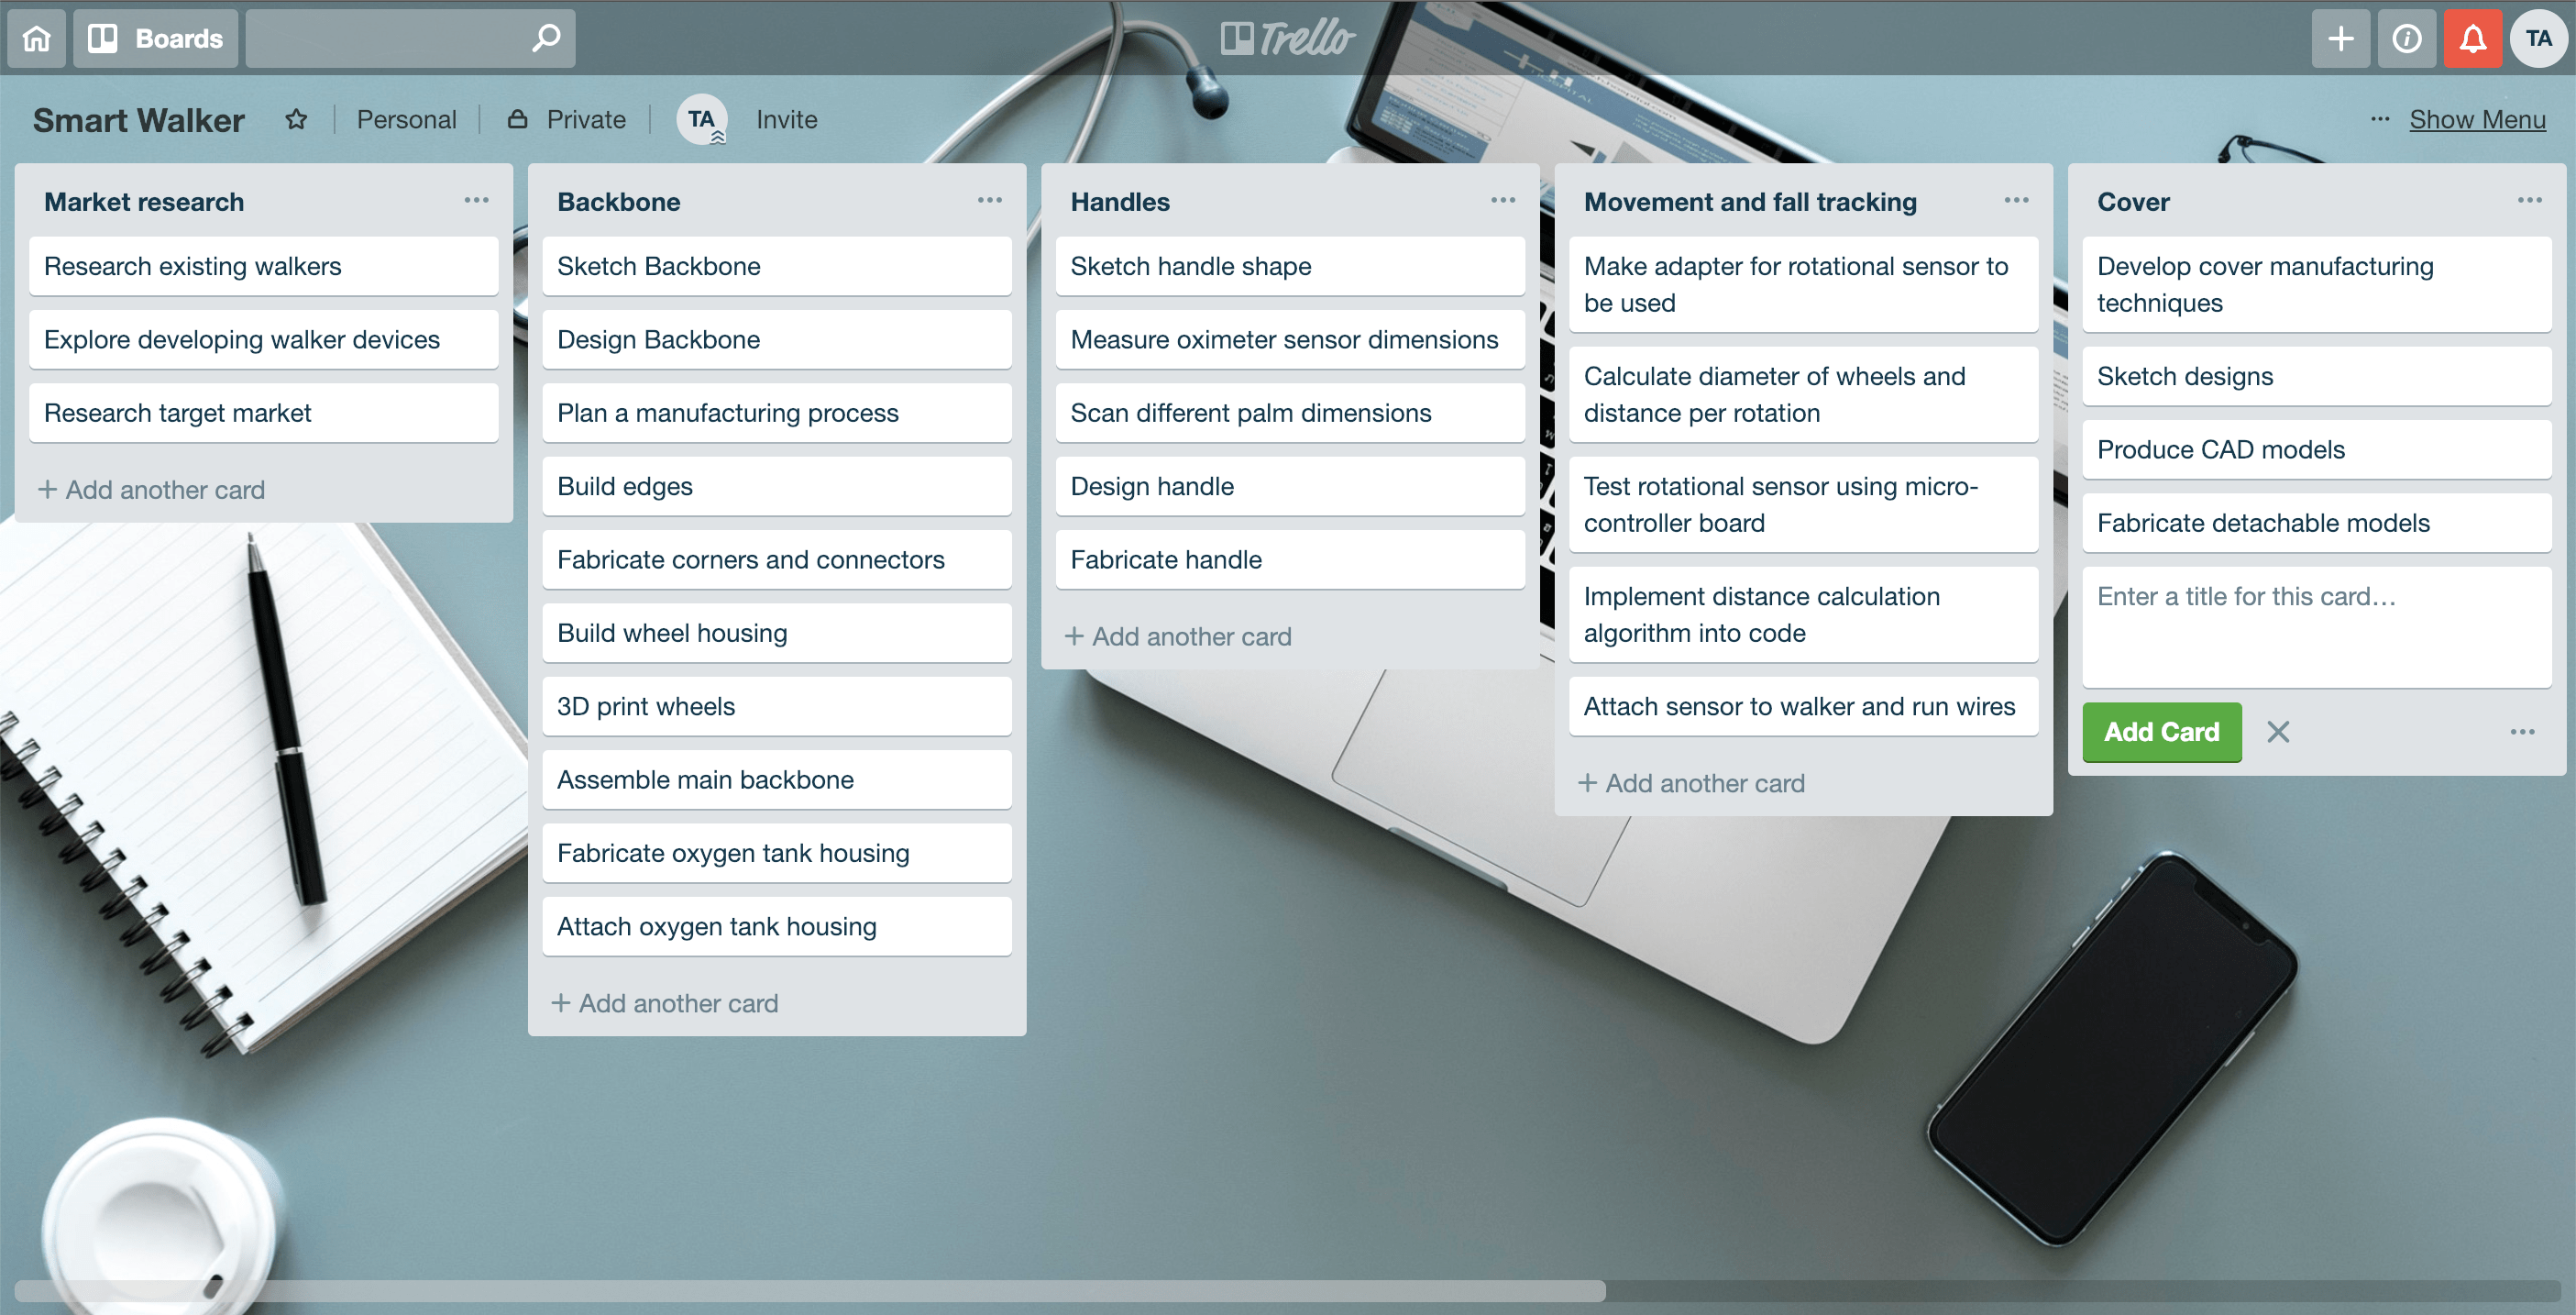
To keep track of the tasks and progress of the project I've started a trello board, creating a card for each module and the mini-projects I wish to complete in weekly assignments.
I have also set a general template to how each project, including the final project would be documented.
Inspiration
Market research
Ideation
Materials
Design and Render
Deliverables
Fabrication
Review of project success
Website development overview
For this week we had to design a website for the documentation to provide information about ourselves and more importantly document our progress in assignments as well as the final project. The content and structure of the website will be primarily written in hypertext markup language (HTML) while the design and layout will be written as cascading style sheets (CSS). Further down the line some interactive content may be included using a Javascript library such as JQuery.
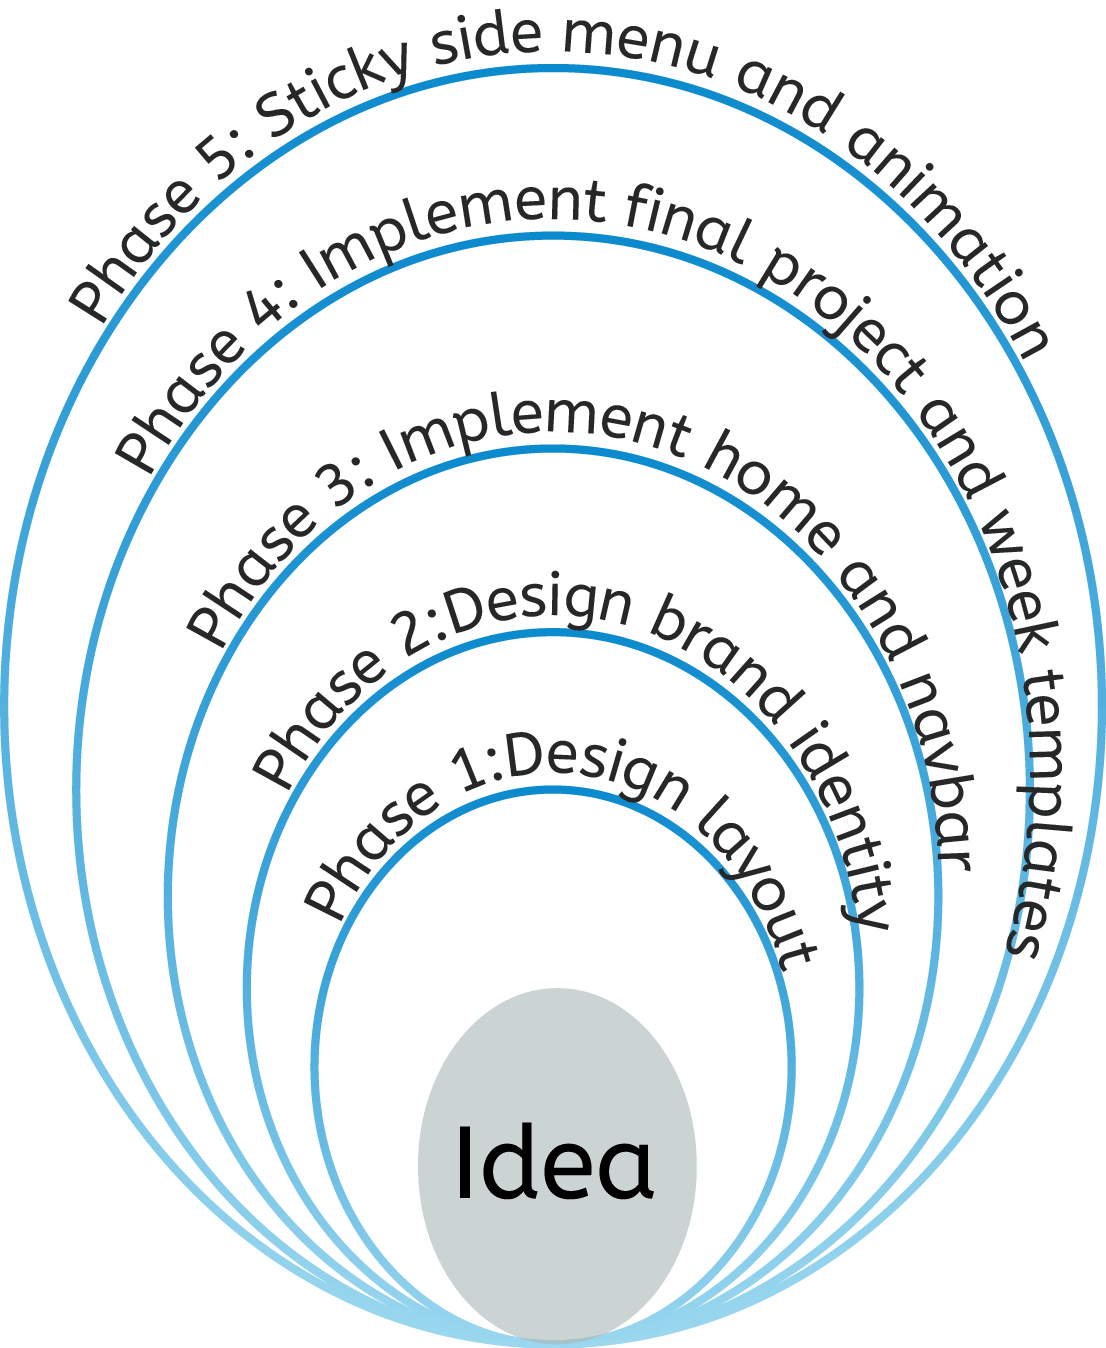
As mentioned earlier, here is the spiral development plan constructed for the development of the website.
Phase 1: Design a preliminary layout and structure for the website
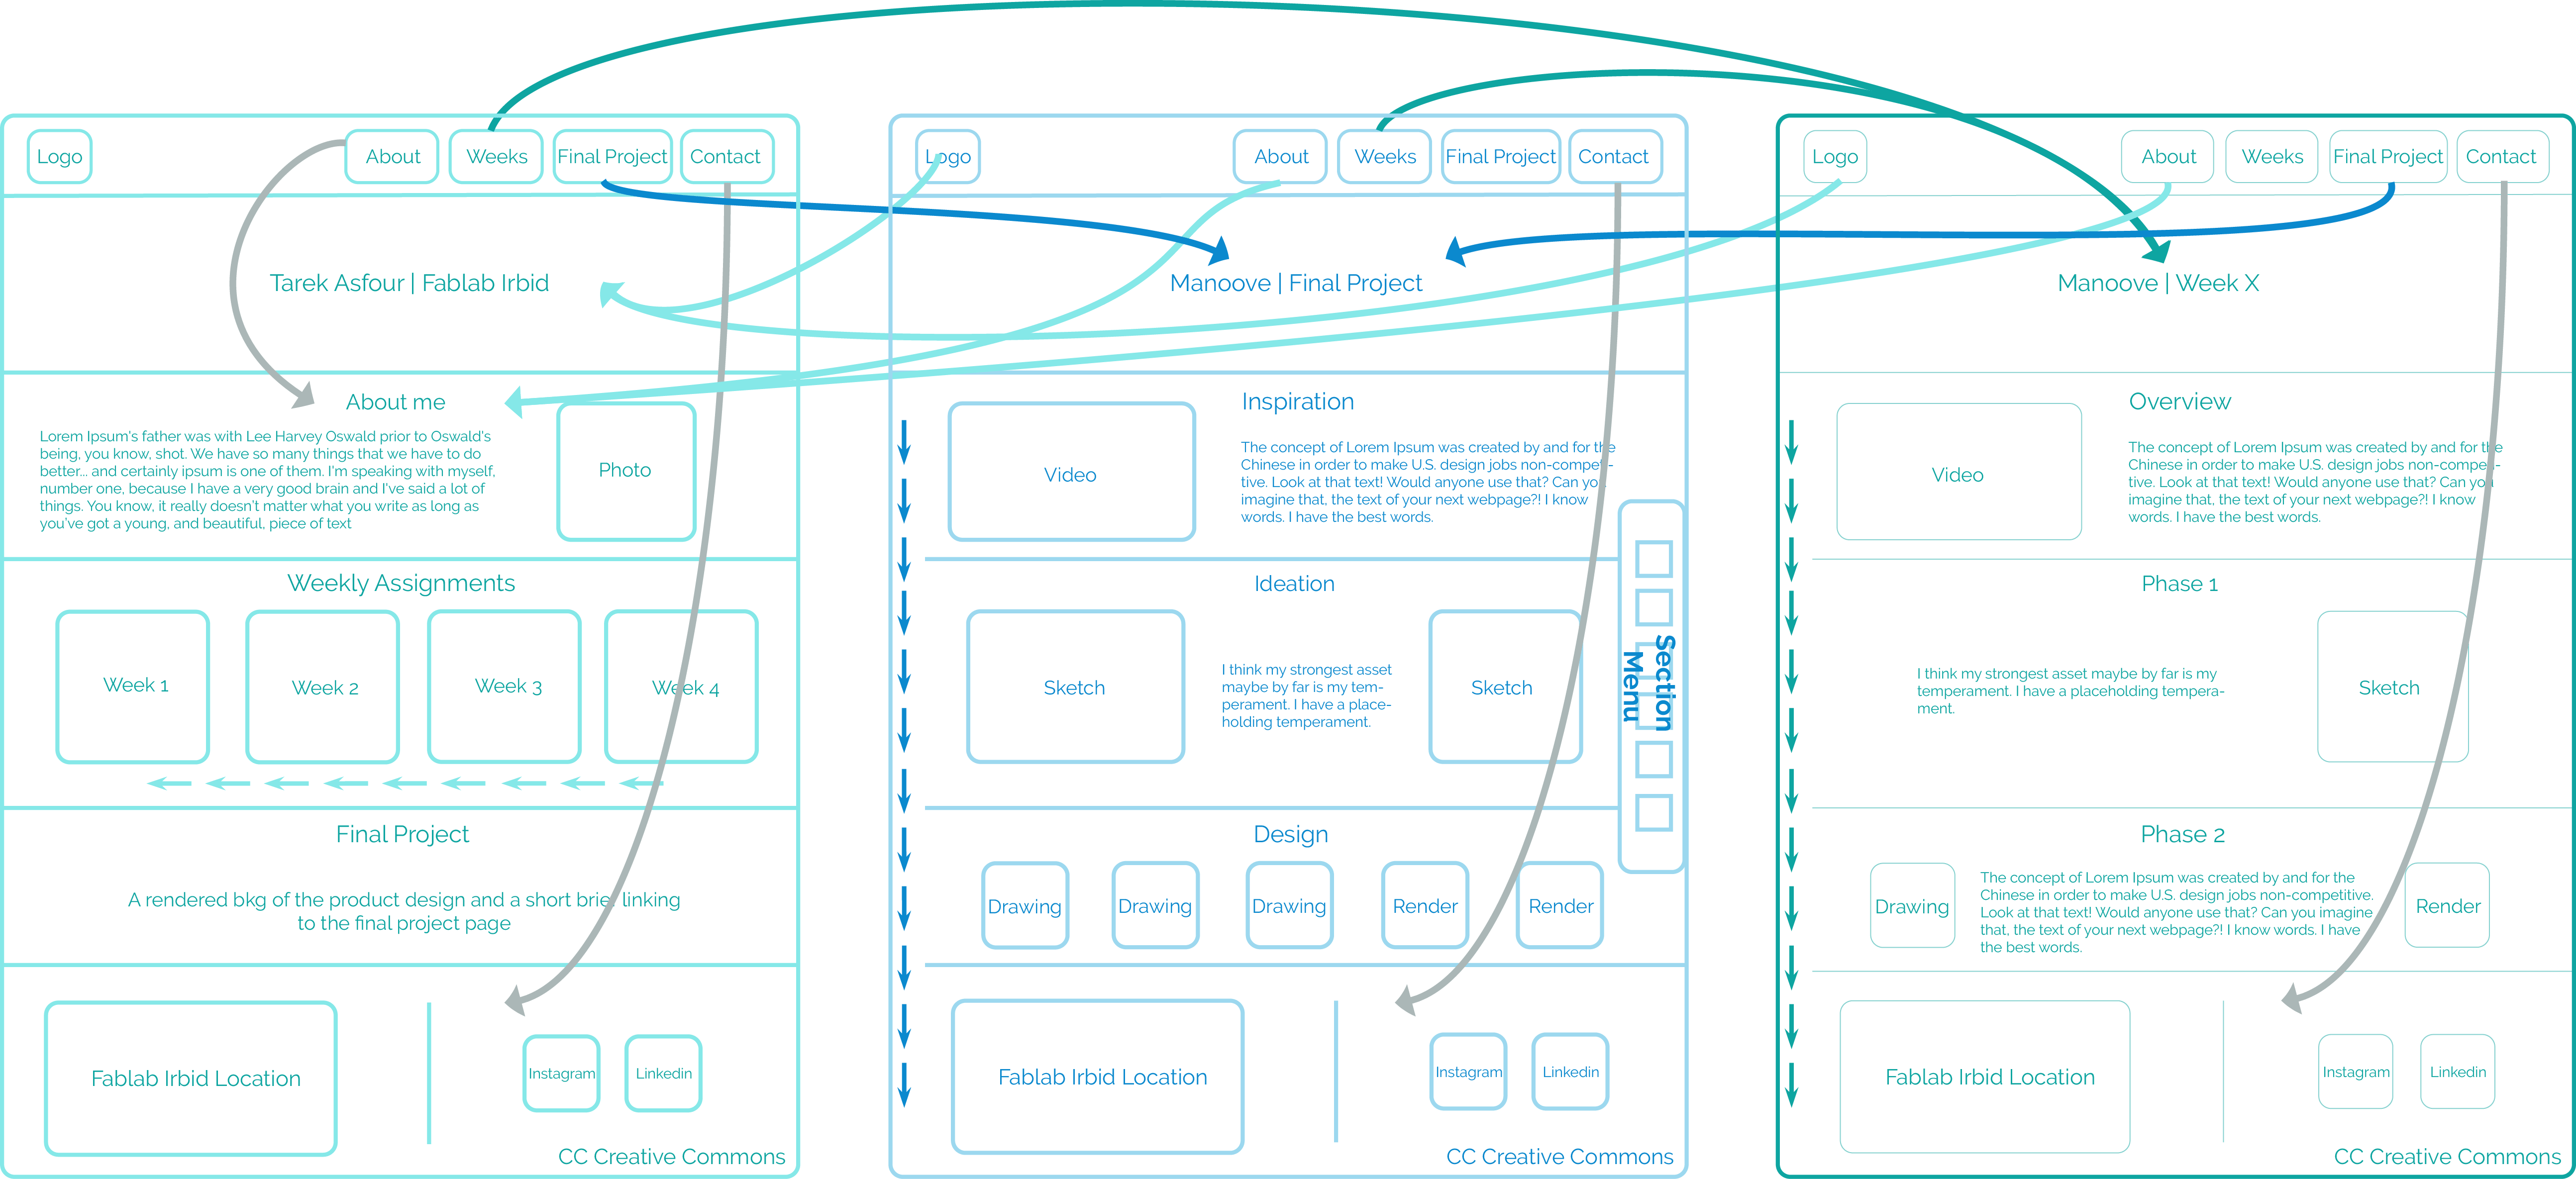
Before setting out to code the website I had to have an idea of how I wanted to organize the pages and content throughout the website. I constructed a basic map of how navigation through the website would be implemented and sketched templates for each of the main pages
Phase 2: Design a brand identity
To produce an aesthetically pleasing website, I first came up with a brand name for my final product and picked out the colors I wanted to use for the product, the website and all related content. I then used Adobe Illustrator to draw up a few logo designs to get a feel for the brand identity.
Phase 3: Implement Home page and navbar design
I have basic web design skills as I've previously designed a few websites through front-end drag and drop interfaces and a wiki presenting research for a competition . Our local instructor also gave us a tutorial on the basics of HTML and CSS.
I picked Brackets to develop the website primarily due its live review feature as shown to the right; allowing one to track the code output in real-time. I referred to W3 schools to check out how to include certain feature and correct code syntax. HTML has a basic structure throughout all pages as shown in image one. Any sections within the code have to be structured as shown in image two, except for some exceptions such as for a line break <br>. Content is written within the code as well as linking Images from their respective path in the website directory.
In the head section of the HTML code, the CSS file path is included. I also decided to use a particular font using google fonts. This is achieved by including a link of the fonts' URL in the head section. The font can then be used by referring to it in the CSS code, an example of the including links in the head section is shown below.
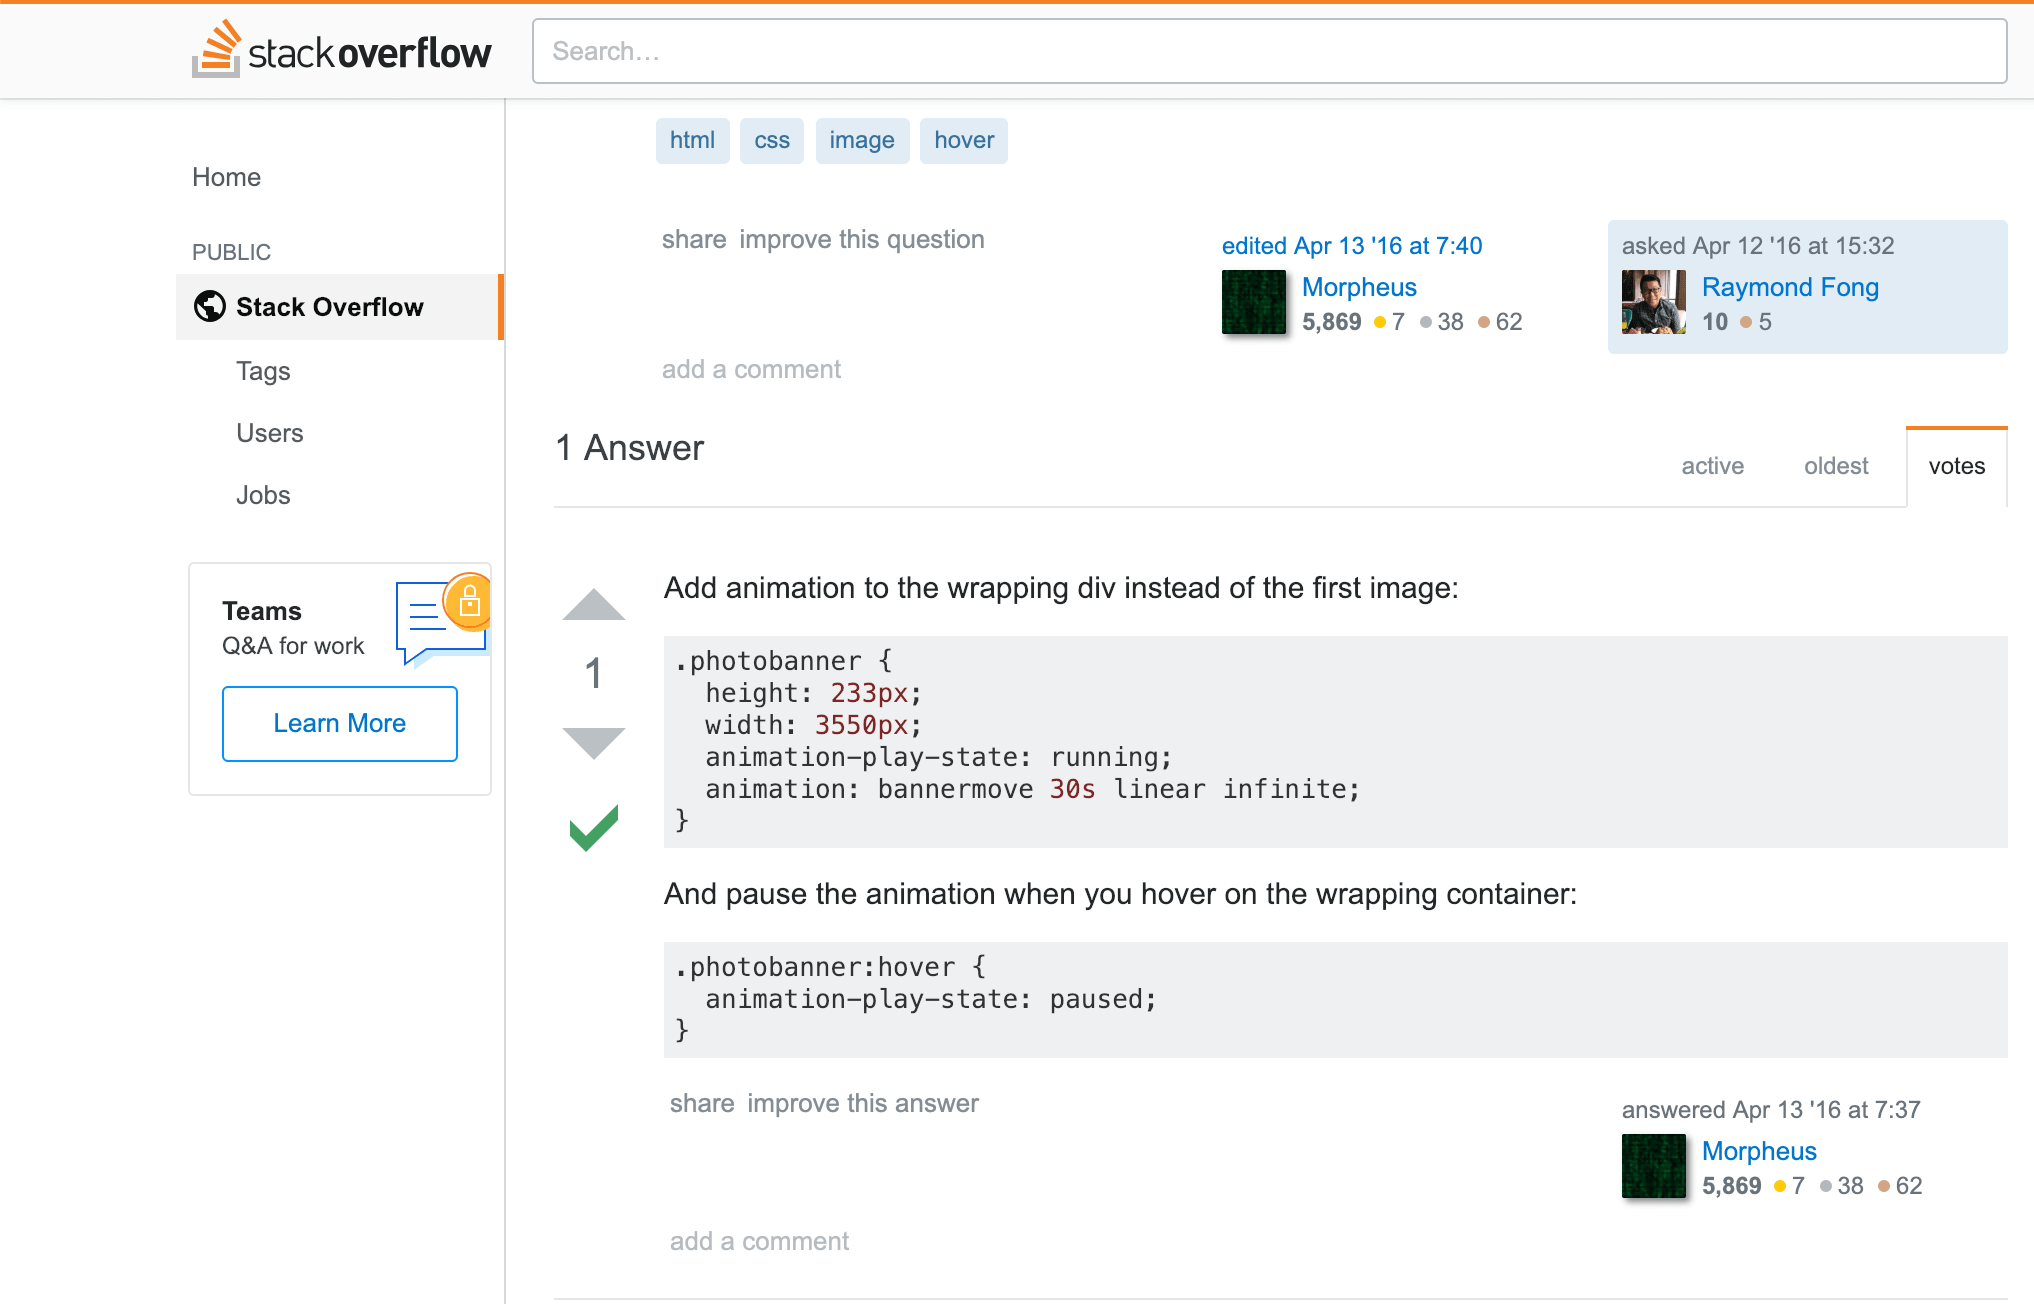
Obstacle 1: Infinite sliding photo banner
On the main page I wanted to have a continuous sliding banner displaying an image for every week which would also take you to that respective week. I researched online and found a tutorial taking you step by step through achieving this using CSS animation . However since I wanted it to pause when the user scrolls over it, I referred to StackOverflow where I found the solution.
Obstacle 2: Organizing images and texts in a div
While using css to control the display, float and position or elements, organizing the layout for each div was proving very tedious and wasn't producing a consistent result on different browsers/machines. After some research on the beloved Stack Overflow , I found the answer to my question. Although it was a solution that is applicable on 97% of browsers, it proved to be the most efficient and eventually would be supported by all browser. This is the display: flex option, allowing intuitive control over div layouts and automatically alligning contents vertically and horizontally. After finding the answer on stack overflow, I read more about this feature on W3 schools to learn the correct syntax and extent of its application.
Obstacle 3: Changing the color of hr seperator
I tried to change the color of hr seperator as is done with text in css. However the color remained black although I had control over the properties since I was able to control the width. After searching for someone who has faced the same problem, I found the question asked in quora and the answer was by adding these few simple lines of code.
Phase 4: Implement Final Project page and week templates
This Section has only been partially completed. I have constructed the weekly page template. This was achieved using the flex function in divs to organize the content in a more intuitive manner. Although this function allows better control of children inside a container, its viewing is limited to approx. 97% of updated web browsers. Since this phase is required for the final product, its is listed as a preffered functionality in the clamshell model; it might not be integral for the website initially but the earlier it's completed the better.
Phase 5: Creating sticky side menu
This Section has not yet been completed, however as is evident, the website is fully functional since according to the clamshell development model of the website this feature is an additional modular feature that isn't an integral part of the website.
Parallel Phase: Uploading to git
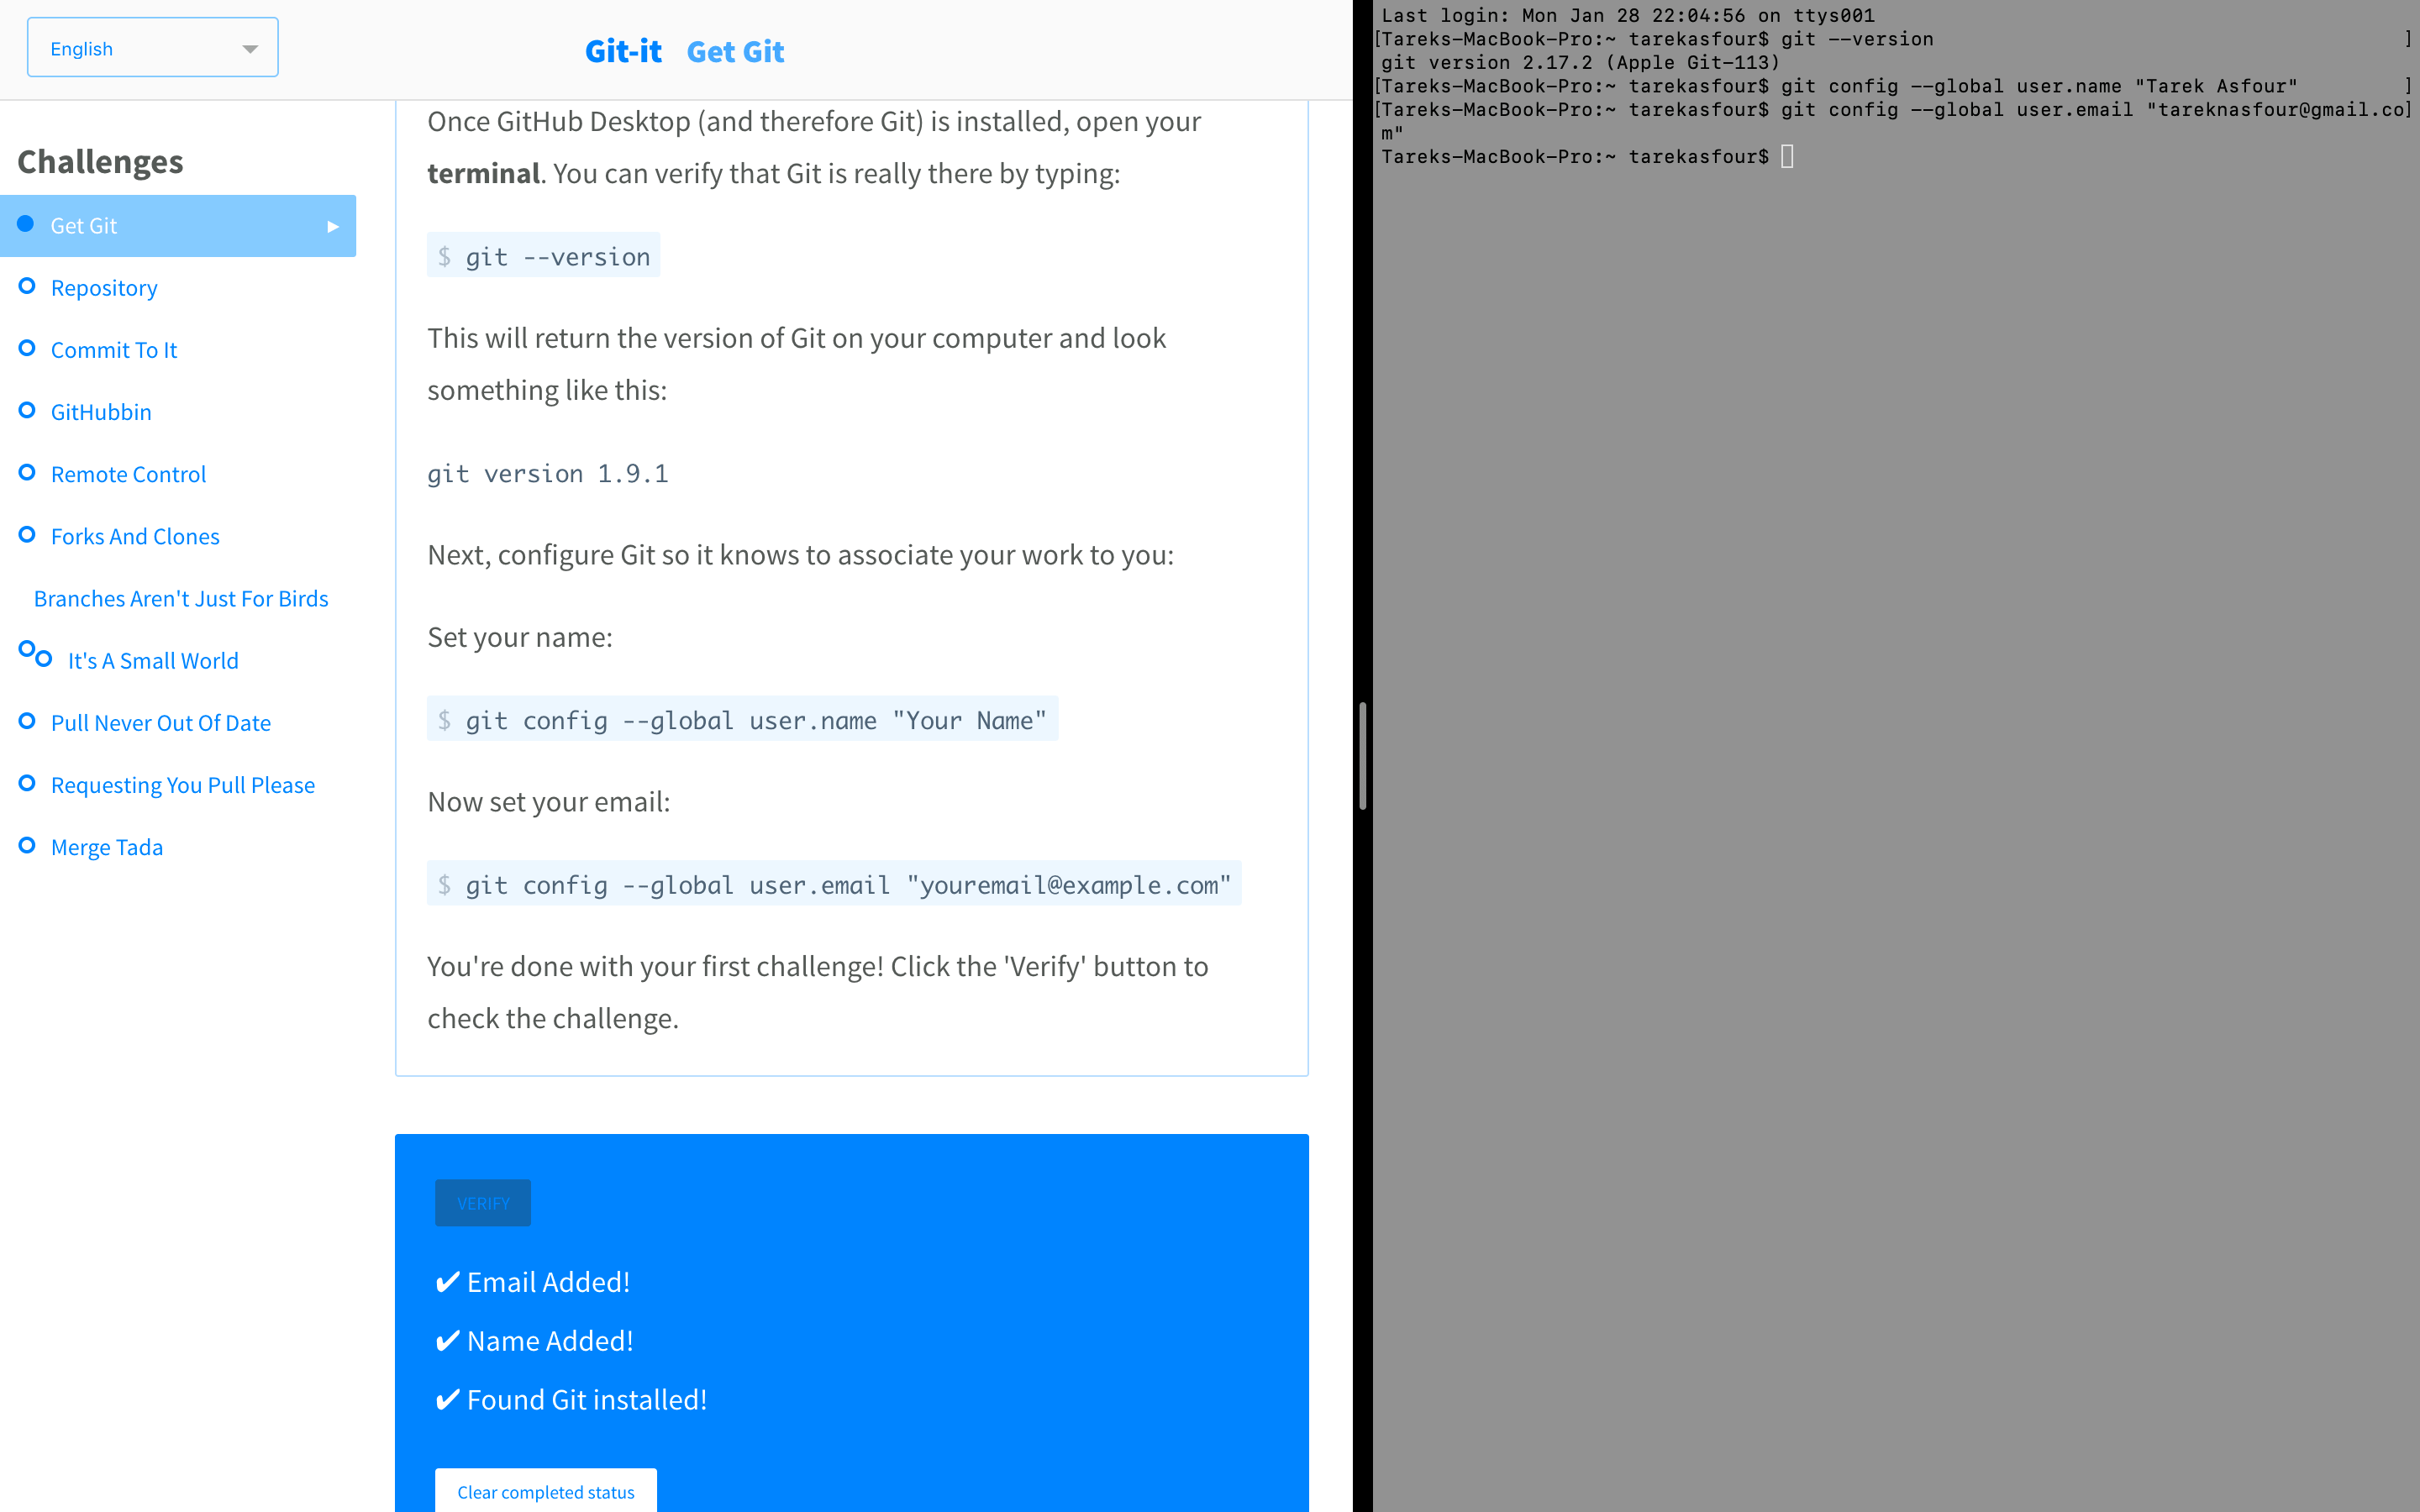
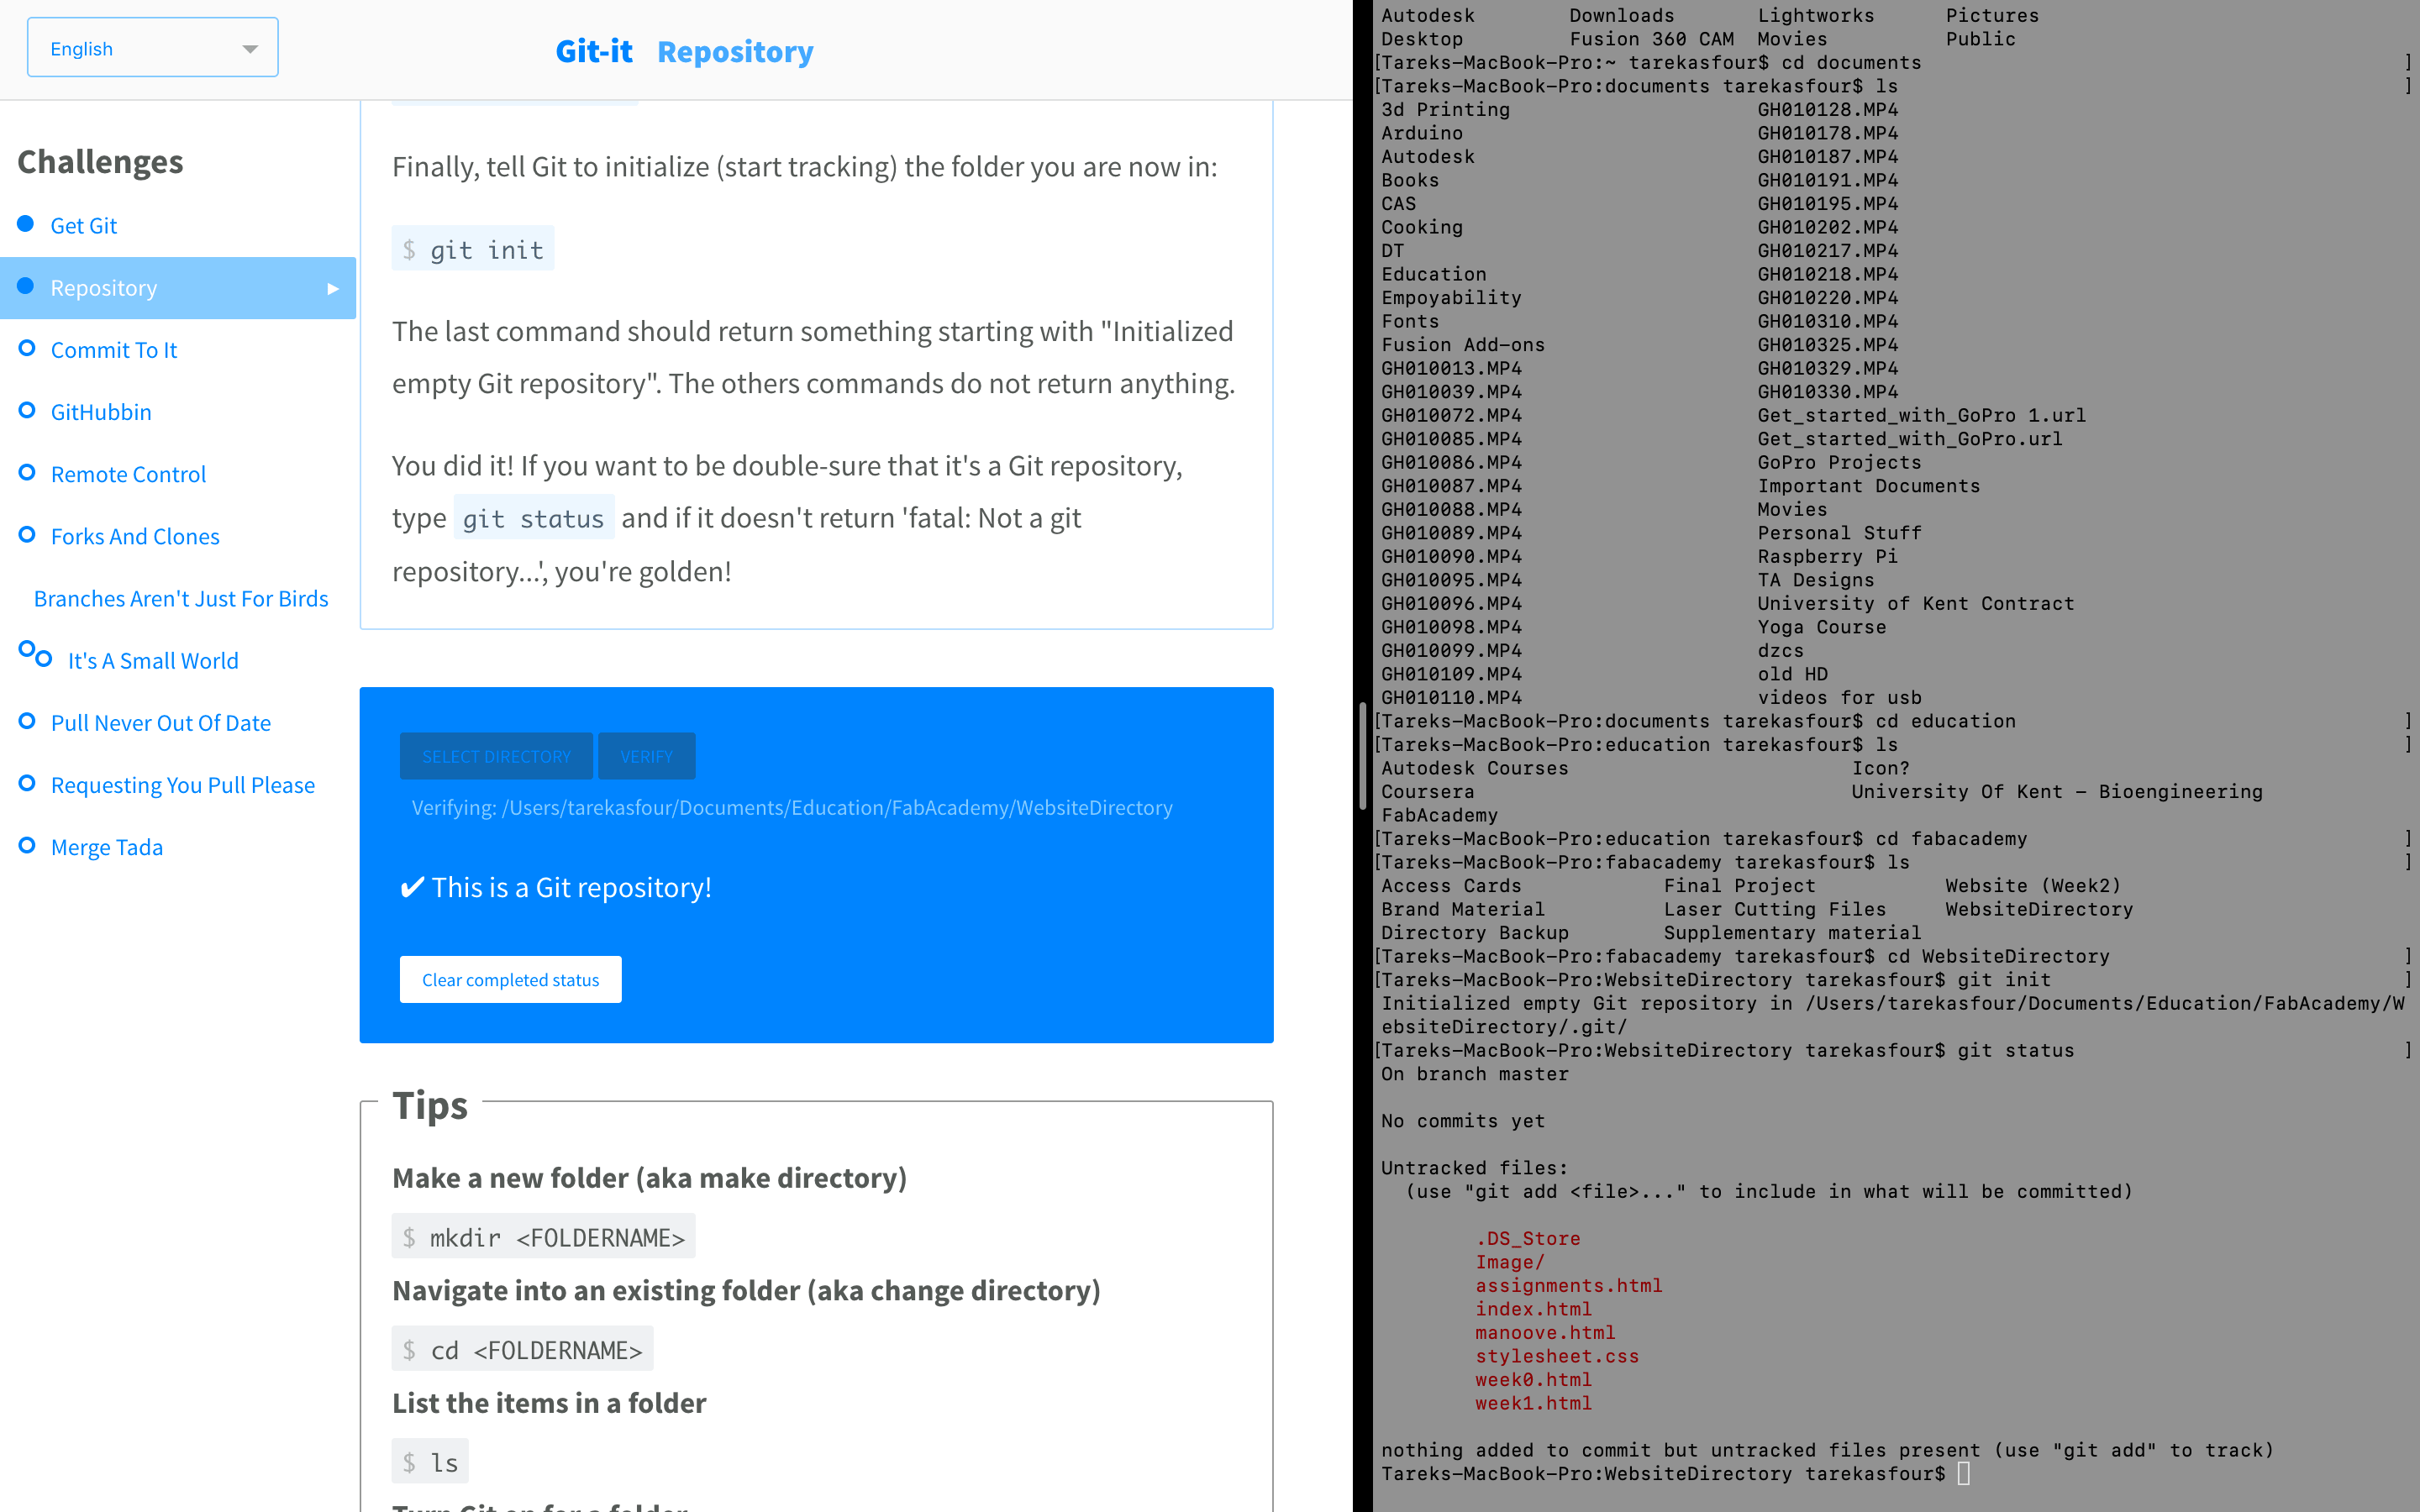
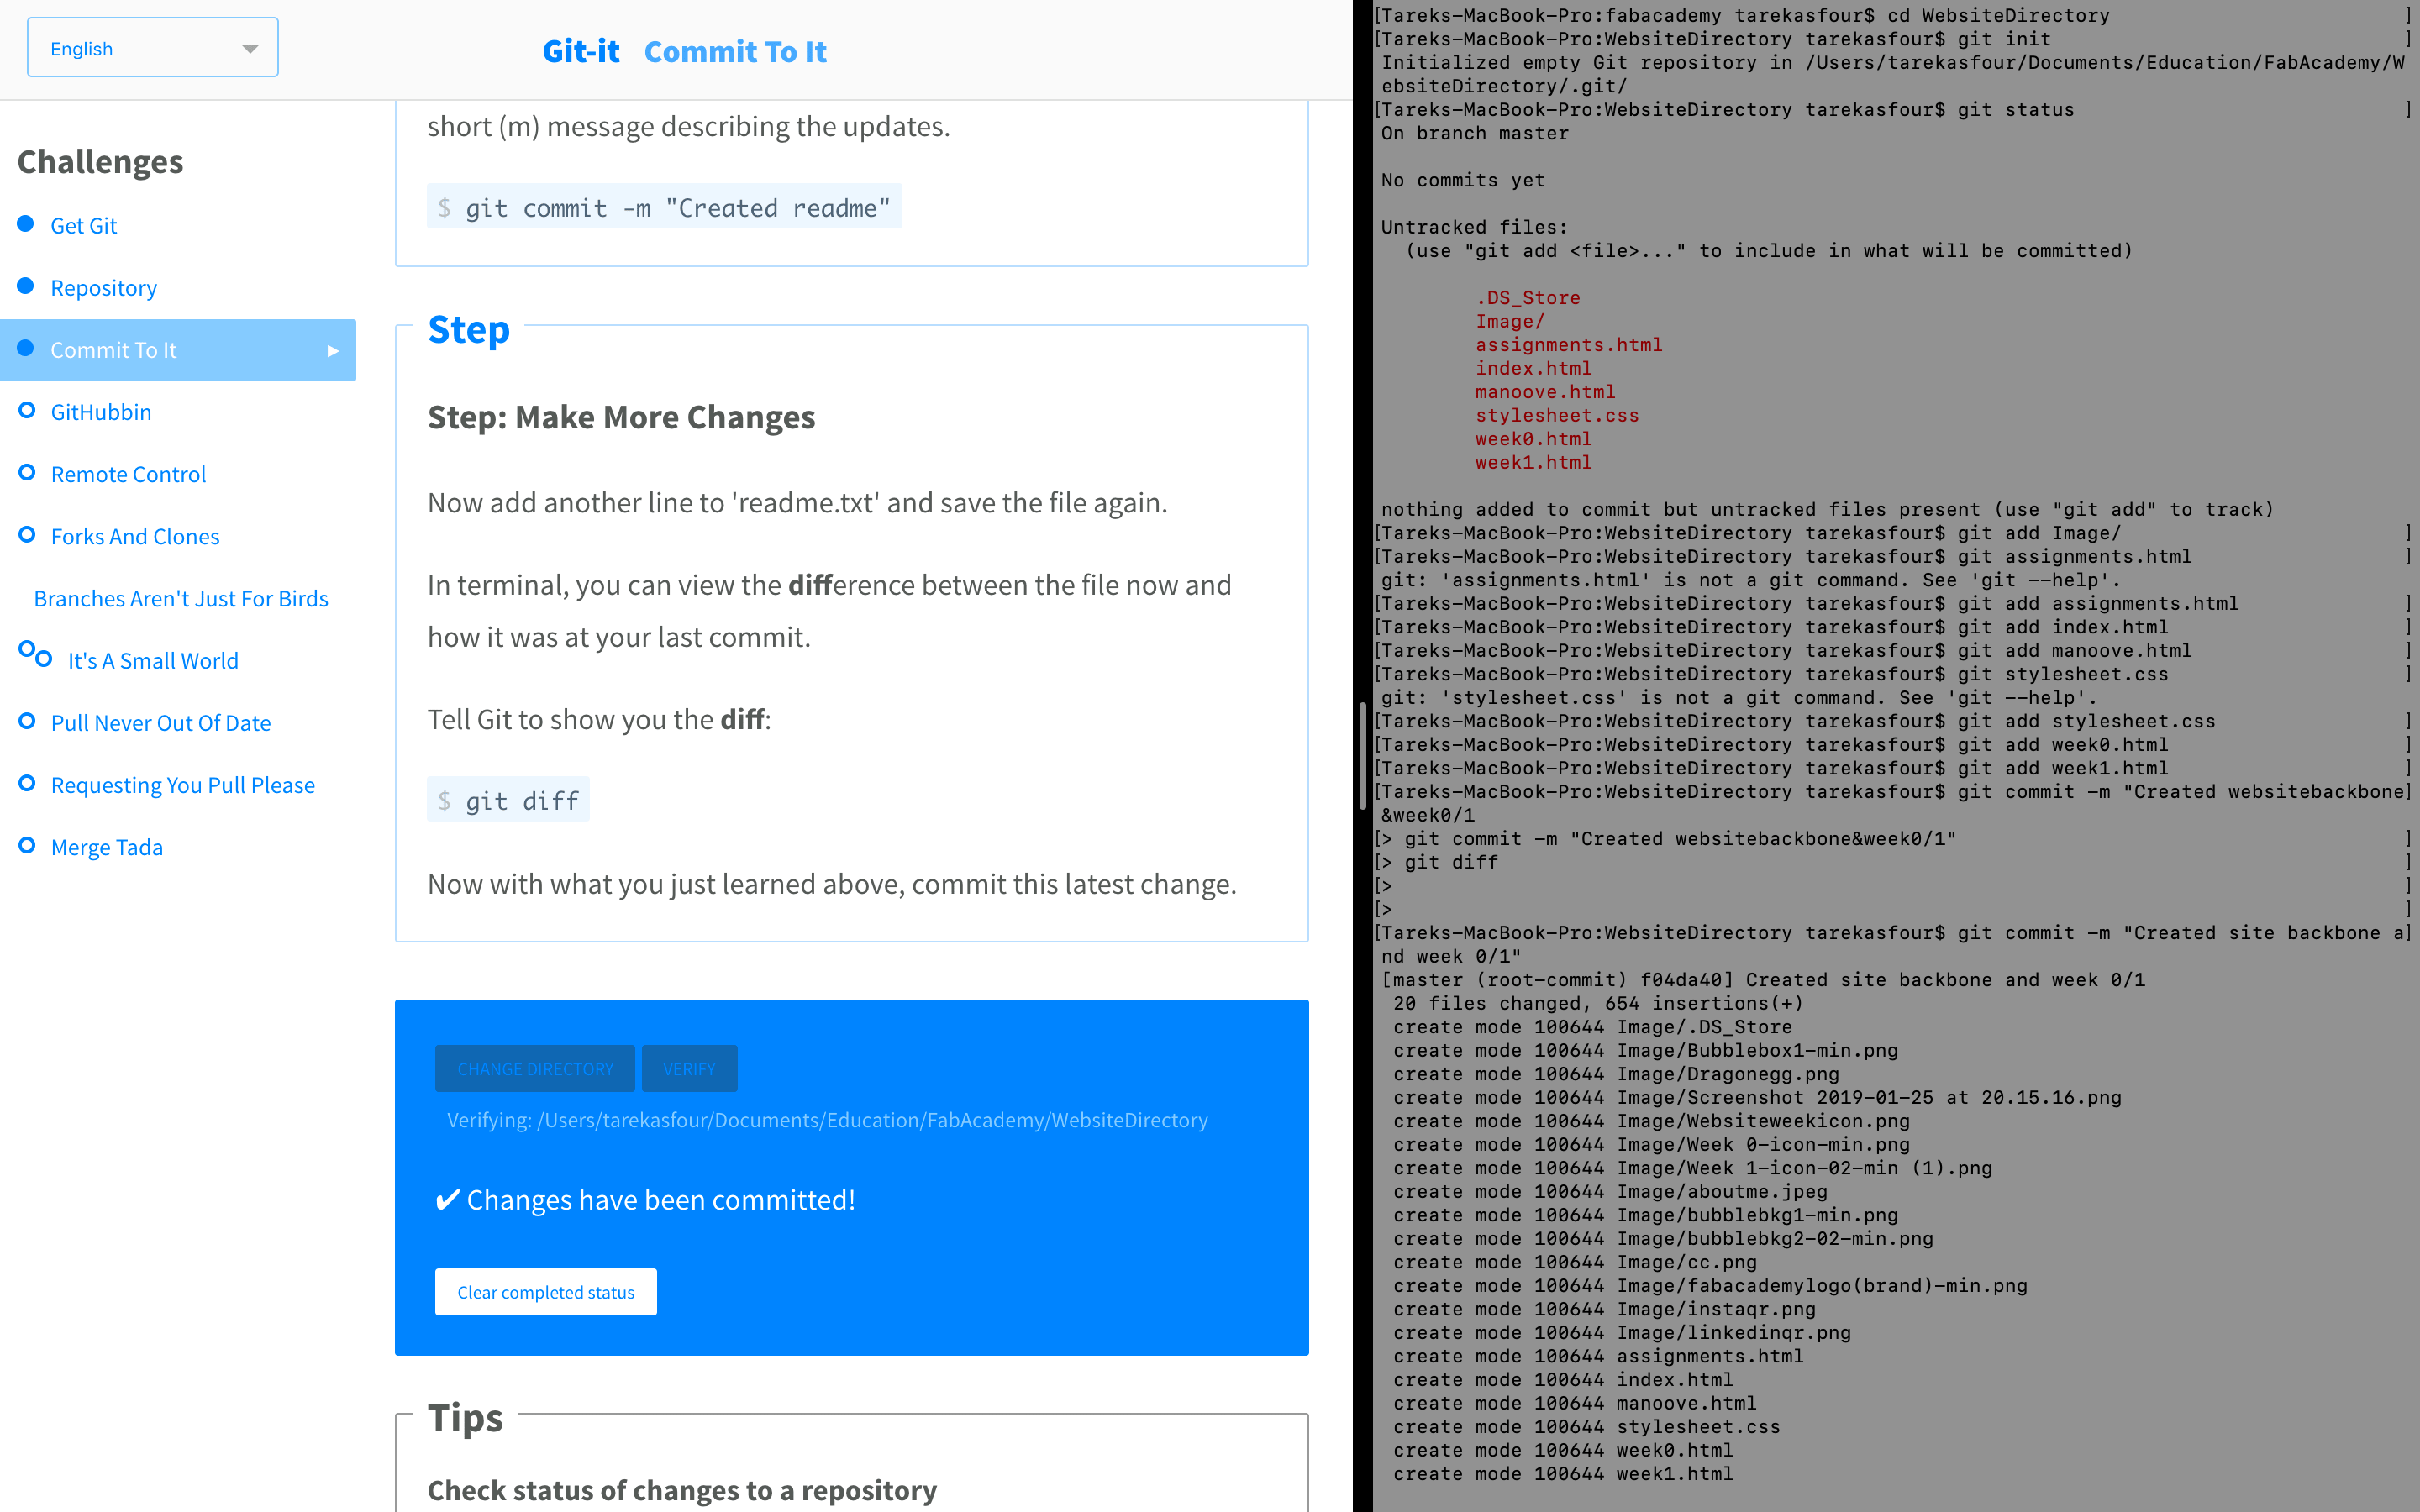
Having no history of work with Git other than viewing and downloading other peoples files, I first went with Fiore's advice and downloaded git-it to guide me through the setup process and check the process as I go . I was able to set up git on my mac, then create a repository and finally add some files and commit.
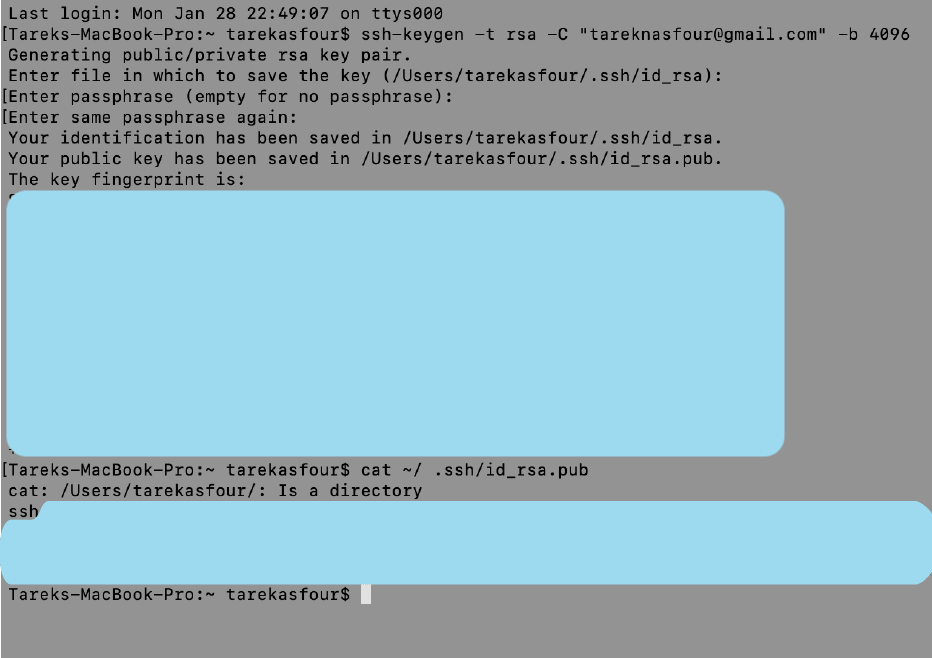
Now that I had a basic idea regarding the git commands, I had to link my remote account to my machine, allowing me to upload onto my online repository. For that I needed to create an SSH key...I referred to the following youtube video tutorial:
The last three steps required before successfully hosting your website onto the gitlab domain can realistically be done in any order.
All files and templates have to be deleted from the repositary
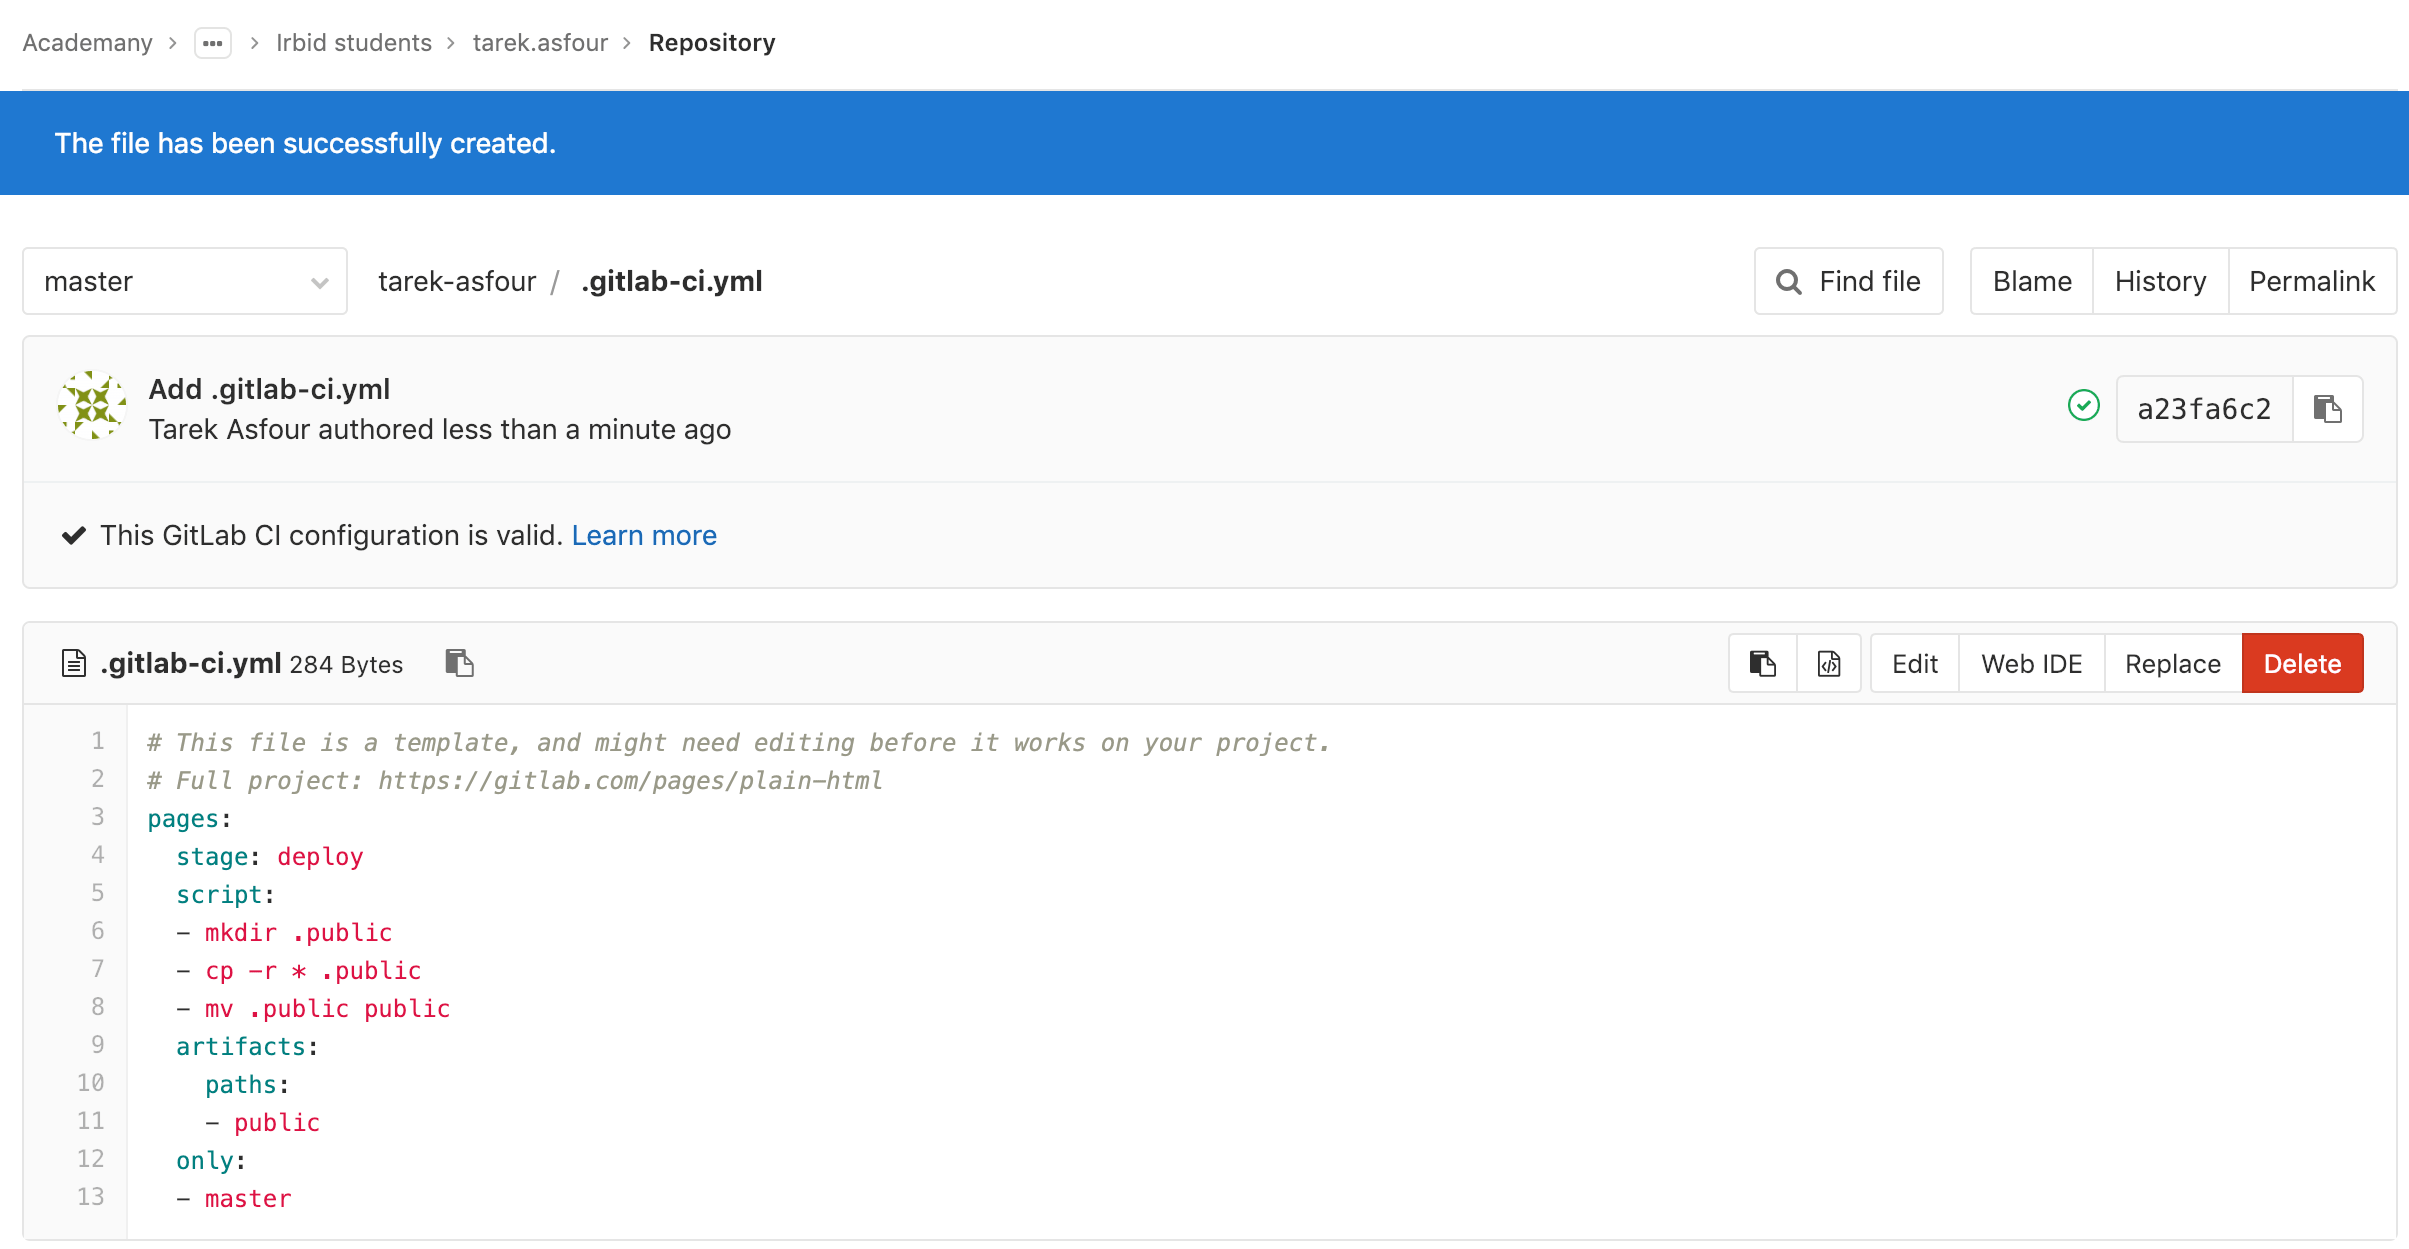
A .yml file to handle plain html in the repositary has to be created as shown on the left
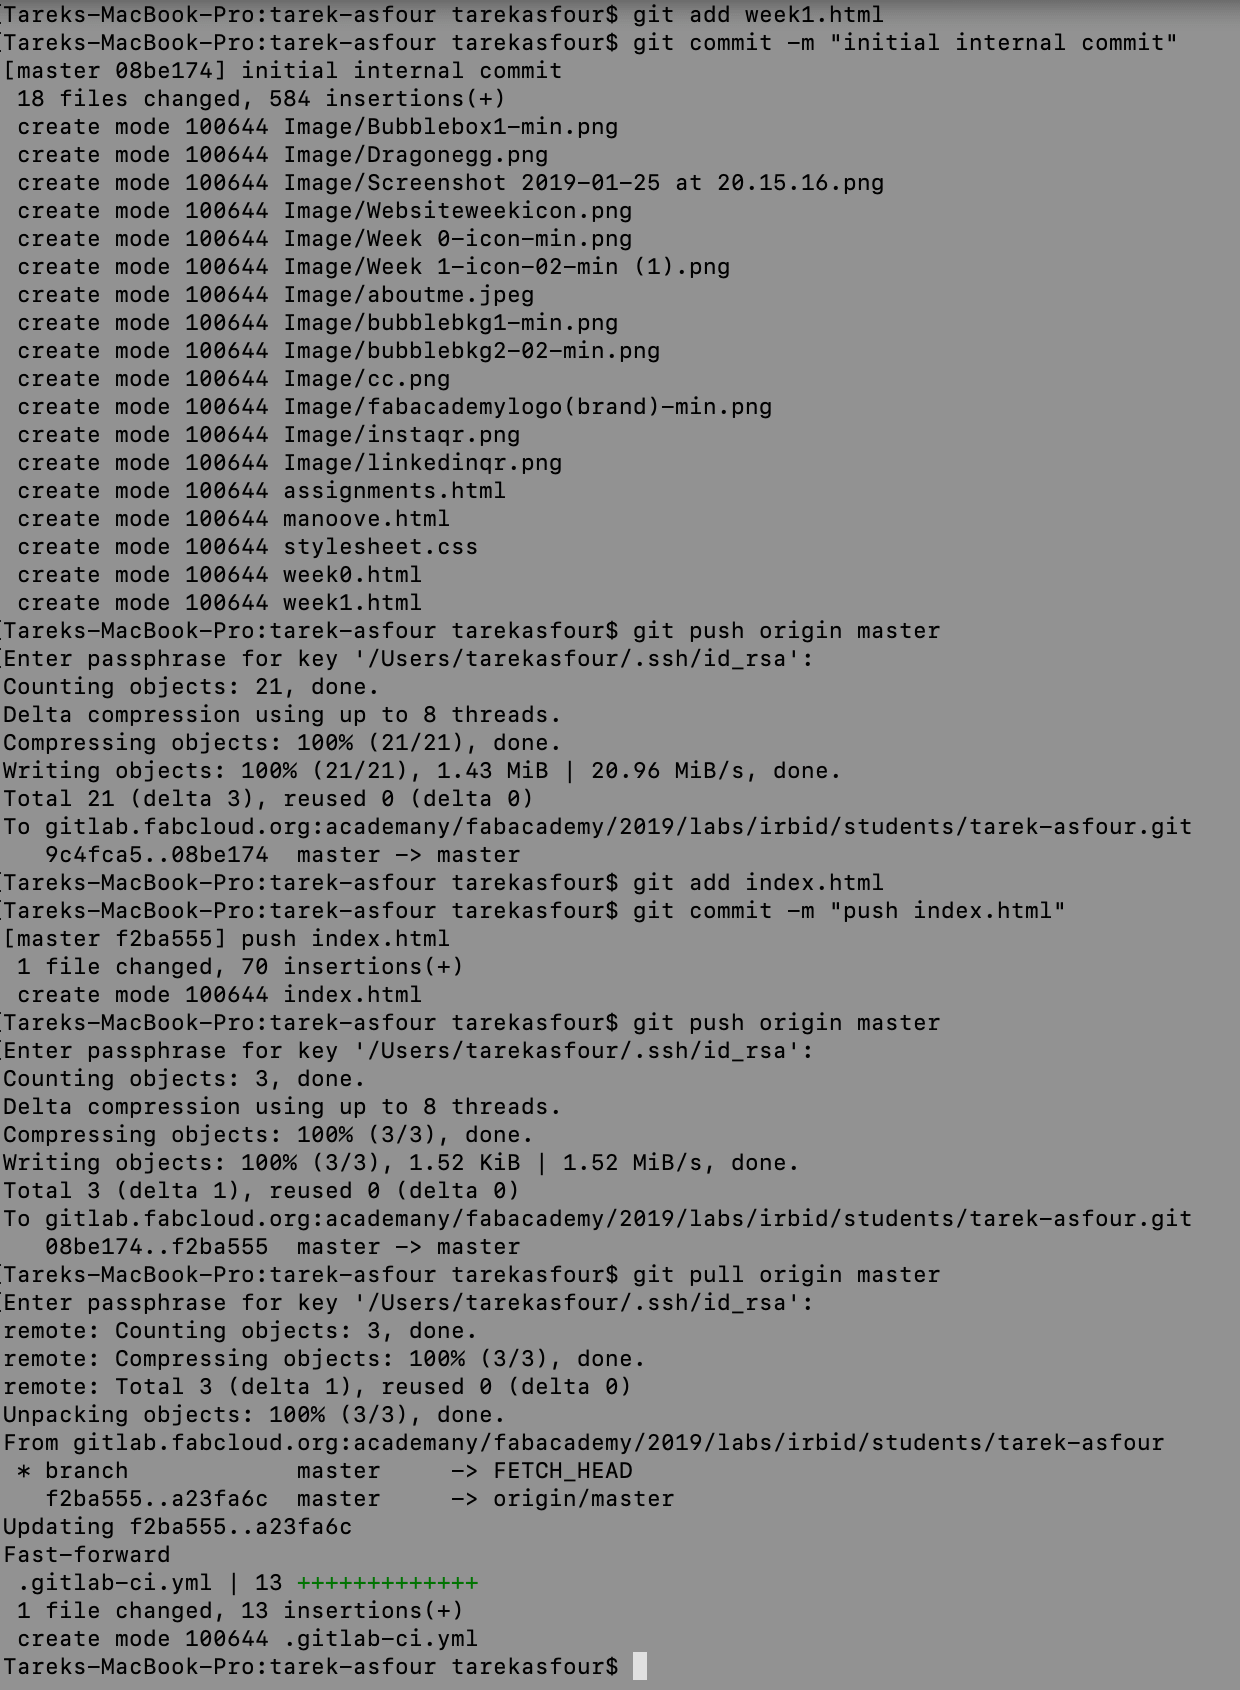
A push request is initiated from the terminal window as shown on the left
-min.png)