
This work is licensed
under a
Creative Commons
Attribution-NonCommercial-
ShareAlike 4.0
International License.
This week's goals are:
Described your process using words/images/screenshots.
Explained the the GUI that you made and how you did it.
Outlined problems and how you fixed them.
Included original code.
Types of Interfaces:
device interfaces.
data interfaces.
user interfaces.
Look at java programs to create graphics such as three.js . This a library that
must be loaded. GPUs (graphics processing units) can be used to process graphics
but also to process math.
Multimedia:
SDL - library for videos in web written in C
Web Audio
Tools For FabLab final Project:
Language: processing
Graphics: three.js . The beginners guide to three js.
ncurses
SDL
Web Audio
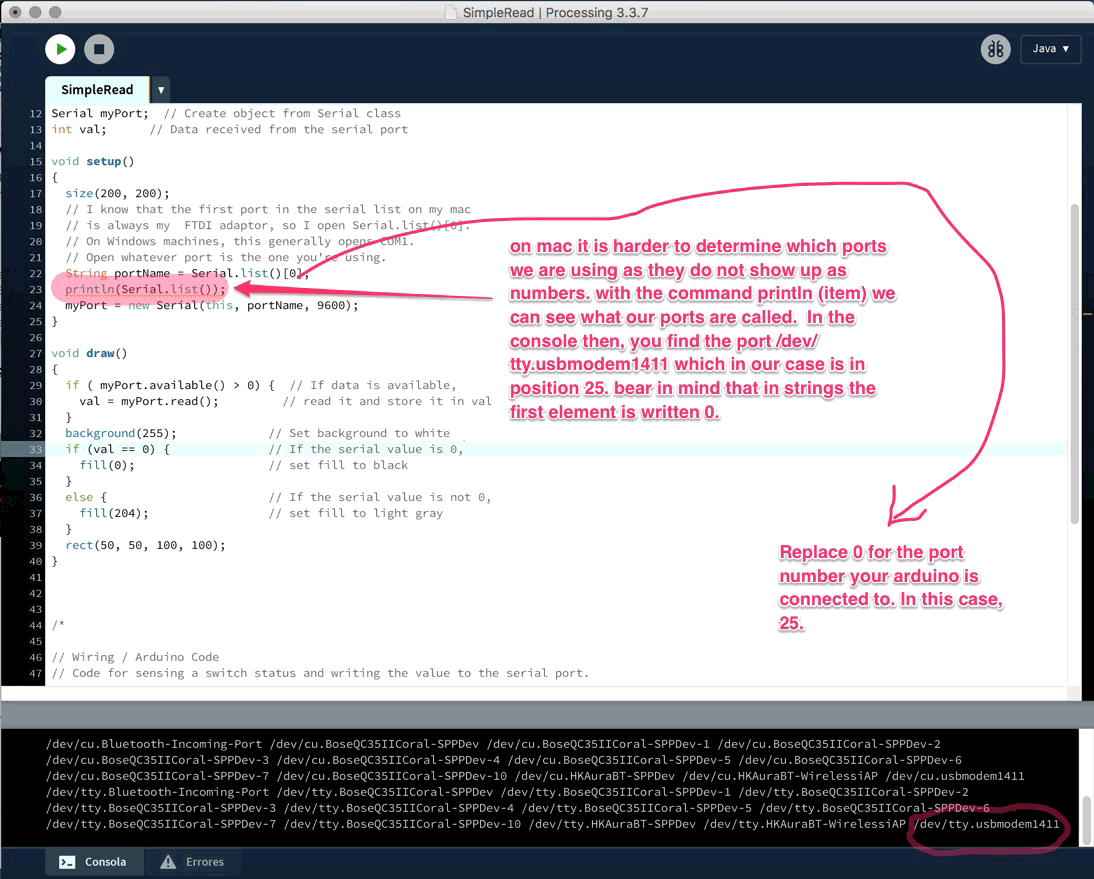
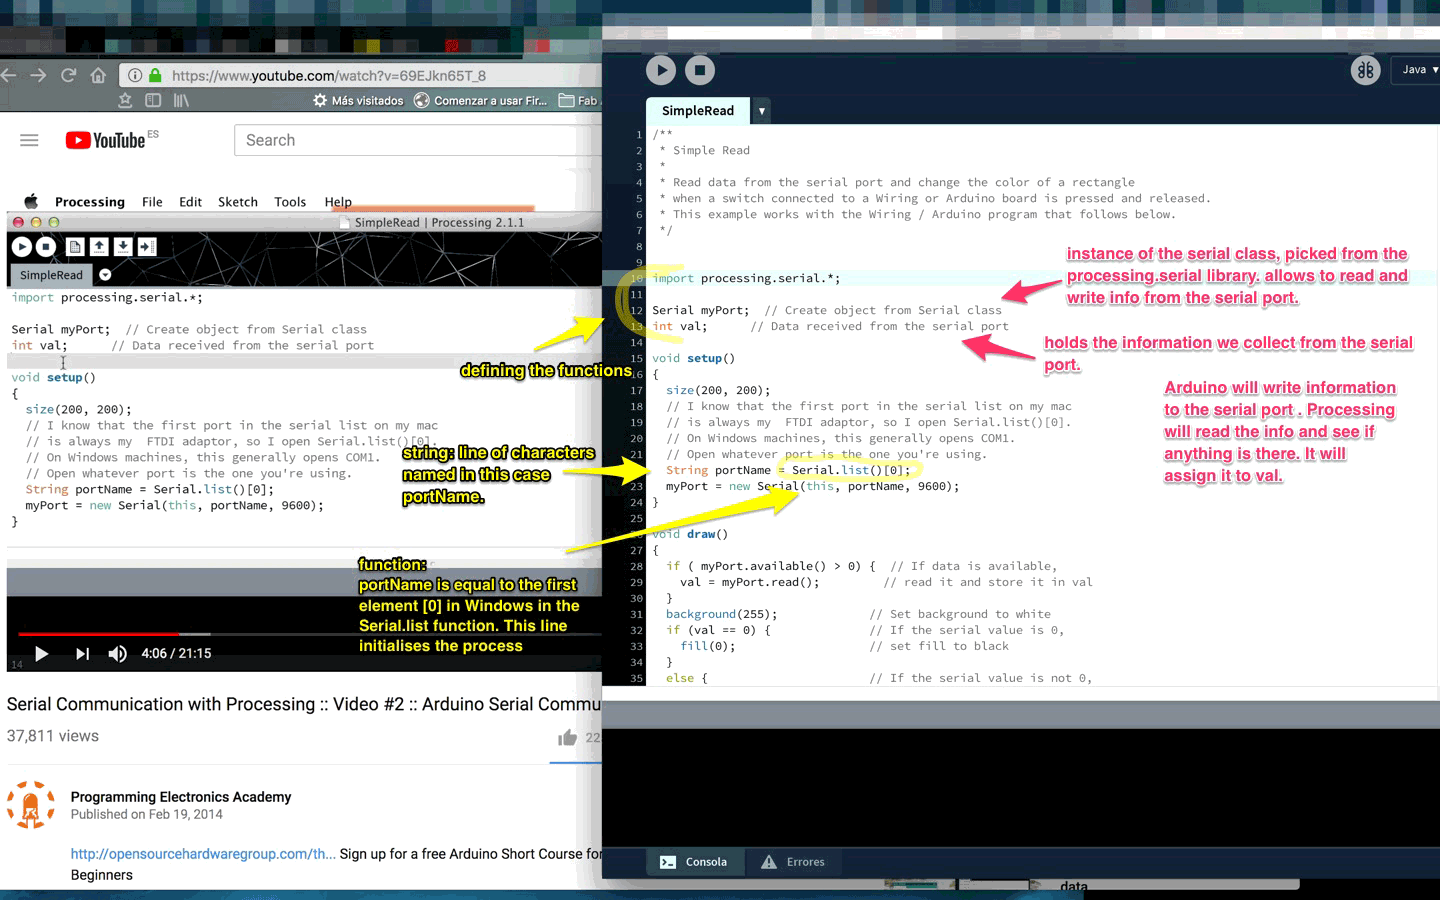
I first walked myself through this tutorial:
See below my notes and screenshots:
However, two thirds into the tutorial, I ran into my usual FTDI port issues that I thought I had fixed in week 10. This time the Arduino IDE would not even read the Arduino Uno board. I got a message error saying that the port which was running the board was already in use by a different device.After going through a couple of online forums, among which were this one and this one, I realized that that my bluetooth headphones were using the same usb port.
I solved this issue by making the bluetooth utilities in my computer forget my headphone devices. I could then upload the sketch into the board.
In the forums, they also mentioned the FTDI port bugs that are apparently recurrent
in newer versions of Mac OS X. I decided once and for all to go ahead and fix the issue
before proceeding with the Processing tutorial. Otherwise, I would never be able to program the boards I designed
myself!
The following links have been helpful when debugging the FTDI drivers:
Link 1
Link 2
Link 3
Link 4
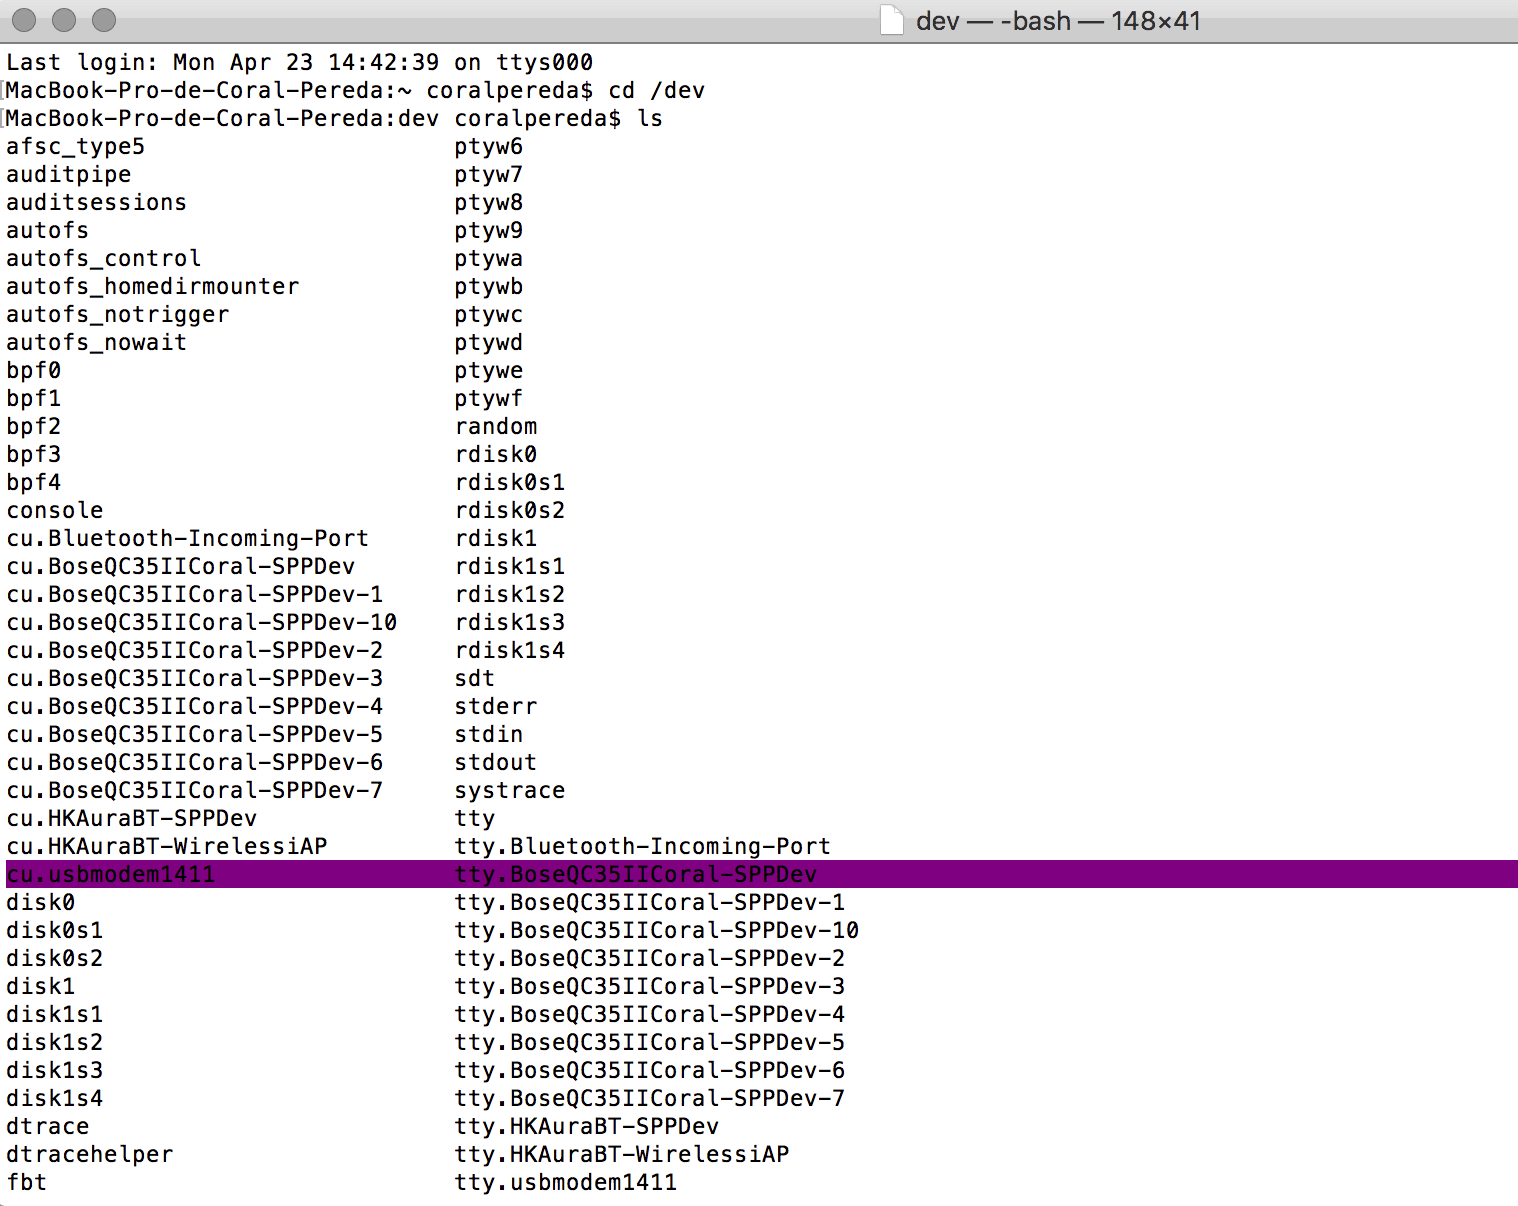
I accessed the rm functions of the by changing my computer user to "root". Here is a tutorial on how to do so on Mac High Sierra.
Once in root mode, I tried modifying the file located in cd /System/Library/Extensions/AppleUSBFTDI.kext.
However, as indicated in the FTDI install guide, you will not be allowed to rename the file if running
a software newer than 10.10 . Since I am running 10.13.3, I had to try something else.
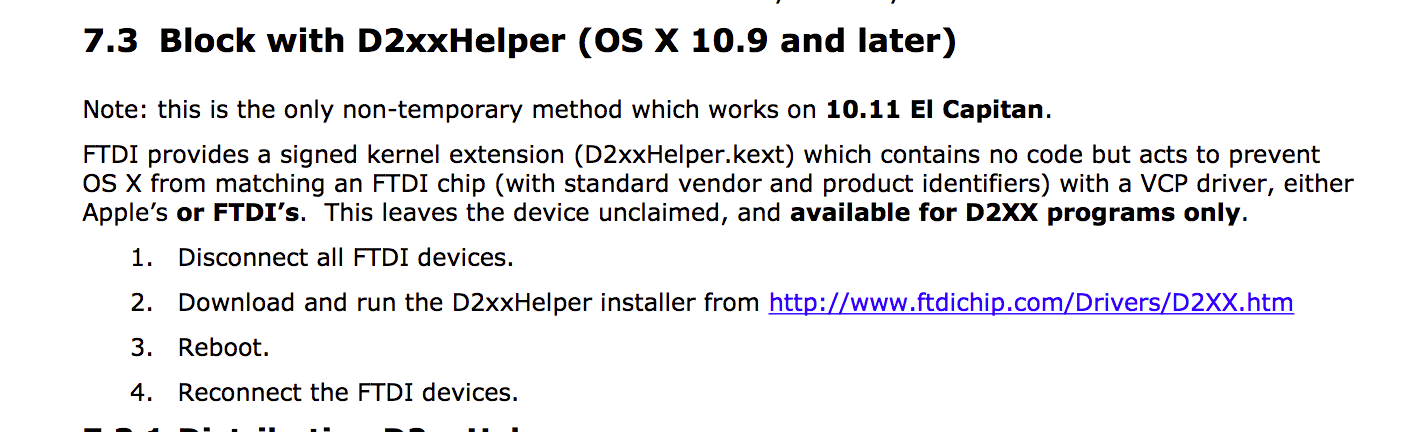
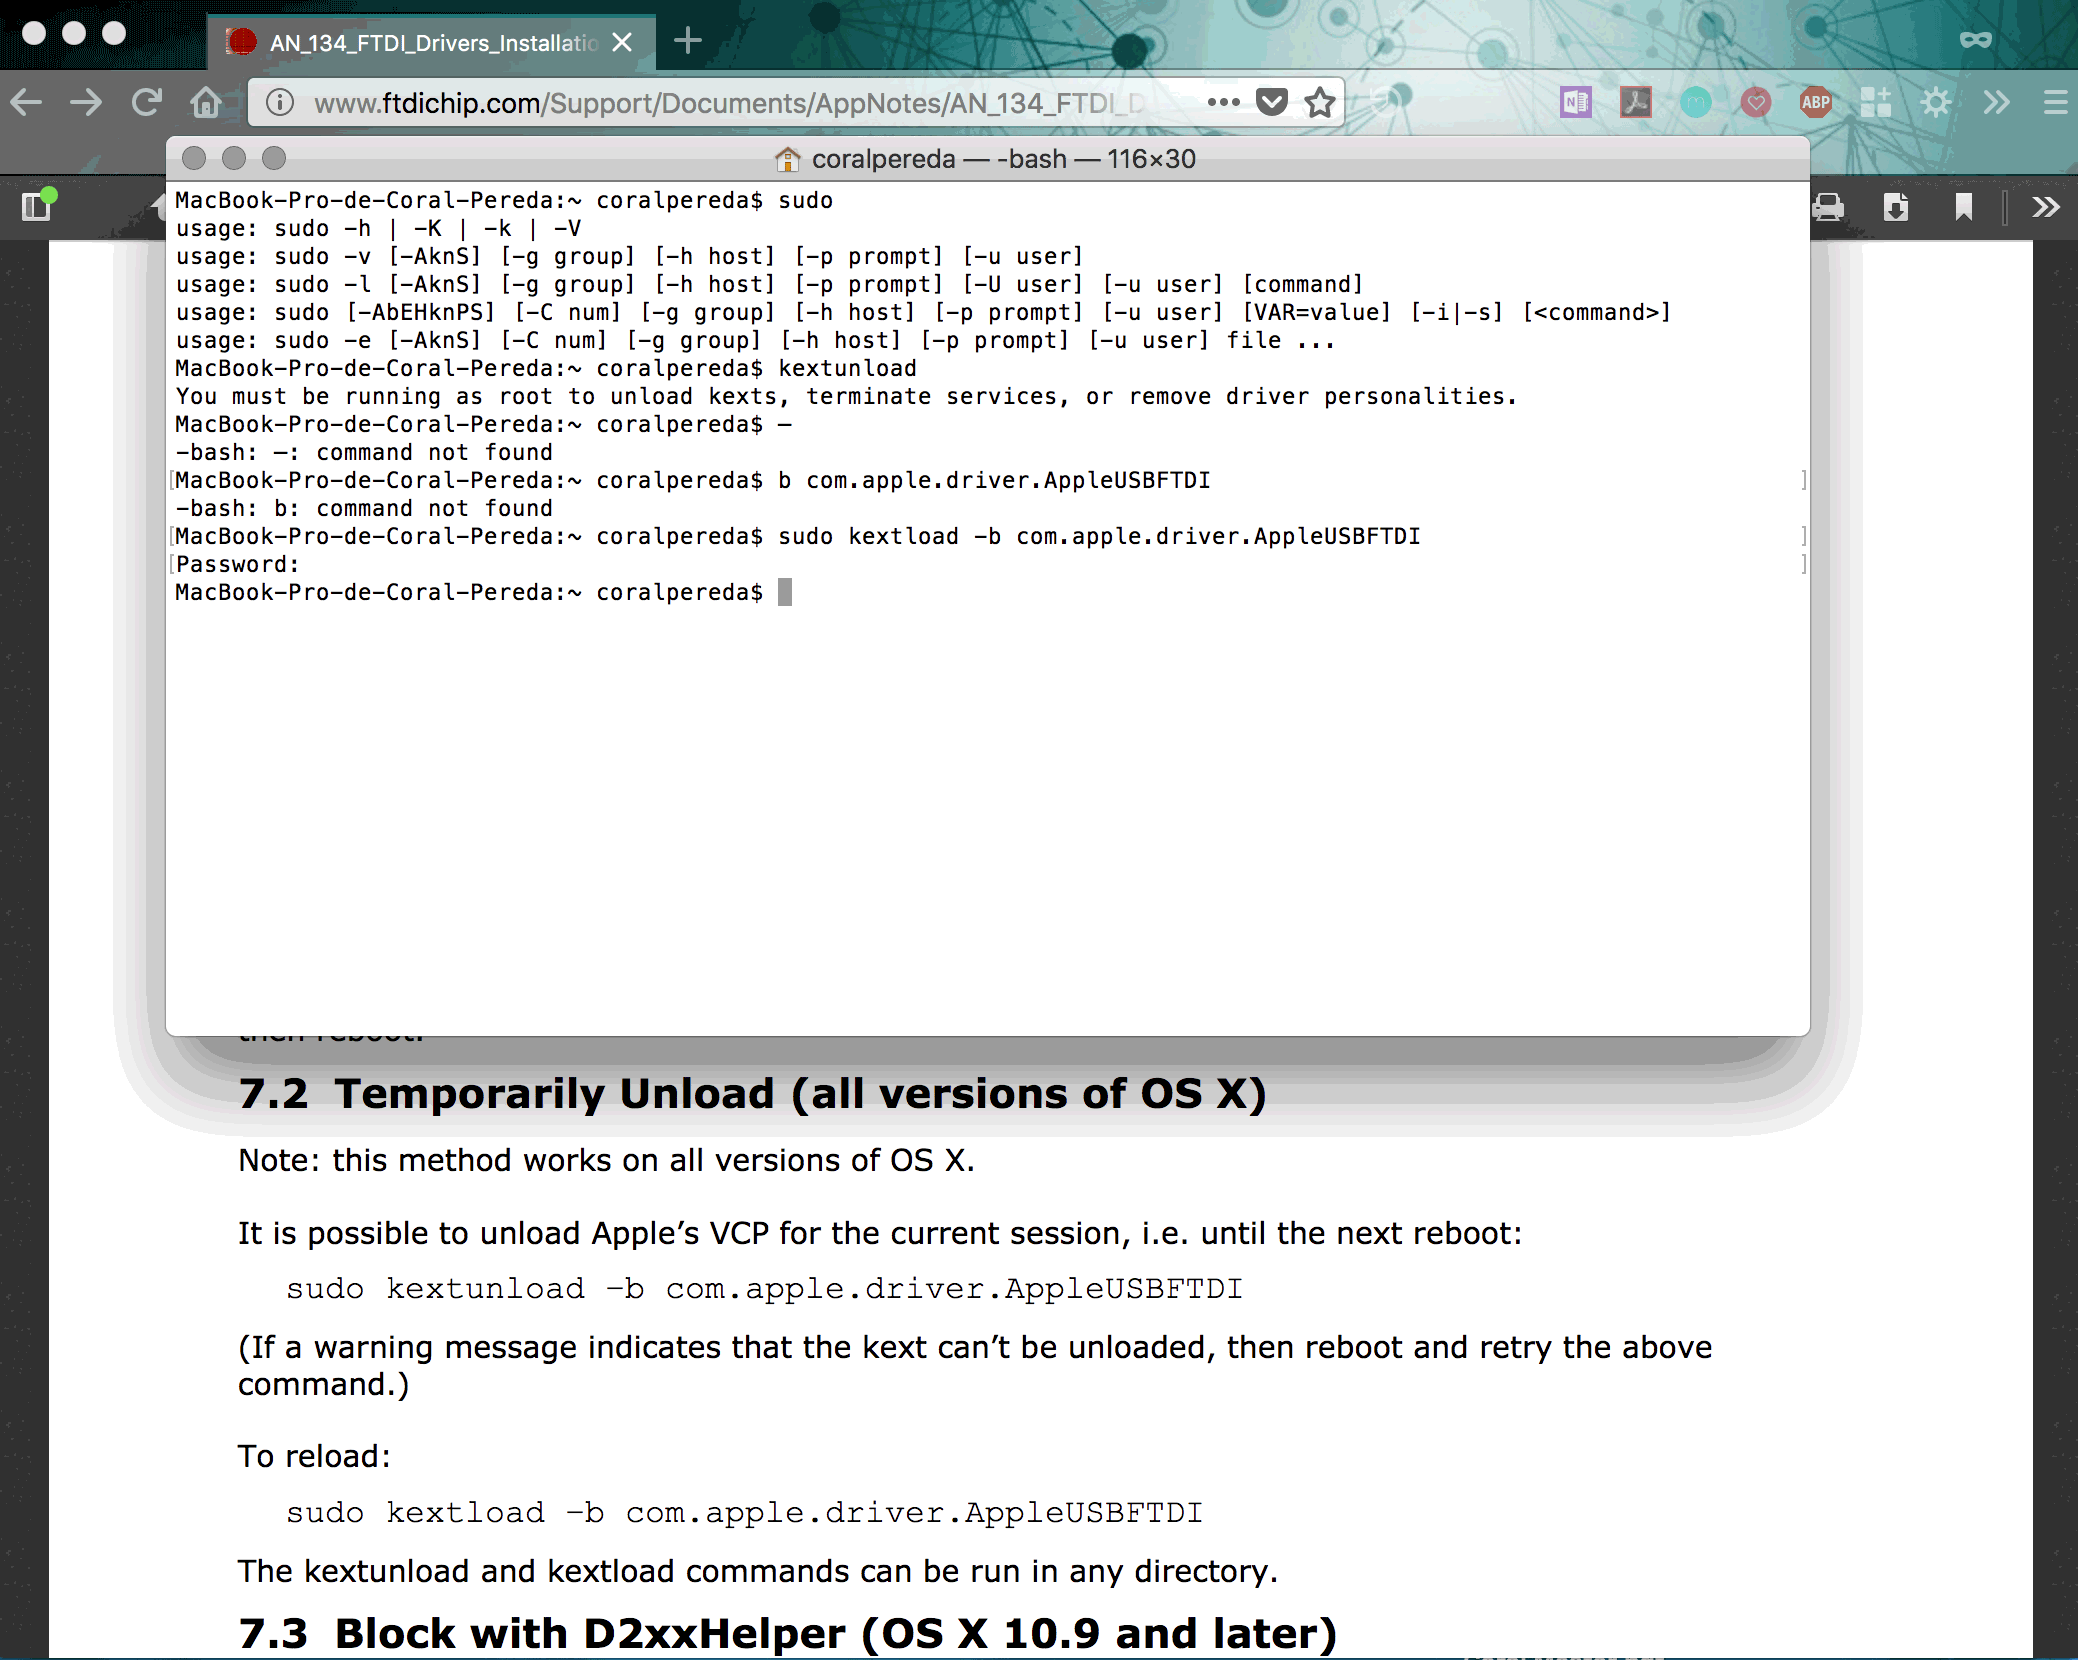
I therefore tried every single option provided in the guide mentioned above. More specifically, the instructions
that ended up being the game changer were located on page 19 section 5.4 and on page 22 section 7.3 as seen below:

To sum up, the steps I've been following to solve this issue were:
1. Uninstall all the VCP FTDI and D2XX driver files I had
installed in the previous weeks so as to avoid conflics.
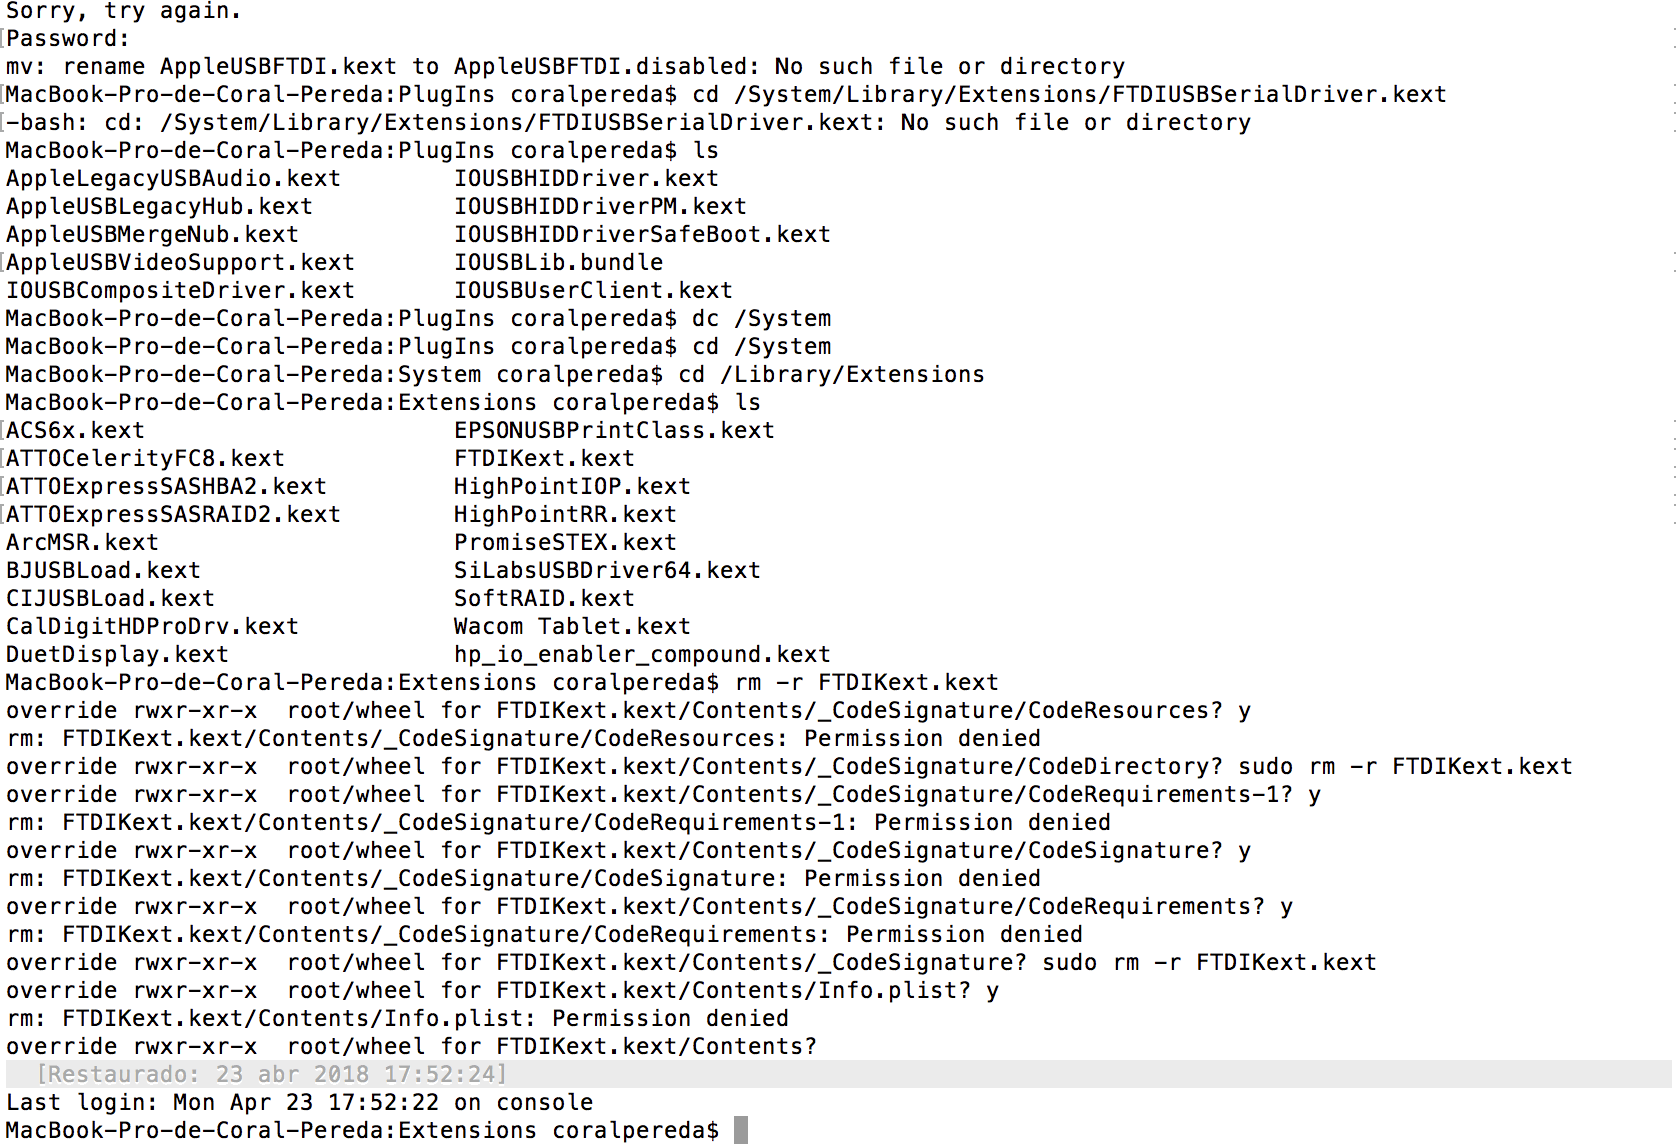
2. Tried to rename the file AppleUSBFTDI.kext while running the computer in root mode.
This did'nt work because I didn't have permission to modify it.
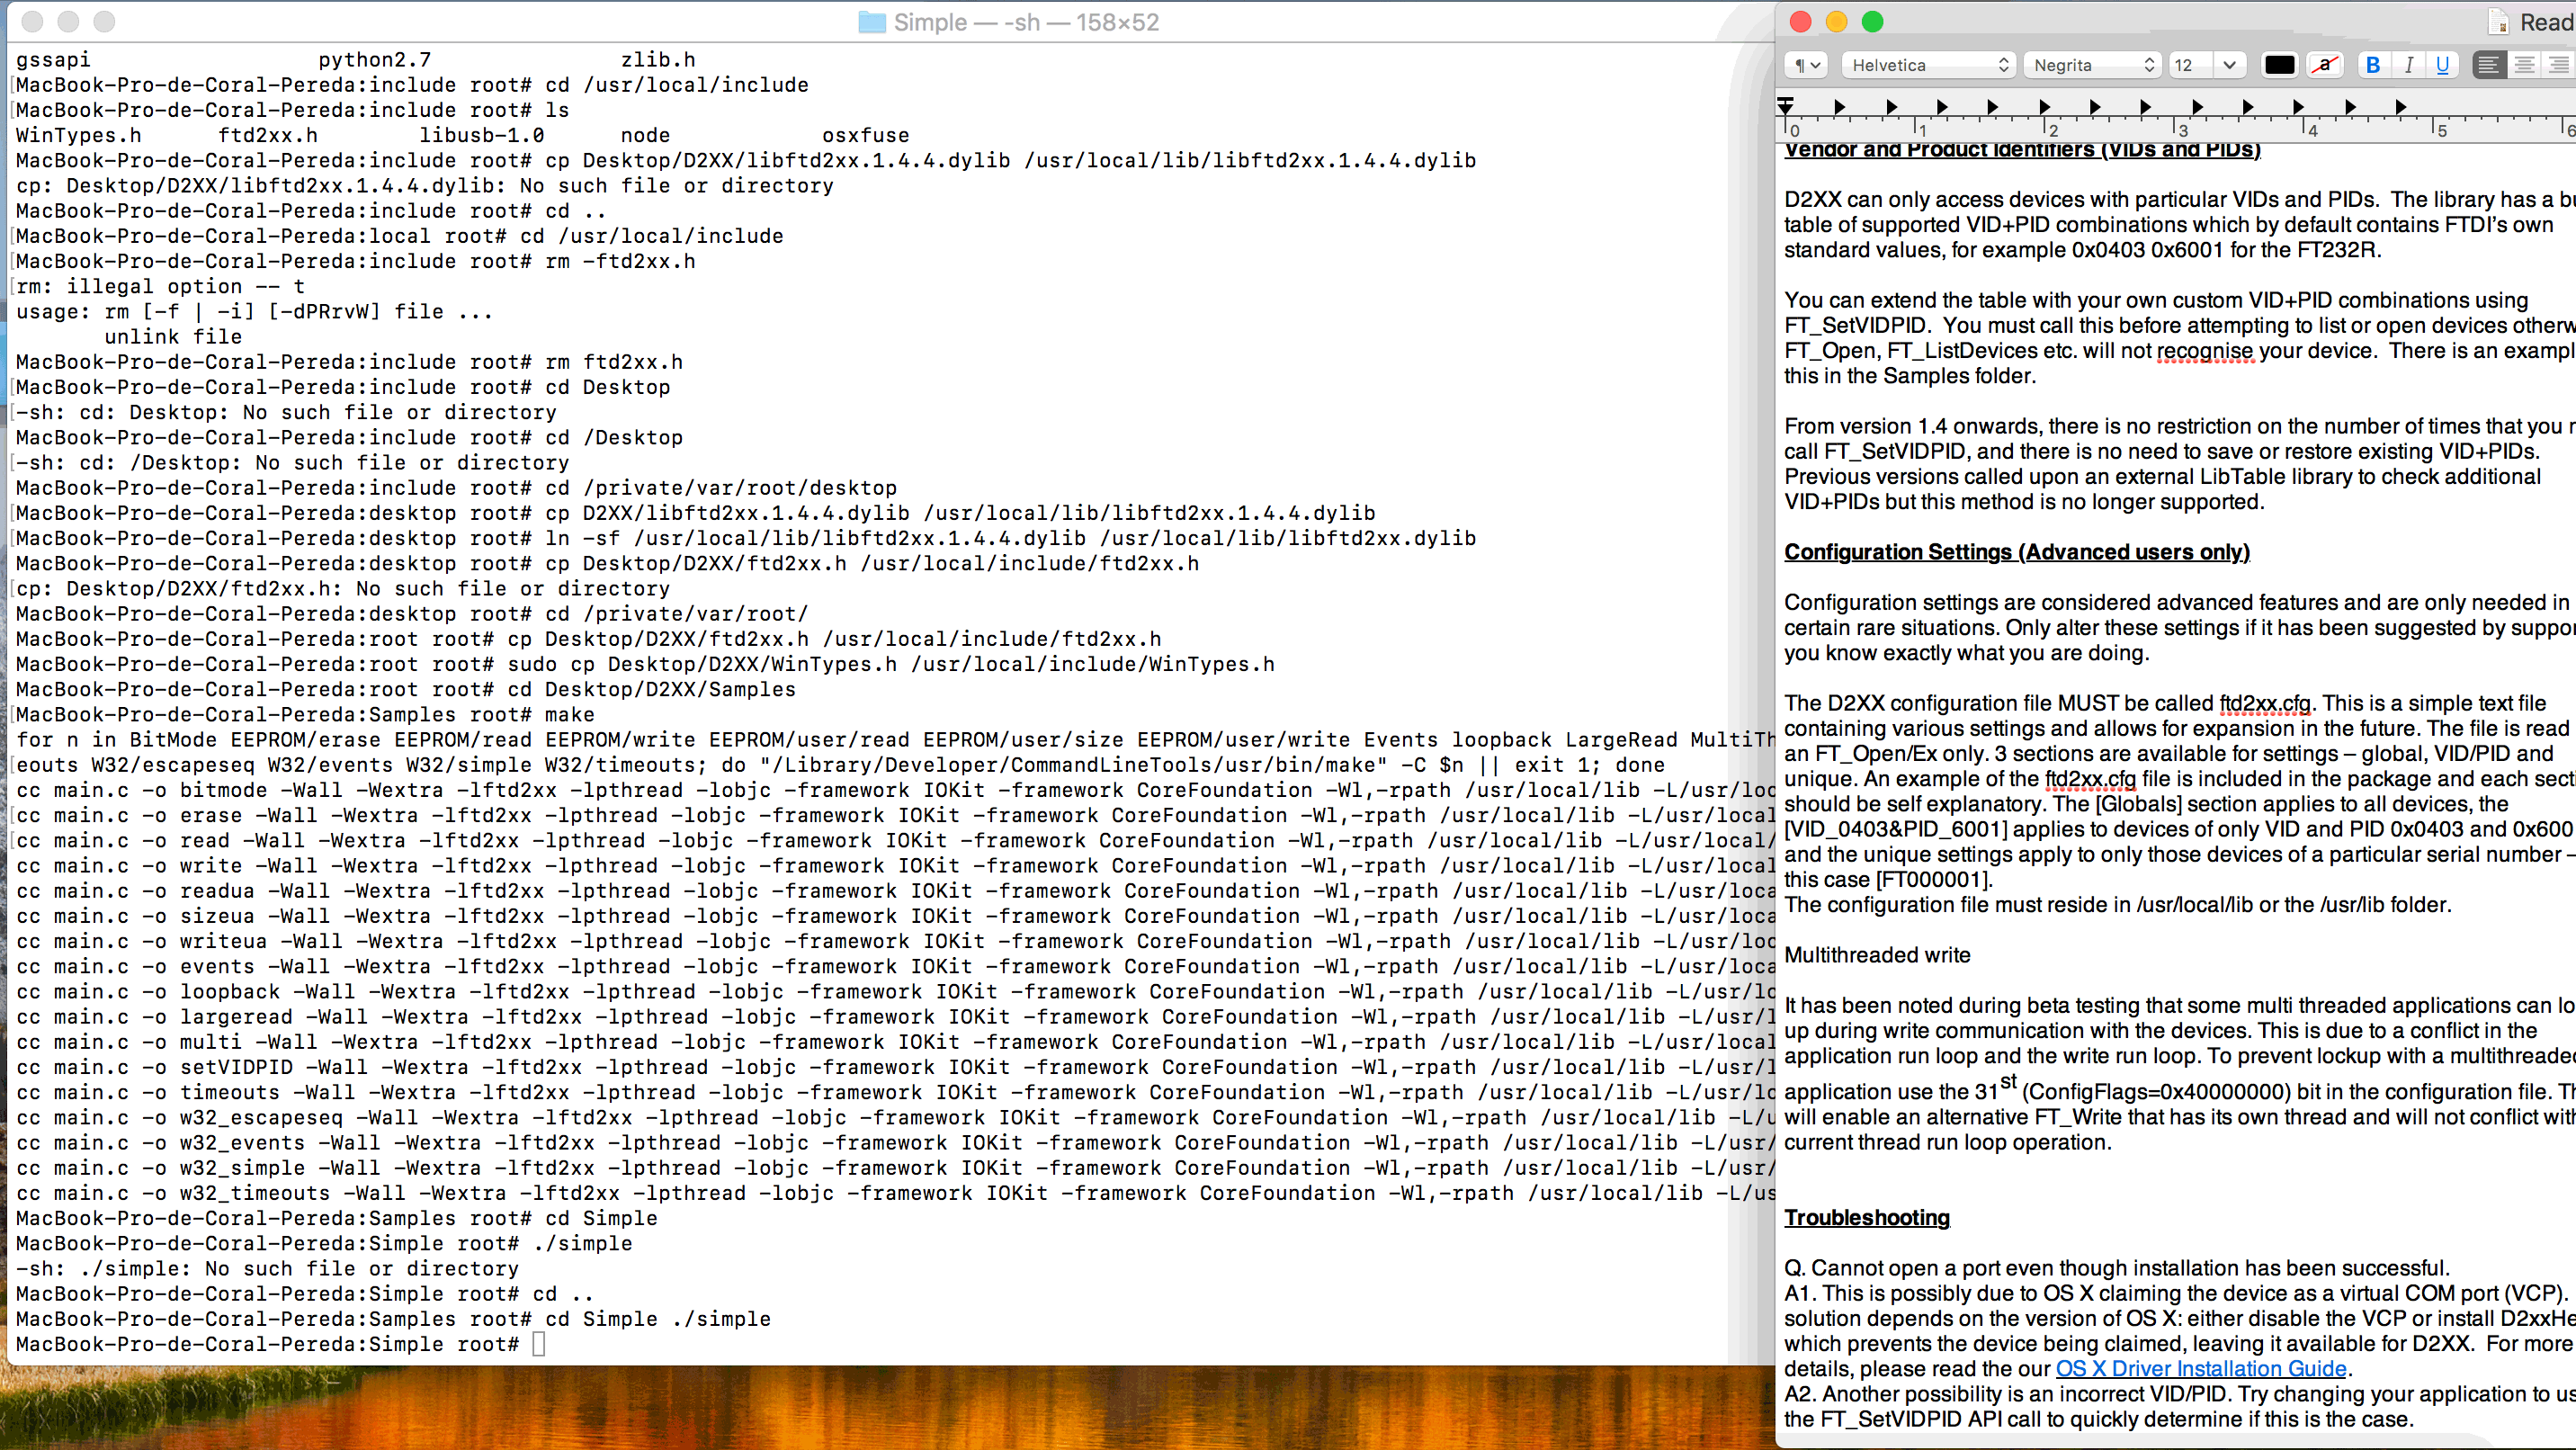
3. Reinstalled the D2XX drivers. This alone did not allow the Arduino IDE read the FTDI port.
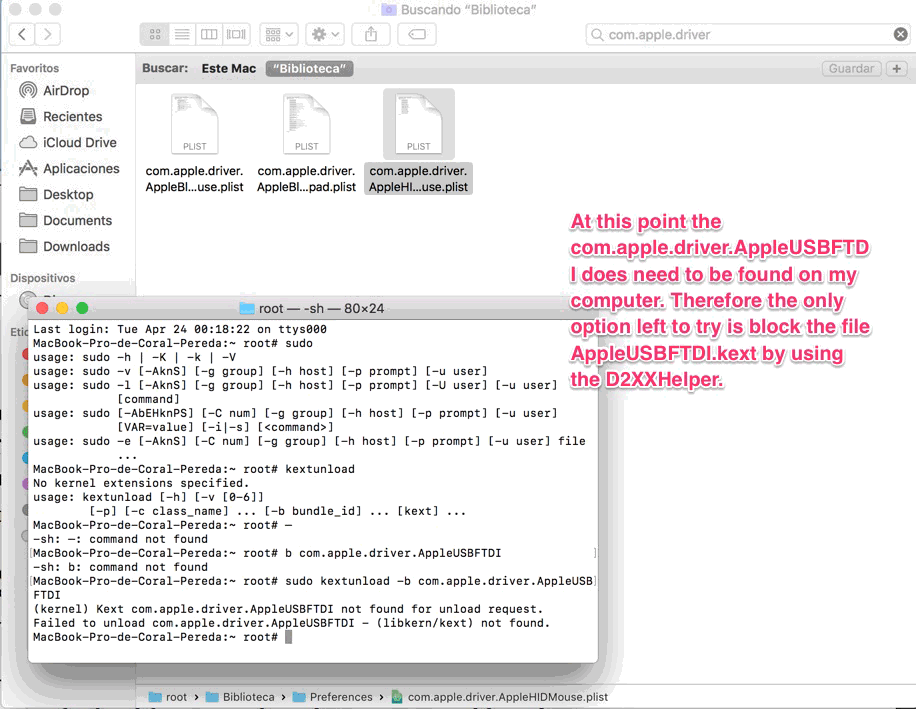
4. Tried to temporarily unload AppleUSBFTDI.kext (Section 7.2) by using the command
sudo kextunload –b com.apple.driver.AppleUSBFTDI. This did not work as the file com.apple.driver.AppleUSBFTDI was not present
in my computer.
5. Installed the D2xxHelper which blocks the AppleUSBFTDI.kext . Rebooted the computer. This alone did not allow the Arduino IDE to read the FTDI port.
6. Installed the VCP drivers. I know that the D2xxHelper could also block FTDI's VCP driver but at this point I was ready to try anything. This alone did not allow the Arduino IDE to read the FTDI port.
7. Assigned the file FTDIUSBSerialDriver.kext the wheel permission. I did so typing into the terminal the following command line:
 cd /system/extensions

chgrp - R wheel FTDIUSBSerialDriver.kext
This alone did not work.
8. Rebooted the computer. This worked!!
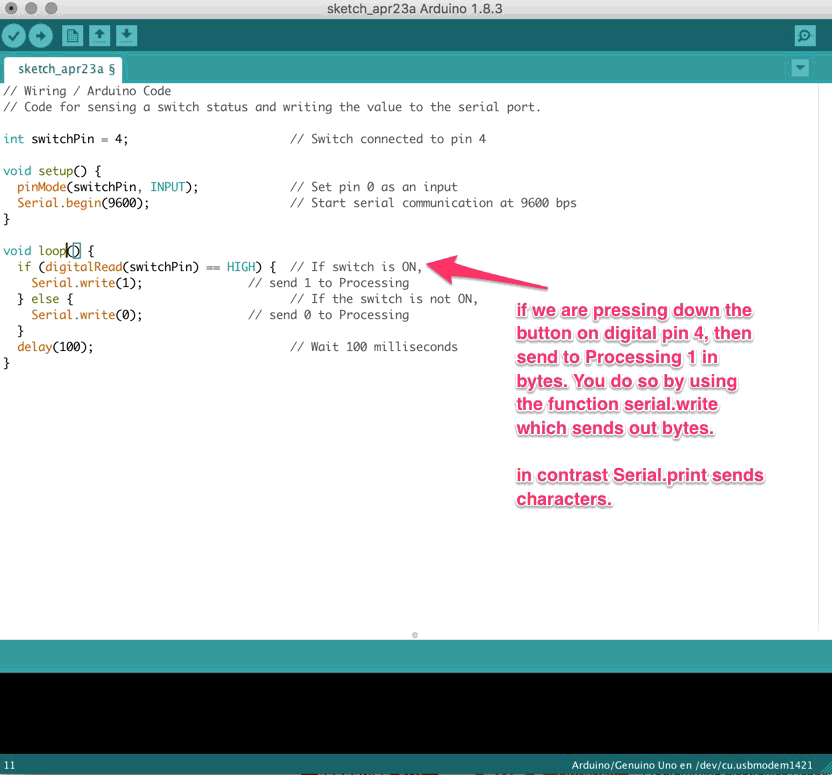
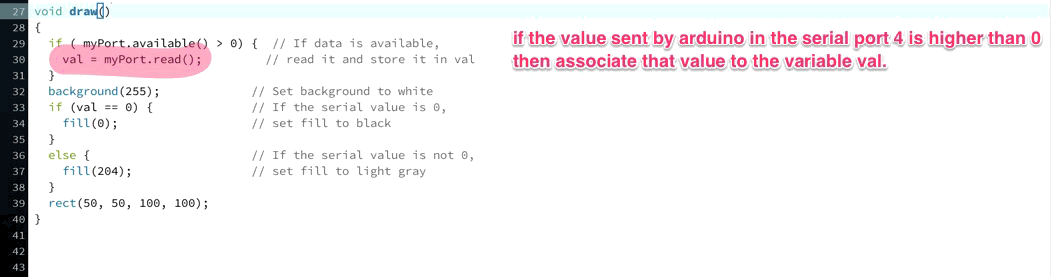
Once I was finally able to fix my ftdi ports, I was able to finish the tutorial and by the codes provided, I managed to change the color of a square in processing by using a button and the arduino Uno Board.
I worked through the following tutorials among many others.
.
This link to the Processing website is a great resource to the code strategies in processing.
Code References: David McCallum
Interface design was a big part of my final project. For more information to further understand the role played by the interface, please visit my final project page. I started out by creating two different animations. The first one is what the user sees when she is not touching any of the sensor points: throbbing orange circles whose sizes vary randomly. I did so by including this snippet which indicates that sizes A1 and A2 are a random value comprised between 180 and 250 pixels.
    sizeA1 = random(180,250);

    sizeA2 = sizeA1;


    sizeB1 = random(110,180);

    sizeB2 = sizeB1;
When the users touch a contact point, I want the circles to move away from its predetermined position and move randomly.
    hor1 = hor1 - random(10,20);

    hor2 = hor2 + random(10,20);


    ver1= ver1 + random(10,20);

    ver2= ver2 - random(10,20);
 I then connected the two animations above by including them in an
 if...else statement and by linking my processing sketch to the arduino one. In the future, I would love to have the time to develop this animation further.
Final project Processing Arduino codes
Arduino to Processing tutorial code