Imbedded Programming
The assignment for this week was to experiment with the circuit board we built two weeks ago, and to try to program it in as many different languages as possible. We also had the opportunity to build our own arduino board. To program our LED/Button boards that we made earlier, we need to use the FABISP. We built the FABISP a few weeks ago, and while my board was succesfully programed and was used to program classmates FABISPs, when it came time to use it this week to program my LED/Button board, it didn't work, and the computer didn't recognize it. I guess two weeks unprotected in a backpack was just too much for the little board. I fired up the soldering iron and touched each connection to hopefully reflow the joints and get the proper connections. When I plugged it into the computer, again, it was not recognized. I tried reflowing it agin, and this time, when plugged in to the computer, one of the diodes lit up red hot and created a bunch of smoke!
I thought the smoke test was not something that boards ever failed, because I had never experienced it, and was very surprised when it occured. I looked it over and I realized that when I reflowed the joints for the second time I had created a short circuit across two pins of the USB header. This was the last nail in the boards coffin, and I figured my time would be best spent creating a new board instead of continuing to toubleshoot this one.
I was able to capitalize on a classmates good luck, who had been in the same boat as me and had already milled a new board, but got his old board to work, so all I had to do was stuff the board and program it. Once I programmed it, I was ready to program my LED/Button board.

I decided to program my board in Arduino IDE. Arduino is based off of C and C++ languages, but makes it very easy for a begginer to write code. First, I needed to set the fuses on the board. This was done by burning a bootloader onto the board from the Arduino IDE. I connected the board via the FTDI cable to my Mac, and connected that to my new FABISP, which in turn was also connected to the Mac. I selected the corerct settings for burnign the bootloader with the fab isp and the right chip that is on the board. The board also has an external clock, so I made sure to choose the right option.

I hit burn bootloader, and then crossed my fingers. It loaded for a few seconds and then told me it was succesful. Next I opened an example arduino sketch that uses a button and an led. I had to change the pins that the input and outputs were on, but other than that it was very simple. I sent the sketch to the board, and the light lit up, and when I pushed the button it turned off. Exactly what it was supposed to do.

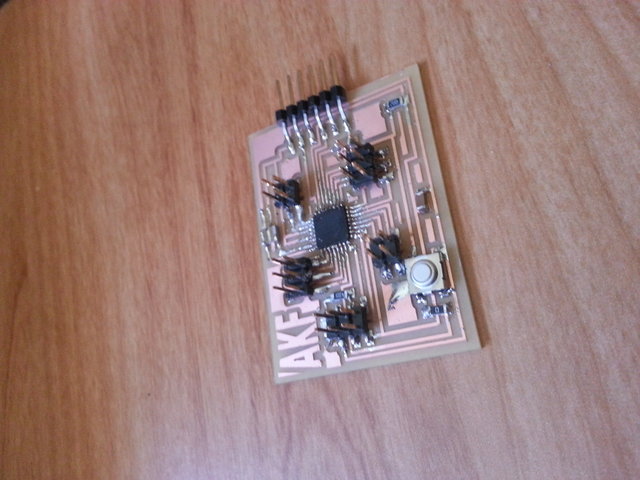
The next project was to create an arduino that is capable of being programmed without the use of an ISP, and with more capabilities than the LED/Button board. I downloaded the Fabduino that Anna had modified to have more input/output pins than the original, and milled it on the modela. I stuffed the board with the components, and then plugged the board into my computer.
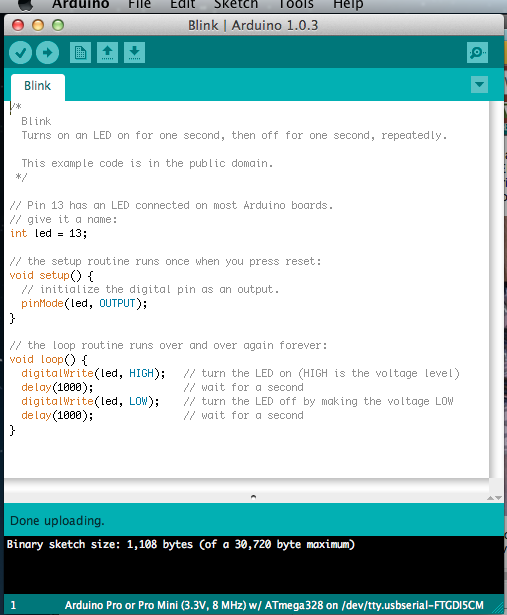
To burn the bootloader onto the board, I used my FABisp, and the arduino IDE. The board acts the same as the same as an arduino pro mini 3.3 v with an 8 MHz clock, so that is the option I selected in the arduino IDE. I then used the blink example to test it out. The arduino blinked it's led!