Program your board to do something
Firstly, I checked a microcontroller
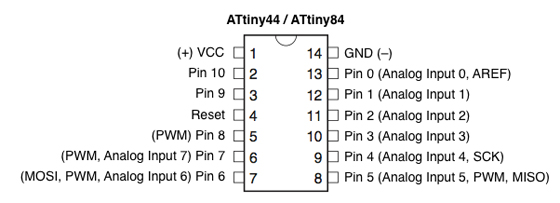
Pin-outs of ATtiny44/84.
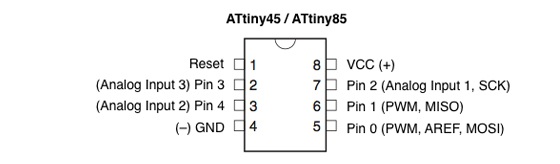
Pin-outs of ATtiny45/85.
I followed the tutorial written by High-Low Tech of MIT Media Lab, in order to program an ATtiny with FabISP. By downloading and installing ATtiny support, ATtiny series become available and can be selected in the "Board" menu.
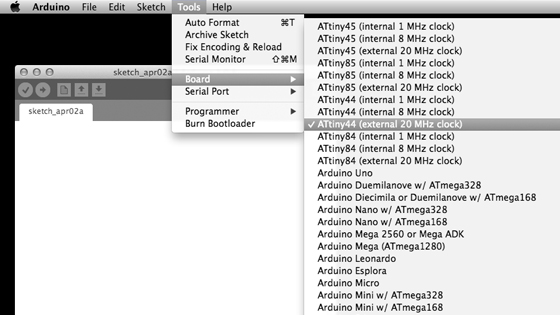
Screen capture of Arduino software.
Then I provide power to the ATtiny (right) and connect it my FabISP programmer (left) as shown below.
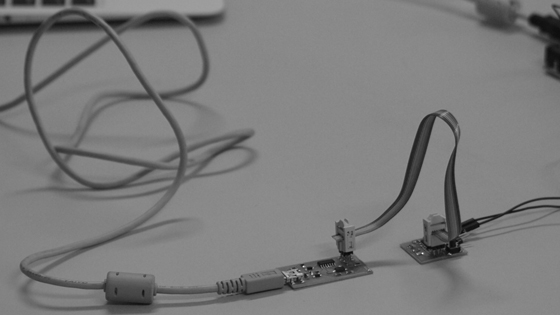
Photo of connecting the ATtiny44.
I tried to use my FabISP to upload program to the ATtiny, however, I had an error. I used Atmel AVRISPmkII In-System Programmer instead to try to connect the ATtiny. However, I had an error message while burning bootloader again, as you will see below.
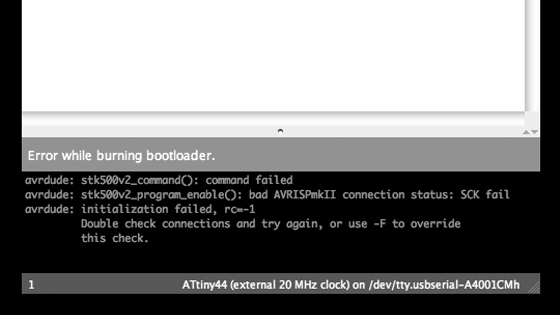
Screen capture of Arduino IDE. "Error while burning bootloader".
Therefore I exchanged the board for that I made in the other assignments, I got the message "Done burning bootloader".
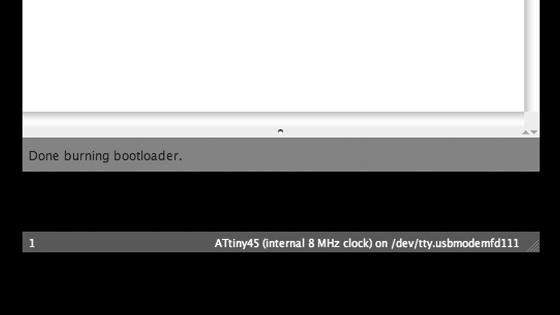
Screen capture of Arduino IDE. "Done burning bootloader".
Note: Here we should ensure that we have selected correctly the board from the "Board" menu before burining bootloader. In my case, I have used ATtiny45 (internal 10 MHz clock) on the board, but selected "ATtiny45 (external 20 MHz clock) from the "Board" menu in the IDE by mistake and burned bootloader. After setting external clock, I could never write again without external oscillators such as crystal units. I exchanged ATtiny45 for new one and selected the correct board in the IDE, then the Sketch can be written for ATtiny over and over again.
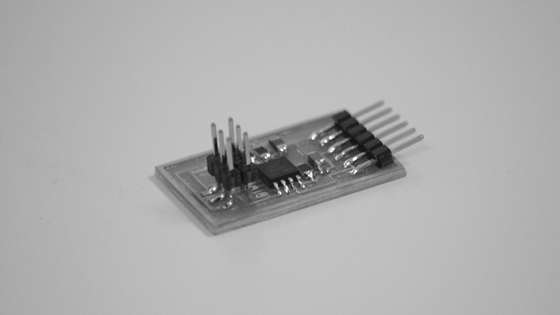
The board I used (hello.temp.45).
Next, I downloaded the pySerial which encapsulate the access for the serial port. To install it, I opened Terminal in OS X, moved to the directory, and type:
$ sudo python setup.py install
I also downloaded and installed the CrossPack for AVR development, a development environment for Atmel's AVR Microcontrollers. I opened a Teminal window, made the new directory and moved to the directory, and type:
$ avr-project projectx
To open the project in Xcode, I double-clicked on the "projectx.xcodeproj" file. I opened the "Makefile" file and "main.c" file in the "firmware" folder, and edited the code. (In this example, I rename from "Makerfile" to "hello.temp.45.make", from "main.c" to "hello.temp.45.c", respectively. And I made the "hello.temp.45.py" file. I rewrote these files with reference to here.)
To flash the microcontroller, I opened Terminal in OS X, moved to the "firmware" directory, and type:
$ make -f hello.temp.45.make program-avrisp2
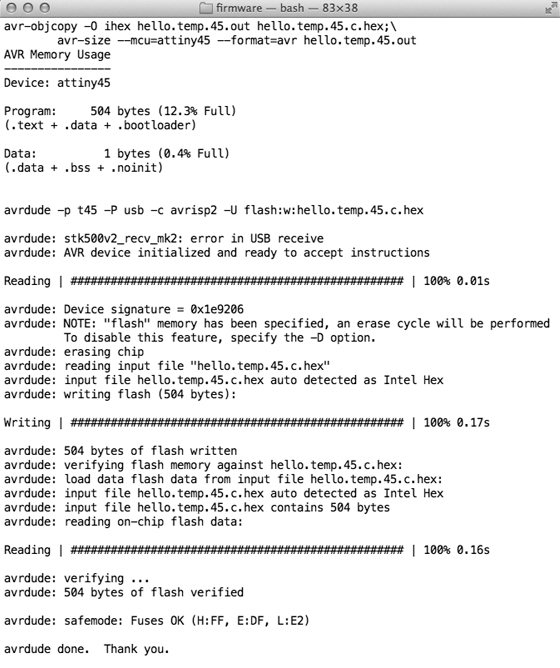
Terminal output.
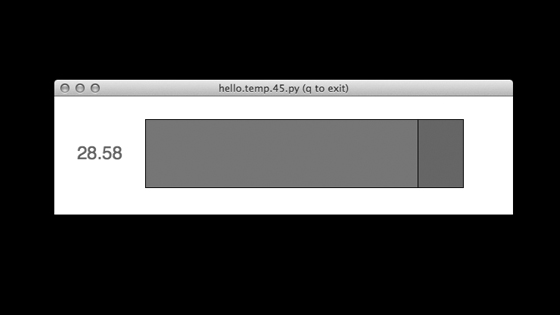
To run the Python program, I opened Terminal in OS X, moved to the "firmware" directory, and type:
$ ls /dev/tty.*
I got a list of all of my serial ports, and picked the one that I would like to open. In this example, I selected "/dev/tty.usbserial-A4001CMh", and type:
$ python hello.temp.45.py /dev/tty.usbserial-A4001CMh
Example. Screen capture of Arduino IDE.
