Assignments: design and make a 3D mold (~ft2), and produce a fiber composite part in it
Fan blade
Since I've got another idea for final project, I decided to make something related to it though still I don't know which idea I'll choose at last but back up is always nice.
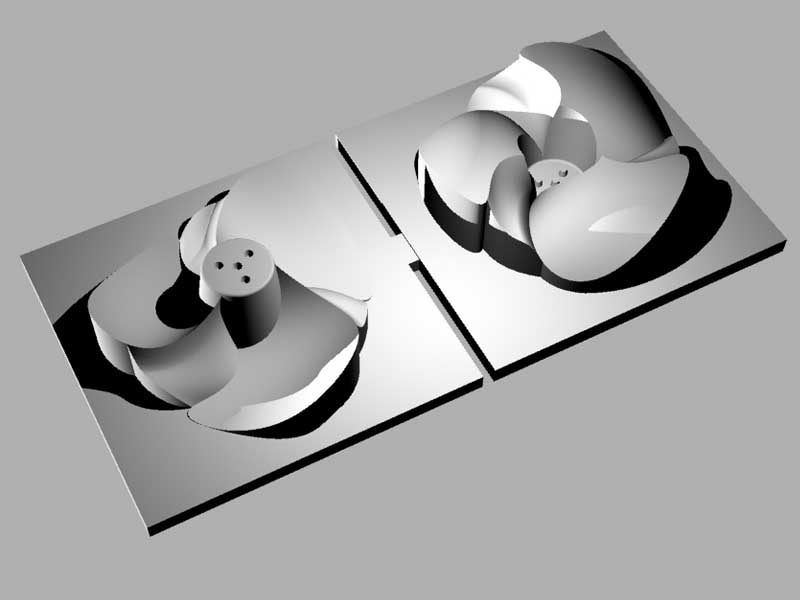
So what I made in this week is a fan blade of electric fan to make wind. It's 30cm diameter and 8cm height. I designed it with Rhino. As you can see in the image from Rhino, I made positive and negative mold to sand fiber and matrix between them.
Milling foam
Machining foam was quite fun process, Feed rate and path depth can go much faster then machining wood but sound is less noisy.
I used 1/4inch endmill for rough cut and smooth cut, and settings are
- Feed rate: 100
- RPM: 12000
- direction of rough cut: along X
- direction of smooth cut: along Y
I put MDF plate wide enough to cover foam on base plate of Shopbot and then attached machinable foam on it with gure gun.
And let shopbot run through rough and smooth cut without changing bit.
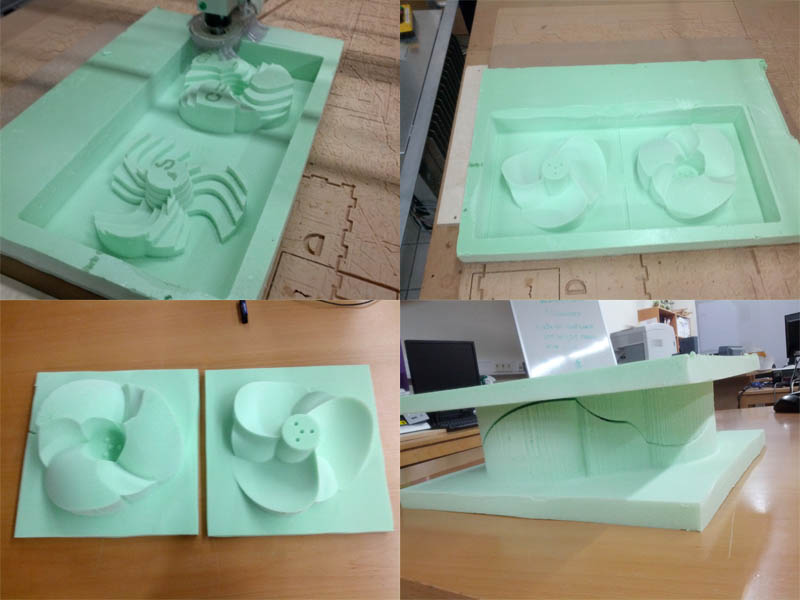
After milling, I put negative mold and positive mold together to check how they fit.
MISTAKE! There was 1~2mm gap between molds bacause I didn't fillet edge of model with diameter of milling bit so milling bit couldn't some parts too narrow. Next time fillet edge with diameter of milling bit must be on list to make mold fit perfectly.
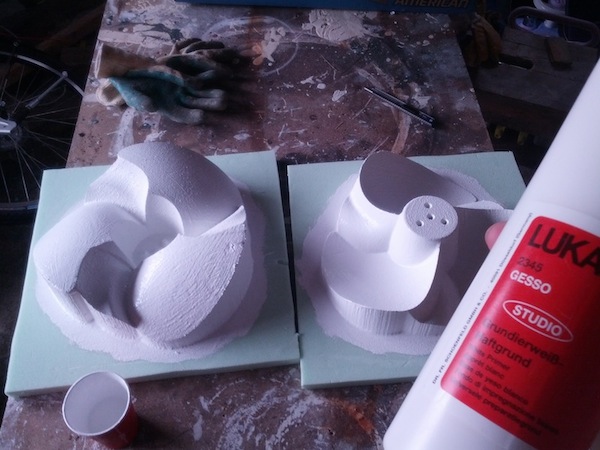
Foam molds were painted with gesso to remove composite from it easily. I had to paint two times and gesso became hard 4 hours later after applying it to surface so I painted first layer saturday and paited second layer again at sunday morning.
Cutting fiber
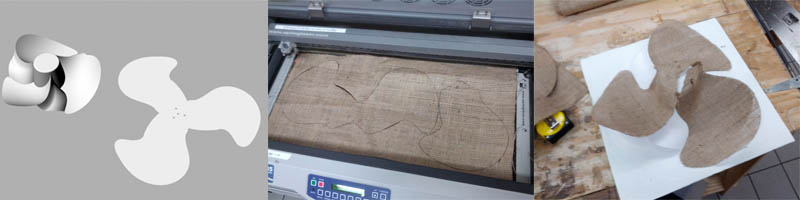
As fiber for composites, I used sheet cut out from a jute bag in our lab's storage. I tried to put four-sided sheet to my mold as beginig but it doesn't fit well so some process to cut sheet into the shape of the mold was required. Squish command of Rhino solved this problem. It generate flat surface which fit to the curved surface user selcted. But this command can be applied only one surface so I had to connect cut sheets by hand.
I use epilog laser to cut the fiber but its working area is 600cm x 300cm which isn't wide enough to cut fiber as one piece so I devided my cut sheet into 2 pieces, small piece covers one blade and large piece covers two blade. and it fits nicely with mold.
Composite
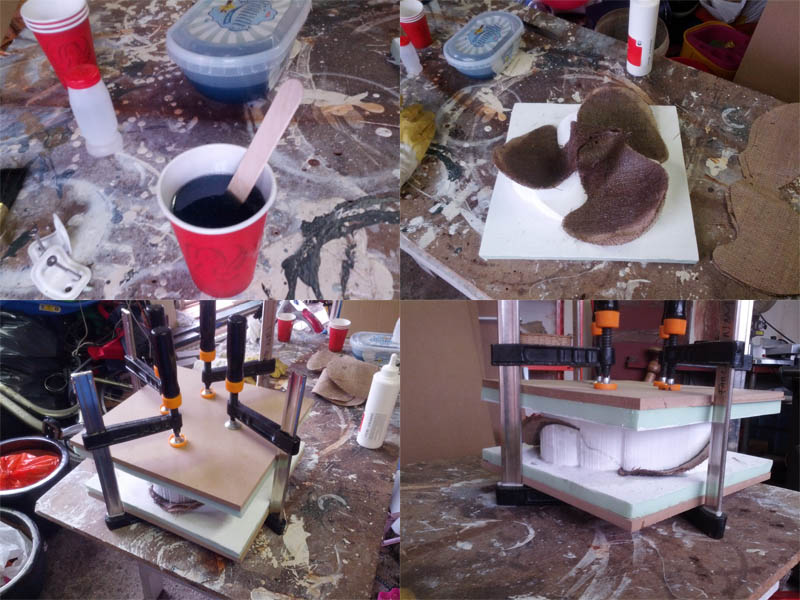
There is a ship factory around our lab, Frosti, the manager of our lab, introduced me to one guy working at there and we got Polyester from him.
Since Fiber, matrix, and molds are ready, it's time to cook. I mixed Polyester with hardner.(actually I don't know the ratio of these two requids, I just mix amount the ship factory guy gave me.)
And then I put one-sheet of the fiber and put polyester on it and repeated it three times in total. it means I made 3 layers. As it's mentioned avobe, all blade is covered with the combination of small piece and large piece of fiber and the position of sheets was rotated 120˚ every time i put new layer on so each blade is covered with one small piece and two large pieces.
After all layer is located as it should be, I put nagative-mold together and put it between 12mm MDF plates which has been cut into sam size as mold then fixed it with 4 clamps tightly.
When clamps were tighten, I saw the two mold fit toghter without gaps and extra polyester came out between them.
Taking it out
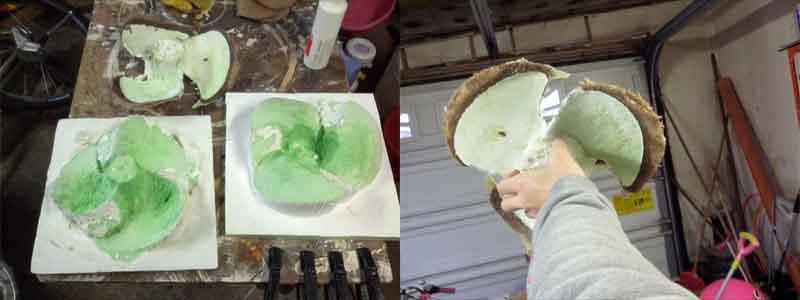
It took 4 hours to be cured. And it was very hard to remove the mold from another. Foam and gesso stick with composite at some part so I broke off the mold and it can't be used for another composite anymore. Probably I should paint more gesso before since I found polyester melt a few places of foam.
But anyway, the shape of fan blade is nicely done even though surface is a little bit rough. It's more rigid and light than I thought.
Result
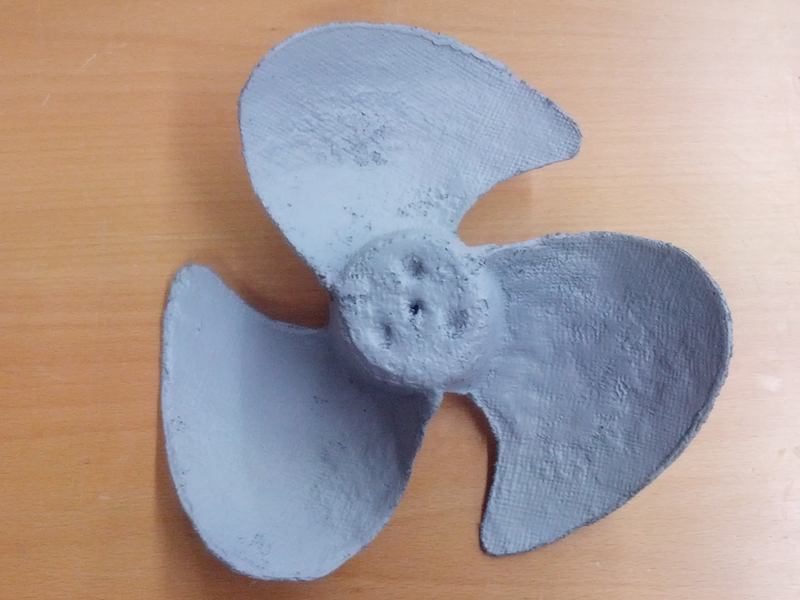
I removed extra part from fan blade and did sanding surface then I painted it with gray primer to make surface more smooth. But still surface is not flat enough so I think it's needs putty to fill holes and sanding to make it smooth more.
Resource
fan blade: This Zip file contains STL model for milling the fan blade.