


Machine design
We will need two controllers, one for the speed of the motor and one for the heating.
Motor control
The motor runs at 5A with 12V which means that we need a much more powerful motor controller than the one I build for the Output devices.
I designed a board in Eagle that uses an Attiny44 for sending PWM to the 16A-MOSFET from the fablab inventory (RFD16N05LSM9ACT-ND). (eagle-files)
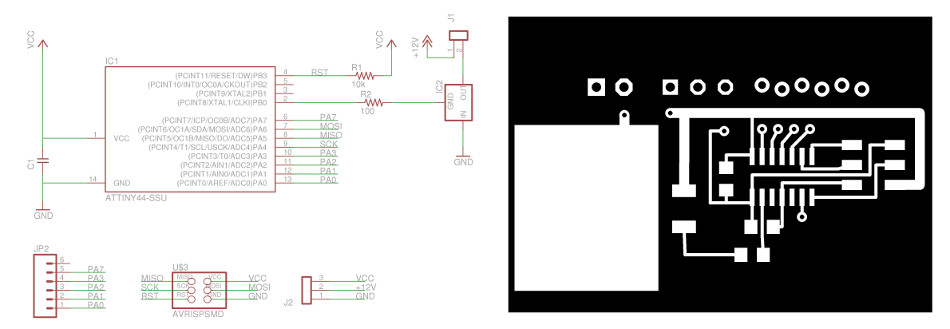
It attaches to +5V and +12V from a computer power-supply and has a screw-terminal output for the motor. The left-over in and out-ports go to a 6x1-female connector, for a speed-control potentiometer and potential other devices.
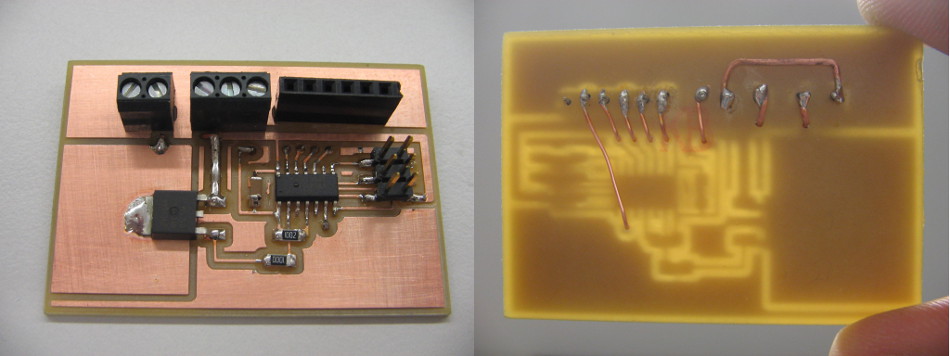
The control works very nice. For security (even though Neil told me that it is not necessary) I’m using a second diode right at the connectors of the motor. So far I tested the board without heavy load for longer periods and nothing gets hot!
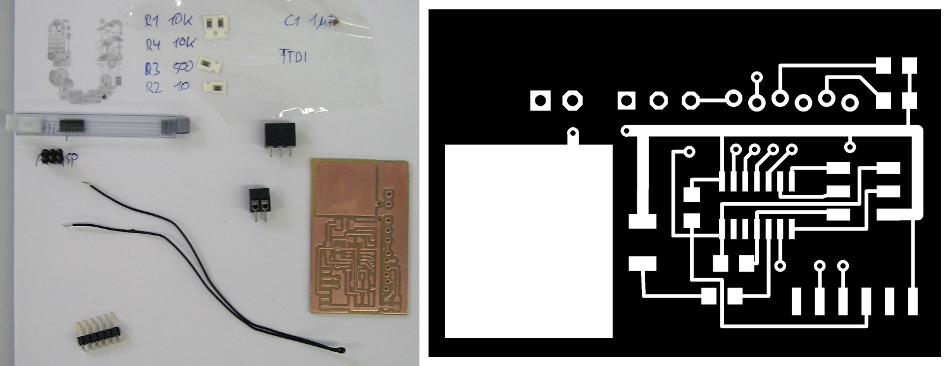
Temperature control
I made another quite similar board for the temperature control.
For measuring the temperature I will use an NTC 100k Thermistor that I found in some garbage from EDP. It connects to the Attiny with a potential divider and I will use a PID-controller to adjust the PWM for my heating MOSFET.
By mistake the additional MOSFETS haven’t been ordered which will delay the future work a bit :-(
The board is milled already and I will start testing the temperature sensor soon. The temperature will be adjusted by a Potentiometer and I will try to use the Arduino PID-library for the control. It would be nice to have an LCD for displaying the set-point and the current temperature, but for the time being a PWM-modulated LED will have to be sufficient to visualize the distance from the target value.
On this board I included the FTDI-header so the values can be communicated by serial to a computer.
Update 2.6.2013
Today I finished the temperature controller. I didn’t get the exactly same MOSFETs at Farnell so I used the RFD16N06LESM. (eagle-files)
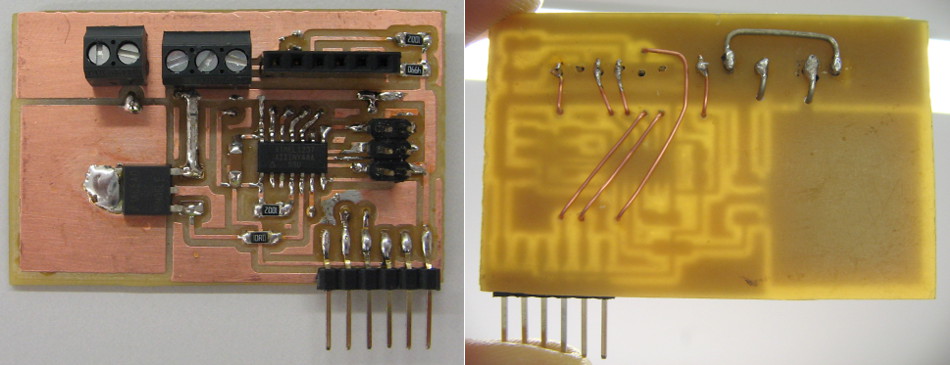
In the following video you can see me testing the circuit with the thermistor attached to a spoon for measuring the temperature. It controls the pulse-width that would normally regulate how much current goes to the heating wire of the extruder. In this case it only changes the brightness of an LED.