Week 8 > Electronic Production
Characterize the design rules for your in-house PCB production process: document the settings for your machine. Document the workflow for sending a PCB to a boardhouse Document your work to the group work page and reflect on your individual page what you learned
Software Tool
MODS PROJECT - Generating Toolpaths Using Mods Project
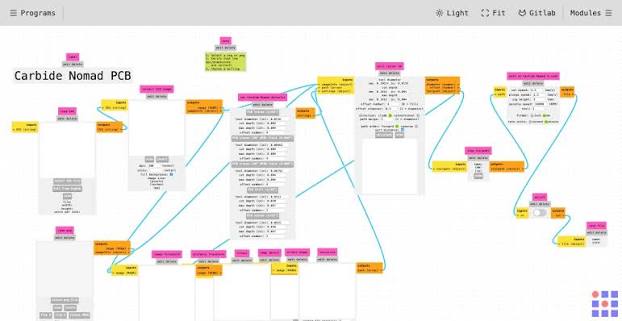
I used Mods Project, a web-based tool for generating toolpaths for CNC and PCB milling. The tool converts the PCB design files into machine-compatible toolpaths that can be sent to the Roland SRM-20.
Step 1: Select the Roland SRM-20 Program
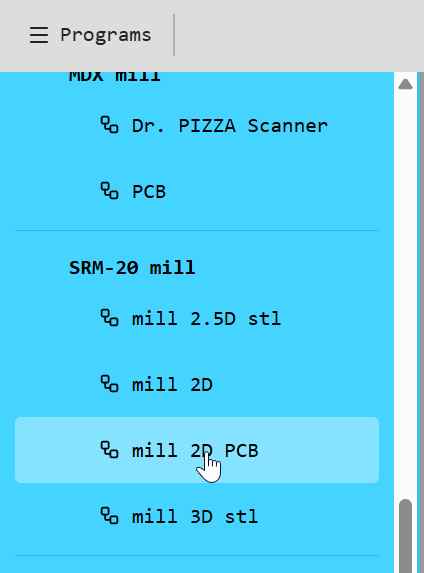
From the Programs section on the left panel, scroll down to Roland and select SRM-20 → Mill 2D PCB. This loads the appropriate workflow for generating a PCB milling toolpath for the Roland SRM-20.
Step 2: Select the PCB File
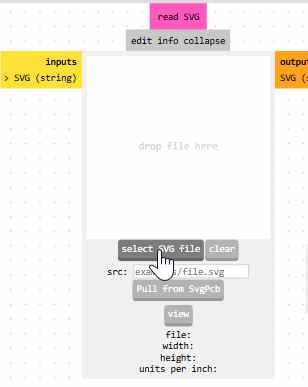 Under the Read SVG module, click Select File and upload the SVG file that contains the PCB design.
Step 3: Invert the Image
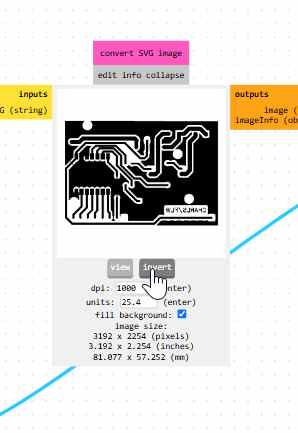
After loading the file, always select the Invert option where required. This ensures that the milling areas and the areas to be removed are interpreted correctly by the toolpath generator.
Step 4: Configure PCB Defaults
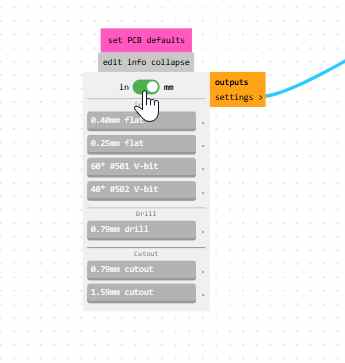
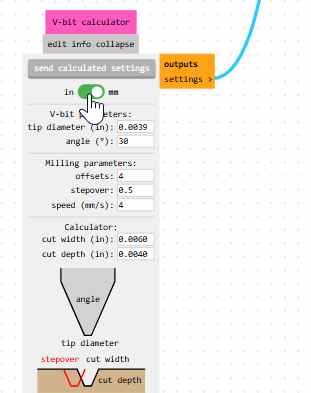 Set the required PCB defaults, including:
Measurement units PCB dimensions Tool/end mill size Cutting parameters
These settings should correspond to the material, milling tool, and requirements of the PCB design.
Step 5: Configure the Toolpath
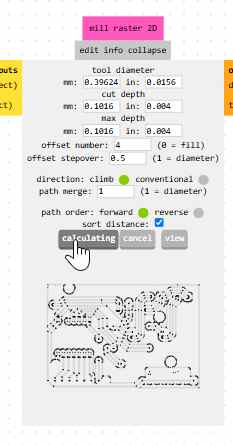
The Toolpath section contains the machining parameters used to generate the cutting path. After selecting the appropriate PCB defaults, Mods Project automatically populates the required settings. These parameters can be manually adjusted if specific milling requirements are needed.
Step 6: Set the Origin
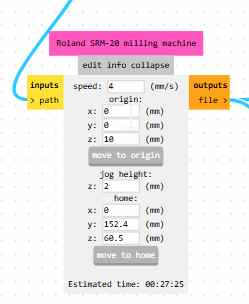
Under the origin settings, I set the X and Y coordinates to 0 (X = 0, Y = 0). This ensures that the milling job starts from the intended origin position established on the Roland SRM-20 rather than using an unintended default position.
The Z-axis settings are left unchanged because the Z-axis needs to remain in its safe position when starting and stopping the milling operation.
Step 7: Generate and Save the Toolpath
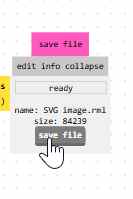
After completing the settings, Mods Project automatically generates the toolpath. I then clicked Save File to download the generated toolpath file.
The downloaded file is then ready to be loaded into VPanel and sent to the Roland SRM-20 for milling.
V-Panel
VPanel is the software used to control and operate the Roland SRM-20 desktop milling machine. It provides the interface for configuring the machine, setting the origin point, controlling spindle movement, and starting or stopping milling jobs.
I downloaded and installed VPanel from the official Roland DG software resources.
Operate Vpanel
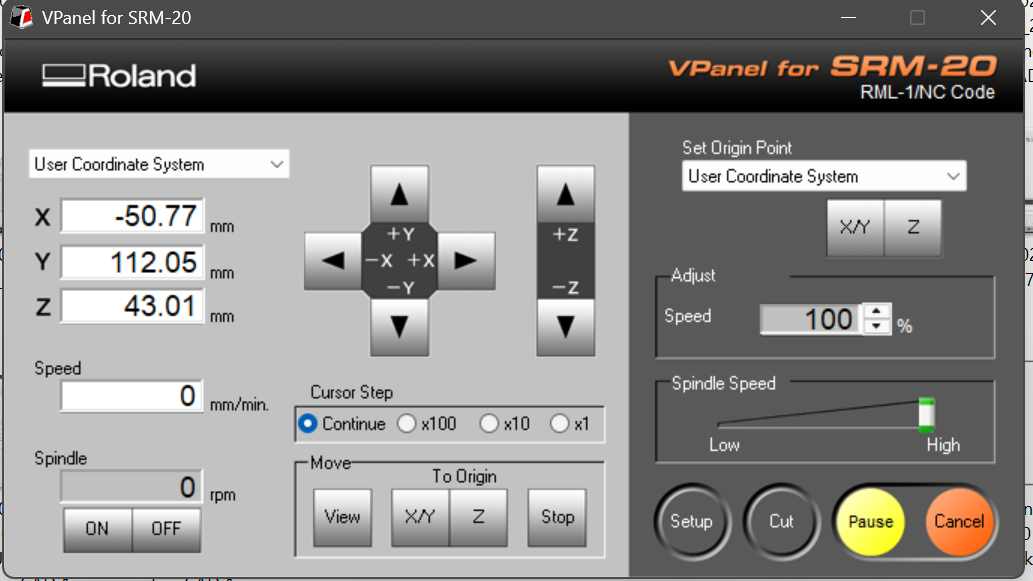
After launching VPanel, the main interface provides access to the controls and settings required to operate the Roland SRM-20. From this interface, you can manually move the spindle along the X, Y, and Z axes, perform machine homing, set the work origin and coordinates, configure milling parameters, and start or stop the milling process. VPanel therefore serves as the main control interface between the computer and the Roland SRM-20, allowing the operator to prepare, configure, and safely execute milling jobs
CUT
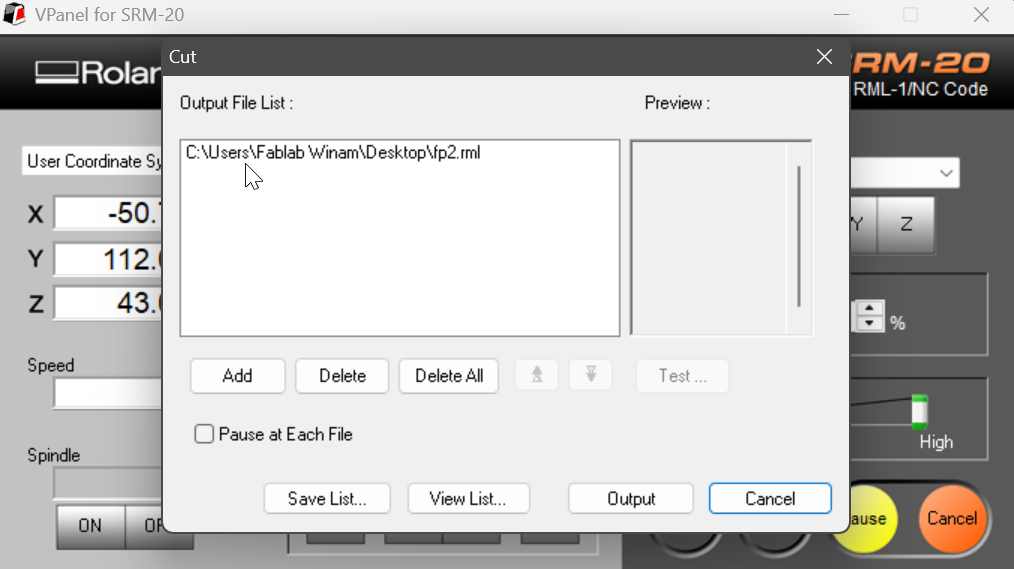
To send a milling job to the Roland SRM-20, click the Cut button in VPanel. A new interface will open where you can select and upload the generated toolpath file.
After selecting the appropriate toolpath, review the job settings and confirm that the machine is properly prepared. Click Output to send the toolpath to the Roland SRM-20 and begin the milling operation.
SETUP
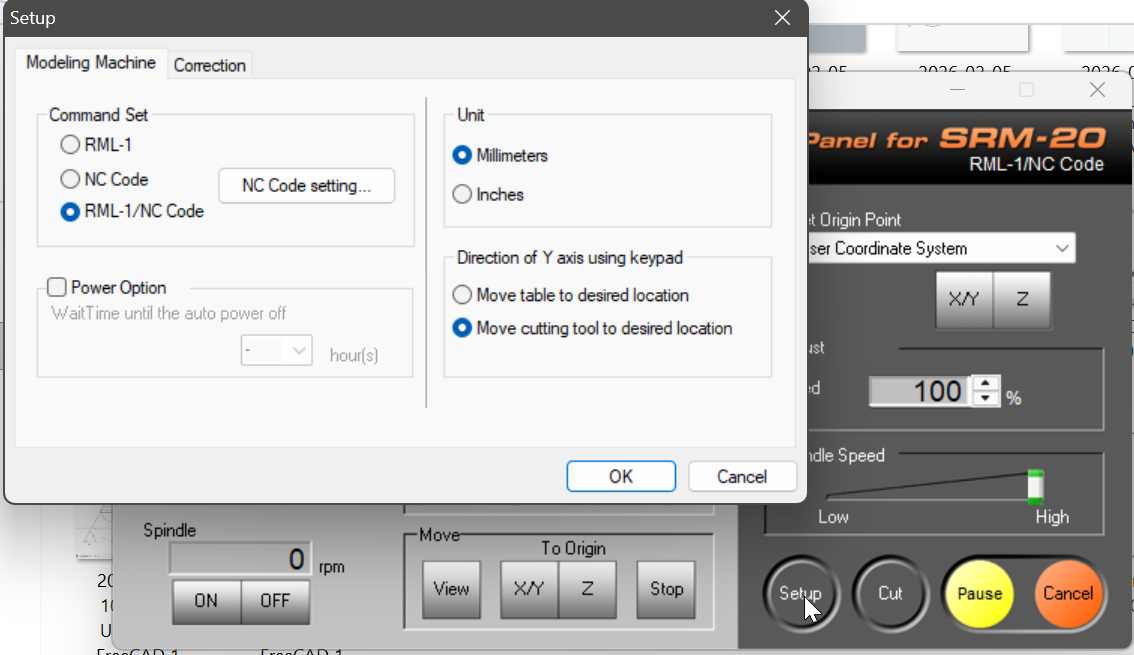
The Setup section is used to configure the command set and measurement units for the milling job. Under Command Set, I selected RML/NC Code, which is the command format configured for communication between VPanel and the Roland SRM-20.
RML: Roland’s machine-control language used to define tool movements, cutting paths, and other milling commands. NC Code: Numerical Control code used to define instructions such as tool movements, coordinates, feed rates, and machining operations.
I also set the units to millimetres (mm) to match the units used when generating my toolpath. This ensures that the dimensions and coordinates are interpreted correctly by VPanel and the Roland SRM-20, preventing scaling or positioning errors.
Characterization of Design Rules for In-House PCB Production (Roland SRM-20) 1. Machine Used
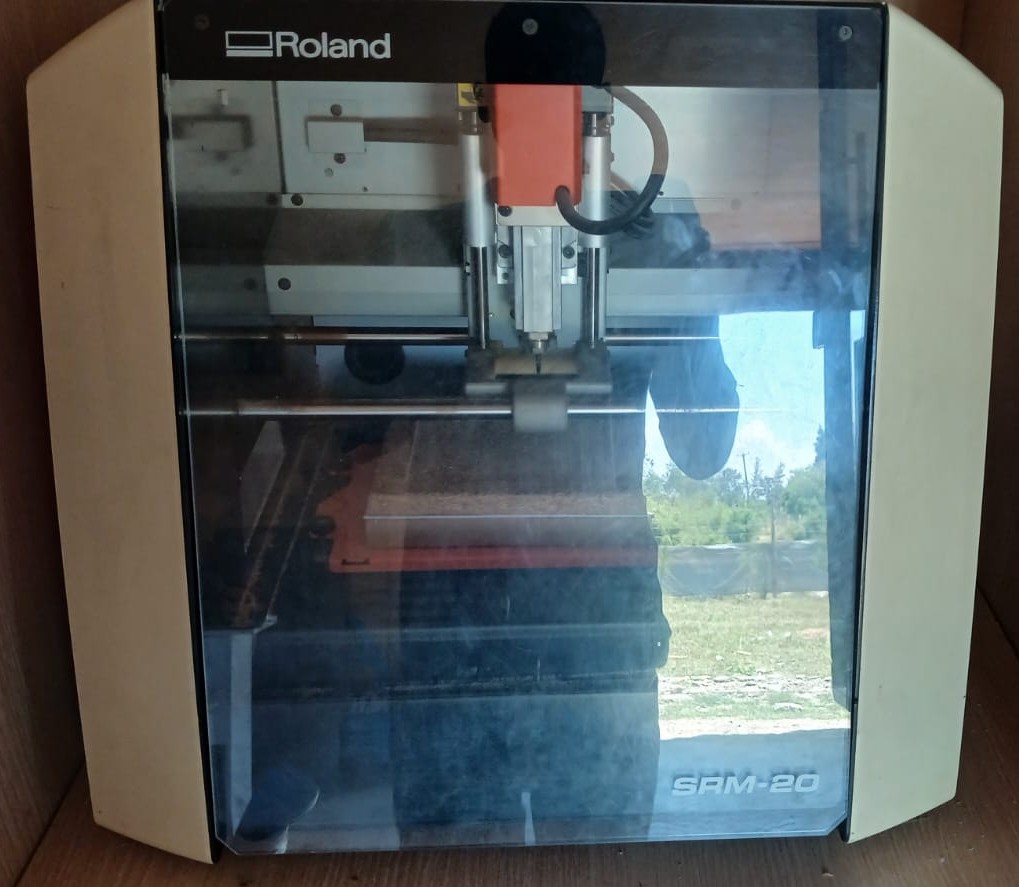
I used the Roland SRM-20 desktop CNC milling machine for PCB fabrication using FR1 copper-clad boards and V-bit / flat end mills.
- Tooling Used
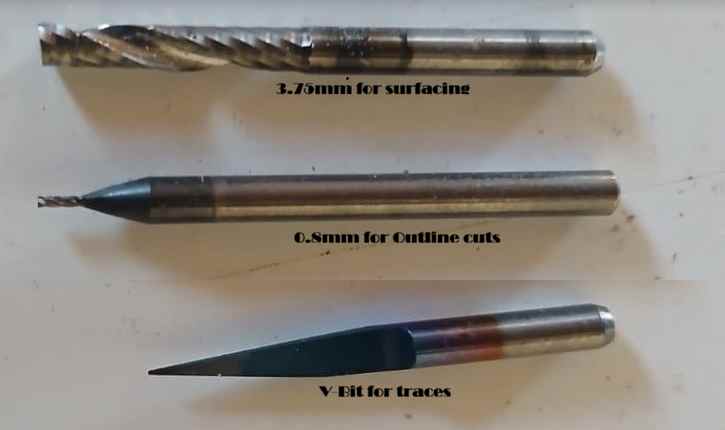
1/64” (0.4 mm) end mill → PCB traces 1/32” (0.8 mm) end mill → outline cutting V-Bit endm mill for traces
- Characterized Design Rules
A. Minimum Trace Width Reliable minimum trace width: 0.4 mm (16 mil) Safer recommended width: 0.5 mm – 0.6 mm Anything smaller risks breaking during milling or not being milled properly
B. Minimum Clearance (Isolation Gap) Minimum spacing between traces: 0.4 mm Recommended clearance: 0.5 mm – 0.6 mm This ensures the milling bit can fully isolate copper without shorts
C. Minimum Drill / Hole Size
Practical minimum hole size: 0.8 mm – 1.0 mm Smaller holes are unreliable with SRM-20 milling Through-hole components must match drill capability
D. Tool Diameter Constraints Main engraving bit: ~0.4 mm effective cutting width This limits: pad density routing density via size (if used)
E. Copper Removal Strategy Two-pass milling is recommended: Rough pass (clear isolation) Second pass (clean edges if needed) Improves reliability of fine traces
F. Board Flatness Sensitivity FR1 board must be perfectly leveled Even small height variation causes: broken traces (too shallow cut) short circuits (too deep cut)
G. Milling Speed & Feed (Observed)
Spindle speed: fixed (~7000–10000 RPM depending on setup) Feed rate: moderate (too fast causes broken bits) Depth per pass: ~0.1 mm recommended for PCB isolation
- Observed Limitations of SRM-20
Board leveling is critical for success
- Design Adjustments Made Based on These Rules
Reflections
To ensure successful and accurate PCB fabrication, I made several important adjustments during the milling process.
- Setting the X and Y Origin
Under Mods Project, I changed the X and Y origin values to 0 (X = 0, Y = 0). Initially, when I attempted to mill the PCB, the machine would move to approximately X = 10 and Y = 10 before starting the job. This caused the milling operation to begin away from the intended origin.
Setting both coordinates to 0 ensured that the toolpath started from the correct home/origin position, improving the alignment between the generated toolpath and the physical PCB material.
- Surfacing the PCB
Another important step was surfacing the PCB material. I performed surfacing to ensure that the copper board had a flat and uniform surface before milling.
This was particularly important because variations in the height of the PCB can cause the milling bit to cut deeper in some areas and too shallow in others. By surfacing the board, I achieved a more consistent milling depth and uniform traces across the entire PCB.
The complete surfacing process is documented on my individual project page.
- Maintaining Consistent Units
I also learned the importance of maintaining consistent measurement units throughout the entire toolpath-generation and milling workflow. If the PCB design is created in millimetres (mm), the same unit must be selected in Mods Project, VPanel, and the toolpath settings.
Using inconsistent units can result in incorrect dimensions, scaling problems, or misalignment during fabrication. Therefore, I ensured that mm was used consistently across all stages of the workflow.