Week_01:Principles&_Practices/Project_Management
This weeks assignments:
Principles and Practices
- Plan and sketch a potential final project
Project Management
- Read, sign (add your name to) the student agreement and commit it to your repo
- Work through a git tutorial.
- Build a personal website in the class archive describing yourself and your final project. Refer to the lecture material for examples.
- Upload parts 1 and 2, to the class archive.
Principles and Practices:
- Final Project Sketch
Final project description:
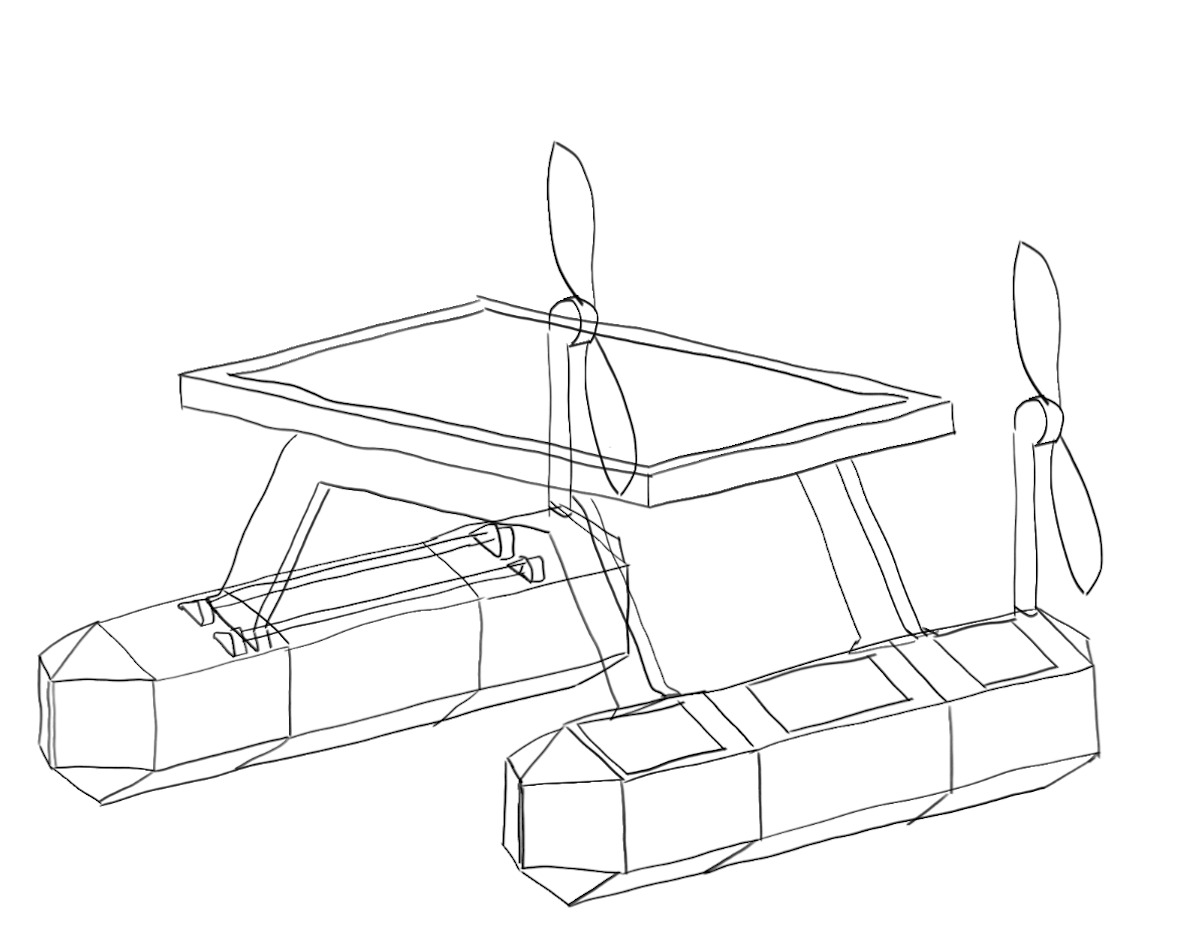
For my final project I will be designing and building a modular, solar powered, unmanned surface vehicle (USV).
It will use large propellors and brushless motors to enhance efficiency and will be controlled through ardupilot opesaorce software installed on the machine and managed remotely through mission planner software
Each hull will have minimum 3 basic sections containing different modules designed for different purposes both hydrodynamicly and functionally and the two hulls will be held together with by a solar panel to increase efficiency that will house the electronics underneath it in a waterproof container:
Project Management:
For this course we will be completing weekly assignments colaborating with other students and tracking our final project progress through our own personal websites. We will set up local repositories to store our files on our computers and they will be published online through Git.
What is Git
Git is a version control system that tracks changes in files over time, synchronize files between different computers allowing you to save different versions, collaborate with others, and revert back to earlier versions if needed.
Documentation site workflow:
To be as efficient as posible with my limited html skill there will be 3 primary components to my weekly documentation:
- Notion for basic documentation and feedback
- Local repository for images and files
- Gitlab web IDE for editing and final touches
- I will document as I go using notion allowing me to be fast and efficient and organize the site visually with its useful drag and drop editing for test, images and files and get fast feedback from my instructor. Once I am satisfied with the documentation I will export the page.
- Once I have exported my notion content I will convert and compress images using image magick and transfer them to my local repository folder to be pushed to git lab.
- Finally I will do my final touches in the Git lab web IDE to check images and links are displaying correctly and everything is correctly formatted before publishing
setting up GIT on local computer
- Install homebrew using the following command in terminal:
/bin/bash -c "$(curl -fsSL [https://raw.githubusercontent.com/Homebrew/install/HEAD/install.sh](https://raw.githubusercontent.com/Homebrew/install/HEAD/install.sh))"
- once that's done install GIT using terminal on MacOs
brew install git
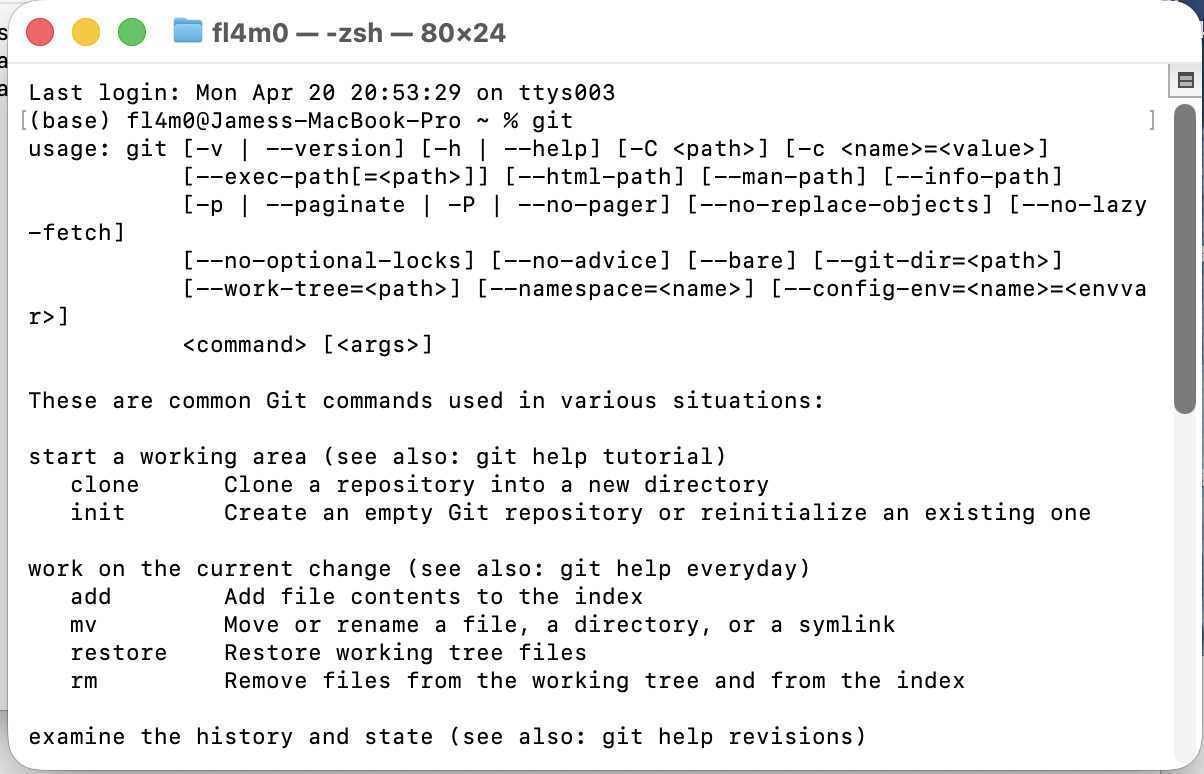
check instalation by typing git in the terminal and you should get something like this if successful
- you will need to clone your git repository locally in order to be able to “push” (upload) files to gitlab which is the cloud based git interface we will be using.
start by making a new folder in a location where you would like to house your fab academy repository
- next add an SHH key:
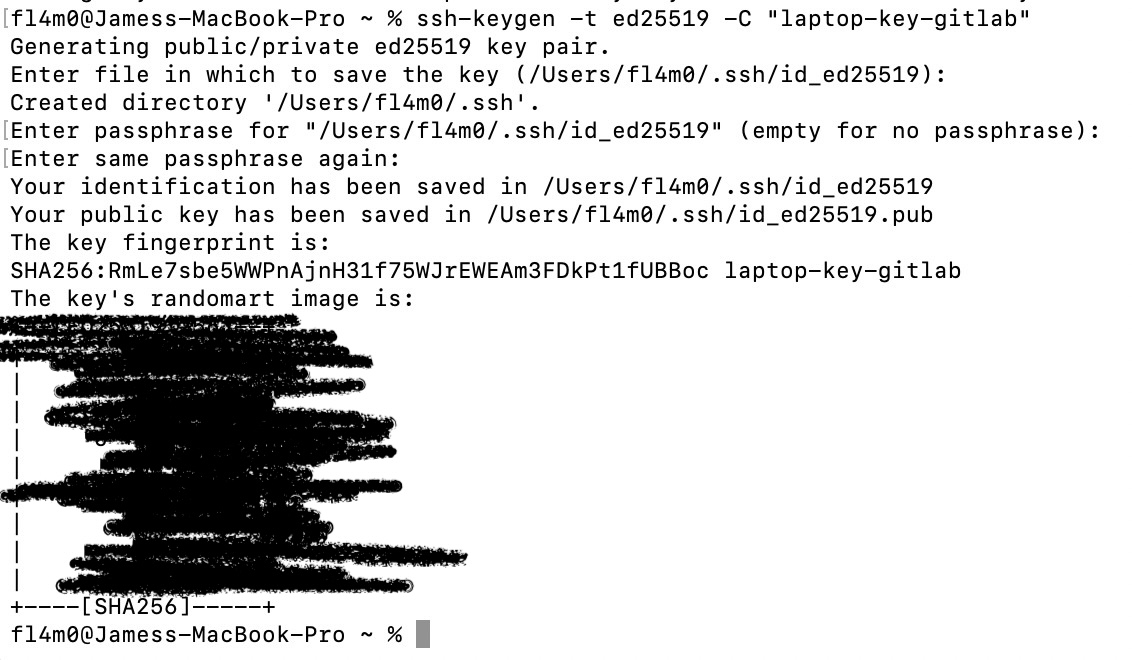
input the following in terminal to create a new key
ssh-keygen -t ed25519 -C "my-laptop-key-for-gitlab”
You will get a return like this
- add the private ssh key to your ssh agent
ssh-**add** ~/.ssh/id_ed25519
Then navigate to you profile in Gitlab and under the “SSH keys” tab click the add new button and paste in the following:
tr -d '\n' < ~/.ssh/id_ed25519.pub | pbcopy
to verify if it was successfully added try the following in your terminal and it should return a welcome message
**ssh** **-T** **git**@**gitlab**.**fabcloud**.**org**
once that is done change directory in your terminal by typing “ cd Users/name/ location” of your folder for example mine is:
'/Users/fl4m0/Desktop/Fab academy/repo’
on your git lab repository home page click the dropdown arrow of the blue “Code” button
the first option will read “clone with SSH”
click the copy button and paste into terminal and your gut hub student repository will be pulled to your local repository folder and you will be ready to start uploading your files
GIT workflow basics
you must start by initiating git in the terminal
git init
this will initiate Git and it should return with the name of the Git repository like so:
Reinitialized existing Git repository in /Users/fl4m0/Desktop/Fab academy/repo/james-stewart/.git/
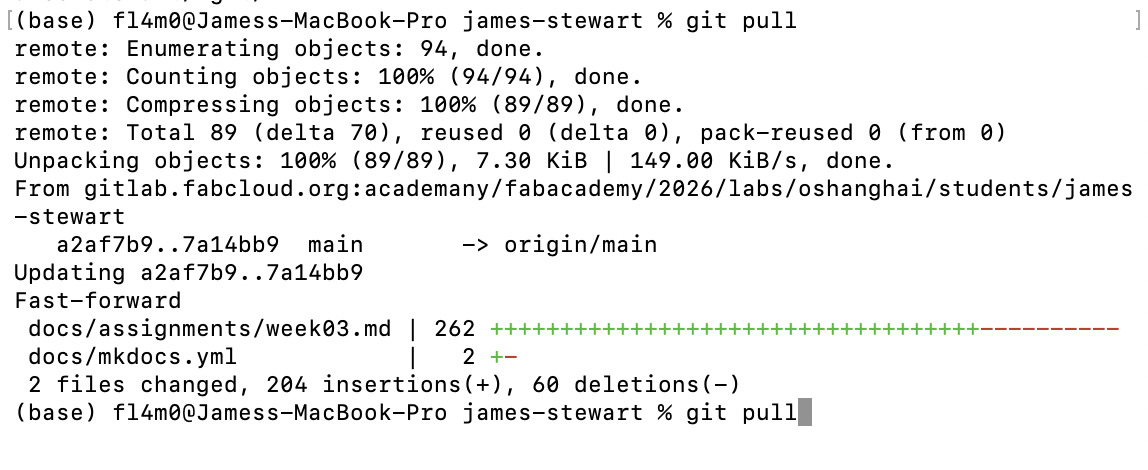
once Git has been initialized you must “pull” your repository to consolidate any changes between local repo and the cloud
check the status once your Files have been added to your local repo
git status
This will name the files that need to be added with the following command just replace
git add <file>
once files have been added you must commit the files and add a message to log what changes you have made
git commit -m "message"
once this is done you can now upload or “push” your changes
git push
check with git status one done to see that everything was uploaded correctly and also visit your URL to check that everything is displaying as intended and done
Git Commands cheat sheet
| git init | Initialize a new Git repository | |
|---|---|---|
| git clone |
Clone an existing repository | |
| git add |
Add files to the staging area | |
| git commit -m "message" | Commit changes to the repository | |
| git fetch | Only download changes from the remote repository without pulling them into your local branch | |
| git push | Push changes to the remote repository | |
| git pull | Pull changes from the remote repository | |
| git status | Show the status of files in the working directory | |
| git log | Show the commit history |
References: