Week 15: INTERFACE AND APPLICATION PROGRAMMING
group assignment: • compare as many tool options as possible
For the group assignment, we compared p5.js. and Node-RED.
p5.js (angela)
For the group assignment I decided to explore p5.js, a free, open-source JavaScript tool perfect for artists and those learning to code. I appreciated their emphasis on accessibility, inclusivity, and community.
You can set up coding environment either on the web or on your computer vs VS Code. I opted to use the Web Editor. NOTE: Firefox, Edge, Chrome, Safari are browsers that work. I had some issues trying to run on DuckDuckGo.
This software uses JavaScript programming language (hence “.js”) which is great for making things pretty and interactive.
I walked through the tutorial and learned some of the basics for Javascript like how to change background size and color, how to draw shapes, how to start using user interface with mouse pressed inputs.
Next, I followed a tutorial for creating an interactive landscape. Learnings:
- all p5.js projects have its library and three files: index.html (sets up the webpage), sketch.js (sets the style of the webpage) and style.css (where you make changes to canvas)
- two main functions are setup() (like I’m used to in Arduino, this runs one time to set everything up before running the remaining functions) and draw() ( executes lines of code wihin curly brackets at 60 times per second until stop or noLoop() function)
- there’s a cool feature for color where you can search for different colors within the web editor interace
- when drawing things, unless you specify values for thinks like fill color, strokeweight, stroke color, etc. it will just go by defaults
- you can add emojis! >> for example: text(“🤠”, 100, 370); this adds in an emoji with the corresponding X and Y (textSize(50) is used to change the size to say, 50)
- note about data types: some functions need arguments that are strings (“text”) and some need arguments that are numbers (number)
- coding in the interactivity! for X and Y coordinates of things, rather than a number you can set it to “mouseX” and “mouseY” and it will adjust according to your pointer
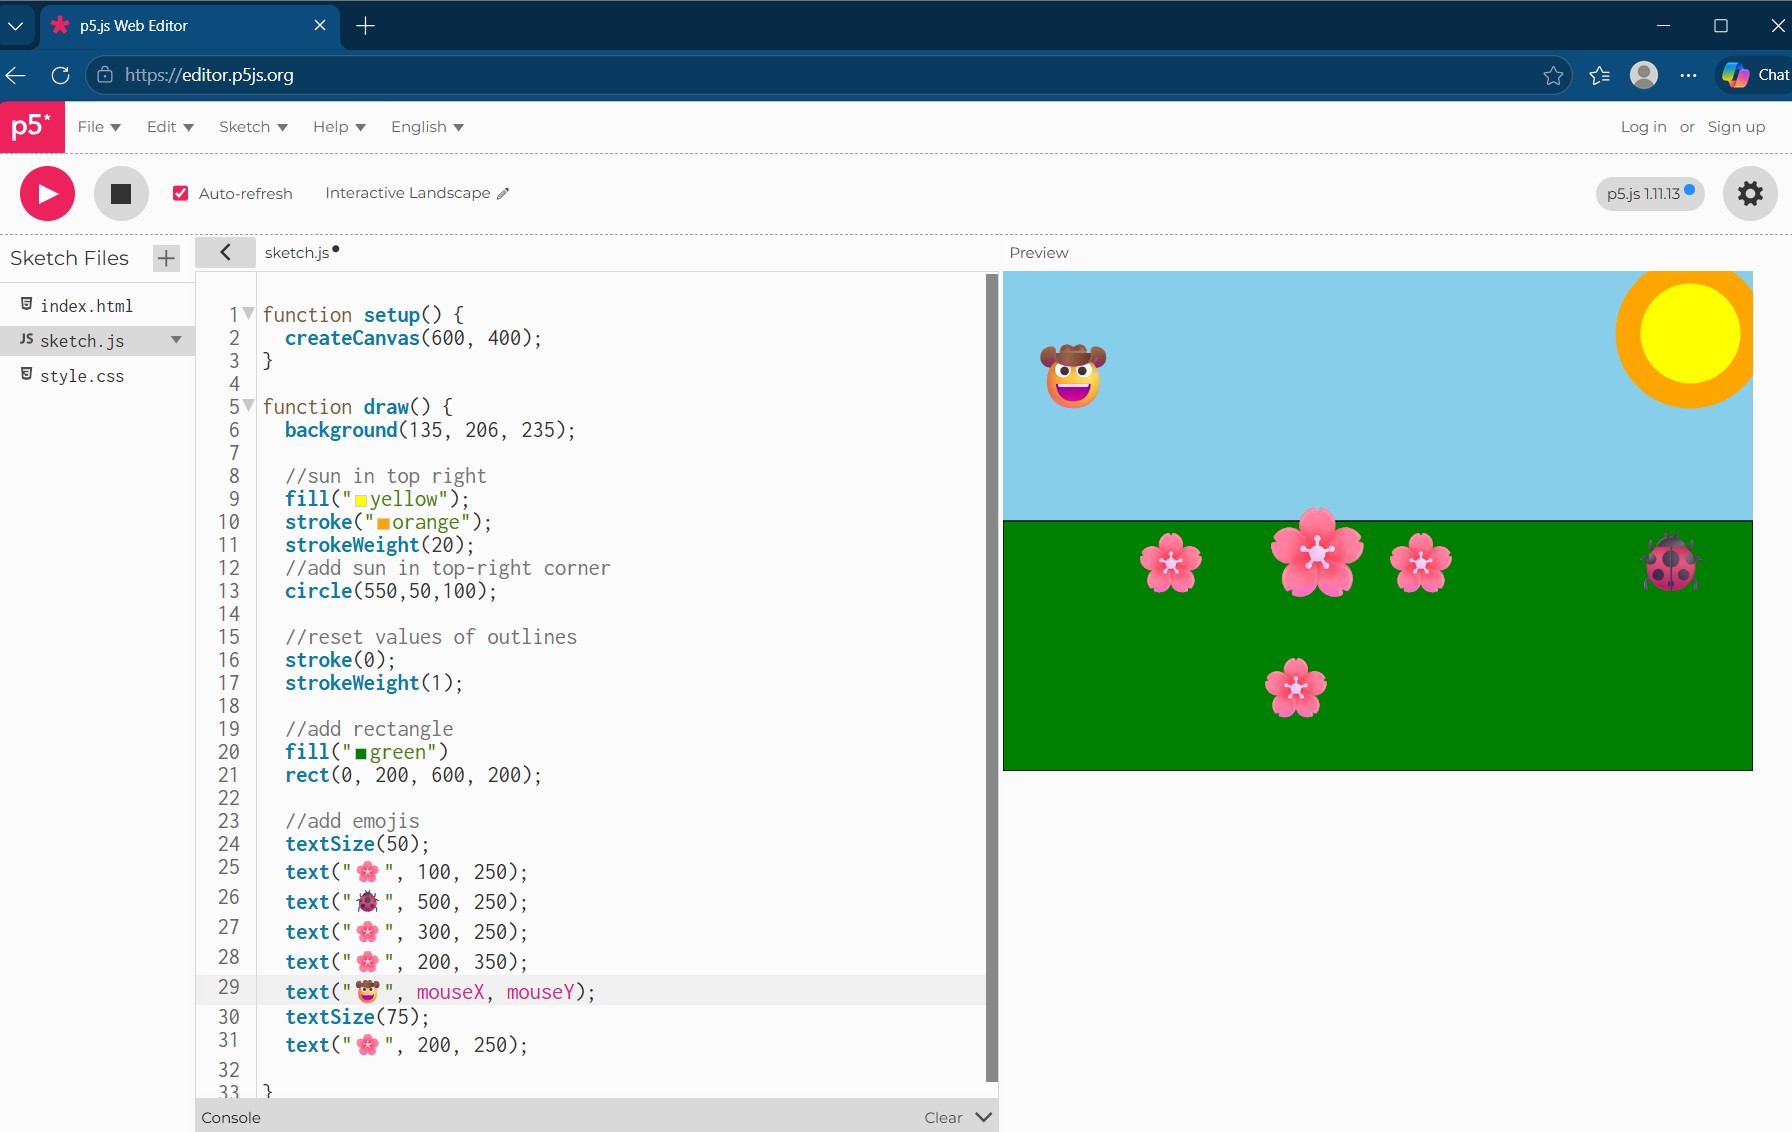
My beautiful landscape!
Now that I’ve got basic familiarity, I looked for ways to interact with a microcontroller board. This page on github provided a library to do this. I adapted code from this LED light example
First added in some extra LEDs and updated pins:
Code in Arduino
// Code from gohai's p5 webserial library on github: https://github.com/gohai/p5.webserial/tree/main
// angela adapted for Fab Academy 2026

//defining LED pins
#define LED_PIN D2
#define LED2_PIN D3
#define LED3_PIN D4

void setup() {
Serial.begin(57600);

//set LED pins as outputs
pinMode(LED_PIN, OUTPUT);
pinMode(LED2_PIN, OUTPUT);
pinMode(LED3_PIN, OUTPUT);
}

void loop() {
if (Serial.available() > 0) {
    String line = Serial.readStringUntil('\n');
    line.trim();  // get rid of unwanted characters
        if (line == "1") {
        digitalWrite(LED_PIN, HIGH); // turns LEDs on
    digitalWrite(LED2_PIN, HIGH);
    digitalWrite(LED3_PIN, HIGH);
    } else if (line == "0") {
    digitalWrite(LED_PIN, LOW);  // turns LEDs off
    digitalWrite(LED2_PIN, LOW);
    digitalWrite(LED3_PIN, LOW);
    }
}
}
Then I had to carefully look through documentation to figure out how to adapt the code for it to work with my XIAO ESP 32 C3 microcontroller and the port it is in. This meant I needed to specify “COM14” as my port since thats where my microcontroller is plugged in (working with Processing earlier helped me figure this out). Also, since I’m not using an Arduino board I took out the part of code that looks for that board specifically. And changed some of the language. My main and most time consuming mistake: trying to use DuckDuckGo 🫠 Once I ran the code with its adjustments in a compatible browser it worked!
Code for p5.js Web Editor
// code from gohai's p5 webserial library on github: https://github.com/gohai/p5.webserial/tree/main
//angela adapted for Fab Academy 2026

let port;
let connectBtn;
let ledOn = false;

function setup() {
createCanvas(400, 400);

port = createSerial();
connectBtn = createButton("Connect to XIAO");
connectBtn.mousePressed(connectBtnClick);

// in setup, we can open ports we have used previously
// without user interaction
let usedPorts = usedSerialPorts();
if (usedPorts.length > 0) {
    port.open("COM14", 57600);
    connectBtn.html("Disconnect");
    //connectBtn.hide();
}
}

function draw() {
background(255);

if (ledOn) {
    fill(255, 0, 0);
} else {
    noFill();
}
circle(width / 2, height / 2, 200);
}

function mouseClicked() {
if (ledOn) {
    // it's on, turn it off
    ledOn = false;
    port.println("0");
} else {
    // it's off, turn it on
    ledOn = true;
    port.println("1");
}
}

function connectBtnClick() {
if (connectBtn.html() != "Disconnect") {
    port.open(57600);
    connectBtn.html("Disconnect");
    //connectBtn.hide();
} else {
    port.close();
    connectBtn.html("Connect to XIAO");
}
}
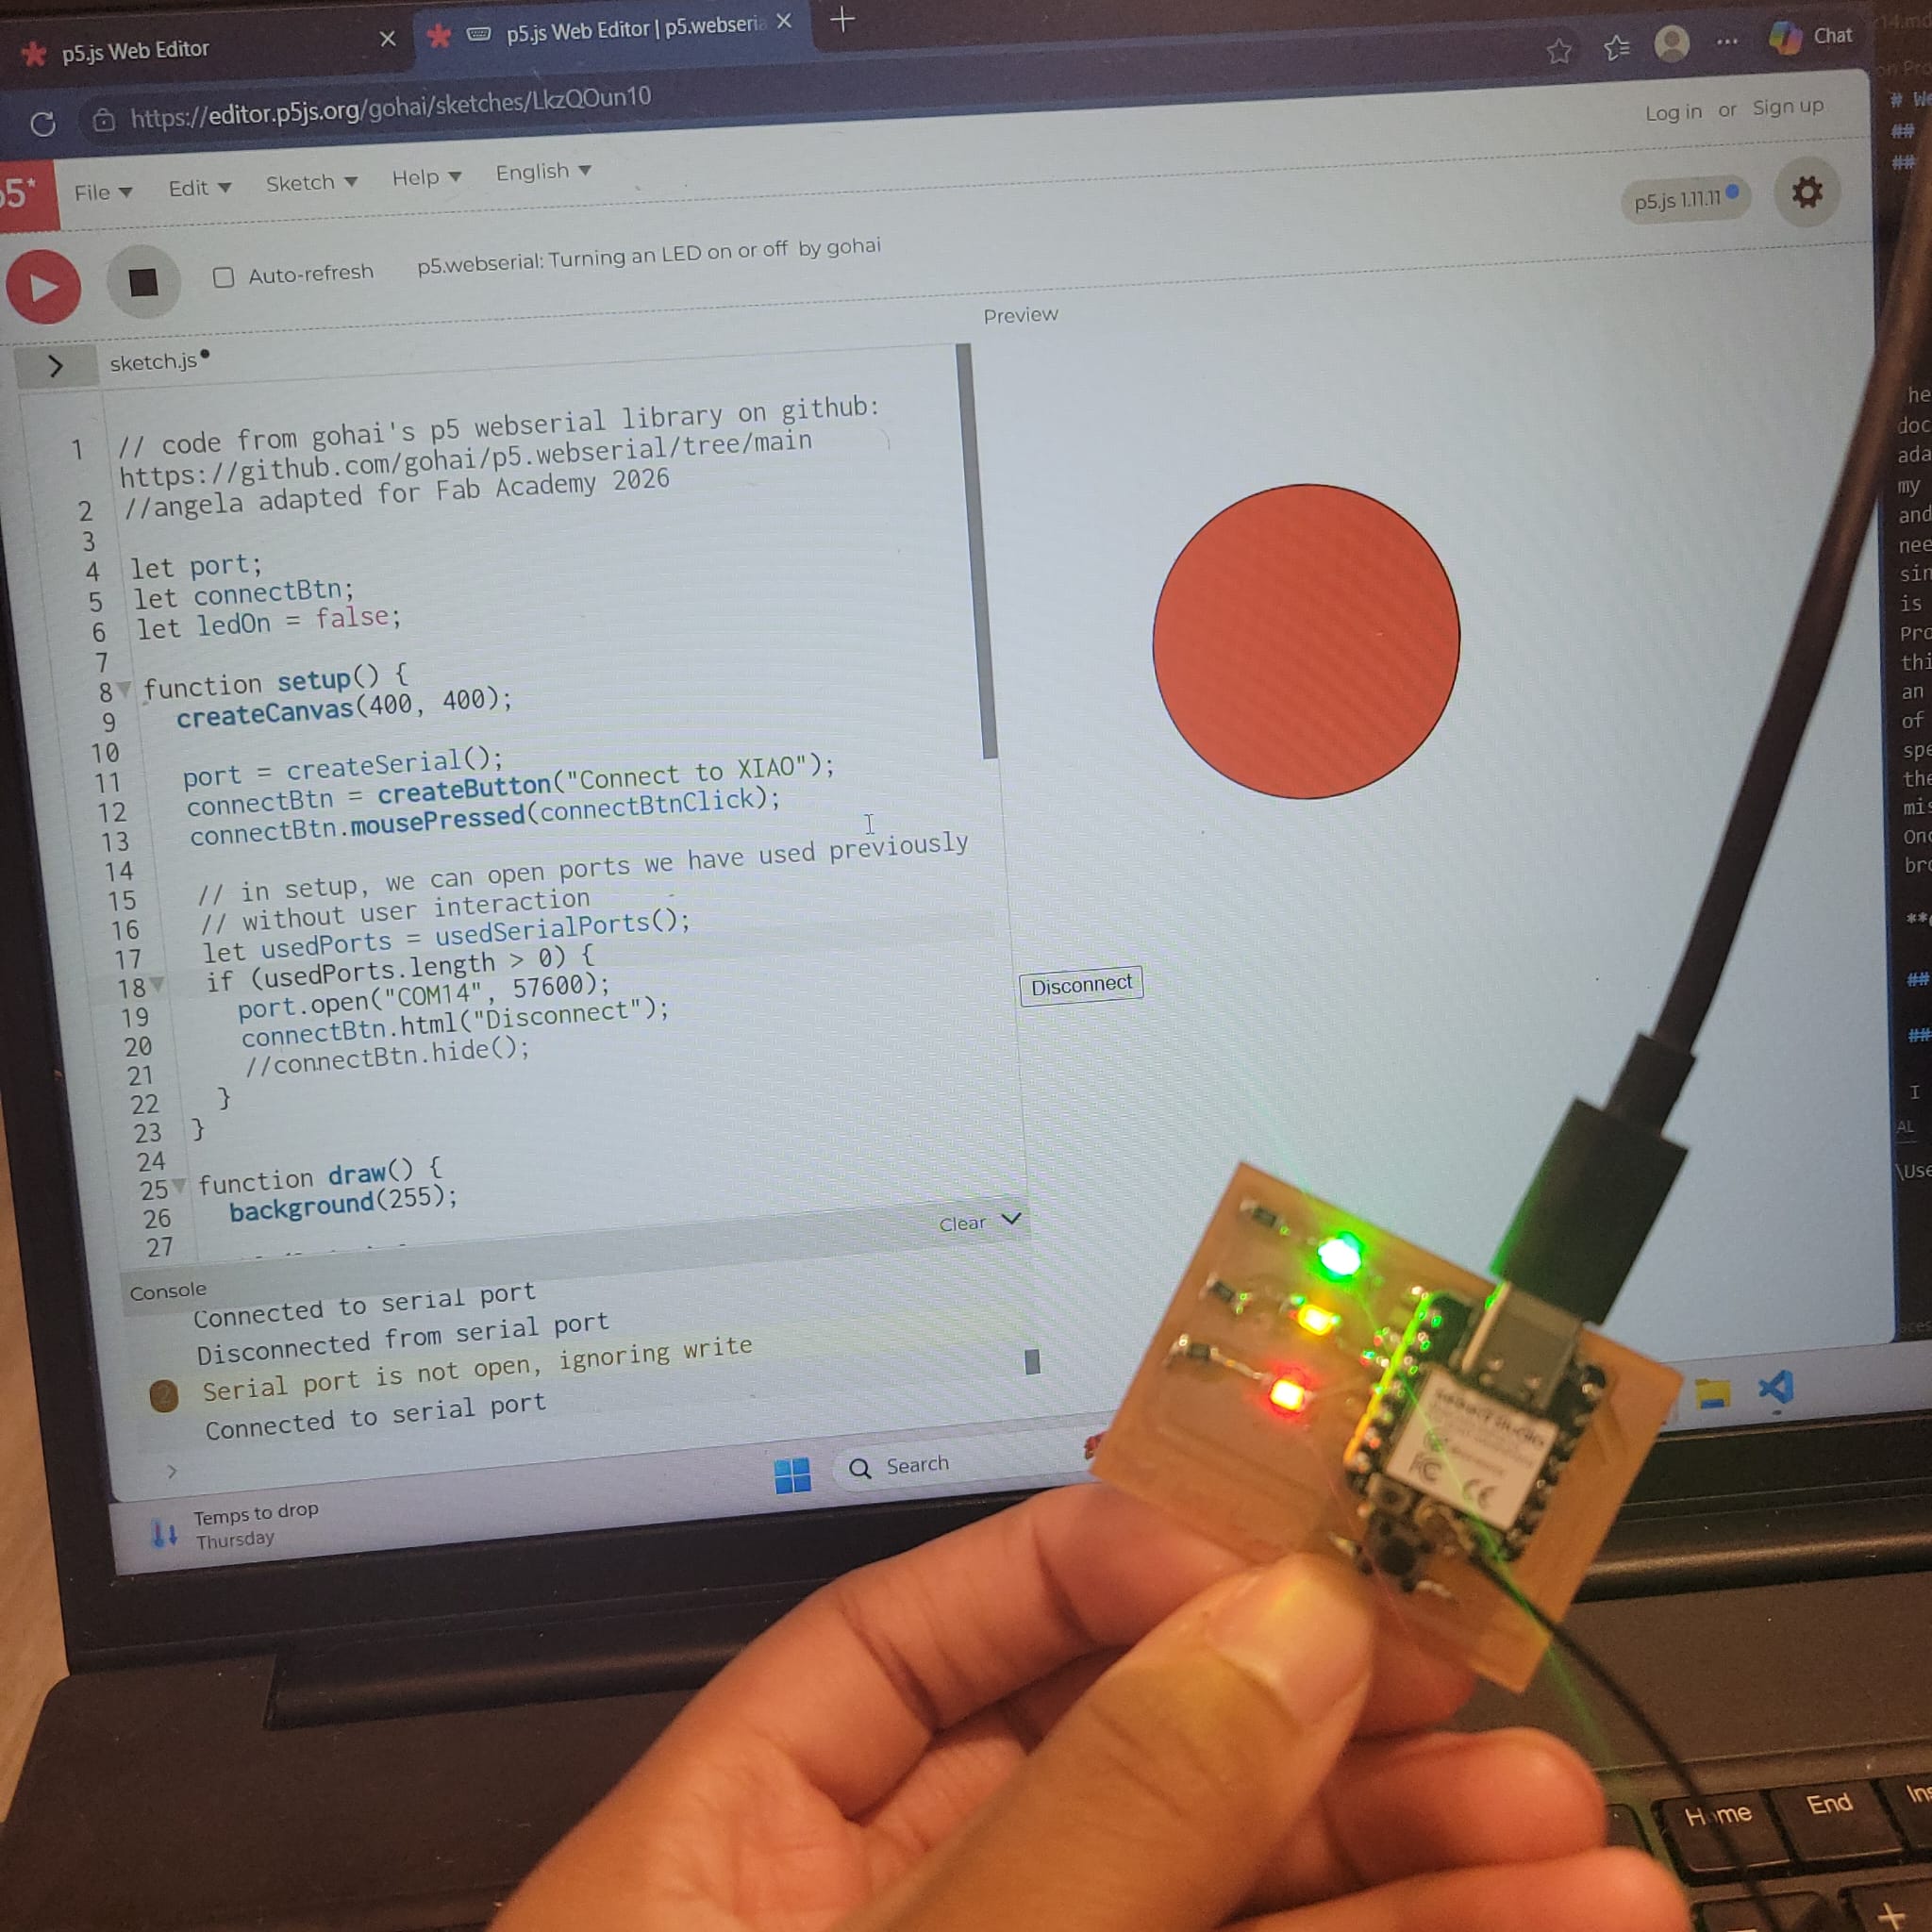
When I connect the XIAO to the web server I can then use the button function to turn the LEDs on the board on and off
Here’s a video of using this
Overall, p5.js is a wonderful resource and very friendly to use for beginners like me. It uses JavaScript and is similar to Processing (which I used for my individual assignment). I appreciated how you can share a URL to open up and share code and how its optimized for web use.
Processing (Castor)
I followed the tutorial“Connecting Arduino to Processing” Make sure to download both Arduino and Processing. First I connected my board with a USB to my computer.
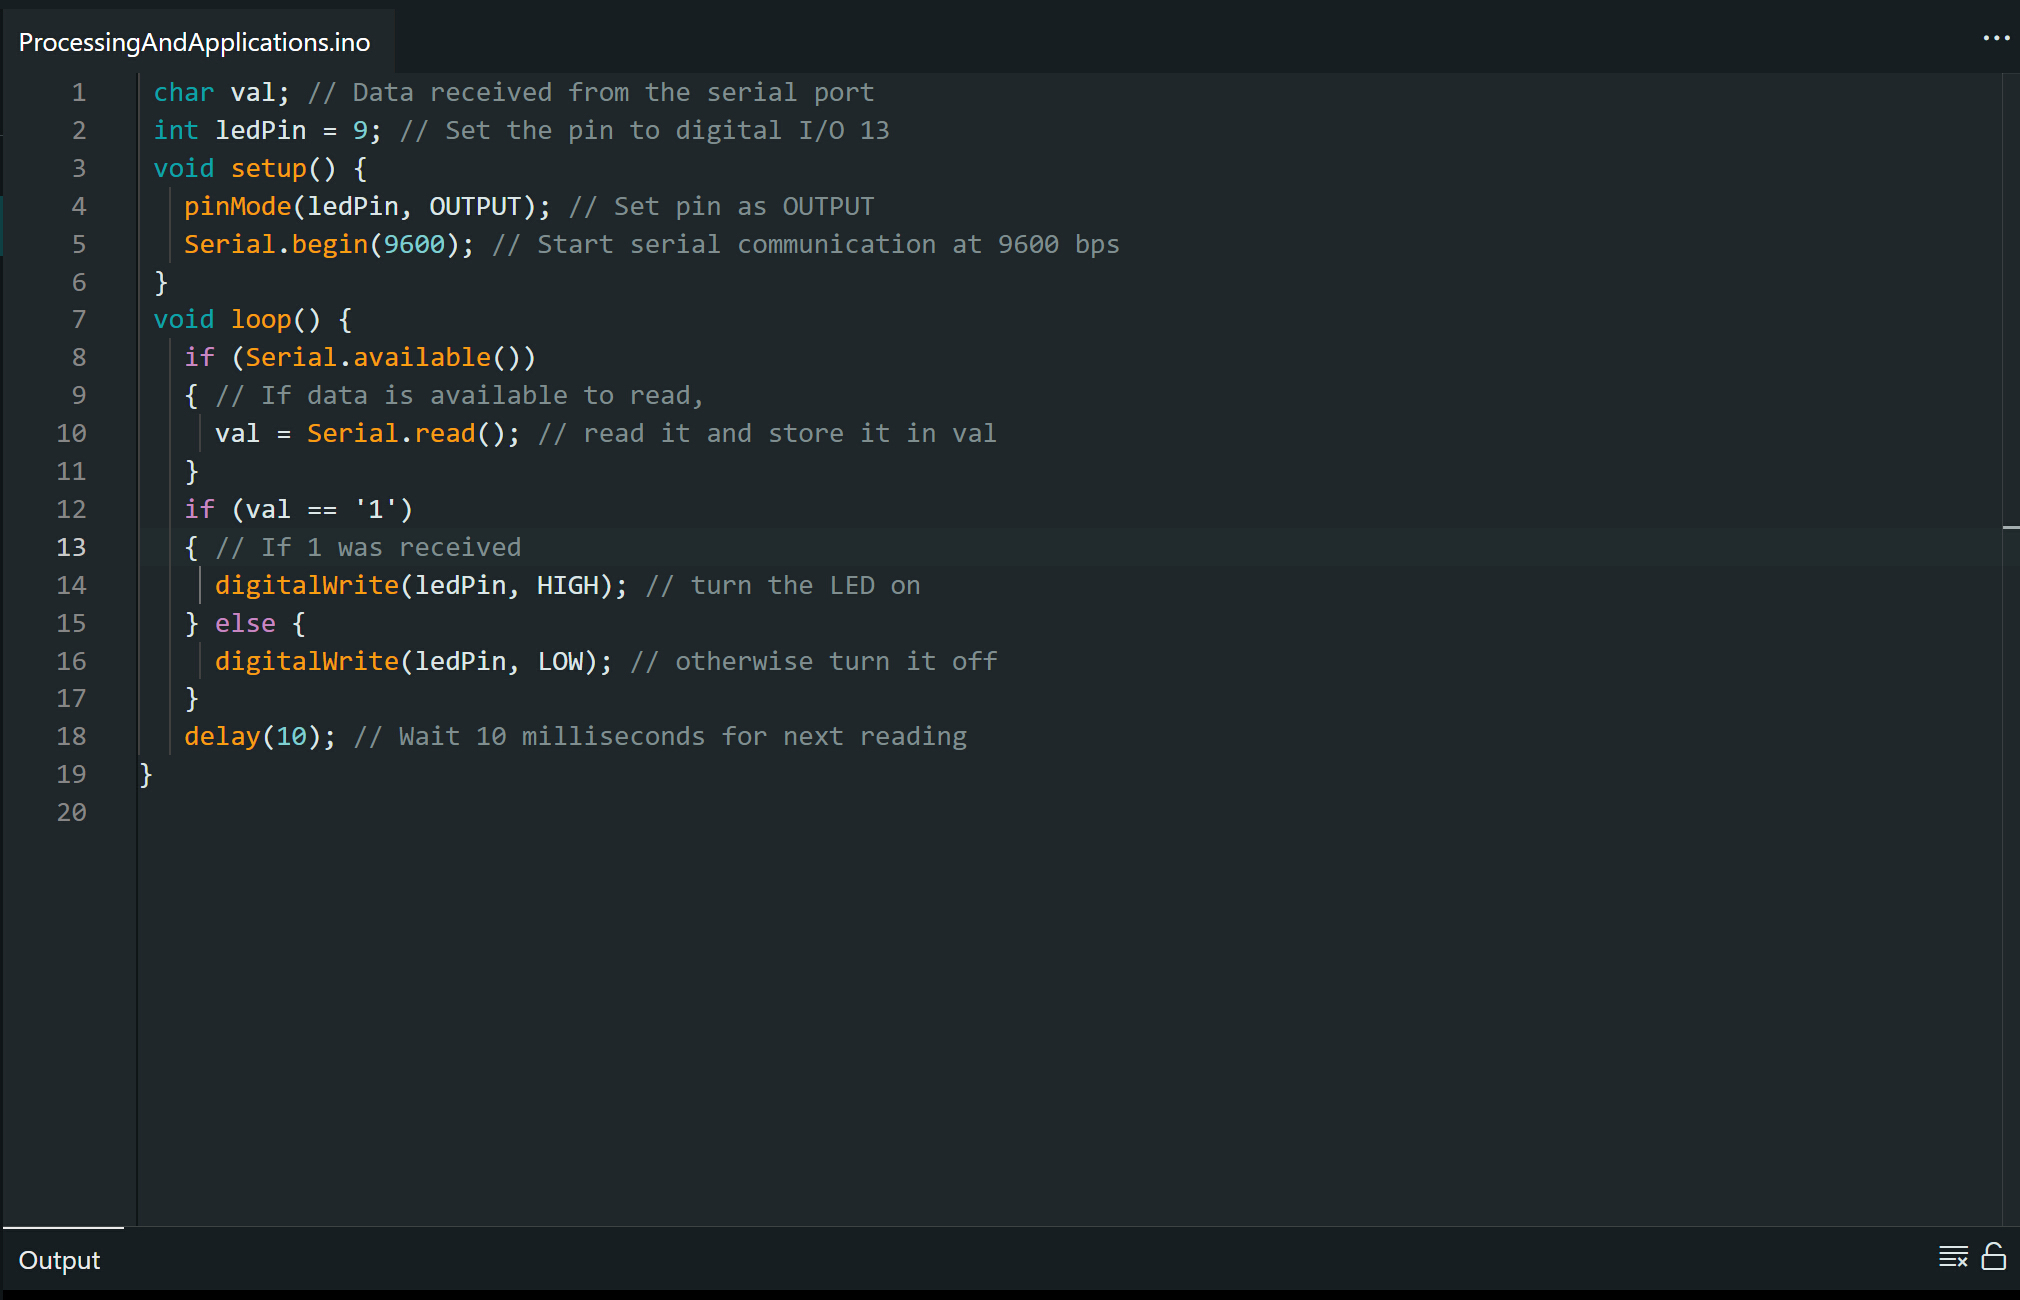
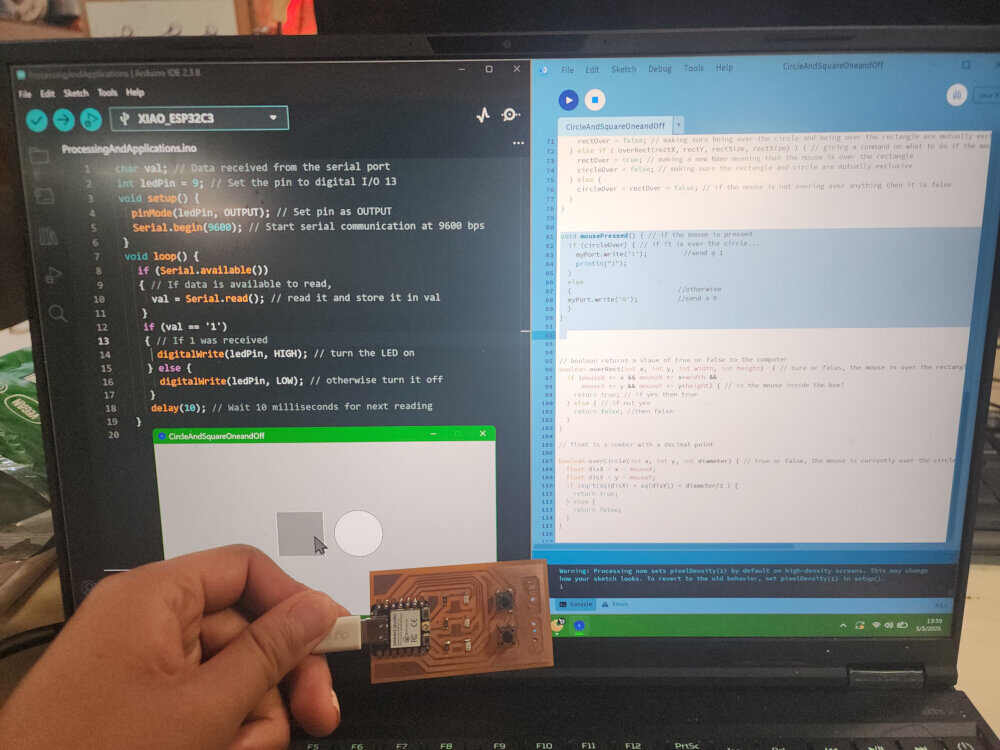
Next I input this code into Arduino. I make sure to write it so that it has the correct pin associated with the LED. This makes it so that when the devboard recieves a “1”, it turns on the LED.
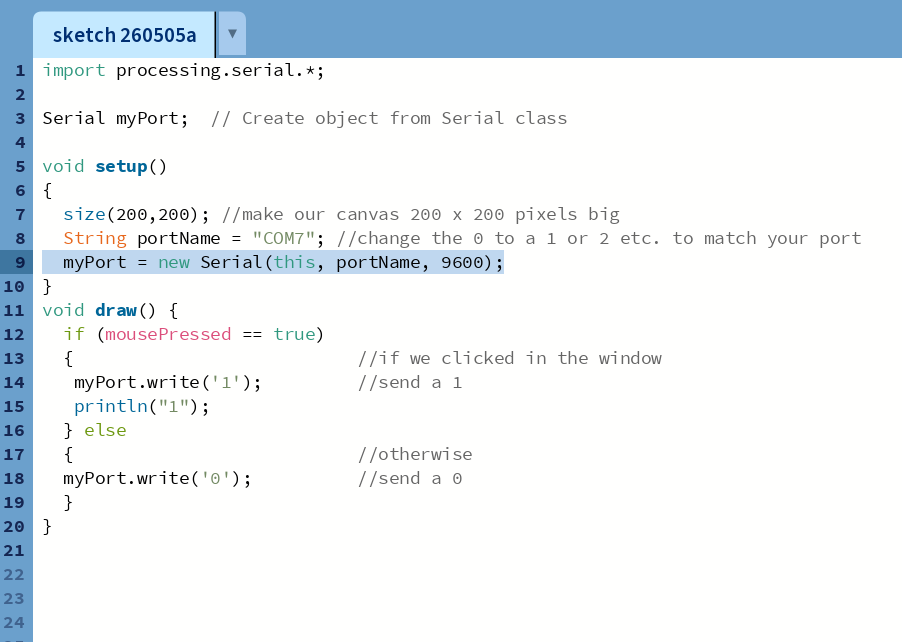
Next I input this code into processing. When I move my mouse into the window and click, it sends a 1 to my USB port, “COM7”. When arduino gets the 1, it turns on the LED!
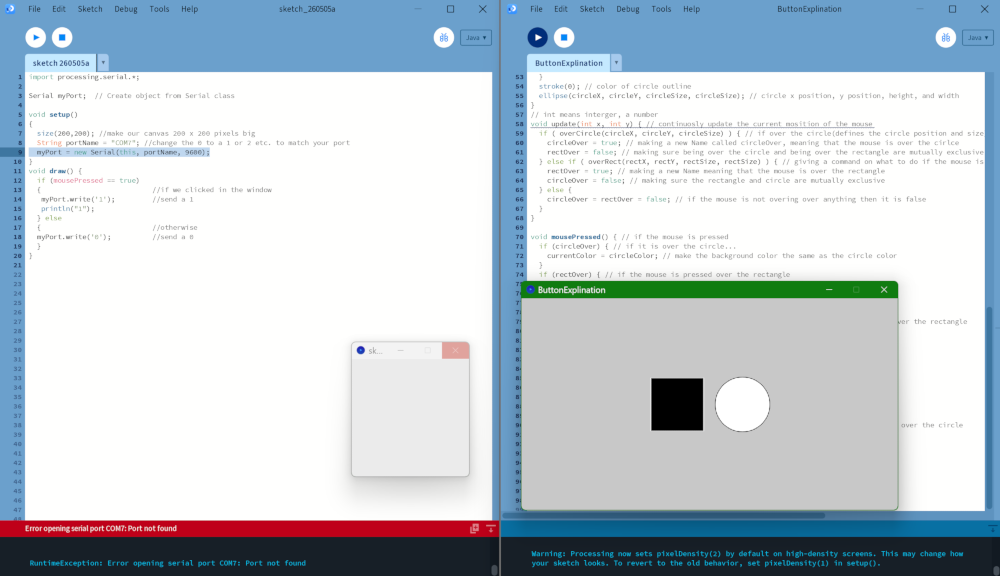
I used this code next by looking up buttons on arduino. The window on the left is the code and UI for turning the LED on. The window on the right is a code for buttons!
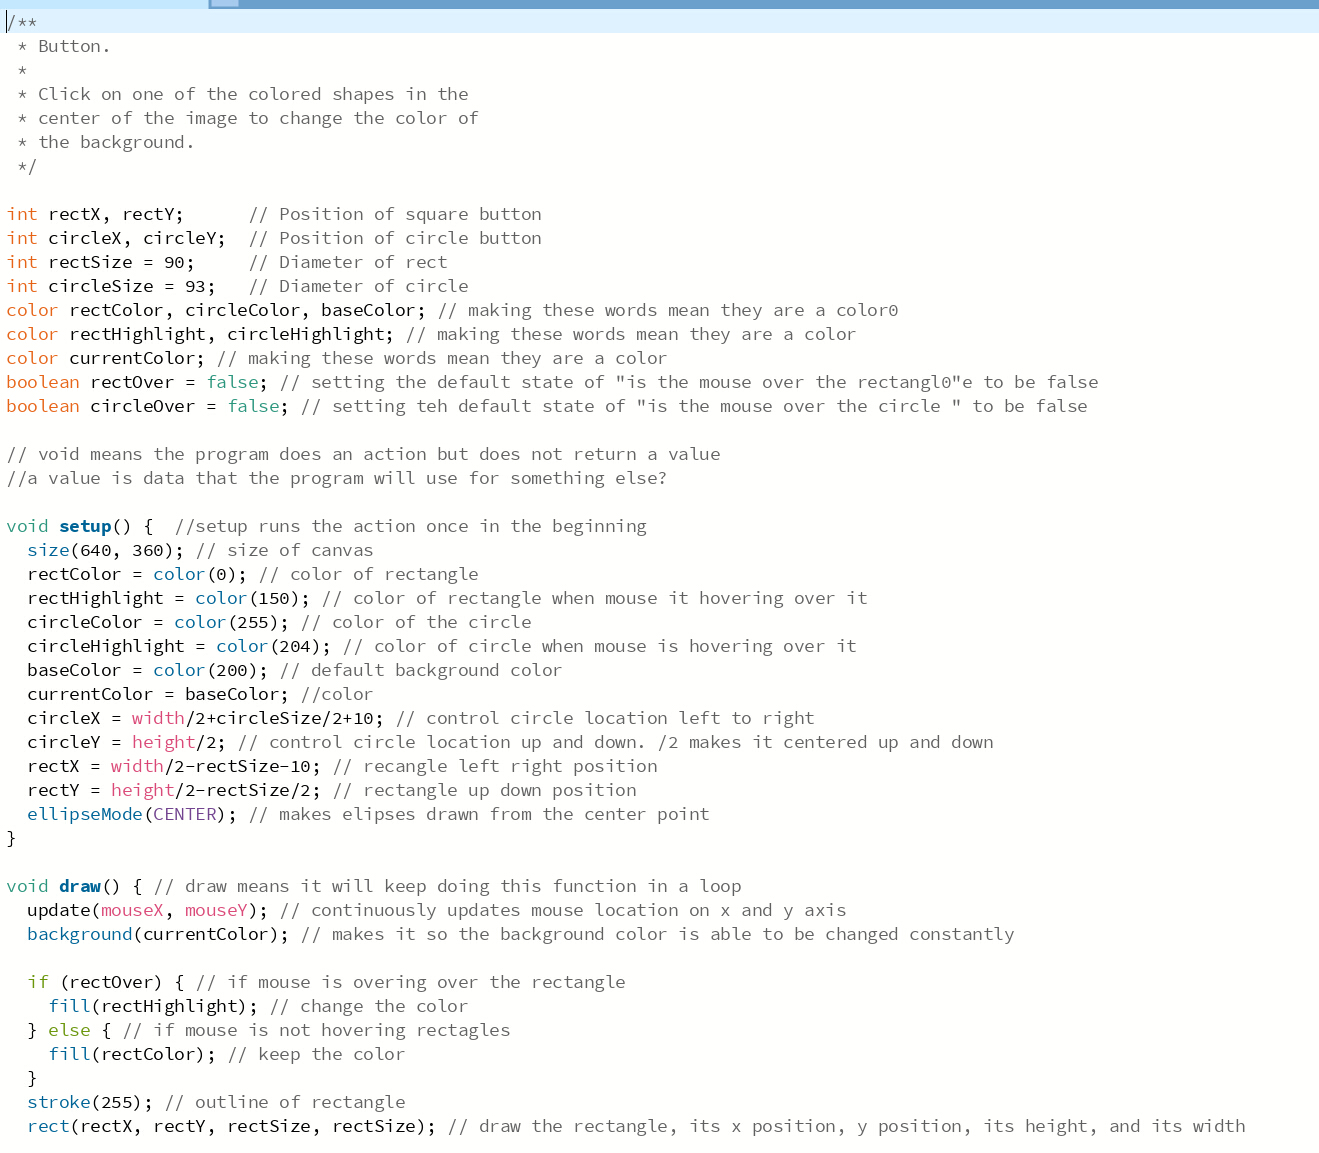
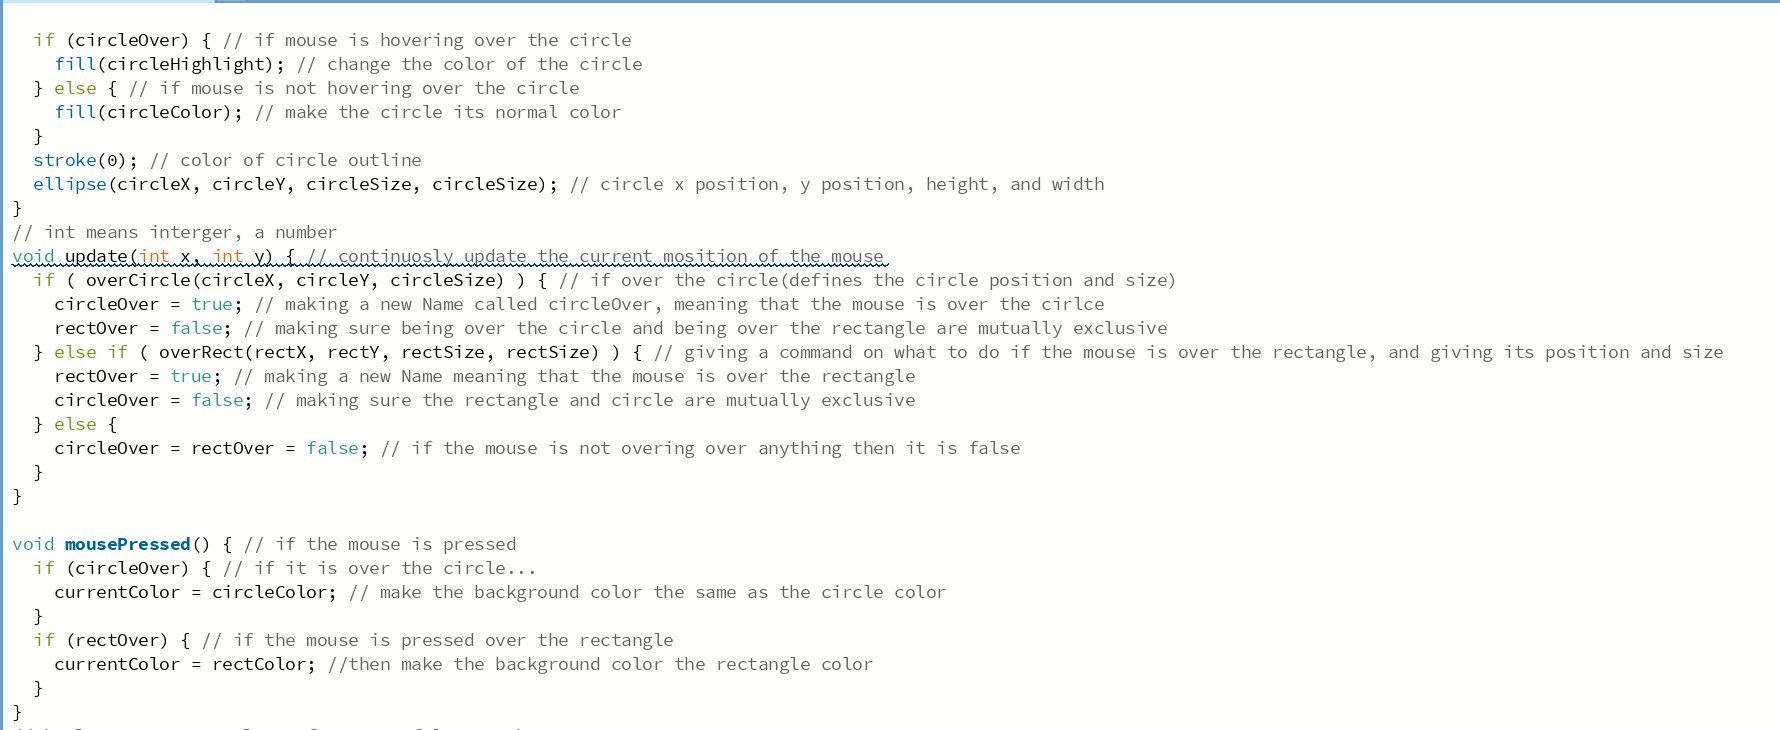
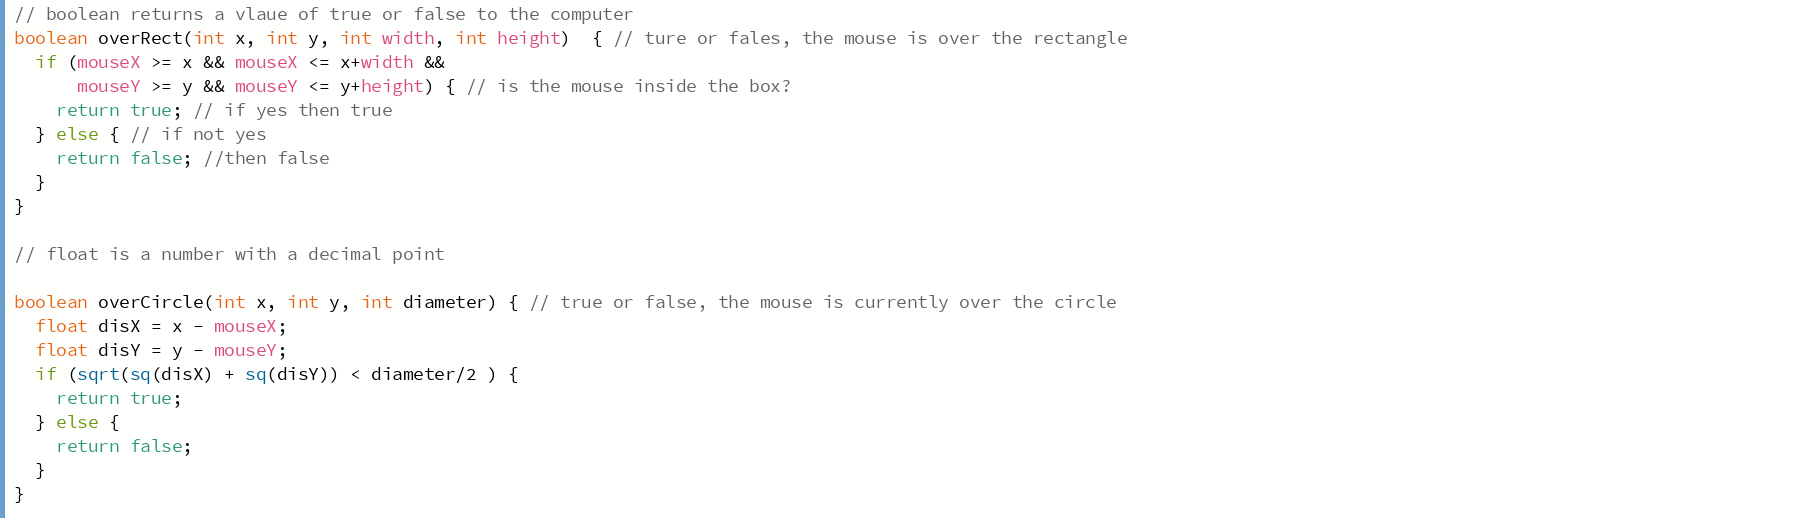
By changing and running it line by line and googling definitions, I was able to learn what each line did
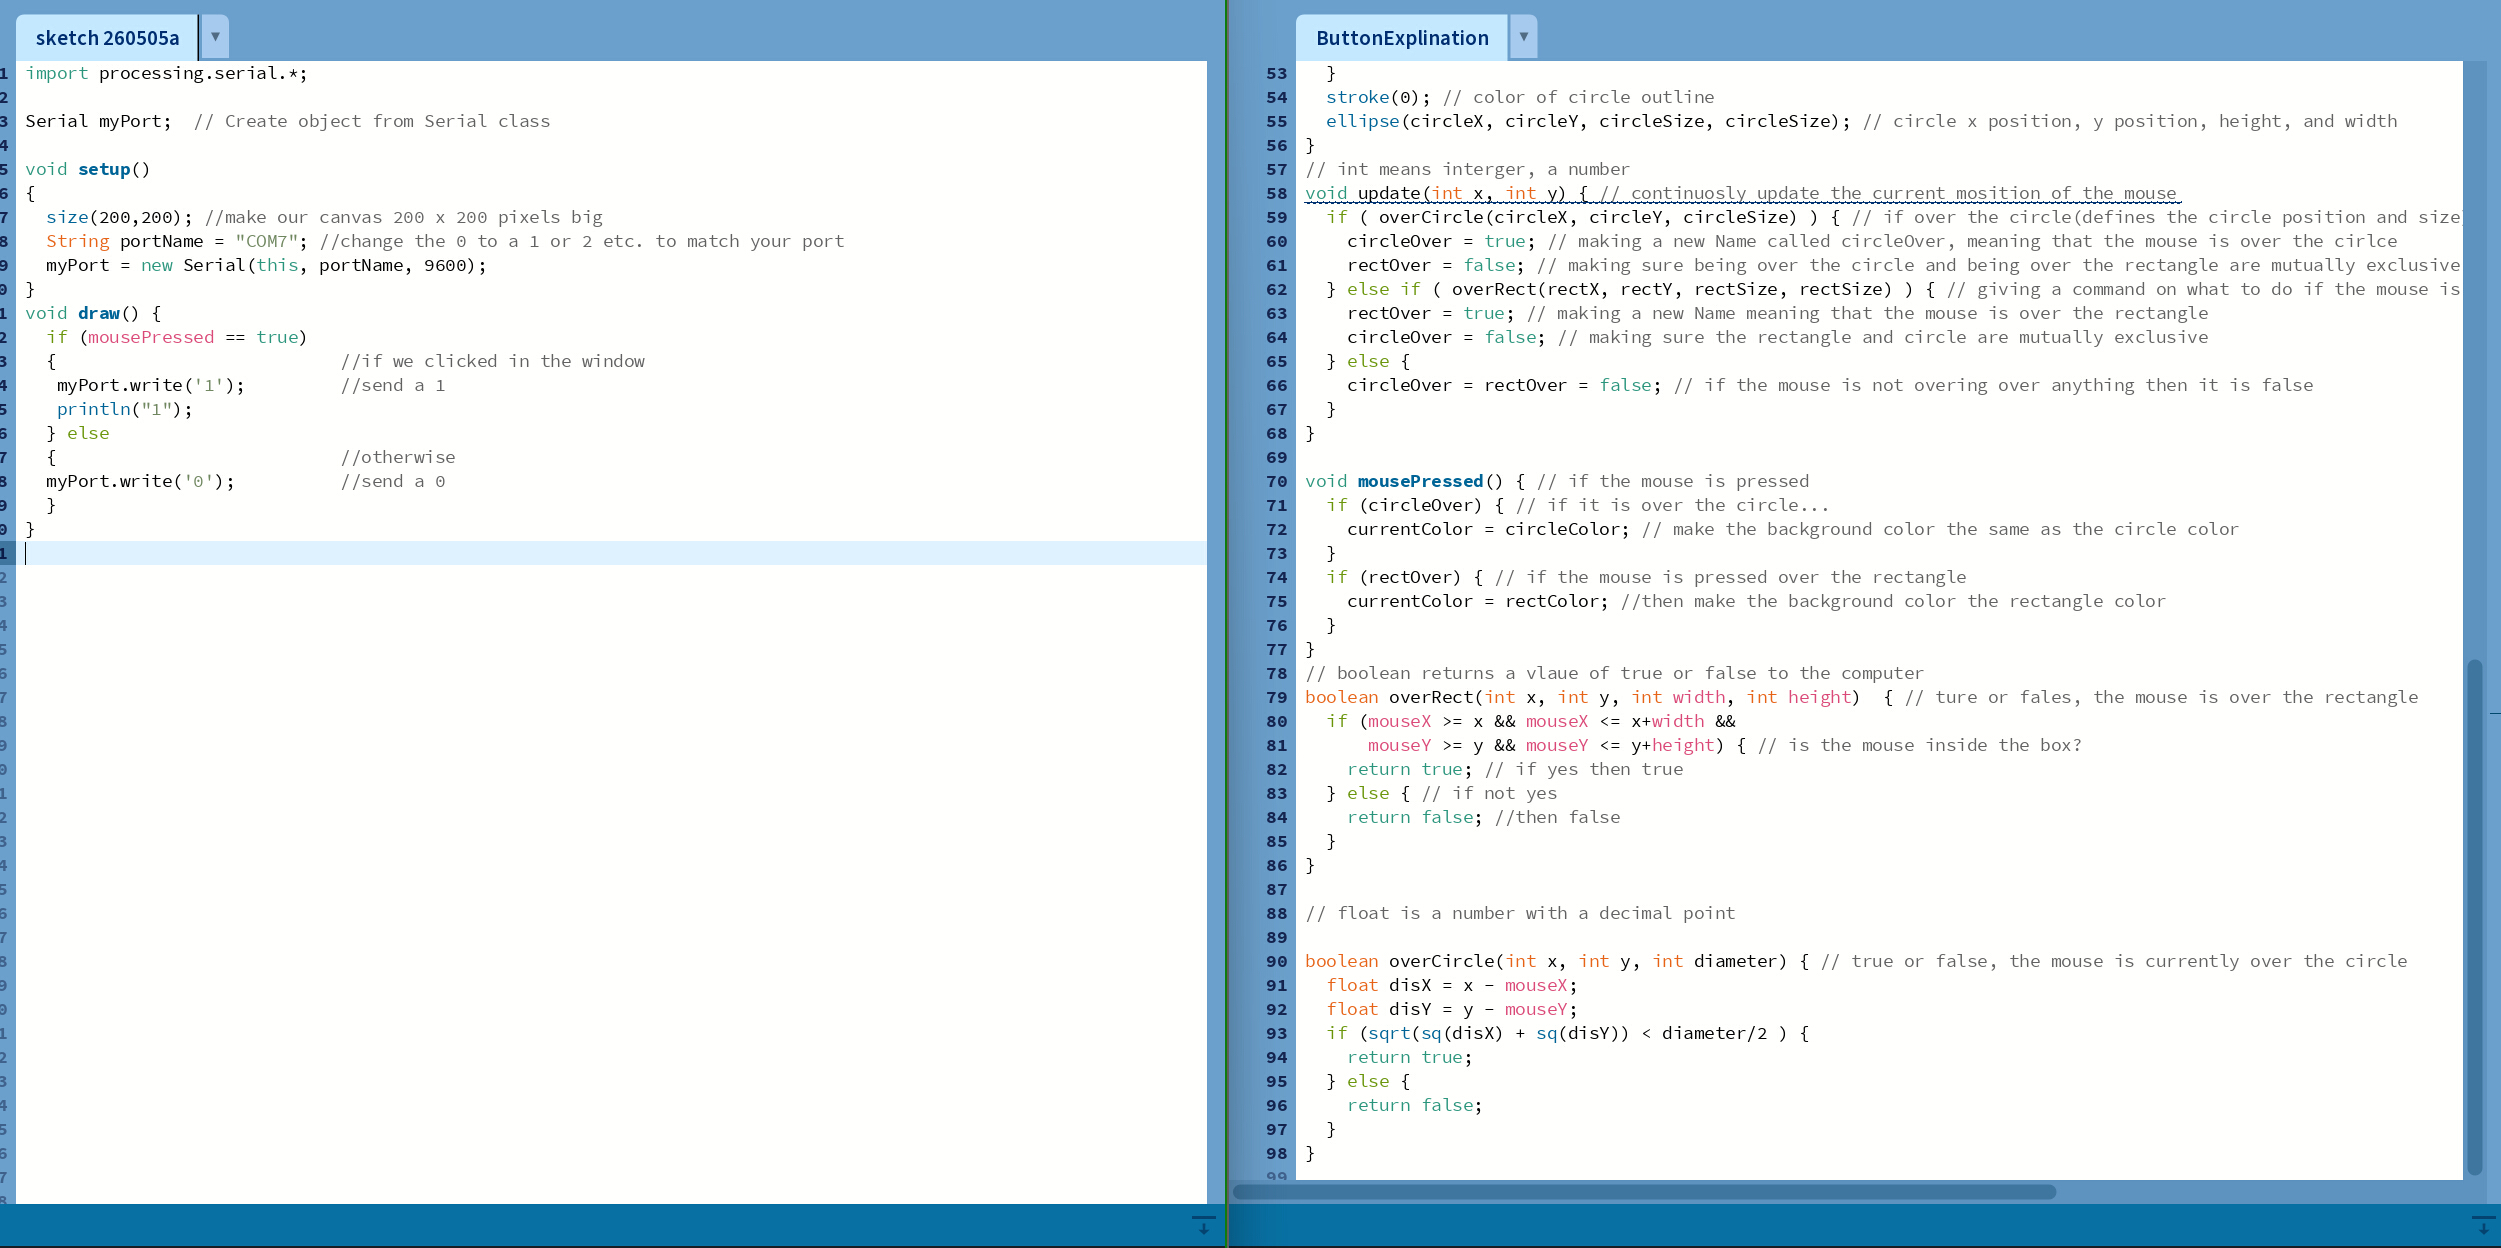
Now I just have to combine these two… Much of the code seems to be just saying what colors things are and where the shapes are, as well as tracking where the mouse is and defining the bounds.

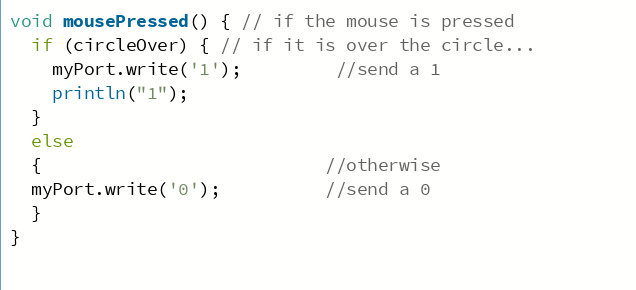
In the end, I just had to make 2 small changes. editing where it said the words mouse pressed, and importing the library and serial port so it knew who to communicate with.
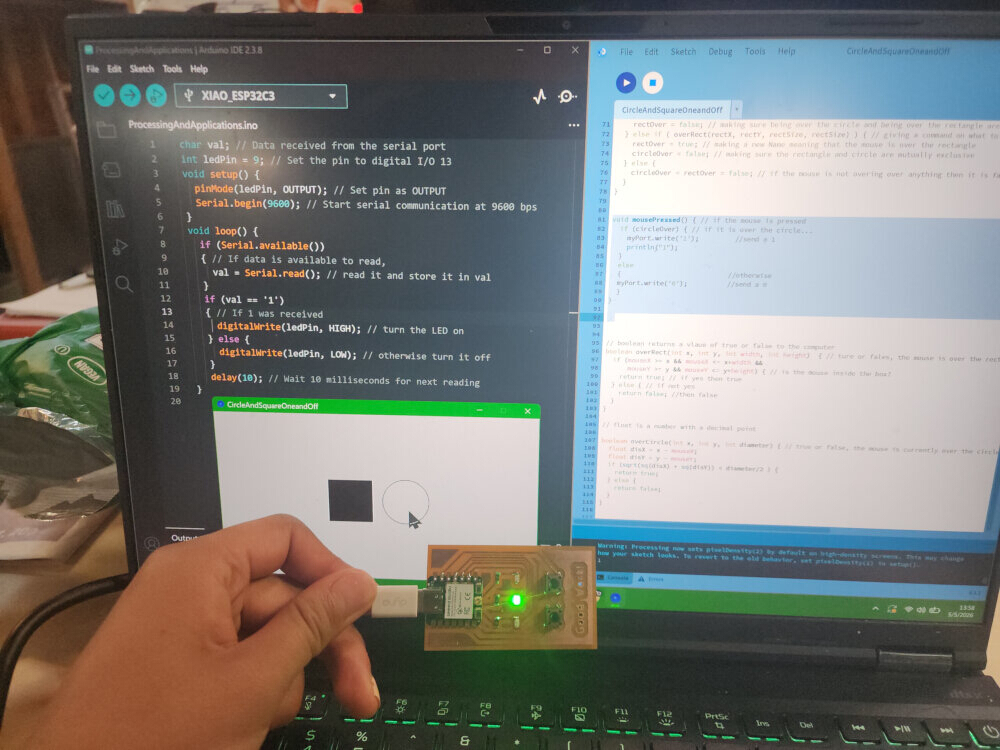
With these 2 small changes, I was able to get the board to work! I made an interface by combining code!
Arduino Cloud
I did attempt to also use Arduino Cloud,
but I failed because I could not get the website to detect my board. Here’s the troubleshooting I did:
- Download and run it in code
- restart my computer
- restart the cloud agent
- make sure I was using a data transfer cable
- boot, reboot, restart my esp32c3
- tried to manually enable permissions on my brower
Honestly I have no idea why it isn’t working and I am very tired. I was promised a beautiful, bueatiful and easy to drag and drop program.