Overview
The topic of this week was interface and application programming. The assignment was to write an application that interfaces a user with an input and/or output device. For my final project, I focused on the output side and created a web application that controls the emotional LED feedback of Loco Pik.
In this test, the WS2812B-compatible addressable RGB LED strip was a commercial component. My own work was the interface and integration layer: the PIKPIK CARE webpage, the JavaScript command bridge, the ESP32-S3 HTTP interface, the firmware logic, and the emotional mapping between user actions and physical light behaviors.
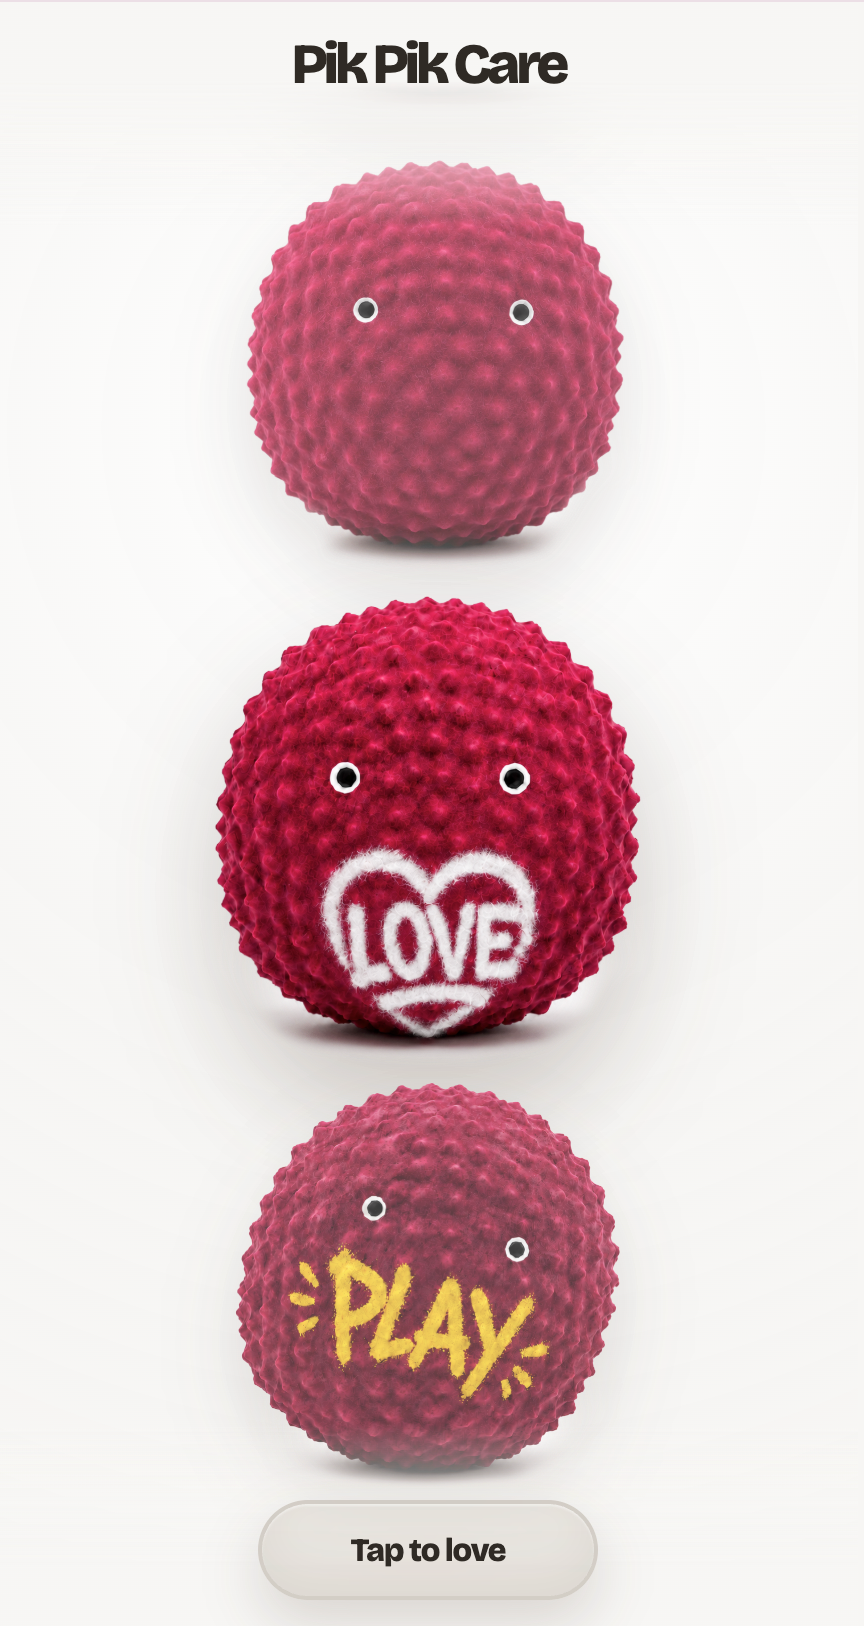
I built a browser-based interface called PIKPIK CARE. It works like a small phone-based emotional care app. Users can scroll through different Loco Pik actions, tap the active character item, and trigger screen animation, sound feedback, and physical LED light output.
The webpage sends HTTP requests such as /love,
/play, /feed, /sleep, and
/unhappy to the ESP32-S3. The ESP32-S3 receives the
request and controls the commercial LED strip as an output module of
my final project prototype.
Assignment
Group Assignment
The group assignment was to compare as many interface tool options as possible. We compared different ways of building applications and connecting them to physical devices, including serial interfaces, web interfaces, desktop GUI tools, MQTT, Node-RED, and mobile IoT platforms.
Individual Assignment
The individual assignment was to write an application that interfaces a user with an input and/or output device. For this assignment, I built the PIKPIK CARE web interface and connected it to the ESP32-S3 through HTTP commands. The ESP32-S3 then controls a commercial WS2812B-compatible addressable RGB LED strip as the physical output module of my final project prototype.
The LED strip itself was not fabricated by me. My own work was the interface and integration system around it: the webpage structure, visual interaction, JavaScript command bridge, ESP32-S3 HTTP server, firmware logic, and the mapping between emotional actions and physical light behaviors.
Group Assignment
Comparing interface and application options
For the group assignment, we compared different interface and application programming options. Some tools are useful for quick debugging, while others are better for visual design, mobile control, or IoT communication.
| Tool / Method | Interface type | Advantages | Limitations | Use in my project |
|---|---|---|---|---|
| Arduino Serial Monitor | Serial text interface | Very simple and useful for checking microcontroller messages. | It is not a real user interface and is not convenient for mobile use. | Used only for debugging ESP32 logs. |
| Web Serial | Browser to USB serial | Useful for browser-based debugging when the board is connected by USB. | Mobile browser support is limited, and the phone cannot easily connect to the board by serial. | Not chosen because I wanted phone-based control. |
| Python Tkinter | Desktop GUI | Can create buttons, labels, sliders, and local control windows. | Requires a Python environment and is not convenient for mobile use. | Not chosen for this week. |
| Processing / p5.js | Visual and creative interface | Good for graphics, animation, and creative interaction. | Still needs extra communication logic to control the ESP32. | Useful for future visual experiments, but not used this week. |
| MQTT | Network message interface | Good for IoT systems and communication between devices. | Requires a broker and more setup than a direct local HTTP request. | I used MQTT in Week 11, but not for this assignment. |
| Node-RED | Dataflow interface | Good for connecting sensors, APIs, dashboards, and IoT data streams. | The setup is more complex than a simple webpage and HTTP request. | Not chosen for this week. |
| Blynk | Mobile IoT app | Good for quickly making a mobile control panel. | Depends on an external platform and account system. | Not chosen because I wanted to design my own interface style. |
| HTTP Web Interface | Browser-based local network interface | Works on both laptop and mobile phone. Easy to design, test, and document. | Requires the ESP32-S3 to run an HTTP server and have a local IP address. | Chosen for my individual assignment. |
After comparison, I chose the HTTP web interface method. It matched my final project better than a serial monitor because it allowed the user to control the robot through a designed interface from both a laptop and a mobile phone.
Individual Assignment
PIKPIK CARE web interface for Loco Pik
For my individual assignment, I built a web-based application interface for Loco Pik. The interface is called PIKPIK CARE. It was designed as a small emotional care interface rather than a normal technical control panel.
The interface includes an intro screen, a vertical scroll interaction, different Loco Pik action images, an information panel, sound effects, and screen animations. It also includes a JavaScript HTTP command bridge that sends emotional commands to the ESP32-S3.
PIKPIK CARE webpage structure
I organized the PIKPIK CARE interface as a separate mini web
application inside my Fab Academy site. The webpage files are stored
in the public/pikpik-care/ folder, while the character
images are stored in public/images/pikpik-care/.
public/
├── assignments/
│   └── week14.html
├── pikpik-care/
│   ├── pikpik-care.html
│   ├── pikpik-care.css
│   ├── pikpik-care.js
│   └── sounds/
│       ├── feed_cookie_crunch.mp3
│       ├── love_heart_pop.mp3
│       ├── play_shake_pop.mp3
│       ├── sleep_soft_breath.mp3
│       └── unhappy_warning.mp3
└── images/
    └── pikpik-care/
        ├── info.png
        ├── love.png
        ├── play.png
        ├── sleep.png
        ├── feed.png
        ├── unhappy.png
        └── cookie.png
Instead of using a code screenshot for the file structure, I documented it directly as a text-based project tree. This makes the structure easier to read, copy, and update.
Web interface design idea
Since Loco Pik is an emotional companion robot, I did not want the interface to look like a normal engineering control panel. Instead, I wanted the webpage to feel soft, playful, and close to the character language of my final project.
The main design idea was to translate technical hardware commands
into emotional user actions. Instead of showing buttons such as
LED_RED, BLINK, or
SET_COLOR, I used actions like Info, Love, Play, Sleep,
and Feed. These actions are closer to the way people interact with a
digital pet or companion robot.
| Design layer | Design decision | Reason |
|---|---|---|
| Interaction language | Use actions such as Info, Love, Play, Sleep, and Feed. | These actions are easier for users to understand than technical LED commands. |
| Visual structure | Use a phone-like vertical scrolling interface. | The interface feels closer to a small companion app or digital pet device. |
| Interaction behavior | The active character item can be tapped to trigger an action. | This makes the interface more playful than a normal button panel. |
| Screen feedback | Each action has its own animation style. | The user can understand the result immediately from the screen. |
| Physical feedback | Each action can send an HTTP command to ESP32-S3. | This connects the webpage interface with the physical LED output. |
The webpage is not only a visual demo. It works as a testing and interaction layer for the final project. Through this interface, I can check whether each user action creates the correct screen effect, sound effect, HTTP command, and WS2812B LED light response.
Embedded preview version
I also added an embedded preview version of the PIKPIK CARE interface directly inside this Week 14 documentation page. This allows the interface to be viewed and tested without opening a separate page.
The embedded window shows the same PIKPIK CARE interface that I used during local testing. The interface can be previewed after the page is uploaded to Fab Academy. However, the live hardware control only works when the browser and the ESP32-S3 are connected to the same local Wi-Fi network.
Week 14 documentation page
        ↓
Embedded PIKPIK CARE preview window
        ↓
User taps Info / Love / Play / Sleep / Feed
        ↓
pikpik-care.js plays screen effects and sound effects
        ↓
pikpik-care.js sends HTTP request to ESP32-S3
        ↓
ESP32-S3 controls WS2812B emotional light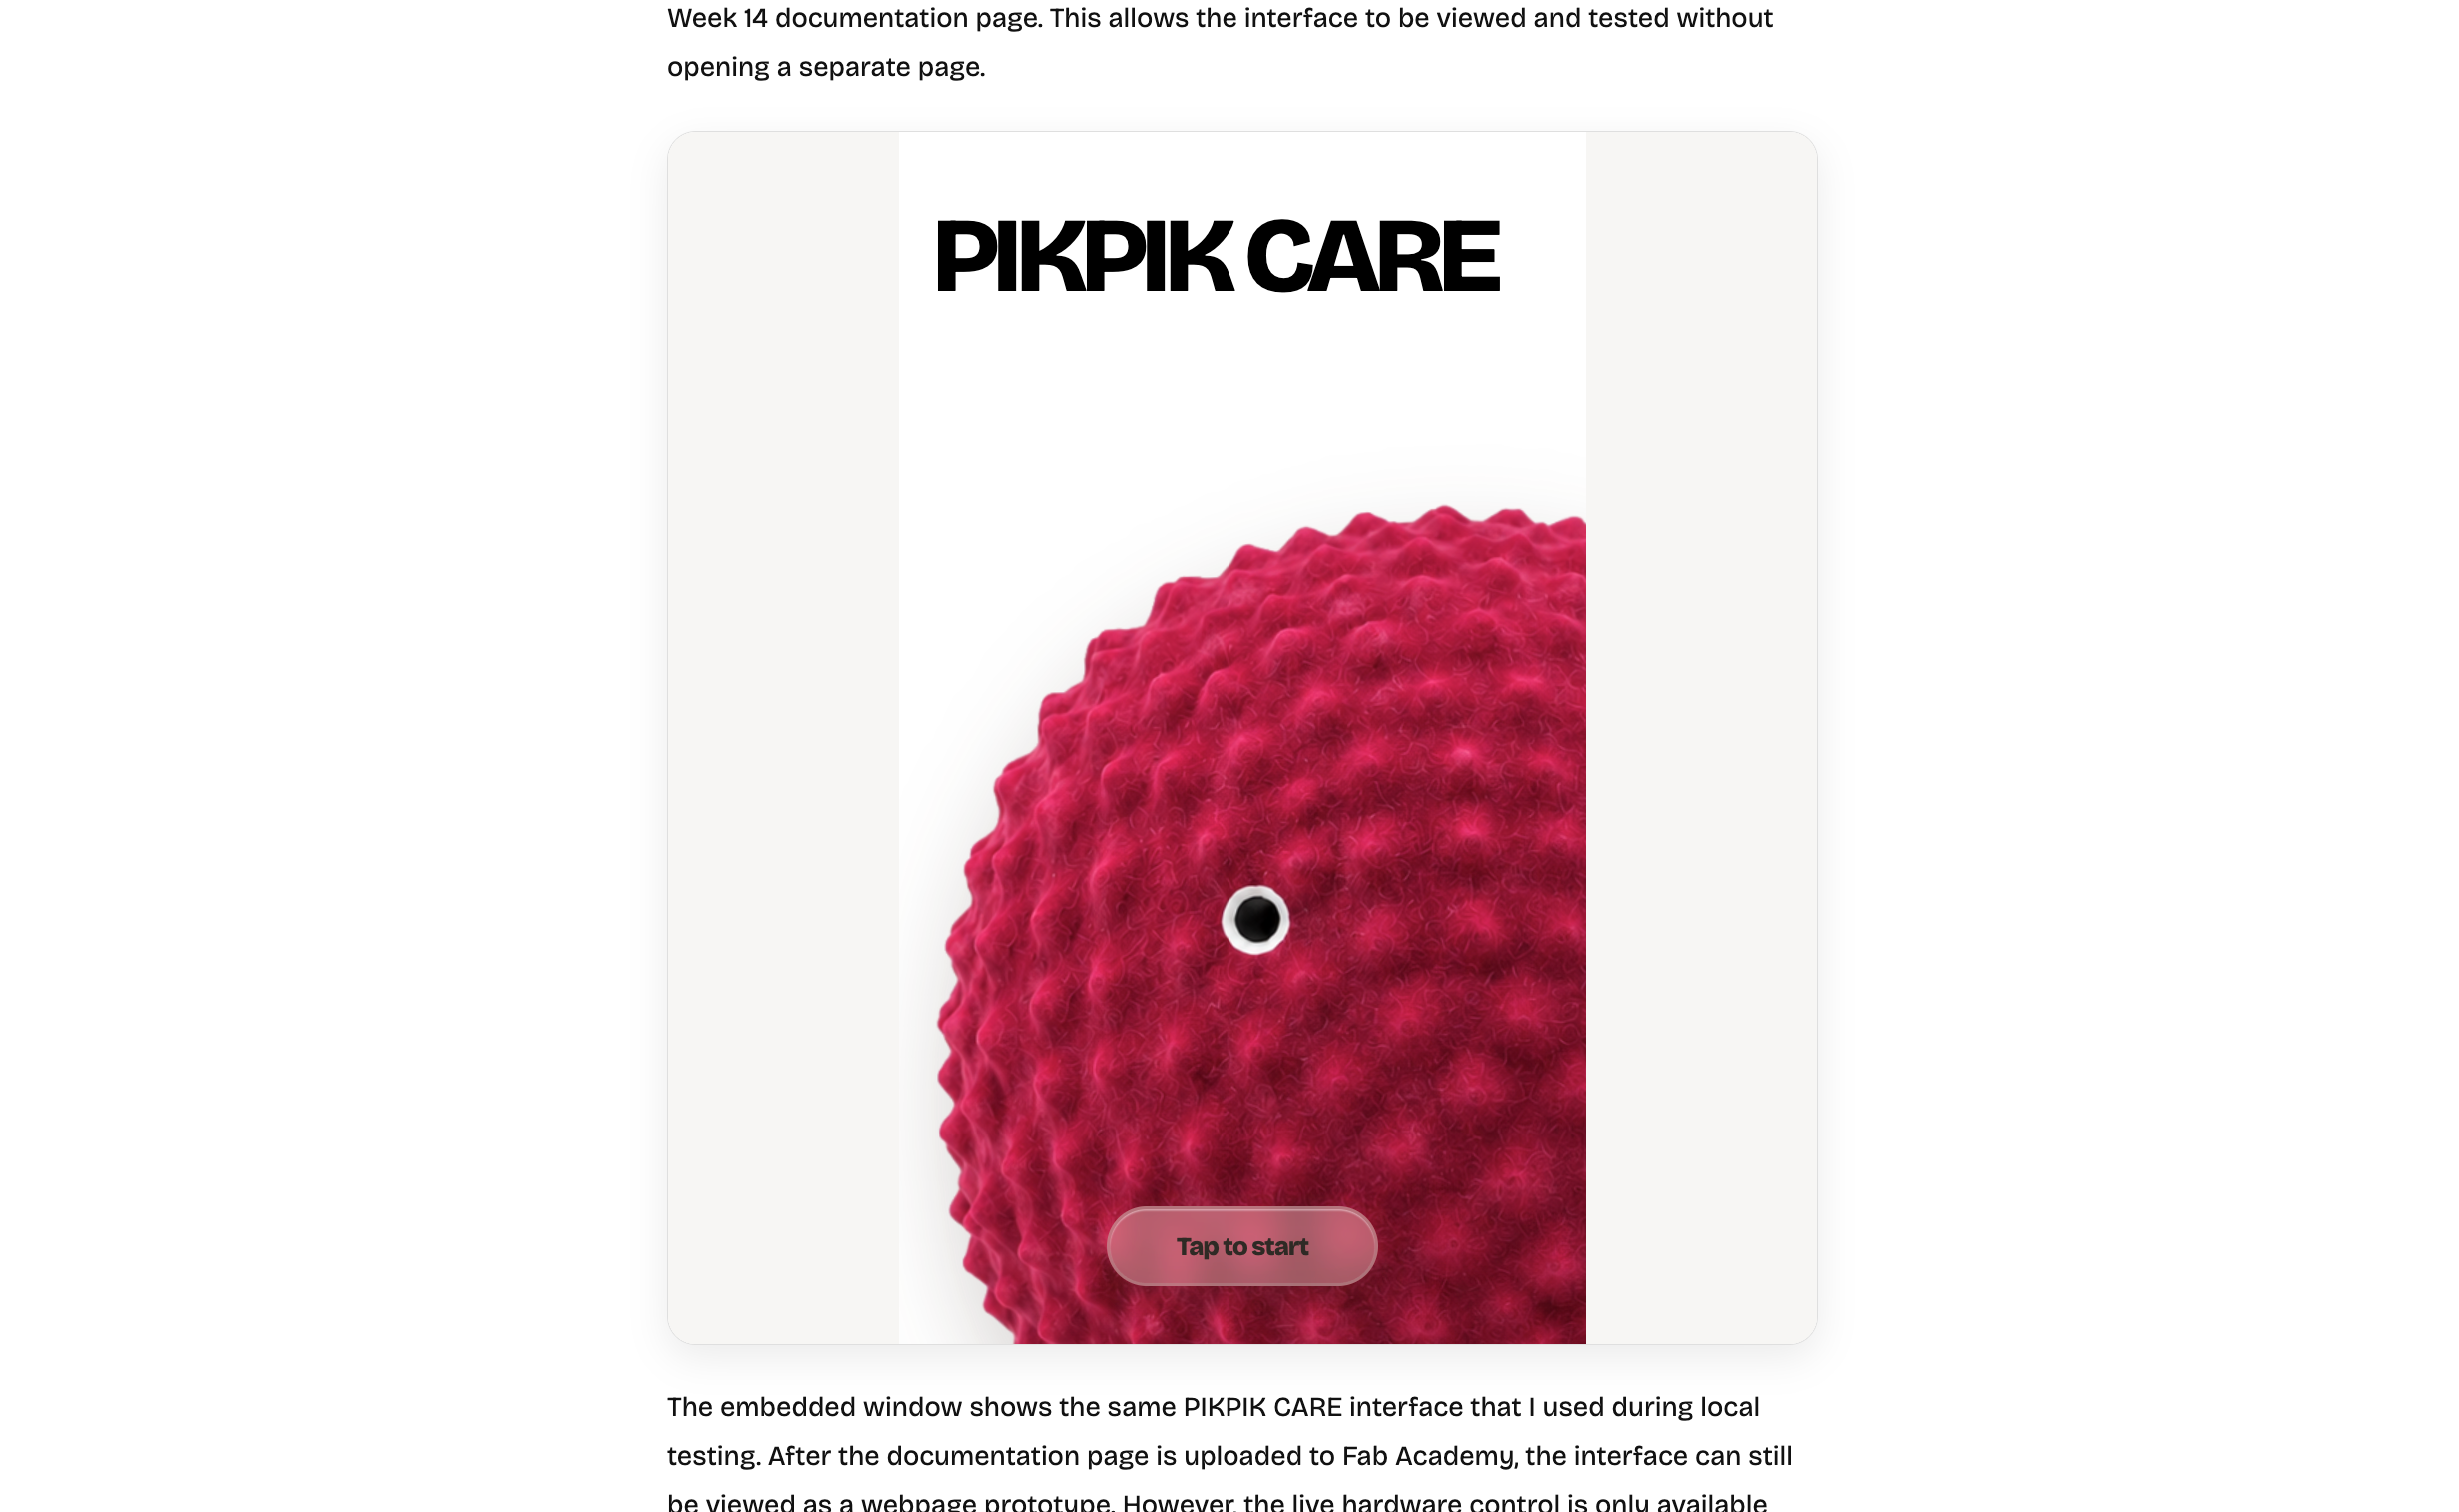
System overview
The system has three main layers: the user interface, the network command layer, and the physical LED output layer. The user interacts with the PIKPIK CARE webpage. The webpage sends HTTP requests. The ESP32-S3 receives and parses the requests. Finally, the WS2812B LED strip shows the emotional light effect.
Text-based system map
Phone / Laptop
        ↓
PIKPIK CARE Webpage
HTML + CSS + JavaScript interface
        ↓
HTTP requests over local Wi-Fi
        ↓
ESP32-S3
HTTP server receives emotional commands
        ↓
WS2812B-compatible LED Strip
Physical emotional light output
In this system, the phone or laptop does not control the LED strip directly. The user opens the PIKPIK CARE webpage in a browser. The webpage sends HTTP requests through the local Wi-Fi network. The ESP32-S3 receives these requests and translates them into temporary WS2812B LED light effects.
| Layer | File / Component | Function |
|---|---|---|
| User interface | pikpik-care.html |
Defines the PIKPIK CARE interface, intro screen, character actions, and emotional items. |
| Visual style | pikpik-care.css |
Controls the phone-like layout, scrolling interaction, liquid glass panel, masks, and visual effects. |
| Browser logic | pikpik-care.js |
Handles interaction, sound playback, screen effects, motion input, and HTTP requests to the ESP32-S3. |
| Image assets | images/pikpik-care/ |
Stores the Loco Pik action images for Info, Love, Play, Sleep, Feed, Unhappy, and cookie effects. |
| Sound assets | pikpik-care/sounds/ |
Stores the sound effects for different emotional actions. |
| ESP32-S3 HTTP server | loco_pic_light_server.cc |
Receives emotional commands such as /love, /play, /feed, /sleep, and /unhappy. |
| LED output logic | ws2812b_mood_light.cc |
Plays the corresponding temporary WS2812B LED effect. |
Control chain logic
The complete control chain starts from a user action in the PIKPIK CARE webpage and ends with the physical LED output. After a temporary light effect finishes, the LED strip automatically returns to the AI conversation emotion mode.
User taps an active item in PIKPIK CARE
        ↓
pikpik-care.js triggers screen animation and sound
        ↓
Browser sends HTTP request
        ↓
ESP32-S3 receives /love, /play, /feed, /sleep, or /unhappy
        ↓
LocoPicLightServer parses the command
        ↓
Ws2812bMoodLight plays the corresponding LED effect
        ↓
After 2 or 4 seconds
        ↓
The light automatically returns to the AI conversation emotion mode| Step | What happens | Purpose |
|---|---|---|
| 1 | User taps Love, Play, Feed, Sleep, or Unhappy. | Turns an emotional action into an interface event. |
| 2 | JavaScript plays the screen animation and sound effect. | Provides immediate digital feedback to the user. |
| 3 | The browser sends an HTTP request to the ESP32-S3. | Connects the webpage interface to the physical device. |
| 4 | The ESP32-S3 HTTP server receives and parses the command. | Converts the URL path into an emotional event name. |
| 5 | The WS2812B LED strip plays a temporary light effect. | Creates the physical emotional output. |
| 6 | The light returns to the latest AI emotion mode. | Prevents temporary webpage actions from breaking the normal emotion light behavior. |
Connecting PIKPIK CARE actions to ESP32-S3
In the PIKPIK CARE webpage, each user action is not only a screen
interaction. The JavaScript also sends a matching HTTP command to the
ESP32-S3. For example, when the user taps Love, the webpage plays
the love animation and sound effect, and then sends a request to
http://192.168.1.75/love.
This means the same action controls both the digital interface and the physical LED output. The webpage becomes a bridge between user intention and hardware behavior.
PIKPIK CARE action
        ↓
Screen animation and sound effect
        ↓
sendEsp32Command("love")
        ↓
GET http://192.168.1.75/love
        ↓
ESP32-S3 receives /love
        ↓
WS2812B LED strip shows love light effect
The relationship between one PIKPIK CARE action and one ESP32-S3 command was implemented in JavaScript. One user action can trigger screen feedback, sound feedback, and physical LED feedback.
const ESP32_BASE_URL = "http://192.168.1.75";

const actionCommandMap = {
  info: "info",
  love: "love",
  play: "play",
  sleep: "sleep",
  feed: "feed",
  unhappy: "unhappy"
};

function triggerPikpikAction(actionName) {
  const command = actionCommandMap[actionName];
  if (!command) return;

  playScreenEffect(actionName);
  playSoundEffect(actionName);
  sendEsp32Command(command);
}

function sendEsp32Command(command) {
  fetch(`${ESP32_BASE_URL}/${command}`, {
    method: "GET",
    mode: "no-cors"
  });
}
JavaScript HTTP command bridge
In pikpik-care.js, I added an HTTP command bridge. This
function converts emotional action names into URL paths and sends
GET requests to the ESP32-S3 local IP address.
const ESP32_BASE_URL = "http://192.168.1.75";

function sendEsp32Command(eventName) {
  if (!eventName) return;

  const command = eventName.toLowerCase();
  const url = `${ESP32_BASE_URL}/${command}`;

  fetch(url, {
    method: "GET",
    mode: "no-cors"
  })
    .then(() => {
      console.log(`ESP32 command sent: /${command}`);
    })
    .catch((error) => {
      console.error(`ESP32 command failed: /${command}`, error);
    });
}
I used mode: "no-cors" so that the browser can still
send the command to the ESP32-S3 during local testing, even if the
ESP32-S3 does not return CORS headers. In this mode, the webpage
cannot read the response body, but the command can still reach the
board.
The code above is the actual HTTP command bridge used in the webpage. I documented it as editable code instead of using a screenshot, so the logic can be read directly in the browser.
Interface command table
Each PIKPIK CARE action has a screen effect, sound effect, HTTP command, and physical LED output. This table helped me connect the user interface, emotional meaning, and hardware behavior together.
| PIKPIK CARE action | ESP32-S3 command | Screen / sound feedback | WS2812B LED output | Sound file |
|---|---|---|---|---|
| Info | /info |
Open Loco Pik Lab information panel | No major light change / keep default state | None |
| Love | /love |
Heart particles and love sound | Rose pink light for 2 seconds | love_heart_pop.mp3 |
| Play | /play |
Shake animation, colorful particles, and play sound | Yellow flashing light for 2 seconds | play_shake_pop.mp3 |
| Feed | /feed |
Cookie particles and crunch sound | Warm orange light for 2 seconds | feed_cookie_crunch.mp3 |
| Sleep | /sleep |
Blue breathing circle and sleep sound | Soft blue breathing light for 4 seconds | sleep_soft_breath.mp3 |
| Unhappy | /unhappy |
Red warning screen and unhappy sound after too many taps | Red warning light for 2 seconds | unhappy_warning.mp3 |
Local network setup
To test the interface on my phone, the laptop, phone, and ESP32-S3 needed to be connected to the same Wi-Fi network. I used VS Code Live Server to host the webpage on my Mac.
| Device | IP address / URL | Role |
|---|---|---|
| Mac | 192.168.1.225 |
Hosts the webpage through VS Code Live Server. |
| Phone | 192.168.1.224 |
Opens the webpage in a mobile browser. |
| ESP32-S3 | 192.168.1.75 |
Receives HTTP commands and controls the WS2812B LED strip. |
On the phone, I opened the webpage using the Mac's local network IP:
http://192.168.1.225:5501/pikpik-care/pikpik-care.htmlHowever, the webpage actions send requests to the ESP32-S3:
http://192.168.1.75/love
http://192.168.1.75/play
http://192.168.1.75/feed
http://192.168.1.75/sleep
http://192.168.1.75/unhappy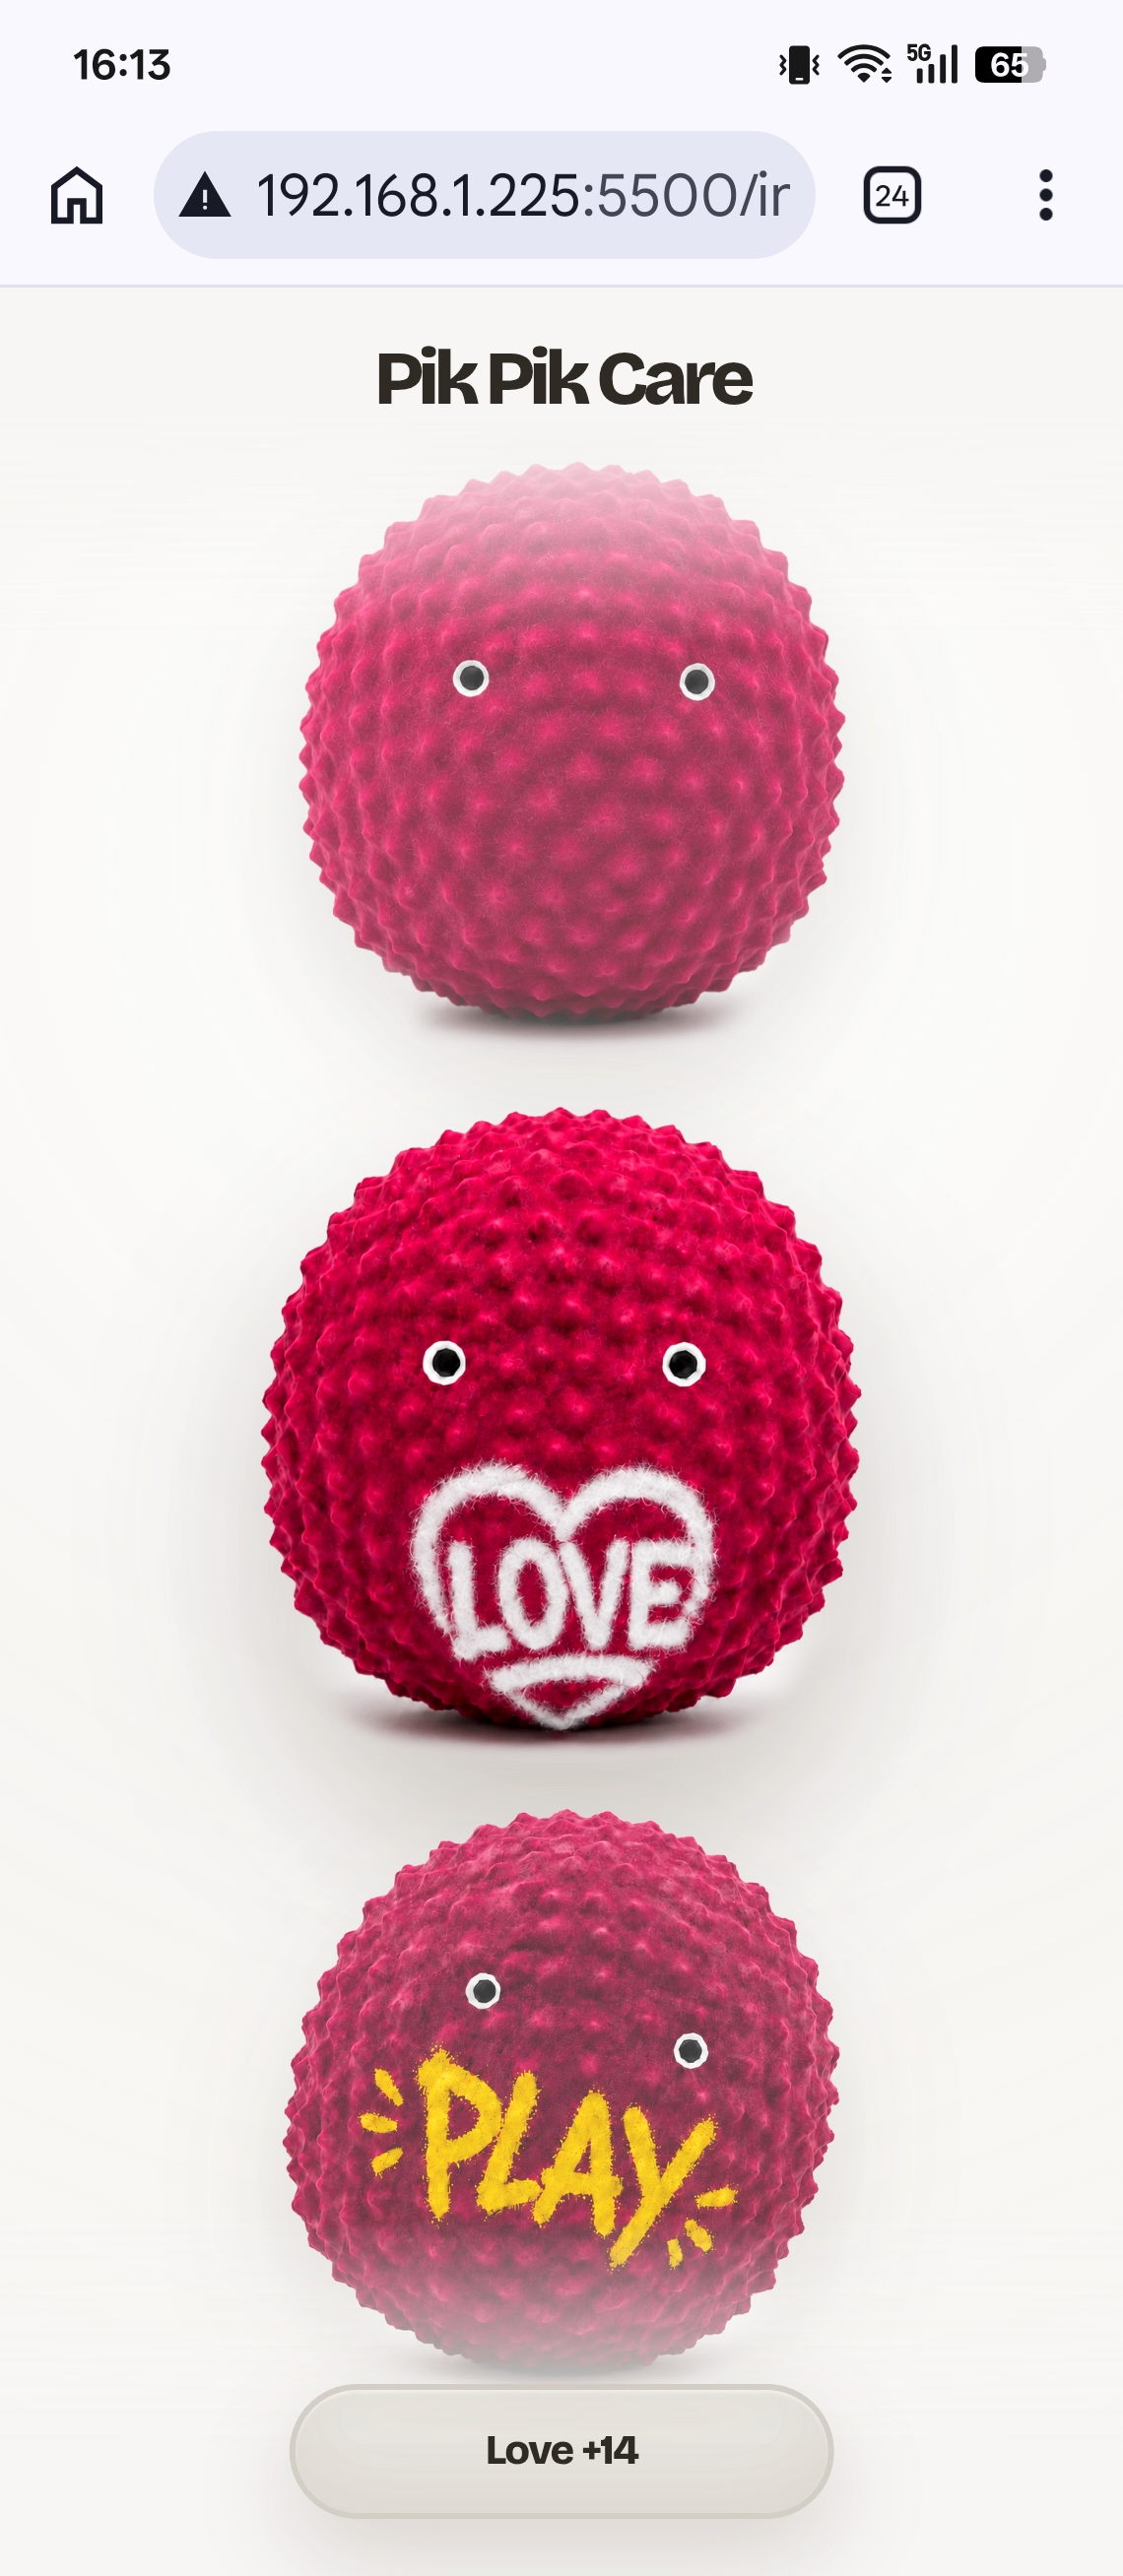
Starting the HTTP server after Wi-Fi is ready
One important detail was that the ESP32-S3 HTTP server should not start too early. At first, I considered starting the light server directly inside the board constructor, but this could make the device unstable because Wi-Fi and TCP/IP were not fully initialized yet.
To solve this problem, I added a network-ready flow. The board waits
until Wi-Fi is connected, then calls OnNetworkReady, and
only then starts the Loco Pik light server.
ESP32-S3 boot
        ↓
Connect to Wi-Fi
        ↓
Network becomes ready
        ↓
OnNetworkReady()
        ↓
Start Loco Pik light server
        ↓
Receive HTTP commands from PIKPIK CARE| File | Function |
|---|---|
board.h |
Adds a default OnNetworkReady hook. |
application.cc |
Calls OnNetworkReady after Wi-Fi is connected. |
seeed_xiao_esp32s3_sense.cc |
Starts the Loco Pik light server after the network is ready. |
I changed the firmware structure so the light server starts only after Wi-Fi is ready. This avoids starting the HTTP service before the TCP/IP stack is initialized.
// board.h
class Board {
public:
  virtual void StartNetwork() = 0;
  virtual void OnNetworkReady() {}
};

// application.cc
void Application::Start() {
  auto& board = Board::GetInstance();

  board.StartNetwork();

  // After Wi-Fi and TCP/IP are ready, start board-specific services.
  board.OnNetworkReady();
}

// seeed_xiao_esp32s3_sense.cc
void OnNetworkReady() override {
  if (mood_light_ != nullptr) {
    loco_pic_light_server_.Start(mood_light_);
  }
}
ESP32-S3 HTTP server
The ESP32-S3 runs a small HTTP server. In
loco_pic_light_server.cc, I registered several short
command paths. All of these paths are handled by the same function,
which parses the request and sends the event name to the LED class.
/info
/love
/play
/feed
/sleep
/unhappy
For example, when the browser visits
http://192.168.1.75/love, the HTTP server receives the
URI /love. The code removes the first slash and converts
it into the event name love. Then it calls the LED
control function.
Browser request
        ↓
GET /love
        ↓
LocoPicLightServer receives request
        ↓
Parse "/love" into event = "love"
        ↓
Call Ws2812bMoodLight
        ↓
Play Love LED effect
The HTTP server registers short URL paths as emotional commands. These paths are used by the webpage when the user taps an action.
bool LocoPicLightServer::Start(Ws2812bMoodLight* mood_light) {
  if (server_ != nullptr) {
    return true;
  }

  mood_light_ = mood_light;

  httpd_config_t config = HTTPD_DEFAULT_CONFIG();
  config.server_port = 80;
  config.max_uri_handlers = 16;
  config.lru_purge_enable = true;

  esp_err_t ret = httpd_start(&server_, &config);
  if (ret != ESP_OK) {
    ESP_LOGE(TAG, "Failed to start HTTP server: %s", esp_err_to_name(ret));
    server_ = nullptr;
    return false;
  }

  httpd_uri_t love = {
    .uri = "/love",
    .method = HTTP_GET,
    .handler = HandleAction,
    .user_ctx = this
  };

  httpd_uri_t play = love;
  play.uri = "/play";

  httpd_uri_t feed = love;
  feed.uri = "/feed";

  httpd_uri_t sleep = love;
  sleep.uri = "/sleep";

  httpd_uri_t unhappy = love;
  unhappy.uri = "/unhappy";

  httpd_register_uri_handler(server_, &love);
  httpd_register_uri_handler(server_, &play);
  httpd_register_uri_handler(server_, &feed);
  httpd_register_uri_handler(server_, &sleep);
  httpd_register_uri_handler(server_, &unhappy);

  return true;
}
WS2812B mood light logic
The LED output is handled by the Ws2812bMoodLight class.
This class manages both the AI emotion light mode and the temporary
webpage-triggered light effects.
| Member | Meaning | Purpose |
|---|---|---|
emotion_mode_ |
Whether the LED strip is following the AI emotion mode. | Temporarily disabled when a webpage effect is playing. |
effect_generation_ |
Current light effect generation ID. | Prevents multiple temporary effects from fighting each other. |
last_emotion_ |
The latest AI conversation emotion. | Used to restore the correct AI emotion light after a temporary effect. |
Even when a webpage-triggered light effect is playing, the latest AI emotion is still recorded. When the temporary effect finishes, the LED strip can return to the most recent AI emotion instead of an old state.
The important members of the Ws2812bMoodLight class
manage AI emotion mode, temporary webpage effects, and automatic
recovery.
class Ws2812bMoodLight {
public:
  Ws2812bMoodLight(gpio_num_t gpio, int led_count);
  ~Ws2812bMoodLight();

  bool IsReady() const { return led_strip_ != nullptr; }

  void SetEmotion(const std::string& emotion);
  bool SetColorByName(const std::string& color);
  void SetRgb(uint8_t r, uint8_t g, uint8_t b);
  bool SetLocoPicAction(const std::string& action);

  void SetEmotionMode(bool enabled);
  bool IsEmotionMode();

private:
  led_strip_handle_t led_strip_ = nullptr;
  int led_count_ = 0;

  bool emotion_mode_ = true;
  uint32_t effect_generation_ = 0;
  std::string last_emotion_;

  std::mutex mutex_;

  void SetAll(uint8_t r, uint8_t g, uint8_t b);
  void ApplyEmotionLocked(const std::string& emotion);
  void RestoreEmotionLocked();
  void StartTemporaryEffect(const std::string& action, int duration_ms);

  static void TemporaryEffectTask(void* arg);
};
Temporary light effect and AI emotion recovery
The LED class manages two different kinds of light behavior. One is the AI conversation emotion light, and the other is the temporary light effect triggered by the PIKPIK CARE webpage.
When a webpage action is received, the system temporarily pauses the AI emotion light mode and plays the selected LED effect. After the effect duration ends, the LED strip automatically returns to the latest AI conversation emotion.
| Action | Effect type | Duration | Recovery behavior |
|---|---|---|---|
| Love | Fixed rose pink color | 2 seconds | Return to latest AI emotion light |
| Play | Yellow flashing light | 2 seconds | Return to latest AI emotion light |
| Feed | Fixed warm orange color | 2 seconds | Return to latest AI emotion light |
| Sleep | Blue breathing light | 4 seconds | Return to latest AI emotion light |
| Unhappy | Fixed warning red color | 2 seconds | Return to latest AI emotion light |
The effect_generation_ variable is important when the
user taps different actions quickly. For example, if the user taps
Love and then taps Sleep one second later, the old Love task will not
restore the light after it finishes, because the current effect
generation has already changed. This prevents Love from interrupting
the Sleep effect.
User taps Love
        ↓
Love effect starts
        ↓
User taps Sleep before Love finishes
        ↓
Sleep effect becomes the latest generation
        ↓
Old Love task finishes
        ↓
Old Love task does not restore the light
        ↓
Sleep continues correctly
The effect_generation_ check prevents older temporary
effects from restoring the LED state after a newer effect has
already started.
void Ws2812bMoodLight::StartTemporaryEffect(
    const std::string& action,
    int duration_ms) {
  std::lock_guard<std::mutex> lock(mutex_);

  emotion_mode_ = false;
  effect_generation_++;

  auto* context = new TemporaryEffectContext{
      this,
      action,
      effect_generation_,
      duration_ms
  };

  xTaskCreate(
      TemporaryEffectTask,
      "loco_light_effect",
      4096,
      context,
      4,
      nullptr
  );
}

void Ws2812bMoodLight::TemporaryEffectTask(void* arg) {
  auto* context = static_cast<TemporaryEffectContext*>(arg);
  auto* light = context->light;
  const std::string action = context->action;
  const uint32_t generation = context->generation;
  const int duration_ms = context->duration_ms;
  delete context;

  auto still_current = [light, generation]() {
    std::lock_guard<std::mutex> lock(light->mutex_);
    return light->effect_generation_ == generation;
  };

  if (action == "play") {
    const int step_ms = 160;
    for (int elapsed = 0;
         elapsed < duration_ms && still_current();
         elapsed += step_ms) {
      std::lock_guard<std::mutex> lock(light->mutex_);

      if (light->effect_generation_ != generation) {
        break;
      }

      if ((elapsed / step_ms) % 2 == 0) {
        light->SetAll(48, 36, 0);
      } else {
        light->SetAll(4, 3, 0);
      }

      vTaskDelay(pdMS_TO_TICKS(step_ms));
    }
  }

  {
    std::lock_guard<std::mutex> lock(light->mutex_);

    if (light->effect_generation_ == generation) {
      light->emotion_mode_ = true;
      light->RestoreEmotionLocked();
    }
  }

  vTaskDelete(nullptr);
}
Real hardware test with phone control
I recorded a real hardware test to show the complete interaction. In this test, I opened the PIKPIK CARE webpage on my phone and tapped different emotional actions. The webpage sent HTTP requests to the ESP32-S3, and the ESP32-S3 controlled the WS2812B LED strip to show the corresponding light effects.
This test confirmed that the interface was not only a screen prototype. The phone webpage, Wi-Fi connection, ESP32-S3 HTTP server, and WS2812B LED output were working together as one interaction system.
Phone opens PIKPIK CARE
        ↓
Tap Love / Play / Feed / Sleep
        ↓
HTTP request is sent to ESP32-S3
        ↓
ESP32-S3 receives the command
        ↓
WS2812B LED strip changes color or effect
Problems and Solutions
| Problem | Reason | Solution |
|---|---|---|
The phone could not open 127.0.0.1:5500. |
127.0.0.1 always means the current device itself. On
the phone, it points to the phone, not my Mac.
|
I used the Mac's local network IP instead:
http://192.168.1.225:5501/pikpik-care/pikpik-care.html.
|
| The webpage and ESP32-S3 had different IP addresses. | The webpage was hosted on my Mac, but the LED command receiver was the ESP32-S3. |
I opened the webpage from the Mac IP, but JavaScript sent
fetch() requests to the ESP32-S3 IP.
|
| The ESP32-S3 became unstable when starting the HTTP server too early. | Wi-Fi and TCP/IP were not fully ready during early board initialization. |
I added an OnNetworkReady hook and started the light
server only after the network was connected.
|
| Multiple light effects could overlap. | A previous temporary effect might finish later and restore the LED state while a newer effect is still playing. |
I used effect_generation_ to check whether the task
was still the latest effect before restoring the AI emotion mode.
|
| The webpage request could be blocked by browser cross-origin rules. | The webpage and ESP32-S3 were served from different IP addresses. |
In pikpik-care.js, I used mode: "no-cors"
for local network testing. Another solution is to add CORS headers
in the ESP32-S3 HTTP response.
|
What I Learned
This week helped me understand that an interface is not only a visual screen. It is a communication bridge between the user, the software, the network, and the physical device. A character interaction on a webpage becomes meaningful when it can trigger a real output from the hardware.
I also learned the difference between local webpages, local IP
addresses, and device IP addresses. When I wanted to control the ESP32
from my phone, I could not use 127.0.0.1. Instead, I had
to use the Mac's LAN IP to open the webpage and the ESP32-S3's LAN IP
to send the LED command.
Another important lesson was that interface design is also part of system design. The words, images, animations, sound effects, colors, and interaction behaviors all affect how the user understands the robot's behavior. By using emotional actions instead of technical commands, the webpage became more suitable for Loco Pik's character.
I also learned that embedded web services need correct timing. The HTTP server should not start before the network is ready. By moving the light server startup to the network-ready stage, the system became more stable.