Overview
This week was about molding and casting. Unlike direct fabrication processes such as 3D printing or CNC machining, molding and casting require designing both the final object and the negative space around it. The mold is not only a container. It controls how the material enters, how air escapes, how the material cures, and how the final part can be removed.
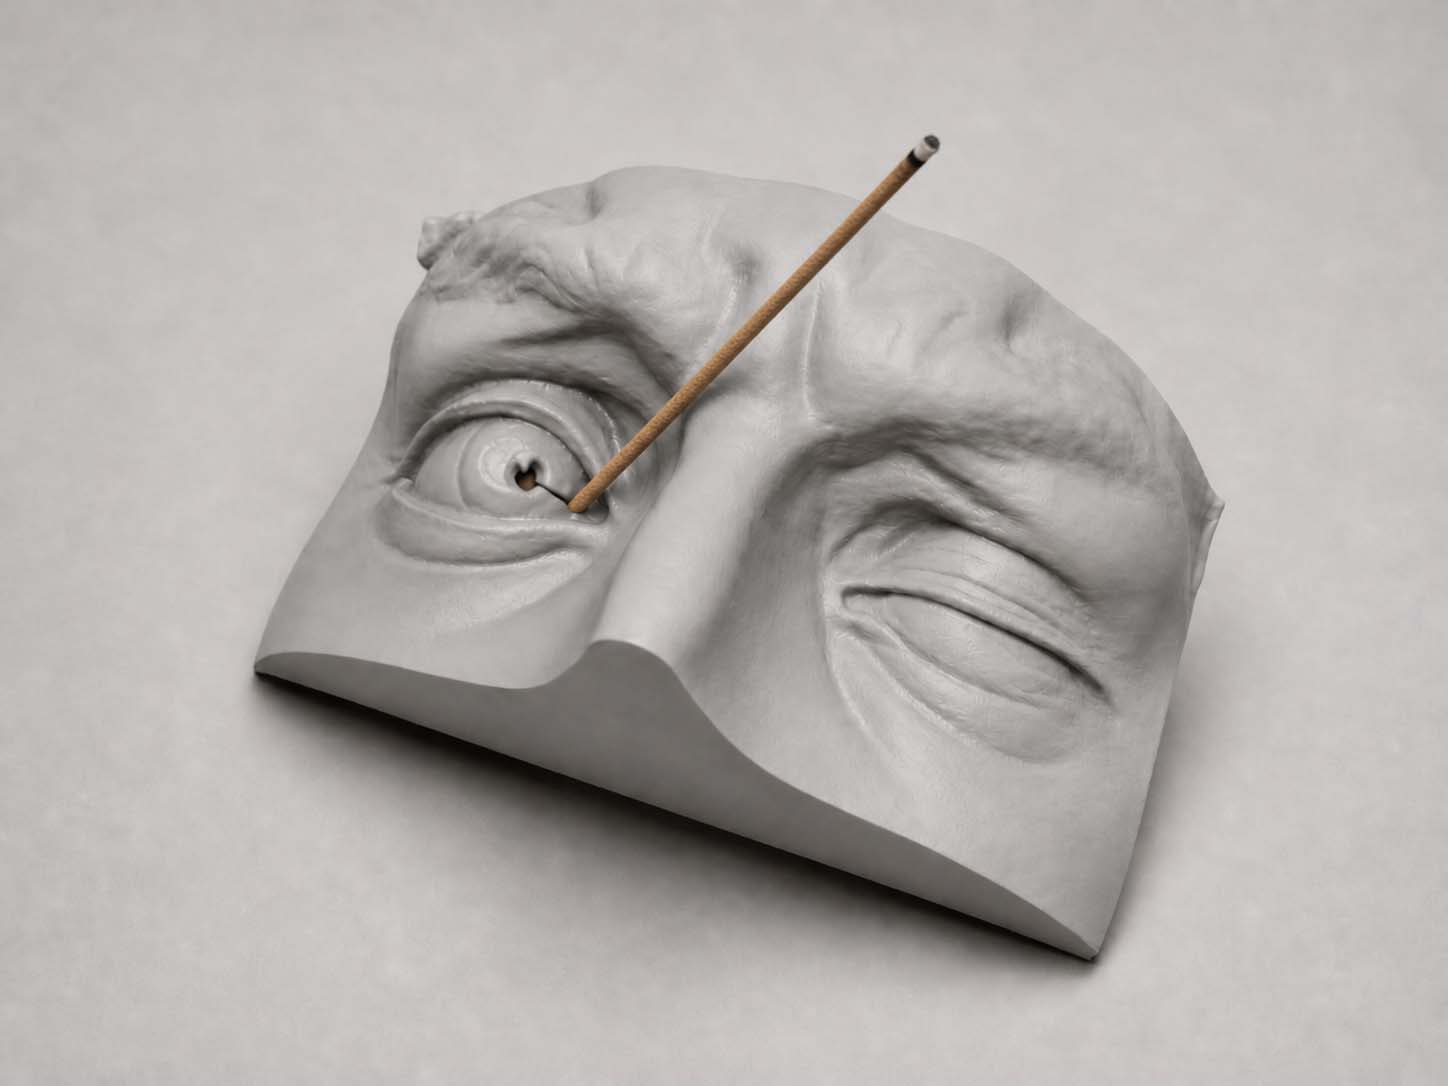
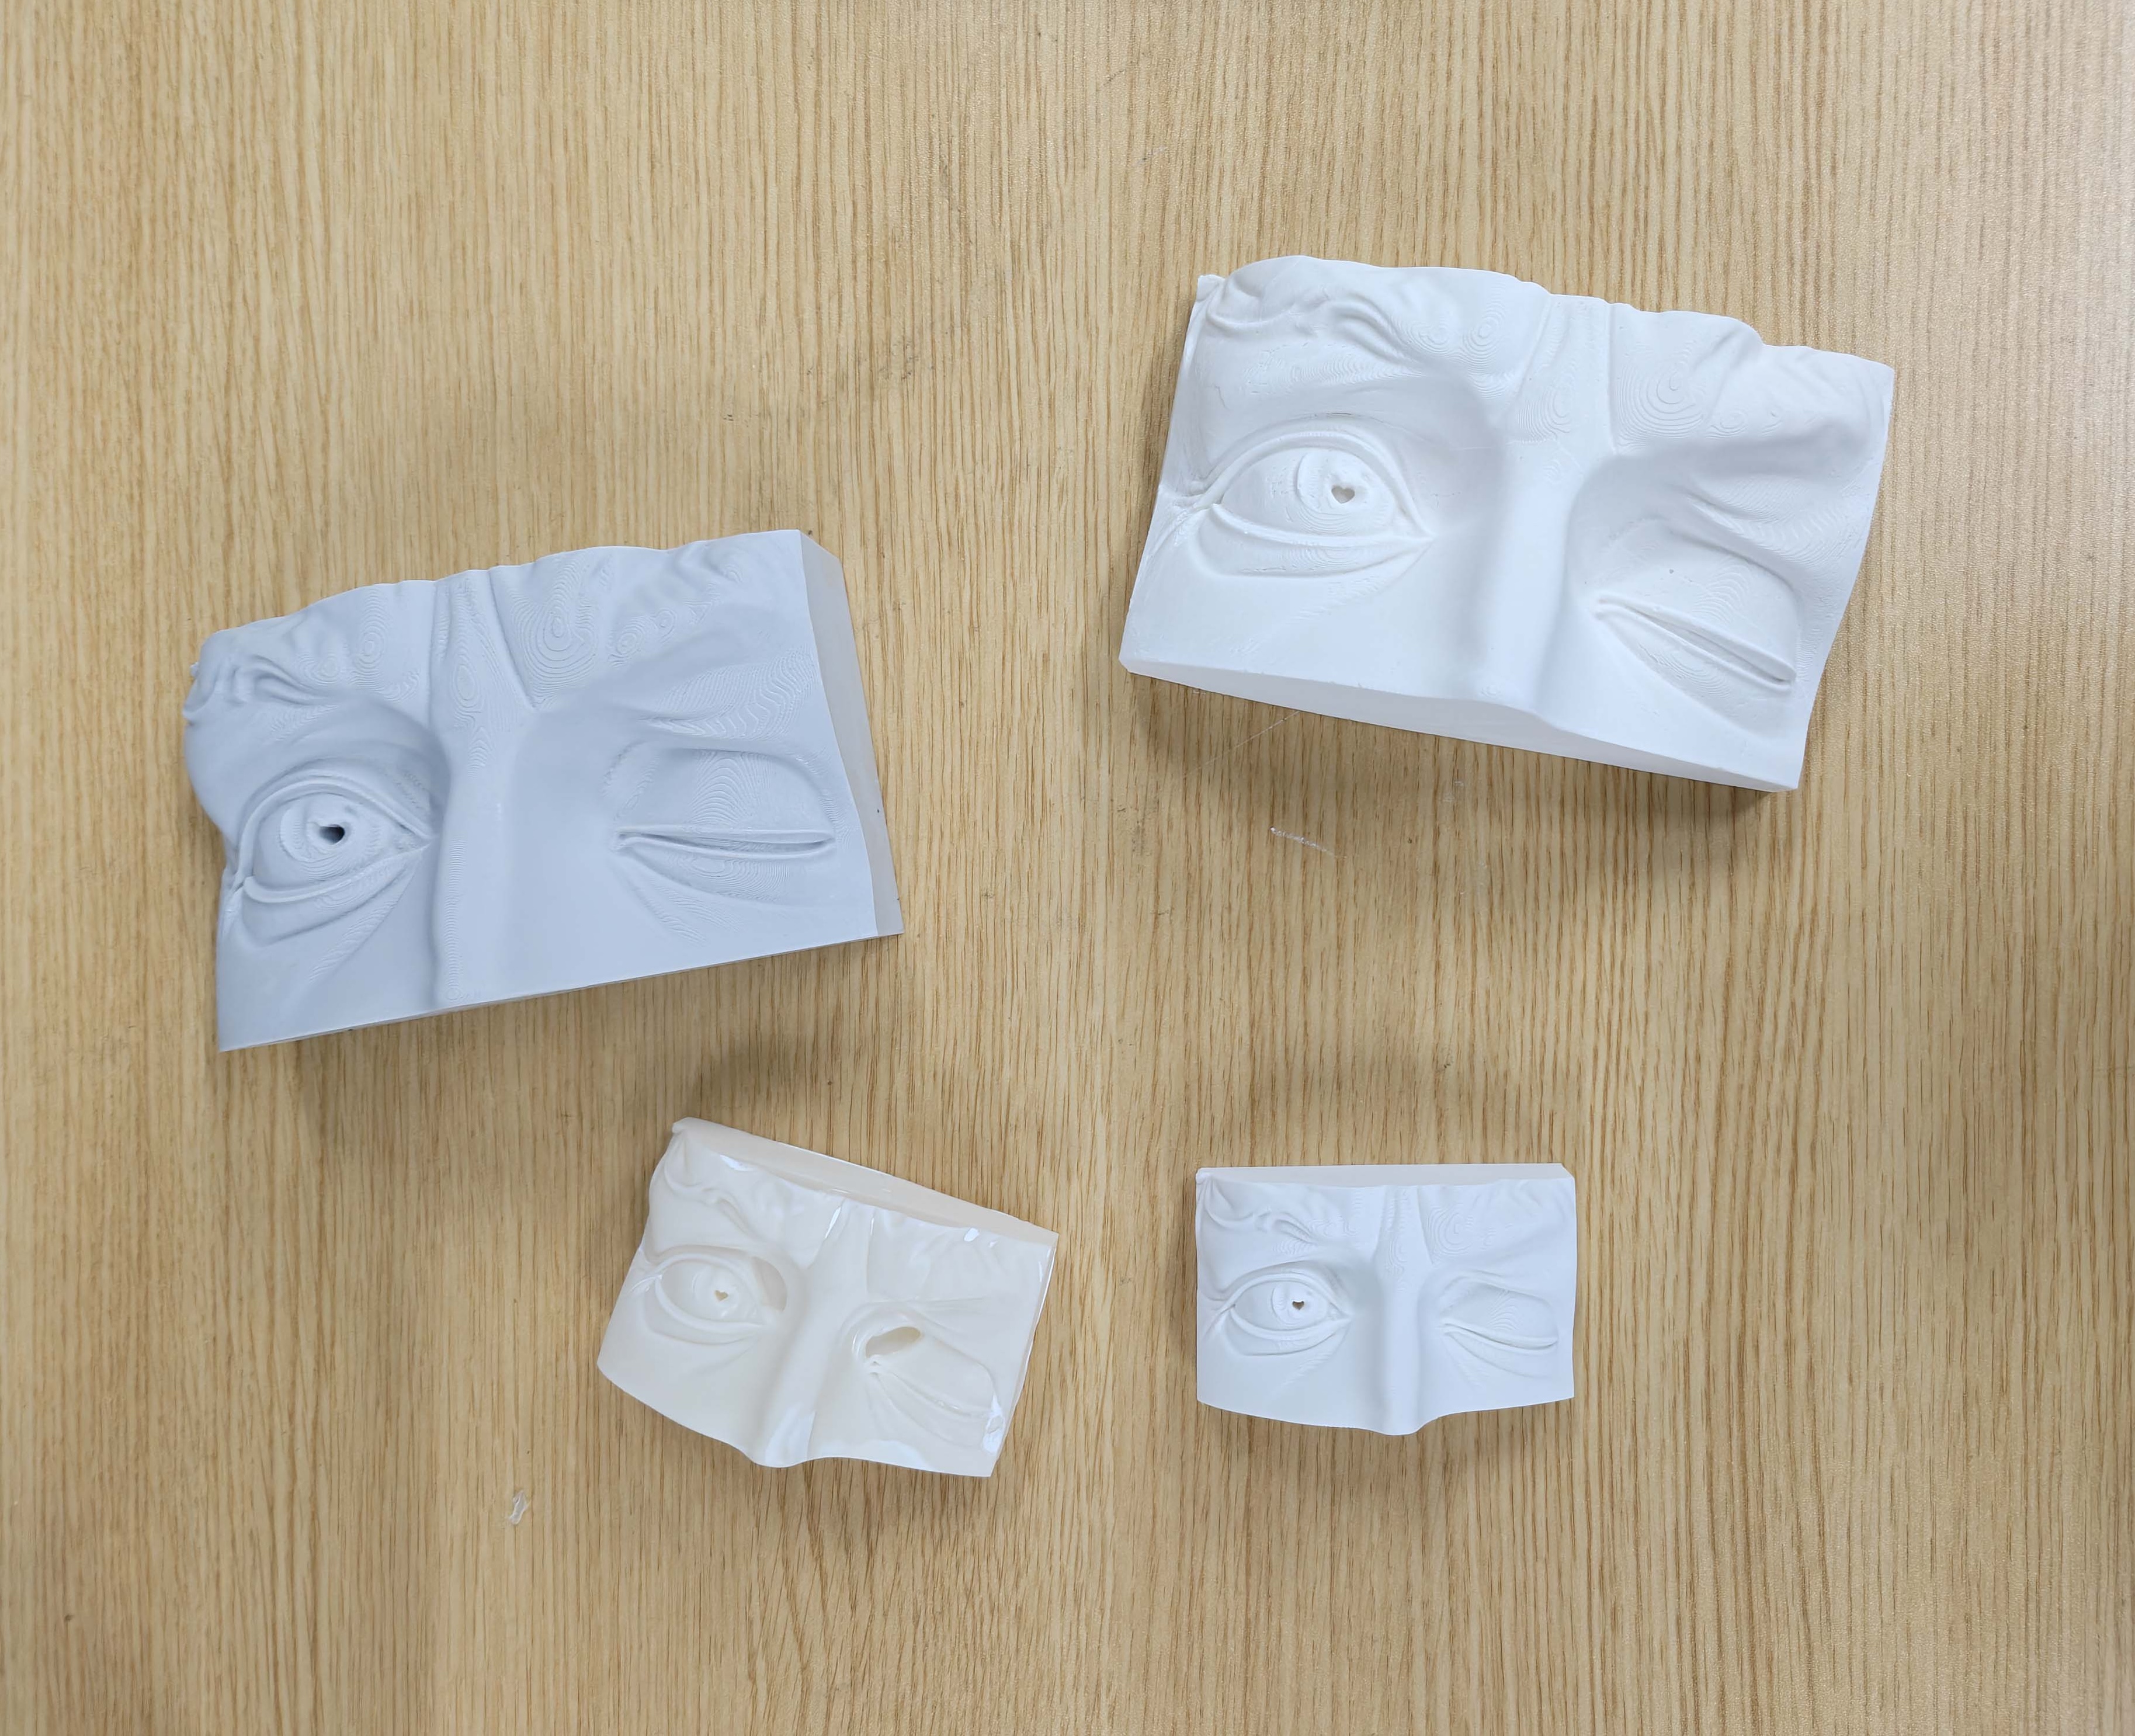
For my individual assignment, I designed and cast a small incense holder. The object has a face-like form with one open eye, one closed eye, and a small hole near the eye area for holding incense. I wanted the object to feel quiet, emotional, and slightly ritual-like, rather than only functional.
The final process was: FDM printed master model, 3D printed mold box, silicone mold making, and plaster casting. Before deciding the final master model process, I also tested SLA resin printing. SLA printing created a very smooth surface, but I preferred the visible FDM layer lines for this object. The layer texture looked similar to skin pores, wrinkles, and facial surface traces, so I kept it intentionally as part of the design language.
Assignment
Group Assignment
The group assignment was to review the safety data sheets or available safety information for each molding and casting material, make and compare test casts with different materials, and compare different mold-making processes.
Individual Assignment
The individual assignment was to design a mold around the process we planned to use, produce it with a smooth or intentional surface finish, and use it to cast parts.
In my project, the visible FDM layer texture was kept intentionally. Instead of removing all fabrication traces, I used the layer lines as a skin-like surface quality for the face-shaped incense holder.
Group Assignment
Material safety review and mold-making tests
For the group assignment, we reviewed the safety information and material labels of the molding and casting materials available in the lab. We also tested silicone mixing, vacuum degassing, and different mold-making methods. These tests helped us understand how material ratio, mixing time, bubbles, mold structure, and curing behavior affect the final result.
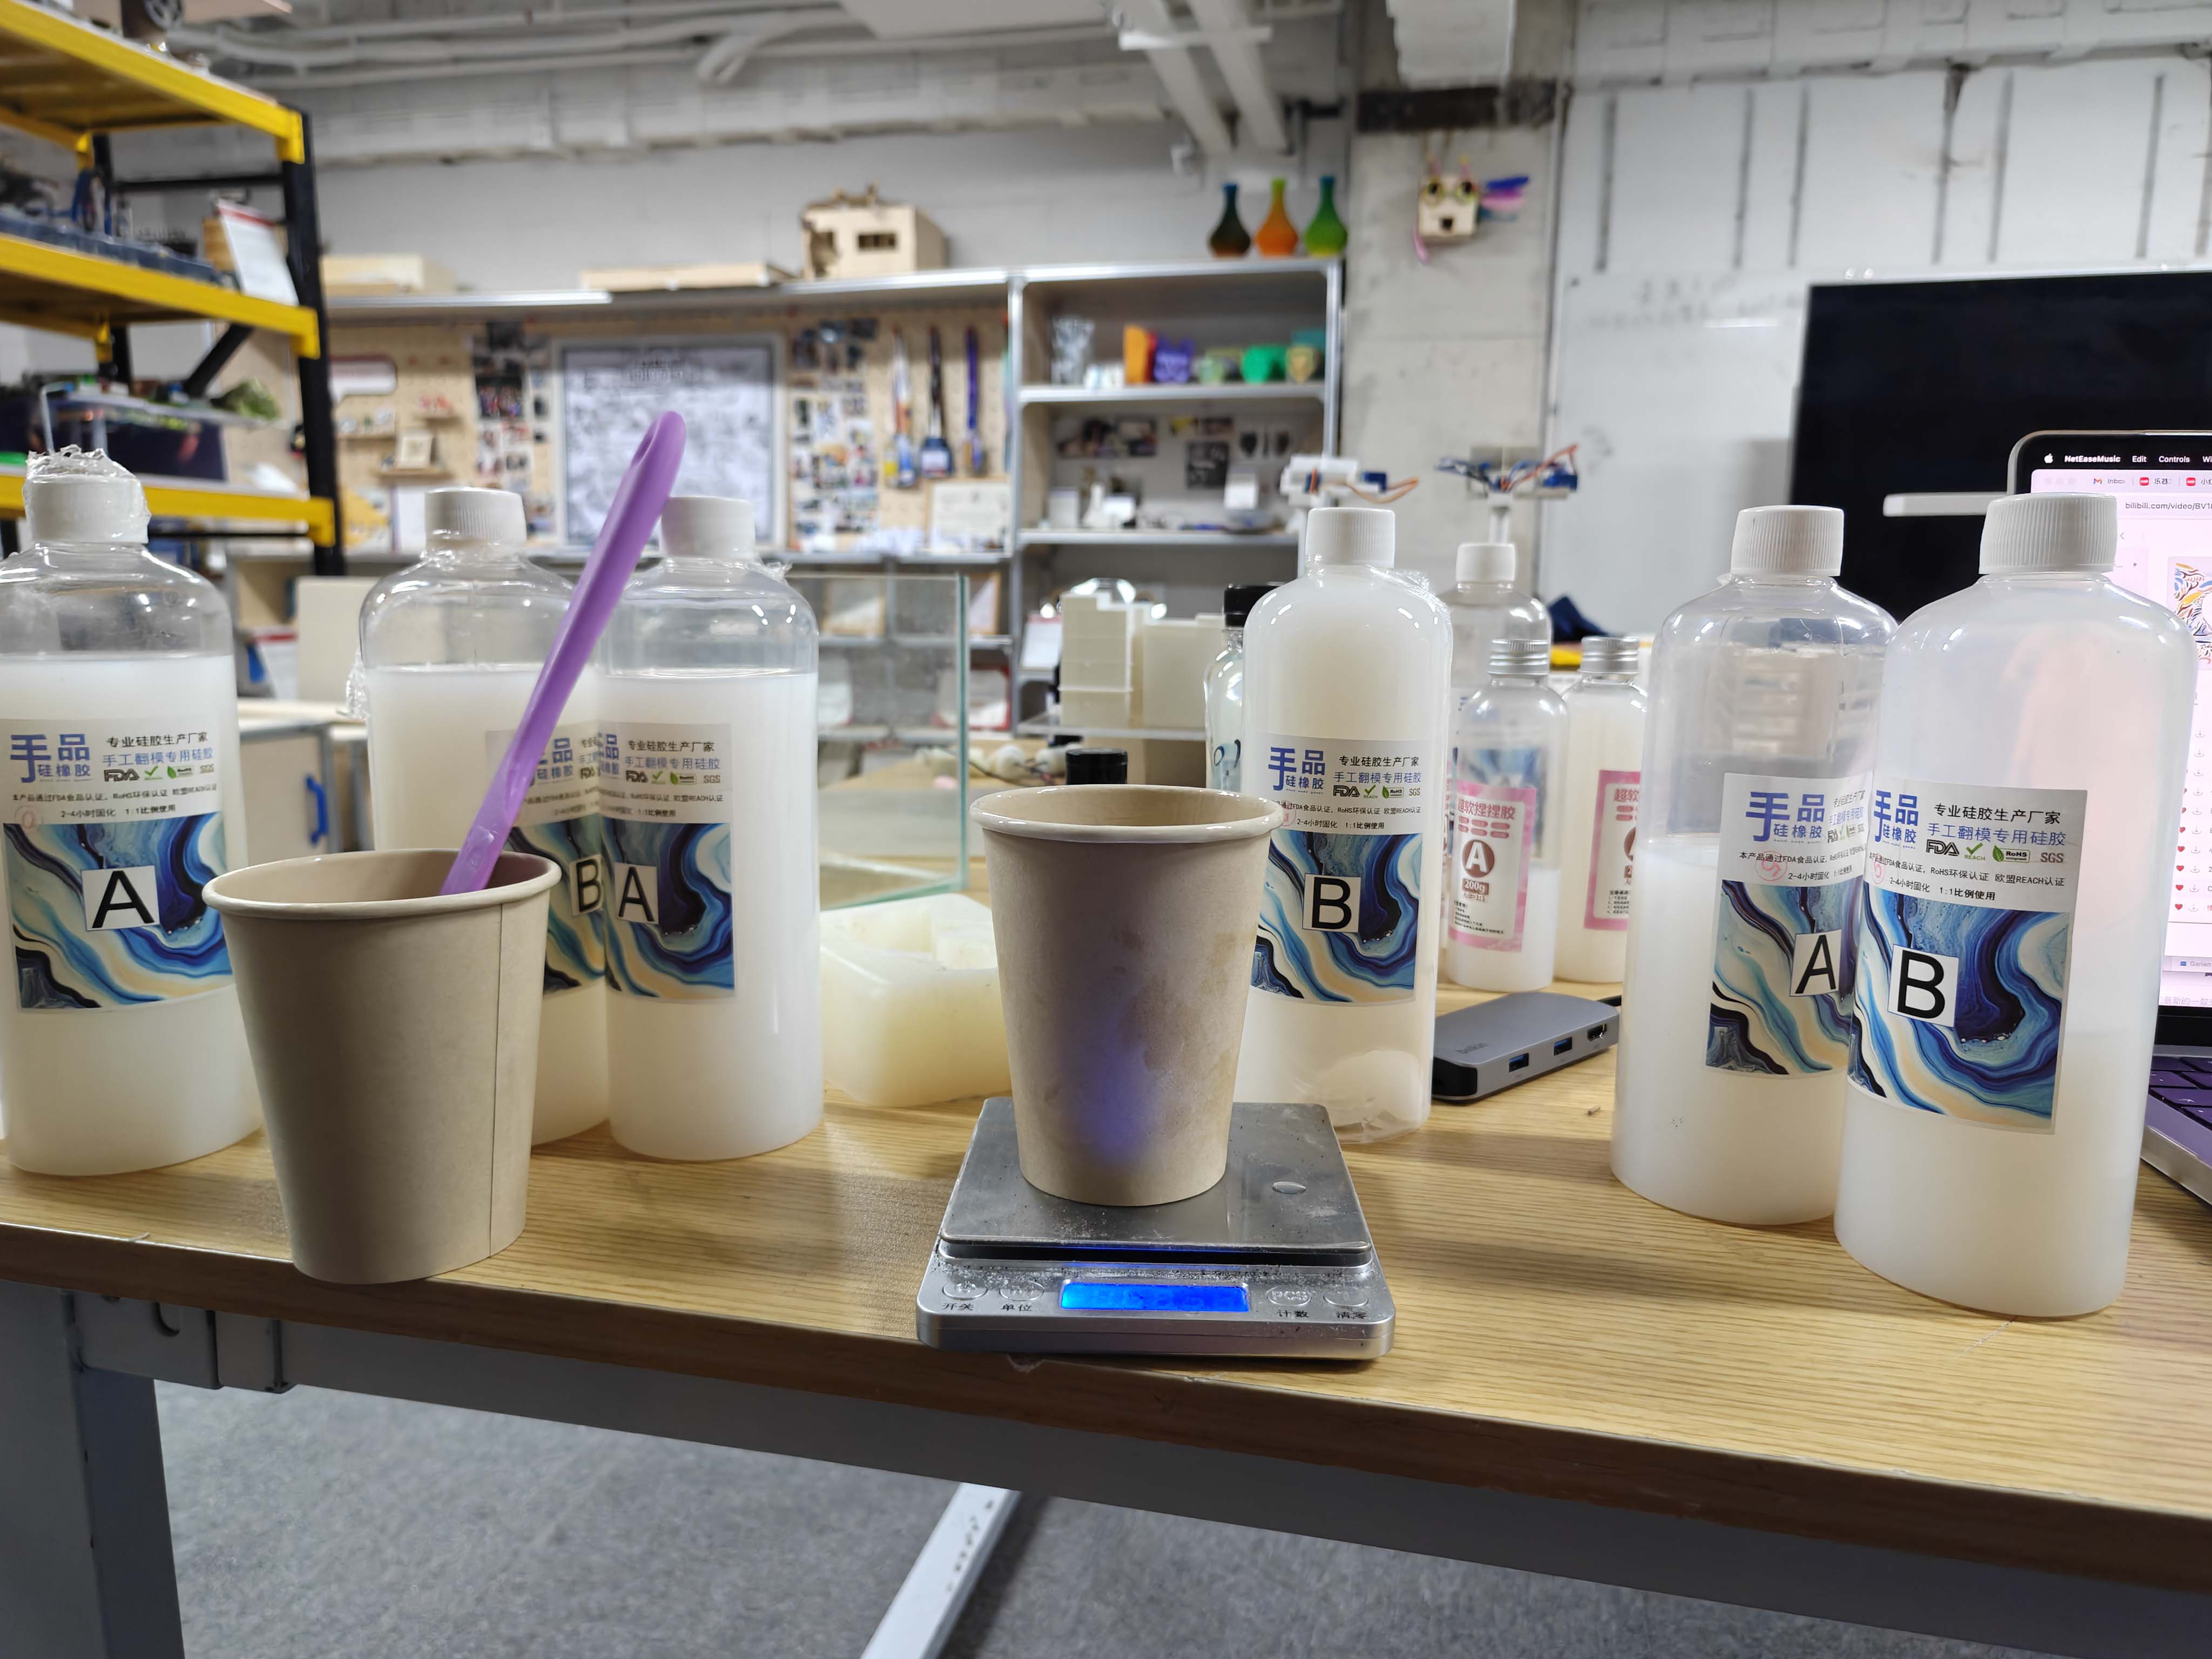
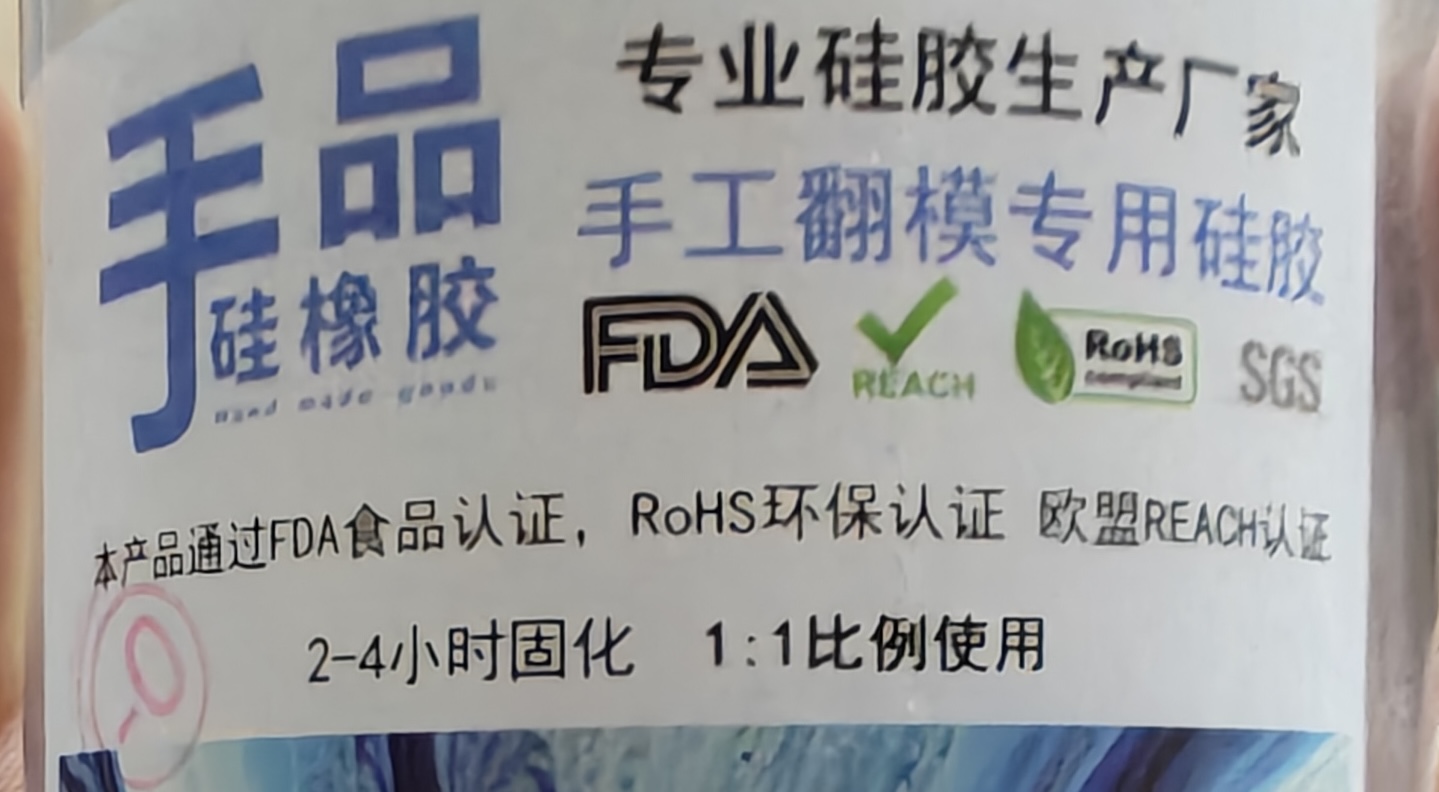
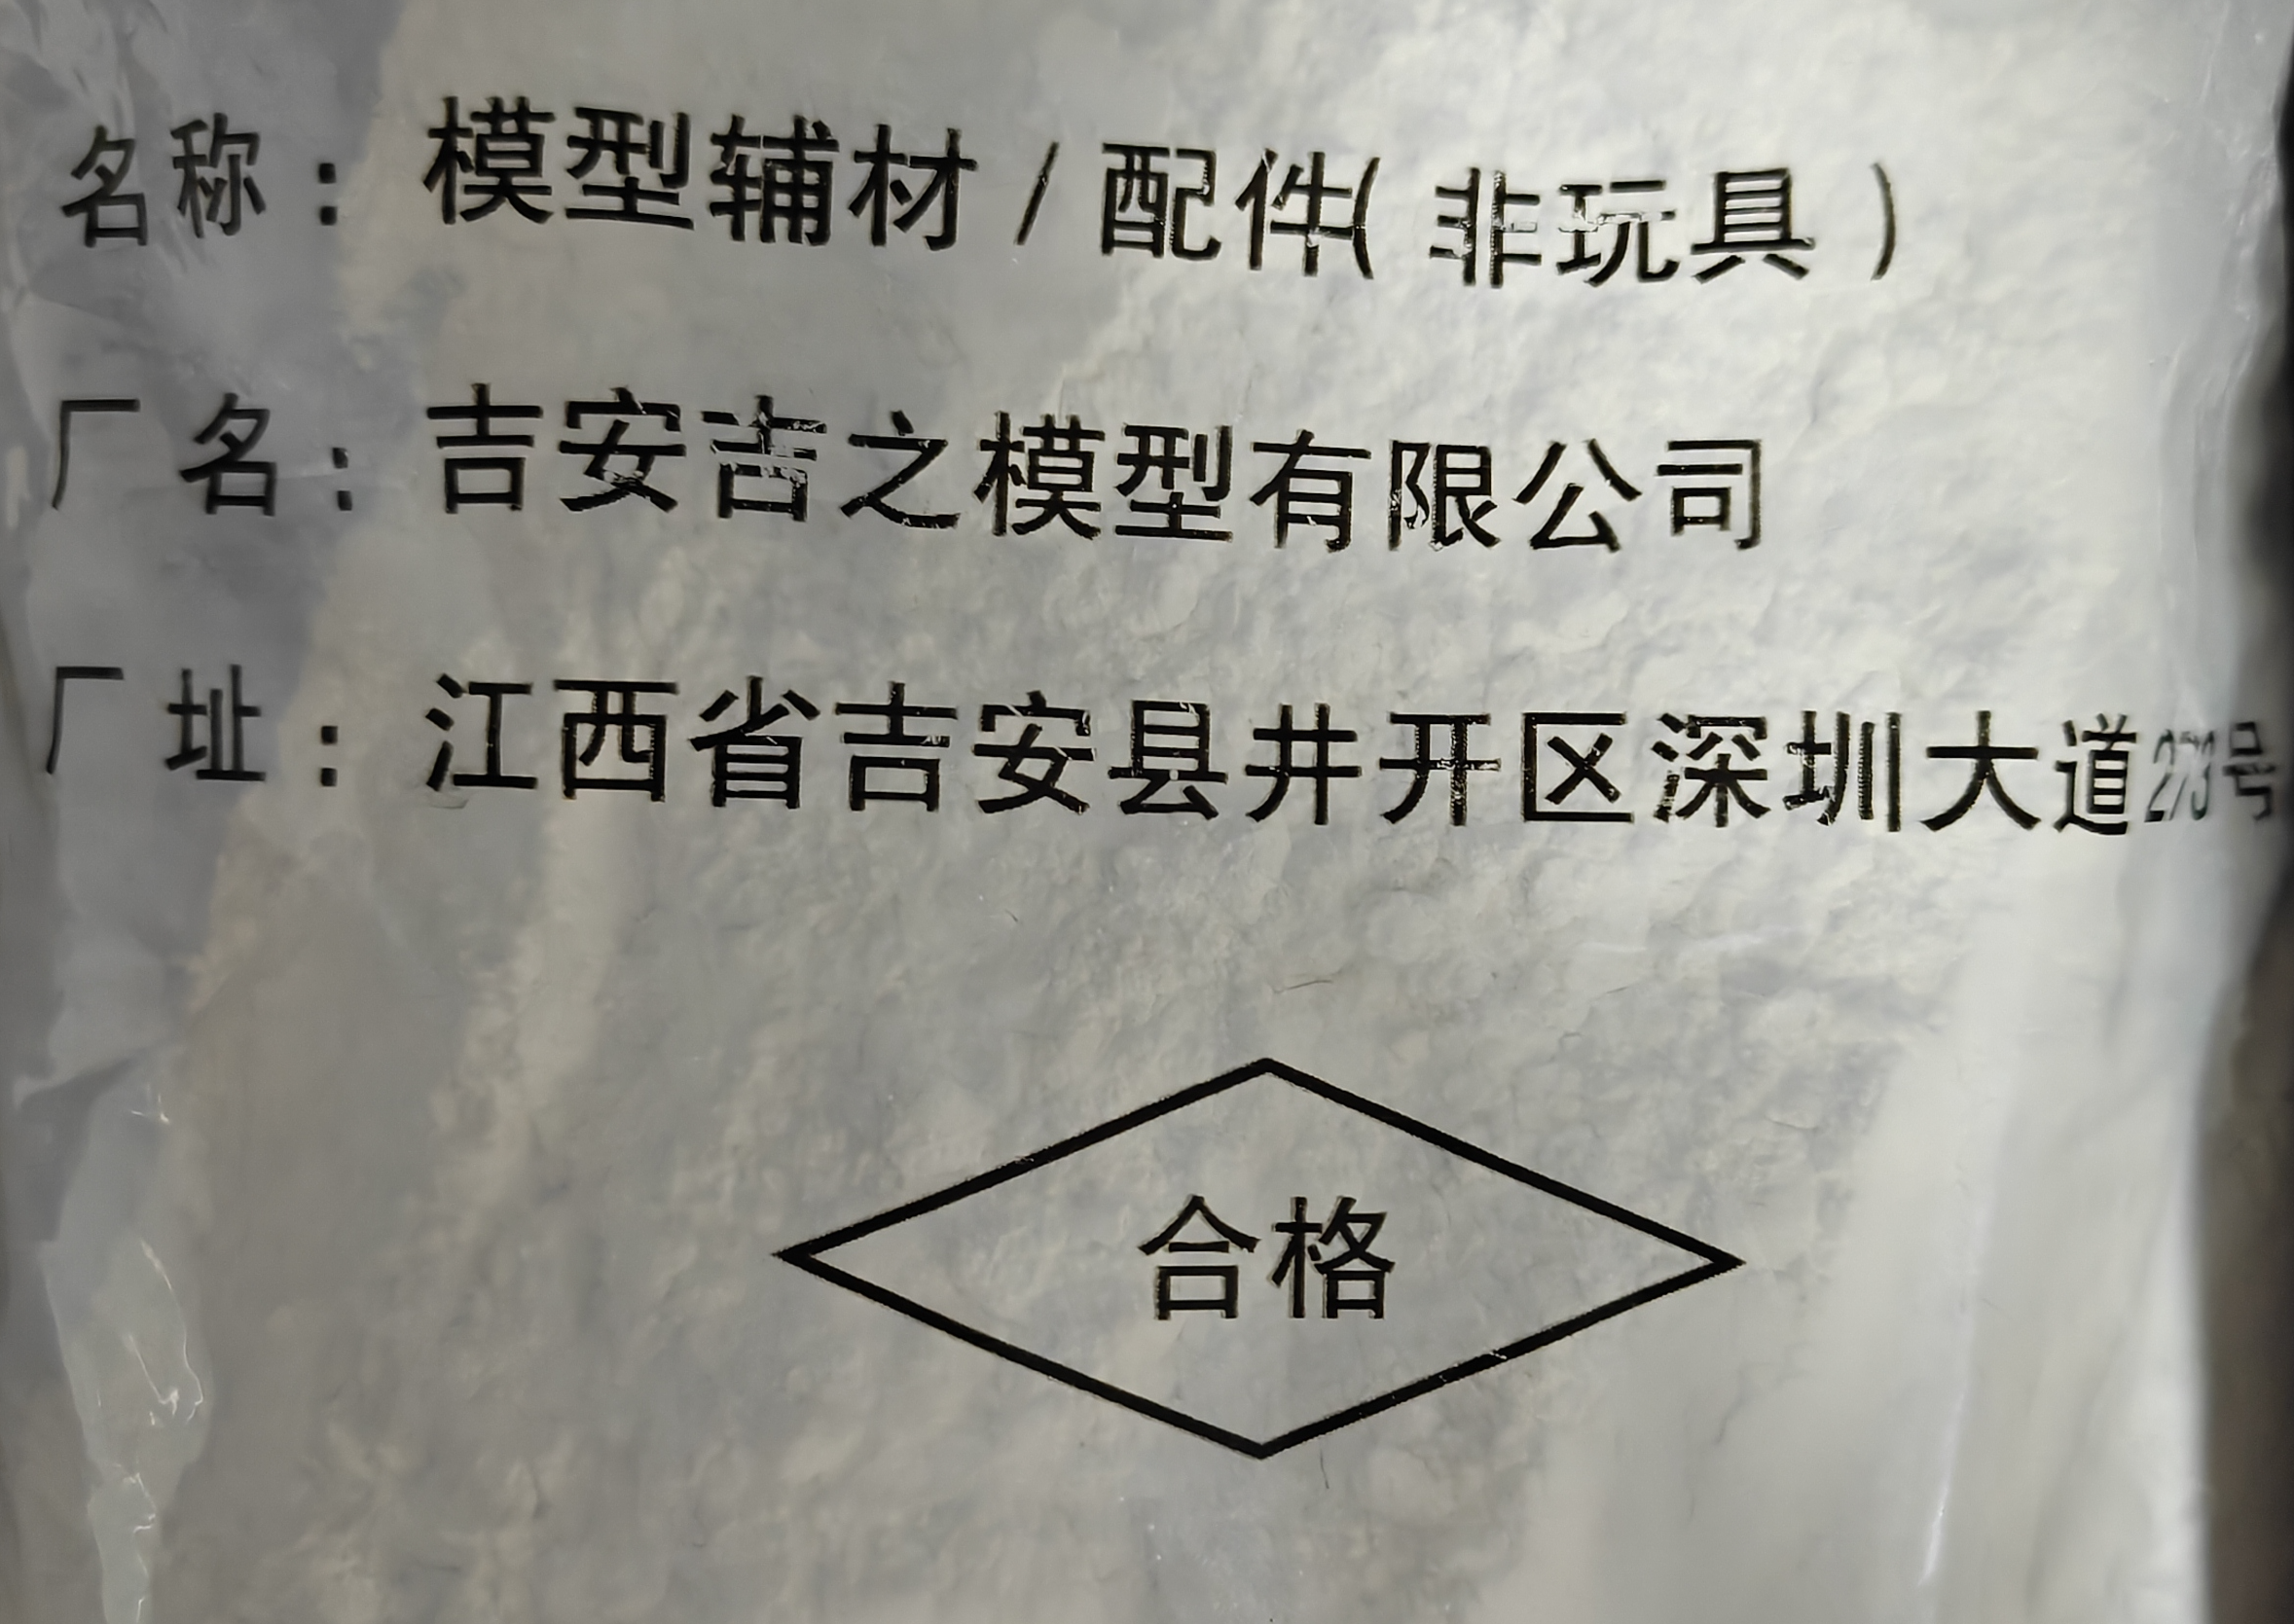
Material safety and label review
Before using the materials, we reviewed the safety information and labels of the silicone and plaster materials. Molding and casting materials may involve skin contact, powder dust, short working time, heat during curing, and disposal issues. Therefore, gloves, masks, goggles, and good ventilation were important during the process.
| Material | Main risk | Protection | Notes |
|---|---|---|---|
| Two-part silicone rubber | Skin contact, eye contact, and contamination during mixing | Gloves, goggles, and clean tools | Mix Part A and Part B evenly. Avoid touching uncured silicone directly and keep the workspace clean. |
| Plaster / gypsum | Powder dust and mild heat during curing | Mask and gloves | Avoid breathing dust. Do not pour leftover plaster slurry into the sink because it can harden and block pipes. |
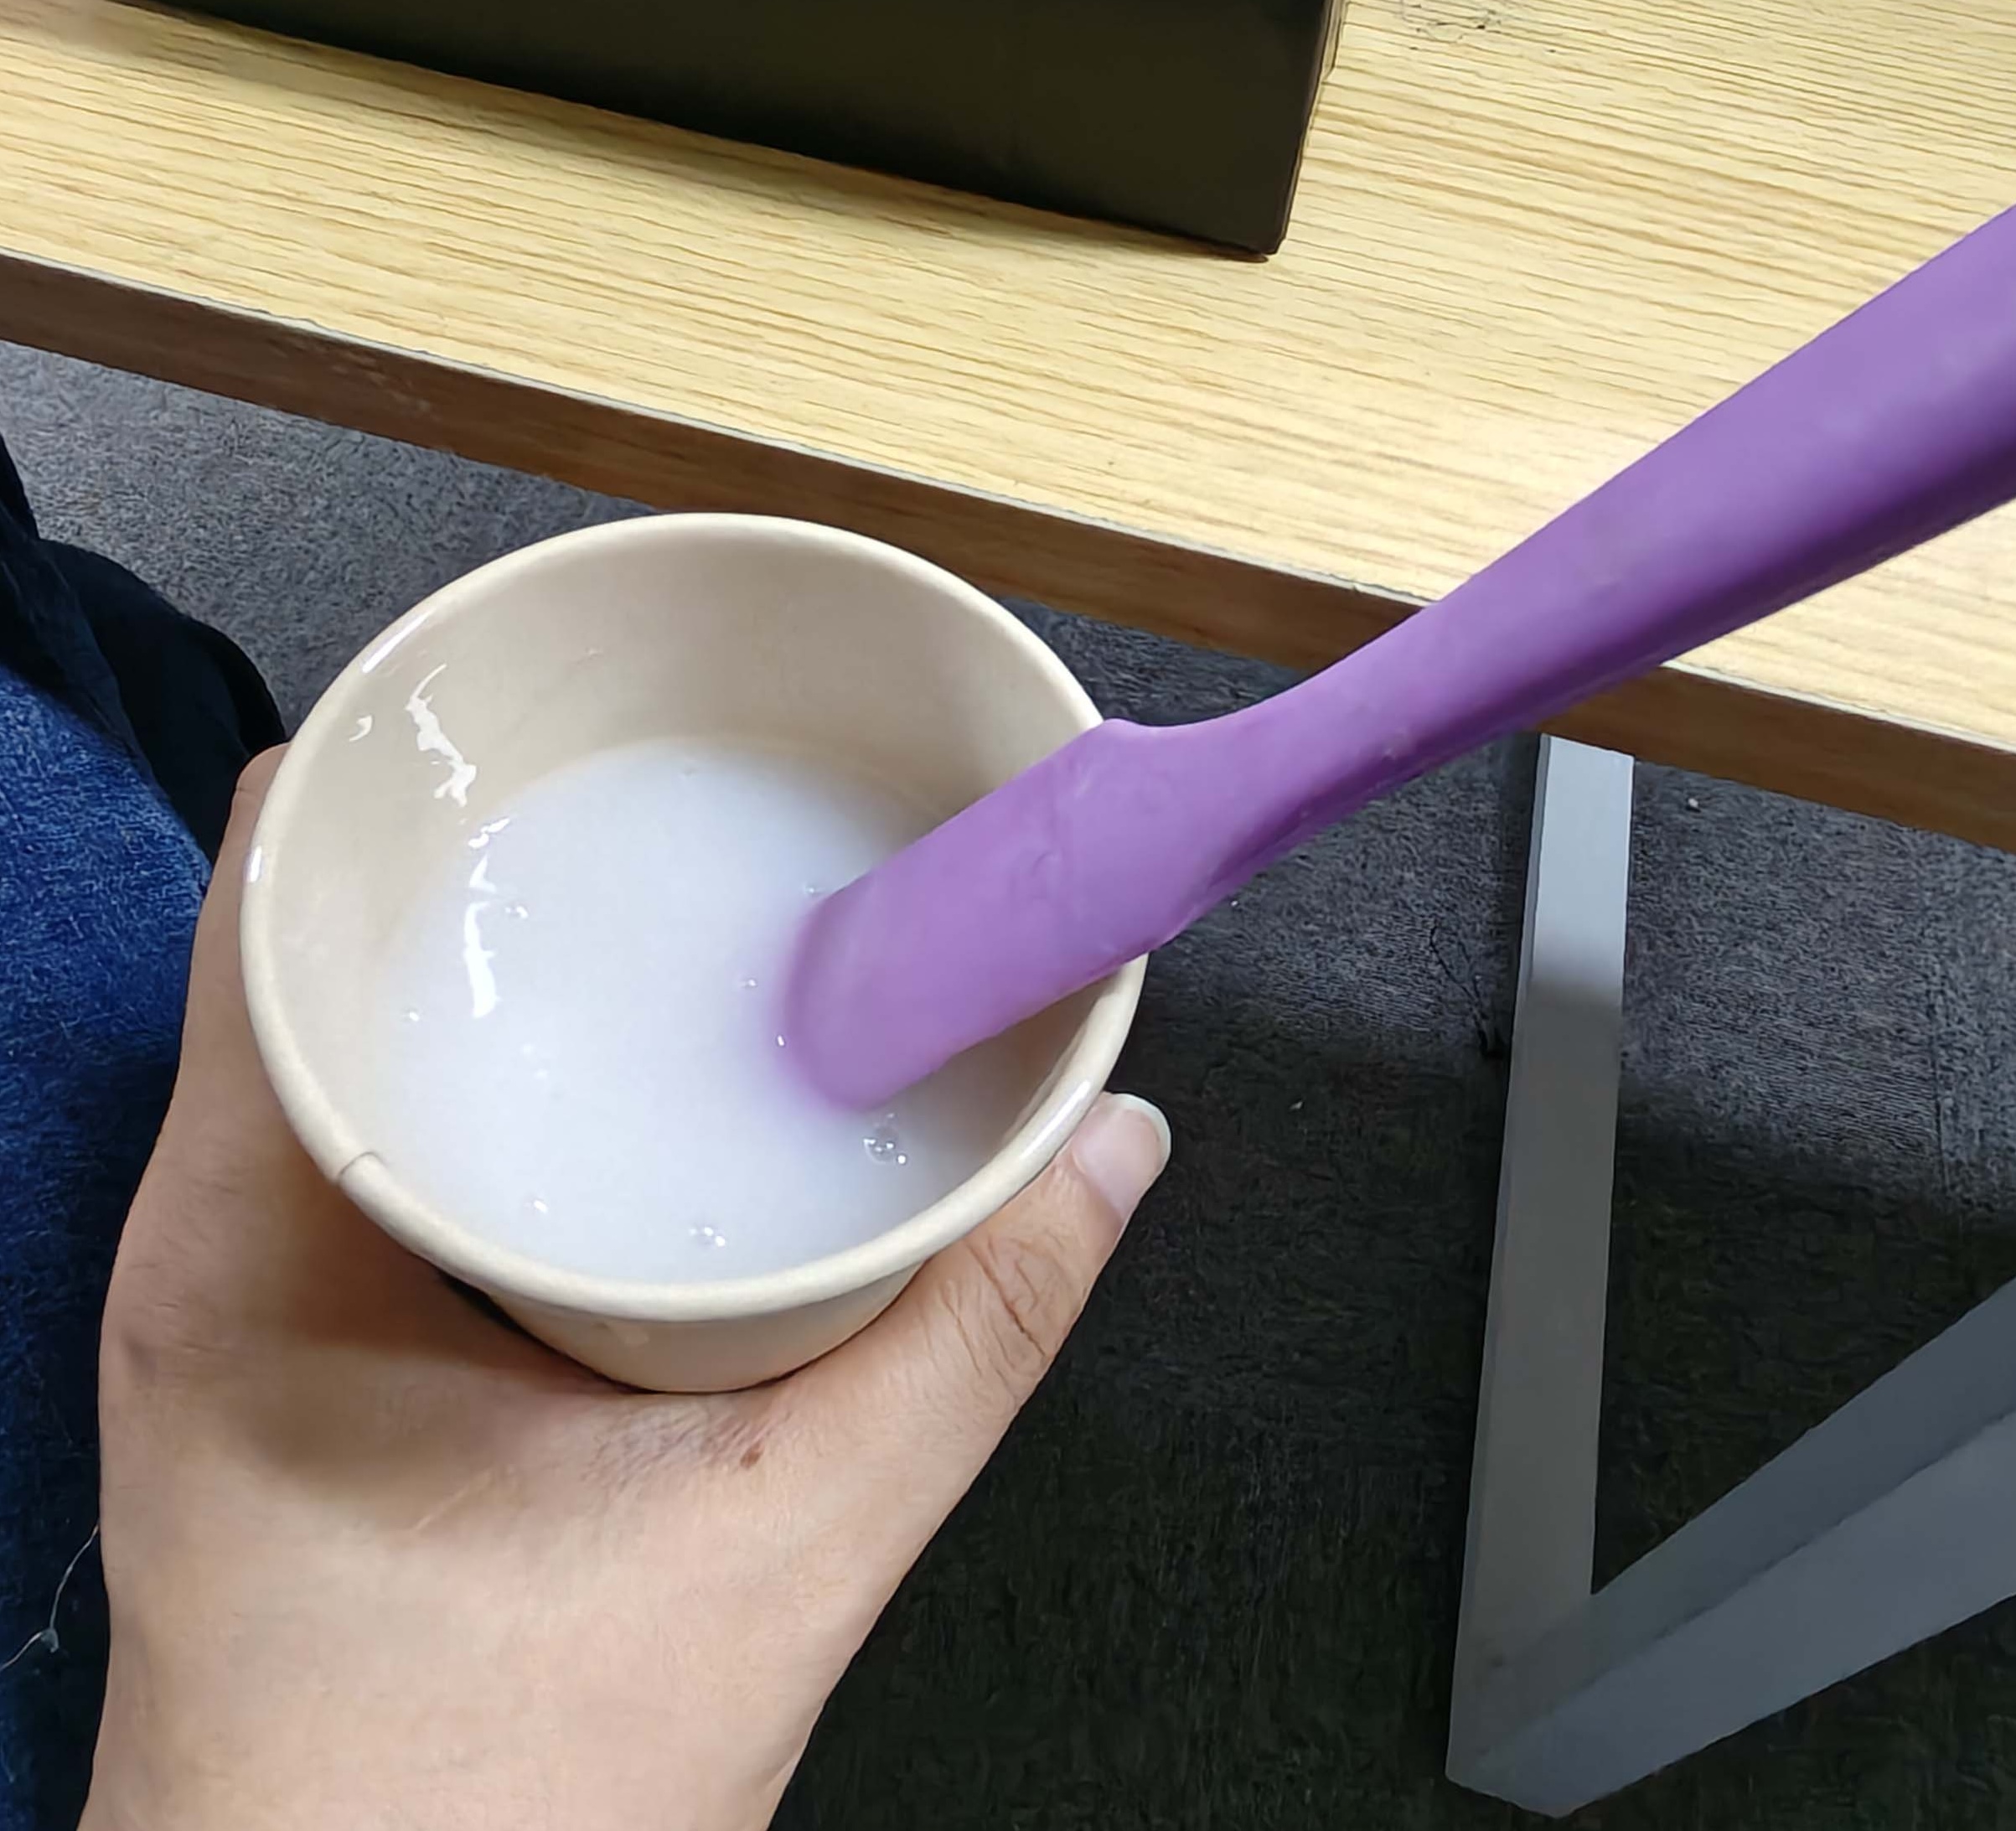
Silicone mixing test
We tested the mixing process of two-part silicone rubber. The two parts needed to be measured and mixed evenly. If the material is not mixed well enough, some areas may remain soft or fail to cure properly.
During the test, we mixed the A and B components with a stirring stick for several minutes. We tried to scrape the sides and bottom of the cup so that the material would be fully mixed.
Vacuum degassing
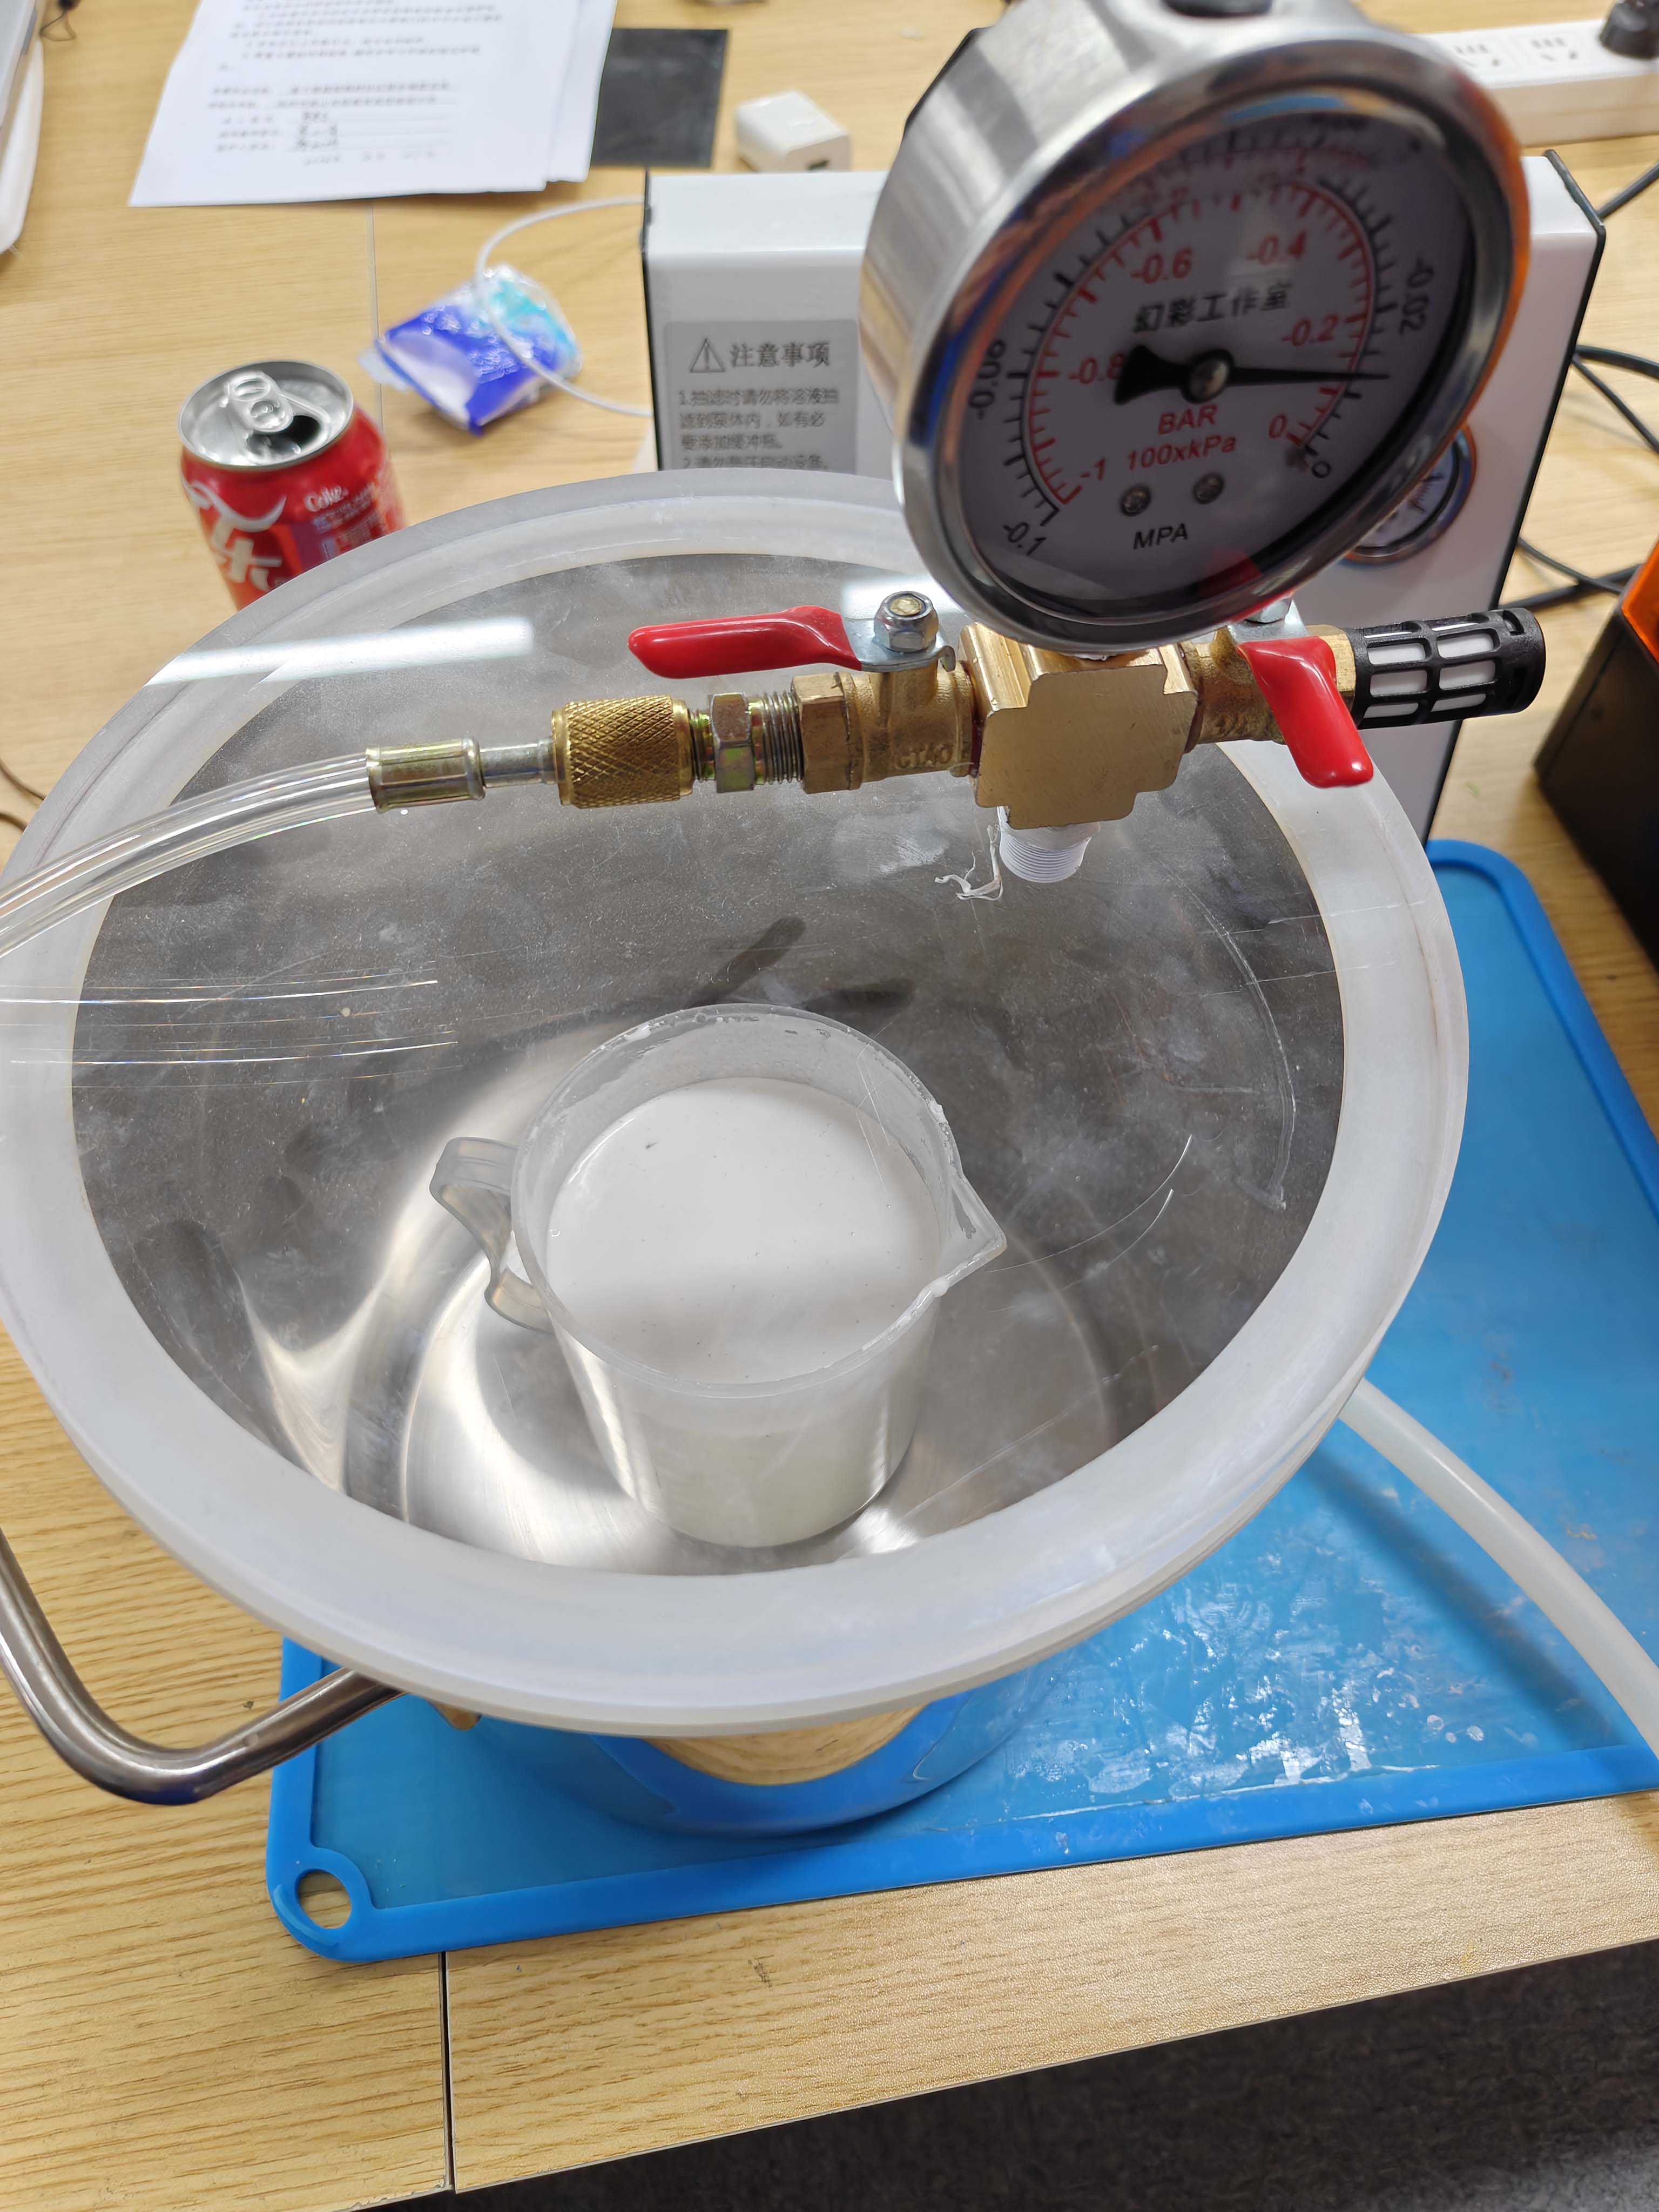
After mixing, the silicone contained many small air bubbles. If these bubbles stayed inside the material, they could appear on the mold surface and affect the final cast. To reduce this problem, we used a vacuum chamber to remove bubbles from the silicone before pouring it into the mold.
Testing different molds
We also tested different mold forms and casting objects. This helped us compare how mold depth, surface detail, material flow, and demolding difficulty affect the final result. Simple flat molds were easier to cast, while deeper or more detailed molds required more attention to bubbles and demolding.
Material test comparison
After the tests, we compared silicone and plaster in terms of their role in the process, mixing behavior, curing, flexibility, and final use. Silicone was more suitable for making flexible molds, while plaster was more suitable for the final hard cast.
| Material | Use in the process | Observation | Limitation |
|---|---|---|---|
| Two-part silicone rubber | Mold making | Flexible, good detail capture, and easy to demold | Needs careful mixing and bubble removal |
| Plaster / gypsum | Final casting material | Matte, mineral-like, and suitable for the incense holder | Brittle before full curing and sensitive to water ratio |
Comparison of mold-making processes
As part of the group assignment, we compared several mold-making processes. Different processes are suitable for different object types. For my individual assignment, this comparison helped me decide to use an FDM printed master and a silicone mold.
| Process | Advantages | Limitations | Suitable use |
|---|---|---|---|
| FDM printed master | Low cost, fast to print, easy to iterate, and able to create visible layer texture. | Layer lines are visible and will be transferred to the silicone mold and final cast. | Good for prototypes or objects where fabrication texture can become part of the design language. |
| SLA printed master | Higher detail and smoother surface, suitable for polished small objects. | Requires resin cleaning and post-curing. The surface can feel too smooth for some expressive objects. | Good for jewelry-like details, small precise parts, and refined master models. |
| CNC milled wax mold | Accurate, repeatable, and good for controlled mold surfaces. | Limited by tool diameter and difficult for deep undercuts or complex organic details. | Good for simple cavities, wax molds, and precise repeatable mold surfaces. |
| Silicone mold replication | Flexible, reusable, good detail capture, and easy to demold. | Higher material cost and longer curing time. | Good for casting plaster, resin, wax, or other materials from a detailed master model. |
Group assignment summary
Through the group assignment, I learned that molding and casting is strongly affected by material behavior. Silicone needs careful measuring, mixing, and degassing. Plaster is easy to cast, but the water ratio, bubbles, and curing time directly influence the final strength and surface quality.
The process comparison also helped me make a design decision for my individual work. Instead of choosing the smoothest possible master, I chose an FDM printed master because its layer texture matched the face-shaped incense holder.
Individual Assignment
Designing and casting a plaster incense holder
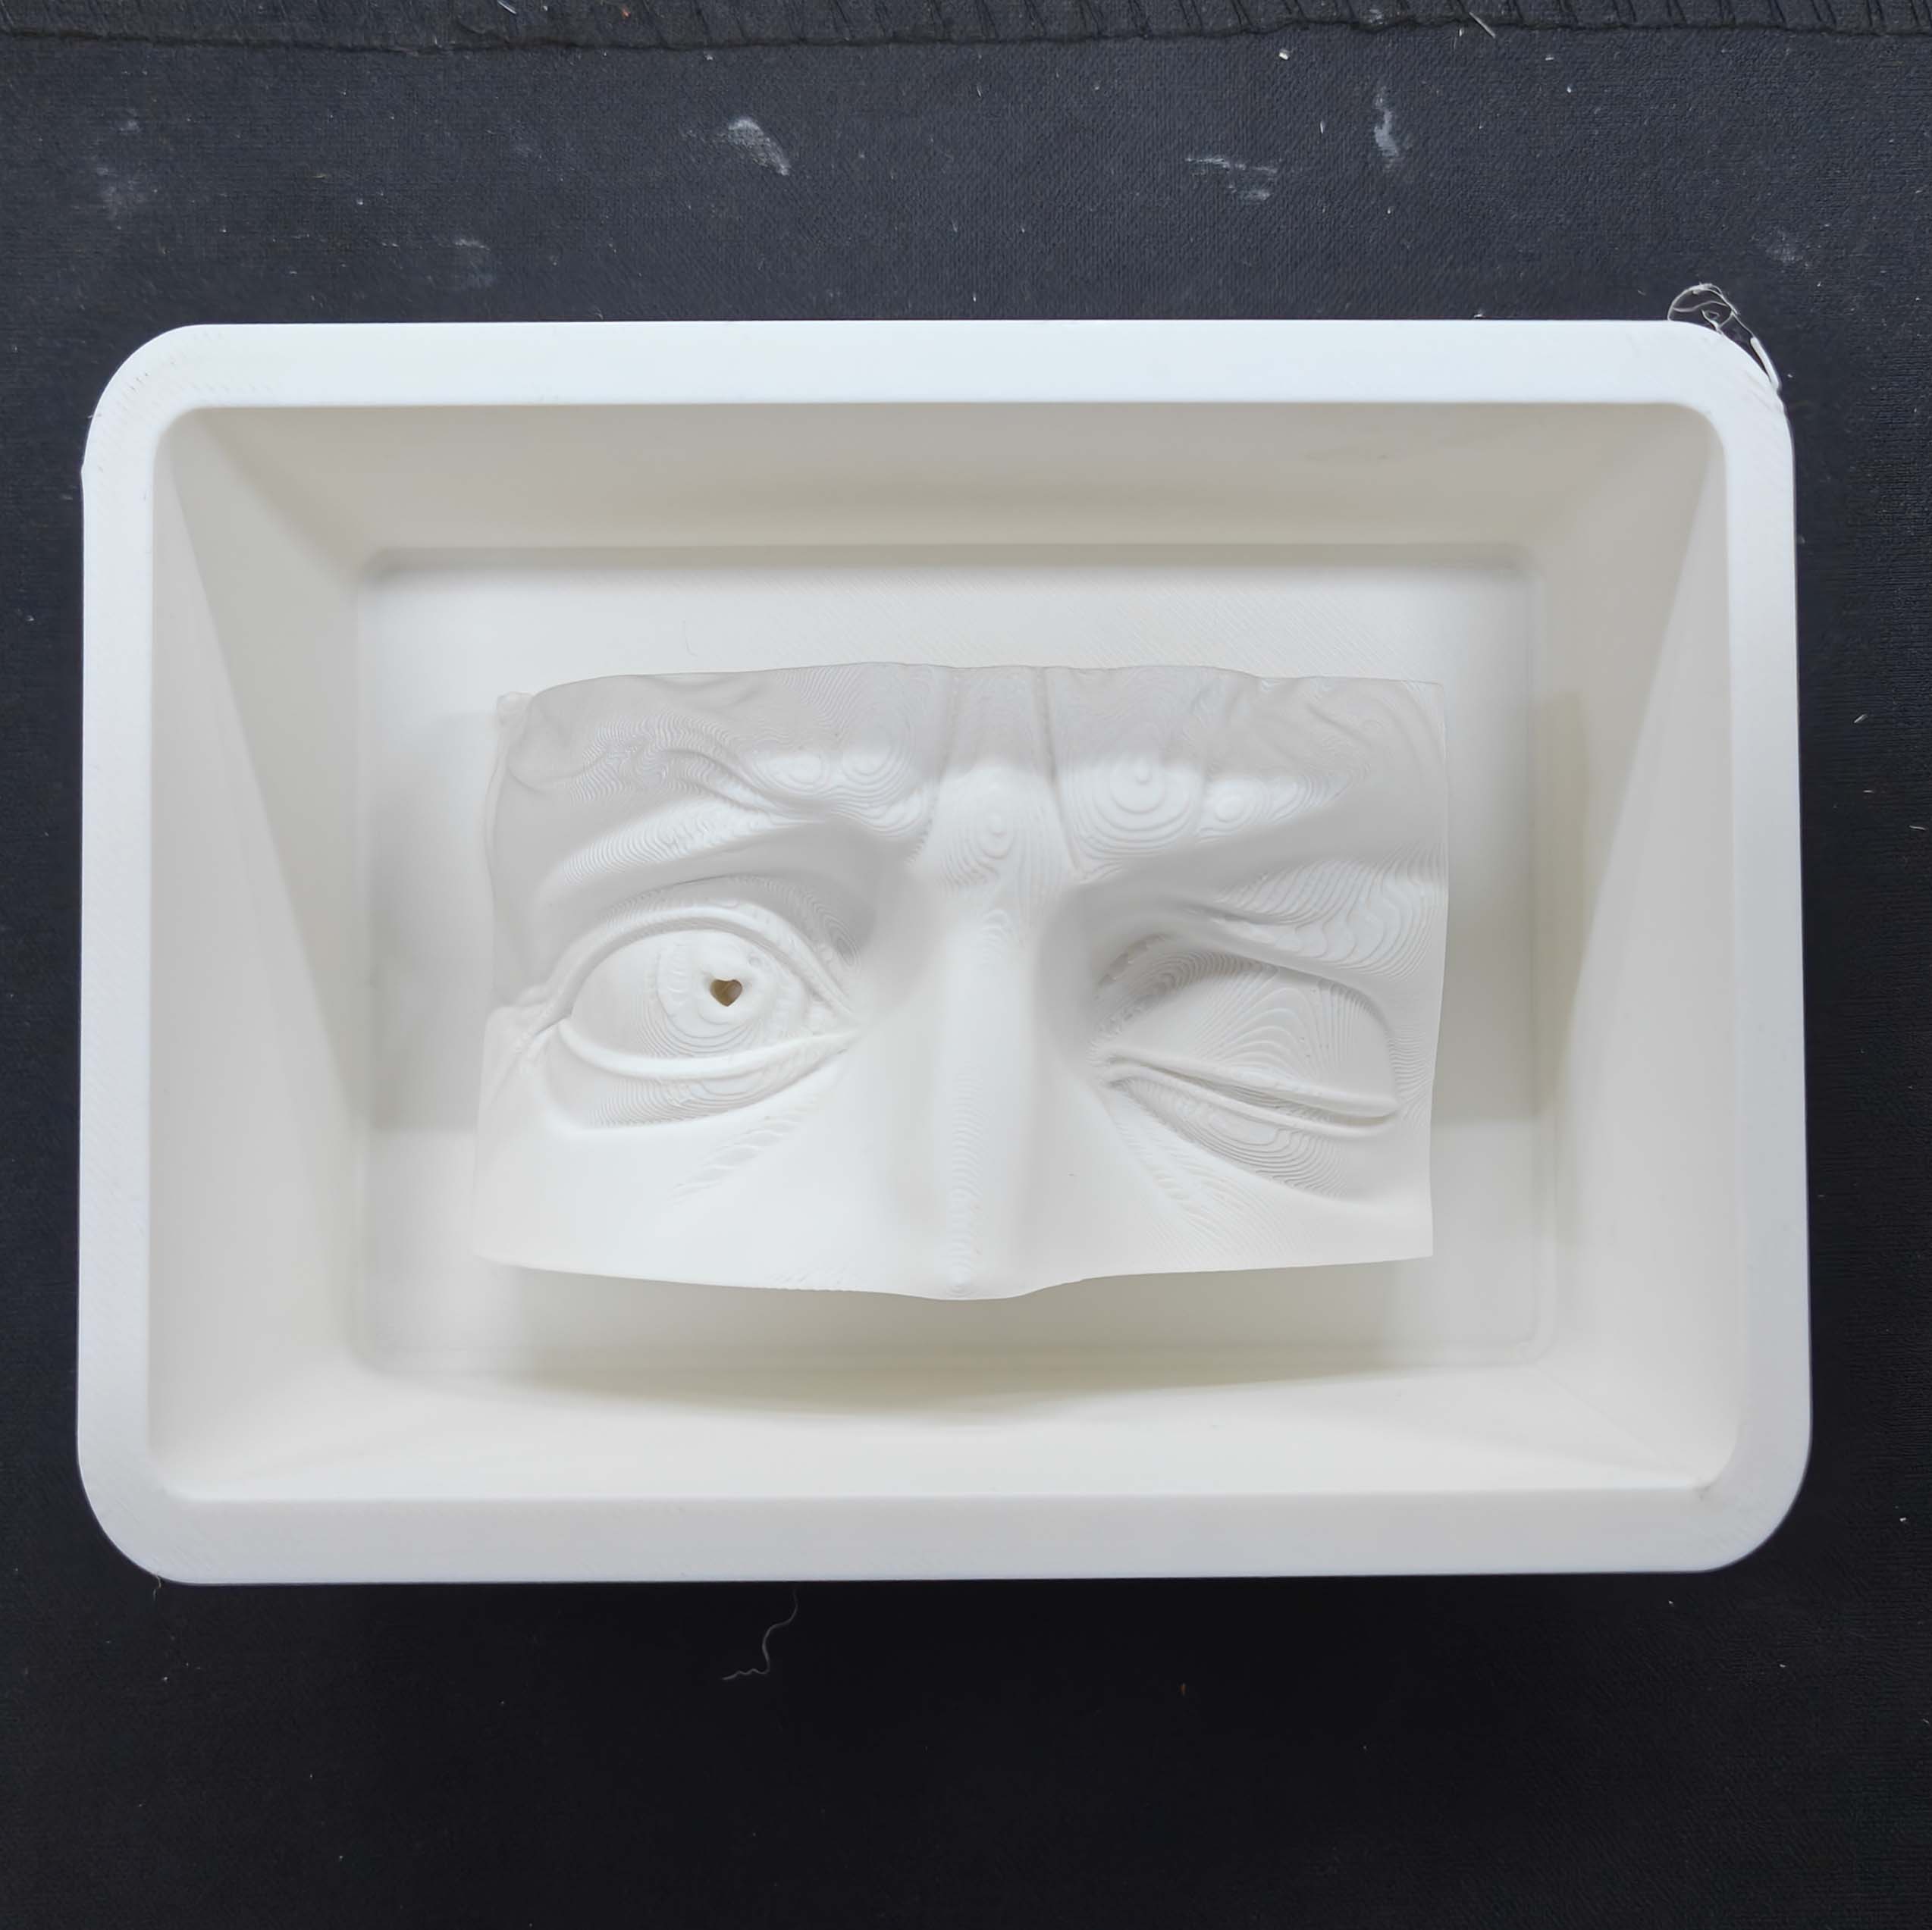
For my individual assignment, I designed a small incense holder and cast it using a silicone mold. The master model and the mold box were both produced by FDM 3D printing. The design has a face-like form with one open eye and one closed eye. A small hole is placed near the eye area to hold incense.
I chose plaster as the final casting material because the object is related to incense use. Compared with ordinary plastic, plaster has a more mineral, quiet, and stone-like feeling. This matched the ritual atmosphere I wanted for the incense holder.
1. Design idea and AI concept image
The design started from the idea of combining a facial expression with the function of an incense holder. I wanted the object to have a calm but slightly strange expression. One eye remains open while the other eye is closed. The incense hole is placed in the open eye area, so the incense becomes part of the face rather than an added accessory.
I first used AI to generate a concept image for the incense holder. This image helped me define the facial expression, the open eye, the closed eye, and the incense position before moving into 3D modeling.
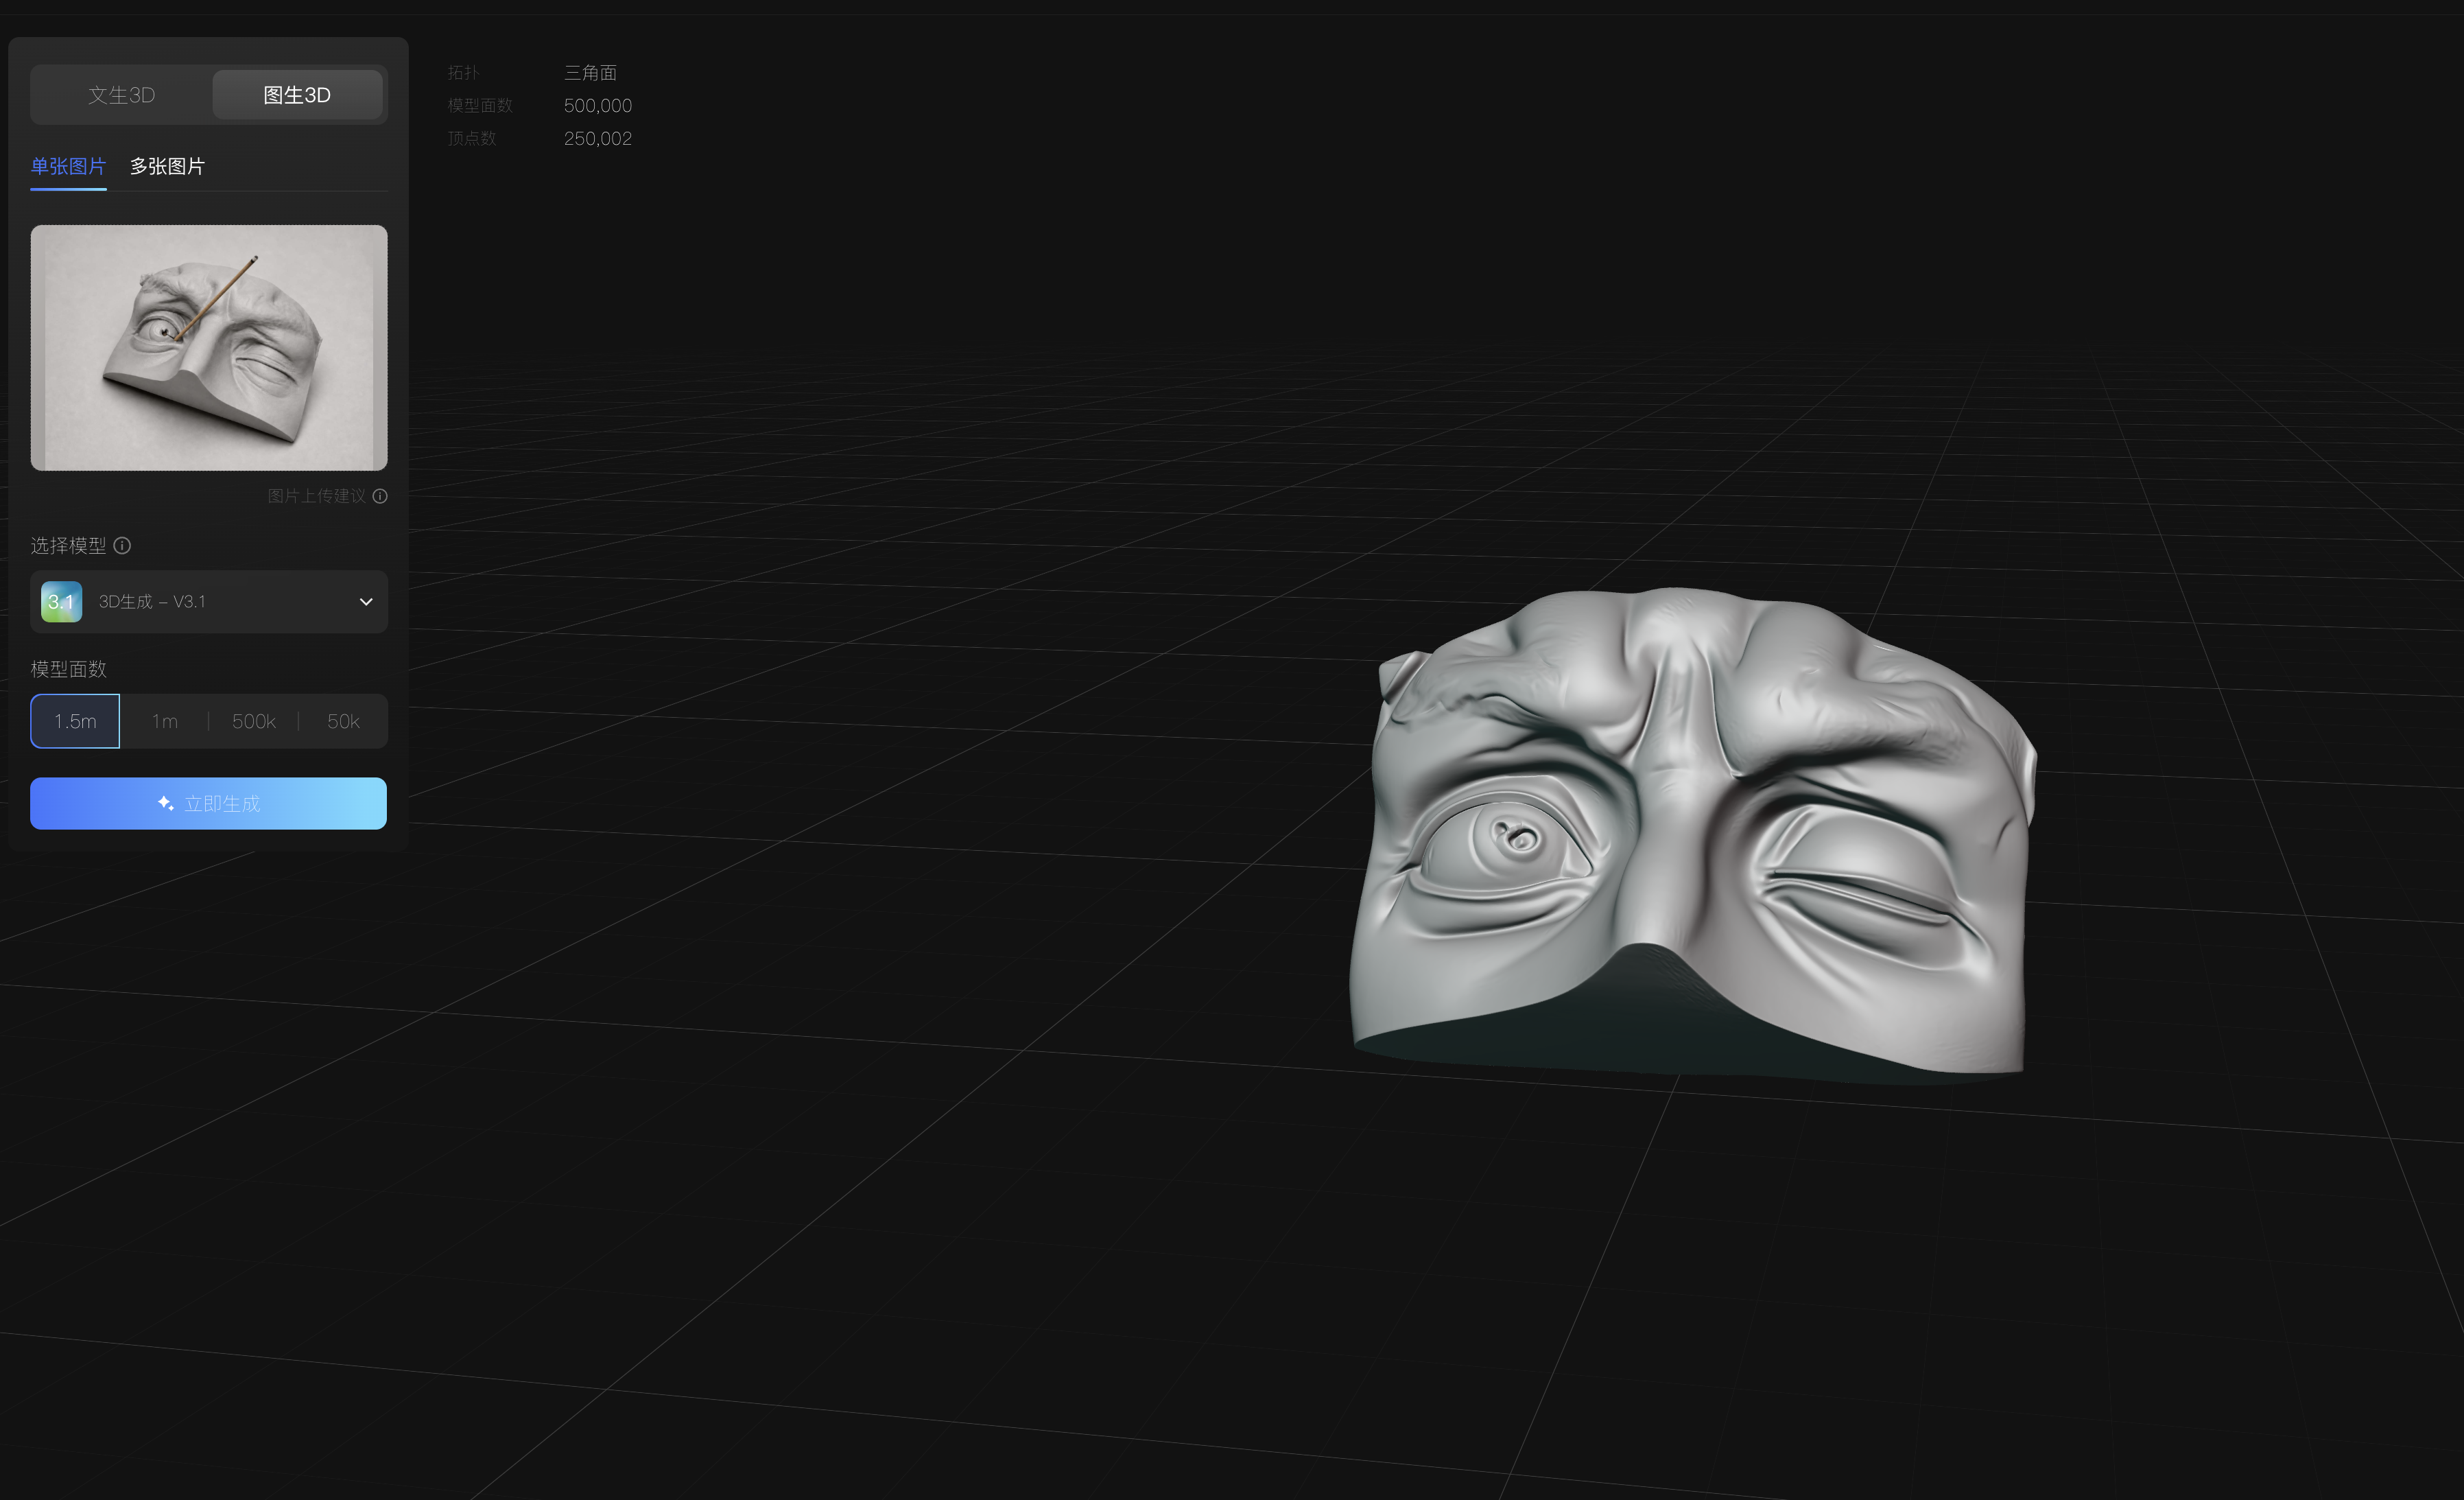
2. Hunyuan3D model generation
After the concept image was clear, I used Hunyuan3D to generate an initial 3D model from the image. This gave me a quick starting point for the face surface, the eye details, and the overall expression.
However, the generated model was only a starting point. Some surface areas were broken, the incense hole was not clear enough, and the base shape was not ready for molding and printing.
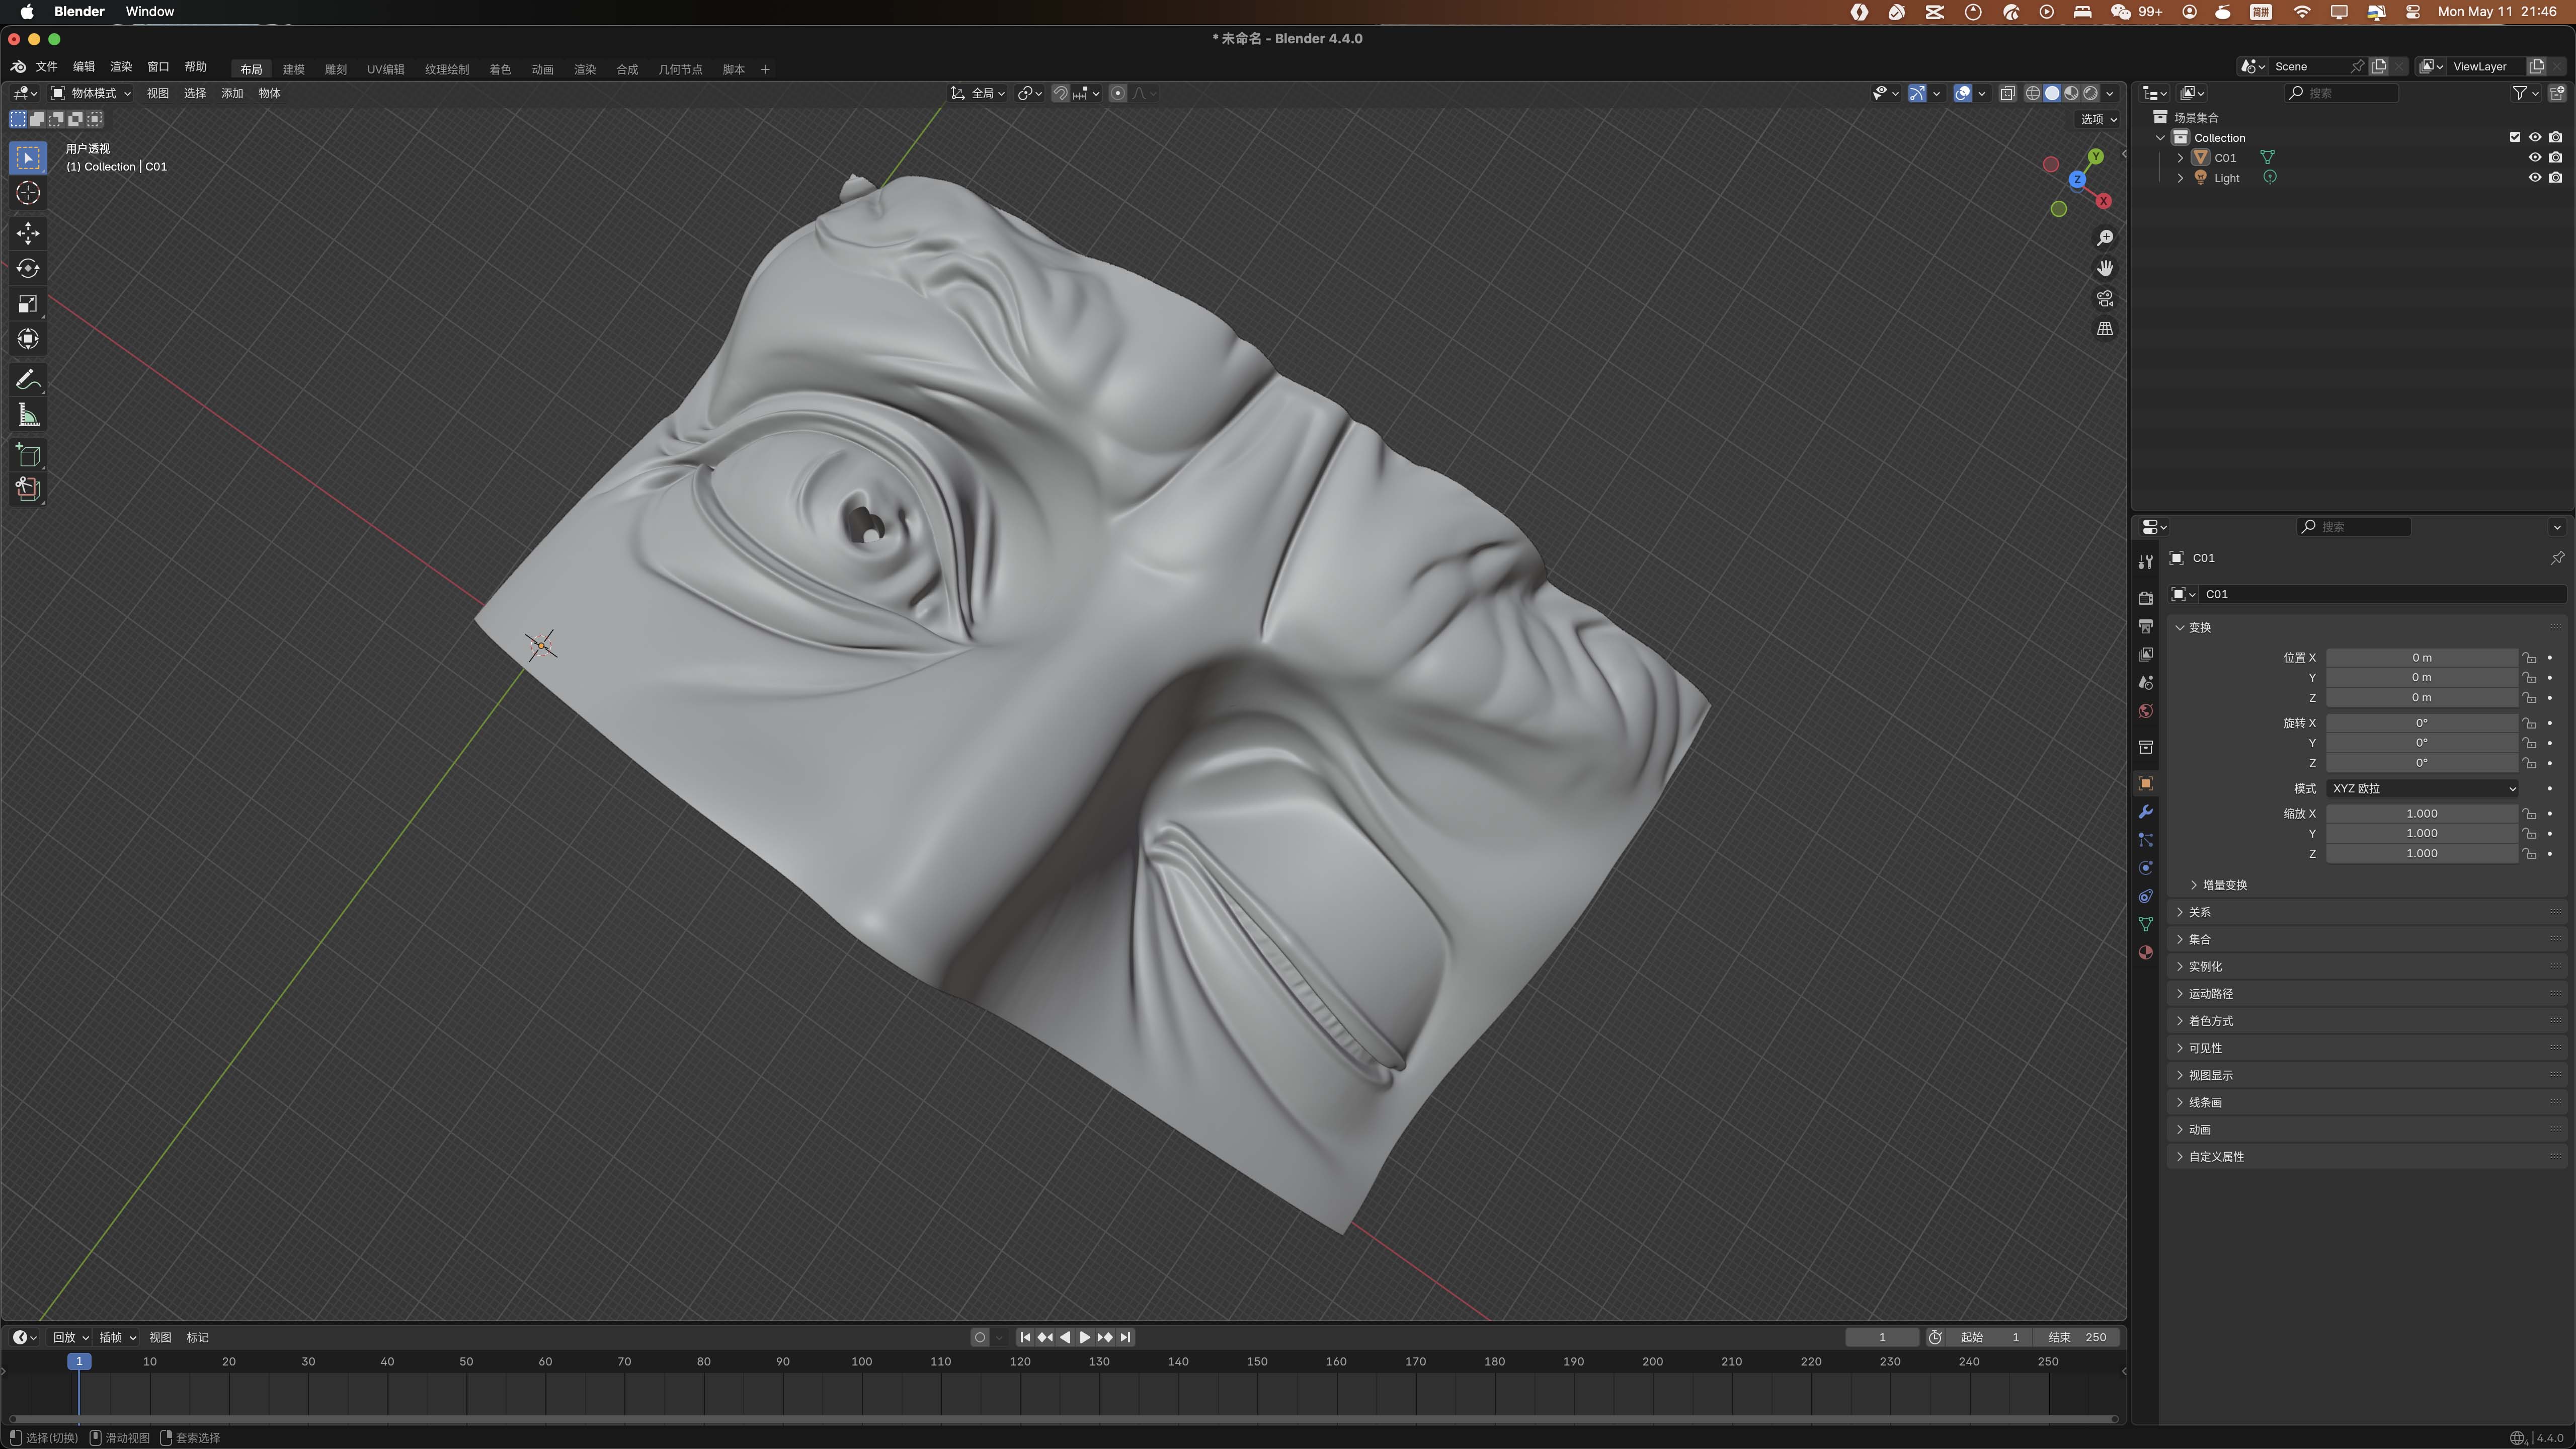
3. Blender model editing
After generating the first 3D model with Hunyuan3D, I imported the model into Blender for manual editing. The AI-generated model gave me the main face shape, but it still needed design and mesh corrections before it could become a useful mold master.
In Blender, I adjusted the eye area and added a heart-shaped incense hole inside the open eye. I also repaired some broken surface areas on the skin-like face surface, so the model would be cleaner and more suitable for silicone mold making.
4. STL cleanup in Bambu Lab Studio
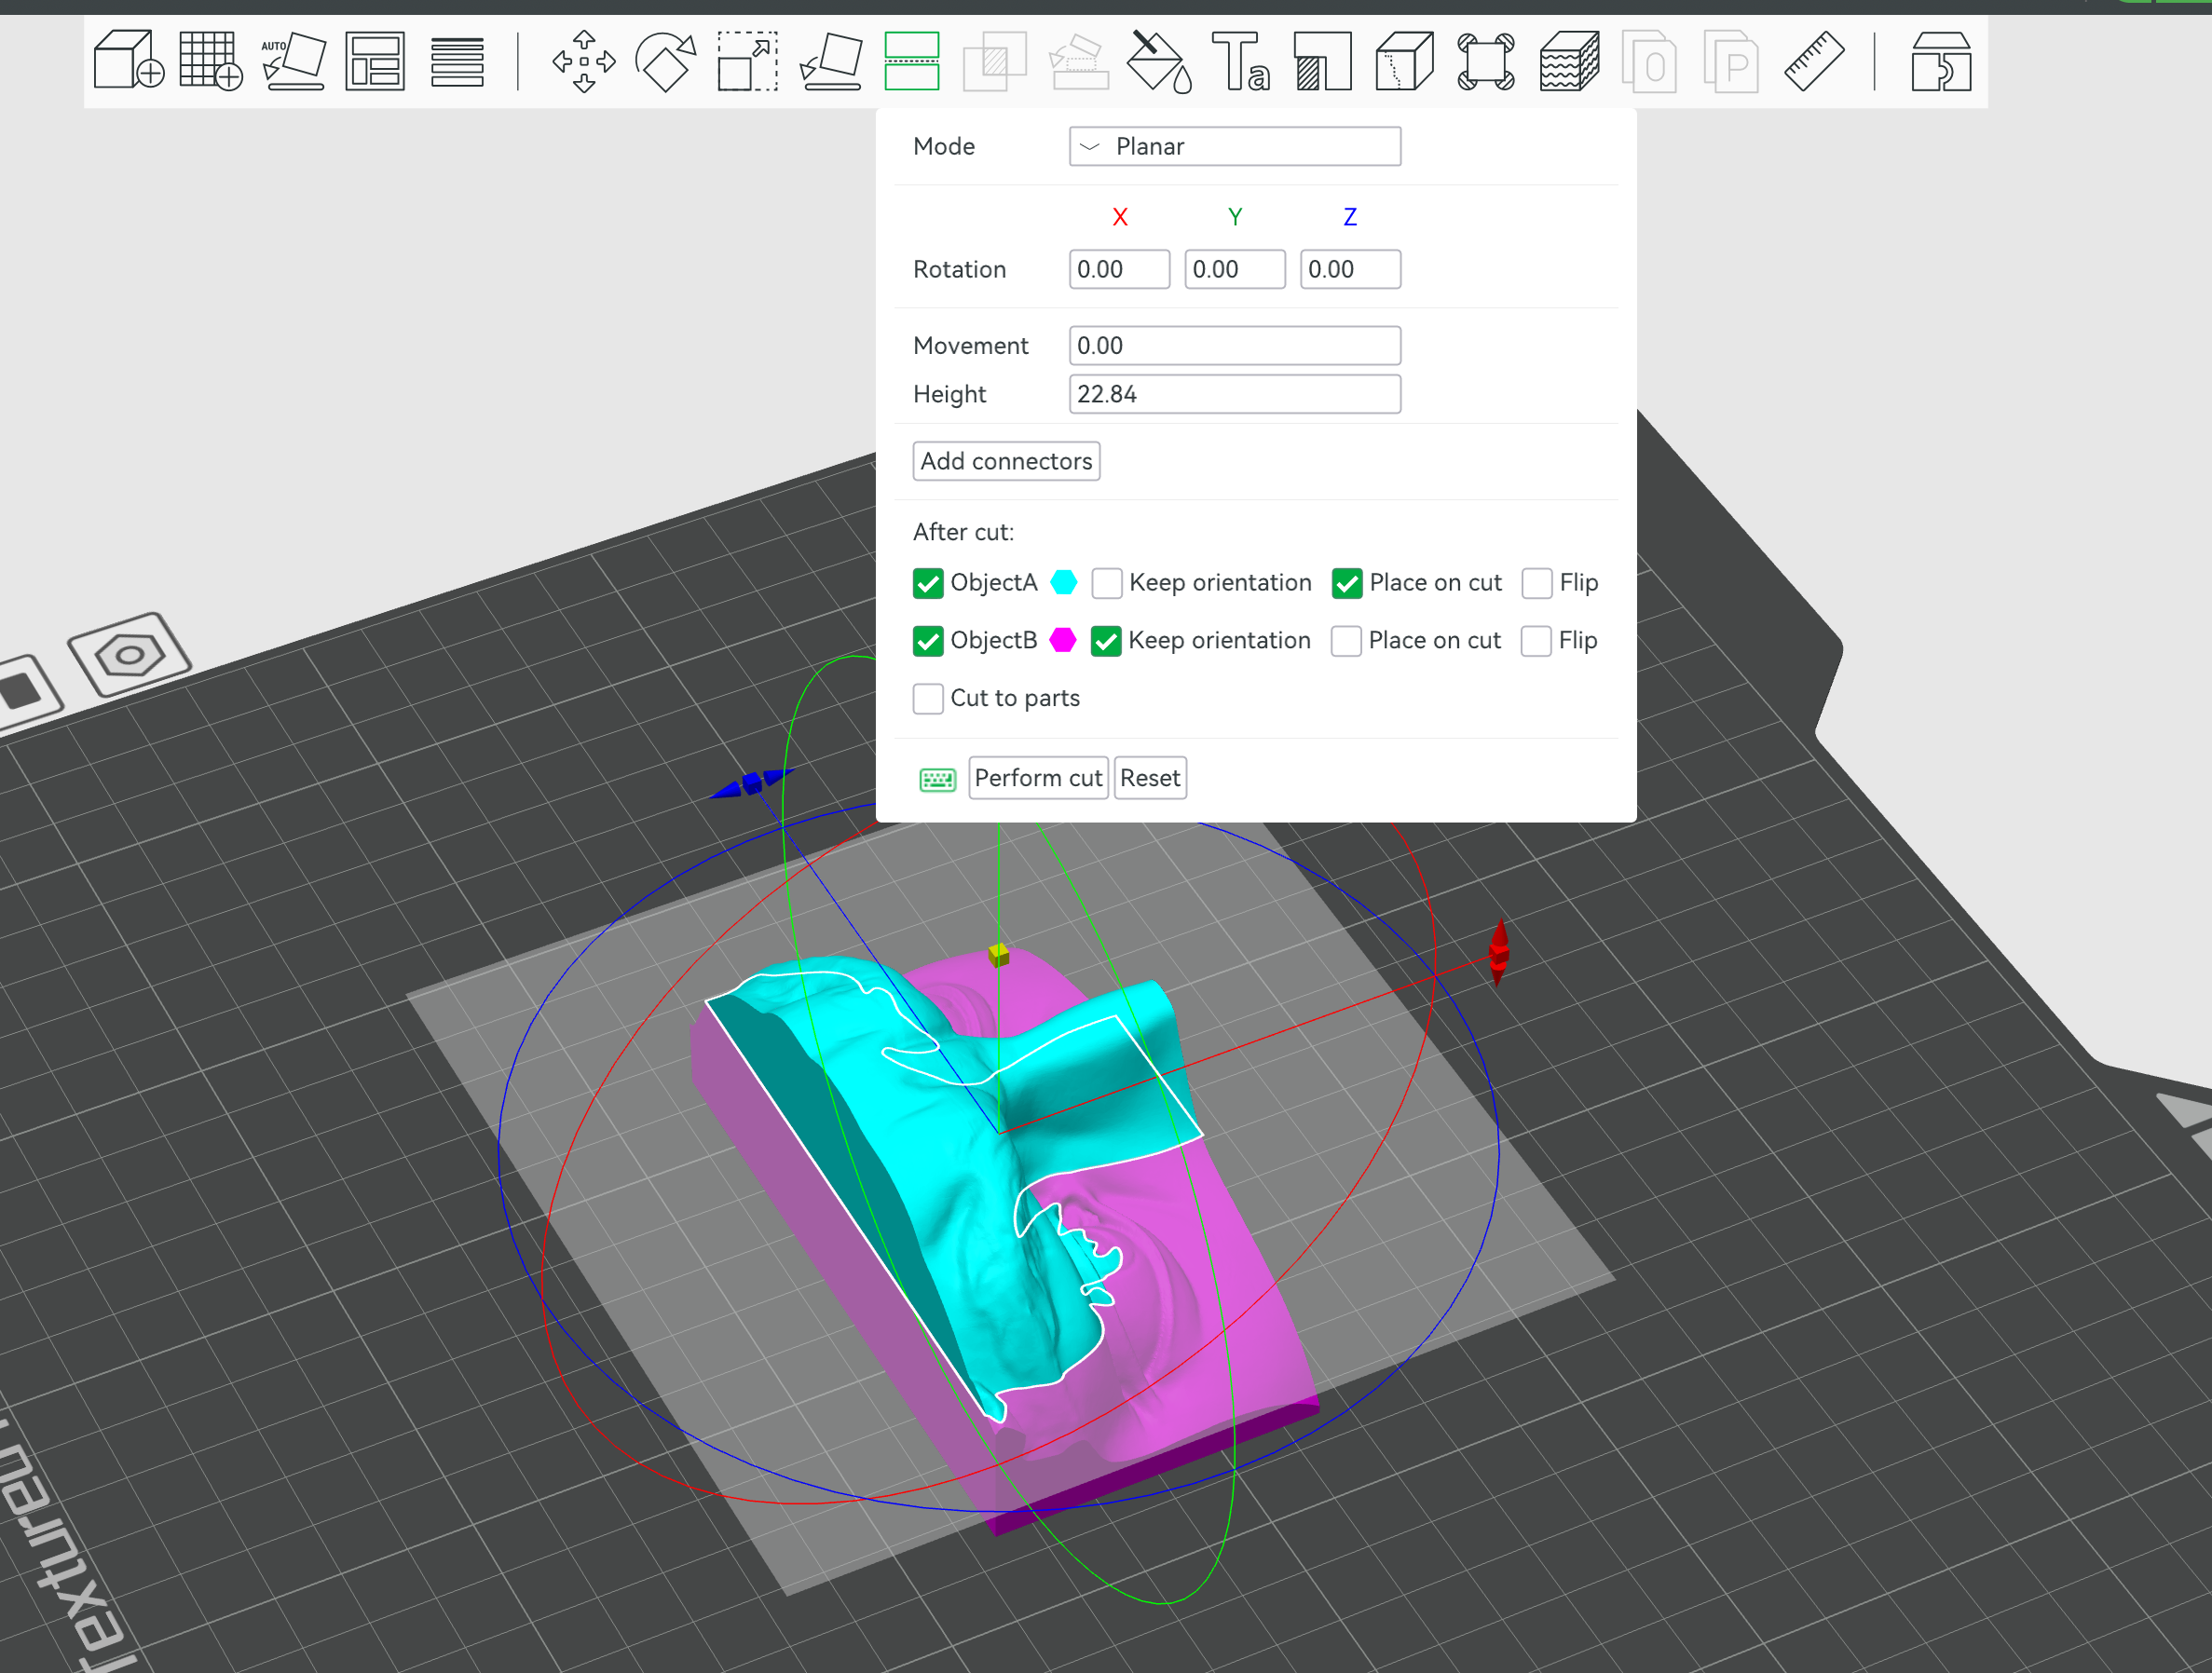
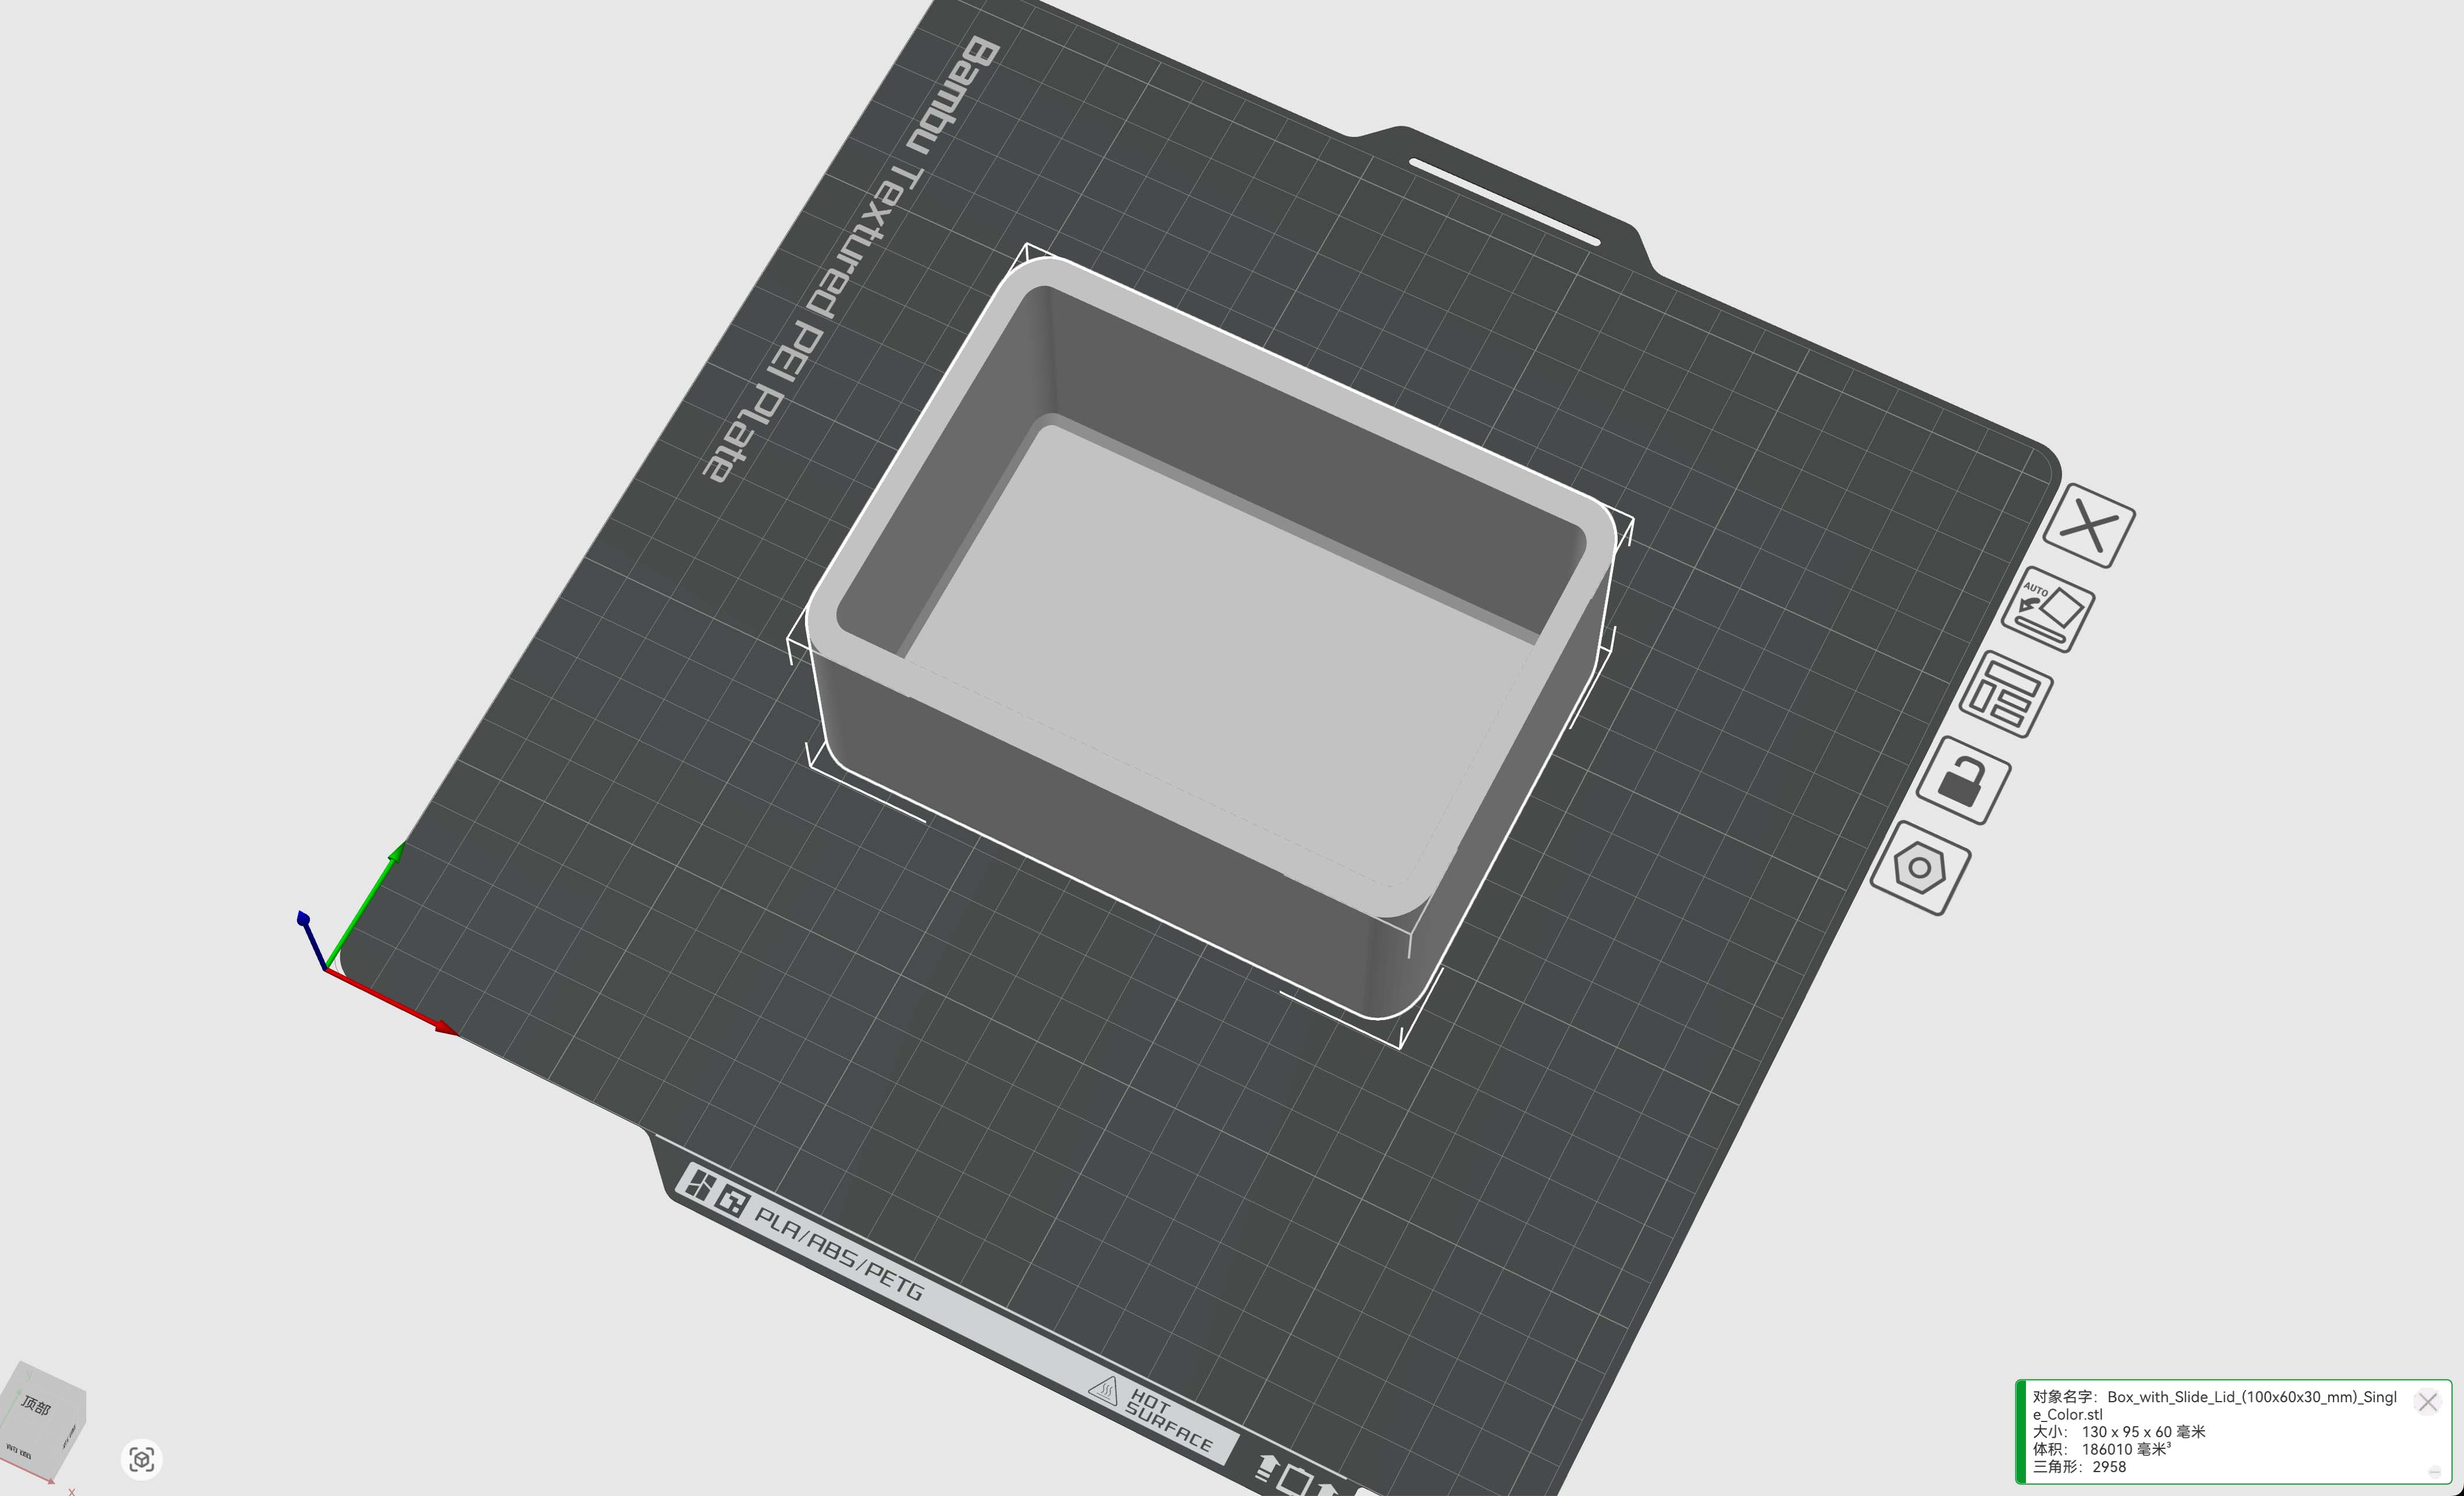
After the Blender editing step, I opened the STL file in Bambu Lab Studio. I used the Cut tool to remove extra geometry and make the base closer to a clean rectangular block.
This cutting step was useful because the AI-generated model had an uneven shape around the base. By cutting away the extra parts, the model became easier to place in the mold box and easier to print as a master model.
5. Mold design strategy
Before making the mold, I needed to think about the relationship between the product shape and the casting process. The most important questions were how the silicone would cover the master model, where bubbles might appear, how the plaster would enter the mold, and how the final cast could be removed without damaging the details.
The front face contains the most important visual information, so I kept the main visible surface facing upward during mold making. I also paid attention to the incense hole and eye area because these details could easily trap air bubbles.
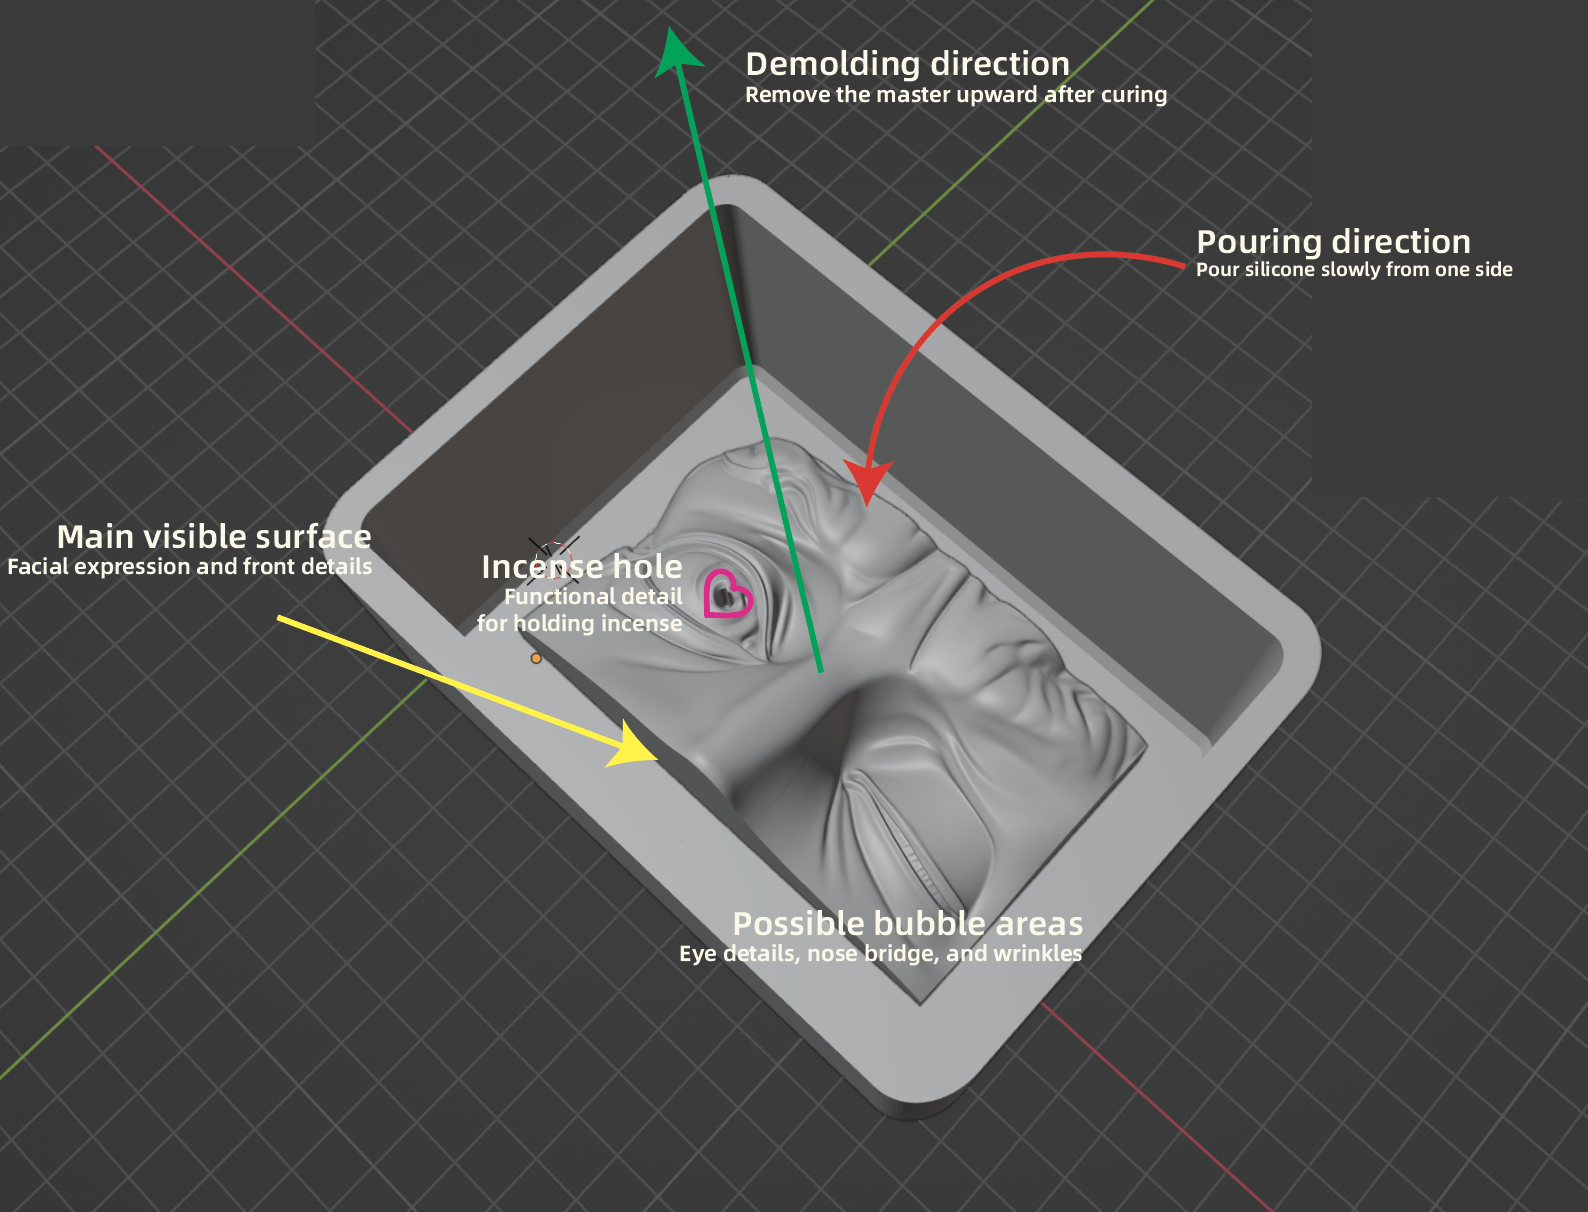
| Mold feature | Design decision | Reason |
|---|---|---|
| Main visible surface | Placed carefully to preserve the facial details | To keep the eye, nose, and facial expression clear. |
| Incense hole | Designed as part of the master model | To integrate the function into the facial form. |
| Bubble-prone areas | Checked around the eye and nose details | Small details can trap air during silicone and plaster casting. |
| Demolding | Used a flexible silicone mold | To release the plaster cast without damaging the detailed face. |
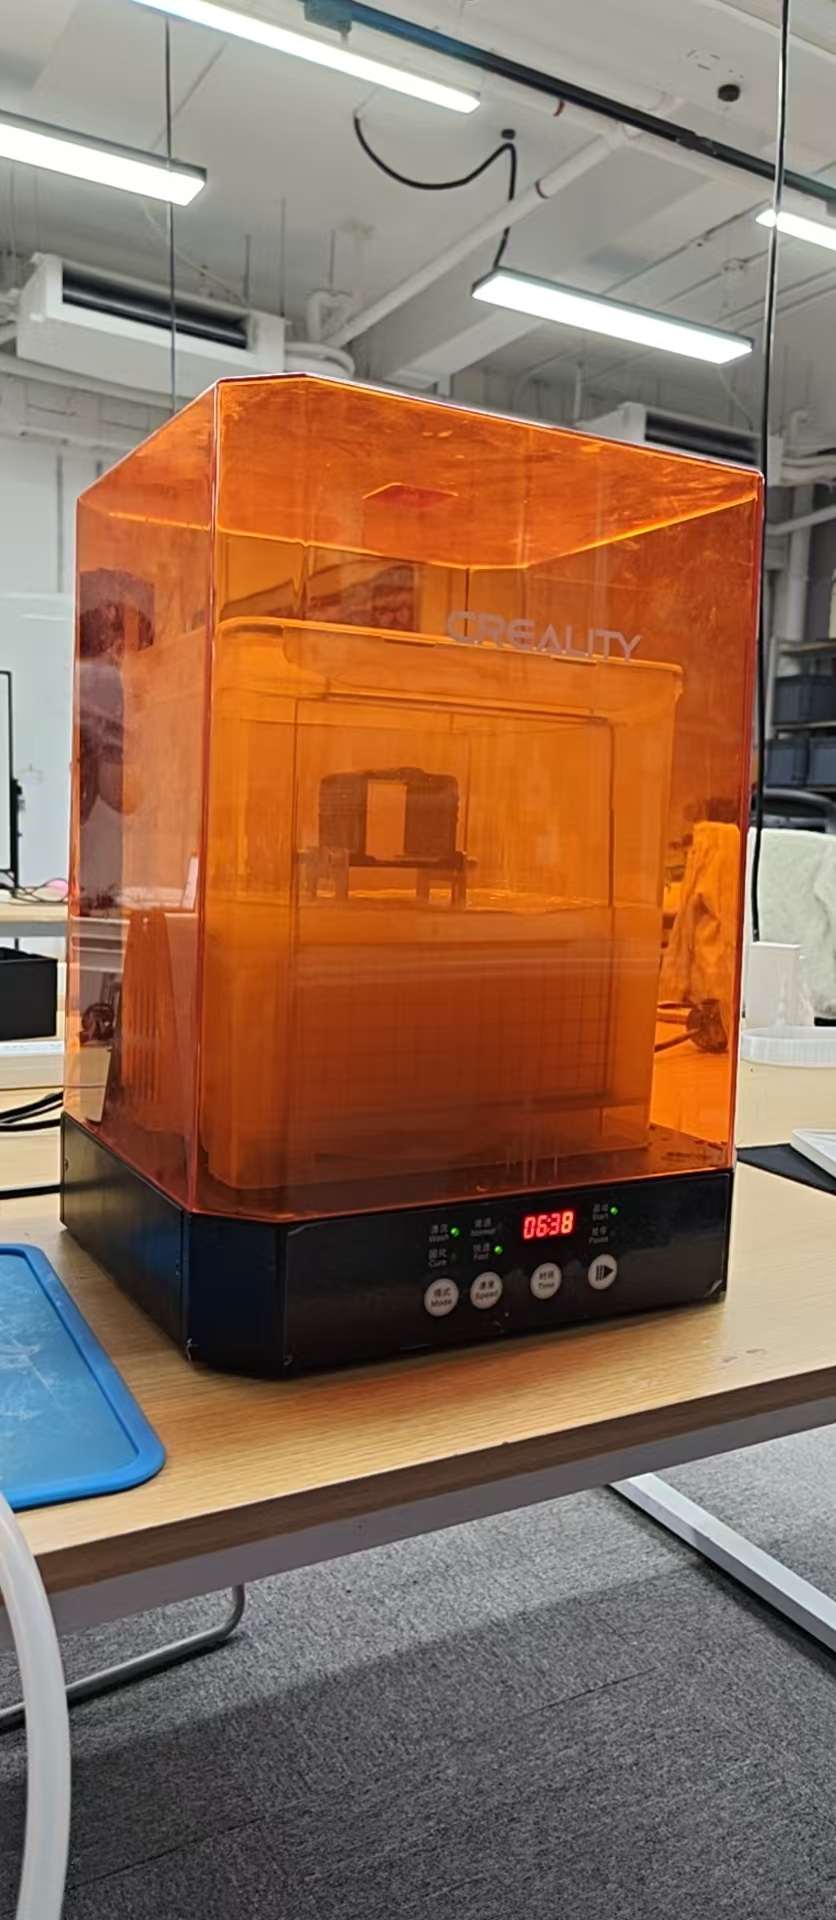
6. SLA printing test and surface comparison
Before choosing the final master model process, I also made an SLA resin printing test. I used Creality UV-curable resin for this test. The resin material can create a smooth surface and fine details, which is normally useful for polished product models.
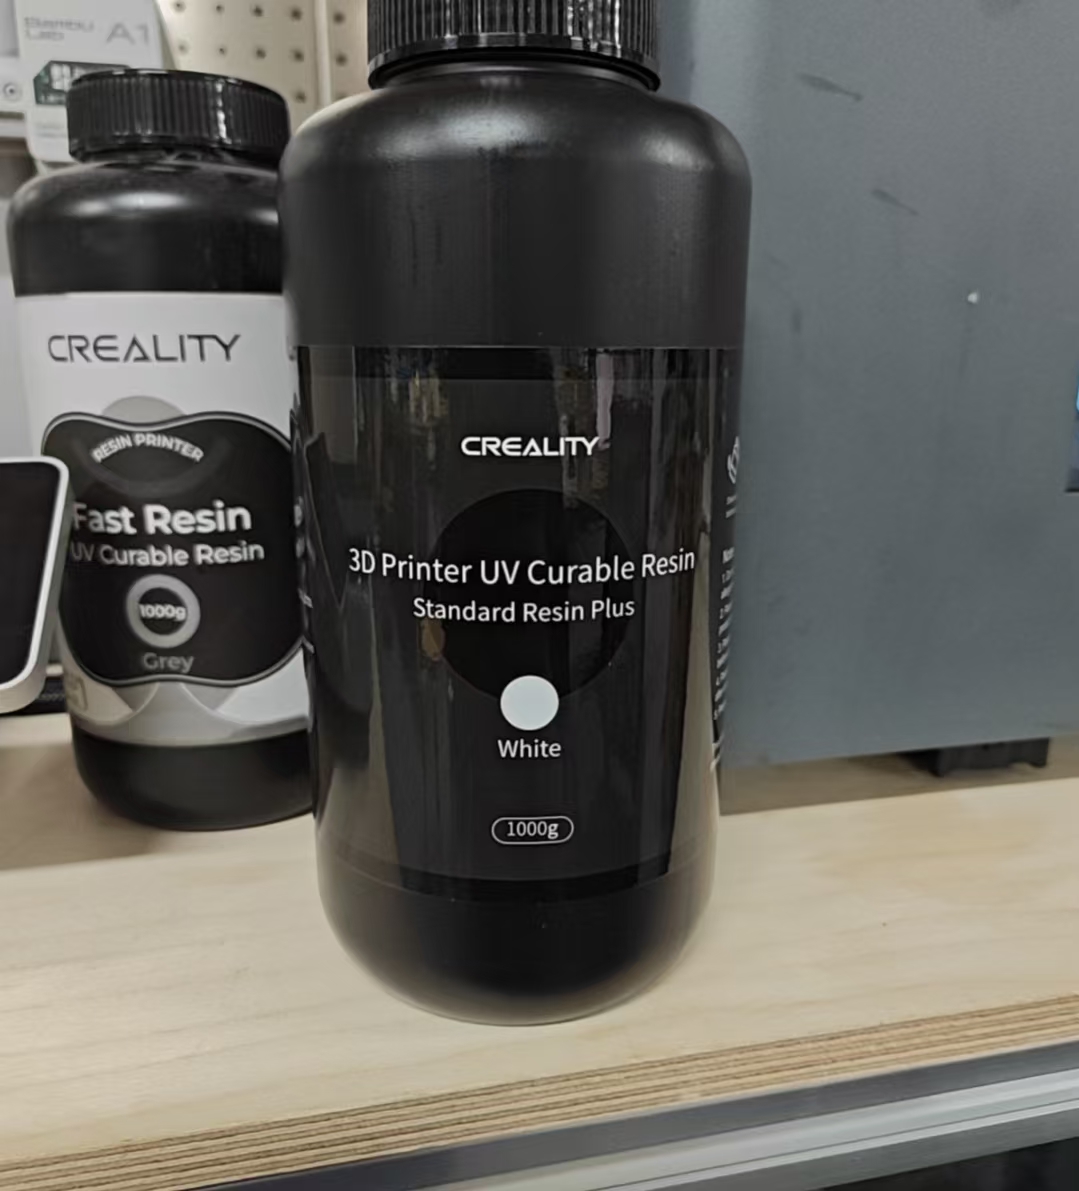
After the SLA print finished, the printed model had to be removed carefully from the build plate. I used a scraper to separate the resin print from the plate, then cleaned the print with alcohol to remove uncured resin from the surface.
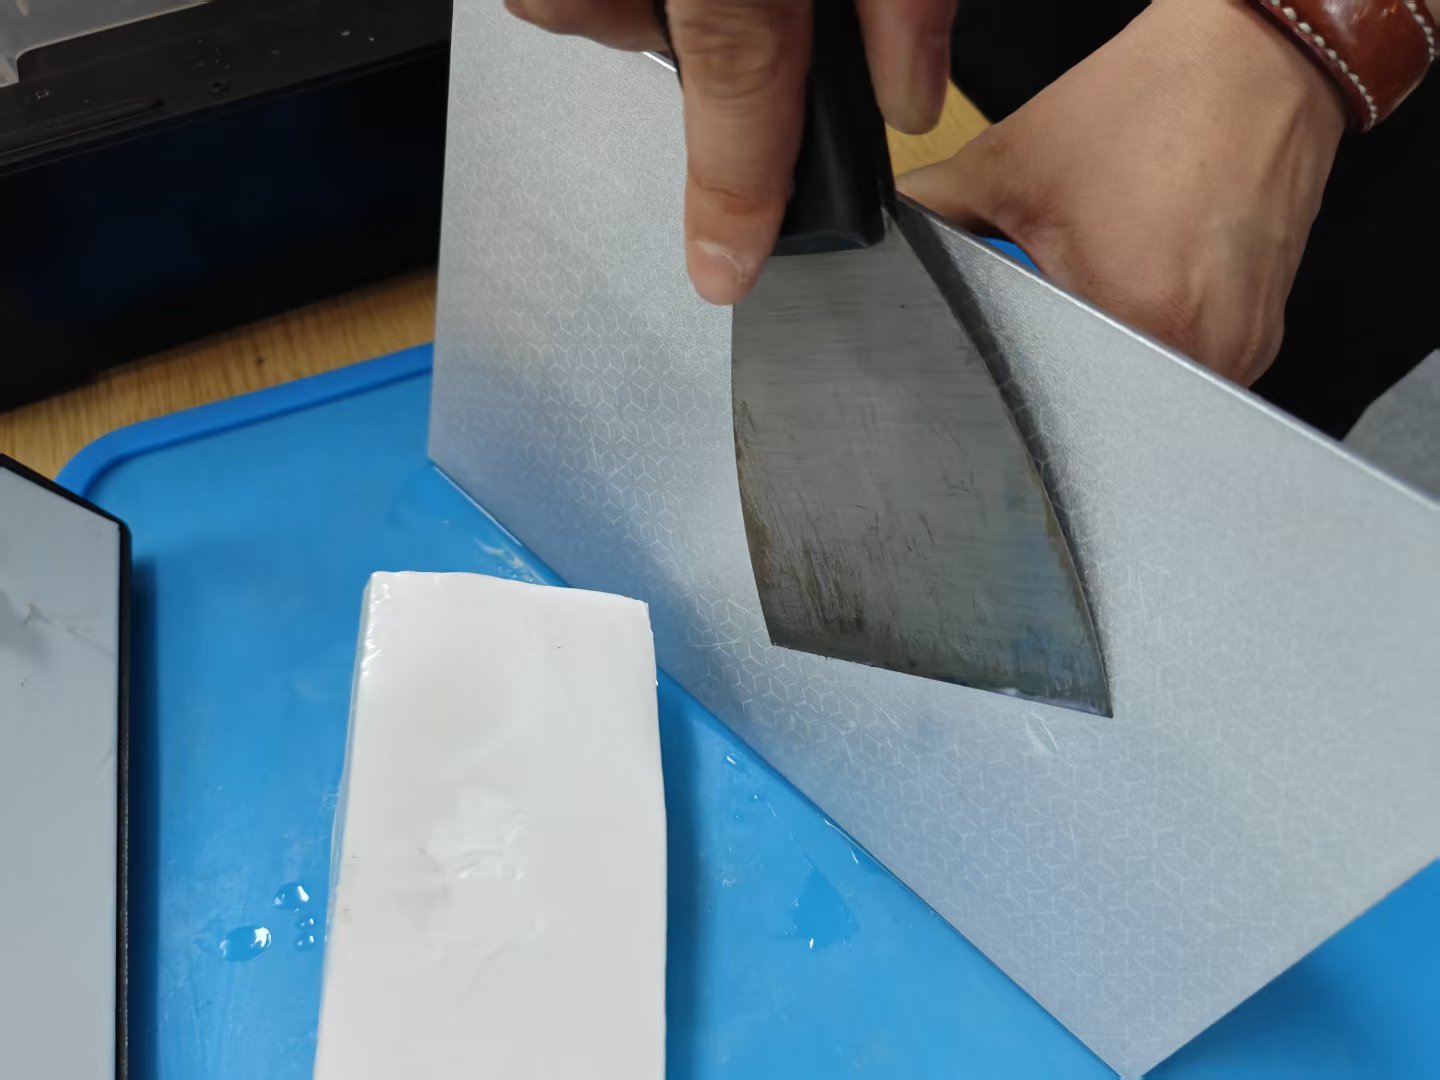

The SLA test was successful, but the final surface felt too smooth for my design. The face looked more polished and artificial, while the FDM printed version kept visible layer lines that looked more like skin pores, wrinkles, and natural facial traces. Because of this comparison, I chose FDM printing for the final master model.
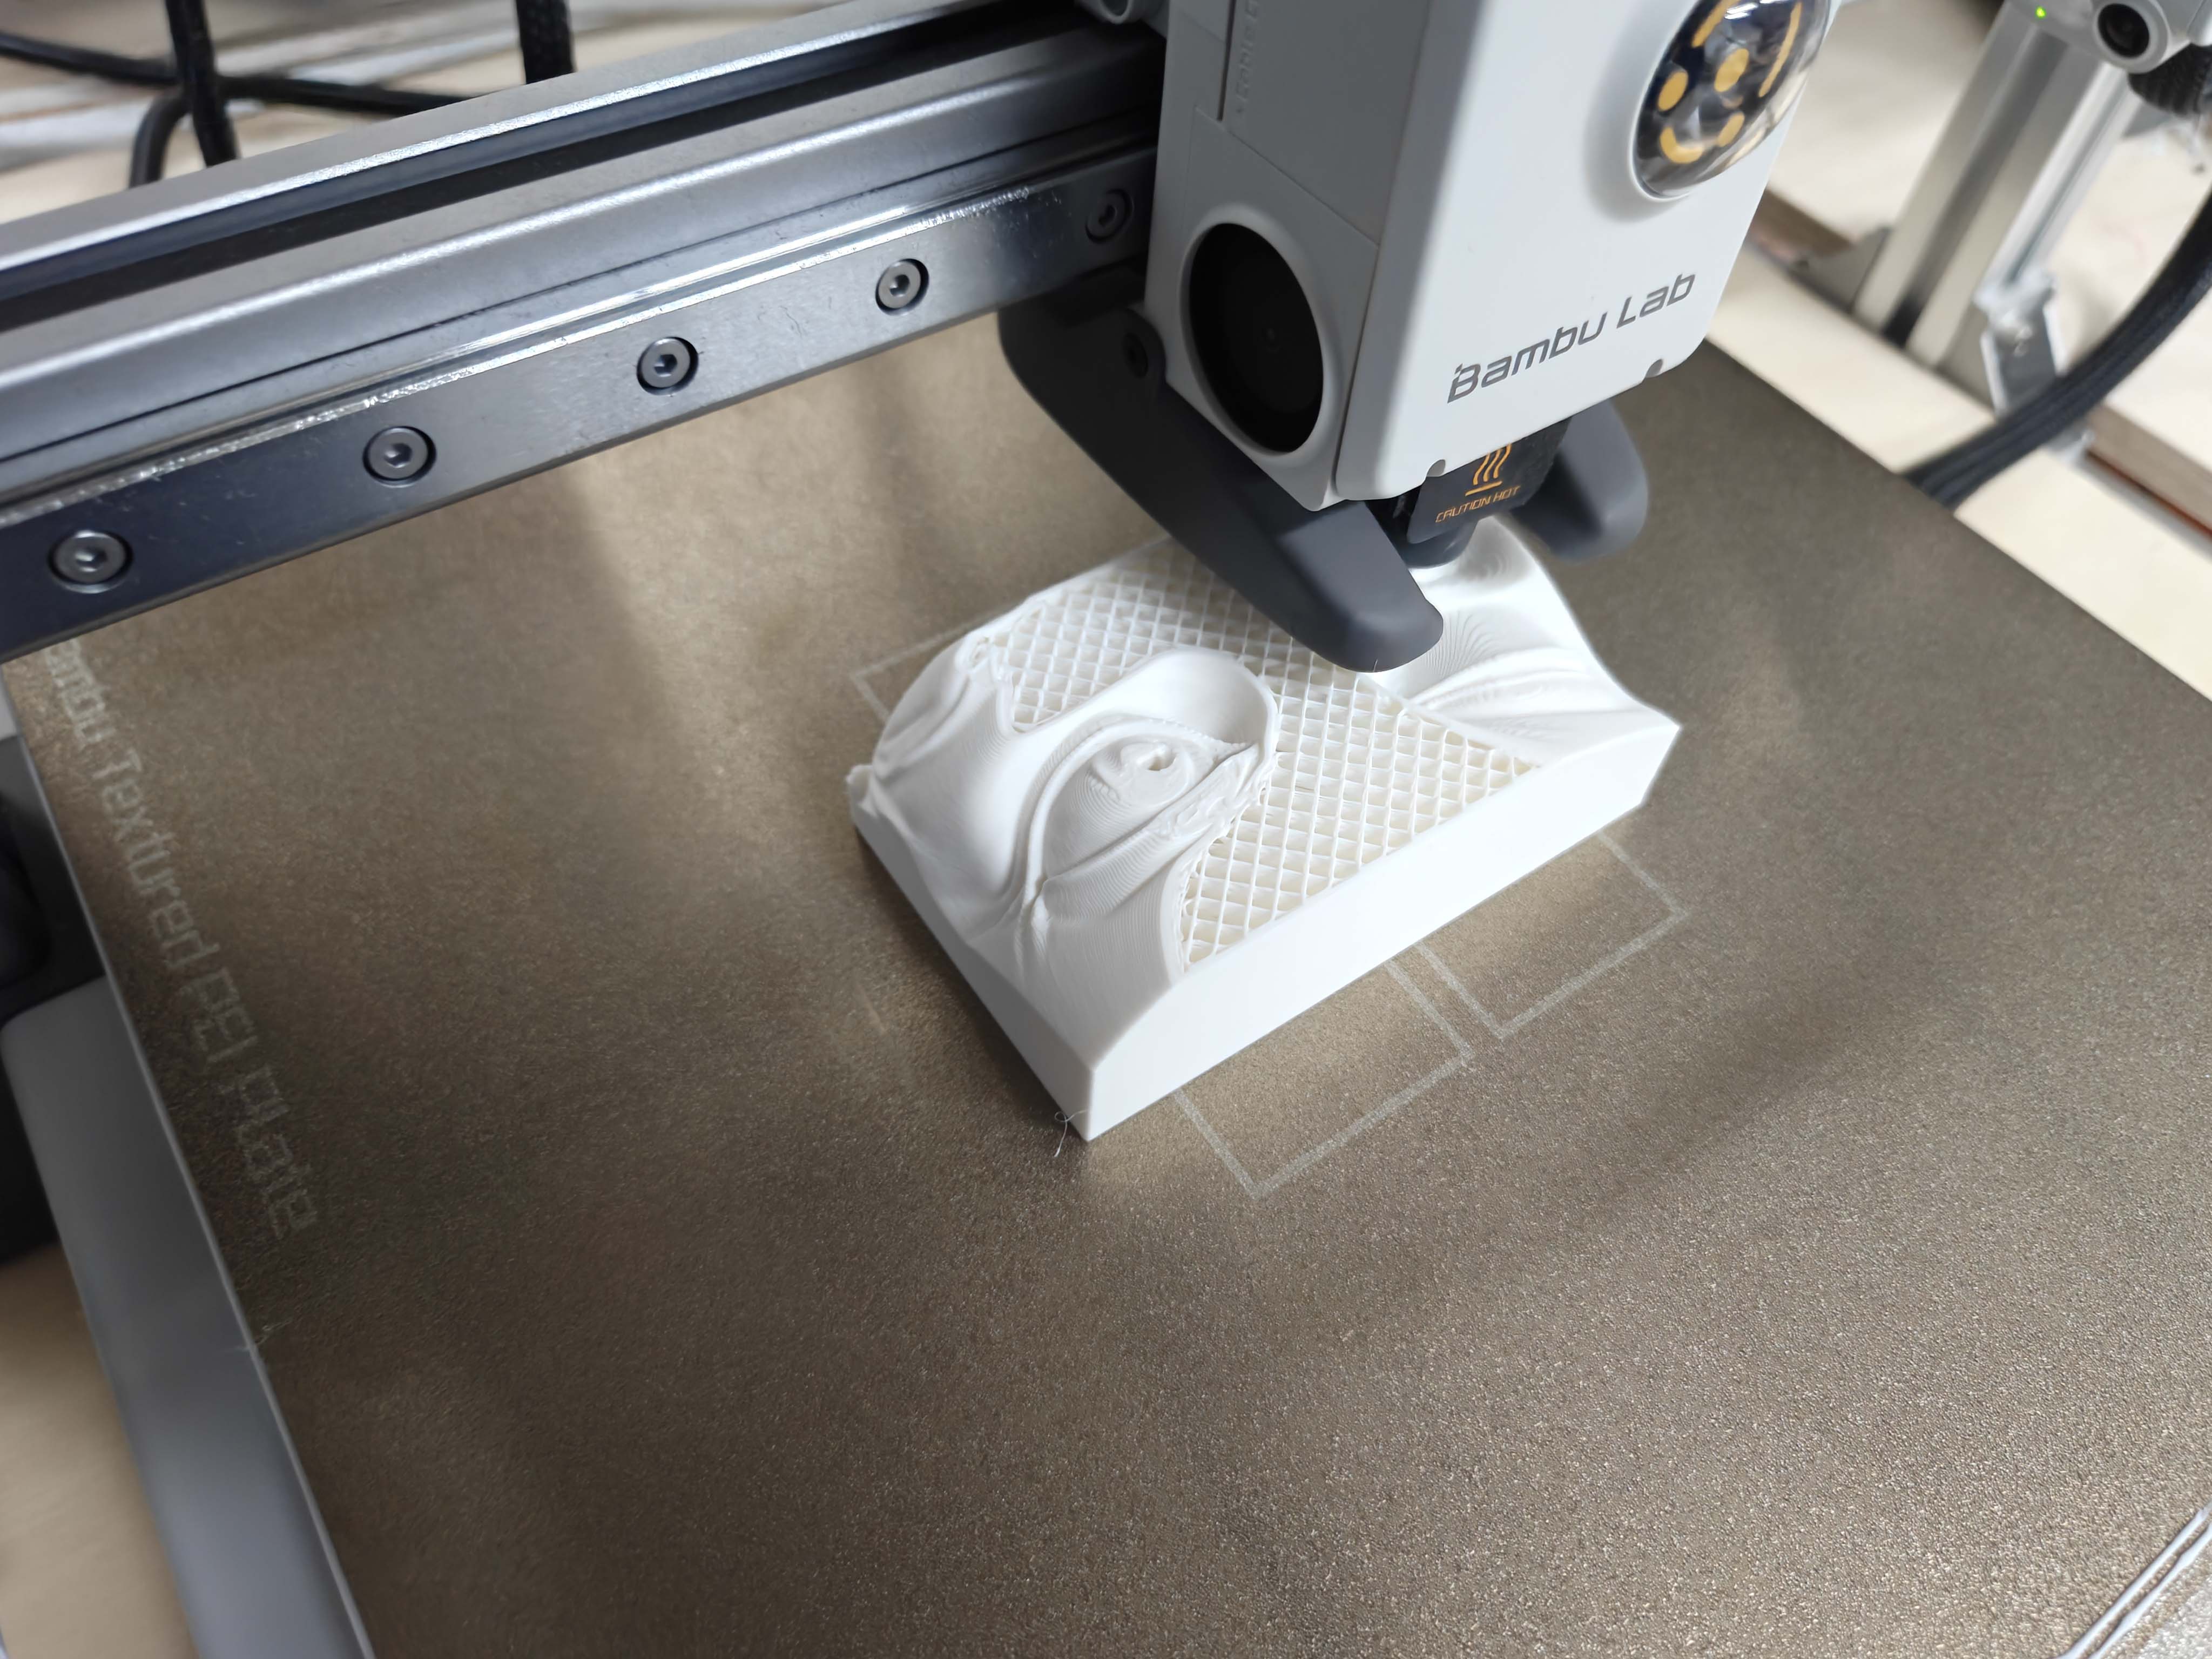
7. FDM printed master model
I used FDM 3D printing to make the master model of the incense holder. The printed model included the facial surface, open eye, closed eye, nose bridge, and incense hole. FDM printing allowed me to quickly turn the digital model into a physical master for silicone mold making.
After the SLA test, I decided to use FDM printing for the final master model. The FDM surface was less smooth, but the layer texture matched the face-shaped object better. It looked similar to skin pores, wrinkles, and natural facial traces.
Because of this, I did not sand away the FDM layer lines completely. I cleaned only the obvious defects and checked the incense hole, but I kept the layered surface as an intentional design quality. This texture was later transferred into the silicone mold and then into the plaster cast.
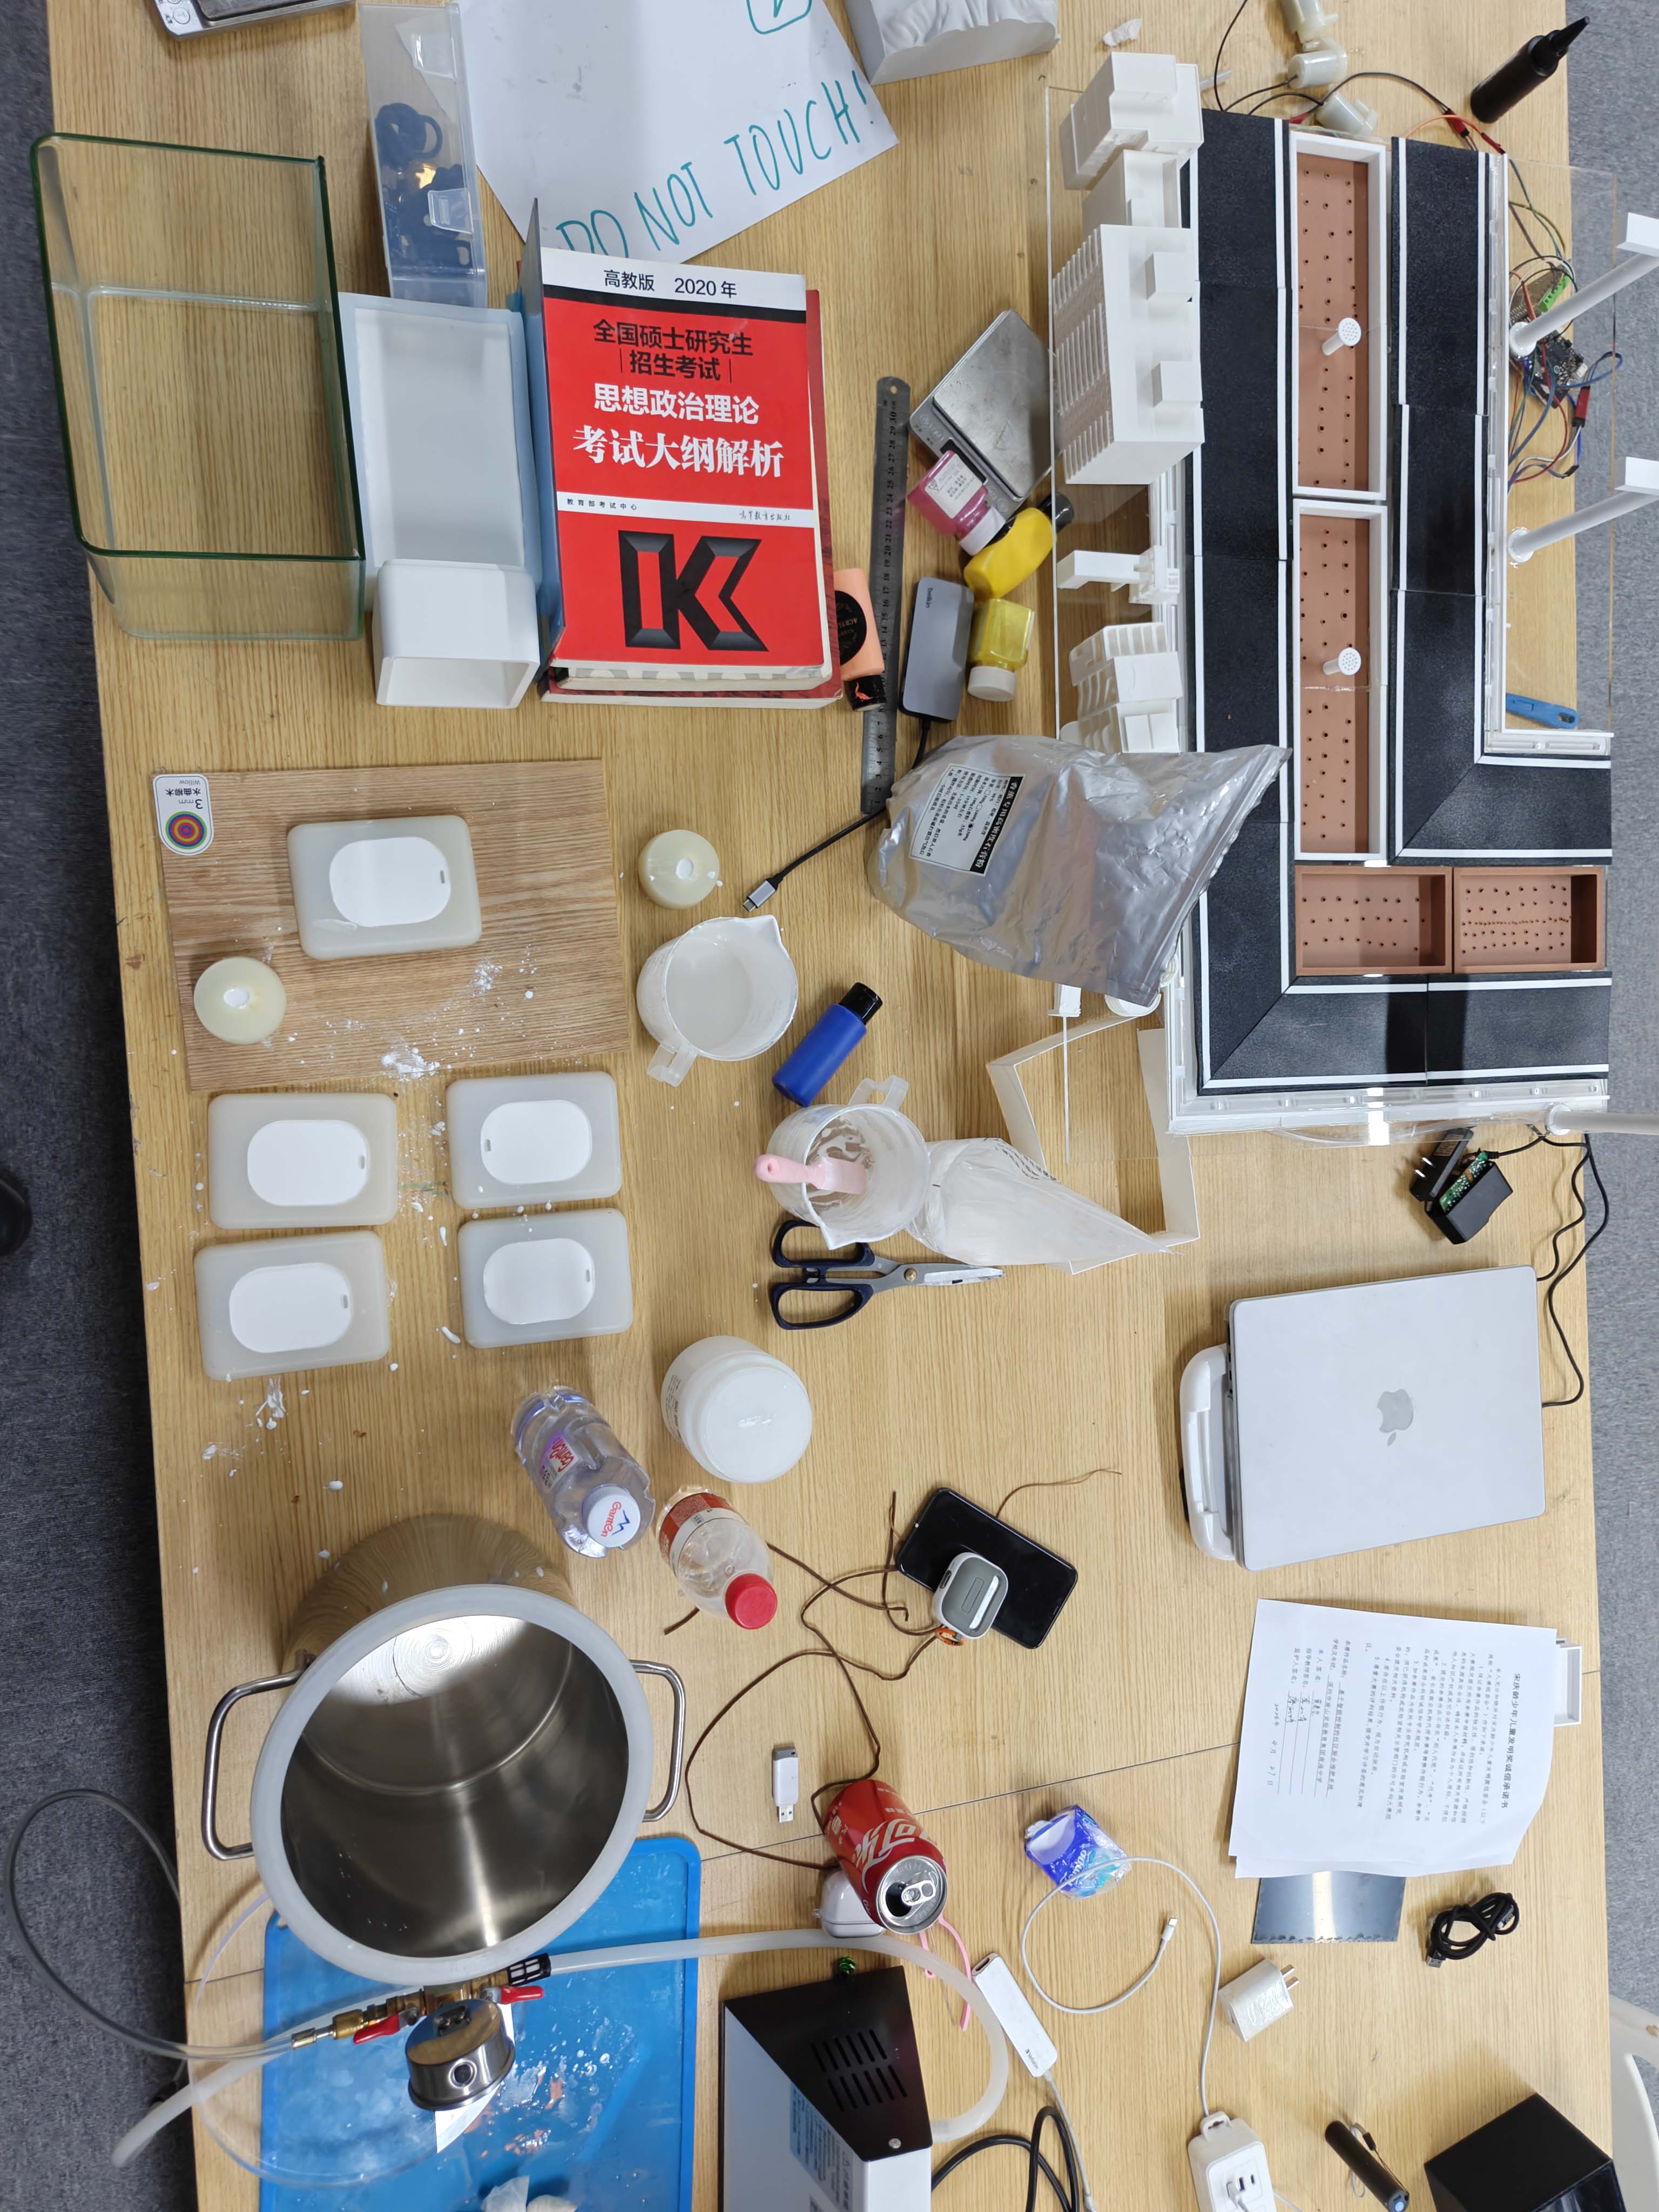
8. 3D printed mold box
I also designed and printed a mold box for the silicone mold. The mold box needed to be larger than the master model so that the silicone could form a thick enough wall around the object. A thin silicone wall could deform during casting, while an overly large mold box would waste material.
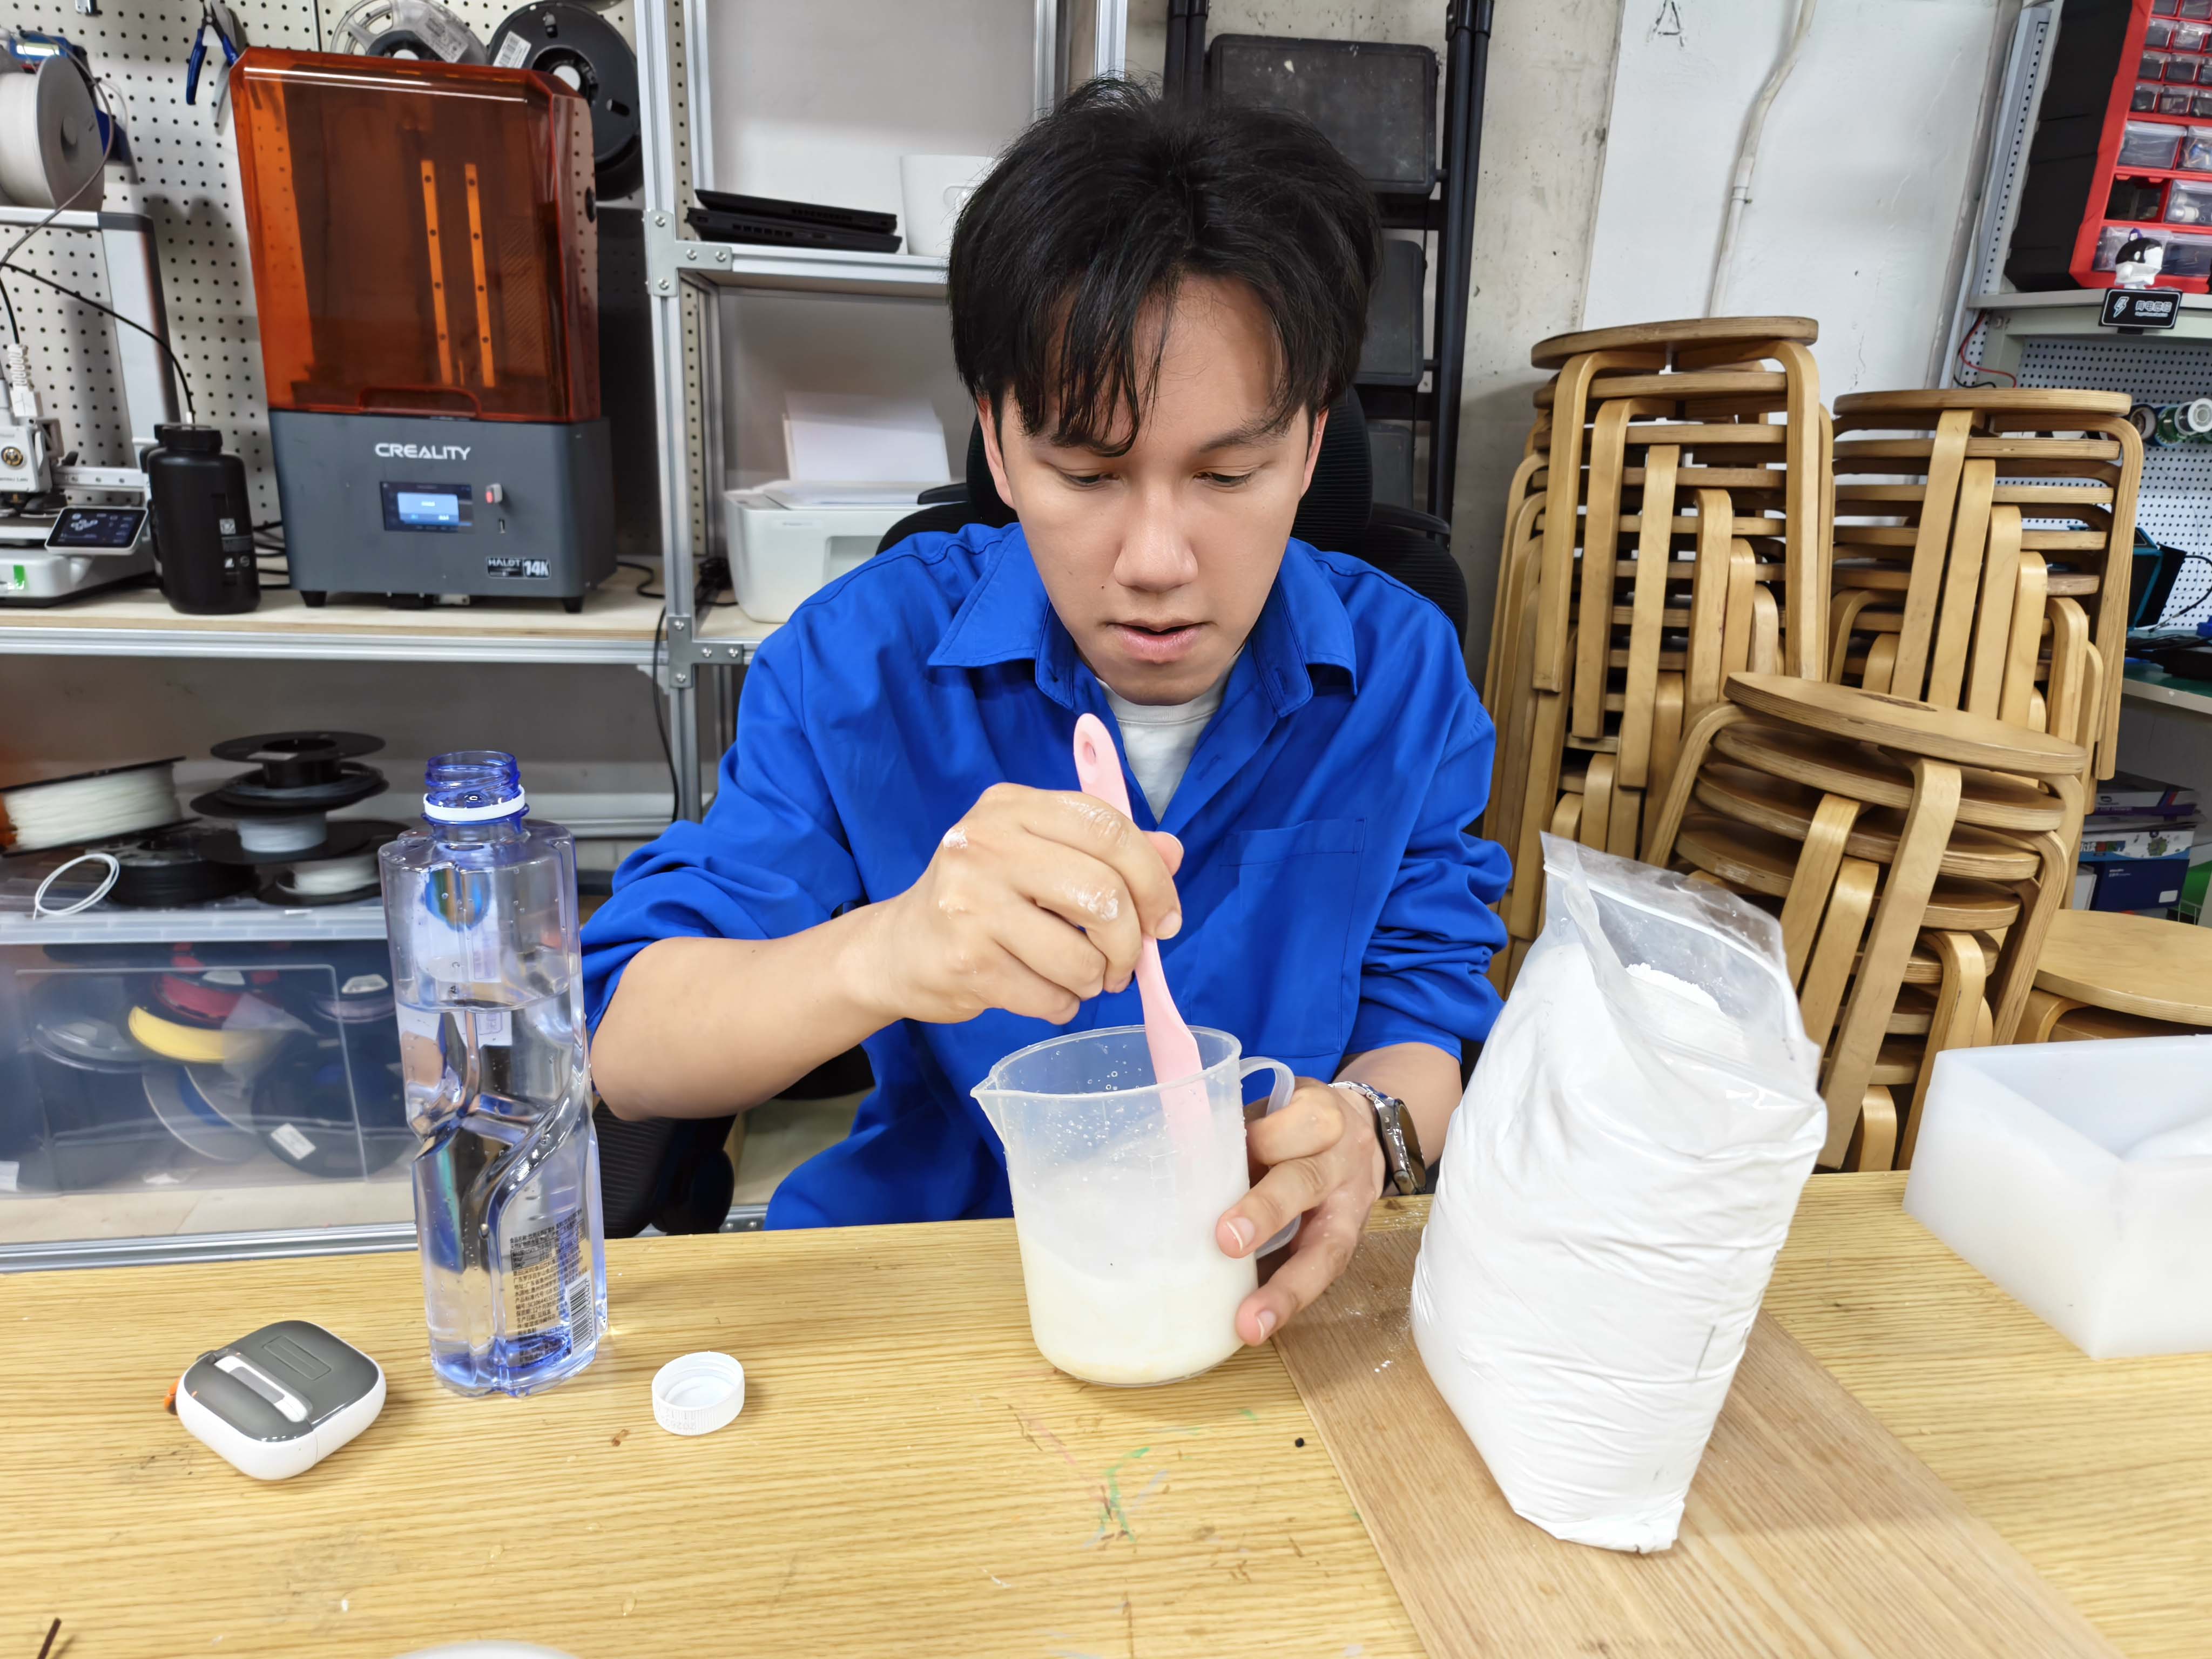
9. Mixing and pouring silicone
The silicone was mixed from two parts. I mixed the A and B components carefully and tried to avoid trapping too much air during stirring. After mixing, the silicone was poured into the mold box so that it could cover the master model and capture the facial details.
Pouring slowly was important because the eye details and the incense hole area could easily trap bubbles. I tried to pour from one side and let the silicone flow gradually over the model.
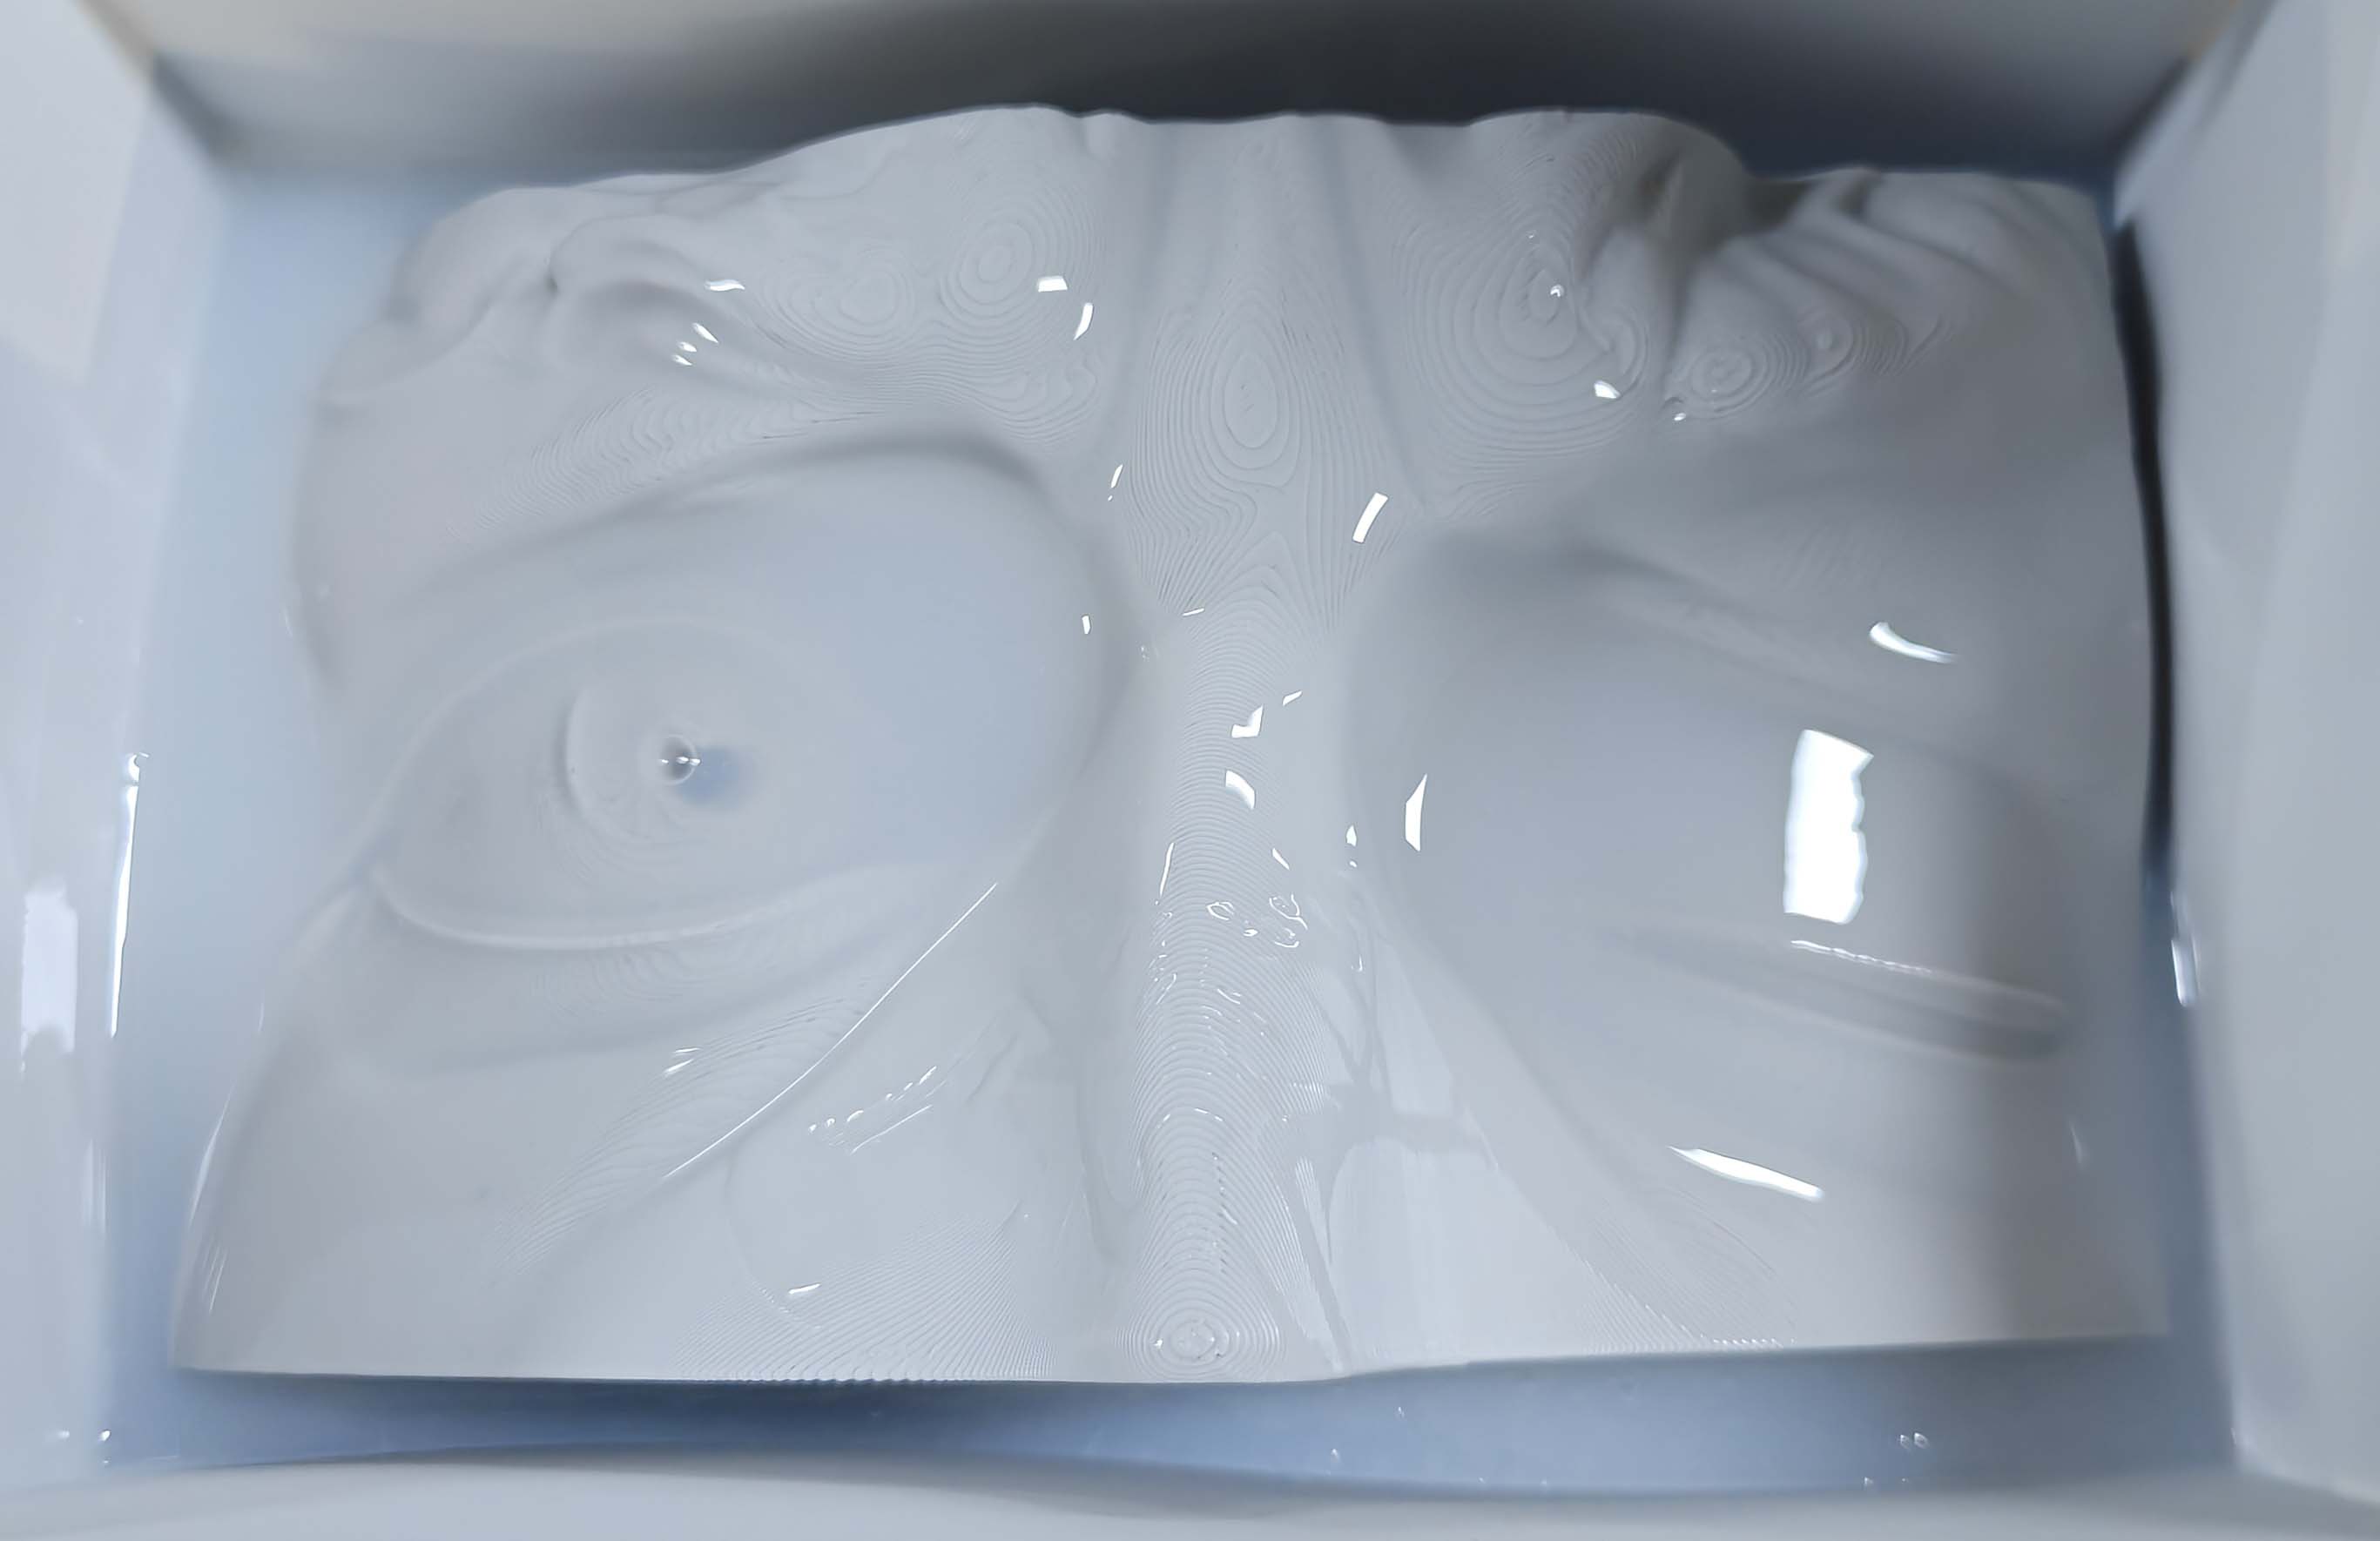
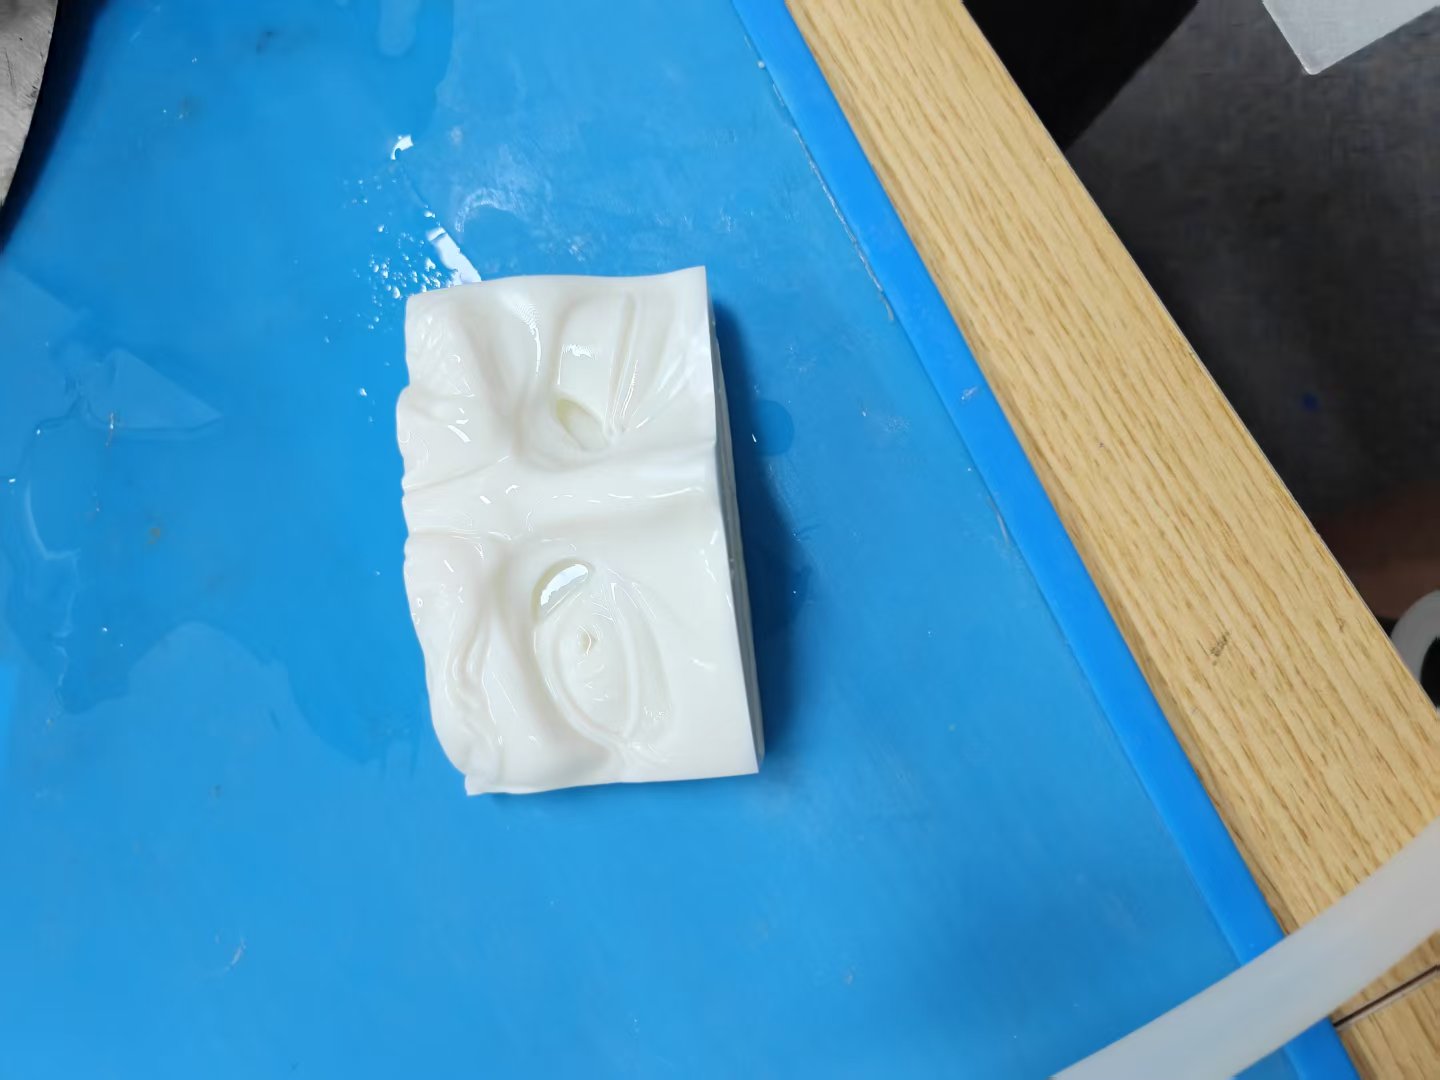
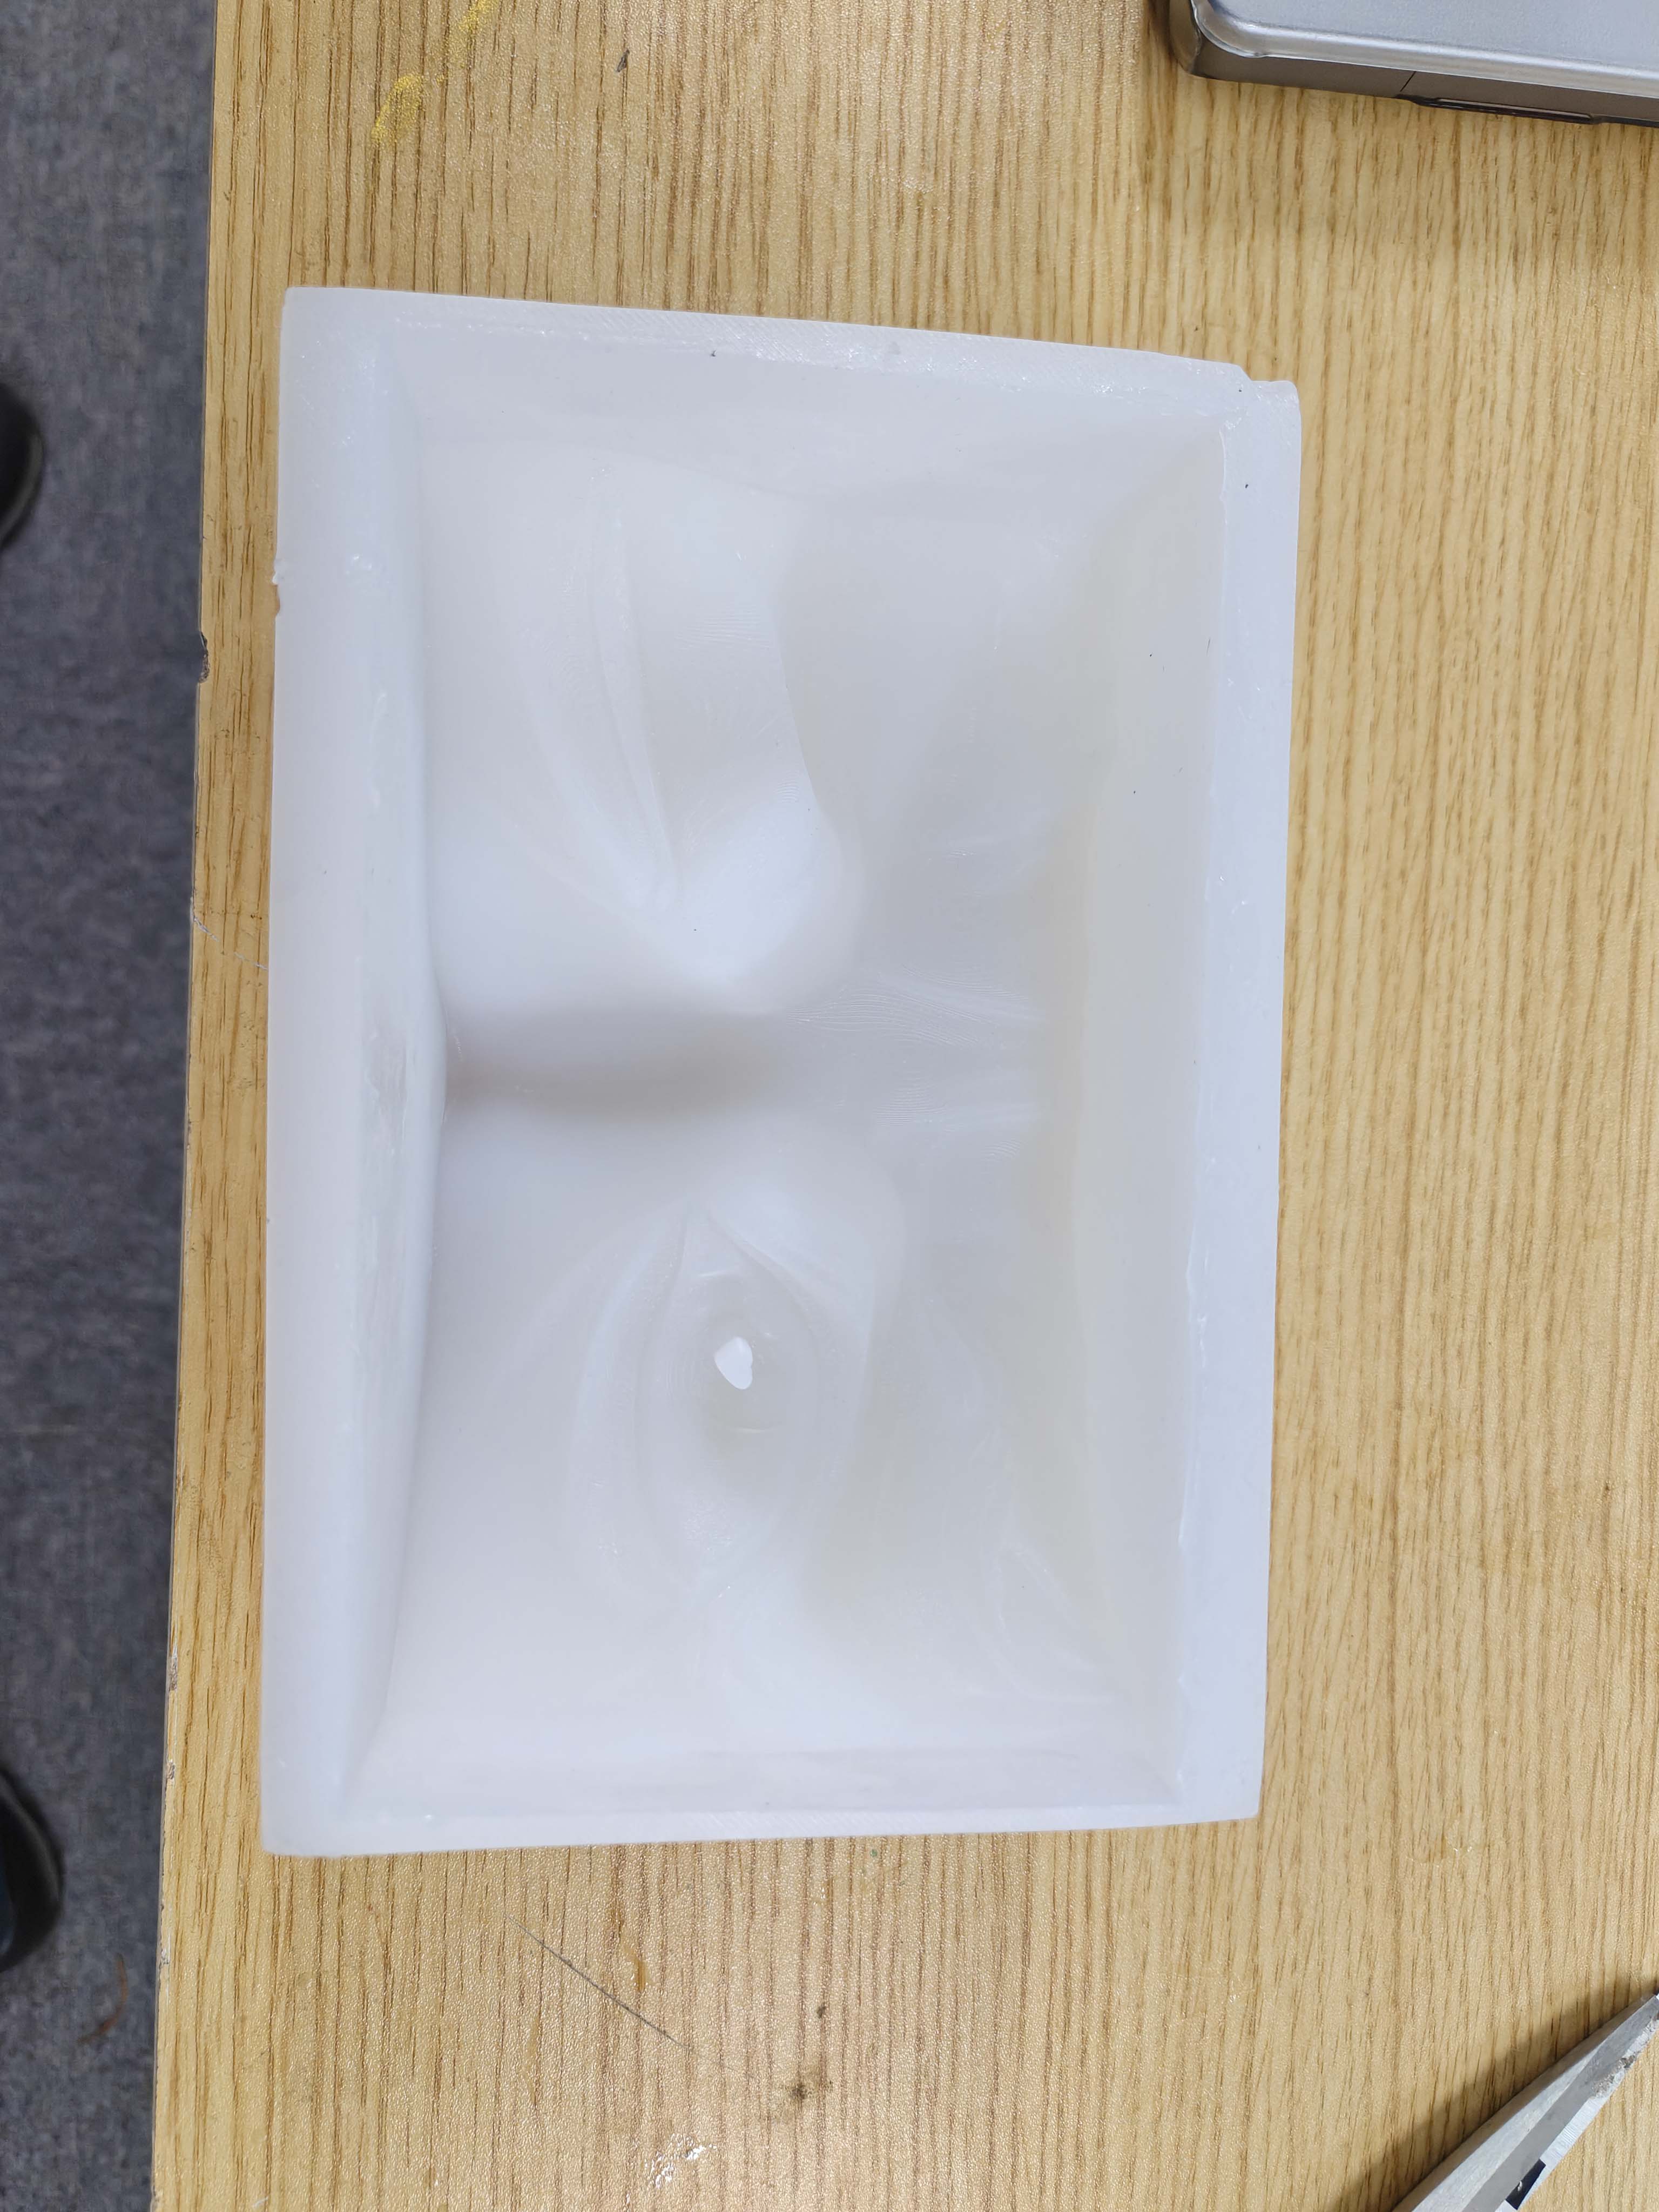
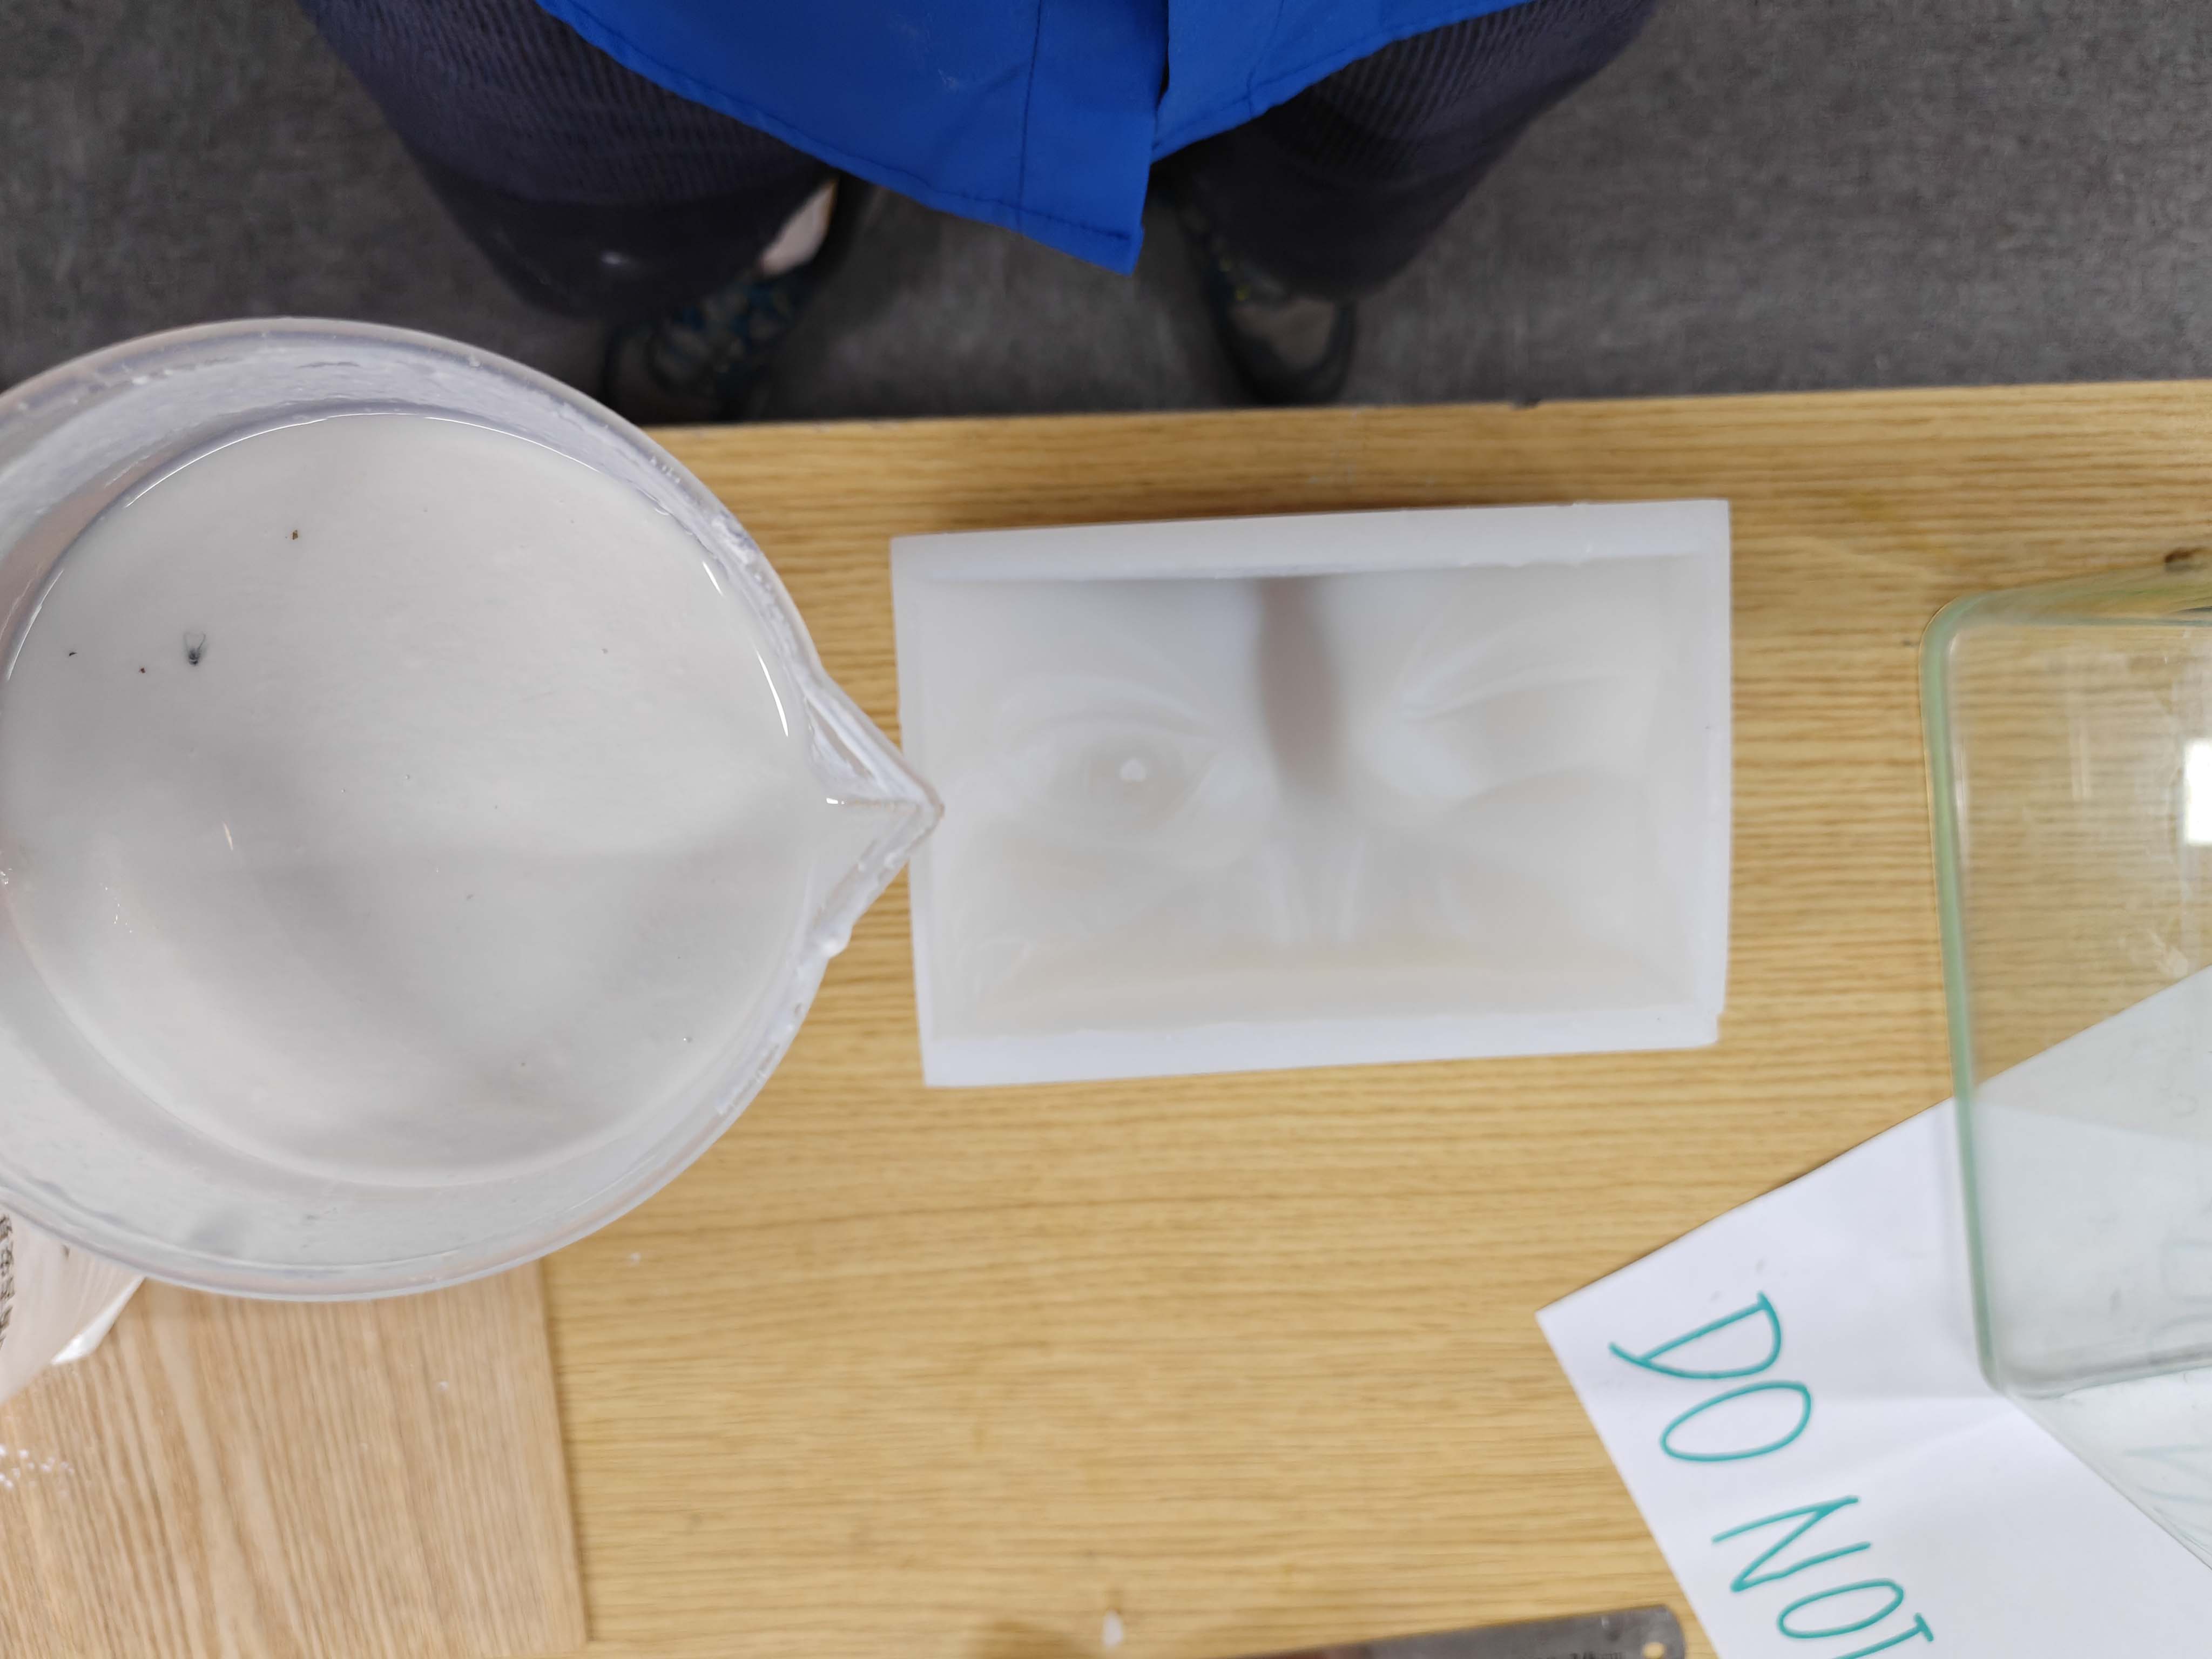
10. Silicone mold result
After the silicone cured, I removed the mold box and took out the FDM printed master model. The cured silicone formed a negative mold of the incense holder. Because silicone is flexible, it was suitable for capturing the eye details, nose shape, incense hole area, and FDM surface texture.
11. Mixing plaster
For the final cast, I used plaster as the casting material. I added plaster powder to water and mixed it until the material became smooth and pourable. The mixture needed to be fluid enough to enter the detailed areas of the silicone mold, but not too watery, because too much water would weaken the final cast.
12. Plaster casting
I poured the plaster mixture into the silicone mold slowly and gently tapped the mold to help bubbles rise to the surface. This step was important because bubbles could damage the eye expression or block the incense hole.
After pouring, I waited for the plaster to cure before removing the cast from the silicone mold. I did not remove the part too early because plaster can be fragile before it fully hardens.
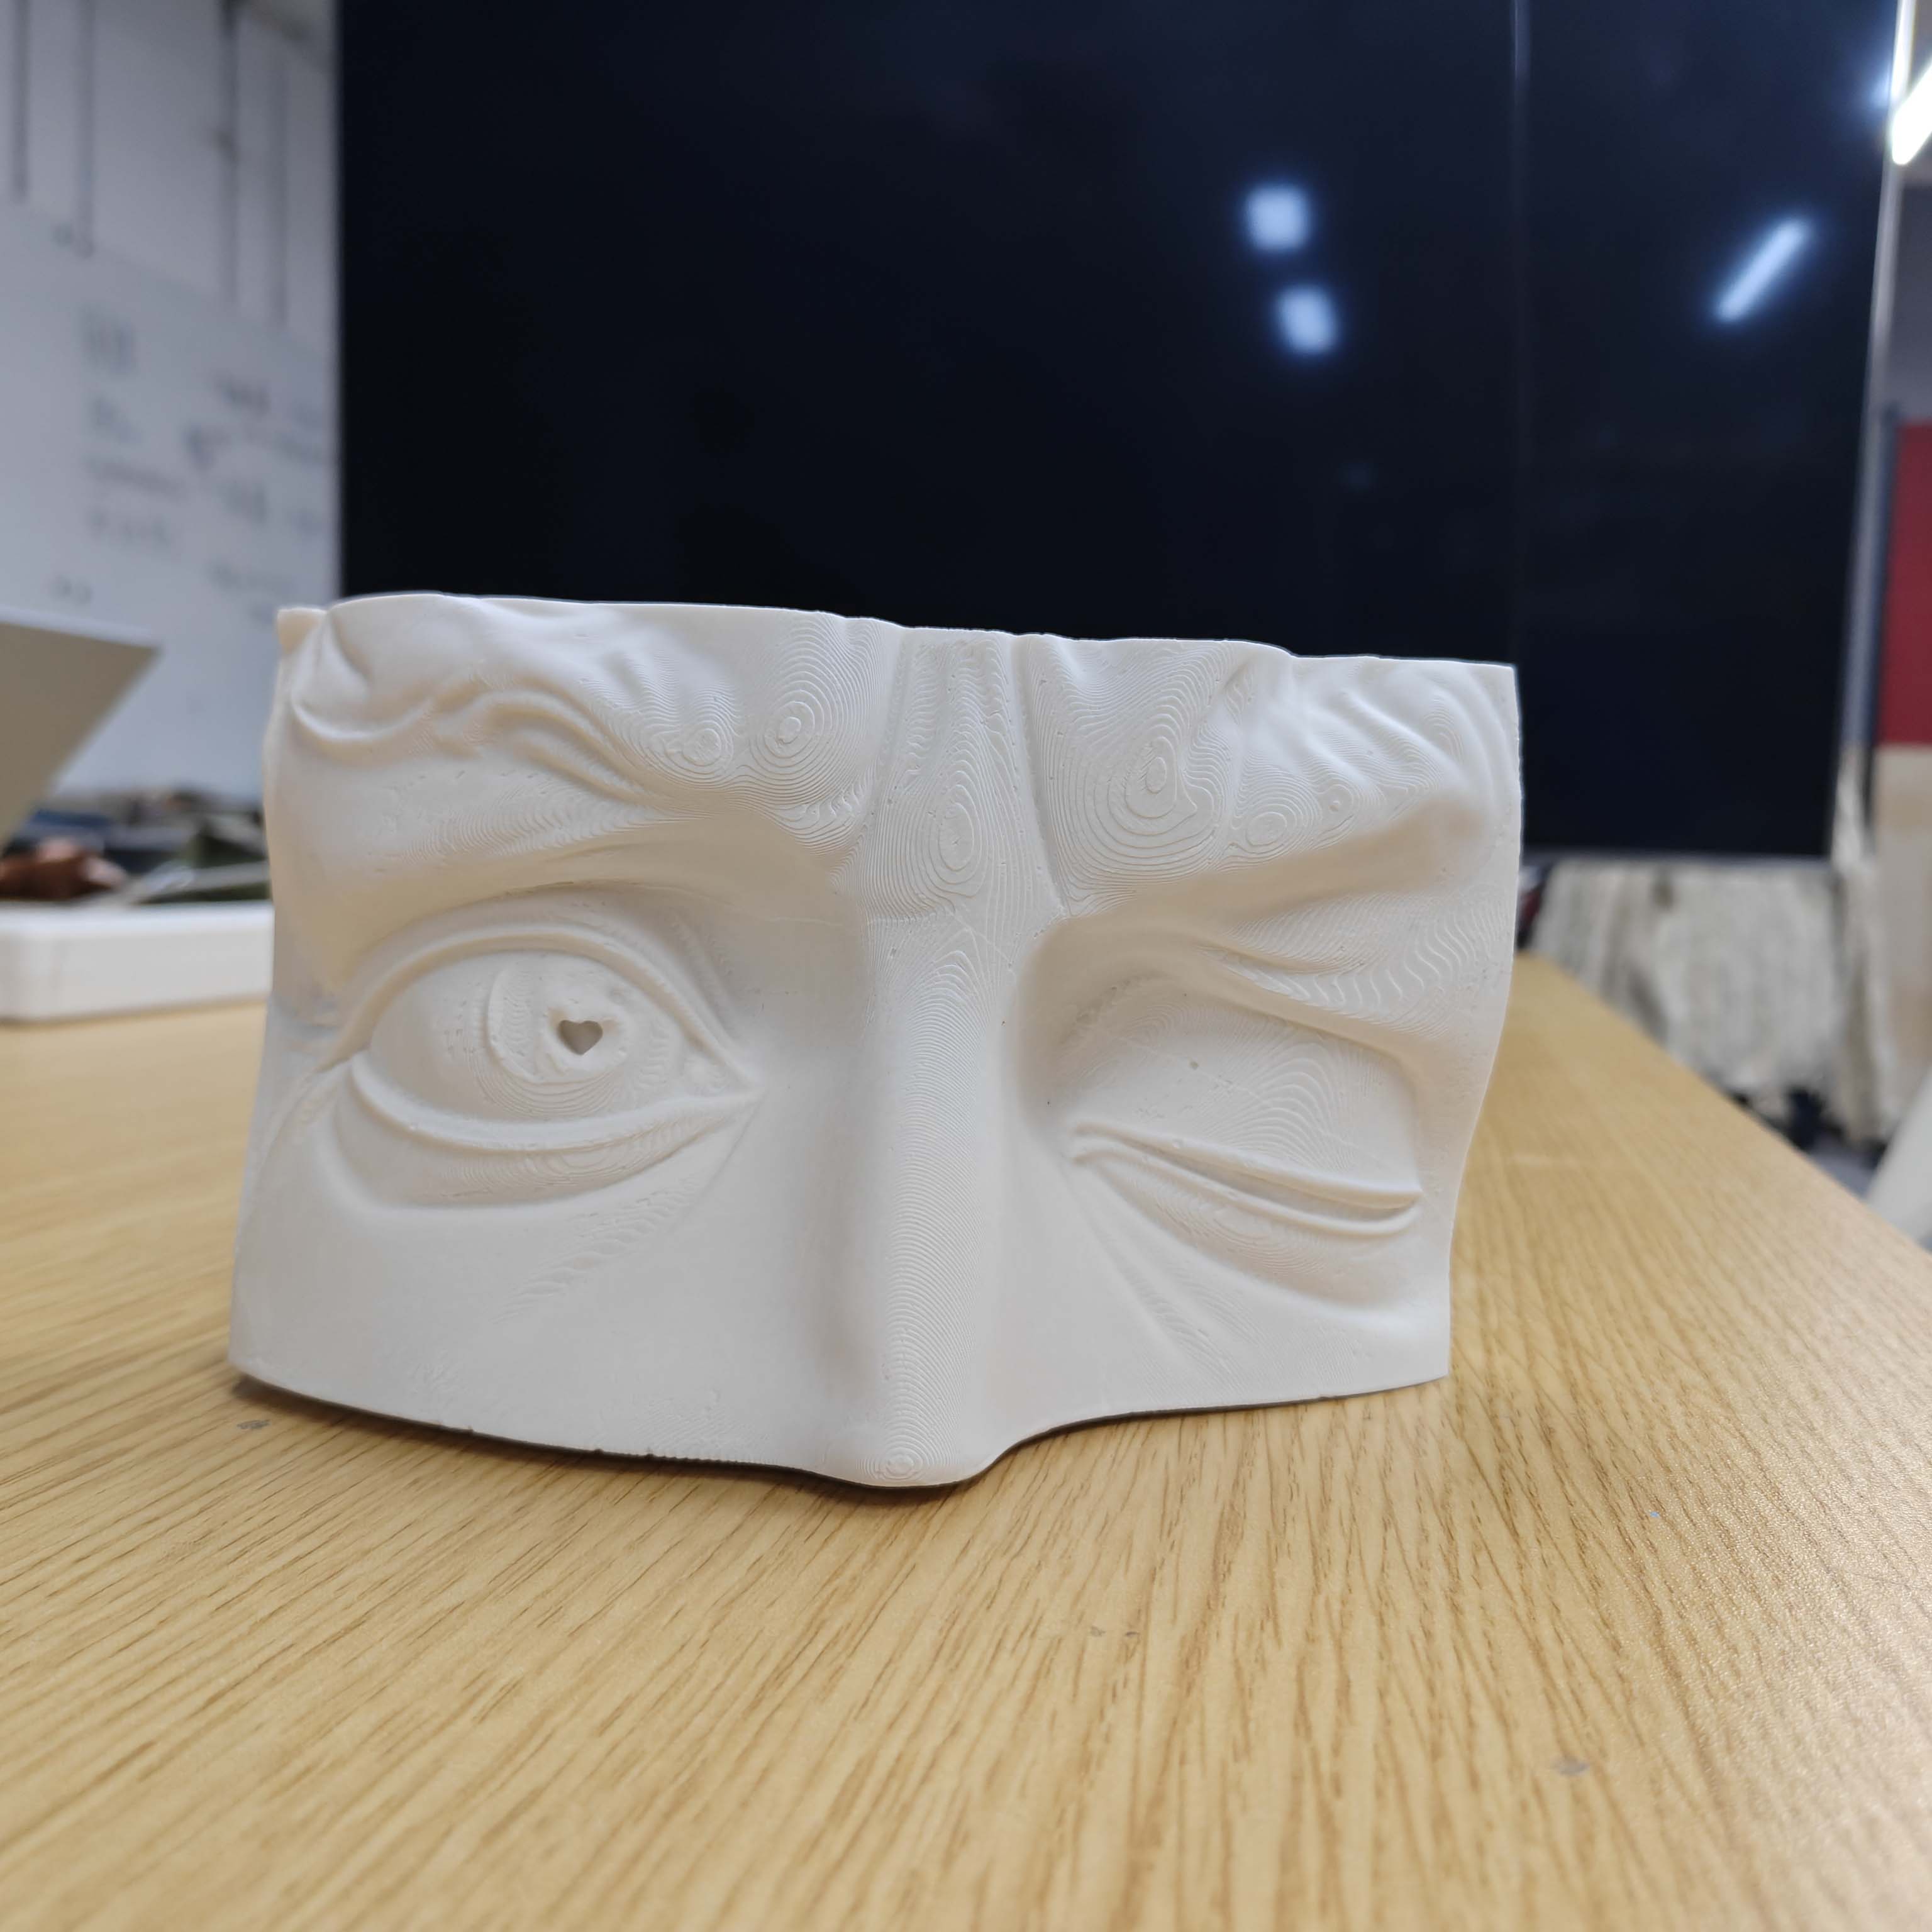
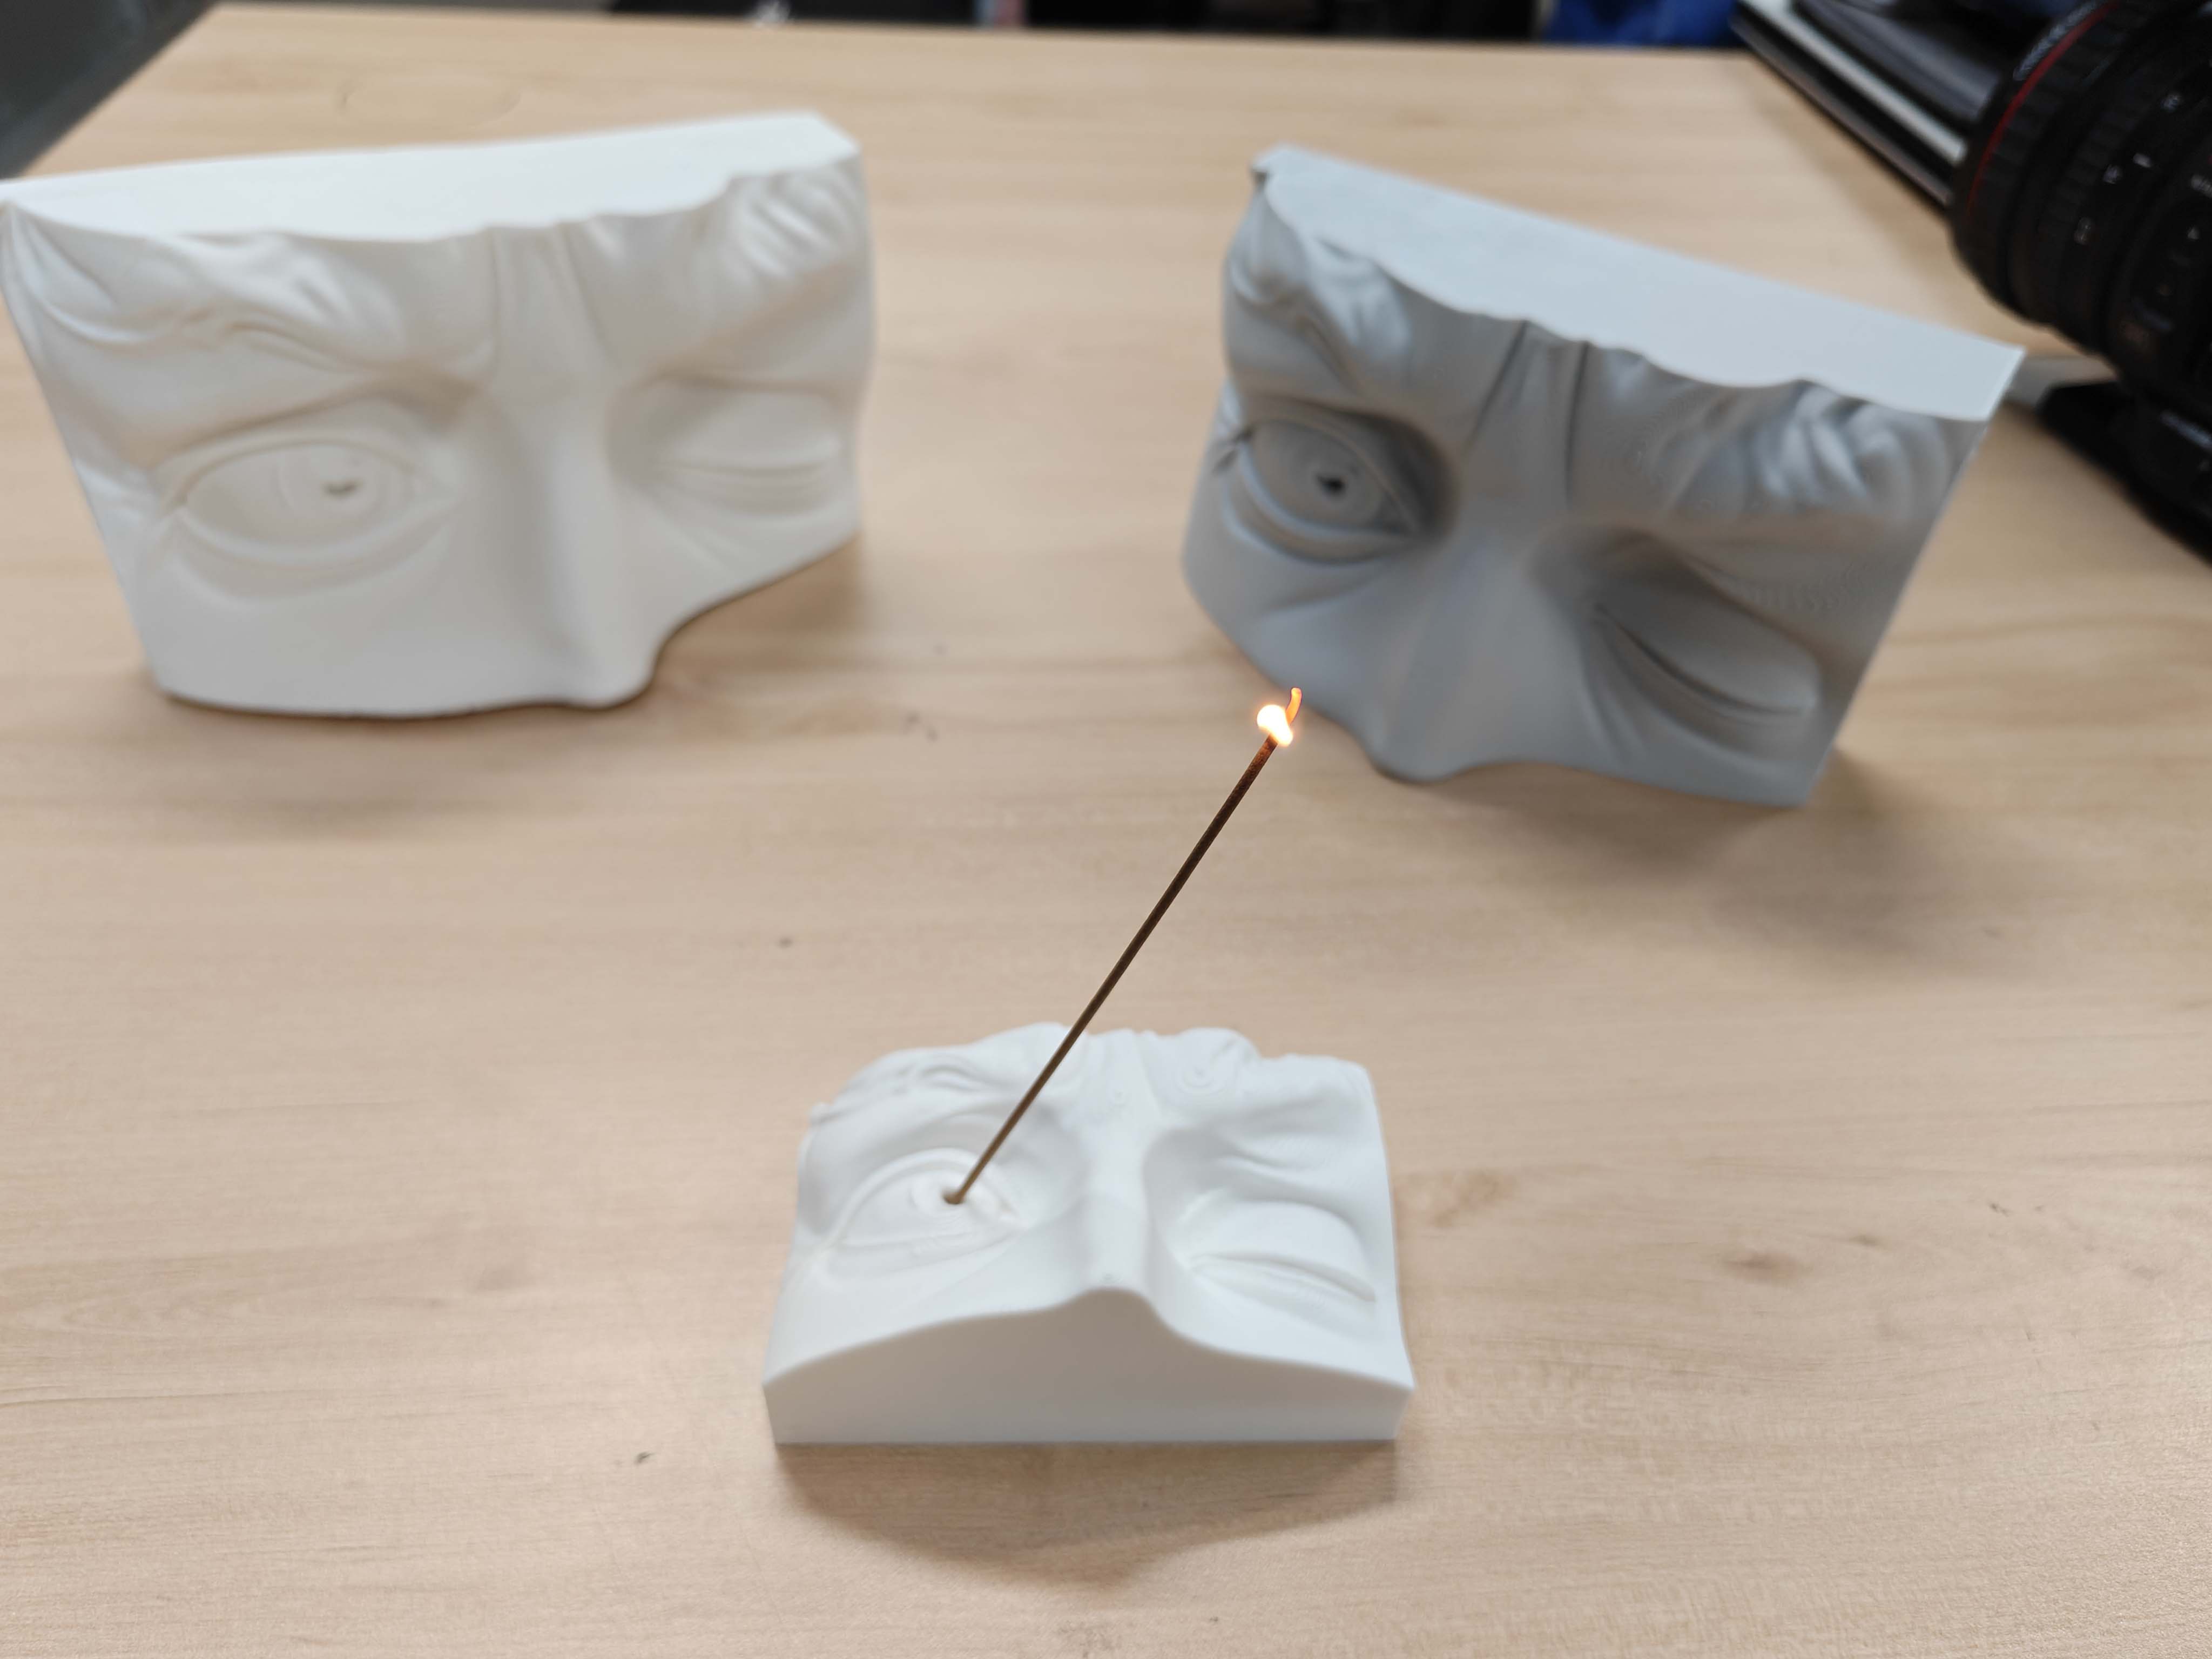
13. Final result
The final result is a plaster incense holder with one open eye and one closed eye. The silicone mold successfully captured the main facial features, the incense hole, and the FDM layer texture from the master model.
The final surface was not completely smooth, but this was an intentional result. The visible lines created a skin-like texture that matched the face-shaped form. This made the final cast feel more organic and less like a polished plastic product.
Problems and Solutions
| Problem | Reason | Solution |
|---|---|---|
| The FDM layer lines were visible on the final cast. | The silicone mold captured the surface texture of the FDM printed master model very precisely. | I kept the layer lines intentionally. After comparing FDM with the smoother SLA surface, I preferred the FDM texture because it looked like skin pores, wrinkles, and natural facial traces. |
| Small bubbles appeared in some detailed areas. | Air was trapped during silicone or plaster mixing and pouring. | I mixed more carefully, used vacuum degassing for silicone, poured slowly, and tapped the mold during plaster casting. |
| The incense hole could be blocked by casting material. | The incense hole is a small detail and can easily trap material or bubbles. | I checked the hole after casting and cleaned it carefully so that the incense could be inserted. |
| The plaster part was fragile during removal. | Plaster needs enough curing time before it reaches better strength. | I waited for the material to cure before removing the cast from the flexible silicone mold. |
| The mold box had to be sealed carefully. | Liquid silicone can leak through small gaps during pouring. | I checked the mold box before pouring and made sure the model and box were stable. |
What I Learned
This week helped me understand that molding and casting is a process of designing both positive and negative forms. The final object cannot be separated from the mold. The mold controls material flow, air bubbles, curing, demolding, and final surface quality.
I also learned that surface finish is not only a technical issue, but also a design decision. SLA printing can create a very smooth master model, while FDM printing leaves visible layer lines. In this project, I preferred the FDM texture because it made the face-shaped incense holder feel more organic, like skin pores or facial wrinkles.
Another important lesson was material behavior. Silicone needs careful mixing and bubble control. Plaster is easy to use, but the water ratio, pouring speed, curing time, and removal moment all influence the strength and surface quality of the final object.
Reflection
This week made me think about fabrication in a different way. In 3D printing, the machine directly produces the object. In molding and casting, the object is produced indirectly through a mold. This means that I had to design the process, not only the form.
One important decision in this project was the choice between SLA and FDM printing for the master model. SLA printing would have made the surface smoother, but I felt that the result might look too polished and artificial. FDM printing created visible layer lines, and these lines matched the facial form of the incense holder. They looked like pores, wrinkles, and natural traces on the surface, so I kept them intentionally.
The incense holder was a useful object for this assignment because it combined function, material, and expression. The small incense hole was not only a technical detail, but also part of the visual language of the object. It forced me to think about how a functional detail can be integrated into the mold and casting process.
If I continue improving this project, I would test different plaster ratios, design better venting around the incense hole and eye details, and make a cleaner multi-part mold to improve the casting stability.
AI Use Statement
I used AI tools during the early design stage of this assignment. First, I generated a concept image to explore the facial expression, the open eye, the closed eye, and the incense position.
Then I used Hunyuan3D to convert the concept image into a 3D model. The generated model was useful as a starting point, but it was not ready for fabrication. It needed manual editing before becoming a mold master.
I edited the AI-generated 3D model in Blender. I added the heart-shaped incense hole in the eye area and repaired broken surface areas on the face. After that, I used the Cut tool in Bambu Lab Studio to remove extra geometry and make the base closer to a clean rectangular form.
The AI tools helped with the early concept and base geometry, but the design decisions, model editing, mold planning, material choice, casting process, and documentation were completed by me.