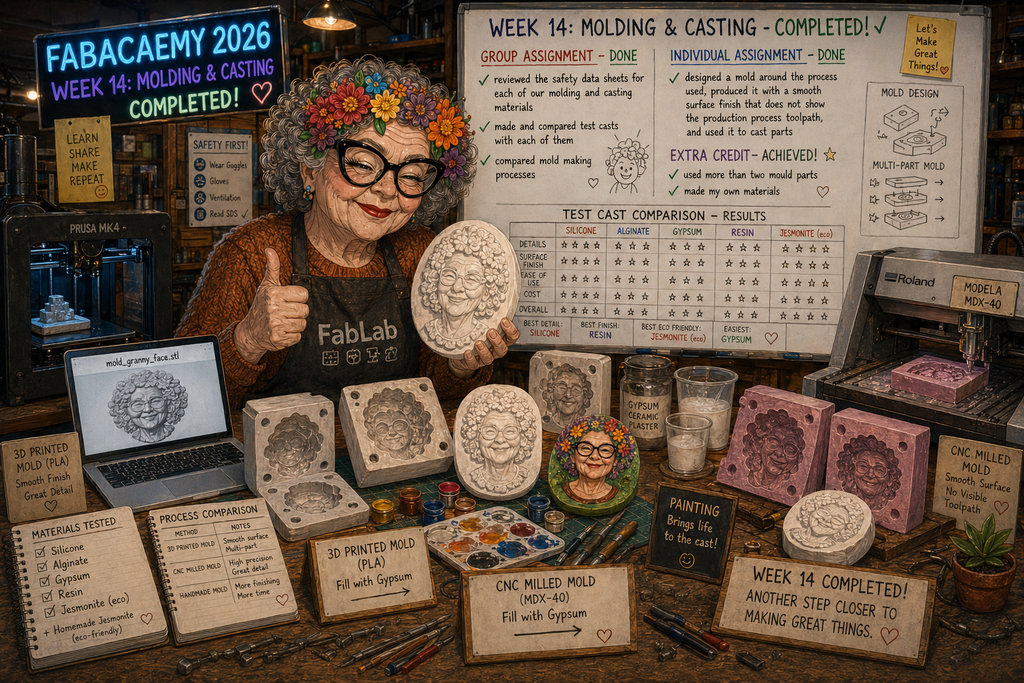
Week 14
AI prompt:
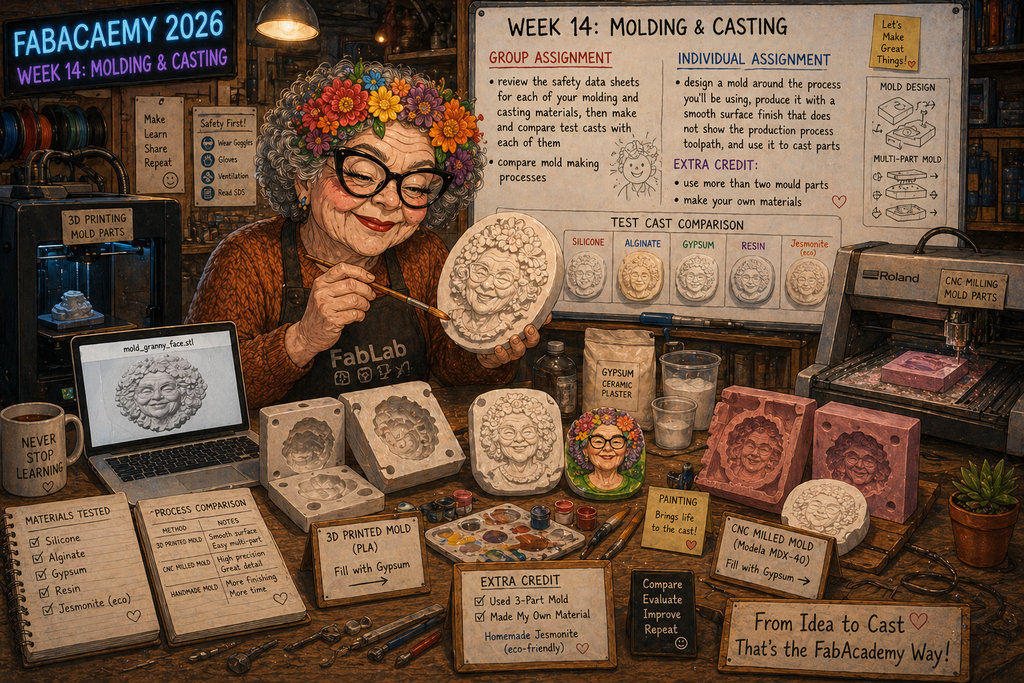
Please generate image, when this grandmother started Week 14 molding and casting. In this week need to do this points: group assignment: • review the safety data sheets for each of your molding and casting materials, then make and compare test casts with each of them • compare mold making processes individual assignment: • design a mold around the process you'll be using, produce it with a smooth surface finish that does not show the production process toolpath, and use it to cast parts • extra credit: use more than two mould parts • extra credit: make your own materials And Granny generate her image for the moulding process. And printed this .stl file in 3d Printer, for after printing fill gypsum, and painting. Also, with the Roland CNC machine need to cut this model again, fill it with gypsum and compare it to the models. And please that environments generate more like FabLab theme.
molding and casting
For the Group Assignment, we started by deeply studying the details of moulding and casting, different types of applications, and how they are used in different fields. Now I will talk about what experiments we did together and what we learned, which I will later apply in my individual assignment.
First, I would like to present some important safety rules for working with these materials.
When using or applying plaster, it is important to protect your respiratory system, eyes, and skin. Dry plaster dust can be a strong irritant, while wet plaster is highly alkaline.
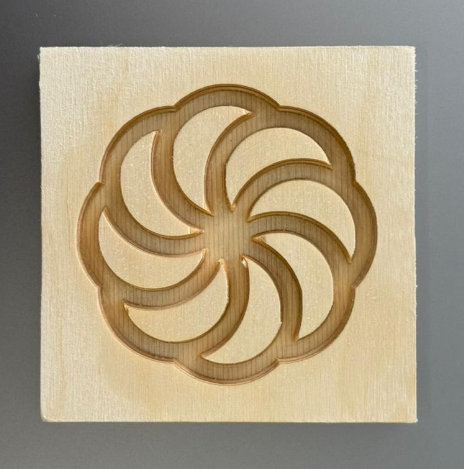
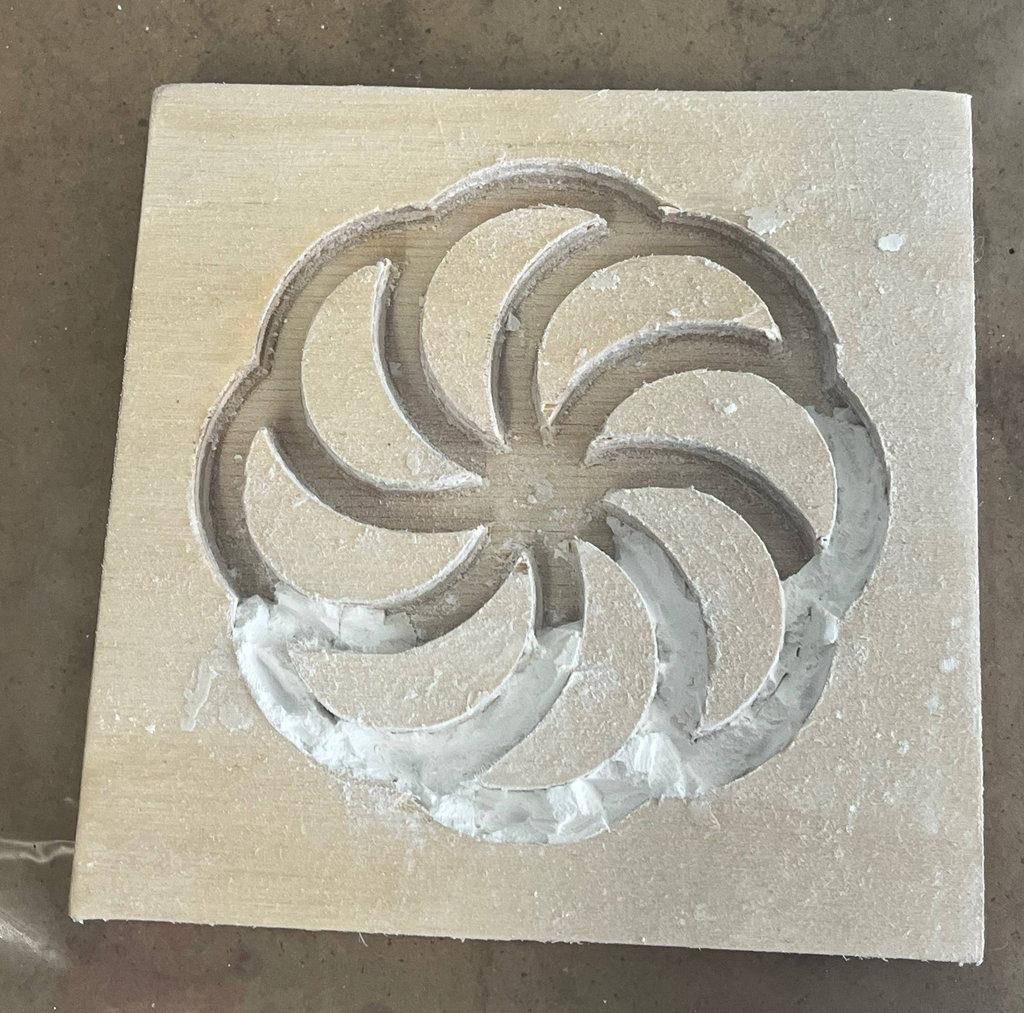
We designed the Armenian symbol shown below and used the CNC ShopBot machine to mill a mould from plywood.
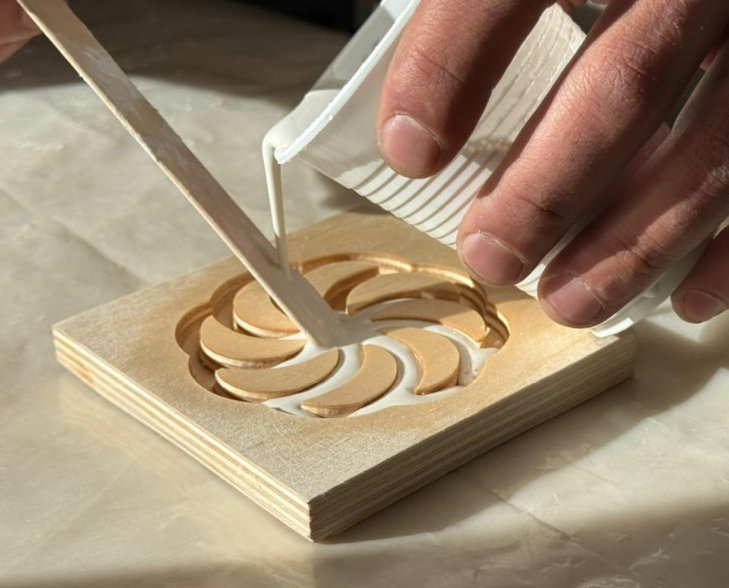
Next, we prepared plaster using a 1:2 water-to-plaster ratio.
In our case, this was:
- 100 g plaster - Buy from Total Armenia
- 50 g water

After carefully pouring the mixture into the mould, we waited for it to dry.
Plaster does not require much time to harden, and after about two hours, judging by its appearance, we tried to remove it from the mould.
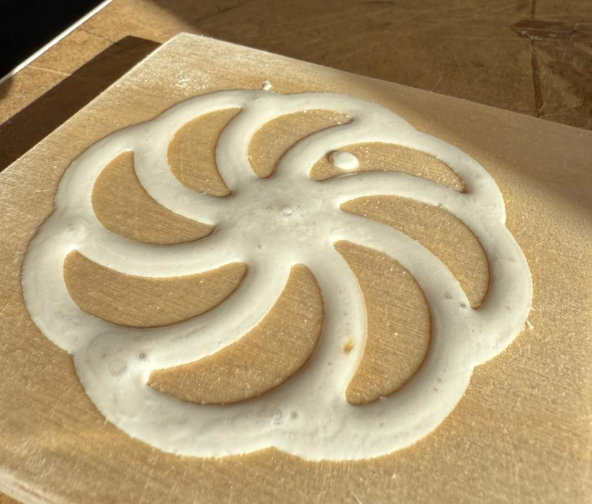
However, making a plaster mould inside plywood was not a very good idea because plywood can retain moisture for a long time. Also, during drying, diffusion can occur, causing the plaster and the plywood to stick together instead of separating. That is exactly what happened in our case. 😄
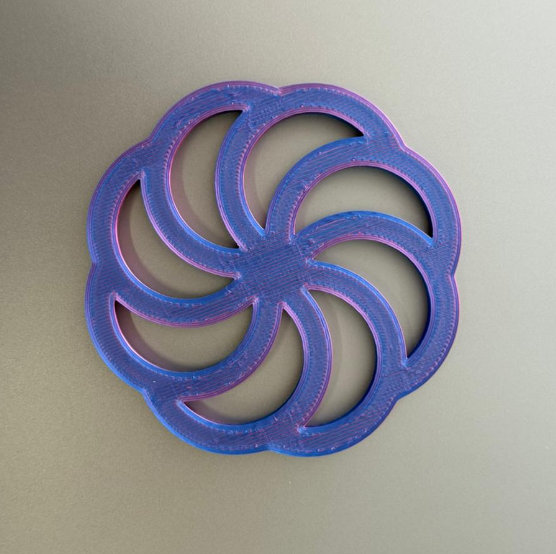
For the next experiment, we used the same Armenian design again, but this time we 3D printed it. Our goal was not to create the master model but another mould using PMC™-121 Series liquid rubber.
The main safety rules when working with liquid rubber are:
- Eye protection: Wear safety glasses with side shields. Do not rely only on contact lenses.
- Hand protection: Wear liquid-proof, chemical-resistant gloves such as butyl rubber, neoprene, or PVC.
- Body protection: Wear long sleeves and long trousers to reduce the risk of skin contact.
- Ventilation: Use the material only in a well-ventilated area.
- Wash your hands thoroughly with soap and water immediately after use.
- Spills: Clean up spills immediately using an absorbent material and wash the surface with a diluted ammonia solution.
Here is the printed model together with some photos from the preparation process.
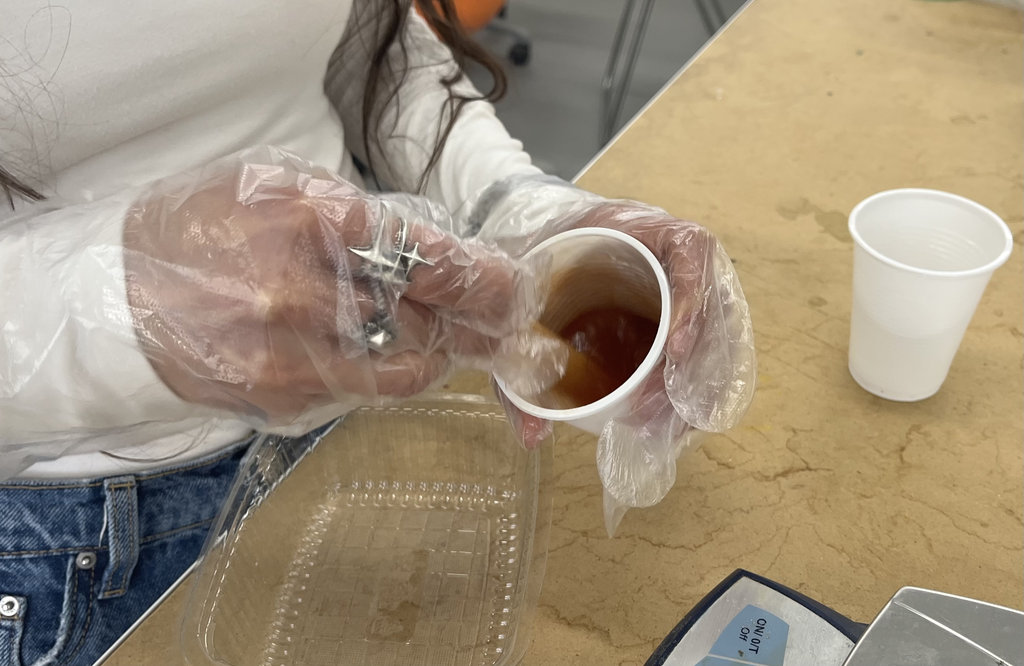
To prepare the material, we followed the manufacturer's instructions and mixed it in a 1A : 1B ratio.
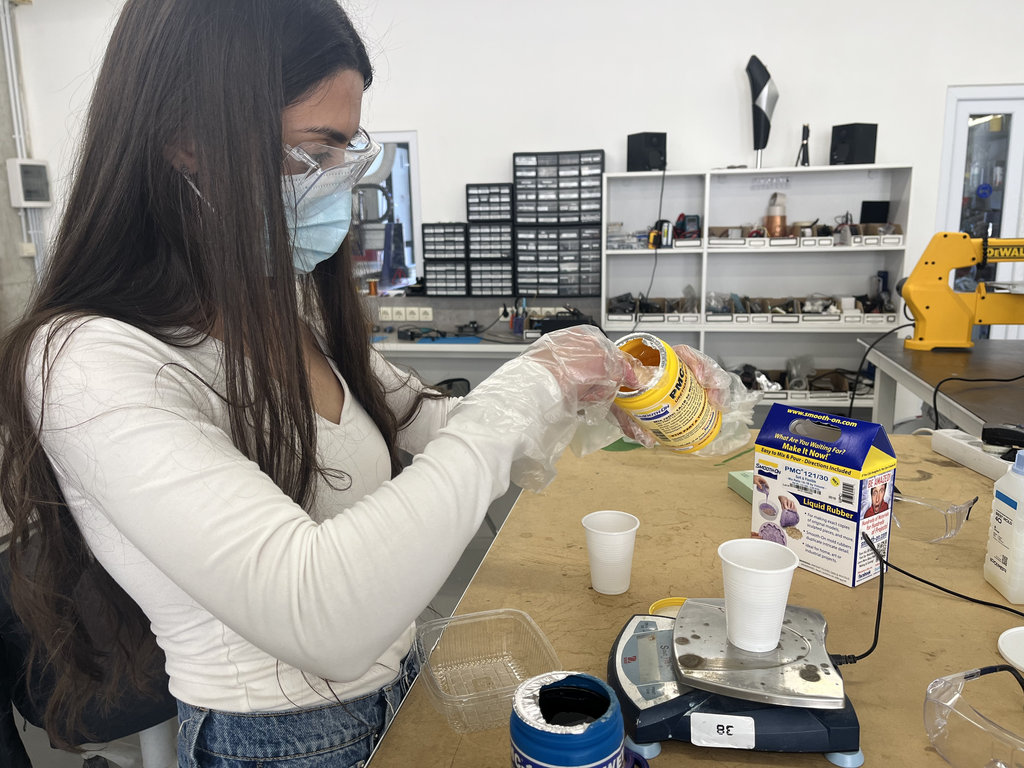
The mixture must be stirred slowly to avoid creating bubbles. We took the first plastic container we found, placed the model at the bottom, and poured the material over it.
You can find more details on our Group Assignment page.
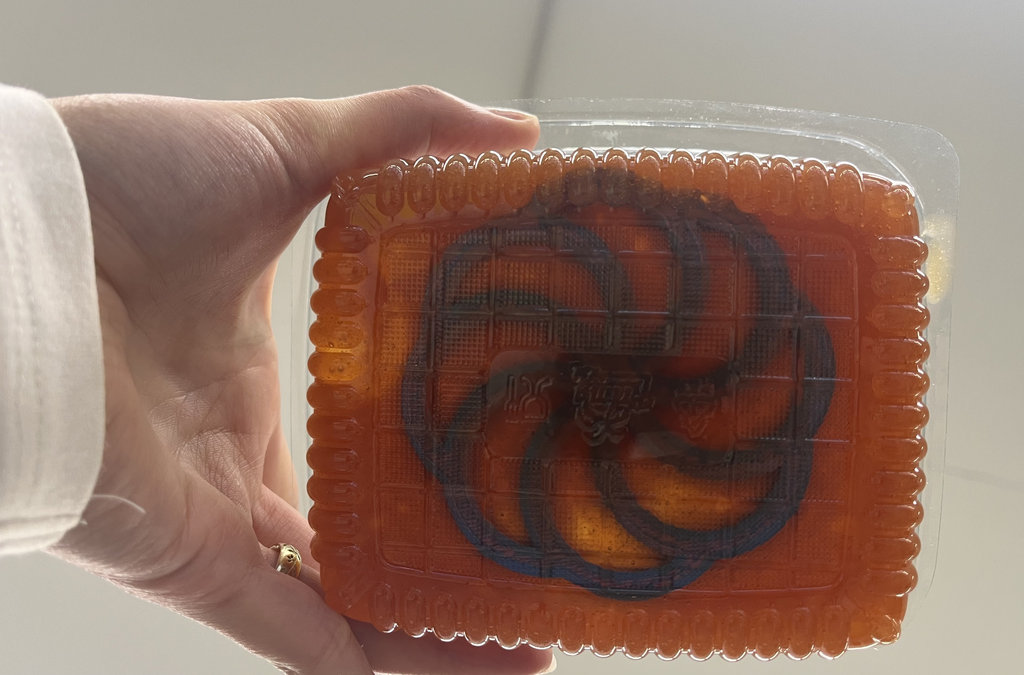
After waiting one day, we removed the model from the cured material.
The result was quite good, especially considering that our liquid rubber had expired about two years earlier. 😄😄
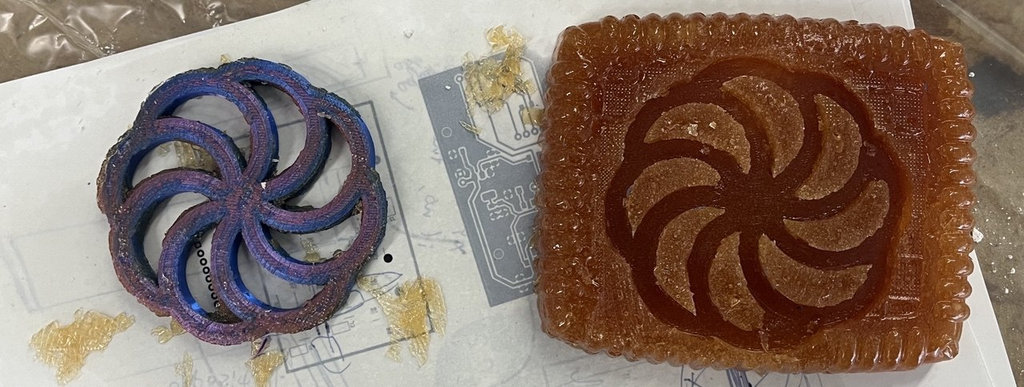
We also printed the mould of our model to try making another plaster cast.
However, once again we were unable to remove the plaster. 😄
From this, we concluded that to obtain a proper plaster casting, it is necessary to use a mould made from a suitable material.
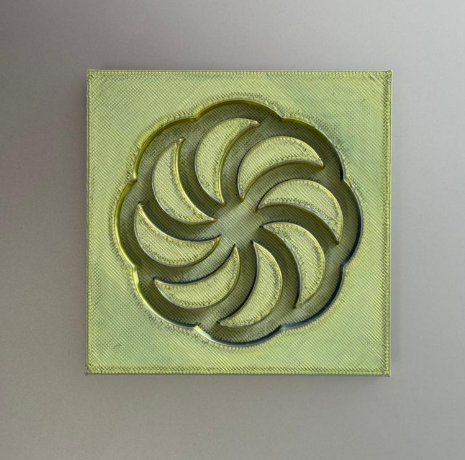
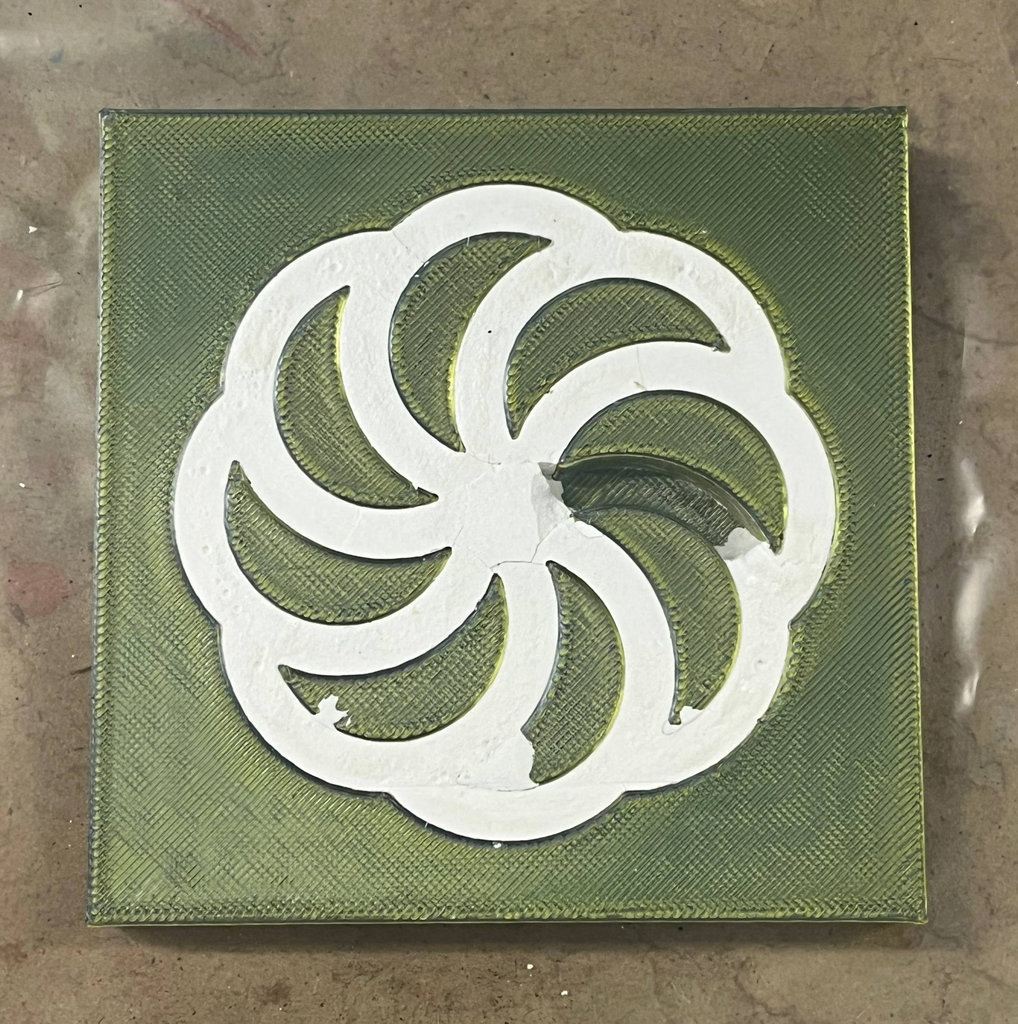
After that, we decided to use silicone with a mould printed by last year's students.
Silicone should also be mixed slowly to avoid creating bubbles, but... I rushed it. 😄
Still, the important thing is that we achieved a fairly good result. 😄😄

mini conclusion
Through these group experiments, I learned that choosing the right mould material is just as important as the casting material itself. I also gained practical experience working with plaster, liquid rubber, and silicone, while following the appropriate safety procedures for each material. Not every experiment was successful, but each failure helped me better understand the properties and limitations of the materials. The knowledge I gained during these tests became the foundation for my individual molding and casting project later in the week.
I can say that, out of all the materials we used, silicone was the easiest to work with, although it also has its own application-specific details that need to be considered.
It was also easy to work with the liquid rubber, and it can be used with a wider variety of mould materials than plaster. Plaster is much more demanding and requires a mould made from a suitable material to achieve a good result.
After thinking for a long time about what model I wanted to create, I decided to go again with my favorite “Granny” model 😄
The reason I was thinking so long is that I really don’t like working with 3D software, and I couldn’t get Fusion360 running on Ubuntu.
Anyway, since “Granny” only existed in virtual form, this was a good chance to bring her to life and have her always with us. One thing I really like about FabAcademy is that I can both program and physically touch what I create. Now it’s time to touch “Granny” 😄
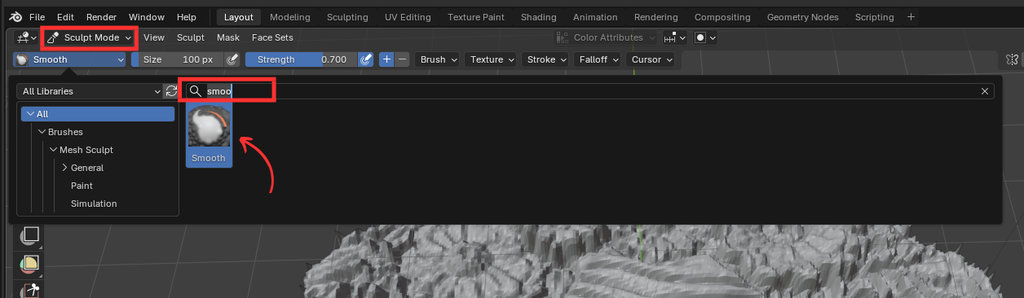
For that, I took only the face of “Granny” from the image, removed the background, and used an online 2D to 3D tool to give it a 3D effect. Then I opened it in Blender to refine it, because the online conversion created a lot of rough surfaces.

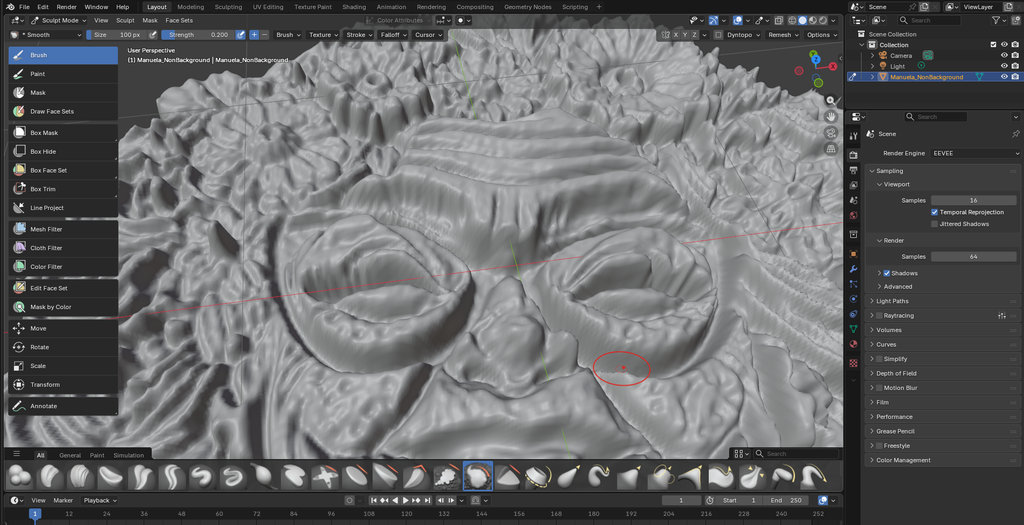
So I switched from Object Mode to Sculpt Mode, then used the Smooth tool to clean and refine the surface.
Here is a short video of the process — and sorry to all Blender gurus, it’s my first time using it 😄
I am happy with the result, I even opened “Granny’s” breathing 😄

After finishing the model, it was time to create the mould.For that, I needed to “put Granny inside a cube” 😄
From the top menu I selected: Add → Mesh → Cube
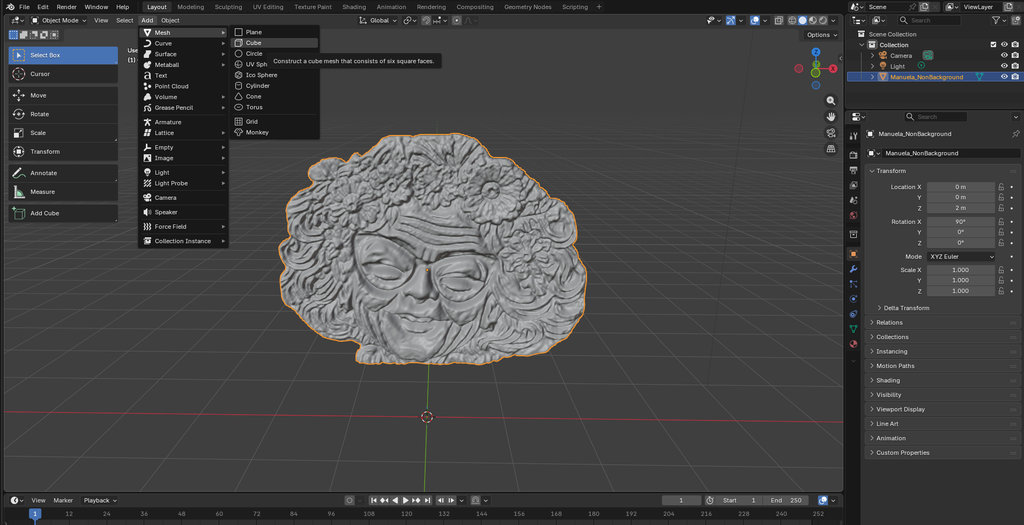
Then I pushed “Granny” into the cube so that only the back layer remains outside.
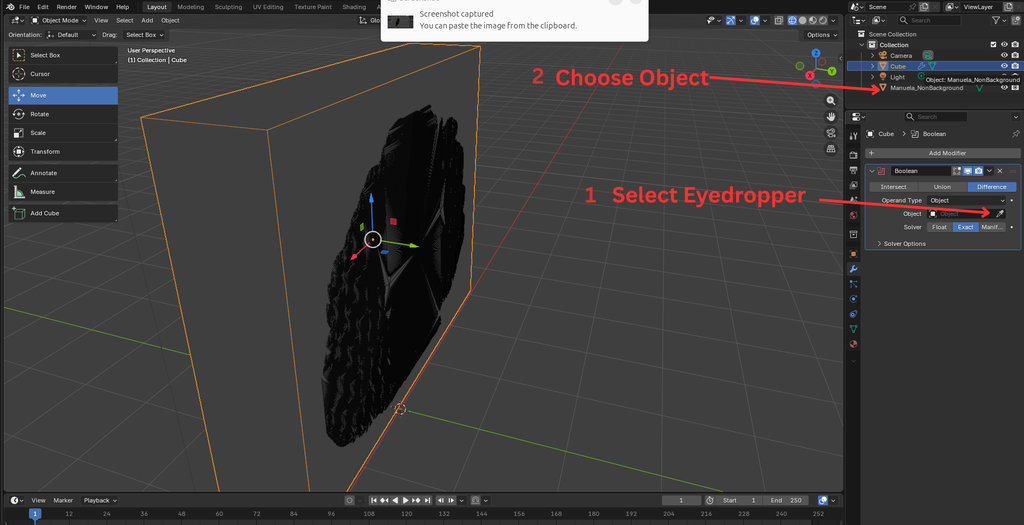
After that: Selected the cube, Opened Modifiers, Add Modifier → Generate → Boolean
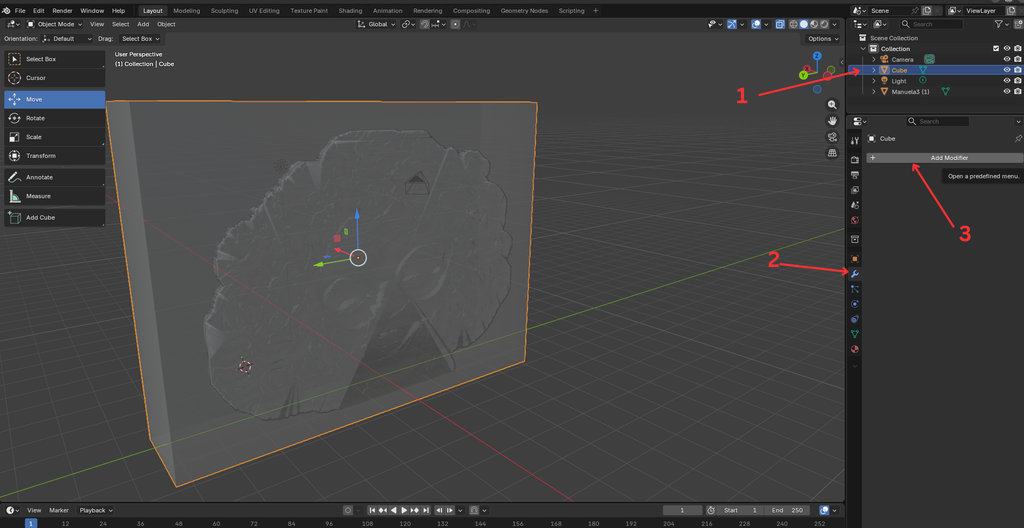
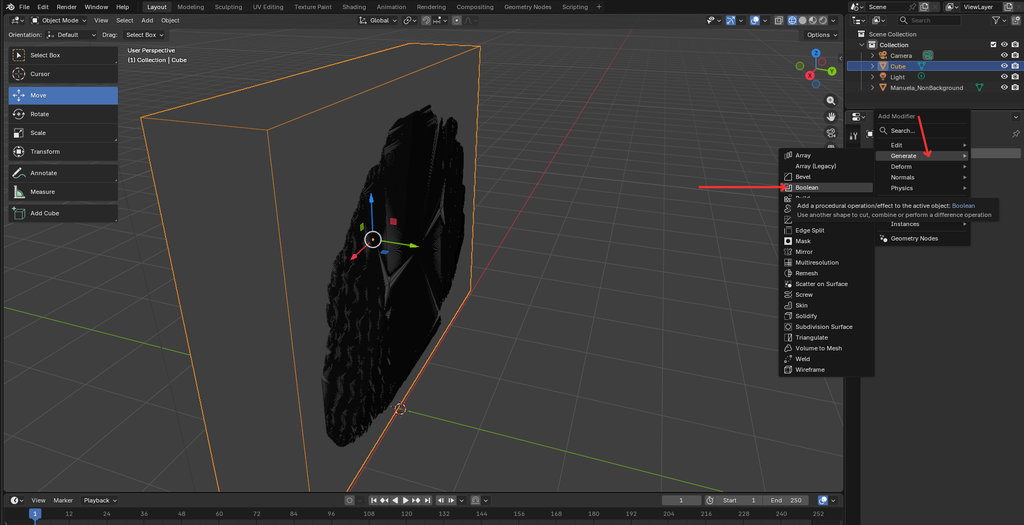
Used the eyedropper to select the “Granny” object
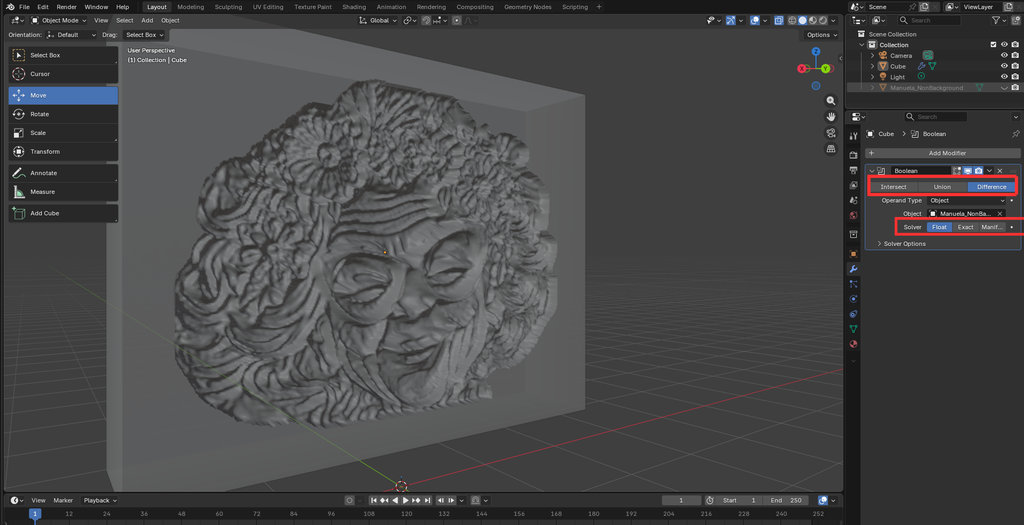
Now the result is visible. After confirming everything is correct, I deleted the “Granny” object.
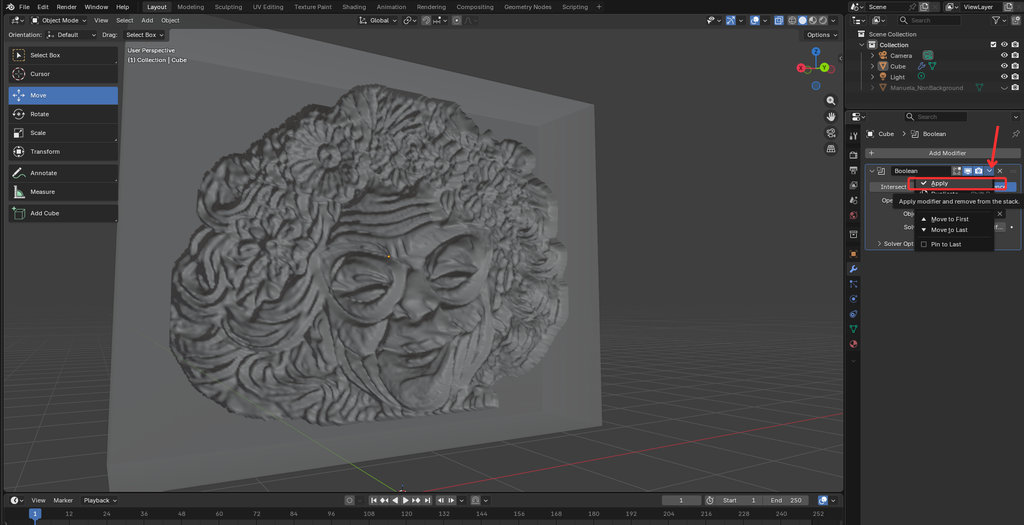
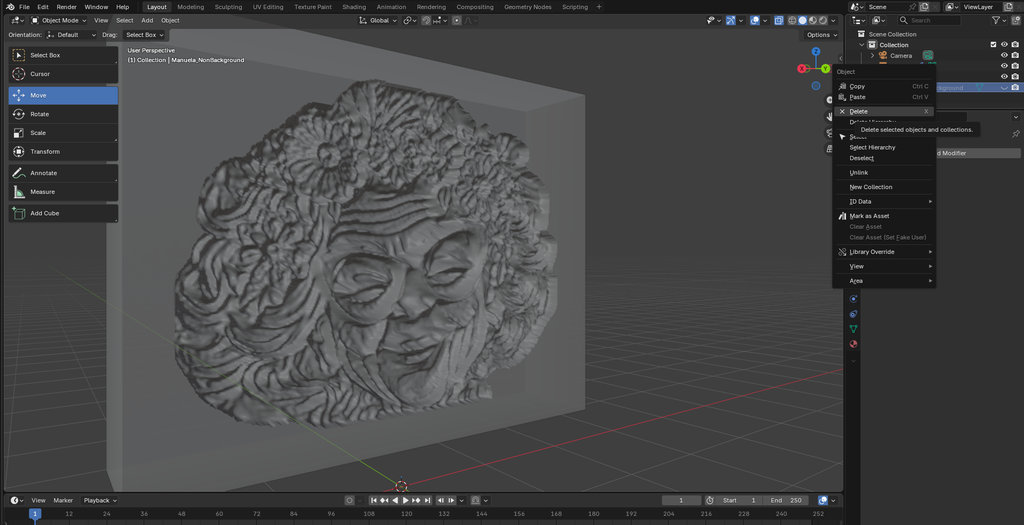

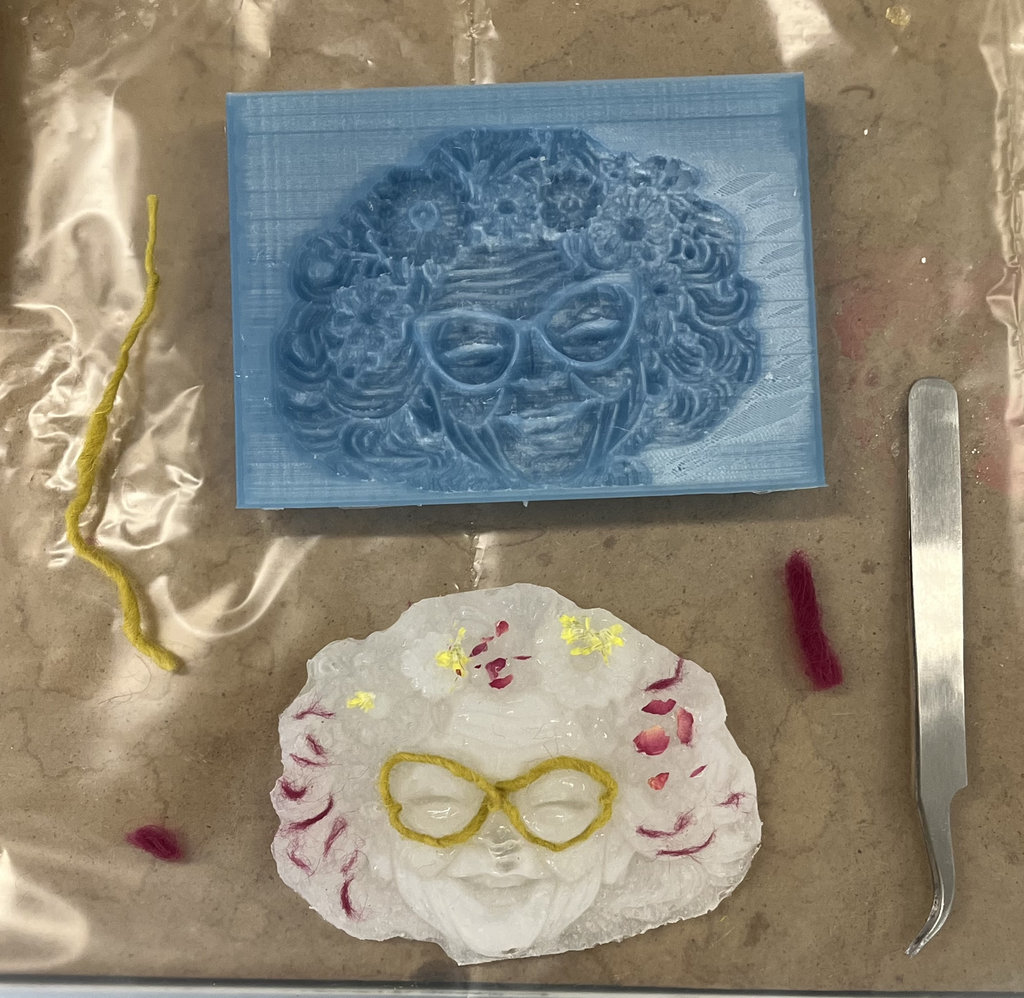
Now the mould is ready to export. I exported it as an .stl file.
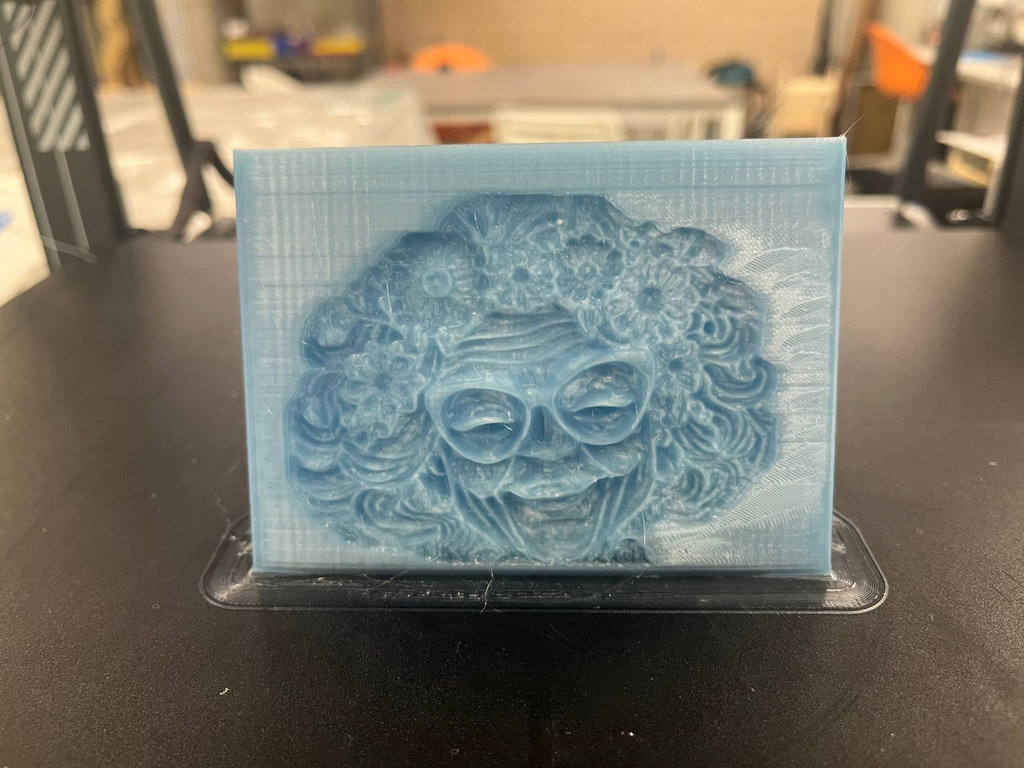
After that, it was ready for printing to get the mould. I printed it using a 3D printer.
Here is the result. I am very satisfied with the quality, but we will be sure after casting the material inside.
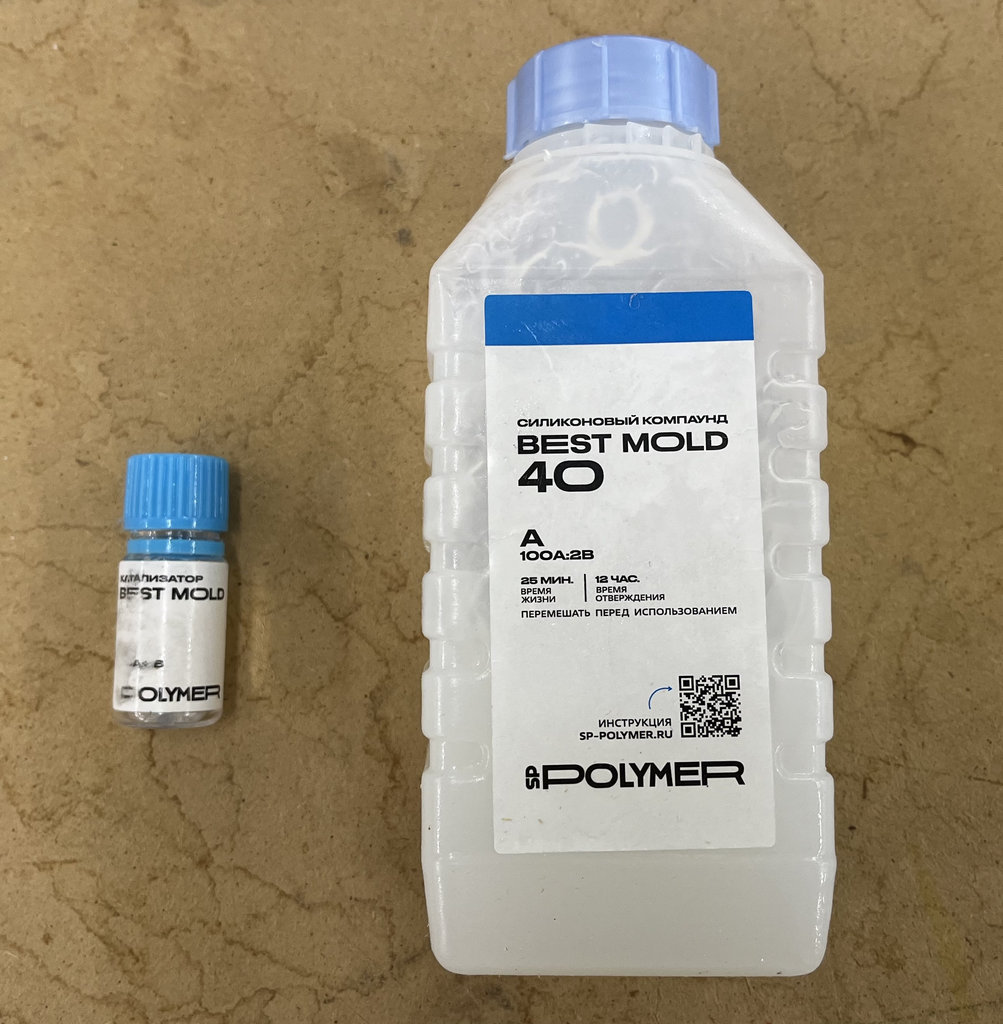
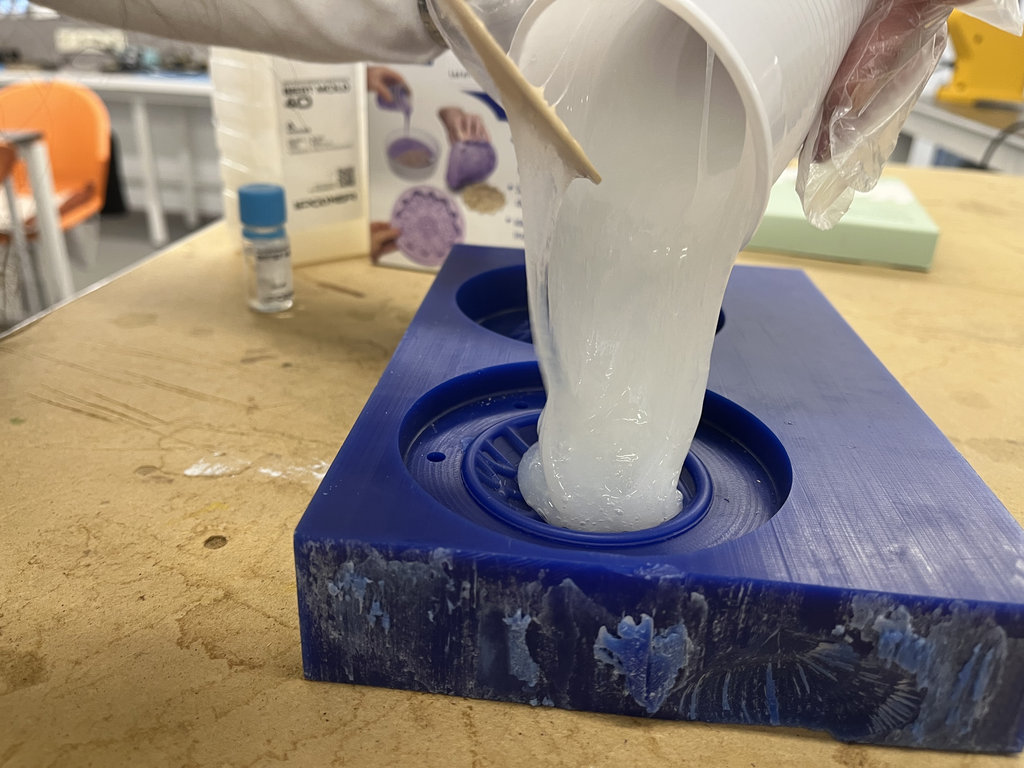
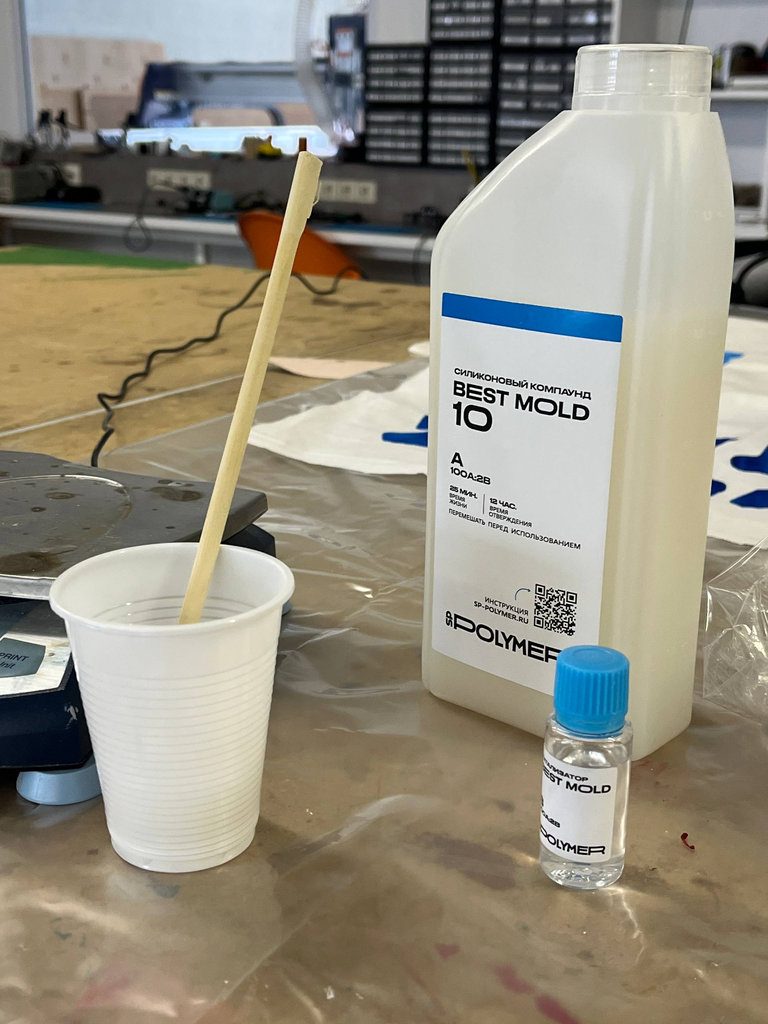
For casting, I first used silicone material.
I used Best Mold 10, which is a two-component liquid silicone.
According to the instructions, the ratio should be 100:2 (A:B).
I mixed: 50g of A and 2g of B
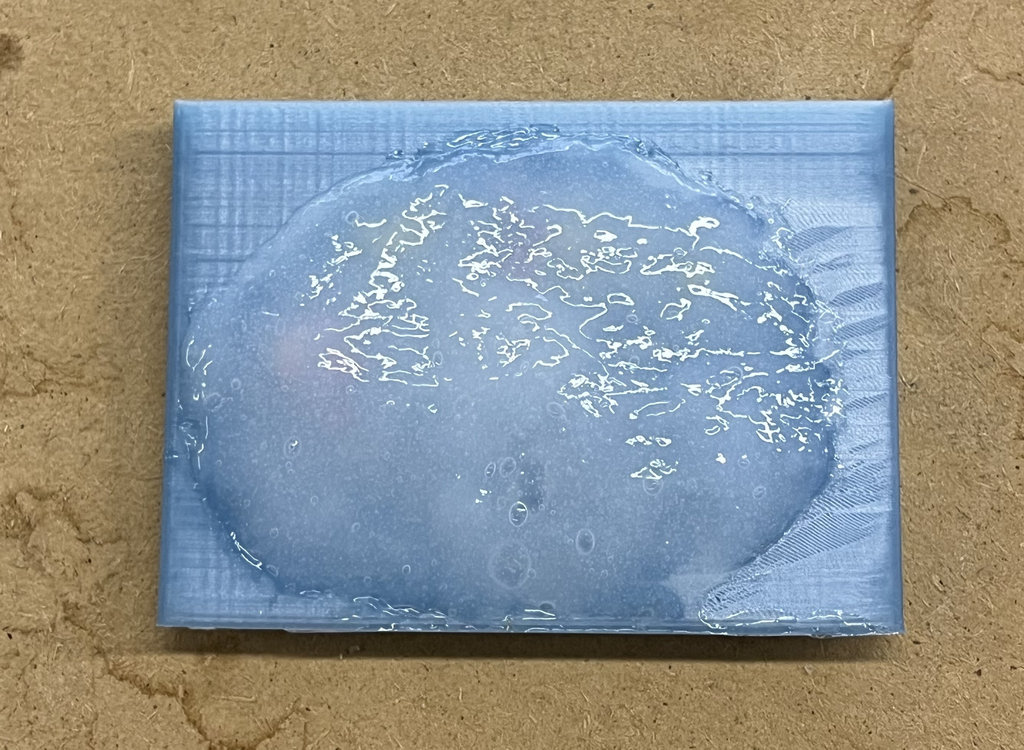
Before pouring the material, I also decorated “Granny’s” hair with flowers 😄

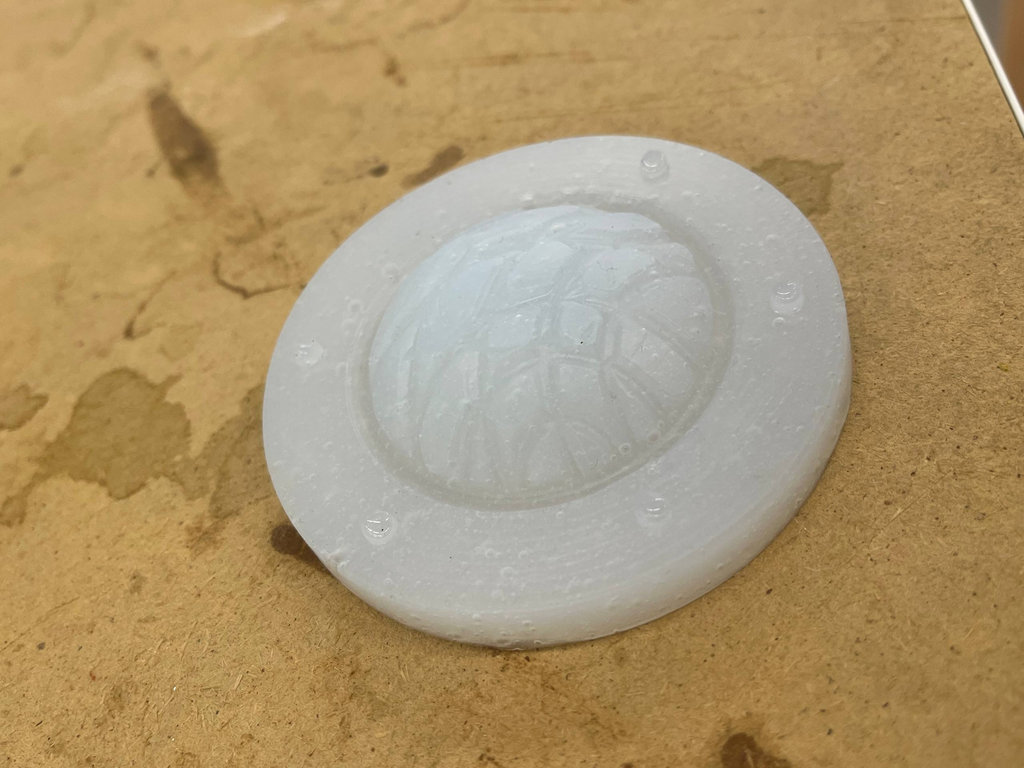
It was written that I should wait 12 hours, but I couldn’t wait and removed it after 5 hours 😄
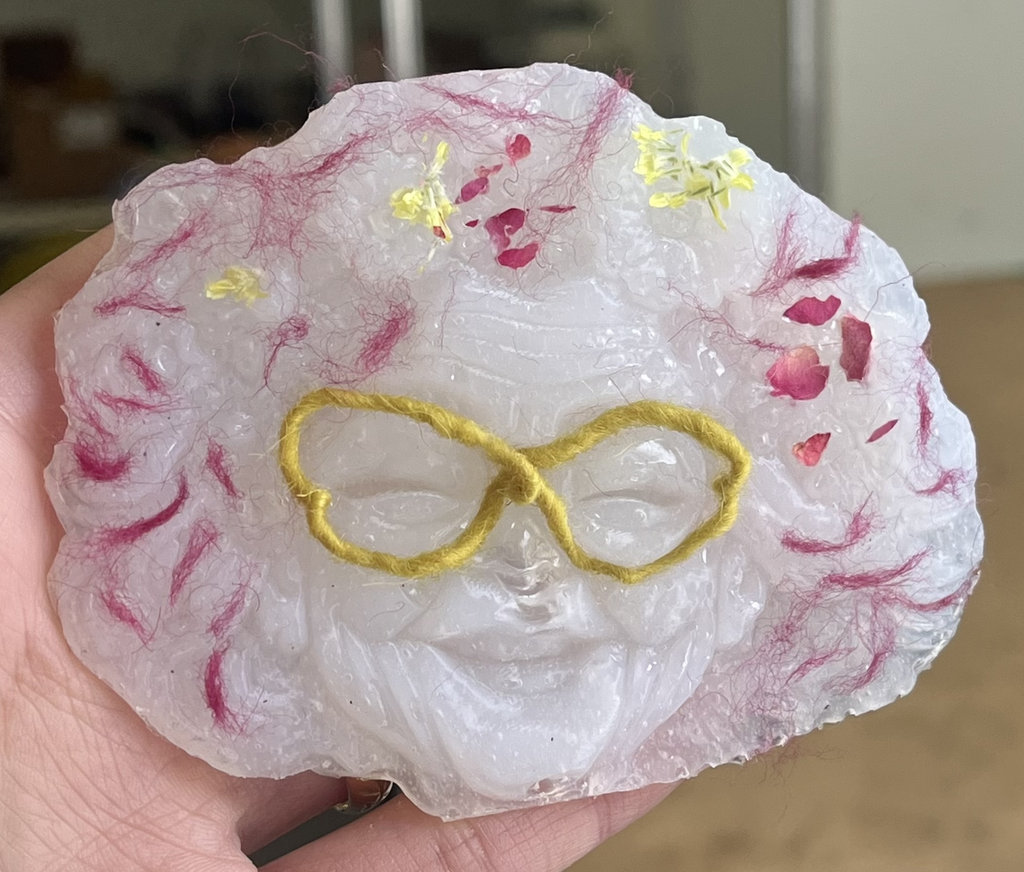
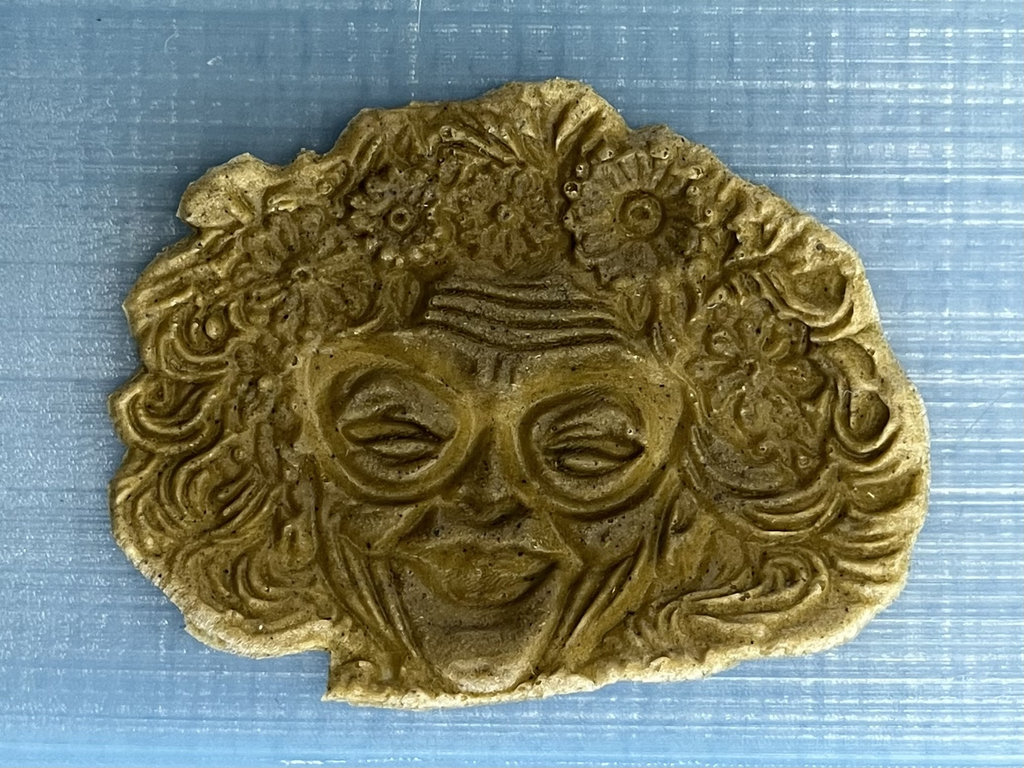
Here is the result. As we can see, even though I carefully fixed the nose in Blender, the silicone didn’t reach that part, and now we have a nose-less Granny 😄
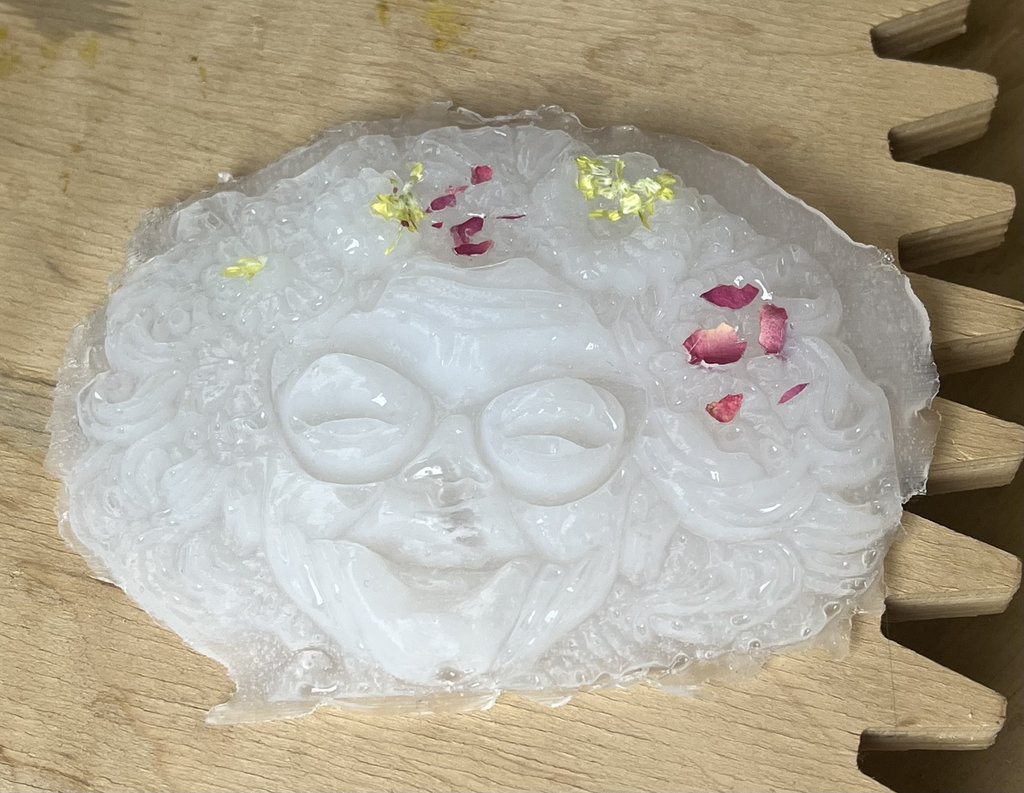
But we don’t get sad — I decorated “Granny” using threads 😄
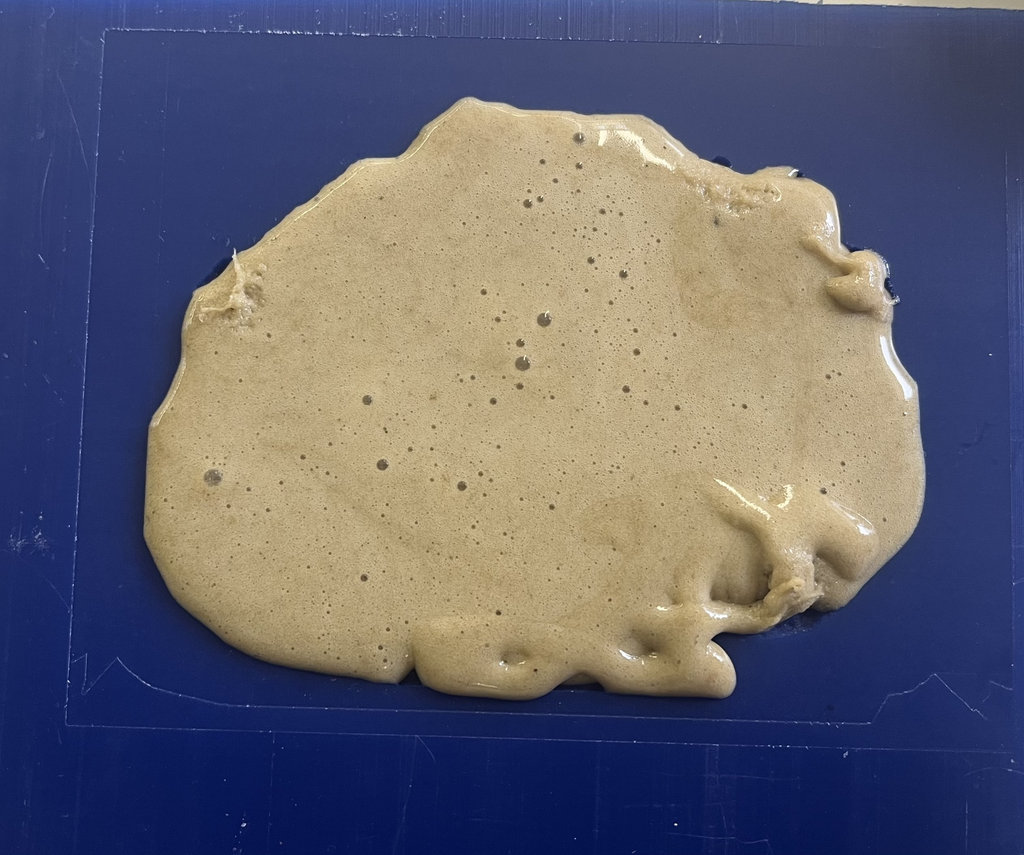
Now I needed to think what else I can pour into the mould to get my “Granny”. From our Group Assignment experiments it was already clear that gypsum would not come out from my mould, and the rubbers are expired — they work, but with difficulty.
So I decided to use biomaterials. I’ve always been interested in creating things with biomaterials, and we also have a Fabricademy instructor in our lab, who has been specializing in this field for more than two years and has many amazing works. Here is Erika Mirzoyan amazing page.
I asked her to help me create a material that would not dry too much over time, so my “Granny” would not shrink and deform. She suggested using one of her experiments, which is clay-based. The good thing about this material is that we can always melt it again and create a new form. She also mentioned that every time you melt it, the quality becomes even better. So now I have a really nice material to melt and bring my “Granny” back to life again.
Here are the components Erika used to create this material.
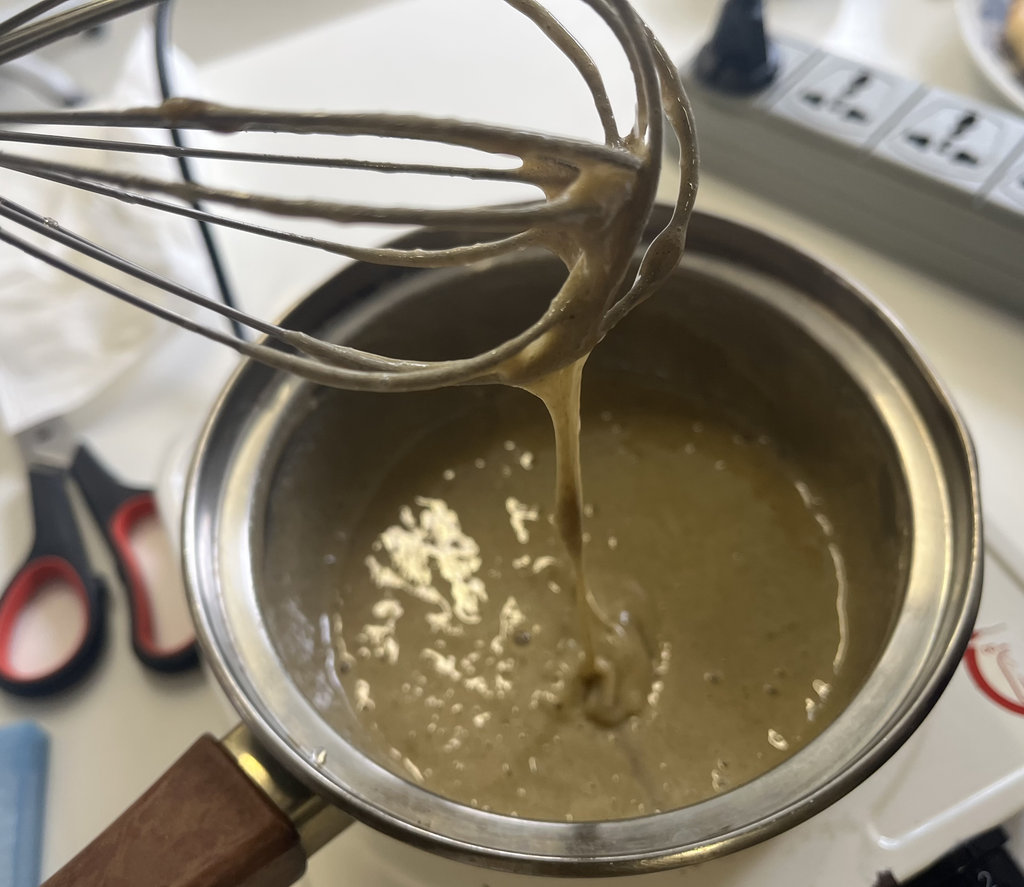
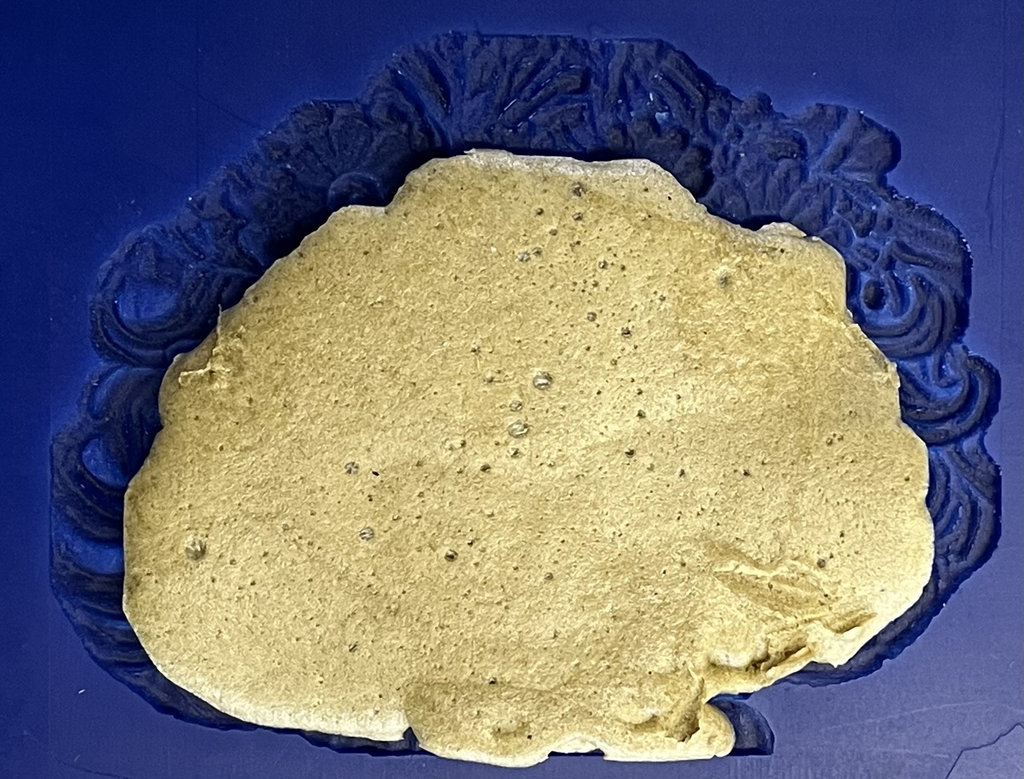
I divided this piece into several parts, added water, and started mixing it continuously over heat.
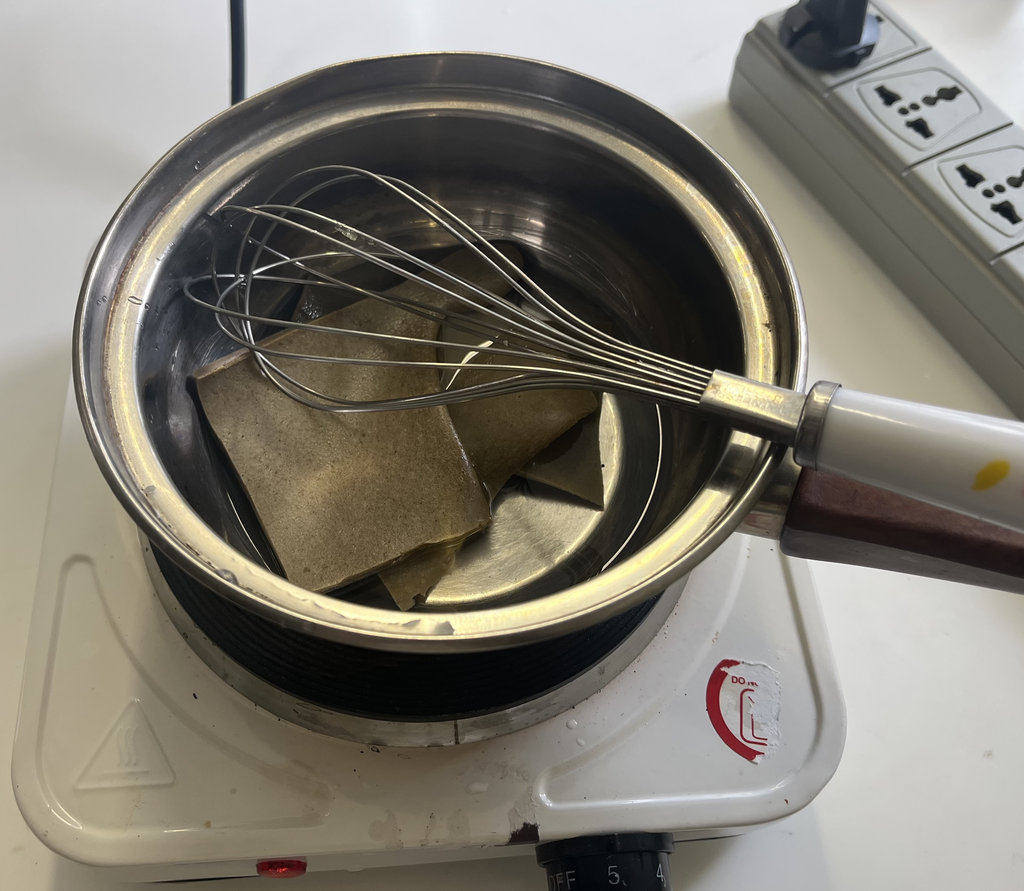
When I felt that all the big chunks had melted, it was ready to use. Since it cannot become perfectly homogeneous, I ignored some small lumps and used a filter to pour it into the mould.
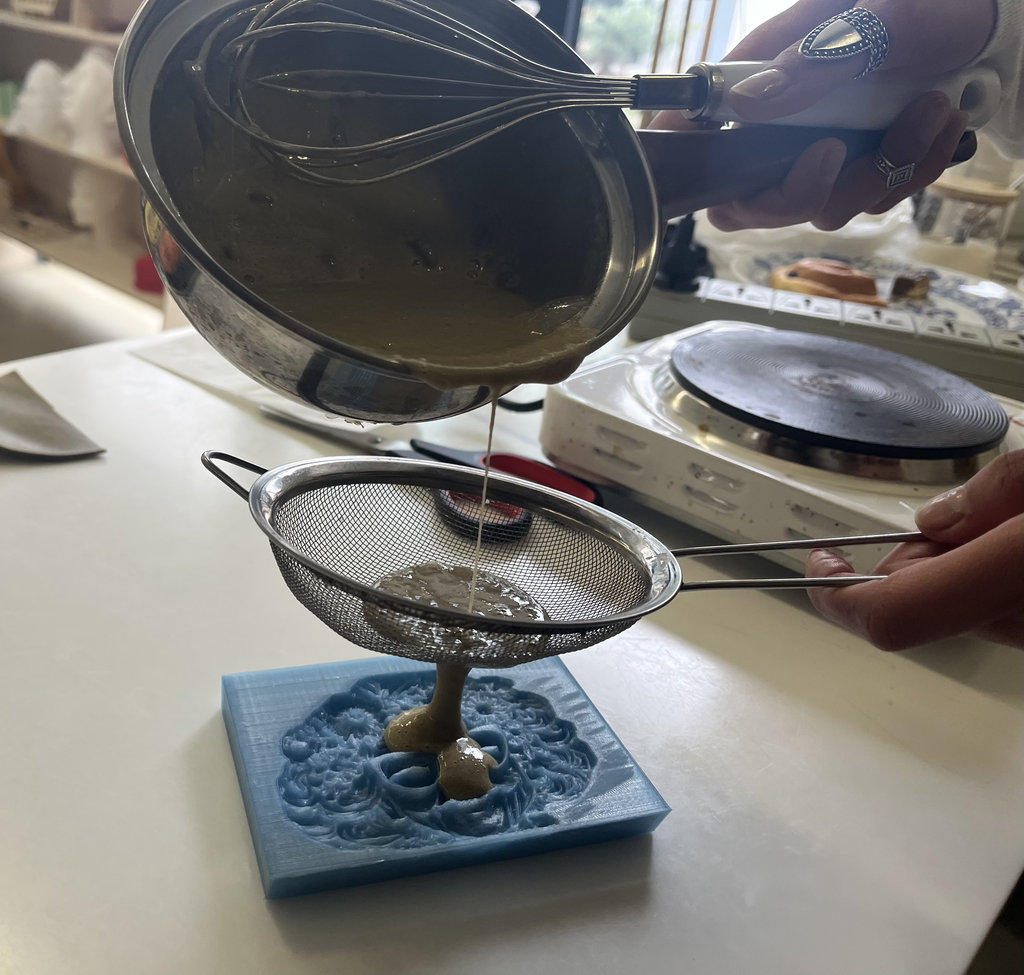
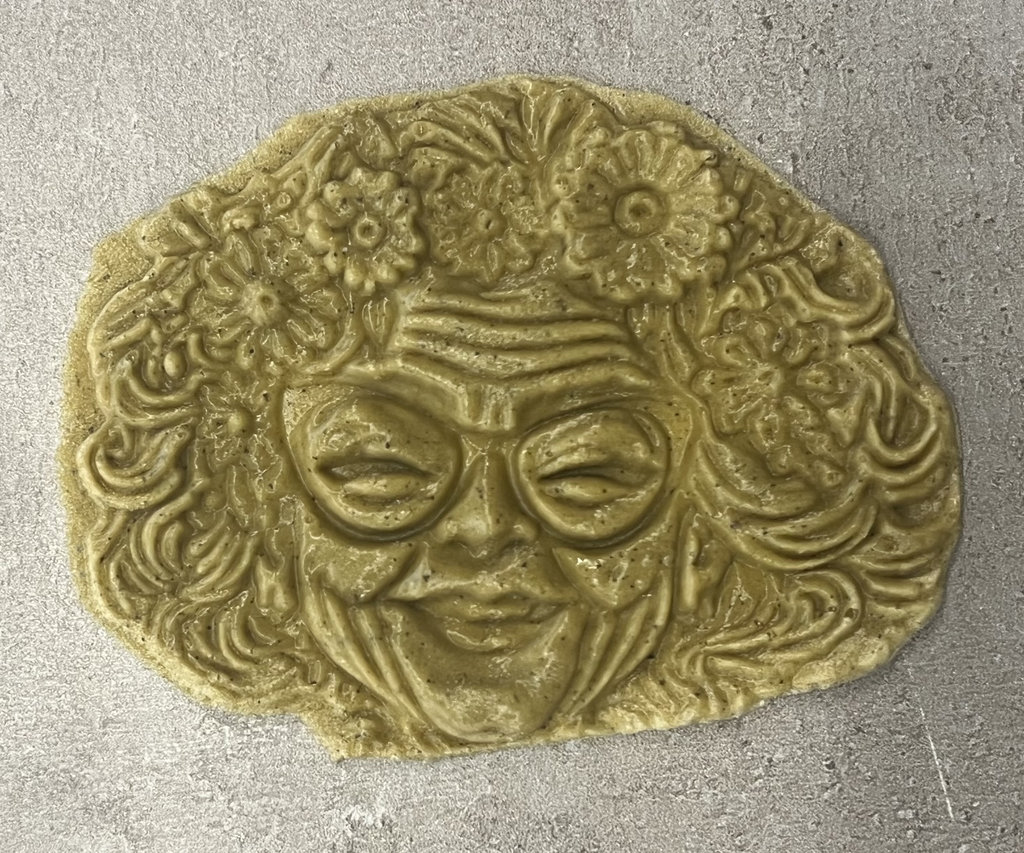
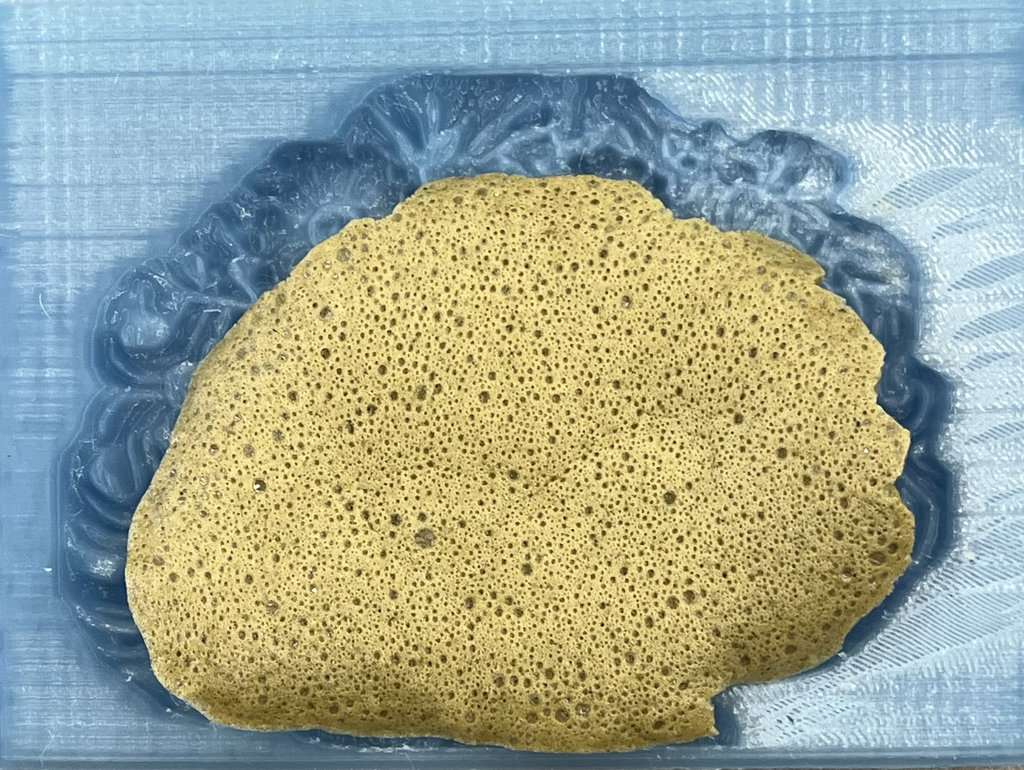
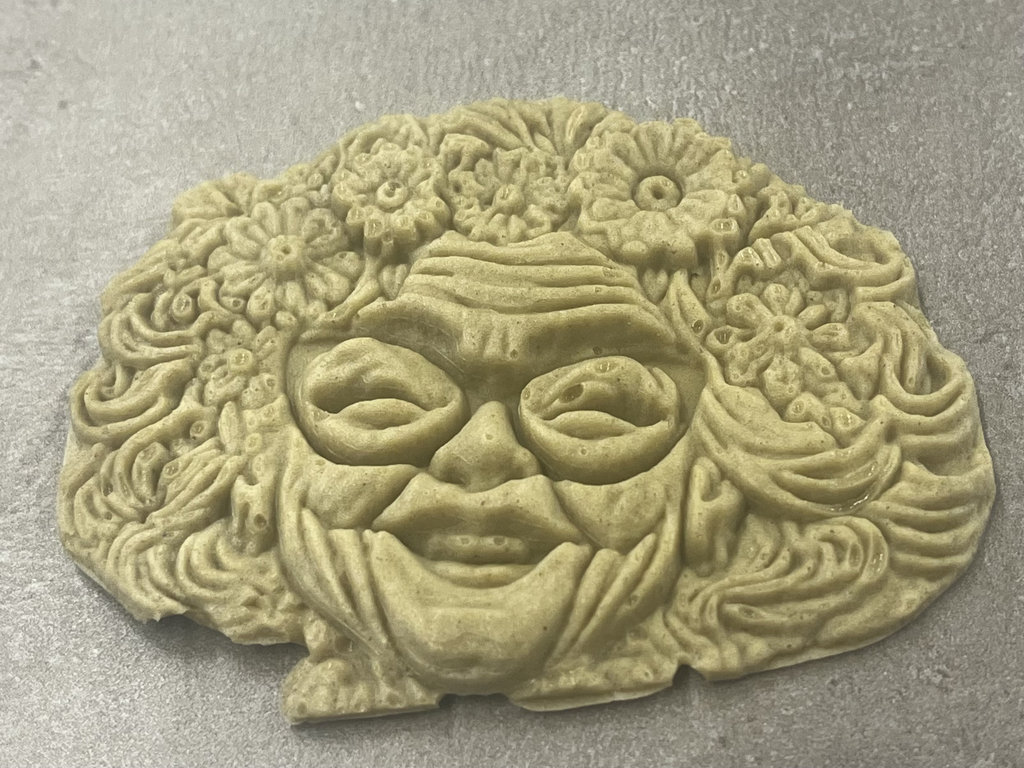
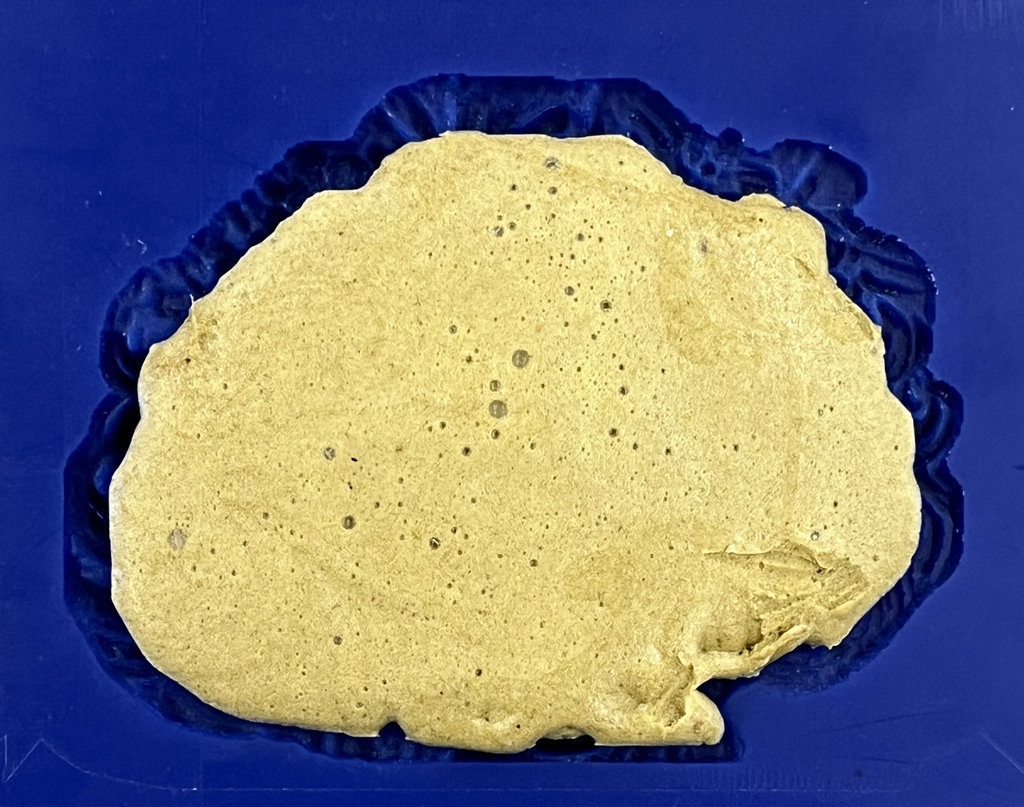
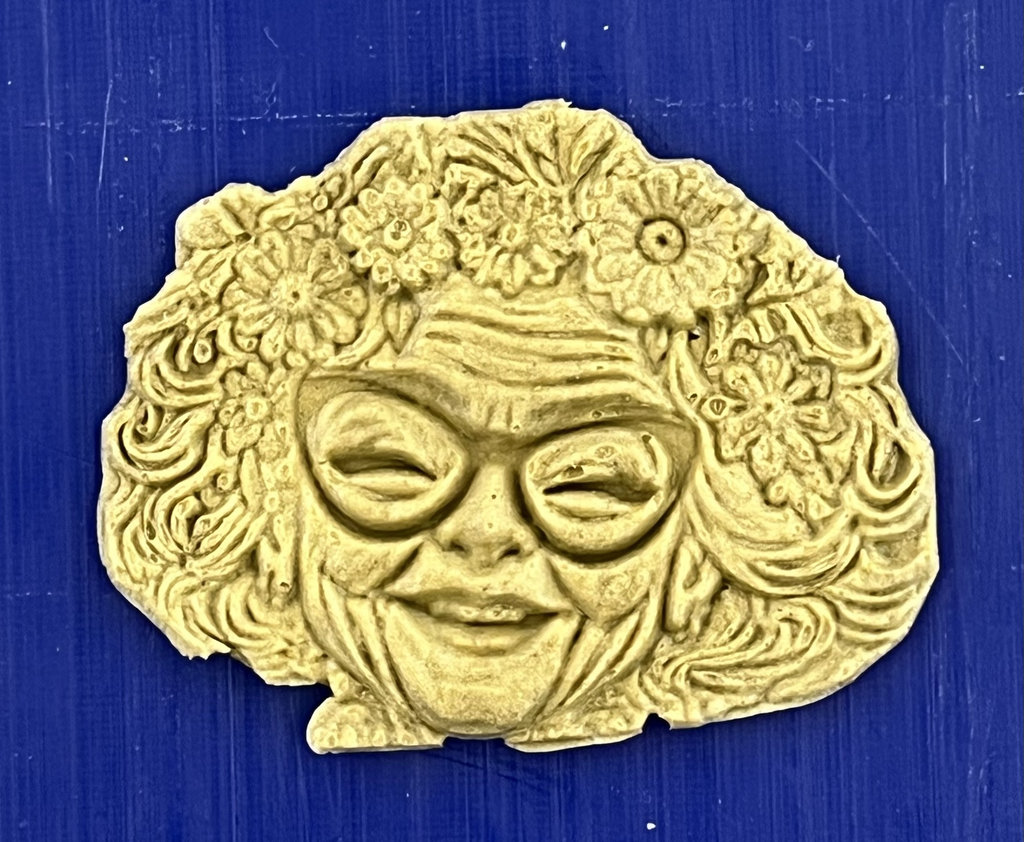
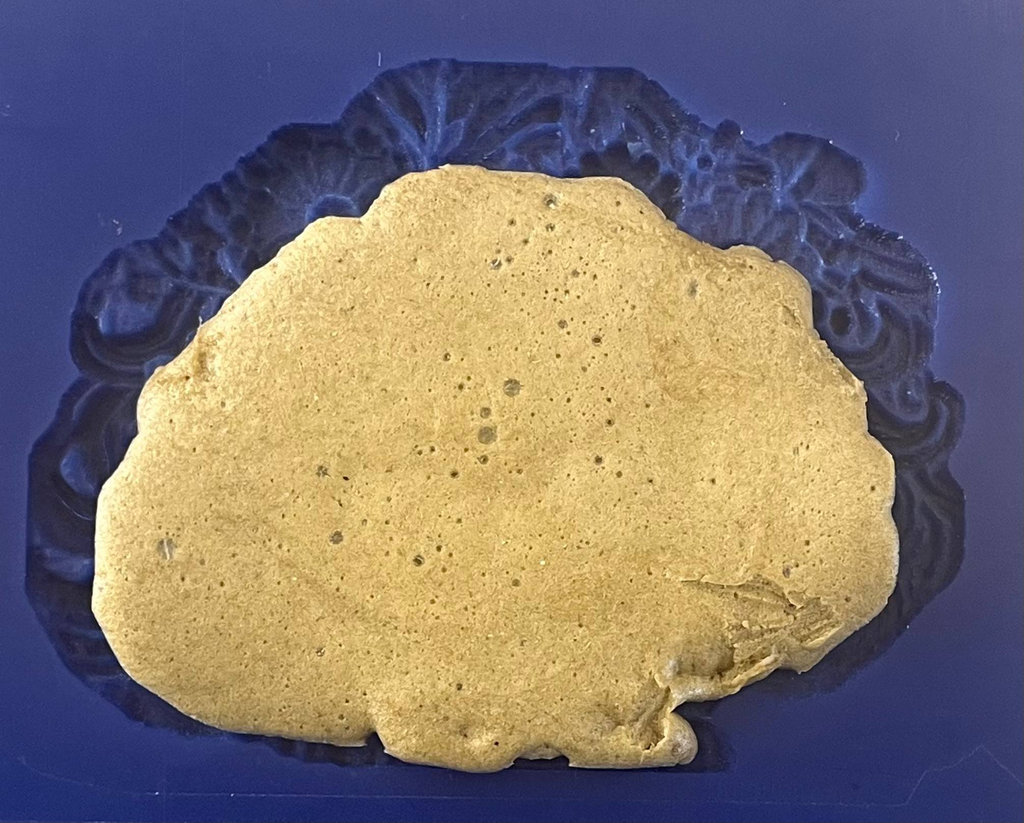
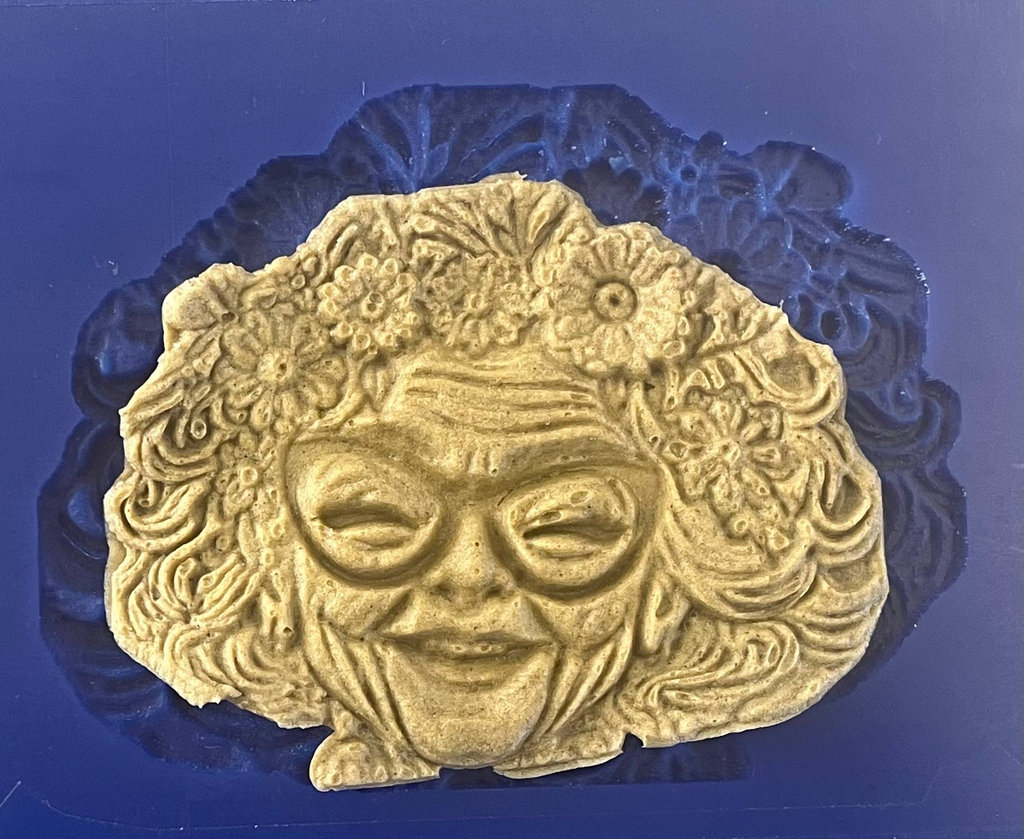
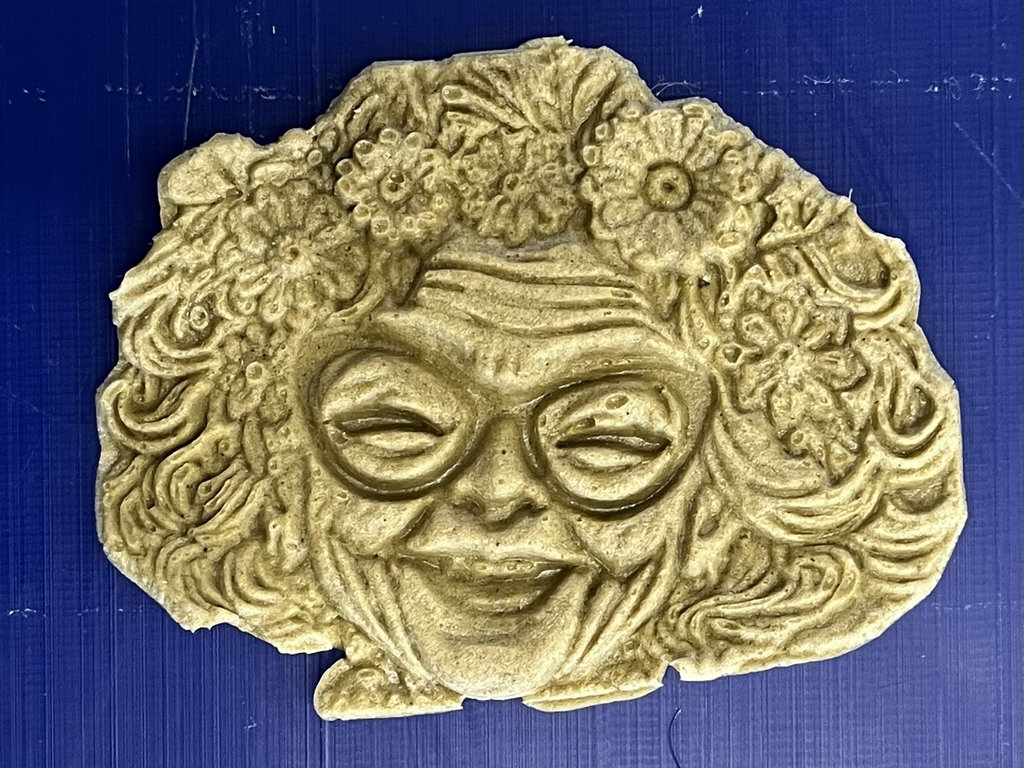
Here is how it looked after pouring, and after leaving it overnight, I could feel it had dried, so I removed it.

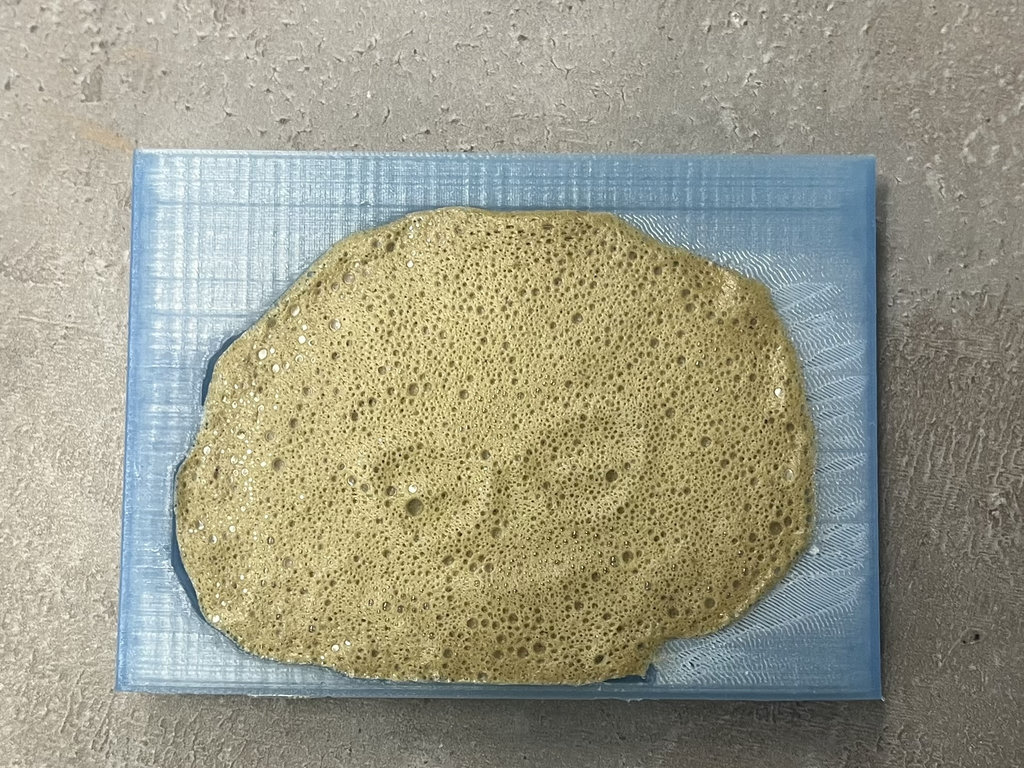
It turned out just perfect. I’m really happy both with the mould and especially with Erika’s material ❤️
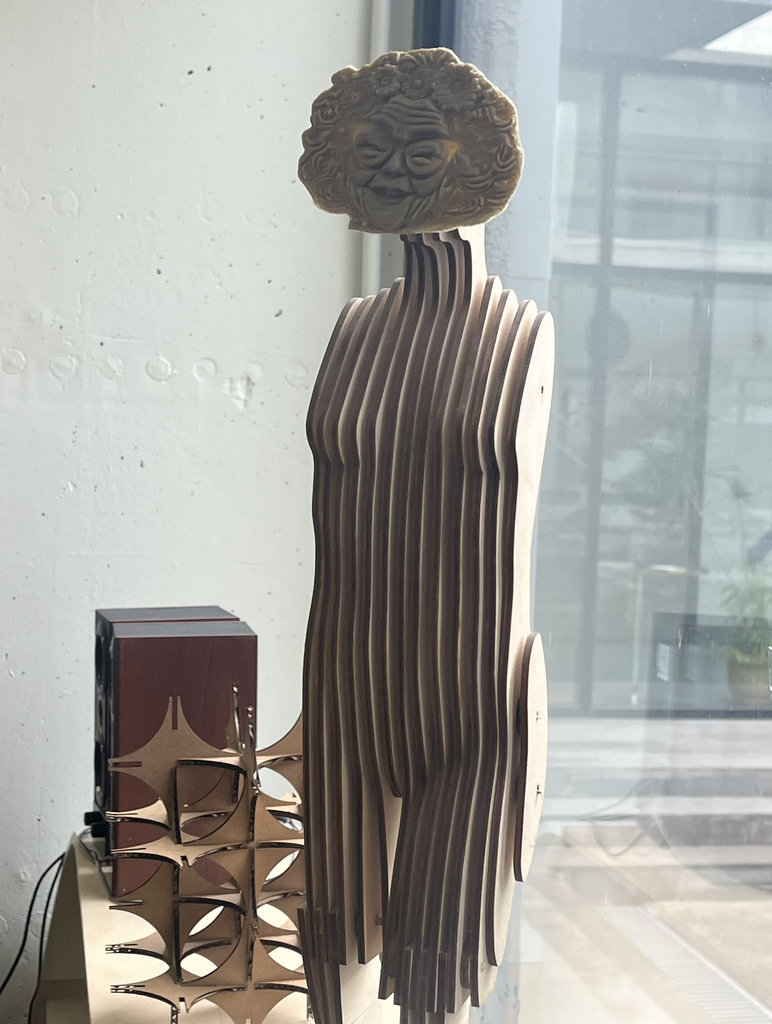
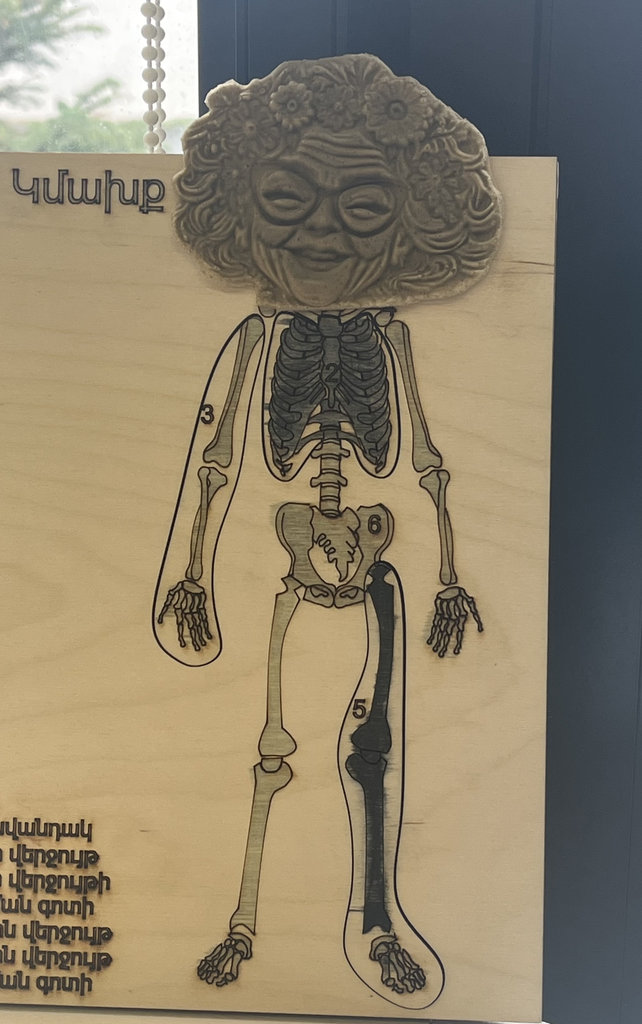
I also did some experiments with “Granny”, trying different forms in the lab 😄
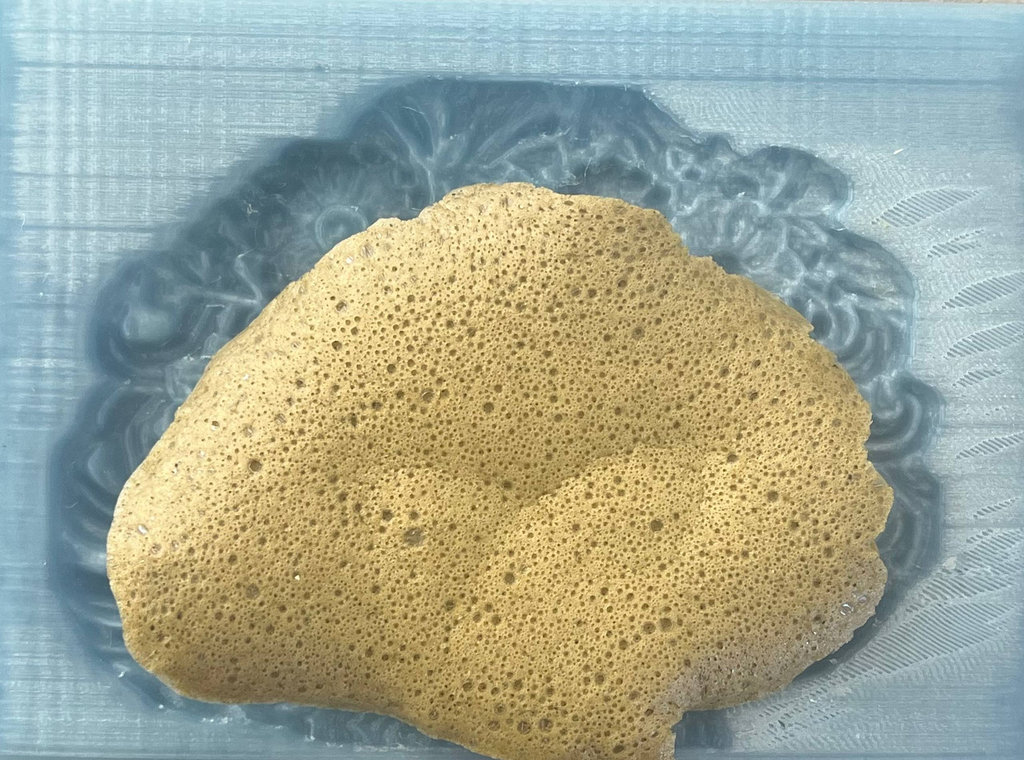
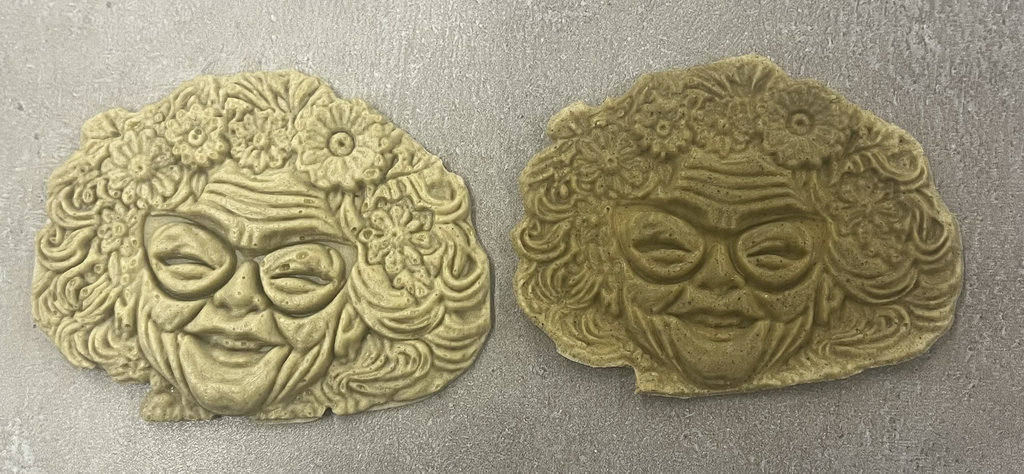
These photos are taken one day later — you can already see how much it shrank, and also small cracks appeared, and it became drier.

This photos after 2 days.

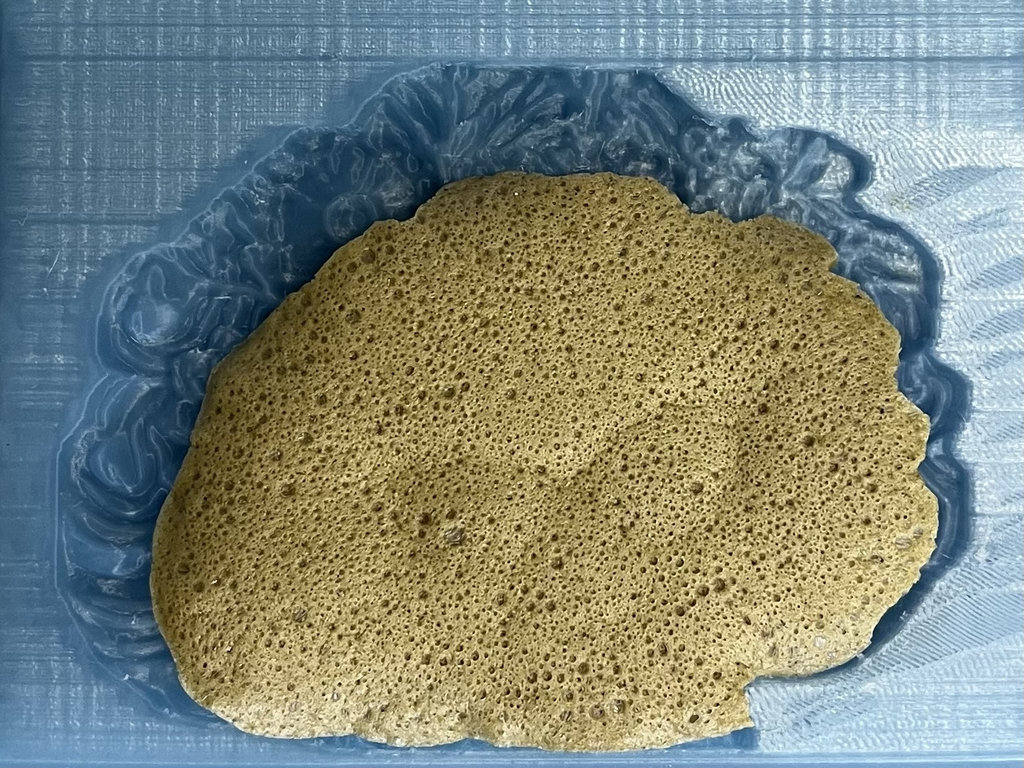
This photos after 3 days.
This photos after 4 days.
Granny with CNC machine
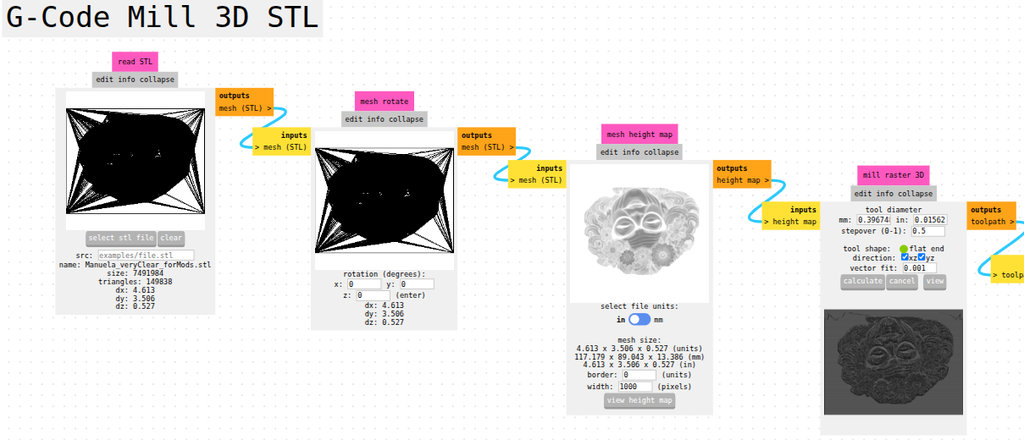
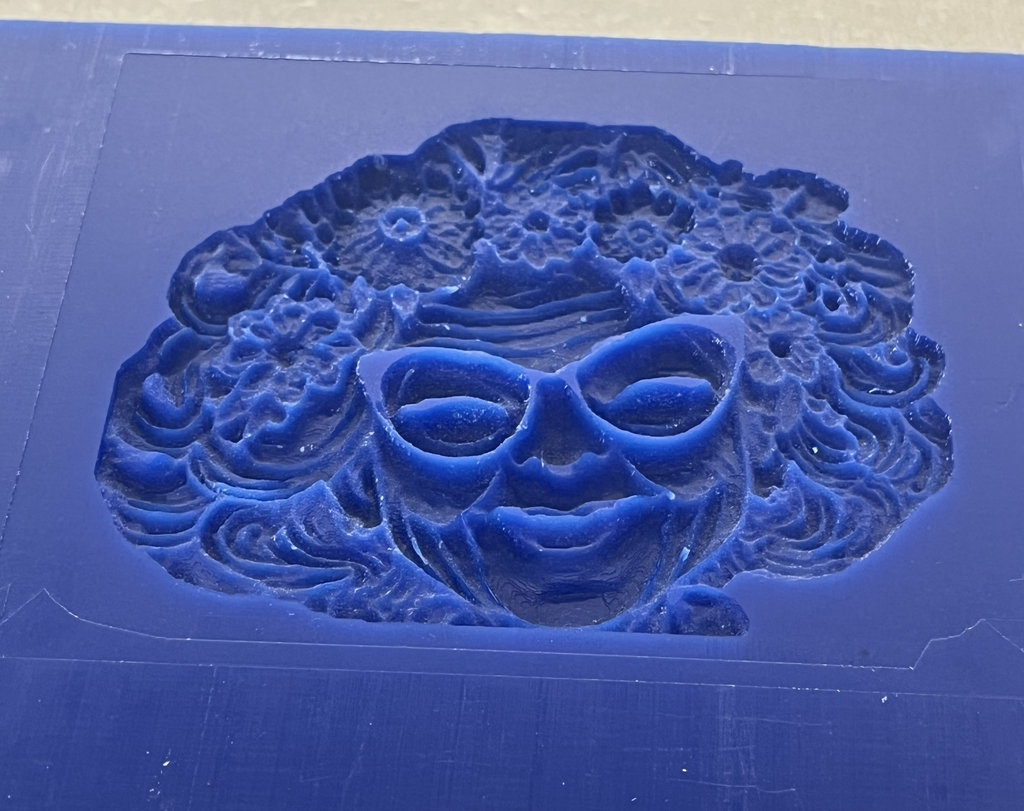
I wasn’t fully satisfied with this result, so I also tried to create the “Granny” mould using a CNC milling machine(monoFab SRM-20 Roland). It was not an easy or fast process, so here is how it went.
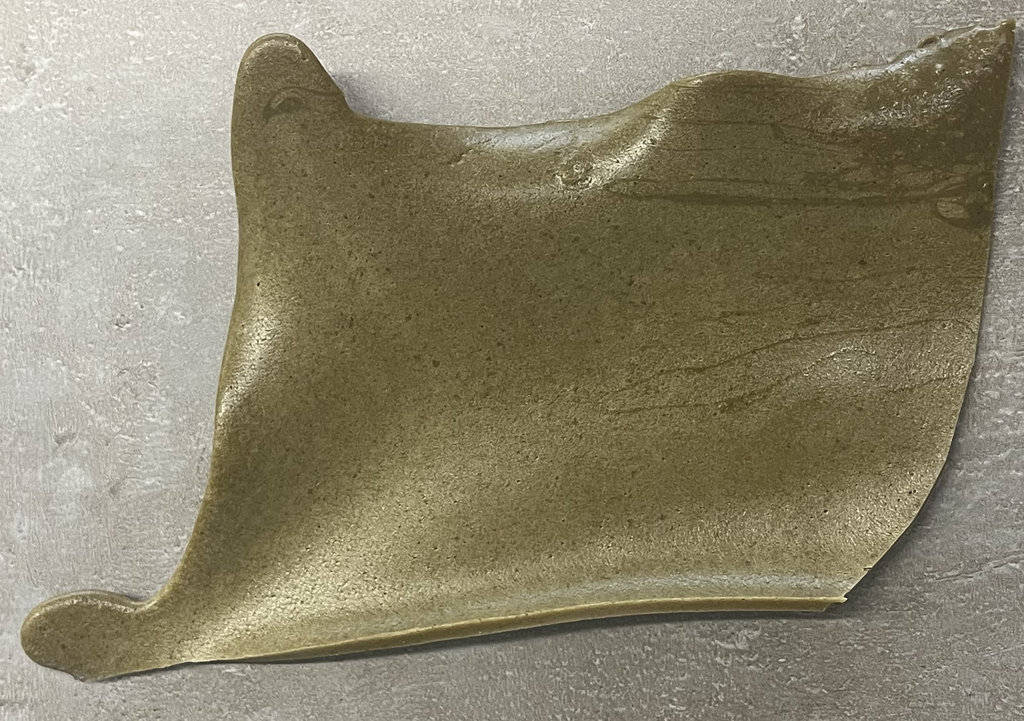
I fixed the wax to the machine bed using double-sided tape, just as we did when securing the PCB to the bed.
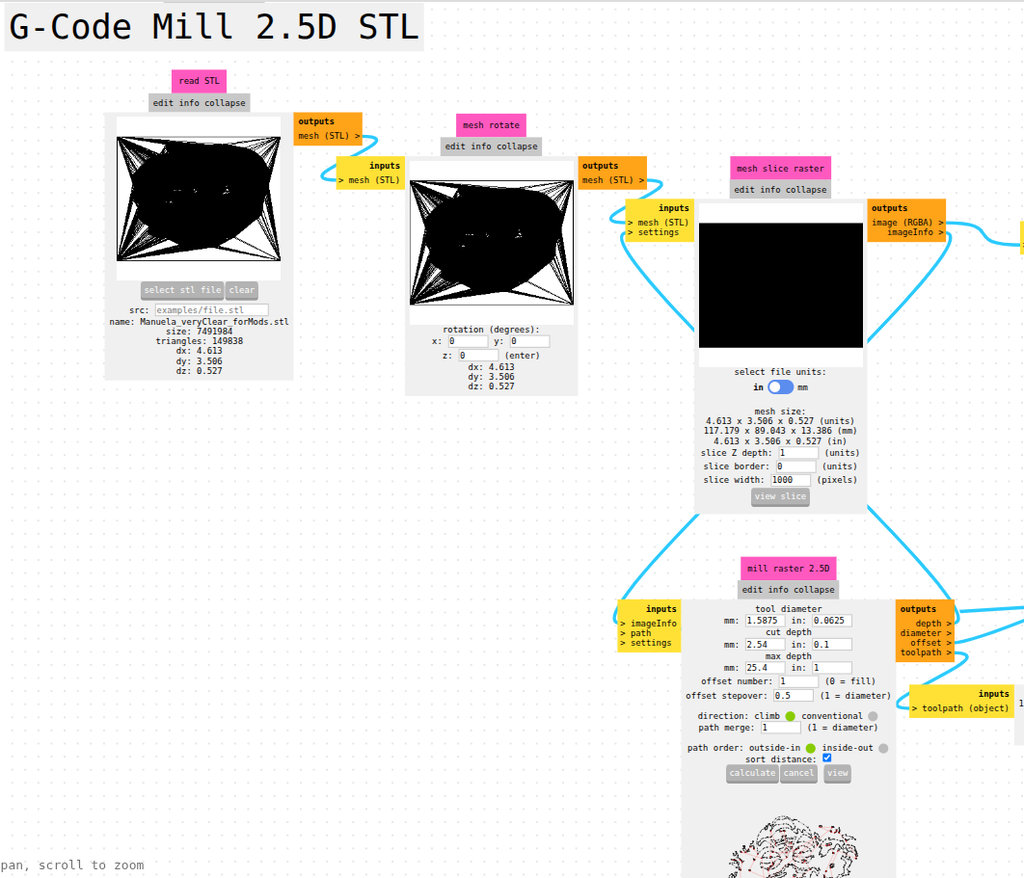
Since I worked on the 3D model in Blender and it doesn’t generate G-code, I exported it as an .svg file to use with mods.org.
I opened “G-Code Mill 2.5D STL”, selected my SVG file, then selected a 1/16 end mill (1.5875 mm), calculated, and checked the result. I chose this size to gradually reach a clean final result without damaging the mould.
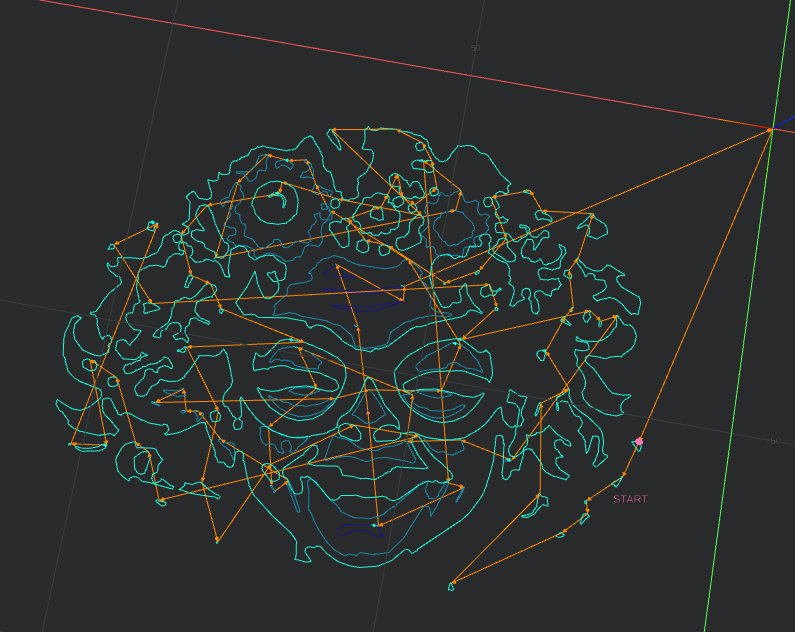
Here is the result — you can already see the rough shape of “Granny”. The CNC machine took about 40 minutes. I’m satisfied 😄❤️

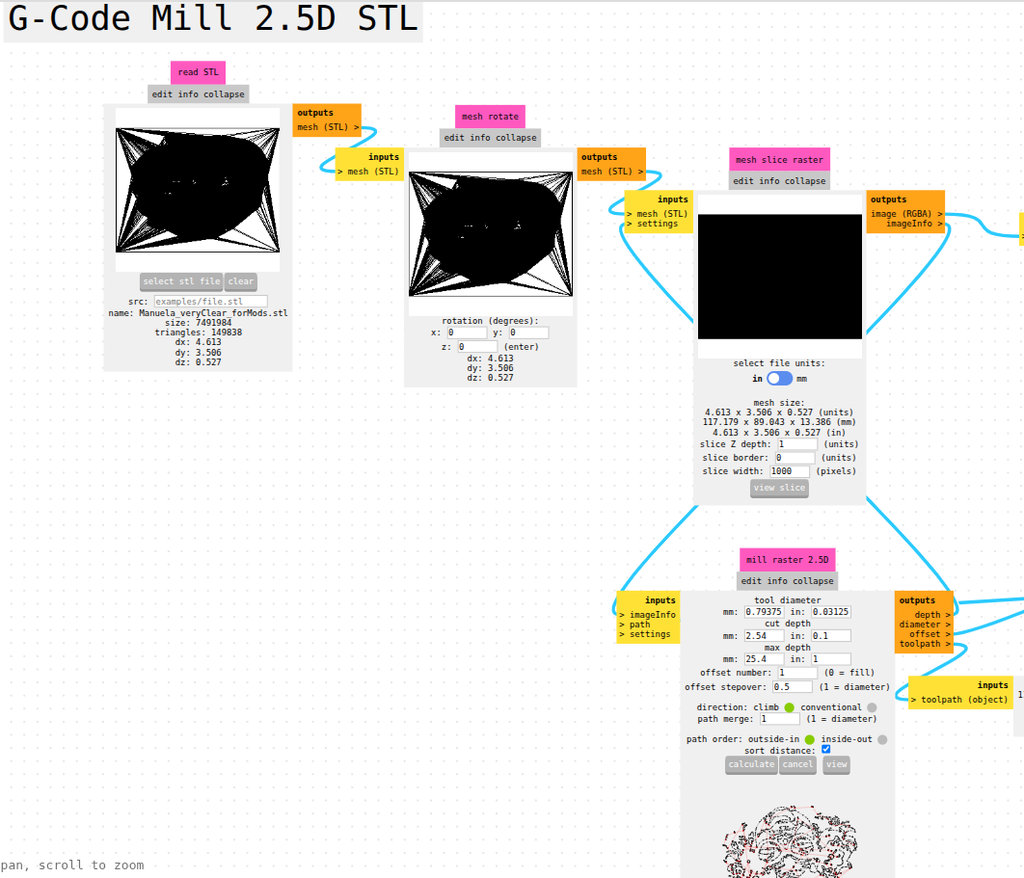
Then I generated another .nc file, this time changing only the end mill size to 1/32 inch (0.79375 mm).
After calculating and checking, I sent it to the CNC machine, changed the tool, kept the same XY coordinates, and re-zeroed Z.
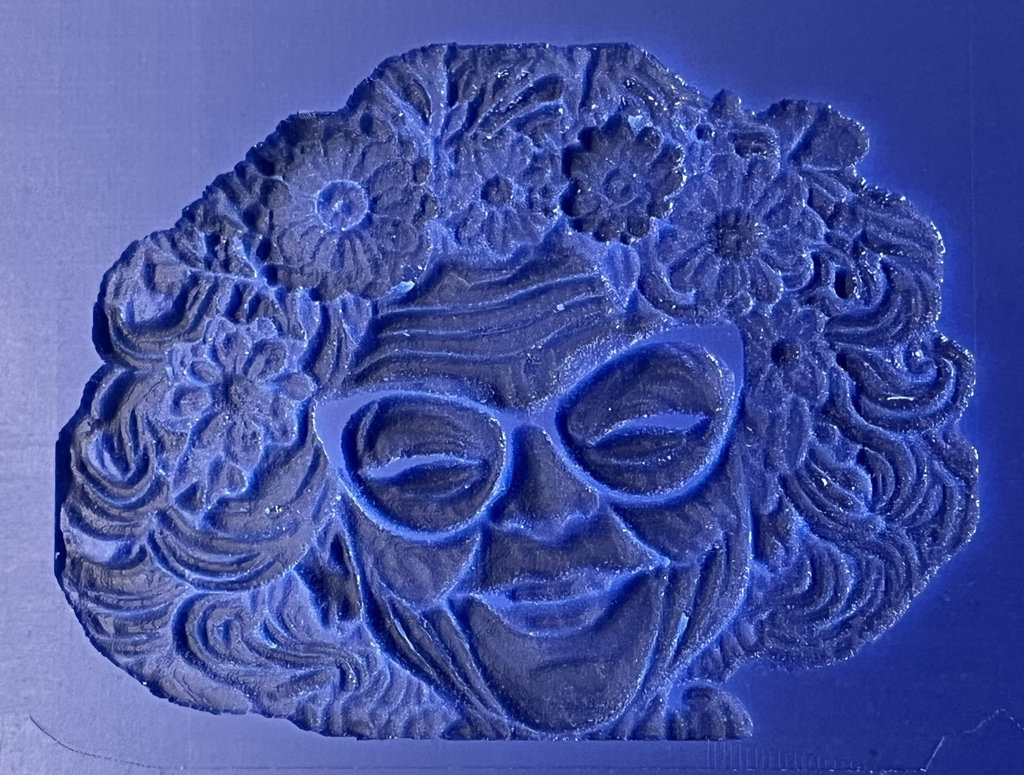
Here is the result — “Granny” became more clear. This also took about 40 minutes.

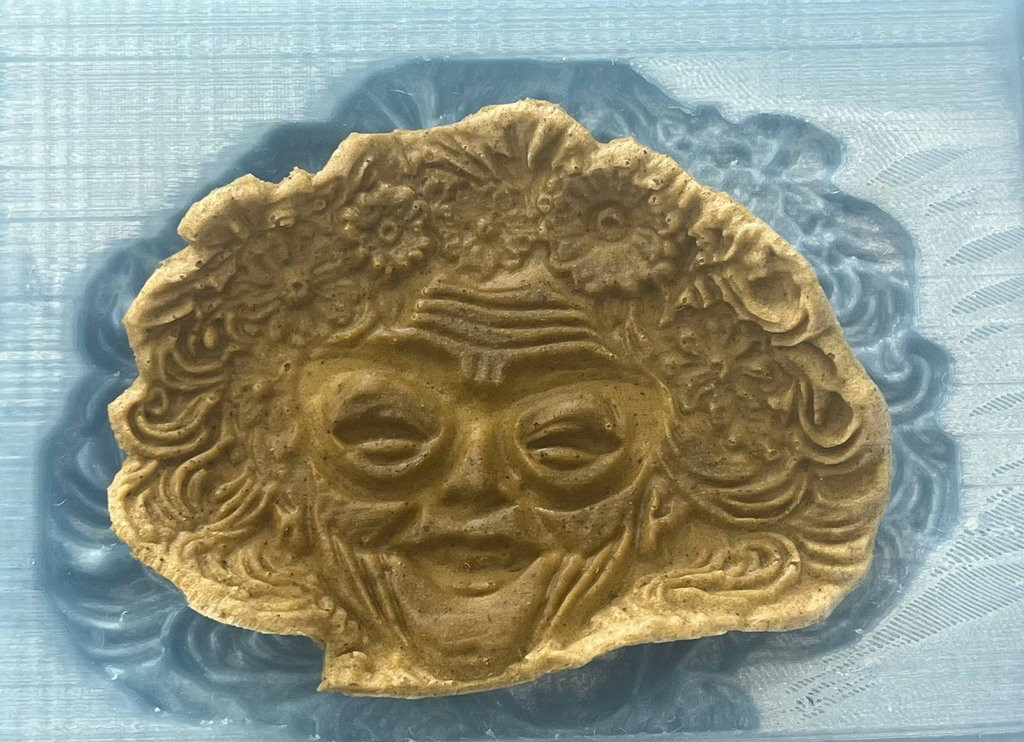
The final step was to use a 1/64 end mill, but this time I opened “G-Code Mill 3D STL” for a more detailed result and set the tool size to 0.396748 mm.
After calculating and seeing the 3D preview, I understood this would take a long time… and I was right — it took 12 hours 😄
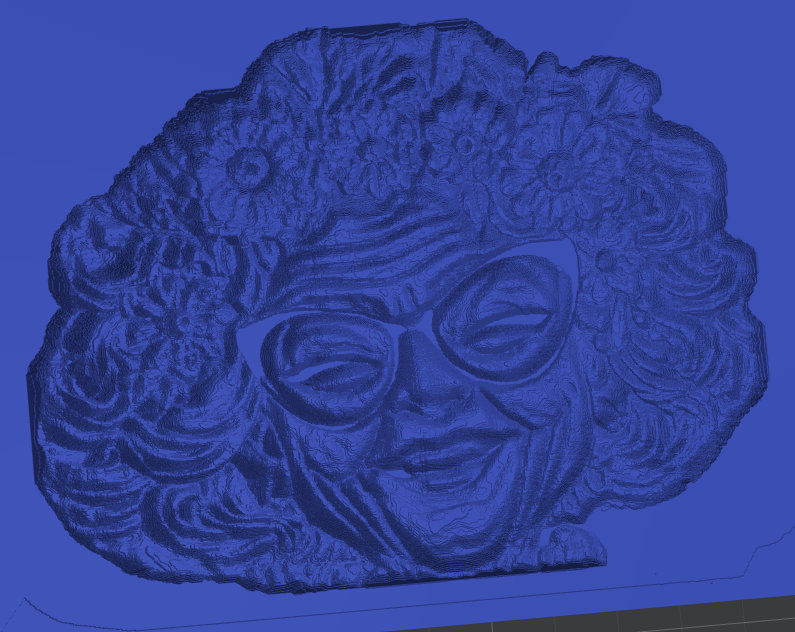
But it was worth it. It looks so good that honestly, I could leave it empty and still be happy 😄
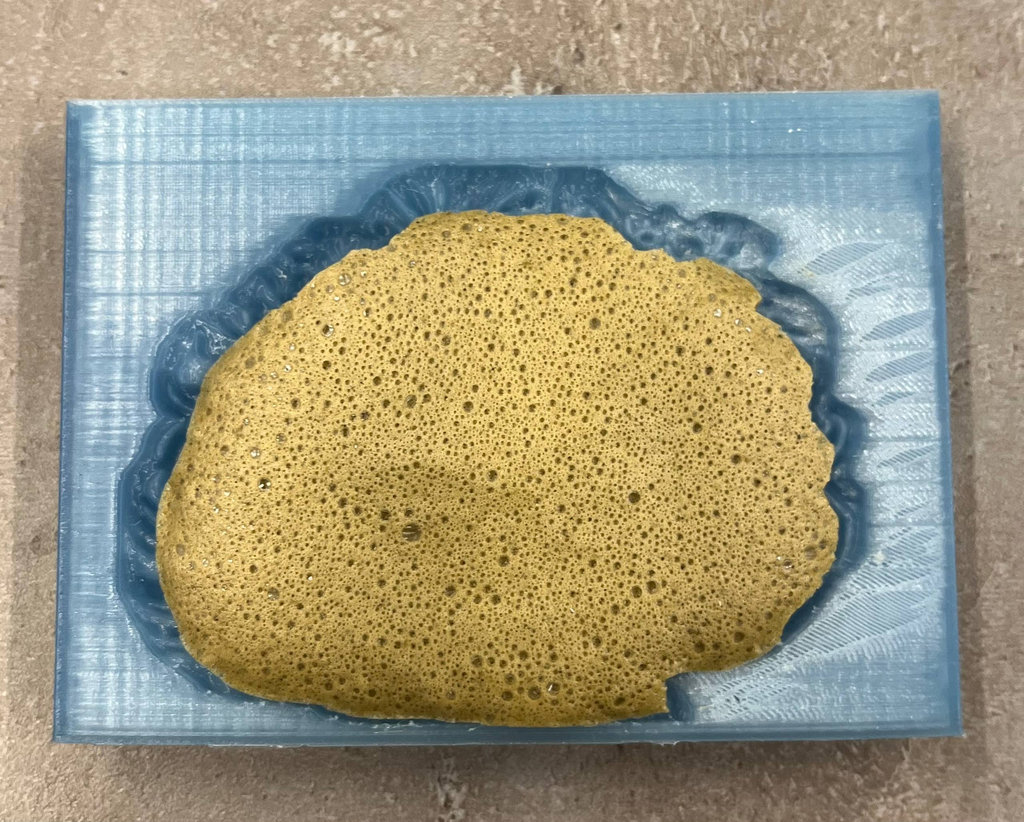
I poured the saved biomaterial again after melting it with water. But this time I added too much water, so it will take longer to dry. Since I can’t wait too long, I removed it after 5 hours.
Because I planned to pour it into wax, I waited some time before pouring, but it seems I waited too long — it became harder to pour, and I noticed air bubbles inside after removing it.
Still, the wax version turned out more detailed.
So now we have two bio-Grannies 😄
This photos after 1 day.
This photos after 2 days.
This photos after 3 days.
I will continue experimenting and try to create more “Grannies” with different materials 😄
This week was really interesting and a bit experimental for me. I worked with moulding and casting for the first time and also tried different materials to finally bring my “Granny” into the real world 😄
I liked the process of turning something from digital into a physical object, especially testing different approaches like 3D printing, CNC milling, and biomaterials. The biomaterial part was the most interesting for me, because I could experiment, remake it, and see how the material behaves over time.
At the same time, not everything went perfectly — I had issues with materials not filling properly, shrinking, cracks, and even small details like the nose missing 😄 But honestly, that’s also part of the learning process.
I also learned that patience is very important in this week… which I clearly don’t have enough of 😄 (removing materials earlier than needed).
Overall, I really enjoyed this week, especially the hands-on part, experimenting, and seeing real results. And now I have my “Granny” not only in digital form, but also physically 😄
Individual assignment
- Granny .stl file Granny.stl
- Granny .bland file Granny.blend
AI prompt:
“And Generate image when she fineshed Week 14”