Overview
This week is the plan for my final project, Maya's Mirror — defining its scope, answering the planning questions, and pulling together the schedule and bill of materials. The detailed build documentation lives on the final project page →; this page is the planning lens on top of it.
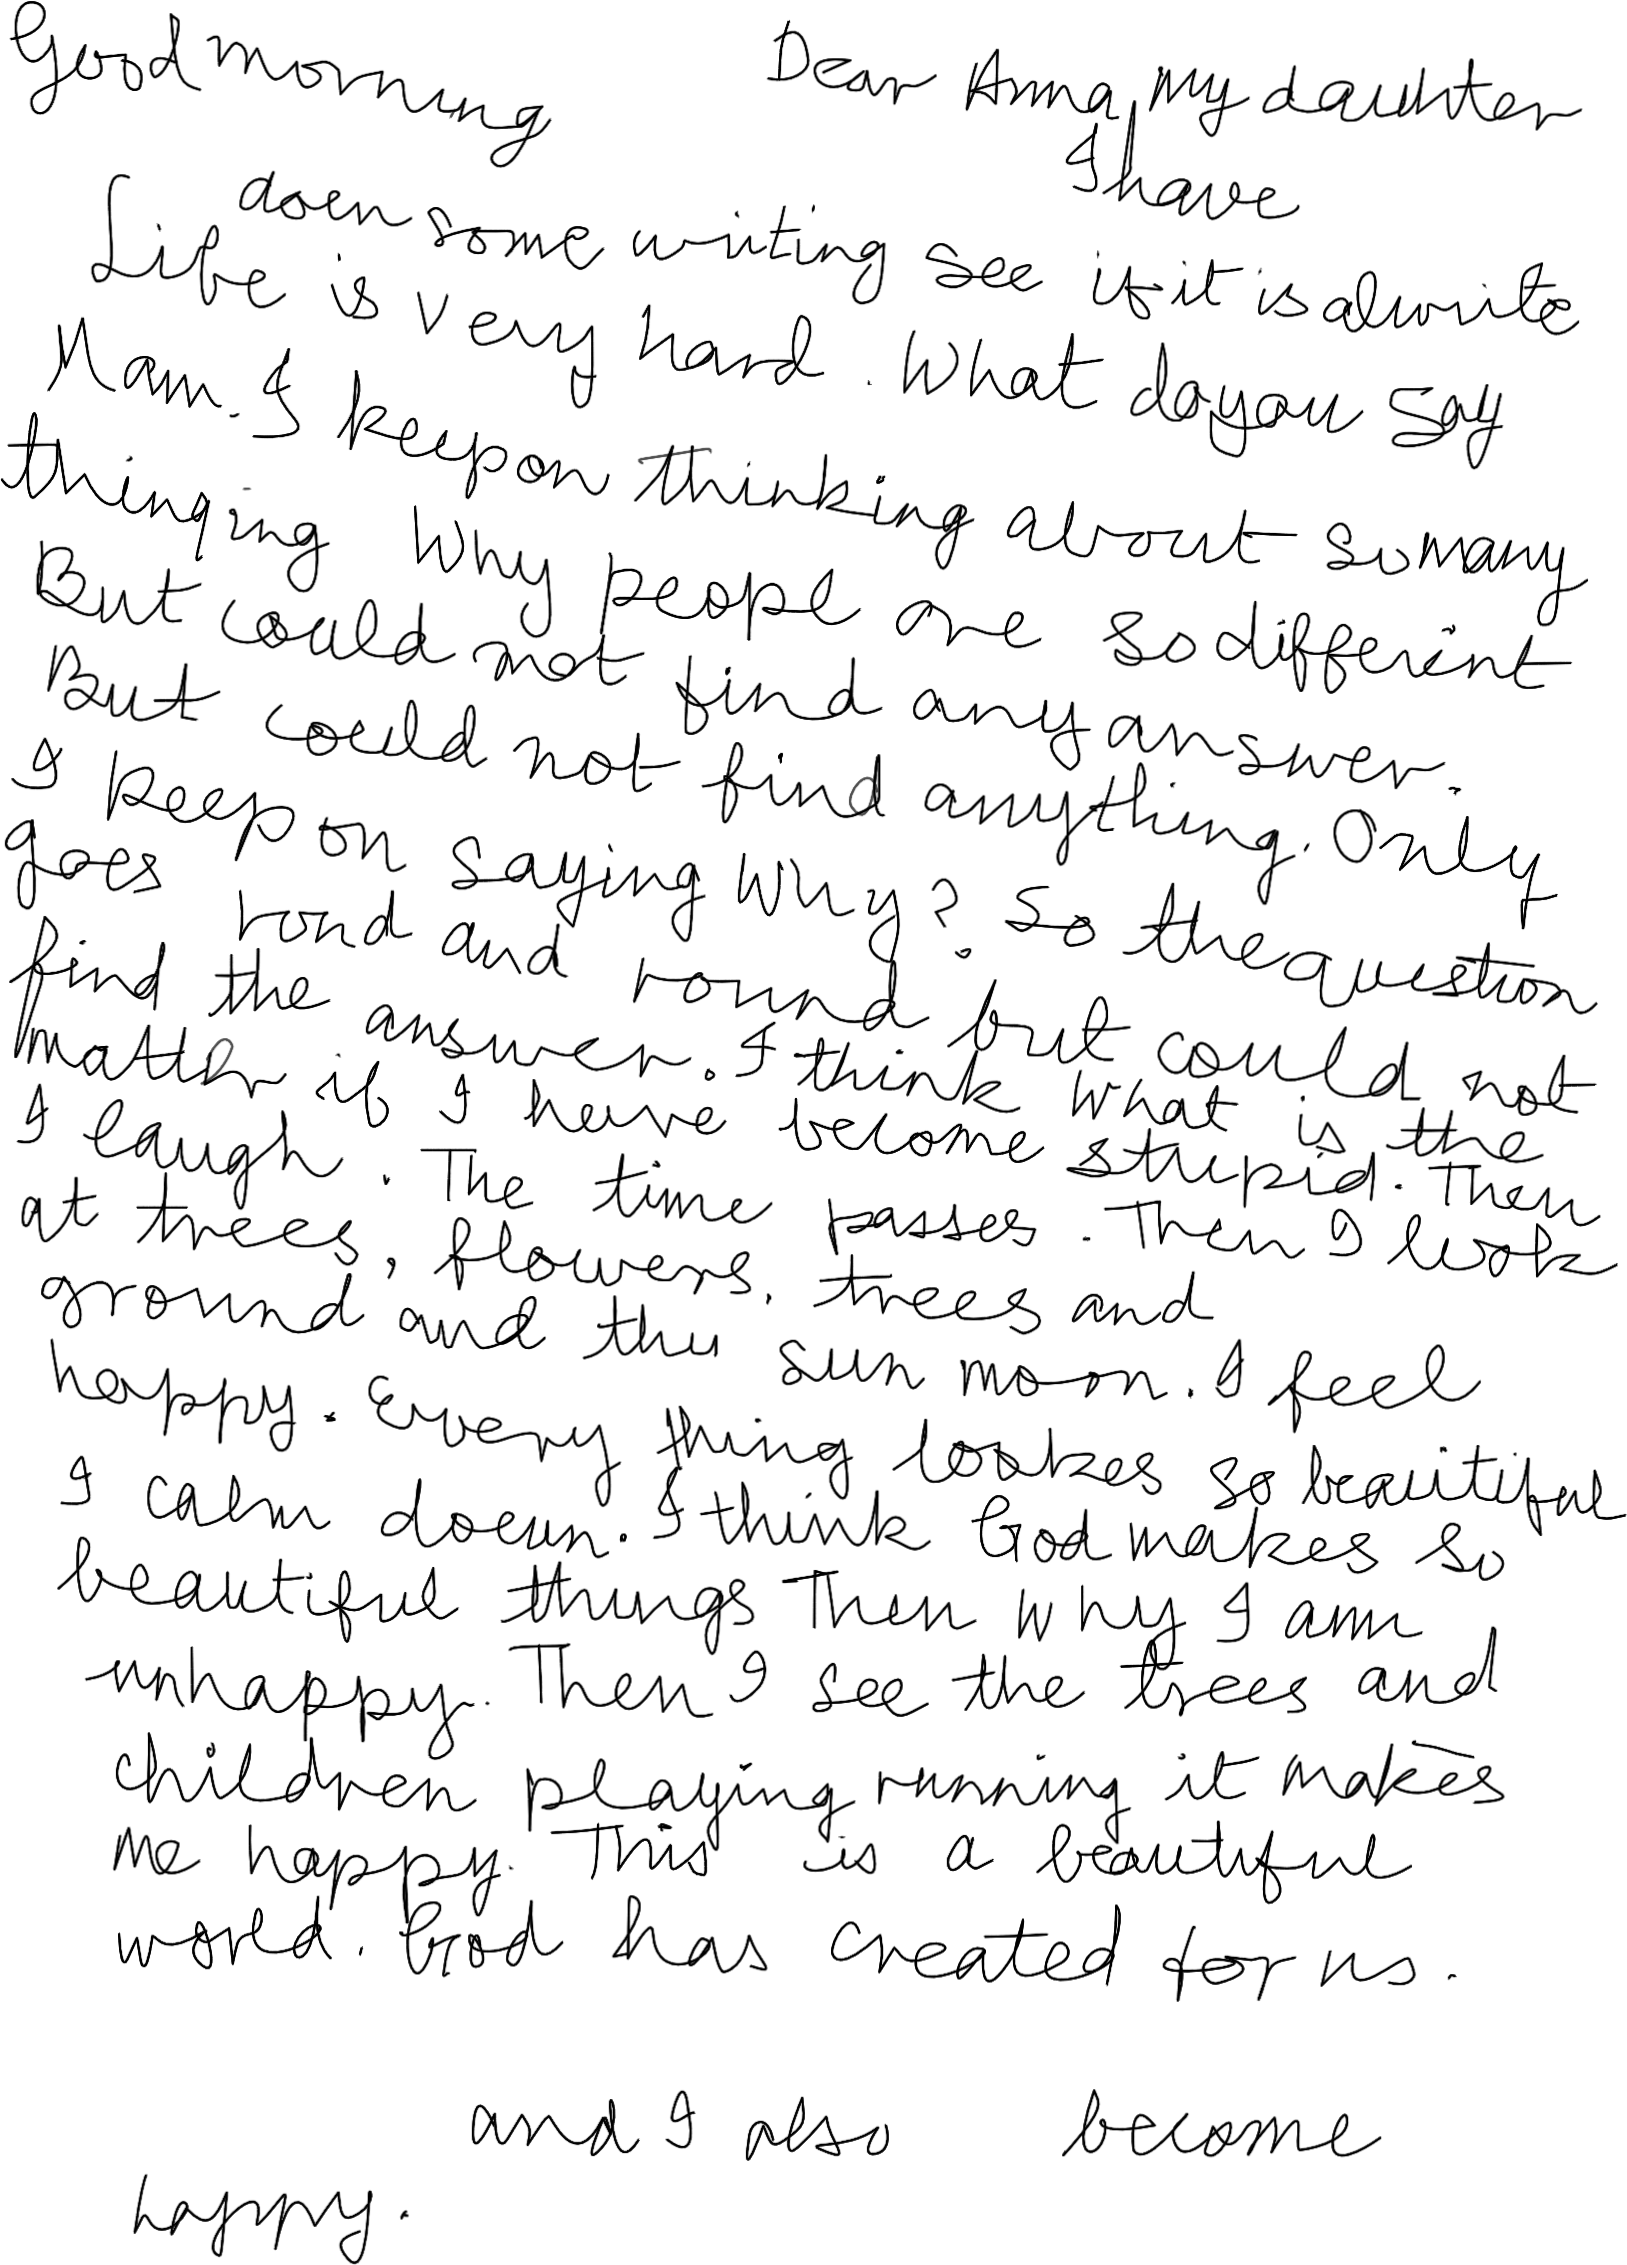
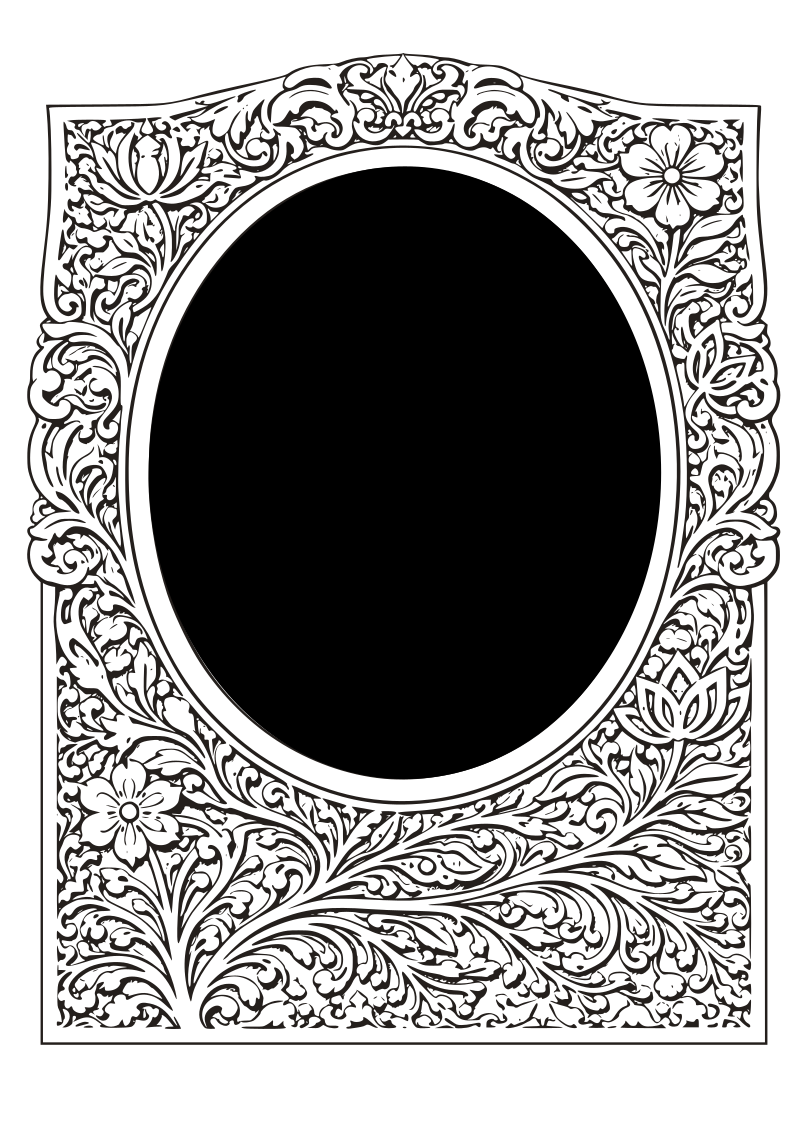
Maya is both my grandmother's name and the Sanskrit word for illusion — the mirror itself is maya. Inspired by the letters and botanical artwork she left behind, the piece embodies her experience with dementia, from confusion and the dissolution of self to the rediscovery of beauty, meaning, and gratitude.
"So what if I have become stupid? I look at the children playing in the fields. I see the sun, the moon, the flowers, the beauty of nature. Everything around us is gorgeous and beautiful, then why should I be upset?" — from my grandmother Maya's letter.
What Will It Do?
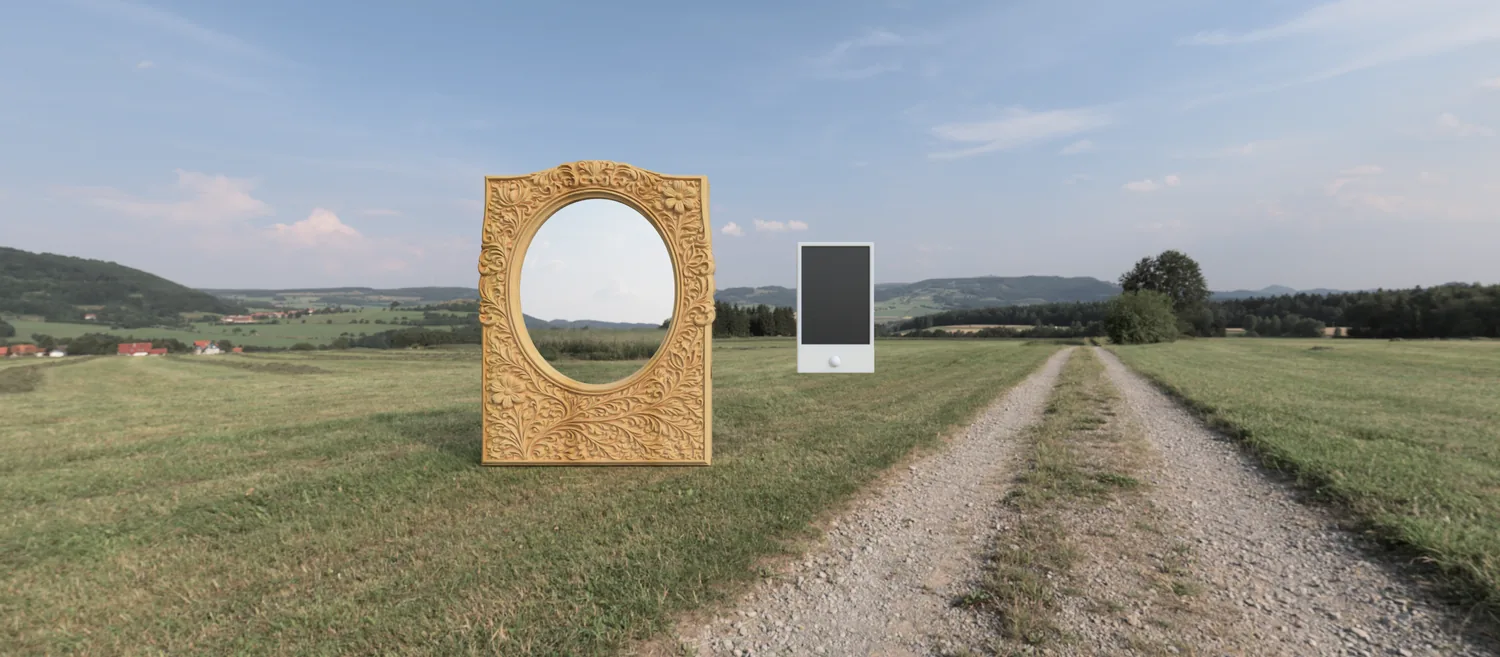
Maya's Mirror is an interactive installation. A viewer approaches what looks like an ornate mirror; a PIR motion sensor in the letter holder reads movement and cycles the piece through three states. A first motion lights the NeoPixels behind Maya's laser-marked acrylic letter; a second motion turns that light off and begins the experience — a hidden monitor behind one-way mirror film tracks the viewer's face and transforms it, the reflection distorting and dissolving before being redrawn in the flowers and vines of my grandmother Maya's botanical artwork; a third motion returns everything to rest. It is an emotional reflection on memory loss, identity, and beauty, inspired by Maya's experience with Alzheimer's.
Current state: the experience is advanced by a spacebar HID trigger from a wireless keyboard while the PIR sensor drives the letter lighting; the intended interaction is the full three-motion cycle on that sensor — motion to light, motion to begin the experience, motion to reset.
The experience arc: reflection → distortion → dissolution → reconstruction through nature. The botanical surface isn't decoration — it's the destination the simulation moves toward.
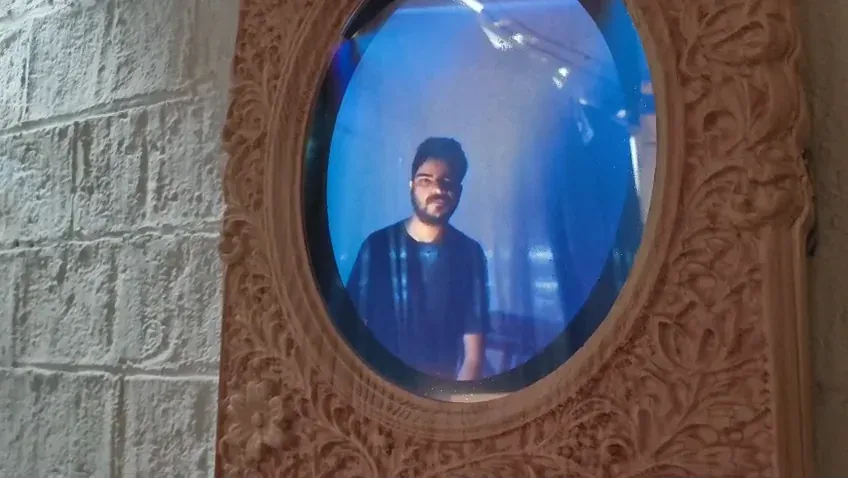
Reflection — the viewer meets a clear likeness of themselves.
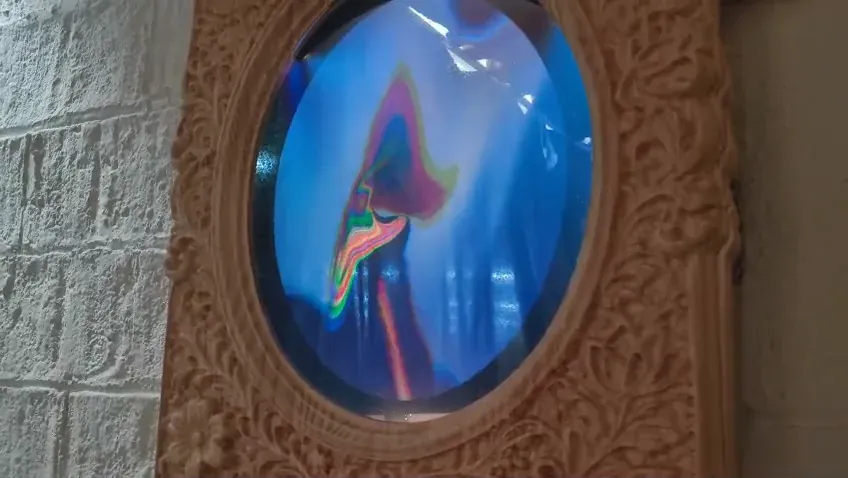
Distortion — the likeness breaks into colour and flow before dissolving into Maya's flora.
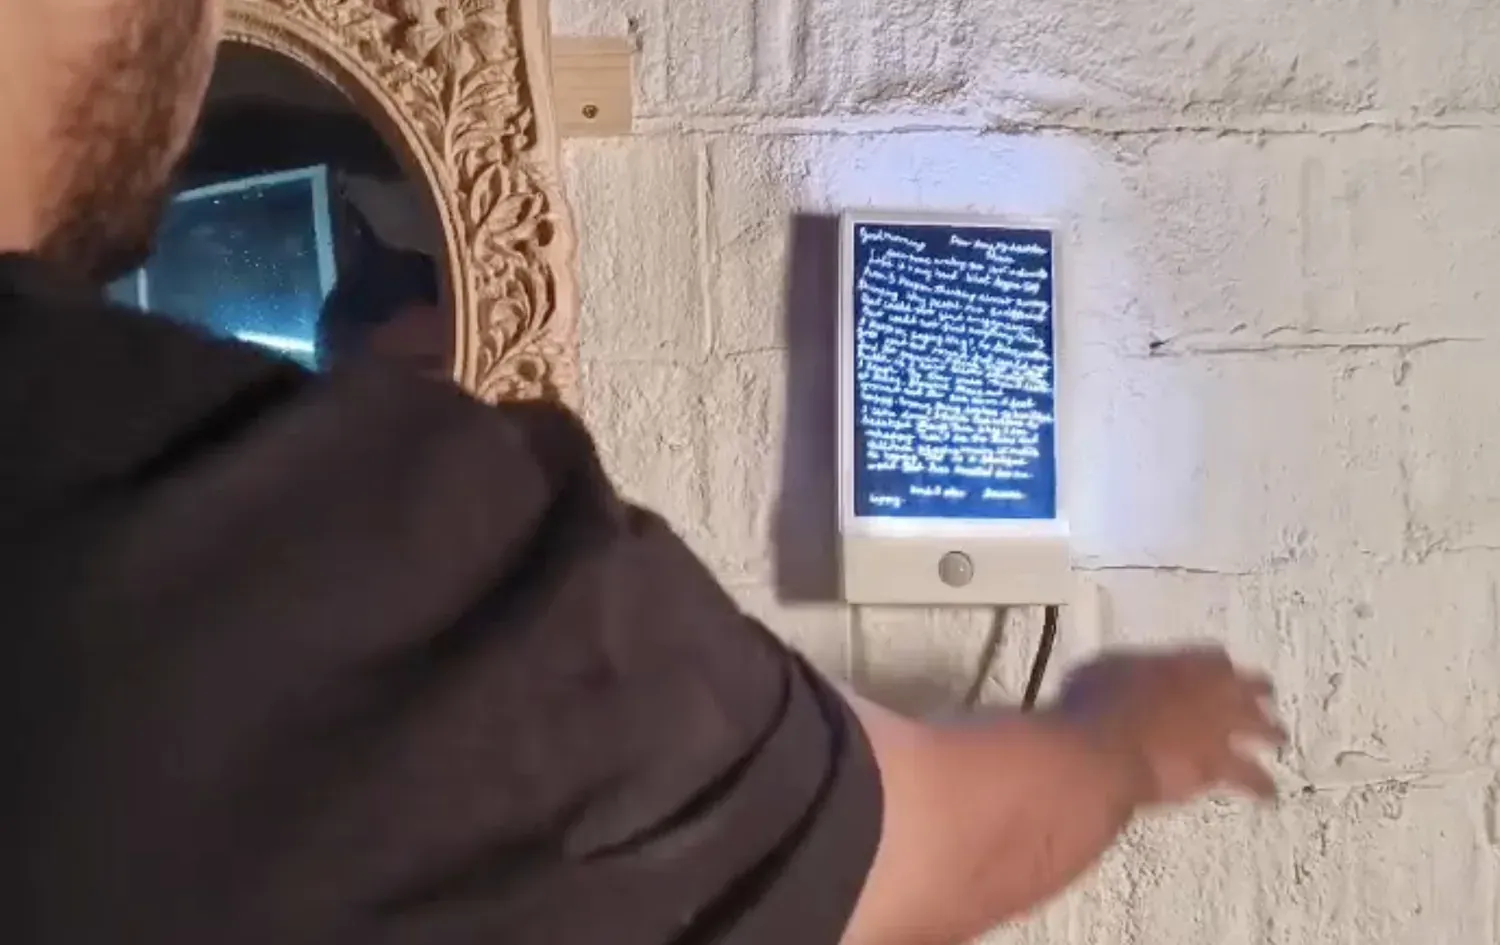
The interaction in practice — a motion over the PIR sensor on the lit letter holder drives the piece between states.
Who Has Done What Beforehand?
Maya's Mirror sits at the intersection of several existing traditions, none of which it copies directly:
- Interactive / smart mirrors — the smart-mirror tradition of monitors behind one-way film. I borrow the optical approach but invert the intent: not information, but dissolution of identity.
- Physarum polycephalum simulation — slime-mould growth models are well documented in generative art; I run a true agent-based physarum model on the viewer's face mesh.
- Asaro head lighting model — used to drive vine density from facial light planes.
- MediaPipe FaceMesh — Google's 478-landmark face tracker, run in-browser.
- Installation art on memory & aging, and Indian floral / paisley traditions — the cultural and emotional reference points.
What Sources Will I Use?
- Maya's original botanical drawings and handwritten letter (primary source material)
- MediaPipe FaceMesh documentation
- Physarum polycephalum growth literature and reference implementations
- The Asaro head lighting model
- Alzheimer's narratives and lived experience
- Fab Academy weekly assignments — each subsystem was prototyped in a corresponding week (CNC, electronics, molding, embroidery, system integration)
What Will I Design?
The parts I design and make myself, rather than buy:
- CNC wood frame — ornate botanical relief modelled from scratch from Maya's drawings, milled on the CNC router
- Custom PCB — XIAO ESP32-S3 sensor/lighting board, designed in KiCad, milled in-house
- 3D-printed rear enclosure, webcam arch & spacing ribs — maintains the air gap, holds the electronics, aims the camera, removable rear cover
- The generative simulation — WebGL + MediaPipe FaceMesh, physarum agent model, botanical drawing layer (8 iterations)
- Embedded firmware — PIR trigger, NeoPixel control, serial + WiFi behaviours
- Acrylic + mirror-film optical stack — cut and laminated to the frame aperture
- Maya's letter — laser-marked & animated — her handwriting centerline-traced to a vector SVG and laser-marked (one score down each stroke), not raster-engraved, so the NeoPixel edge-lighting reads it cleanly; the same traced strokes drive the self-writing animations
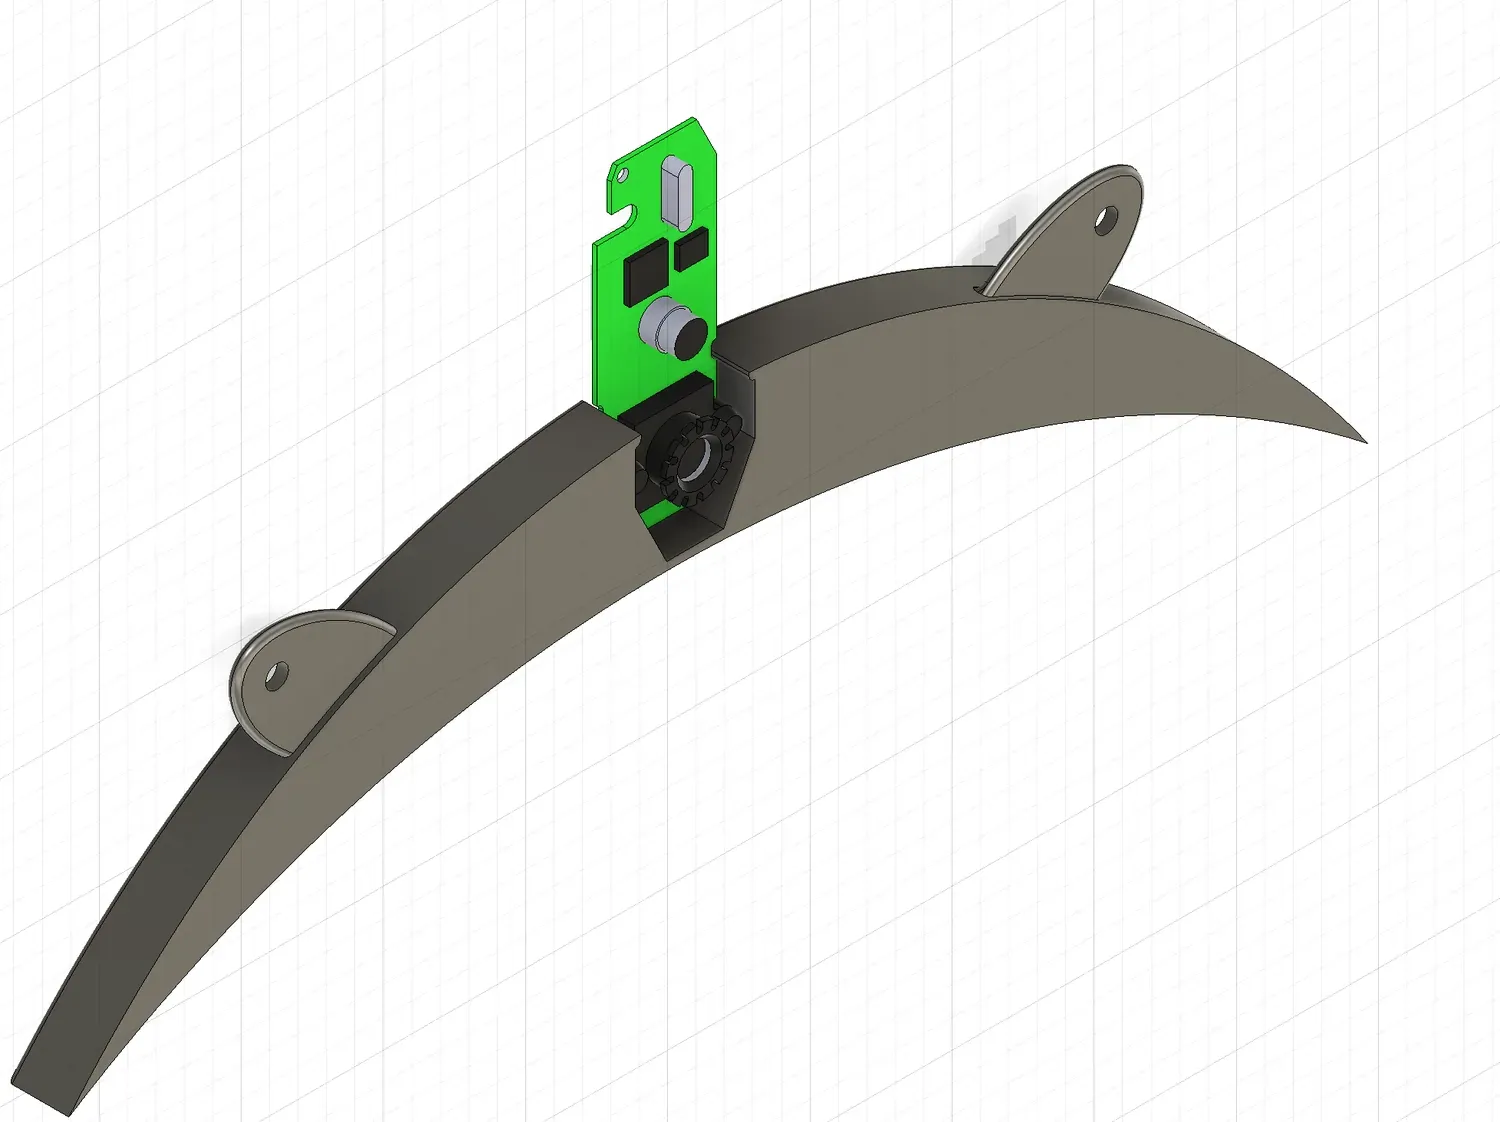
3D-printed webcam arch — a curved bracket holding the bare camera PCB at the top of the oval, aimed through the film.
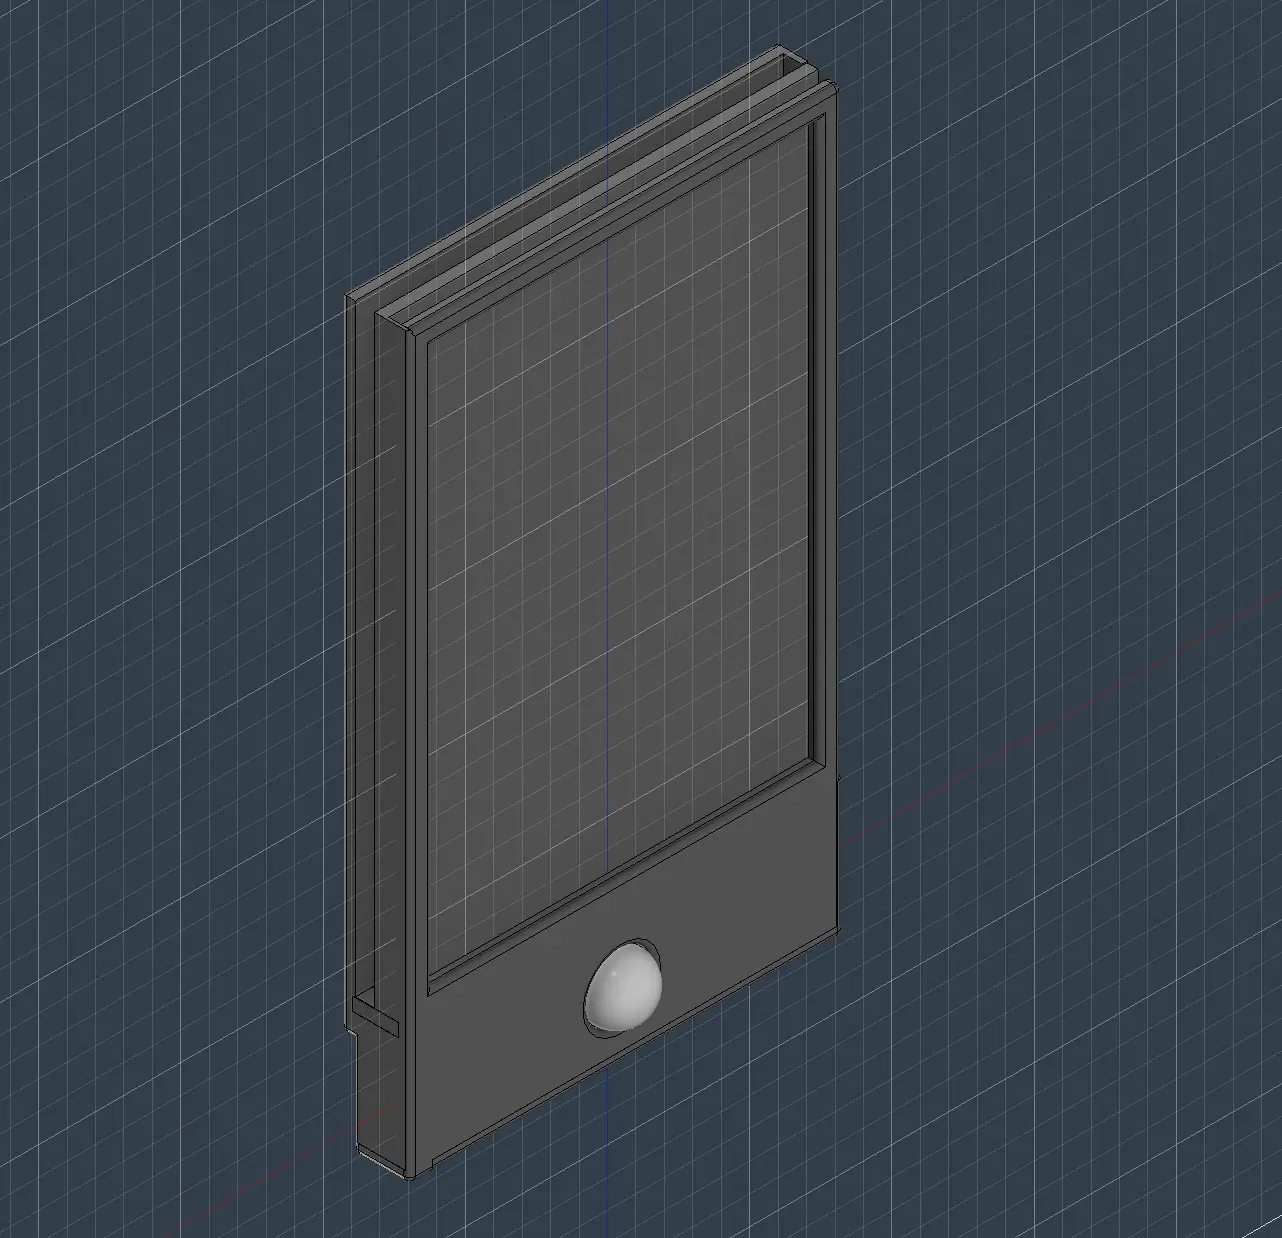
The letter holder — a 3D-printed box for Maya's acrylic letter, with the PIR sensor dome recessed at its base.
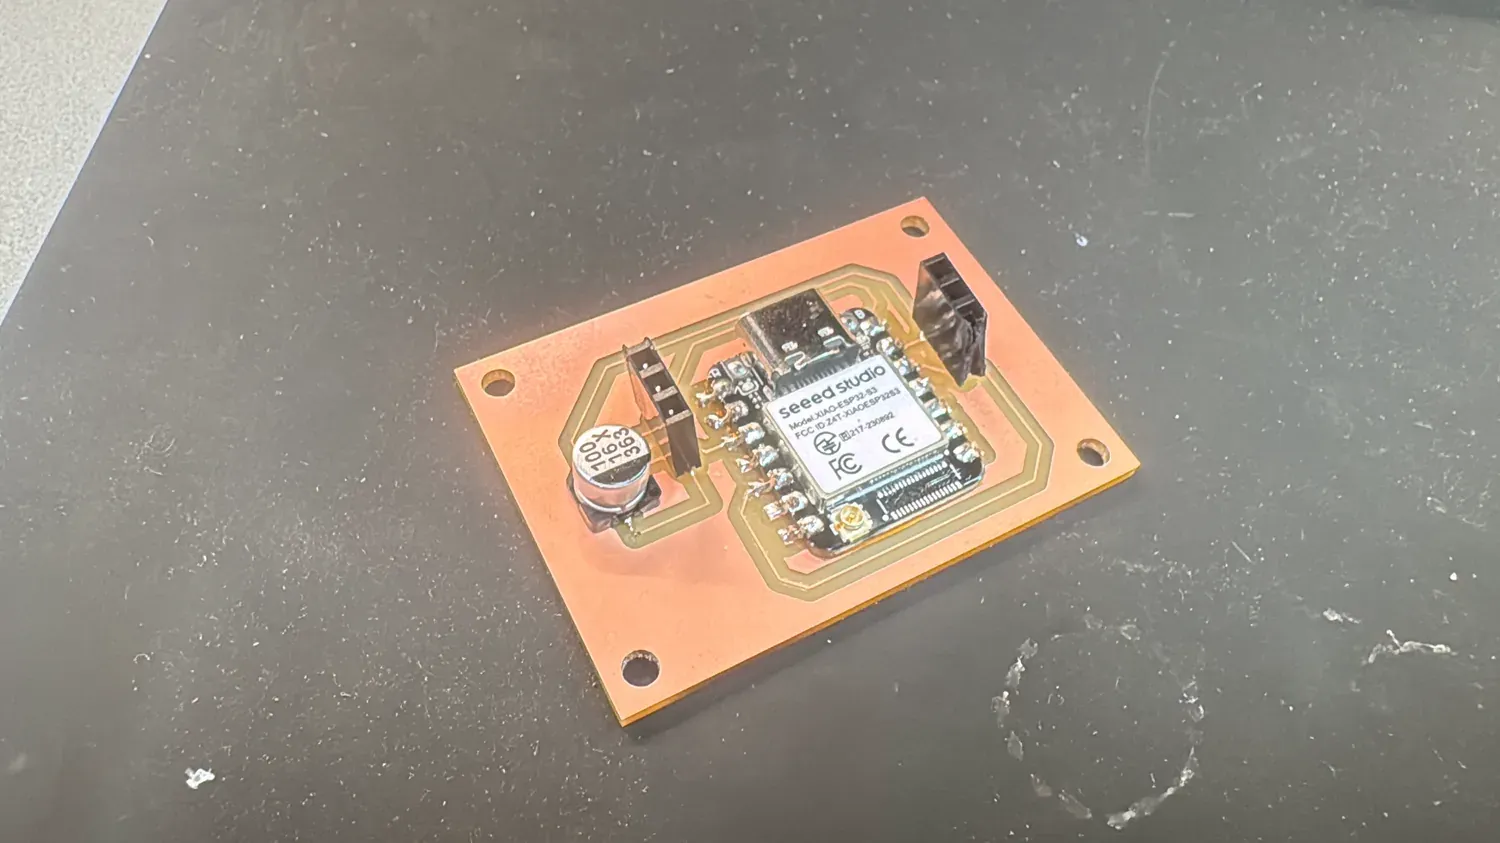
Custom PCB — XIAO ESP32-S3 on an in-house milled single-sided board (PIR in, NeoPixel out, USB serial).
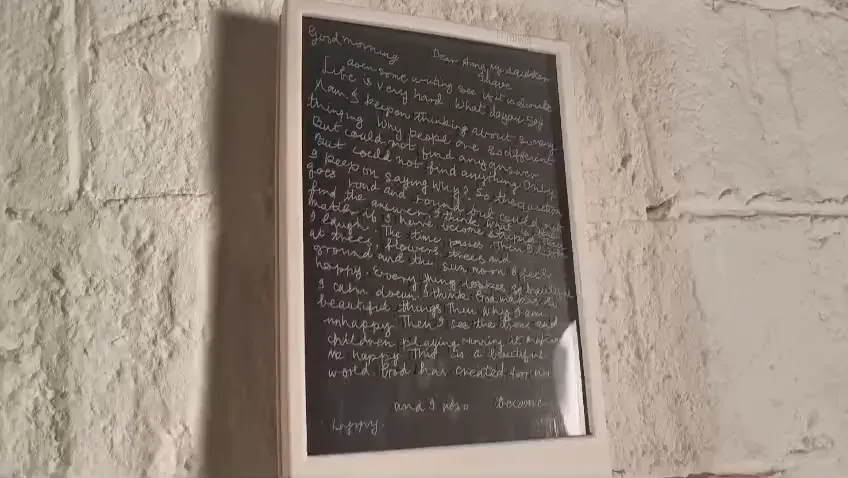
Maya's letter — centerline-traced from her handwriting and laser-marked (vector score, not raster) into acrylic.
Form & Chassis — Planning the Build
Before any wood was cut, I worked the enclosure out on paper. I sketched the chassis from several angles, then printed the CAD of the stacked components and drew straight on top of it — testing how the monitor, mini PC, and PCB would sit behind the carved face and where the depth would land.
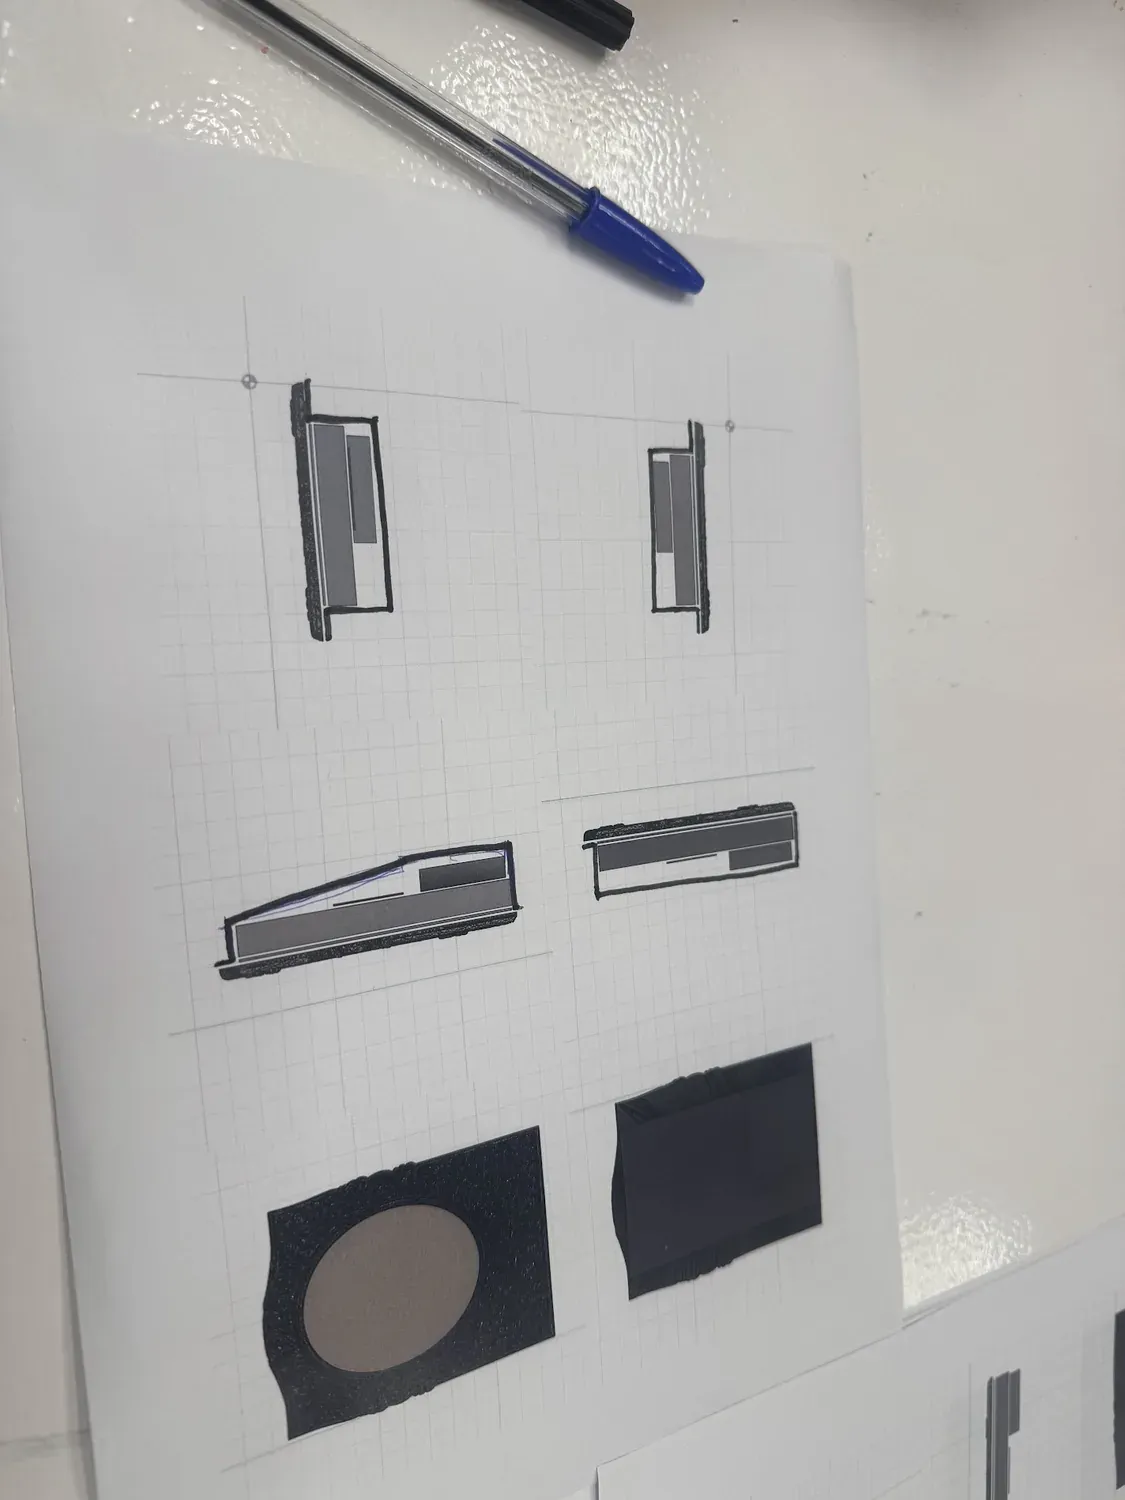
Sketching over printed CAD — working the section and profile of the layer stack by hand, on top of the rendered views.
I mocked the aperture and mounting in paper first: a cut-out for the oval face over a folded body, with the four VESA points marked where the monitor would bolt in. It let me check proportion and the screw pattern before committing material.
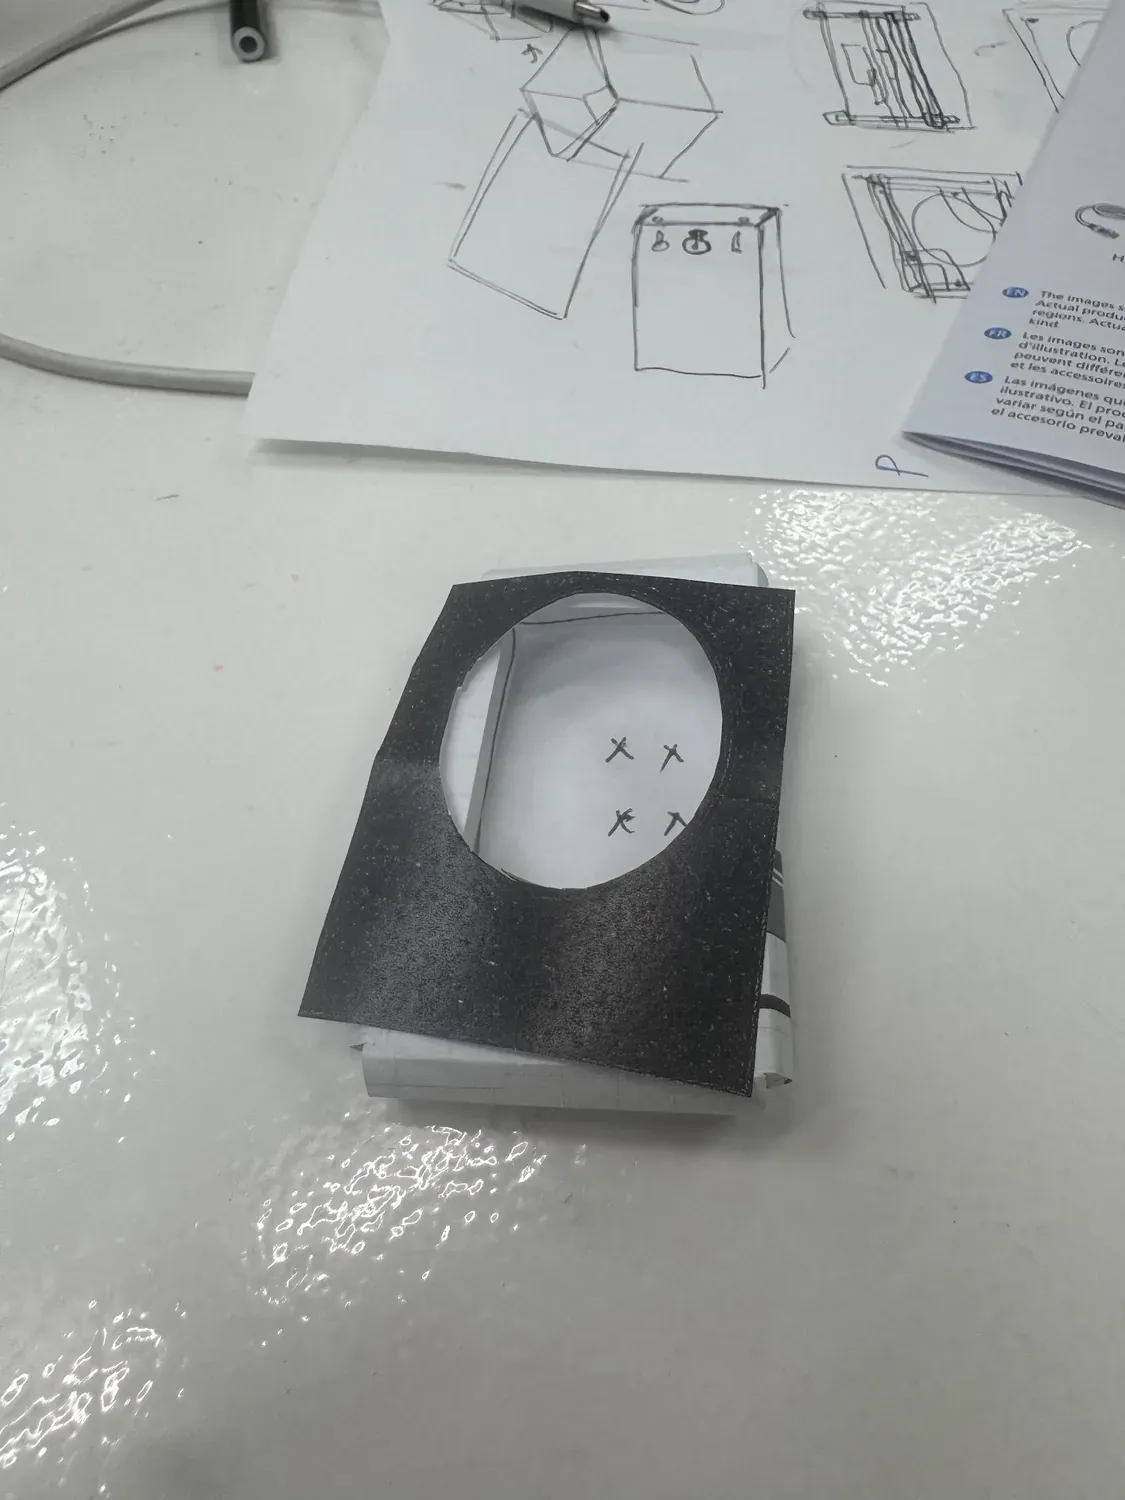
Paper mockup — oval aperture and the four VESA mount points (the X marks), tested against quick chassis sketches.
The main open question was how to build the body. Two options were on the table: pocket the components into solid wood, or cut an Alucobond (aluminium-composite) sheet on the CNC and build the chassis from that. I chose the wooden pocket — it lets the carved botanical face and the body read as one material, and the monitor mounts cleanly into it through its VESA pattern.
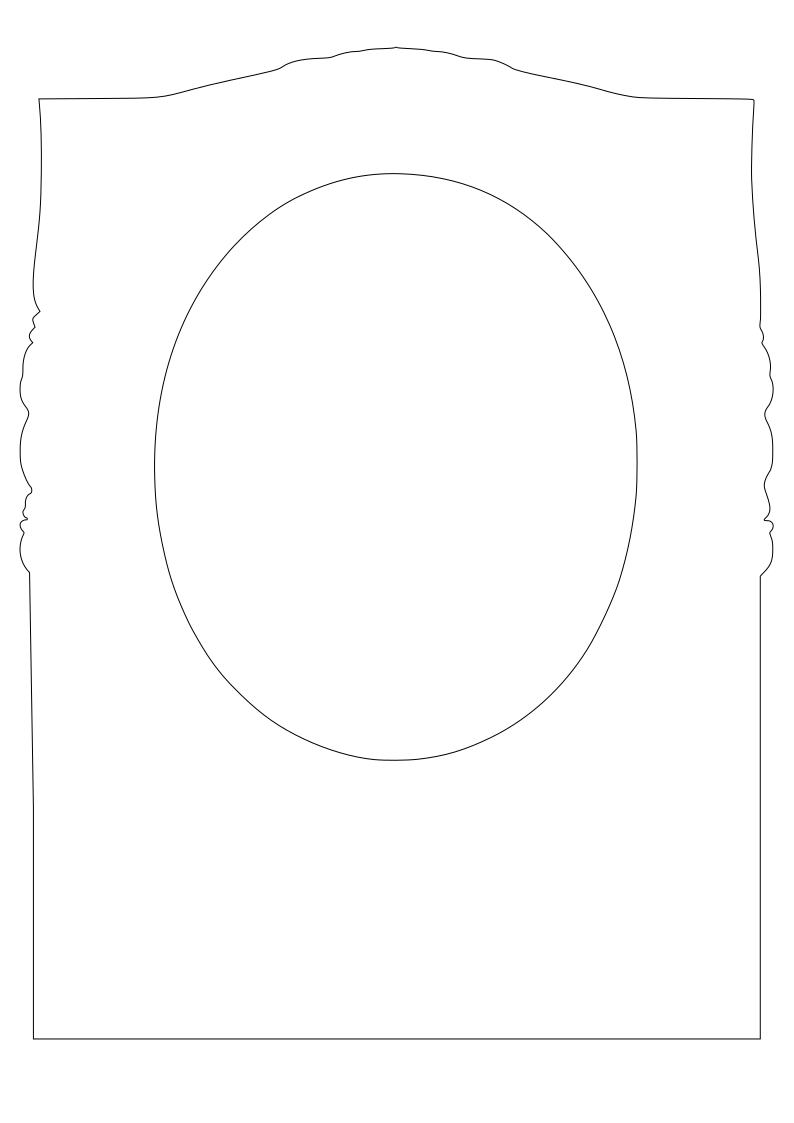
From the mockup I drew the pocket as a flat net so it could be cut and folded as one piece — frame aperture in the centre, attachment tabs and flaps either side. The overall blank runs 2195 mm long by 610 mm, with a 510 × 610 mm frame opening.
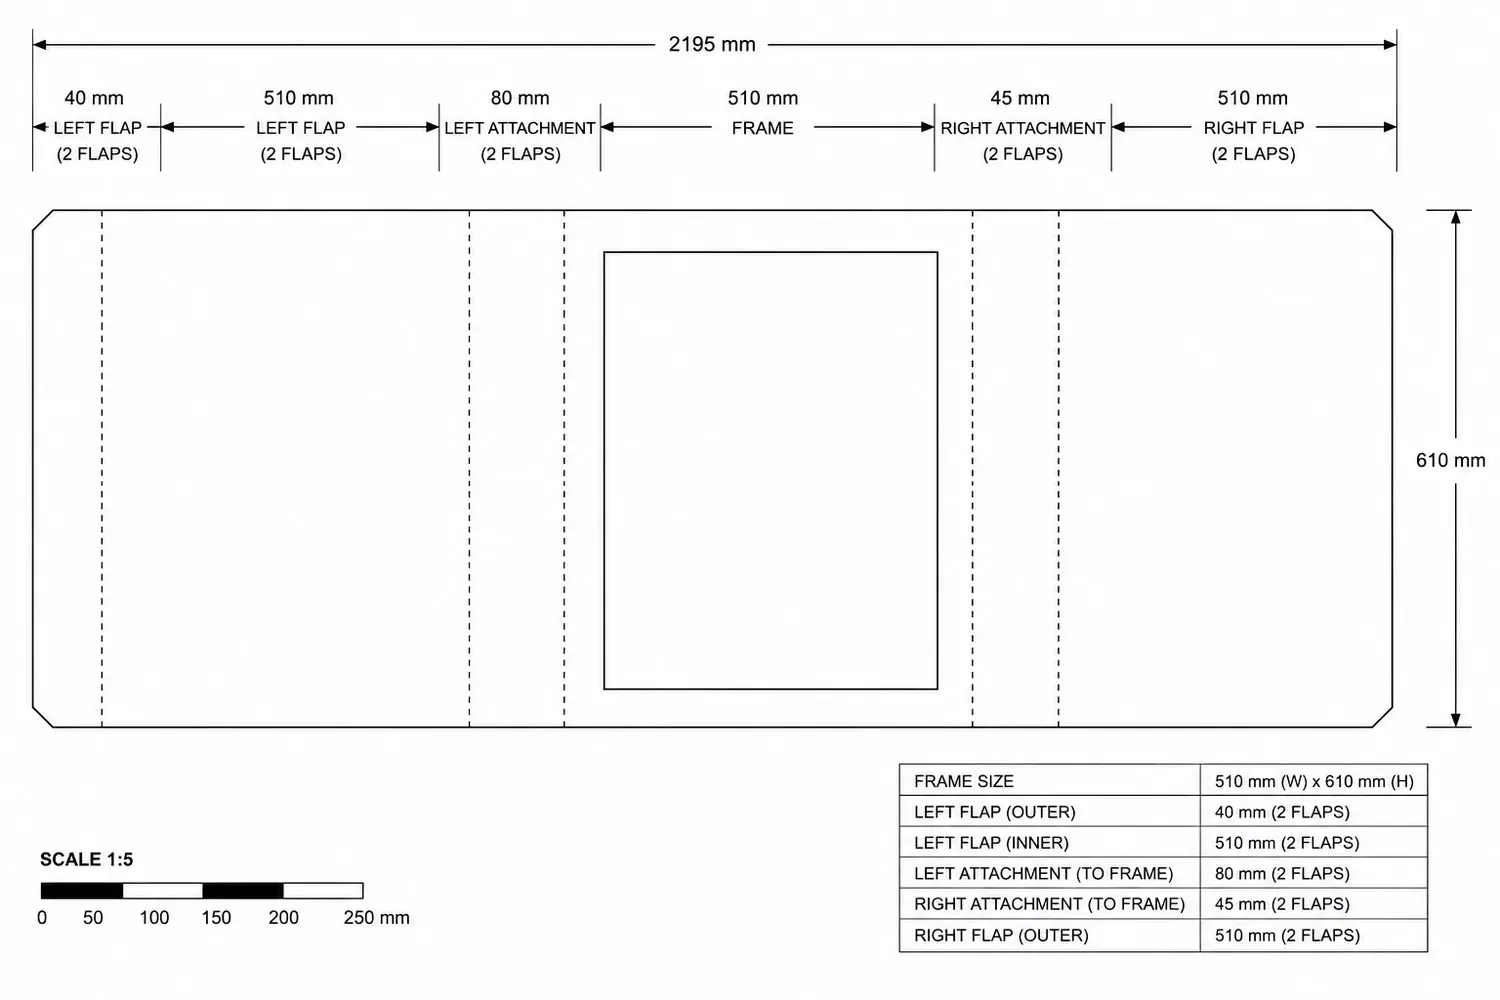
Chassis net — the pocket unfolded flat with dimensions, frame opening, attachment tabs, and fold flaps.
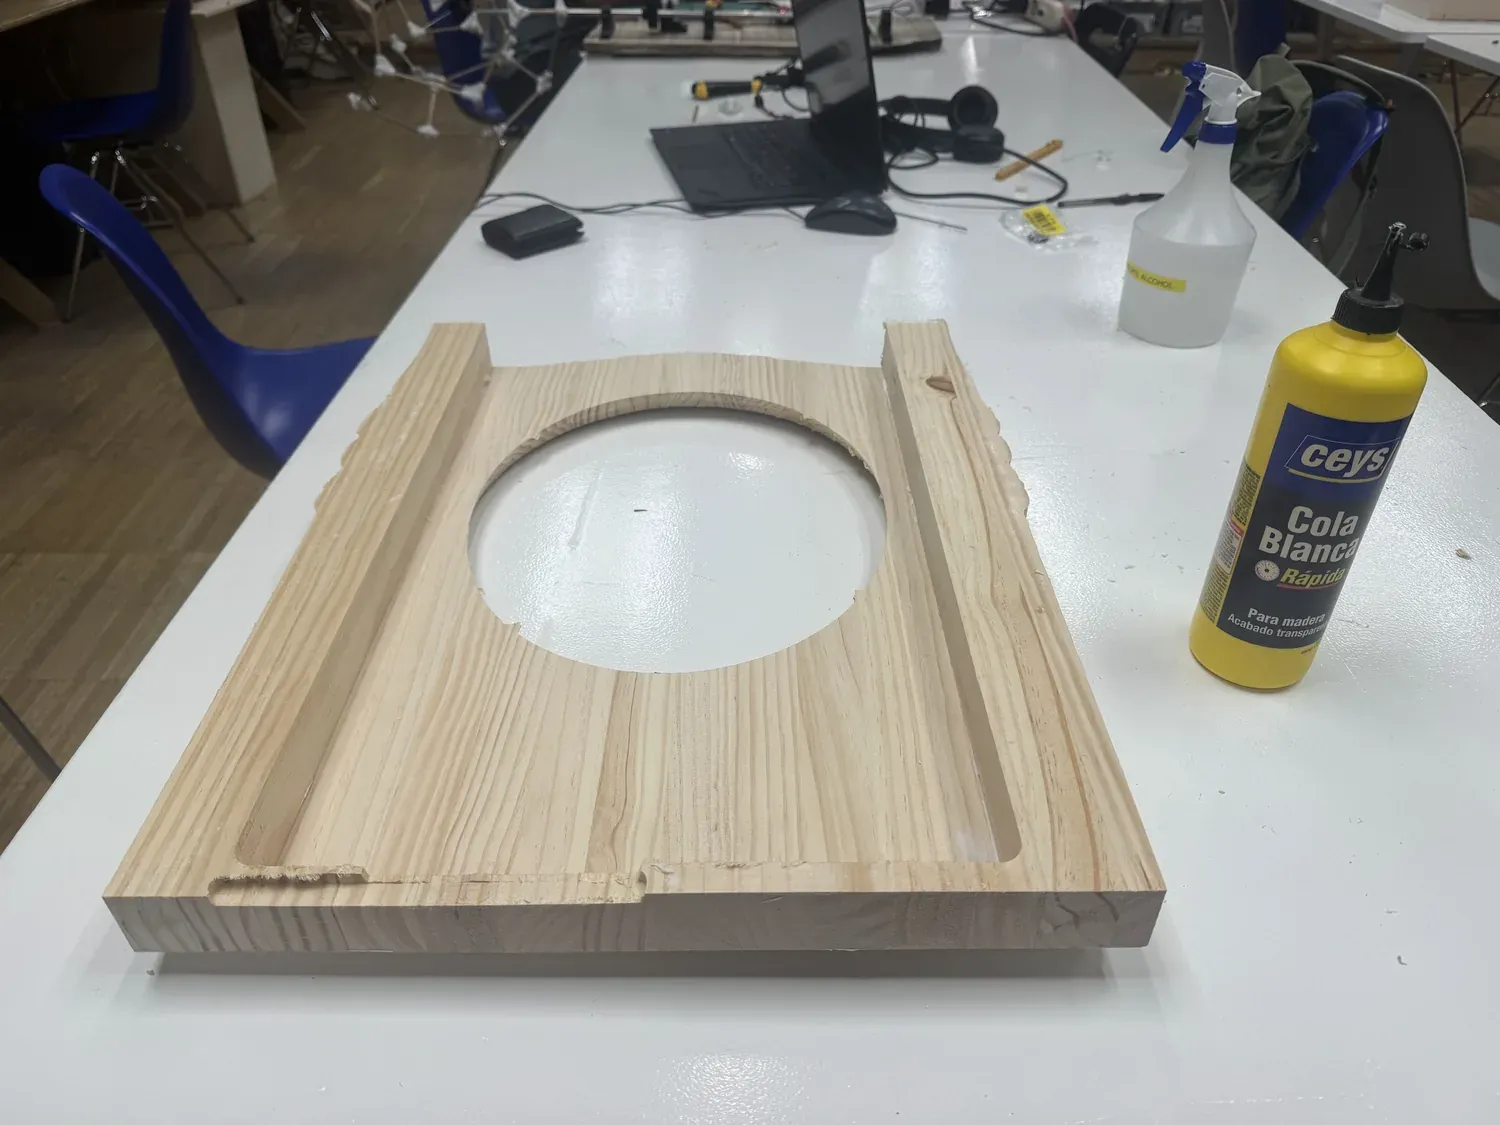
The plan realised — the wooden pocket cut into solid pine: recessed oval opening for the screen and milled side channels for the stack.
Mounting the mini PC to the monitor
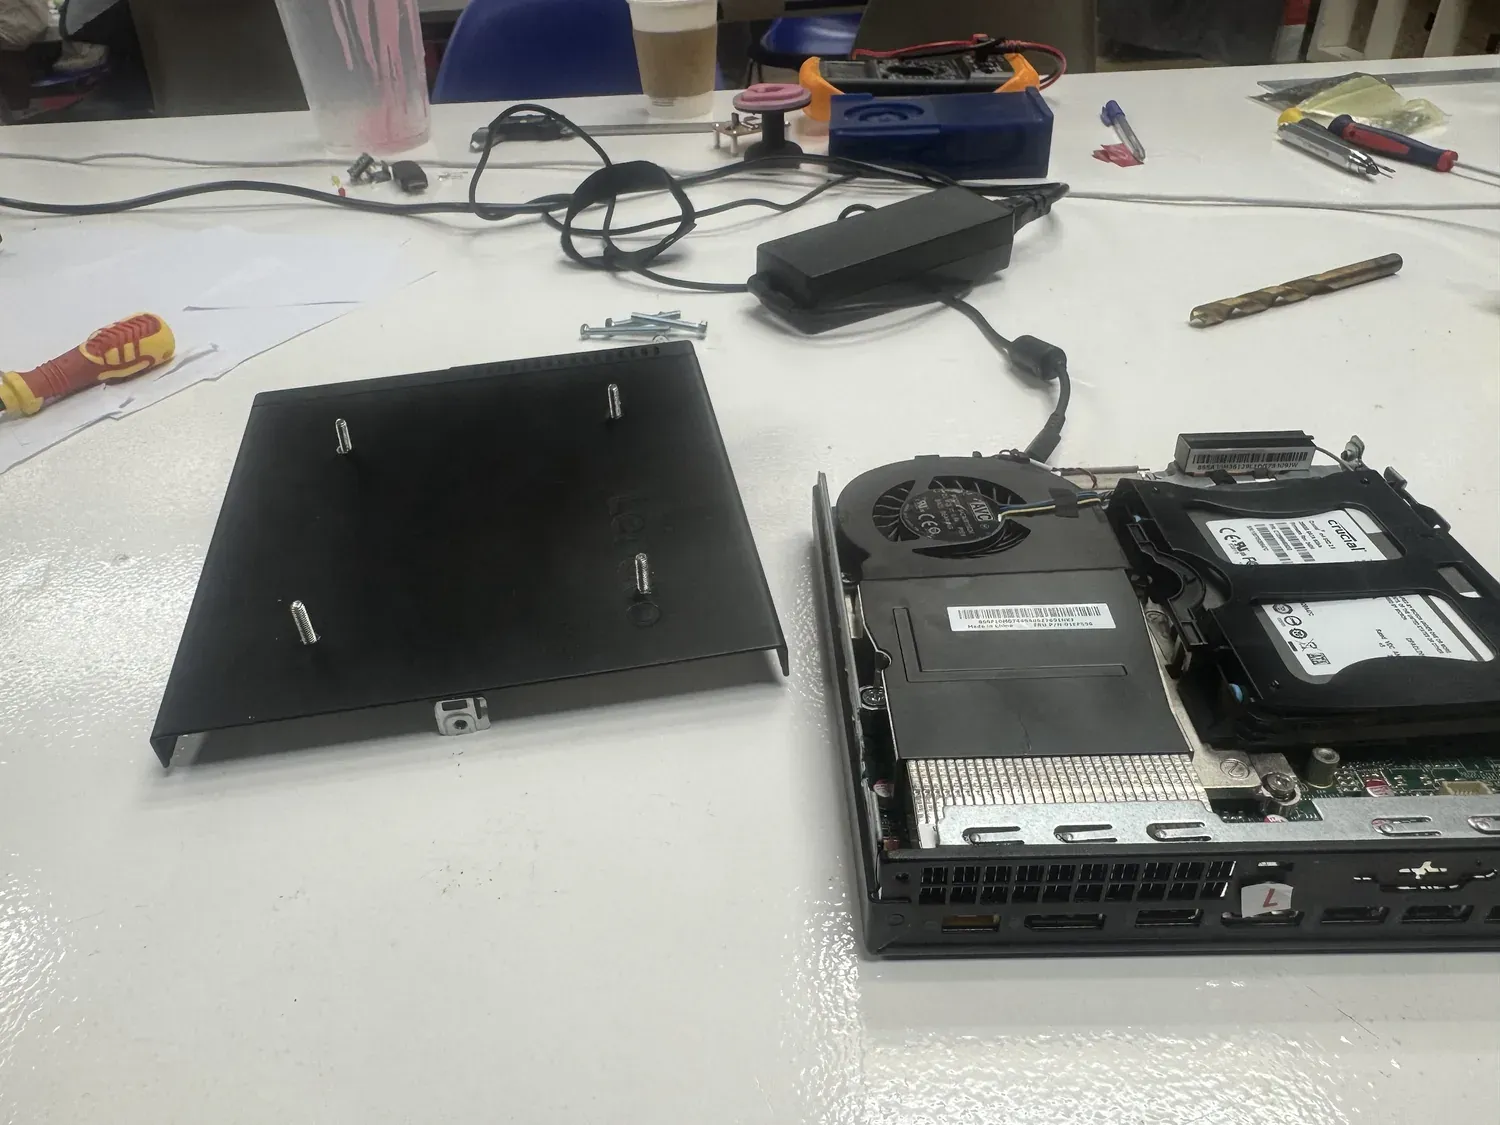
The trickiest integration question was how to fix the mini PC behind the screen without a bulky bracket. The answer: open the Lenovo ThinkCentre, and drill and screw it directly to the monitor's VESA pattern — the computer becomes its own mount. That collapses two of the thickest layers into one and keeps the whole stack shallow enough to sit inside the wooden pocket.
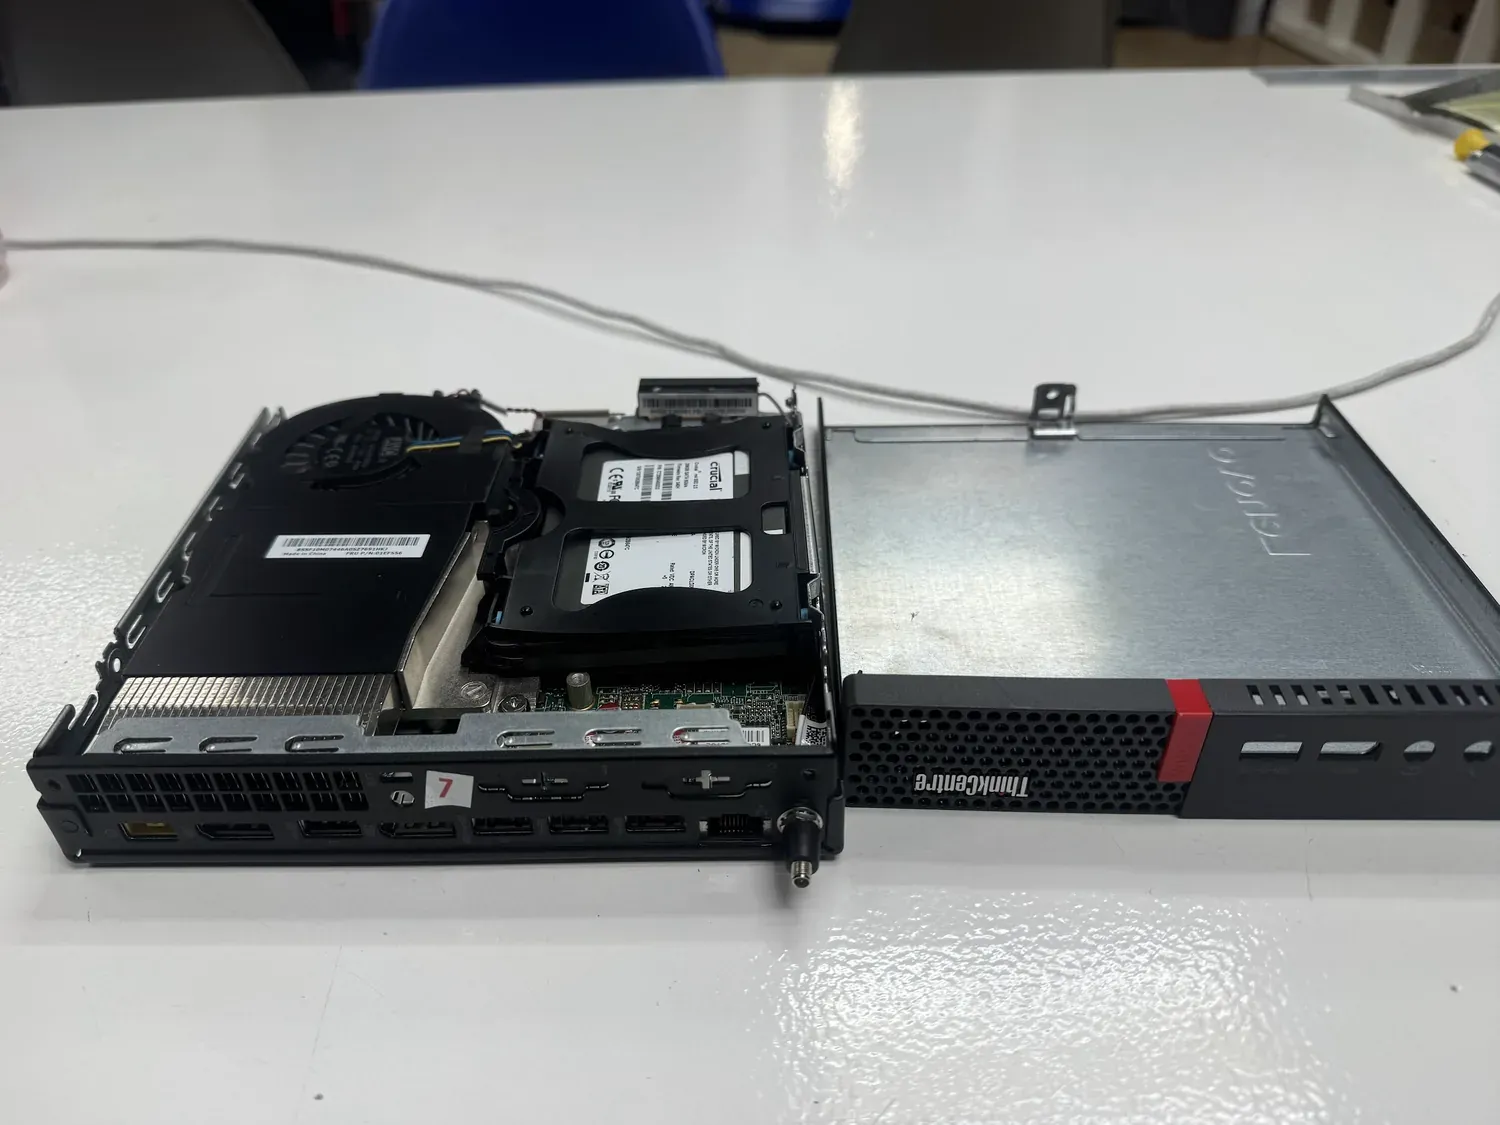
Opening the ThinkCentre M910q — so it can be screwed straight onto the monitor's VESA mounts instead of needing a separate bracket.
Drilling for the VESA screws — the cover plate and bolts that fix the opened mini PC to the back of the monitor.
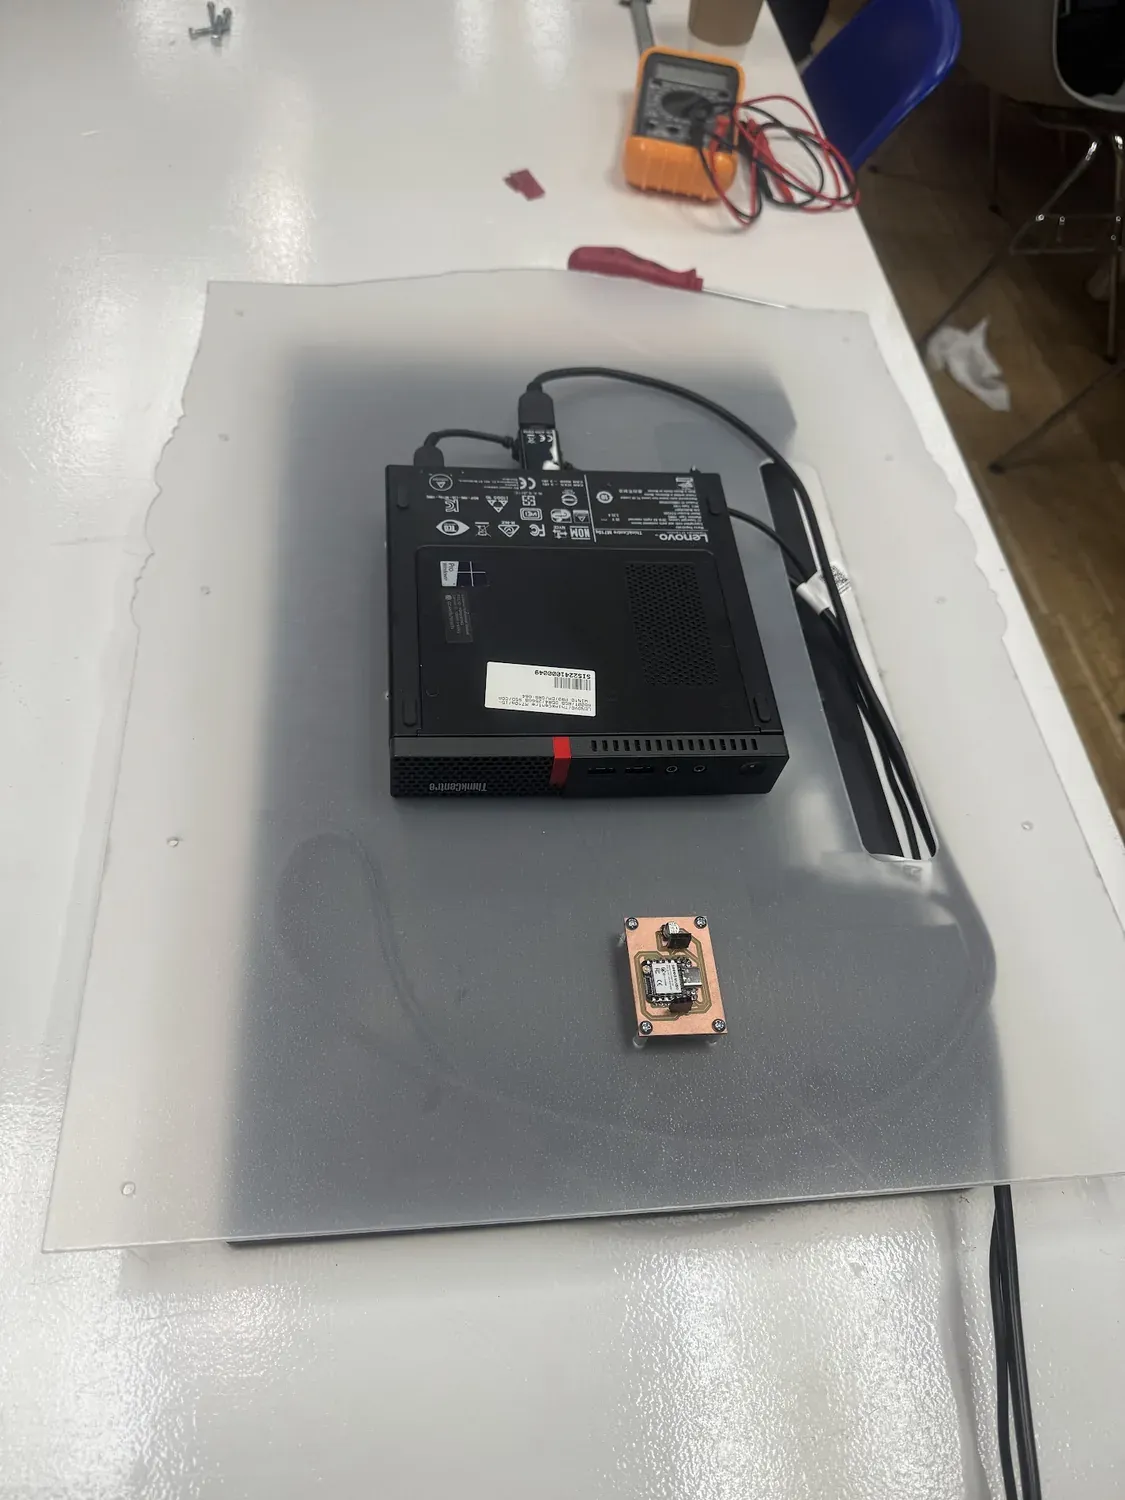
Packaging — the mini PC and the XIAO board laid out on the rear panel, finding their positions behind the screen.
Project Plan & Timeline
The build breaks into parallel tracks — software, fabrication, electronics — that converge into integration and documentation. Here's the plan mapped across the weeks, with where each phase stands.
| Phase | When | Status |
|---|---|---|
| Concept + first FaceMesh / WebGL prototype | Jan–Feb | Done |
| Simulation iterations (physarum, Asaro shading, botanical L-systems) | Feb–Apr | Done |
| Frame CAD + CNC carving (pine) | Apr–May | Done |
| Custom PCB — KiCad design → mill | May | Done |
| 3D prints (webcam arch, letter box, wire organisers, spacers) | May | Done |
| Letter: centerline trace → laser-mark + NeoPixel test | May–Jun | Done |
| Optical stack — one-way mirror film on acrylic | Jun | Done |
| Sensor selection (PIR vs IR) + firmware | Jun | Done |
| System integration — mini PC → VESA, assembly, packaging | Jun | Done |
| Documentation, presentation slide + video | Jun | In progress |
| Global review | Mid-Jun | Upcoming |
Project Management
How the week's project-management ideas actually showed up in building Maya's Mirror:
- Murphy's Law — things broke, so I planned for it. The two-sided PCB failed to mill twice before I redesigned it single-sided with a 0 Ω bridge; the intended swipe trigger didn't land, so the experience runs on a spacebar/HID signal for now.
- 80/20 & 95/5 — the core look of the simulation came together fast; the last 5% (finish quality, edge cases, documentation) is where most of the time actually goes.
- Triage — when time is tight, the face → flowers experience is protected first; nice-to-haves (extra sensors, polish features) yield.
- Documentation during development — exactly the weekly workflow: capture images and notes while building and write the page alongside, never reconstruct it after.
- Demand- vs supply-side time — protecting blocks of maker-time (supply) rather than only reacting to deadlines (demand) is what kept the fabrication tracks moving.
- Spiral development / DevOps — the WebGL piece grew in build–test–refine loops: FaceMesh → physarum → Asaro shading → botanical L-systems, each cycle on real camera input.
- Serial vs parallel tasks — software iterated in parallel while the CNC and prints ran; but some chains are strictly serial — the letter can't be laser-marked before its centerline is traced.
- System integration — the convergence point, and the riskiest: the seven-layer stack, the mini PC on the VESA, mirror film, sensor and lighting all having to agree at once.
- Finish quality — the carved relief, bubble-free mirror film, and tidy internal cabling are what make the separate parts read as one object.
Covering the Fab Requirements
The final project has to incorporate five areas. Here's how Maya's Mirror covers each:
2D & 3D design
Fusion 360 for the carved frame and the full stacked assembly; KiCad for the PCB; Rhino for the letter vector; the WebGL simulation UI itself.
Additive & subtractive fabrication
Subtractive — CNC-carved pine frame, milled PCB, laser-cut acrylic and mirror oval. Additive — 3D-printed webcam arch, letter box, wire organisers, and spacers.
Electronics design & production
A custom XIAO ESP32-S3 carrier board designed in KiCad and milled in-house, driving the PIR sensor and NeoPixels.
Embedded programming
Firmware reads the PIR, controls the NeoPixels, and triggers the experience over USB HID / serial — tested live on the board.
System integration & packaging
A seven-layer stack packaged into the wooden pocket: the mini PC opened and screwed to the monitor's VESA, mirror film on acrylic, cable management, and the carved face on top.
Bill of Materials — Components, Sources & Cost
Where possible I made rather than bought. Bought items are the display, compute, camera, and optical film; everything structural and electronic is fabricated. Buy-item prices are current retail (Amazon.es, June 2026); made parts use Fab Lab stock and are estimated.
| Item | Spec | Make / Buy | Source | Cost |
|---|---|---|---|---|
| Monitor | Philips 24E1N1100A, 24″ FHD IPS | Buy | Amazon.es | €79 |
| Mini PC | Lenovo ThinkCentre M910q, i5-6400T, 8GB, 240GB SSD | Buy | Refurb marketplace | €140 |
| Webcam | Logitech C270 HD, 720p | Buy | Amazon.es | €25 |
| One-way mirror film | Applied to back of acrylic | Buy | Amazon.es | €10 |
| Acrylic sheet | Clear, cut to aperture | Make (cut) | Fab Lab stock | €10–20 |
| Wood (frame) | Pine, CNC-carved relief | Make (CNC) | Fab Lab stock | €20–40 |
| Custom PCB | XIAO ESP32-S3, milled board + components | Make (mill) | Lab + Seeed XIAO | €20–25 |
| Sensors / wiring | PIR motion sensor, NeoPixels, connectors | Buy | Amazon.es | €15–25 |
| 3D-printed enclosure | PLA+, rear cover + spacing ribs | Make (print) | Fab Lab filament | €5–10 |
| Estimated total | ~€300–350 | |||
Parts, Systems & Processes
Maya's Mirror is a seven-layer stack, front to back: CNC carved wood frame → acrylic + mirror film → 10–25mm air gap → 24″ monitor → custom XIAO PCB → ThinkCentre mini PC → 3D-printed rear enclosure. Overall ~520 × 720 × 120 mm. Each part maps to a Fab Academy process:
- 2D & 3D design — Fusion 360 frame + assembly model, KiCad PCB, simulation UI
- Subtractive fabrication — CNC router frame, milled PCB, laser/acrylic cutting
- Additive fabrication — 3D-printed rear enclosure, spacing ribs, sensor/webcam mounts
- Electronics design & production — custom XIAO ESP32-S3 board (PIR, NeoPixel, serial)
- Embedded programming — firmware for sensing, lighting, serial + WiFi behaviours
- System integration & packaging — the layered enclosure, VESA mount, ventilation, cable management (Week 16)
- Molding & embroidery — explored in adjacent weeks, feeding the project's material language
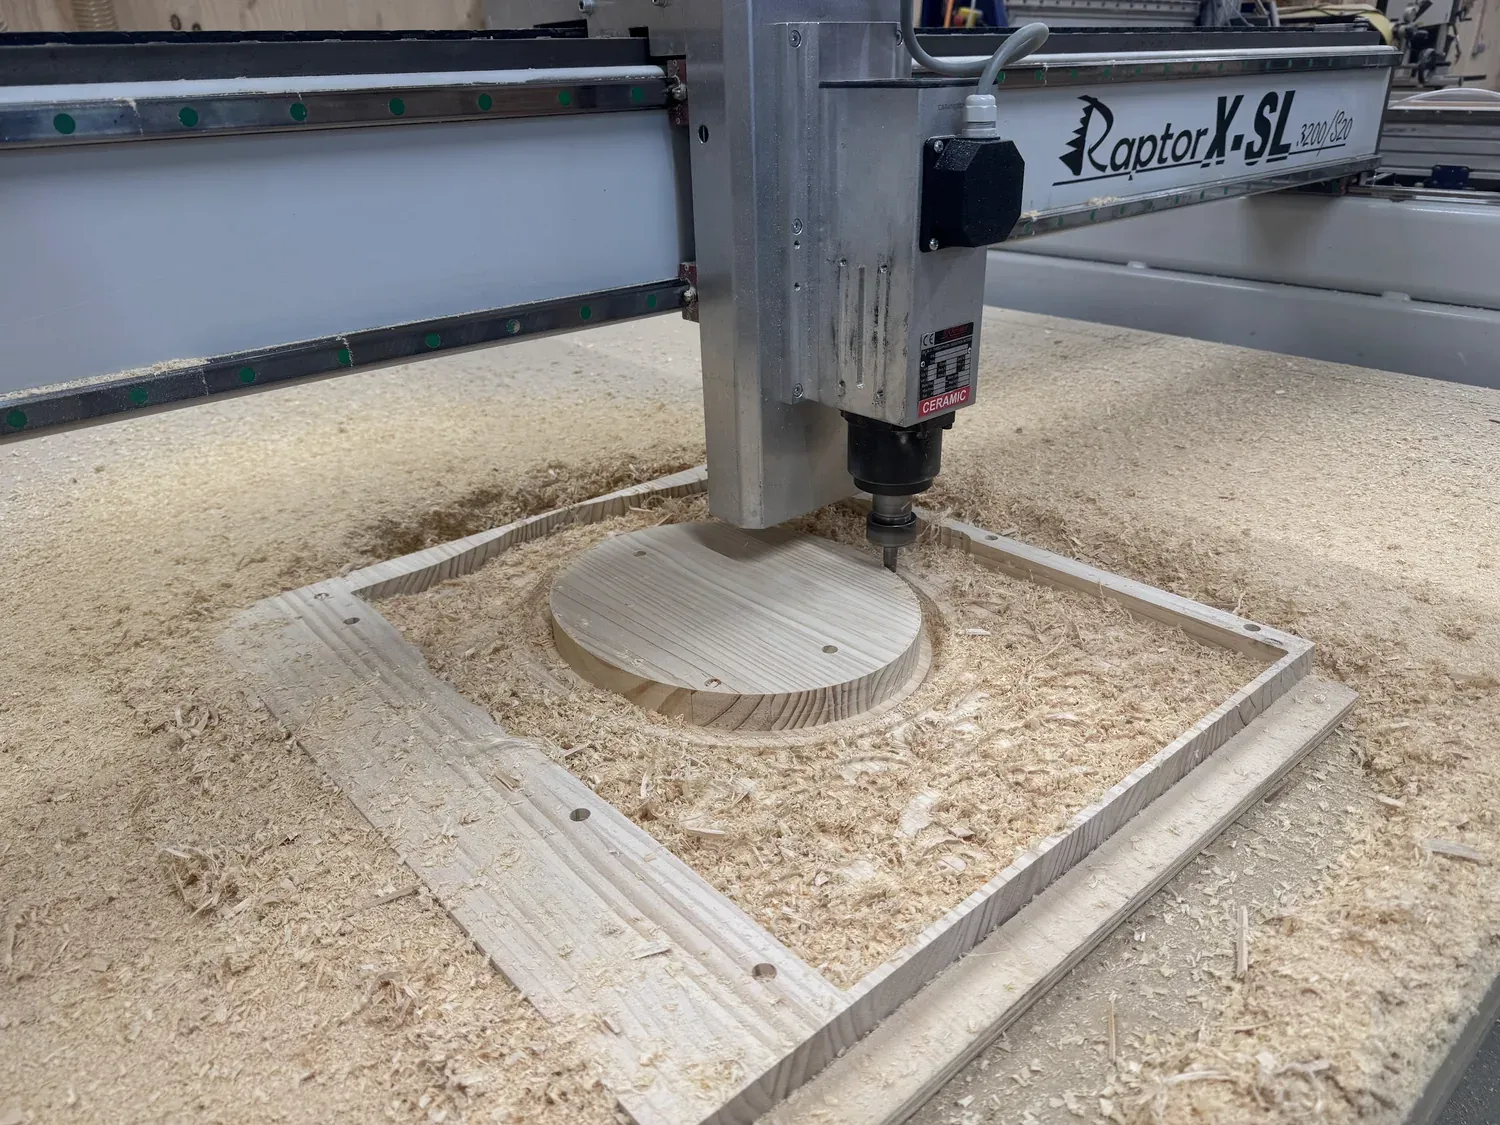
Subtractive — the botanical frame carved from pine on the Raptor X-SL (~5 hr 26 min total machining).
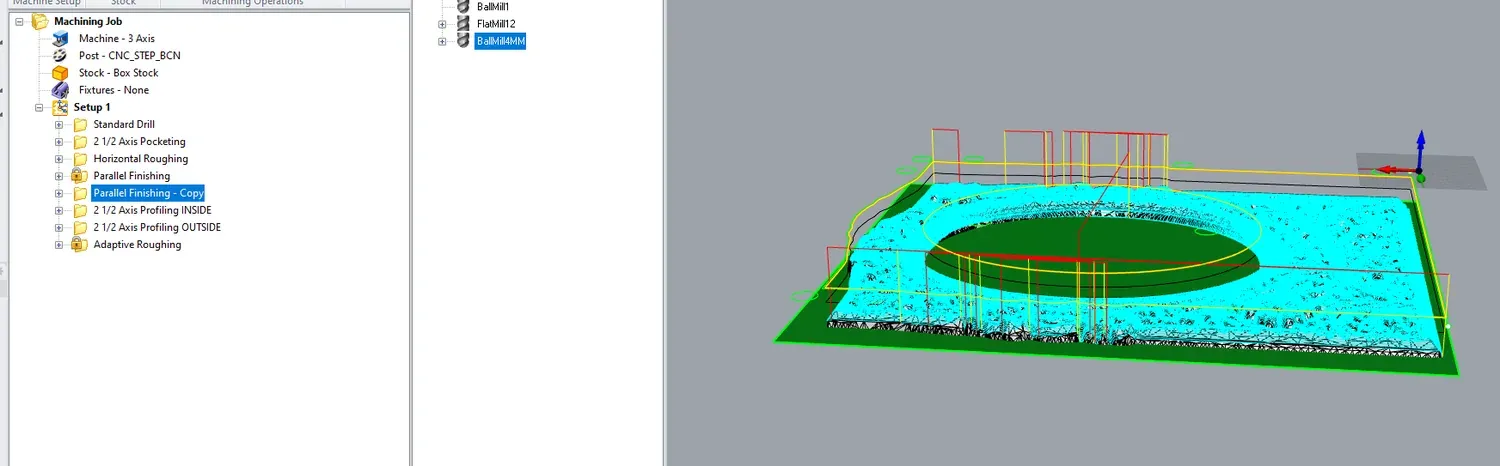
CAM — parallel-finishing toolpath (4 mm ball mill) over the relief; roughing → finishing → profiling in one setup.
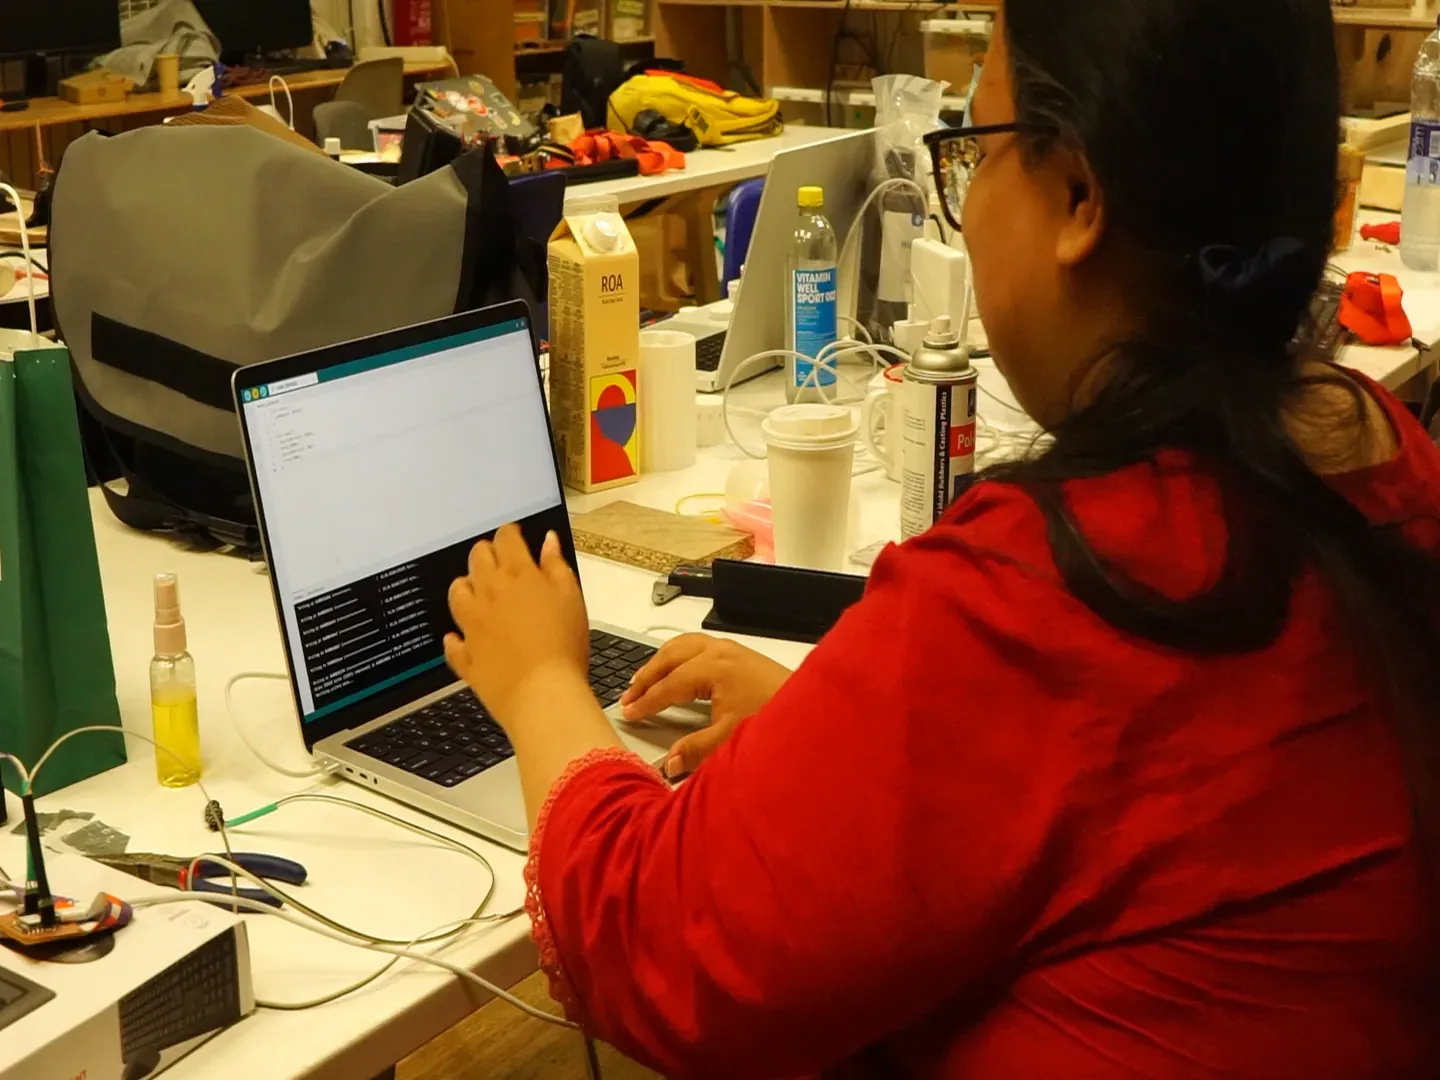
Embedded programming — flashing and debugging the XIAO firmware (PIR read, NeoPixel, serial) in the Arduino IDE.
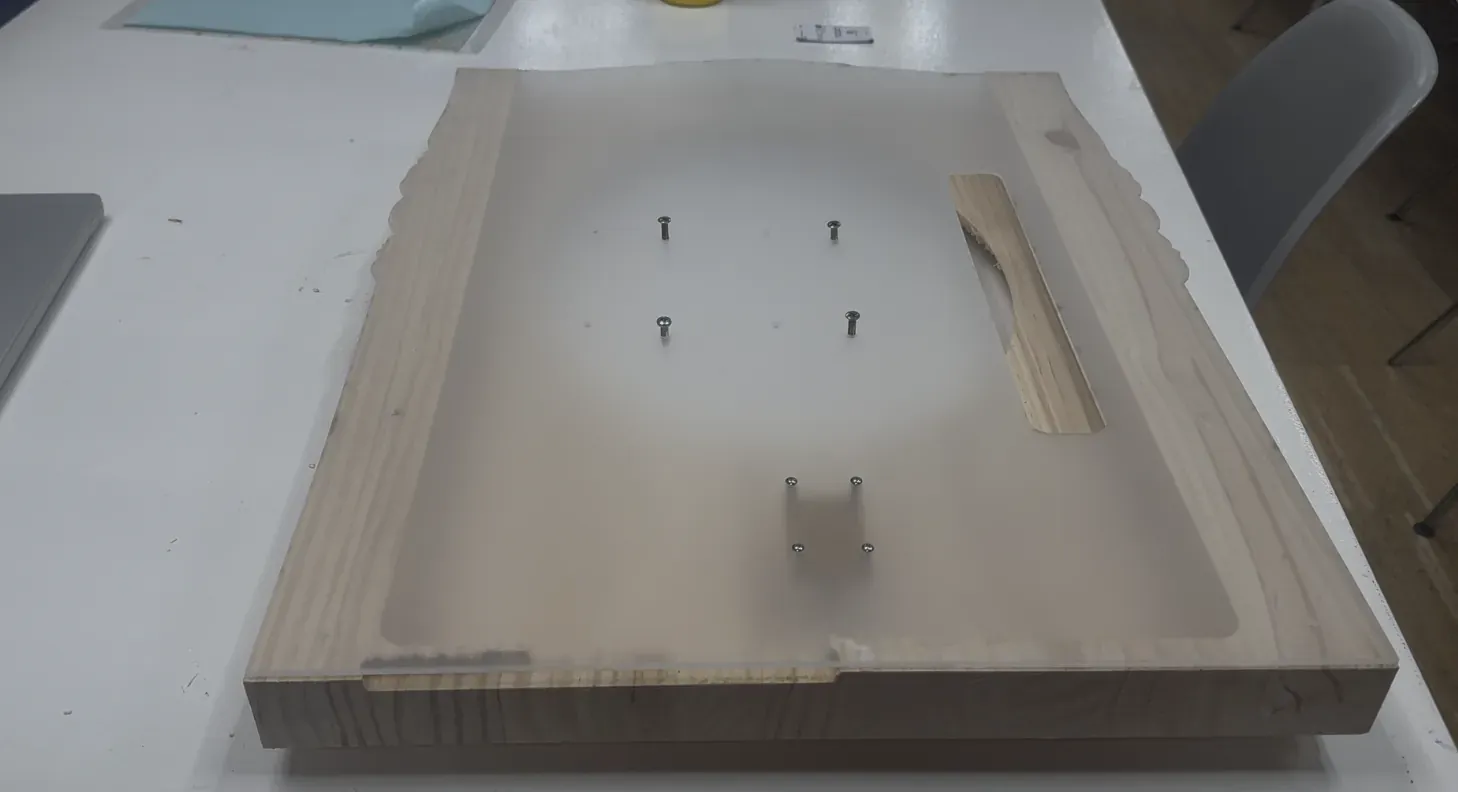
Integration — the rear pocket structure with VESA mounting, cable routing, and a cut handle slot for transport.
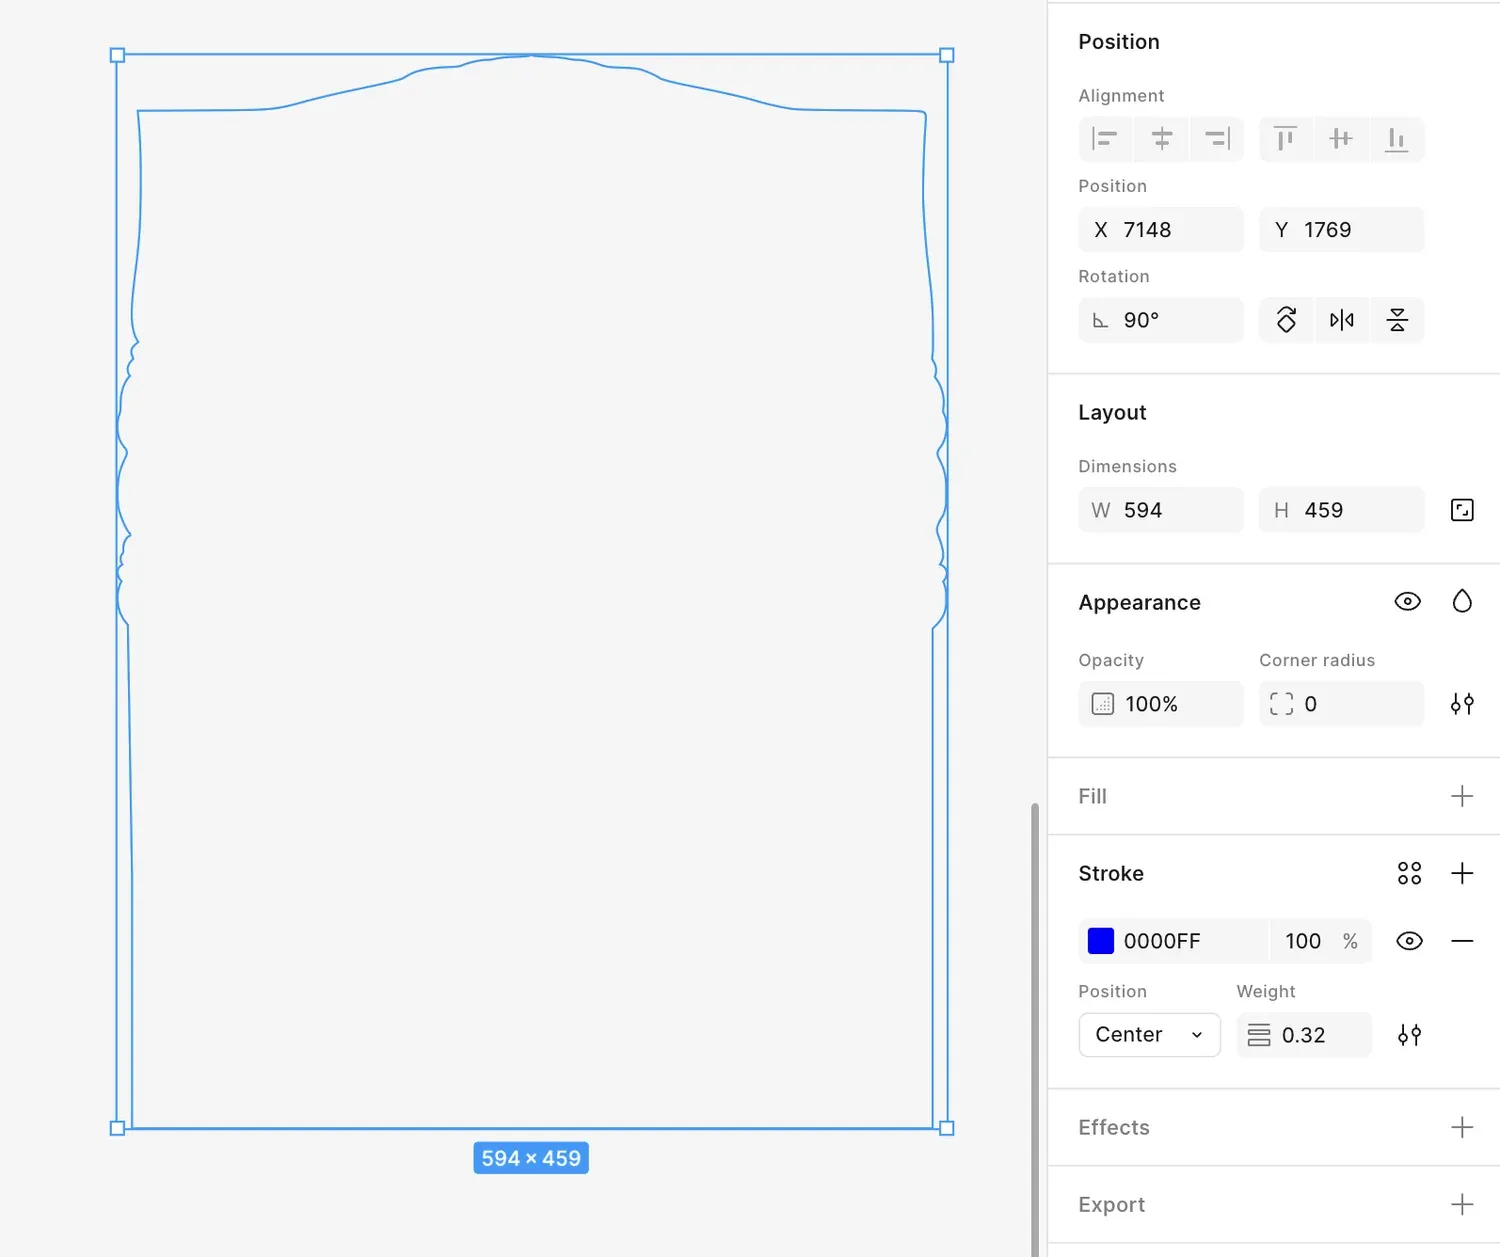
Electronics design — the XIAO ESP32-S3 carrier laid out in KiCad (50.25 × 35.5 mm): LED/NeoPixel, PIR, and power headers before milling.
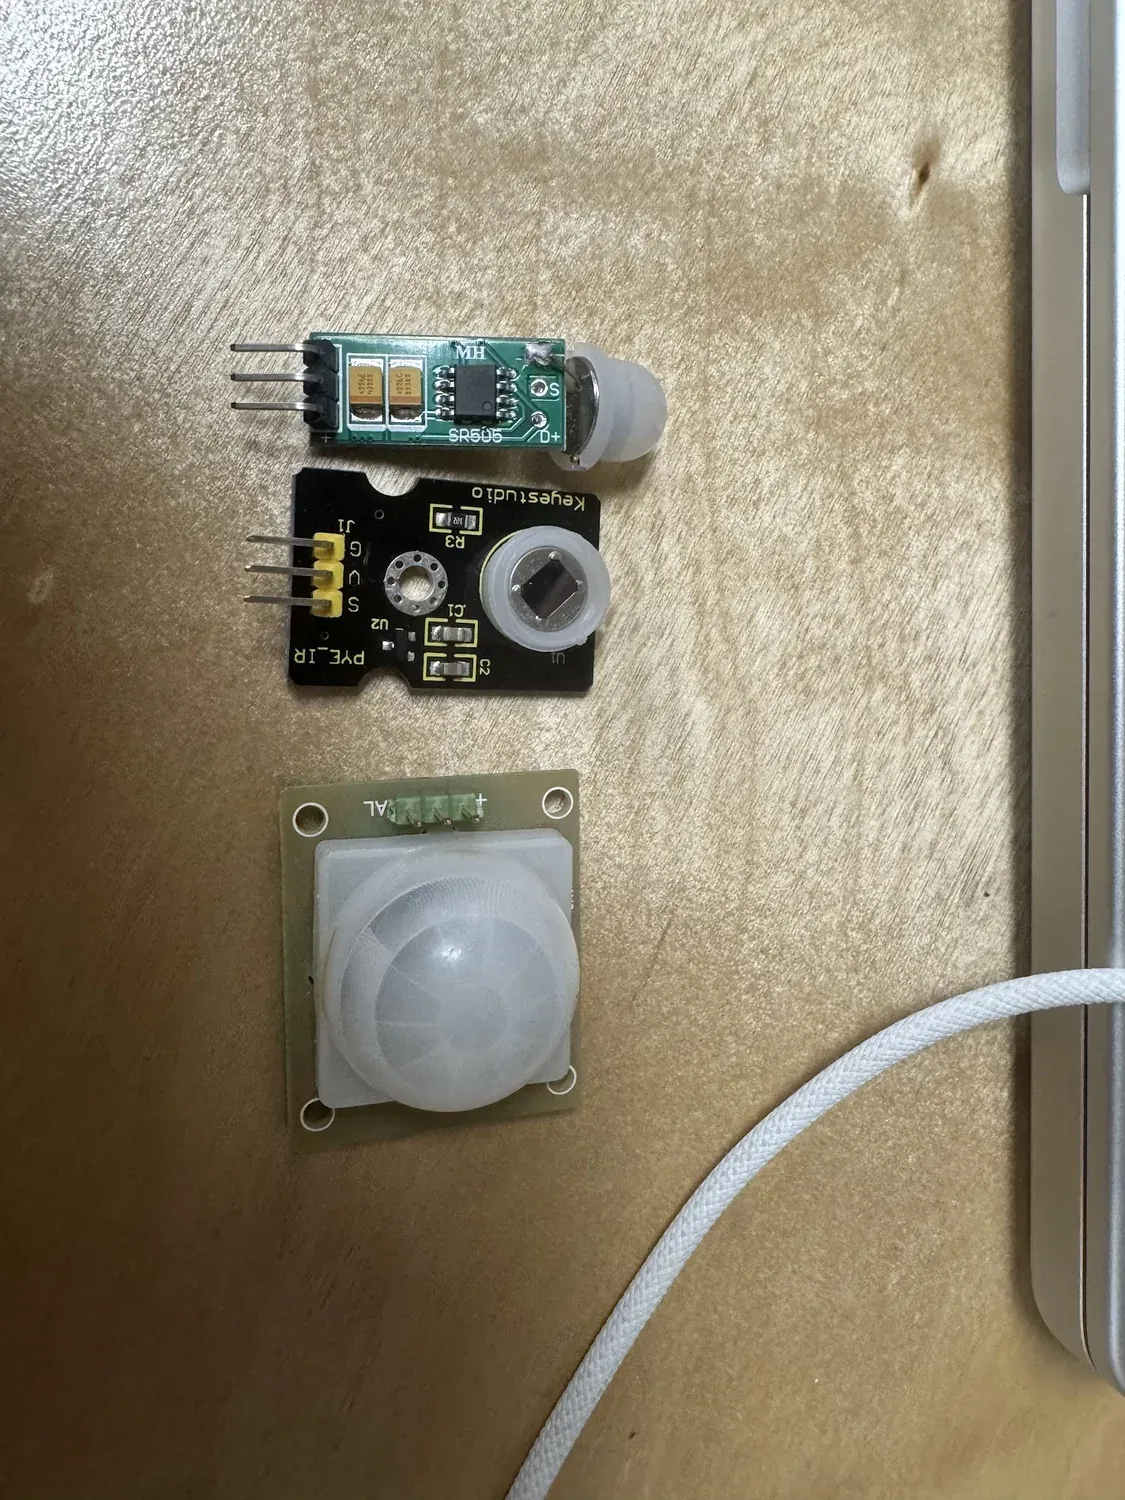
Choosing the trigger — comparing an SR505 mini-PIR, a Keyestudio IR module, and an HC-SR501 PIR before settling on PIR for reliable presence detection.
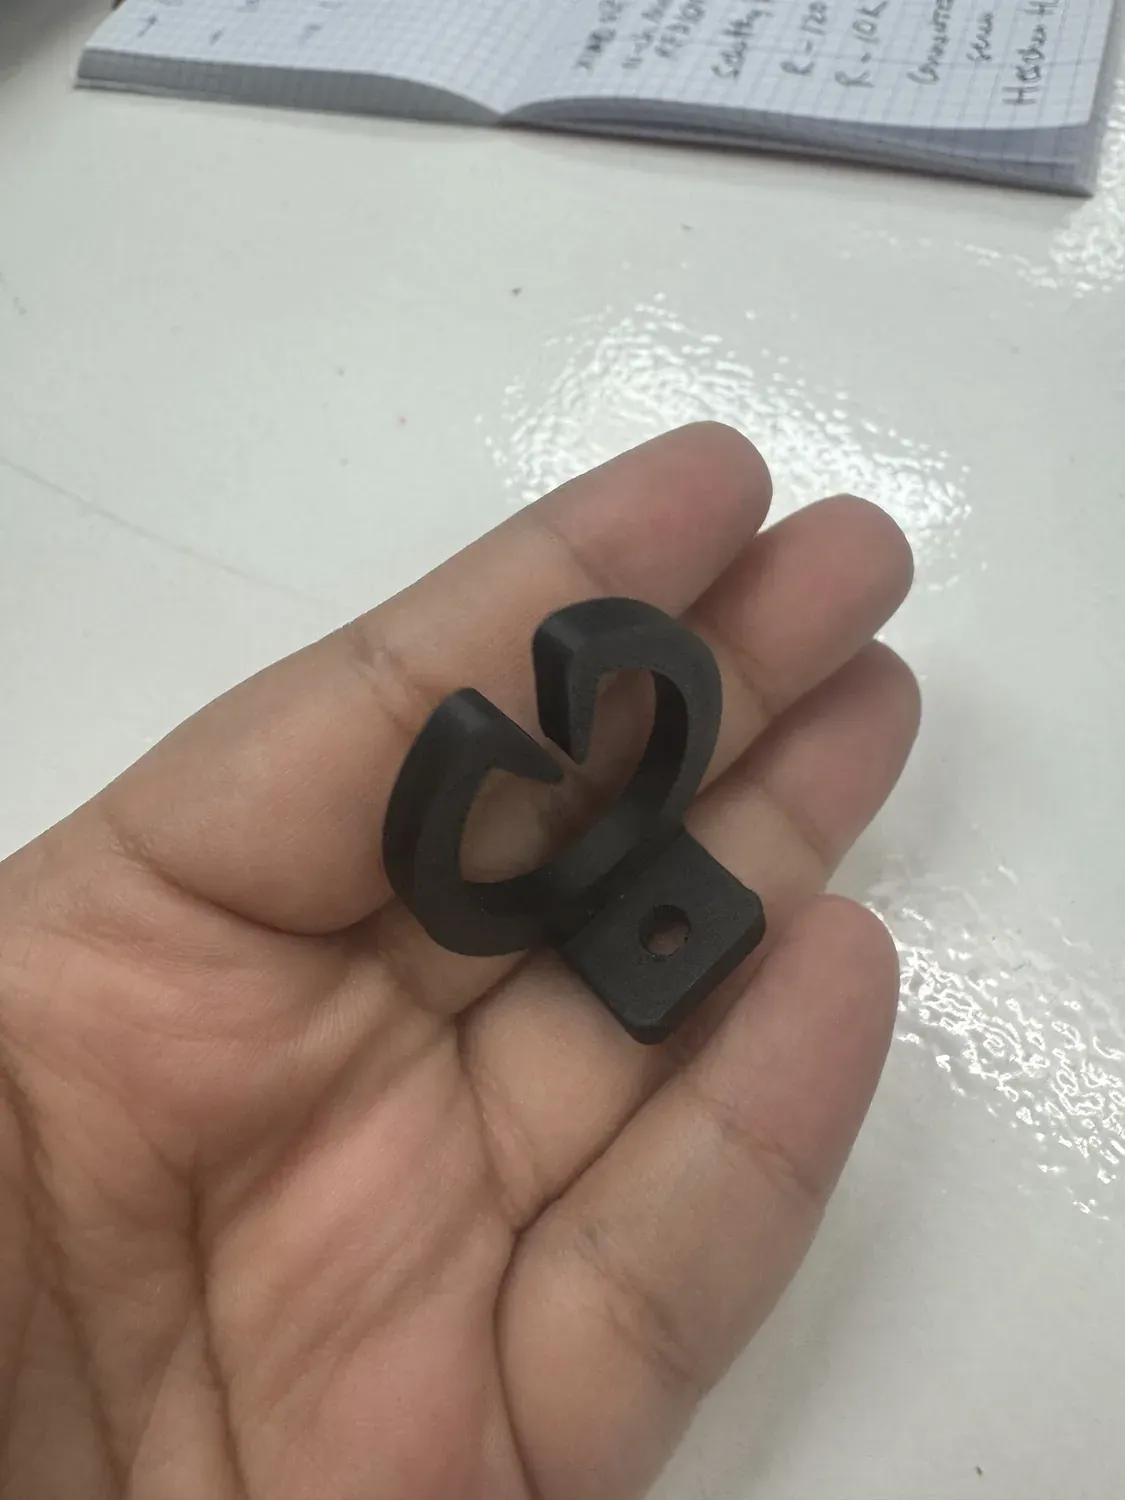
Additive — 3D-printed wire organisers and spacers that keep the internal cabling tidy and set the air gap in the stack.
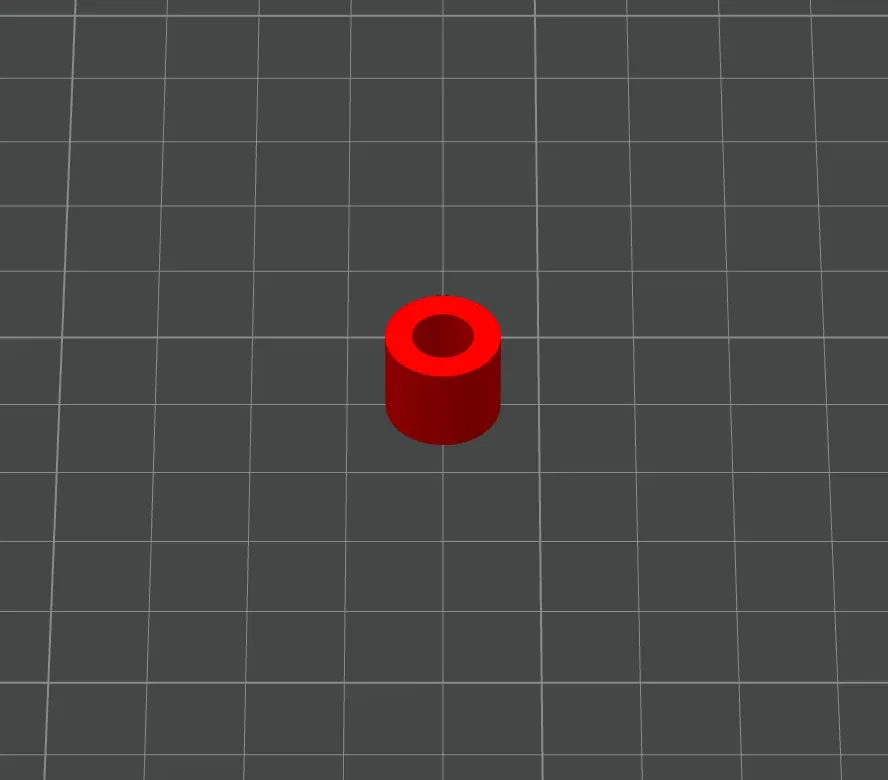
A printed spacer — sets and holds the air gap between the acrylic, screen, and rear layers.
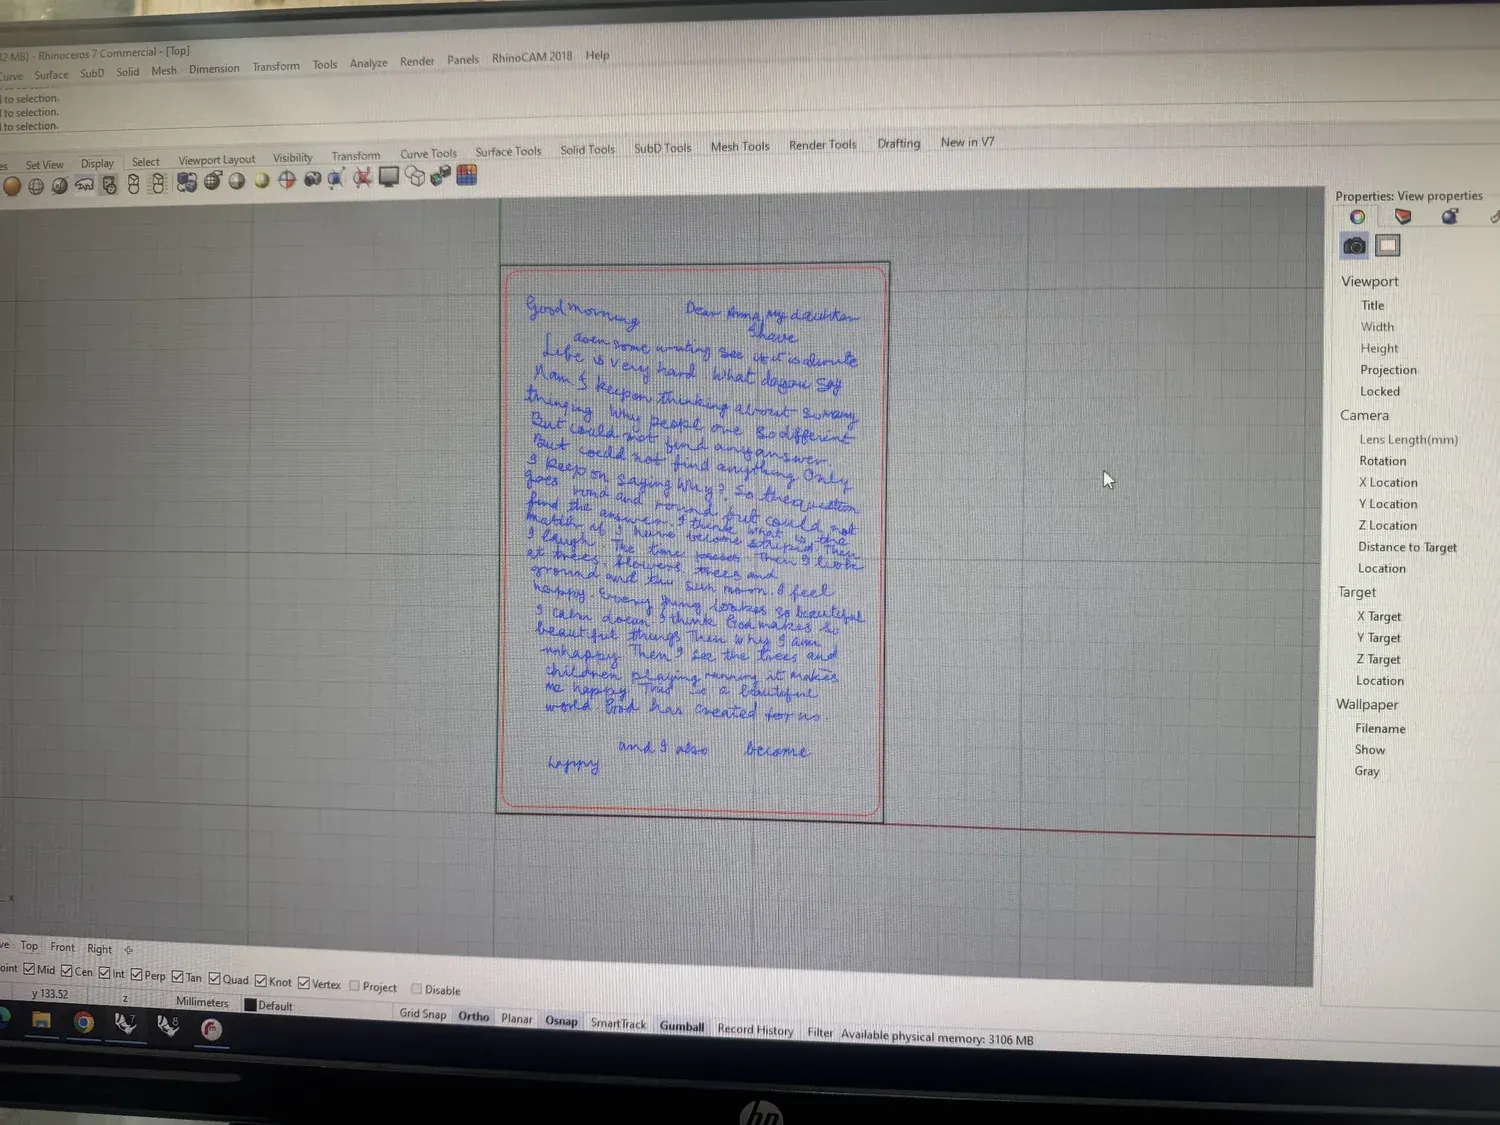
Letter prep — Maya's handwriting vectorised in Rhino, centerline-traced from her scanned letter, ready to laser-mark (and to drive the self-writing animation).
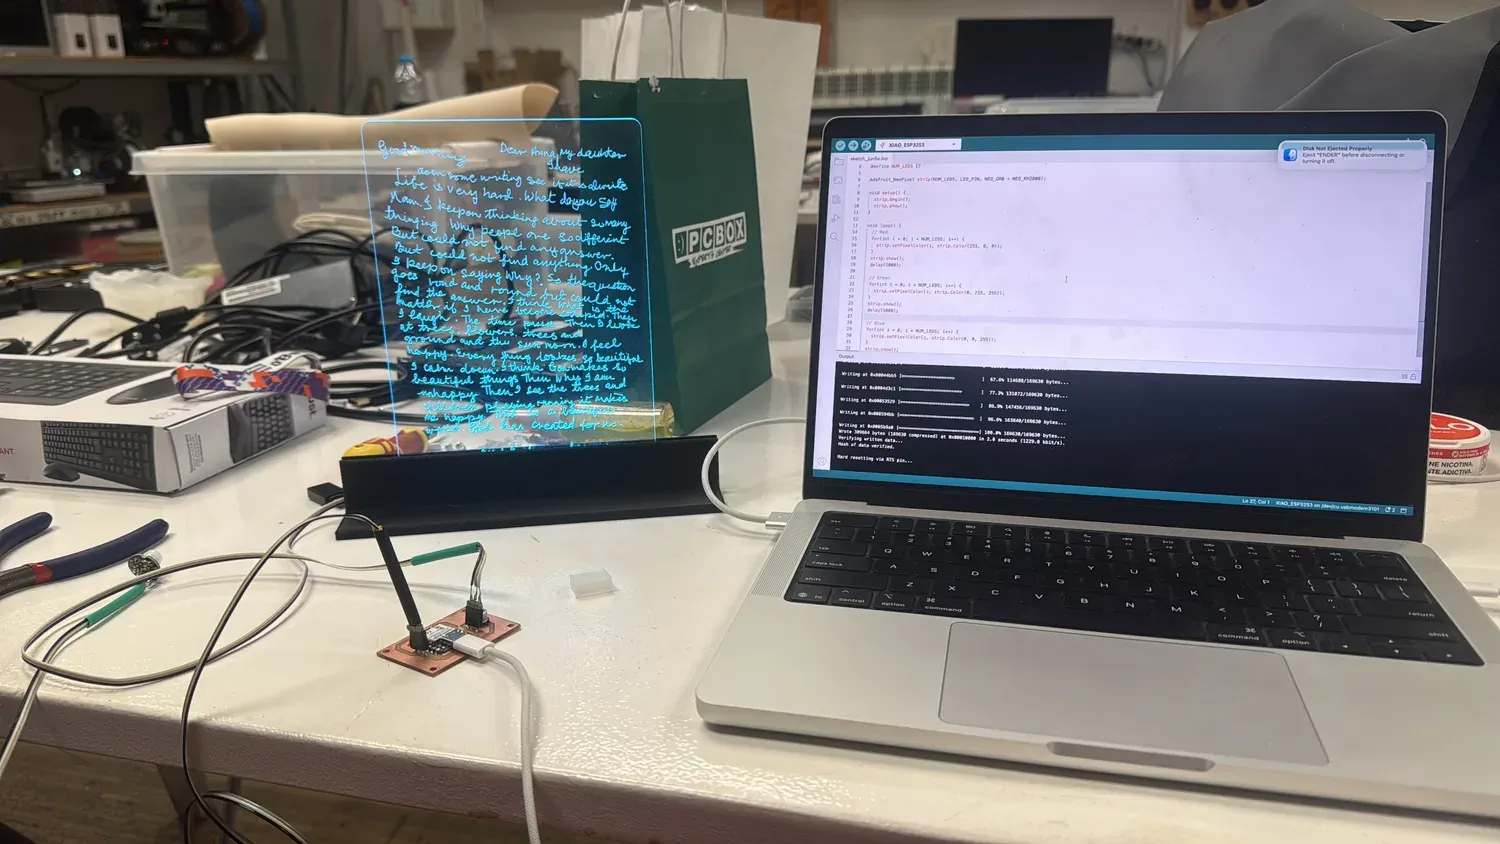
Testing the code — flashing the NeoPixel sketch to the XIAO and watching the laser-marked letter light up edge-lit.
Integration also includes the optical layer: applying the one-way mirror film to the acrylic sheet that sits in front of the screen. Cleanly squeegeed and bubble-free, it reads as a mirror when the display is dark and lets the simulation show through when it's lit — the effect the whole piece depends on.
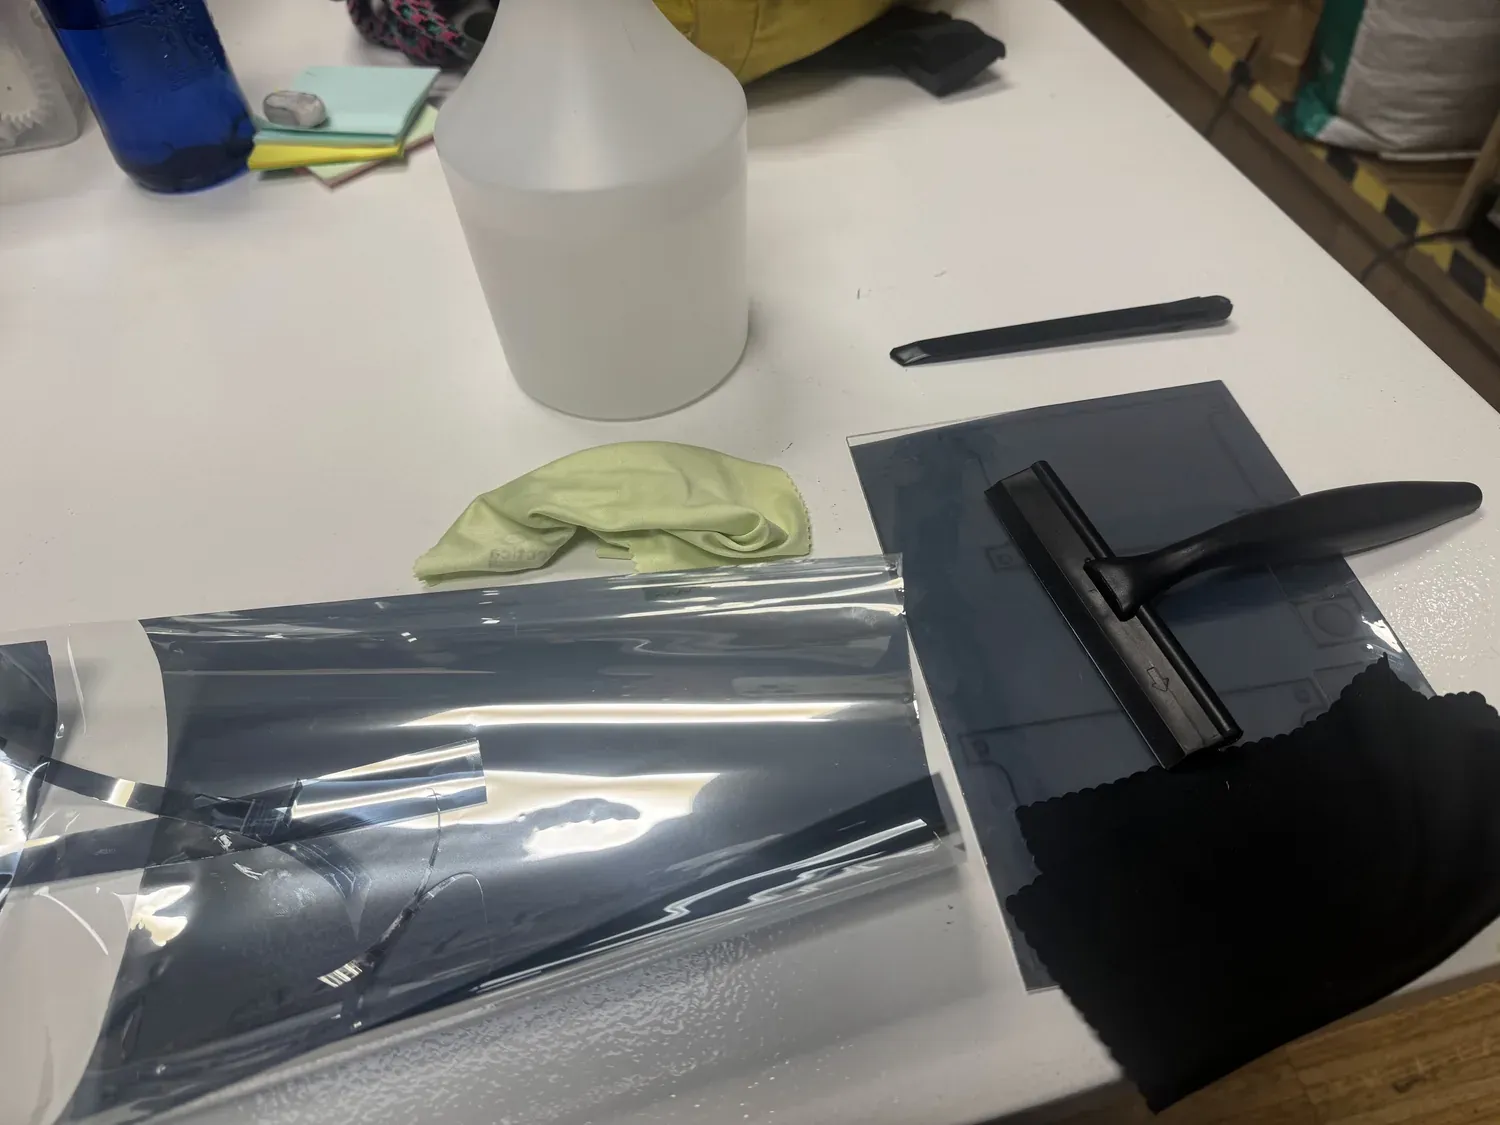
Applying the one-way mirror film — spray, lay, and squeegee onto the acrylic, working bubbles out from the centre.
What Questions Need Answering?
- Mirror film vs monitor brightness — will the display read clearly through the film? Key unknown until physical assembly.
- Webcam alignment through the frame slot — needs precision once hardware is mounted.
- Thermal management inside the sealed rear enclosure — air gap + vent sizing.
- Pin conflict — D4 is also I²C SDA on the XIAO; if an ambient-light sensor is added, the PIR signal must move to D6/D7.
- CNC relief carving time — complex botanical toolpaths; fabrication time is a risk.
- Distortion visual language — staying on the poetic side of dissolution, not horror (largely resolved across 8 simulation iterations).
How Will It Be Evaluated?
Against the Fab Academy final-project requirements and the experience it's meant to deliver:
- Independently operable — powers on and runs the full experience without a tethered laptop or manual intervention.
- Motion → response — the PIR sensor reliably cycles the three states (letter light → experience → reset) as a viewer moves.
- The transformation reads — a first-time viewer perceives the arc from reflection to botanical garden without explanation.
- Range of processes — demonstrates 2D/3D design, additive + subtractive fabrication, custom electronics, embedded programming, and system integration.
- Made not bought — the frame, PCB, enclosure, optics, and software are fabricated in-house.
- Emotional legibility — the piece communicates Maya's philosophy of beauty beyond memory.
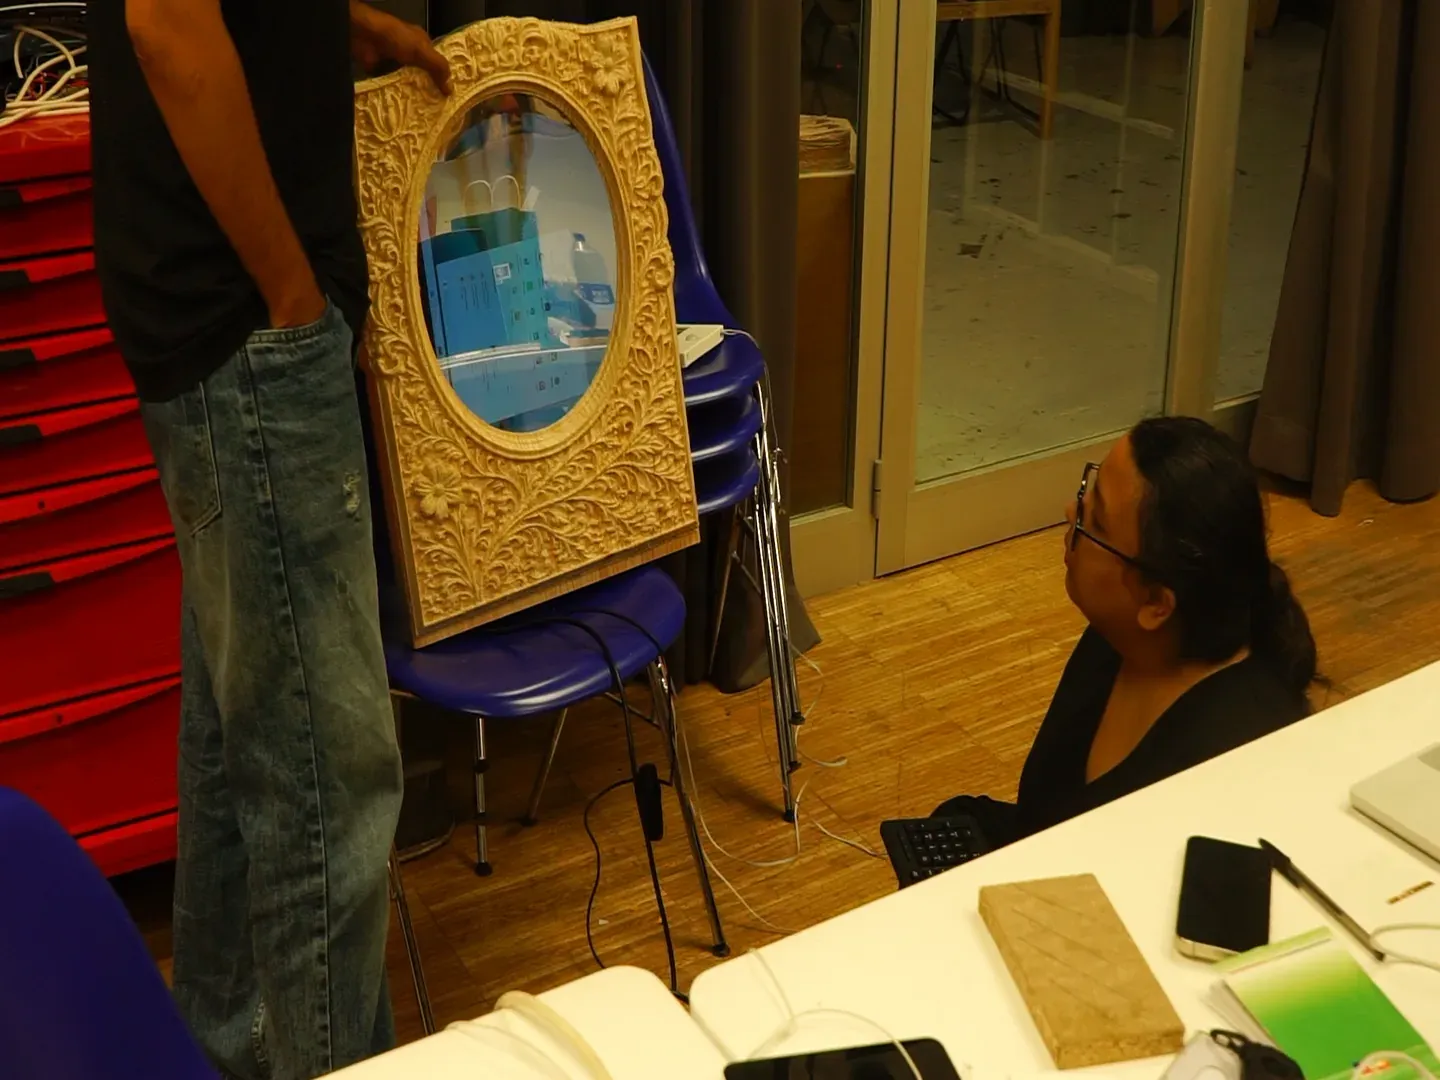
Evaluation in practice — a first-time viewer reads the transformation without explanation.
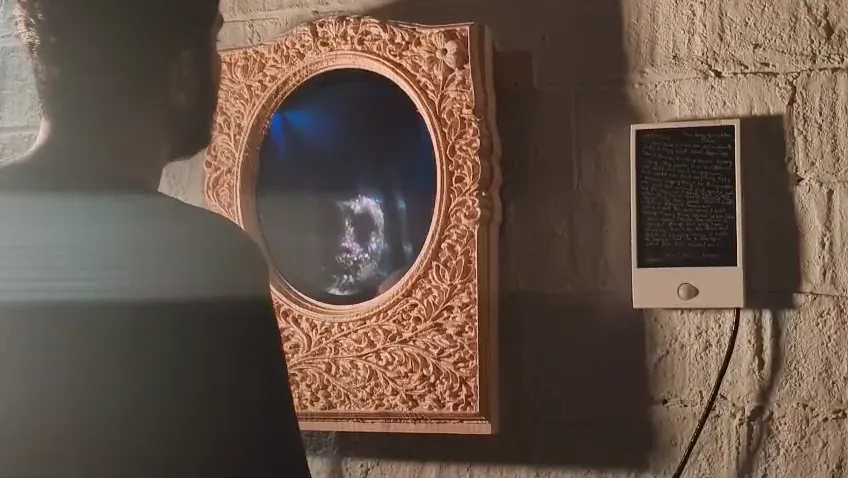
The full installation — mirror and the NeoPixel-lit letter holder, read together as one piece.
Project Development — Slide & Video
The summary slide (presentation.png,
1920×1080) and video clip
(presentation.mp4, 1080p, <1 min,
<25 MB) live in the root directory and are linked
in the final presentation schedule.
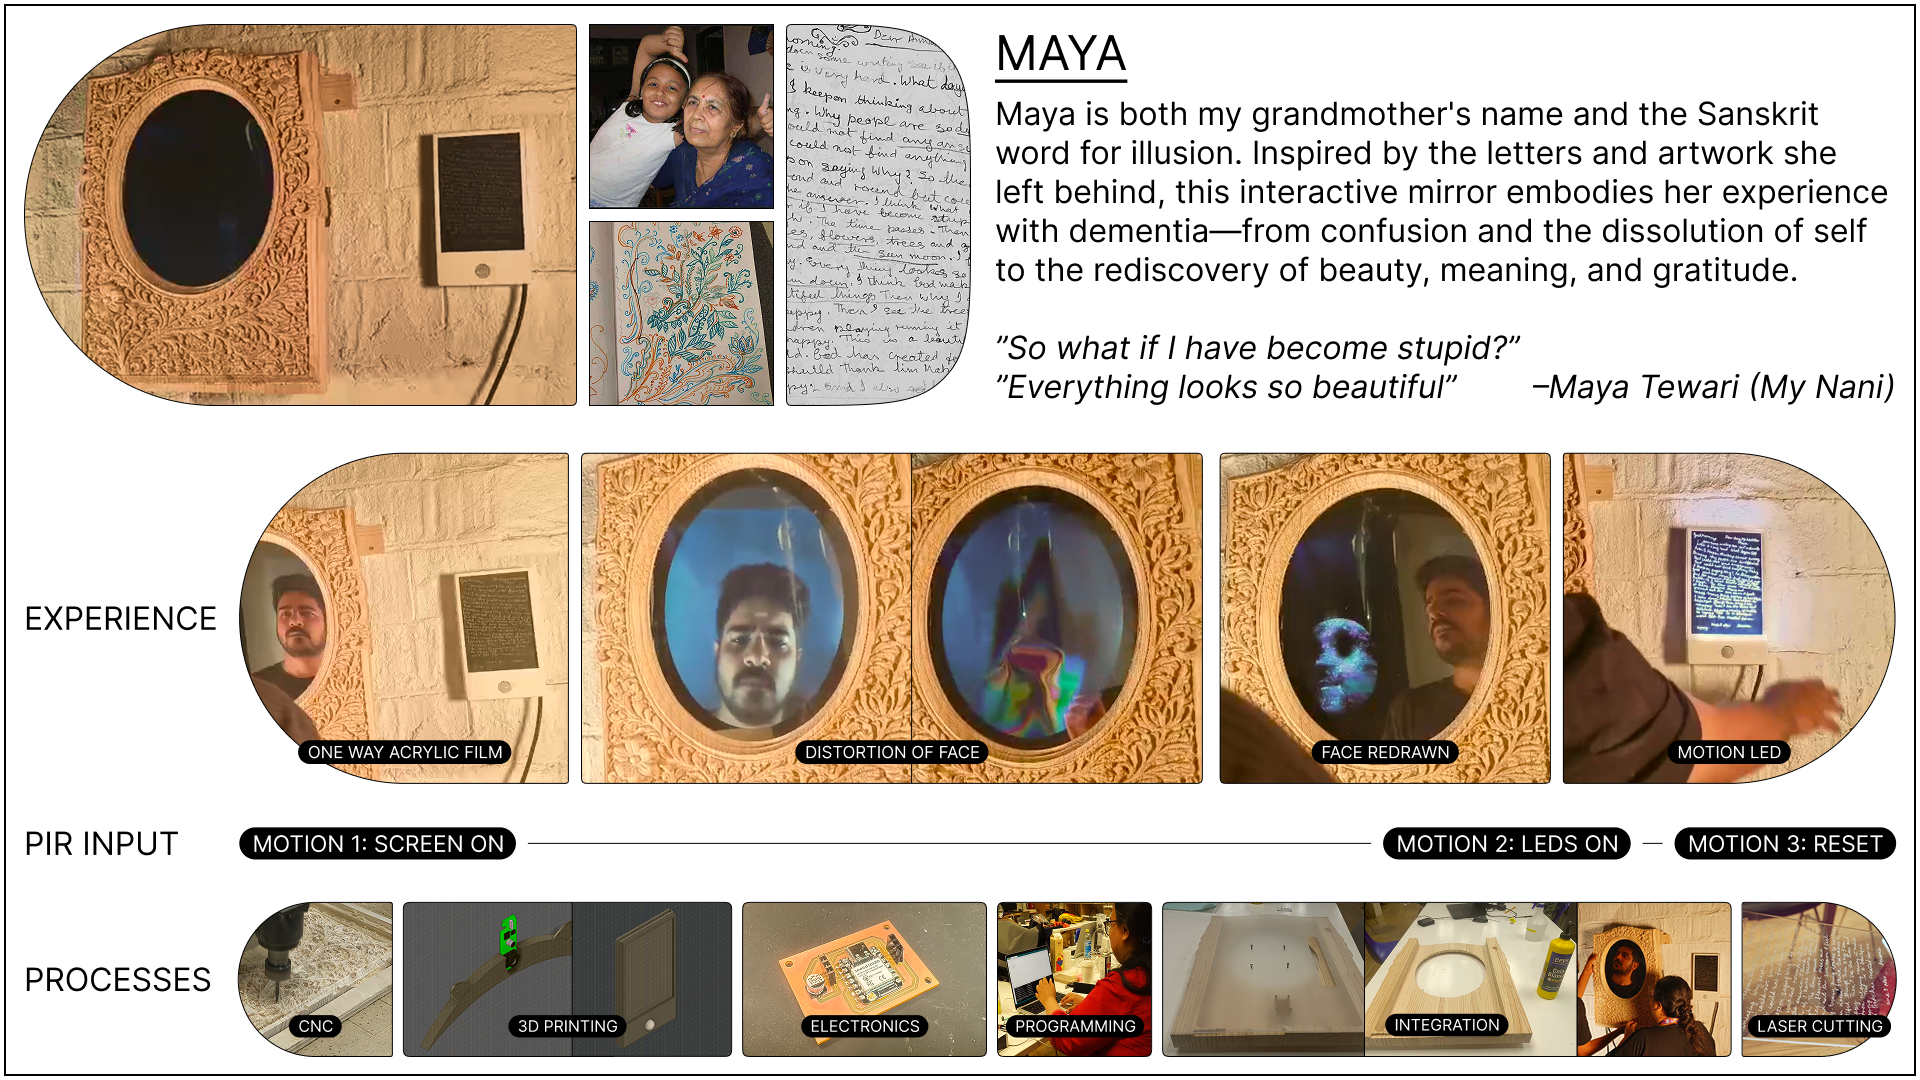
Summary slide — presentation.png.
Summary video — presentation.mp4.
Design Files & Source
The frame was modelled in Fusion 360 and carved on the CNC; the letter was centerline-traced for laser-marking; the spacer and housings were 3D-printed. Subsystems were built across the weekly assignments — System Integration in Week 16 →, and the full build on the final project page →.
- matalaser.svg — Maya's letter, centerline-traced vector for laser-marking
- Mirror2.svg — botanical frame relief artwork
- mirroroutline.svg — mirror oval cut outline
- mirrorspacer.stl — 3D-printed air-gap spacer
- Maya.pdf — frame multiview drawing