week03 \ computer-controlled cutting
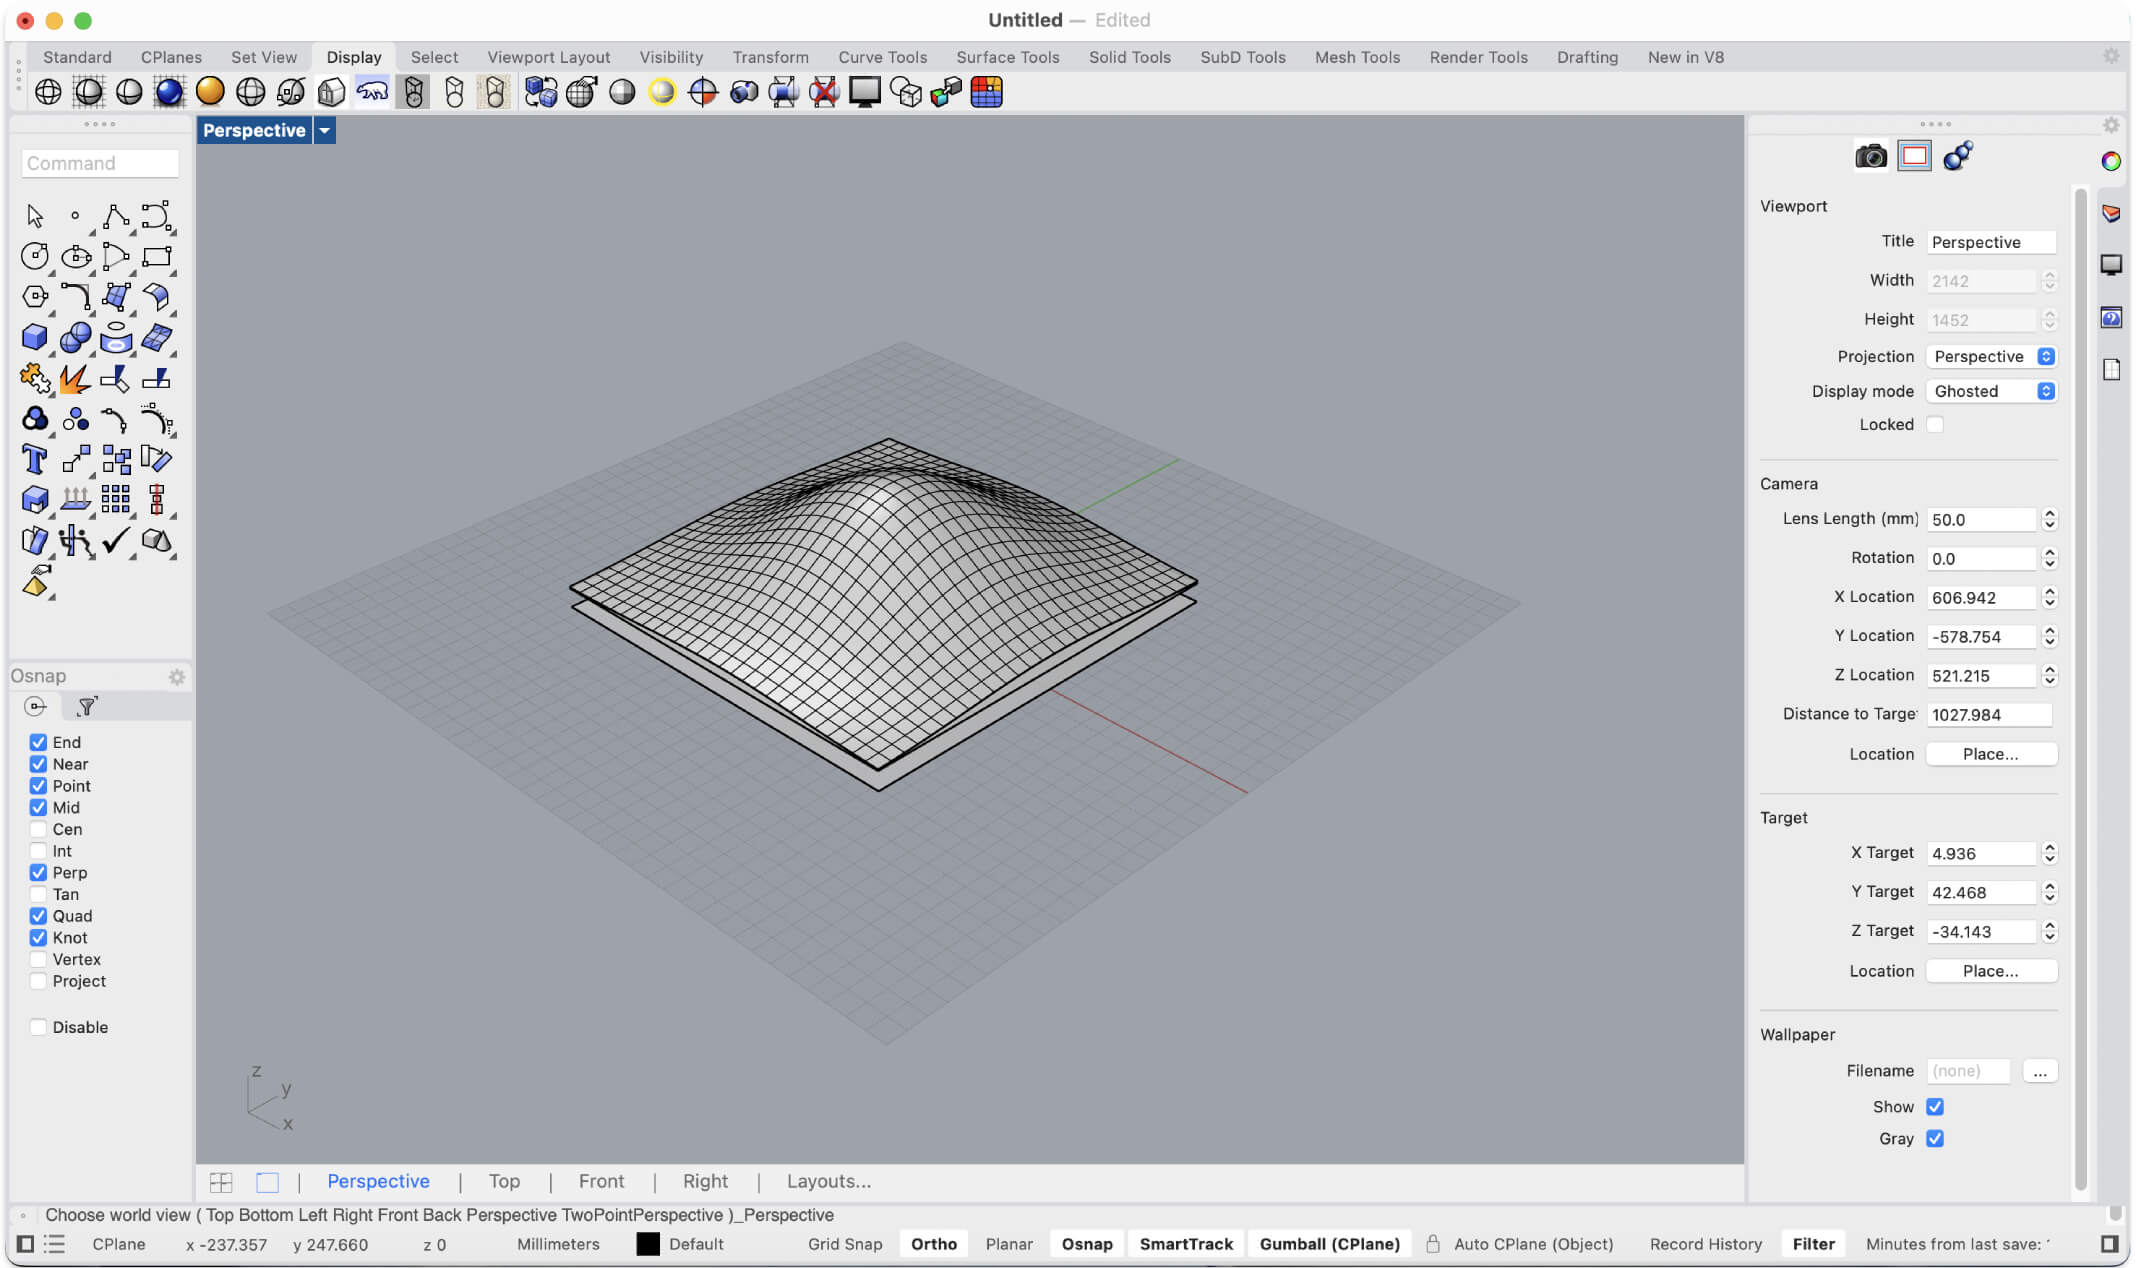
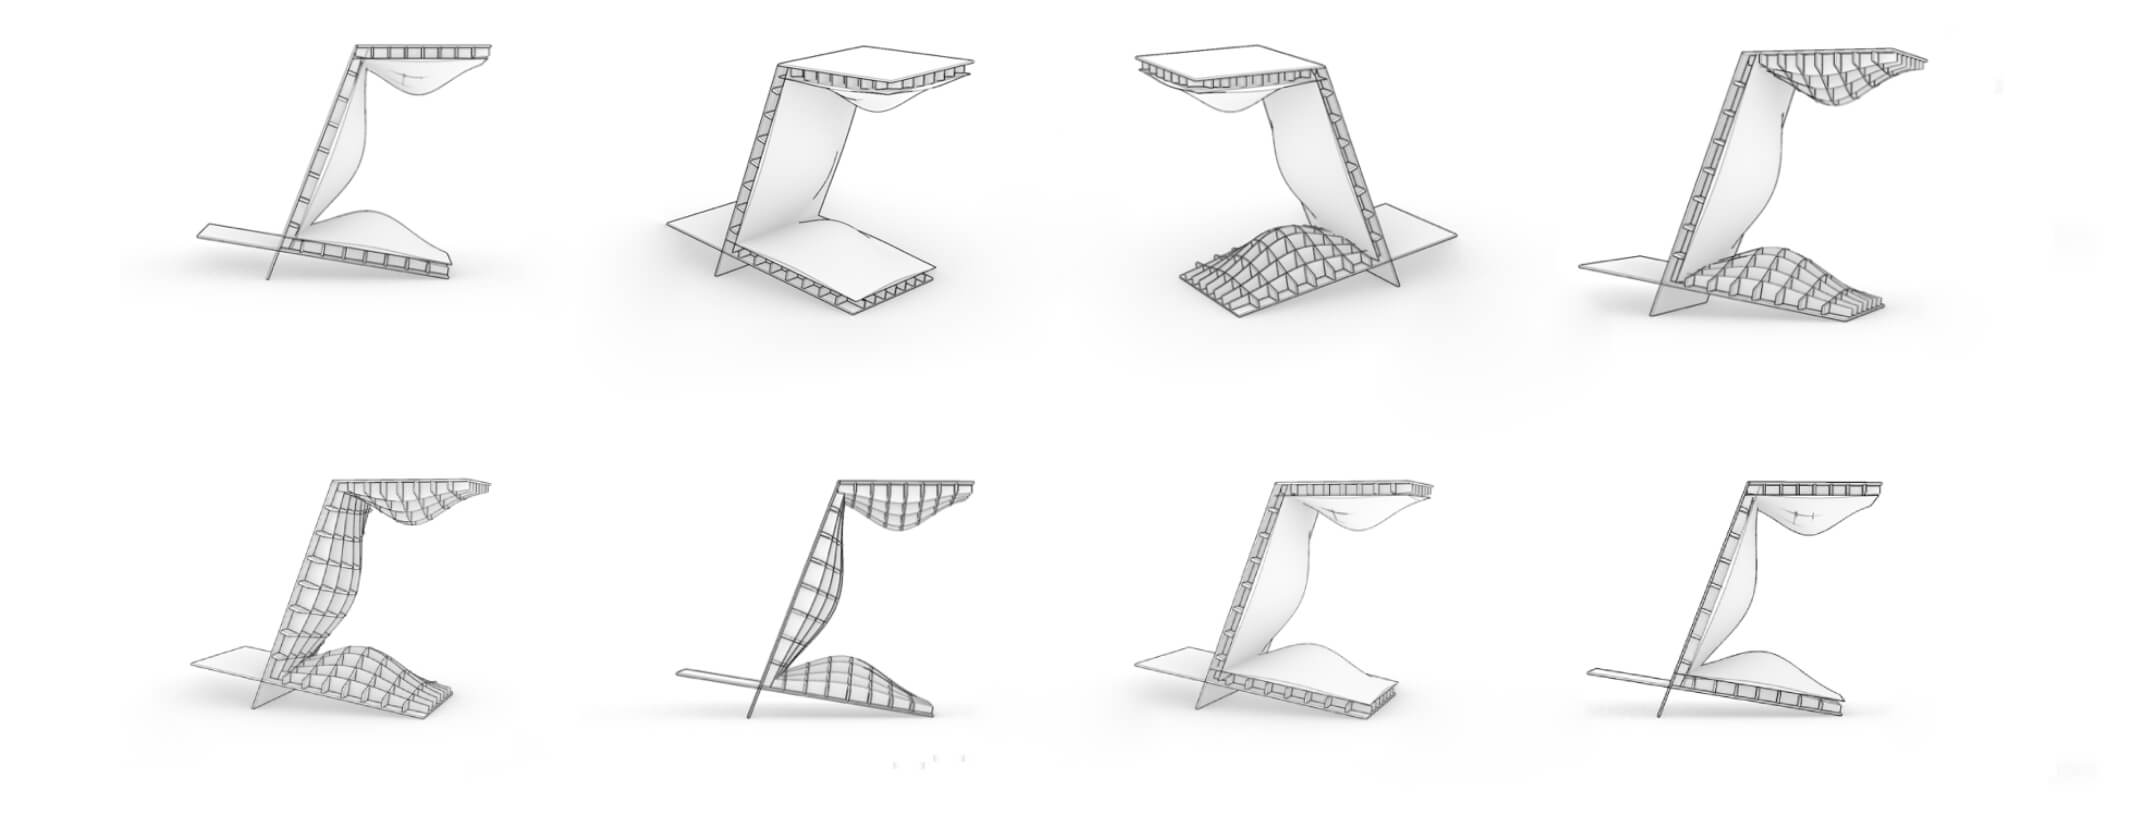
The goal was to design a lamp based on an interlocking "waffle" structure, featuring an organic central bump. This "bump", initially modeled in Rhino as a NURBS surface, is not just an aesthetic choice, but serves as the main structural core where the interlocking joints (and kerf calculations) will be concentrated.
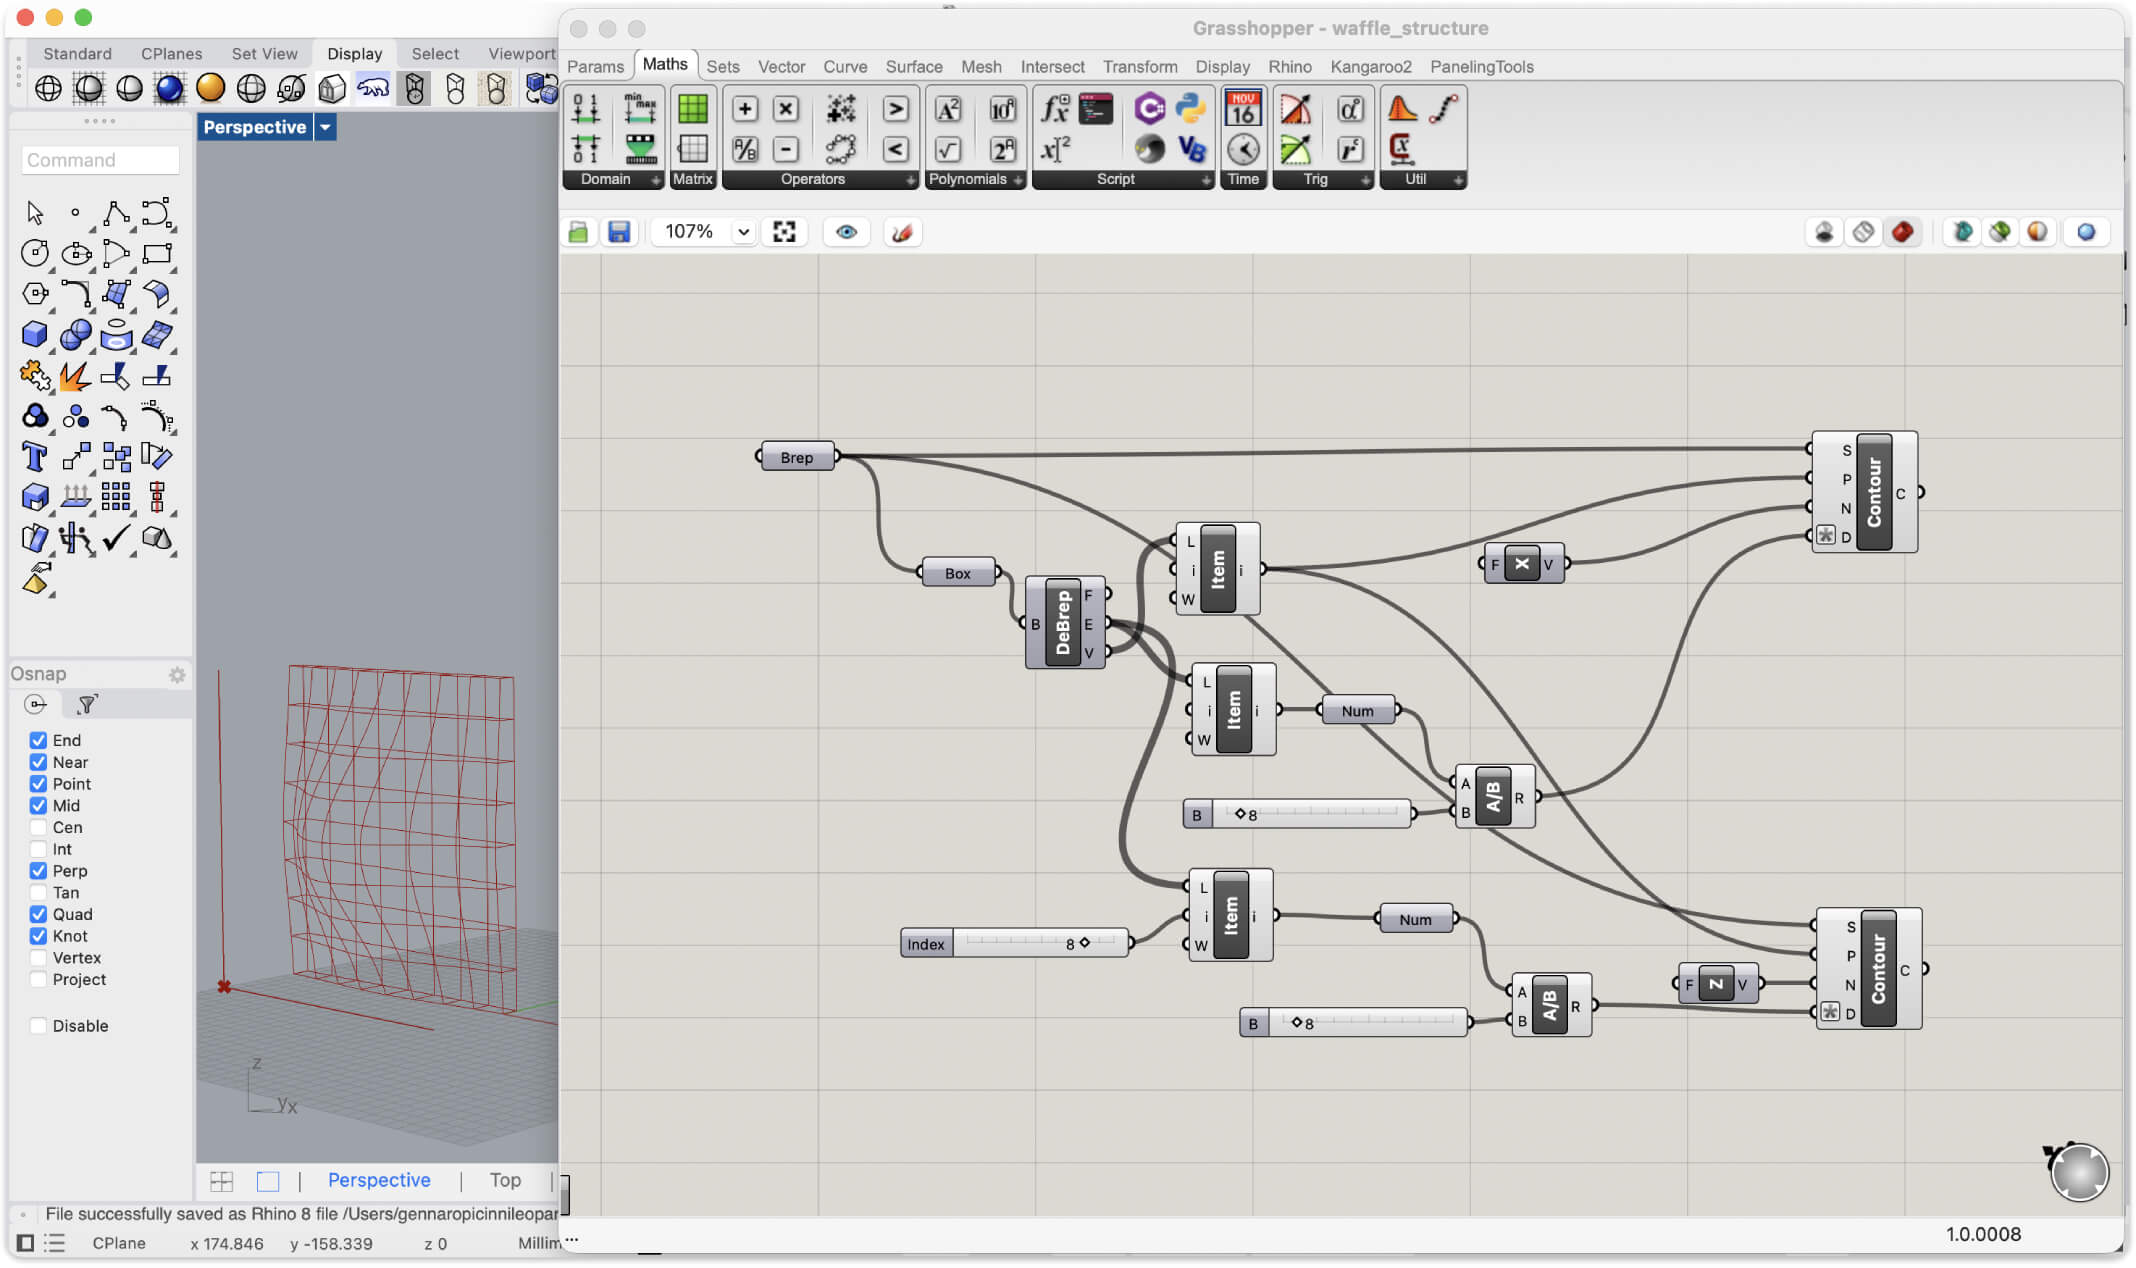
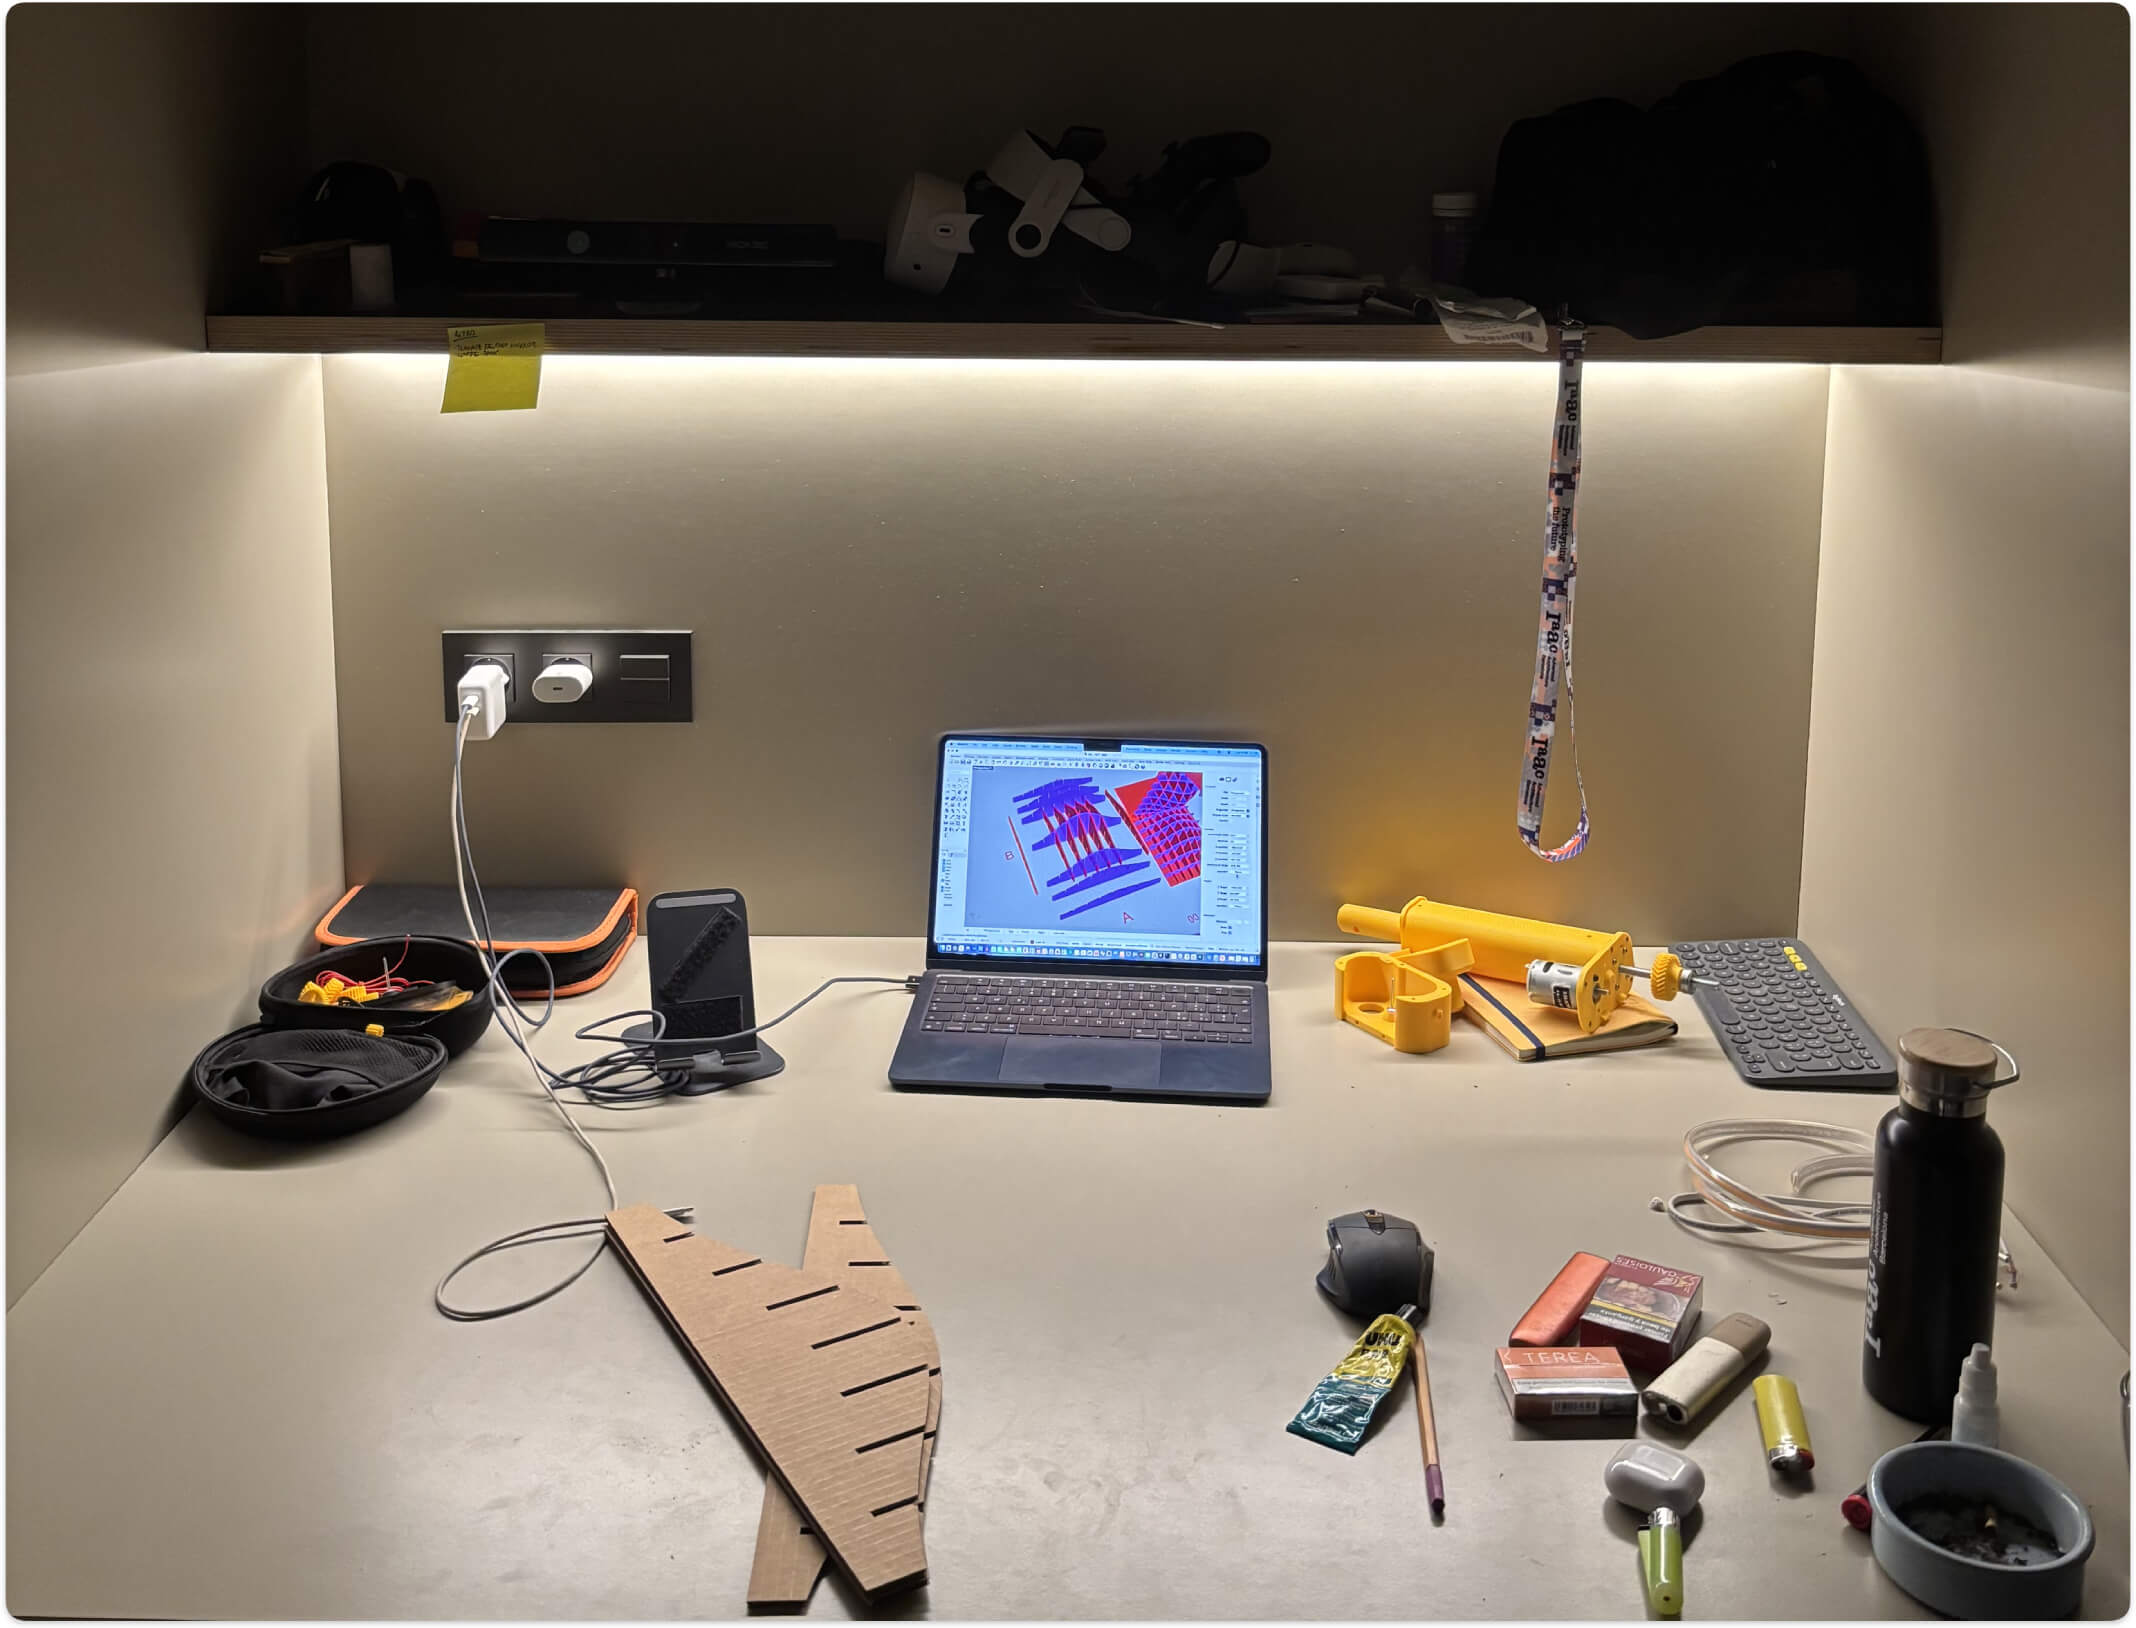
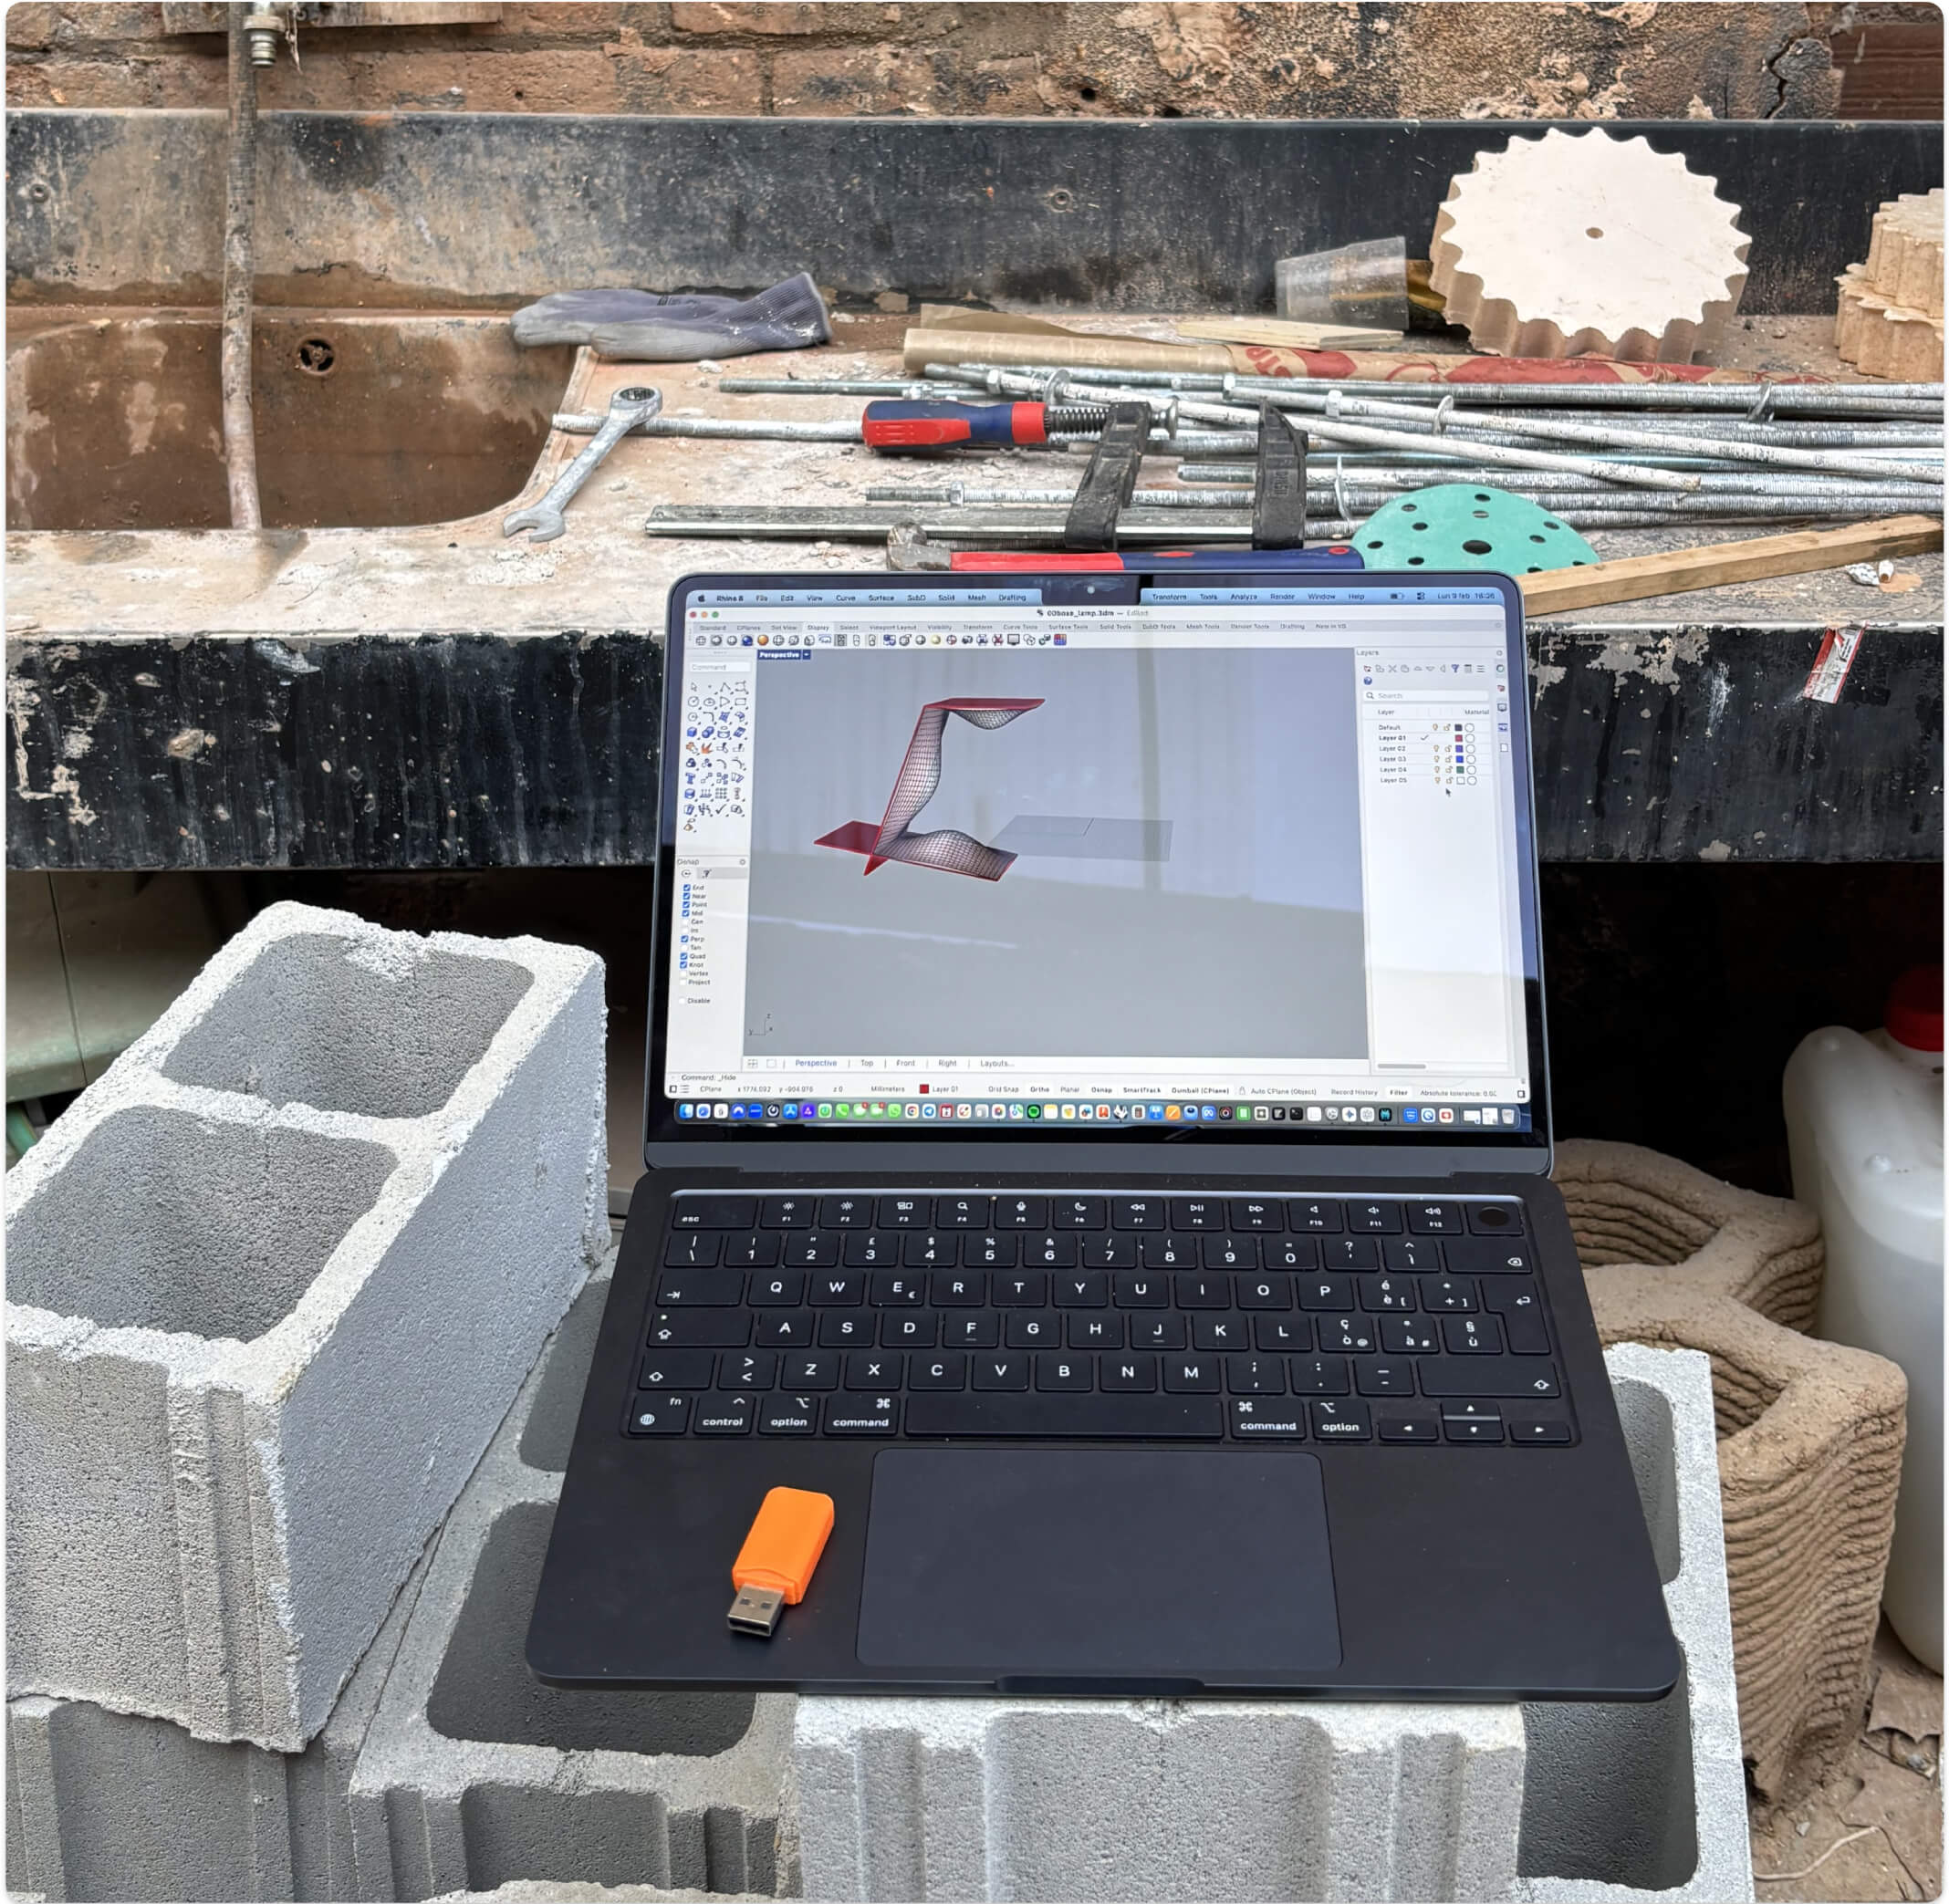
After importing the geometry into Grasshopper, I used the Contour component to slice it along two orthogonal axes. Thanks to numeric sliders, I can dynamically control the grid density and the distance between the cutting planes, instantly generating the framework for the joints without any manual redrawing.
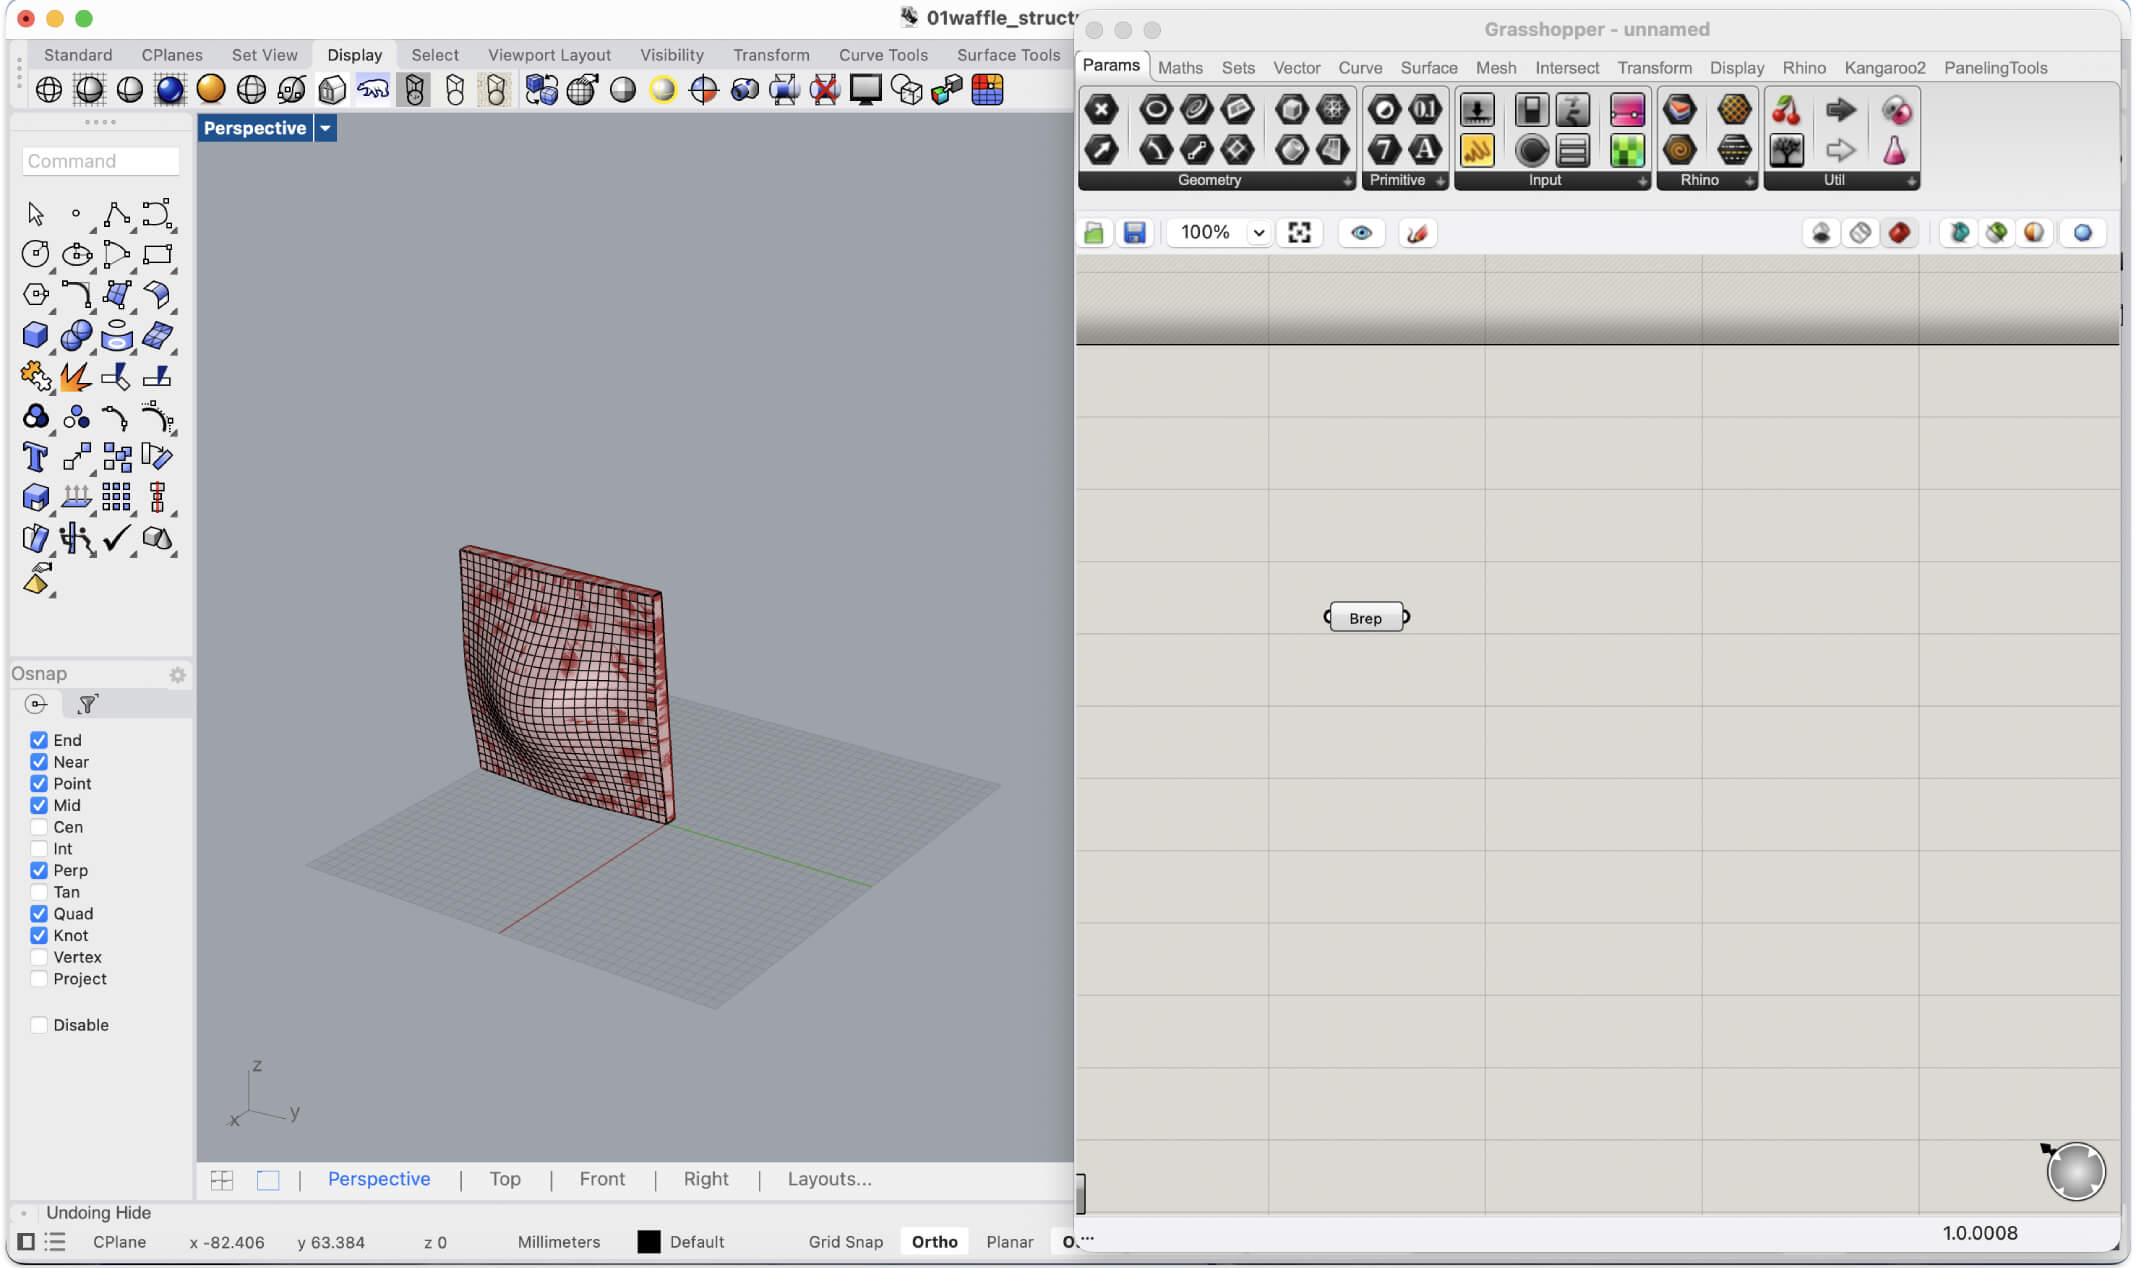
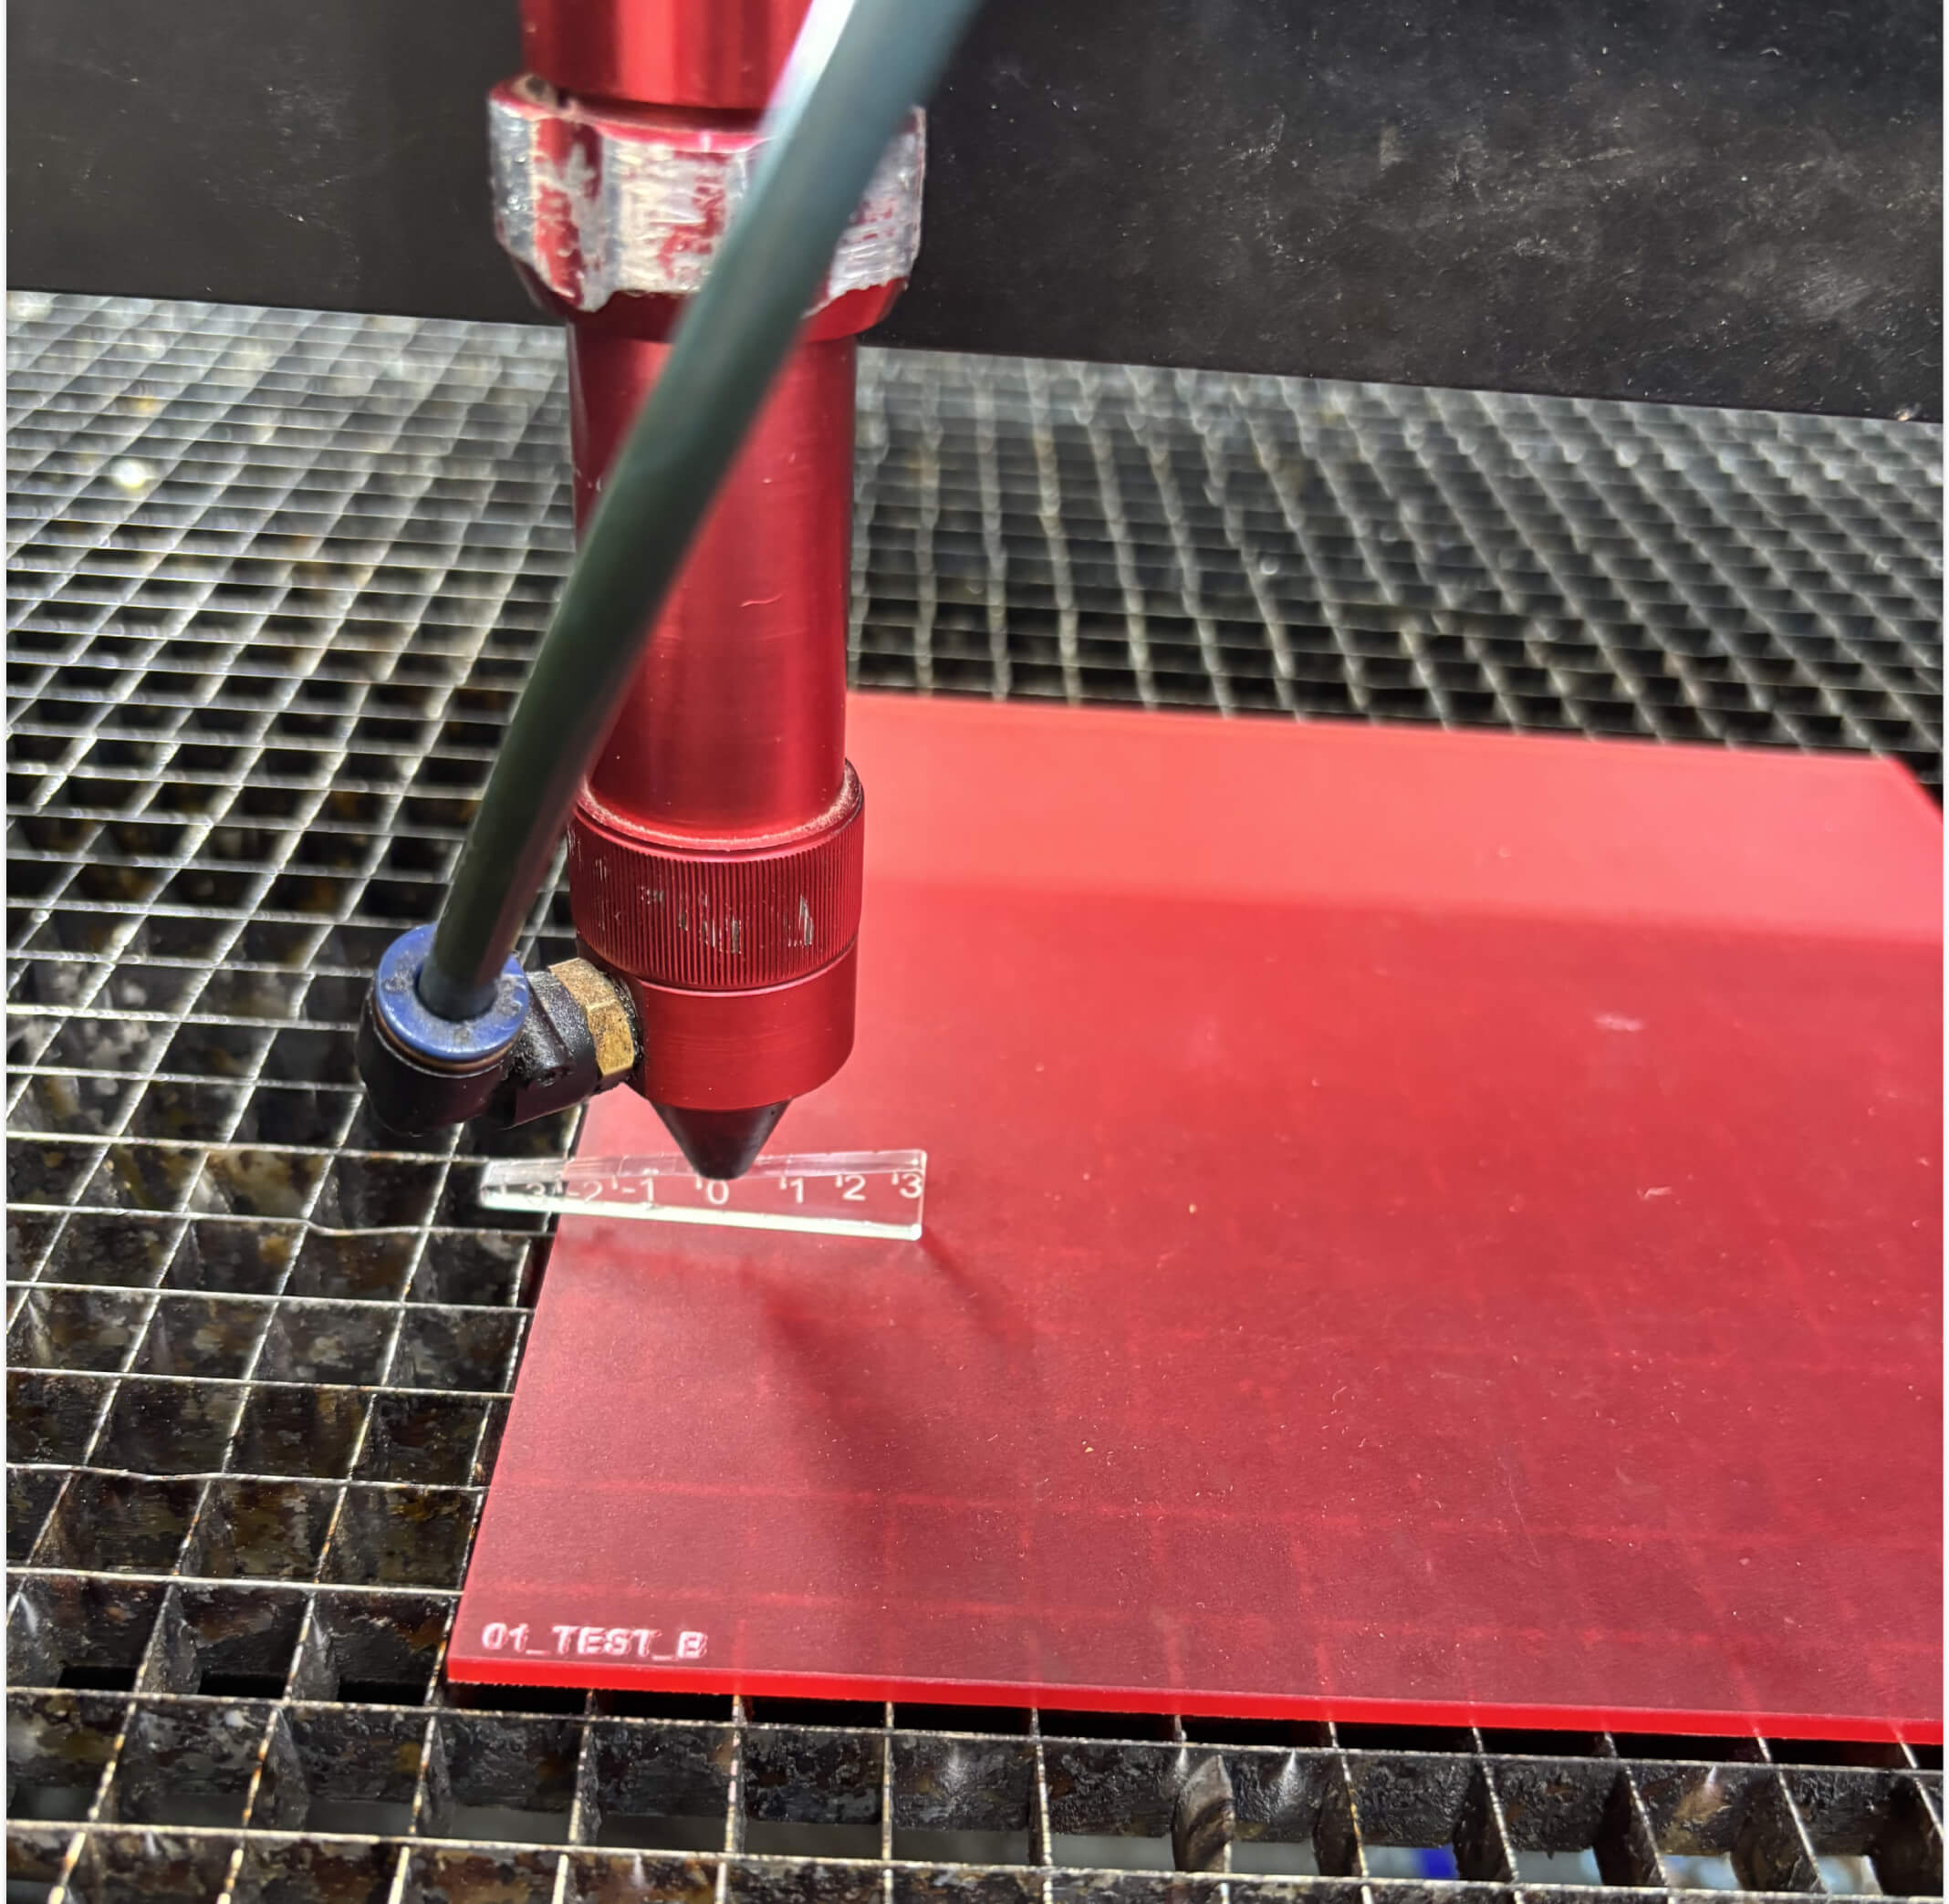
Once the parametric design was ready, I extracted the 2D profiles and nested them to prepare the cutting layout in Rhino. I placed a sheet of corrugated cardboard into the Rayjet R500 and launched the first test.
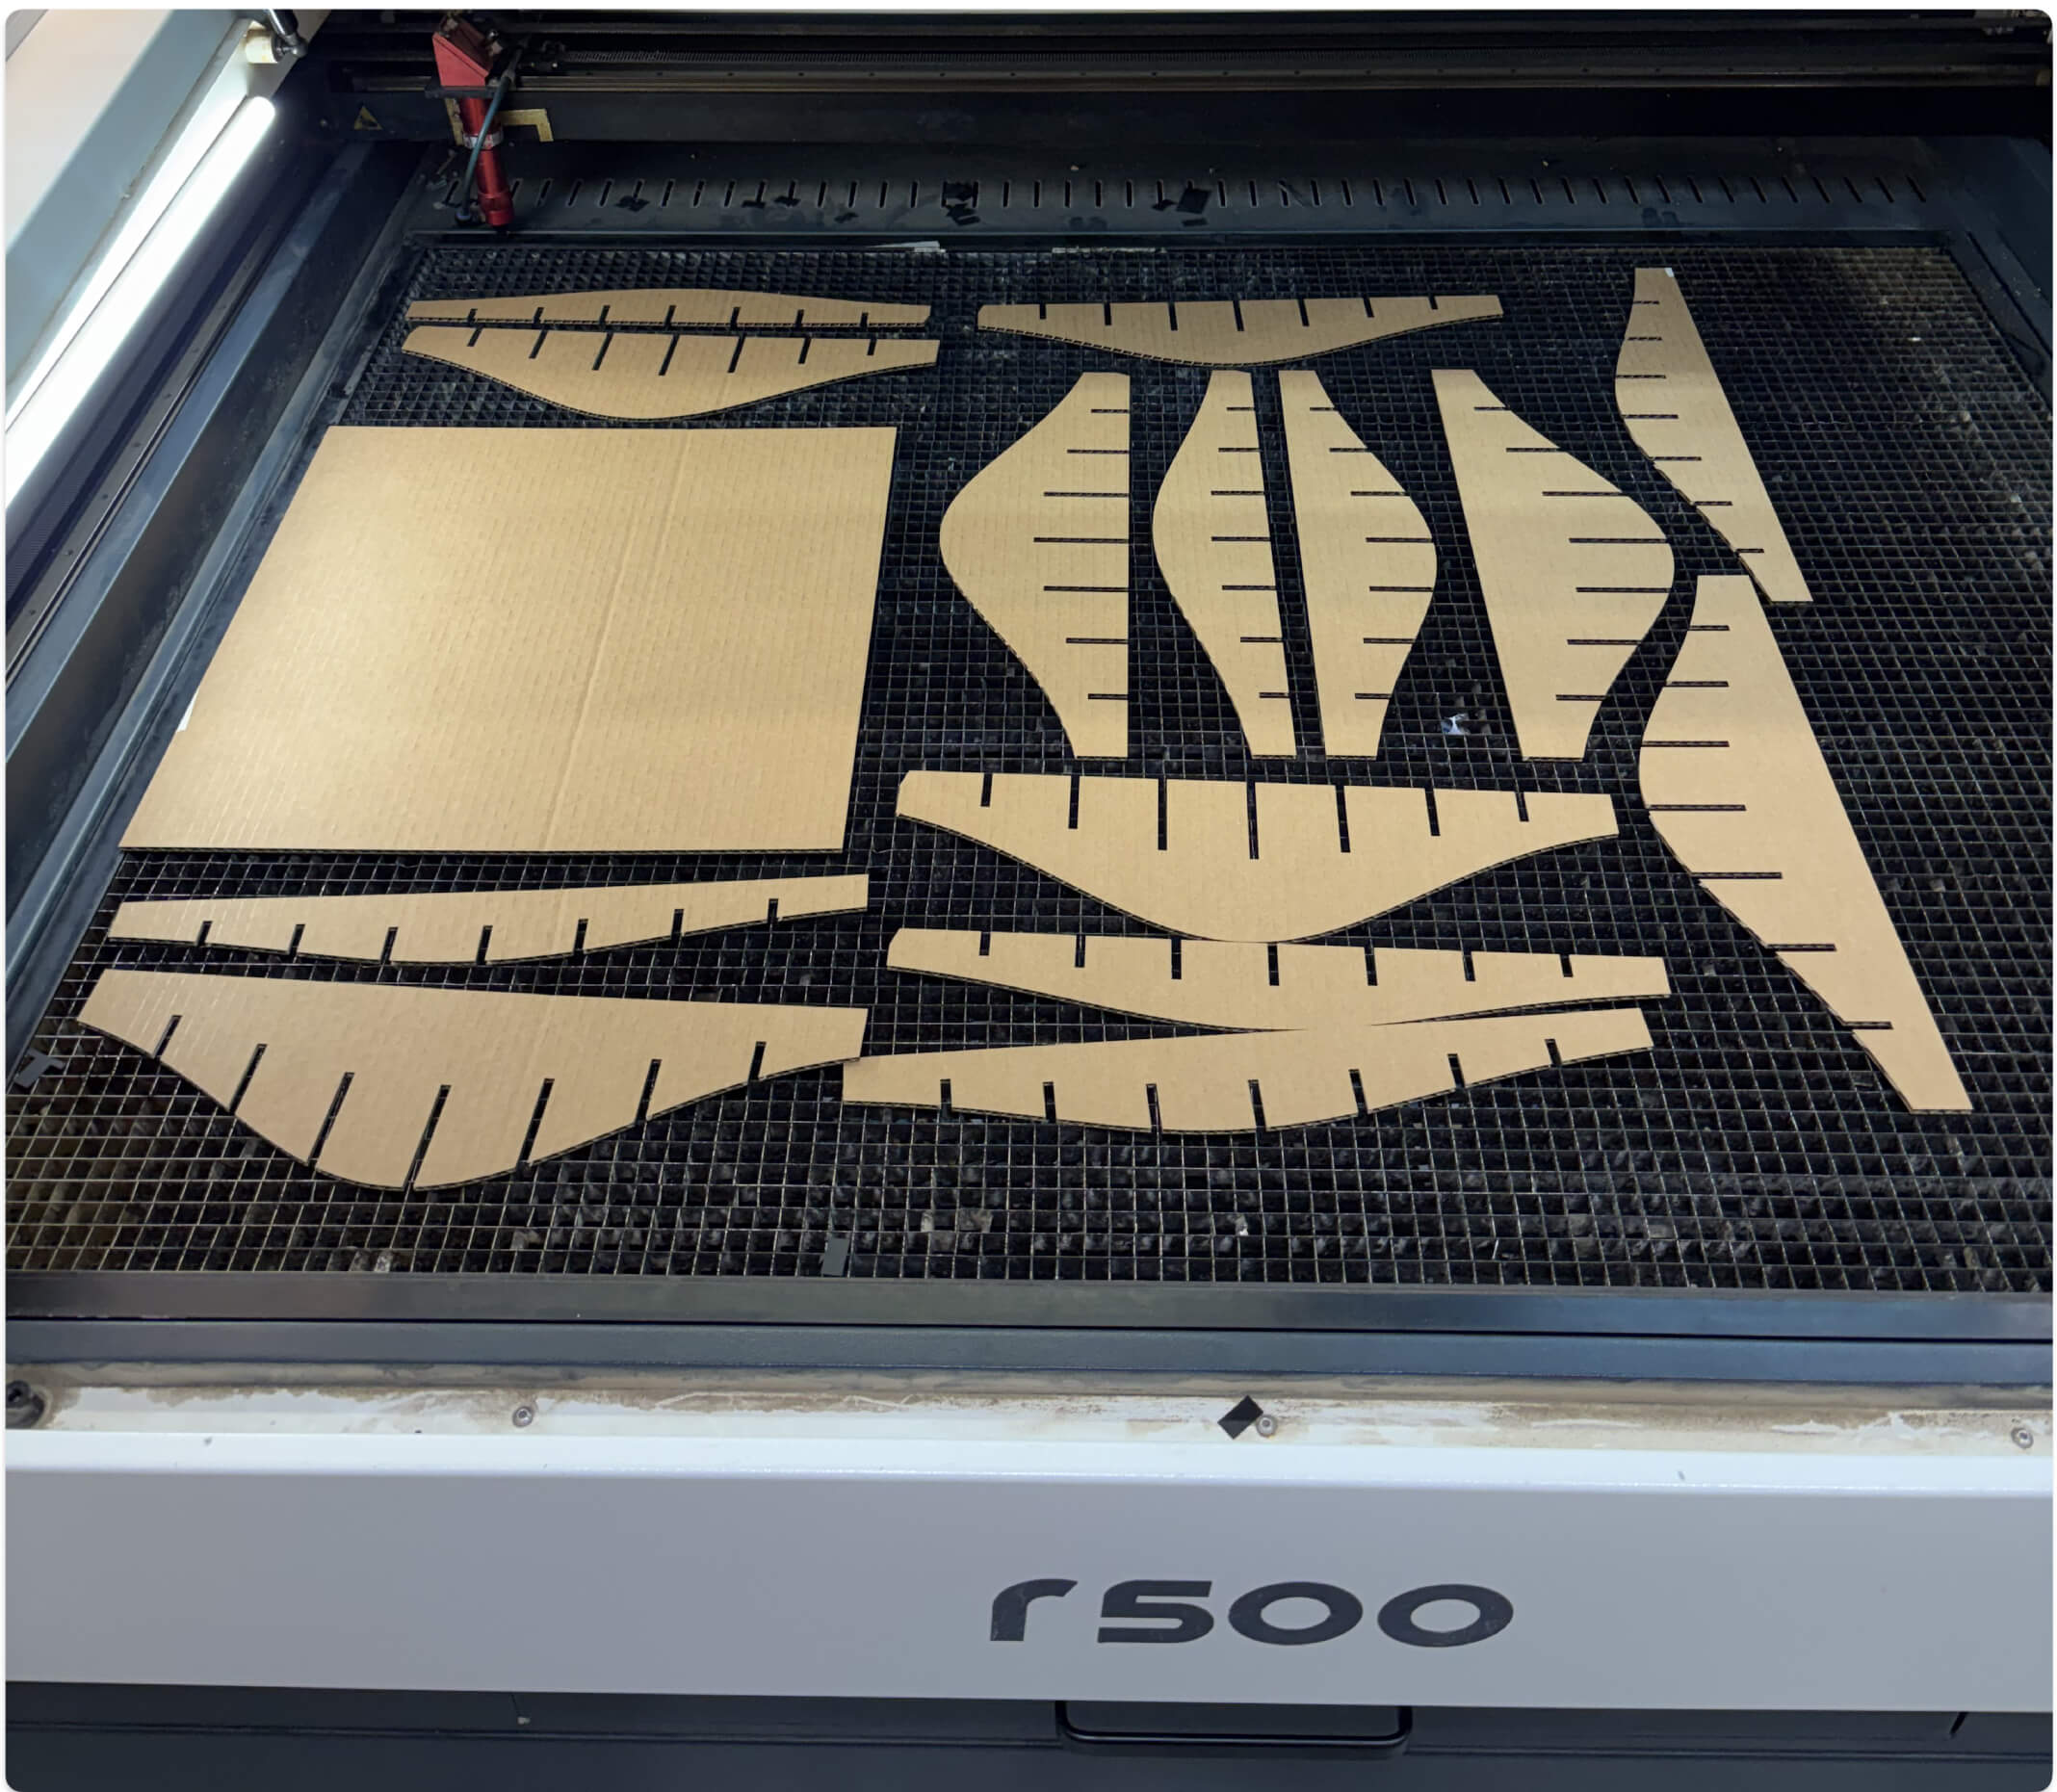
This was the first of a very long series of cuts. I didn't know it yet, but my ambition to build a complex lamp rather than a simple object was going to cost me dearly in terms of time. But I couldn't hold back: having full access to this machine to just test, make mistakes, and iterate was a completely new experience for me. Seeing those first pieces come out cleanly had me incredibly hyped and ready to push hard. I brought the first cut components back to my desk to start figuring out the physical assembly alongside my digital model.
After evaluating the first physical tests, I went back to the digital model to refine the overall geometry. I iterated through a few variations until I locked in the final shape. The design evolves into a continuous, self-supporting folded structure. I really wanted to keep the exterior as clean and smooth as possible, leaving all the "movement" on the inside. It took on this sort of 'C' or 'Z' profile, where the three interior bumps almost look like they want to communicate with each other. The parametric grid adapts seamlessly to these severe curves, ensuring the press-fit joints will align correctly even on the inclined planes.
When I realized I needed a physical light source to proceed, it hit me just how incredible this environment is. It was a beautiful, almost overwhelming realization: in a single day, I could launch a file on the 3D printer, walk over to the laser cutter to slice a new material, and immediately test physical lighting effects right at my desk. Having an entire lab at my disposal to rapid-prototype across multiple machines simultaneously is something I had never experienced before. It completely shifted my mindset from linear design to parallel, hands-on iteration.
After some research, I found the perfect LED modules at IKEA. They come in two sizes, which was ideal: I bought two small ones and one slightly larger one to match the three internal "bumps" of my design. I immediately went back into my digital file and adapted the laser cut holes to perfectly fit these specific bulbs.
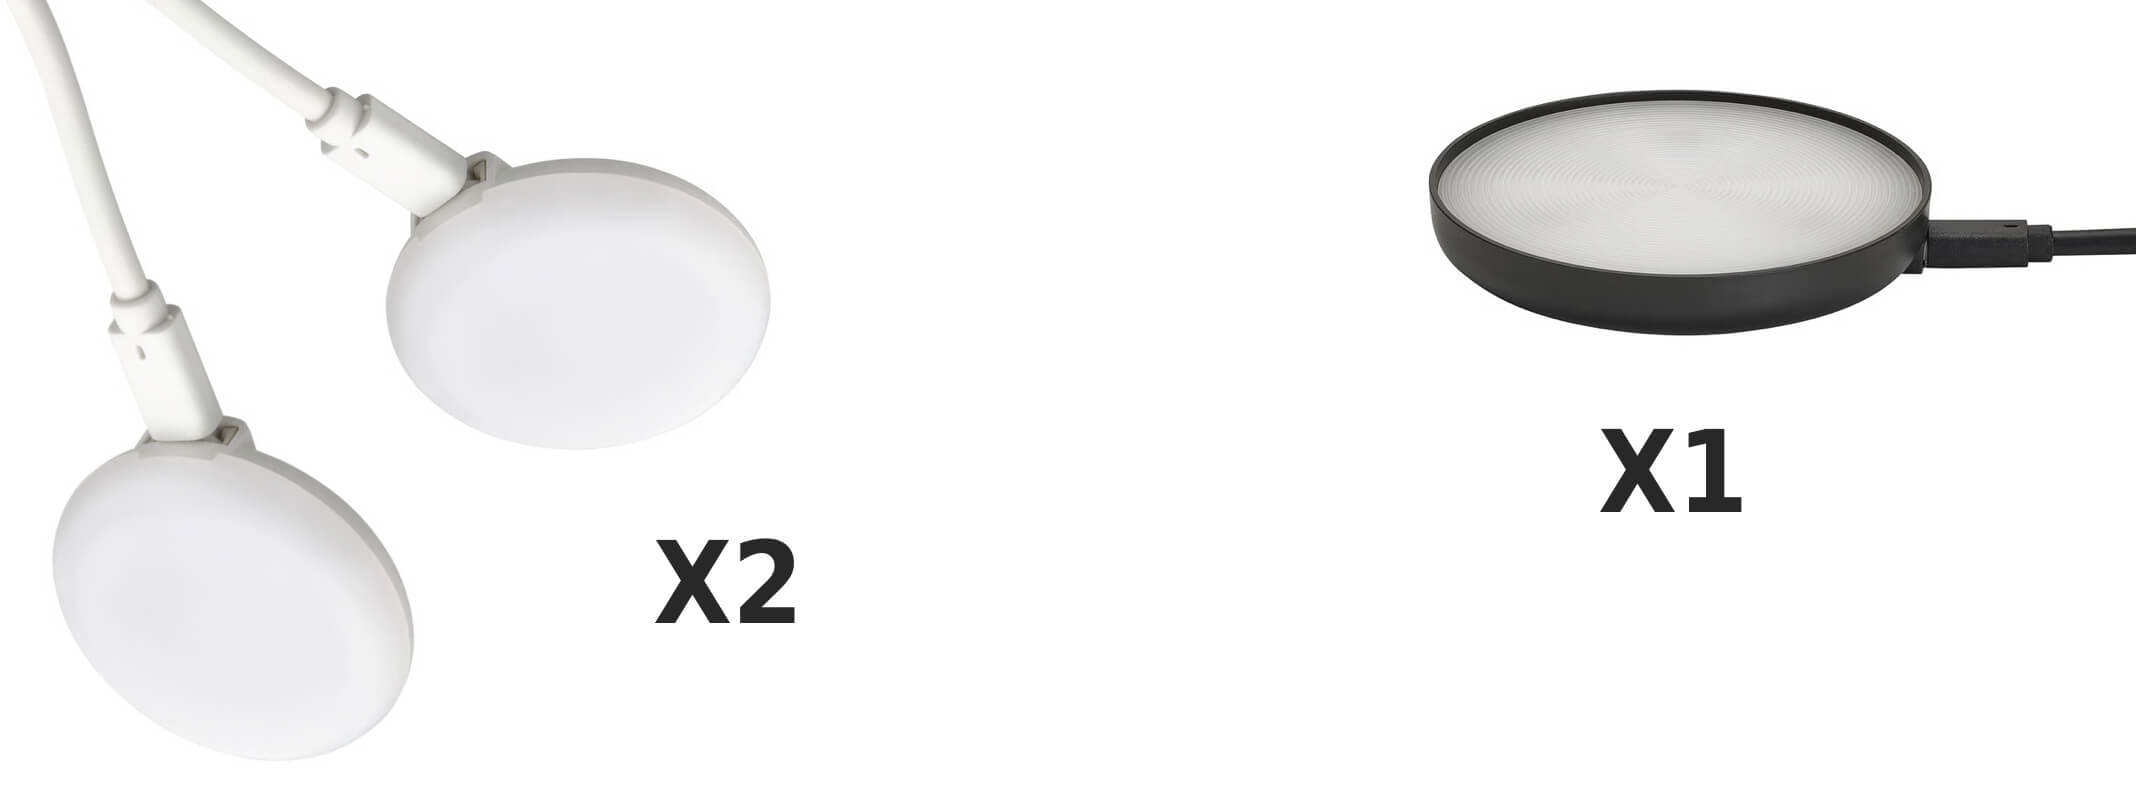
STRIMSÄV foco LED negro \ x1 \ Link IKEA
KÄPPLAKE foco LED blanco \ x2 \ Link IKEA
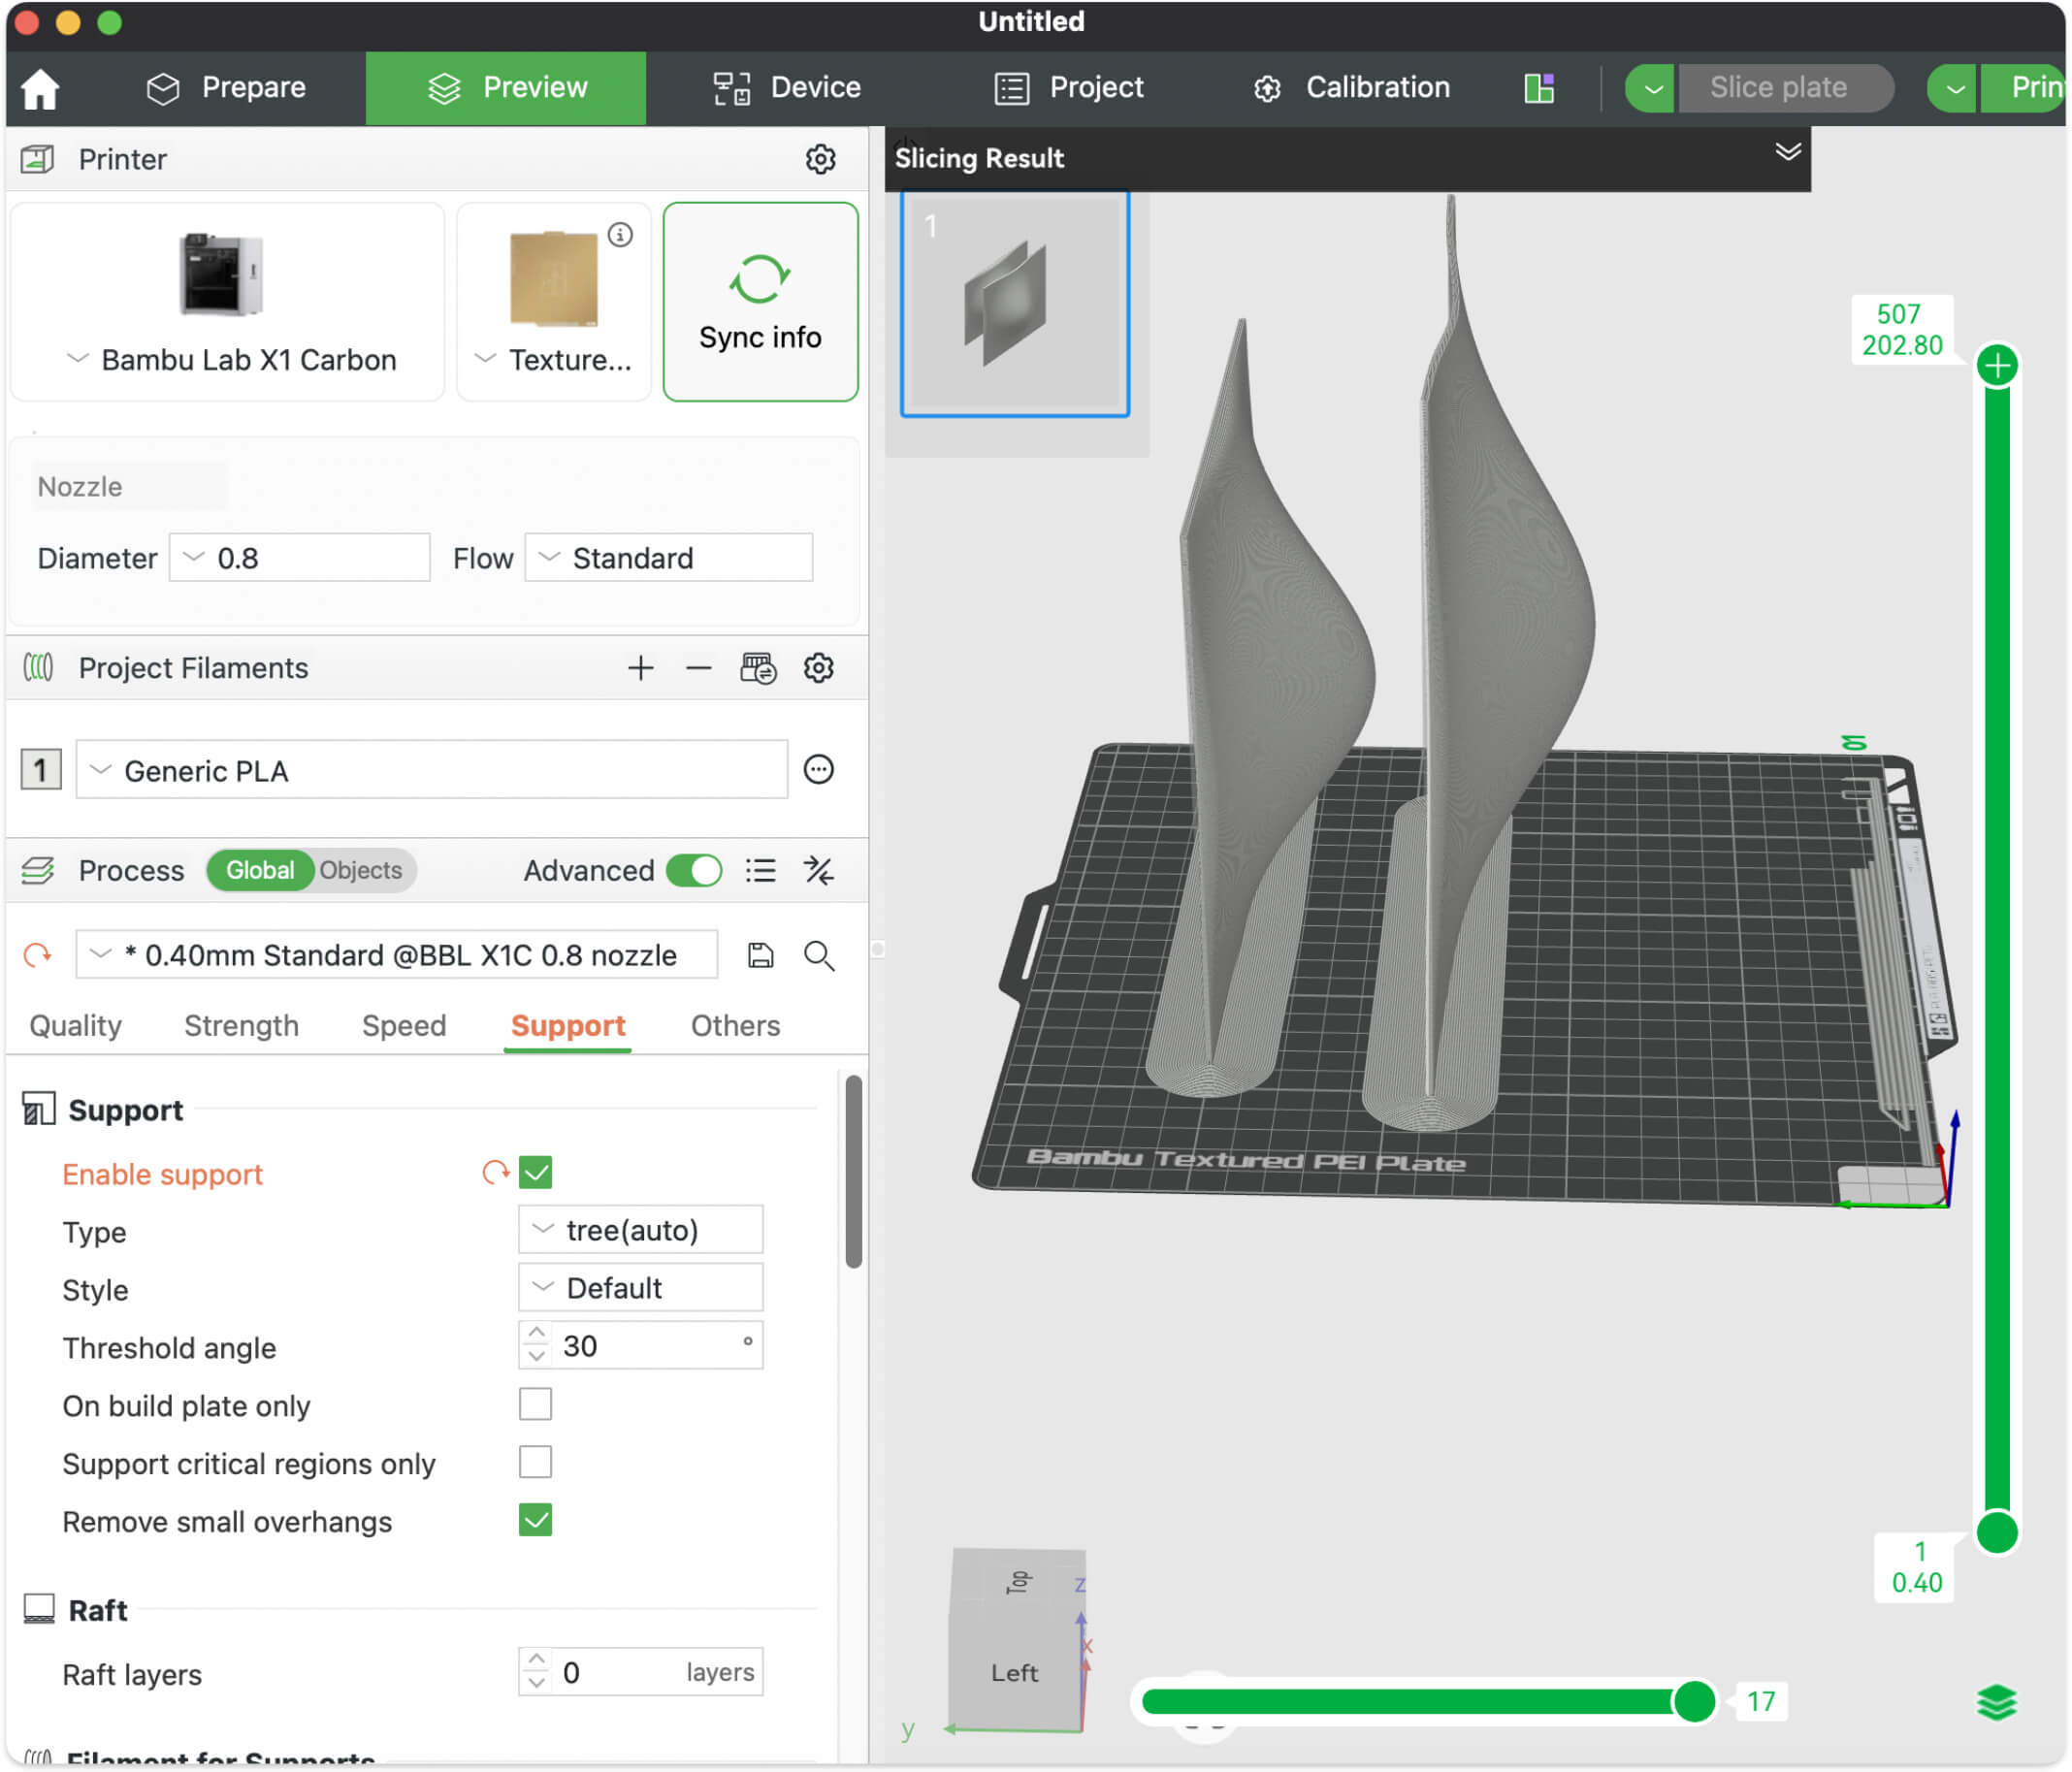
To make the diffusers, I used the Bambu Lab X1 Carbon, slicing the tall pieces vertically. I didn't know it yet, but these 3D printed parts were going to give me a really hard time and throw me completely off course. But at that moment, I was just too excited to stop.

For the materials, I envisioned a mix: wood for the main interlocking kerf structure, a 3mm red acrylic sheet I found at a local hardware store, and matte white 3D printed covers to act as light diffusers over the bumps. Testing the light through these elements and the waffle structure was incredible. It was an amazing feeling to realize I could use a 3D printer, a laser cutter, and do lighting tests all in the exact same day.
The lighting tests revealed a critical issue: the light output was just too weak. I had to rethink the assembly, but I really wanted to use the parts I had already cut - starting over completely felt like a huge waste of time and material. So, I did something I'm almost embarrassed to admit: I removed the entire wooden support structure. Yes, the very core of the press-fit assignment!
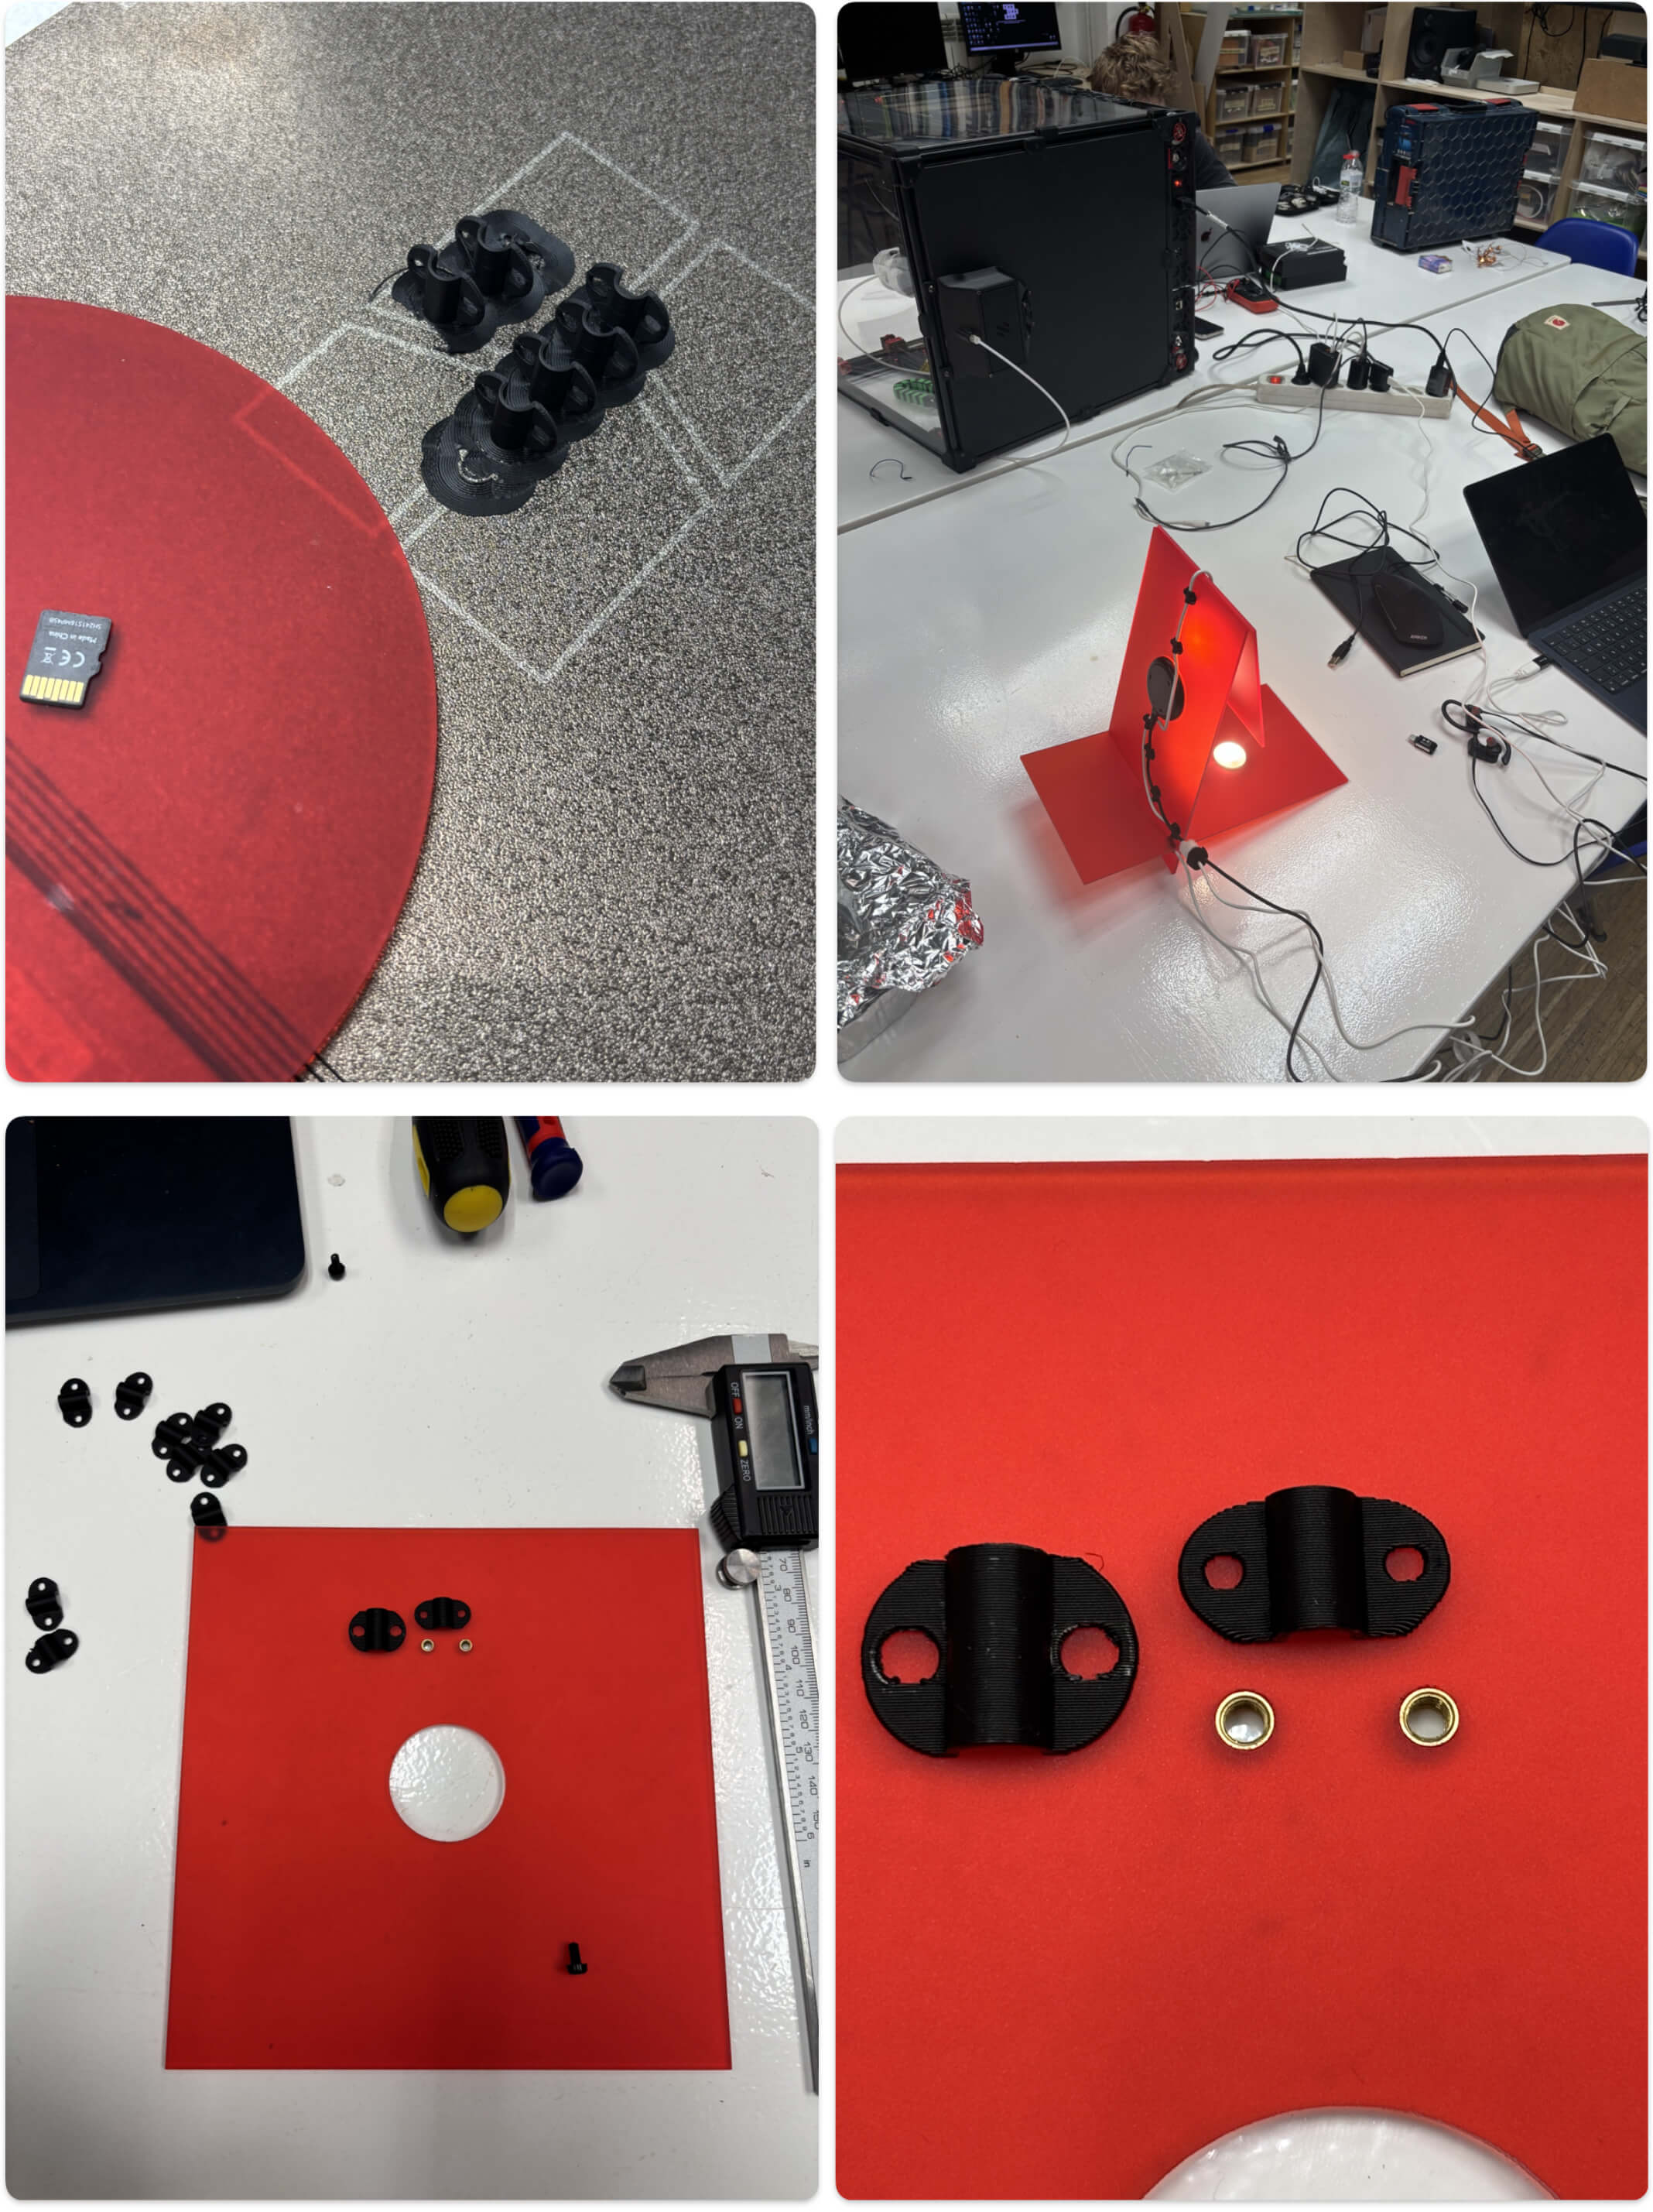
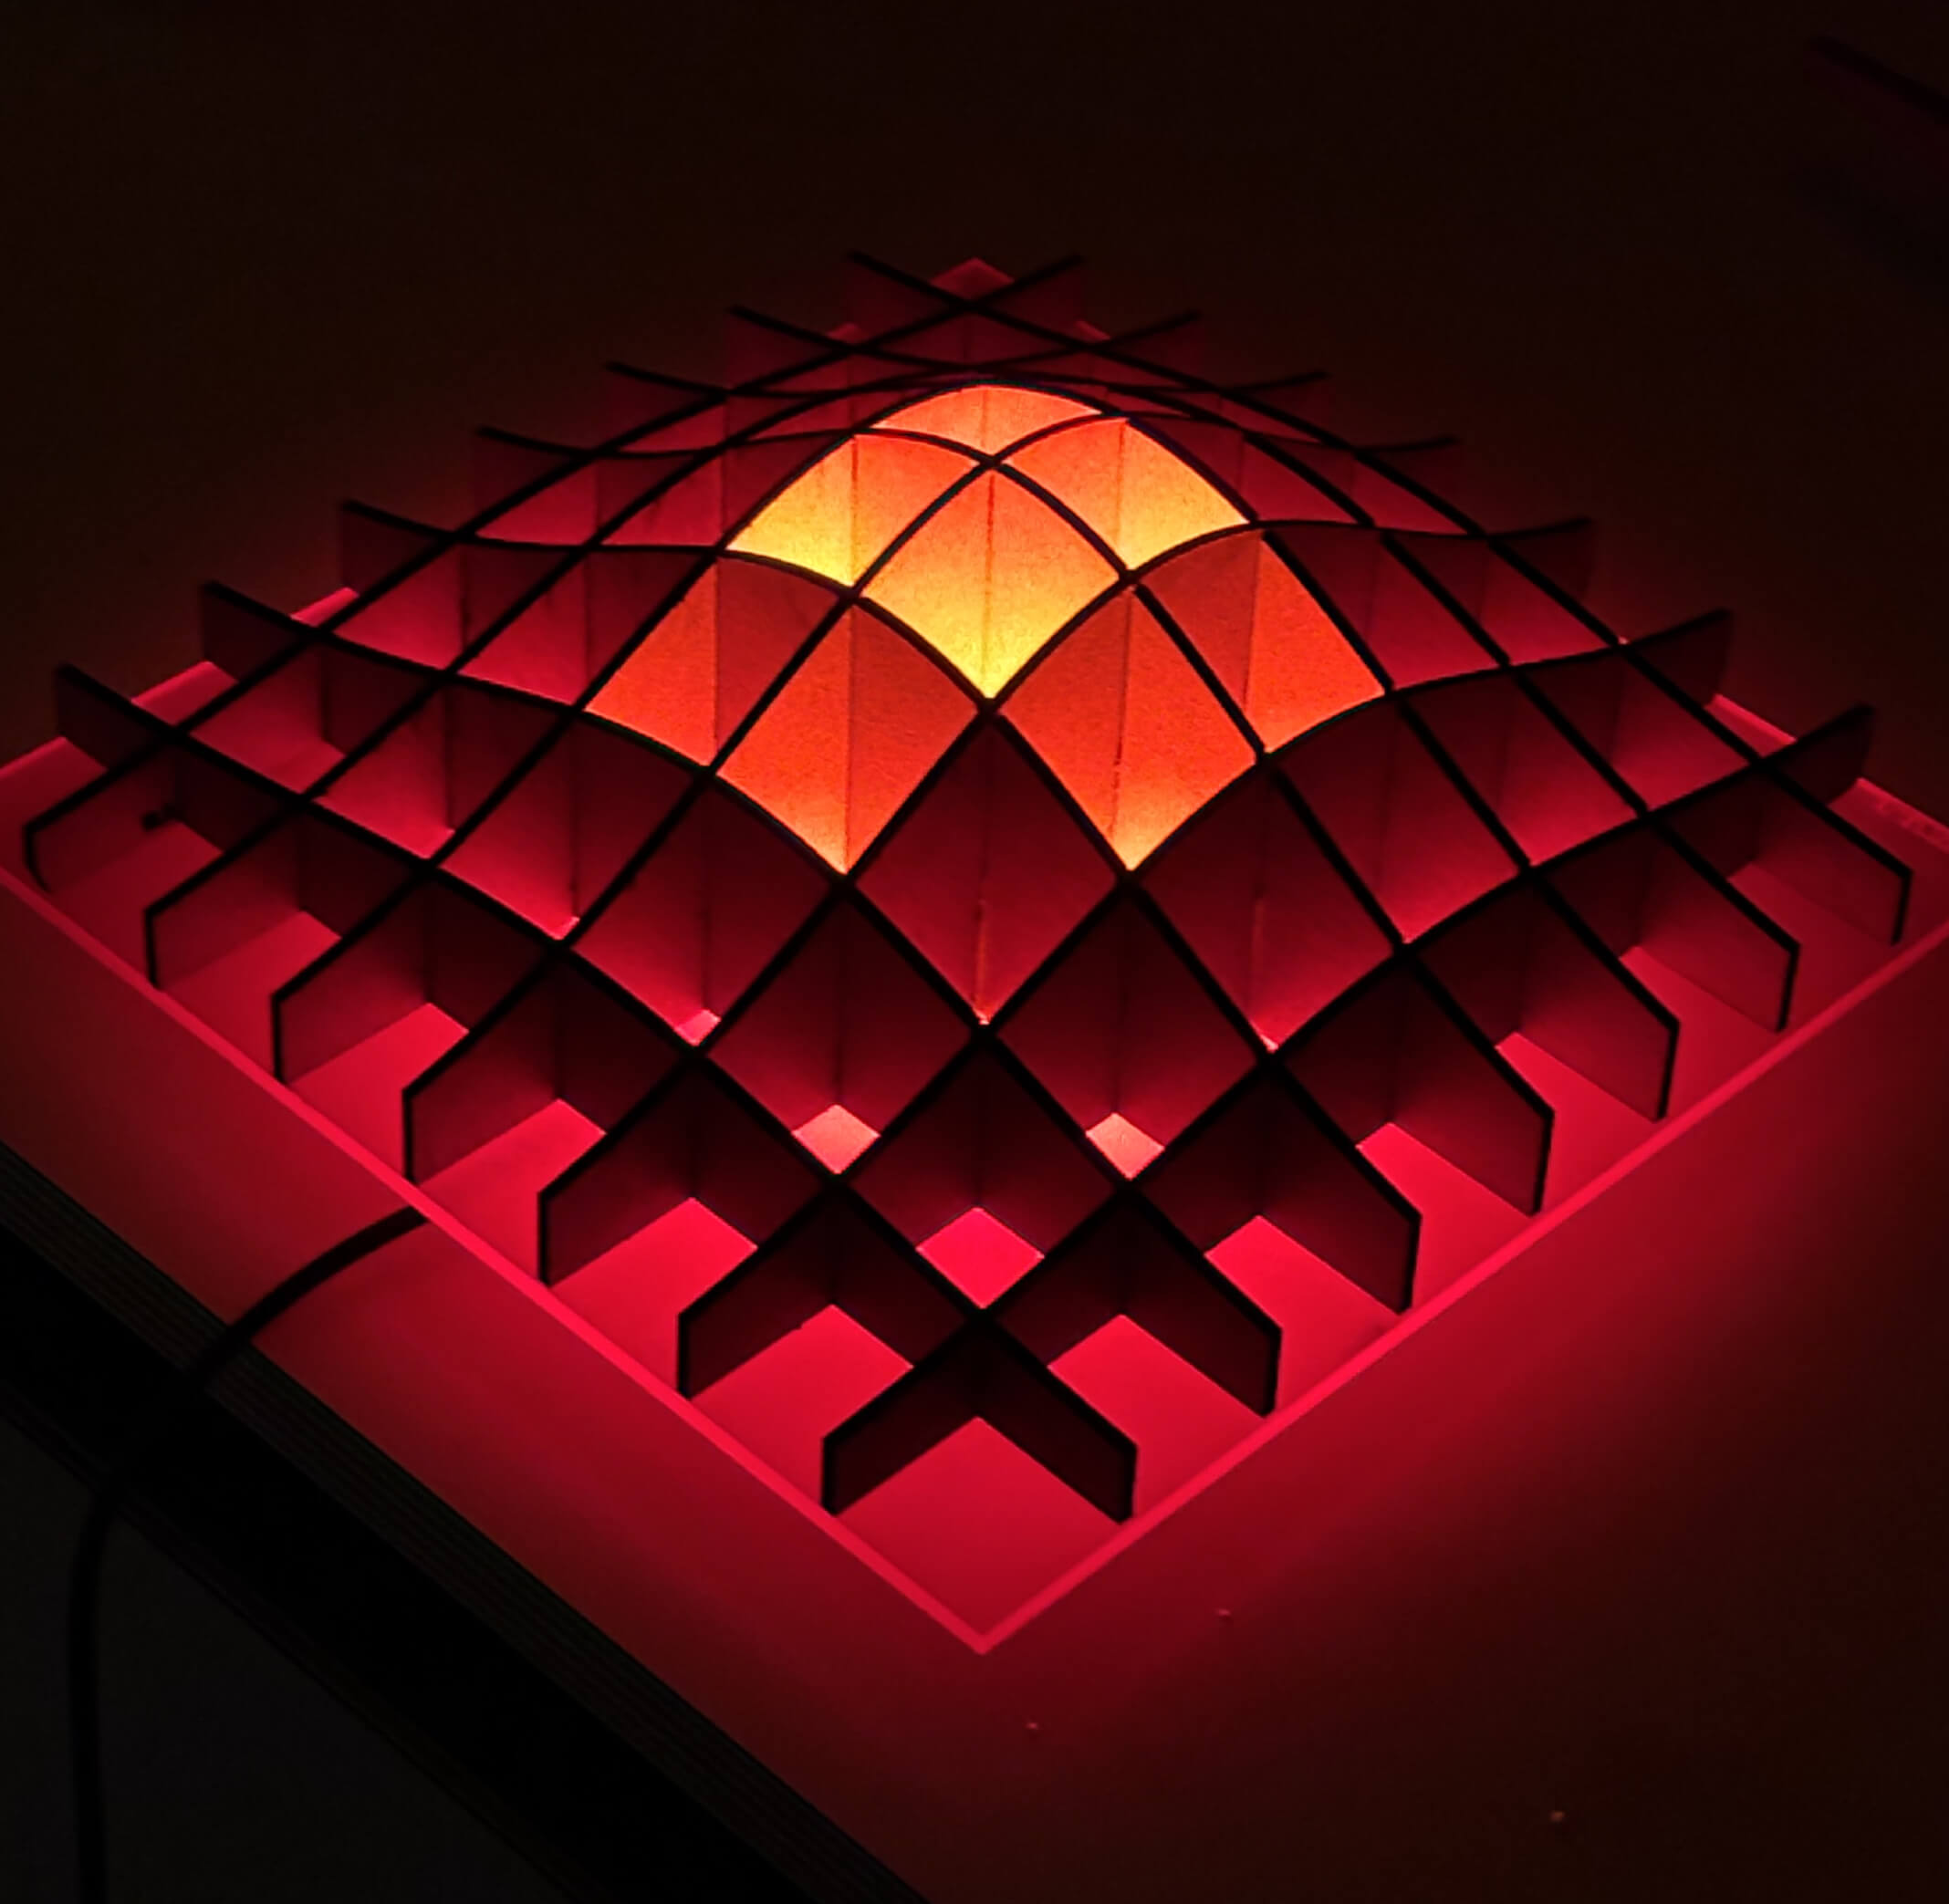
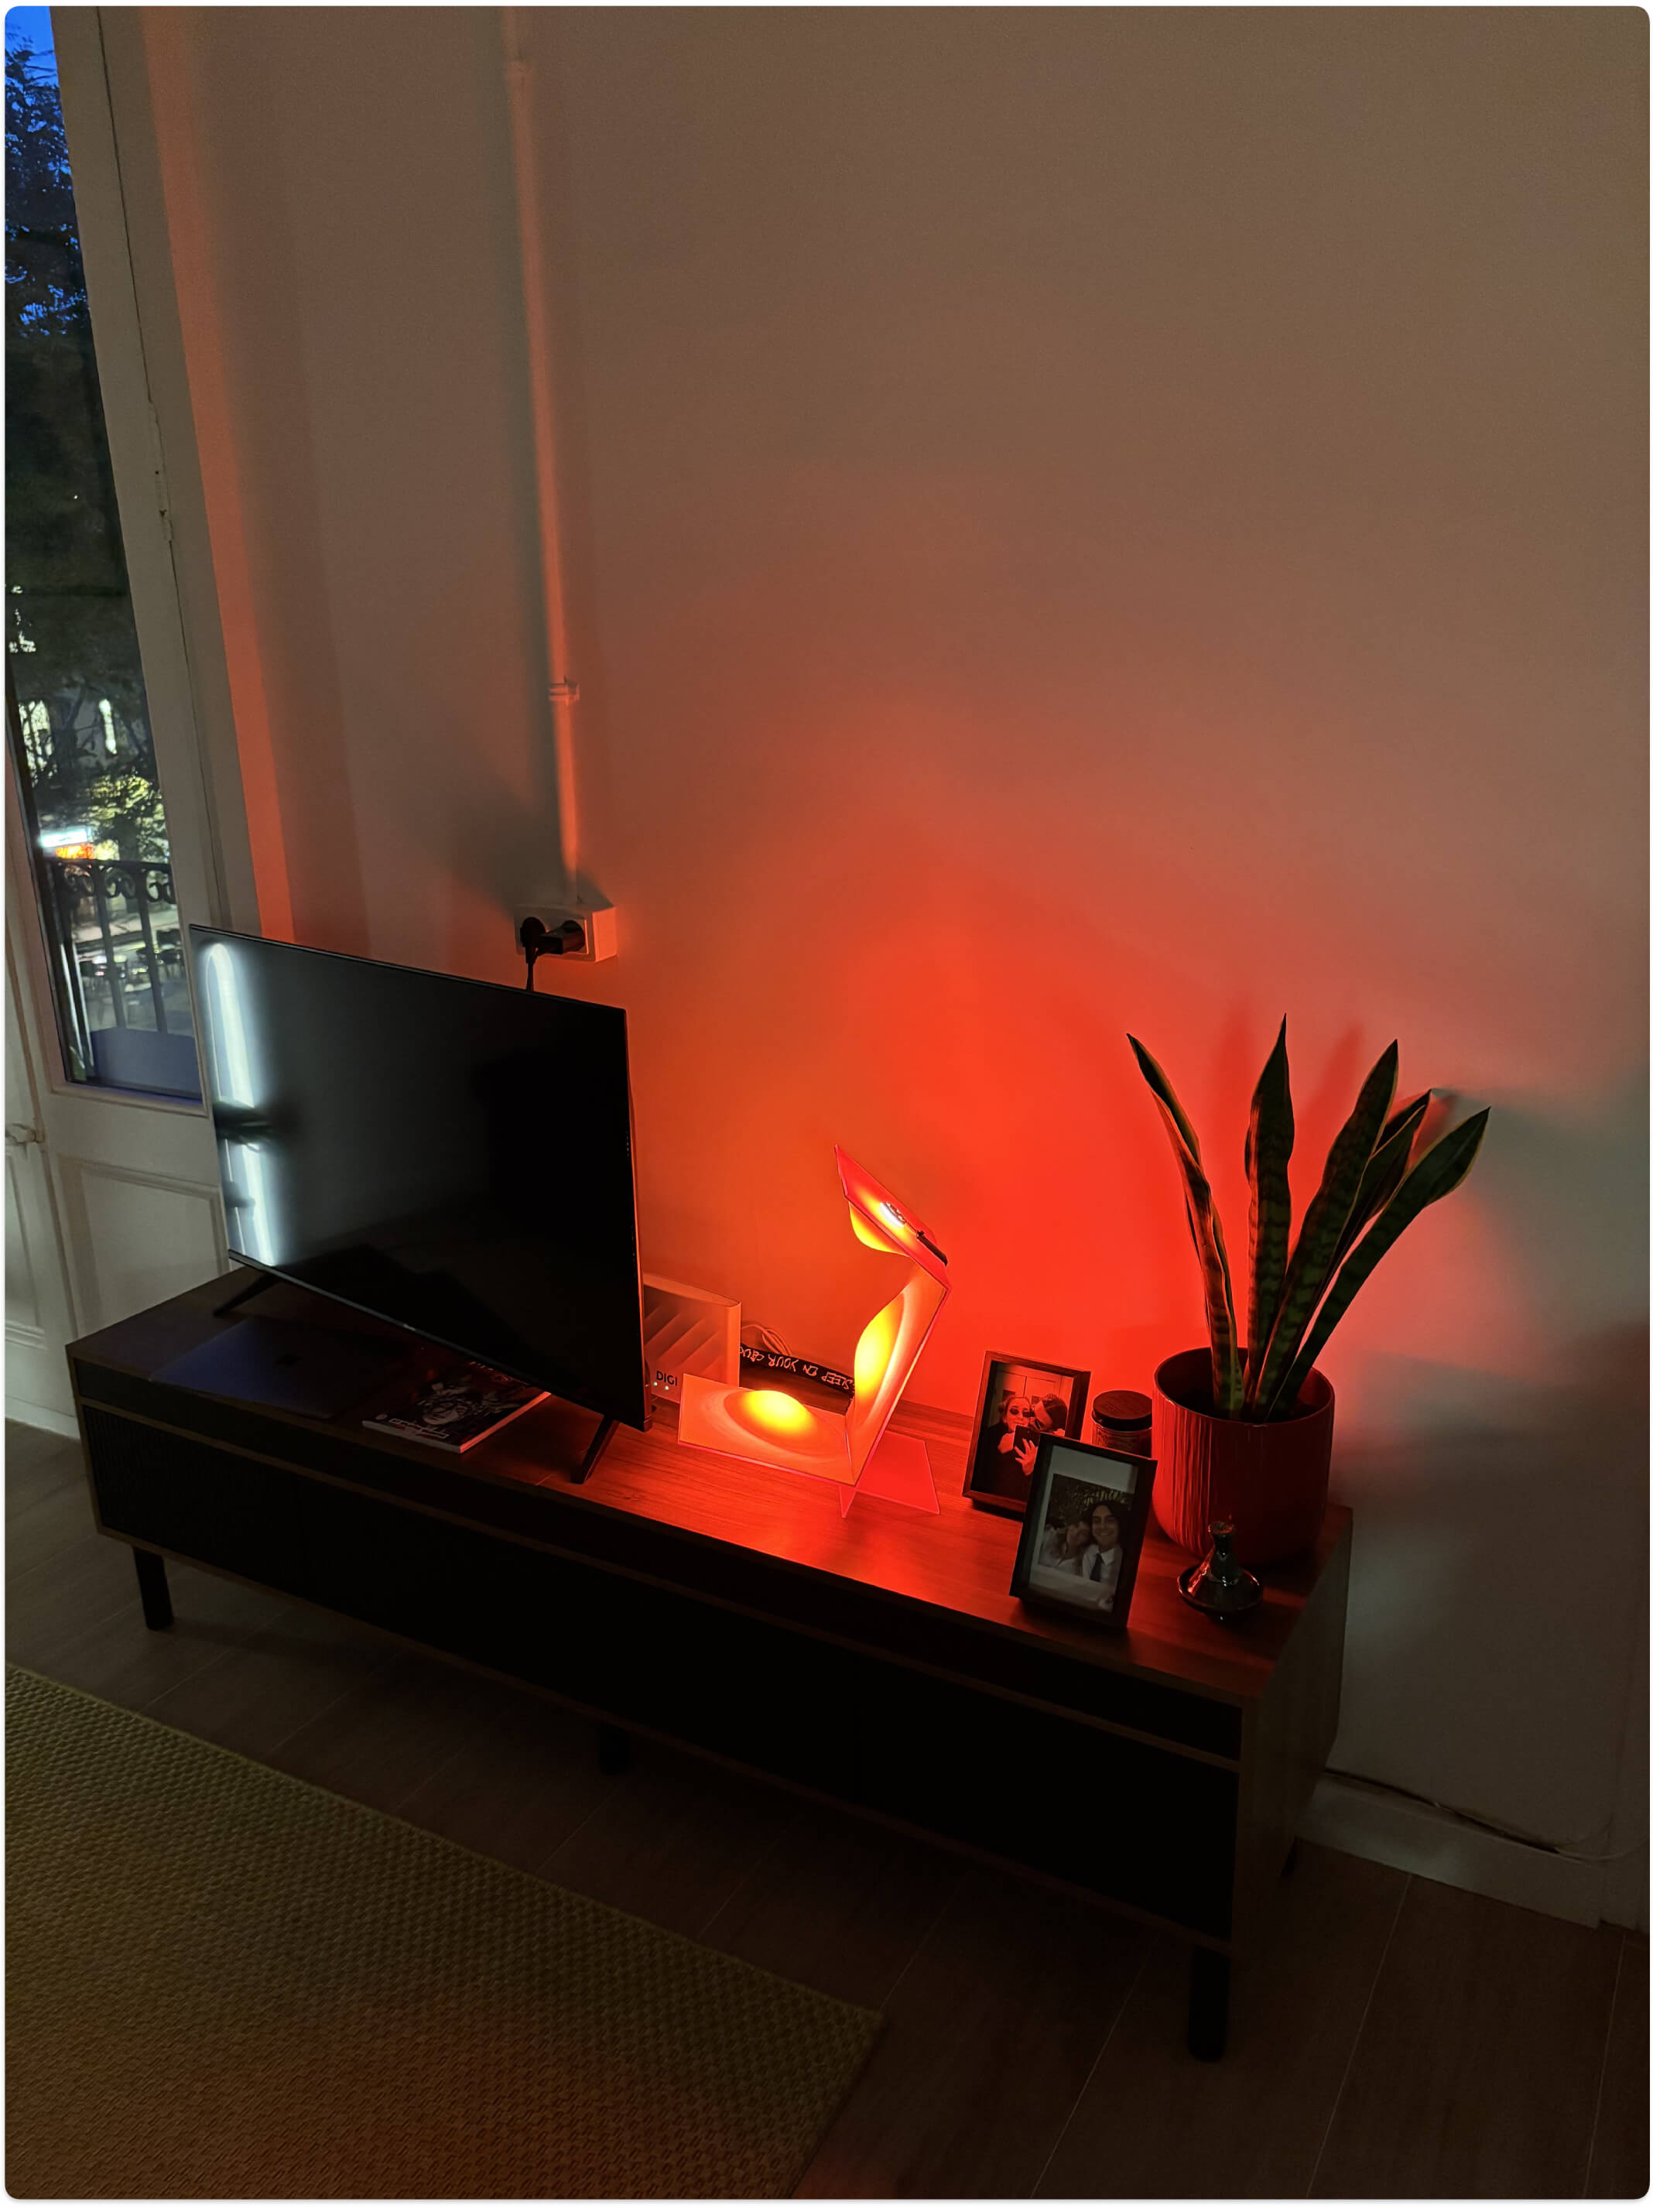
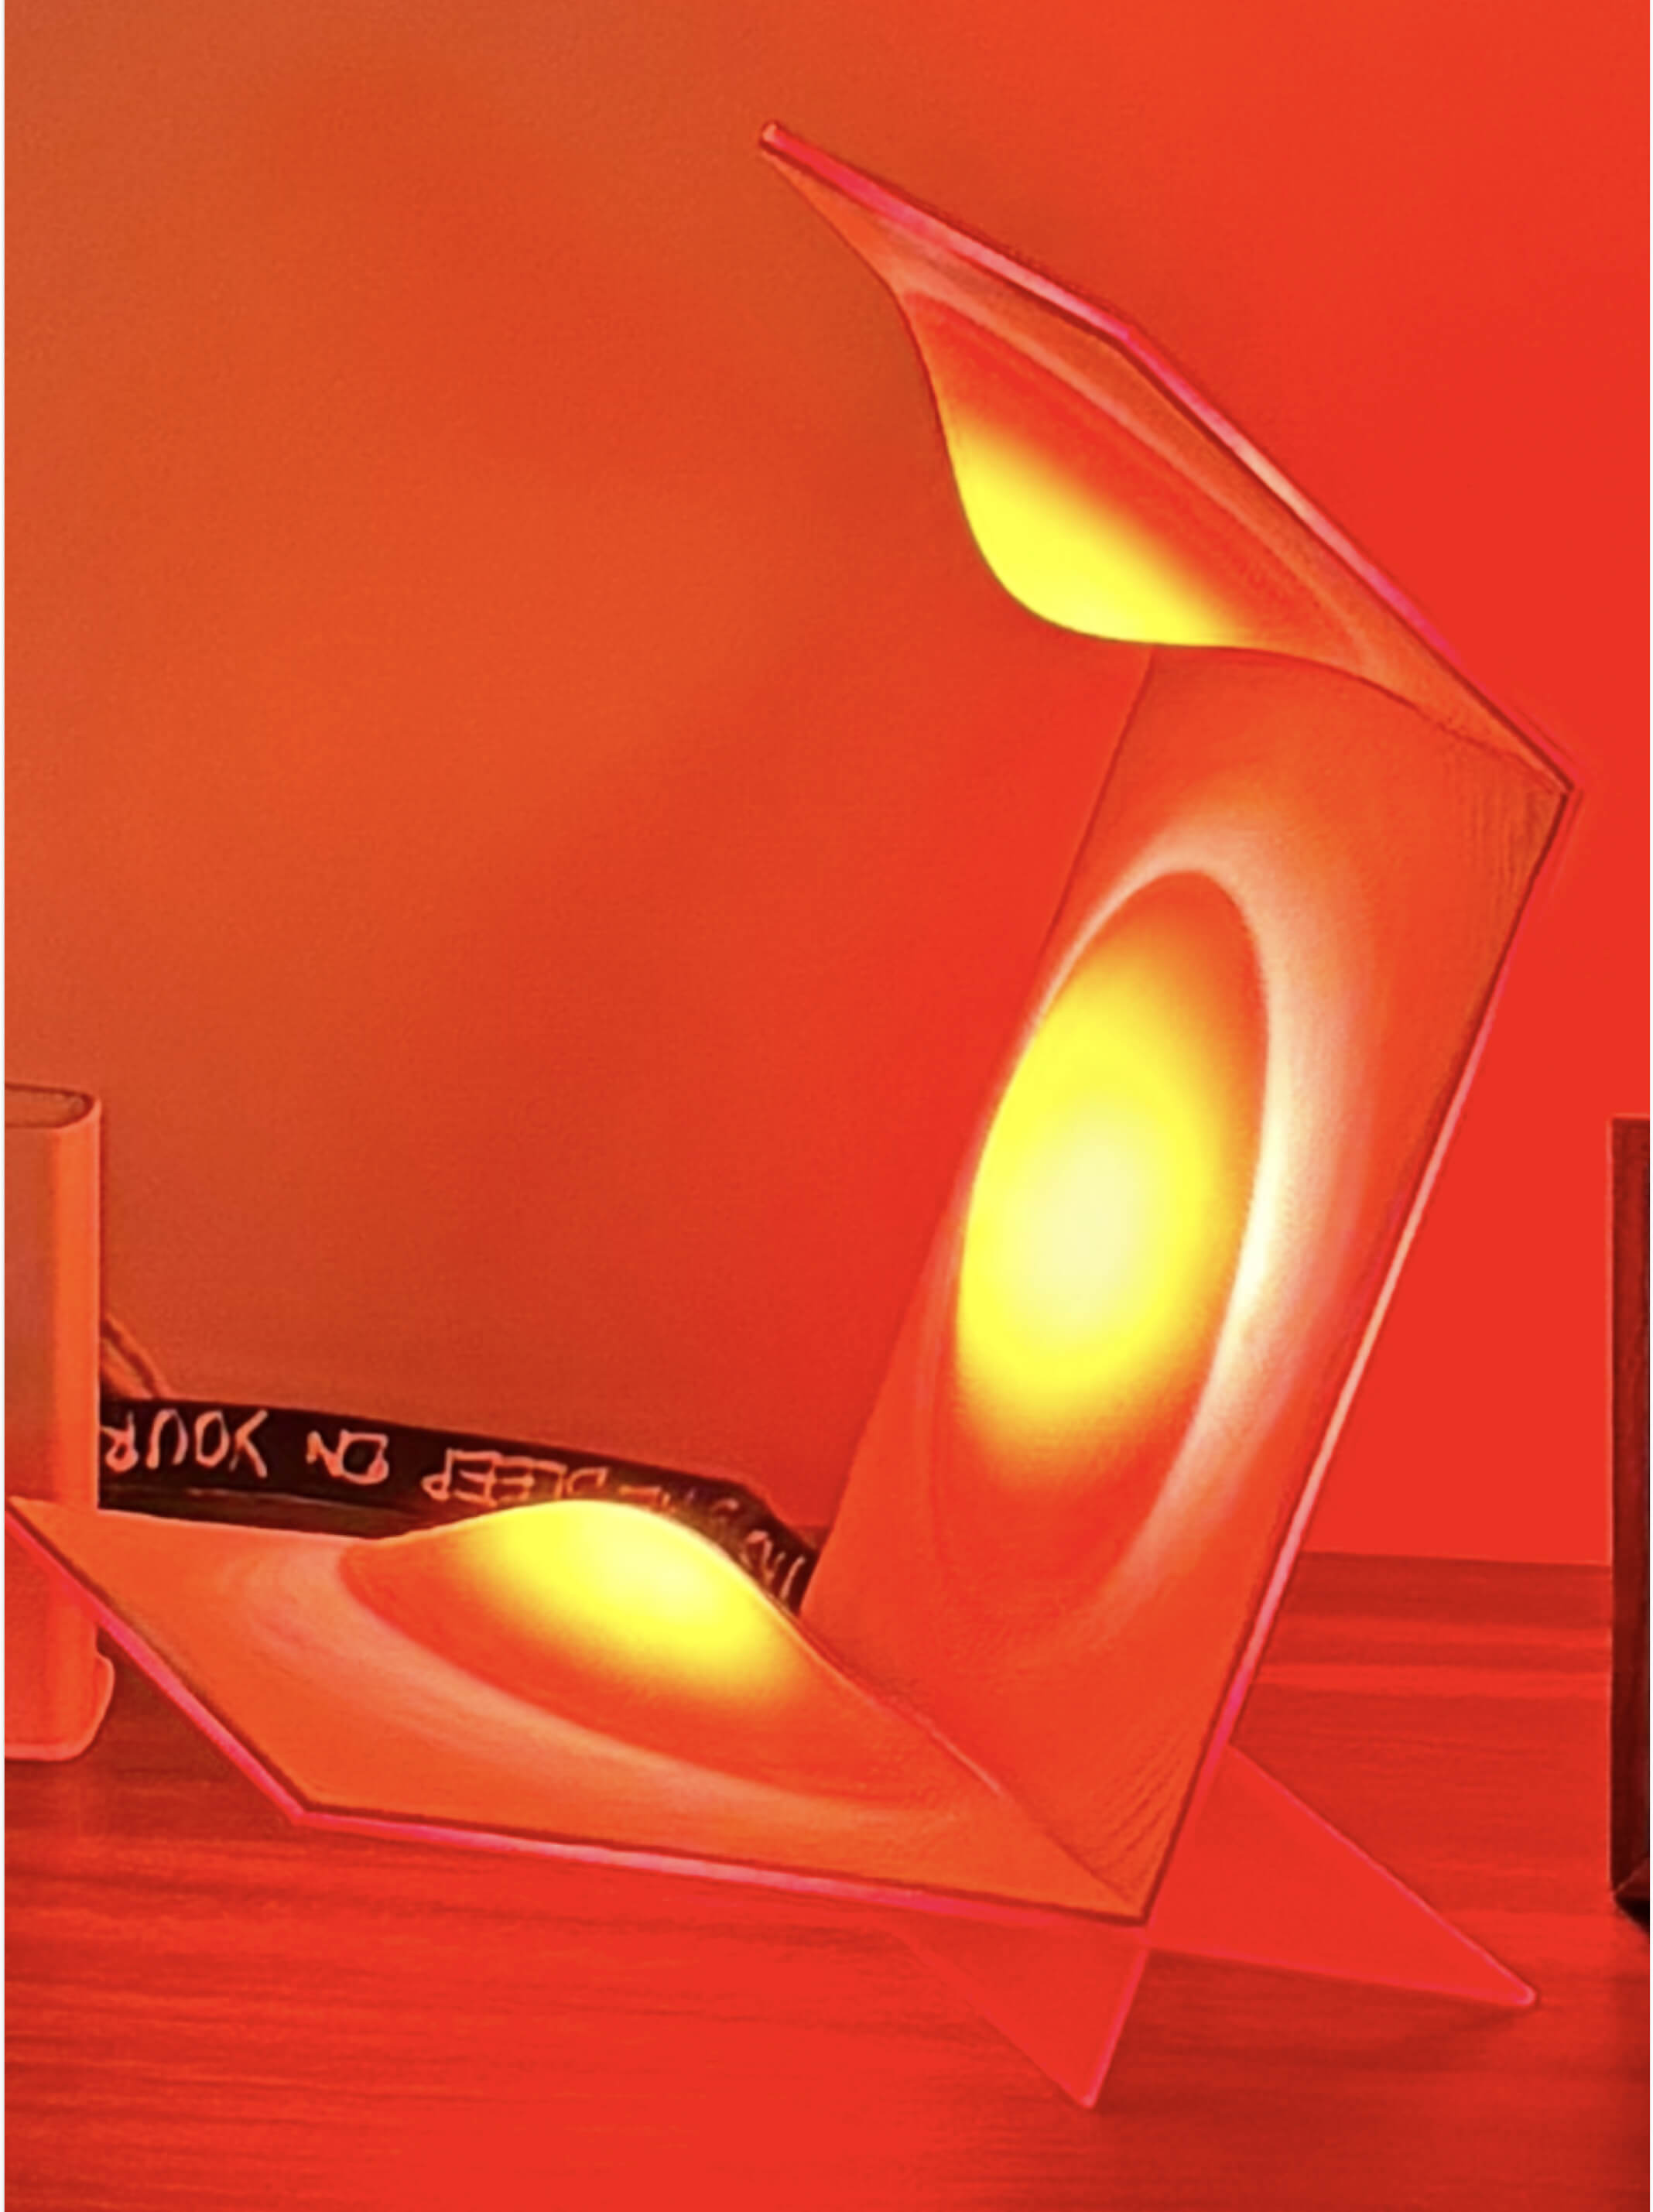
Feeling the pressure of the new week starting, I replaced the wooden grid with rounded pieces of 3mm red acrylic. This solved the lighting issue beautifully, turning the cold white light from the 3D printed covers into a warm, reddish-orange glow. At this point, only one main kerf joint remains in my design - the structural press-fit connection between the base and the longest vertical piece. So technically, I am still fulfilling the assignment requirements!
However, removing the inner skeleton created a new physical problem: the "roof" of the lamp can no longer support itself and is completely floppy. While trying to figure out how to stabilize the structure, I kept pushing forward and 3D printed two different versions of custom clips for cable management. Despite the structural crisis, the object is finally starting to look like a real product.
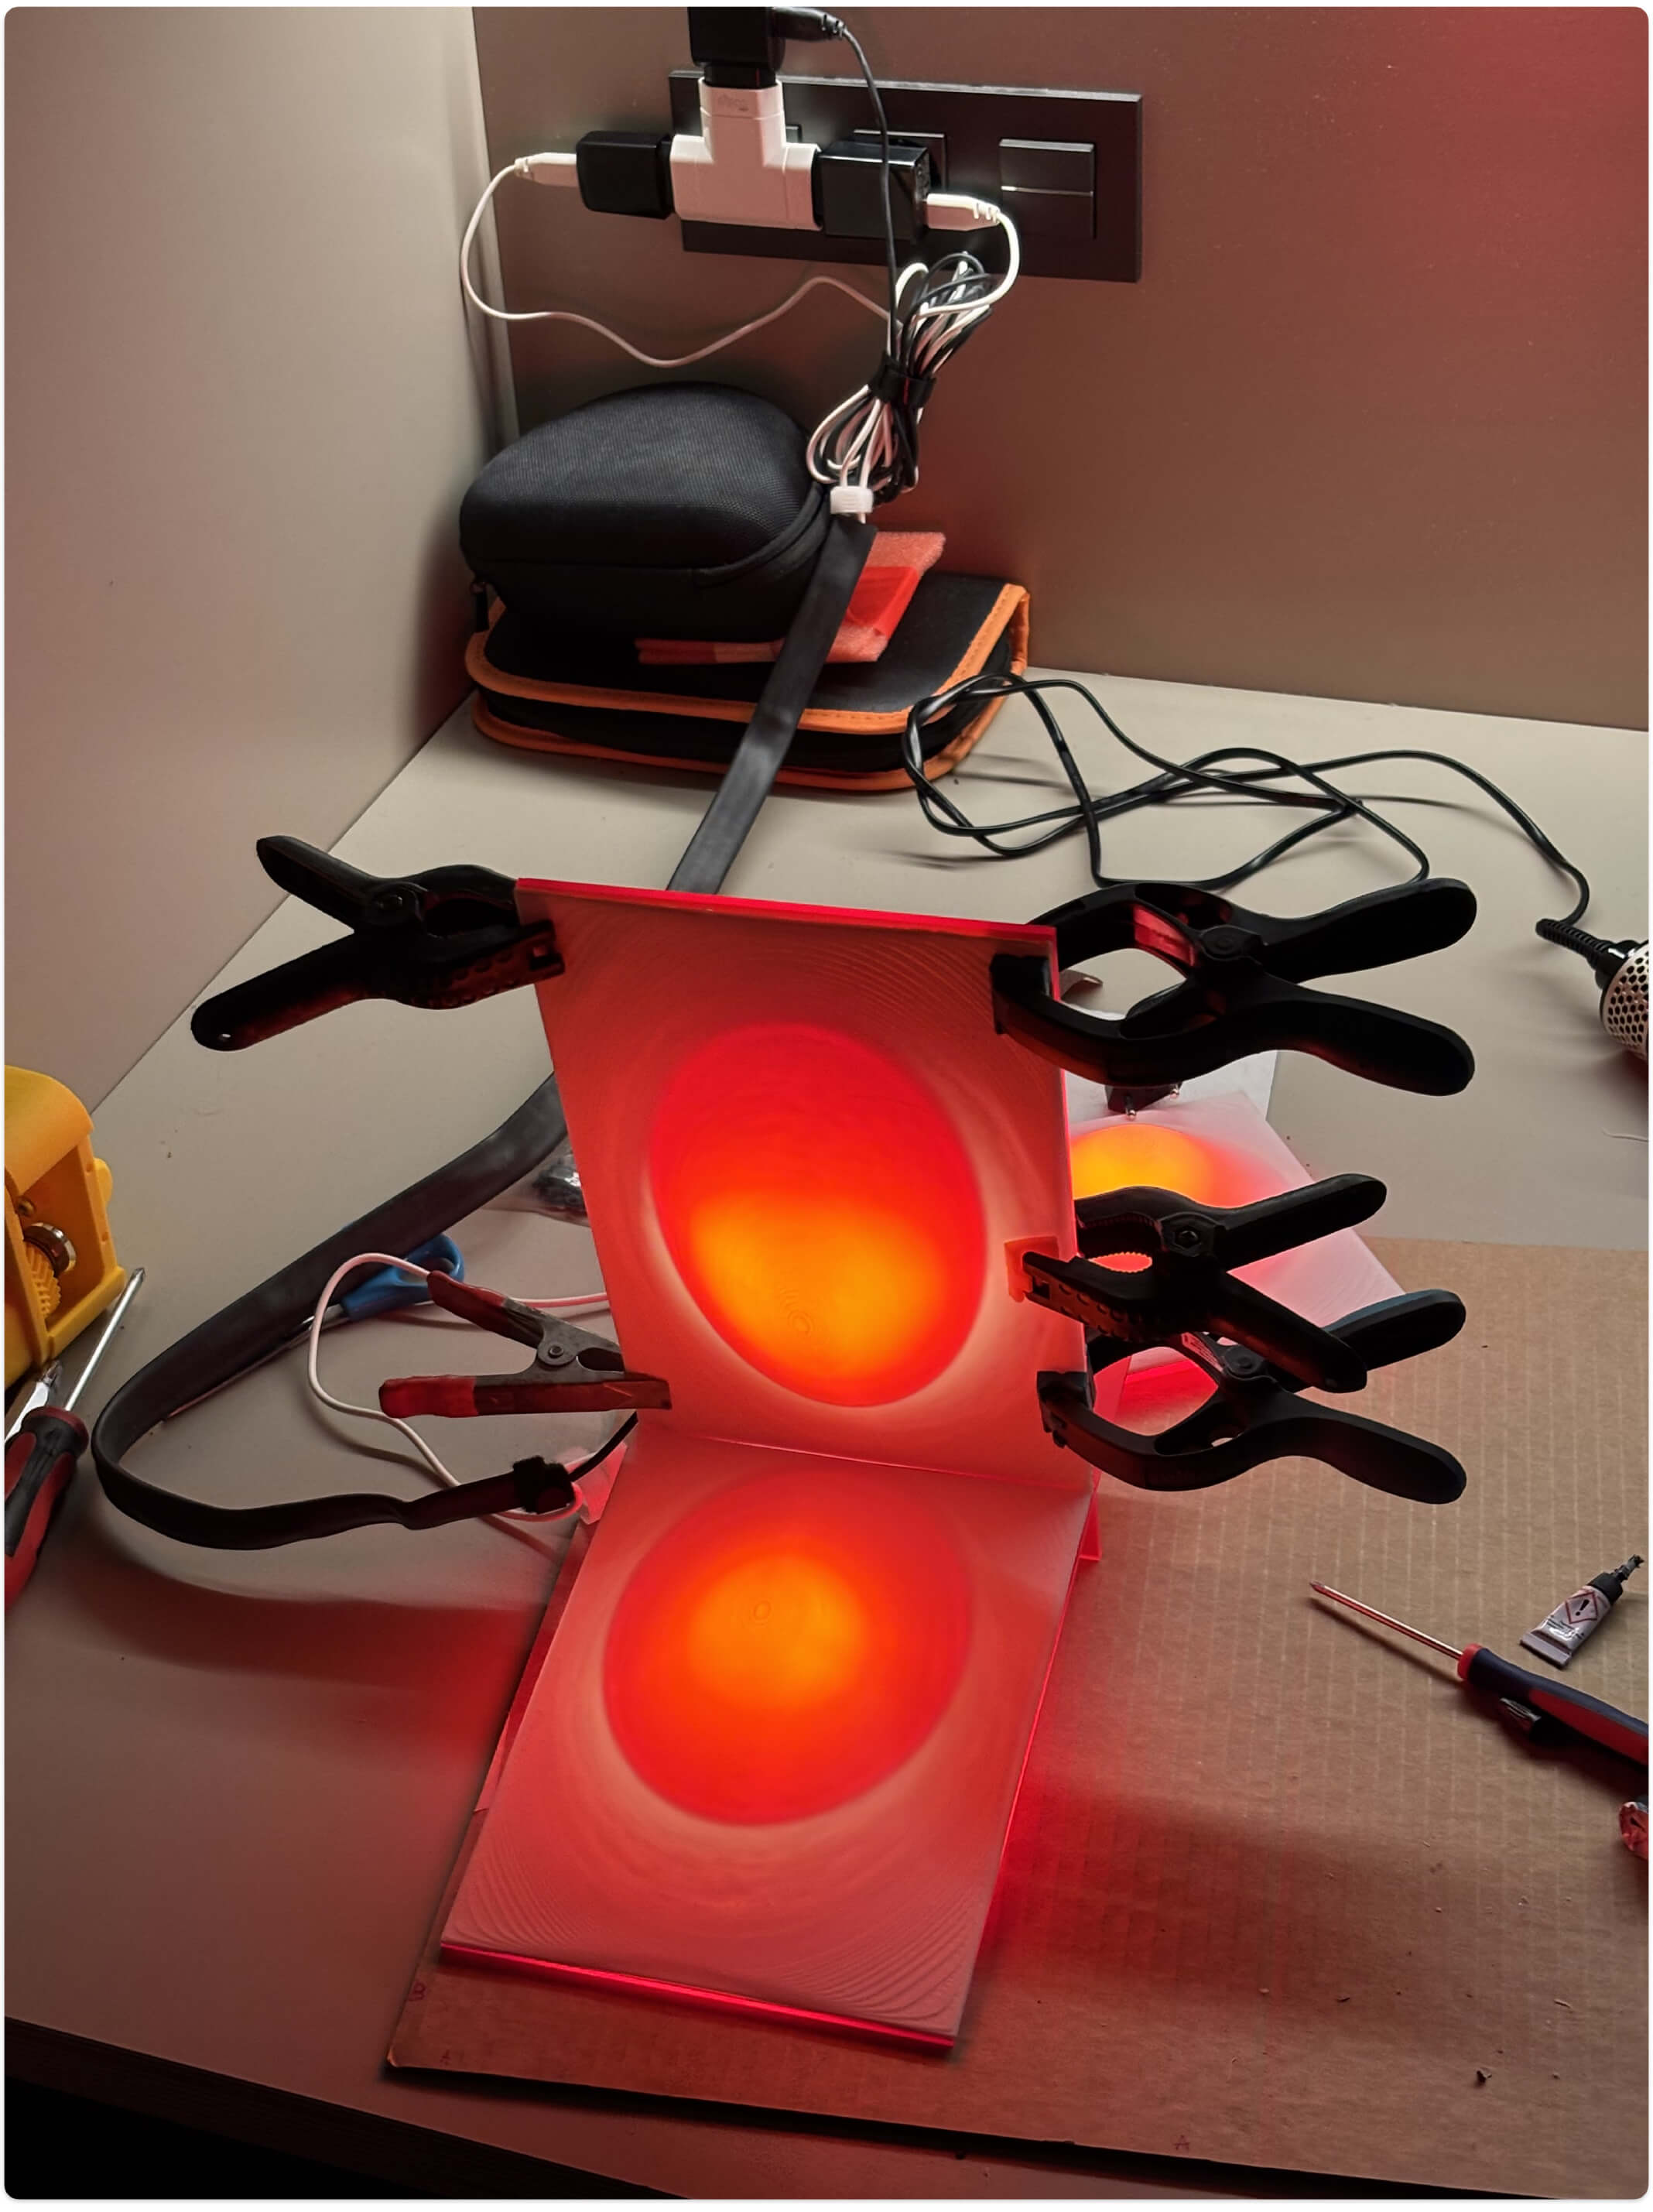
I took all the parts back to my apartment to work through the night. Laying the pieces on their side, I clamped everything together to visualize the final outcome and test the lighting assembly. To fix the floppy roof issue, I am prototyping a custom L-shaped support that will hopefully hold the top section rigid.
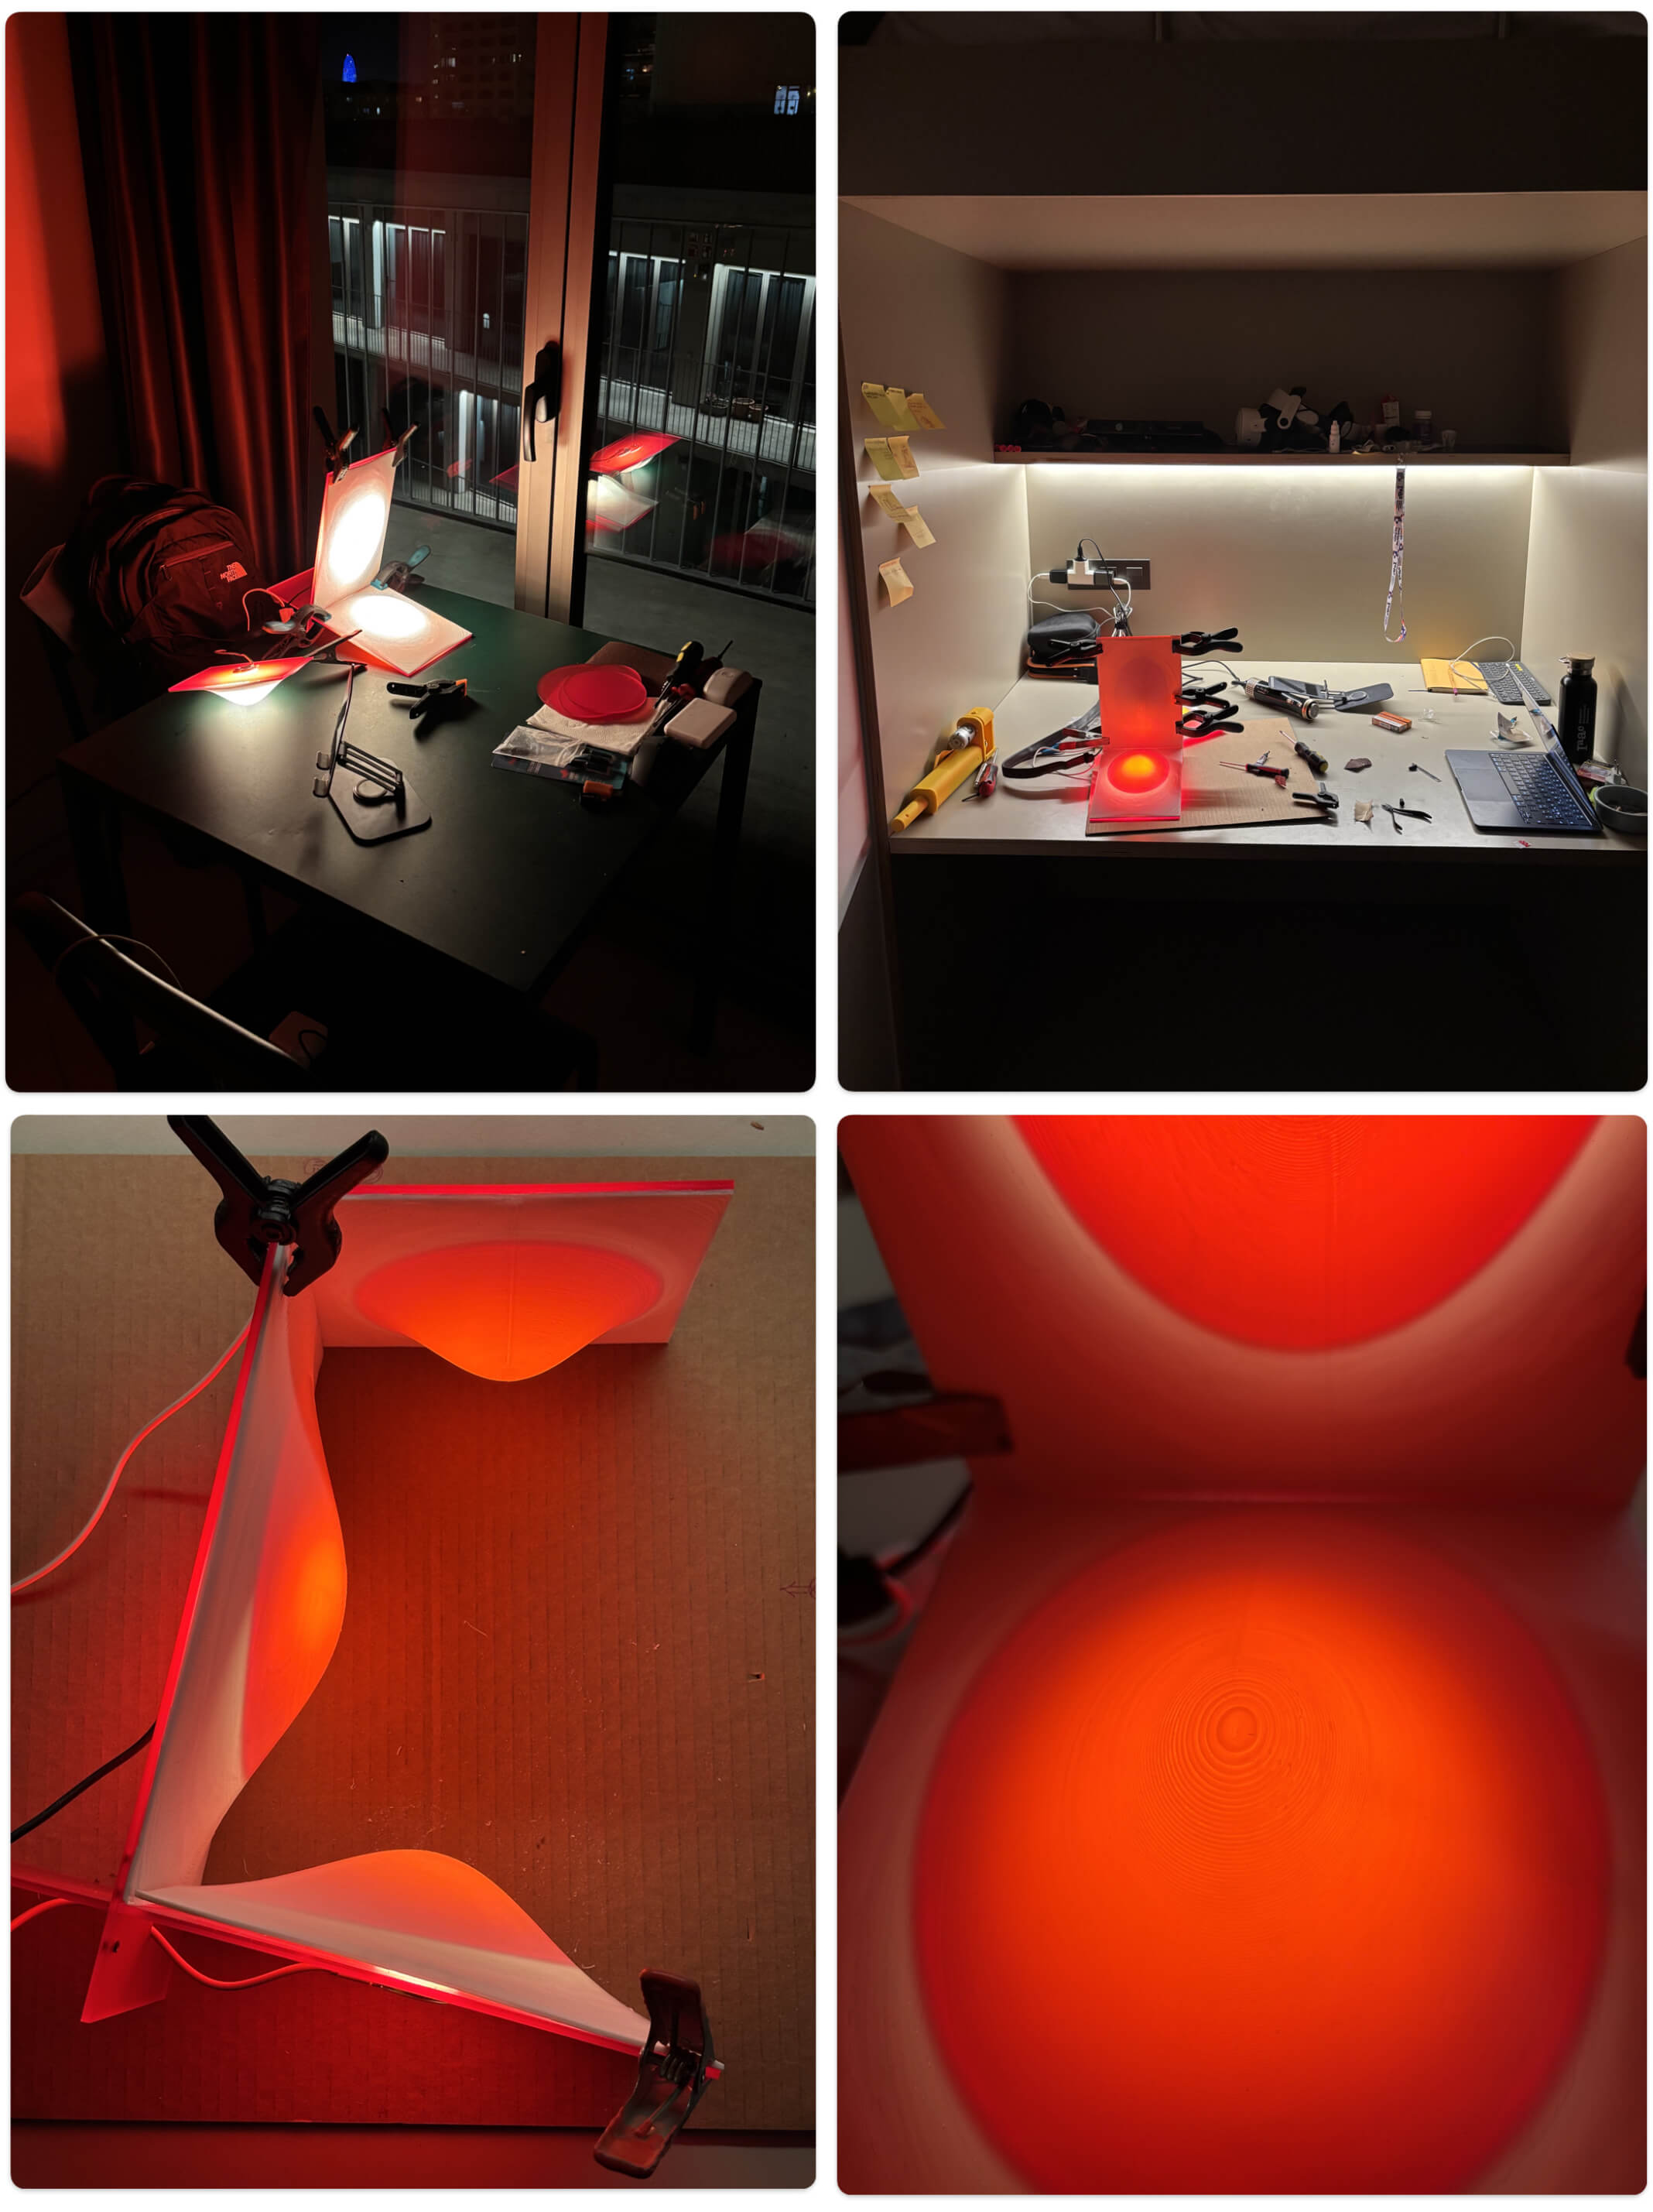
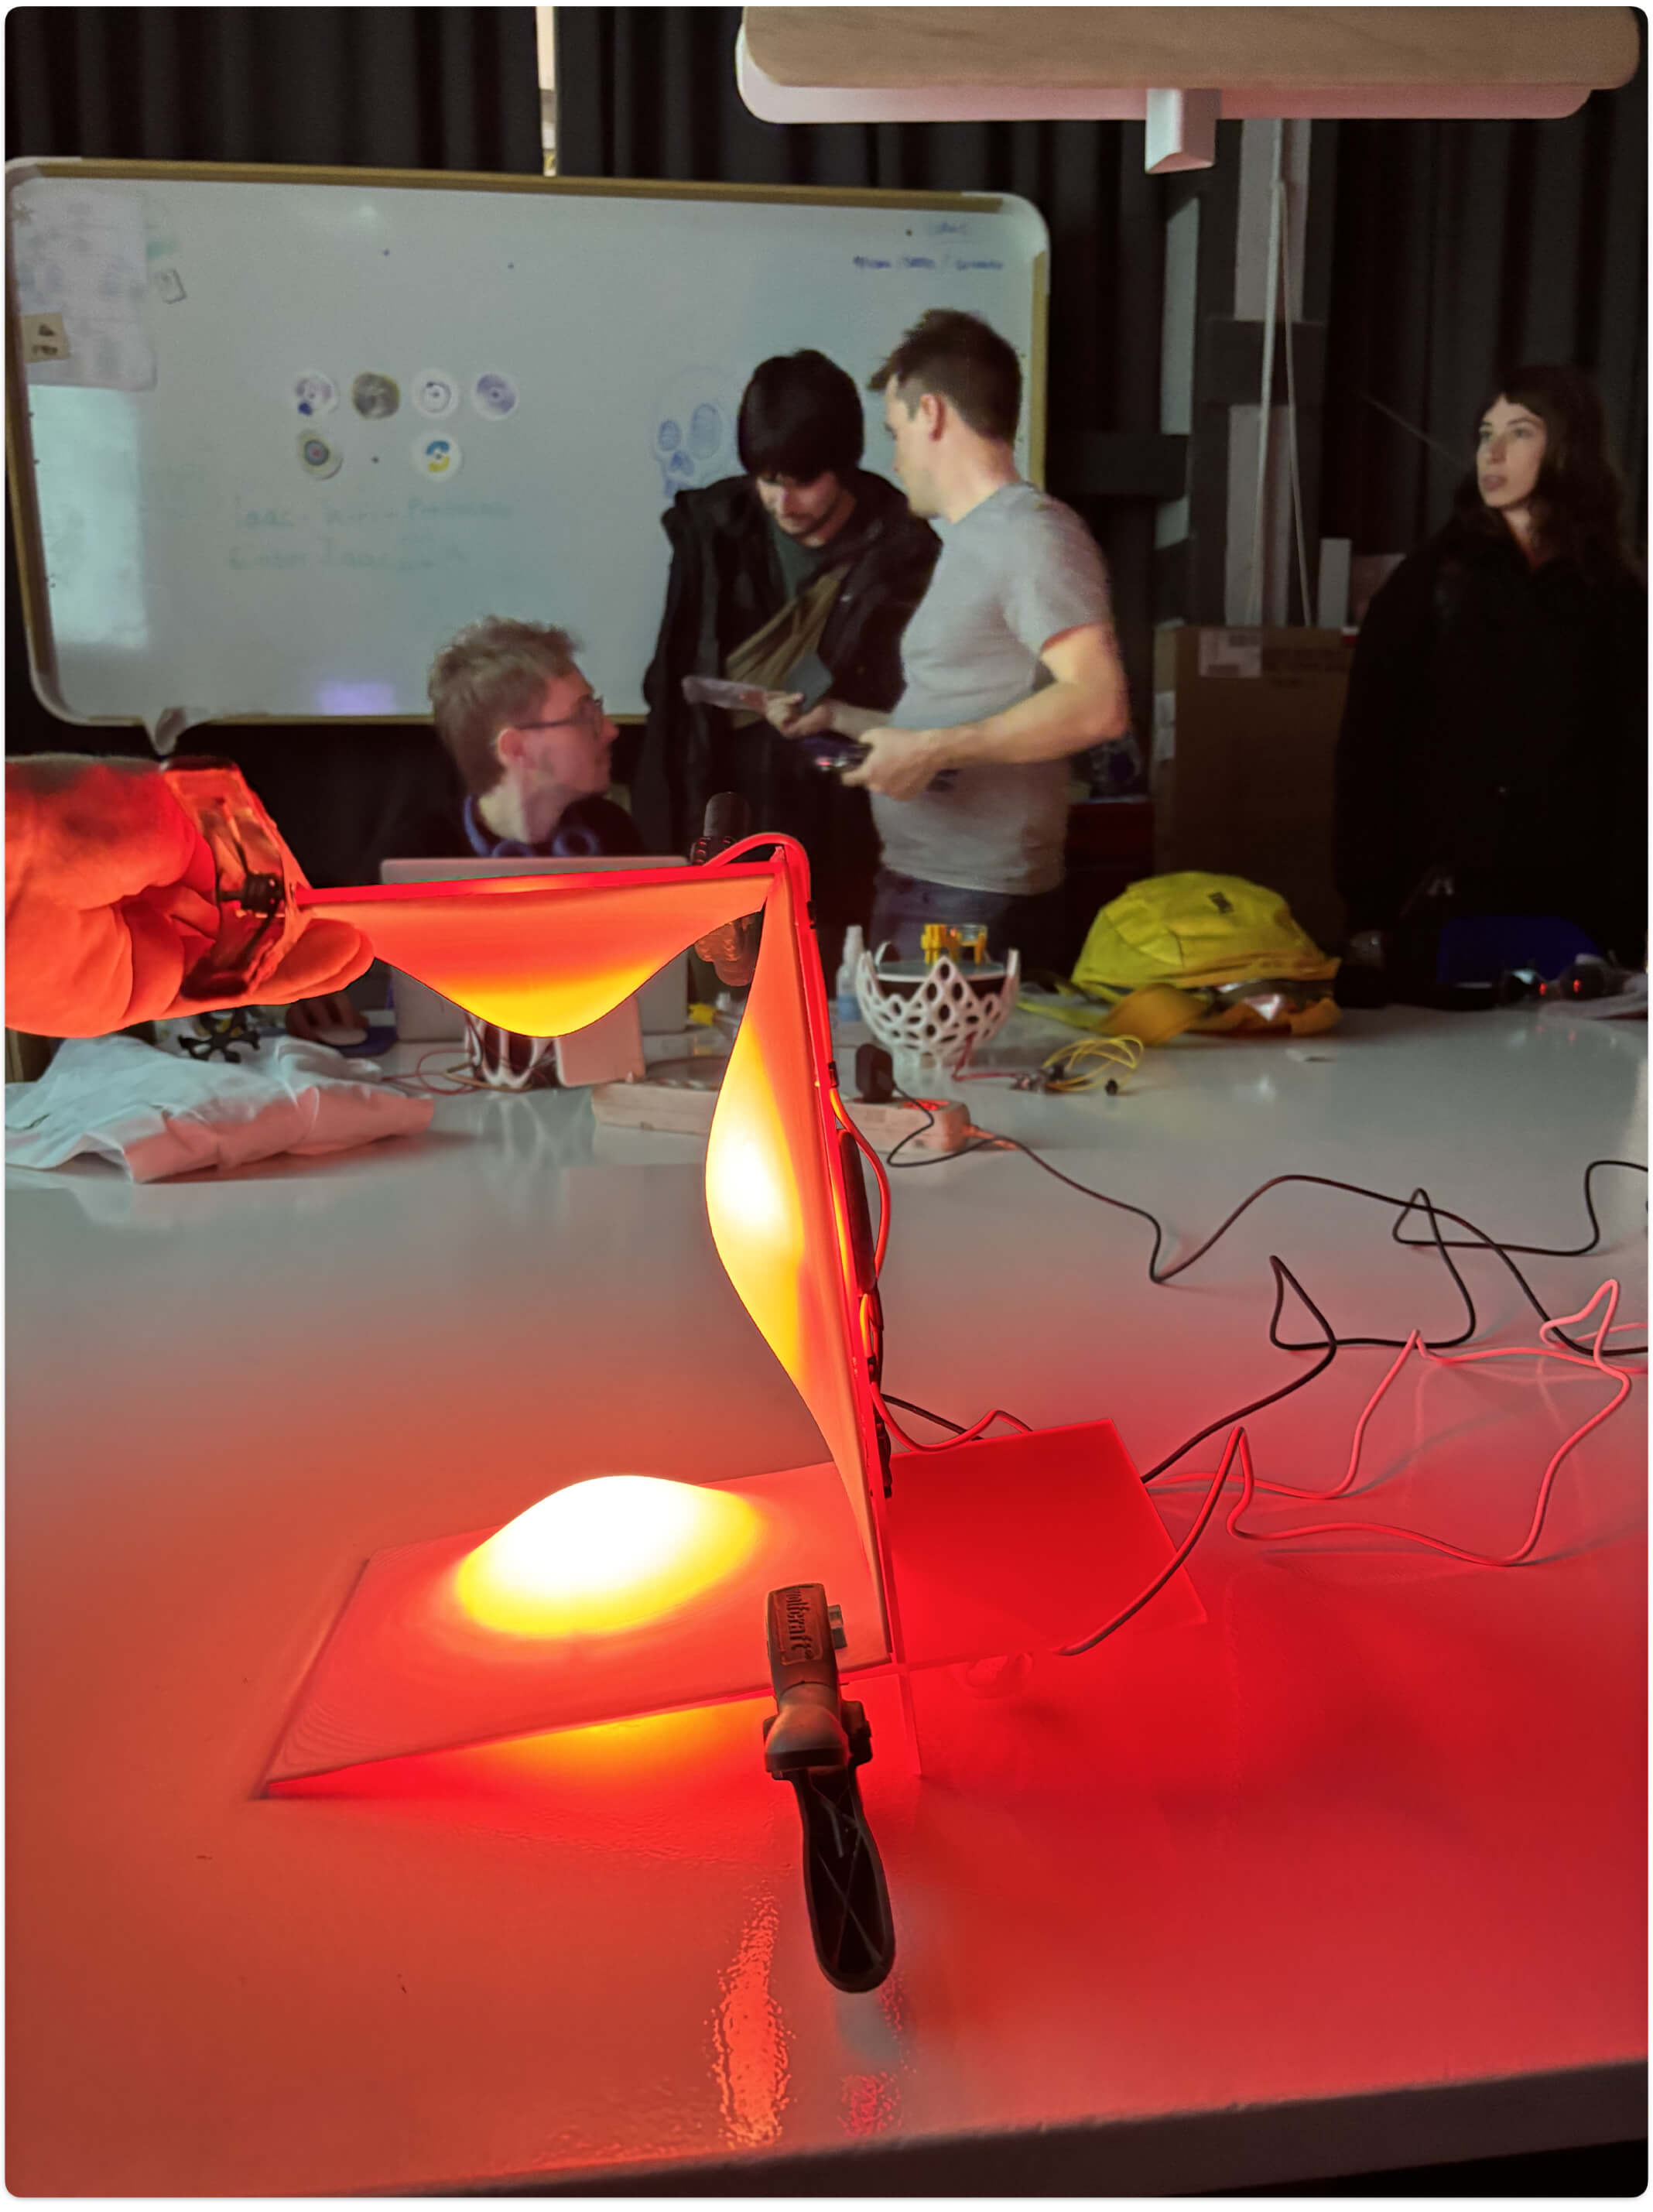
For the electronics, I want to merge the three separate USB cables into a single power line. I found an old bicycle inner tube in the lab, which will be perfect for a rugged, flexible cable management sleeve. I'll need to ask Dani to teach me how to safely solder the wires together without blowing anything up - especially since I plan to give this lamp to my friend Luigi, who kindly hosted me during my first week here in Barcelona! Seeing the intense red glow completely transform the vibe of the apartment at night confirms that despite the structural headaches, the aesthetic payoff is absolutely worth it.

The next morning, I printed the custom L-shaped support, and it actually worked! It held the "roof" perfectly rigid, allowing me to finally assemble the whole structure. Back in the lab, Dani patiently guided me through my first real electronics task: properly soldering the three USB cables into a single power line without blowing anything up.
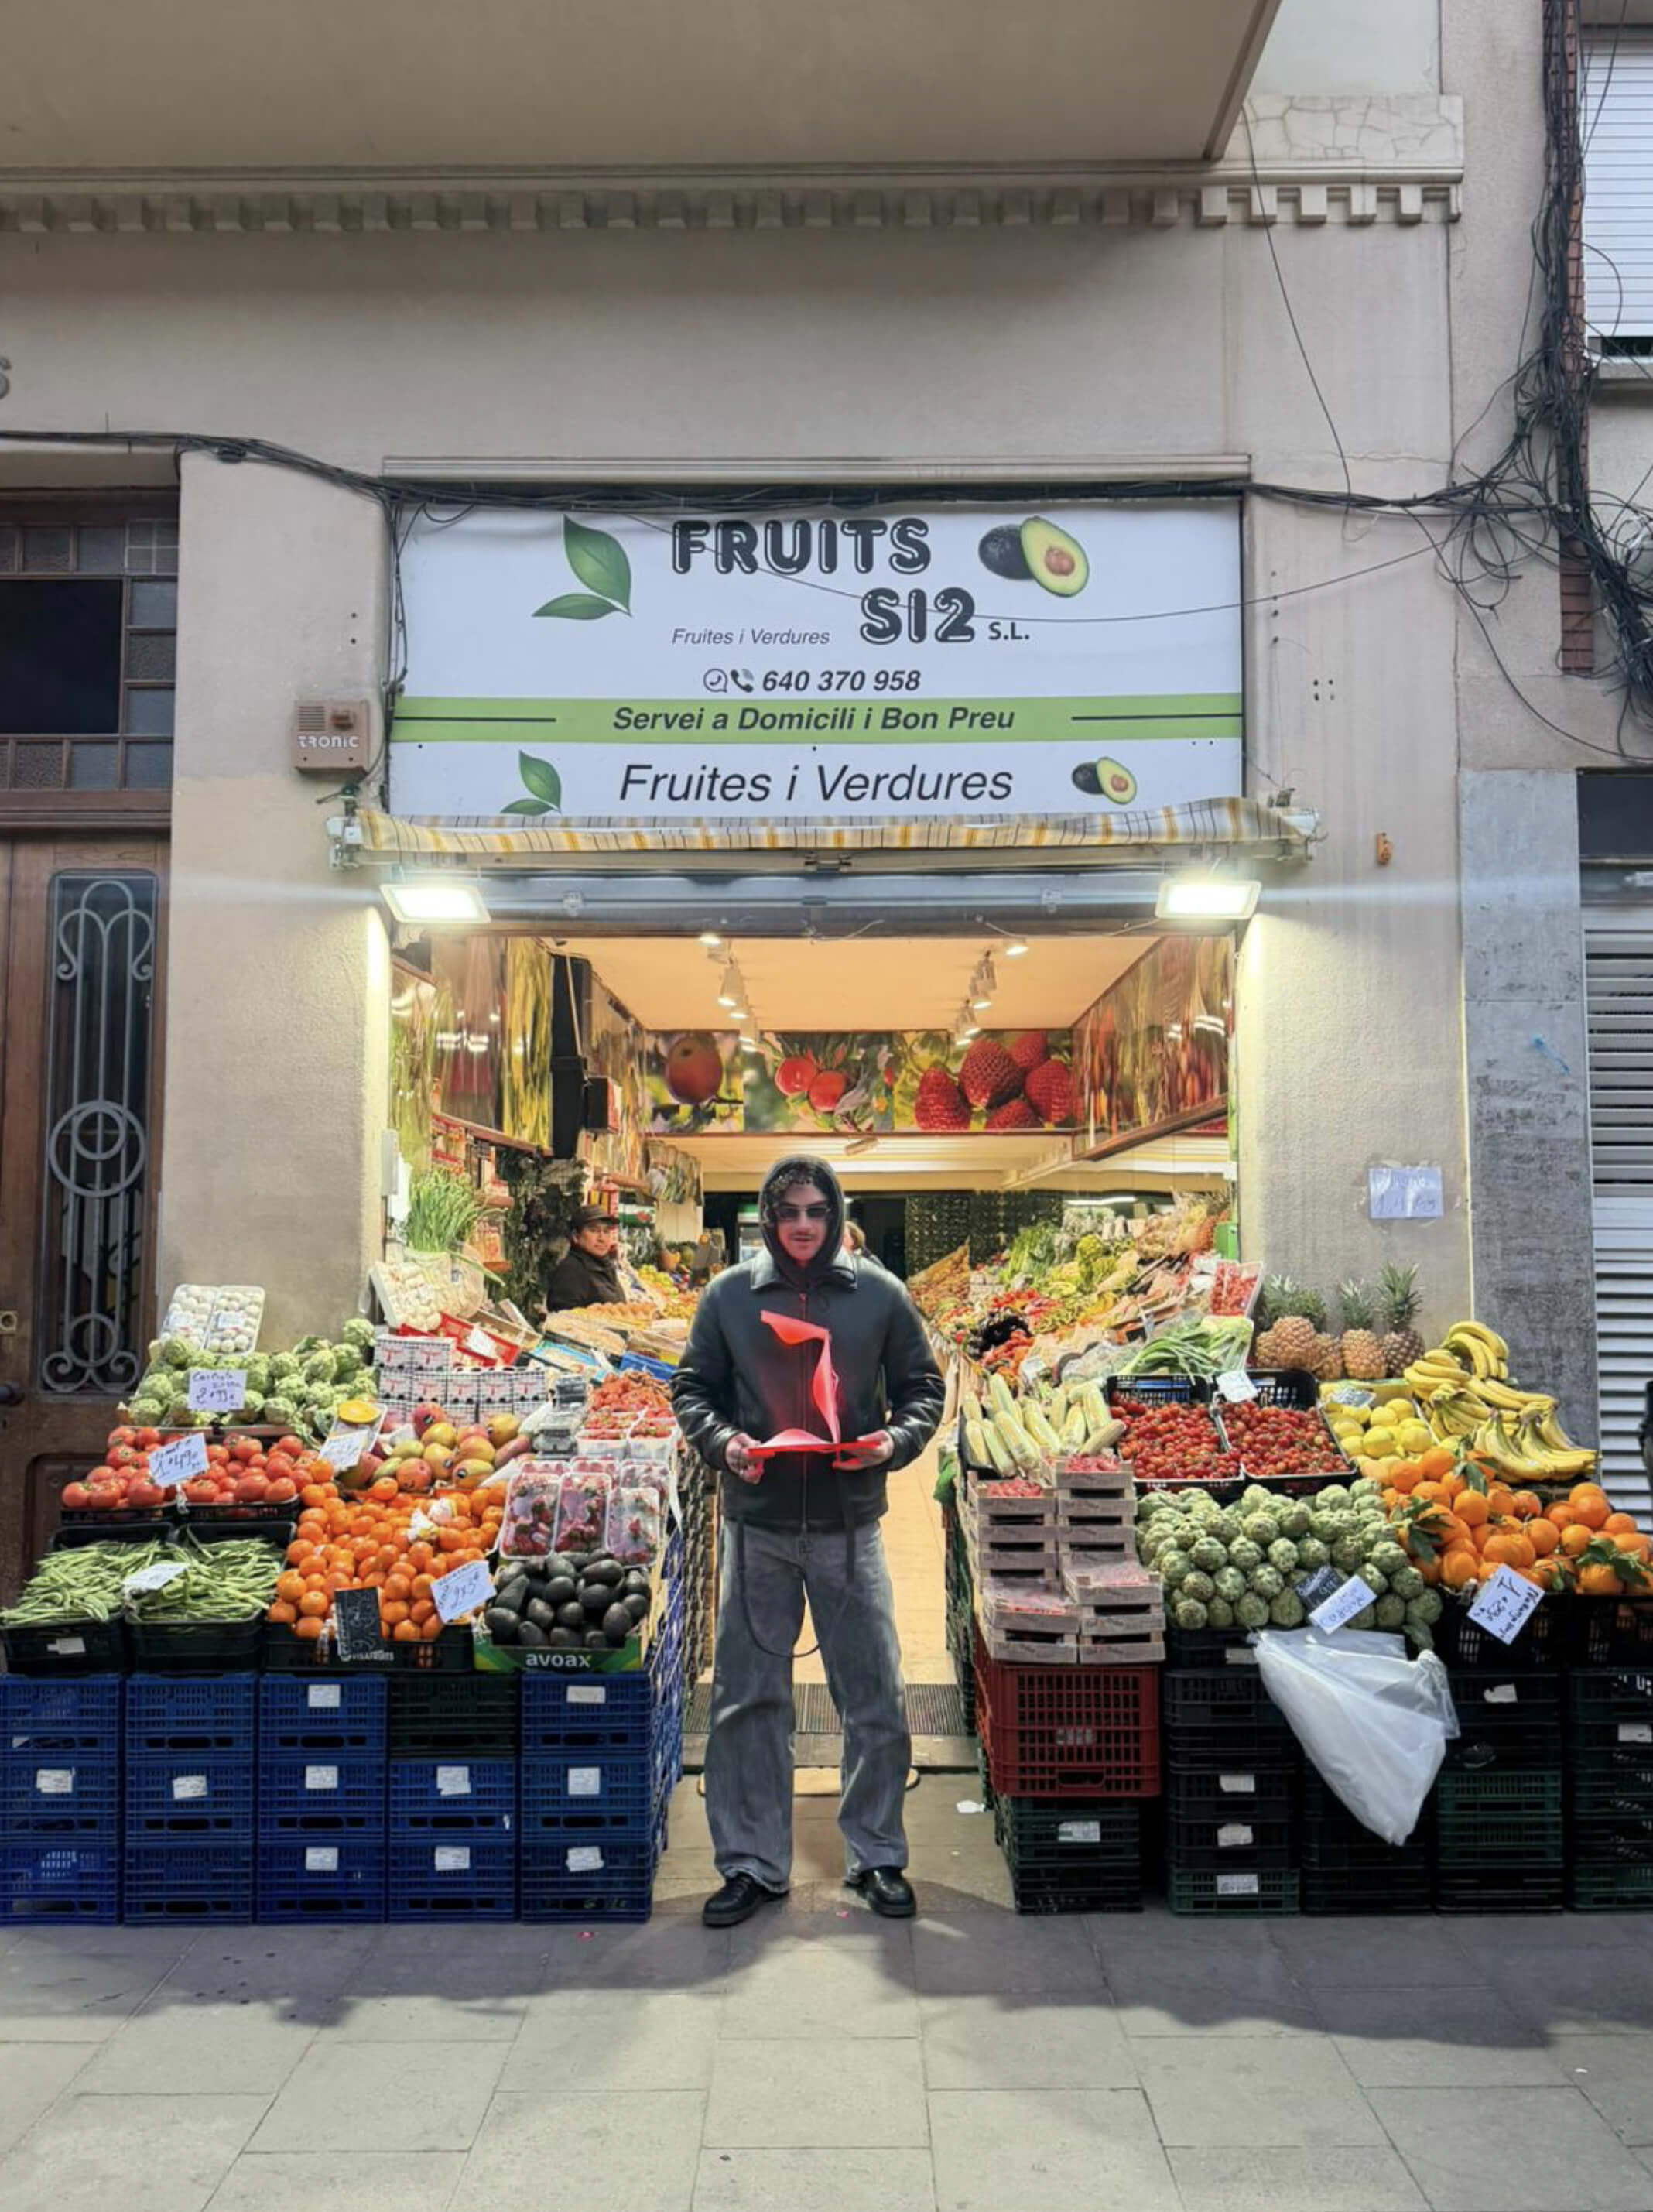
Then, I had a brilliant realization: since it runs on USB, I could hook it up to a power bank. This meant I could surprise my friend Luigi by delivering the lamp to him fully lit up, right in the middle of the street! Seeing him completely happy and caught off guard with this glowing red object was a fantastic payoff. Finally, I got to see the lamp in its new habitat, lighting up his living room with its warm, intense vibe.
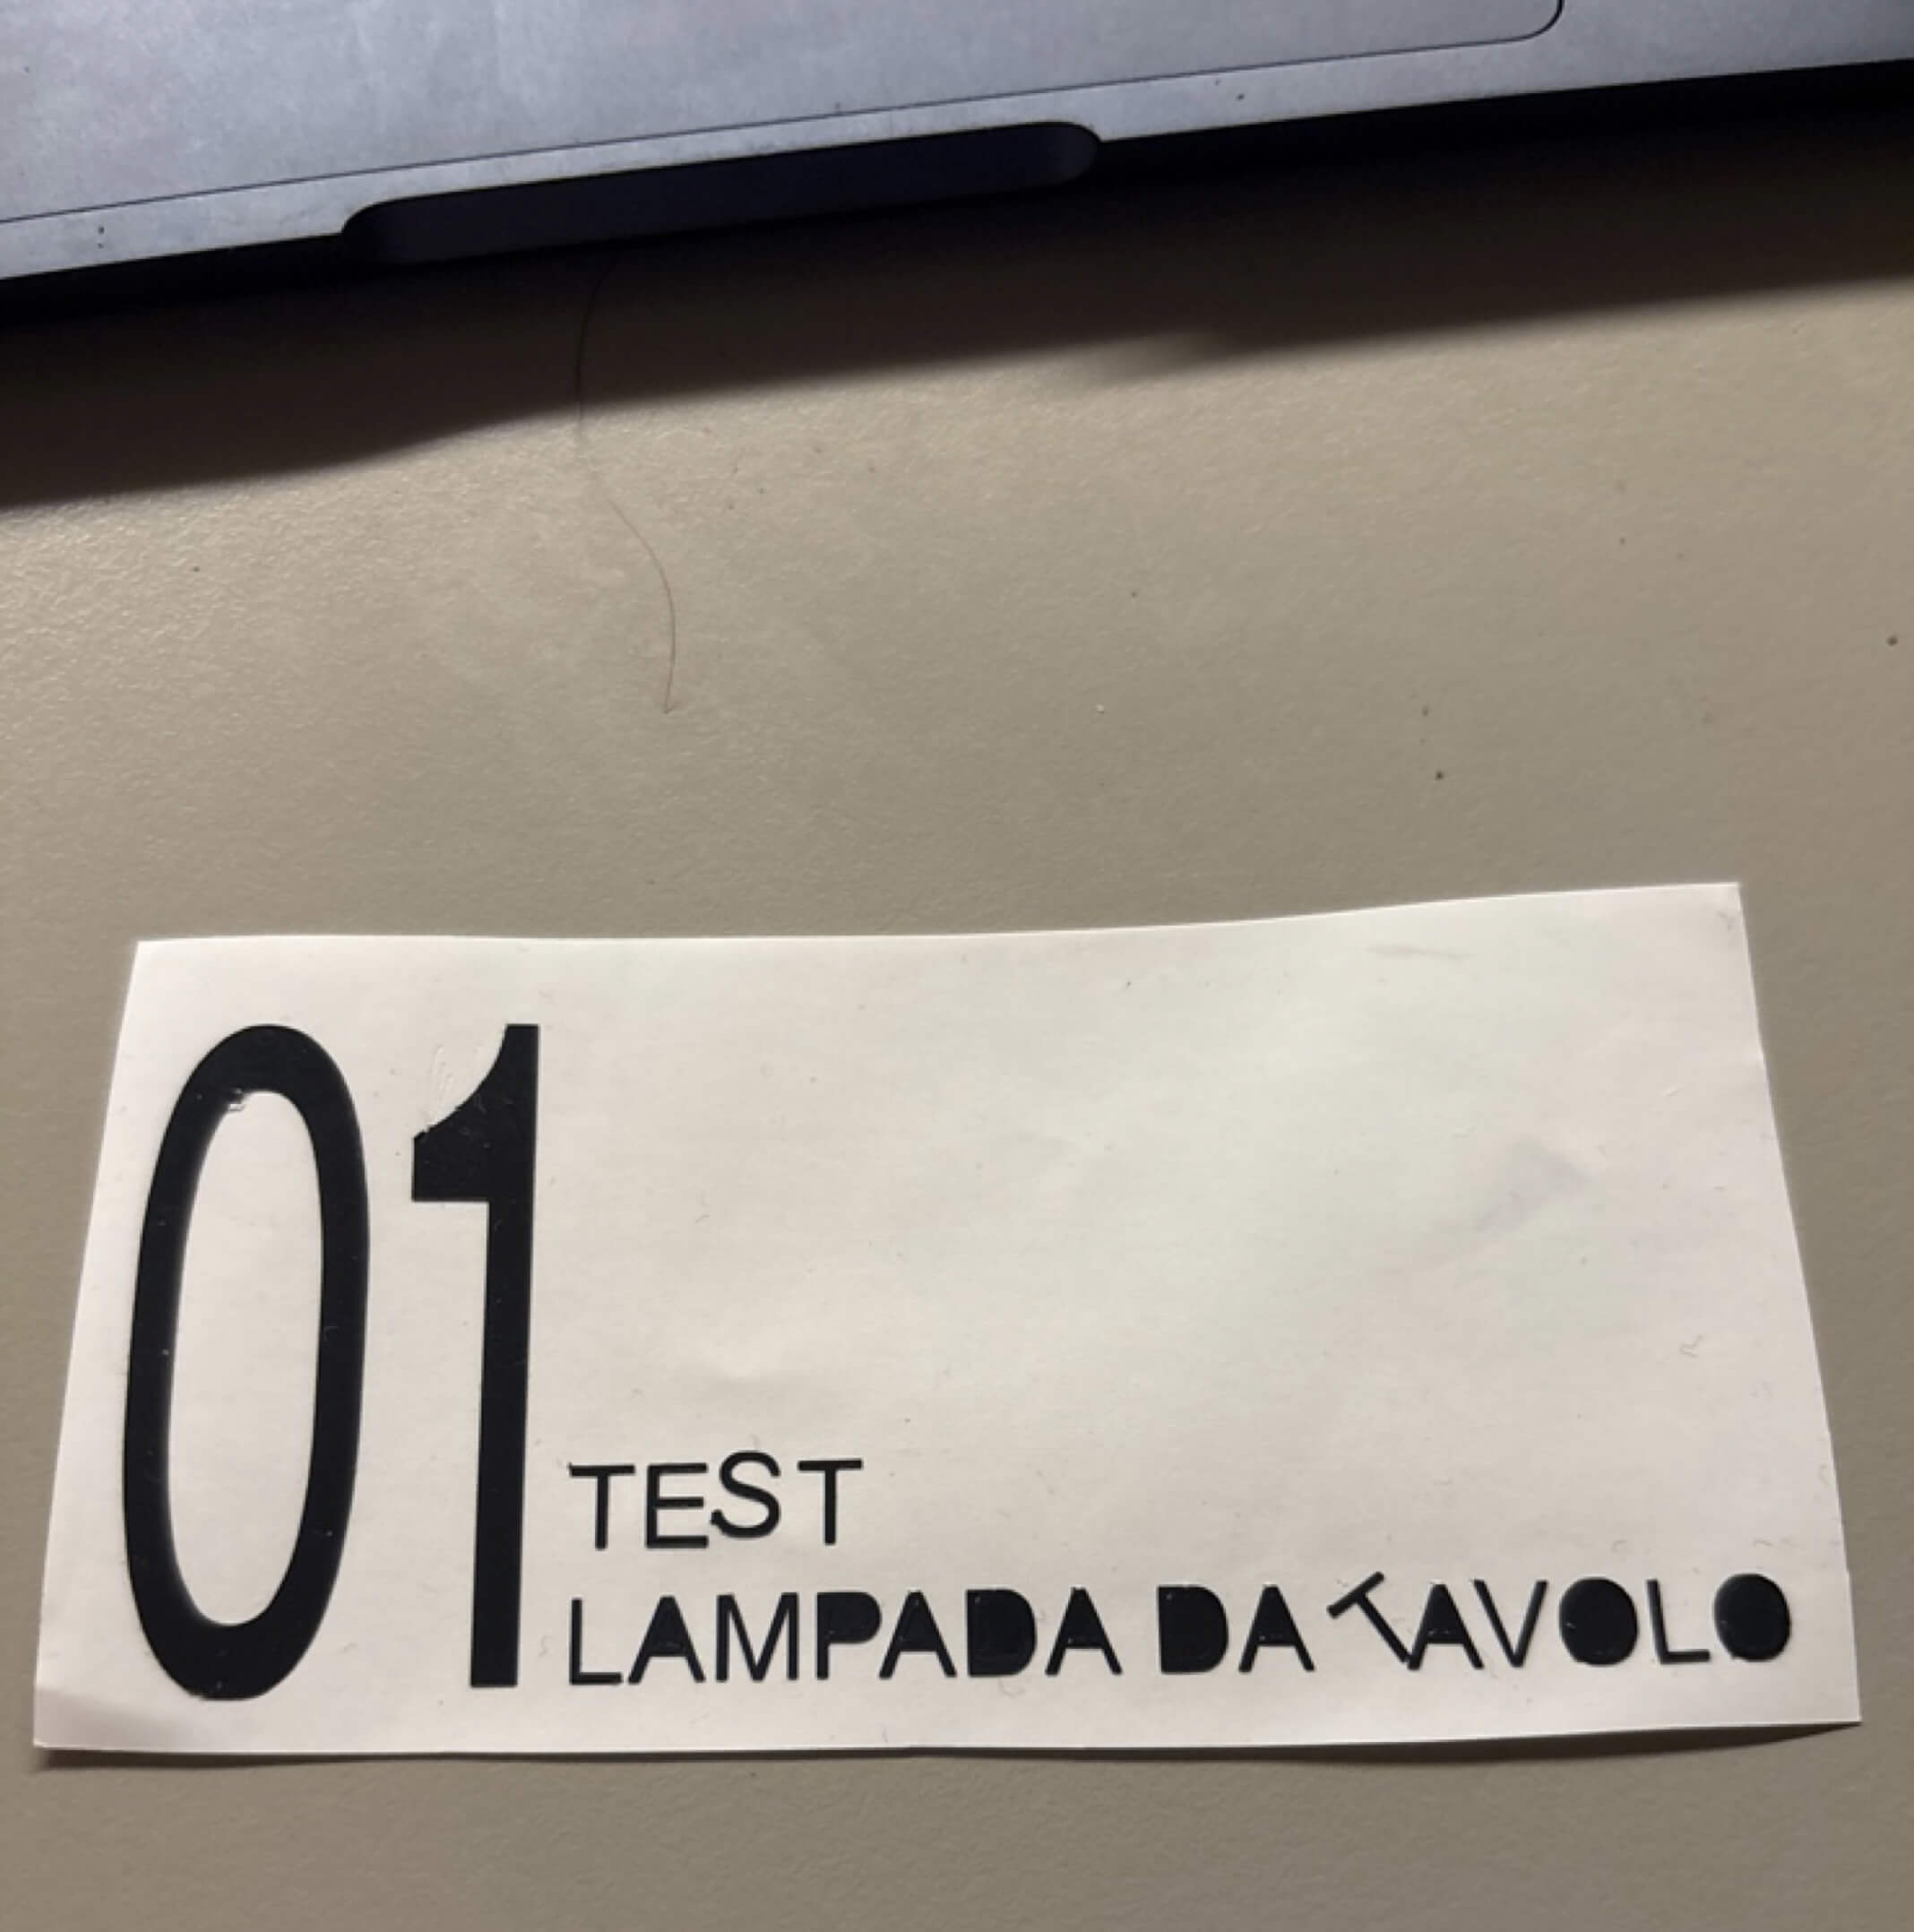
To fulfill the final requirement of the week, I planned to use the Silhouette vinyl cutter to create a sleek label for my prototype. I prepared a vector file with the text "01 TEST LAMPADA DA TAVOLO" (01 Test Table Lamp), imported it into the cutting software, and set up the blade and force parameters. After the machine scored the design, I weeded out the excess vinyl and prepared it with transfer tape.
But here is the plot twist: when I looked at the finished lamp with its warm red glow and the rugged bicycle tire sleeve... the perfect, glossy vinyl sticker just didn't fit the vibe. It felt too clean, too formal. So, I decided not to use it at all! Instead, I grabbed a white permanent marker and hand-wrote a personal dedication directly along the rubber tire sleeve. It matched the raw, prototyped soul of the object so much better. Even though the sticker didn't make it onto the final product, I mastered the vinyl cutting workflow.