Week 5: 3D Scanning and Printing
Group Assignment
The group assignment this week was to characterize the 3D printers in our lab. HERE is the group assignment page.
We tested the Prusa MK4, which is what I then used to print my model. All of the testing allowed me to design my model in such a way that I could be confident it would successfully print. For example, I needed to know how well bridging worked for the hole in the middle of my snowman. With the test print, we found it could successfully bridge a 20 mm gap. We also tested how big of an overhang can successfully print without supports, which was useful for designing the nose of my snowman.
3D Modeling & Printing
I made a snowman-shaped shaky egg.Modeling
I am once again using Autodesk Fusion for 3D modeling. I won’t be covering how to use every tool because I used them in week 2 and/or week 3.
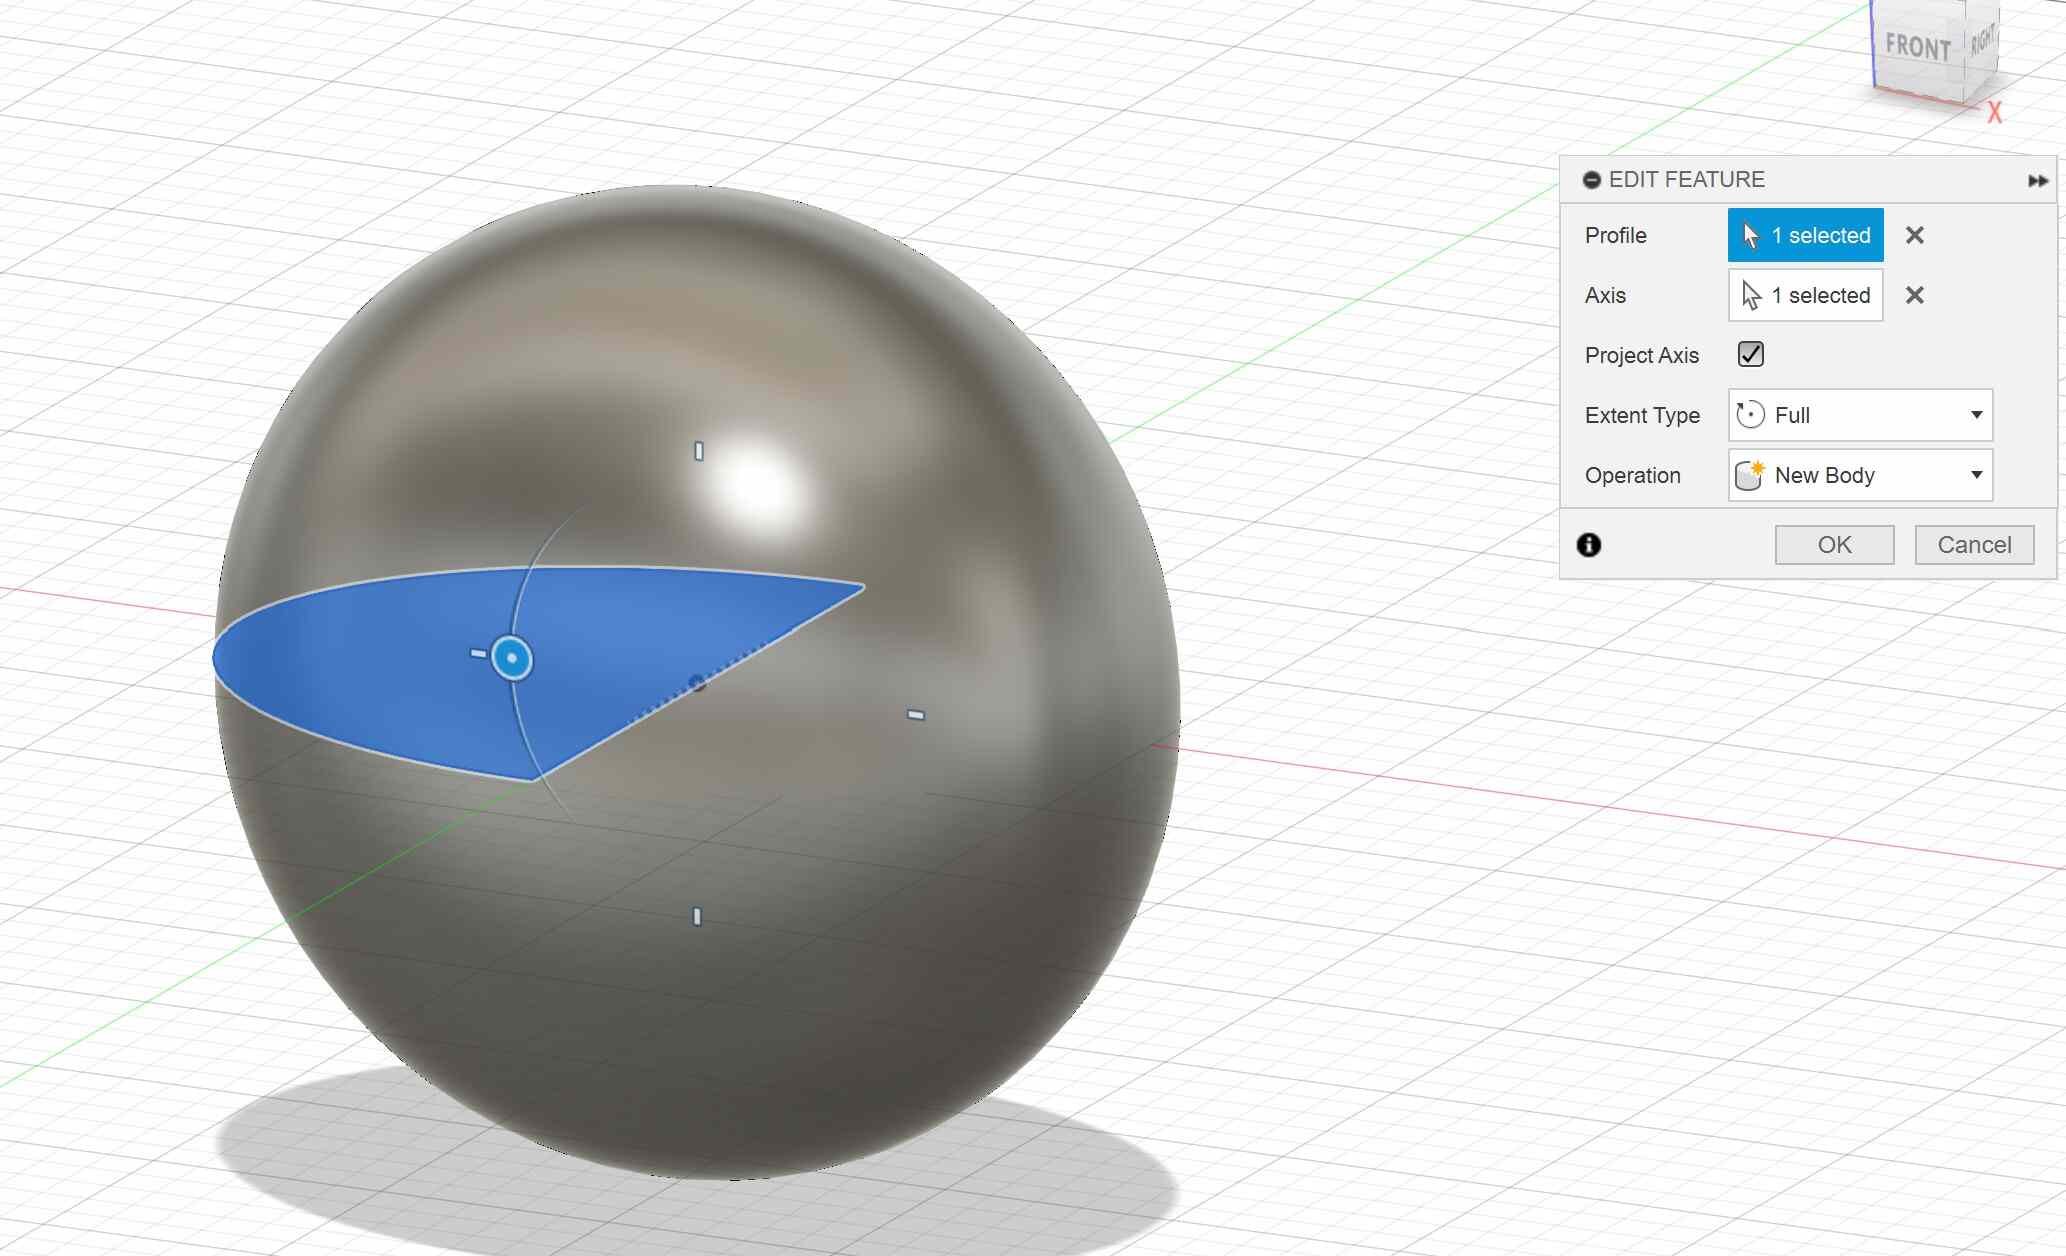
I started with the main body of the snowman. I started by making an oval in the sketch tool using the ellipse tool. I then put a line through the middle of it and trimmed half of the ellipse so that I was left with half of an oval. I then completed the sketch. Next, I used the revolve (create -> revolve) tool to make it 3 dimensional. I selected the sketch for the profile and the flat side for the axis, which is what it’ll revolve around. I chose full for the extent type because I wanted to make a full oval, however you can also choose to only revolve a certain amount of degrees around the axis. Once happy with the settings, hit “OK” in the revolve window.
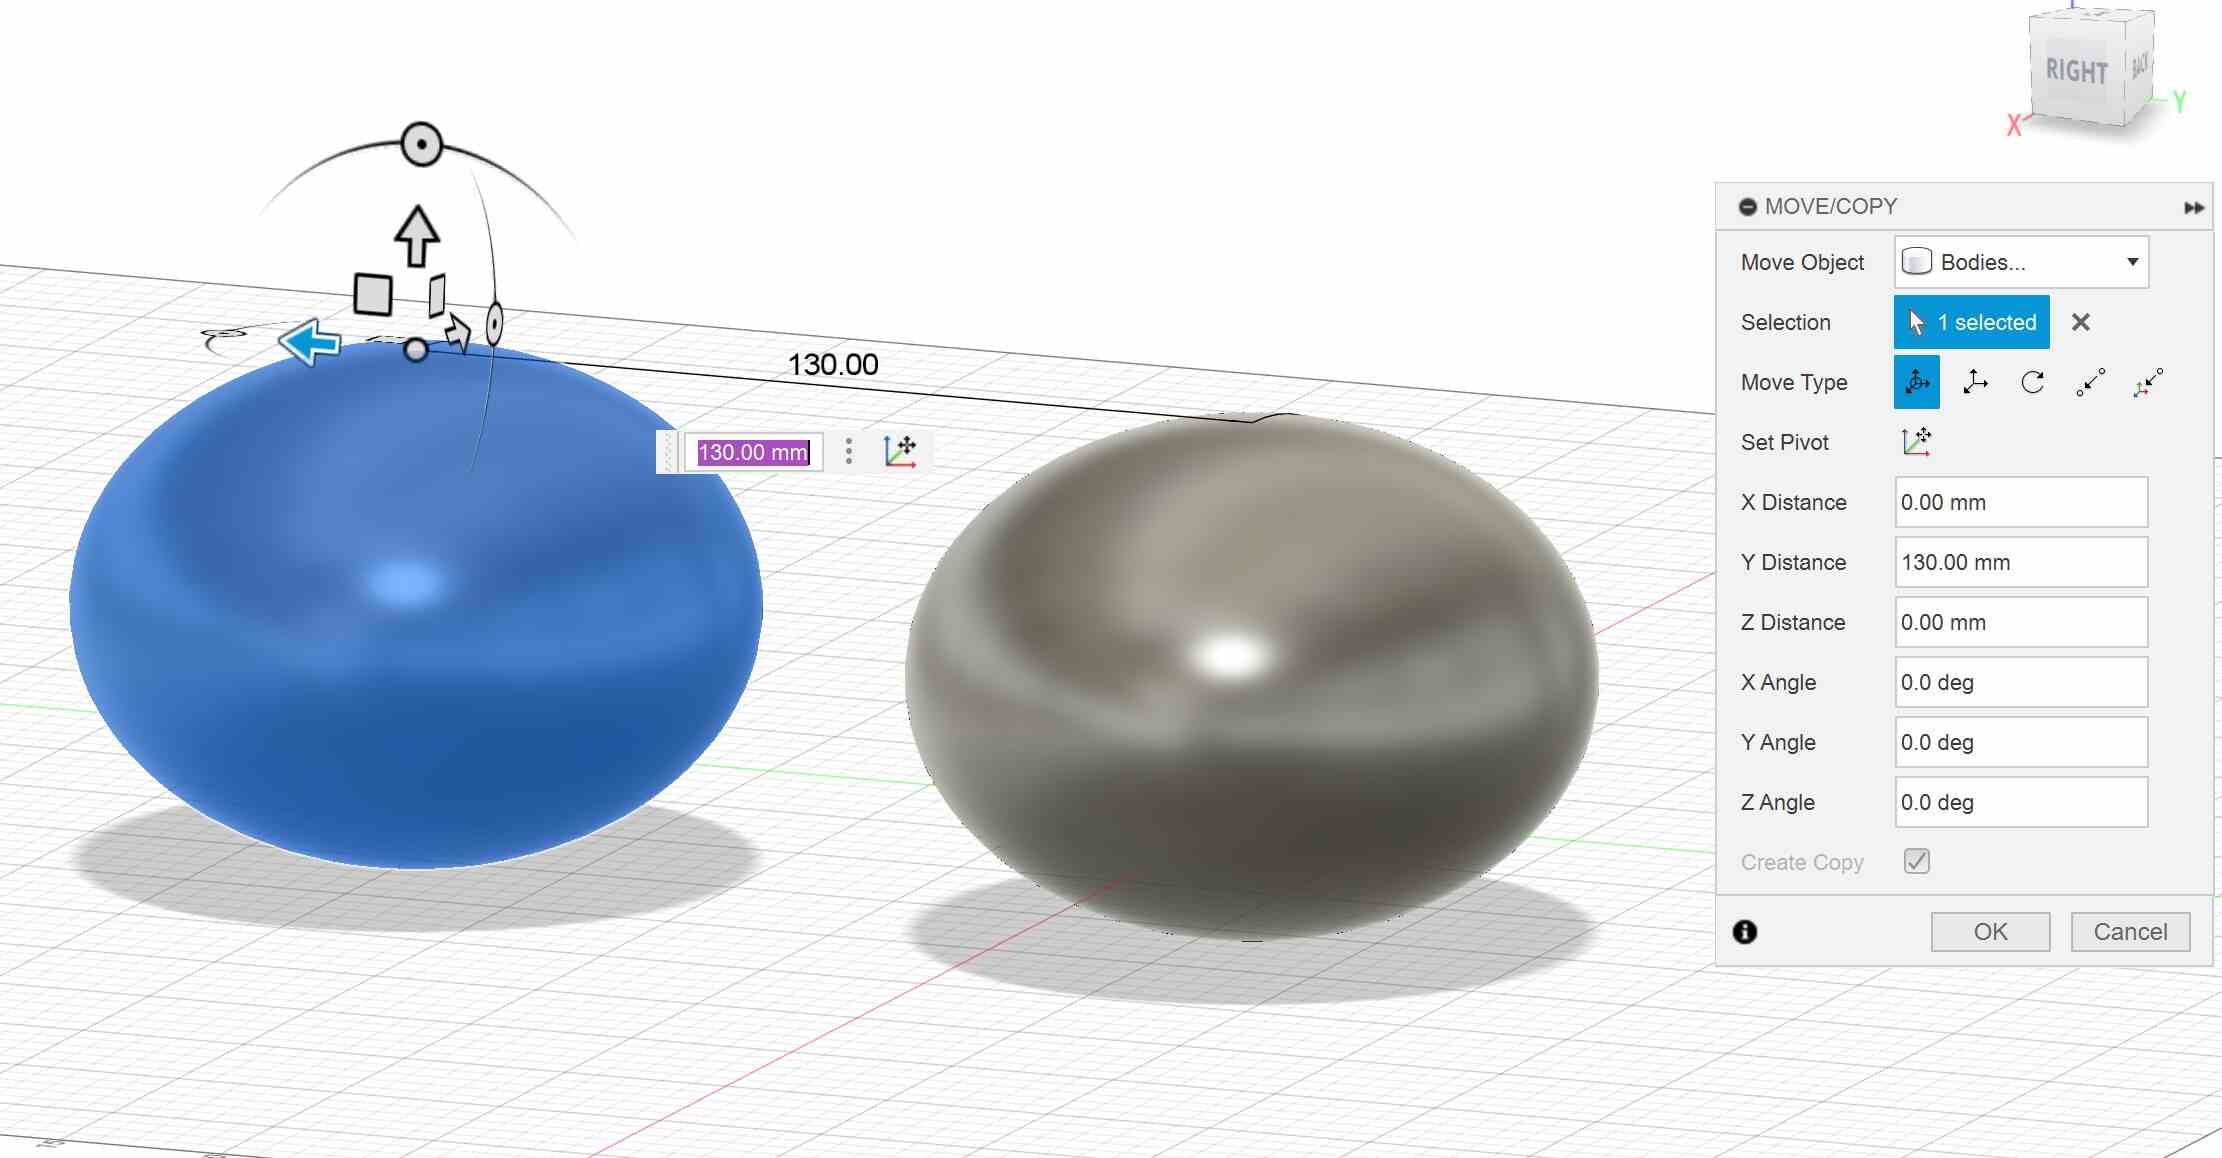
Copy a Body
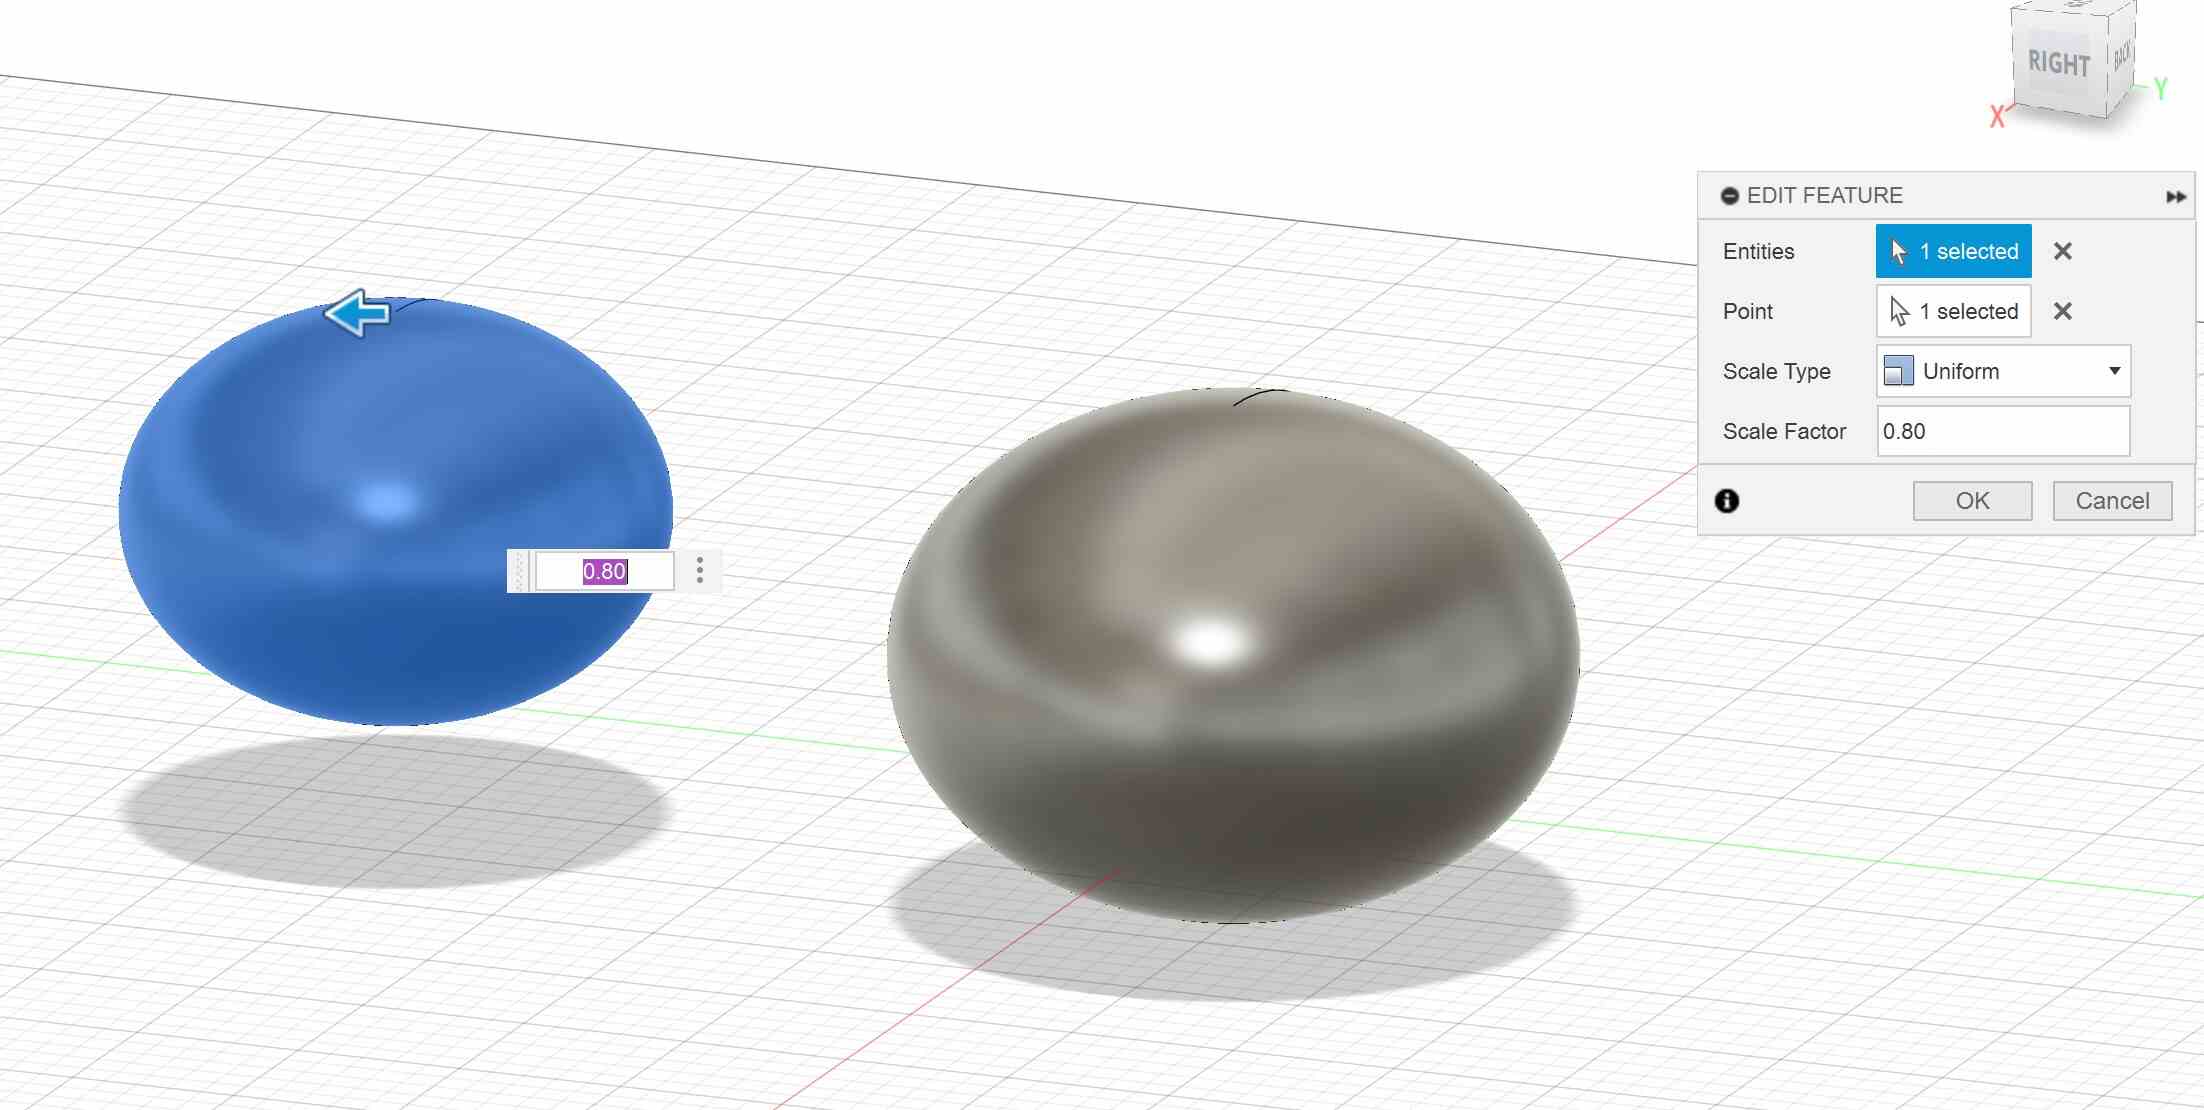
Scale a Body
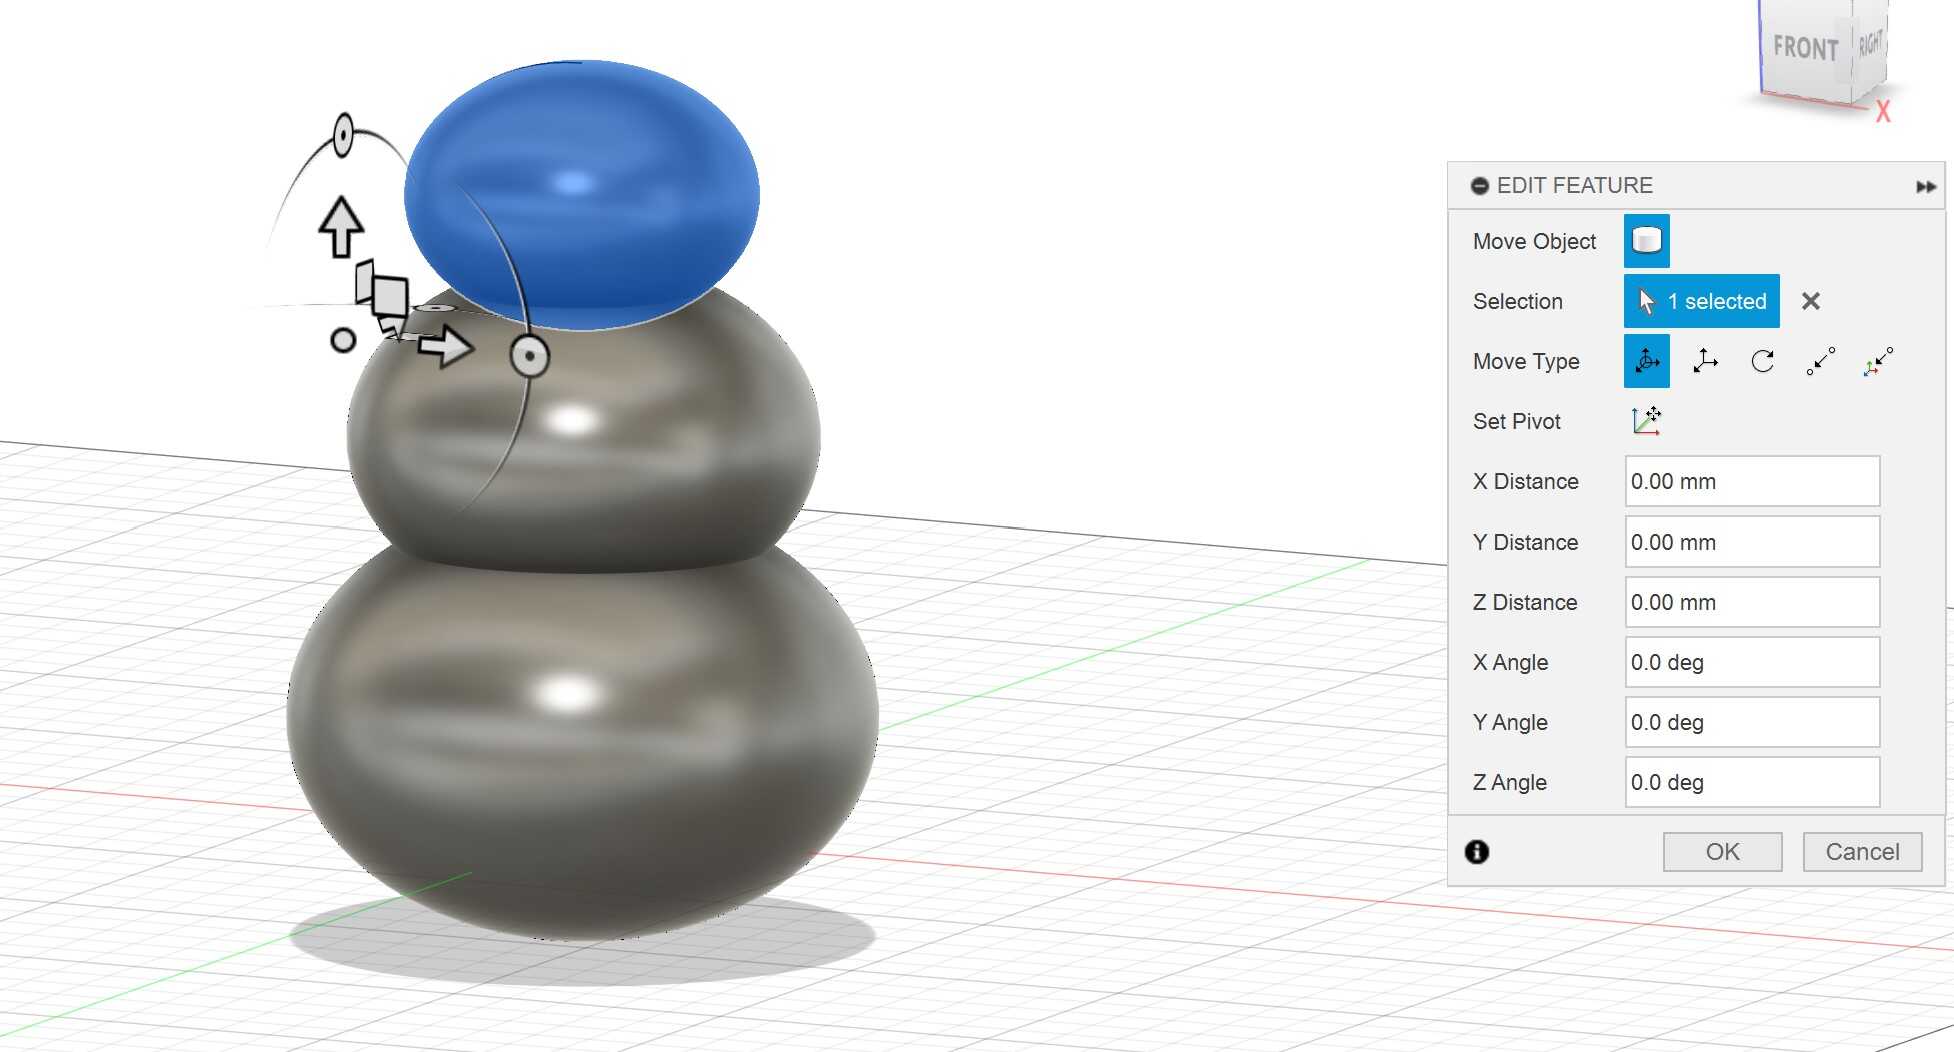
Basic Body Shape
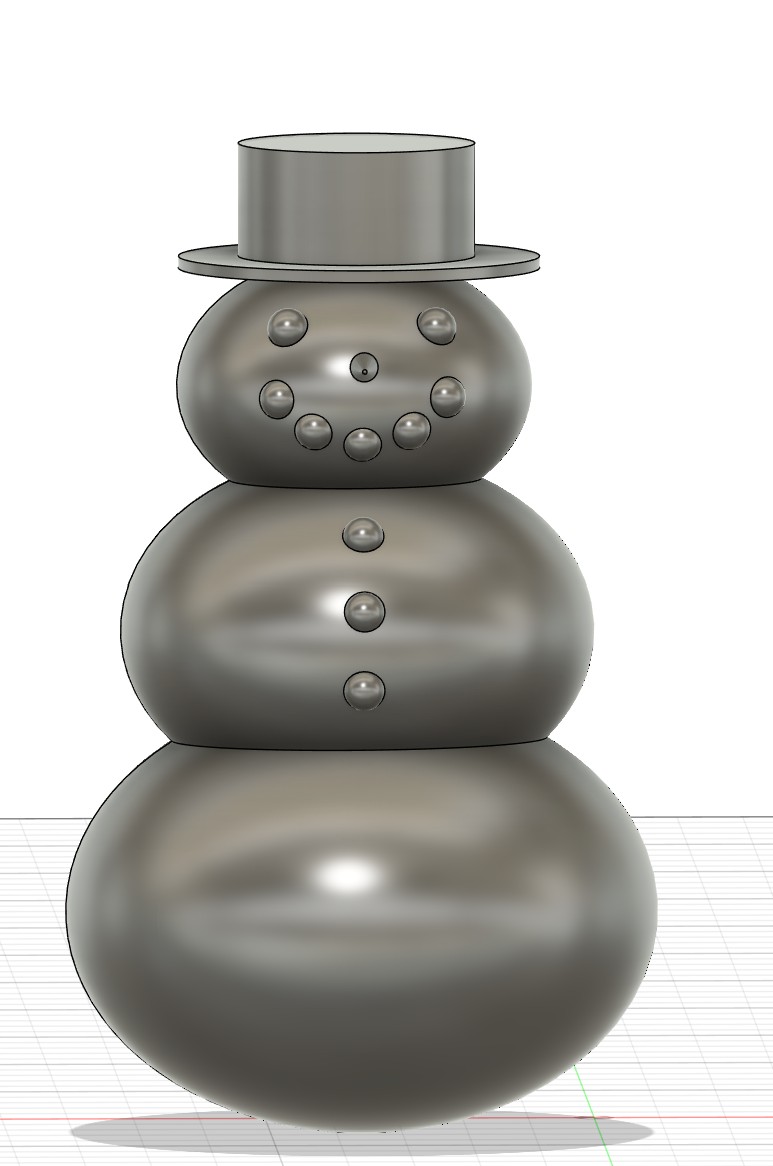
The next step was to copy the snowball twice and scale them down. For this, I started with the Move/Copy tool (Modify -> Move/Copy) to copy the original snowball twice. For the Move Object option, I selected Bodies and then selected the original snowball. At the bottom of the Move/Copy window, make sure to check the “Create Copy” box, otherwise it will just move the object. I then used the arrows so that the snowballs weren’t right on top of each other. I repeated this process so that I had three snowballs in total. I then used the Scale tool (Modify -> Scale) to make the other snowballs smaller. I selected the snowball I wanted to shrink and then entered the scale factor. The scale factor is a percentage of the original shape. I did 0.8 for the middle snowball, which means it is 80% the size of the bottom snowball. For the top snowball I did 0.6, or 60%. I then used the Move/Copy tool again to stack the snowballs on top of each other to create the body of the snowman.
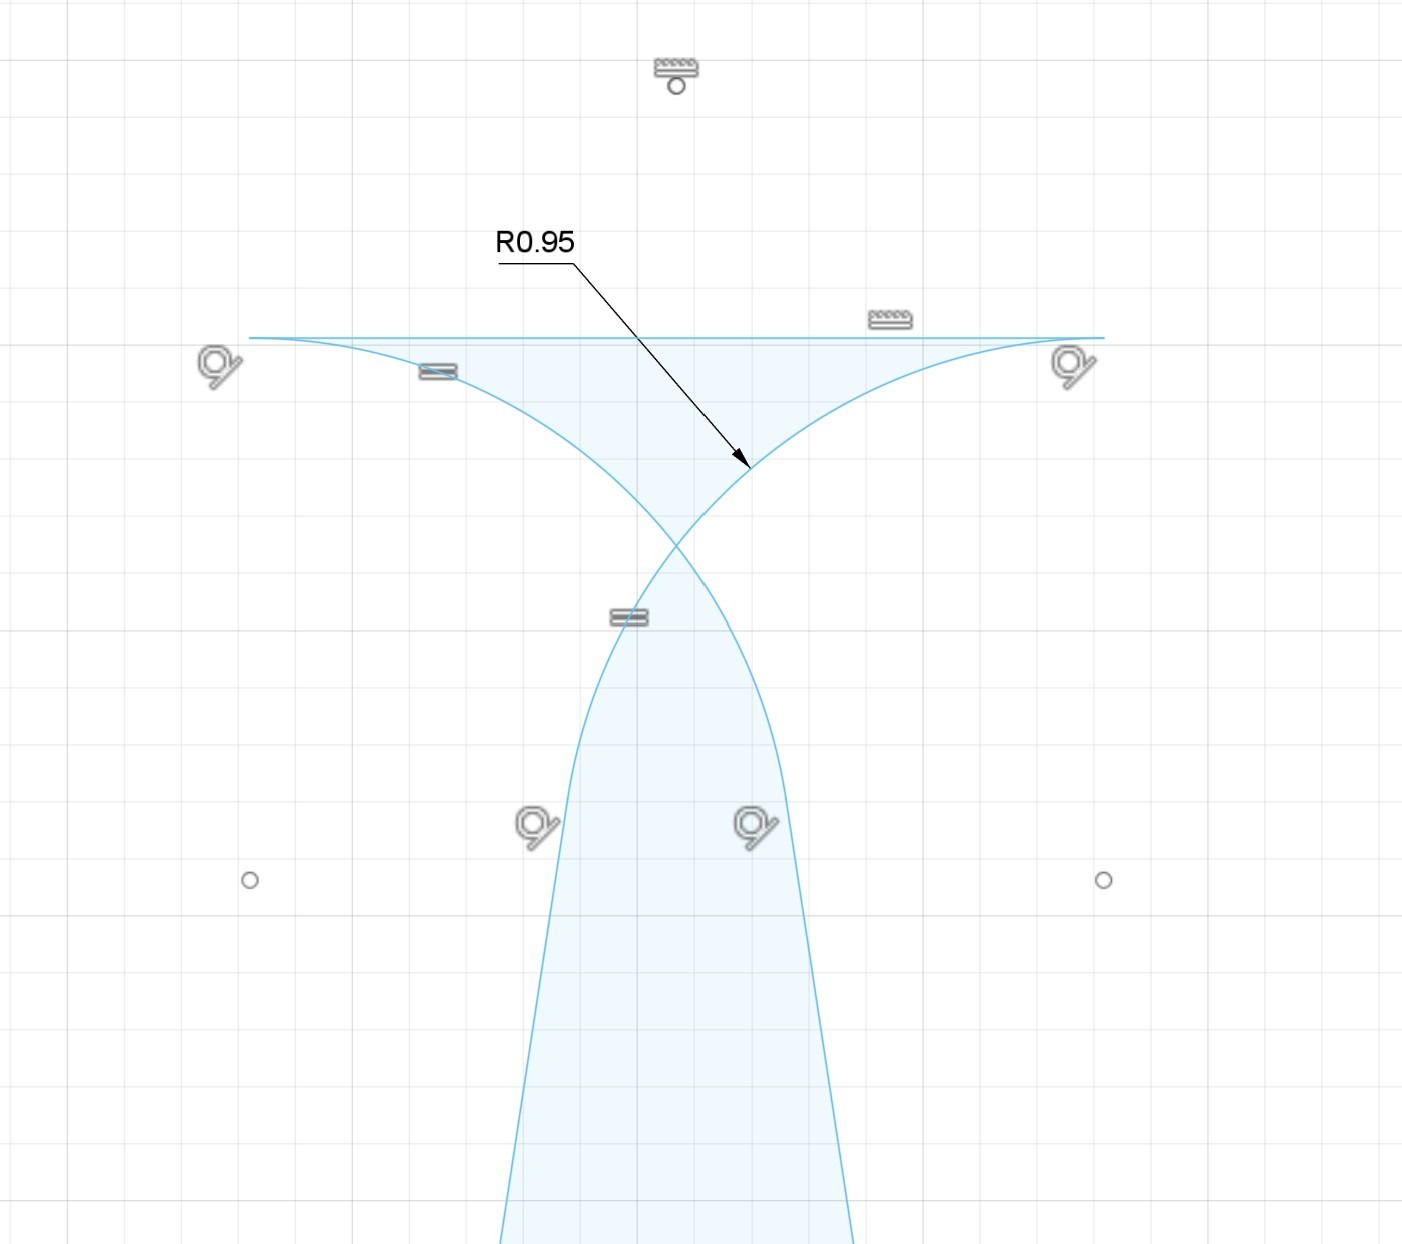
Fillet Tool
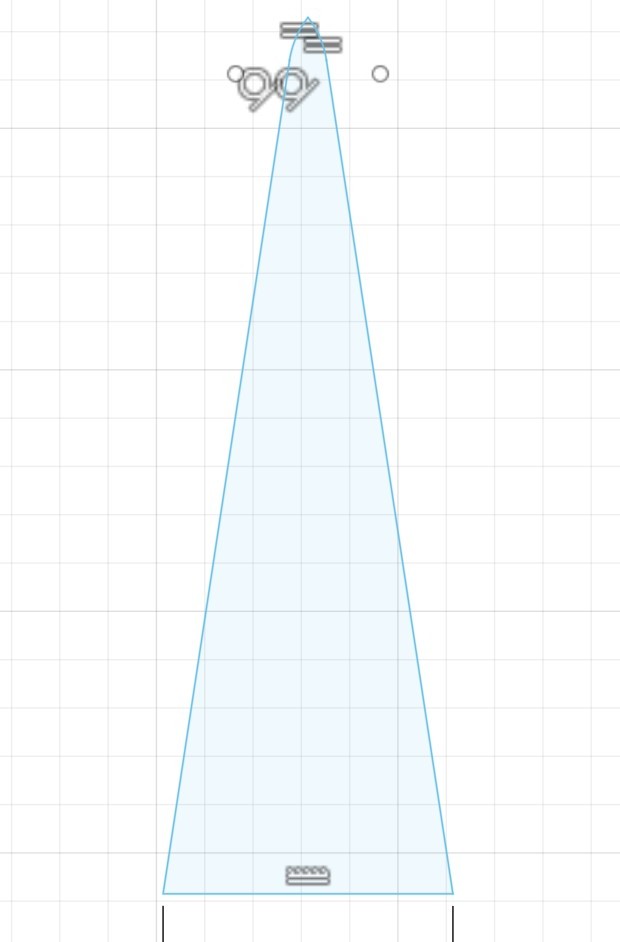
Sketch of Nose
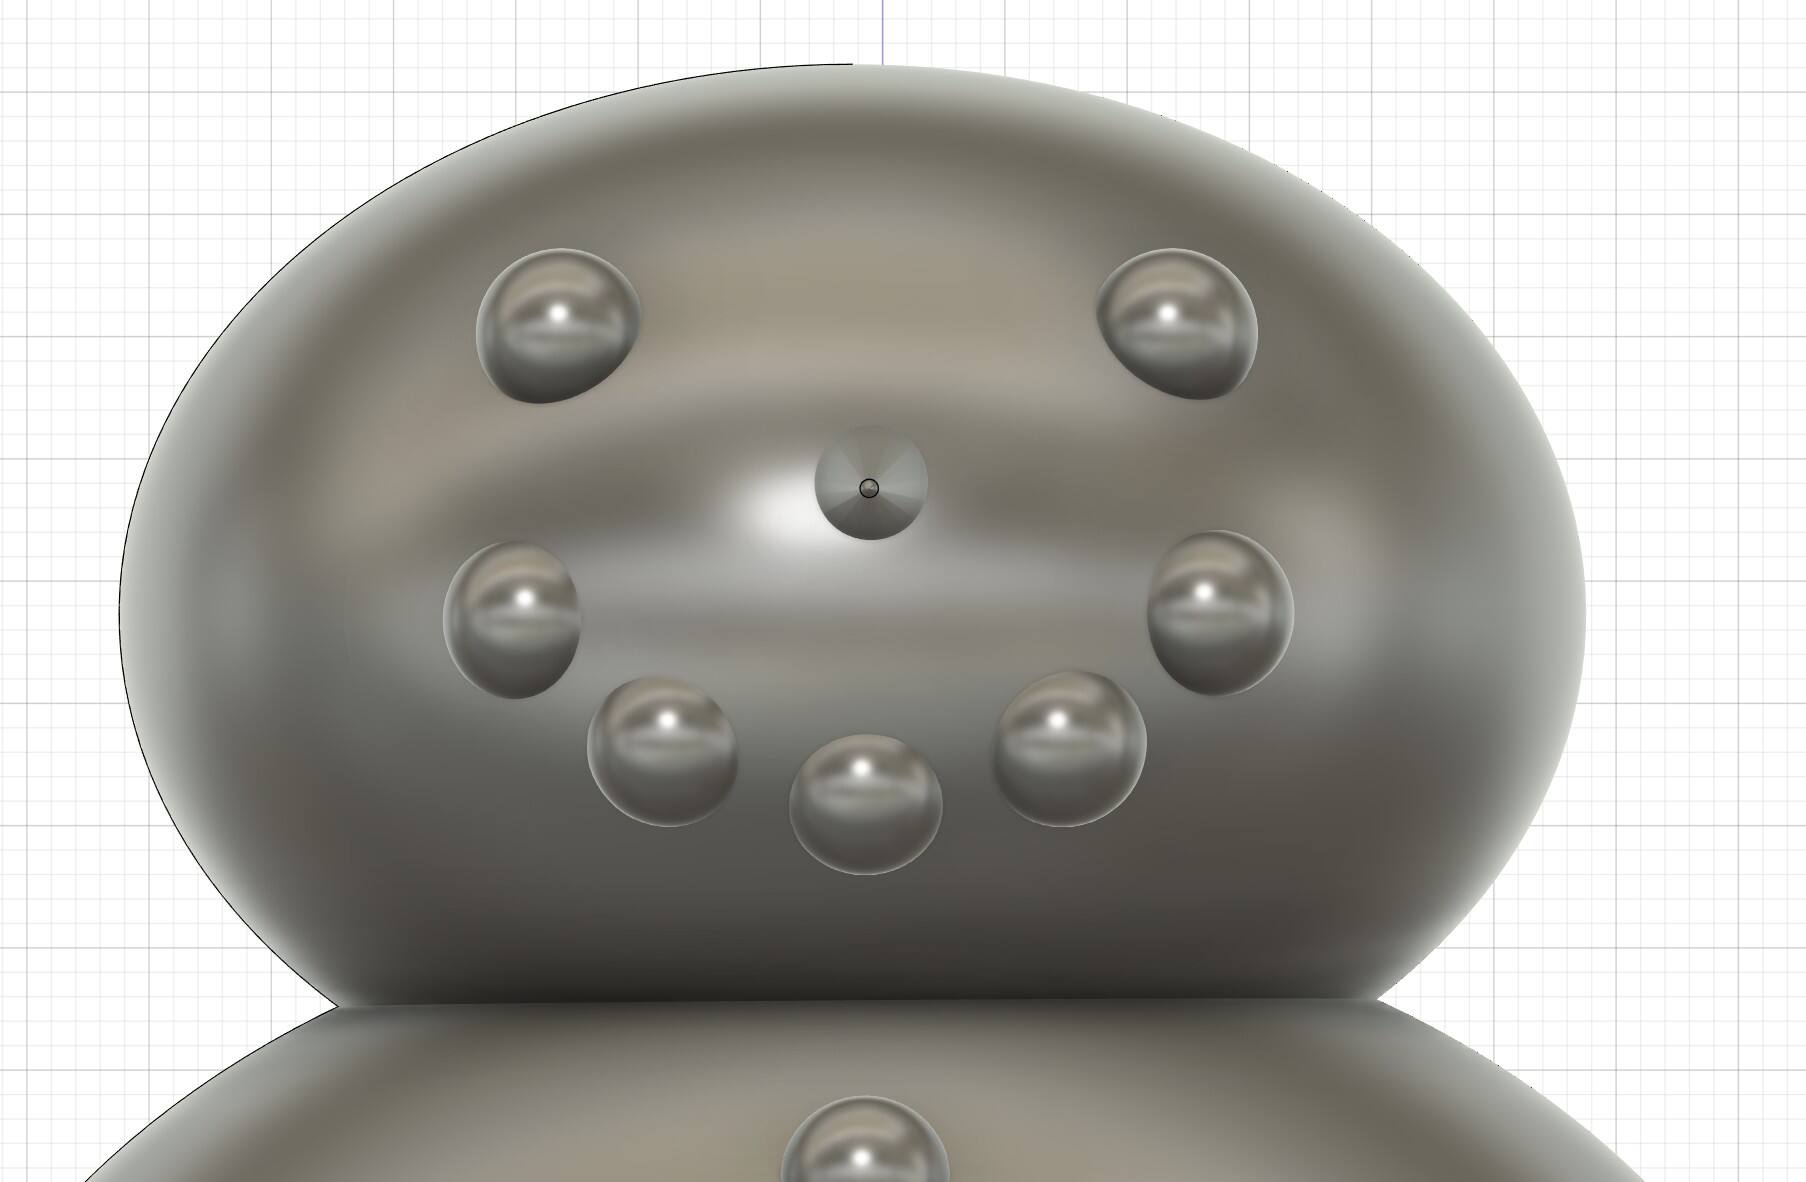
The Completed Face
Next up was the face. I started by making a small sphere using the same method as the snowballs, except starting with a circle instead of an ellipse. I then used the Move/Copy tool to copy the sphere to create the eyes, mouth, and buttons. The spheres were partially inside the body to give the effect of rocks being pushed into a snowball.
The carrot nose was a bit trickier. I started by making a sketch of a triangle and cutting off the tip of it using another line and the trim tool. I then used the fillet tool (Modify -> Fillet) to curve the narrow end into a point. To make them curve opposite each other, I selected both corners of the small top line before curving them inwards. After finishing the sketch, I used the revolve tool by selecting one of the long edges as the axis to create a cone. As with the stones, I then used the Move/Copy tool to place the nose on the face.
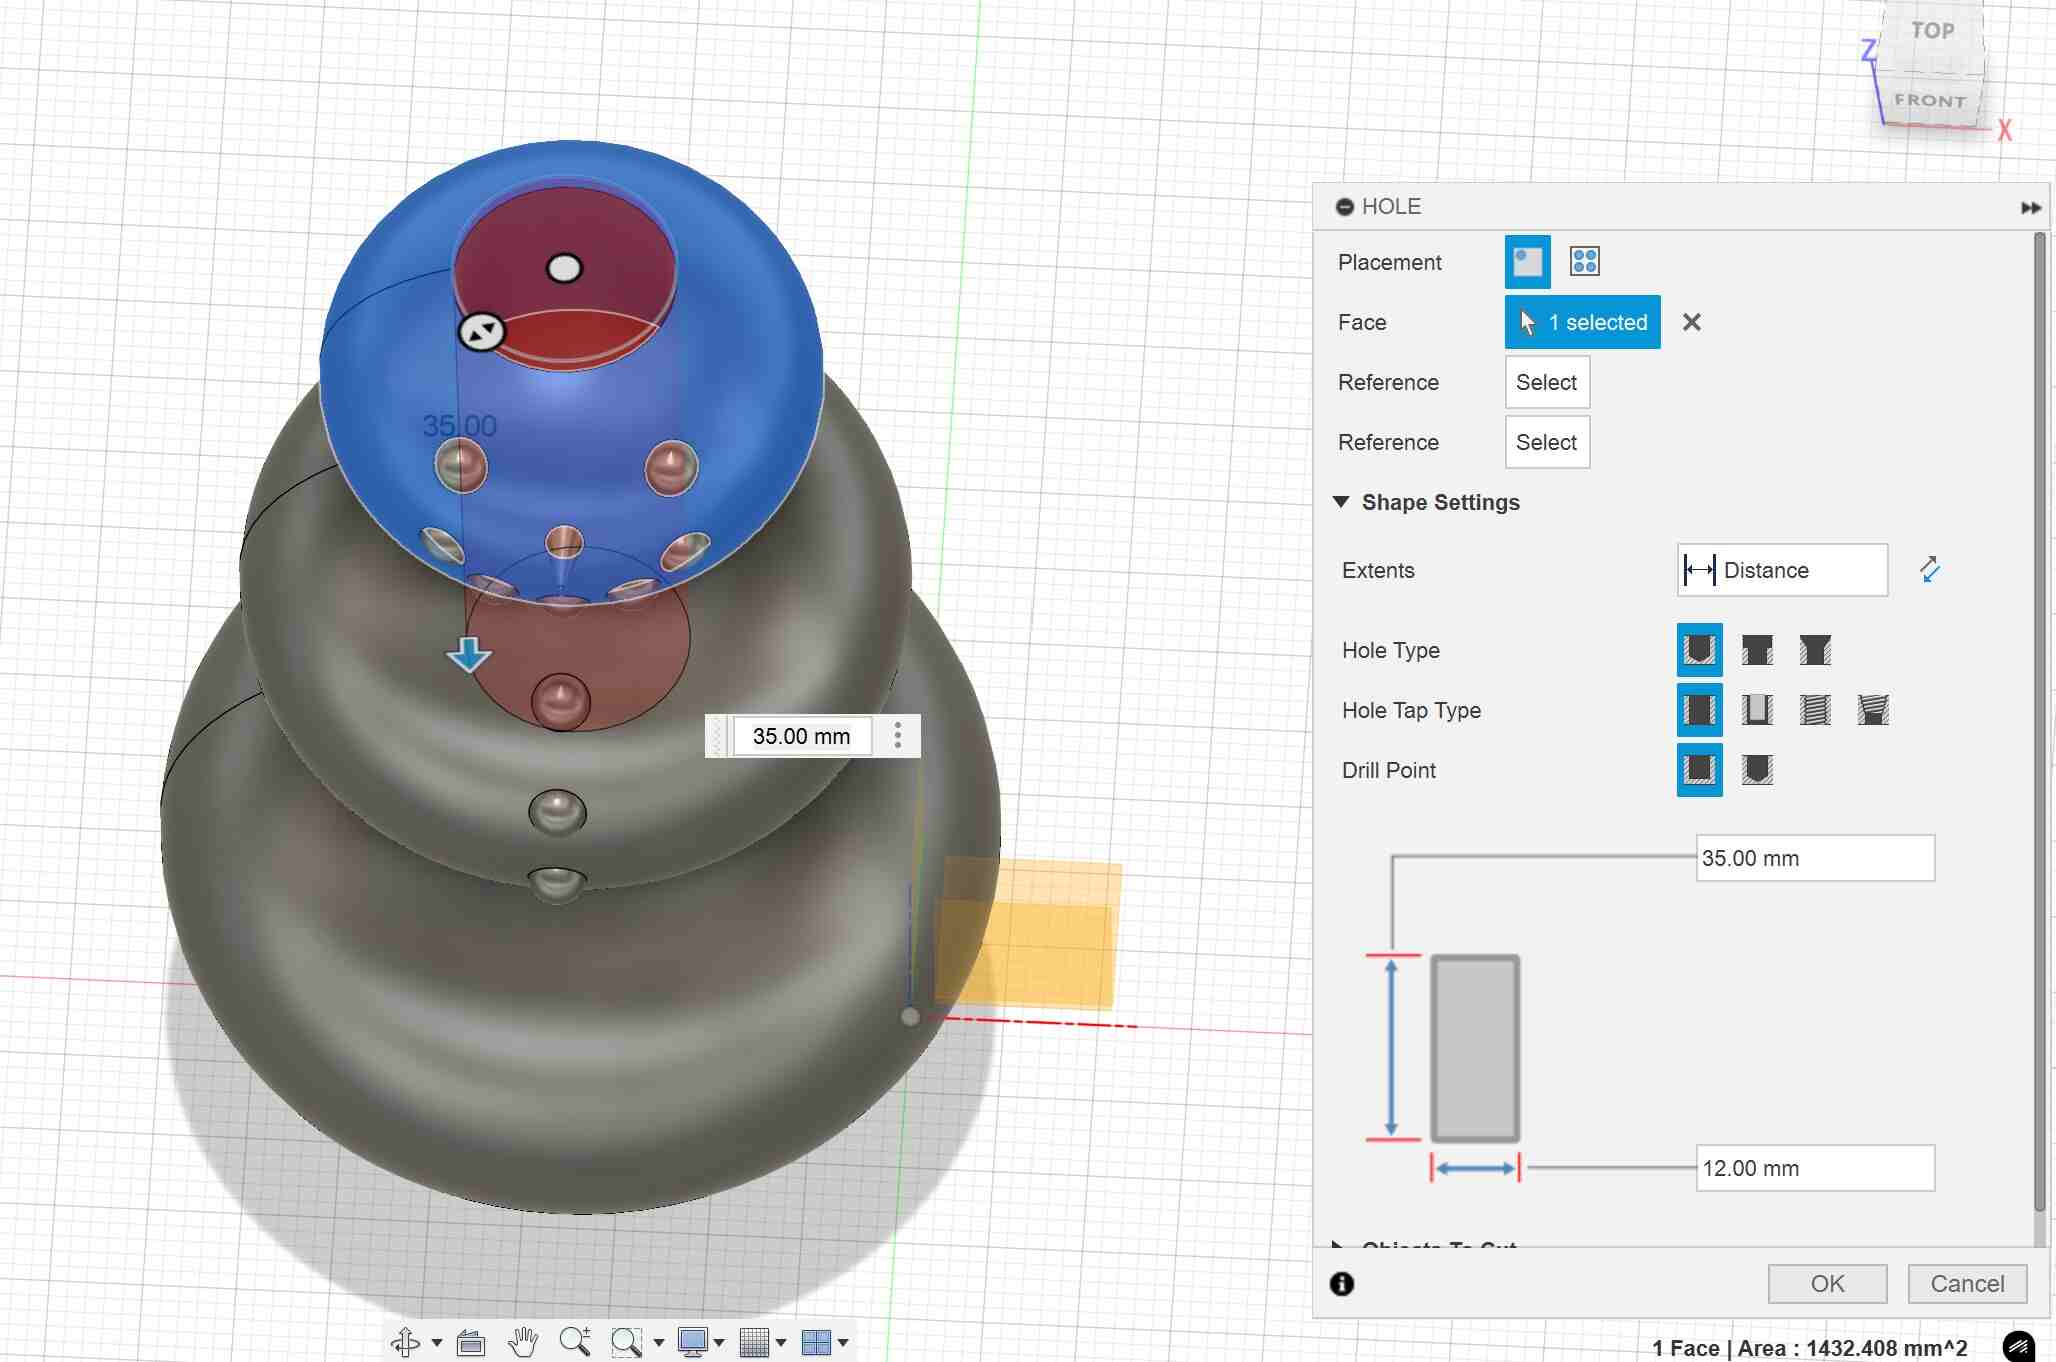
Adding the Hole
Top Hat
Half Circle To Put Inside the Snowman
The snowman needs a hollow inside for the beads to make it a shaky egg. So before adding the hat, I had to create a hole in the middle of the snowman. Conveniently, there is a hole tool (Create -> Hole) that I could use. There are different kinds of holes you can make, but I selected the options to just get a straight, smooth shaft with a flat bottom. You can change these settings as well as width and depth in the Hole menu that pops up when you select the tool.
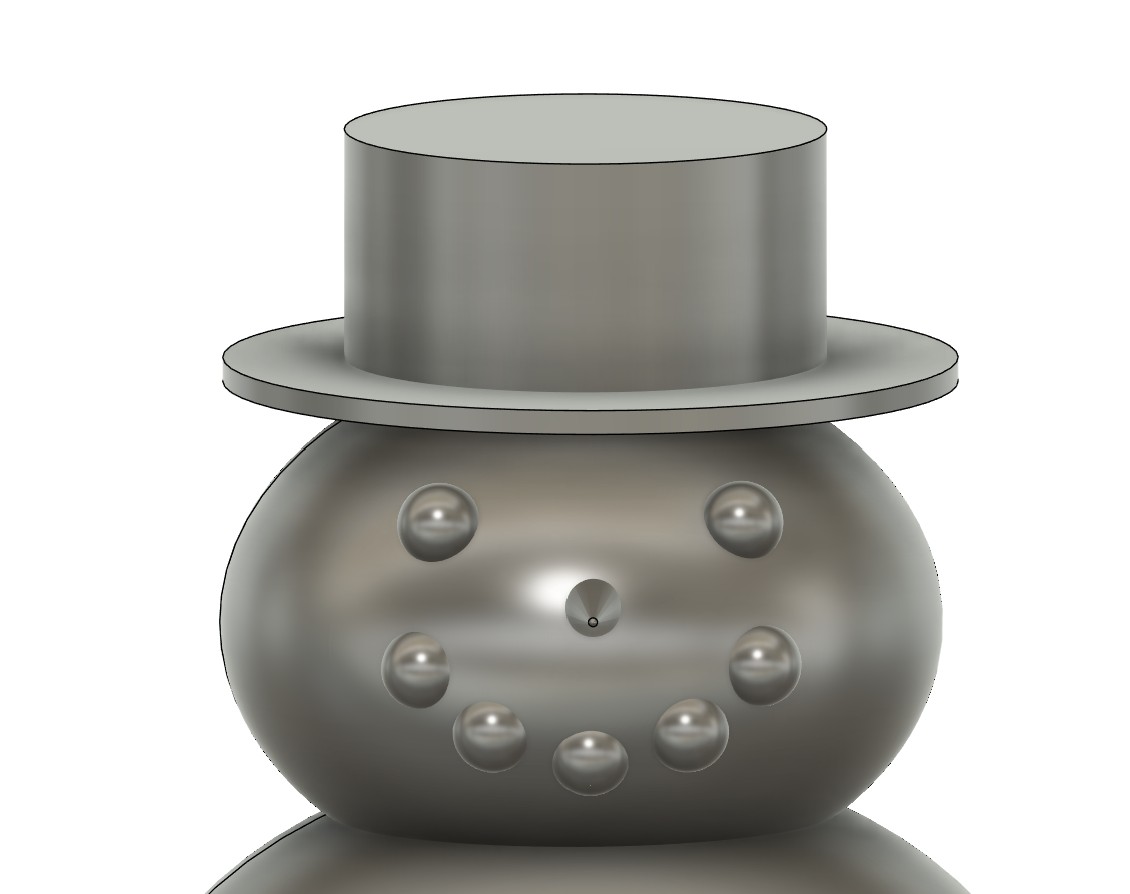
To finish it off, I made a top hat for the snowman. I made two different sketches of circles, one bigger than the other. I then extruded both circles, with the larger circle being much thinner for the brim of that hat. I then used the Move/Copy tool to place each component of the hat on top of the snowman. I then combined the face and hat bodies so there wasn’t any unneeded empty space between the top of the snowman and that hat. This completed the snowman model!
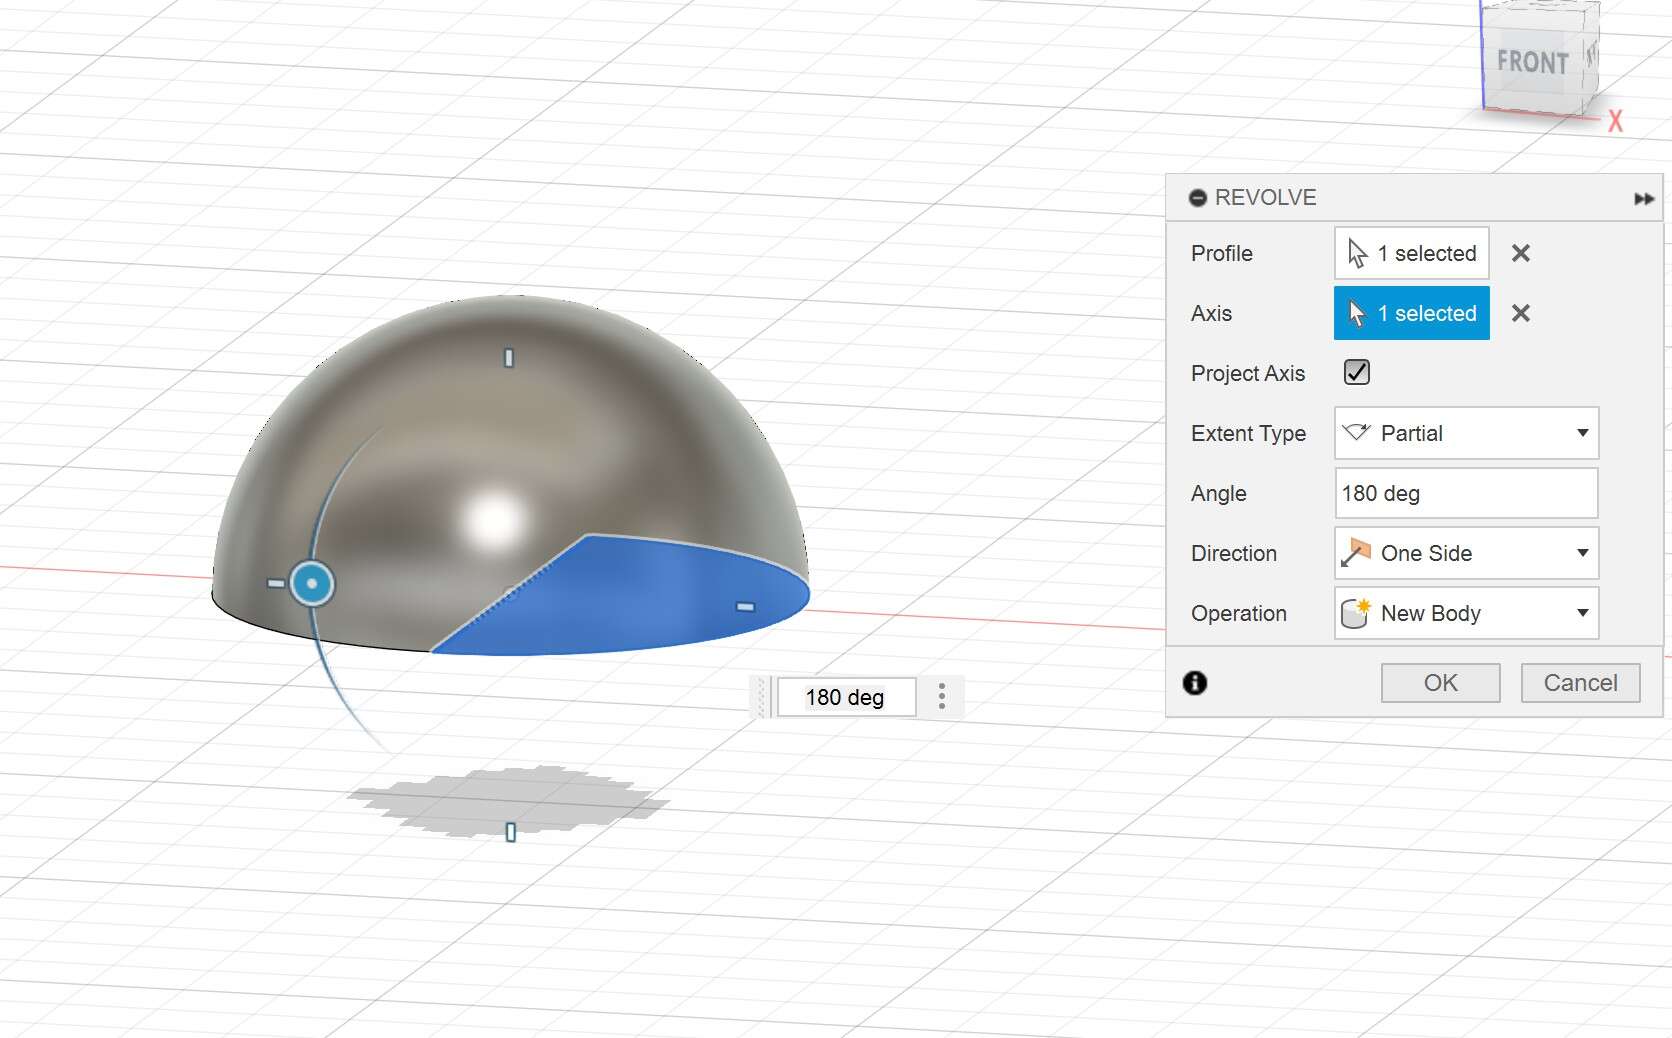
However, I still needed something to put inside the snowman to make noise. For this, I modeled a half sphere. I did this in the same way as the stones except I only revolved it 180 degrees for the half circle. I then used the Move/Copy tool to make 20 in a grid that could be easily printed out. This didn’t end up being enough, but I’ll come back to that later.
Slicing the Model
Exporting from Fusion
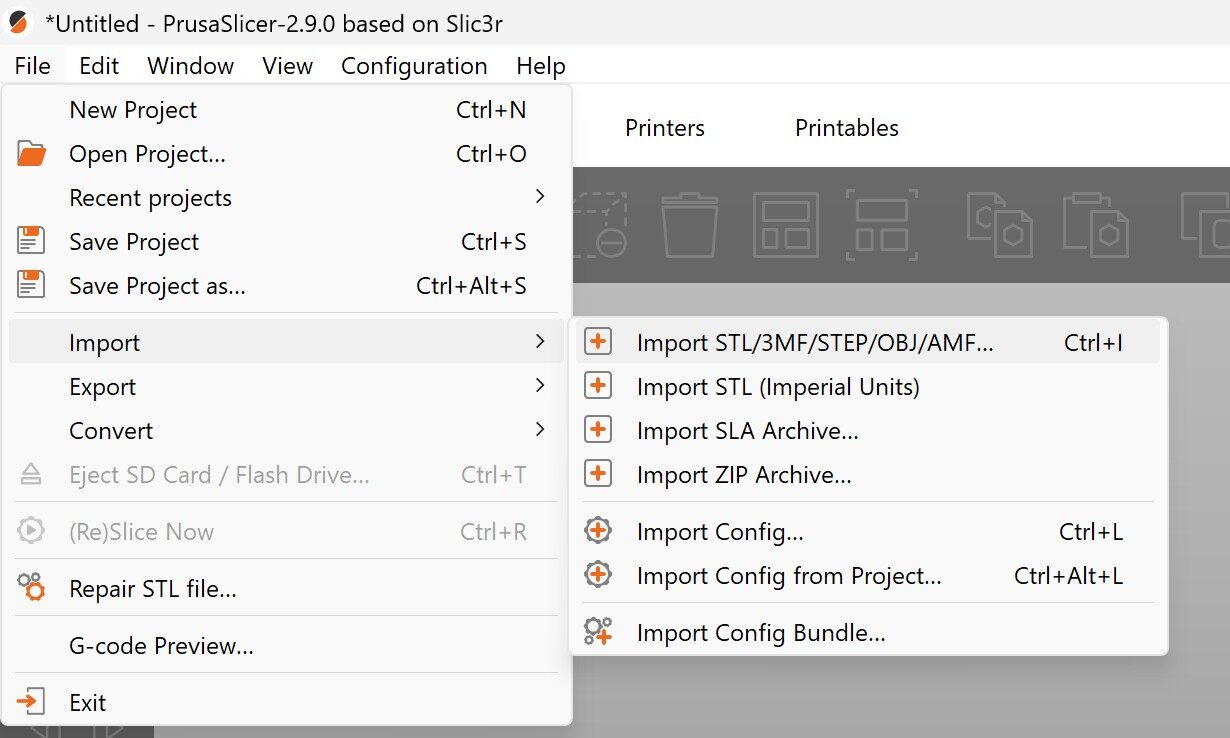
Import an STL file
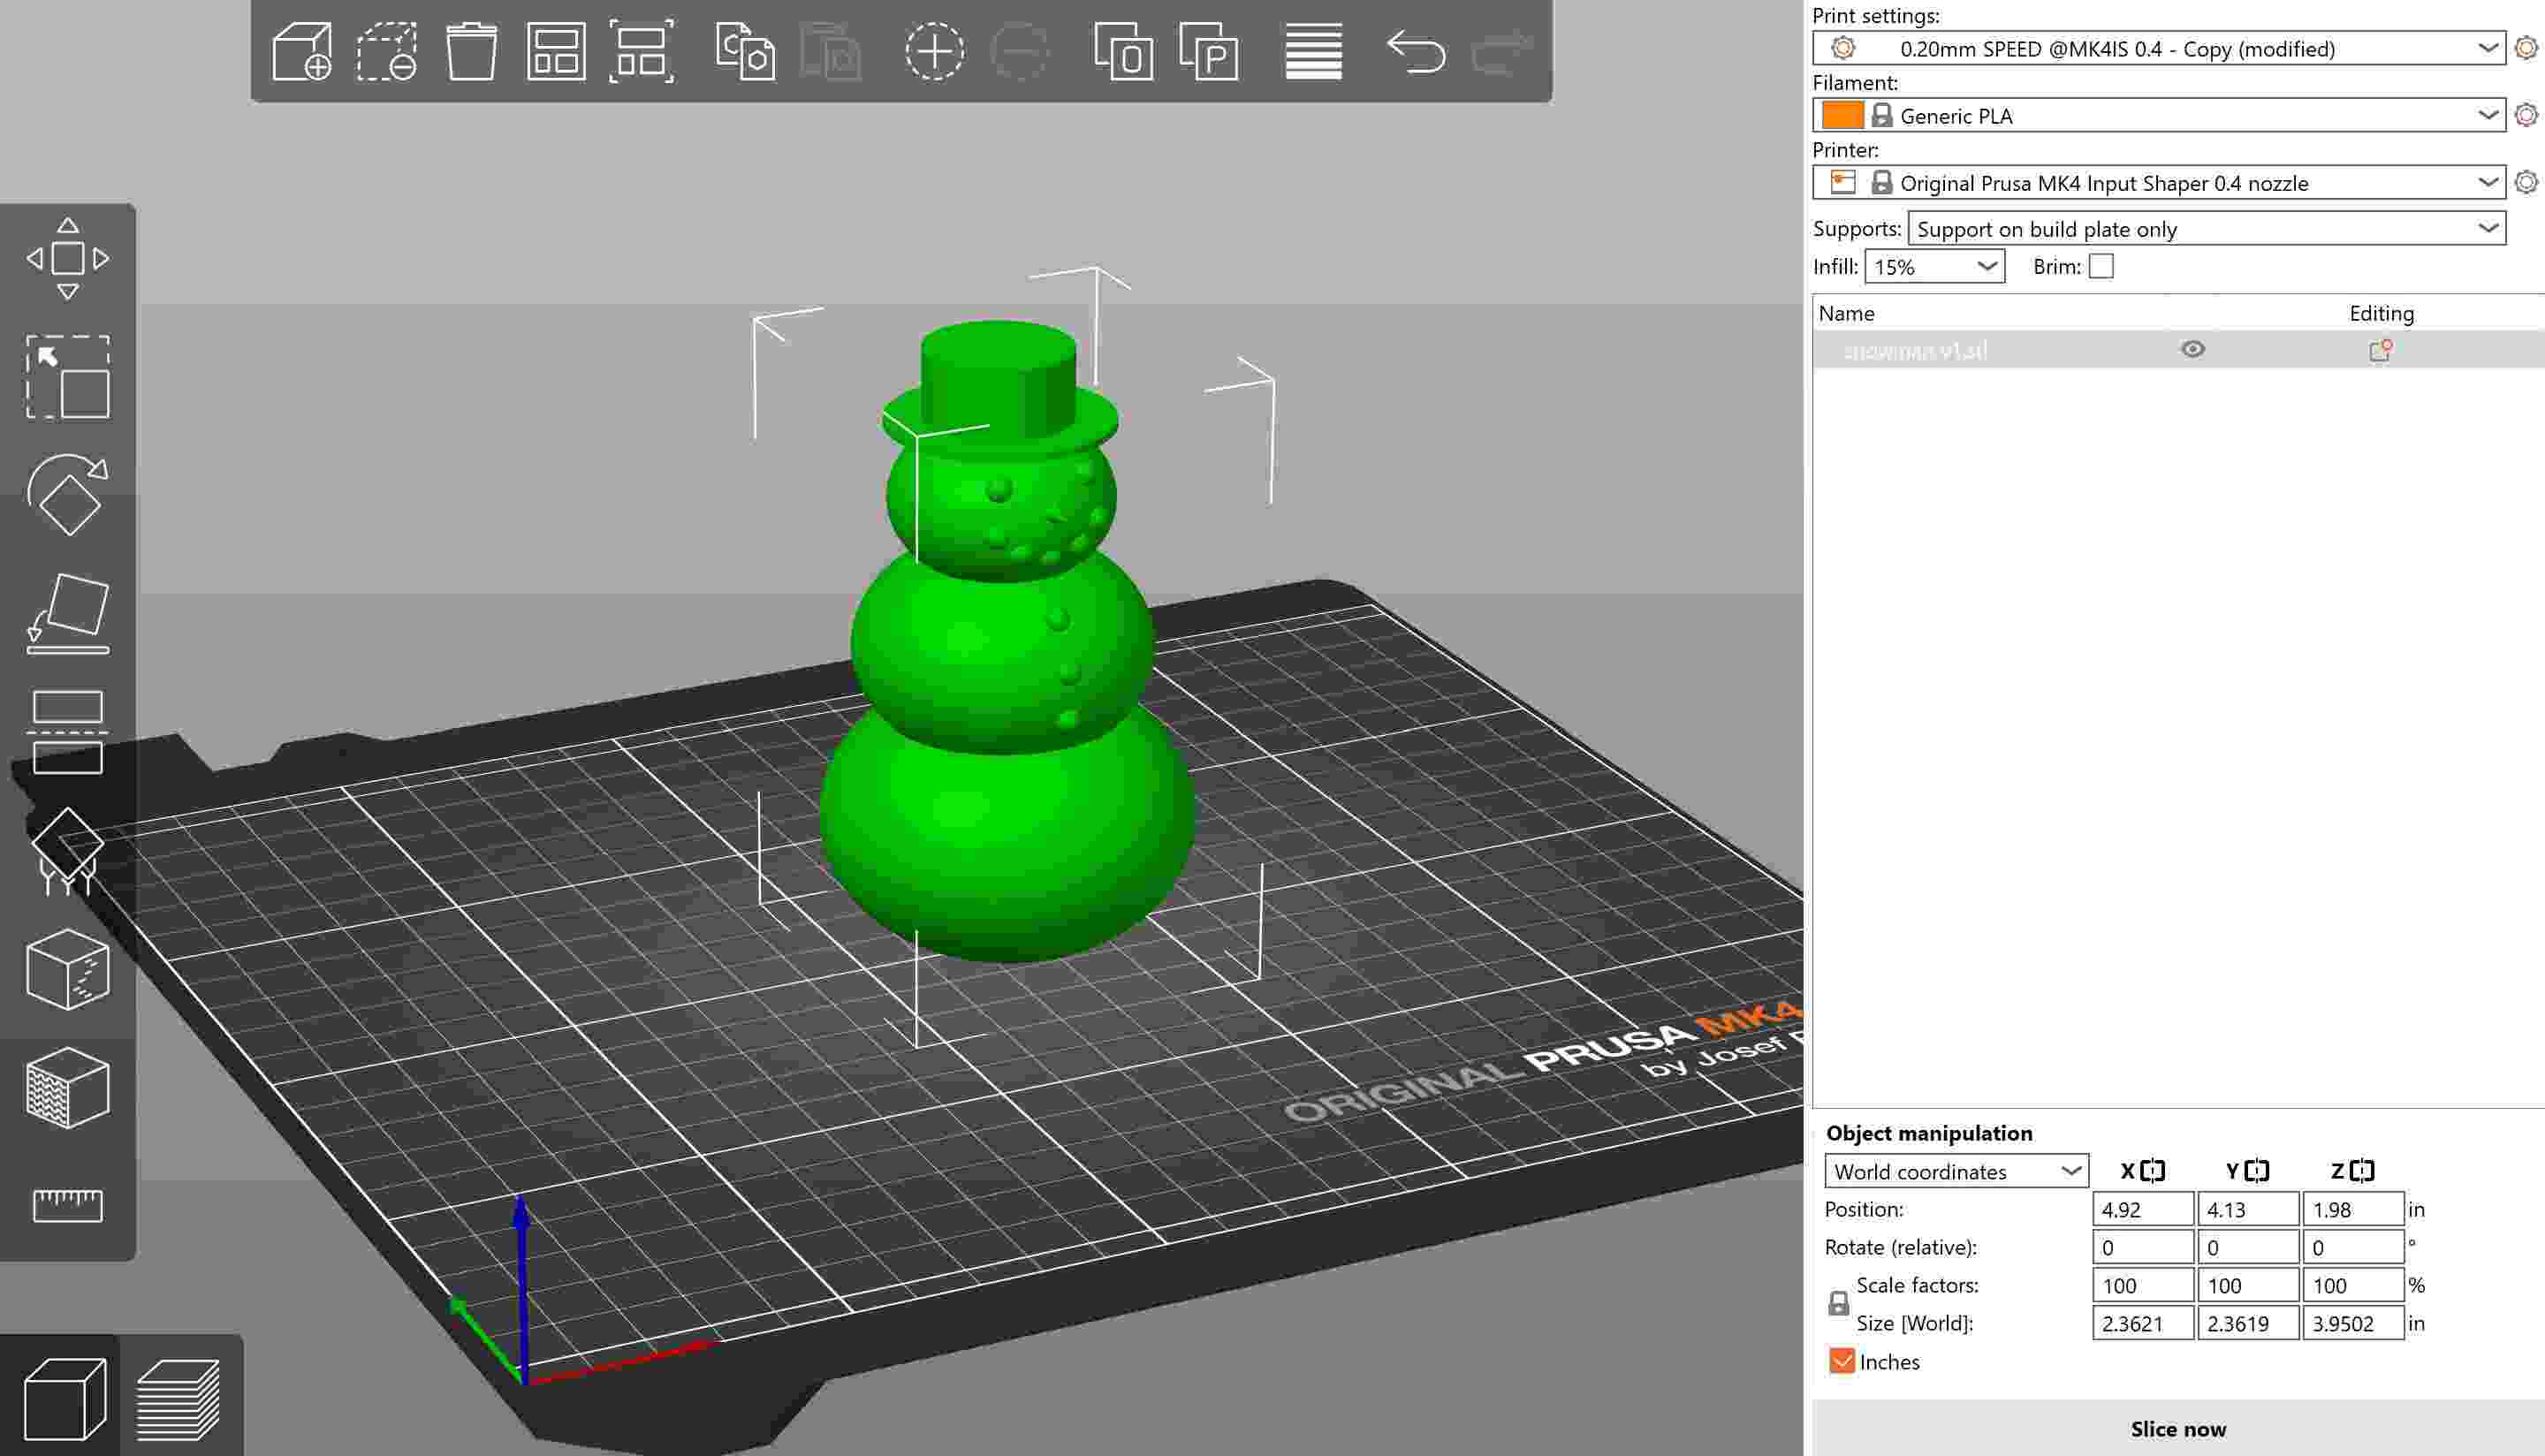
Imported Model
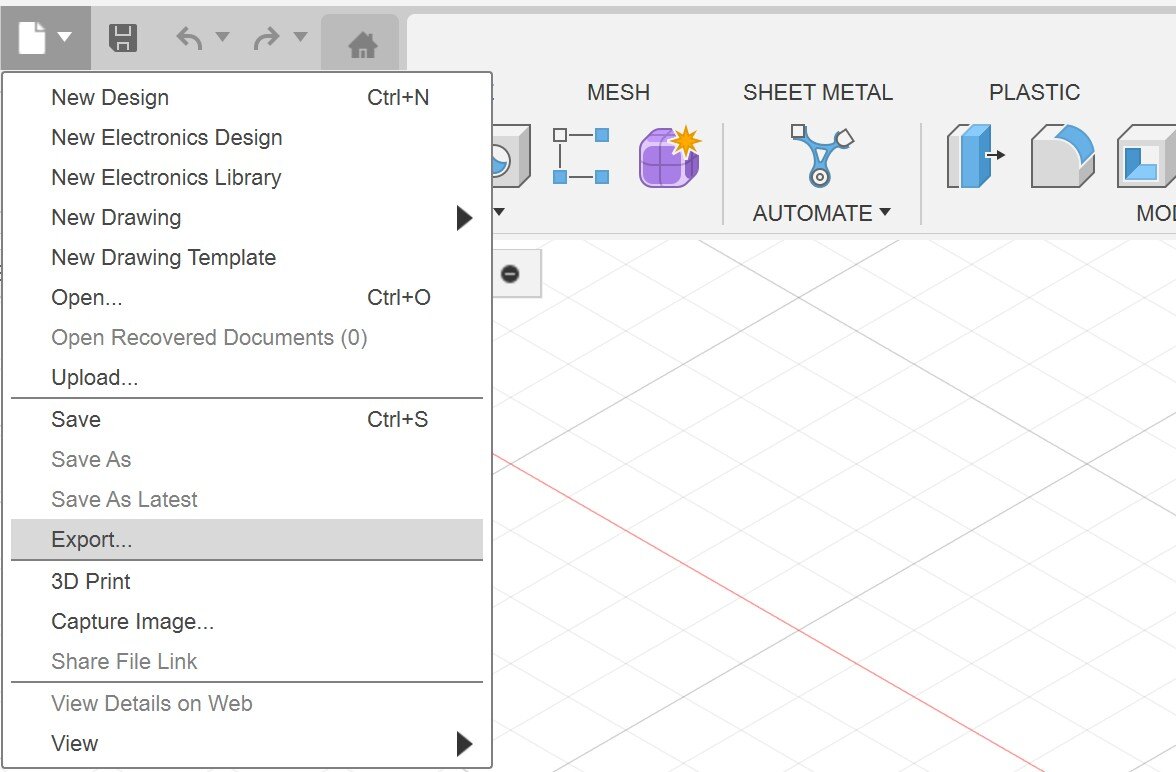
To slice my model, I used the PrusaSlicer software. I exported the file from Autodesk Fusion by going to File -> Export and choosing to save it as an STL file. I can then import the file into PrusaSlicer by going to File -> Import -> Add STL/3MF/etc. You are then able to move around and/or scale your model. Using the move tool (top of the sidebar), I moved the snowman so that the bottom of the model was “in” the plate. This was so the snowman would have a flat bottom and stand up easily.
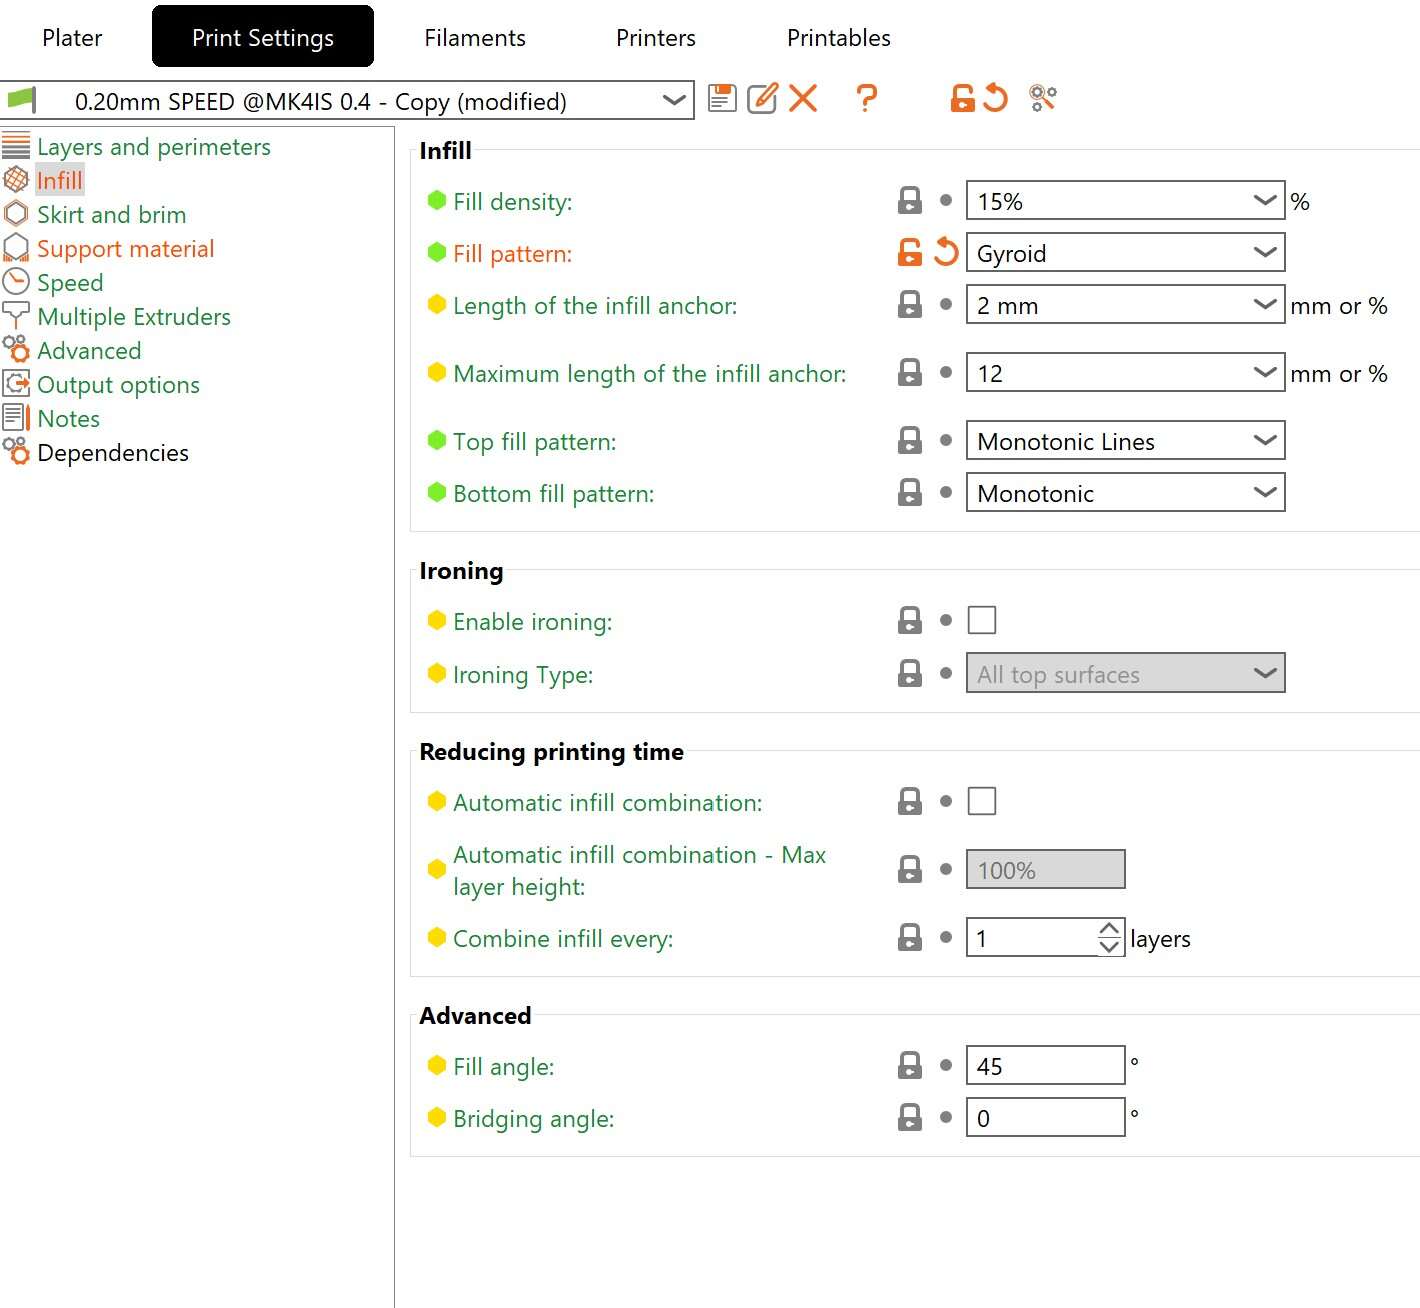
Infill Settings
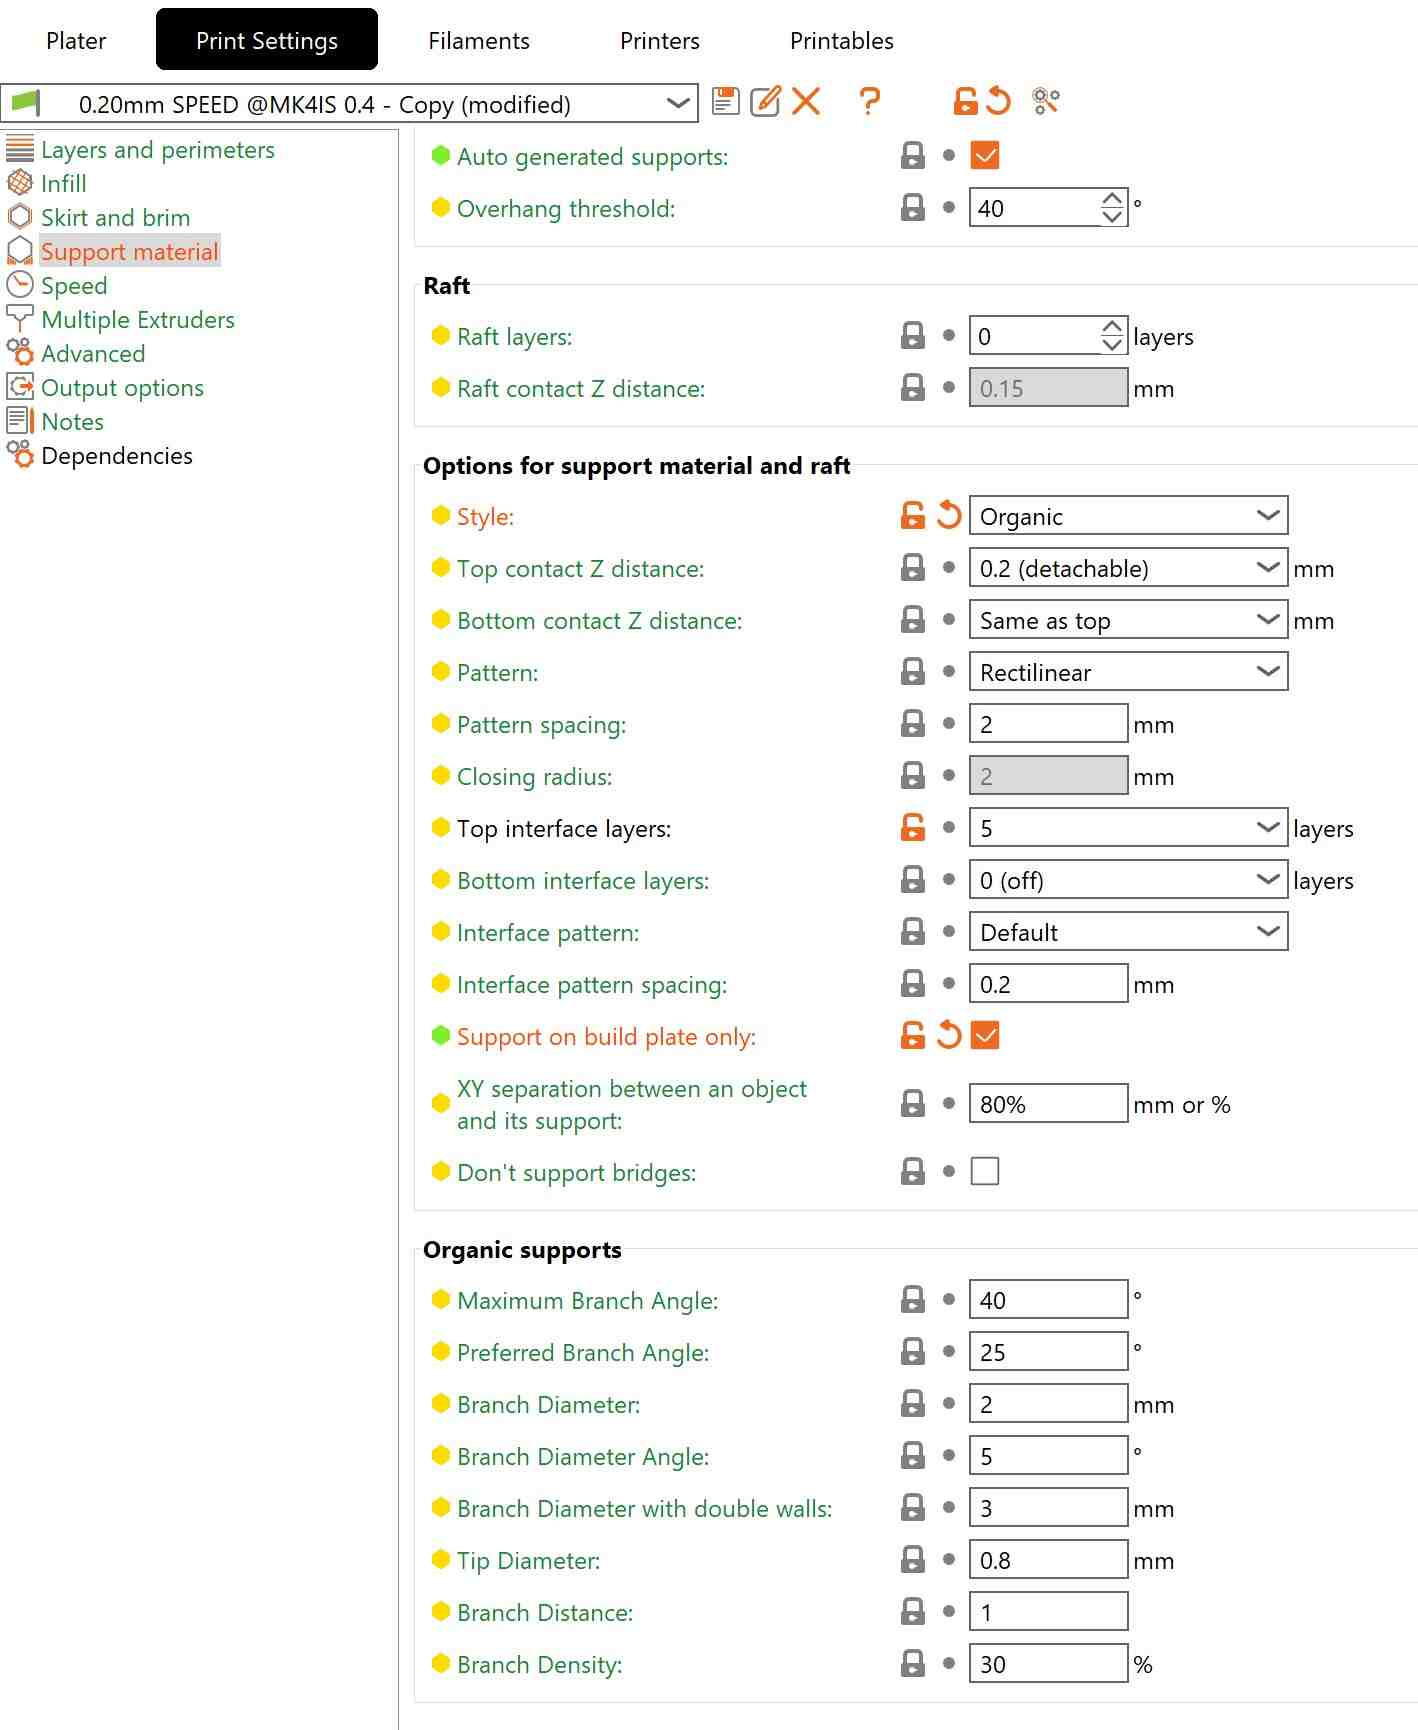
Support Settings
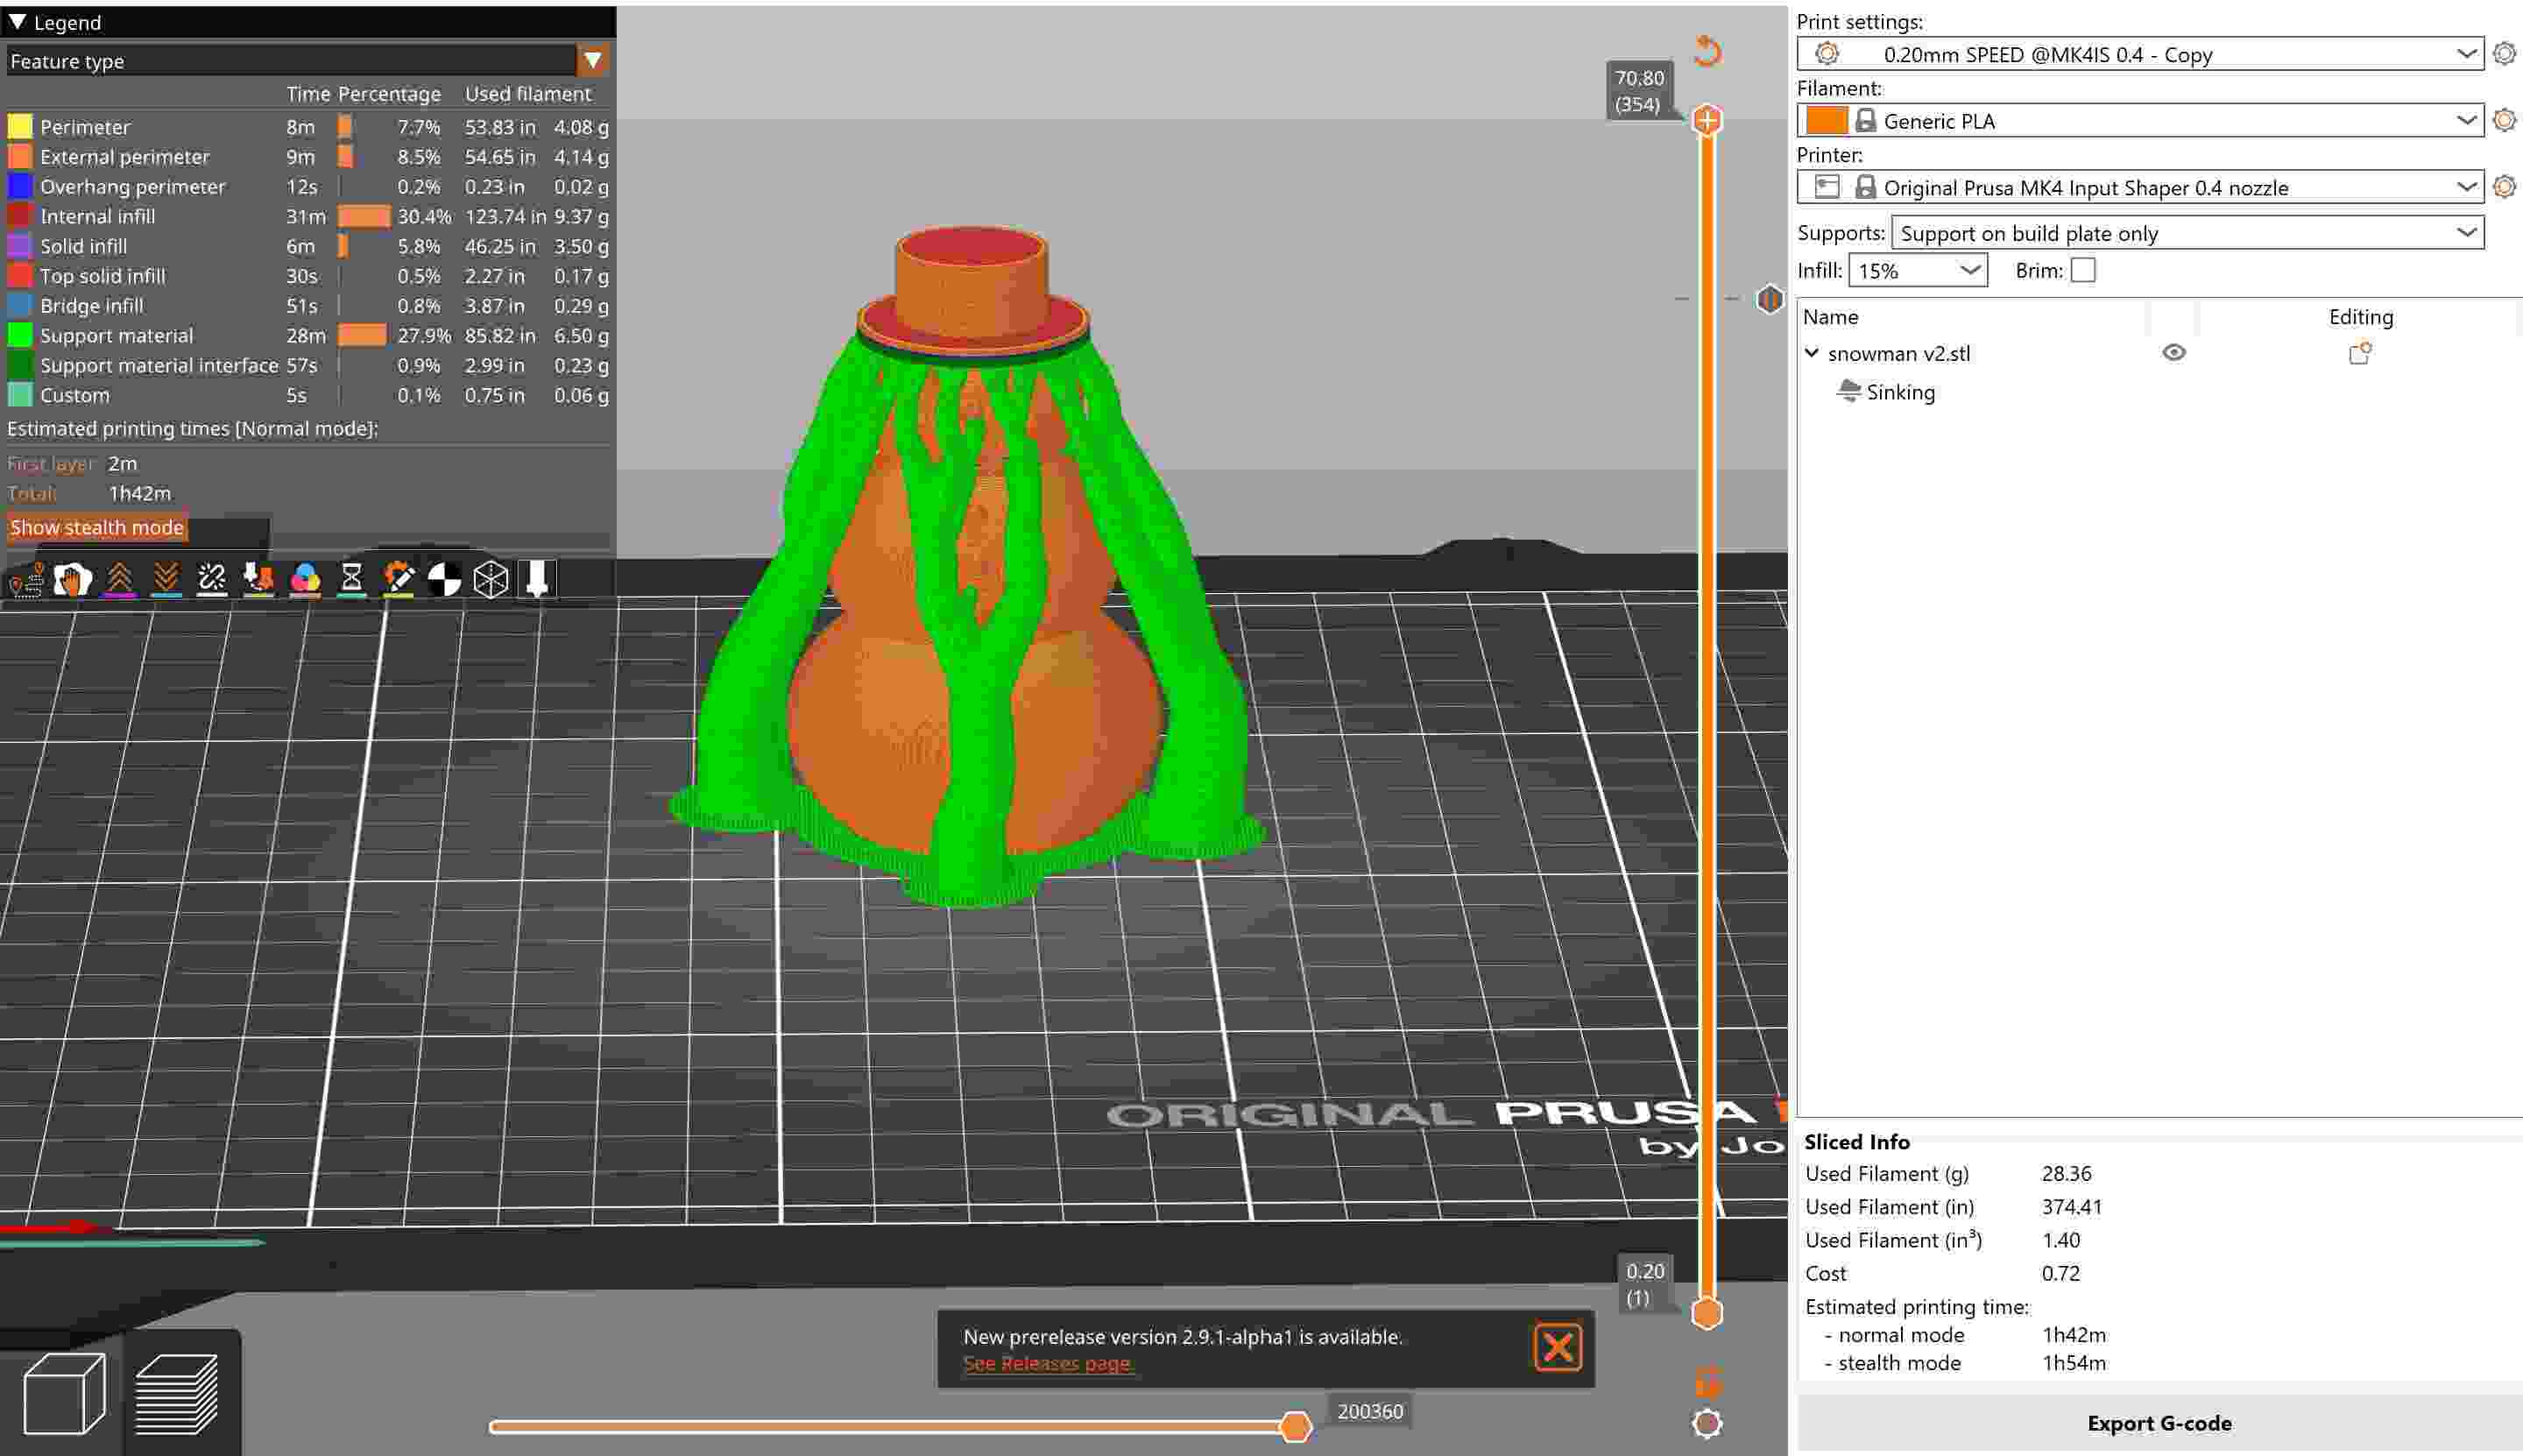
Next up is changing the print settings. To have more options, you have to be in either normal or advanced mode. The mode can be changed in the top right and is directly above the filament setting. I started with the settings in the right sidebar. I selected the generic PLA option because I was using a PLA filament that was not Prusa branded. I then chose “Support on Build Plate Only” for the support option. I had already had the Prusa MK4 as my default printer because I knew that is what the Wheaton Fab Lab has. I could get more options by hitting the cog icon on the side, choosing Add/Remove Presets, then going to Prusa Research in the window that pops up. I then went to the more detailed settings in the Print Settings window. I did a gyroid infill since my instructor recommended it because it means the printer never has to go through where it has already printed, like with a grid infill. The only thing I needed to support was the brim of the top hat. To reduce the amount of supports connected to the snowman, I used organic supports that only started on the build plate.
Infill Settings
Support Settings
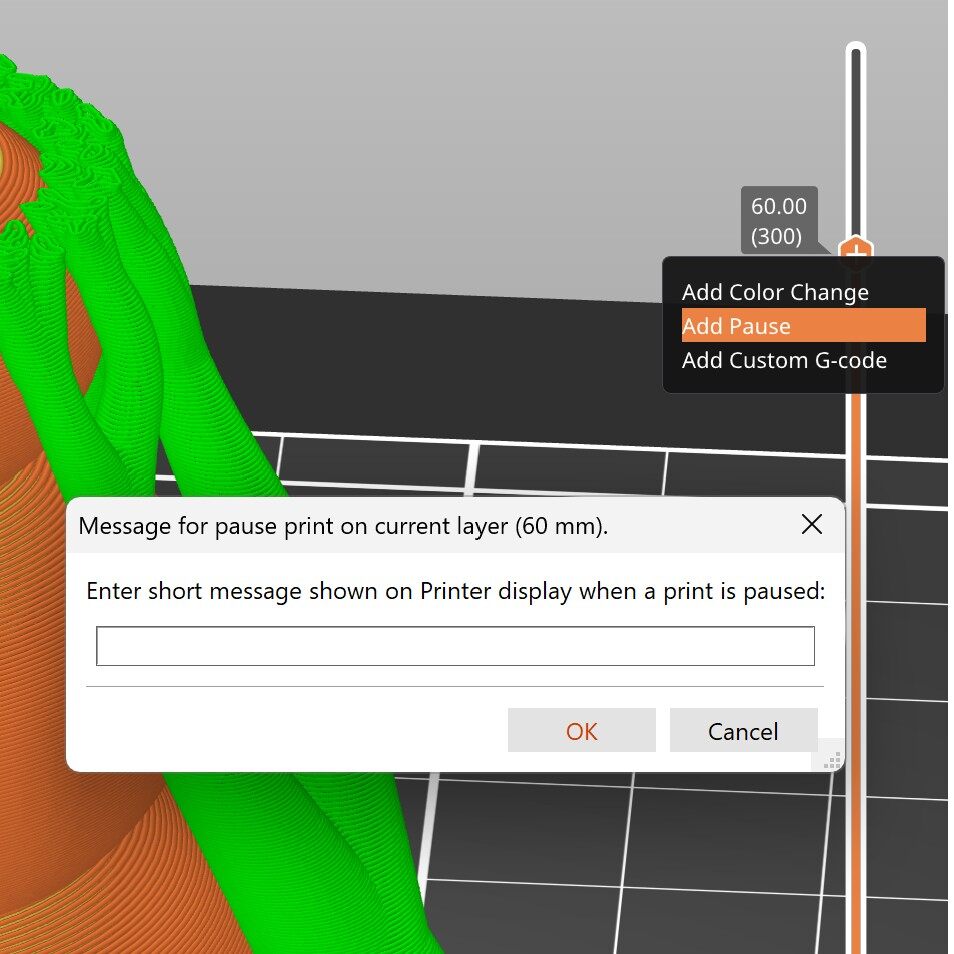
Once you’re happy with the settings, go back to the Plater window and hit Slice Now in the bottom right corner. The print time and filament needed will show up in the bottom right corner. There is also a long orange bar next to the right window. Sliding the hexagons up and down will show you a portion of the print. It is here you can add a pause in your print. Slide the hexagon to where you want the print to pause. Then right click the hexagon and select Add Pause. You can then add a note as to why you’re pausing. I added a pause right before the middle hole got covered up so I could add the beads into the middle. Make sure to slice your model again to save the pause. You can then export your print as G-code by hitting the Export G-code button in the bottom right. This is the file you will bring to the printer. I went through the same process with the little beads, except without supports because they don’t have any overhang.
3D Printing
Clean the Print Bed
Main Menu on Prusa MK4
All Noisemakers
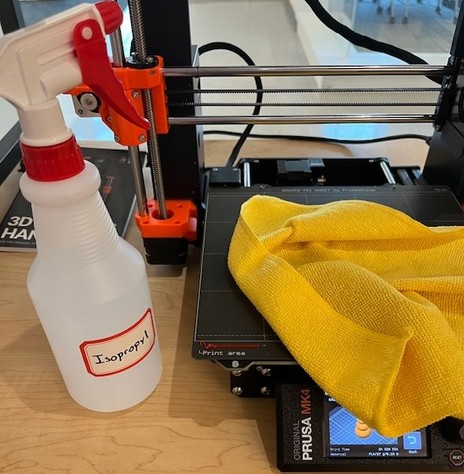
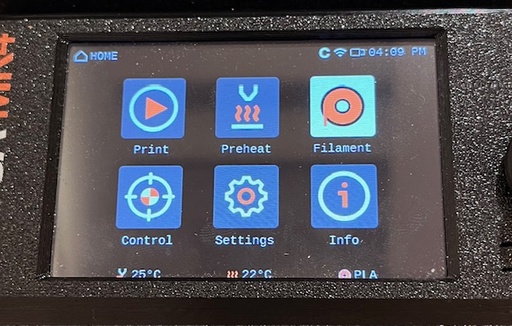
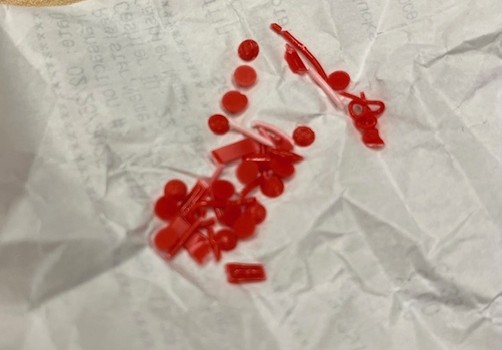
Before I printed the snowman, I first printed the little beads that will go in the snowman. I used a red PLA filament for these. I started by cleaning the print bed by spraying isopropyl alcohol onto a microfiber cloth and wiping the print bed. I then transferred the G-code file to the printer using a USB. Conveniently, the print screen with the newest file automatically pops up when you plug in a USB to the printer. You can also hit the print button in the top left corner of the main menu and then select your file from the USB stick. Once ready, I hit start and watched them print. The beads took about 2 minutes to print. I realized I probably should’ve printed more dots. To fix this, I cut up some scrap filament from changing the filament and the strips the printer outputs when calibrating. While it isn’t as pretty, it still makes noise.
Filament Settings
Filament Loading Screen
Purging the Filament
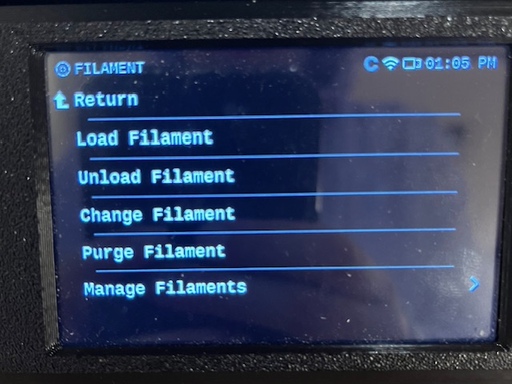
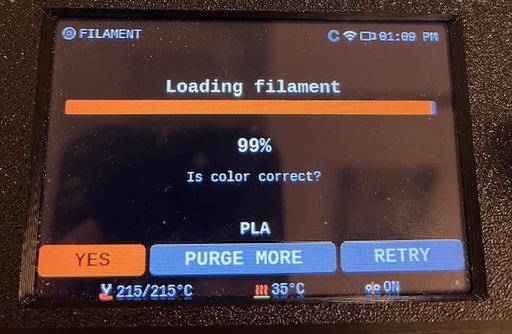
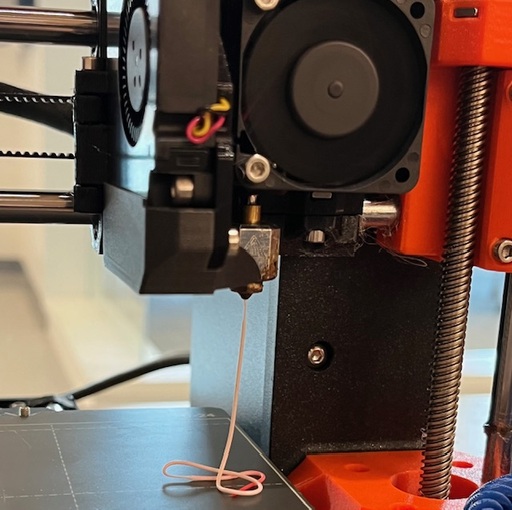
I wanted to change to a white PLA filament for the snowman. To do this, I chose the filament option in the top left corner of the main menu. I then chose the Unload Filament option. The machine releases the end of the filament that was inside so it is easily removable. Be sure to wait until the screen says it has been completely removed before pulling the filament out. Still in the filament menu, you then select Load Filament. You then select the type of filament you’re loading, which is PLA in this case. You can then put the end of your desired filament into the top of the cube that you just took the other filament out of. Make sure to push it in a bit, but don’t force it too much. You can then confirm that you have loaded the filament on the screen and the machine will start pulling in the new filament. It will extrude some filament to get rid of the old filament. It will extrude for a bit and then ask you if the extruded filament is the correct color. If not, you can keep selecting Purge More until it is the correct color. I had to purge it twice before it was the correct color. Once it is the right color, you can confirm and then start your print as described above.
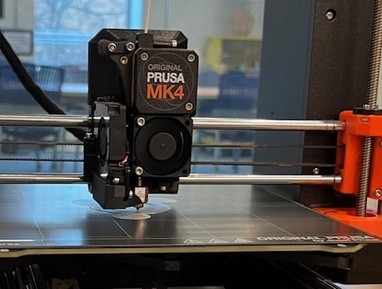
First Layer of Print
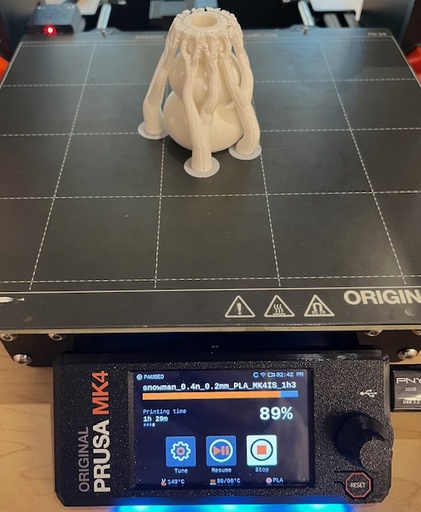
Paused
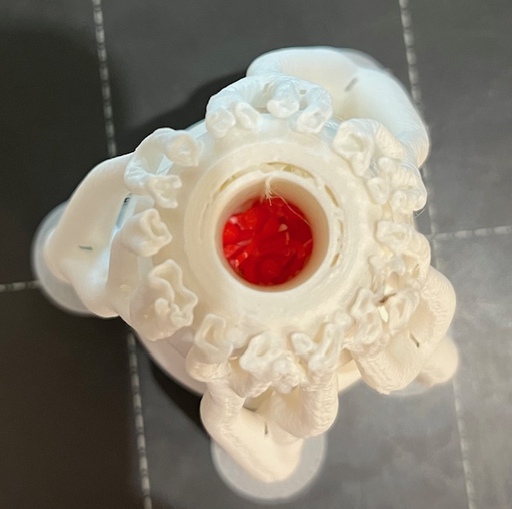
Adding the Noisemakers
It’s important to watch a print for the first few minutes to make sure that the first few layers stick to the print bed. If not, you’ll have to stop and then retry the print from scratch. However, it does not need to be supervised for the entire print. On the screen, it will tell you the time until the print is complete and when the next pause will be. After waiting the given time, my print successfully paused. I added my “beads” into the hole in the middle of the snowman. I then selected the Resume option to resume the print. The noisemakers are then completely sealed in by the snowman’s hat, which is why it can’t be made subtractively.
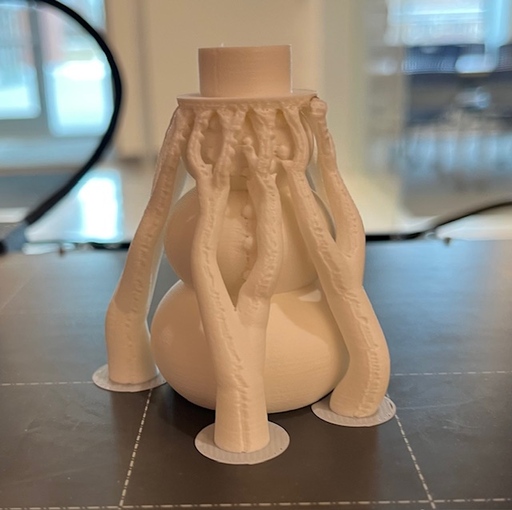
Completed Print With Supports
Remove Supports
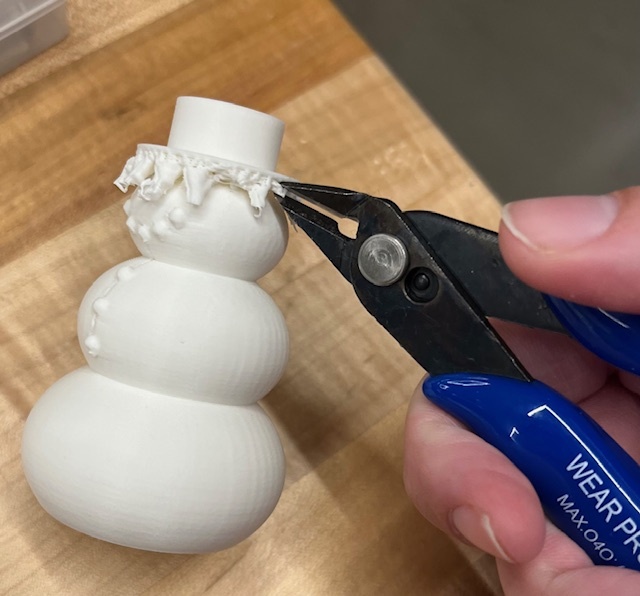
Once the print is complete, the last step is to remove the supports. I started by removing the model from the print bed, using a scraper to help. During this, some of the bases of the supports broke off from the main print. Even if it is no longer attached, be sure to remove all of the filament from the print bed. I used pliers to remove the supports right underneath the hat. I made sure to be slow and careful so as to not break the hat’s brim.
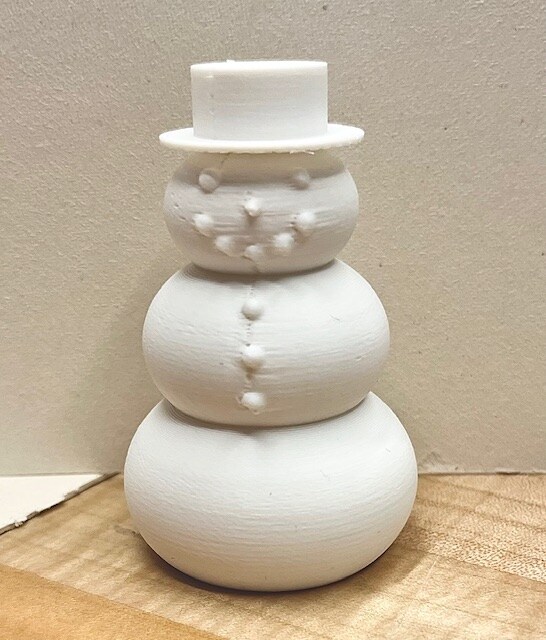
The snowman is complete! It’s 75mm or ~3 inches tall and 45mm or ~1.7 inches wide at its widest part. You may notice a few imperfections in the print, which I don't know exactly what happened. There are some vertical lines where the filament didn’t quite seem to connect since there are some small gaps. It did not seem worth reprinting to fix this issue because it’s not something that will be used much. Overall, I’m still happy with how it came out.
3D Scanning
The Whale
Uploaded Images
The Generated Model
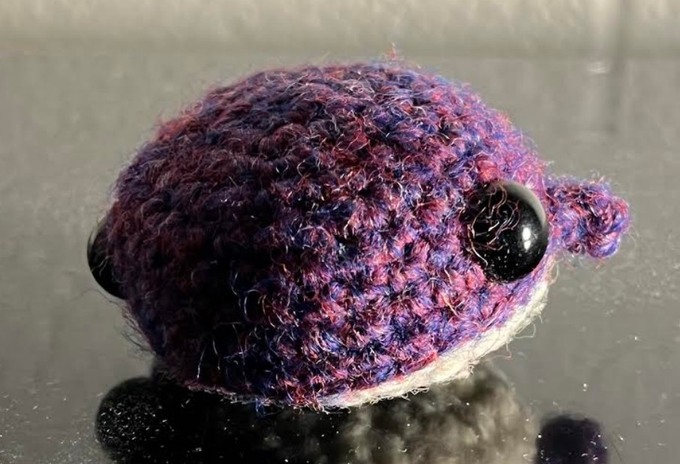
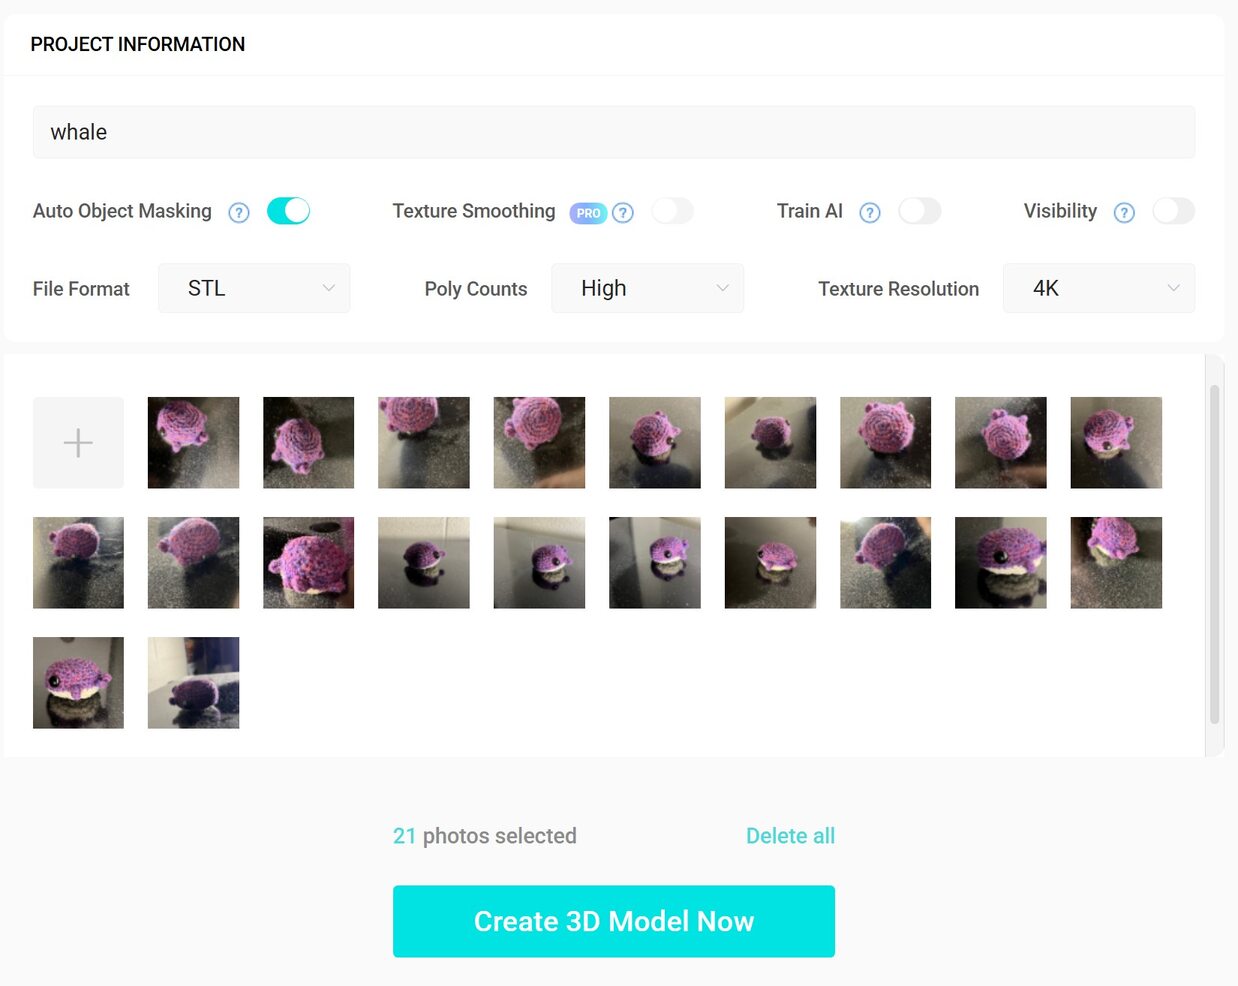
Unfortunately, I had some technical issues with my phone so I was unable to use it for 3D scanning the week of. Instead, I looked into free websites that do photogrammetry. This is when you upload a bunch of pictures of the same object from different angles and then it tries to make a 3D model out of the images. I tried using Kiri Engine because it has a free web browser version. To make a model, you have to upload at least 20 images of the object. I uploaded 21 images of a small crocheted whale. After waiting for it to process, it claimed my model was complete. The video shows it, but it created an outer shell of the whale and that wasn’t very accurate. I’d imagine that if I had more images with more variation in angle that the model would be more accurate.
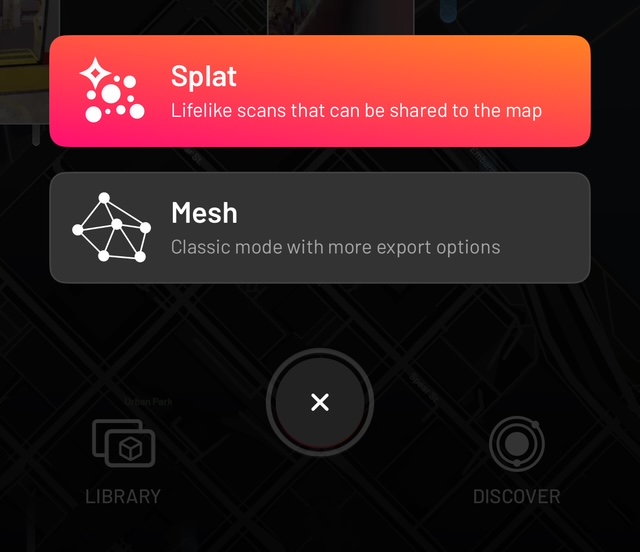
Create New Scan
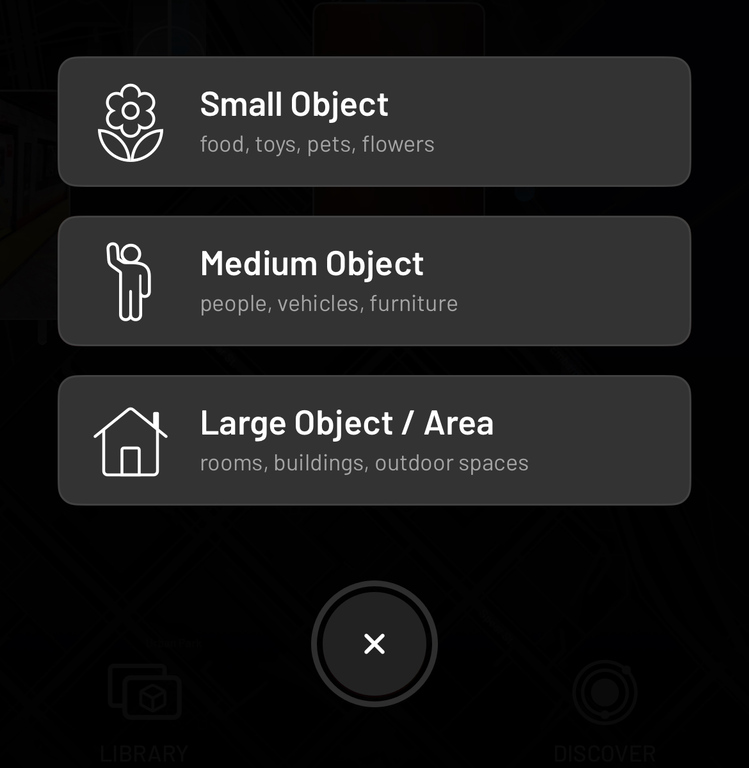
Select What Size Your Object Is
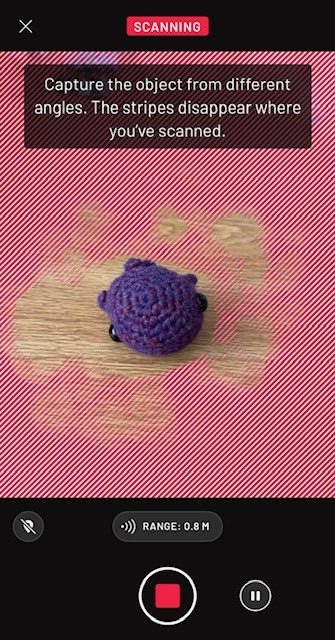
Scan The Object
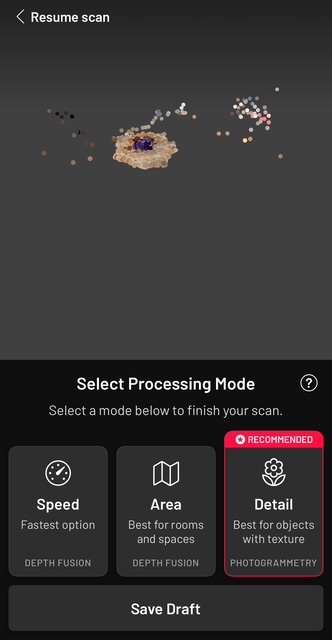
Process the Scan
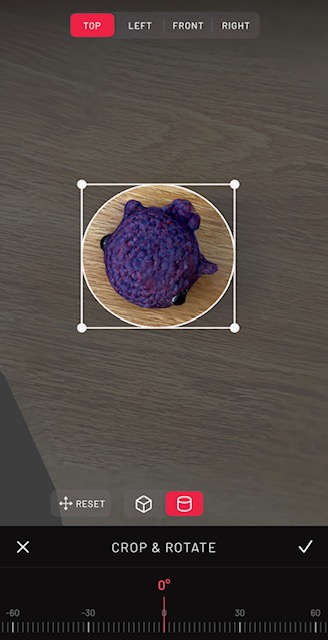
Crop Unwanted Parts From The Model
The Generated Model
With technical issues solved, I tried out Scaniverse a few weeks later. I found it more user friendly. When you first open the app, hit the plus icon at the bottom to start a new scan. I chose the Mesh option and then Small Object because I was once again scanning the crocheted whale. After pressing the red record button on the bottom of the screen, a bunch of red lines show up. It then prompts you to scan your object until there are no more red lines on it, which I did by moving my phone around and being careful not to touch the whale. Once you complete your scan, you can choose how it processes the data. I chose the Detail option, which is photogrammetry. Once rendered, you can do some basic edits to the model. Using the circle crop tool, I cut out most of the table since I only cared about the whale. You can also change angles and crop from different directions. Once I was happy, I went to Share -> Export Model in the view mode. I chose to export it as an STL file, but there are multiple options. This model was a solid shape, so it was much better than my first attempt. I’m fine with the table in the model for this assignment but I imagine you would need a different method for scanning if you want a fully complete model.