Week 2: Computer Aided Design
Image & Video Compression
We are given a limited amount of storage space for our websites and can only upload 10 MB at a time, so compressing your images and videos is important. Just one image taken on a smartphone can be a few megabytes big, and you can imagine how big videos can get. This is where compression tools step in. For images, I try to get them below 100 KB. For videos, I try to keep them as short as possible as well as reduce the dimensions and compress the videos. For screenshots and screen recordings I used the Snipping Tool application, which comes on Windows computers by default.
For image compression, I have been using ImageResizer.com. I like this tool because I can upload multiple images at a time, set the maximum size, and all the images will be compressed to below that size.
For video compression, I'm using FreeConvert. This allows me to both compress videos and change them from a few different file formats to a .mp4. I can choose to compress it by a percentage or give it a target size to compress to.
2D Design
I decided to do my 2D designs as a raster image. This means you can see the pixels in the drawing and it isn't easily resizeable, but it works for general sketches.
I used Paint to do the sketches. It is a default program on Windows computers and has basic drawing, shape tools, and text editing that I used.
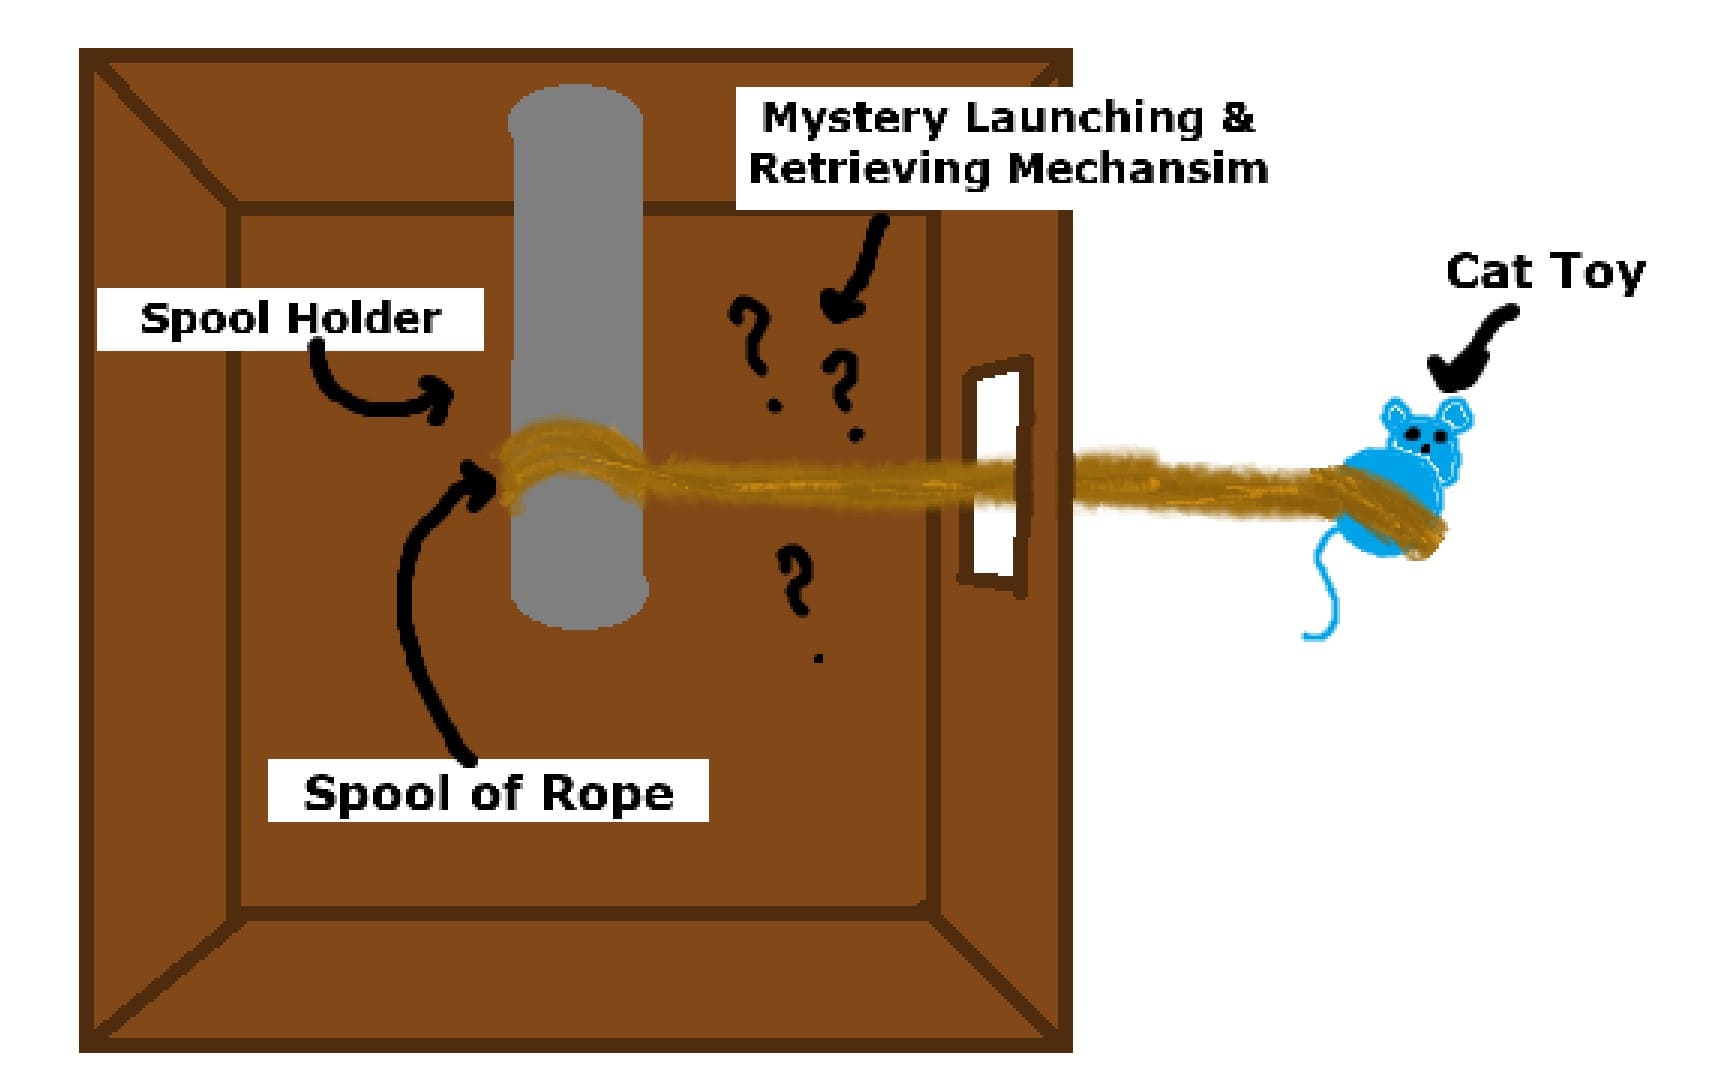
My current idea for a final project is a machine that launches and then reels in a cat toy to keep your cat entertained while you can't play with it. In the top down view,
you can see my general idea that there would be a spool of rope with the cat toy attached to the end. I'm unsure what sort of mechanism could be used to launch the toy,
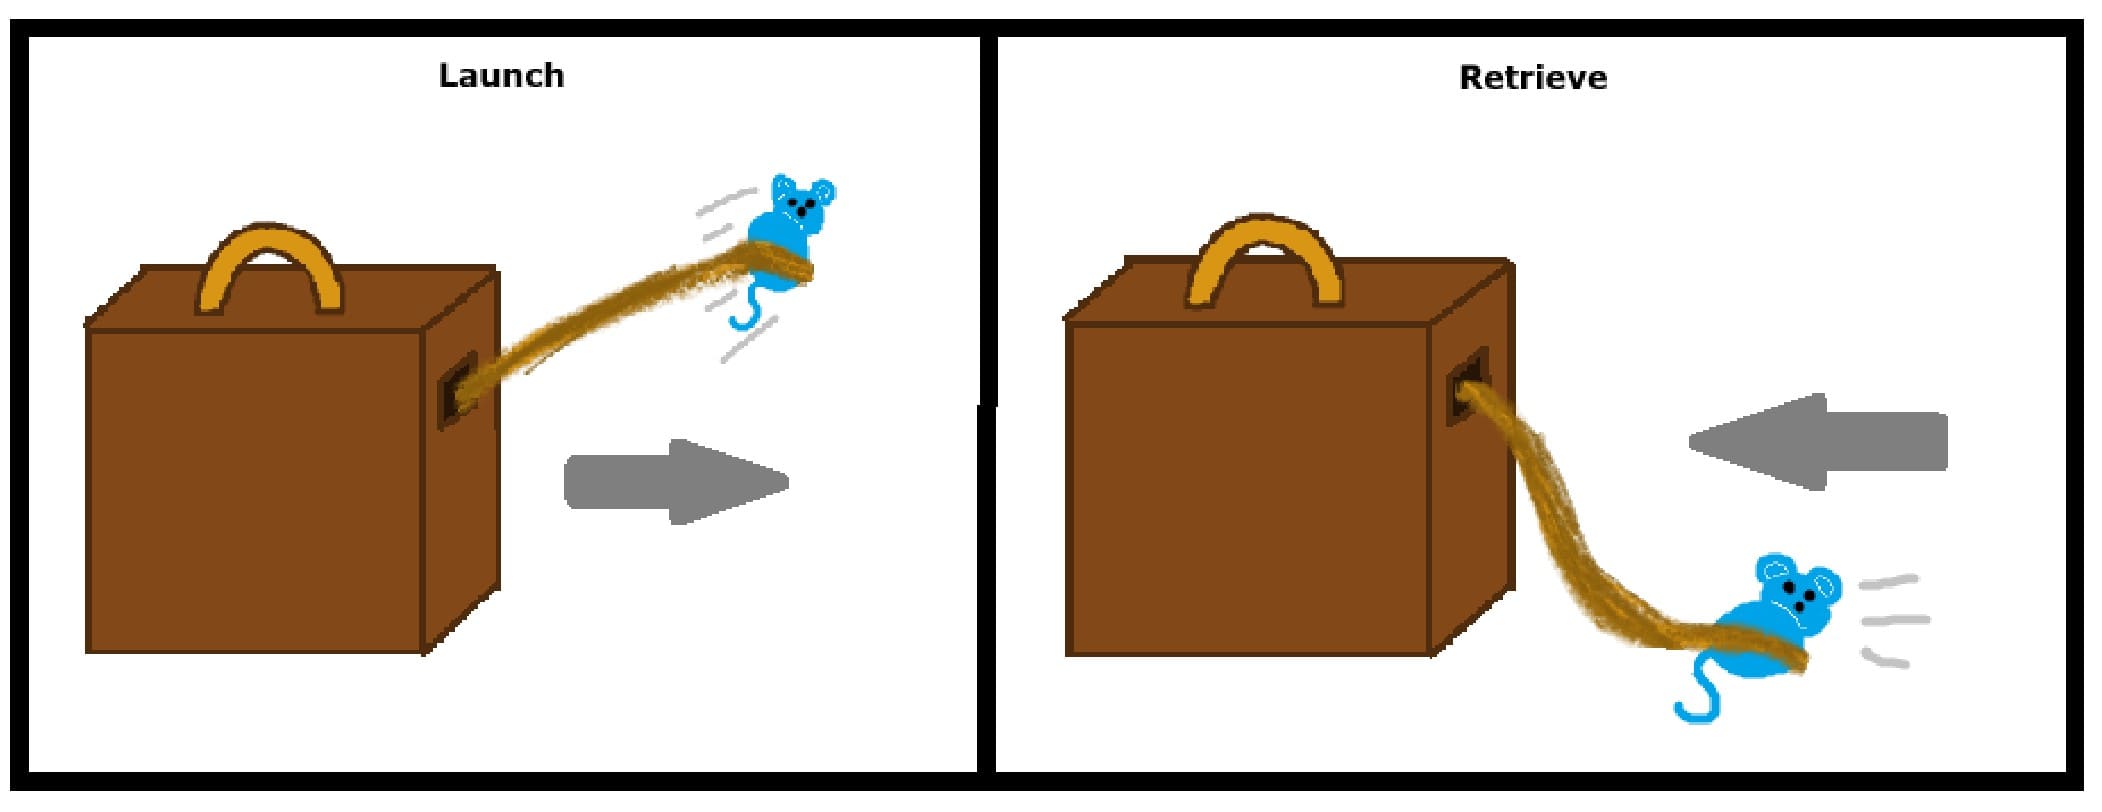
possibly some sort of spring contraption? The other drawing shows the machine in action. After a certain amount of time of the toy either being out or inactive, the machine
would start to reel in the cat toy. The half circle at the top of the box is a handle for the removeable lid. This is so if your cat chews apart some of the rope, it is easily accessible
to fix.
3D Design
To make my 3D model, I used Autodesk Fusion. I had very briefly used it before but I was essentially starting from scratch. One of my local instructors, Jason Goodman, did a session on how to use Fusion. I used that information and trial and error to make my model. I'm also not entirely sure how my idea would actually worked, so I focused on making an outer shell for my final project idea. My current idea is a cat toy launcher that then reels the cat toy back in to be launched again.
Sketch
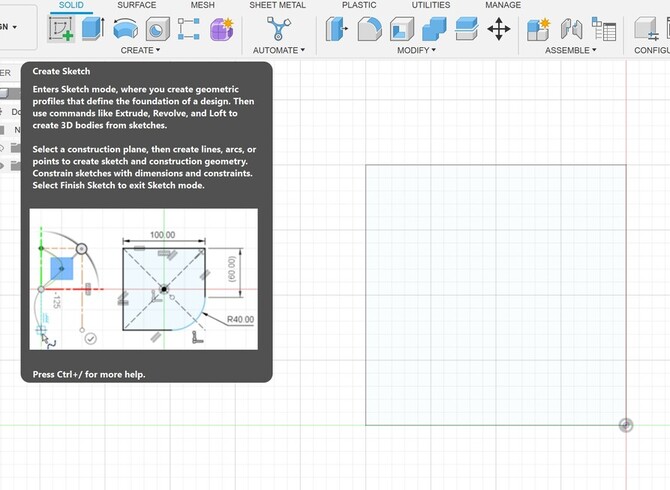
To start, I made a 2D sketch that I will later be able to make into a 3D model. I used the rectangle tool to create a 100mm x 100mm square. I specify the dimensions by typing into the boxes that pop up on each side of the box. The final product would obviously be larger, I just wanted to work with easy numbers. I make sure to complete the sketch so I am not stuck in sketch mode.
Extrude
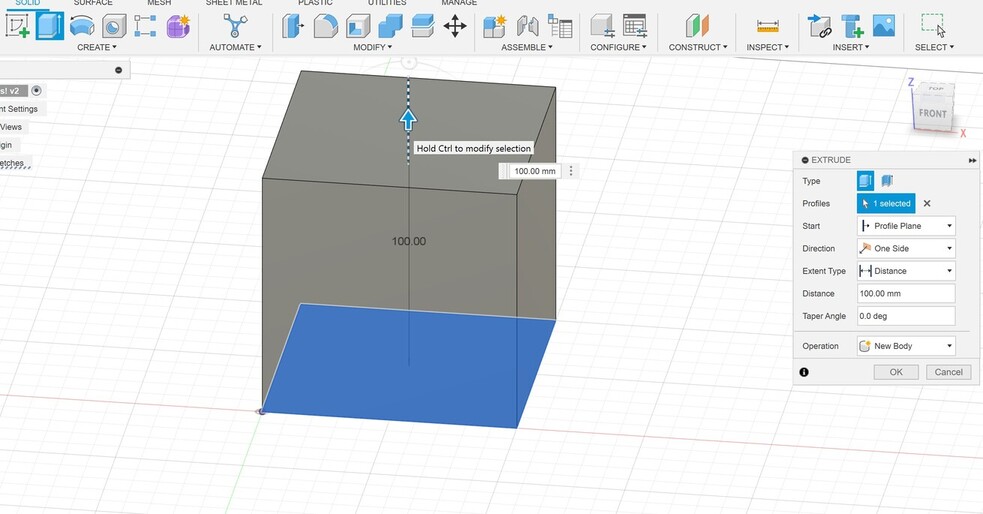
The next step was for me to make my square into a cube. I used the extrude tool to make my cube also be 100mm in height. I used the arrow and dragged it upwards until is was 100mm tall.
Shell
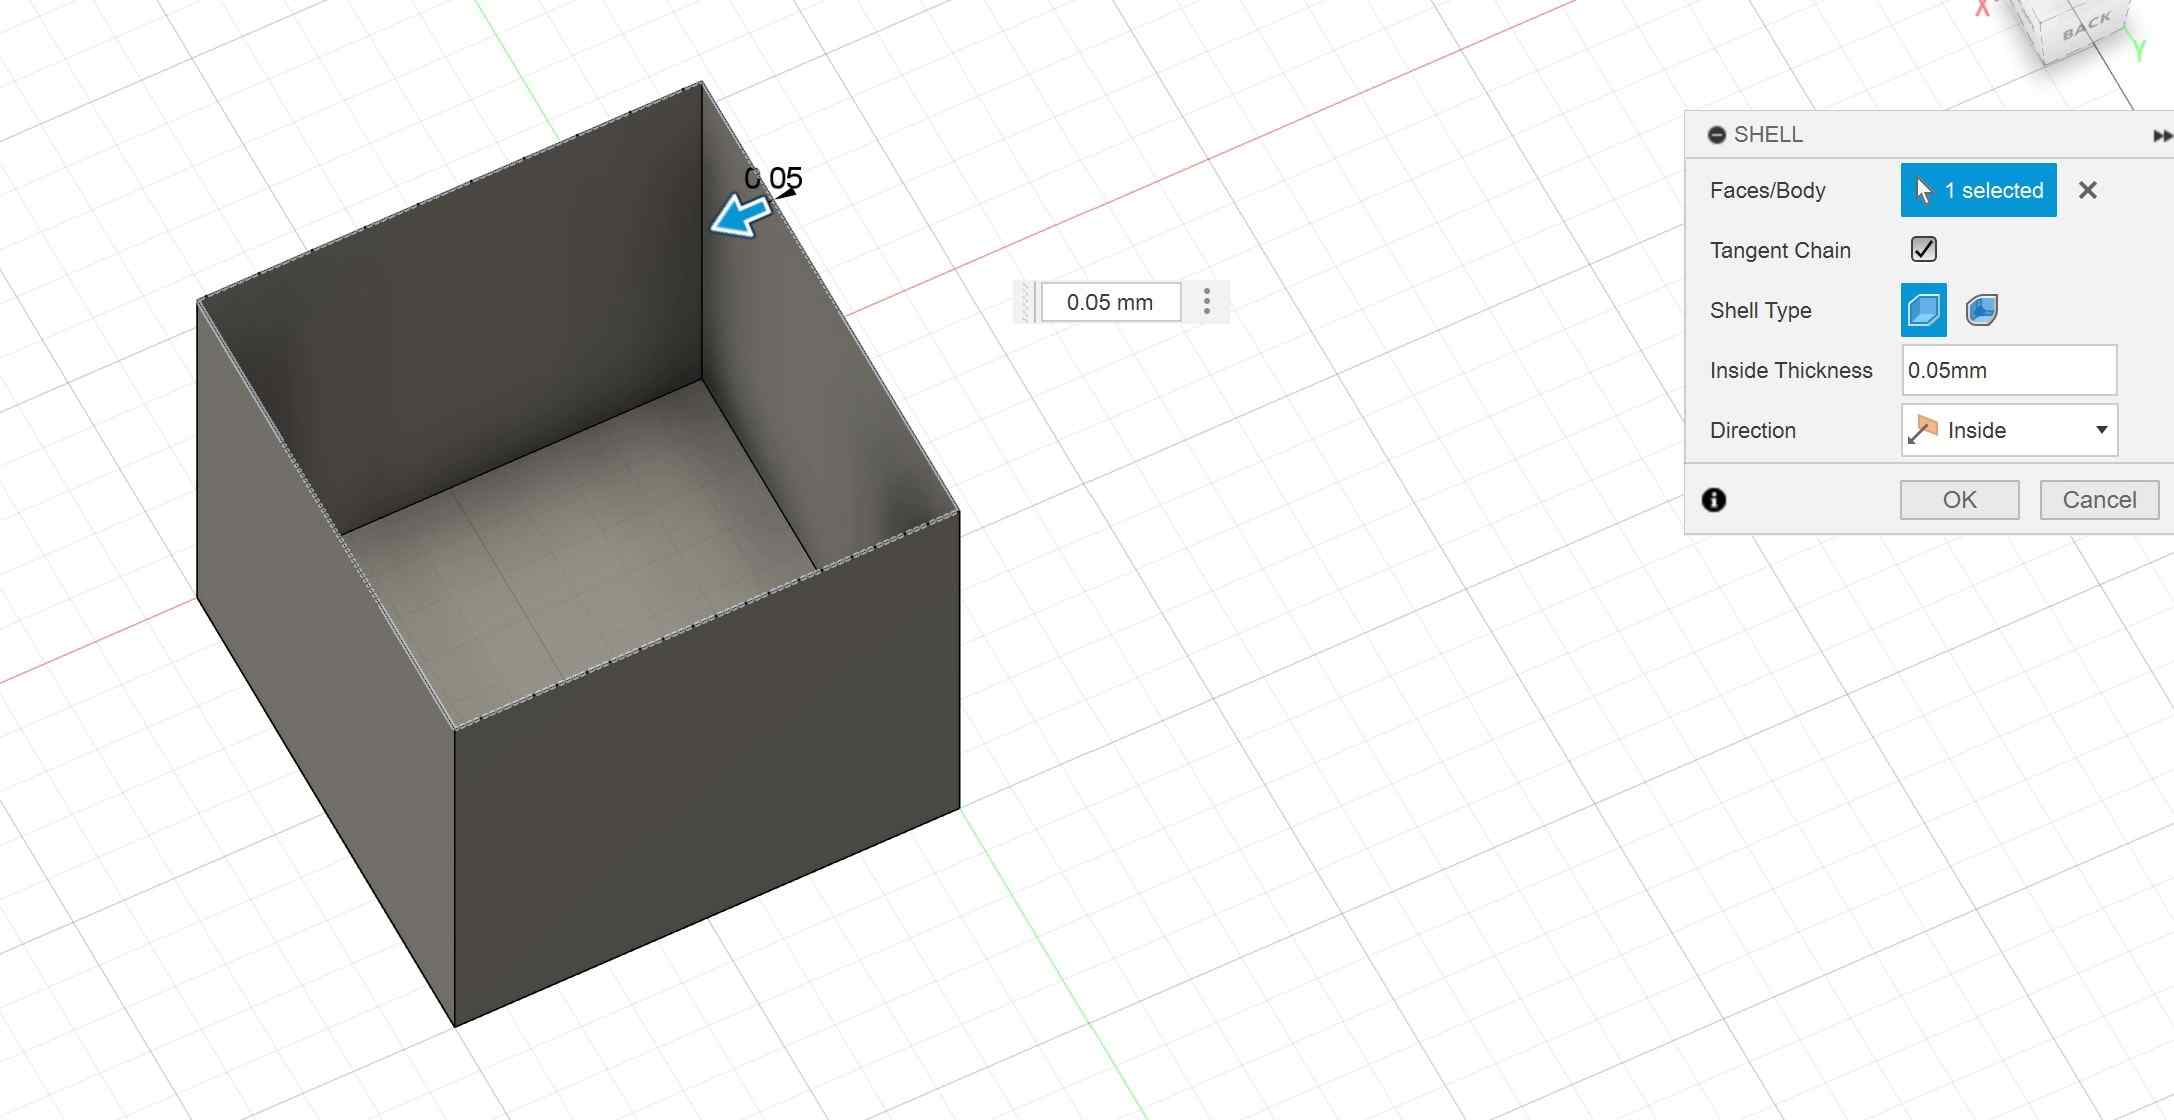
I used the shell tool in the modify tab to hollow out my cube. I arbitrarily set the walls to 0.05mm thick using the panel shown in the above image.
Rope Dispenser & Spool
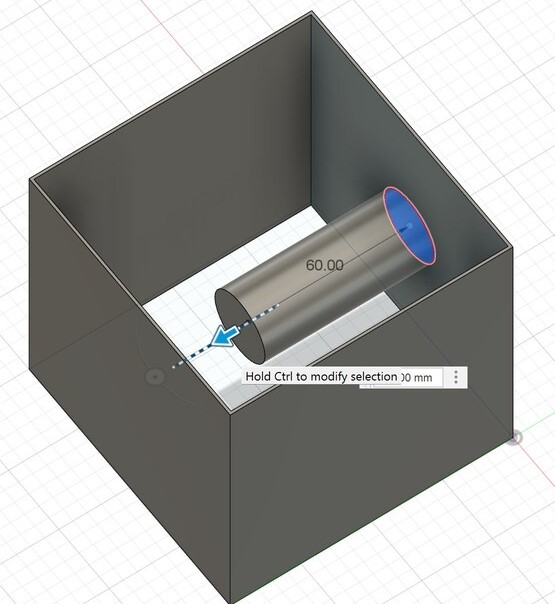
My next goal was to make a cylinder on the inside of the box to hold a spool of rope. To do this, I created a sketch of a circle on one side of the box. I then extruded the cylinder into the box. I chose the join operation in the extrude panel so that the cylinder didn't just create a hole in the box. The idea is that the spool of rope would be easily removeable, which is why the cylinder doesn't go all the way across the box. I used a similar techinque to add a disk on top of the orginial cylinder to represent the spool of rope.
Cutting a Hole
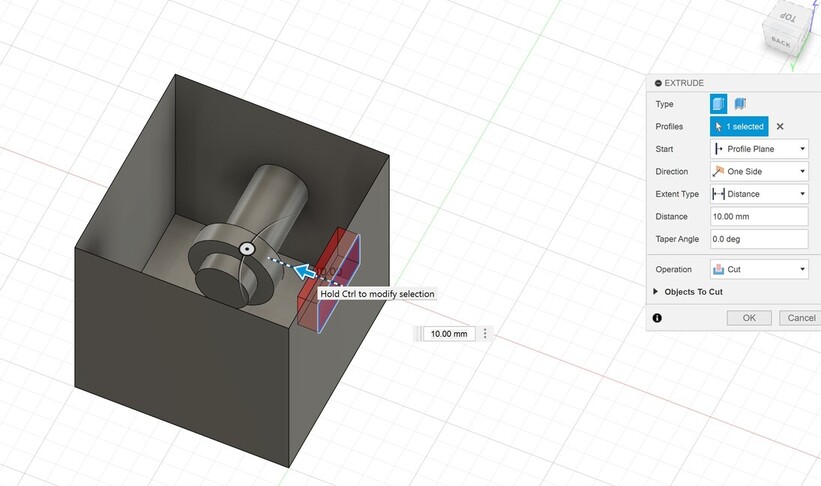
I wanted to add a hole in the front of the box that the rope could go out of. I did this by sketching a 20mm x 40mm rectangle onto the side I want the hole. Then I used the extrude tool and selected the cut operation to create the hole.
Changing Appearances

I wanted to change the appearance of the box as it's unlikely I would make it out of metal. I started by opening the appearances tab by just hitting "a". I then downloaded an oak texture and a yellow fabric texture to add to my model. At the top of the appearances panel, I selected "faces" in the "Apple To" section. This way I could make different faces in the same object appear to have different textures. I added the textures to each face by just dragging the texture I wanted onto the face I wanted to put it on. I made the main box an oak texture and the spool of rope a yellow fabric texture so it looked rope-like.
Completed Model

This is the final model I ended up with. Ideally the final project would also have a lid on the top. I learned a lot while making this model. I would've liked to put more time into practicing 3D modeling, however I was sick most of this week so I didn't have much time. However for a first attempt, I think it could've gone a lot worse. One tool that I want to get the hang of better is the tineline. It allows you to go back to previous stages of your model and edit it, which will then carry over to your present object. I think I could have saved a lot of time by just going back in time to fix mistakes instead of just trying to edit what I had in the present version.