Week 3: Computer Controlled Cutting
Group Assignment
Defining Terminology
- Kerf: The small width of material that gets burned by the laser cutter since it follows the center of the cutting path.
- Engraving: The process of cutting into the material of a surface without fully cutting through.
- Cutting: The process of fully cutting through a material.
- Speed: How fast the laser cutting head moves while cutting/engraving.
- Power: How much energy the laser cutter provides while cutting/engraving.
- Frequency: How quickly the laser pulses on and off whilst cutting.
- Air-Assist: Allows air to be pushed through the laser cutter head to keep the lens clear.
Measuring Kerf
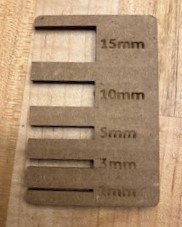
Kerf Comb
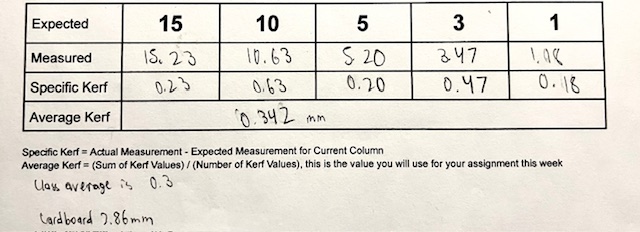
Table of Measurements Taken From Kerf Comb
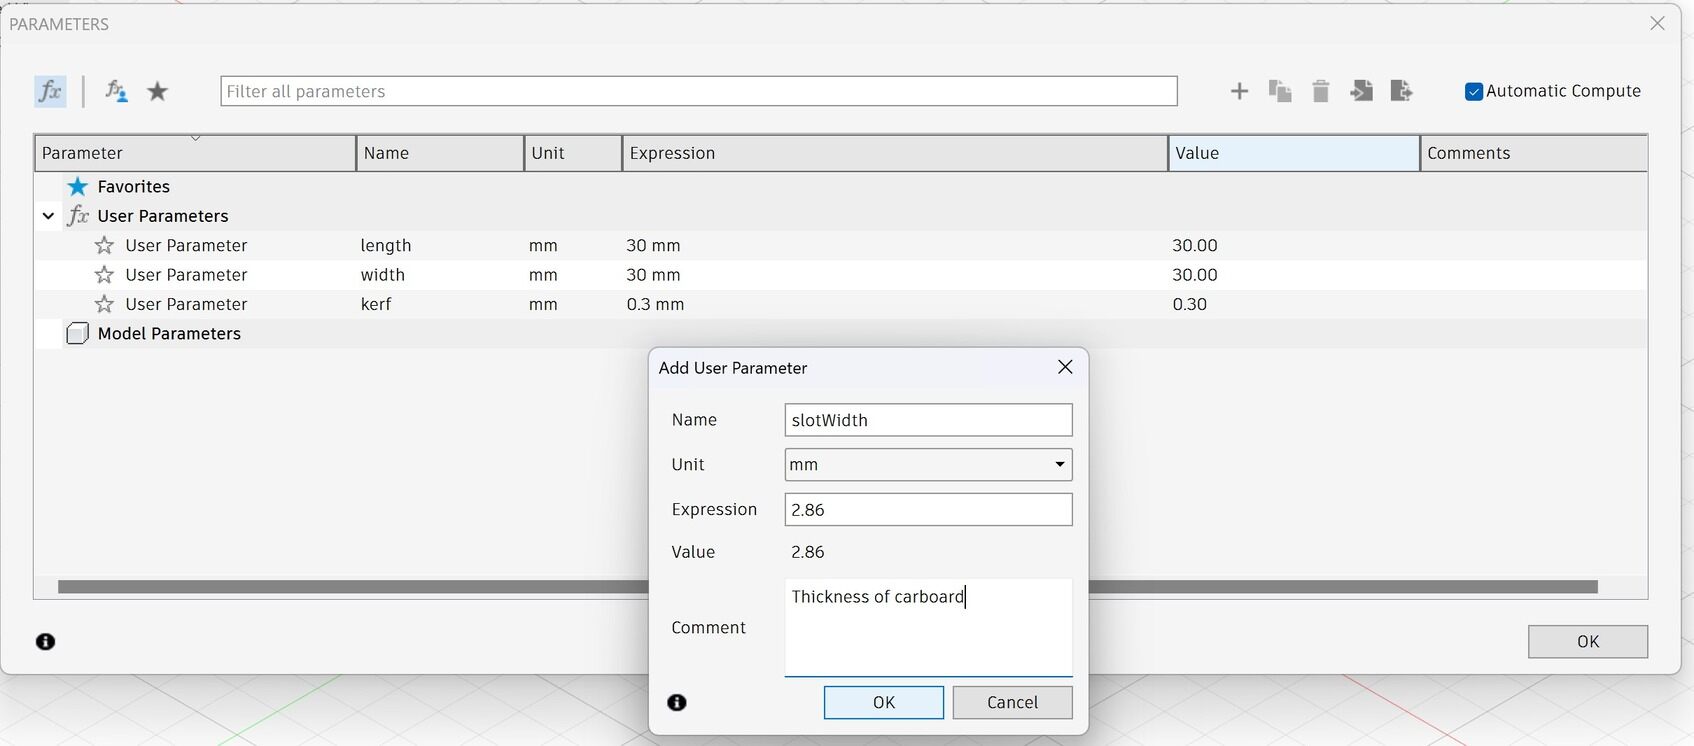
As pictured above, we cut “kerf combs” out of cardboard. Using electronic calipers, we measured the gaps in the comb. The combs are labeled with how big the gap is supposed to be in millimeters. We subtracted the expected measurement from the actual measurement to get the kerf for each gap. We then averaged the kerfs for each measurement. I found the average kerf to be 0.342mm. Amongst multiple classmates, we found the average kerf to be about 0.3mm. While measuring things, we found that the cardboard was 2.86mm thick.
Laser Cutting
Safety
Safety is important when using machinery. We started with fire safety and where the fire safety things are kept. If there is ever a flame not where the laser is or the flame is particularly large, you should stop the cut immediately. You then want to try and put out the fire using a fire safety blanket or fire extinguisher. Another note is the light from the laser cutting can hurt your eyes, even if the glass is protective.
Using the Laser Cutter
Then we learned how to use the laser cutter. The Wheaton College Fab Lab has a Epilog Fusion M2 40 Laser Cutter. This next section is how to use this machine specifically.
Start by turning on the machine with the switch on the front of the machine. You also want to turn on the ventilation using the switch on the wall beside the computer. Once the green light turns on near the ceiling it is safe to cut. You also need to turn on the air compressor on the floor on the right side of the laser cutter.

Place Material in Top Left Corner of the Bed
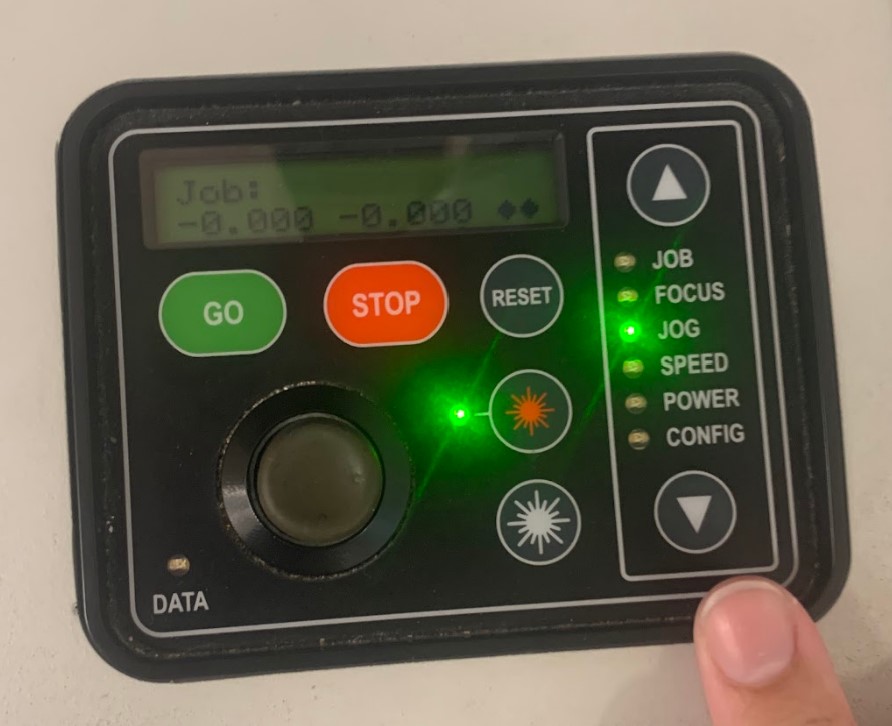
Change Modes and Settings on the Laser Cutter
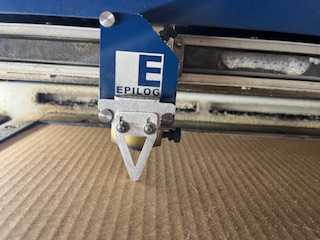
Focusing the Laser Beam
Next up is setting up the machine. You want to start by putting in your material in the top left corner of the cutting bed. Then, use the up and down arrows to change to Jog mode. Use the joystick to put the laser cutting head above your material. Next, switch to Focus mode. Once again, use the joystick to move the cutting bed up and down. Place the metal triangle focusing tool on the screws on the front of the cutting head. Move the bed so that the triangle is touching your material but is still hanging off of the screws. To set it, press the joystick towards the machine. Remember to remove the triangle before cutting! You can then switch back to Jog mode. Move the cutting head over the spot where you want to start cutting. The machine will start cutting in the top left corner of your design. Once set, press the joystick in again.
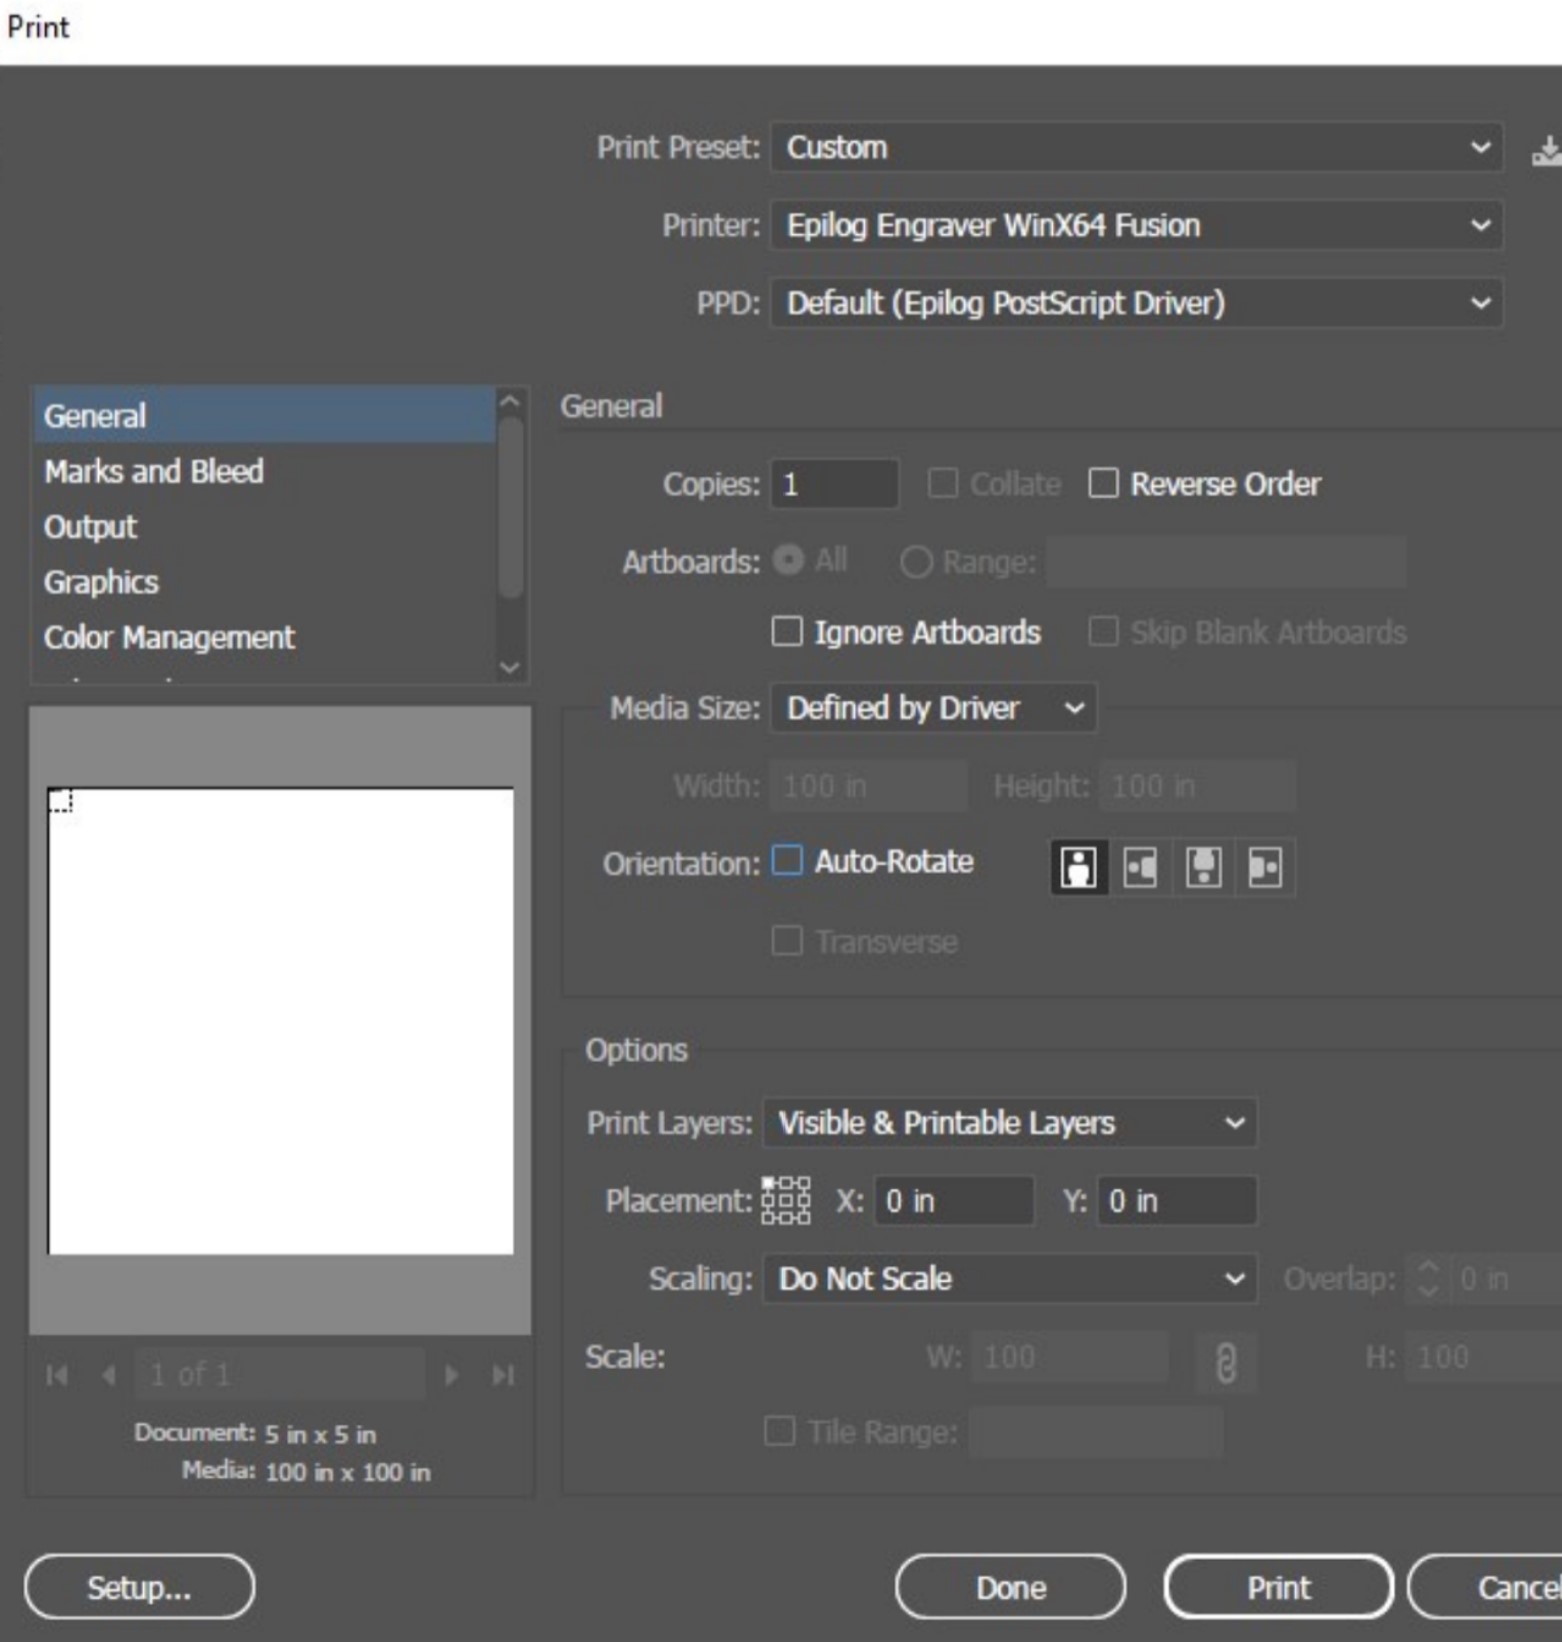
Print Settings to Send to Laser Cutting Software
Settings in Lase Cutting Software
The computer uses Adobe Illustrator to send designs to the laser cutting software. Once you have your design open in Illustrator go to File->Print. The left screenshot shows all of the appropriate settings. Once you hit print, it will open up the laser cutter software. On the sidebar, you have to change the settings depending on what material you are cutting. Make sure to turn on air assist for whatever you’re engraving and cutting! Once down, hit print. You can then press the go button on the control panel on the laser cutter. Once the cut is finished, wait a minute for all of the fumes to be sucked out. You can then open the lid and take out your finished product!
Vinyl Cutting
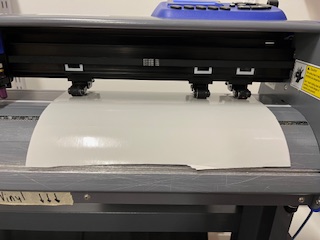
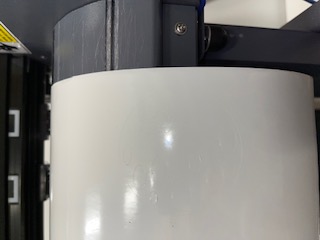
Vinyl Loaded into Vinyl Cutter
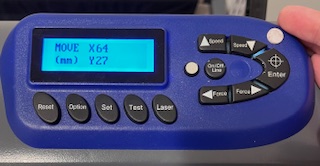
Move Screen on Vinyl Cutter
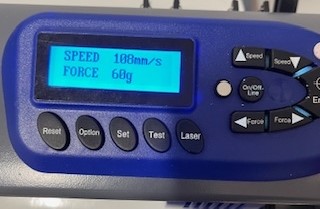
Speed and Force Screen on Vinyl Cutter
This section is how to use the vinyl cutter at Wheaton College Fab Lab. To start, turn on the machine using the power switch on the left side. Set the roll on the metal rods on the backside of the machine. Next, feed the vinyl between the rollers and the cutting surface. Pull it until it just covers the ruler so it doesn't get stuck on the ruler. If the rollers are down, pull the lever just behind the control panel. Push the lever to lock the vinyl into place. Make sure there are rollers near each edge so the vinyl can be moved by the machine without issue.
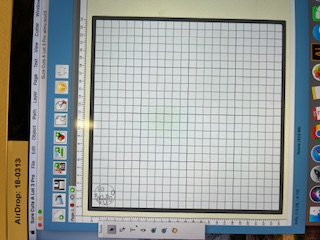
Sure Cuts a Lot is the program used to send the design to the vinyl cutting machine. You can upload png or svg files to the software. Make sure you are only cutting one element at a time, since only one color can be cut at a time. Once you insert your file, make sure it is the correct side. The grid is in inches. Then put your design in the bottom right corner because that is where the machine starts cutting. This will cut down on unused vinyl. Once the machine is set up, click on the "Cut with Cutter" button that has a picture of scissors.
If not on screen that says “move” at the top, press the on/off line button. Use the left and right "Force" arrows to move the cutting head. The black part should be just on the right edge of the vinyl. The machine moves quickly so it may take some time and it doesn't need to be perfect. Hit the Enter button when you're happy with the location.
Press the on/off line button again to get to the speed and force screen. Use the up and down arrows to adjust speed. The speed can differ for different jobs but generally a speed around 100 mm/s is generally good. The force can be changed with the left and right arrows and should be set to 60g.
Sure Cuts a Lot Software
Vinyl Pulled Down Past Groove
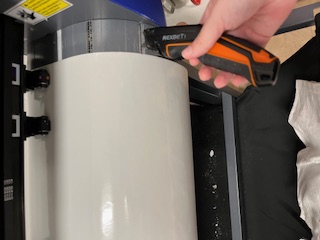
Vinyl About to be Cut After Machine Cutting
Once the cut is complete, hit the on/off line button to take the machine offline. Pull the lever up and pull the vinyl forward until the cut part is below the ruler. Then push the lever so the vinyl is once again locked into place. Using a box cutter, cut along the groove just below the ruler. Be careful and cut away from your fingers. Then pull the lever to release the vinyl and return the roll to where you found it. Finally, turn the machine off using the on/off switch on the left side.
Parametric Design Construction Kit
Design
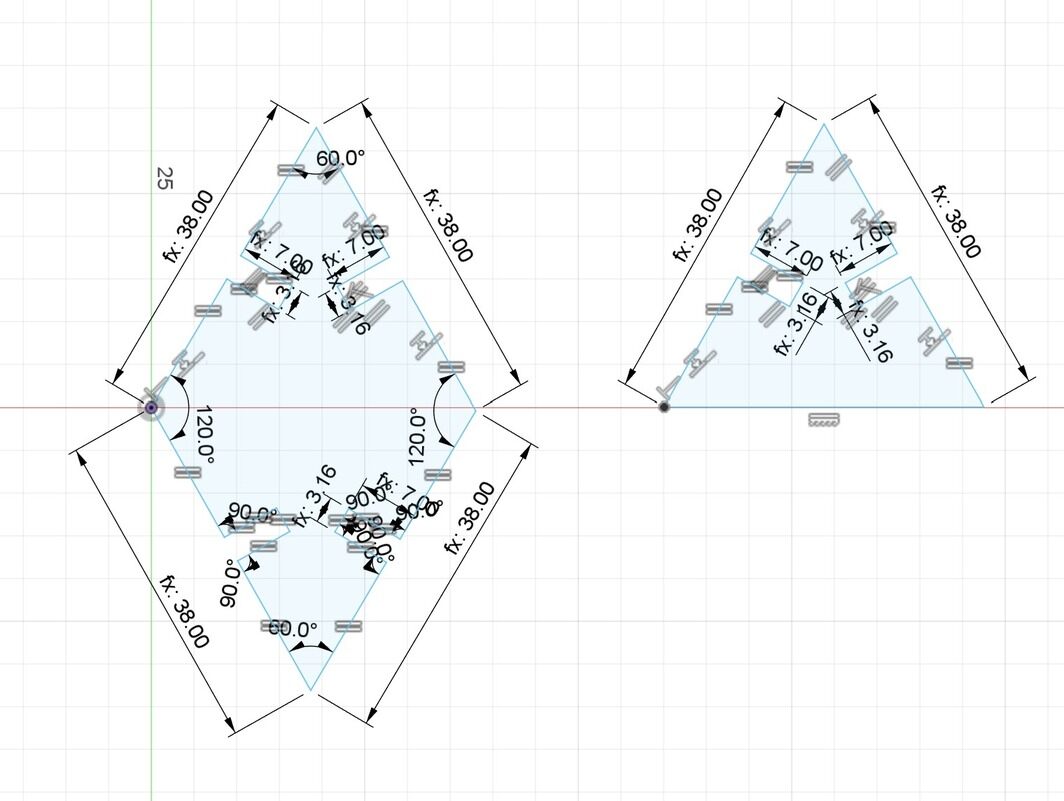
I started my sketch by making a triangle out of lines. I set one side to my length variable. I then used the equal tool, which is under Constraints->Equal. This sets the second line to the same length as the first line. I did this for each side of the triangle. I then used a rectangle tool to make the slot. I made the rectangle length and width slotDepth and slotWidth respectively. I then used the parallel tool, which is under Constraints->Parallel. This tool sets two lines parallel to each other. I set one end of the rectangle parallel to the appropriate edge of the triangle. I then used the clip tool to cut one side of the rectangle so there was a hole in the triangle. Finally, I used the equal tool on each side of the rectangle so that it was centered. I repeated this process on another side of the triangle. This completed my first piece.
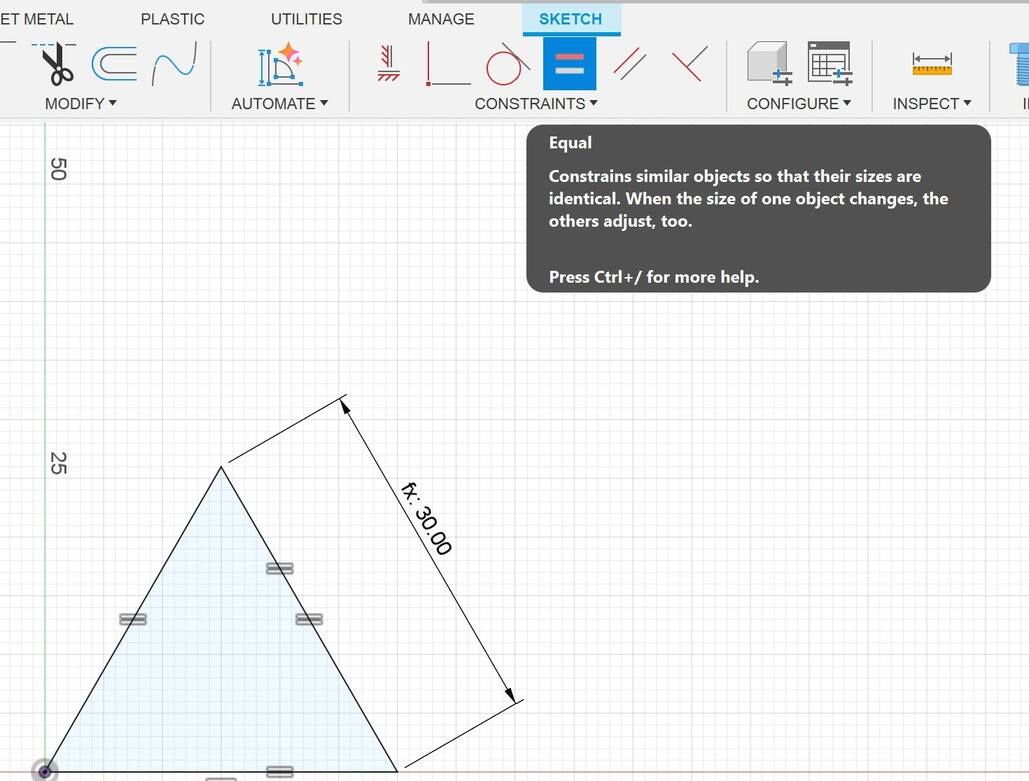
Equal Tool
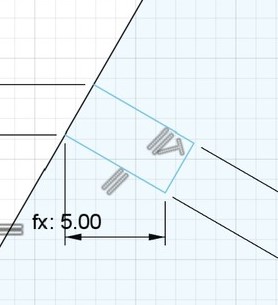
Parallel Tool
Slotted Triangle
I started my sketch by making a triangle out of lines. I set one side to my length variable. I then used the equal tool, which is under Constraints->Equal. This sets the second line to the same length as the first line. I did this for each side of the triangle. I then used a rectangle tool to make the slot. I made the rectangle length and width slotDepth and slotWidth respectively. I then used the parallel tool, which is under Constraints->Parallel. This tool sets two lines parallel to each other. I set one end of the rectangle parallel to the appropriate edge of the triangle. I then used the clip tool to cut one side of the rectangle so there was a hole in the triangle. Finally, I used the equal tool on each side of the rectangle so that it was centered. I repeated this process on another side of the triangle. This completed my first piece.
Mirror Tool
Diamond
Completed Sketches
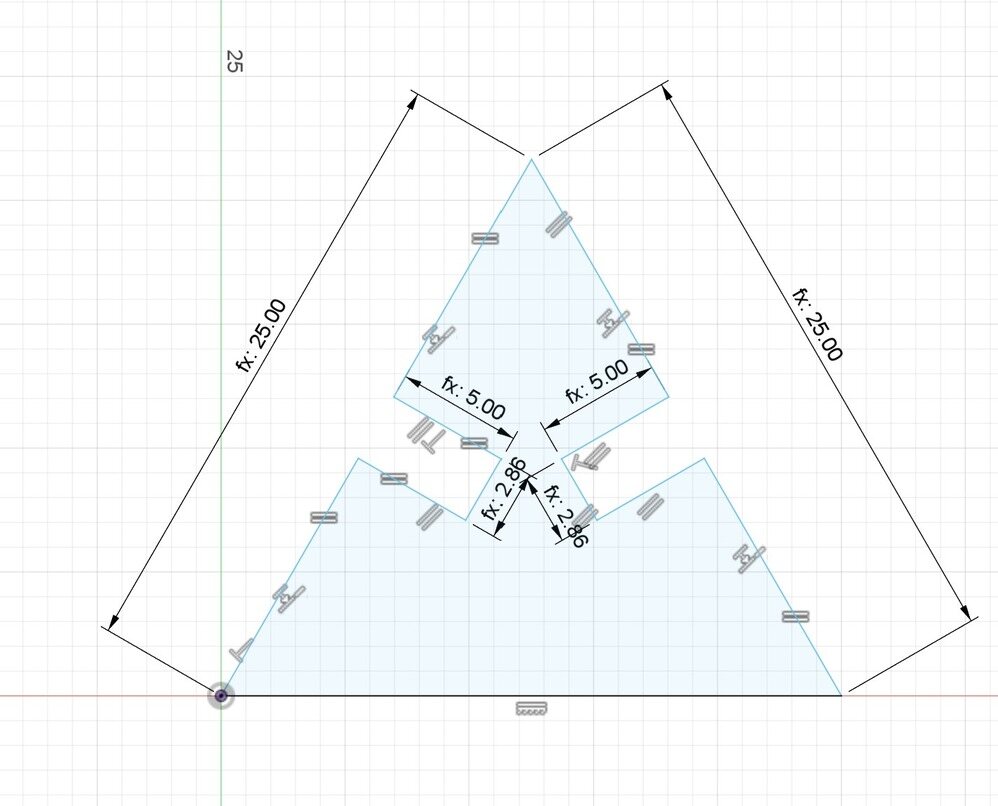
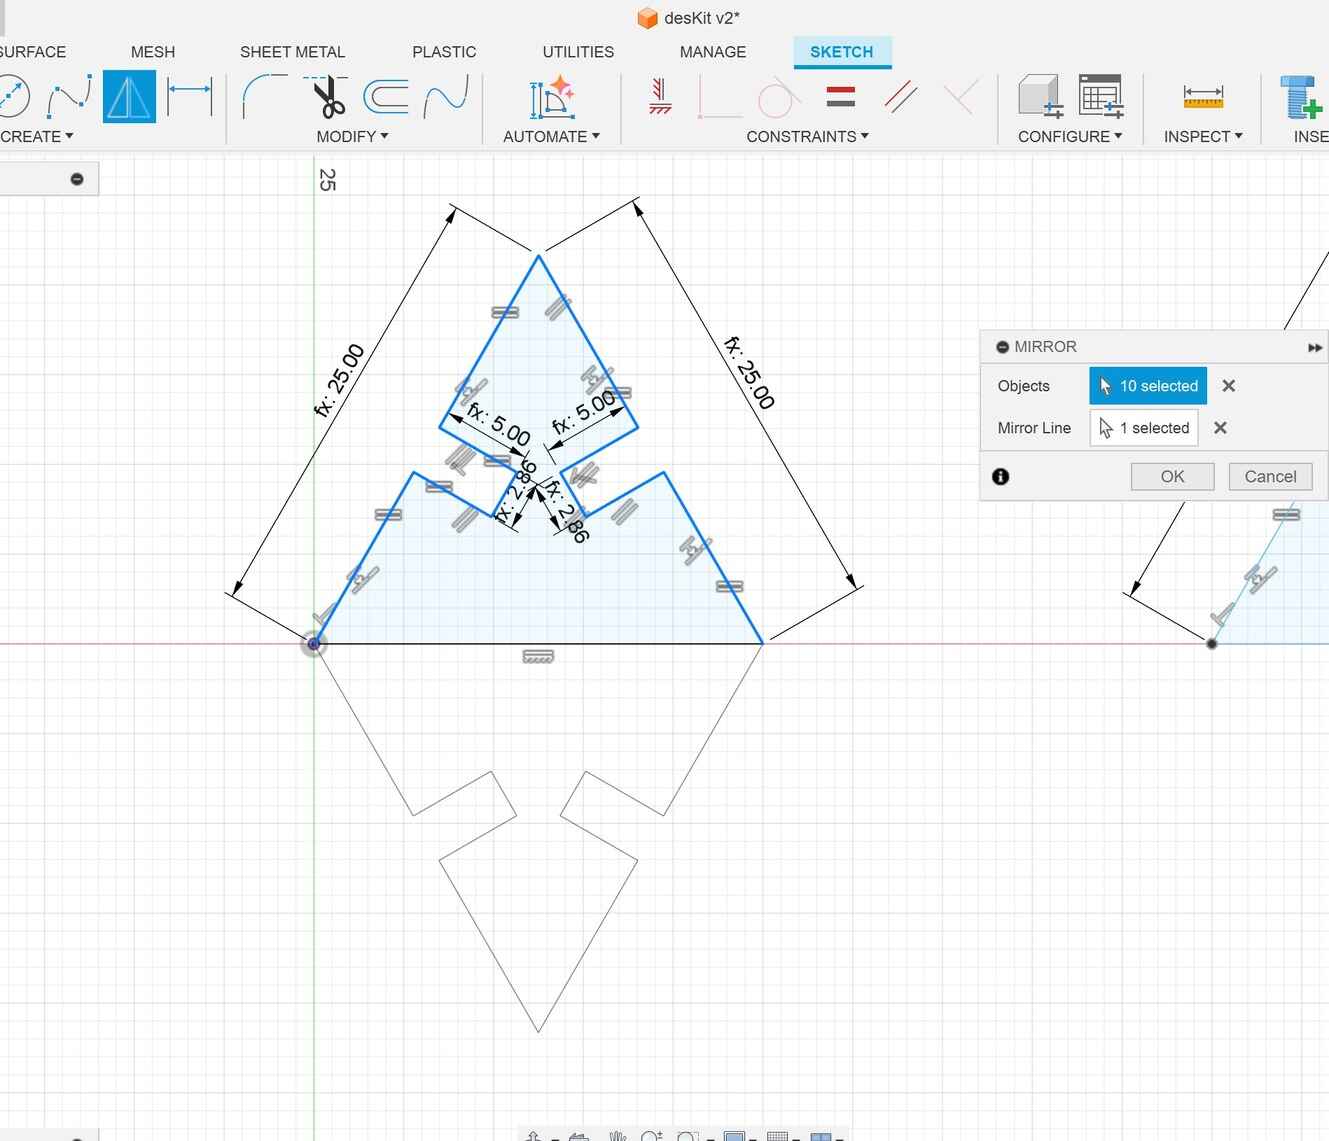
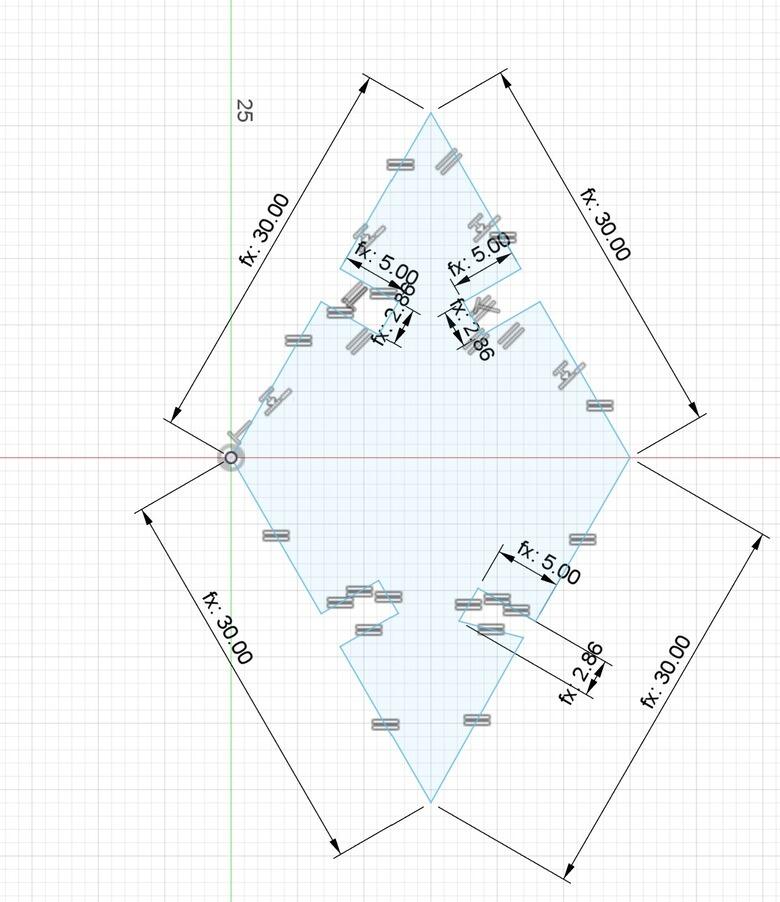
To make the diamond, I decided to mirror my triangle. I started by making a copy of the triangle. Then I used the mirror tool, which is in Create->Mirror. Whatever you select when you have “Objects” selected in the Mirror tab will be reflected. The “Mirror Line” is what the image will be reflected over. In this case, I selected all but the bottom line as objects and the side with no slot as the mirror line. After hitting Ok, I deleted what was previously the bottom line. I then made sure the knew side had parametric measurements for every line. This completed my second piece.
Laser Cutting
Exporting Sketch from Fusion
Importing DXF file into Illustrator
Test Pieces in Illustrator
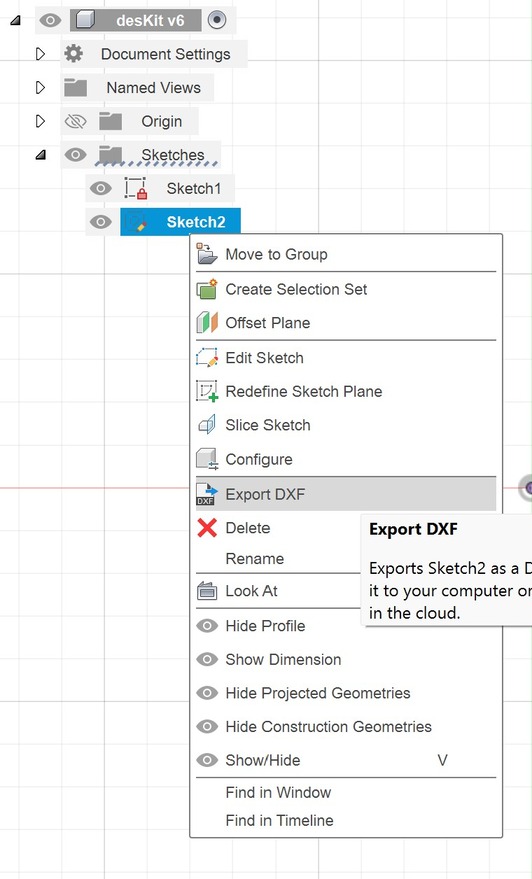
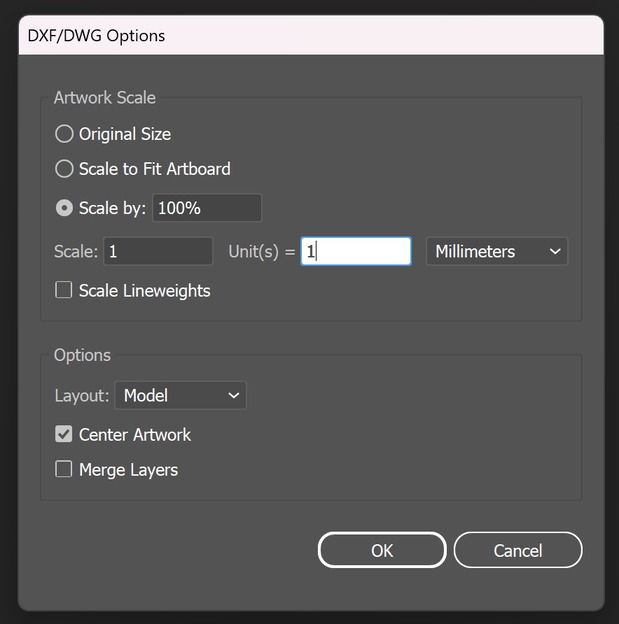
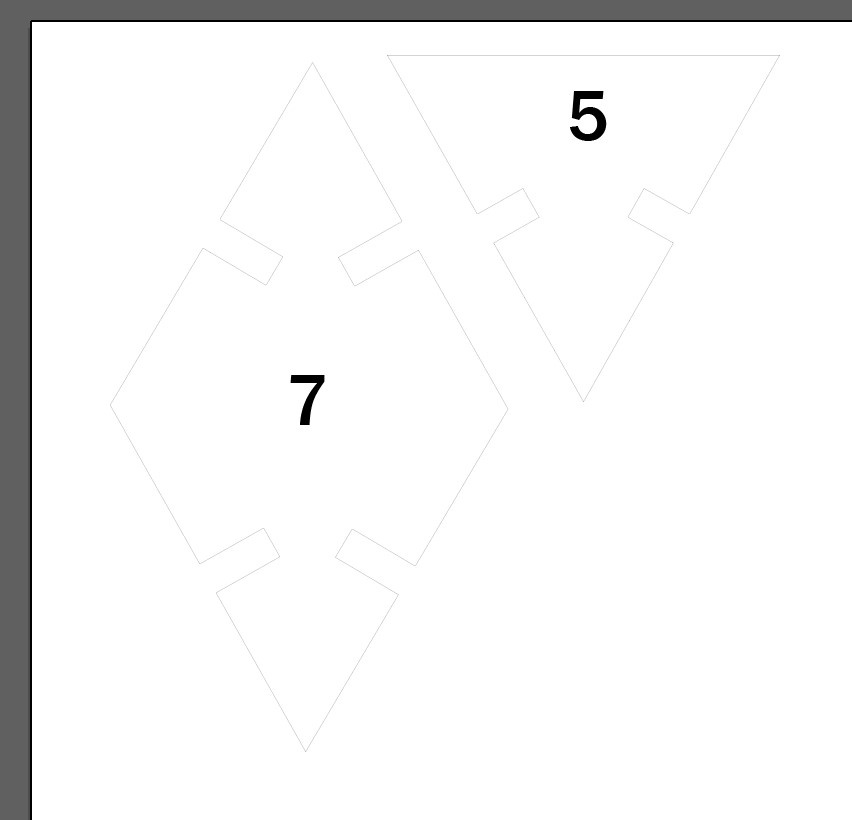
I just want to export the sketch, not the whole project. To do this, I go to Sketches and then right-click on the sketch I want to export. You then want to select Export DXF and save it. I then want to put my file into Adobe Illustrator since this will make it easier to cut. When opening, make sure to choose whatever units you were using in Autodesk Fusion. Then set the Scale 1 and Unit(s) to 1 so that the correct dimensions are brought over. Once in Adobe, set the stroke of your shapes to 0.01mm so that they will be cut out on the laser cutter. I also added some numbers to engrave. Above shows my test pieces. I wanted to test the difference between a slot depth of 5mm and 7mm, hence the numbers.

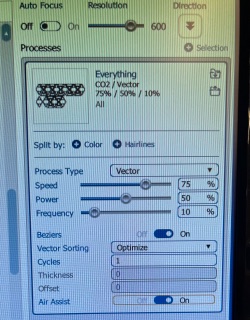
Settings for Engraving and Cutting Cardboard
Test Pieces
All of the Pieces
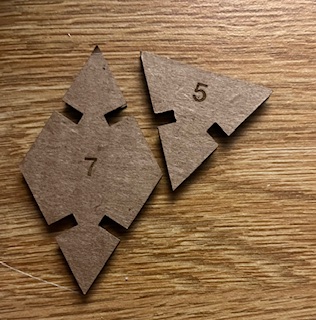
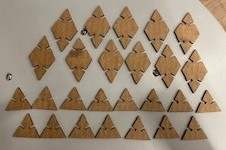
I followed the instructions for laser cutting as described in the Group Assignment section. The right image is an picture of the settings for cardboard. The settings for engraving cardboard are 95% speed and 15% power. The settings for cutting cardboard are 75% speed, 50% power, and 10% frequency. The picture on the left shows the test pieces cut out. I decided to split the difference with 6mm slots. I also had issues with the slots being too loose. Originally, the slot width had been 2.86 + kerf (which was 0.3), so I changed the slot width to 2 + kerf (2.3 total). I also decided to reduce the size of the shapes from the test. Each side of the triangle is 30mm. With these changes, the slots fit together nicely! I designed the slots to be the correct width that they could attach to any part of another cardboard piece.
Completed Kit
Here are just a few of the shapes you can make with my construction kit! I had help from some friends to create these shapes.
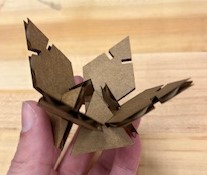
Lotus
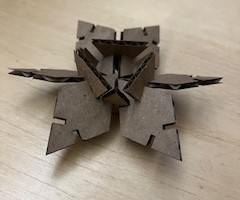
Snowflake
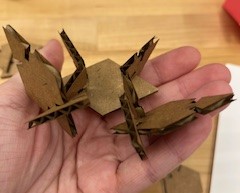
Crab
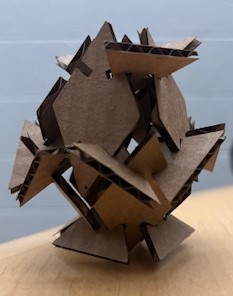
Egg
Vinyl Cutter
Design
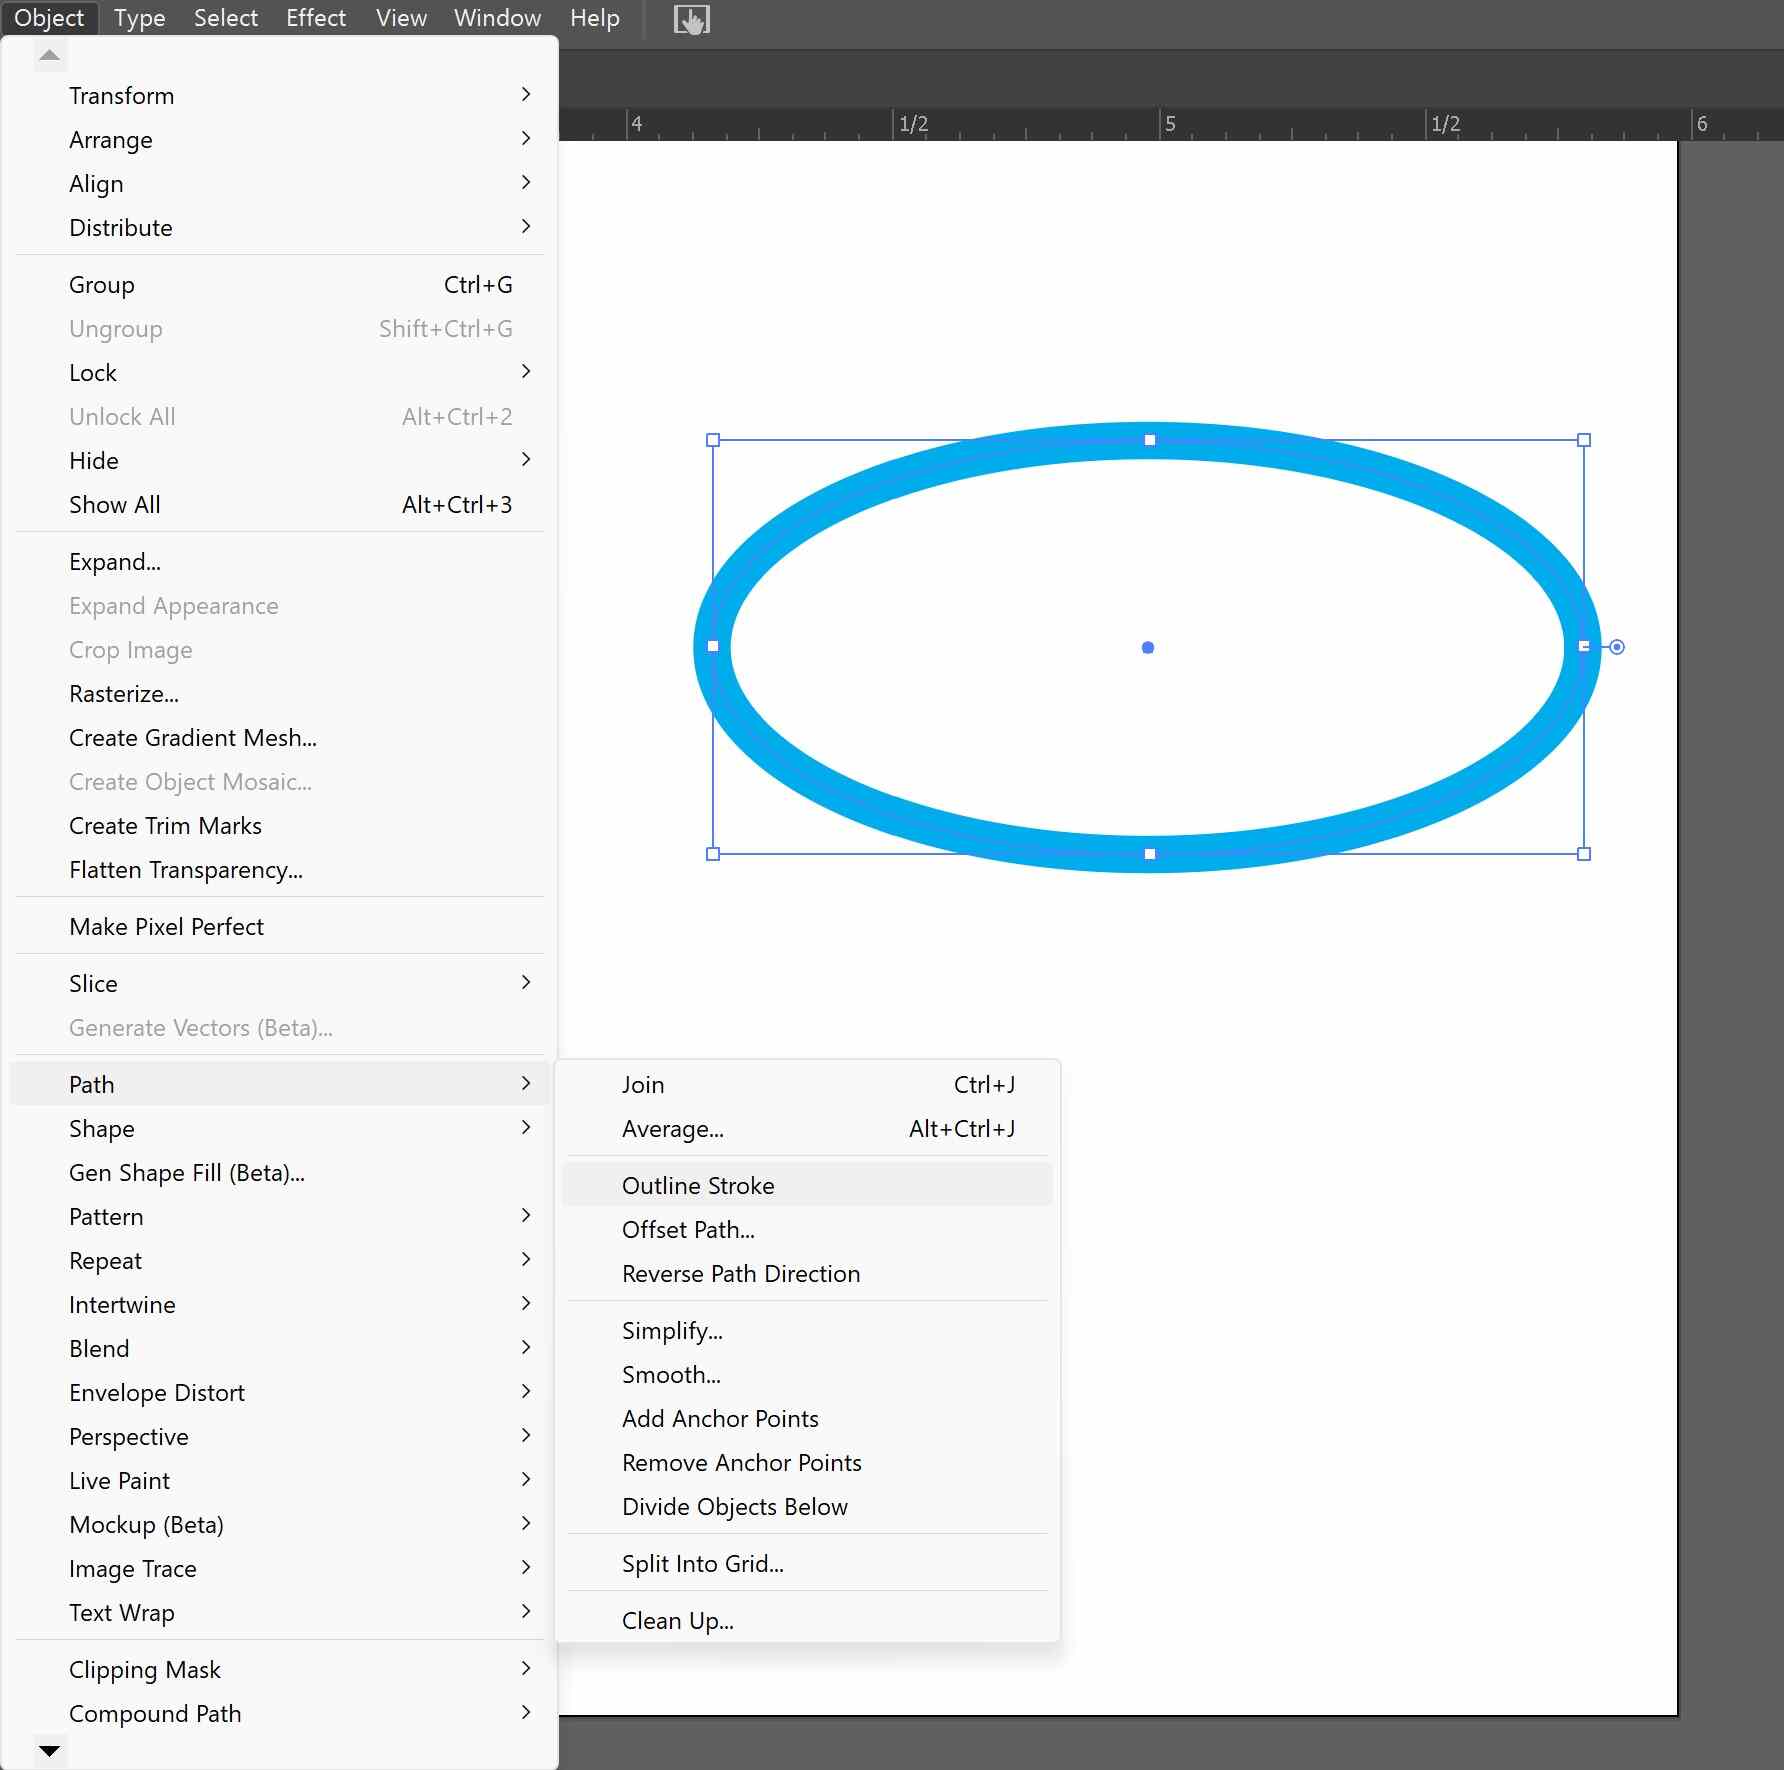
Outline Stroke
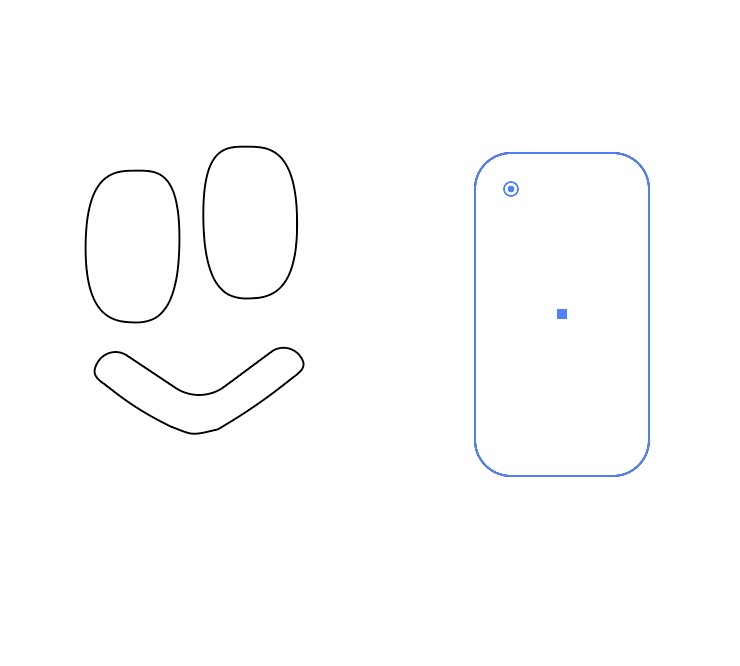
Making the Face
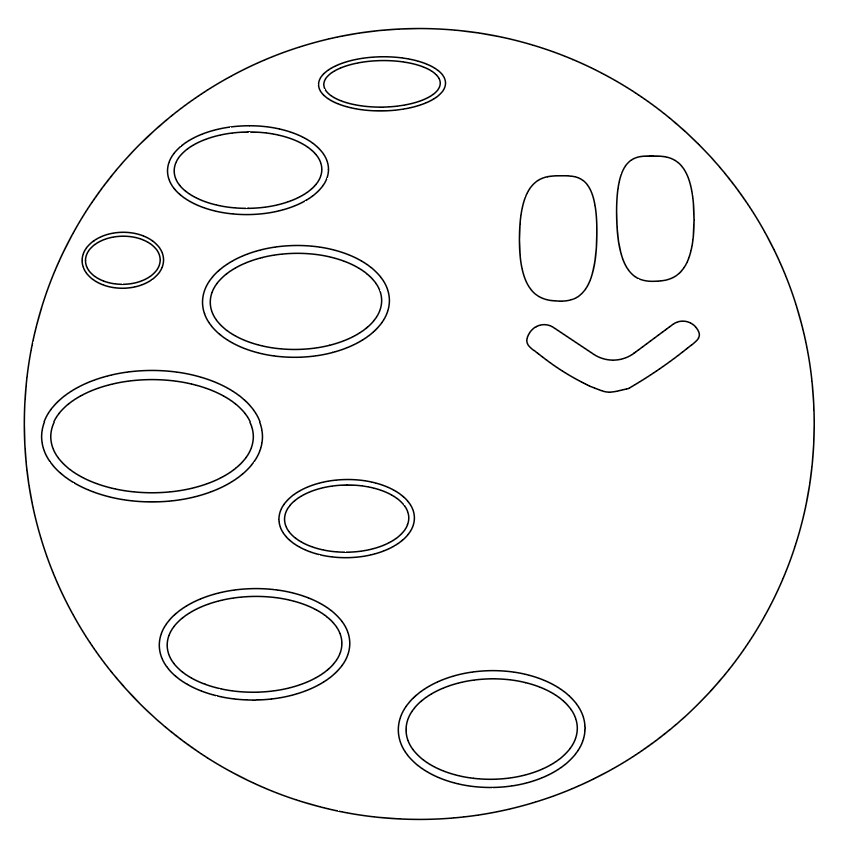
Final Design
For my vinyl cut item, I wanted to make a sticker. I had previously made a smiley sun and cloud sticker and I wanted to add a moon to the collection. I used Adobe Illustrator for designing this. I started by just making a circle and oval using the ellipse tool. I increased the stroke of the oval to 5 pt. To outline the oval, I went to Object -> Path -> Outline Stroke whilst having the oval selected. This creates a path around the outside of the oval. This would allow me to cut the outline of an oval and not the middle part. I then copied the shape and put a bunch of ovals of various sizes in a crescent shape within the circle. Luckily, I still had the file from the original stickers. I had originally created the eyes and mouth using the rectangle tool and rounding the corners. I added the face to the moon and grouped all of the shapes together. My design was then complete!
Cutting
To export the design, go to File -> Export -> Export As and choose SVG. I then followed the instructions for the vinyl cutter in the Group Assignment section. I used a speed of 108 mm/s and 60g of force. I chose a light gray sticker vinyl for this.
Post Processing

Use Weeding Tools to Remove Unwanted Pieces
Fully Weeded Sticker
The next step was weeding my cut vinyl. This is when you remove any parts of the vinyl that are not part of your final product. In this case, I removed the background, face, and the outline of the ovals. You can do this with your hands or with weeding tools. Weeding tools include tweezers and picks that look similar to a dentist’s.
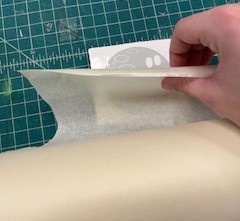
Transfer Tape
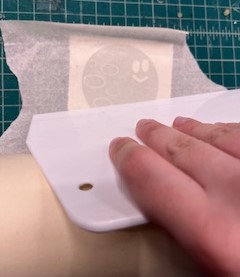
Use a Scraper
Apply To Your Item of Choice
Then we add transfer tape to the top of the sticker. The transfer tape sticks to just the vinyl so that we can peel off the backing and easily place the sticker. This is especially important in a sticker like this where the pieces aren’t all connected to each other. To make sure the transfer tape is fully stuck to the vinyl, use a scraper to get any air bubbles out. When you’re ready to stick your sticker on something, remove the backing paper and use the transfer tape to stick your sticker onto your desired item.
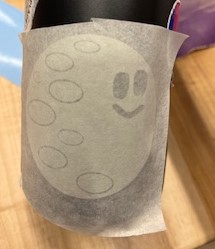
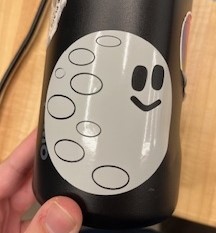
Final Sticker
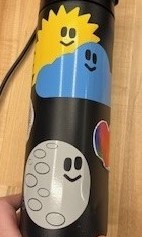
I added this sticker to my water bottle because that is where the cloud and sun sticker I previously made are.
Final Sticker
The Whole Collection