16. Wildcard Week
1. Summary
For this week's assignment, we designed and produced something with a digital process incorporating computer-aided design and manufacturing not covered in another assignment, documenting the requirements that our assignment meets, and including everything necessary to reproduce it.
The process that I employed was computerized embroidery.
2. Computerized Embroidery
The process explored during this assignment is computerized embroidery, a digital fabrication method that closely resembles CNC machining or 2D plotting. Instead of cutting or extruding material, this machine manipulates fabric and thread to render vector-based designs as stitched patterns. Although often seen in decorative or textile contexts, this process is fundamentally a form of automated toolpath execution using a needle and thread as the tool.
In computerized embroidery, the machine interprets a pre-generated stitch plan, analogous to G-code, from a digital file, typically in formats like .PES or .DST. This file contains detailed instructions about stitch direction, density, and movement. The machine moves the fabric using a controlled hoop mechanism beneath a stationary needle, executing each path with high precision. This is functionally similar to a CNC mill or vinyl cutter, but working in thread.
The potential applications of this process go far beyond decorative designs. In addition to artistic expression and personalized garments, it is widely used in wearable technology, e-textiles, smart sensors, and even flexible circuit fabrication using conductive thread. Because it's driven by vector designs and CAM software, embroidery can be integrated into design workflows just like laser cutting or PCB milling.
For this week, I used this process to convert one of my own CAD illustrations into a stitched graphic. The design was processed using the Ink/Stitch extension for Inkscape, which can allow us to precisely control stitch type, orientation, and sequence, essentially generating a CNC embroidery toolpath from a vector source.
3. Design
The embroidery design I used for this assignment originated in Week 3: Computer-Aided Design, where I practiced parametric modeling using SolidWorks. One of the elements I created was a symbolic geometric shape based on a layered rhombus pattern. While initially conceived as a pattern for vynil cutting, the a strong graphical motif of the shape made it a fitting candidate for embroidery.

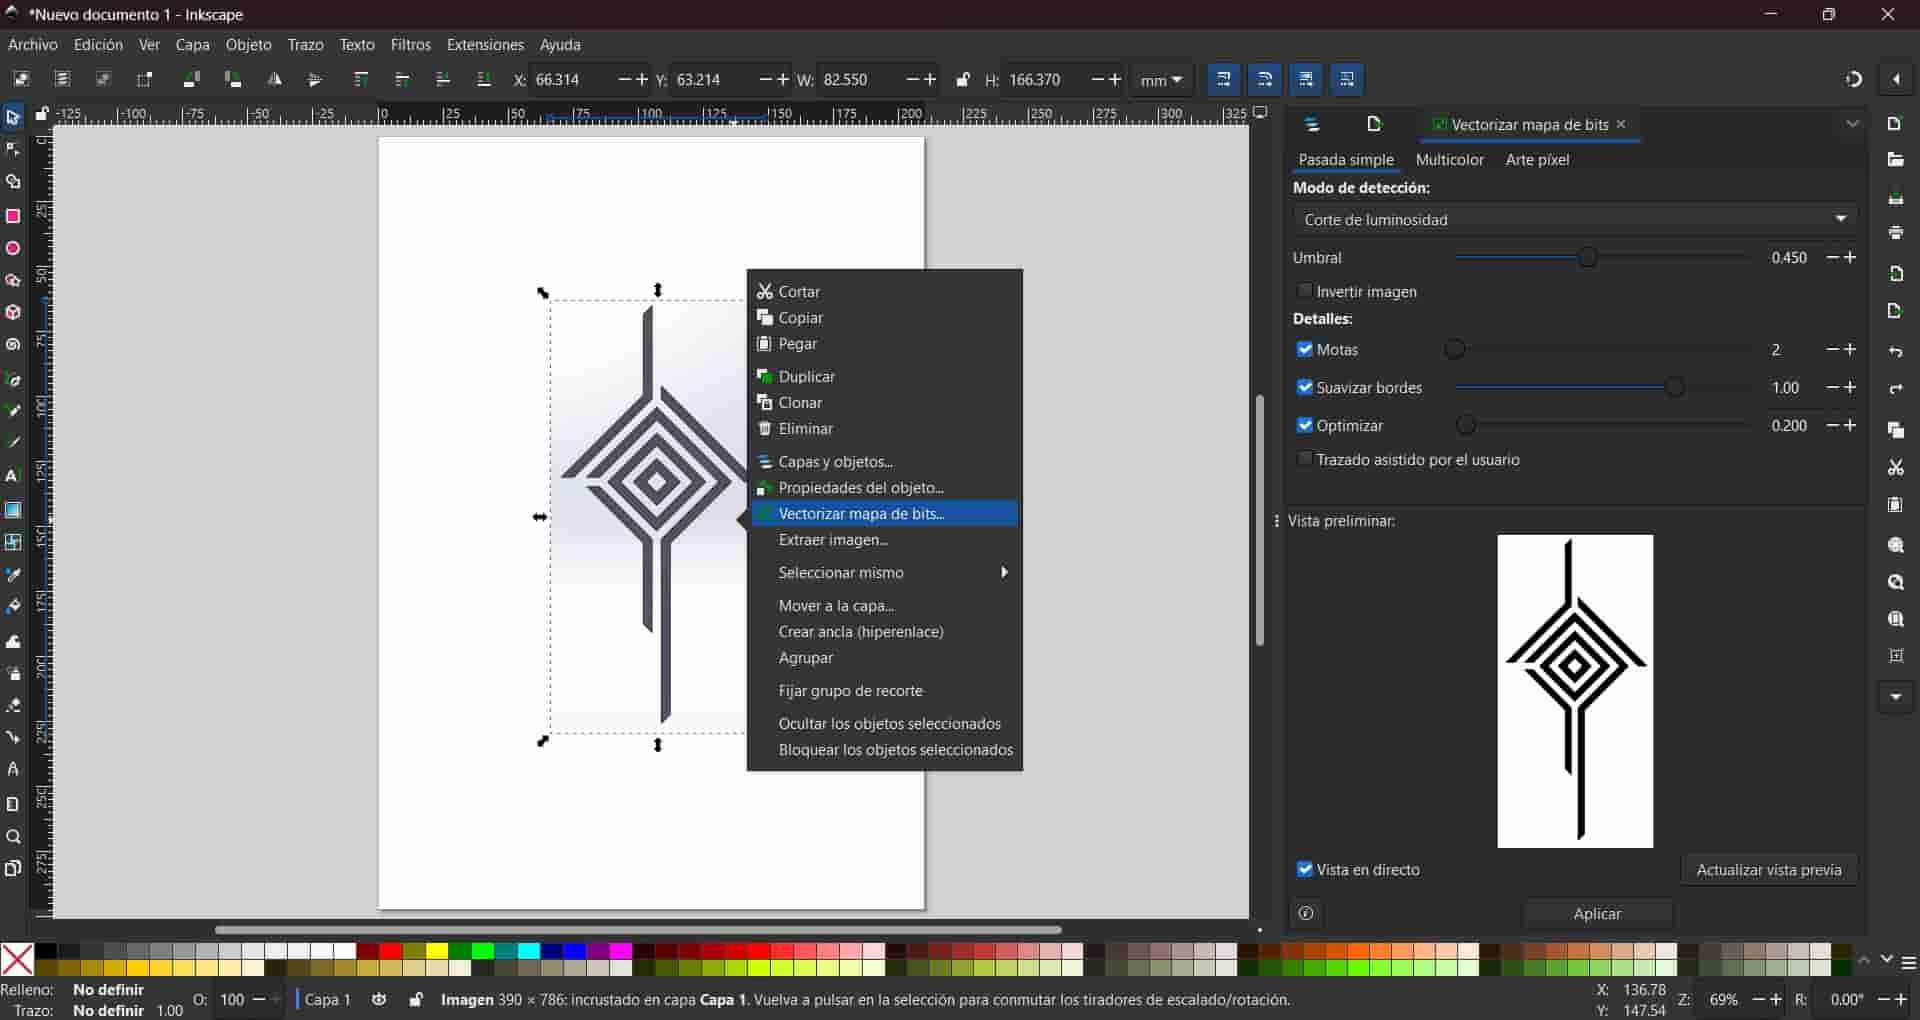
To adapt the model, I took a screenshot of the 3D model and imported it into Inkscape, where I used bitmap tracing to convert it into a clean, vector-based design. This ensured that all lines were suitable for stroke-based stitch planning. Inkscape's tools allow us to generate the patterns with precision and geometric fidelity while optimizing the shape for the embroidery process.
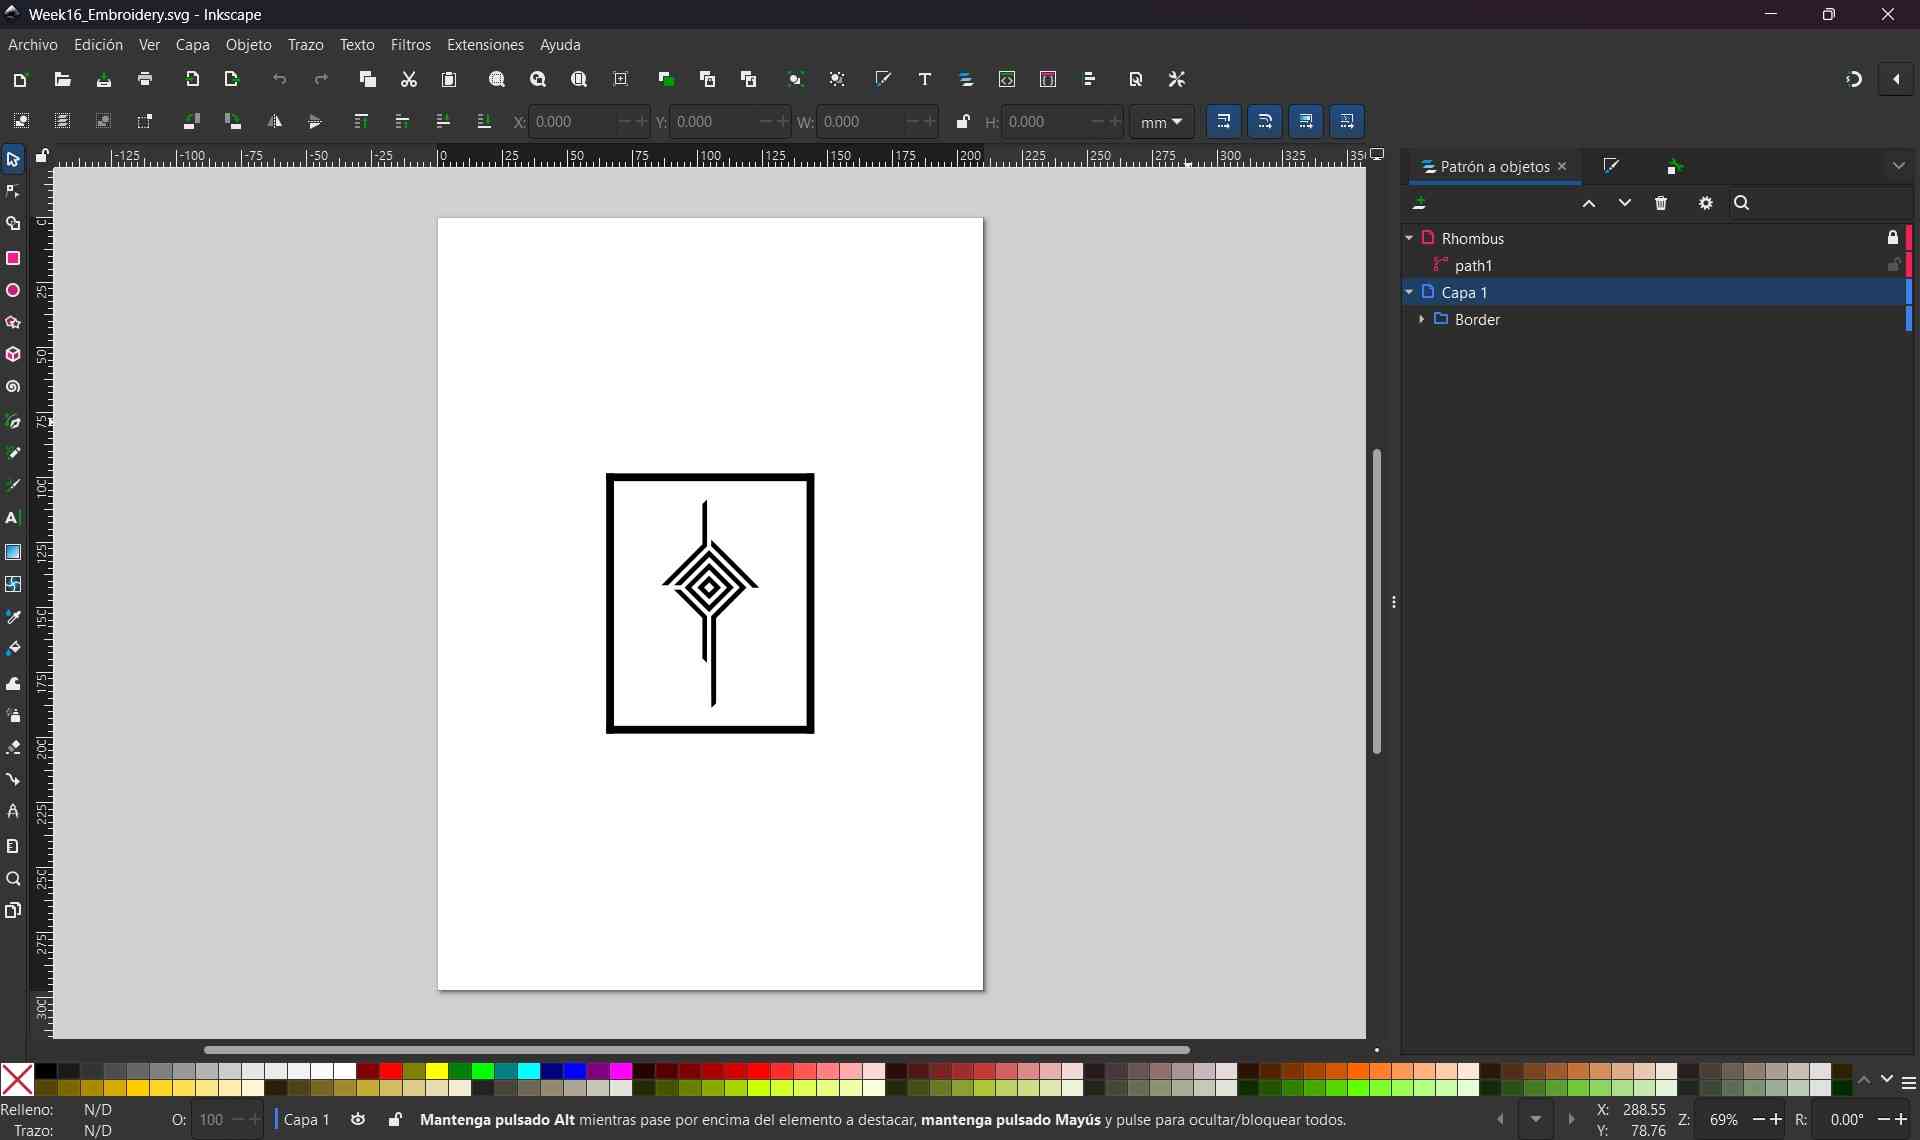
The rectangular border around the symbol was drawn directly in Inkscape to frame the design and provide contrast. This was done after I embroided the rhombus pattern, since I liked the results, I decided to make a full patch with borders. By preparing the artwork in vector format, I was able to later pass it directly into the Ink/Stitch extension for stitch simulation and toolpath conversion.
This hybrid approach combining CAD, image processing, and vector editing, allowed me to repurpose existing design assets in new contexts while learning how to transition between different digital fabrication processes.
4. Ink/Stitch Extension
In order to convert vector graphics into a functional embroidery toolpath, I used the open-source Ink/Stitch extension for Inkscape. Ink/Stitch is a powerful plugin that enables stitch planning, simulation, and file export in embroidery-compatible formats such as .PES, .DST, and .EXP. It integrates seamlessly into Inkscape's interface and allows for full control of embroidery parameters directly from vector paths.
4.1 Installing Ink/Stitch
The extension was installed by downloading the latest version from the official Ink/Stitch website. The installation process involves unzipping the plugin files and placing them into Inkscape's extensions folder, typically located in C:\Users\USERNAME\AppData\Roaming\inkscape\extensions on Windows. After copying the files, I restarted Inkscape to ensure the extension was correctly loaded.
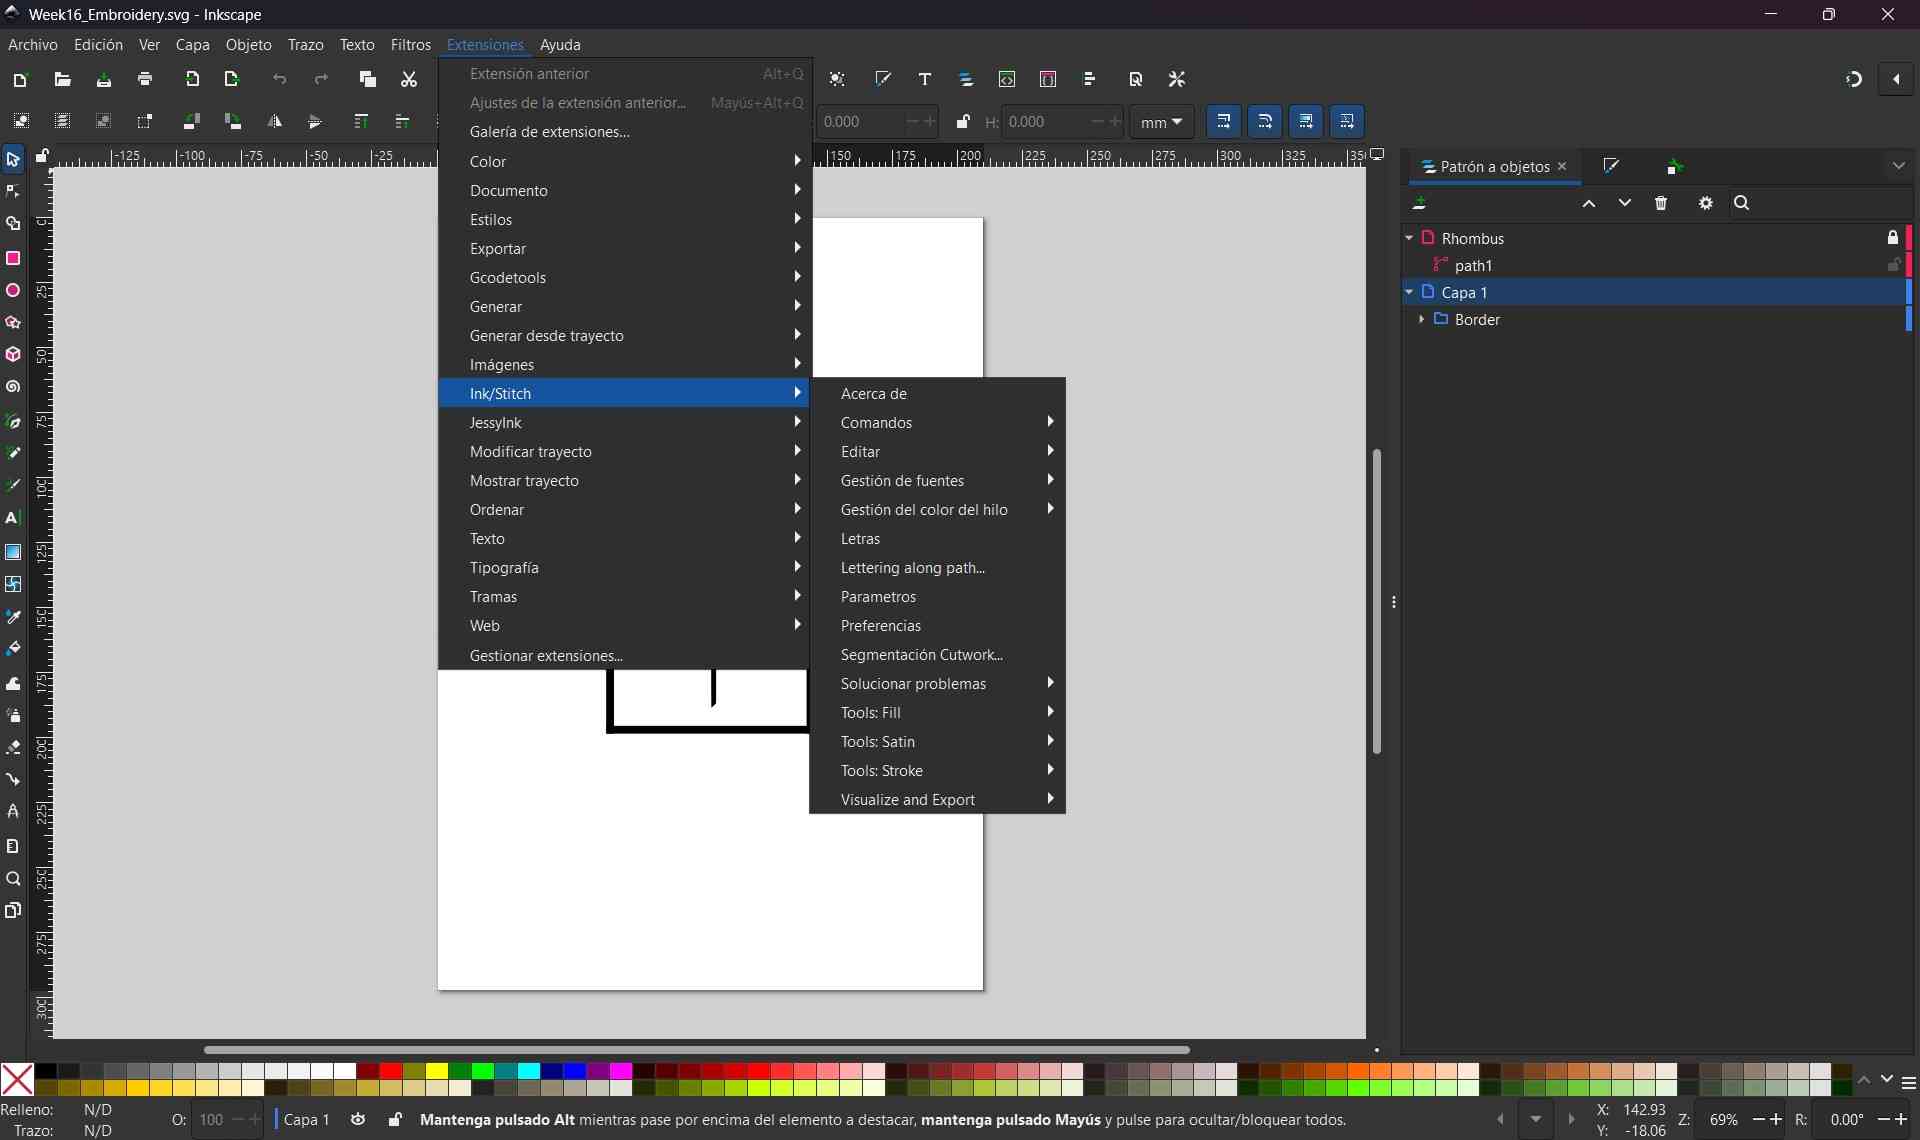
Once installed, a new Ink/Stitch menu appeared in the Extensions tab, providing access to toolpath configuration, simulation, and export features.
4.2 Toolpath Generation
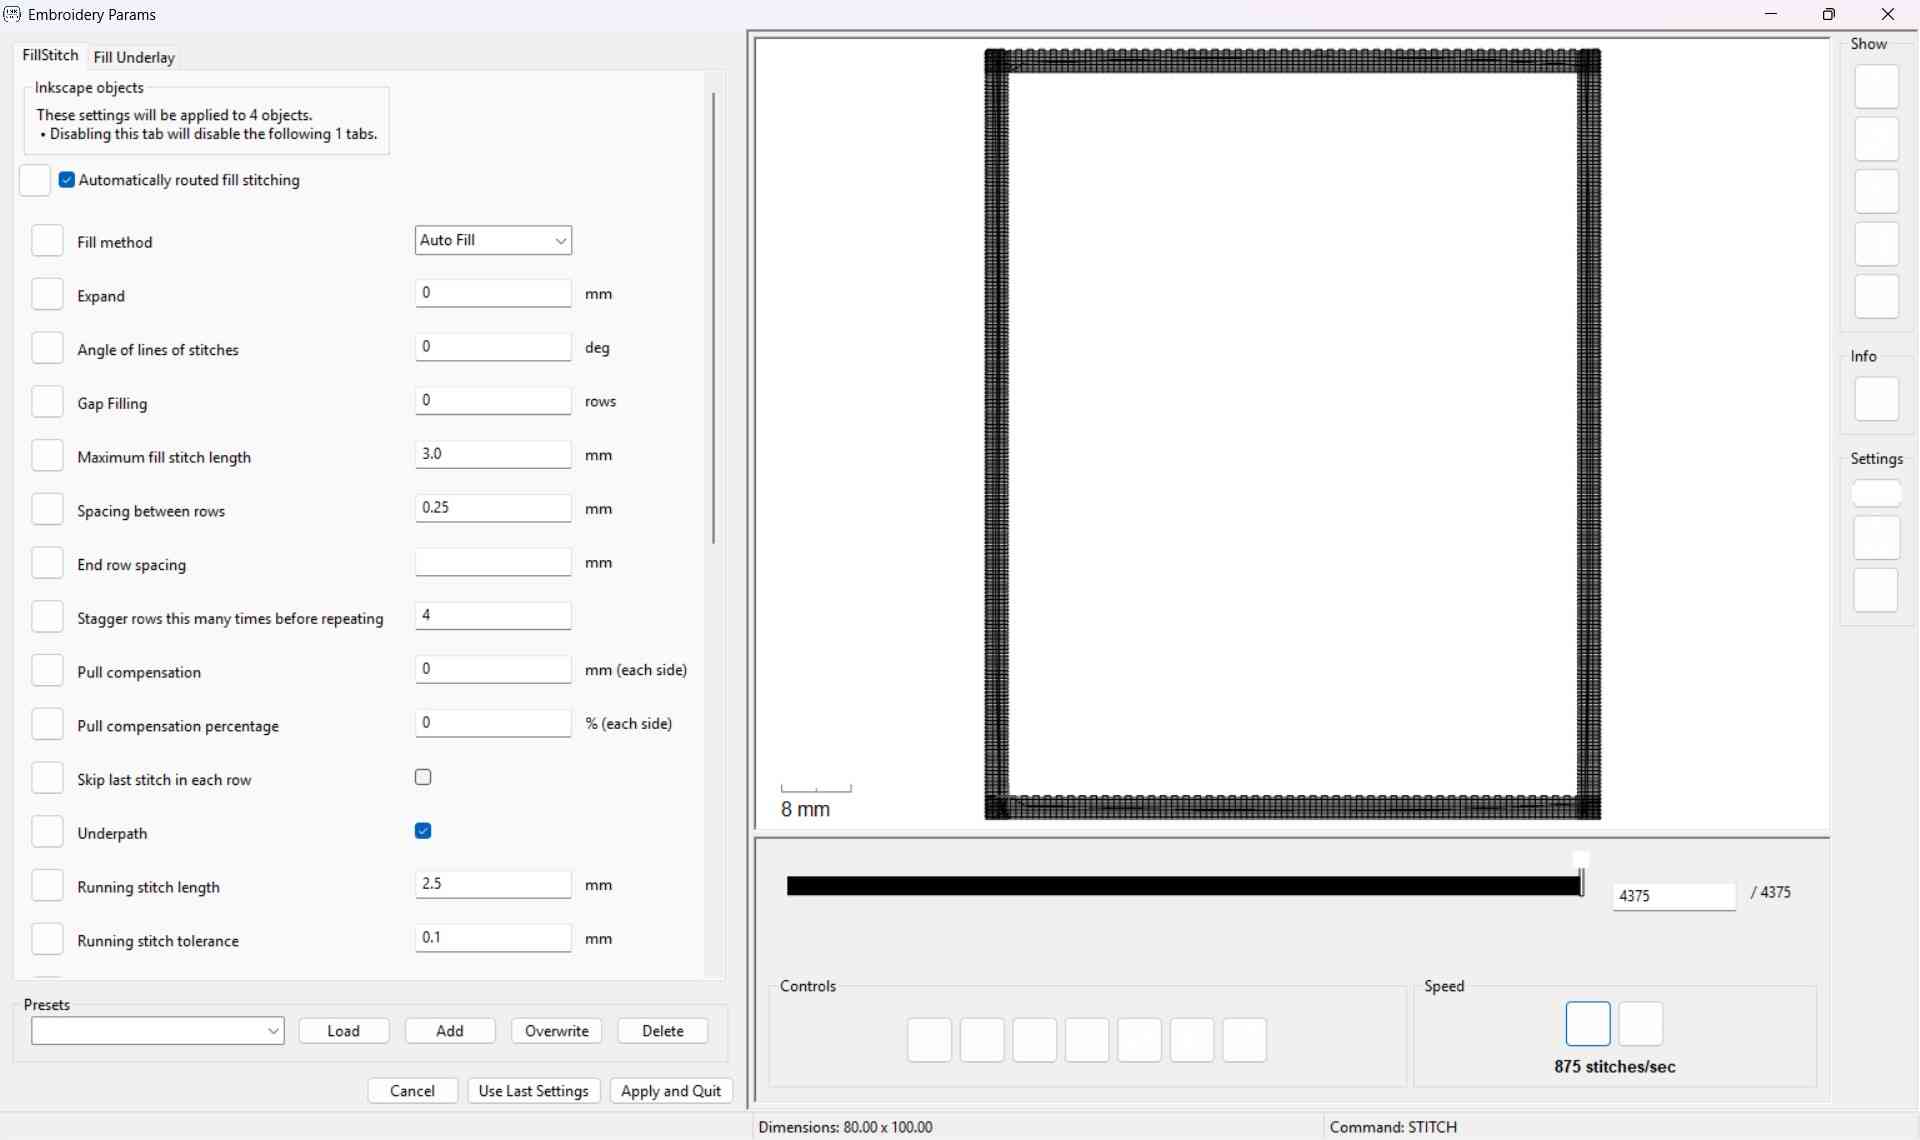
With the vector design ready, I selected the rhombus graphic and opened Extensions → Ink/Stitch → Parameters. In this menu we can define the embroidery parameters for each path, including stitch type, stitch length, direction, density, and sequencing. As this was my first time using the software and given my limited experience with embroidery, I chose to use the default parameters provided by Ink/Stitch to avoid introducing errors.
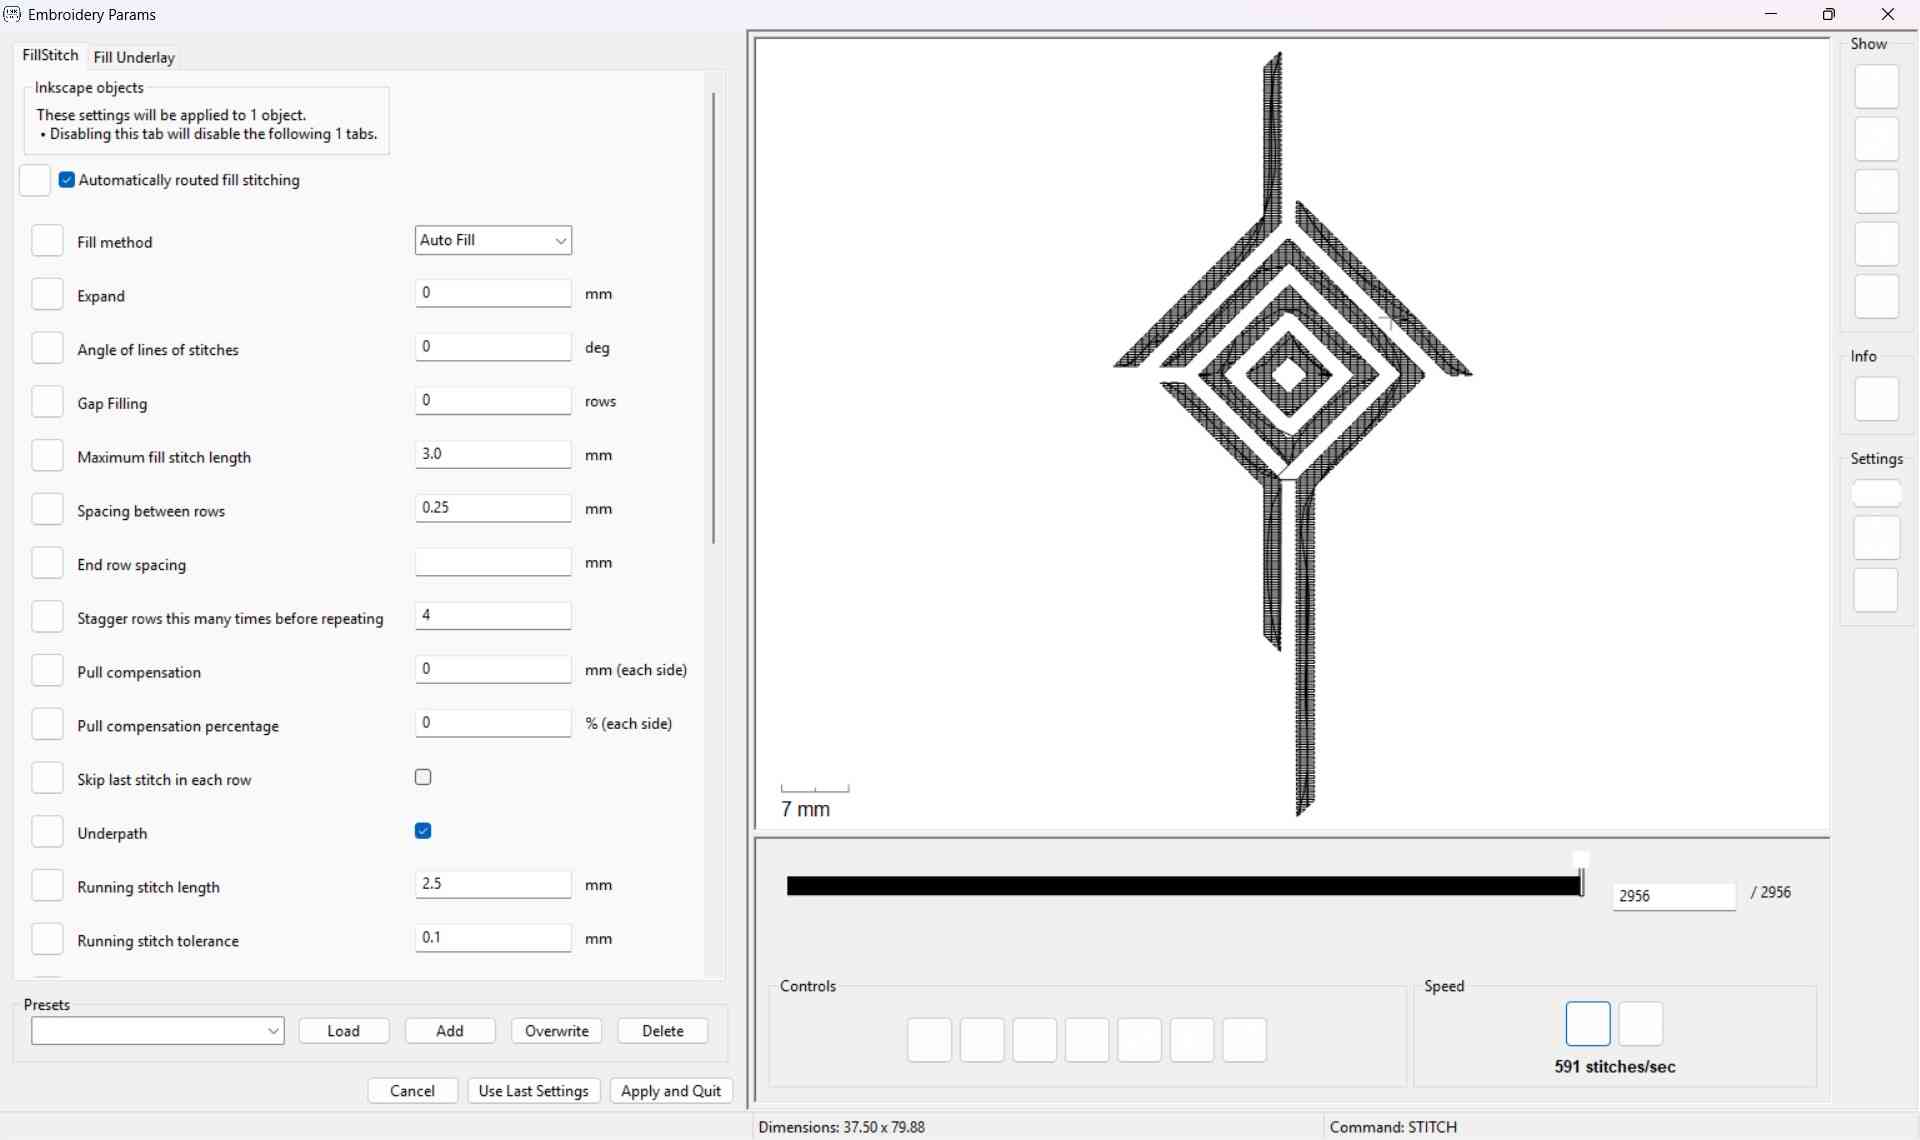
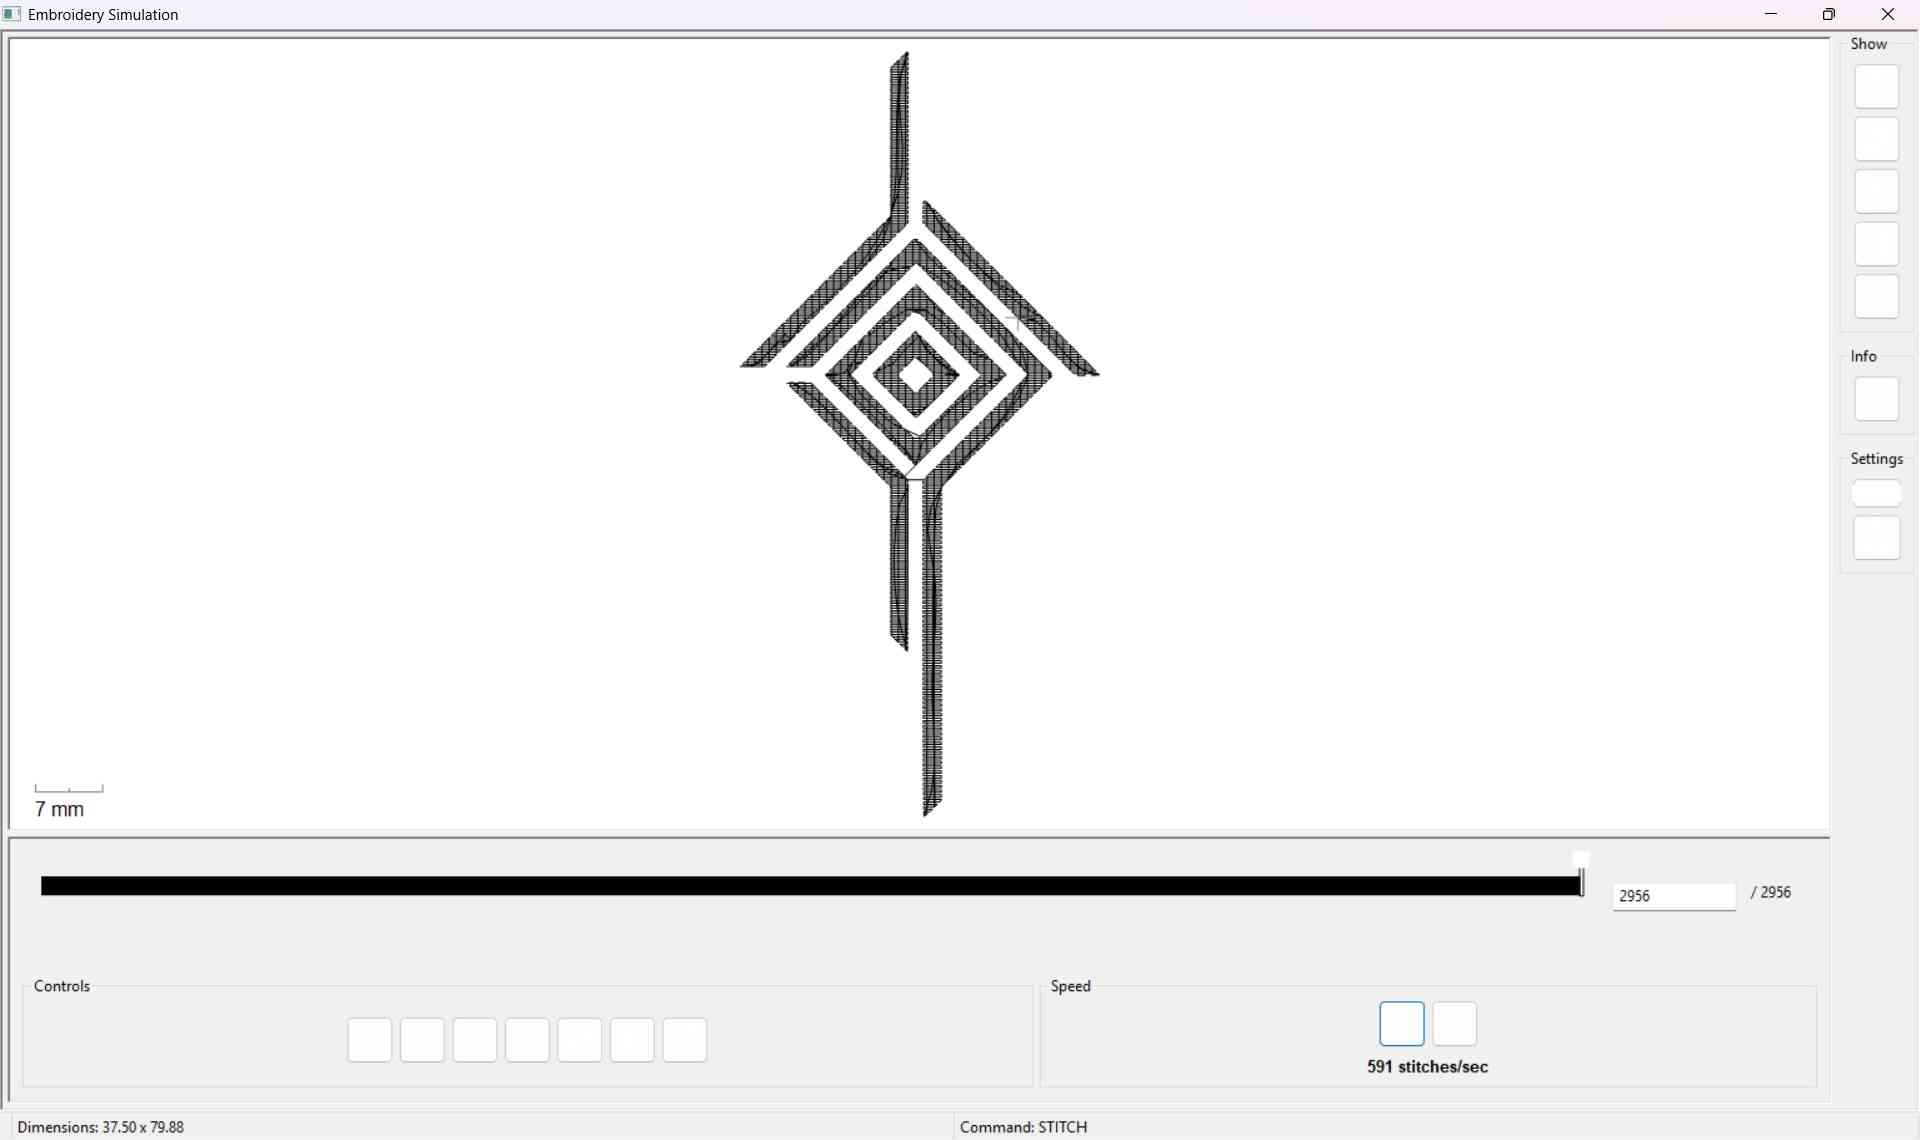
On the right side of the Parameters window, Ink/Stitch displays a live simulation preview of the stitching path. This is particularly useful to verify the logic and order of stitching operations before committing to export. Once satisfied, I clicked Apply and Quit to generate the stitch definitions.
To further verify that the toolpath was correct, I opened Extensions → Ink/Stitch → Visualize and Export → Simulator. This tool animates the needle path in order of execution and highlights any potential stitching issues. However, I experienced repeated software crashes when using the simulator without saving beforehand, so I highly recommend saving your work frequently when performing simulations, especially on larger designs.
Once ready, we will return to our canvas and save the file as a .PES file, this is the file that we will load into the machine. We proceed to copy it into a USB drive, with this, we are now ready to use the machine.
After completing the embroidery of the rhombus and evaluating the results, I drew the borders and repeated the same process, hiding the rhombus object to ensure that only the borders would be processed into the second toolpath.
5. Machine Setup and Execution
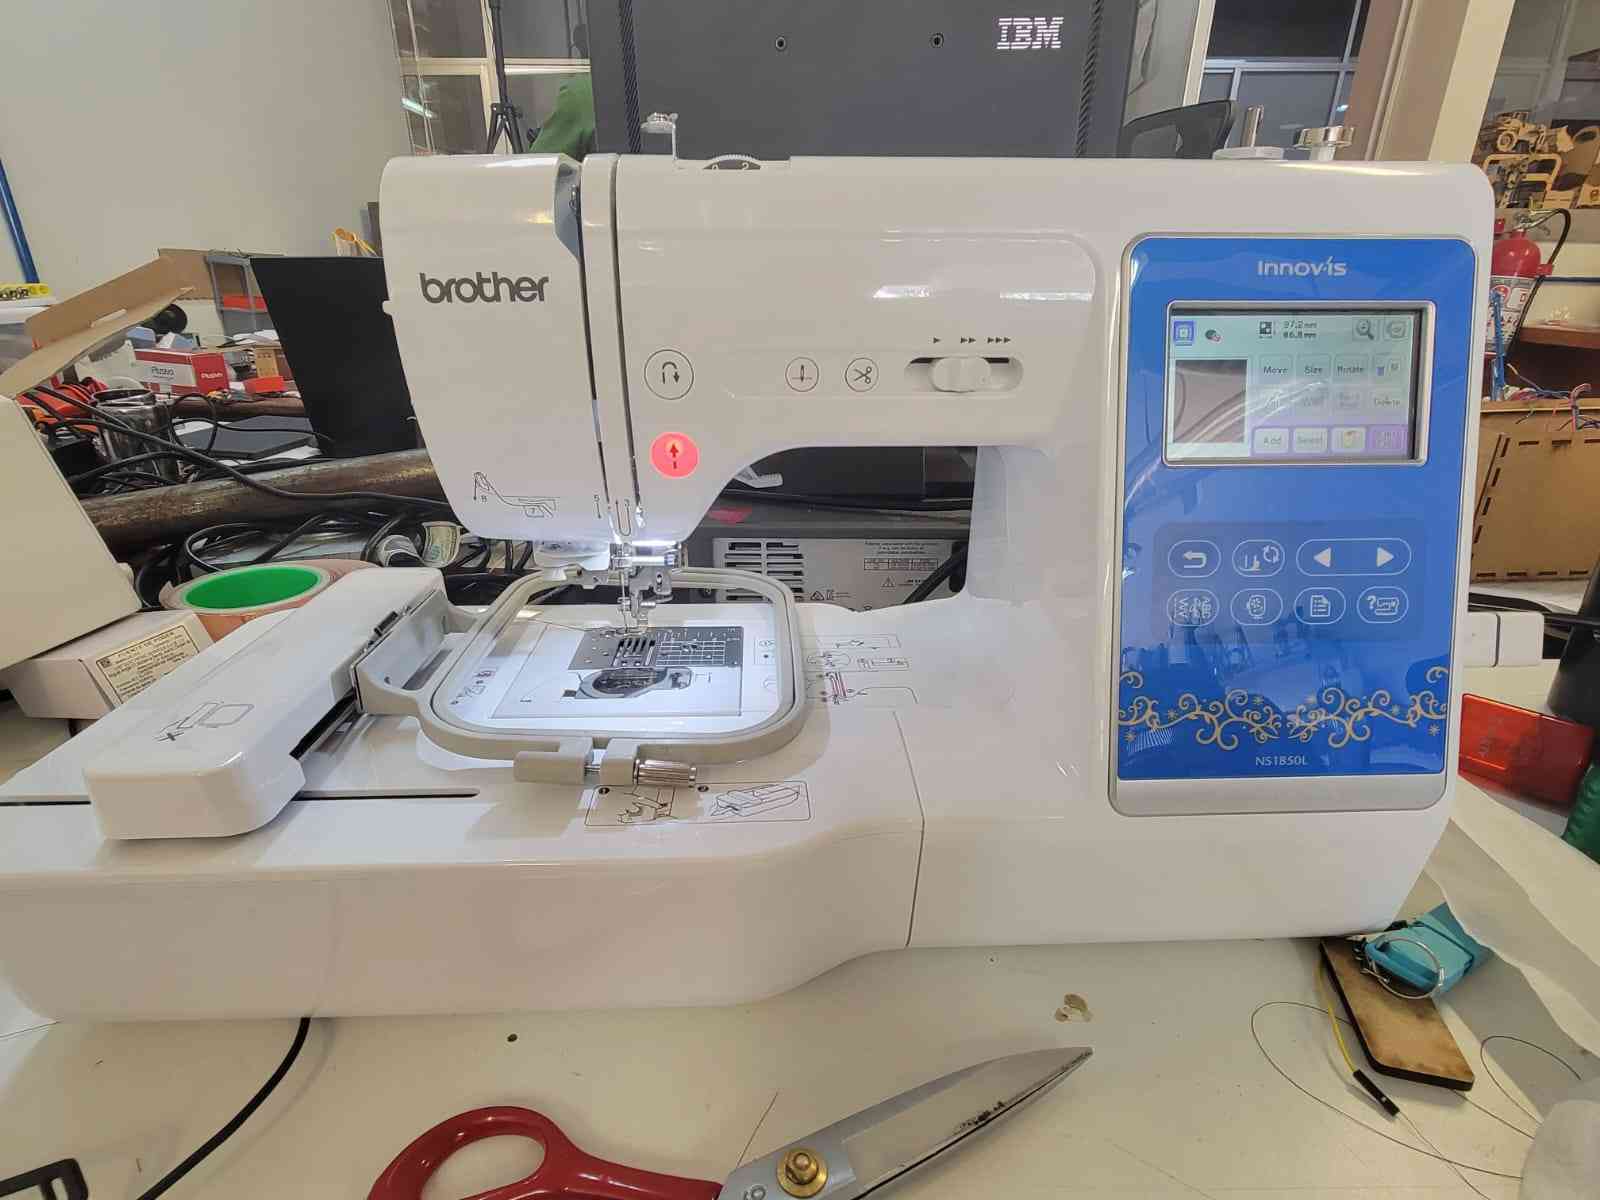
With the stitch file prepared, the next step was to configure the Brother NS1850L embroidery machine. This included preparing both the upper and lower threads, installing the fabric into the embroidery hoop, and loading the stitch file via USB. The Brother interface, along with numbered guides and directional arrows, makes the setup process intuitive and beginner-friendly.
5.1 Winding and Installing the Bobbin
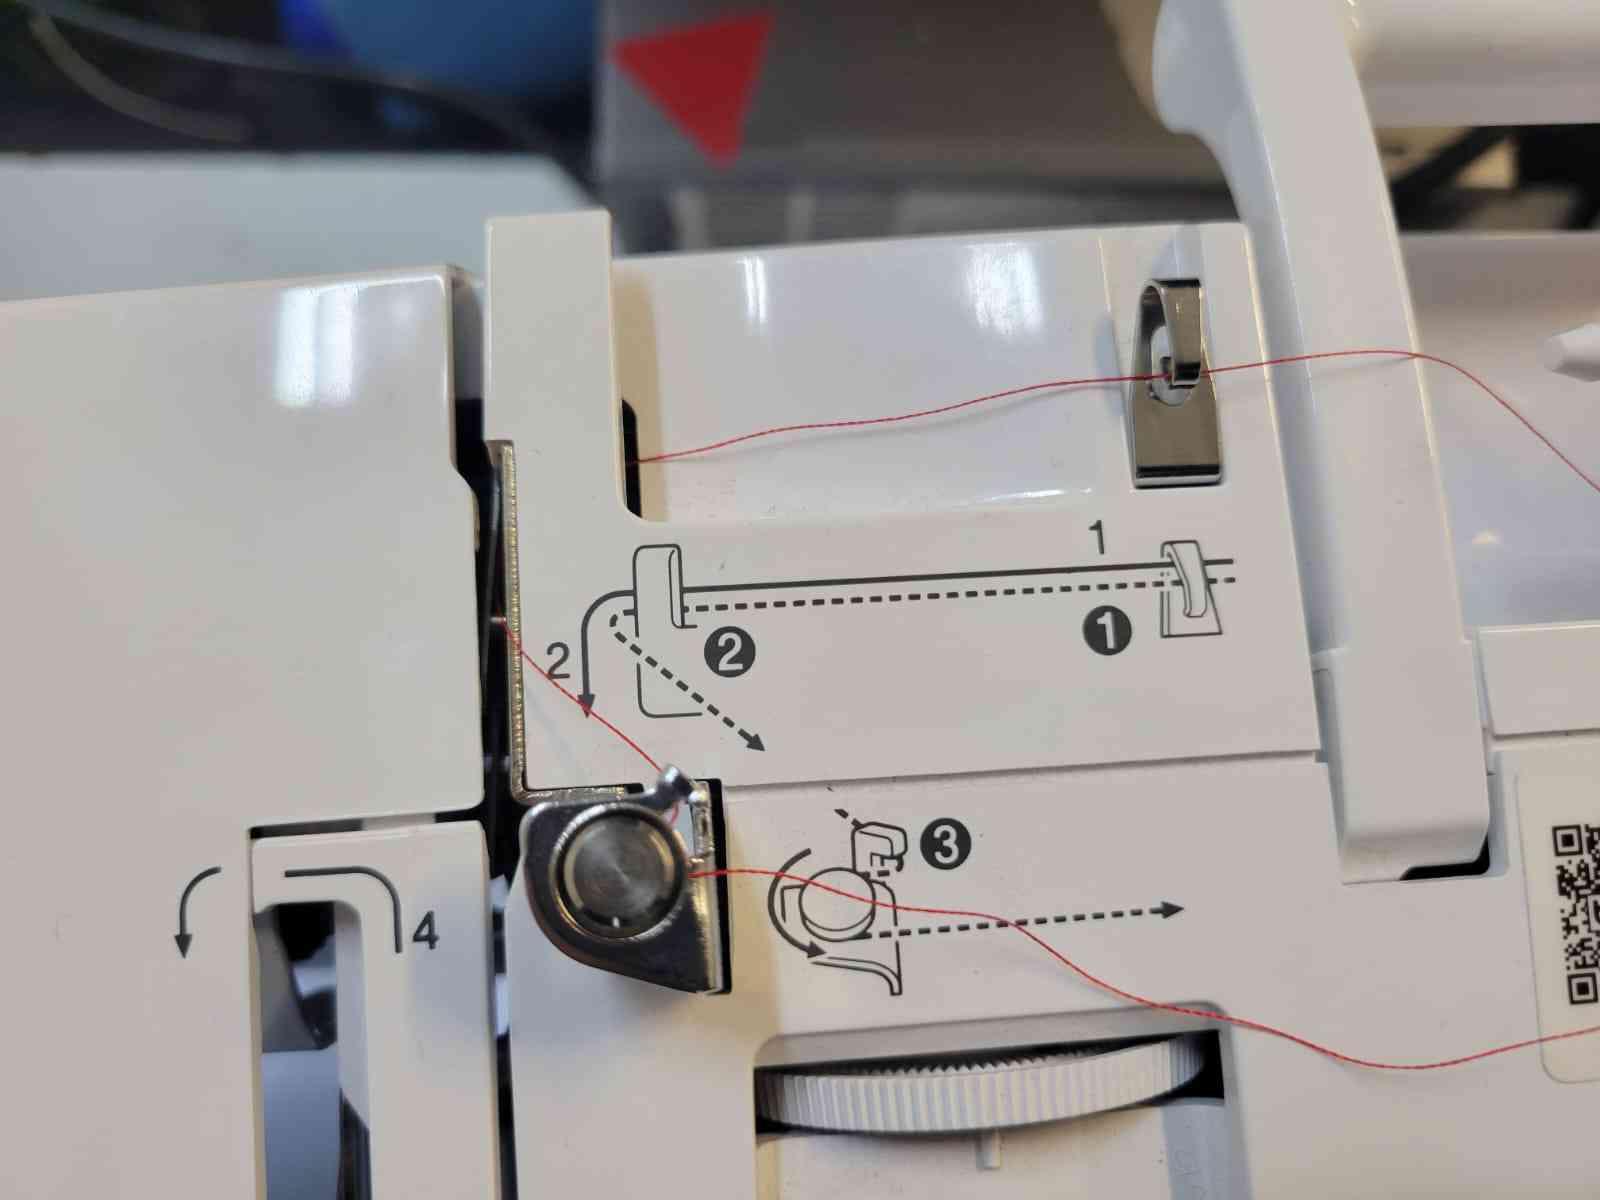
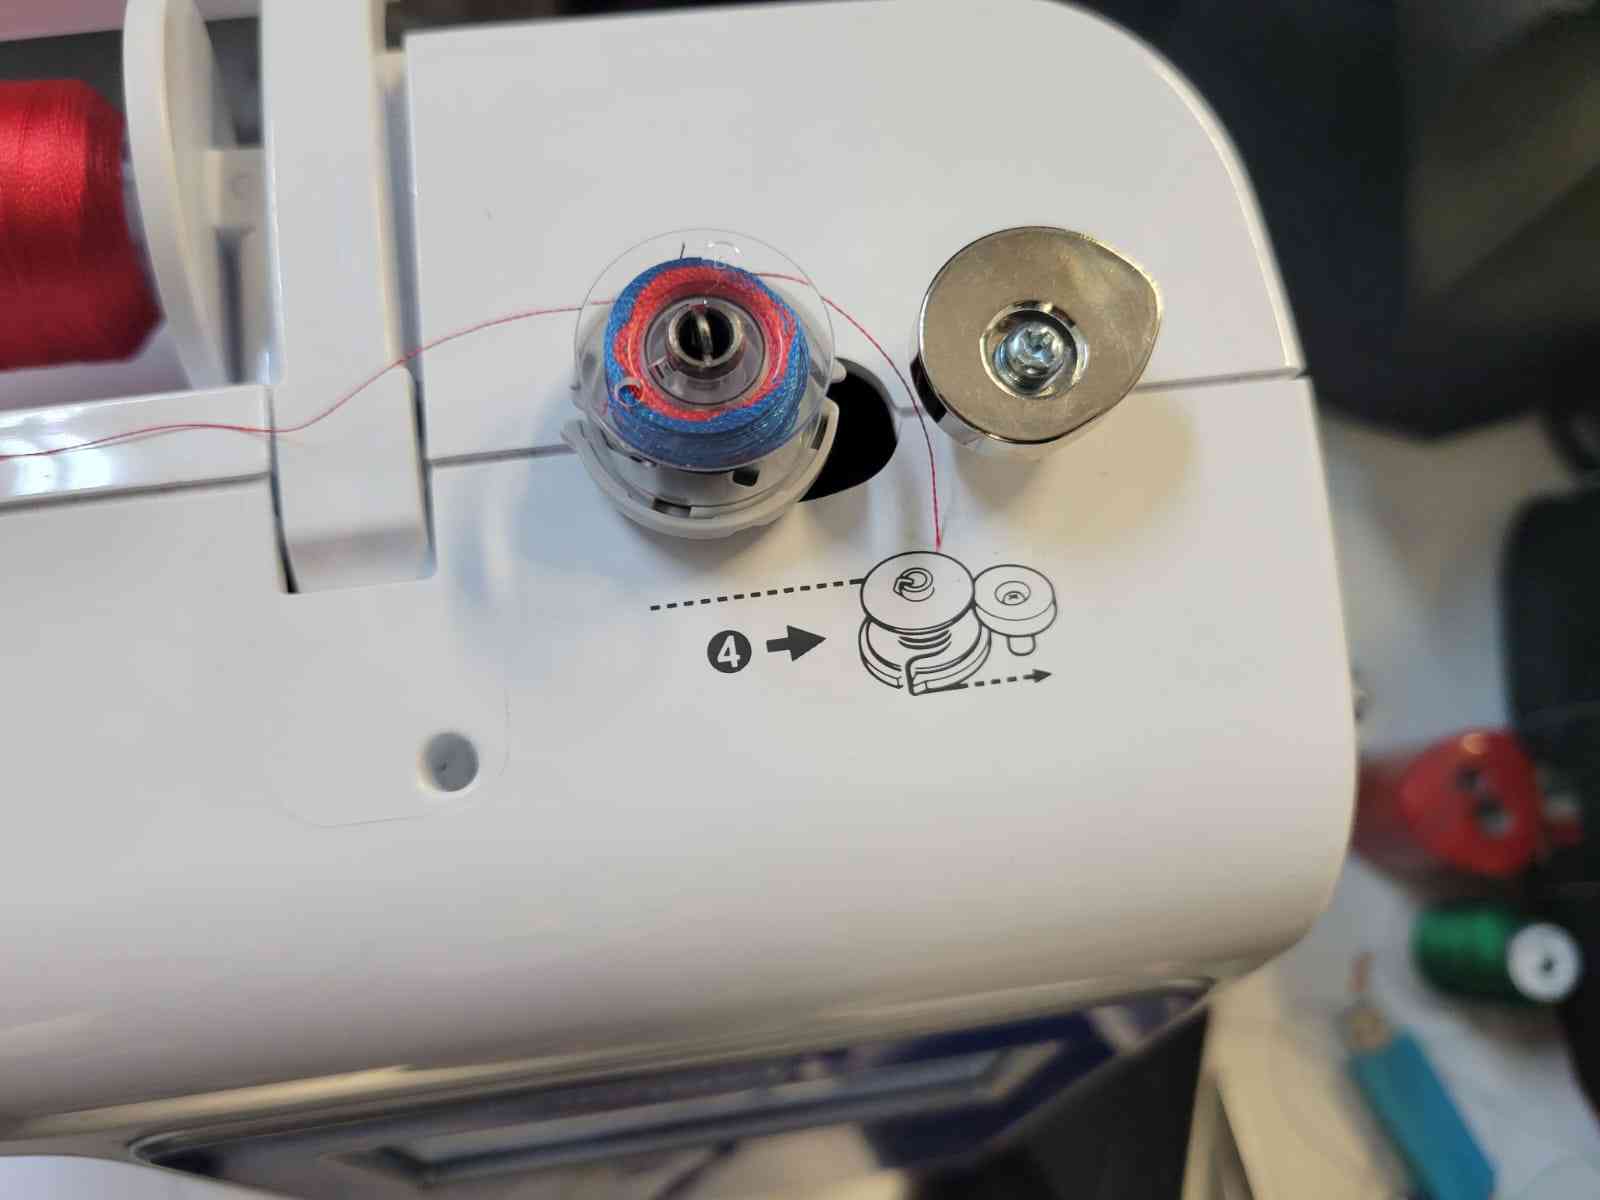
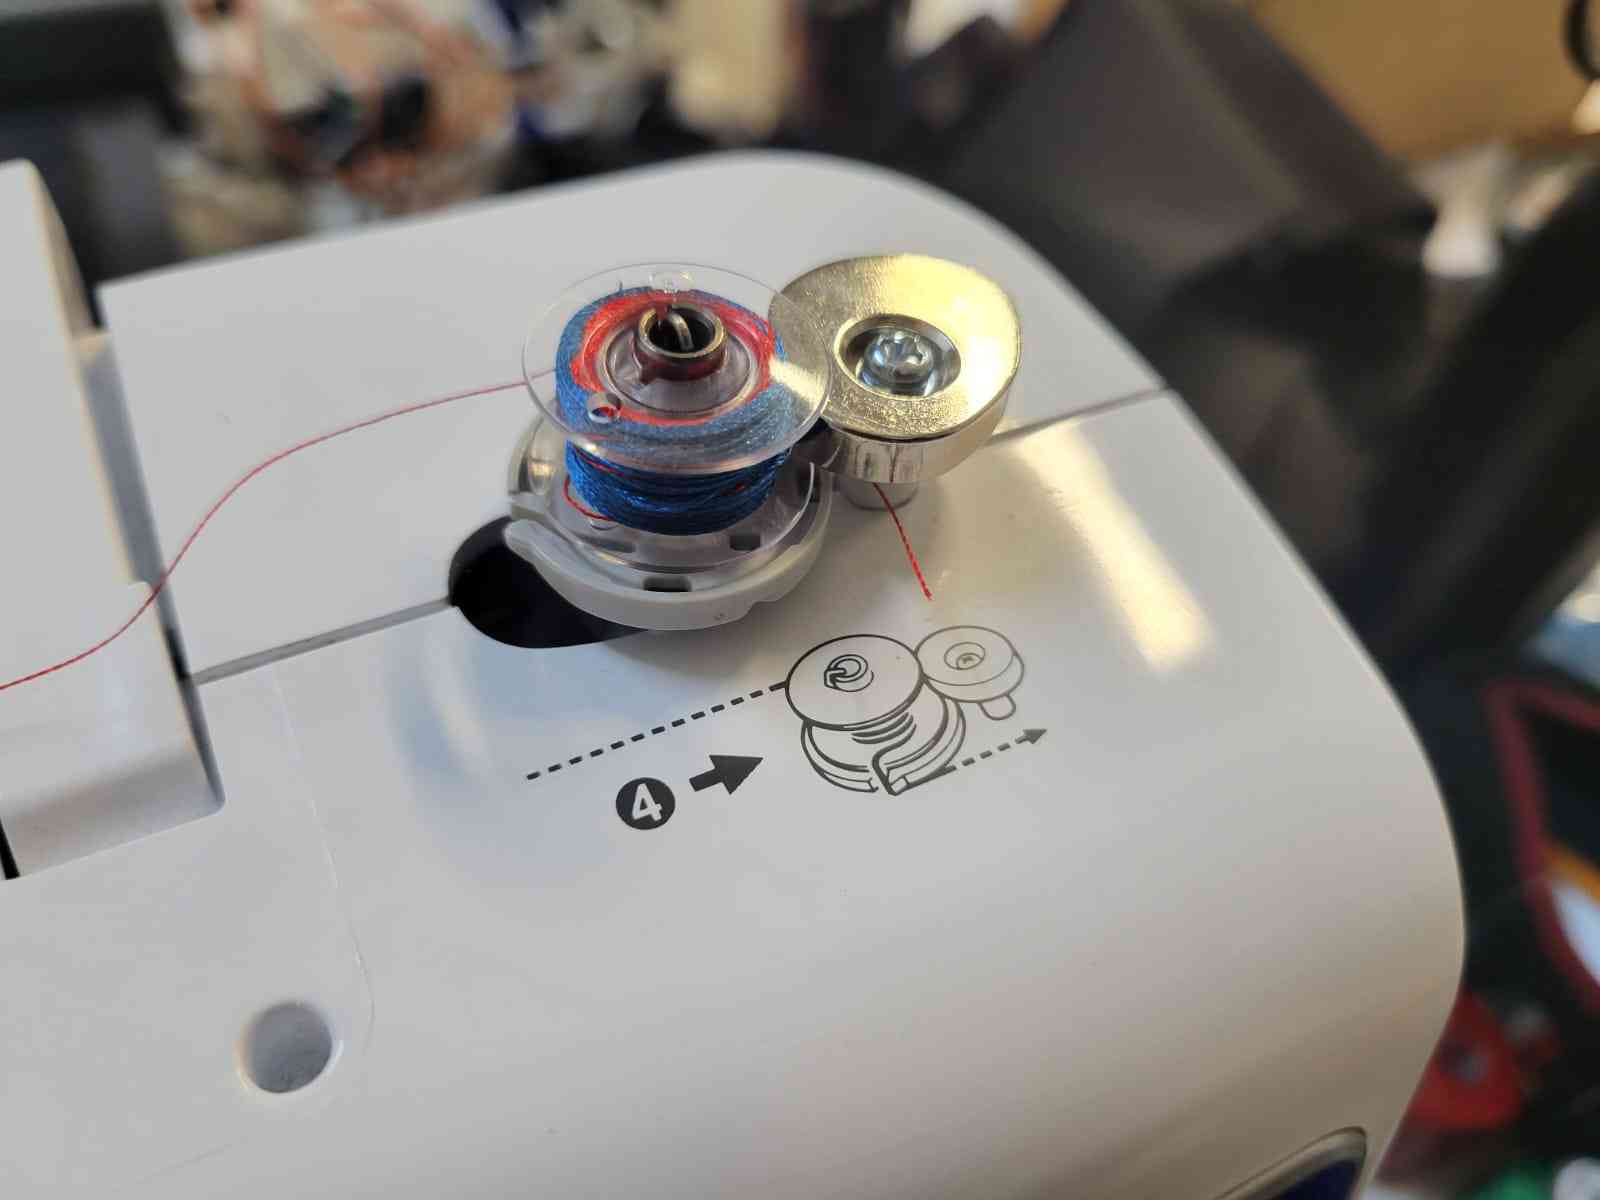
The first step is winding the lower thread onto a plastic bobbin, which supplies the underside of the embroidery. The bobbin is mounted on a small axis located at the top-left of the machine. The thread spool is placed vertically on the top-middle axis and secured with a plastic cap.
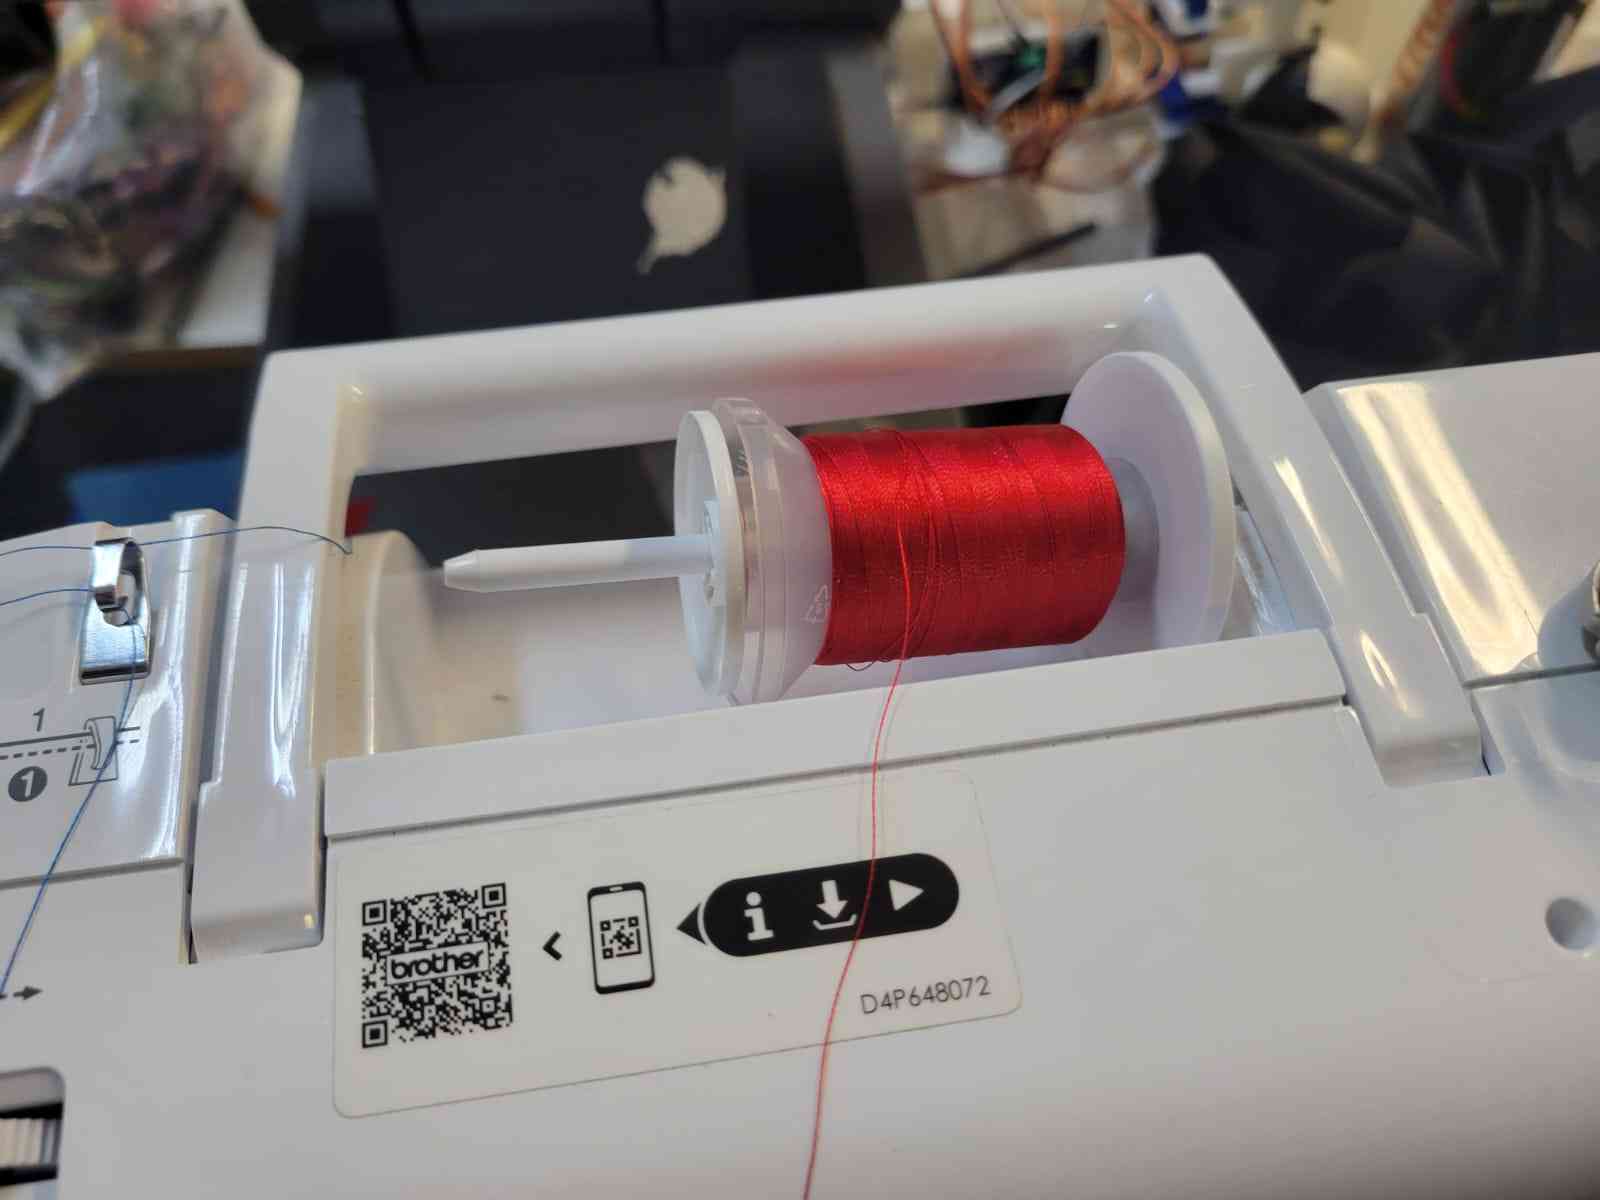
Following the dotted arrows and numbered guides printed on the machine surface, the thread is routed through the guides and wrapped around the bobbin several times. A small hidden blade beneath the bobbin axis is used to cut the thread. Once everything is in place, the orange button is pressed to start winding. Pressing the button again stops the winding process once enough thread has been collected. The bobbin is then removed and cut free from the spool.
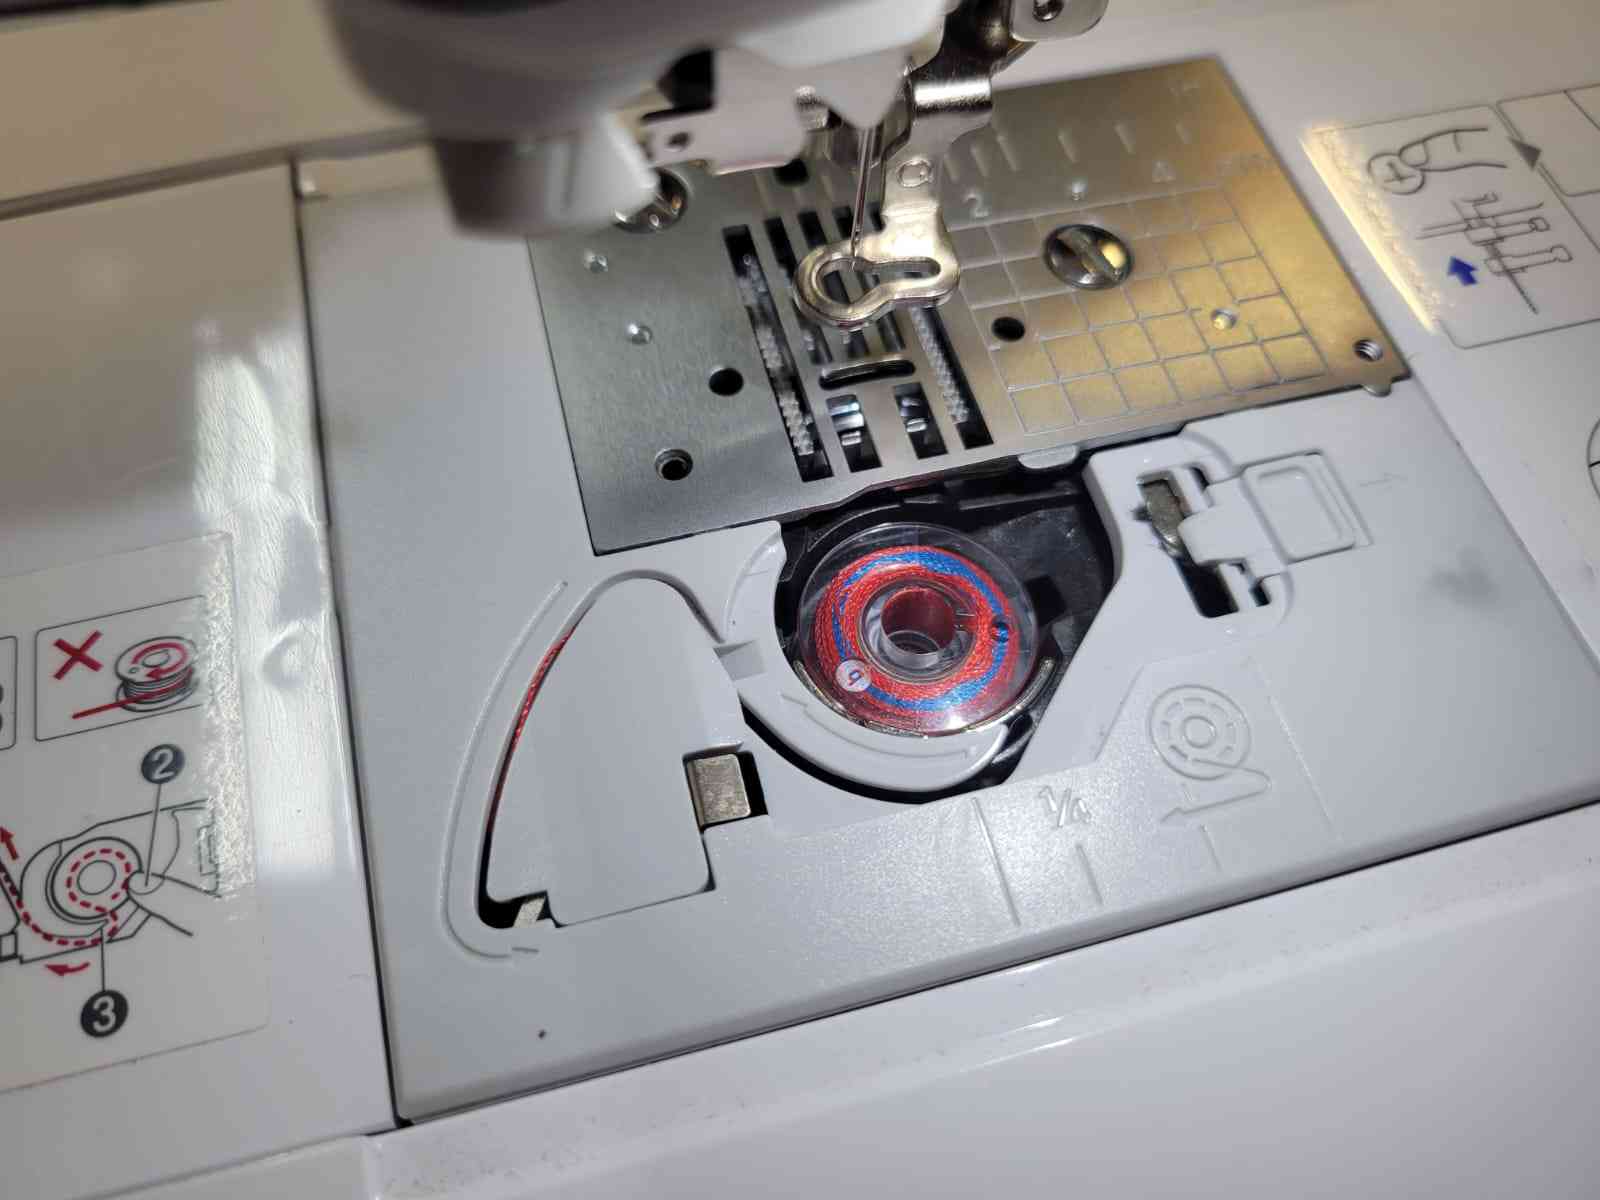
To install the wound bobbin, we open the bobbin compartment directly beneath the needle assembly by removing a small dark plastic cover. The bobbin is dropped into place, and the thread is guided along a built-in channel until it reaches another blade that trims the end. Finally, the cover is snapped back into place.
5.2 Threading the Needle
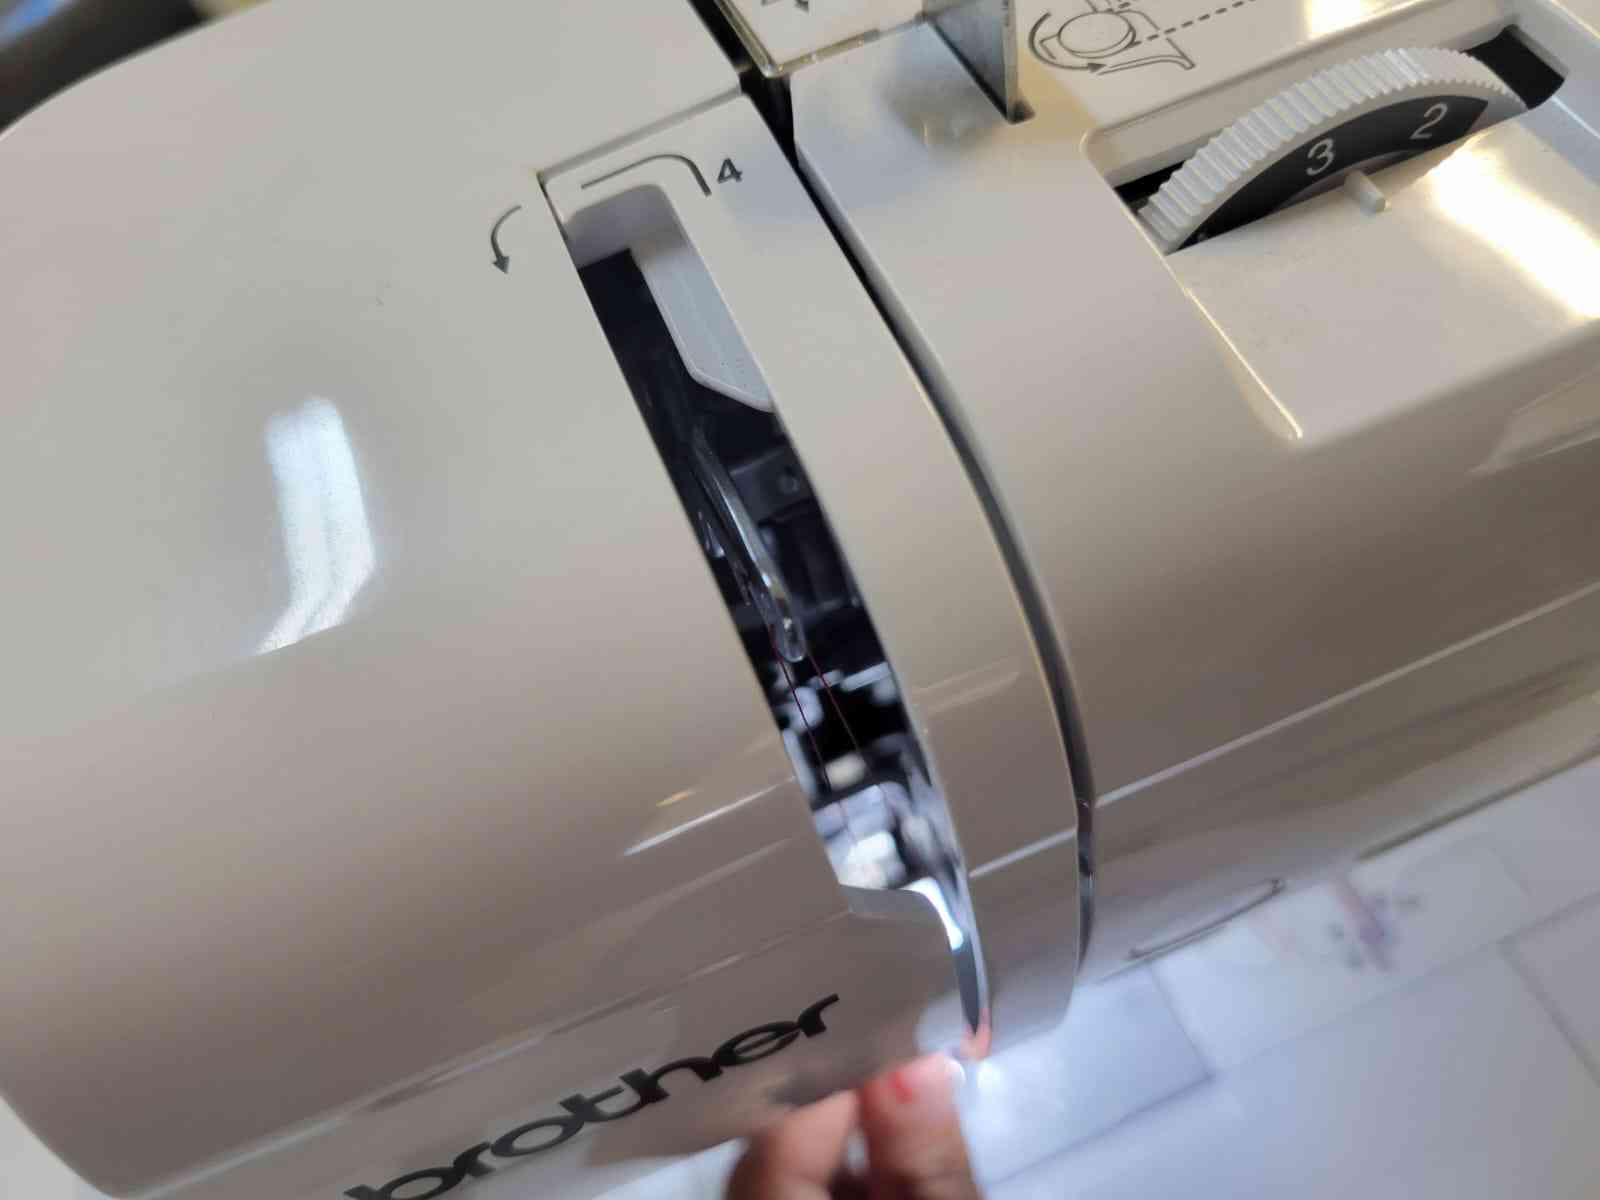
The top thread is routed from the same spool used for the bobbin. This time, we follow the straight arrows and the numbered guides printed on the machine. These guides lead the thread through a channel down the front of the machine (past number 3), around a U-turn at the bottom, and back up toward number 4, where the thread hooks into a metal piece. From there, it is routed back down to number 5 and into the needle assembly at number 6.
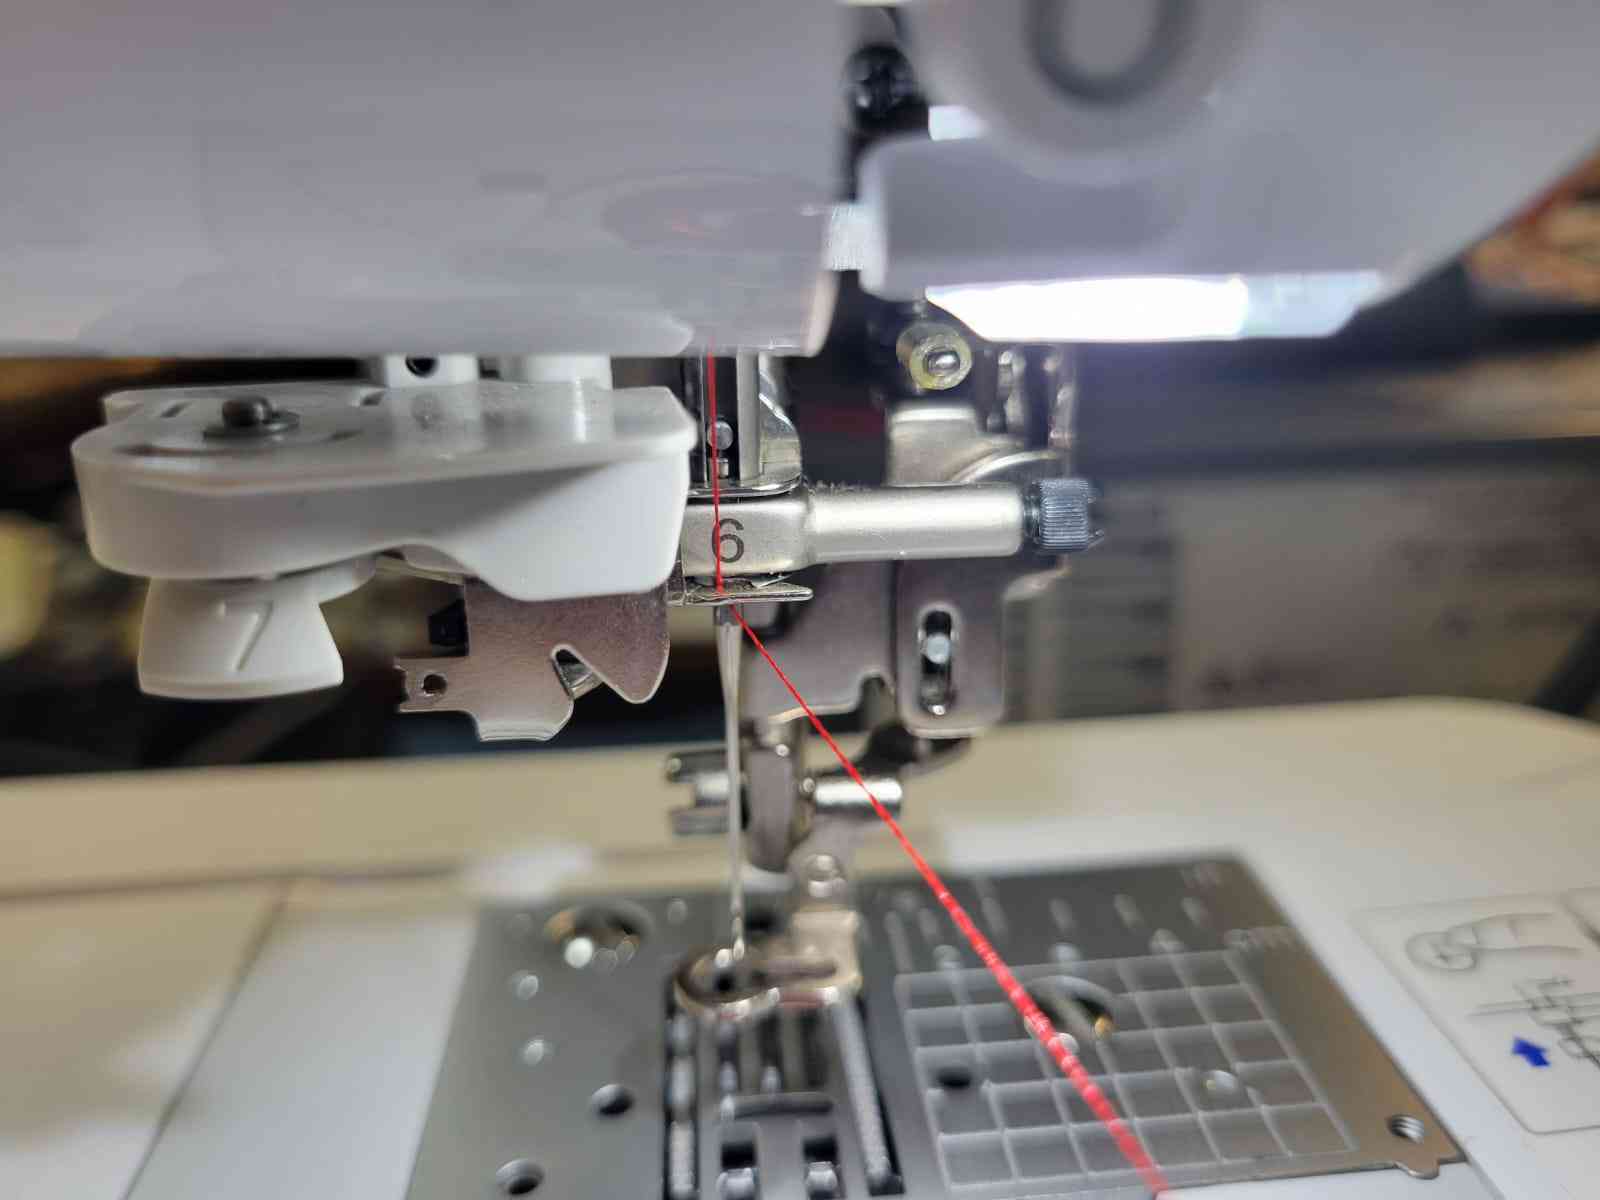
The thread is then inserted manually through the needle's eye or by using the auto-threader mechanism, in my experience, threading it manually is much simpler.
5.3 Mounting the Fabric
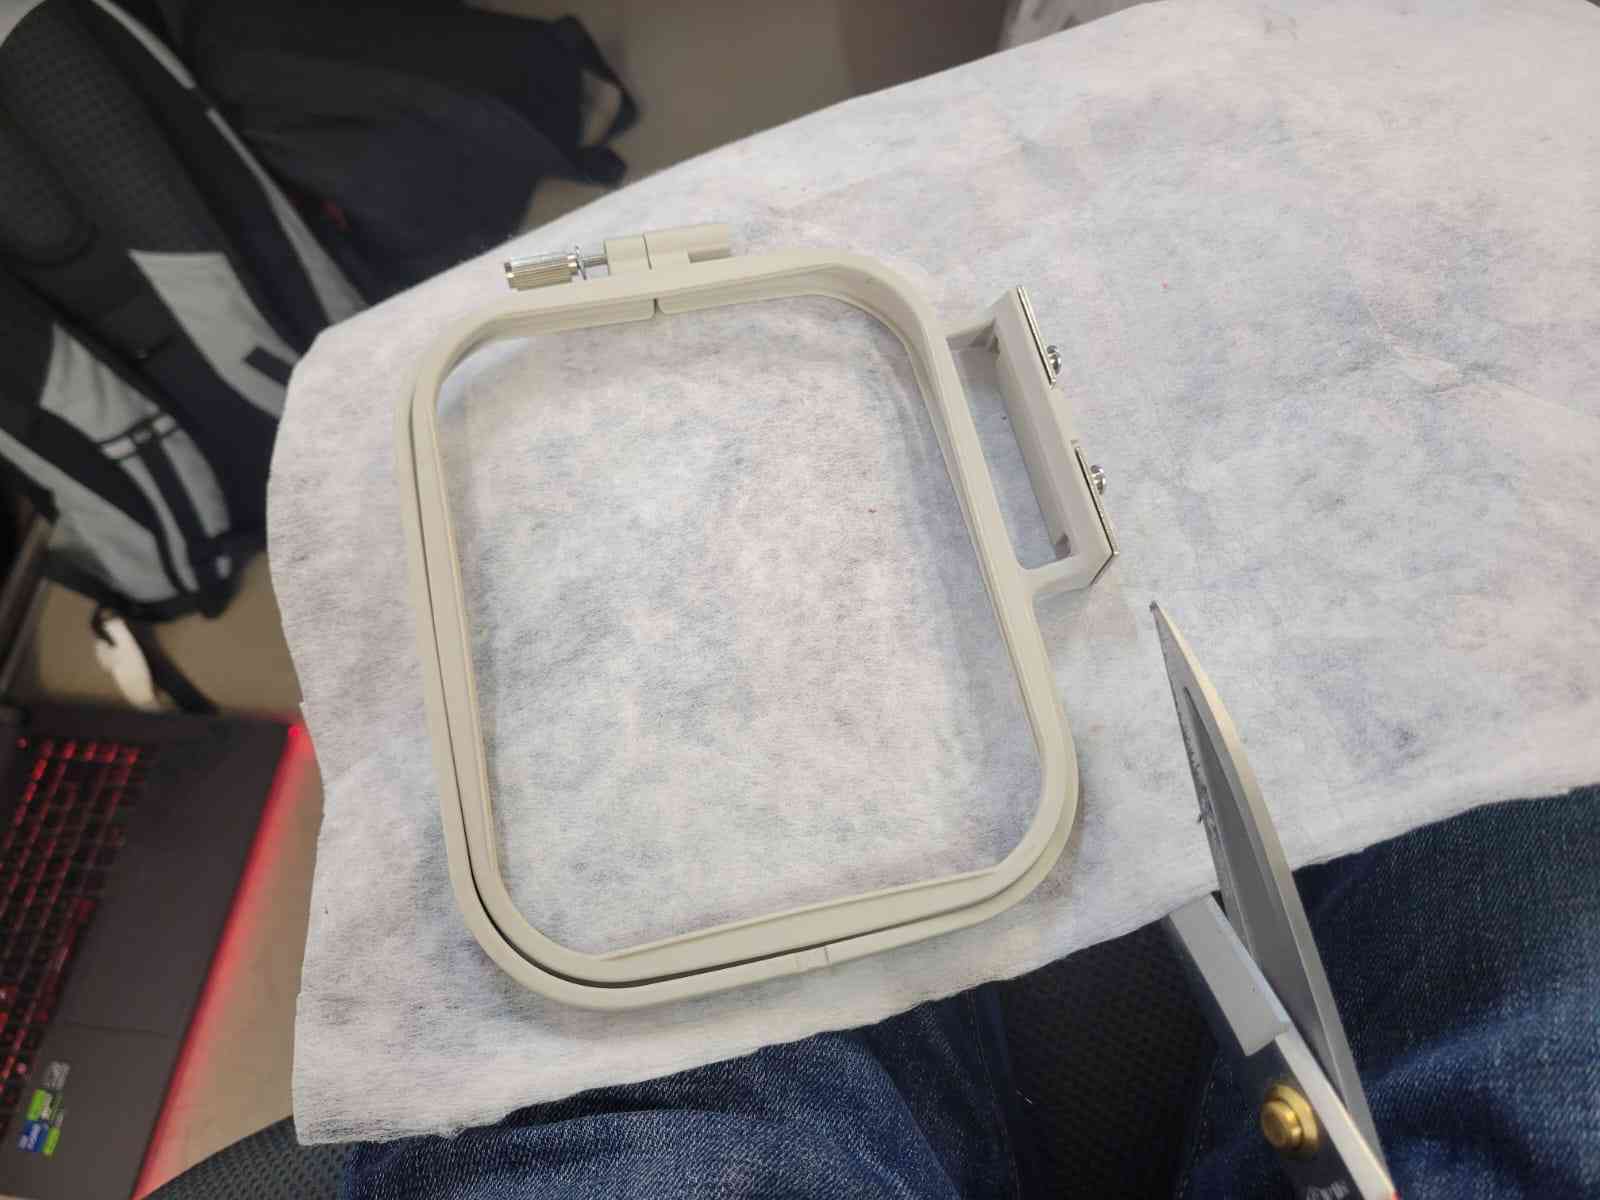
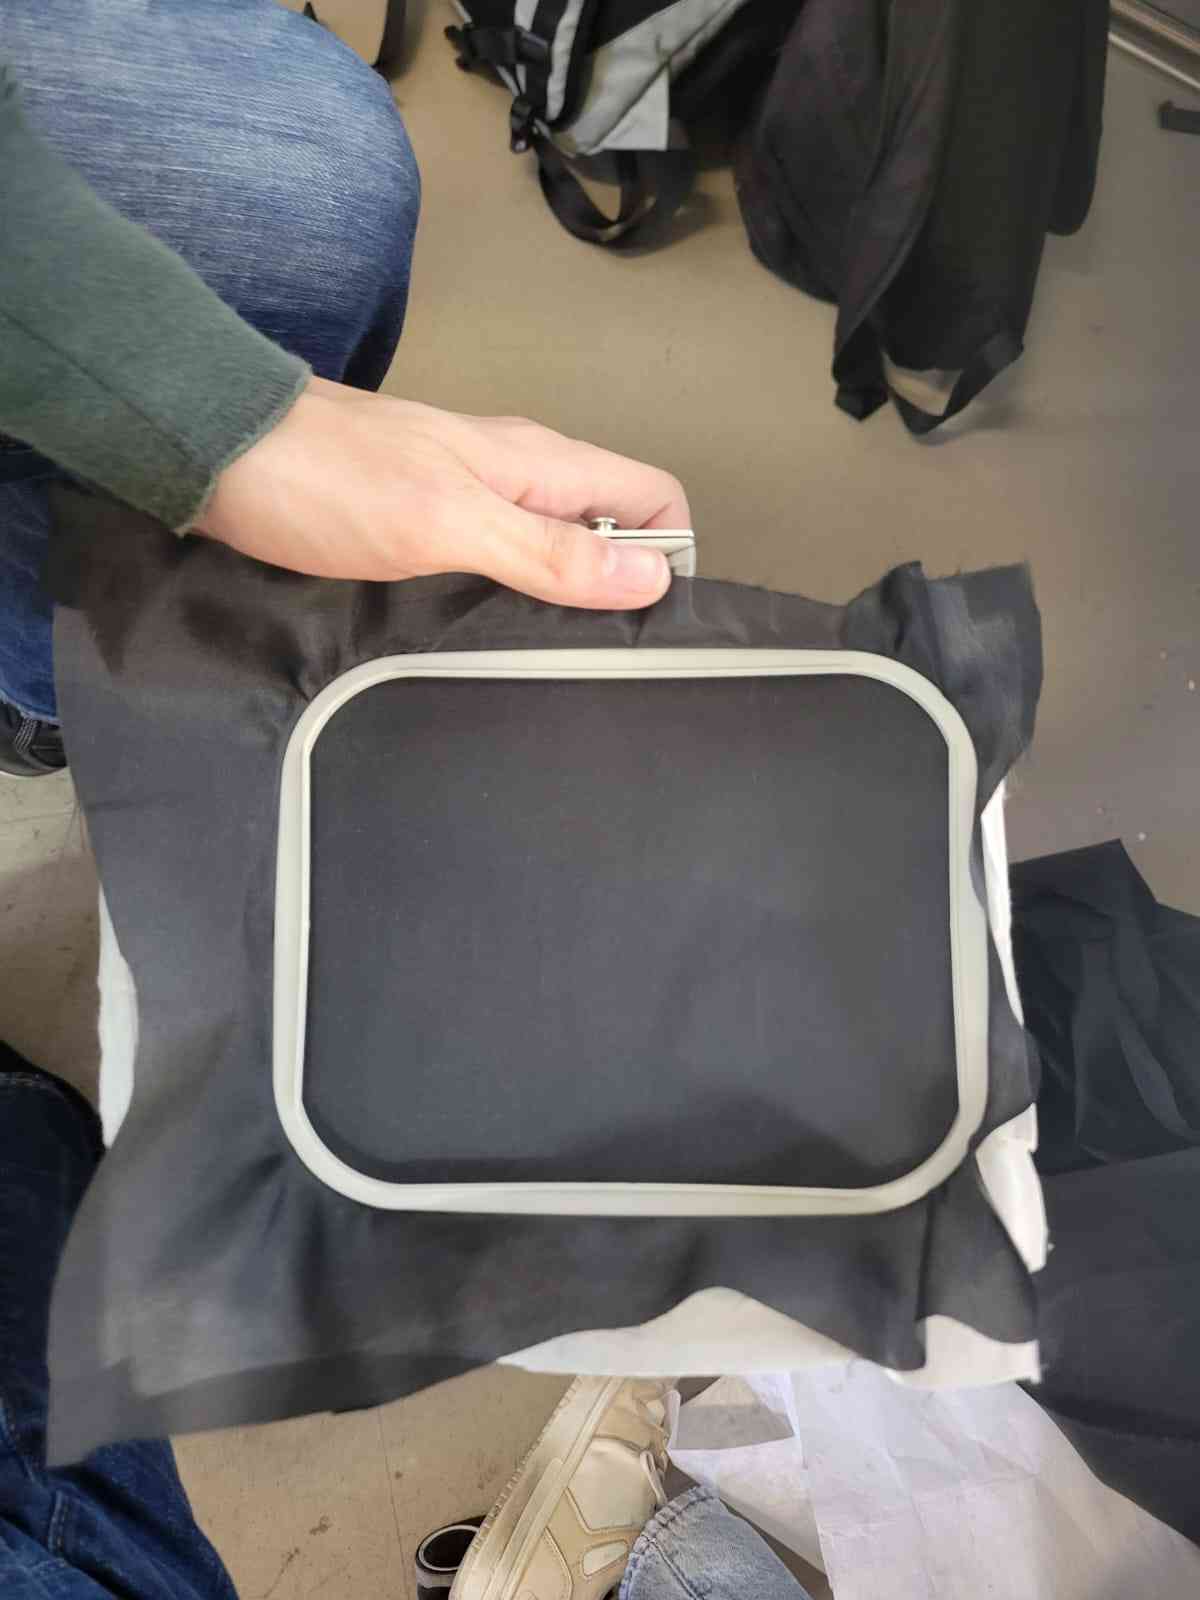
The fabric is clamped between the two halves of the embroidery hoop frame, which is mounted on the machine's carriage unit. The frame is removed by releasing a small metal latch. To secure the cloth, it has to be positioned over the larger square. The smaller square is pressed into place on top, tightly clamping the fabric, a thumb screw is used to ensure that both halves of the frame an the cloth between are secured. It is crucial that the fabric is taut to avoid distortion or damage to the cloth and needle during stitching.
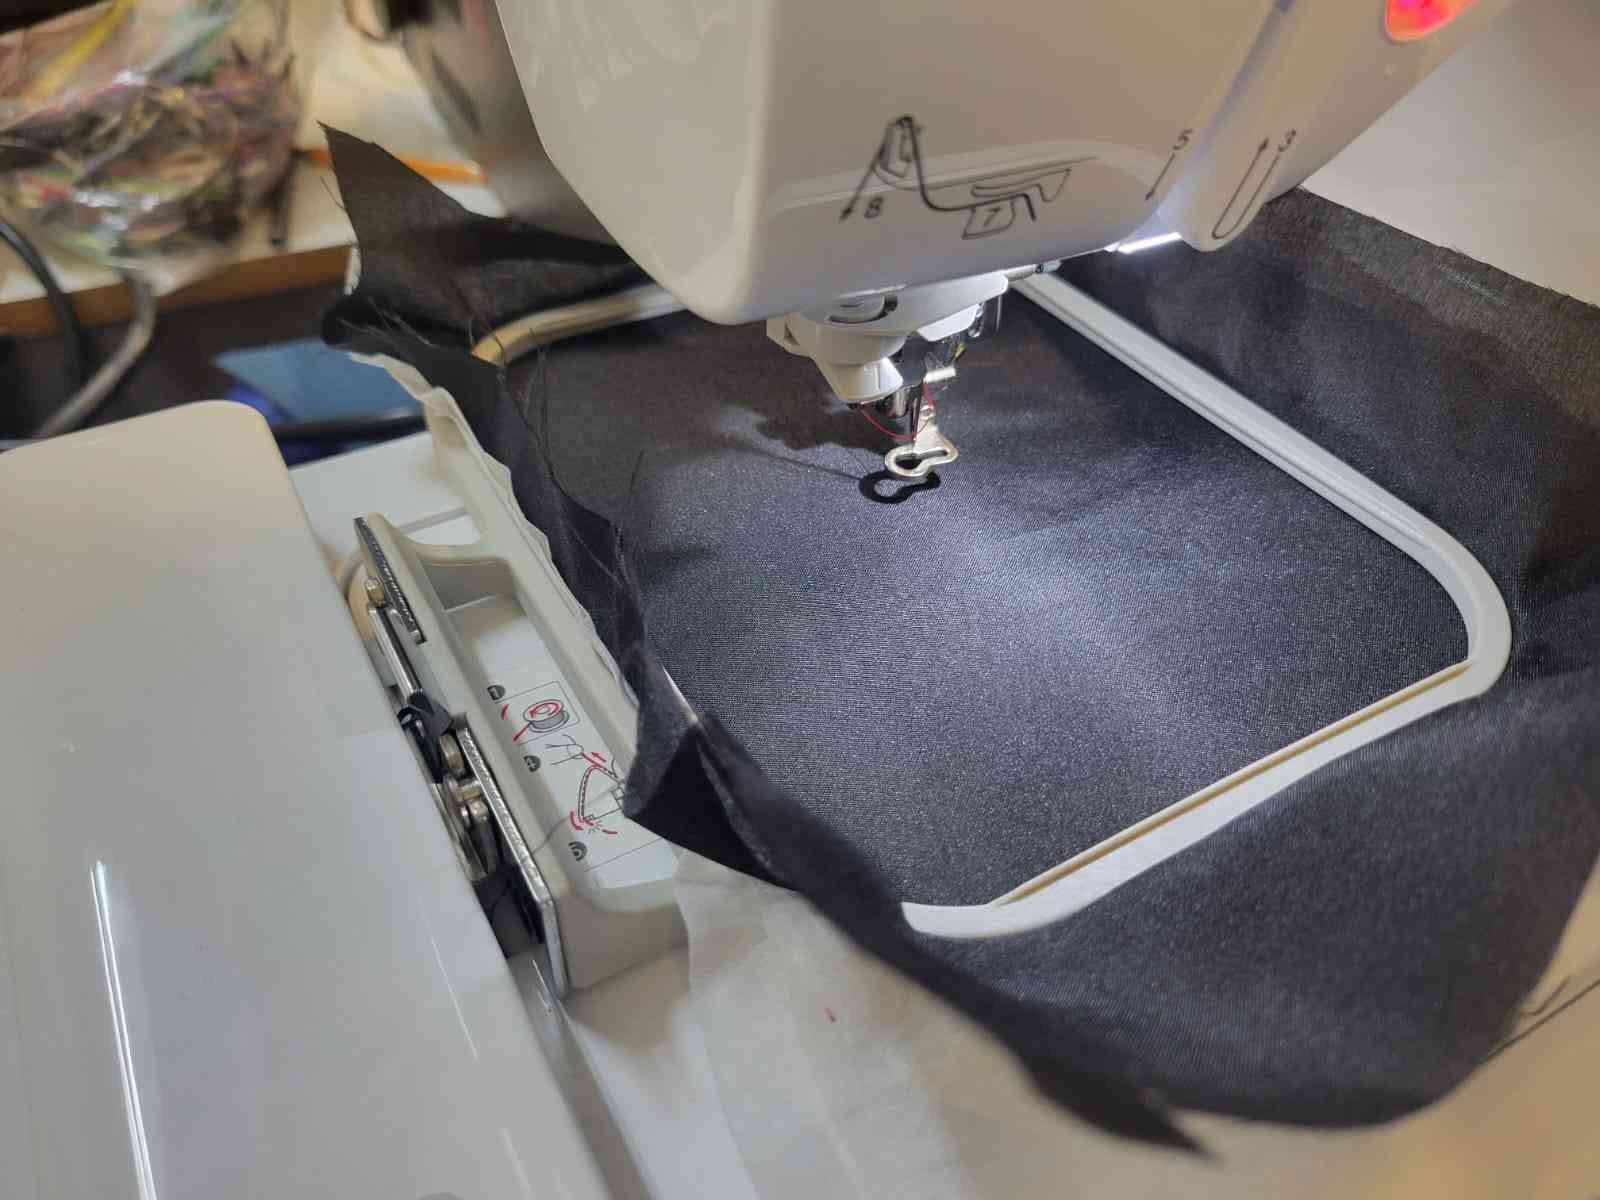
Once the fabric is secure, the frame is locked back into the carriage unit, and the entire carriage is installed on the left side of the machine.
5.4 Loading the Embroidery File
The final step before execution is loading the stitch file. A USB drive is inserted into the side port of the machine. On the main control panel, a yellow shield icon is tapped to access file options. After selecting the USB symbol, the embroidery file is chosen and loaded into memory by pressing the purple Set button.
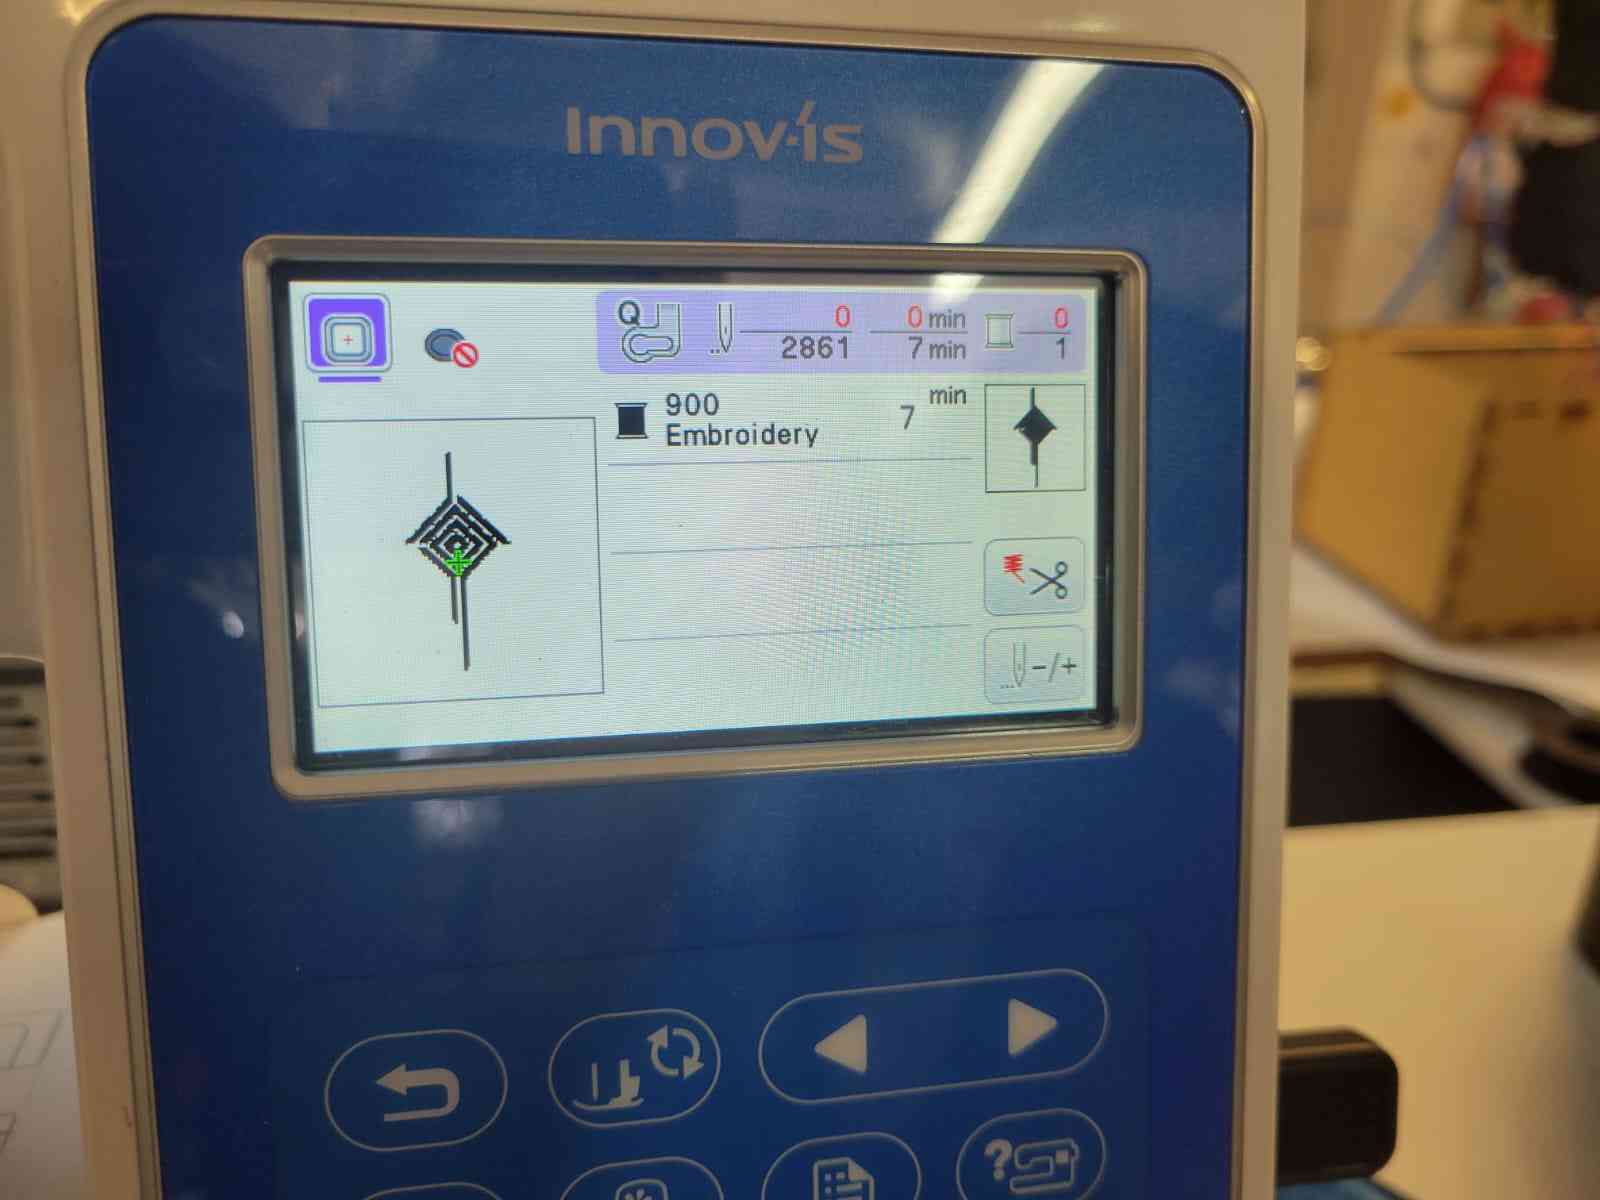
In this preview menu, the pattern can be repositioned or scaled, but for this test, no adjustments were made. The Edit End button finalizes the setup.
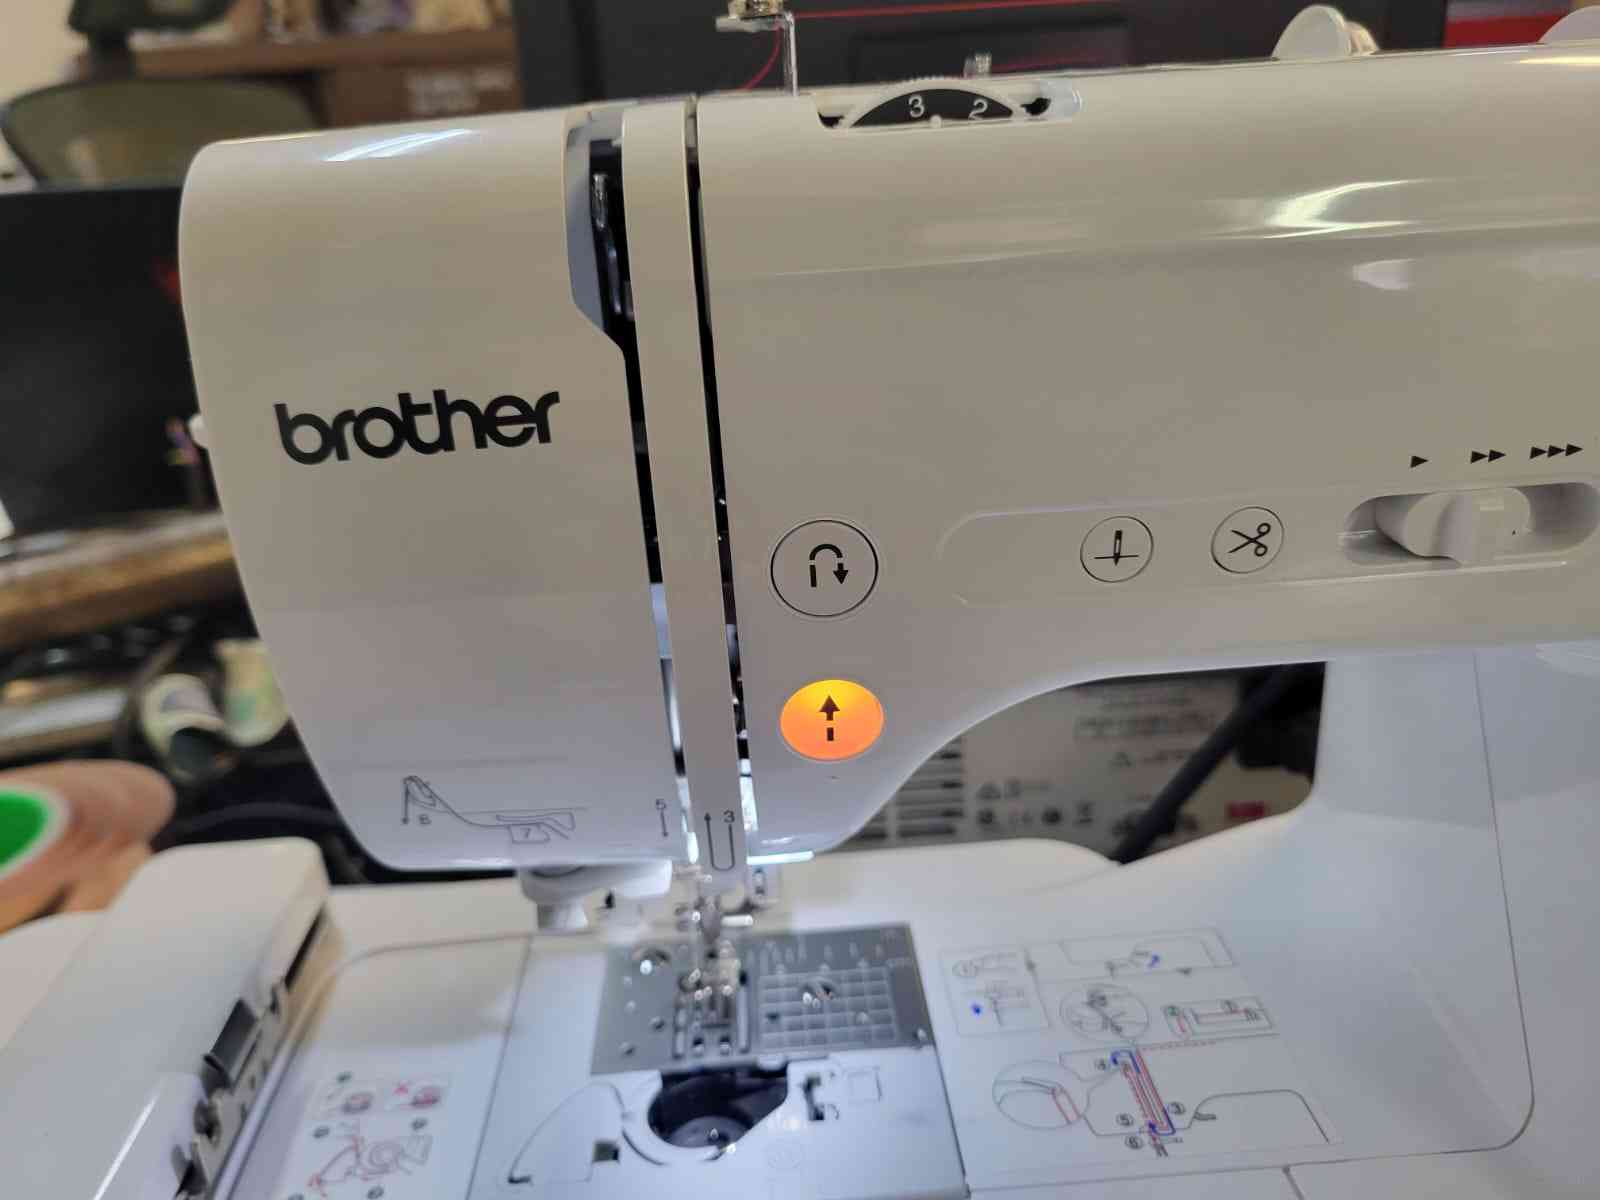
5.5 Starting the Embroidery Process
The last mechanical step is pulling down the small plastic lever on the right of the needle assembly. This action enables the machine's safety mechanism and causes the orange light to turn green, indicating the system is ready to begin stitching.
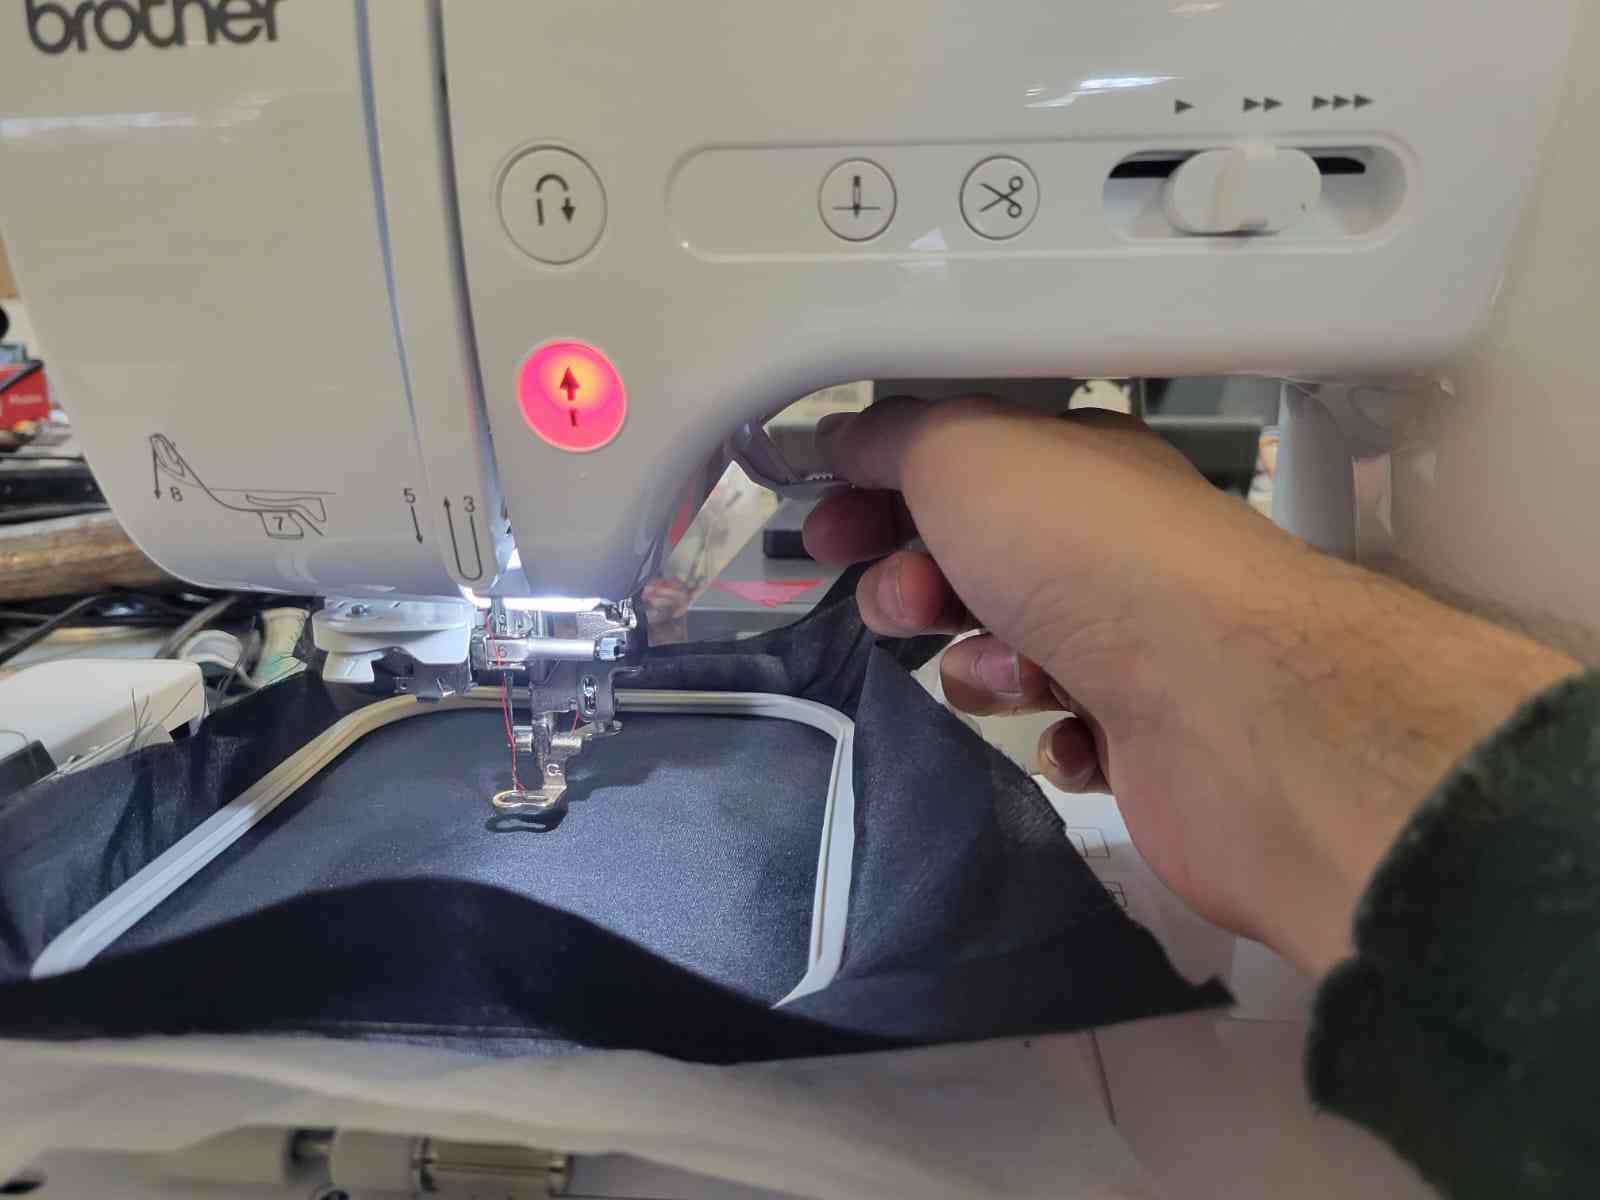
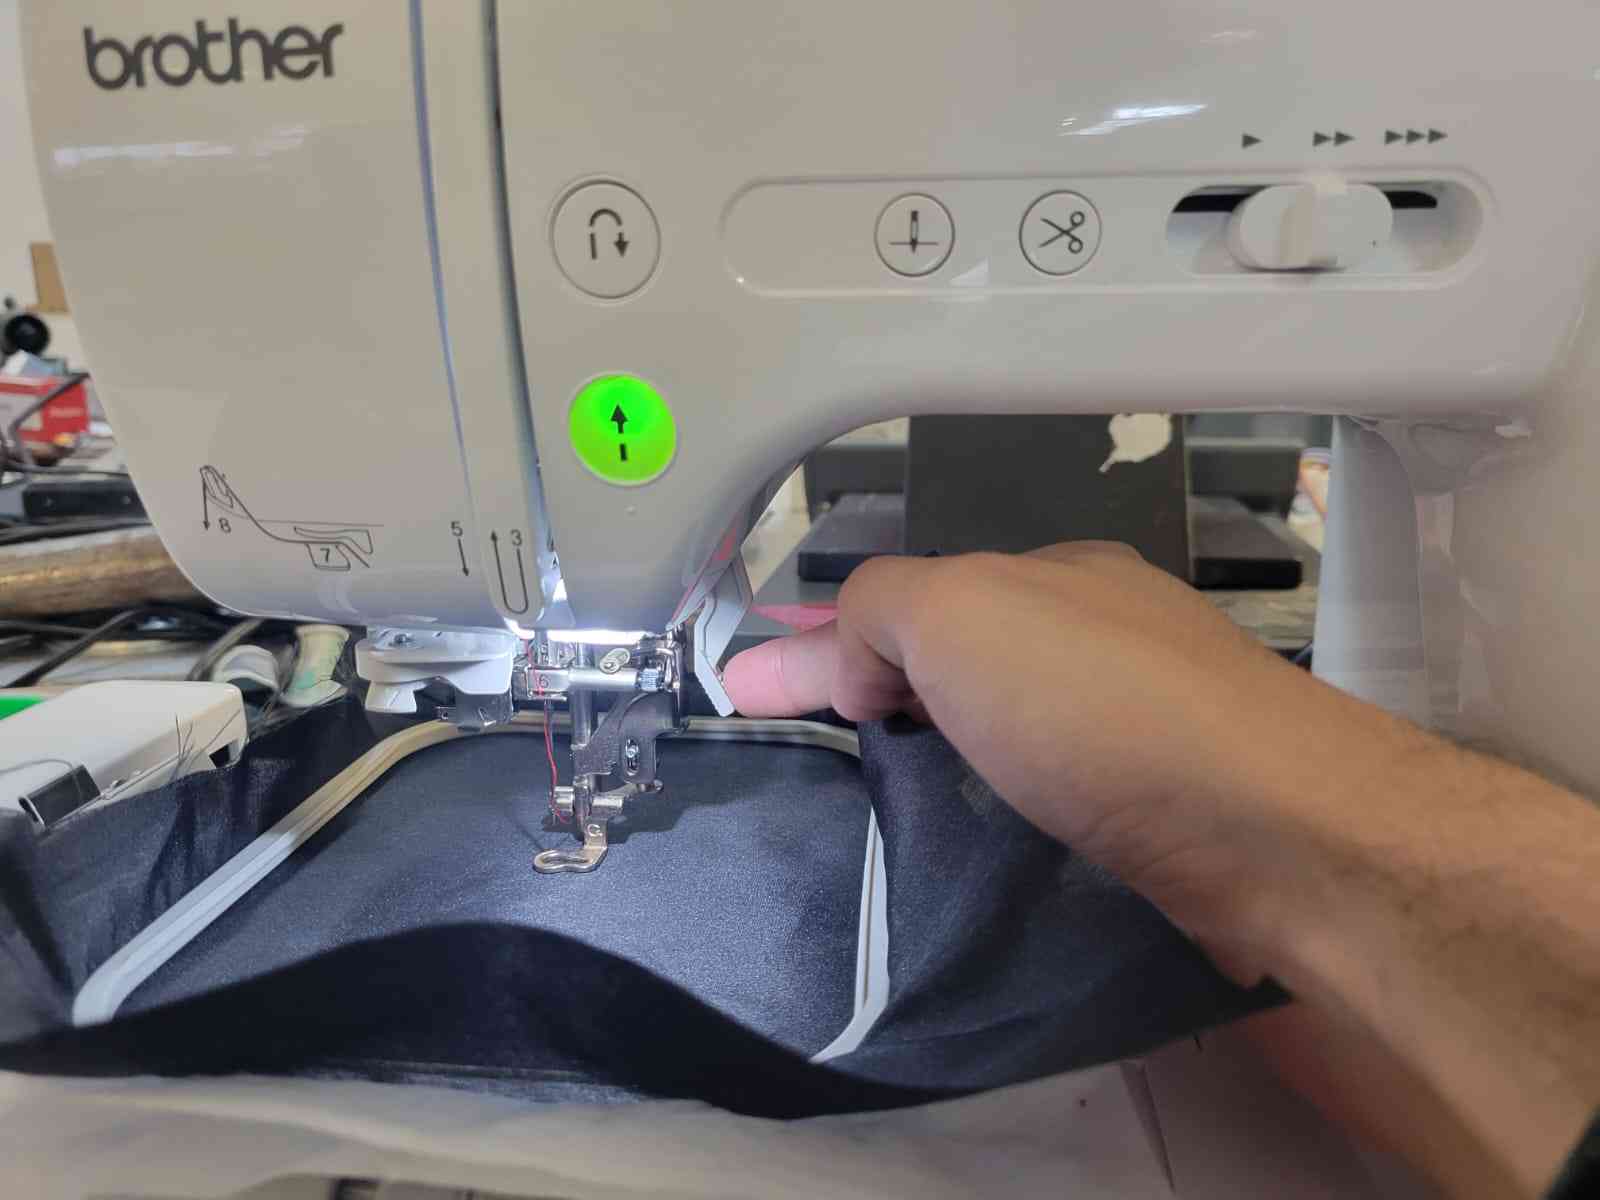
Once the light is green, pressing the button starts the embroidery process. The machine autonomously follows the loaded toolpath, stitching the vector design onto the fabric with high precision.
Once I finished the rhombus, I changed the thread to black and repeated this process with the border file.
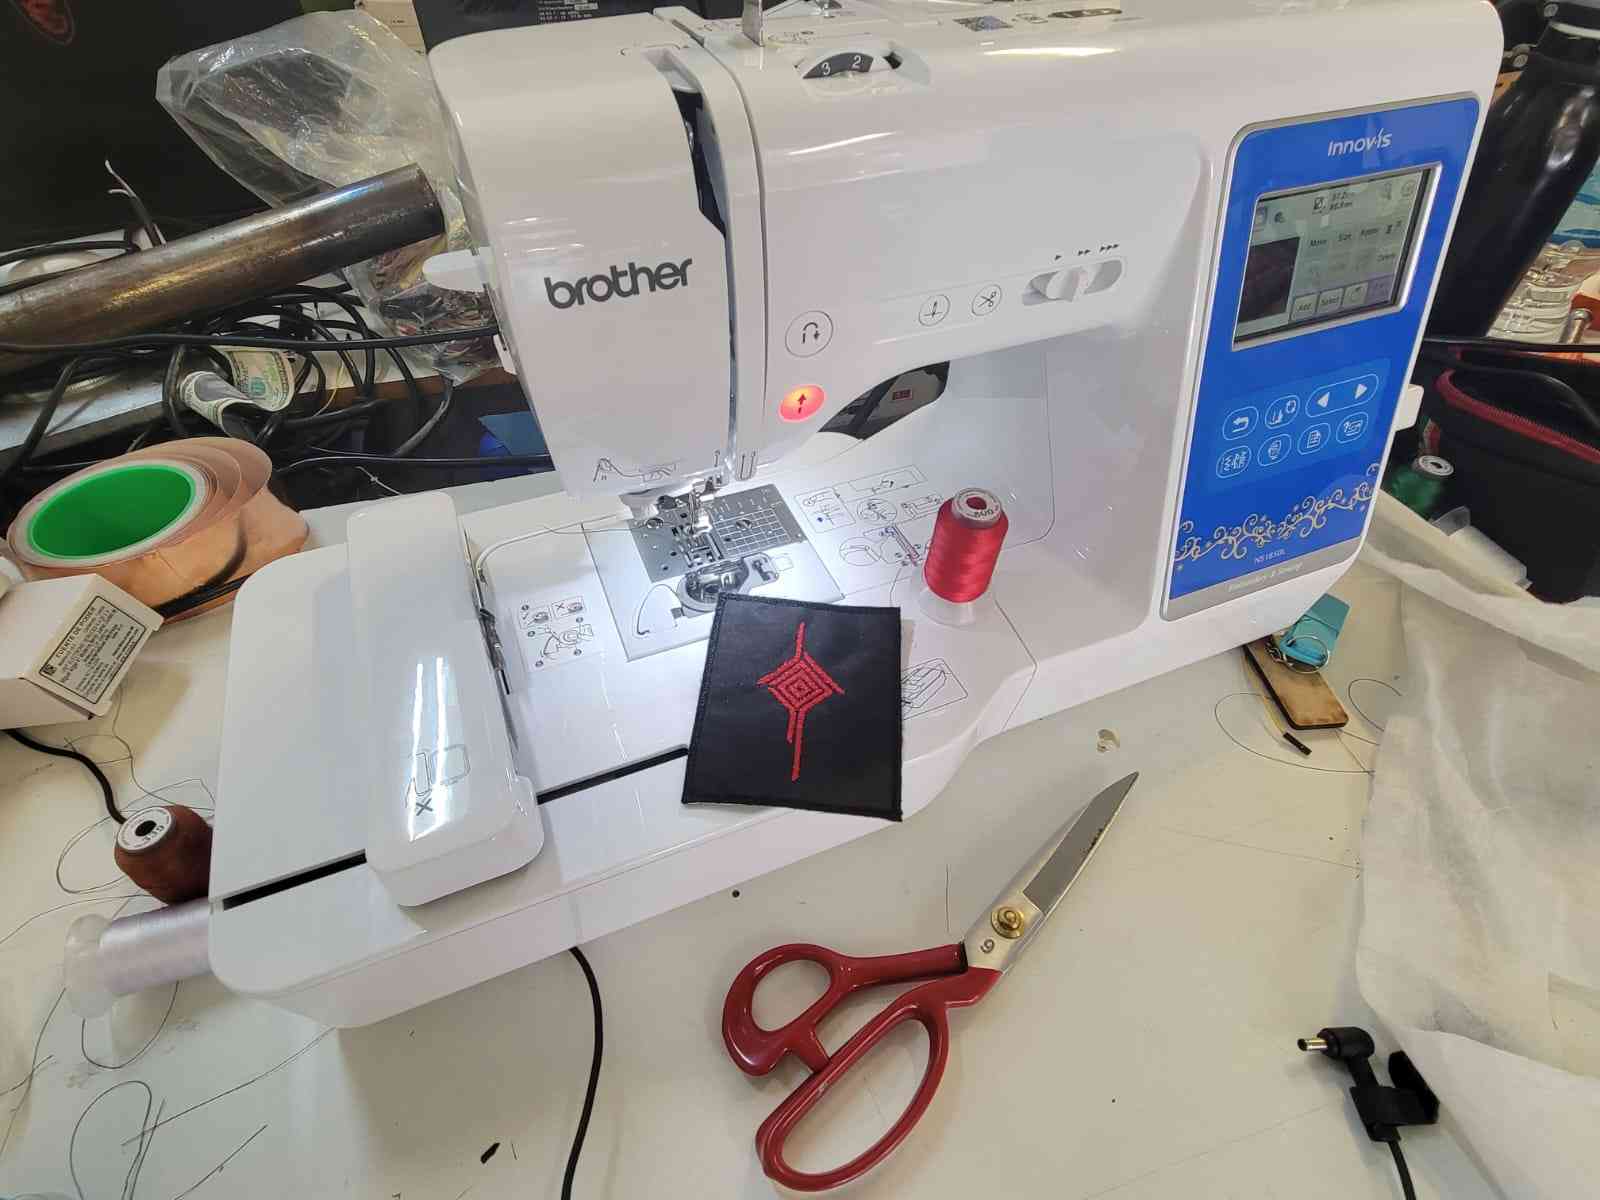
6. Results
The final embroidered piece was a strong success. The design was stitched cleanly onto the fabric, with well-defined lines and no misalignment or tension issues. The Brother NS1850L executed the toolpath accurately, following the design created in Inkscape and exported through Ink/Stitch. For a first-time experience with digital embroidery, the results exceeded expectations.
I present to you this week's hero shot:
While the result was visually effective, I noted that the outer border could have been enhanced with a more elaborate or expressive contour to match the complexity of the inner symbol. Additionally, one improvement for future iterations would be to sew velcro or a compatible backing material onto the back of the embroidered fabric. This would allow the design to function as a removable patch, opening up possibilities for wearable integration or modular textile design.
7. Comments and Recommendations
Digital embroidery proved to be an intuitive and rewarding process, especially when using the Ink/Stitch extension in combination with a user-friendly machine like the Brother NS1850L. However, one of the most critical elements for success, and one that's easy to overlook, is the tension of the fabric in the embroidery hoop.
On one of my peer's attempts, insufficient tension led to the fabric shifting and bunching mid-process, which ultimately resulted in tears and a broken embroidery needle. This highlights the importance of securely clamping the cloth and verifying that it is uniformly taut before starting. Take your time with this step, uneven tension can ruin even a perfectly prepared toolpath.
Another recommendation is to save your Inkscape file frequently, particularly before running any Ink/Stitch simulations. The software is powerful but can be unstable, and crashes are not uncommon during preview rendering. Saving iteratively can prevent unnecessary loss of work.
Lastly, I recommend experimenting with more creative shapes and possibly exploring multi-color stitching or fabric layering in future iterations. Even for technically minded projects, embroidery offers many expressive and practical extensions worth exploring.
8. Learning Outcomes
This week expanded my understanding of digital fabrication by introducing a completely new medium: thread and fabric. It taught me that embroidery, a process traditionally viewed as a craft, can be approached with the same logic and workflow as any CNC process. I learned how vector designs can be interpreted as precise stitch paths, and how toolpath planning, material behavior, and machine setup all influence the final outcome.
I also gained practical experience with Inkscape's interface and the Ink/Stitch extension, which deepened my appreciation for the software. The process of winding the bobbin, threading the machine, tensioning the fabric, and loading digital files onto the Brother NS1850L made me more confident in handling semi-automated textile tools.
Perhaps most importantly, this week reinforced the importance of attention to physical setup — a small oversight in tension or alignment can cause the entire operation to fail, regardless of how perfect the digital file is. This mirrors lessons learned throughout FabAcademy: no matter how advanced the software, success in digital fabrication depends on care, patience, and real-world observation.