week10. Output Devices
Assignment
Group assignment
- measure the power consumption of an output device
Individual assignment
- add an output device to a microcontroller board you've designed, and program it to do something
Group assignment
For more information about group projects, please see the group project page on the FabLab Kannai website. Group assignment page is here
The development board + Microcontroller output processing in conjunction with Node.js
Modify the code implemented in the week4 assignment page to output from the ESP32-C3 to the web browser via the Node.js server.
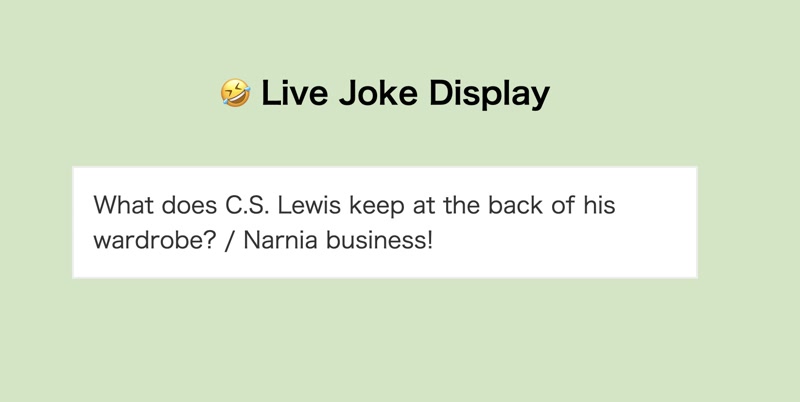
This application generates jokes with ESP32-C3 at 15 second intervals and displays them in the browser. This app was inspired by the documentation from Fab Academy 2021's Nadieh.
1. Output Device Definition
- The Wi-Fi communication module is used with the ESP32-C3 on the development board.
- Instead of using traditional output devices such as OLEDs or LEDs, the output is displayed in a web browser via a Node.js server.
2. Programmed Behavior
- The microcontroller is programmed to fetch a joke from a public API every 15 seconds.
- It transmits the data to a Node.js server, which then displays the joke on a web page.
JavaScript
JavaScript is a programming language used to add dynamic behavior and user interface features to web pages. It is typically used in conjunction with HTML and CSS. It is currently the most important language in web development. For more details, please refer to the following link.
https://developer.mozilla.org/en-US/docs/Web/JavaScript
Node.js
Node.js is a revolutionary technology that overturns the conventional wisdom that “JavaScript = web pages” and enables the development of web apps, IoT, CLI, and APIs all using a single language. In other words, it is a technology that brought JavaScript to the server side. For more details, please refer to the following link.
https://nodejs.org/en/
Installing Node.js
The environment setup (macOS only) is as follows.
brew install node

npm install
Start the server.
node index.jsNode.js app code
The directory structure of a Node.js application is as follows.
realtime-sensor-visualization/
├── node_modules/             # Dependency packages installed with npm
├── public/                   # Public folder for placing client-side HTML and JS
│   └── index.html            # UI displayed in the browser
├── index.js                  # Node.js main application file
├── package.json              # Project settings and list of dependent modules
├── package-lock.json         # Record accurate dependency versions
The code for index.js, the main application file for Node.js, is as follows. This code is a server application that uses Node.js to receive data from a serial port and deliver it to a web browser in real time.
const express = require("express");
const http = require("http");
const socketIo = require("socket.io");
const { SerialPort } = require("serialport");
const { ReadlineParser } = require("@serialport/parser-readline");

const app = express();
const server = http.createServer(app);
const io = socketIo(server);

app.use(express.static("public"));

async function findAndConnectSerialPort() {
  try {
    const ports = await SerialPort.list();

    const targetPort = ports.find((port) => {
      return (
          port.path.includes("usbmodem") || // macOS
          port.path.includes("usbserial")   // Windows/Linux fallback
      );
    });

    if (!targetPort) {
      console.error("No compatible serial port found.");
      return;
    }

    console.log(`✅ Found serial port: ${targetPort.path}`);

    const port = new SerialPort({ path: targetPort.path, baudRate: 9600 });
    const parser = port.pipe(new ReadlineParser({ delimiter: "\n" }));

    parser.on("data", (data) => {
      const trimmed = data.trim();
      console.log("Received:", trimmed);
      io.emit("joke", trimmed);
    });

    port.on("error", (err) => {
      console.error("SerialPort Error:", err.message);
    });
  } catch (err) {
    console.error("Failed to list serial ports:", err);
  }
}

server.listen(3000, () => {
  console.log("Server running at http://localhost:3000");
  findAndConnectSerialPort();
});
The code for public/index.html is as follows. This code is a simple web UI that displays joke data received in real-time from a Node.js server (joke event).
<!DOCTYPE html>
<html lang="en">
<head>
  <meta charset="UTF-8">
  <title>Joke Viewer</title>
  <script src="https://cdn.socket.io/4.7.2/socket.io.min.js"></script>
  <style>
    body {
      font-family: sans-serif;
      background-color: #CEE6C1;
      text-align: center;
      padding: 50px;
    }

    h1 {
      font-size: 2rem;
    }

    #joke {
      font-size: 1.5rem;
      margin-top: 30px;
      color: #333;
      padding: 20px;
      border: 2px solid #eee;
      background: #fff;
      display: inline-block;
      max-width: 600px;
      white-space: pre-wrap;
      word-wrap: break-word;
      text-align: left;
    }
  </style>
</head>
<body>
<h1>🤣 Live Joke Display</h1>
<div id="joke">Waiting for joke...</div>

<script>
  const socket = io();
  socket.on("joke", (data) => {
    document.getElementById("joke").textContent = data;
  });
</script>
</body>
</html>
XIAO ESP32-C3 code
The XIAO ESP32-C3 code is as follows. This code is a simple infinite loop that generates a JOKE in the sense of 15 seconds and outputs it to standard output (print).
#include <WiFi.h>
#include <HTTPClient.h>
#include <ArduinoJson.h>

// Wi-Fi Configuration
const char* ssid = "*******";
const char* password = "*******";

// Joke API
const String url = "https://official-joke-api.appspot.com/random_joke";

// Joke acquisition interval (milliseconds)
const unsigned long interval = 15000;  // 15 sec.
unsigned long lastFetchTime = 0;

void setup() {
  Serial.begin(115200);
  Serial.println("Booting...");

  Serial.println("Connecting to WiFi...");
  WiFi.begin(ssid, password);
  while (WiFi.status() != WL_CONNECTED) {
    delay(500);
    Serial.print(".");
  }
  Serial.println("\nWiFi connected!");
  Serial.print("IP address: ");
  Serial.println(WiFi.localIP());

  // Get the first joke right away
  lastFetchTime = millis() - interval;
}

void loop() {
  unsigned long currentTime = millis();
  if (currentTime - lastFetchTime >= interval) {
    lastFetchTime = currentTime;
    String joke = getJoke();
    Serial.println(joke);
  }
}

String getJoke() {
  Serial.println("Fetching joke...");
  HTTPClient http;
  http.useHTTP10(true);
  http.begin(url);
  int httpCode = http.GET();

  if (httpCode <= 0) {
    Serial.print("HTTP error: ");
    Serial.println(httpCode);
    http.end();
    return "<HTTP error>";
  }

  String result = http.getString();
  http.end();

  DynamicJsonDocument doc(1024);
  DeserializationError error = deserializeJson(doc, result);

  if (error) {
    Serial.print("JSON parse error: ");
    Serial.println(error.c_str());
    return "<parse error>";
  }

  String setup = doc["setup"].as<String>();
  String punchline = doc["punchline"].as<String>();

  return setup + " / " + punchline;
}
app video
The following video shows an app running on the ESP32-C3 that retrieves random jokes and outputs them to the browser.
Development Board + ESP32-C3 + Mini Vibration Motor
Devices Used
- Development Board: Custom board with ESP32-C3 (designed using Fusion 360 Electronics)
- Output Device: Mini Vibration Motor (Seeed Studio Mini Vibration Motor 2.0mm)
- Control Components: 2N7000 N-channel MOSFET, 10kΩ resistor
- Note: A protection diode (1N4148) is also recommended
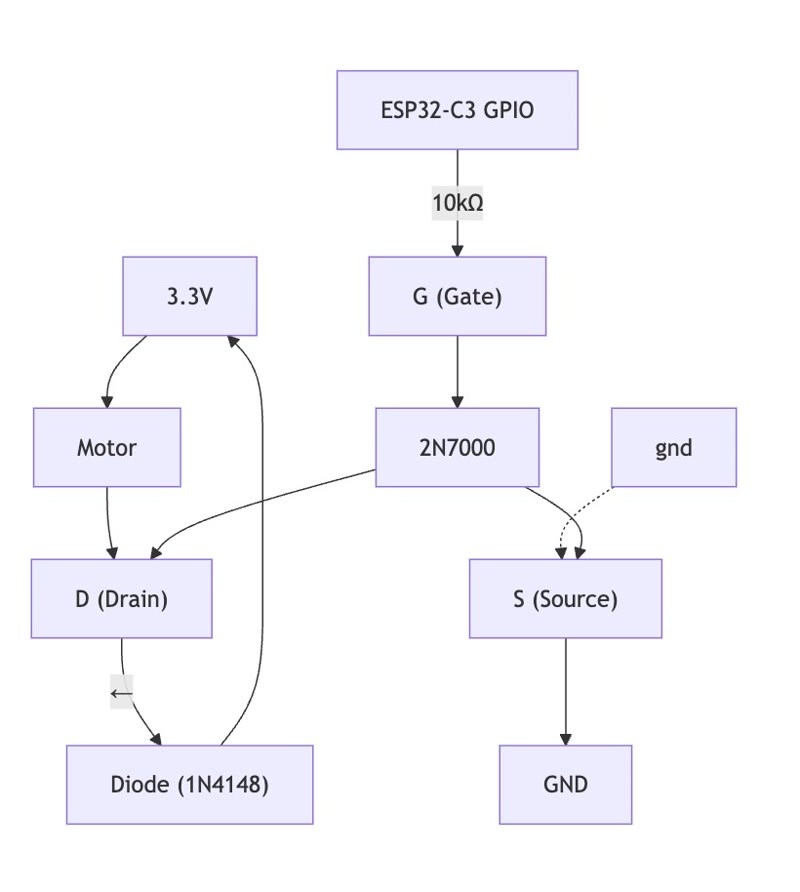
Circuit Overview
- Connect the positive terminal of the vibration motor to 3.3V, and the negative terminal to the MOSFET drain
- The MOSFET gate is controlled from ESP32-C3 GPIO5 through a 10kΩ resistor
- It is recommended to connect a protection diode (cathode to 3.3V side) in parallel with the motor
- The MOSFET source is connected to GND
Actual Implementation and Precautions
In this project, the protection diode (1N4148) was not available at the time, so the motor was tested without the diode.
While the circuit worked temporarily, there is a significant risk of damaging the MOSFET or ESP32-C3 due to back EMF (a high-voltage spike that occurs when the motor is turned off).
Important Note:
When replicating or adapting this circuit, be sure to connect a protection diode (e.g., 1N4148) in reverse across the vibration motor terminals to safeguard your components.
Operation Summary (Program Behavior)
- The MOSFET is controlled by GPIO5 on the ESP32
- The motor vibrates for 1 second → stops for 1 second in a loop
Arduino Code
const int motorPin = 5; // GPIO5

void setup() {
  pinMode(motorPin, OUTPUT);
}

void loop() {
  digitalWrite(motorPin, HIGH); // Motor ON
  delay(1000);                  // 1 second
  digitalWrite(motorPin, LOW);  // Motor OFF
  delay(1000);                  // 1 second
}
Mini Vibration Motor Video
You can see the mini vibration motor in operation.
Development Board + XIAO RP2040 + OLED Display
Output Device Used
In this project, I used a 1.3-inch SH1106G SPI OLED display (128×64 resolution) as the output device.
OLED displays are output devices used to visually present information. In this project, I implemented "continuous visual output control" by scrolling a custom logo image on the display.
OLED Display and XIAO RP2040 Connection Pins (I2C)
When using the SH1106 module in I2C mode, it was connected as follows:
| OLED Display Pin | Connected to (XIAO RP2040) | Description |
|---|---|---|
| VCC | 3V3 | Power (3.3V) |
| GND | GND | Ground |
| SDA | D4 | Data line (I2C SDA) |
| SCL | D5 | Clock line (I2C SCL) |
How to Convert a Custom Image into a Bitmap Array
Follow the steps below to convert a monochrome image into a uint8_t[] array that can be used in an Arduino sketch.
- Prepare your image:
- Recommended resolution: 128×64 or smaller (e.g., 50×50)
- File format: PNG or BMP
- Ensure it is black and white (monochrome)
- Access the web tool:
- Change the settings as follows:
- Output format: Arduino code
- Drawing mode: Monochrome
- Image settings: Adjust the size appropriately (e.g., 50×50)
- Orientation: Horizontal (byte-wise)
- Invert color: Check if necessary
Click the "Generate code" button
Copy the generated code
Example:cppconst unsigned char my_logo_bmp [] PROGMEM = { 0xff, 0xef, 0xff, 0xff, 0xff, 0xff, 0xc0, 0xff, 0xef, 0xbf, 0x7f, 0x3f, ... };
Arduino Code
#include <Wire.h>
#include <Adafruit_GFX.h>
#include <Adafruit_SSD1306.h>

#define SCREEN_WIDTH 128
#define SCREEN_HEIGHT 64
#define OLED_RESET -1
#define SCREEN_ADDRESS 0x3C

Adafruit_SSD1306 display(SCREEN_WIDTH, SCREEN_HEIGHT, &Wire, OLED_RESET);

// 50 pixels wide x 50 pixels high image (generated by bitmap conversion tool)
#define MY_LOGO_WIDTH  50
#define MY_LOGO_HEIGHT 50

const unsigned char my_logo_bmp [] PROGMEM = {
	0xff, 0xef, 0xff, 0xff, 0xff, 0xff, 0xc0, 0xff, 0xef, 0xbf, 0xbf, 0xff, 0xff, 0xc0, 0xff, 0xf0,
	0x7f, 0x3f, 0xff, 0xff, 0xc0, 0xff, 0xe3, 0xff, 0xb7, 0xff, 0xff, 0xc0, 0xff, 0x8f, 0xff, 0x7c,
	0xff, 0xff, 0xc0, 0xff, 0x9f, 0xff, 0x7e, 0xff, 0xff, 0xc0, 0xff, 0x3f, 0xff, 0xff, 0x5f, 0xff,
	0xc0, 0xfe, 0x3f, 0xff, 0xff, 0xcf, 0xff, 0xc0, 0xff, 0x3f, 0xff, 0xff, 0xf7, 0xff, 0xc0, 0xff,
	0xbf, 0xff, 0xff, 0xf0, 0xff, 0xc0, 0xff, 0xdf, 0xff, 0xff, 0xf3, 0xff, 0xc0, 0xff, 0xff, 0xff,
	0xff, 0xf3, 0xff, 0xc0, 0xff, 0xff, 0xff, 0xff, 0xff, 0xff, 0xc0, 0xff, 0xff, 0xff, 0xfc, 0xe7,
	0xff, 0xc0, 0xff, 0xff, 0xff, 0xfc, 0xf7, 0xff, 0xc0, 0xff, 0xff, 0x2f, 0xf4, 0x3f, 0xff, 0xc0,
	0xff, 0xff, 0x8f, 0xf0, 0xff, 0xff, 0xc0, 0xff, 0xfb, 0x9f, 0xf0, 0xff, 0xff, 0xc0, 0xff, 0xf3,
	0xff, 0x20, 0x7f, 0xff, 0xc0, 0xff, 0xf0, 0xfe, 0x80, 0x3f, 0xff, 0xc0, 0xff, 0xf3, 0xf1, 0xd0,
	0x7f, 0xef, 0xc0, 0xff, 0xf3, 0xf9, 0xc0, 0x07, 0xef, 0xc0, 0xff, 0xf3, 0xf9, 0xc0, 0x06, 0x0f,
	0xc0, 0xff, 0xf9, 0xff, 0xe0, 0x00, 0x1f, 0xc0, 0xff, 0xf8, 0xff, 0xe0, 0x00, 0x07, 0xc0, 0xff,
	0xf8, 0xff, 0x90, 0x00, 0x07, 0xc0, 0xff, 0xfc, 0xfe, 0x30, 0x00, 0x03, 0xc0, 0xff, 0xfc, 0x7f,
	0x10, 0x00, 0x19, 0xc0, 0xff, 0xfc, 0x70, 0x10, 0x00, 0x03, 0xc0, 0xff, 0xf2, 0x01, 0xa0, 0x00,
	0x03, 0x40, 0xff, 0xf6, 0x01, 0xe0, 0x00, 0x01, 0xc0, 0xff, 0xf0, 0x01, 0xe0, 0x00, 0x00, 0xc0,
	0xff, 0xf0, 0x00, 0xc0, 0x00, 0x00, 0xc0, 0xff, 0xf0, 0x01, 0x40, 0x00, 0x00, 0x40, 0xff, 0xe0,
	0x02, 0x40, 0x00, 0x00, 0x40, 0xff, 0xc1, 0x00, 0x80, 0x00, 0x00, 0x00, 0xff, 0x83, 0x86, 0x00,
	0x00, 0x00, 0x00, 0xff, 0x03, 0x3e, 0x00, 0x00, 0x00, 0x00, 0xfe, 0x83, 0xfe, 0x00, 0x40, 0x00,
	0x00, 0xfe, 0xc1, 0xee, 0x14, 0xc0, 0x00, 0x40, 0xfe, 0xb0, 0x9f, 0x71, 0x20, 0x00, 0x40, 0xfc,
	0x70, 0x1e, 0xf3, 0xe0, 0x0c, 0xc0, 0xfc, 0x90, 0x3d, 0xe3, 0xf0, 0x30, 0xc0, 0xf2, 0x88, 0x39,
	0xe3, 0xf1, 0xda, 0xc0, 0xfe, 0x78, 0x2f, 0xf7, 0xf9, 0xf0, 0xc0, 0xfe, 0xf8, 0x1f, 0xe7, 0xfb,
	0xf9, 0xc0, 0xe3, 0xf9, 0x7f, 0xef, 0xff, 0xfd, 0xc0, 0xfb, 0xfd, 0x7f, 0xef, 0xff, 0xff, 0xc0,
	0xfd, 0xff, 0xff, 0xcf, 0xff, 0xff, 0xc0, 0xff, 0xff, 0xff, 0xcf, 0xff, 0xff, 0xc0
};

void setup() {
  Serial.begin(9600);

  if (!display.begin(SSD1306_SWITCHCAPVCC, SCREEN_ADDRESS)) {
    Serial.println(F("SSD1306 allocation failed"));
    for (;;);
  }

  display.clearDisplay();
  display.display();
}

void loop() {
  static int16_t x = SCREEN_WIDTH;
  display.clearDisplay();
  display.drawBitmap(x, (SCREEN_HEIGHT - MY_LOGO_HEIGHT) / 2, my_logo_bmp, MY_LOGO_WIDTH, MY_LOGO_HEIGHT, SSD1306_WHITE);
  display.display();

  x -= 1;
  if (x < -MY_LOGO_WIDTH) {
    x = SCREEN_WIDTH;
  }

  delay(20);
}
Operation Confirmation Video
In the following video, you can see the custom logo displayed on the OLED screen slowly scrolling to the left.
This visually demonstrates that the output device is being continuously controlled.
Afterthoughts
Actually, I accidentally reversed the GND and 3V3 pins on the OLED (SH1106), which caused it to break. So I changed my approach and switched to displaying the output using Node.js and a web browser instead. I really wanted to try using the OLED too.
I was able to implement the complex process of fetching a joke via Wi-Fi from the XIAO ESP32-C3, sending it to Node.js through the serial port, and displaying it in the browser — all with simple code!
Always connect a protection diode in parallel with the motor!