2. Computer-Aided Design
Assignment
- Model (raster, vector, 2D, 3D, render, animate, simulate, ...) a possible final project
- compress your images and videos, and post it on your class page
Weekly Summary
- Evaluate and select 2D and 3D software
- Demonstrate and describe processes used in modelling with 2D and 3D software
- Progress of the Final Project
Evaluate 2D & 3D software
I chose those 5 softwares to evaluate. I will describe one by one.
2D
- Inkscape [Vector]
- PhotoShop [Raster]
3D
2D models
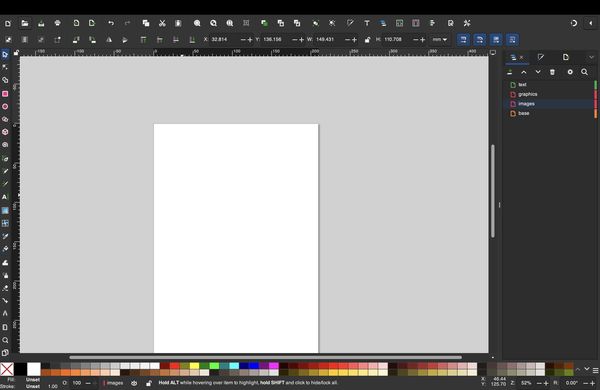
Inkscape
“Inkscape” for drawing
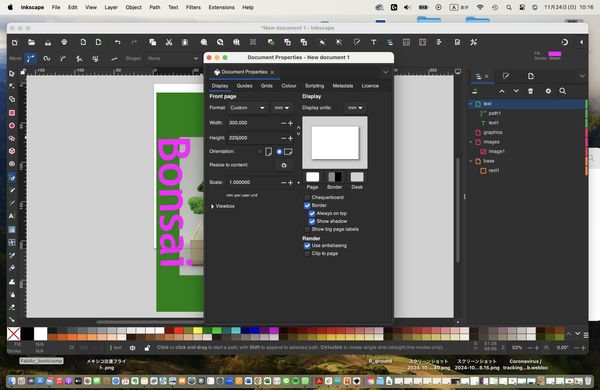
- Open the Inkspace [fig1]
- Set document size(width&Hight, Orientation) [fig2]
- Draw feature by choosing the slide button
- Design
- select the drawing line width(this time :0.001mm)
3D
Tinkercad
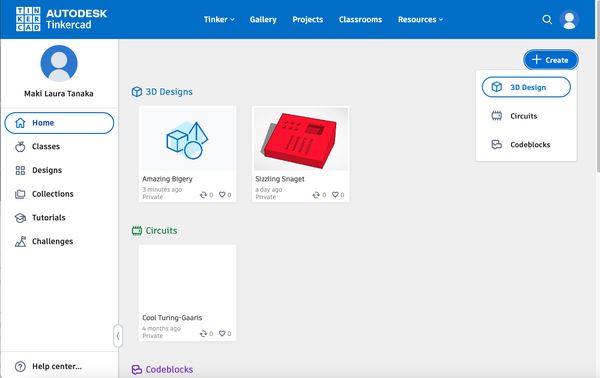
I started Tinkercad by browser. html is
https://www.tinkercad.com/dashboard
After opening the web site, click”+Create” and choose “3D design”
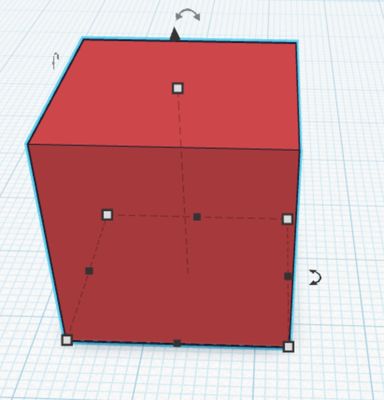
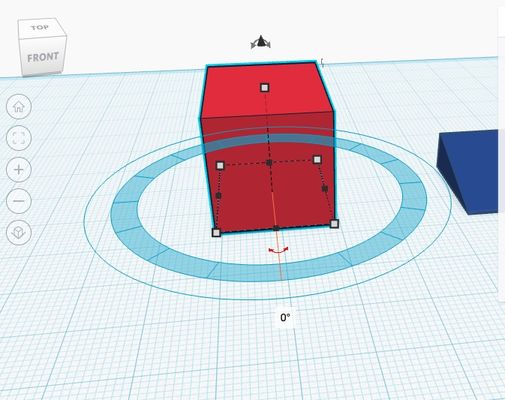
I selected red cube and put on the Workplane.
How to move the sight by a mouse
- right : orbit
- middle :
- keep-pressing: pin and move
- rolling :scrolling the zoom
- left : select the object
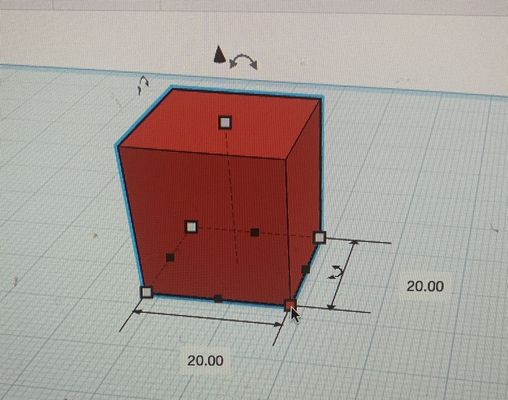
Control the size
When touching white point, it can be input direct number.
When touch black point, it can be change the length by keep pressing left button.
Rotating
When touching bent arrow, you can rotate the object with a mouse or input the direct number.
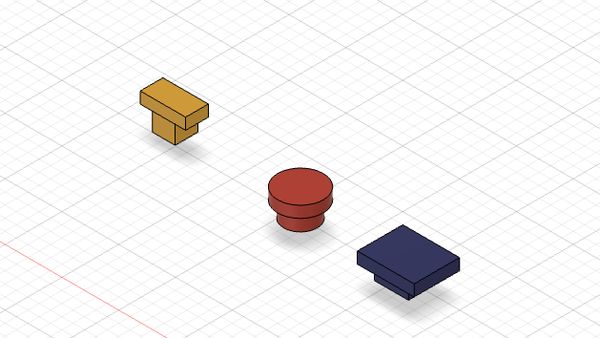
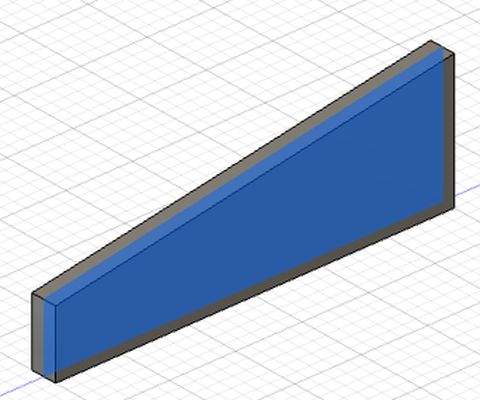
Make basic controller box:
I made 2 objects(red cuboid and blue triangle) and combine them to 1 box.
I select a box(red) and put on the workplace and resize to 35-28-5.
Then I select a wedge(blue) and resize it to 35-28-5.
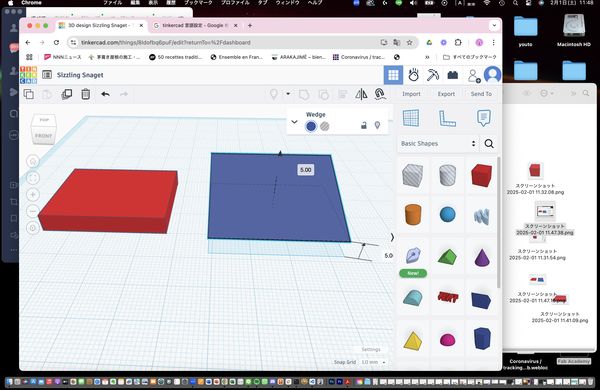
After that, I raise the blue box up to 5(the hight of red one) and move above the red object.
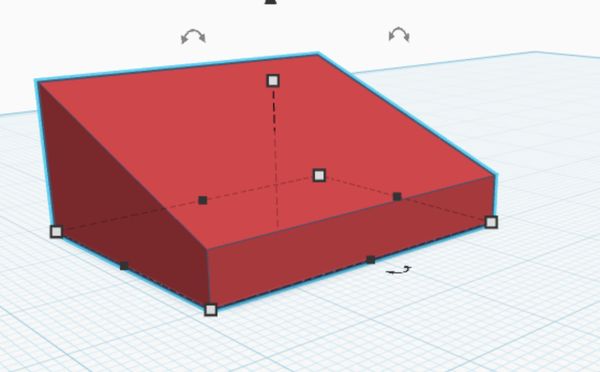
Combine
I choose both objects and select align button.
Then circles and lines are appeared.
These lines are the standard point(edge or center) of both objects.
I choose proper points and click outside the objects(which means release “align situation”)
select the objects which are going to be combined.
Grouping
I select all the object and push "group" button. Then all objects combined and becomes big one object.
Duplicate
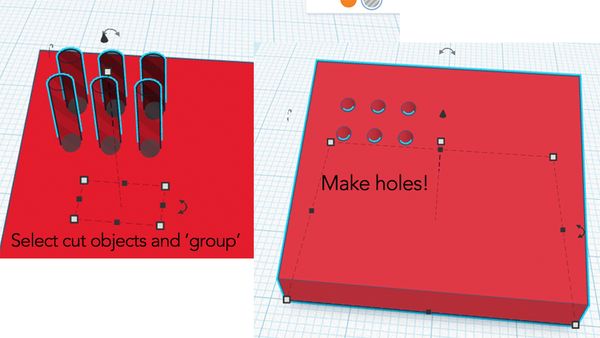
When I make button holes, I want to cut same size hole several time. So I make 1 hole and set a point to cut. Then select that hole object and “control + d” key. Same object is made and I can make same "hole". After that, continue to push “control + d”, the procedure of make hole at the same interval.

Make holes
Striped shape objects are “cutting” objects. Therefore I chose a stripe box and put on the surface where I want to cut. When I want to cut the sloped surface, just put it on it, a stripe box cuts that direction. If I’d cut the same direction as workplace, just put it on the workplace and move it. After that, select all the objects and select “group”
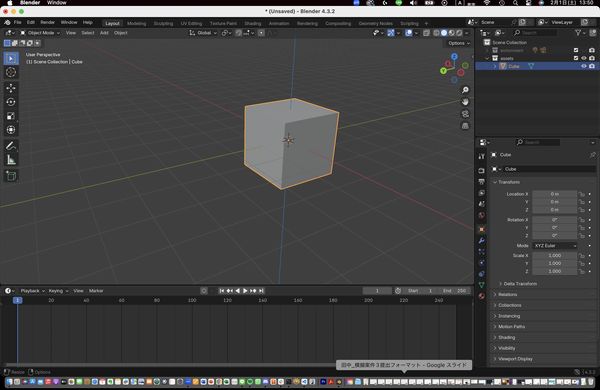
Blender
Next what I learned and evaluate is "Blender".
First I downloaded the the blender app by internet. https://www.blender.org/download/Basic Opearation:
- Rotating/orbit: middle button
- Move the object in fixed coordinate: [shift] + middle button
- Add menu: [shift] + a
- Cancel: [esc]
- Delete: x
- Create folder: c
Navi:
- Cartesian coordinate system
- x: red y: green z: blue
- When we want to see “front”, click “-y”
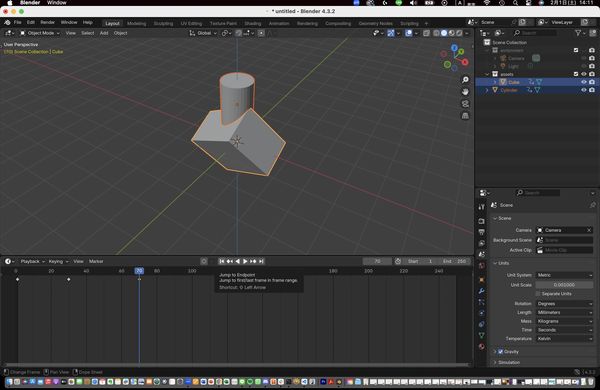
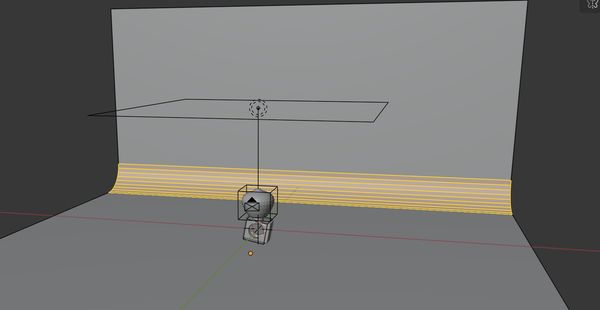
I made a perfume box.
I add a cube on the coordinates.
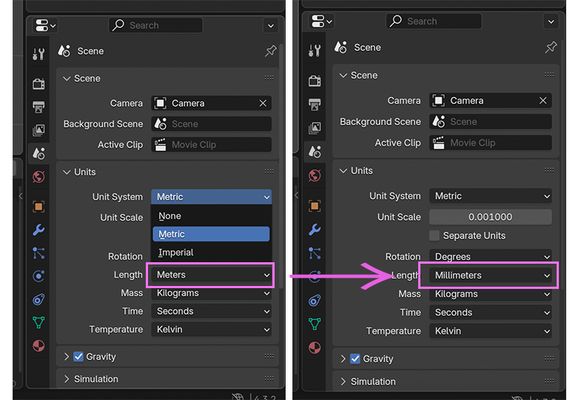
Set the length unit from meters to millimeters
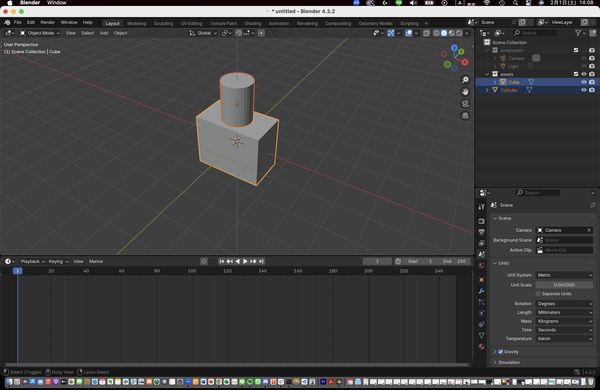
Then, I add a cylinder on the cube.
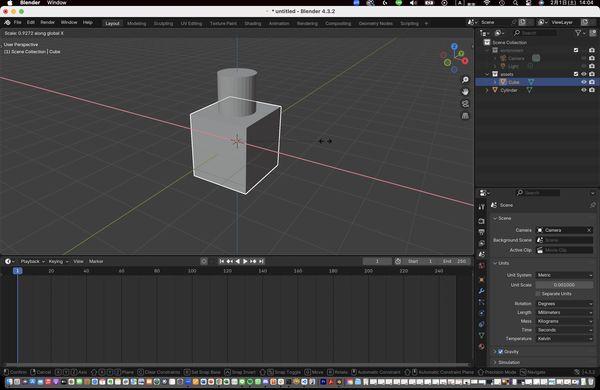
I transformed the cube to “perfume bottle” and moved the cylinder on the center of the “bottle”.
Transformation command:
- Move: g(grab) + {←→ ↑↓ or (x, y, z) + num}
- Scale: s + (x, y, z) + ←→ ↑↓
- Rotate: r + [mouse]
- Duplicate: [shift] + d
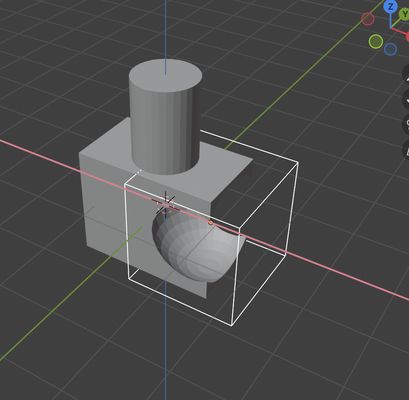
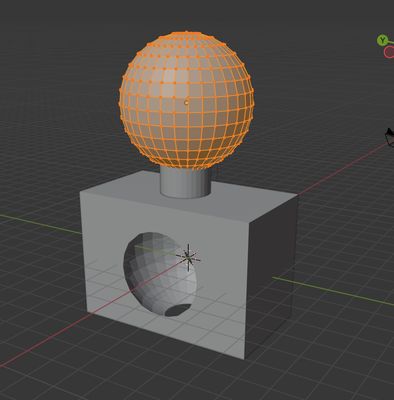
I put a sphere for cutting.

For combining objects, I put “bool tool” add-on tool.
Then we can see the menubar at right side of the window and enable to set or change the data of objects.

Then, menubar comes out and click “Add Modifier” → “Generate” → ”Boolean”
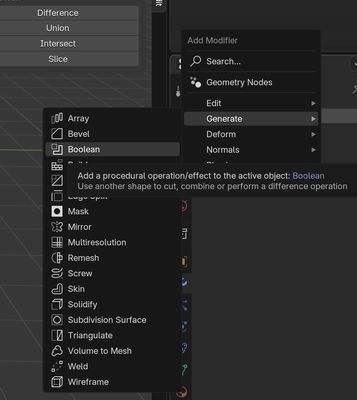
In the Boolean menu, I checked “Difference” mode and clicked “Object” and choose the “cut” object. This time, as sphere is a “cut object”, choose a sphere.
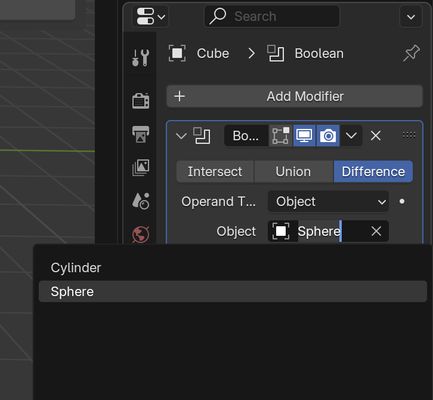
A box is cut by the sphere feature. When I clicked sphere’s eye sign on the right top list(hide), we can see the cut condition of the box.
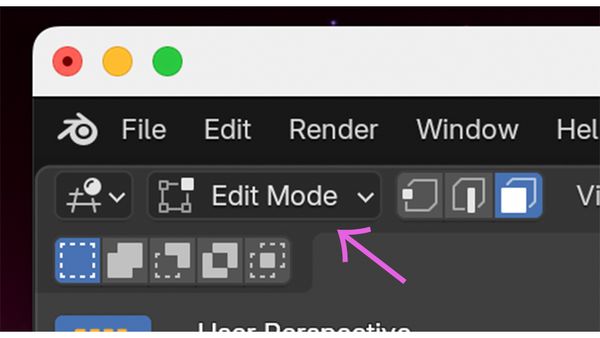
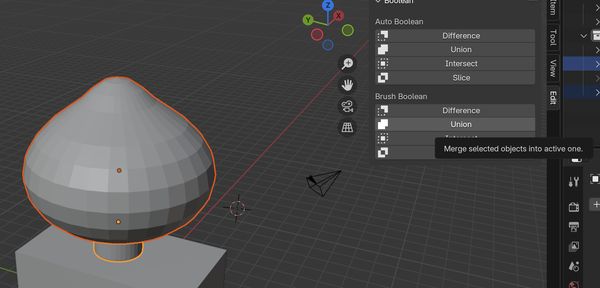
After that, I put another sphere on top of the cylinder for perfume cap top. I want to change the shape of the sphere on the top. After I click that sphere, I changed the mode from Object Mode to Edit Mode. Then display at the top sphere can be changed.
The way to change the shape, there are 3 ways to select; point, line, face. As I want to change the shape to egg shape, I select the line mode and click the line where the part is changed. Those are the commands for changing the shape. Move(from the point): g (x, y, z ← when add those coordinates, shape is only expanded that coordinate) middle mouse(mouse wheel): enable to vary the range of the change

Next, I combined 2 object into 1. I targeted the objects and click “Union” at the “Brush Boolean” menubar
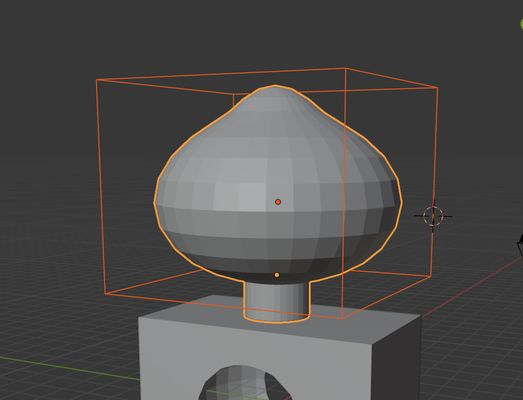

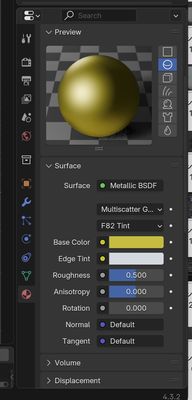
After selecting the object, I chose colors and material.

Make video by Blender
First, I made background.
[shift]+a → mesh → plane
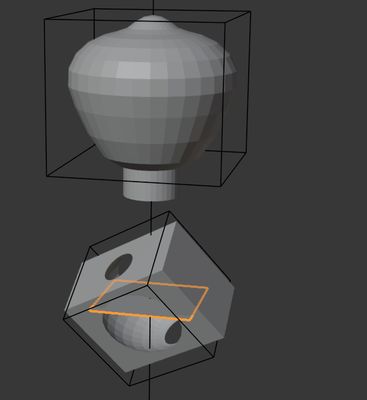
After adjusting the position and size, changed the mode to “Edit Mode”. I picked the line, and extrude the face with “e + z”.
Then, I also chose same line and bevel the line with [command] + b
moving mouse wheel rounds off the corner
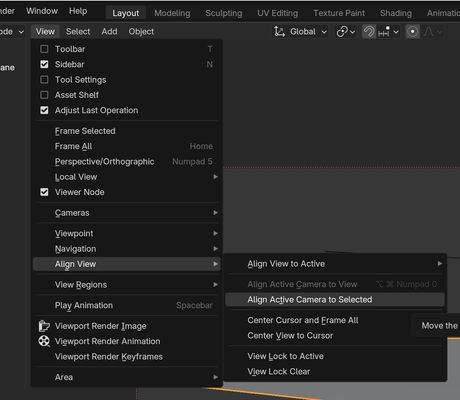
Next I put the light.
[shift] + a → select “area”
adjust the light position and the size which doesn’t make large shadow.
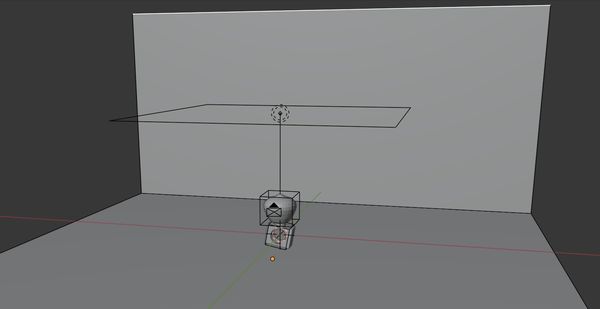
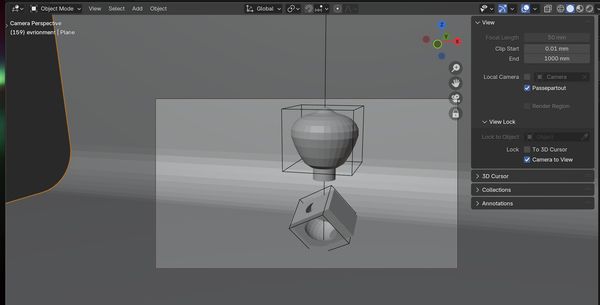
Select “view” at the left-top bar menu → “Align menu” → “Align Active Camera to Selected”
And adjust the object position inside a rectangle(camera view)
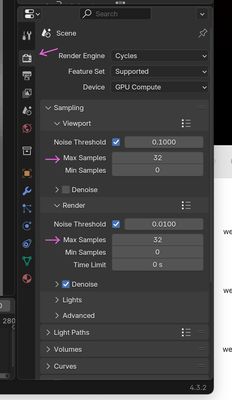
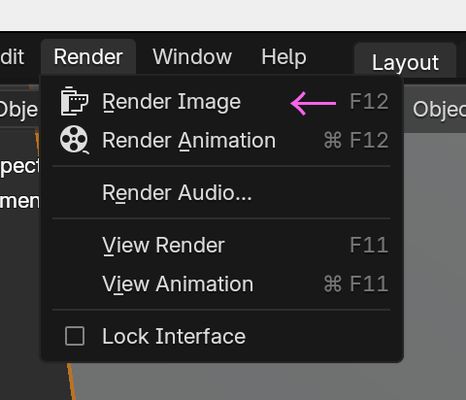
For make slide photo for the video, select “Render” from setting menu, and put Max sample number to 32(depends on how finely animation would like to be ). Then click the "Render" menu and "Render Image"
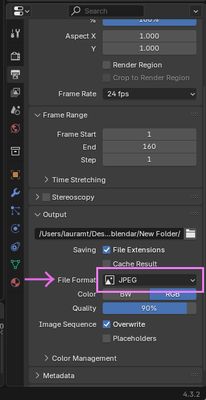
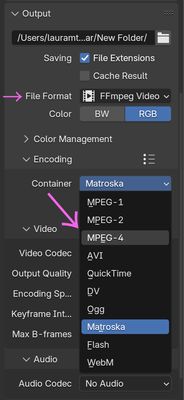
Then I select this time output menu → change setting at File format and check "Frame range" and "Output". I chose "FFmpeg Video" at File format and "MPEG-4" at container. Lastly I chose the "Render" menu at top-left and "Render Animation"

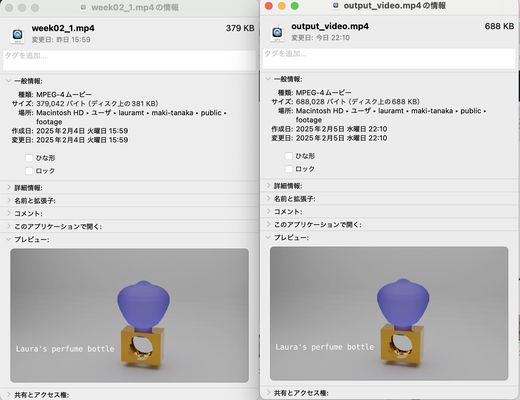
Compress the video
Install ffmpeg
As my computer doesn’t have "ffmpeg" command, I installed it. Install command is
% brew install ffmpeg
After installing ffmpeg, I converted my mp4 file. However converted file is bigger than original one, I keep original one.
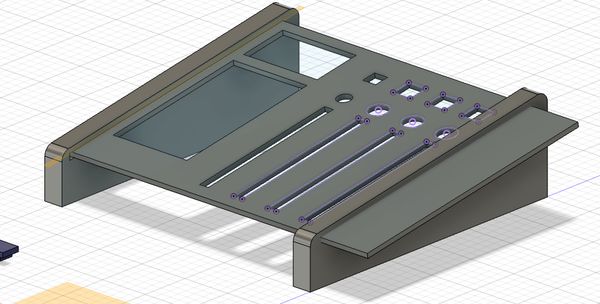
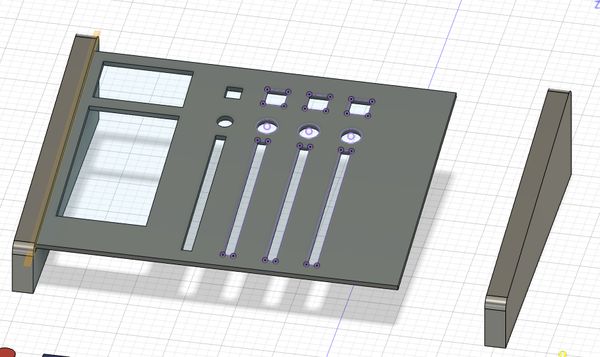
Fusion 360
I touched and evaluate a Fusion while making light controller.
Create sketch → decide the coordinate → rectangle → put scale

put rectangles and circles for button and slider bar
push the “Finish sketch” button ←”It is really important!!”
I extruded big rectangle 5mm.

Then I made small parts such as buttons and slider.
I made side wall and a little slit for putting control board.

I changed the angle of the controller board and put it to the side wall.
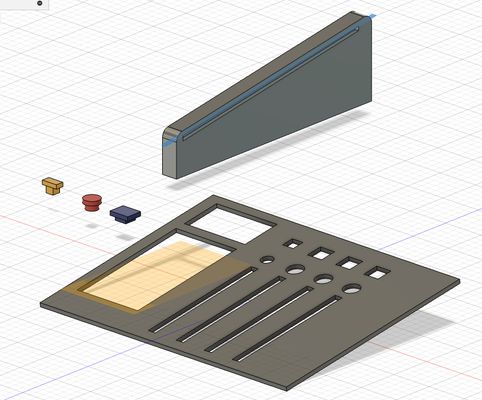
I made a copy of a side wall using "mirror" command.