17. Wildcard Week
Assignments
Here you can find a recording of the lecture from the 21st of May.
This week's assignments and learning outcomes, see here:
Individual assignment:
- Design and produce something with a digital process (incorporating computer aided design and manufacturing) not covered in another assignment, documenting the requirements that your assignment meets, and including everything necessary to reproduce it. Possibilities include but are not limited to wildcard week examples.
Questions to be answered/from Nueval:
Have you answered these questions?
- Documented the workflow(s) and process(es) you used
- Explained how your process is not covered on other assignments
- Described problems encountered (if any) and how you fixed them
- Included original design files and source code
- Included ‘hero shot’ of the result
Hero shot
A live model
Here is a video of the sewing machine working on the logo
Sewing
Using the Letter option in Inkscape
Here is a video that shows what it is like to use the Letter option in the Inkstitch extension.
Lettering in Inkstitch
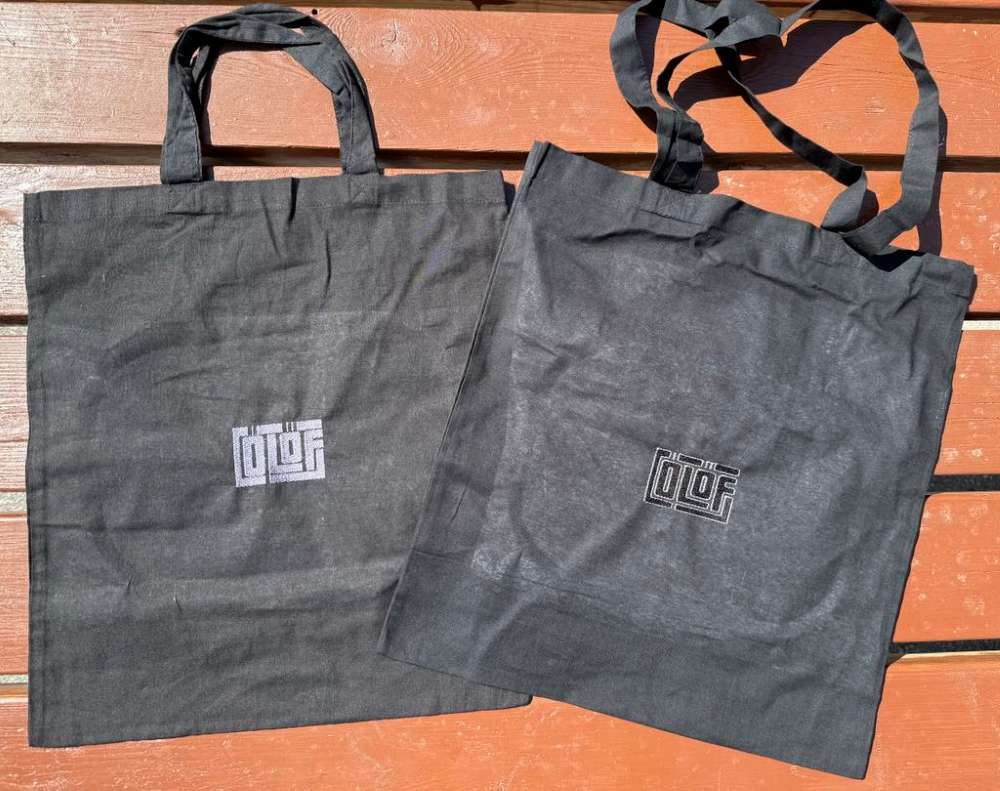
Bags with embroidered logos
Here you can see that I embroidered logos on reusable bags.
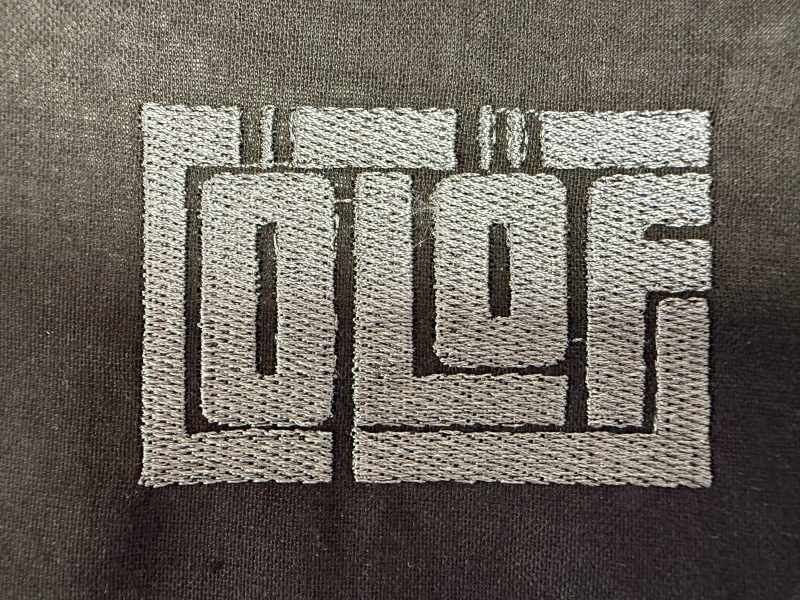
A logo embroidered with fill
Here you can see a close-up of my logo embroidered with fill.
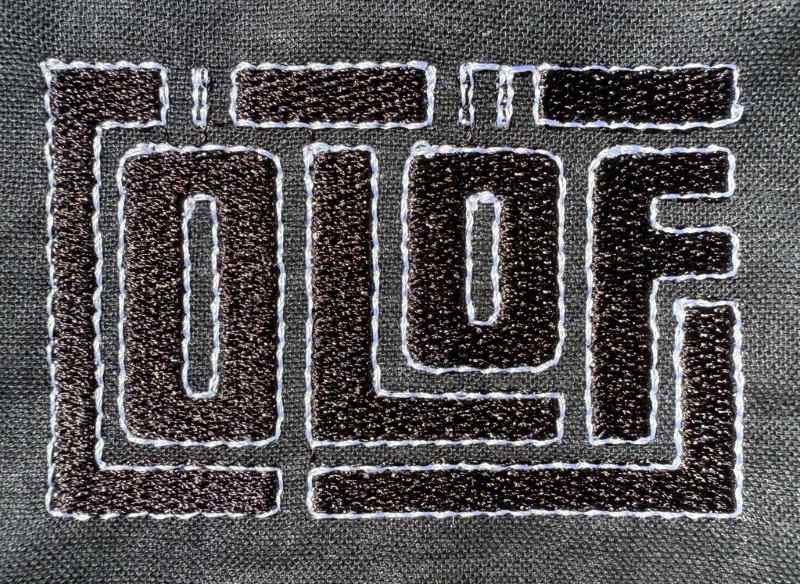
A logo embroidered with fill and outline
Here you can see a close-up of my logo embroidered with fill and outline.
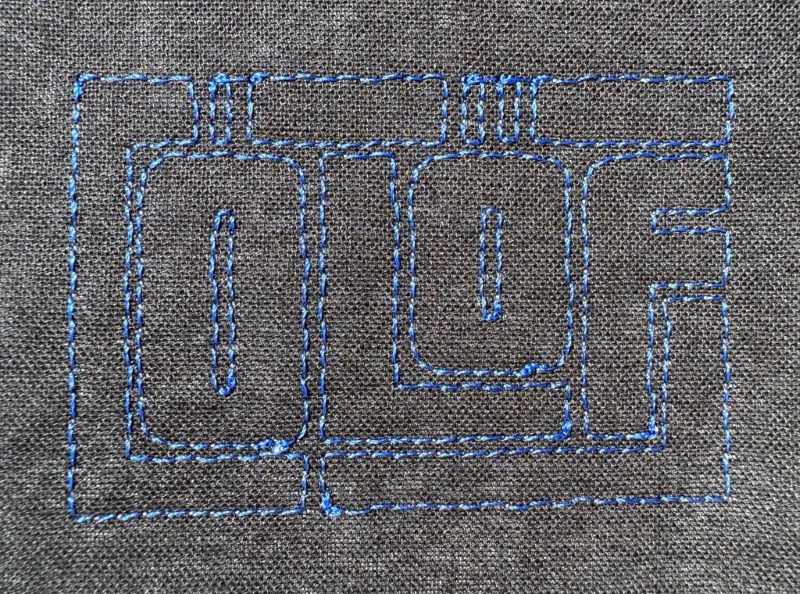
A logo embroidered with outline
Here you can see a close-up of my logo embroidered only with an outline.
Summary
Embroidering
For the wildcard week I wanted to try out the Inkstitch extension, which I find very interesting. I went to a Bootcamp in Fab Lab Húsavík and I knew that they owned a Brother 6-needle embroidery machine which I was so excited to try out. I hope that our Fab Lab Austurland will buy a similar machine one day.
I have not covered this process in any other assignment, neither using the sewing machine nor using the Ink/stitch extension, so this was an interesting process to dive into.
Work process detail
Download, brochure and directions
Brochure for Brother 6-needle embroidery machine
Here is the brochure for the Brother 6-needle embroidery machine. Below you can see a photo of the machine.
A drop of oil before each use
It is important to put a drop of oil onto the hook before inserting the bobbin case. This has to be done each day that the machine will be used.
Guidance
Anna Reneau guided me through the whole process. She told me how to set things up in Inkscape and how to prepare the job in the embroidery machine.
Download and instructions
I downloaded the Inkstitch extension from here.
Here you can find instructions on how to use the machine.
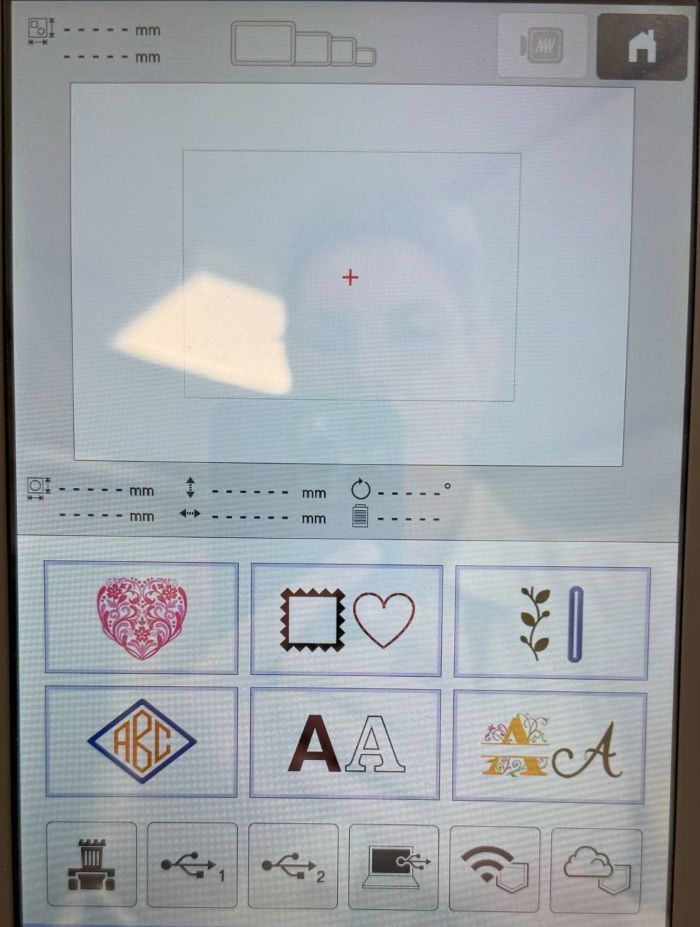
Creating a design for the embroidery machine
Creating a file for the embroidery machine
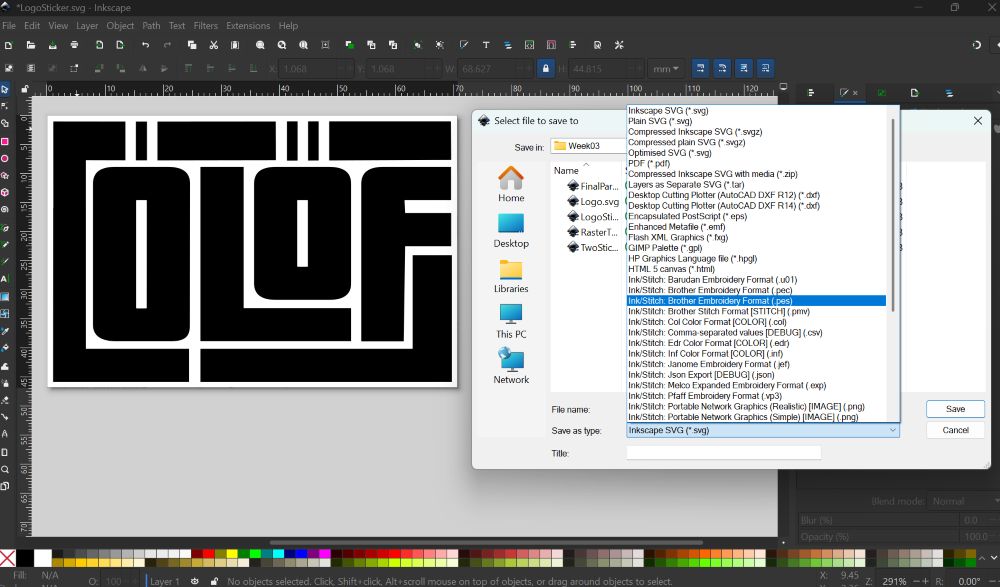
I used a logo that I designed in Pre-Fab and I documented the process in week 03. I opened up the logo file and saved it as a new file. I chose Object and then Fill and stroke. There I turned Fill on and turned of Stroke paint. Then I saved the file as an .svg file so that I could edit it later on if I wanted to.
Saving a .pes file
Saving as a .pes file
The next step was to save the file as a .pes file. I am used to creating .pdf files for rasterizing material in a laser. The steps in this project were exactly the same except that I saved the file as a .pes file. I chose the black colour for the fill in the file and Anna Reneau told me that I could change the colours when adjusting settings in the sewing machine.
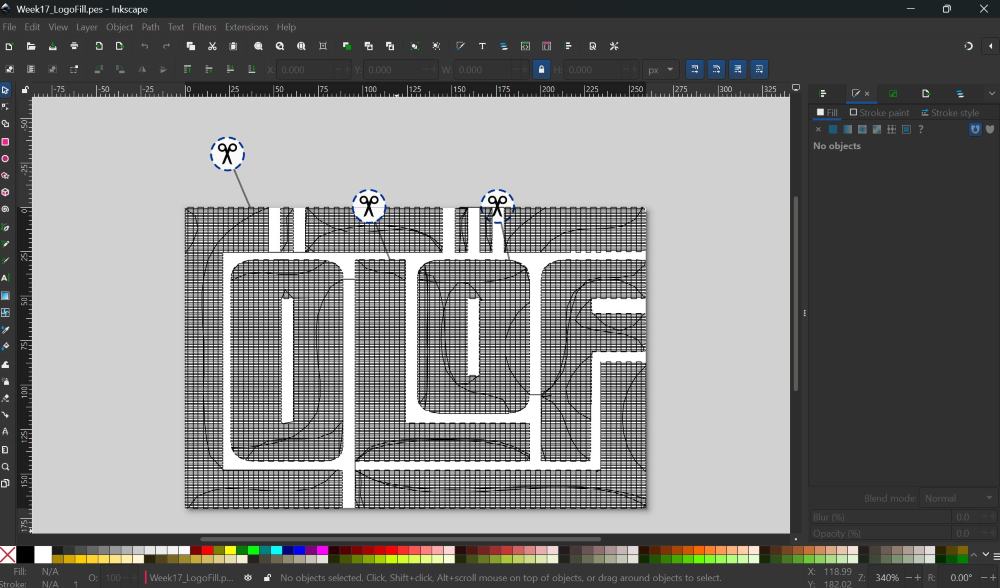
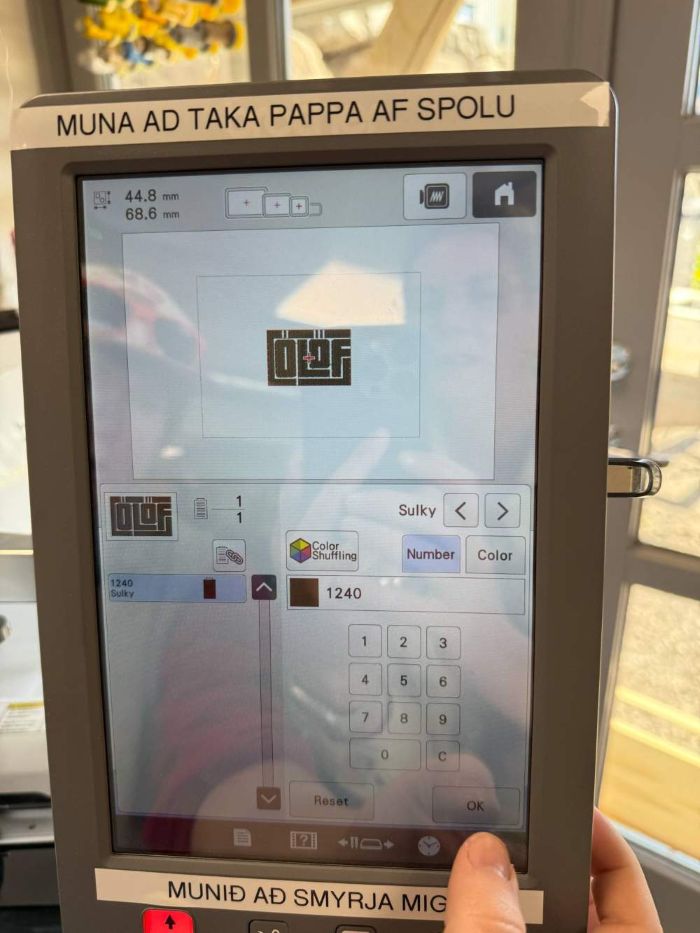
A .pes file generates the sewing path
In the image below you can see how the .pes file has generated a path for the embroidery machine. You can see how the thread will be laid down and you can also see where the machine will cut the thread.
Fastening the material
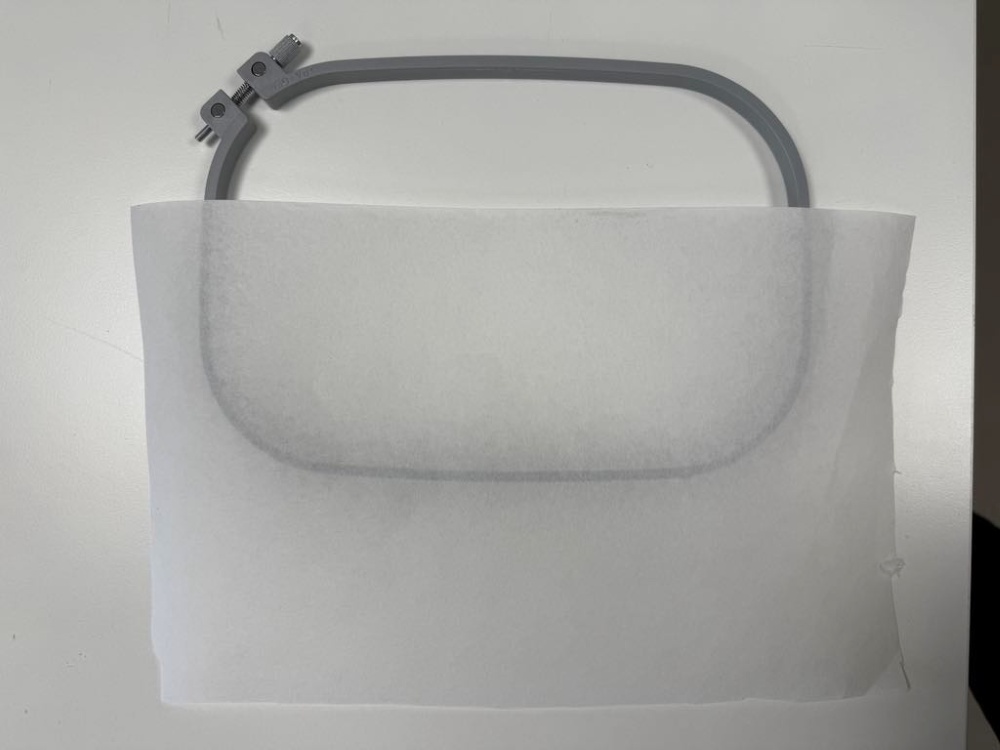
Fastening the material
I used reusable bag for this project. I fastened the material in an embroidery frame. The inner frame frame was placed inside the reusable bag and on top of it, also inside the bag, I placed a stabilizing backing. When I cut the stabilizing backing I made sure that it was a bit bigger than the frame so that it would fit between the inner frame and the outer frame. After adjusting the placement of the inner frame + the stabilizing backing, I pressed the outer frame on top of the reusable bag. Then I used the tightening screw to keep the material in place.
Different sizes of embroidery frames
In the image below you can see screws that you use to adjust the size for different sizes of embroidery frames. Then you slide your embroidery frame into the slots.

USB flash drive
You save the .pes file on a USB flash drive and plug it into the Embroidery machine. Then you click on the symbol for the USB drive (at the bottom). At the top of the screen you can see the Home button. Then you can choose your file and open it.
Choosing colour of thread
By clicking on the colour palette on the home screen you can edit the colours of the thread if you change thread. Sometimes it is enough to use the magic wand (at the bottom). Otherwise you have to choose which brand of thread you are using and then you can write the number of the colour.
Choosing thread
On this image you can see how you choose which thread you are using. There are 6 threads available.
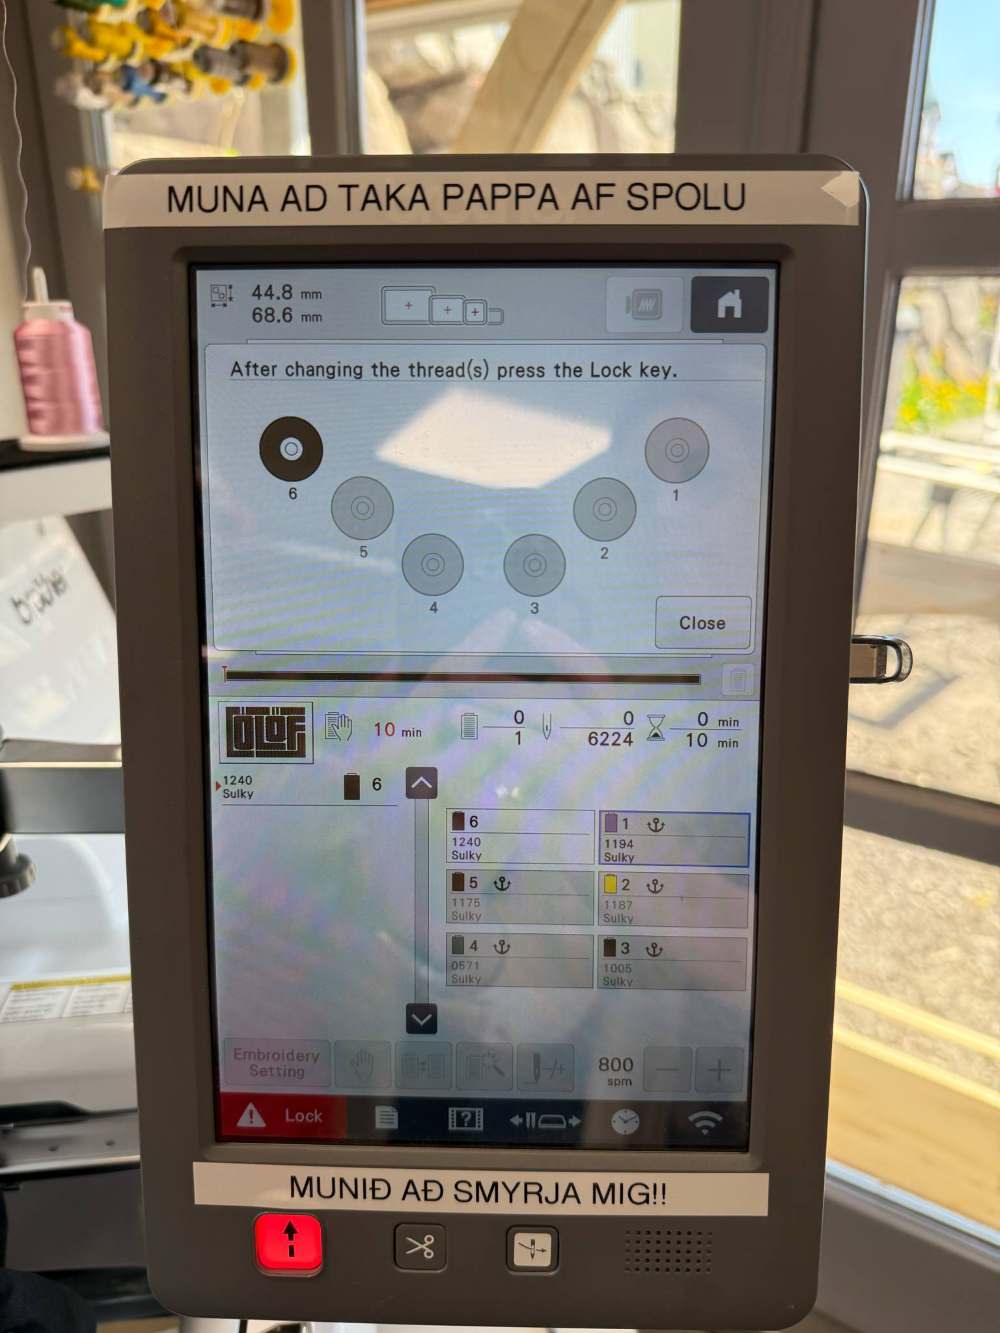
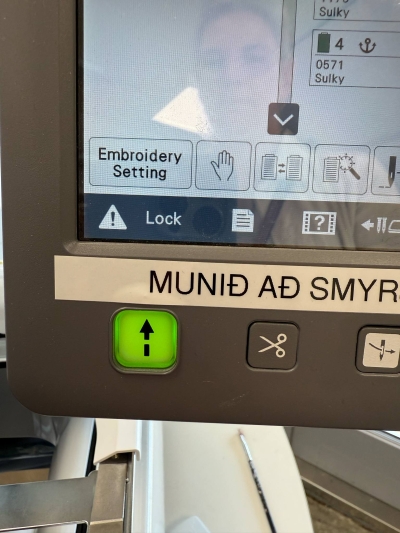
Start the job
When everything is ready you click on the Lock button. Then the Start button turns green and you can press on it. Then the machine starts embroidering.
Problems
Start the job
When the machine was embroidering, the thread broke. I found it very difficult to get the thread into the right places even though I used a small tool to move the thread. Axel Flex Árnason, who works at Fab Lab Húsavík, guided me throught the process. Then he showed me that before starting the job again it was recommended to choose how many steps you wanted the machine to go back. I chose to click on the button that showed that it would go back for ten steps and it came out fine.
Final results
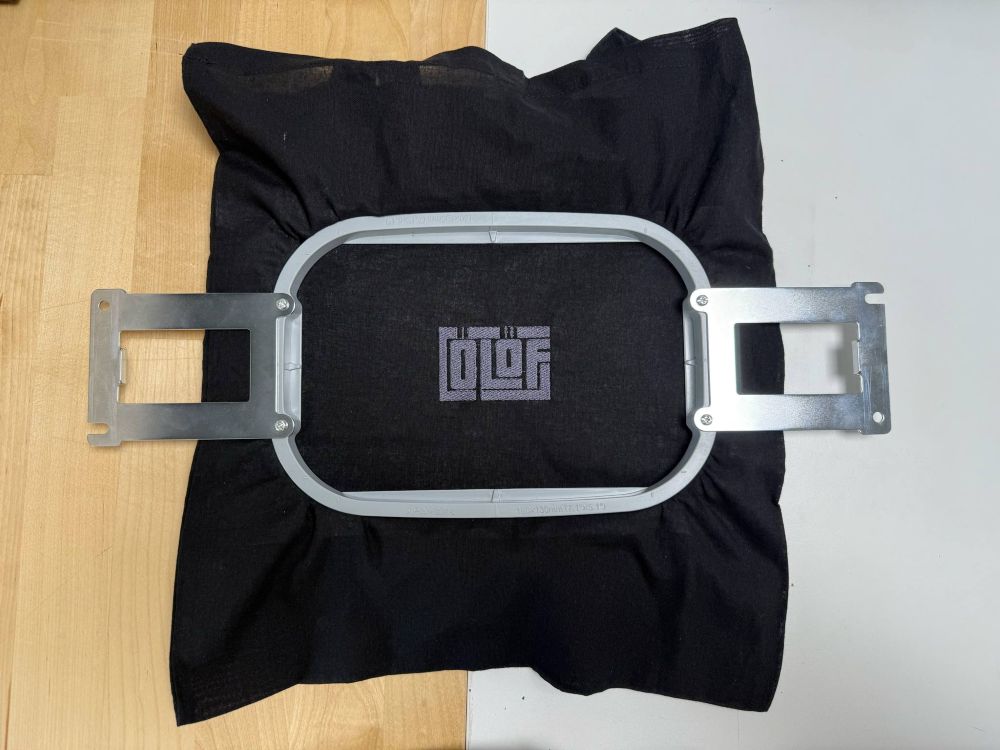
Final results
This is a close-up of the final result.
Arranging layers to control workflow
Arranging the layers
Anna Reneau told me that you can control which layer is stitched first and which layers follow. The machine always begins with the layer at the bottom on the list of layers in Inkscape and then follows the layers upwards. This means that you can arrange the layers if the order of the layers matters. Just drag the layers to arrange them to your preferred setup.

Outline design
Outline
I saved a new Inkscape file and changed the settings. I chose Object and then Fill and stroke. There I turned Fill off and turned Stroke paint on. Then I chose Extensions, then Ink/stitch, then Tools: Satin and finally Convert Line to Satin. Then I saved the file as an .svg file so that I could edit it later on if I wanted to.
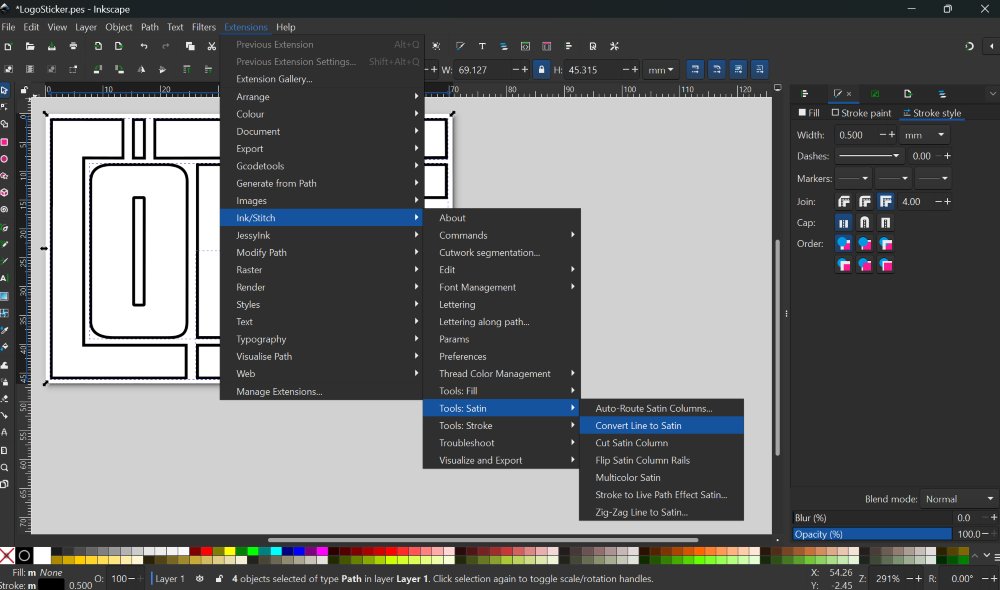
Save as .pes
The last step was to save the file as a .pes file. Here below you can see how the .pes file generated a path for the outline with markings where the machine would cut the thread.

Line too thin
When I showed Anna Reneau she saw that the line did not look good. She said that I might have made the line too thin. I checked and my line was only set to She recommended not to make the line thinner than 1.5mm
Results
Outcome
Here below you can see the outcome.
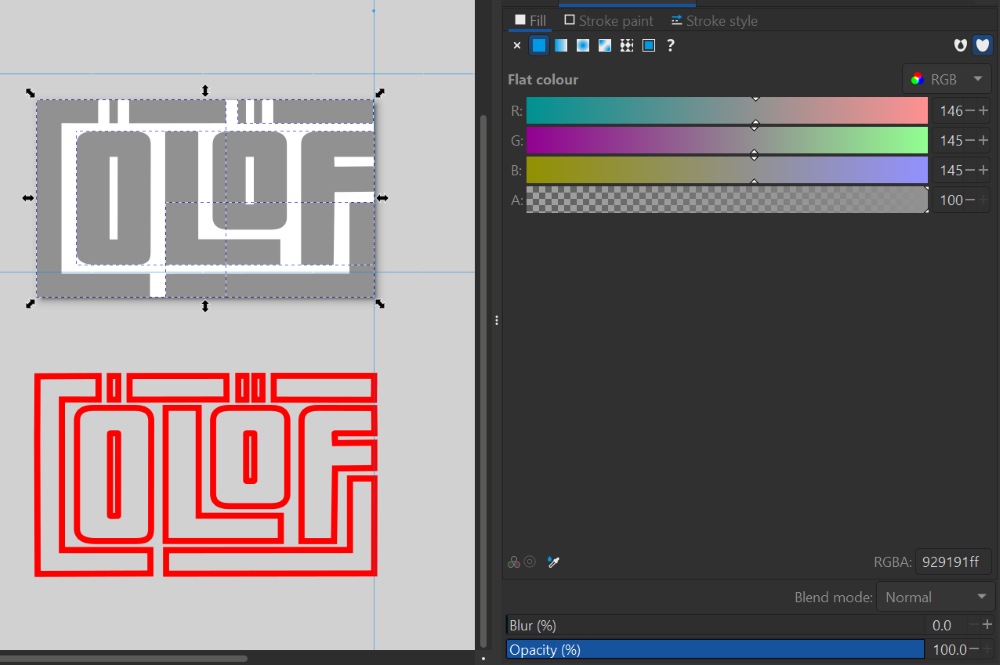
Design with fill and outline
Fill and outline
Outline not on top of fill
I wanted to try out using fill with an outline, but I did not want the outline to be on top of the fill. Anna Reneau taught me how to use offset to adjust the size of areas.
I began by using Copy and Paste to create two versions of the logo. In one of them I turned Fill off and turned Stroke paint on. In the other one I turned Fill on and turned Stroke paint off.
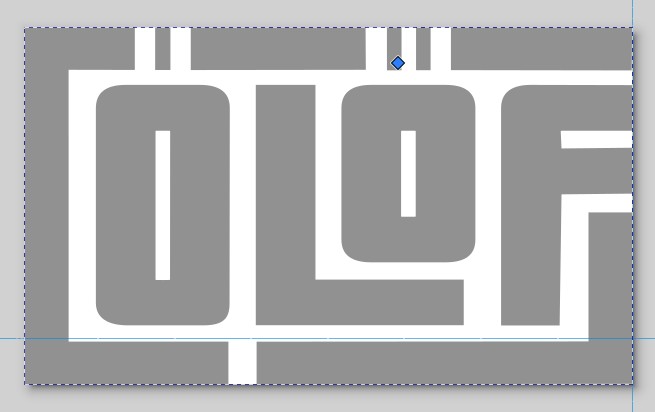
Using offset
Offsetting
when I started to document this, I could not remember how to group the letters in the right way to be able to use a function called Dynamic offset. I found an answer by Lazur to a question in the Inkscape forum. It is second in line from the top.
Lazur says that you can use shortcuts. First you can use Object to path on a text to turn it into a group of paths. Then you do the following:
-
Press Shift+Ctrl+C to convert text to path
-
Press ** Shift+Ctrl+G** to group
-
Press ** Ctrl+K** to combine paths
Can you see the tiny, blue diamond handle at the top of the bounding box in the image below? You can now grab it and resize (offset) the whole design.
Shortcuts in Inkscape
Shortcuts in Inkscape
Here you can find a list of all shortcuts in Inkscape.
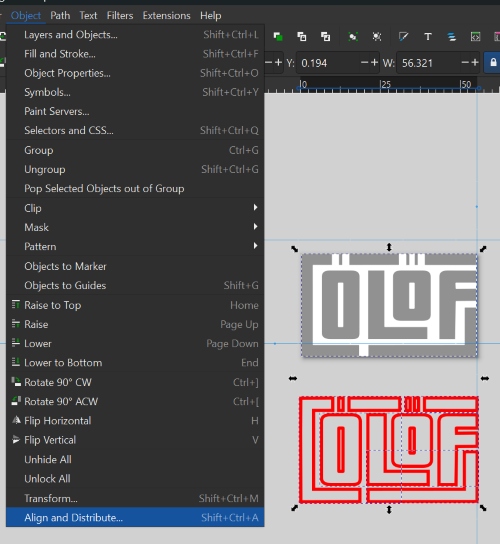
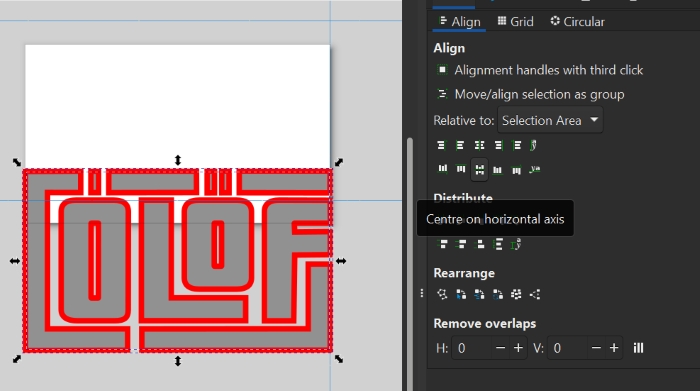
Aligning
Aligning fill and outline
I grouped the outline forms together by pressing Shift+Ctrl+G. Then I left-clicked on my mouse and dragged over both designs to select all. Then I clicked on Object and then Align and distribute.
Saved as a .pes file
Finally, I saved it as a .pes file and performed the job in the sewing machine. There I selected black thread for the fill and a white thread for the outline. Here below you can see the results.
Text in Inkstitch
Many possibilities
I would have loved to continue experimenting with the embroidery machine, but I had to leave Húsavík. I took a look at what kind of text Inkstitch had available and it has many options.
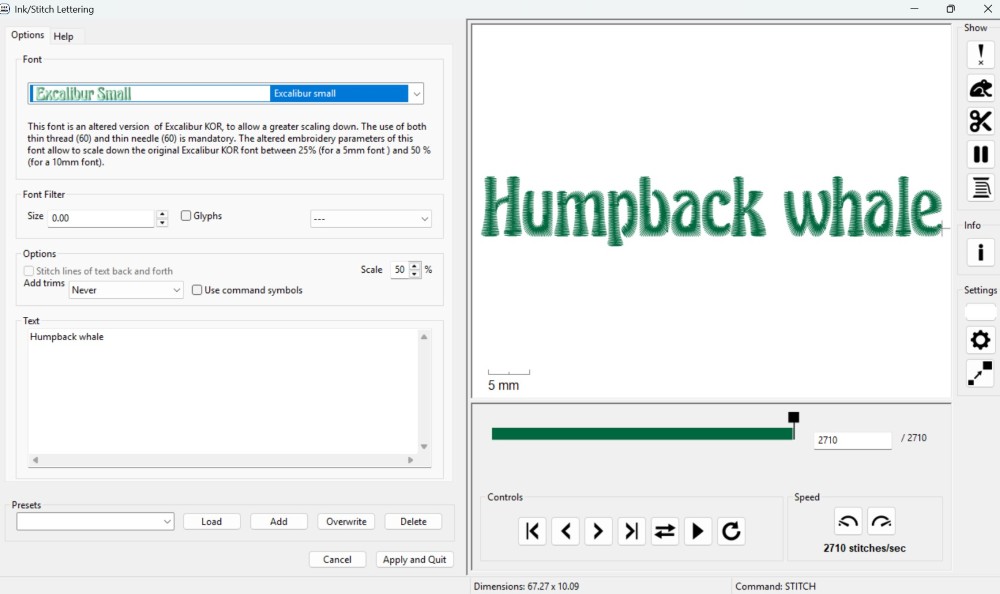
Applying text
When you have decided which font to use and the size of it, you click on apply and quit. It closes the Lettering window and the text appears in the Inkscape file. I think it is always a good idea to save the file as an Inkscape file and then as a .pes file. Here you can see how the scissors symbol shows where the thread will be cut.
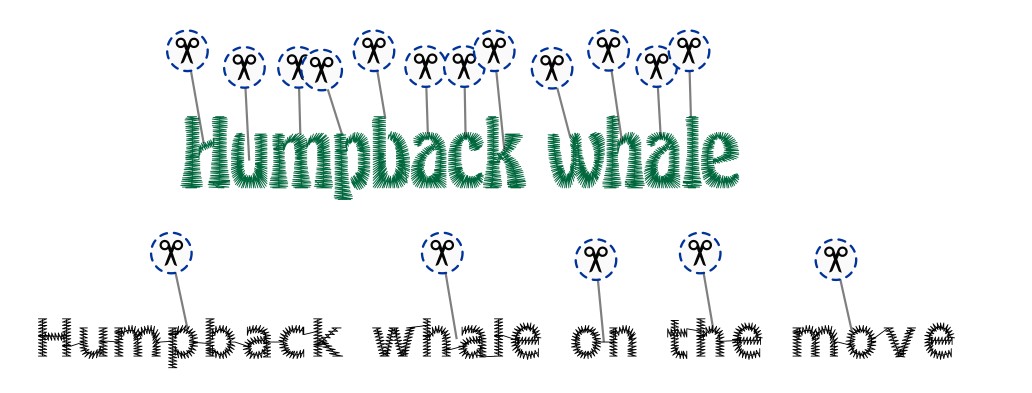
Preview of text
Here is a video that shows what it is like to use the Letter option in the Inkstitch extension. I like the preview function very much.
Lettering in Inkstitch
Learning outcome
I enjoyed doing the assignment in Wildcard week because I like sewing and working with textiles. I learned a lot about creating a design for an embroidery machine and how to operate the machine. I only wish that I had more time in Húsavík to use the machine, because I would have liked to do more.
Design files
.pes and .svg files
Here are the Inkscape files that were saved as .pes files.
Logo with fill and line - .svg file
Logo with fill and line - .pes file
Lettering .pes and .svg files
Here are the Inkscape files done with the Letter option in Inskcape.