Week 3:Computer Controlled Cutting
Group Assignment
- Characterize your lasercutter's focus, power, speed, rate, kerf, joint clearance and types.
- Document your work to the group work page and reflect on your individual page what you learned.
This week’s group assignment mainly involved work with the lab’s laser cutter. We were meant to learn the different parts and components of the laser cutter and the key parameters like focus, power, speed, rate, kerf, and joint clearance.
Laser cutter
This is the laser cutter that we have in our lab
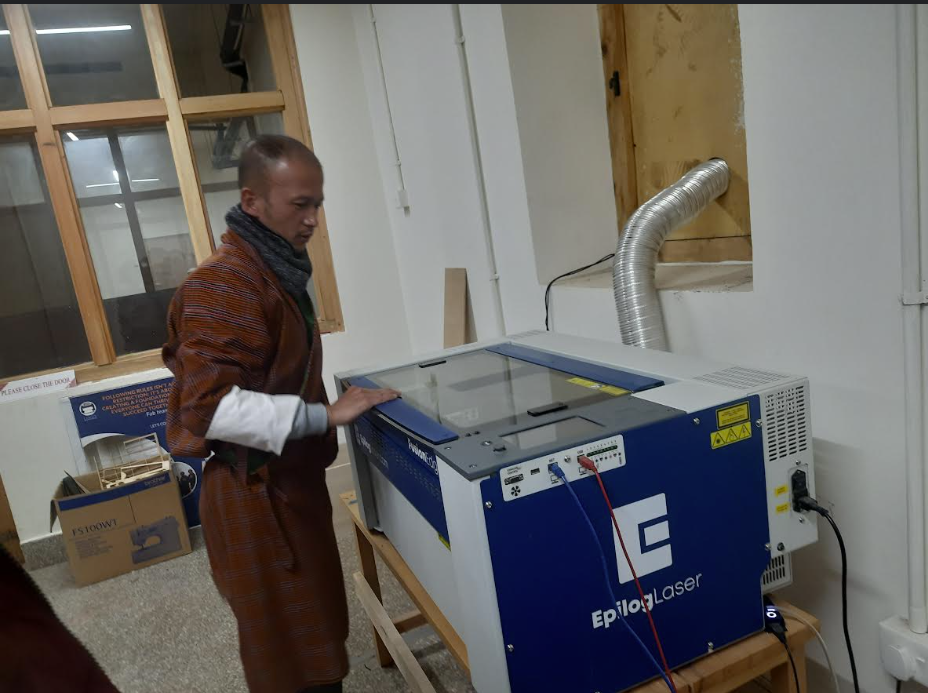
Work area: 24″ x 12″ (610 x 305mm)
Material thickness: 7″ (178 mm)
Camera system: 1 overhead
Wire connectivity: Included
Resolution: Fully-flexible & user-controlled from 75 – 1200 dpi
Maximum engraving speed: 120 IPS (3.05 m/s) with 5G acceleration. Computer-controlled in .001 increments up to 100%. Color mapping feature links Speed, Power, Frequency, and Raster/Vector mode.
Internal memory: Store multiple files up to 1 GB. Engrave any file size.
Operating modes: Optimized Raster, Vector, and Combined mode.
Auto focus: Included
Ventilation: 350-400 CFM (595-680 m3/hr) external exhaust to outside or internal filtration unit required. One output port, 4″ (102 mm) diameter
This Image was from googlr:

When Laser printing, these are the steps we need to follow:
1- Open your file in Inkscape.
2- Make the necessary requirements like changing the image to black and white or changing raster to vector.
3- Change fill and stroke depending on weather you want to engrave, or vector cut your material. (when engraving, turn off stroke and put stroke style as 0. 05mm.When vector cutting, put stroke style as hairline)
4- Press Ctrl + p to open the settings. then click on print to go to epilog dashboard
5- After opened, change the speed and power depending on how you want the cut.(lower power makes cut light, low speed makes cut darker)
6- Than, push the pink looking frame aside from the screen and place your image how you like on the material
7- Finally press the print button and then change the settings on the machine itself. 8- On the laser cutter, print the lens close to the material you want to print with the joystick, auto focus and press done. Then look for the file you sent, and press the main button on the laser cutter.
This was a poster designed by the students of our school on the safety requirments for the use of the lasercutter

Characterzing speed and power
Power
The laser's power can be described as how much energy is realesed by a laser.(Basicly the thickness of the laser)
The importance of this includes determining the way the results of the finished cutting looks. The engraving and cutting abbilities depend on this.
Speed
The speed of the laser refers to how quickly the laser is cutting the material. (Could be in inches/minute or millimeters/second). The speed vchanges with different material type, thickness, cut width, and laser power.
Speed is important when operating a laser cutter as if the speed is to high, it may fail to cut through the object, and if it is to low, it may cut the object entirely.This is why we need to be careful with the settings.
This is the settings you need to change before laser cutting to get the different results.
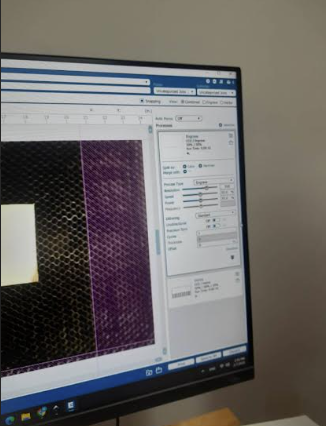
We tryed out the speed and power here.
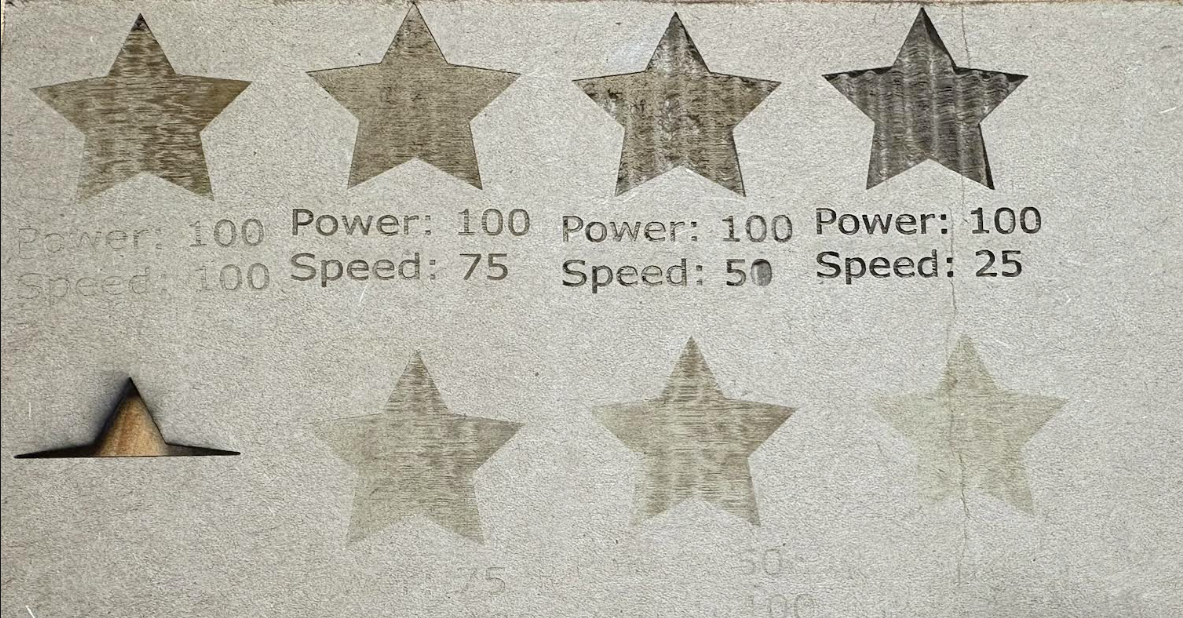
With this, you can see that with difference in power and speed, the result of what you printed changes as well
- When we increase the power, the cut also gets lighter.( This is due to the number of units produced per hour also increases)
- When we decrease the speed, the cut gets darker and burned more.(This is because by decreasing the cutting speed, we increased the amount of time the laser interacted with the material.)
Key difference between speed and power!
Power: how quickly a laser releases energy(the thickness) Speed: how quickly material is cut using a laser
Finding The Kerf
What is Kerf
Kerf is defined as the width of a cut or width of a material that is removed by a cutting process.
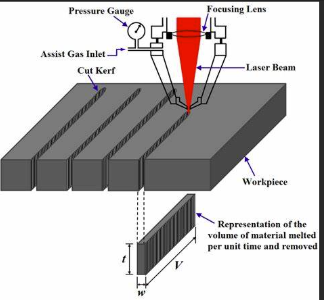
The concept of kerf plays a very important role in press-fit designs when using a laser cutter. Due to kerf refering to the amount of material that is removed during the laser cutting process, it can affect the precision of your cuts and how well parts fit together. When making press-fit joints, if you don’t account for the kerf, you might end up with a loose or too tight fit. This is why we need to check for the kerf first.
Finding the Laser Cutter's Kerf
Before we find the Kerf, we need made a comb to measure with a digital caliper.
This design was made in inkscape before we printed it out.
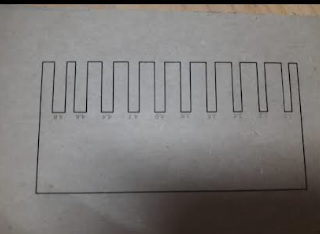
Then after using the digital caliper to measure the distance inside the sloths, we got the difference of 0.2mm between the shapes.
The formula needed to measure the kerf now is
intended cut - actual cut )/2 = KERF
After applying this formula on the intended cut and actual cut, the was our result:
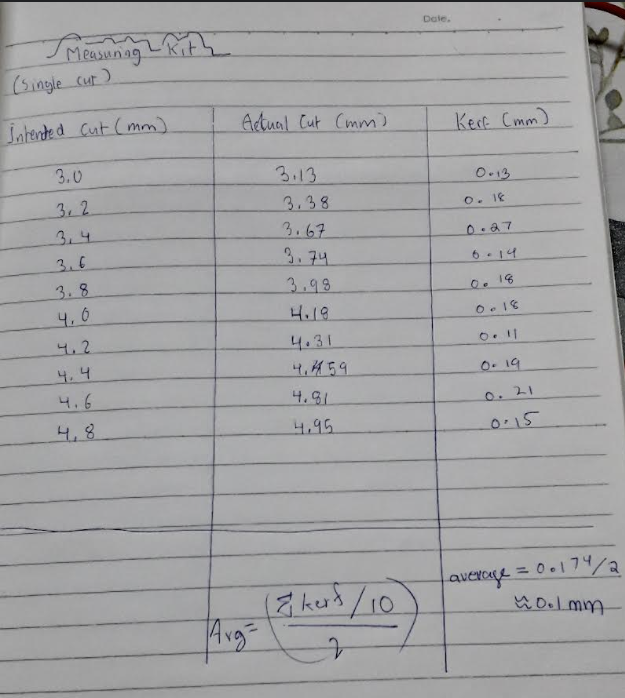
The kerf we got is 0.1mm
The overall exprience of this assignment was quite fun! We not only learned how to laserprint, but also the different settings to change the outcome of what we printed. We learned about kerf and its importance as well, so the overall assignment went well for us!