7. Computer-Controlled Machining
Aassignment for week7
Group assignment - Do your lab’s safety training. - Test runout, alignment, fixturing, speeds, feeds, materials, and toolpaths for your machine
Individual assignment - Make (design+mill+assemble) something big (~meter-scale).
  extra credit: don't use fasteners or glue
  extra credit: include curved surfaces
Group Assignment Highlights
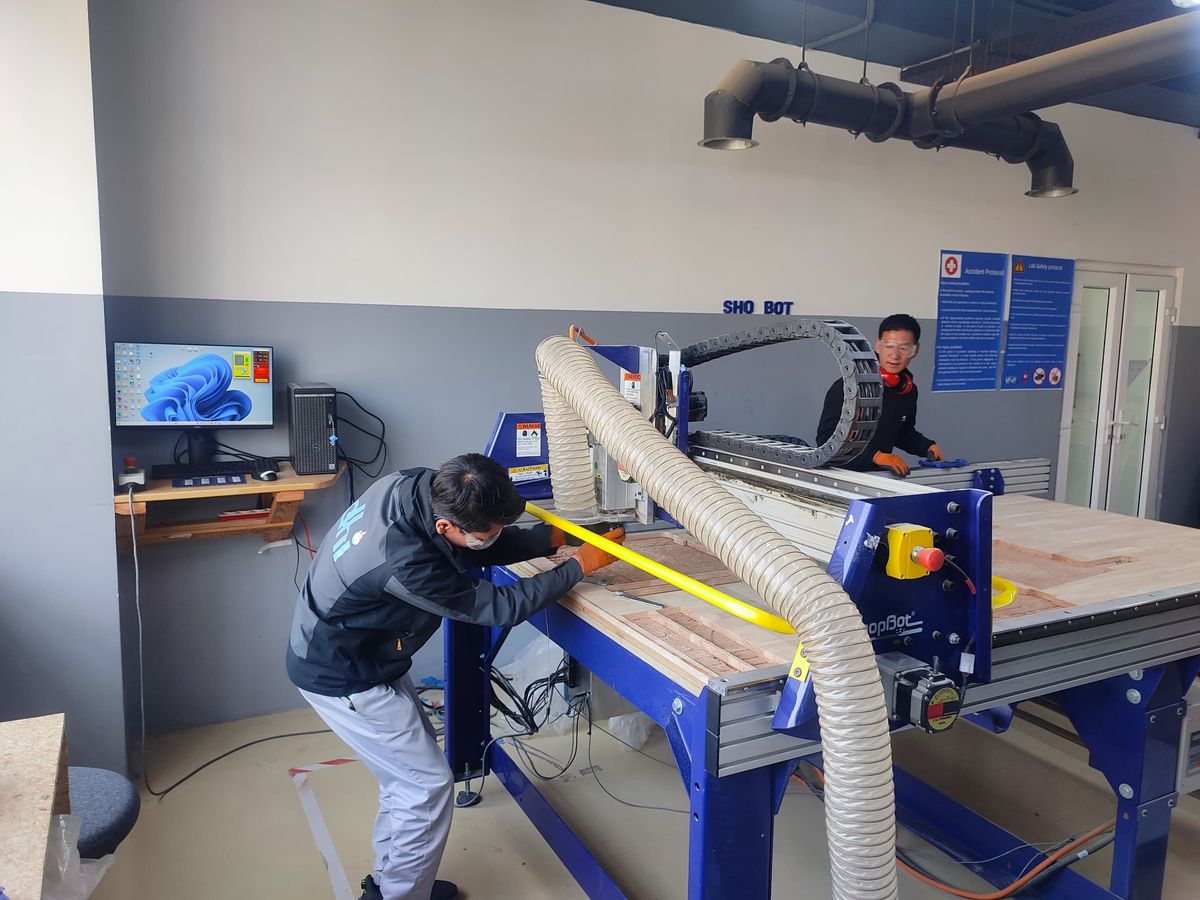
ShopBot CNC Machine: - Purpose: Used for 3D carving, engraving, cutting, sign-making, furniture assembly, and prototyping.
-
Software: V-Carve (CAM software) for generating toolpaths from 2D/3D designs created in software like SolidWorks, Fusion 360, or FreeCAD.
-
Workflow: Import design → Set dimensions → Generate toolpath → Save and run the file.
ShopBot Specifications:
- Material Size: Up to 4’ x 8’ sheets with a 6” cutting depth.
- Table Size: ~6’ x 10’.
- Precision: High accuracy and repeatability (±.003” to ±.015” depending on the task).
- Speed: Rapid positioning up to 1800”/min (X/Y) and 360”/min (Z-axis).
- File Compatibility: Reads .sbp, G-code, and .dxf files.
Safety Precautions:
- Preparation: Read manuals, ensure proper ventilation, and keep a first aid kit nearby.
- Monitoring: Always look, listen, and smell for abnormalities during operation.
- Fixturing: Secure the material and endmill properly to avoid breakage.
- PPE: Wear personal protective equipment and avoid operating under the influence of drugs/alcohol.
- Dust Control: Use the dust collector system and empty it regularly.
- Emergency Preparedness: Keep a fire extinguisher nearby, use the control pendant for emergencies, and never leave the machine unattended.
Here is the link to the group assignment.
ShopBot Operation Steps:
- Setup: Clean the sacrificial layer, place the material, and measure its dimensions.
- Power On: Turn on the machine, engage/disengage the key, and change the endmill if needed.
- Fixturing: Secure the material and measure its thickness.
- Calibration: Perform XYZ calibration.
- Design Import: Open V-Carve Pro and import the test design.
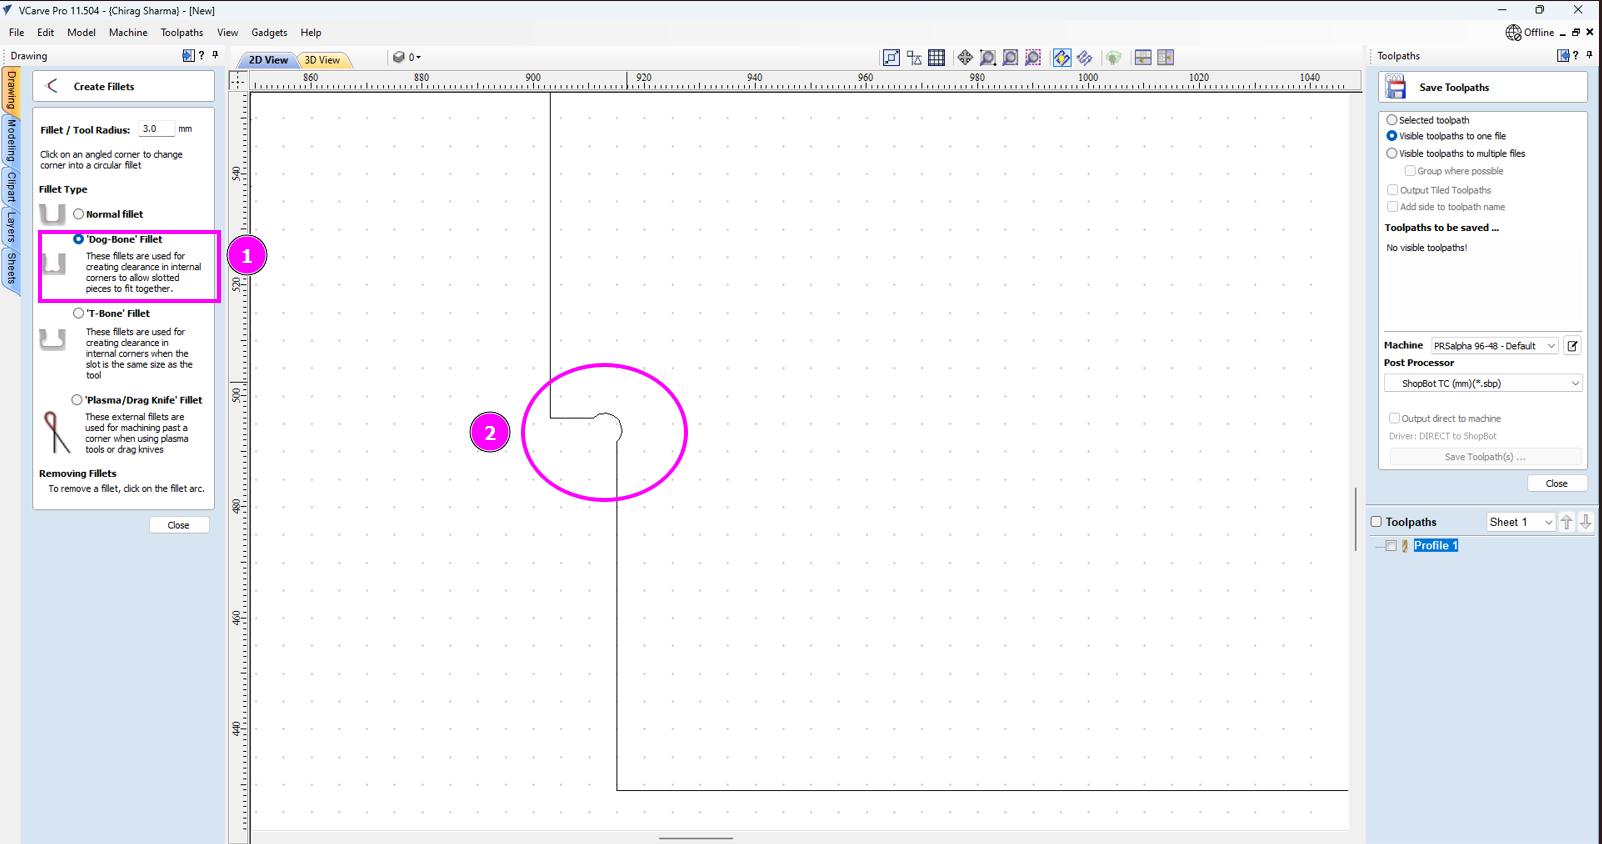
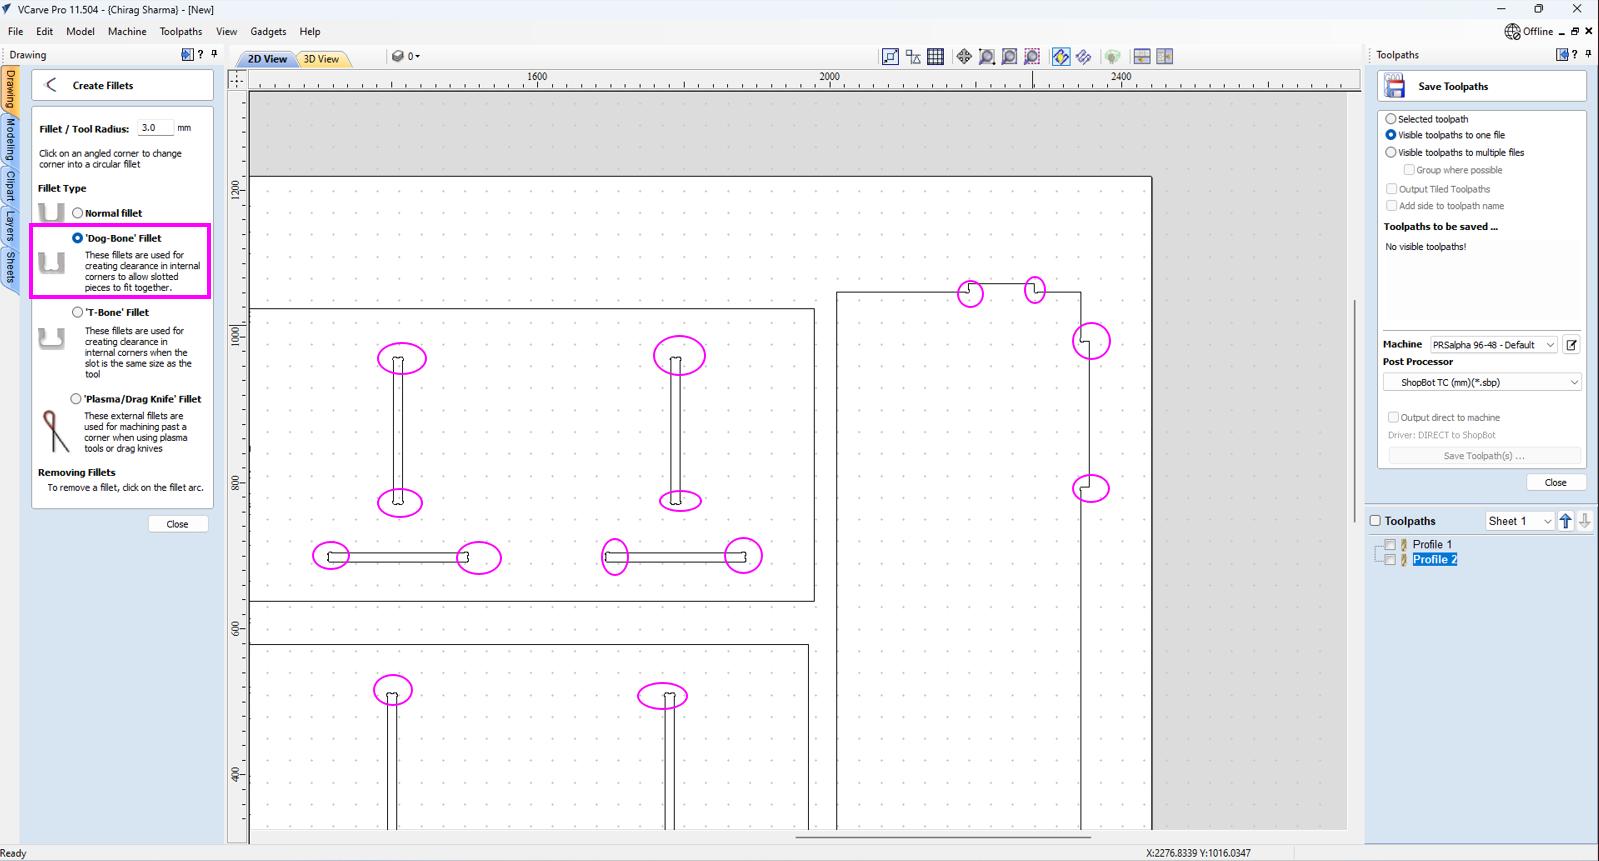
- Toolpath Setup: Add dog-bone fillets (e.g., 2mm radius) and generate toolpaths using the appropriate tool from the database.
Key Takeaways:
- Safety First: Always prioritize safety through proper training, monitoring, and emergency preparedness.
- Precision Matters: Ensure accurate calibration, fixturing, and toolpath generation for high-quality results.
- Teamwork: Operate the machine with at least two people to monitor the process effectively.
- Dust Management: Regularly use and maintain the dust collection system to minimize health risks.
Individual Assignment
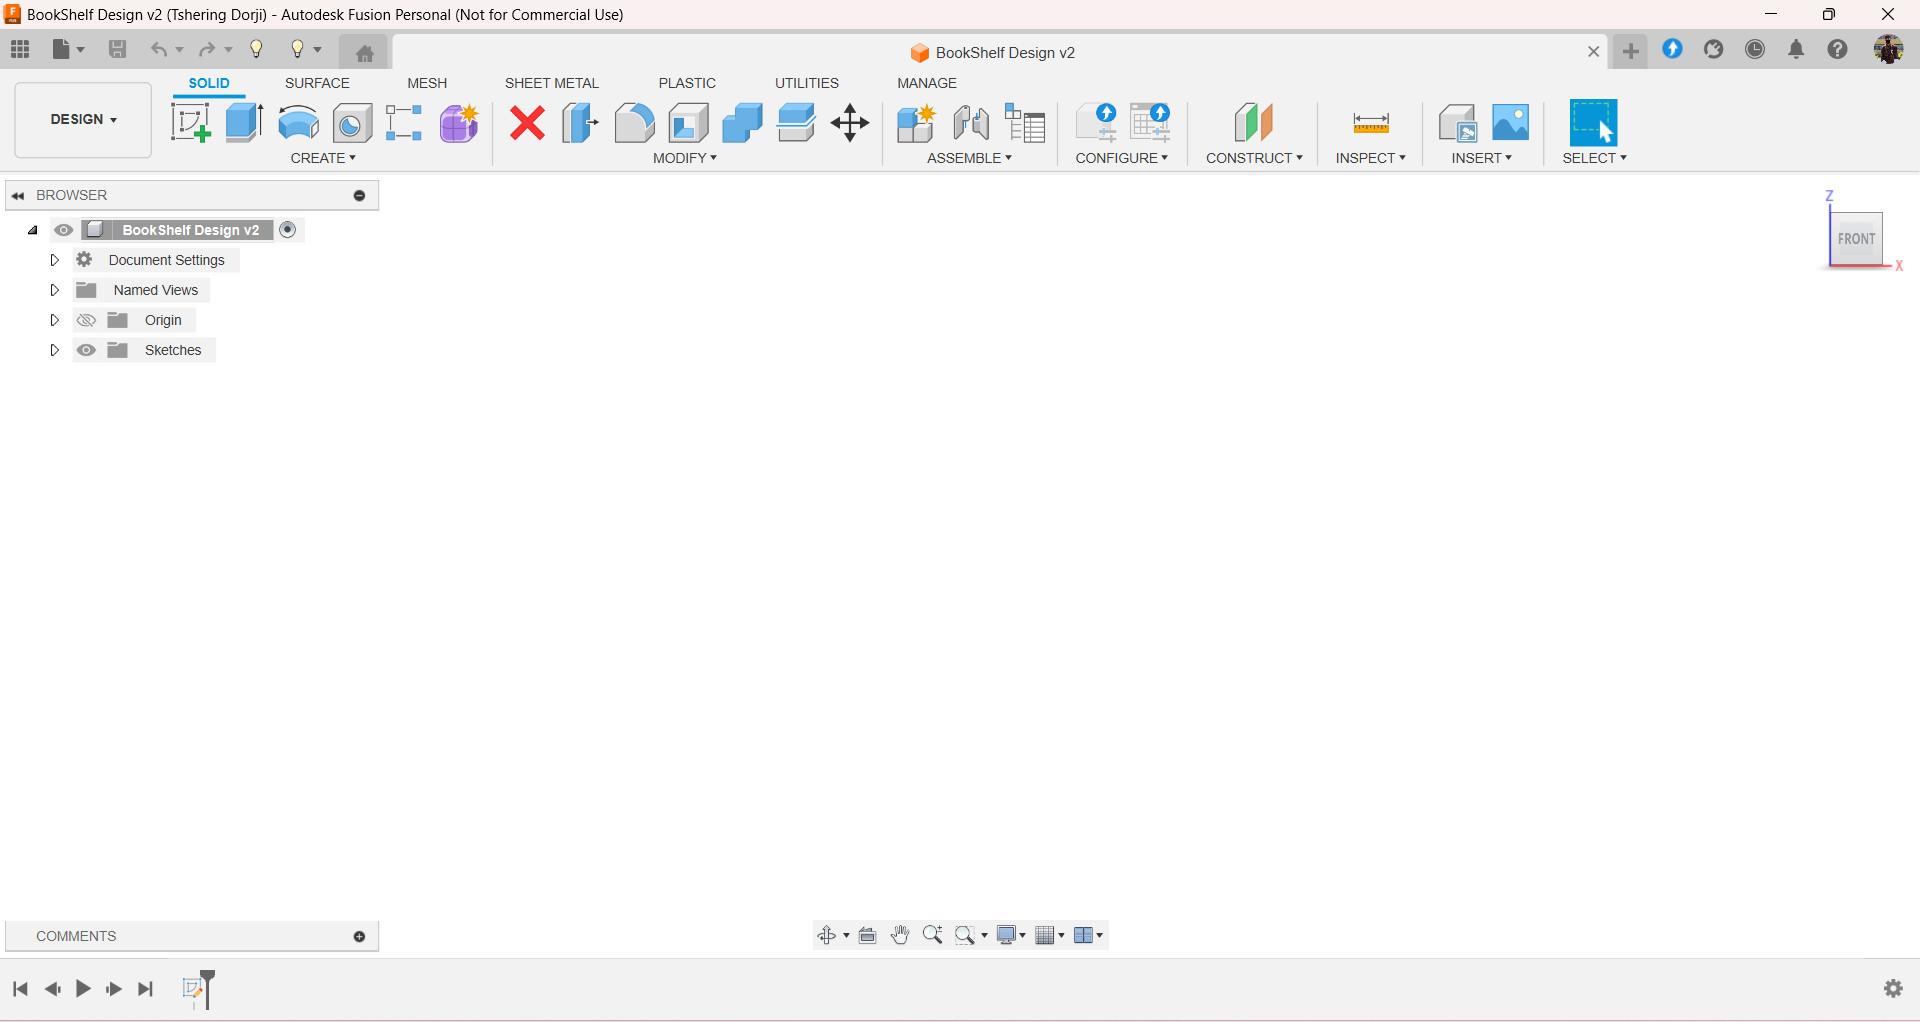
Designing a bookshelf in Fusion
- Open Fusion360.
-
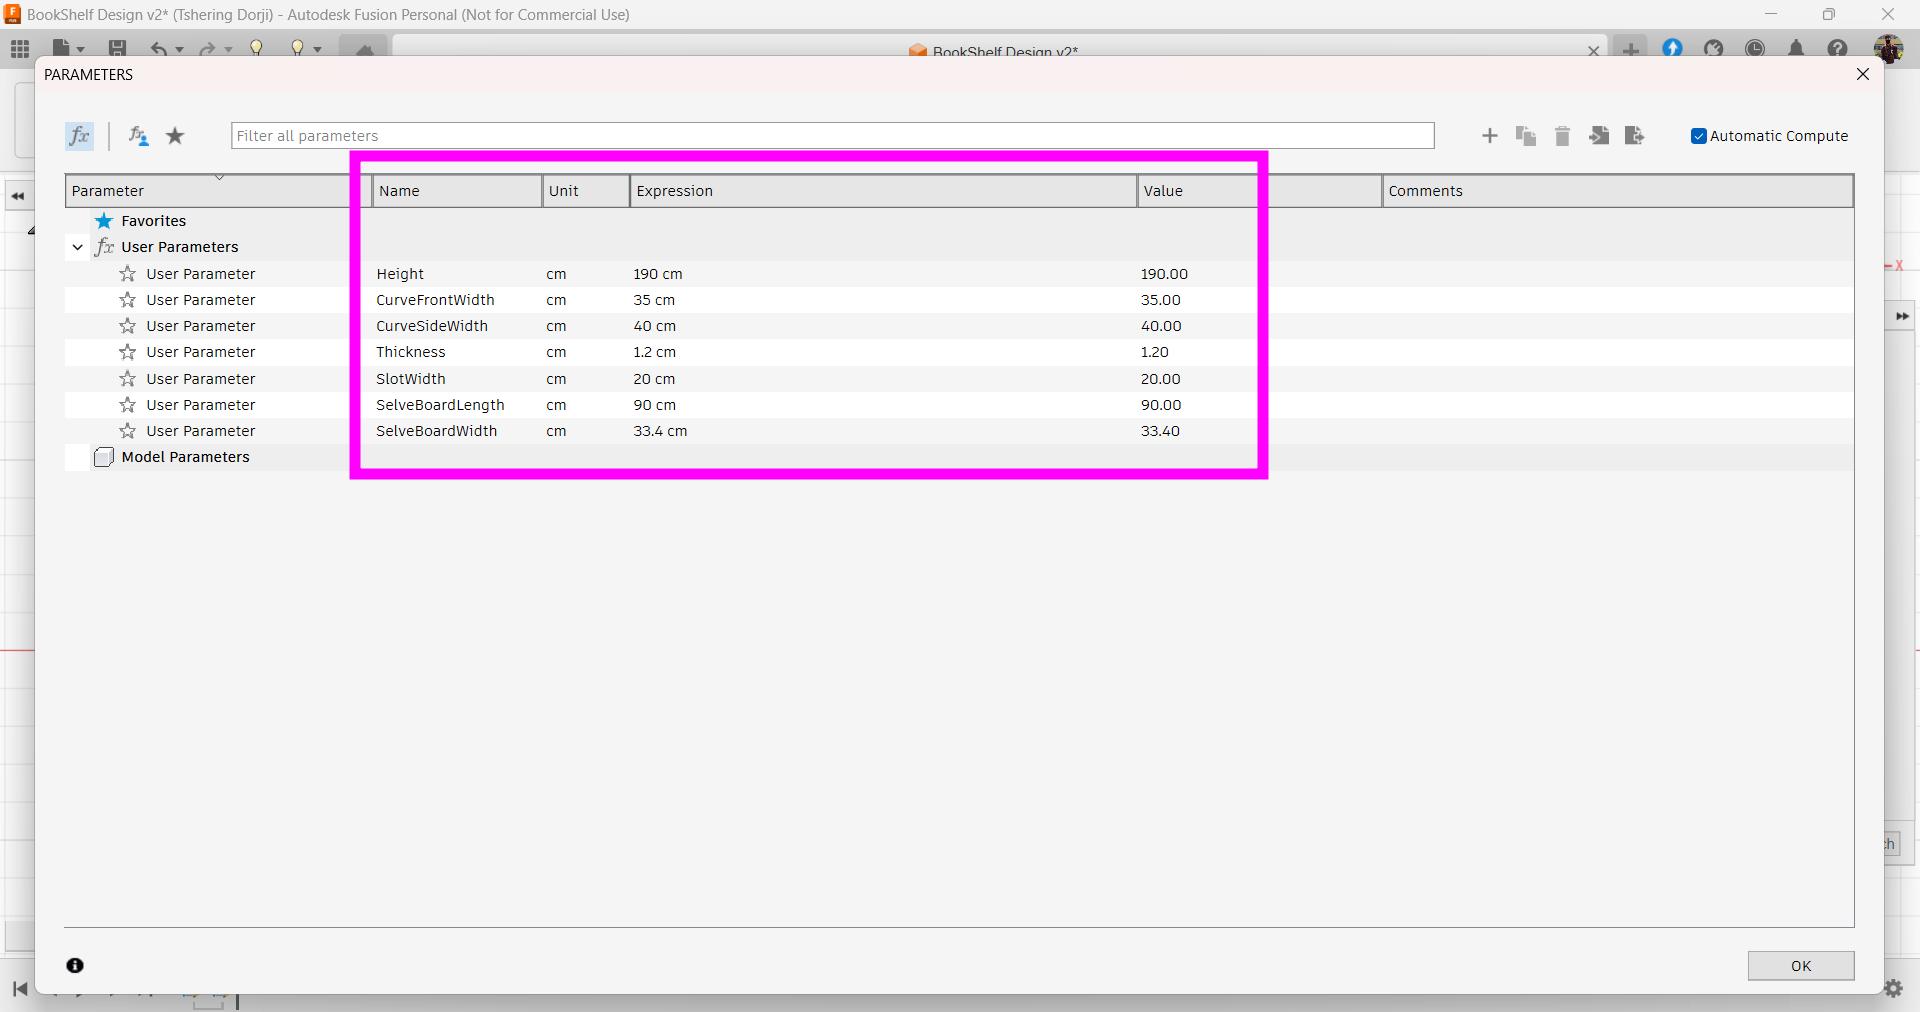
I defined the parameters for my design.
-
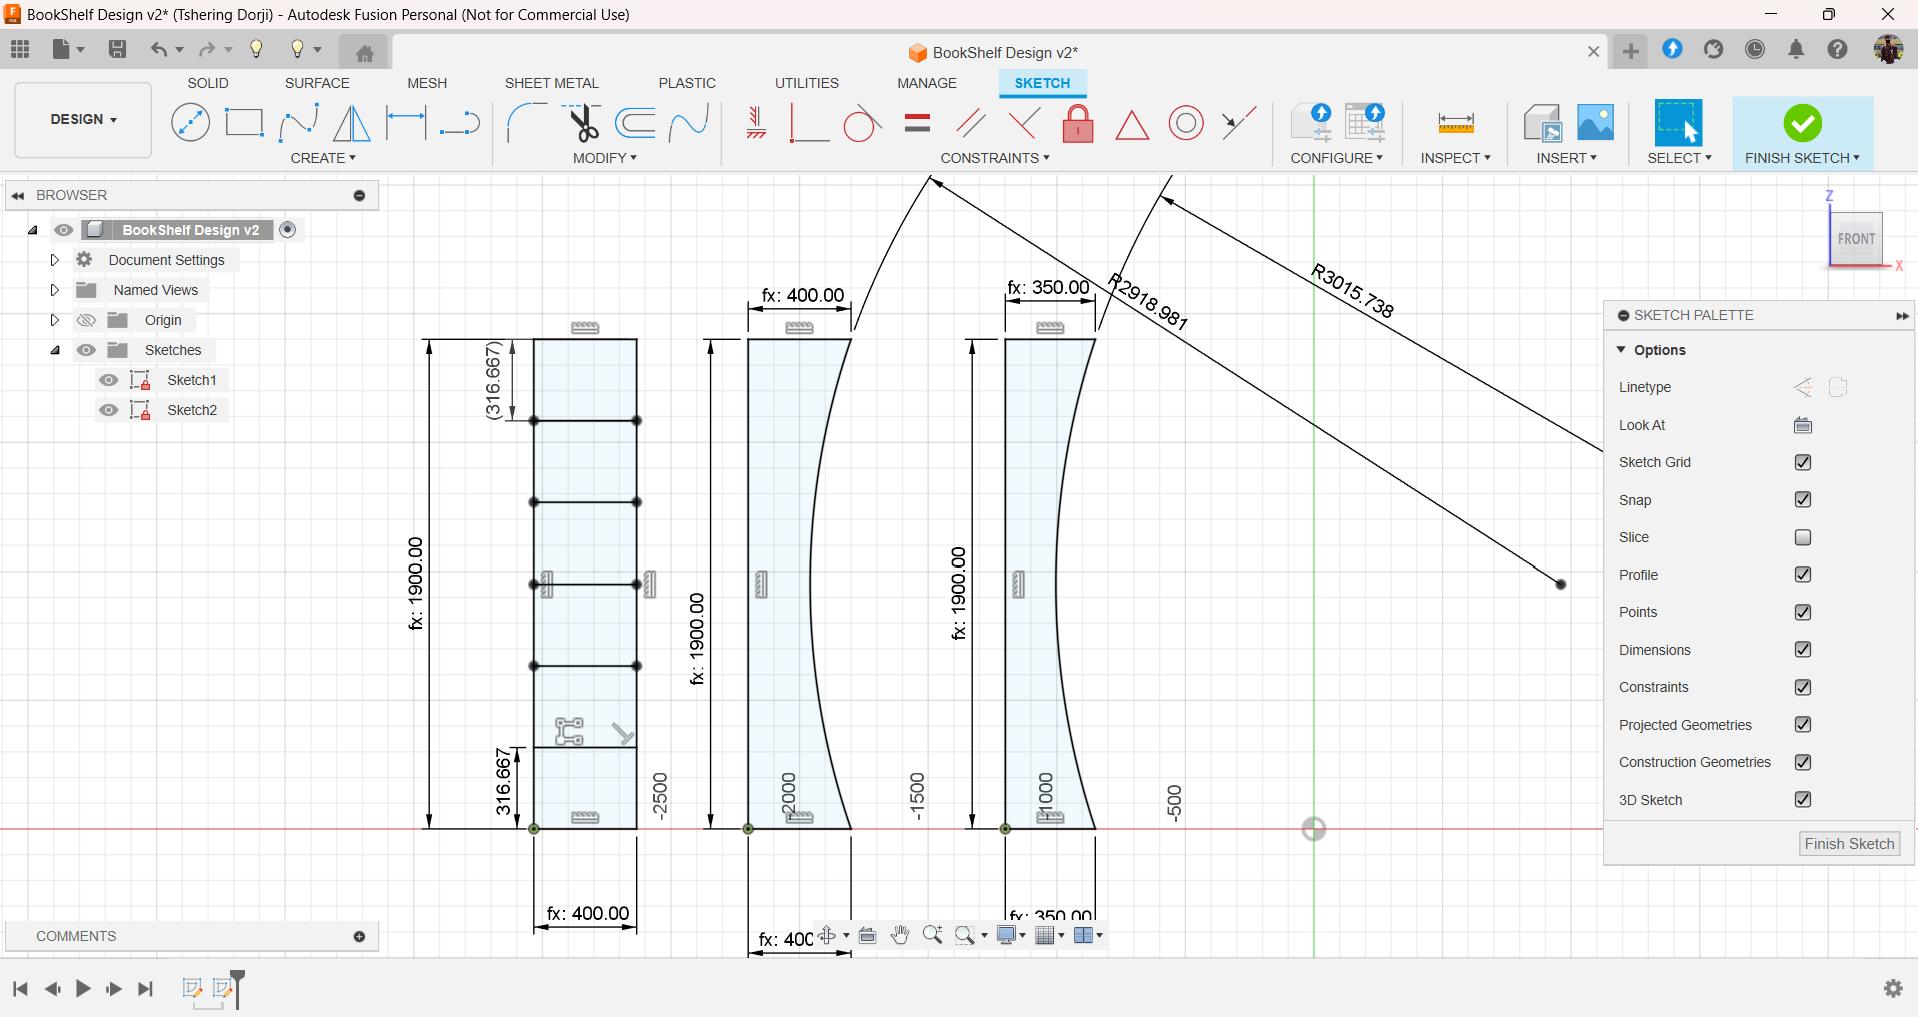
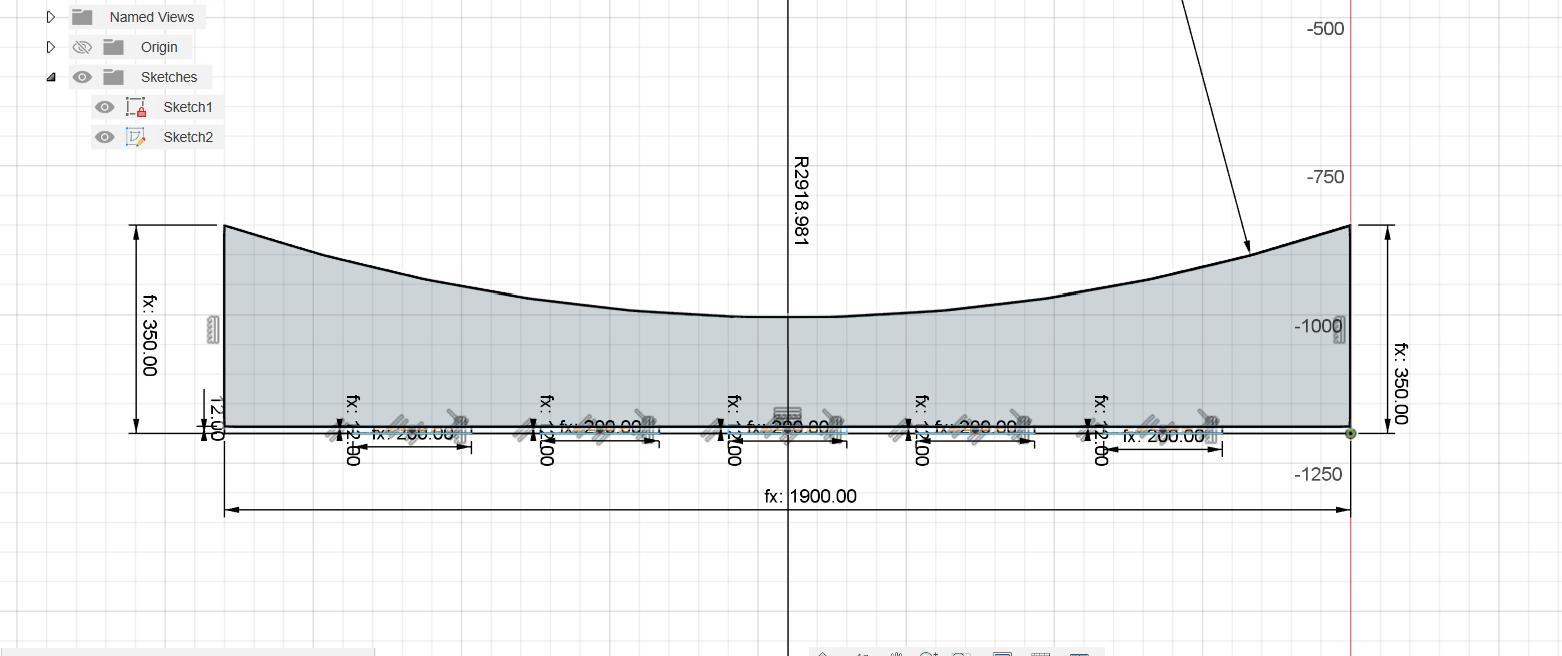
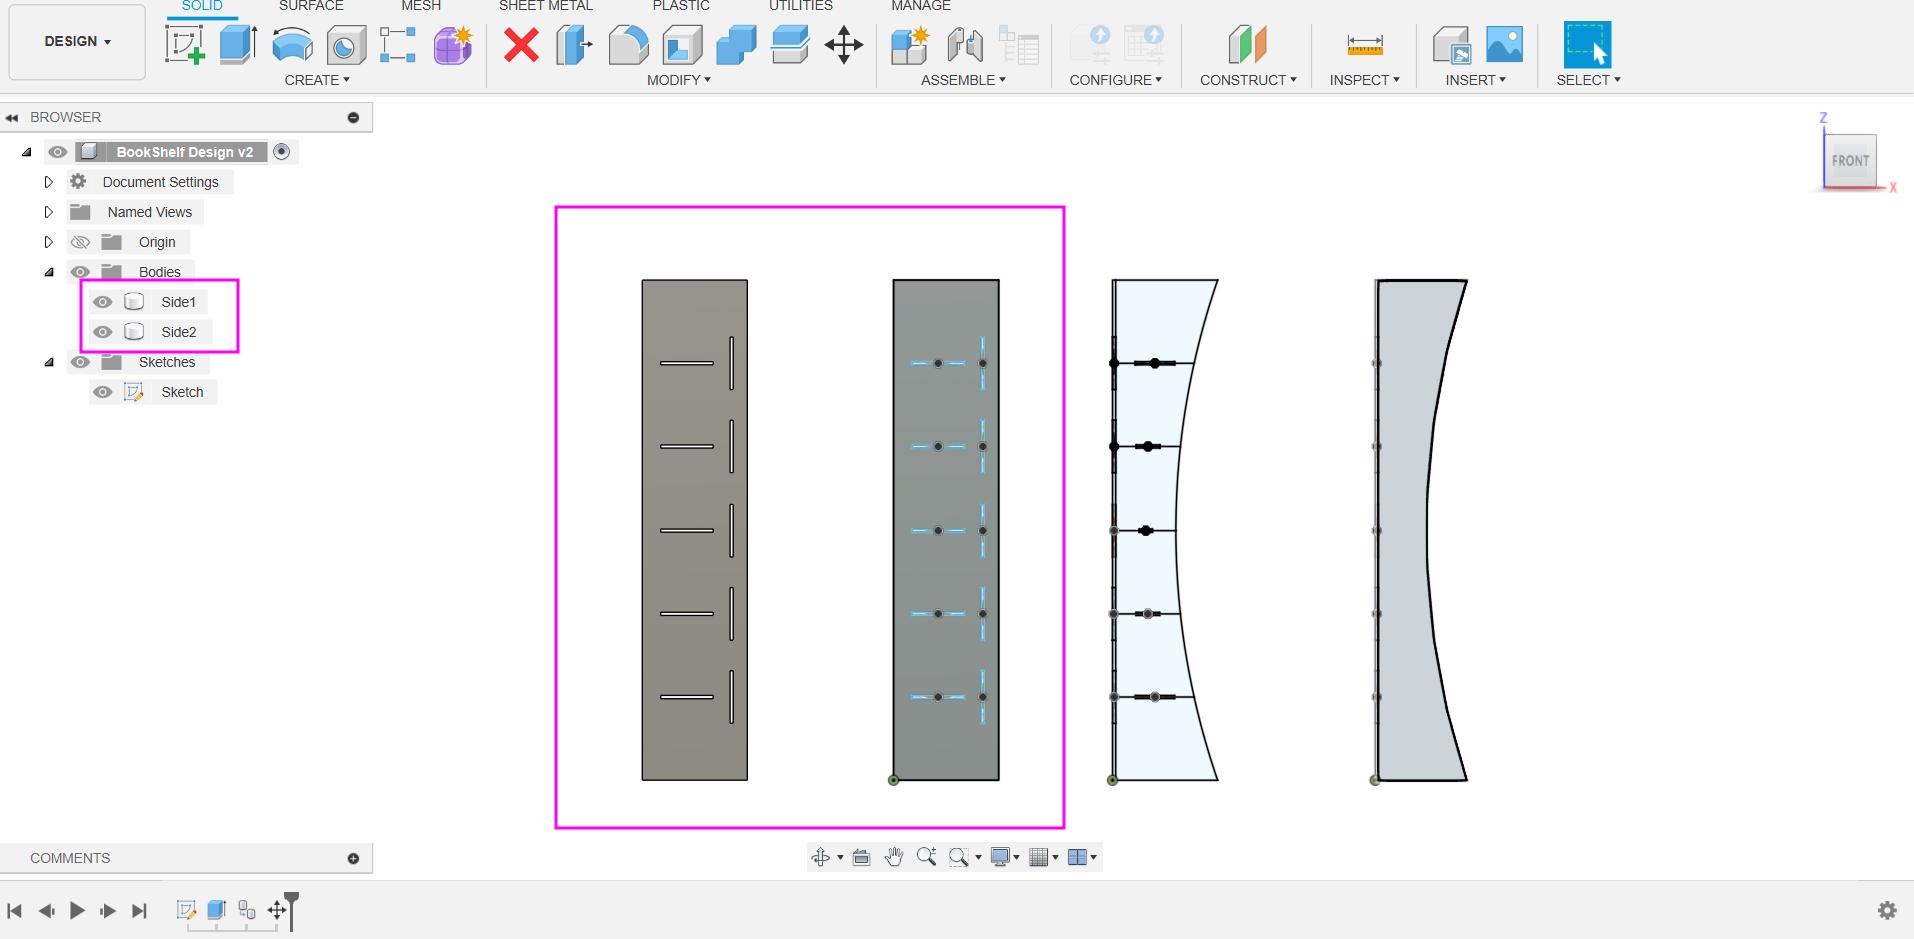
Then I started sketching the side and front side of my bookshelf.
-
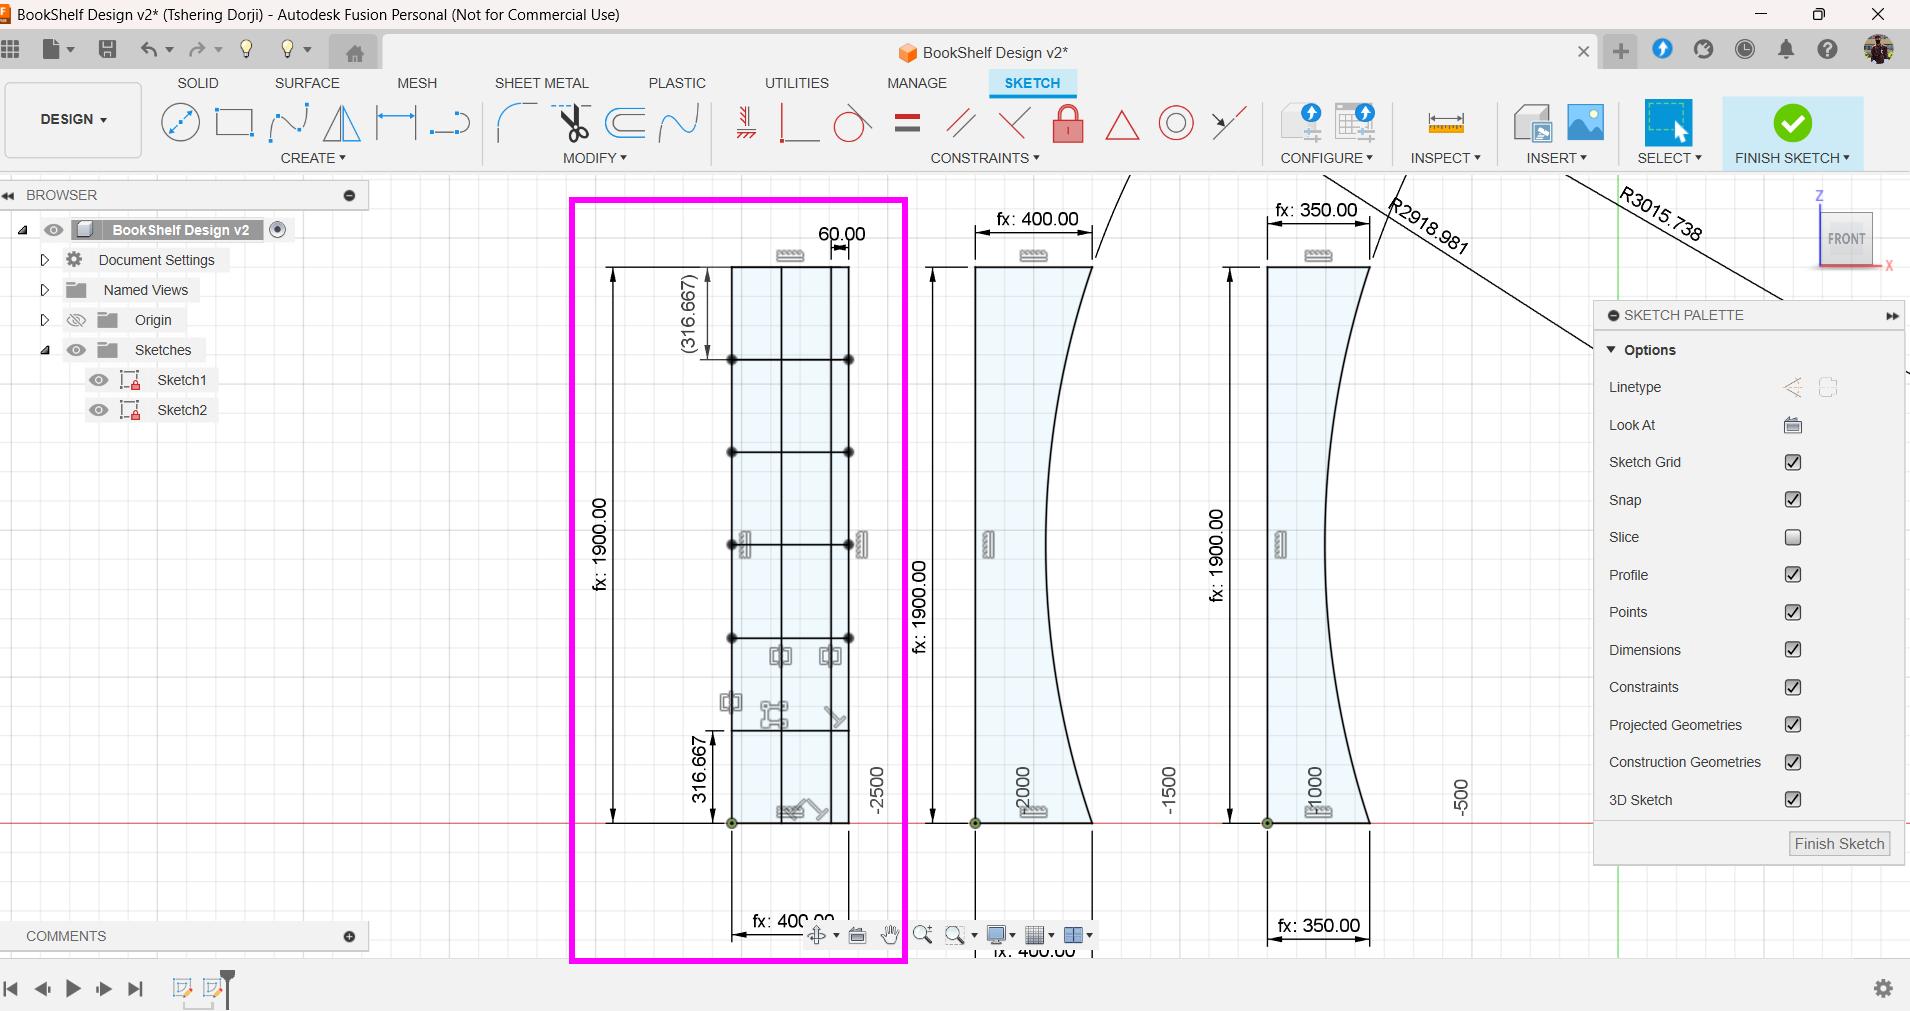
One of the part in my design will be exactly the same and I can extrude that to get two parts from one sketch. I put that part in a box.
-
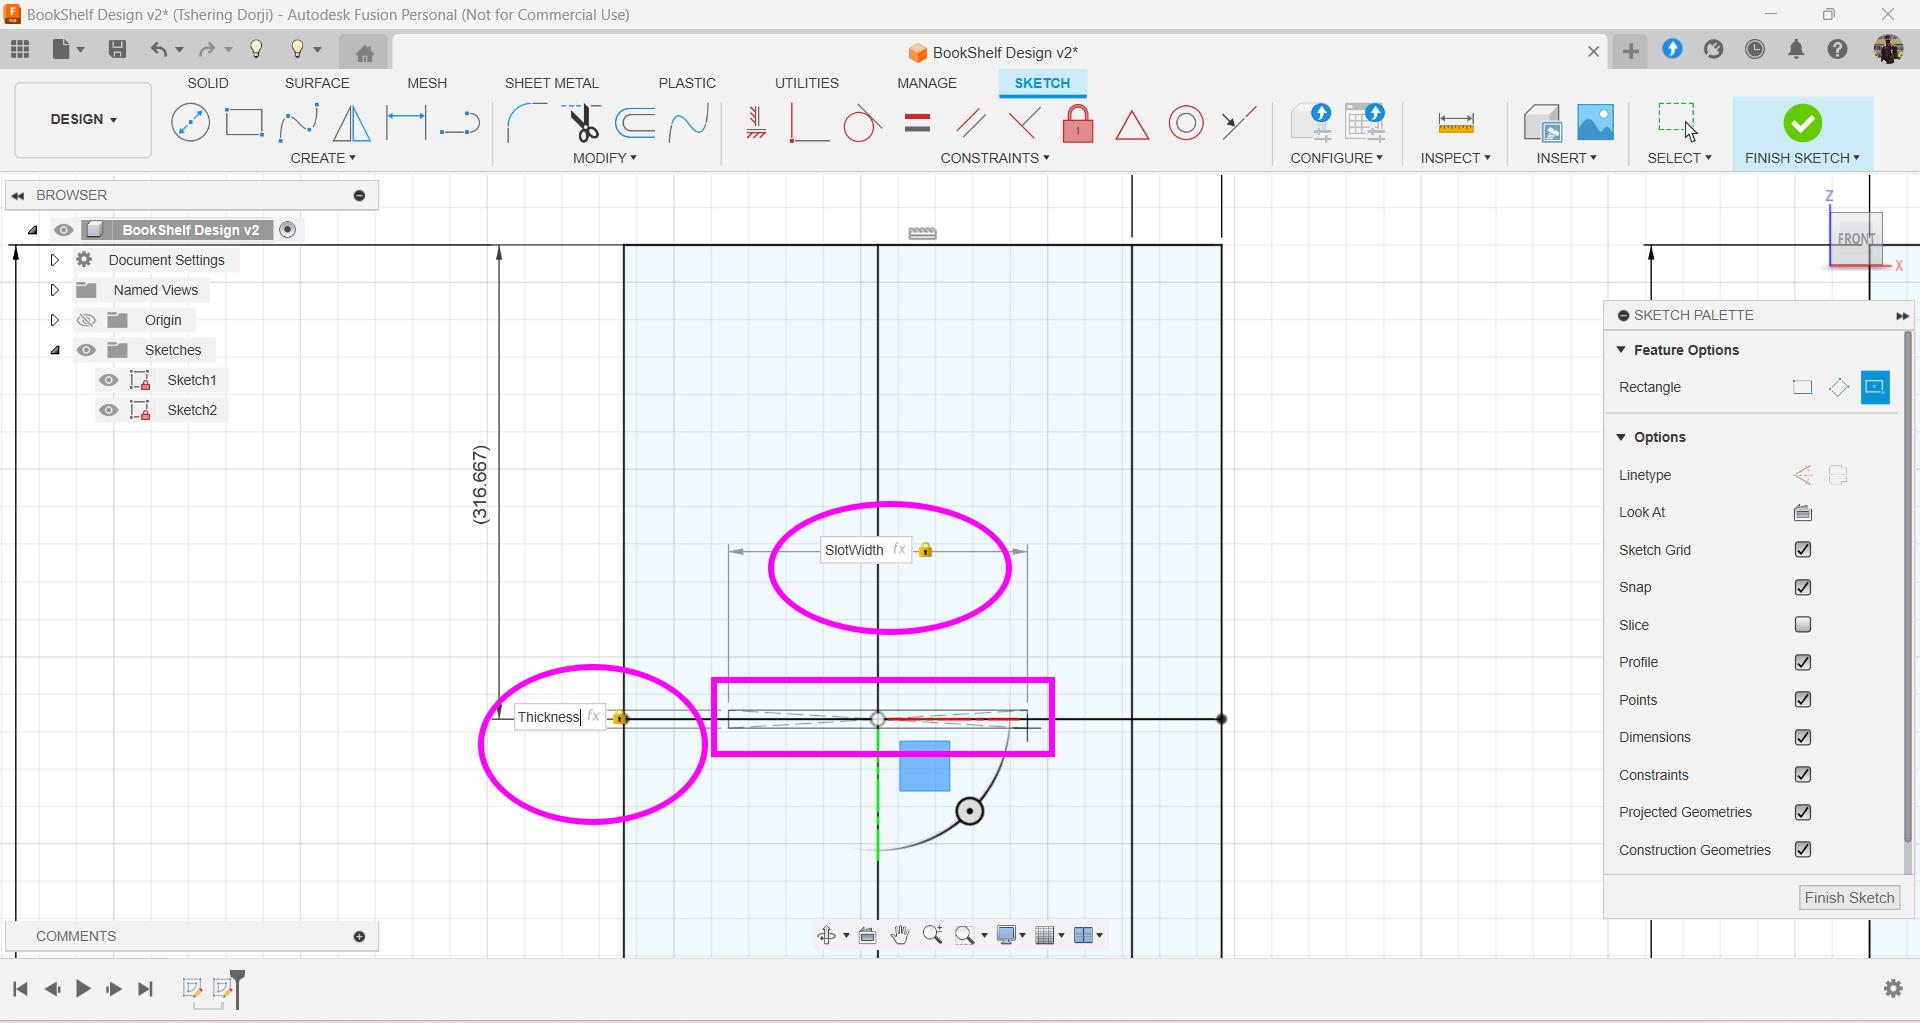
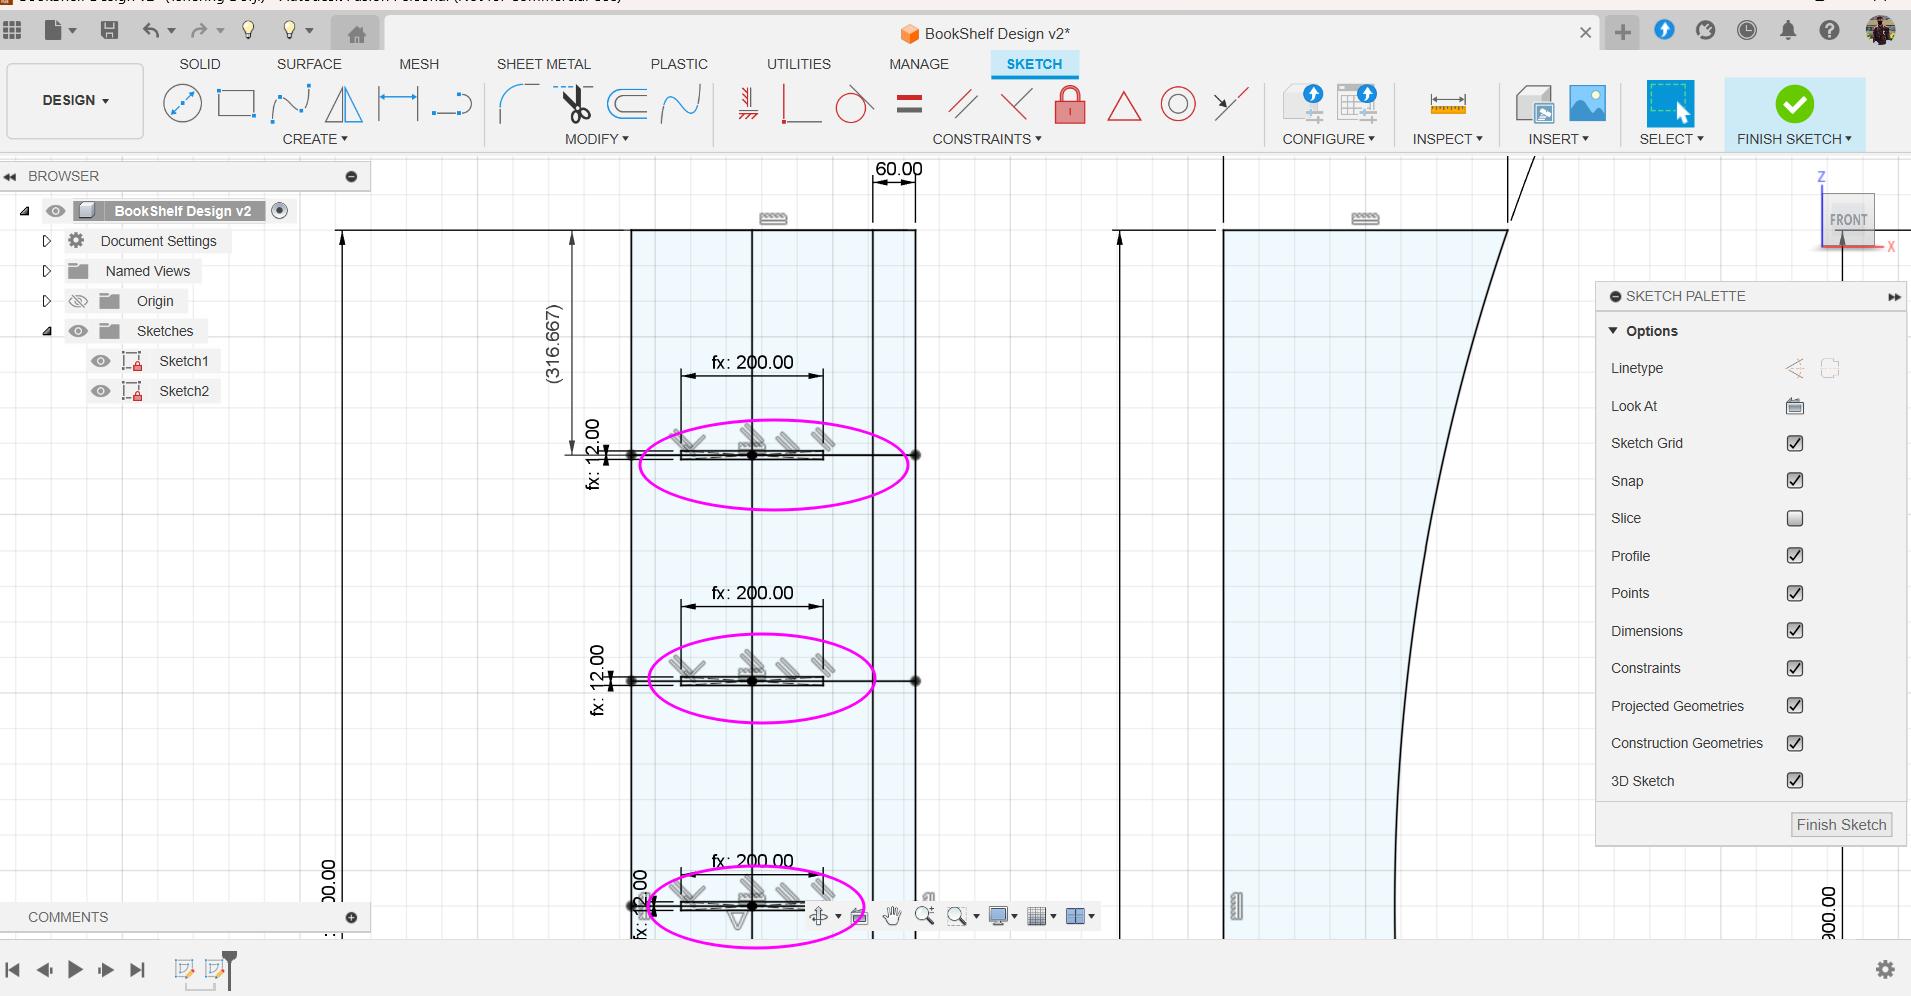
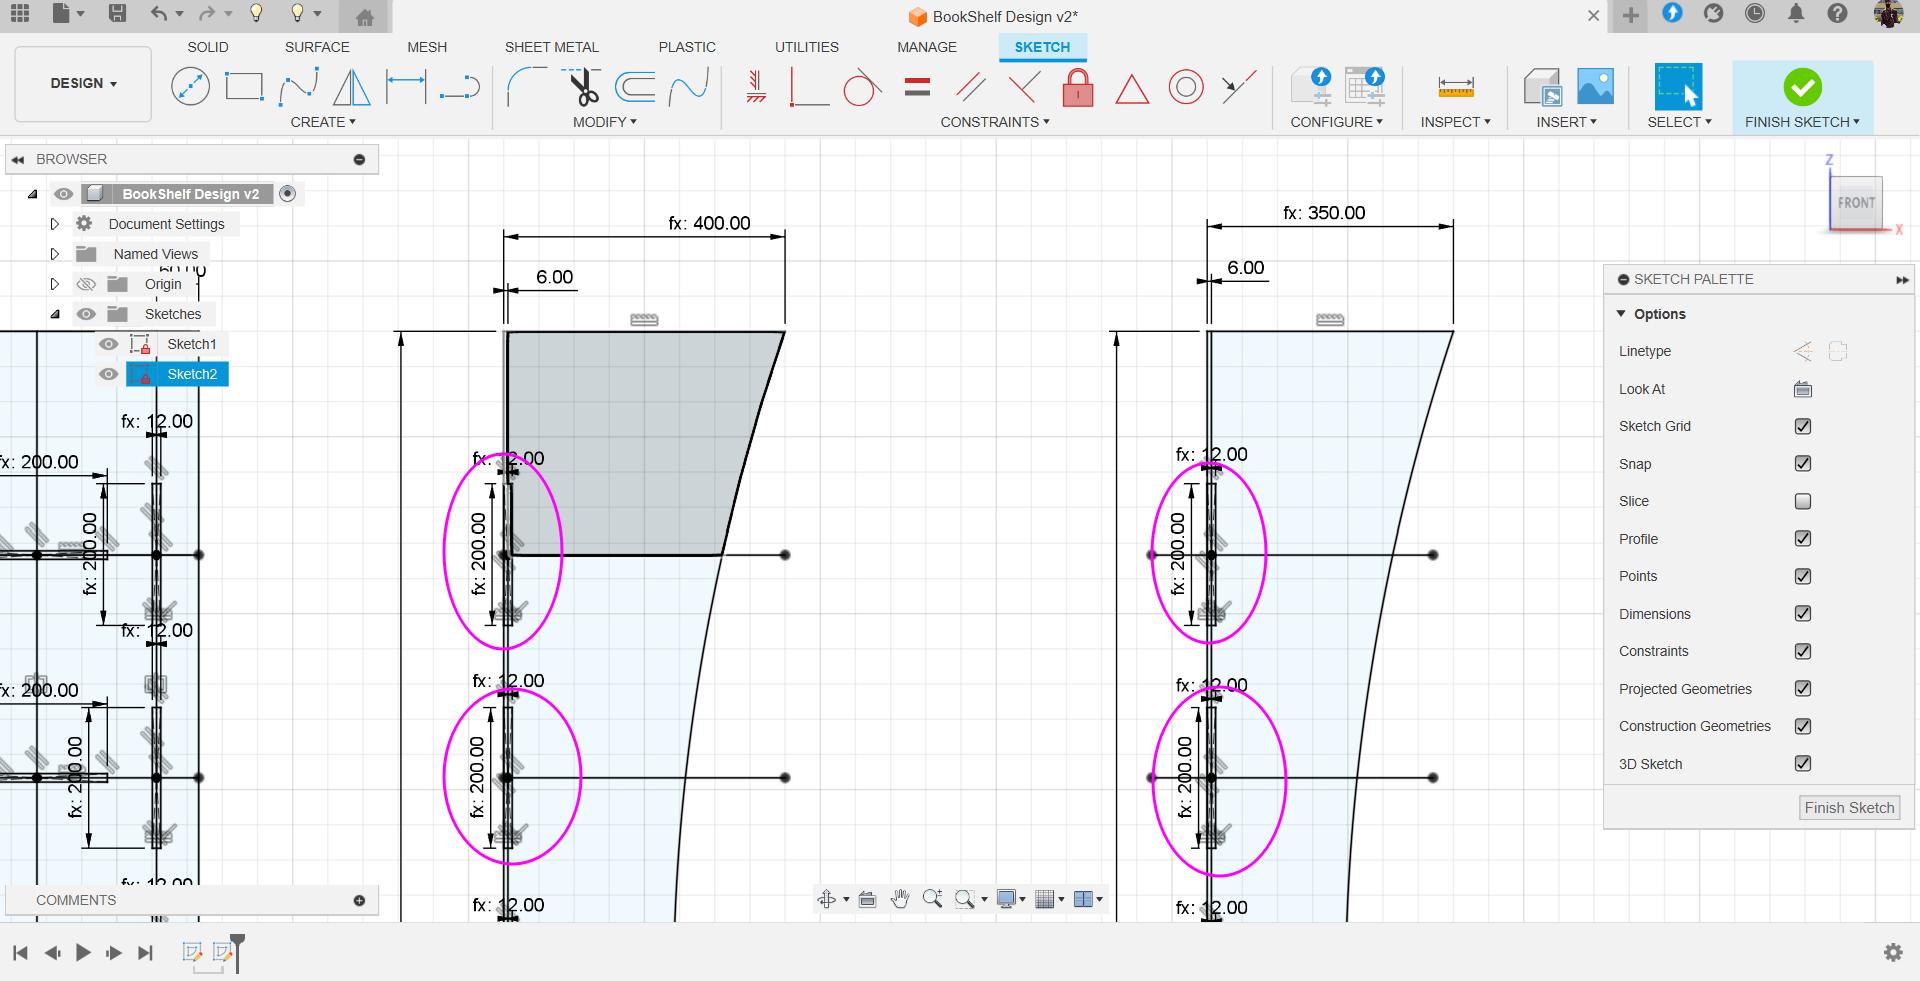
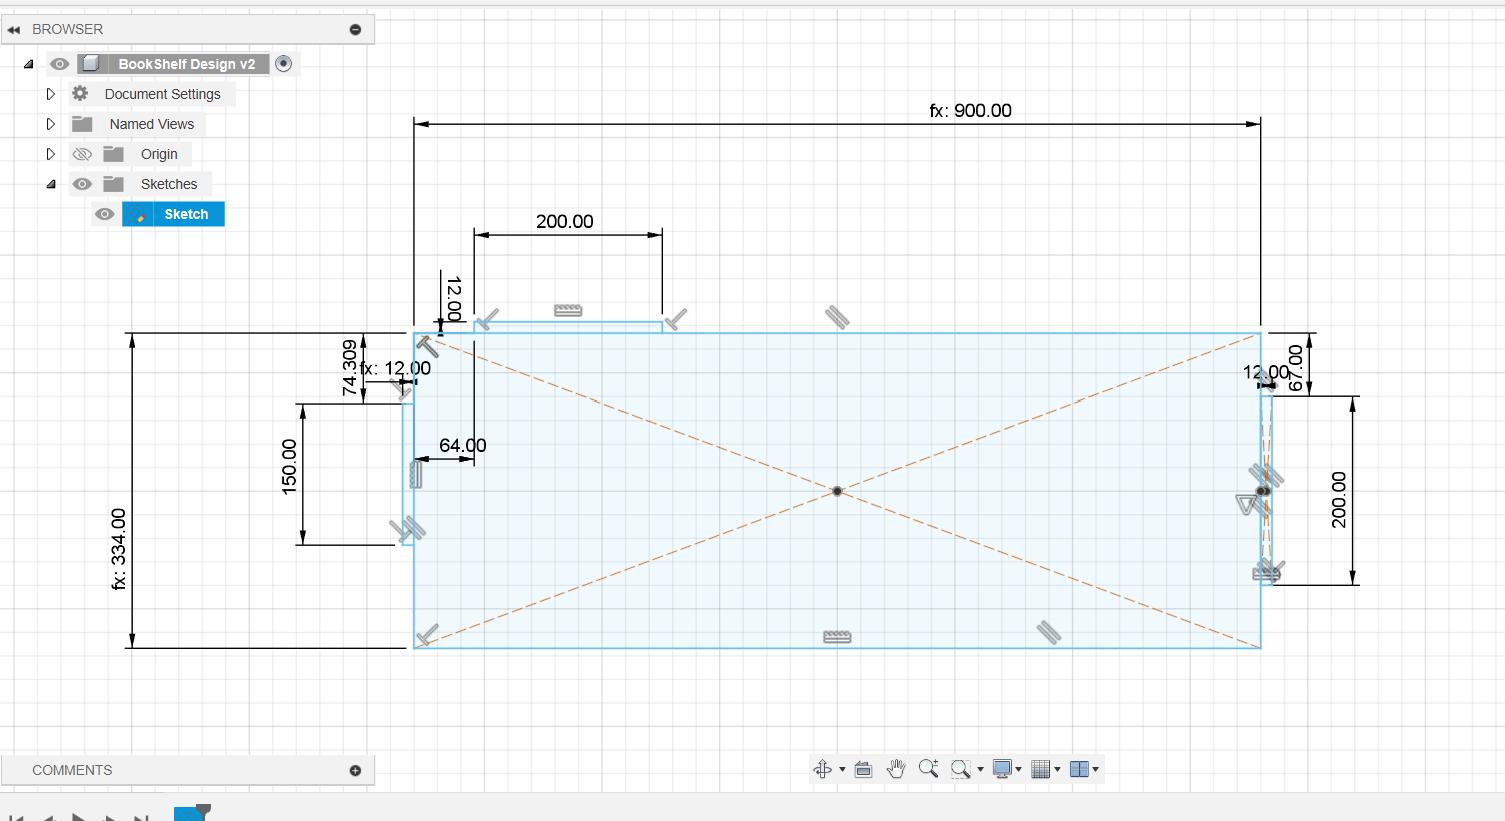
I sketch the slot on the side using the defined parameters.
-
Sketching all other slots.
-
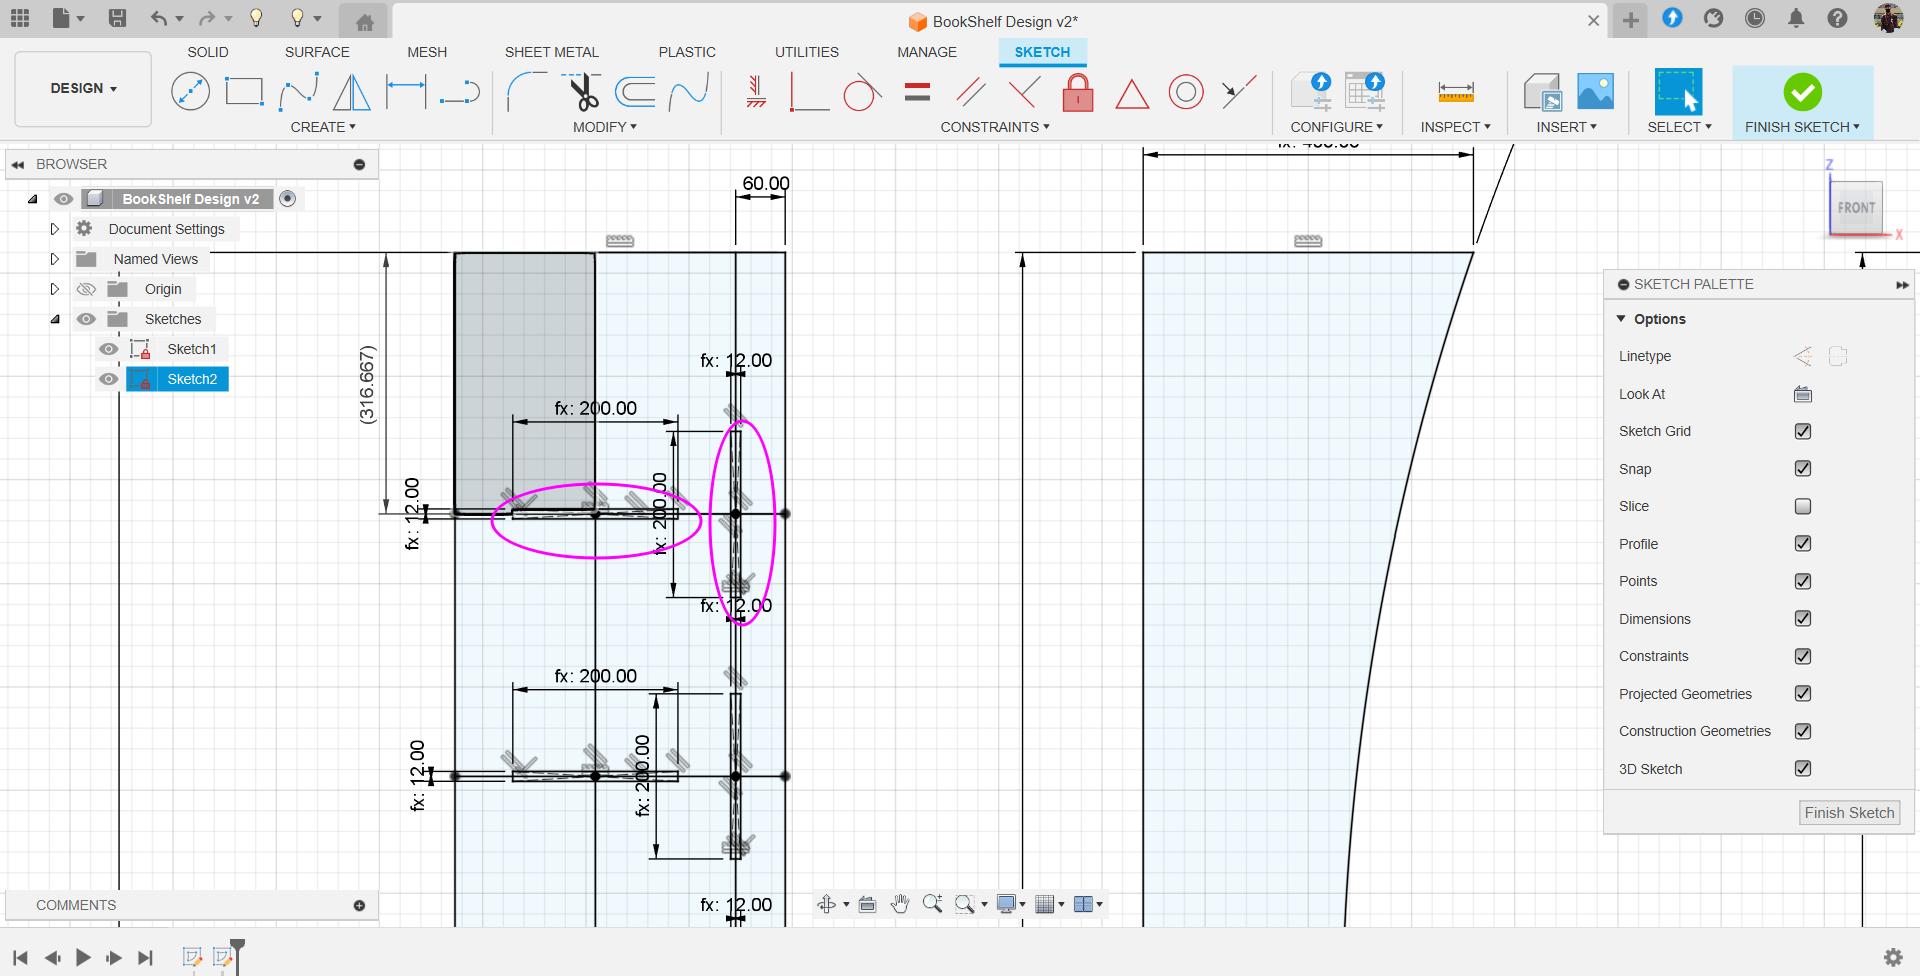
Adding the vertical slots so that I can press-fit the face of the bookshelf.
-
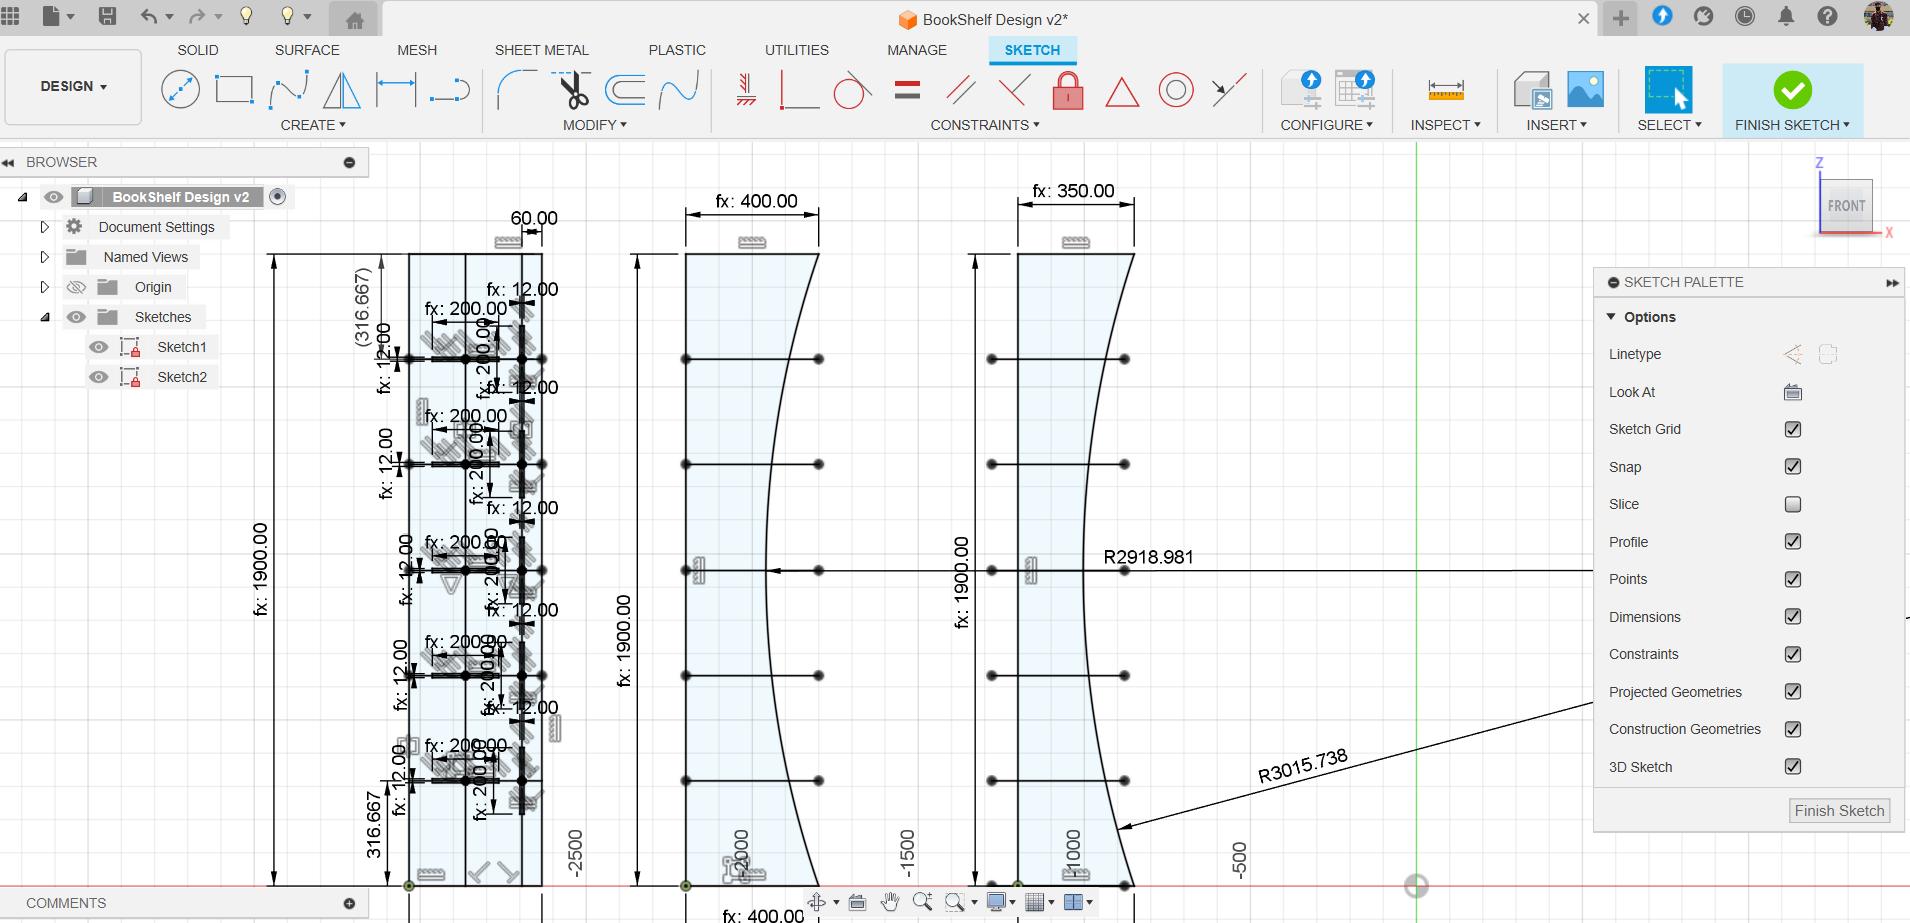
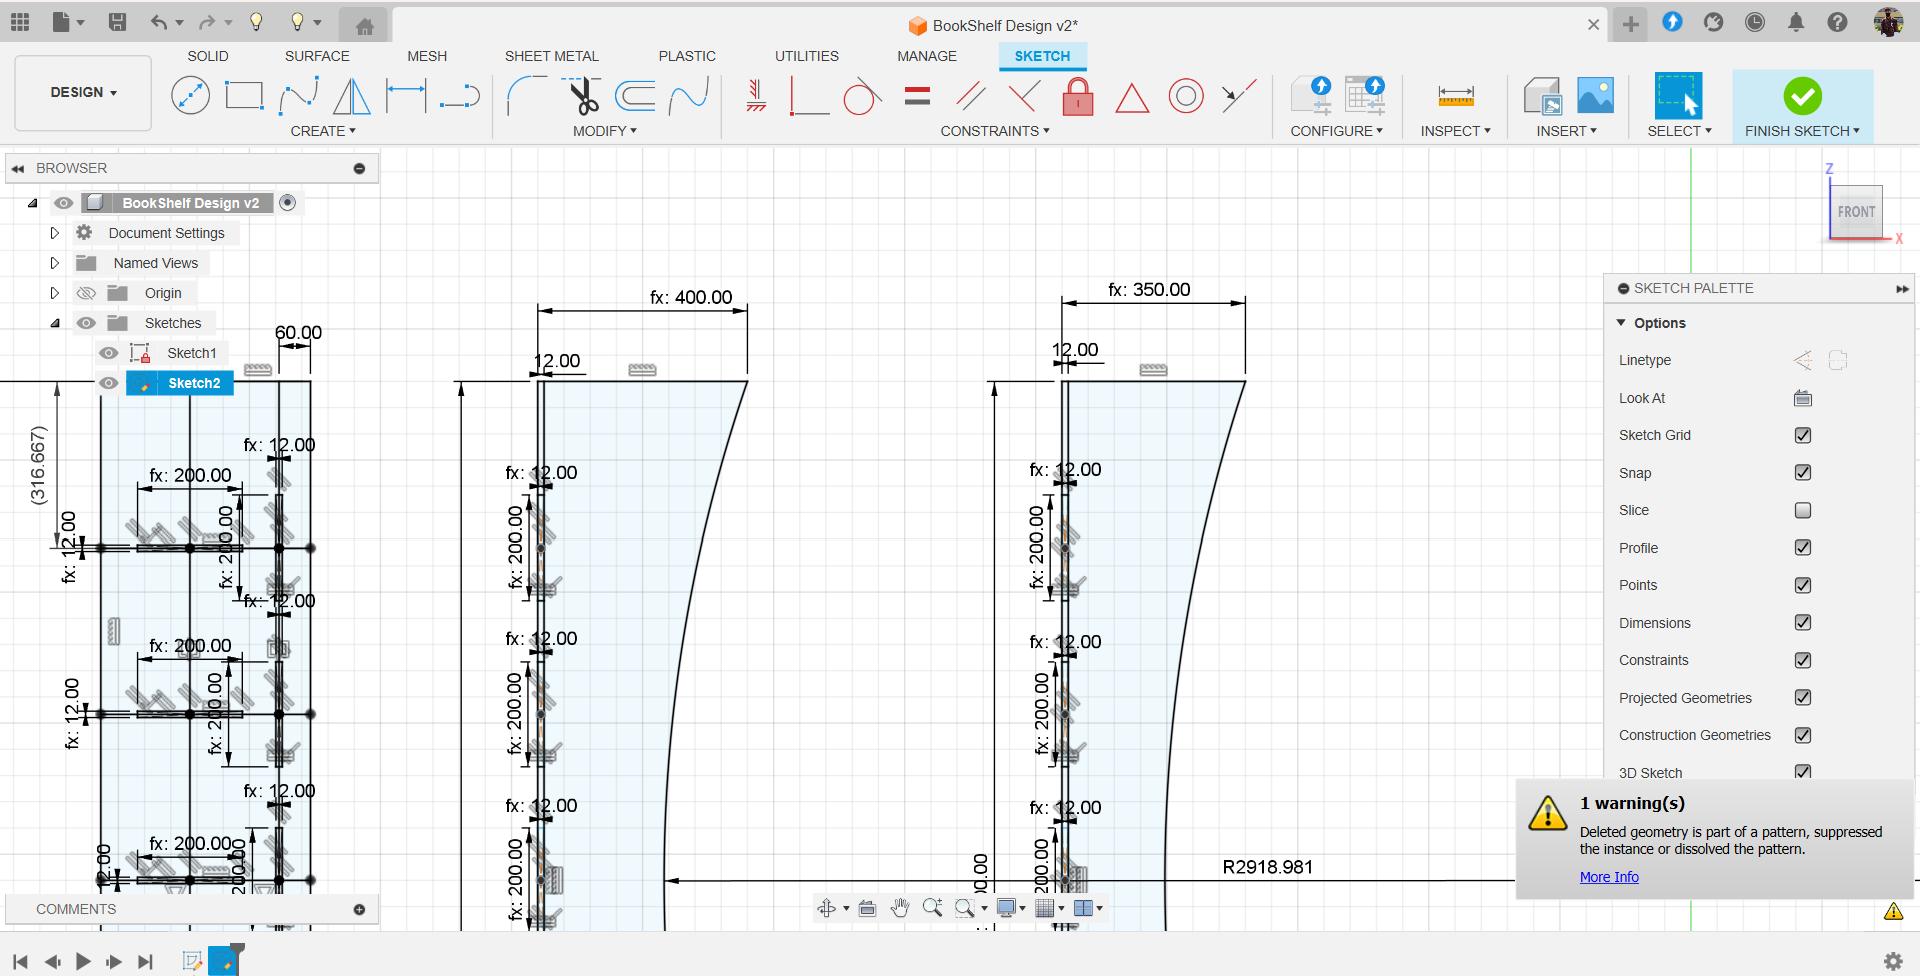
Dividing the curve face into 6 parts so that I can have five compartment in my bookshelf.
-
Sketching a vertical line which can help me position myu slots.
-
Now adding the vertical slots on the curve face of my bookshelf.
-
Done adding the vertical slots.
-
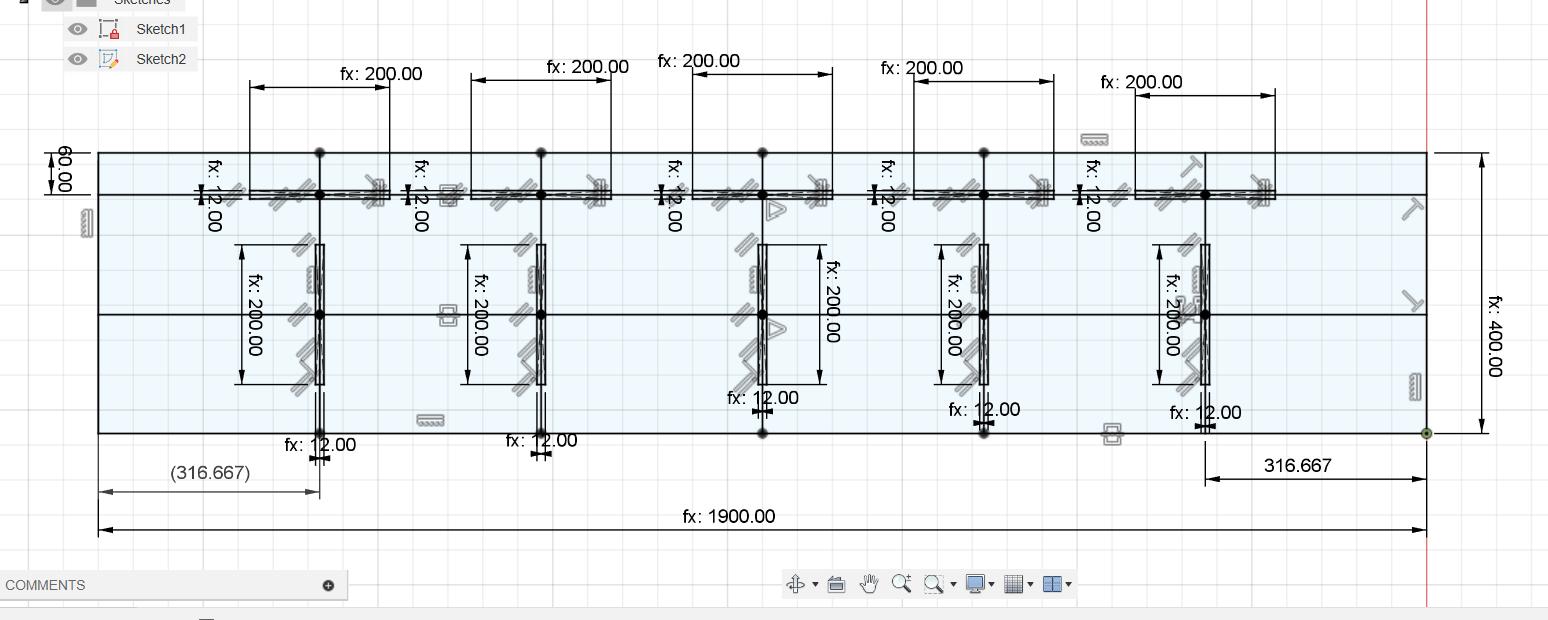
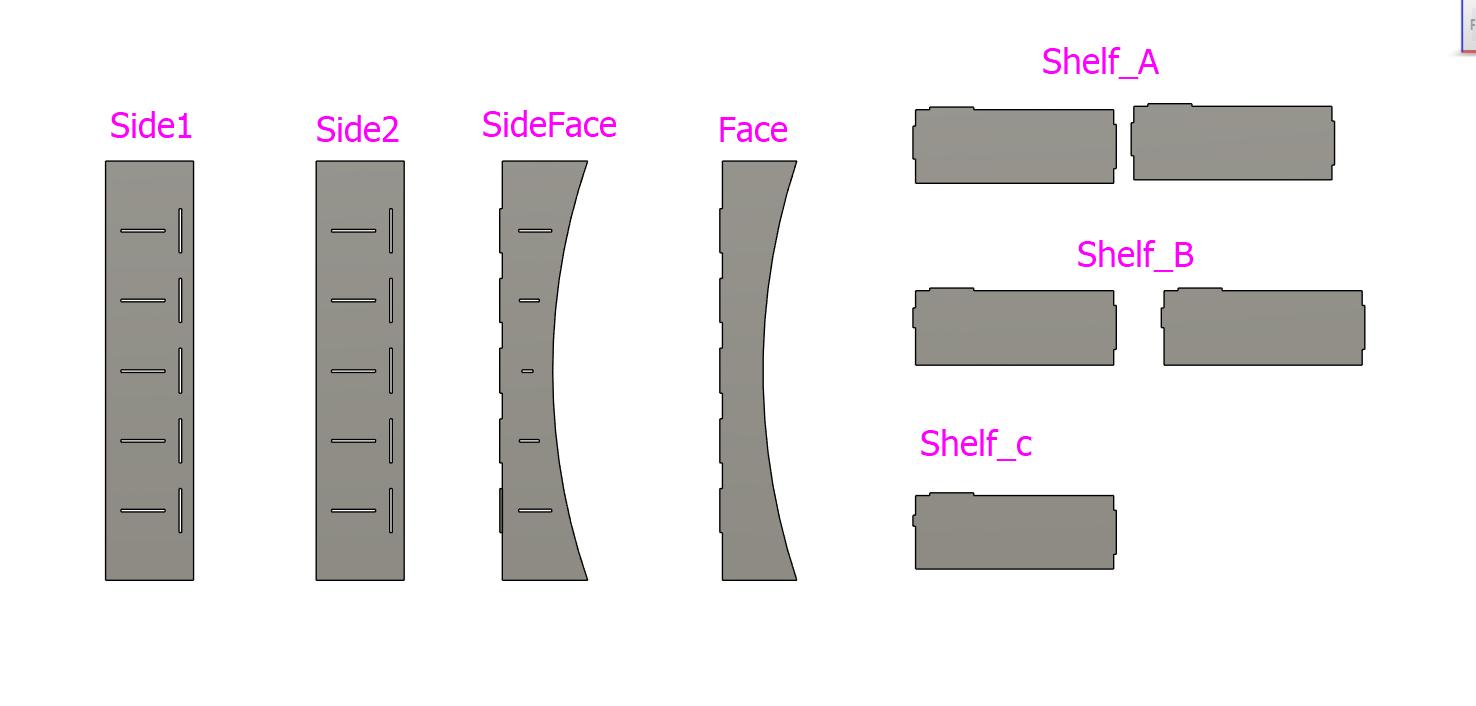
This is the complete sketch for side of my bookshelf.
-
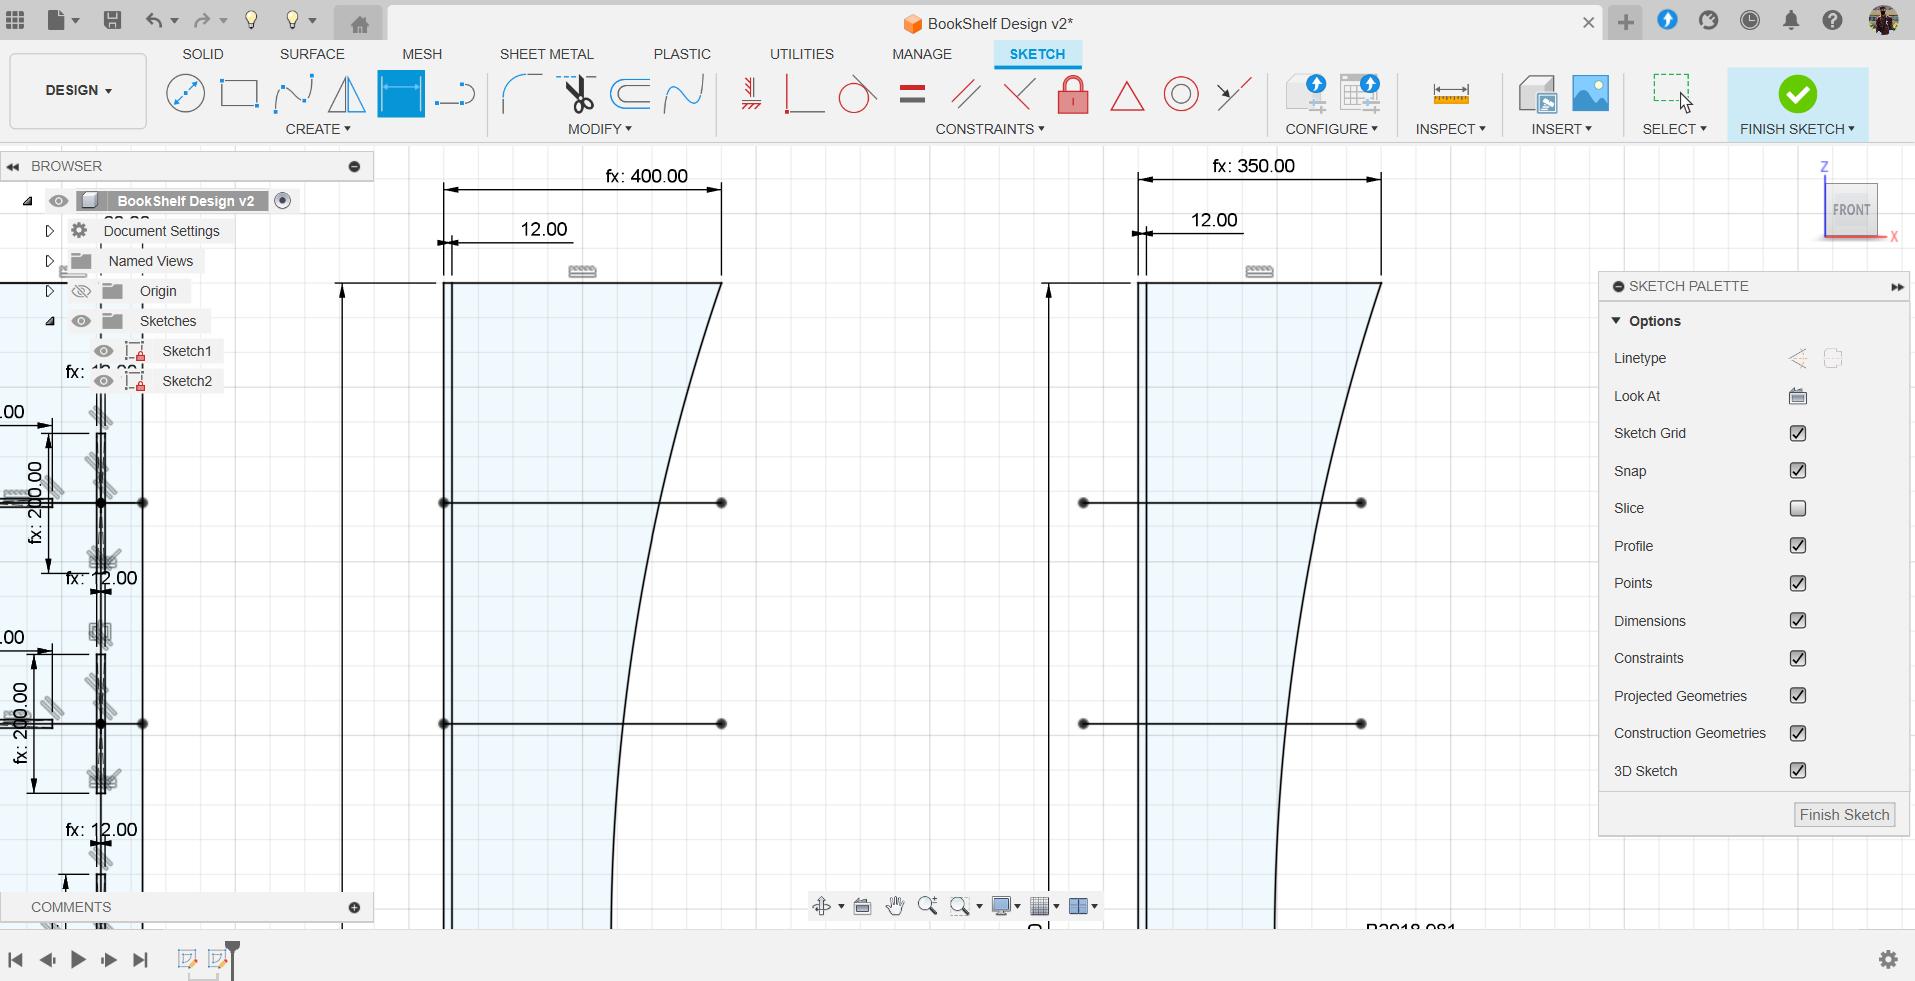
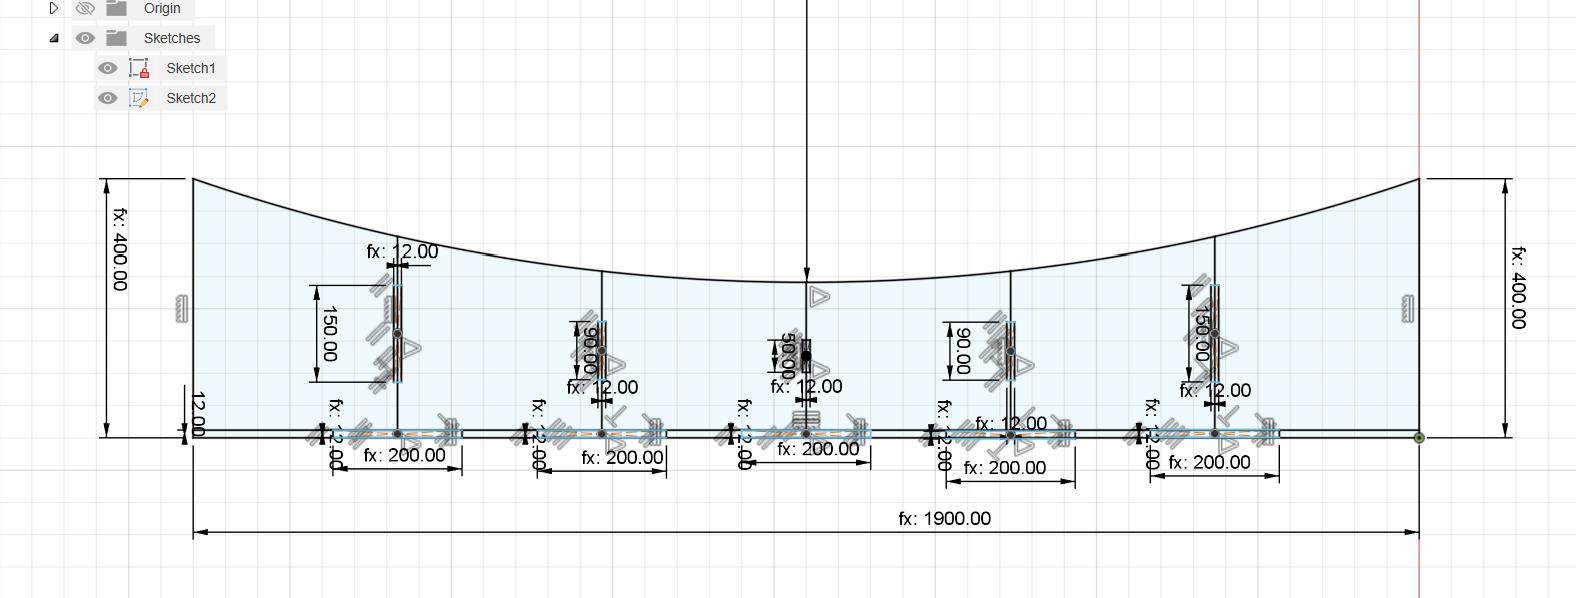
This is the complete sketch of one of the curve faces of my bookshelf.
-
And this the complete sketch for the other curve face.
-
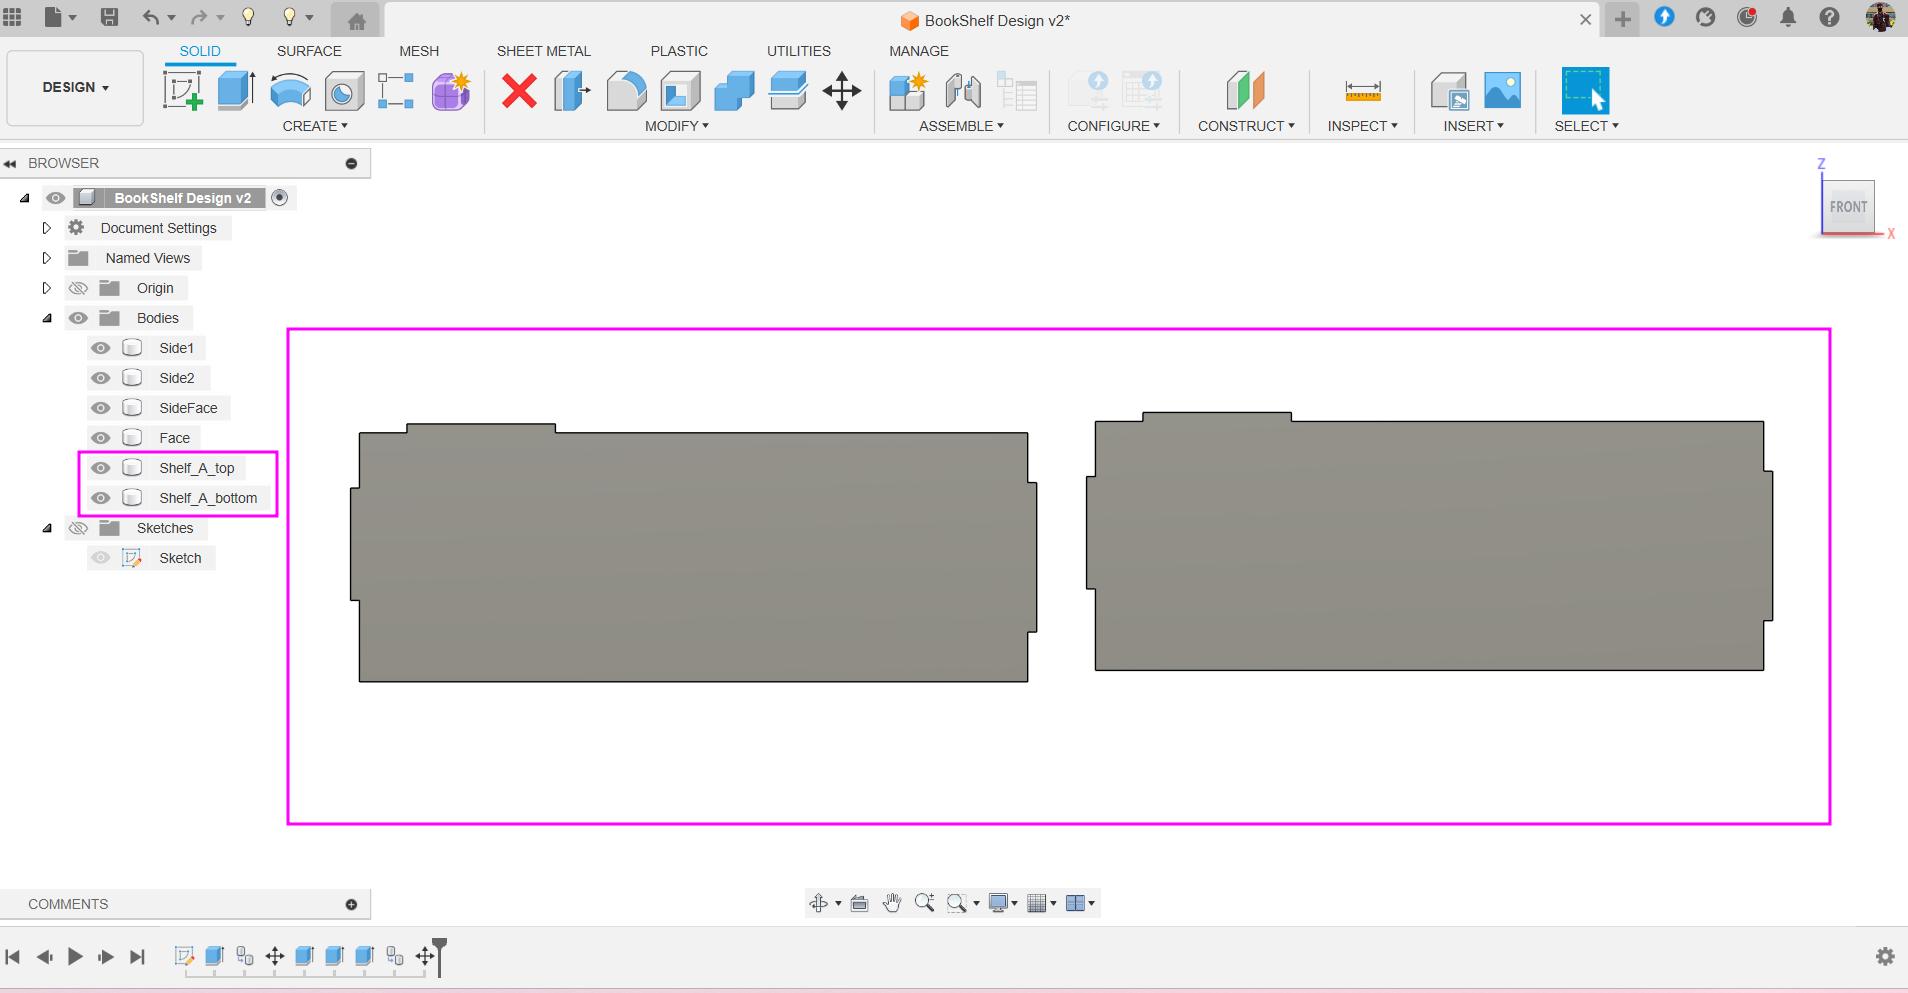
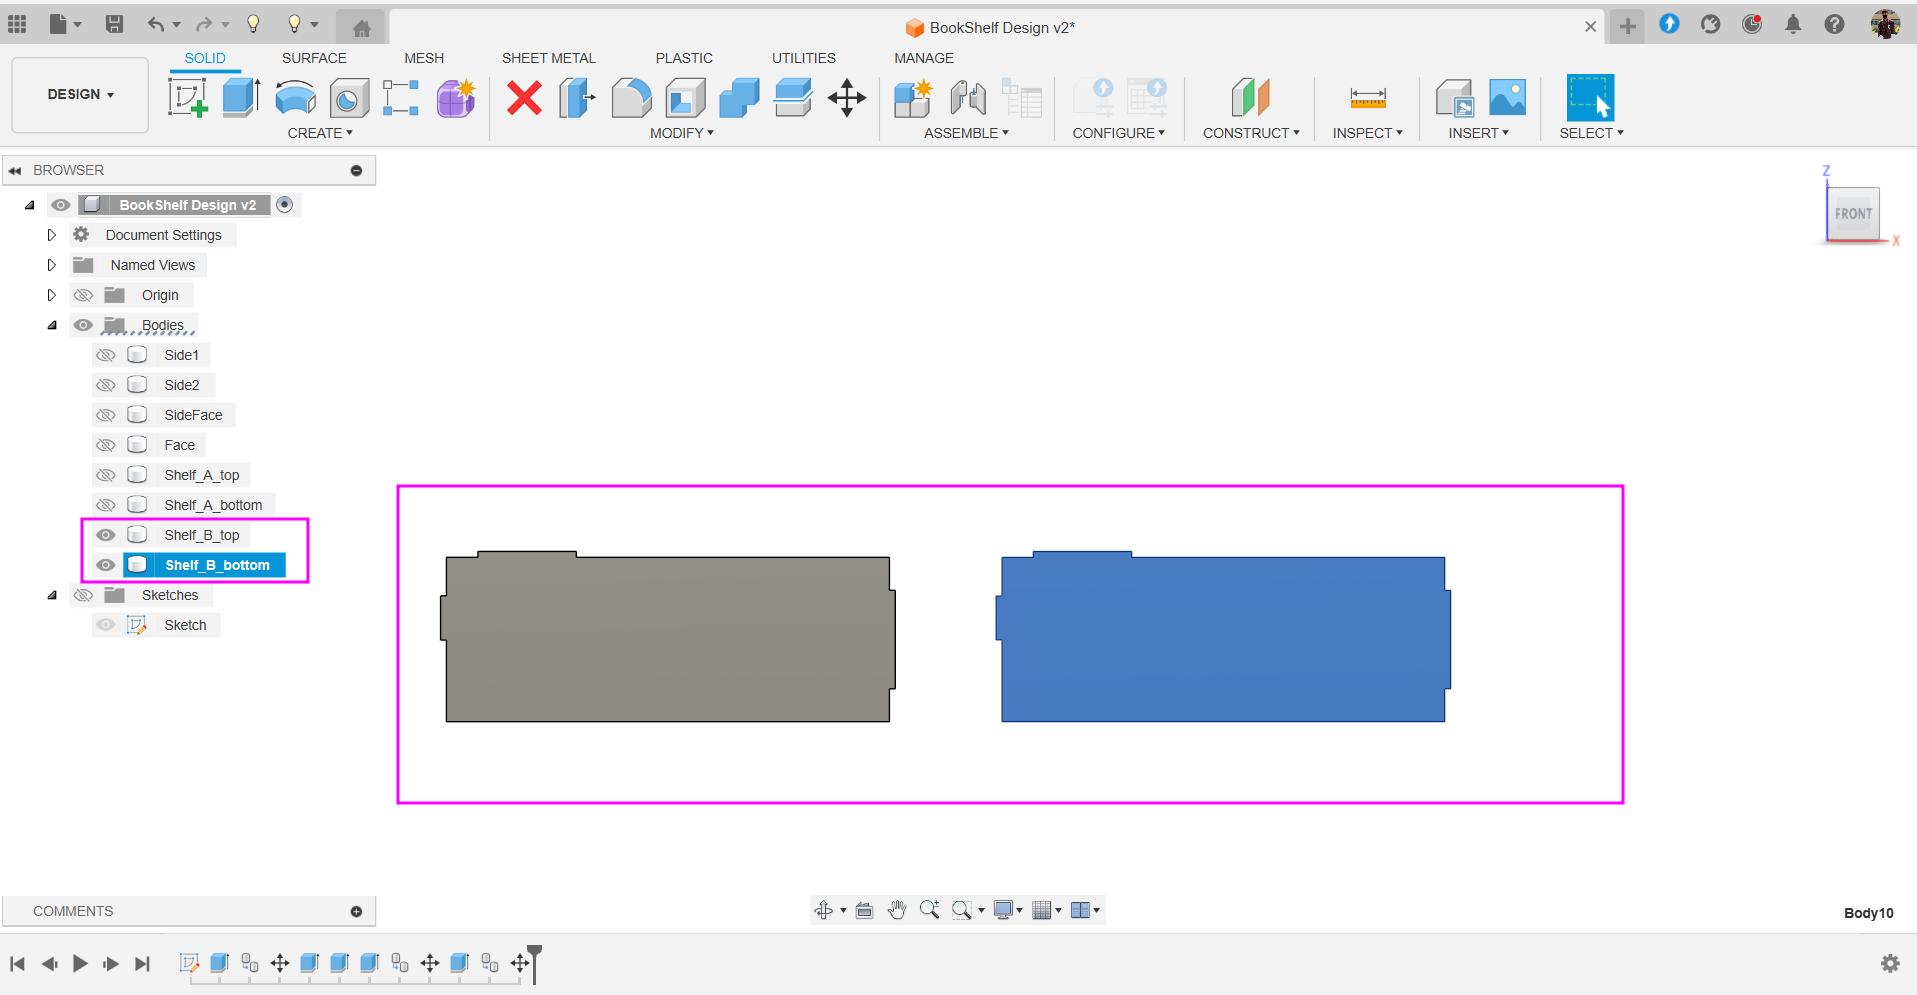
Now, moving on and sketching the selves for compartment. My bookshelf will have five compartment. One same sketch will be used to get two parts, another sketch to get two other part and the one remaining will have different sketch. The sketch below will be use to get top and bottom shelves.
-
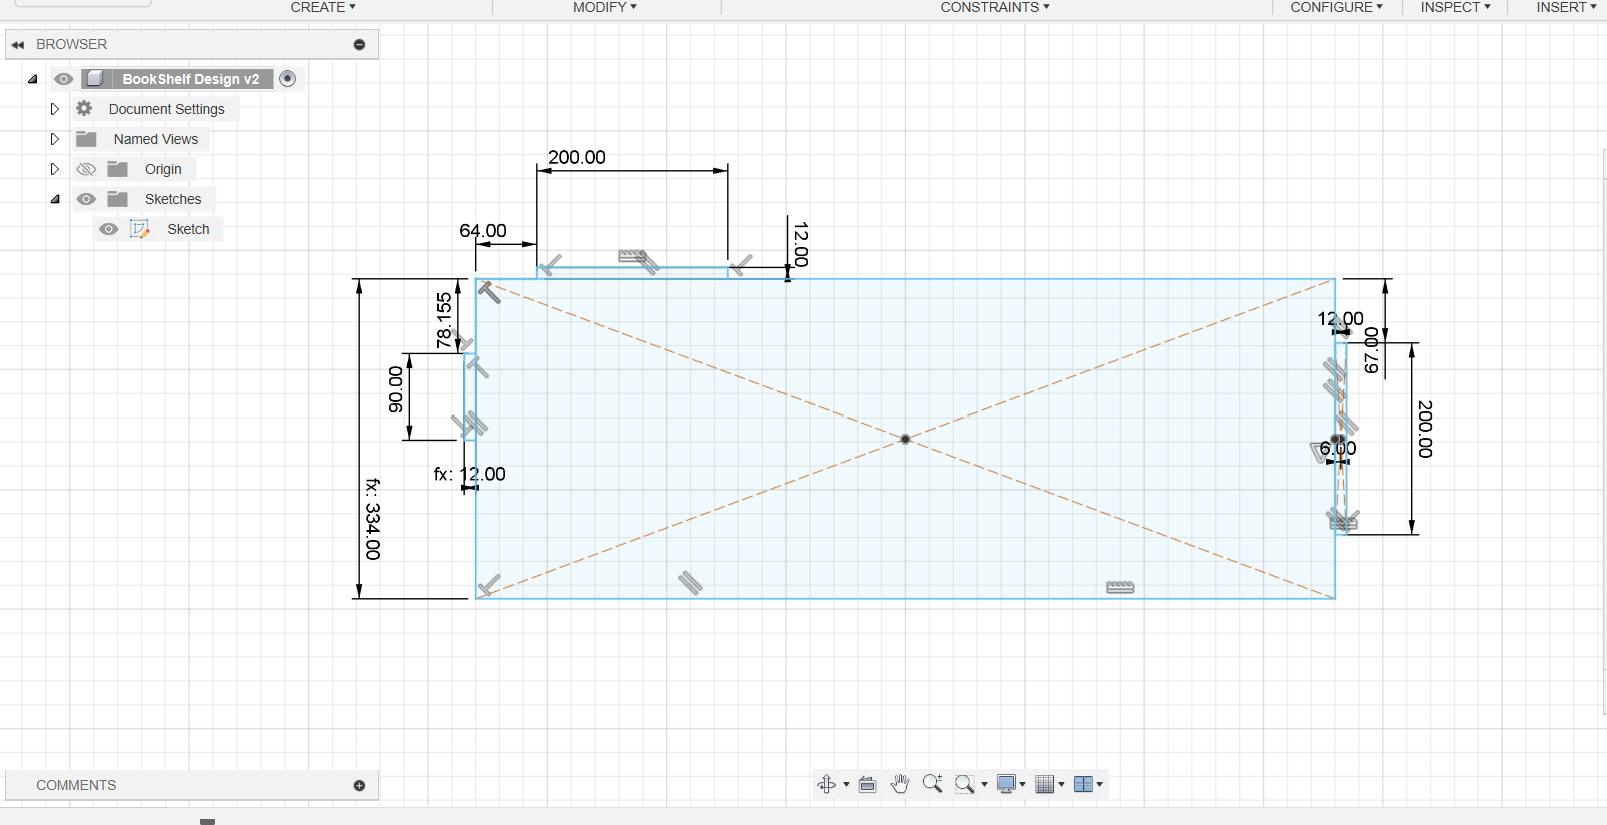
This sketch is for the next top and bottom compartment.
-
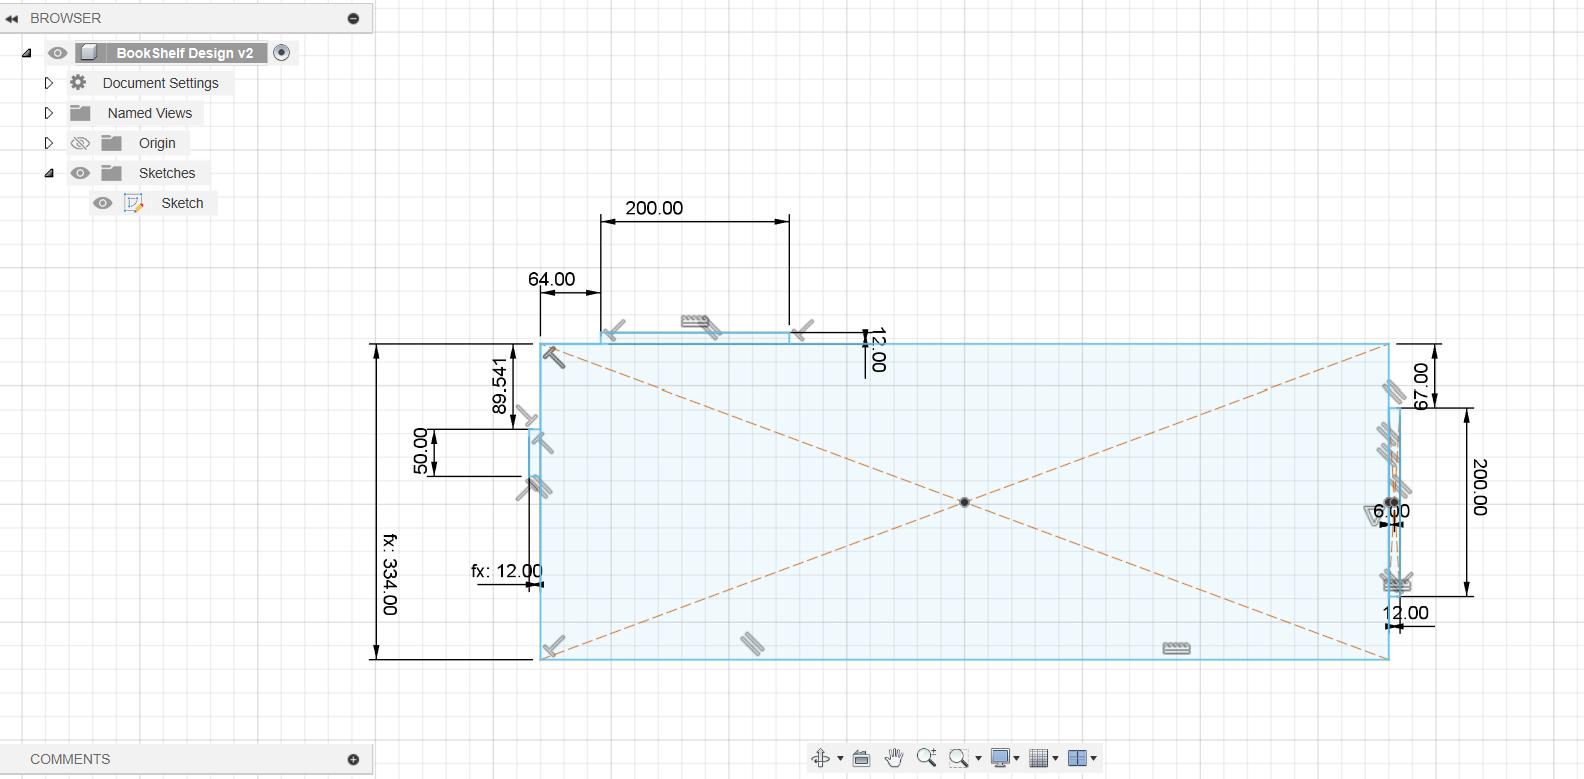
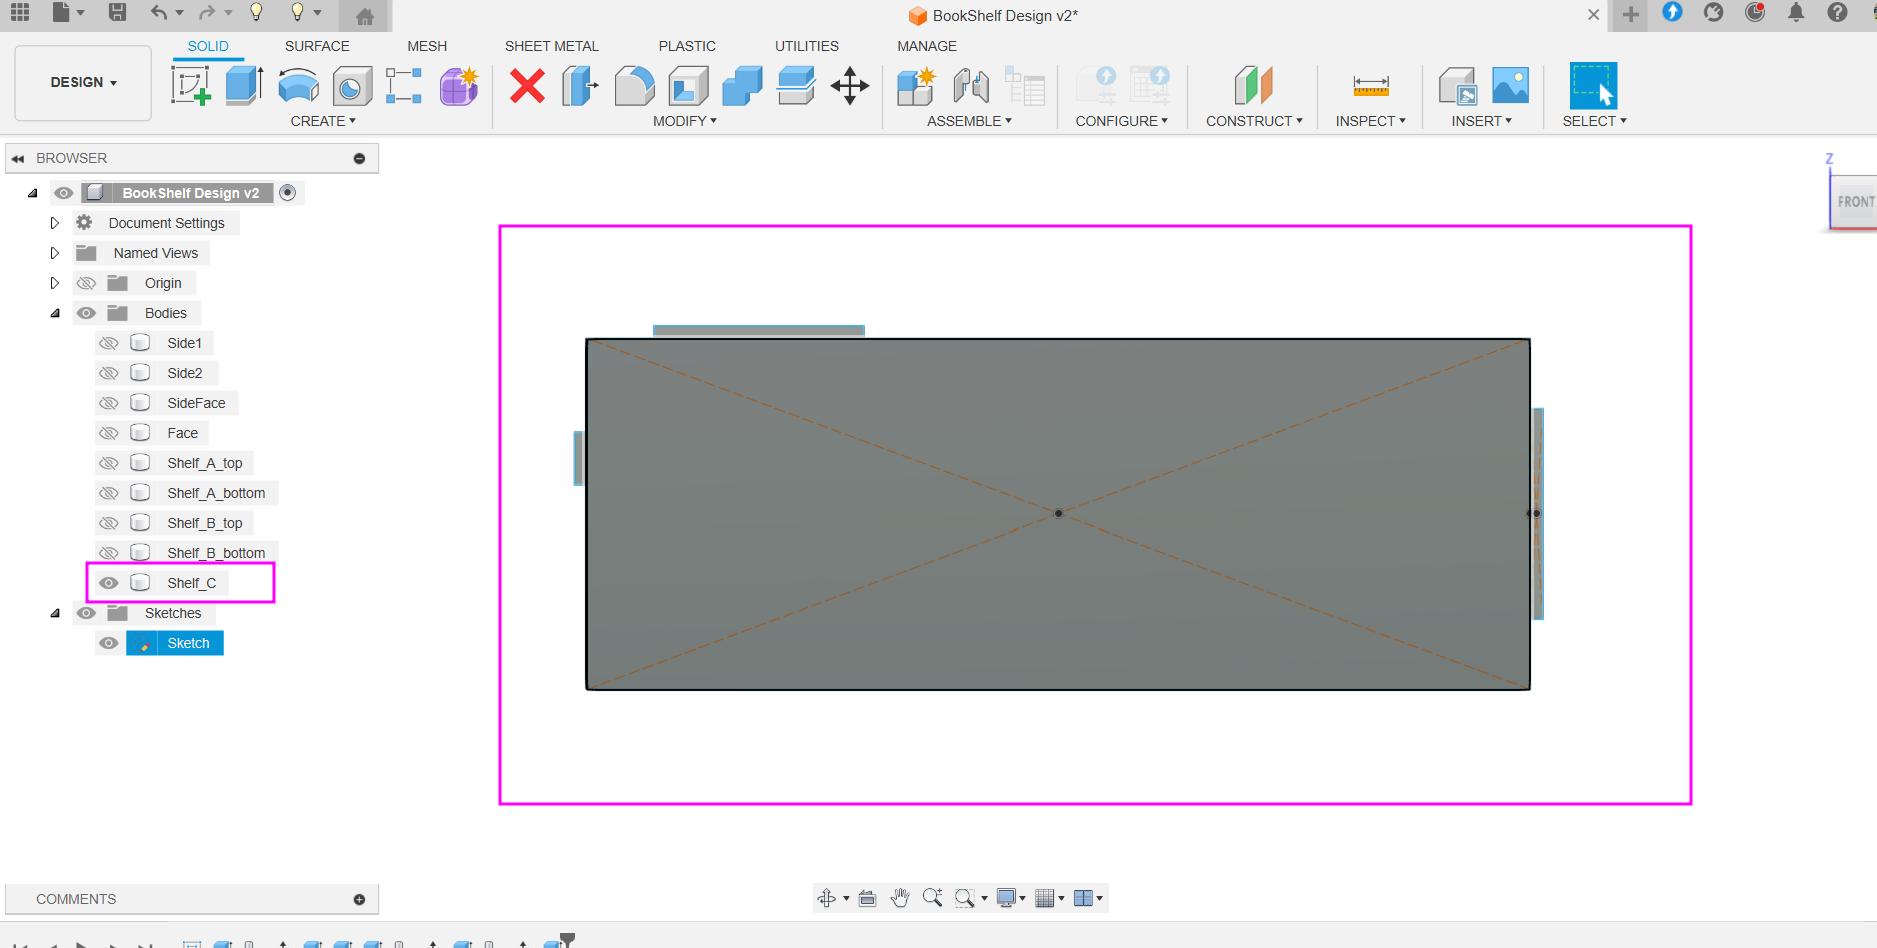
This one is for the middle one.
-
Now it is time to extrude the sides form one sketch.
-
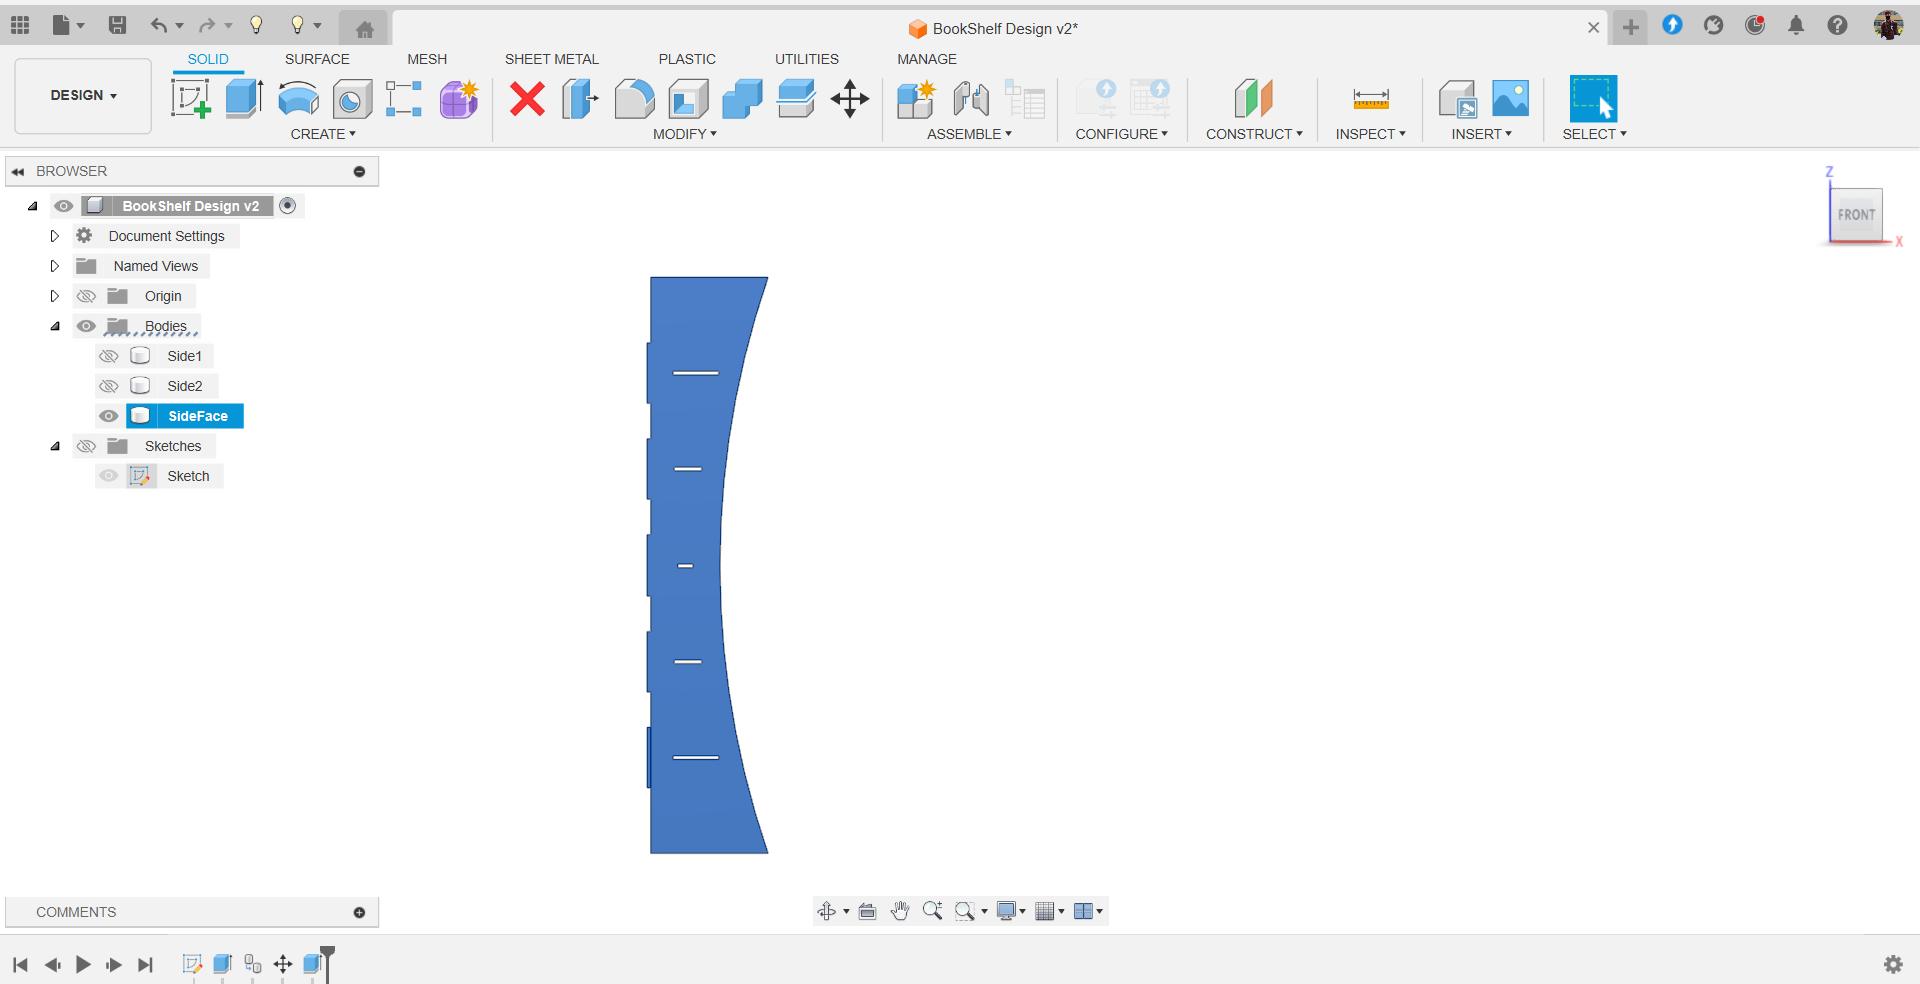
This one is curve face which will be integrated as the side of the bookshelf.
-
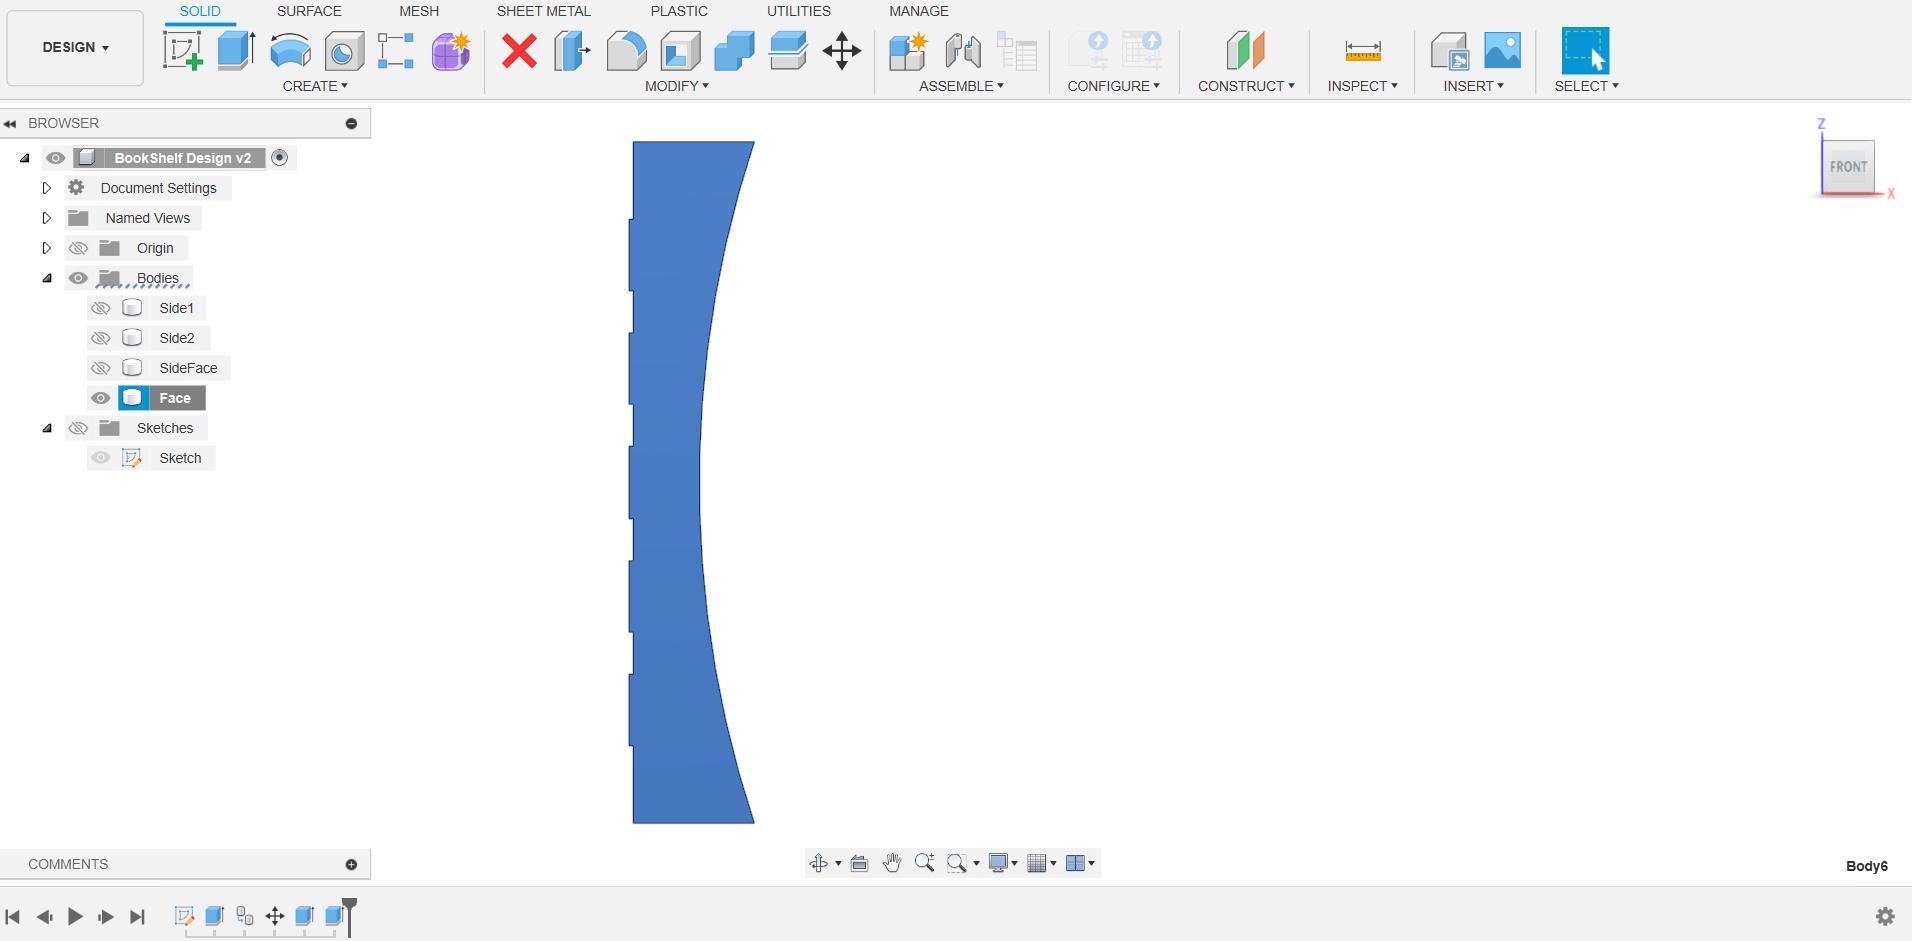
This one will be used as the face of the bookshelf.
-
Extruding the compartment parts for the very first and last compartment.
-
Parts for the second and 4 compartments.
-
Part for middle compartment.
-
All the parts are extruded as different bodies.
-
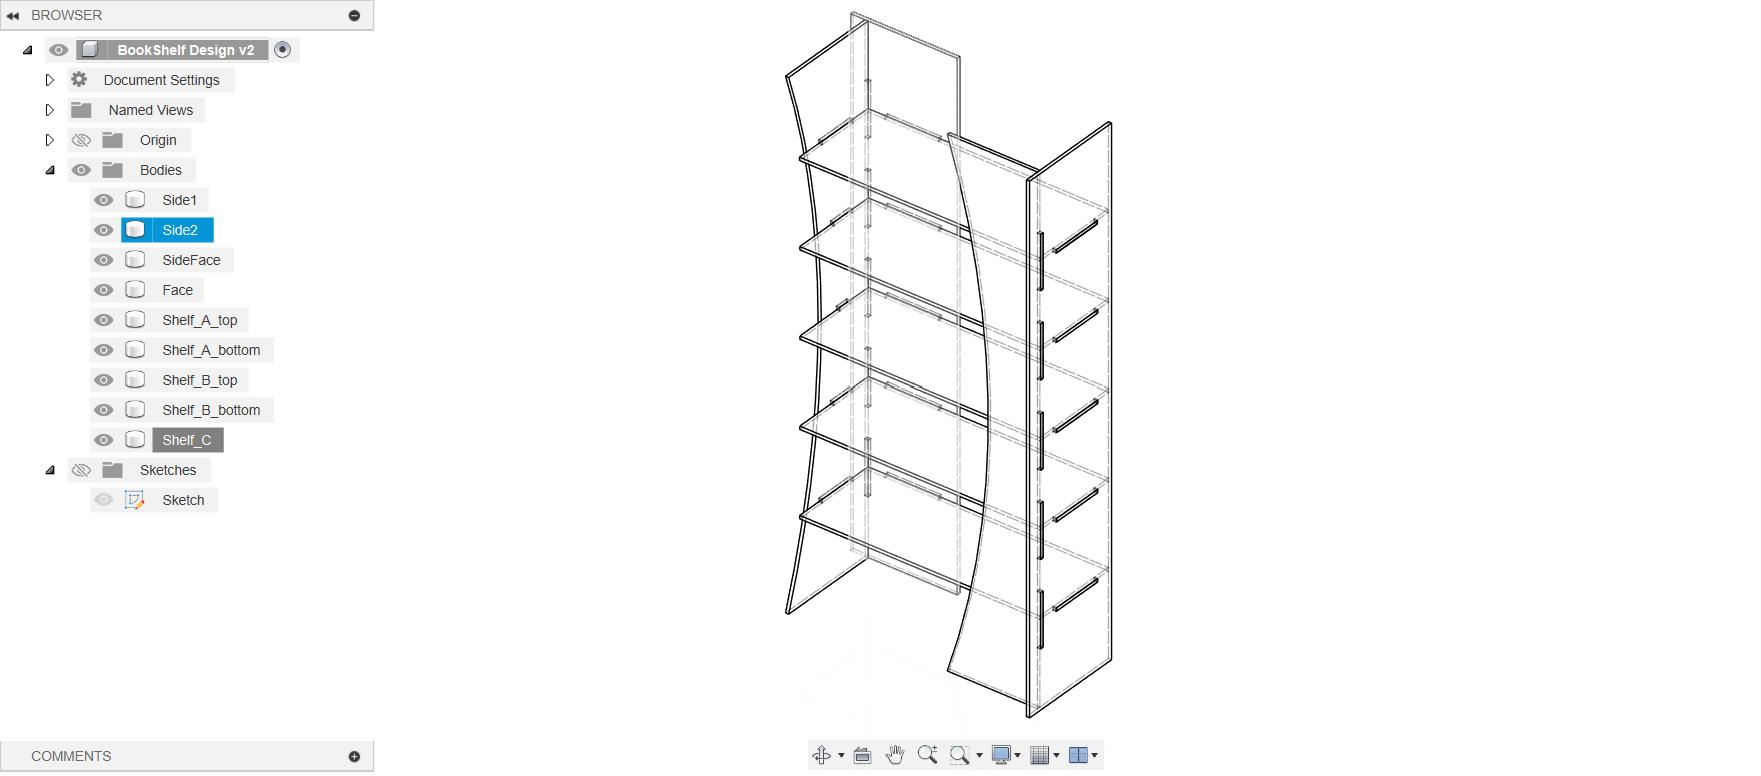
It took me some time to assemble the Bookshelf. I think this type of design approach is simple enough for simple design like this. I should definitely work on my design approach.

-
Taking a look at desing in wireframe view so that I can see the joints properly.
Milling the design in Shopbot Machine
-
Import the DFX file your exported from Fusion earlier into V-curve.
-
Then I fixed the Job piece on the sacrificial layer of the Shopbot machine using Bar clamp.
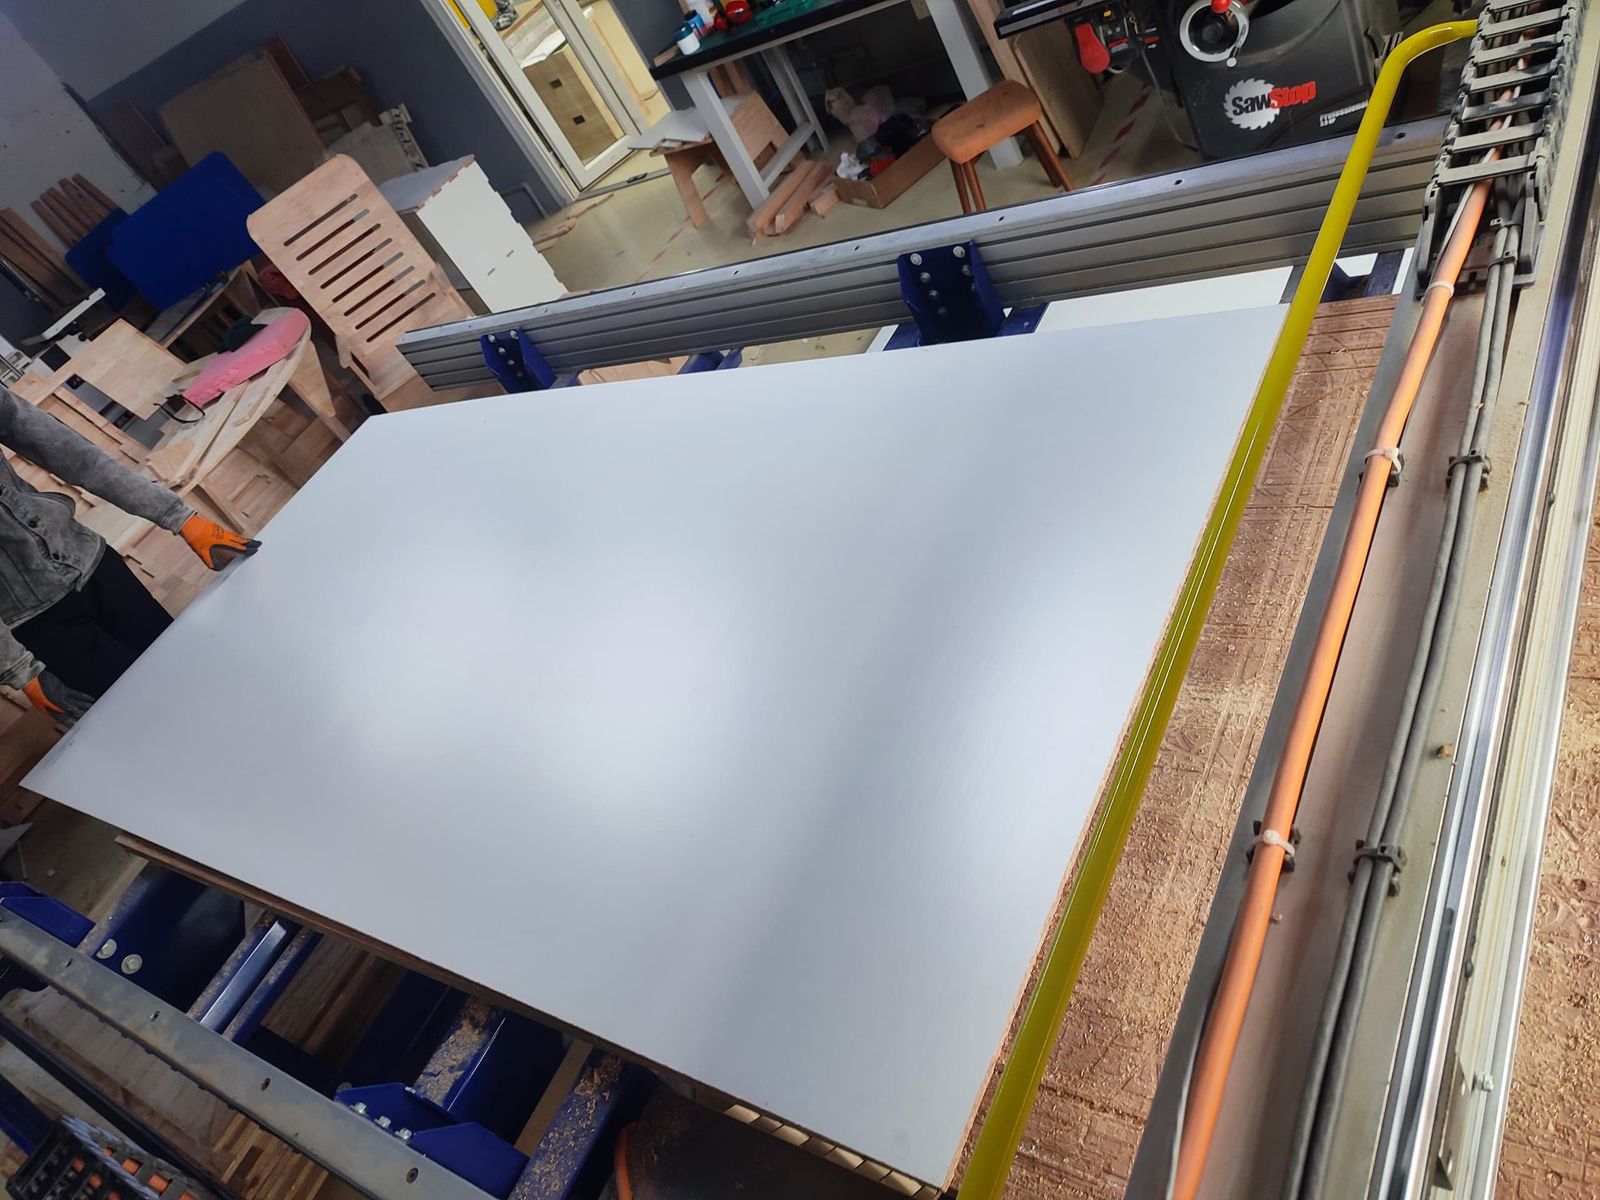
-
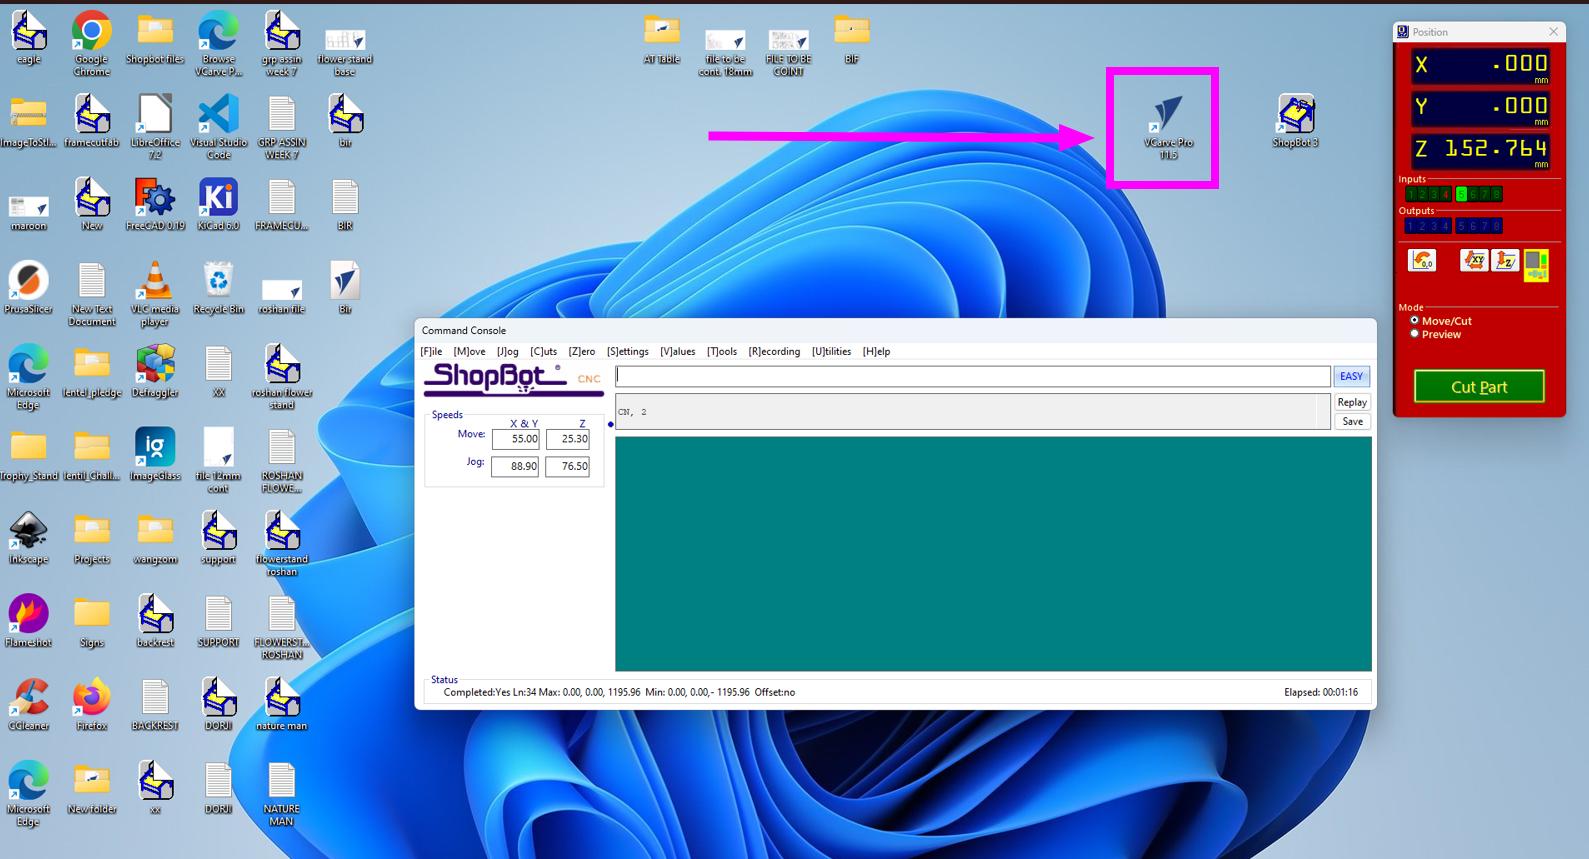
Open the VcarvePro to set the cutting parameters.
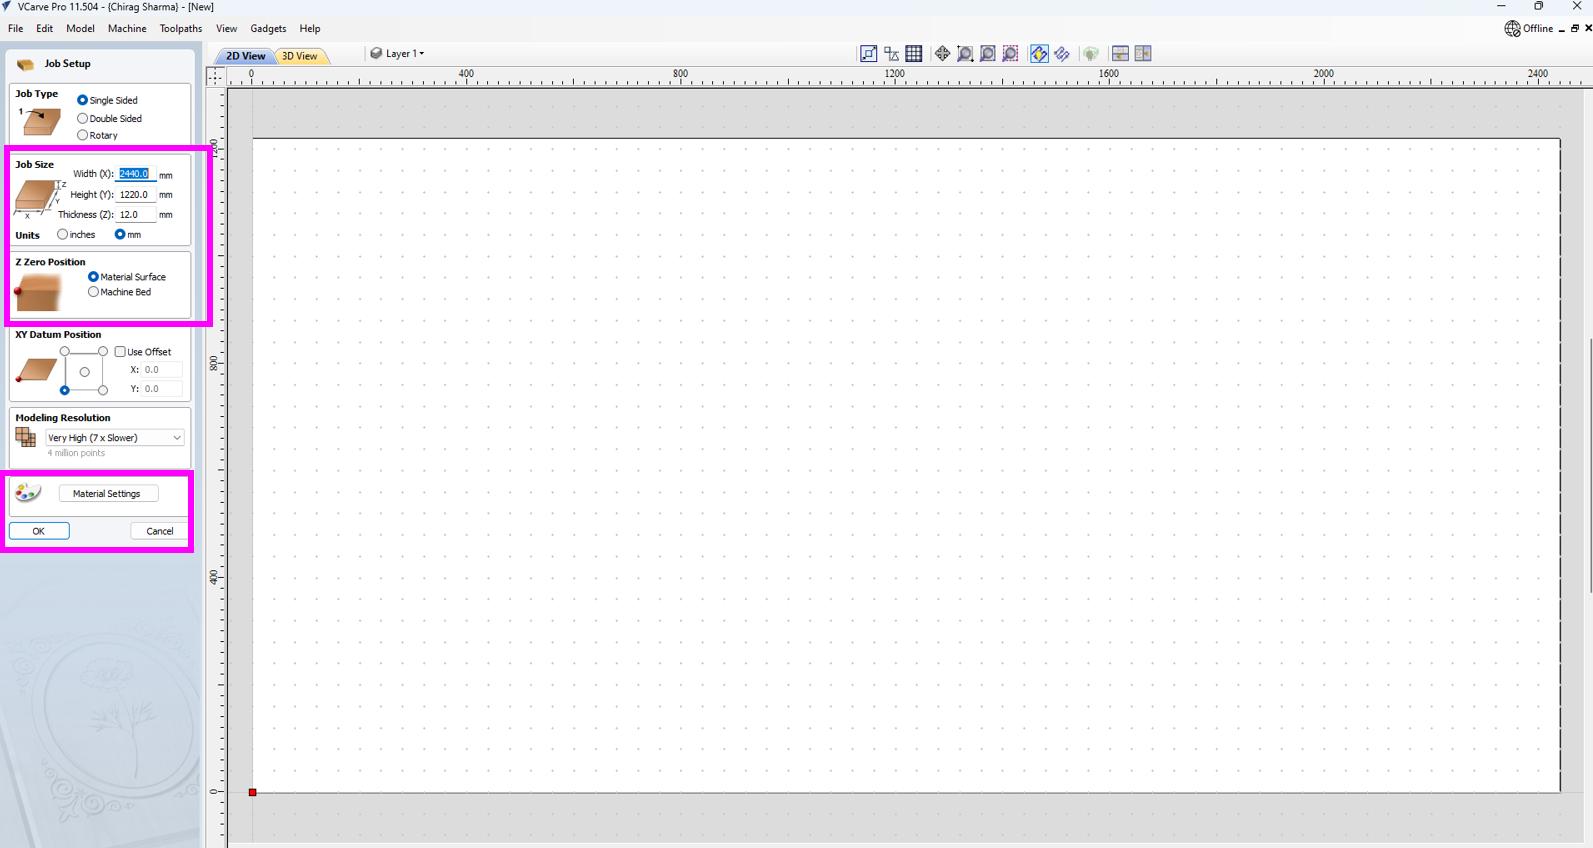
-
Defining the size of the particle Board(job piece) and the material type which is MDF board (Medium Density Fiberboard). The thickness of the particle board used is 12mm.
-
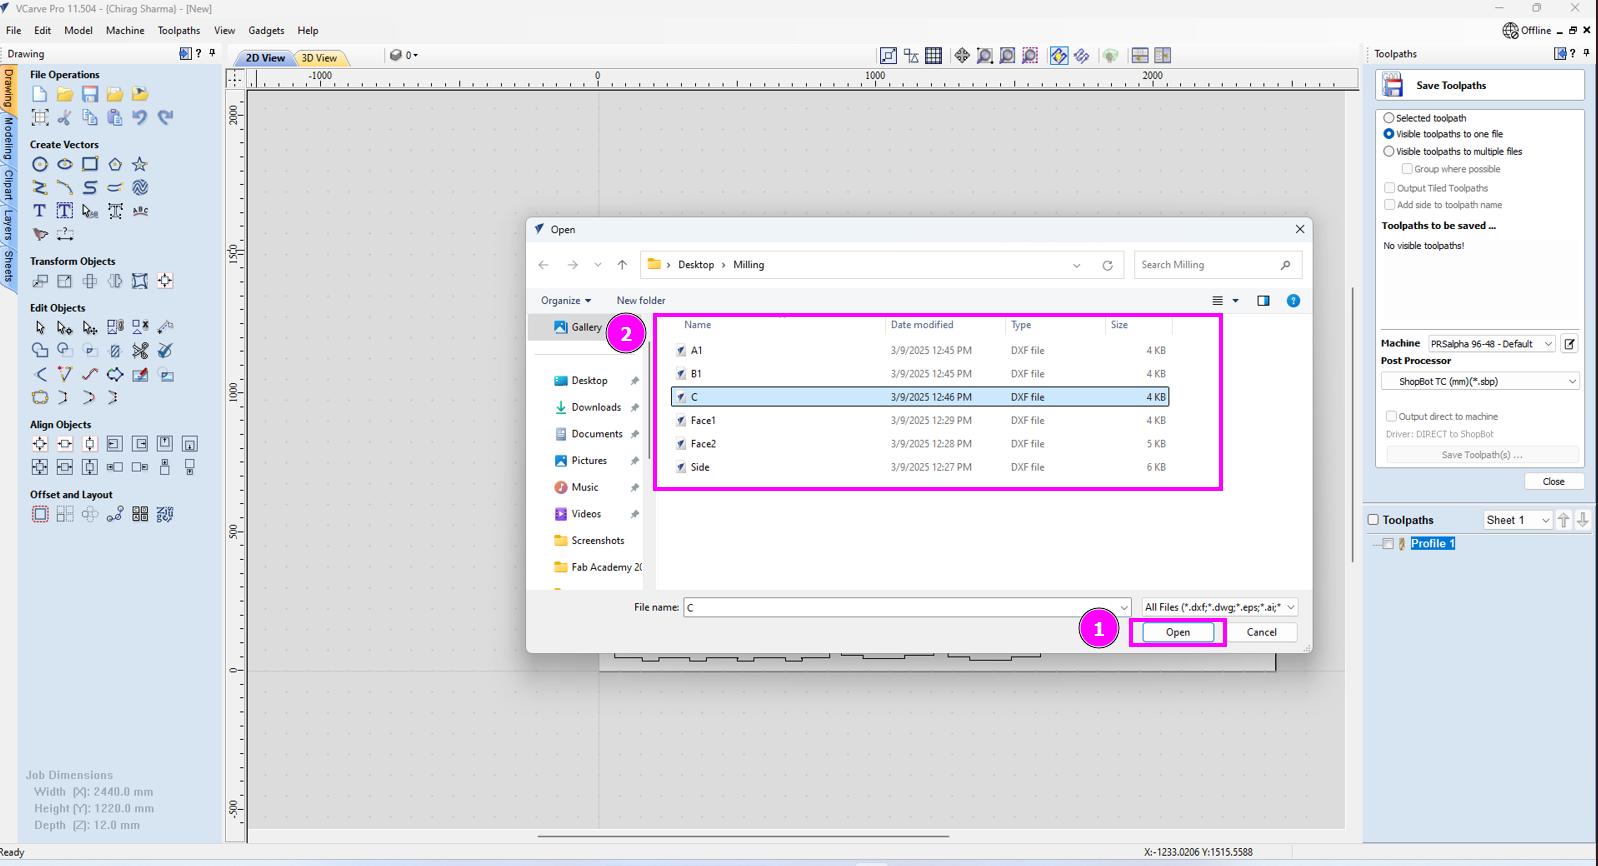
Import the compartment parts for cutting.
-
I will be cutting on the leftover plywood used by my friend for her week 7 assignment. I have labelled her part. I kept her file so that I can arrange my files around her file so that my file will be positioned correctly on the remaining part of the particle board.

-
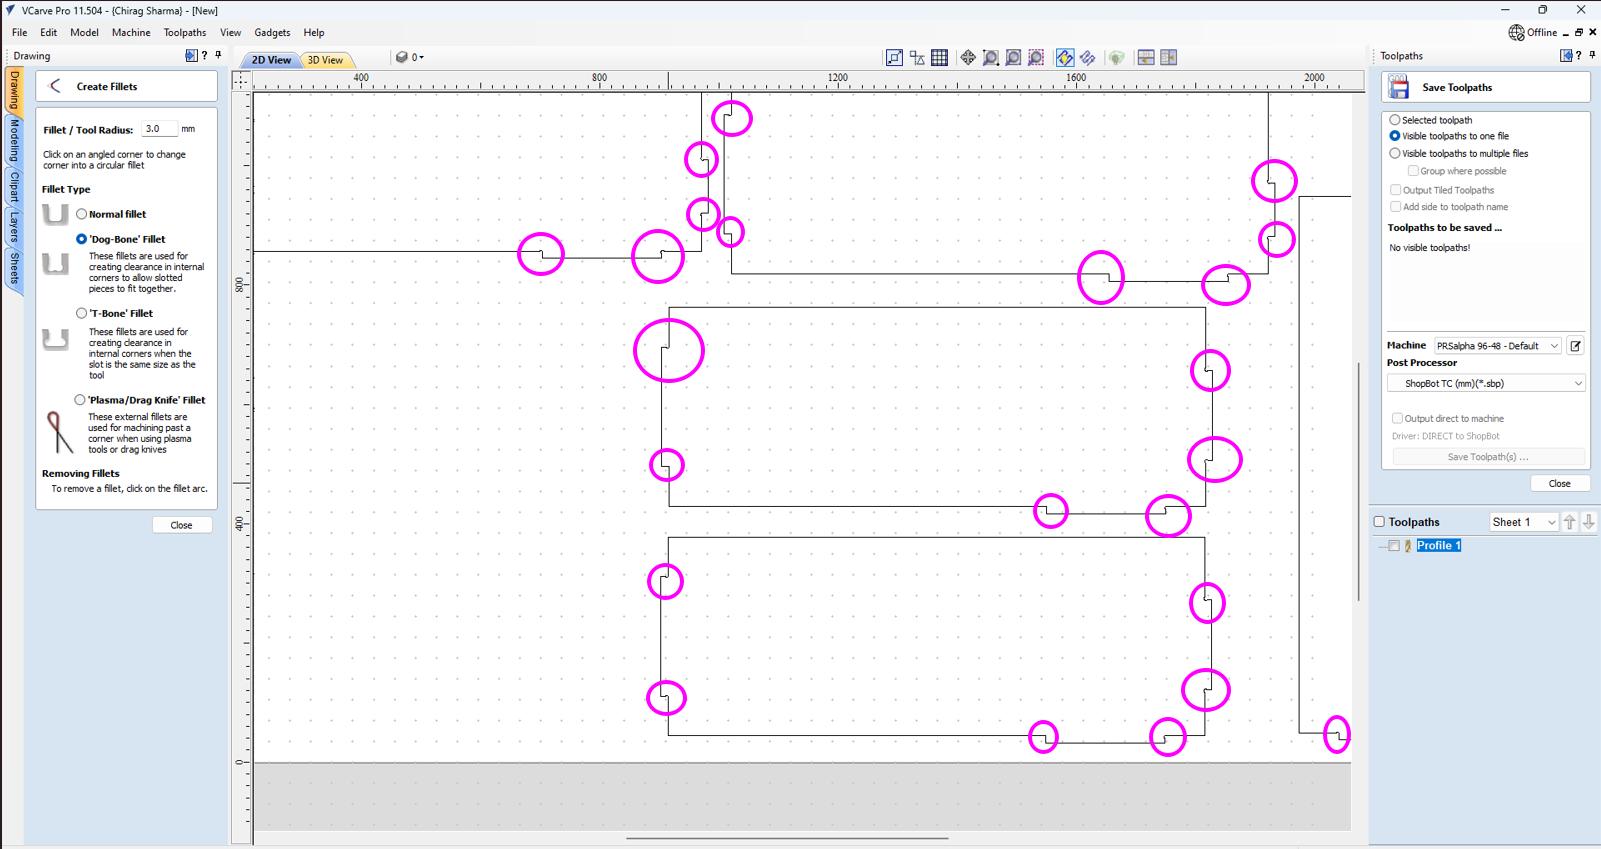
Giving the Dogbone fillet on the edges and corners for easy fitting.
-
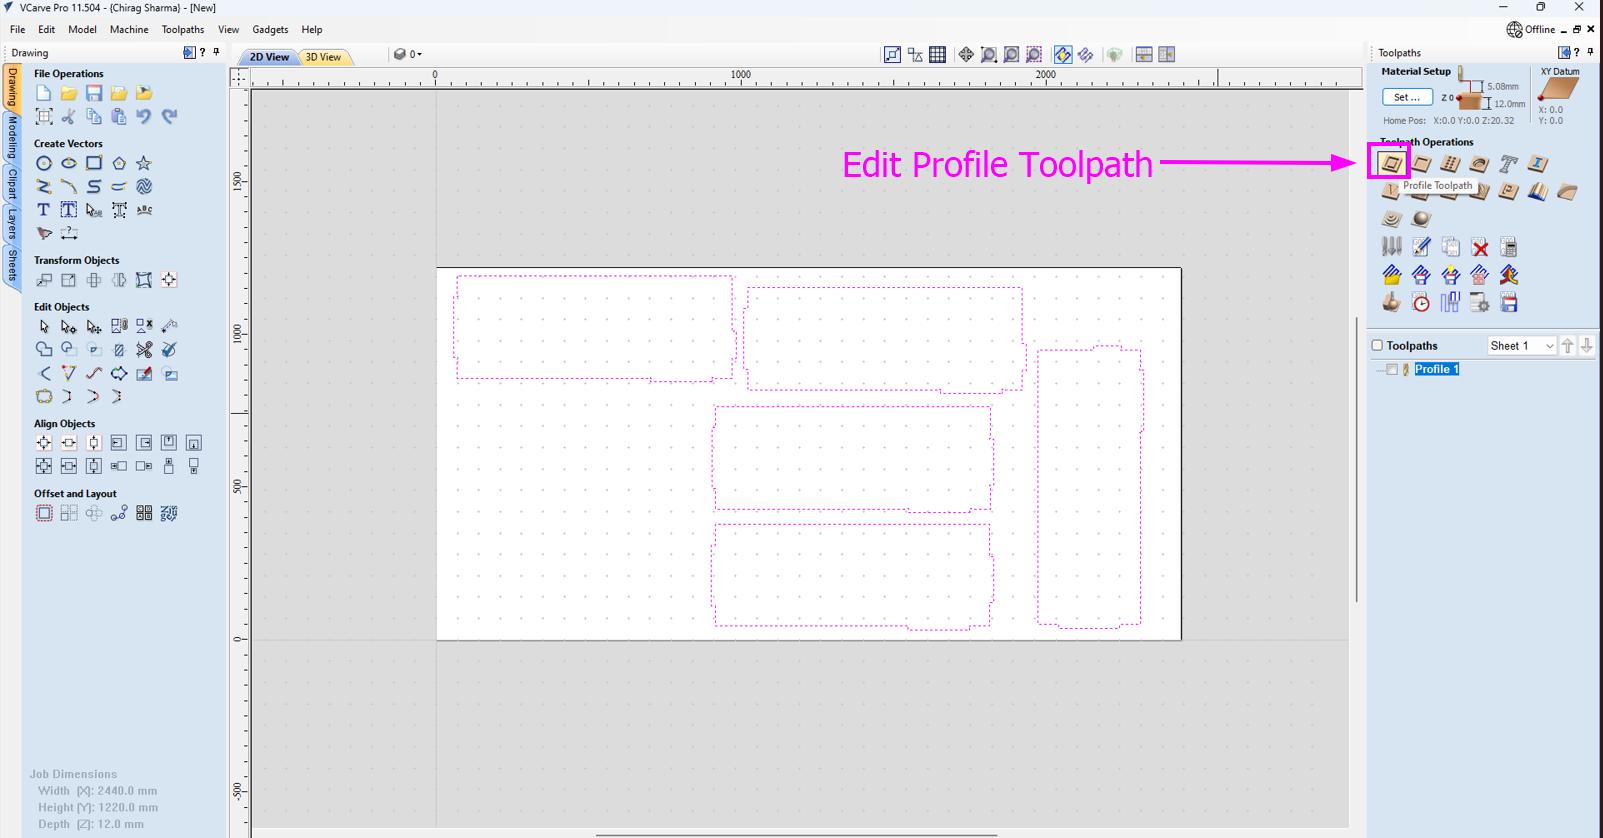
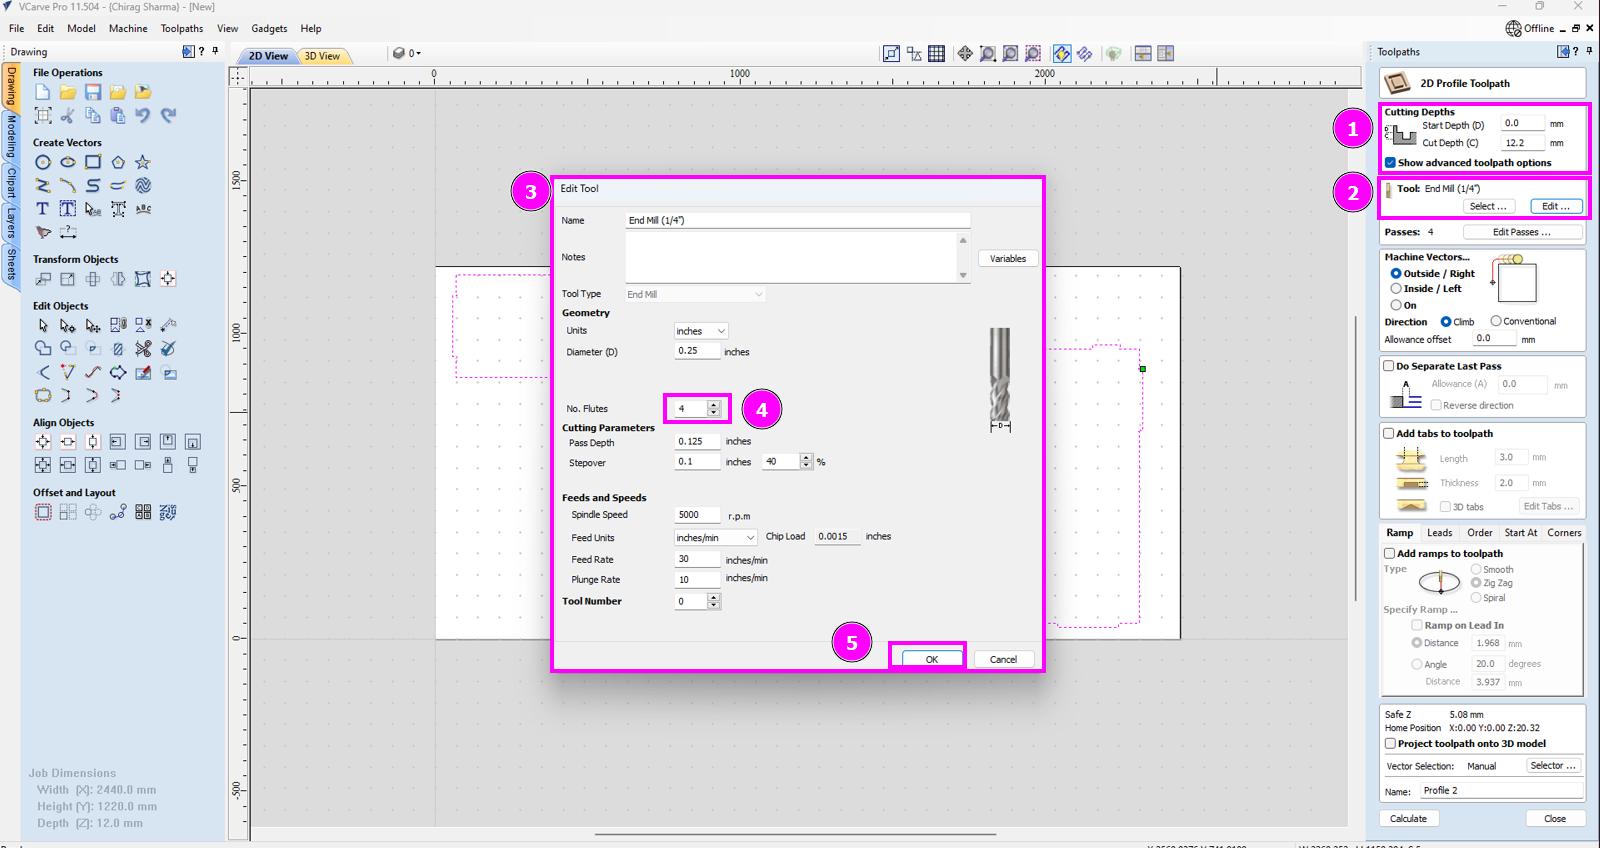
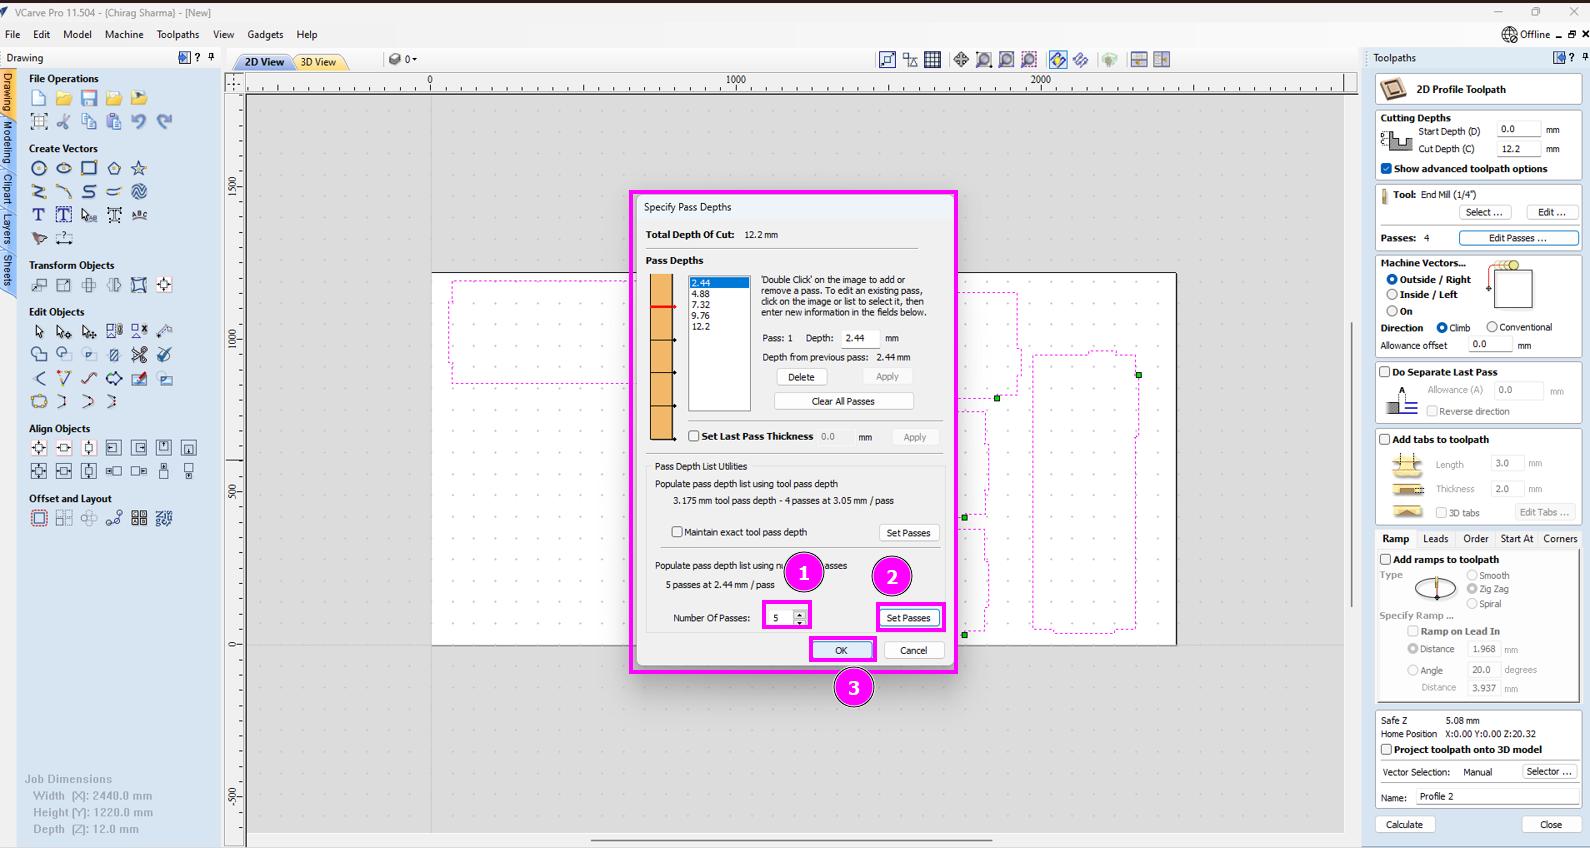
Go to Profile Toolpath to edit the toolpath profile to define the parameters like size of the mill bit, number of flute, passes, r.p.m, tabs and other essential parameters.
- Mill Bit used: 1/4 endmill
- Number of Flute: 4
- Passes used: 5
- Pass Depth: 0.125 inches
- r.p.m : 5000
- Feed Rate: 30 inches/min
- Chip Load: 0.0015 inches
- Plunge Rate: 10 inches/min
-
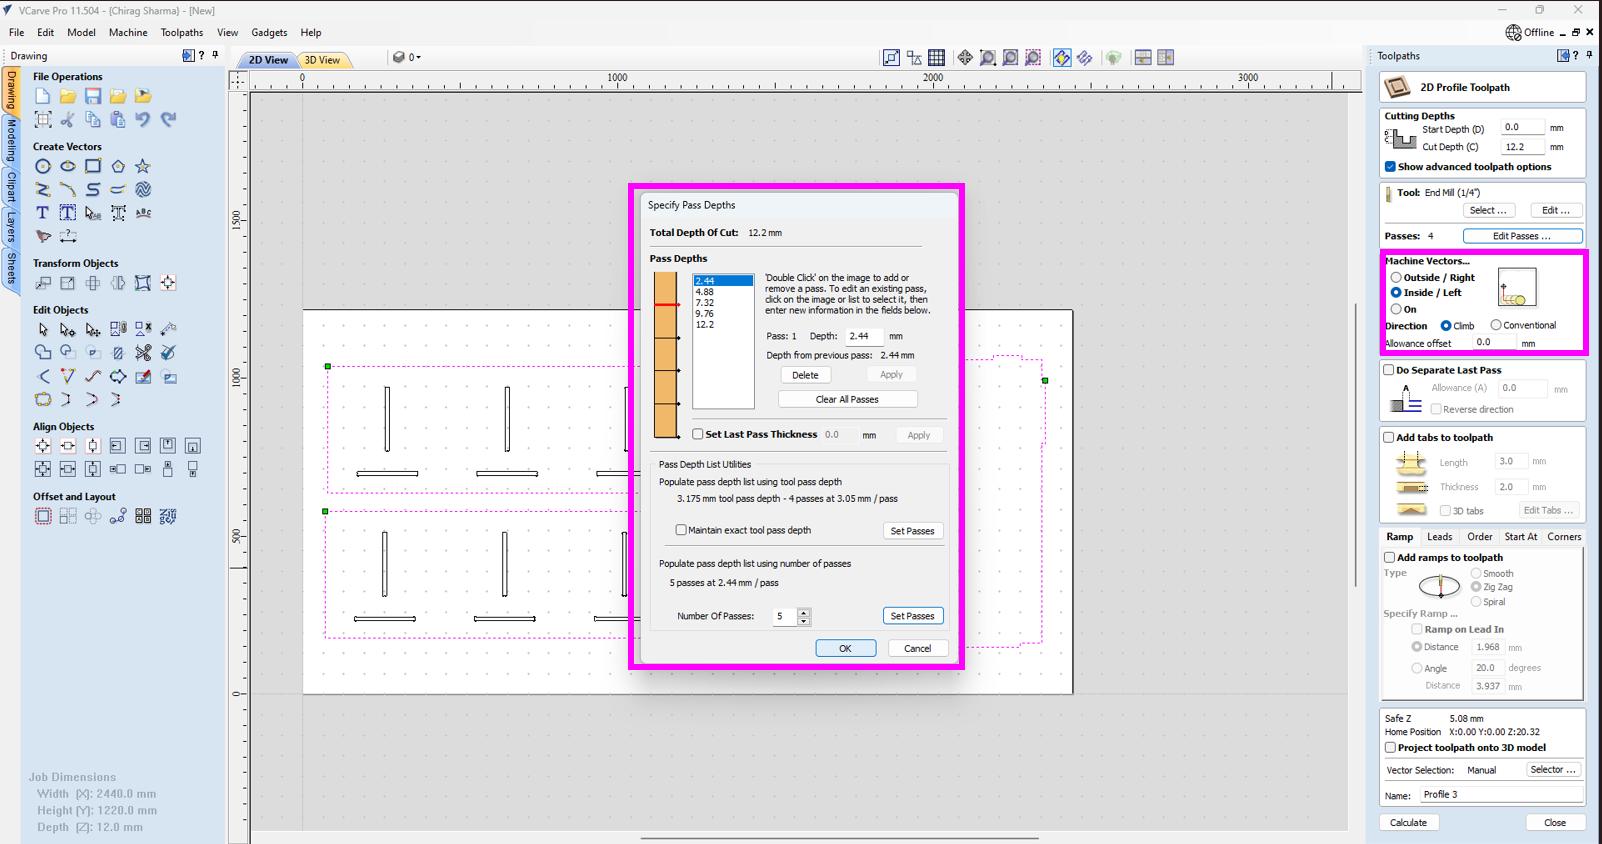
I defined 12.2mm cut depth as it was observed by the earlier users that the machine do not really cut through completely if additional offset of 0.2 mm is not given. And making sure the number of flutes is 4 as I am using 4 flutes end mill which is 1/4” as our lab ran out of 1/8” end mill.
-
I also gave the number of passes as 5.

-
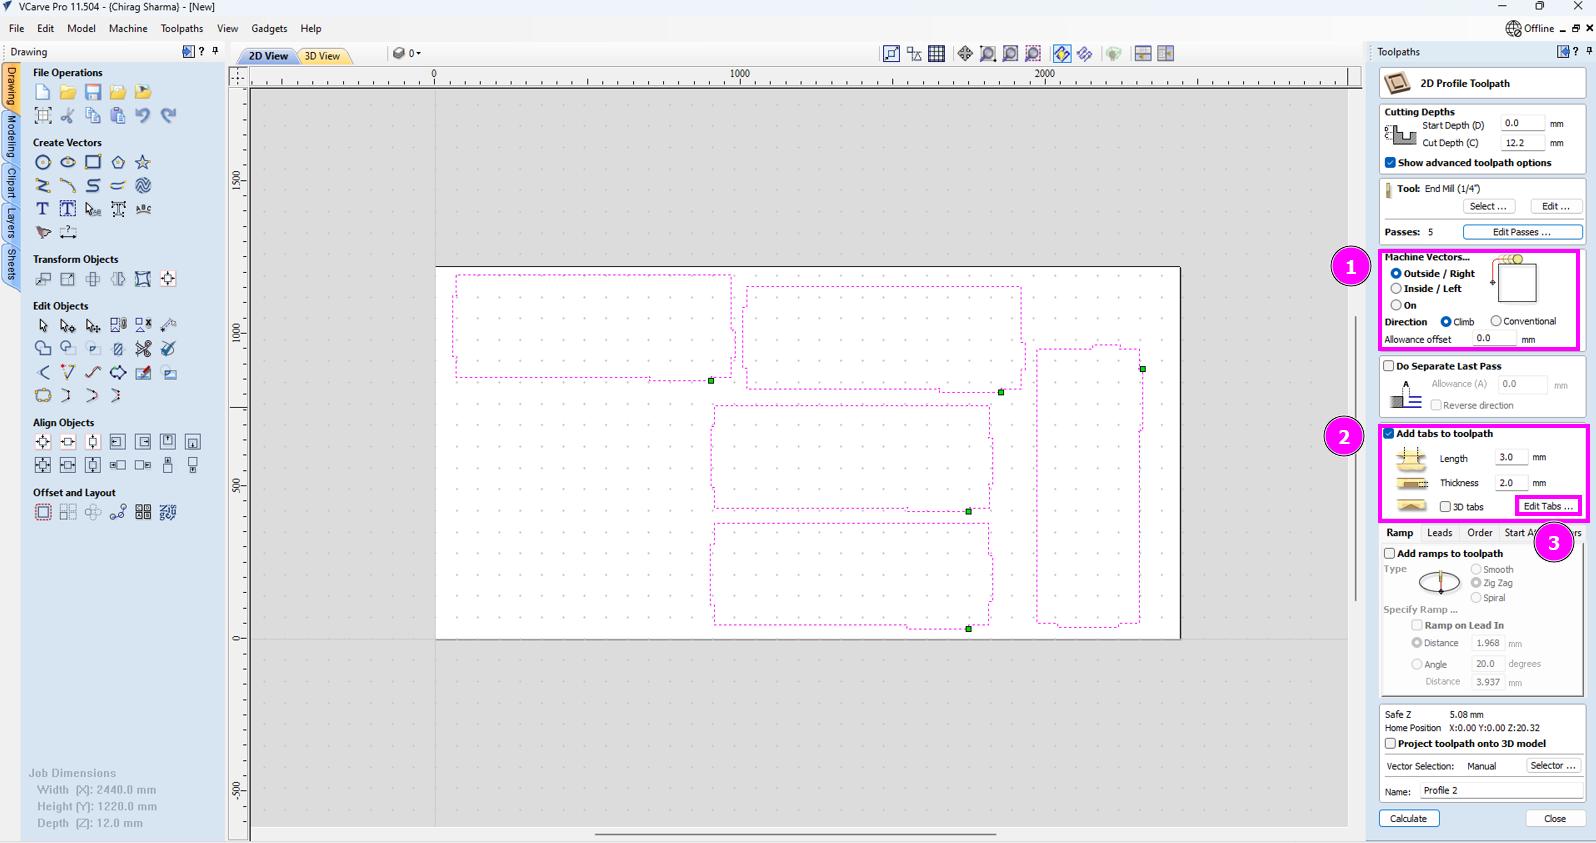
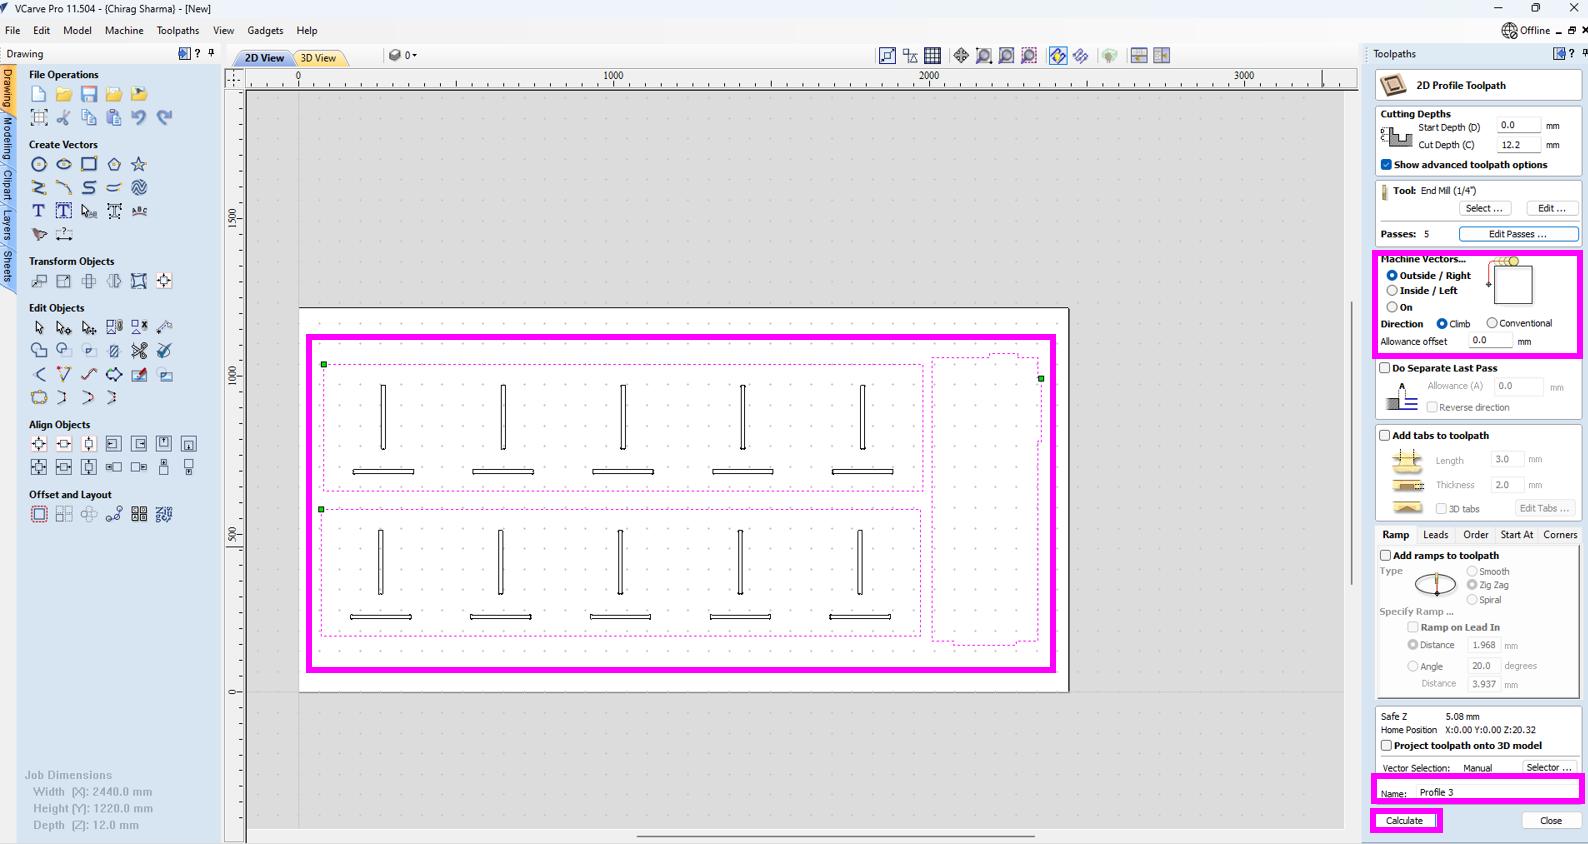
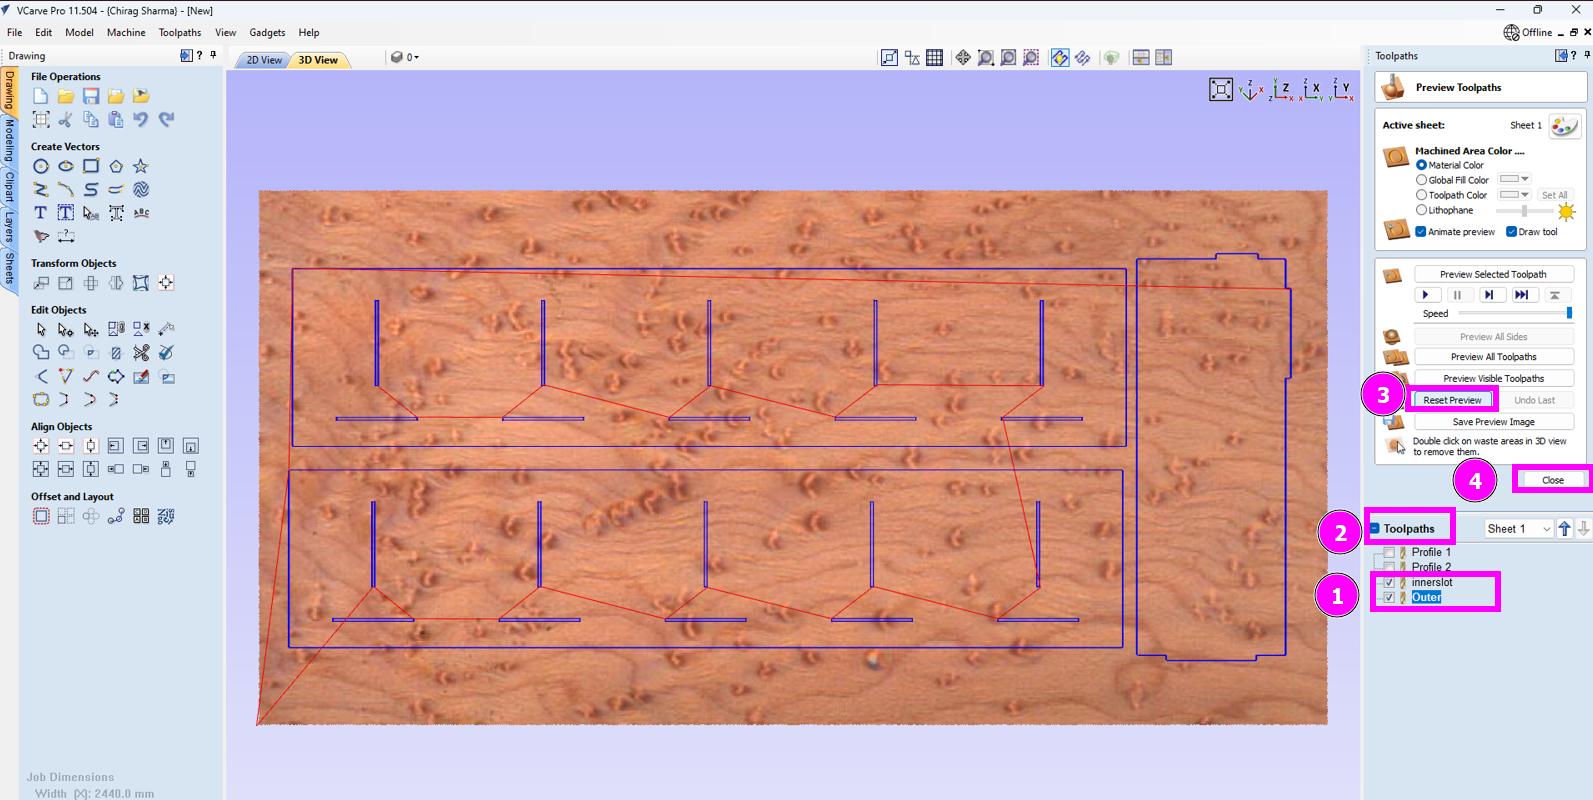
Selecting “outside” as machine vector as I am cutting the edges and the inner part is what I need. Also adding tabs so that the cut parts won’t come out during the last passes.
-
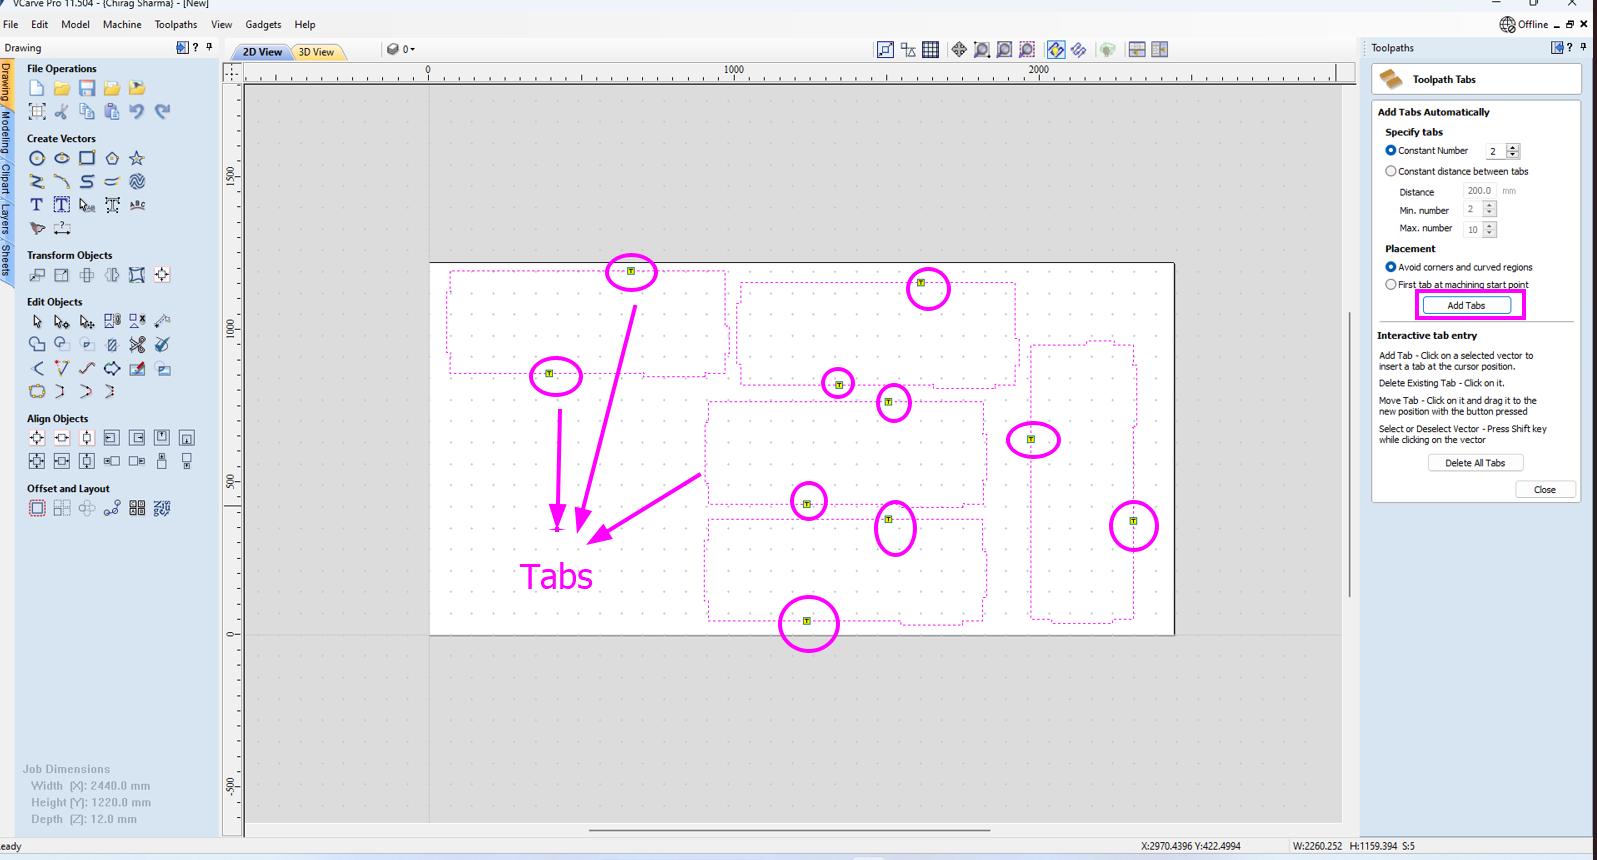
These are the tabs generated by the machine when we click add taps.
-
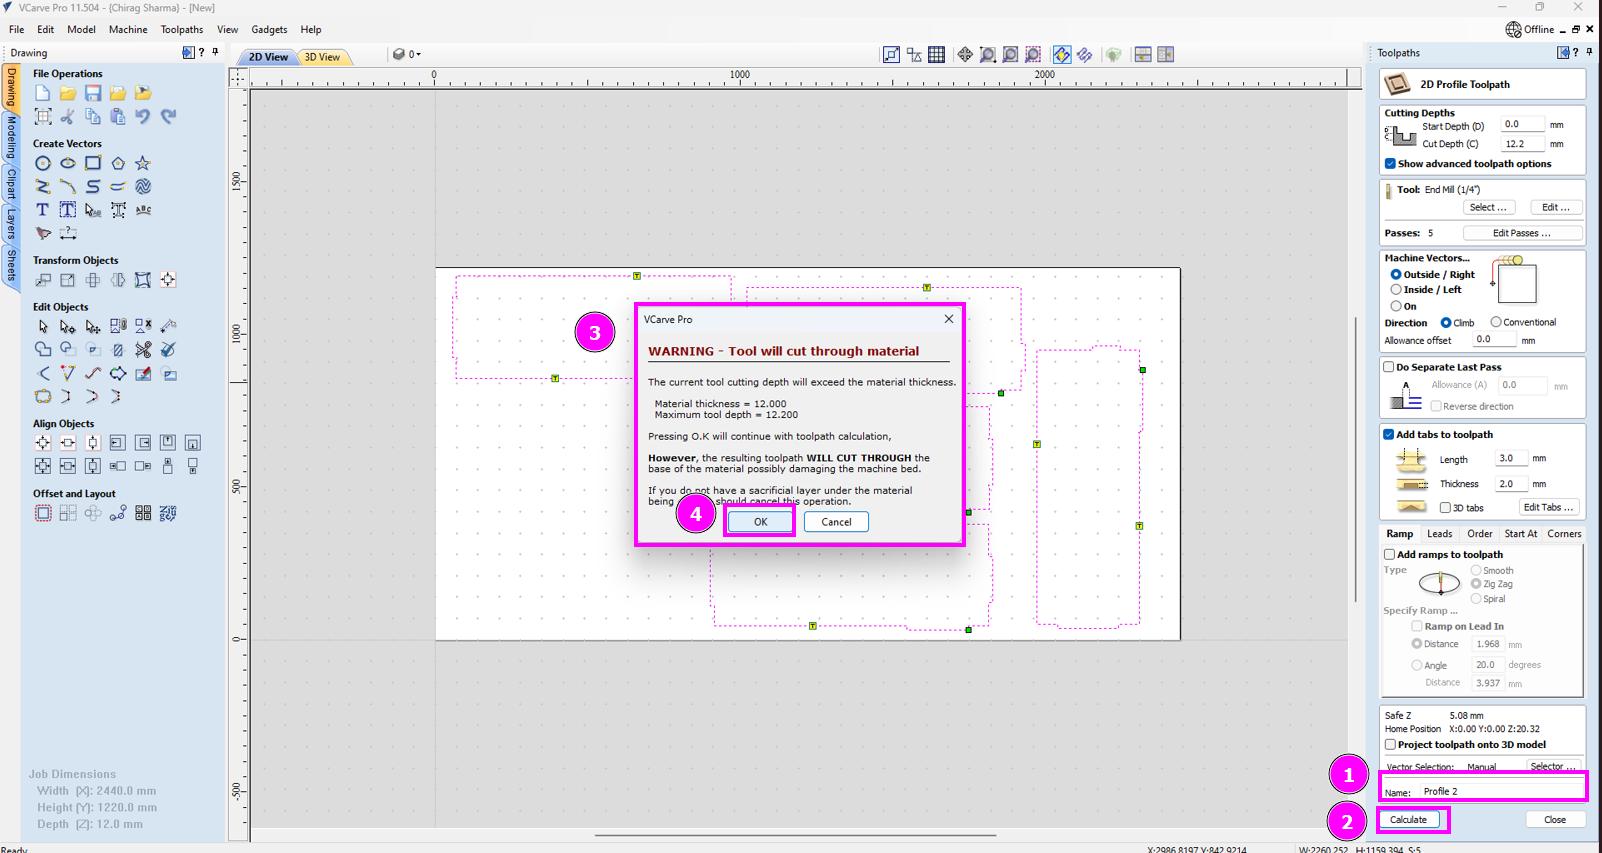
Skipping this warning because I gave the extra 0.2mm so that the machine can cut through.
-
Select the profile, preview it.
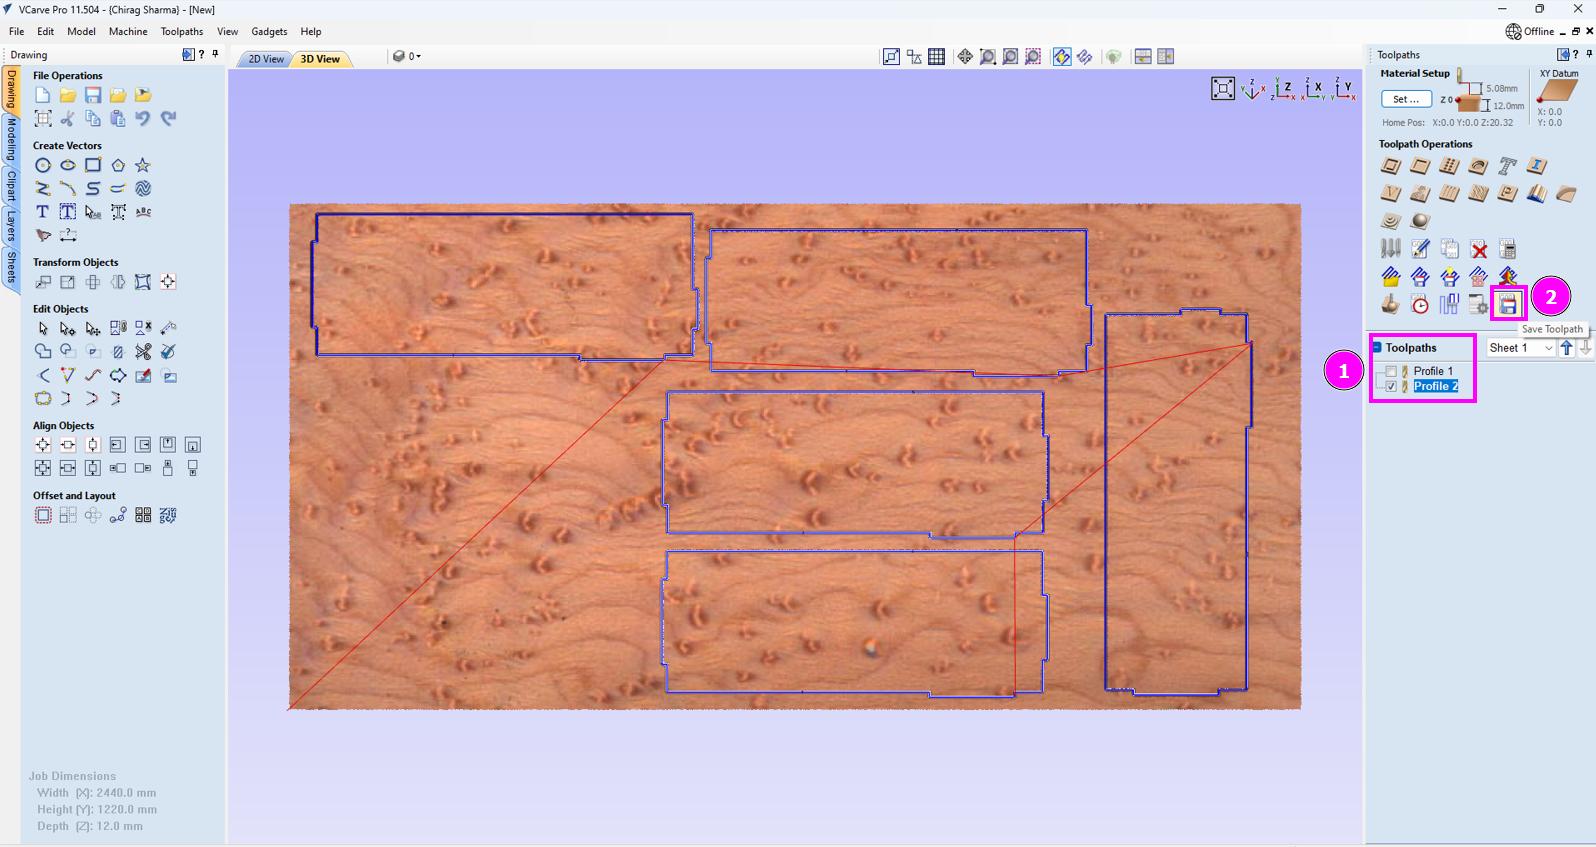
-
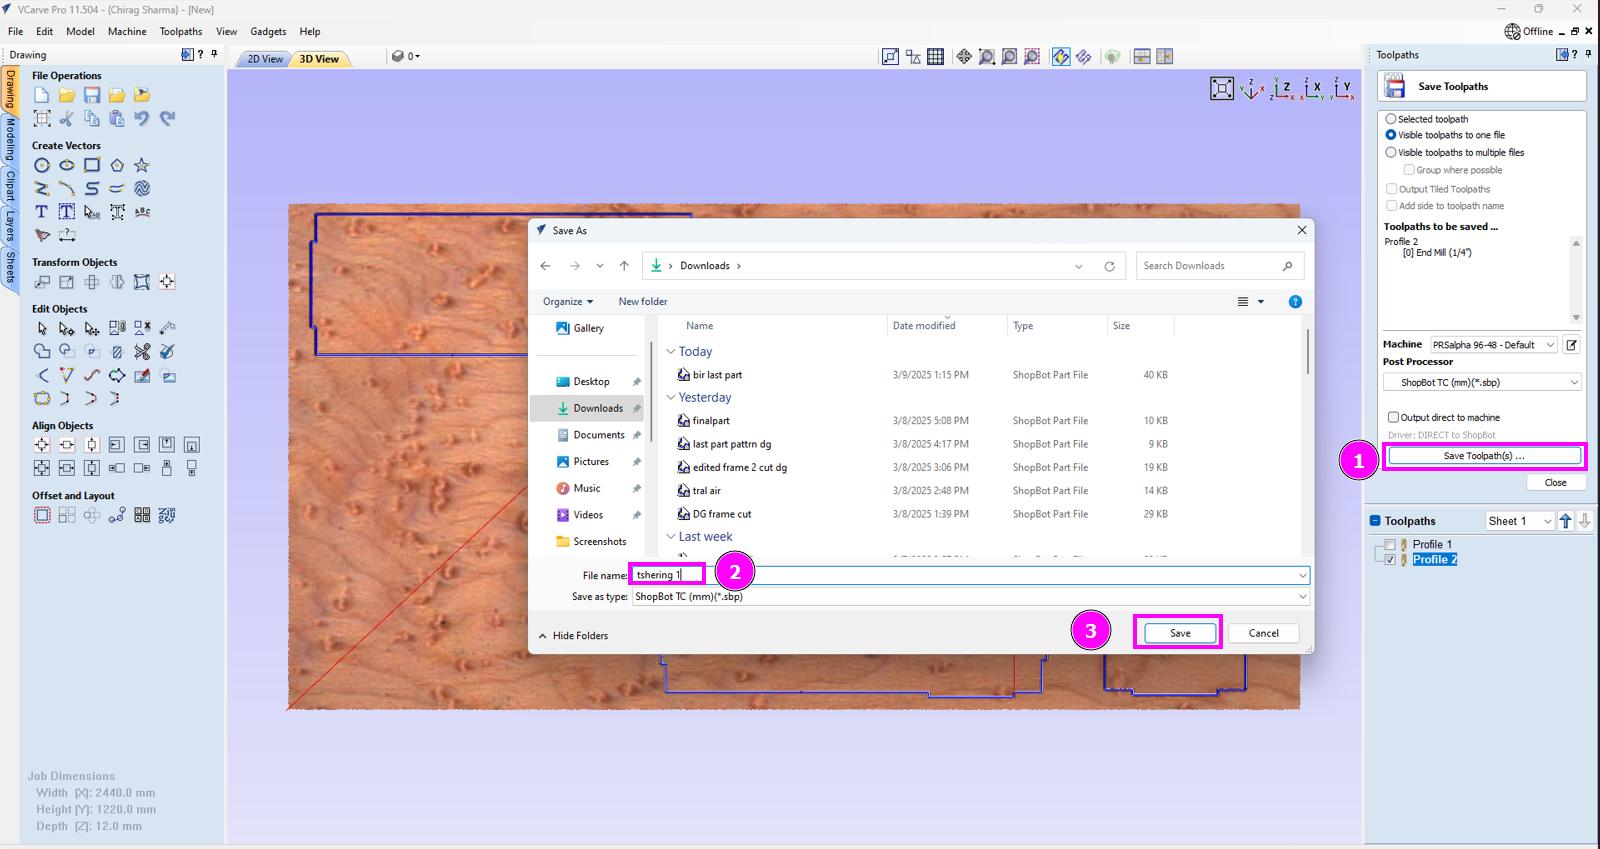
Save the toolpath.
-
Now Open Shopbot3 software and complete the xy calibration.
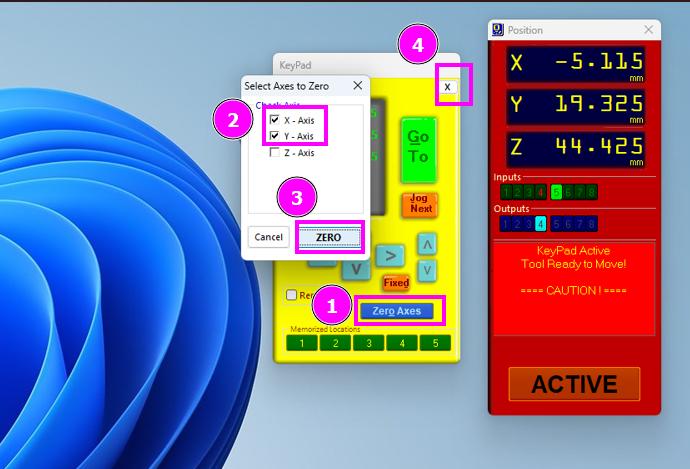
-
Also do the z calibration by clicking the z calibration menu.
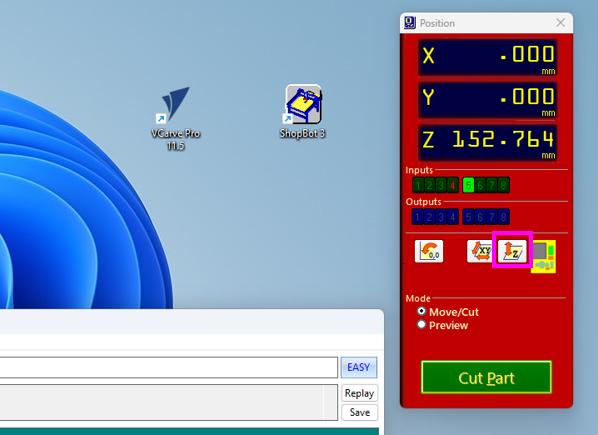
-
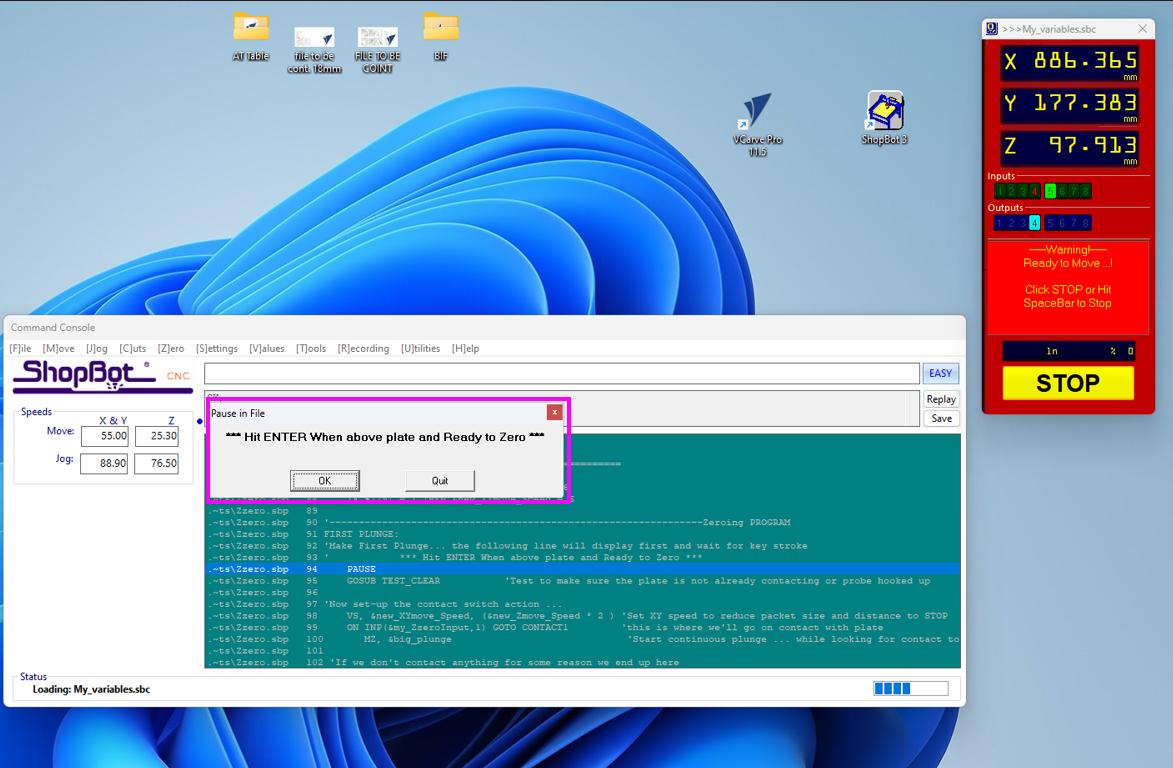
When this instruction pop up, put the plate used in z calibration on the job piece aligning with the position of the mill bit. Also connect the probe that is with the plate on the metallic part of the shobot. You can now go ahead with the z calibration and the machine will calibrate the z axis. Once done, put the plate and the probe back in its position.
-
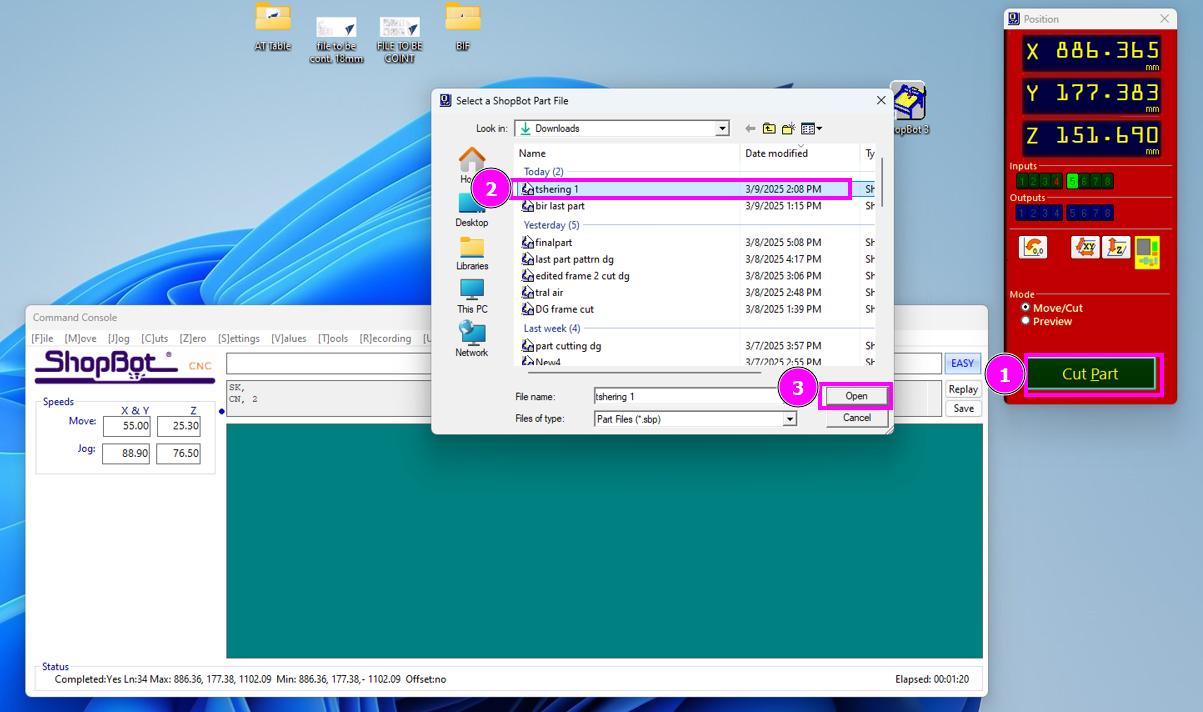
Click on “Cut Part” and select the toolpath which you created earlier.
-
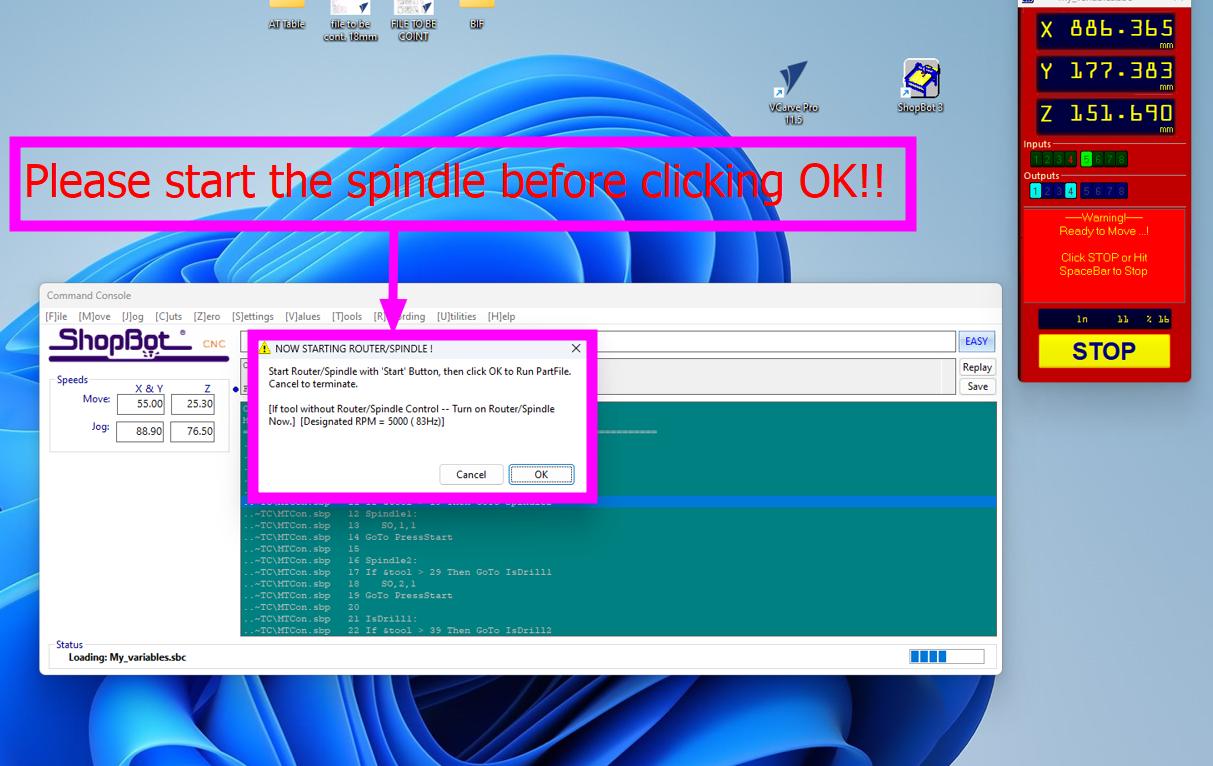
This is very important. Always remember to turn on the spindle when the reminder/instruction message pops up as shown below. If you miss this step, your machine will start moving without actually spinning. And this causes the drill bit to break.
-
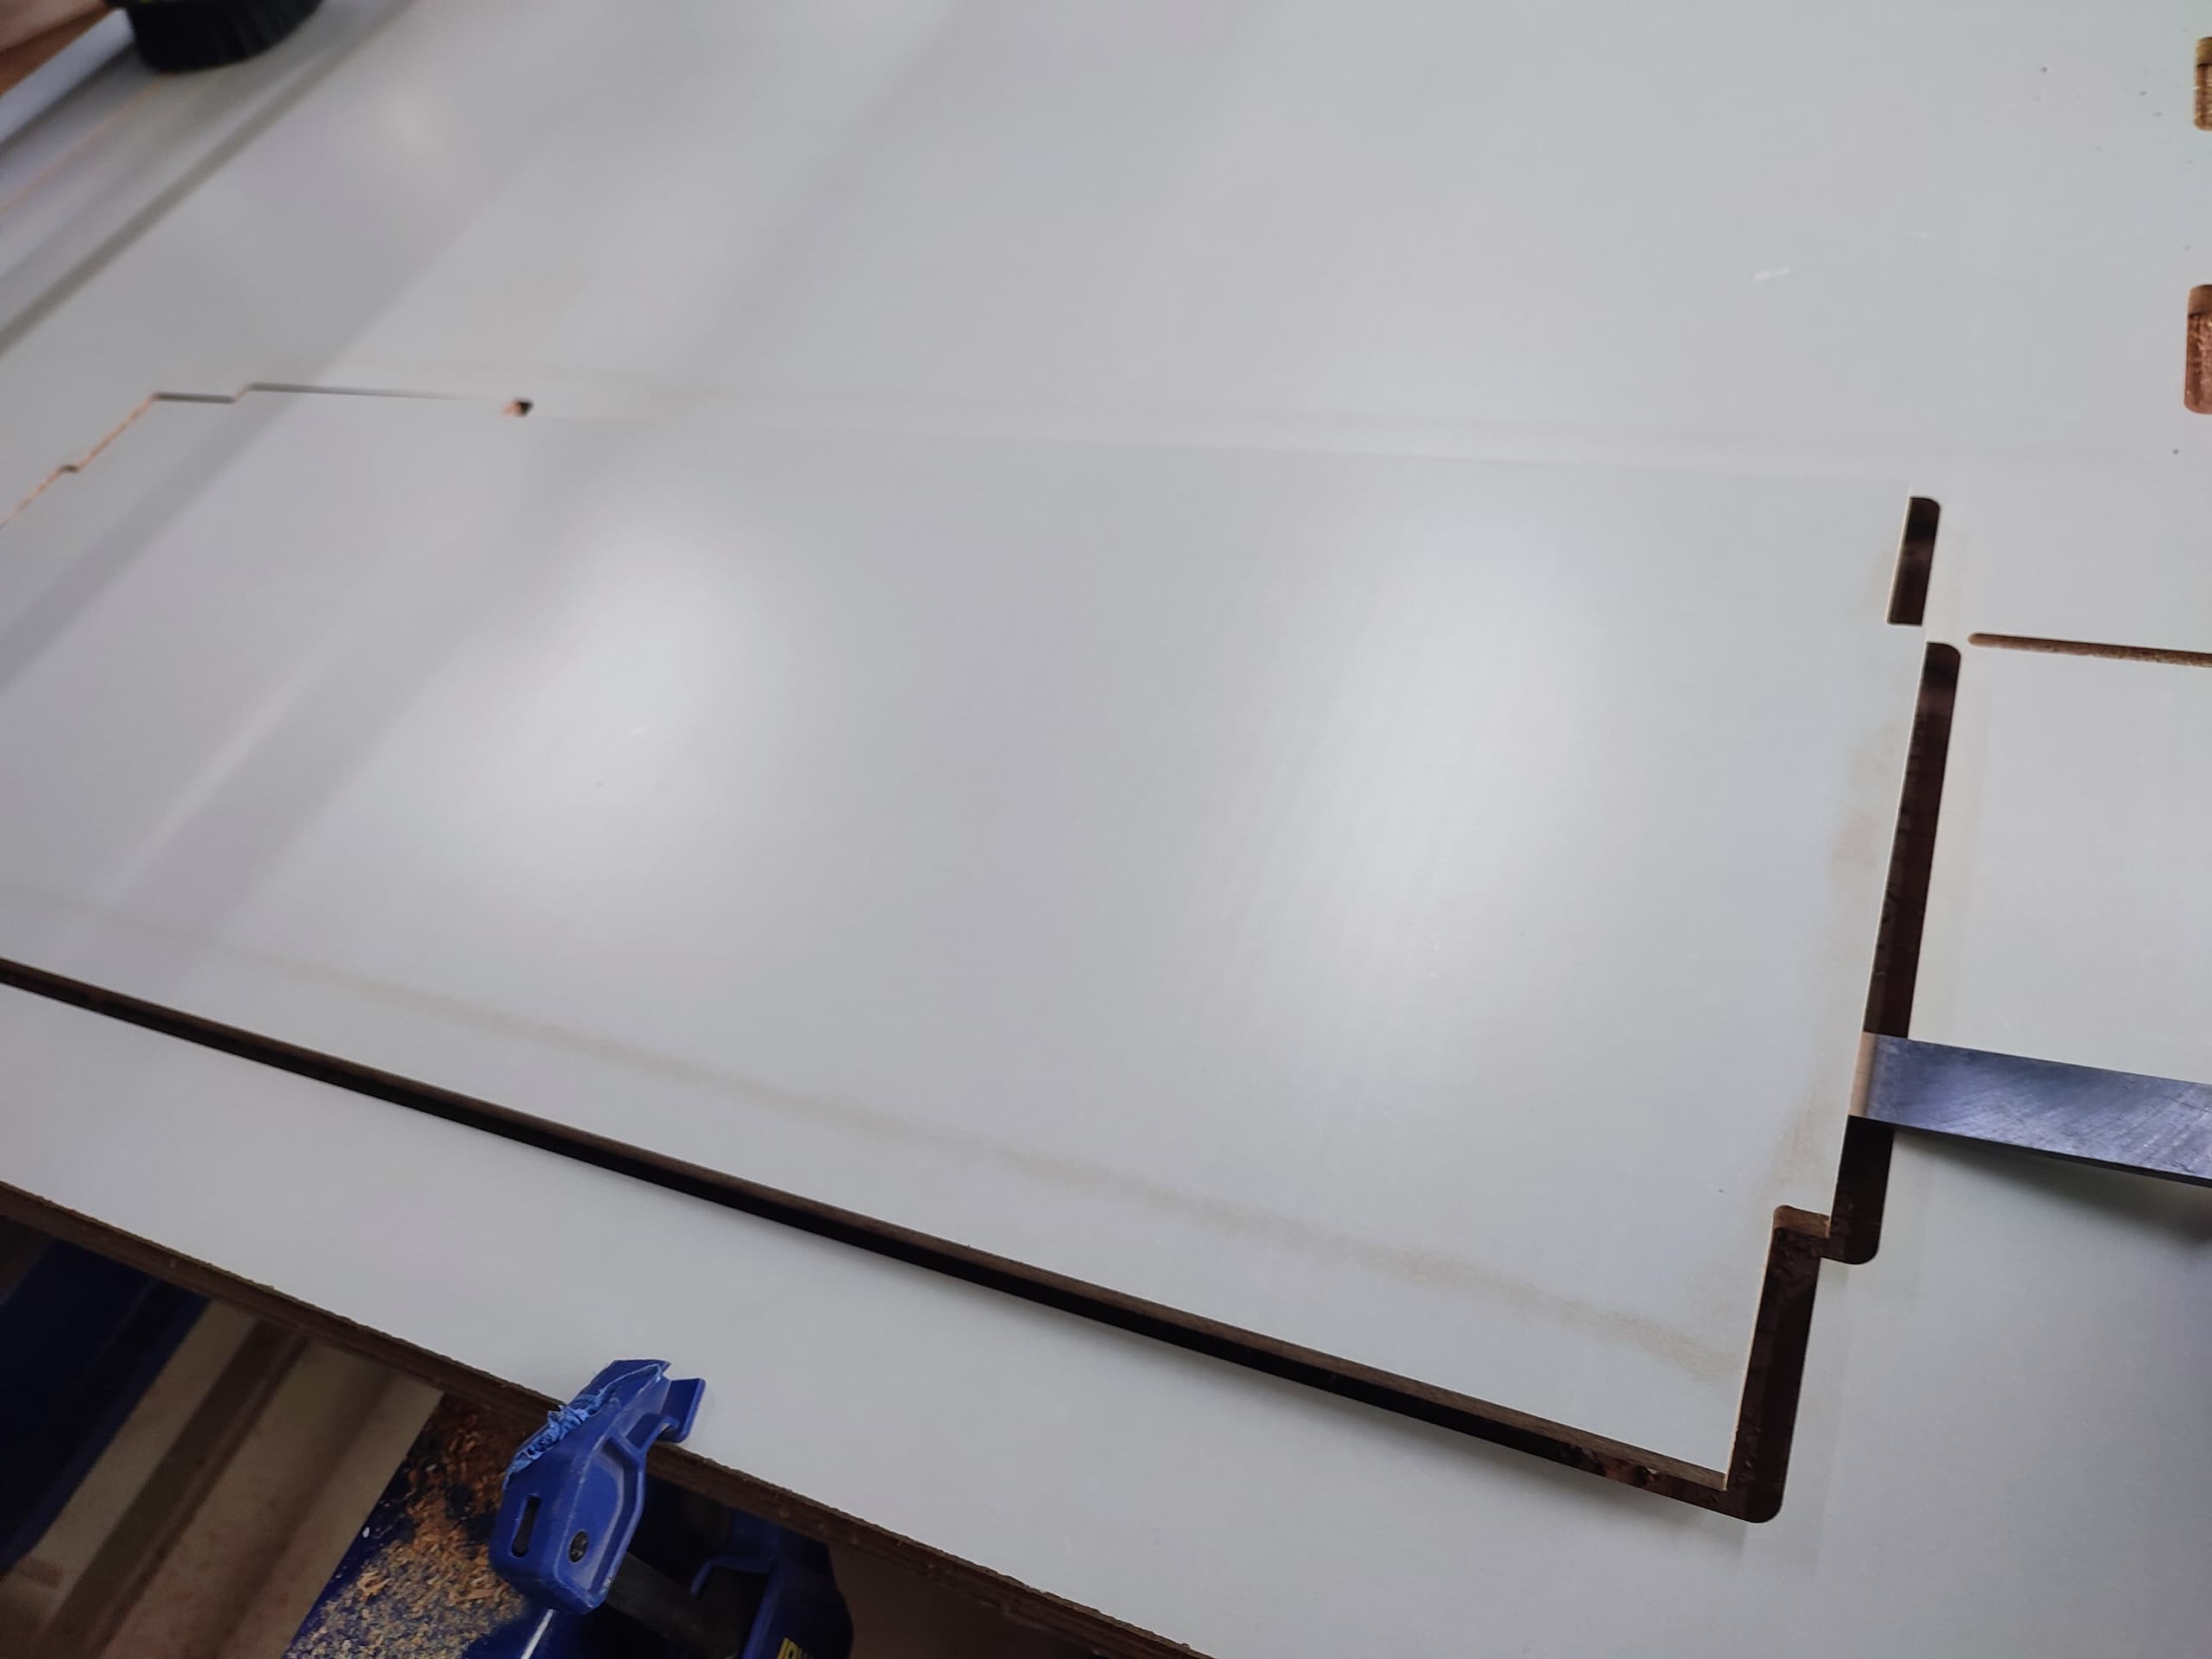
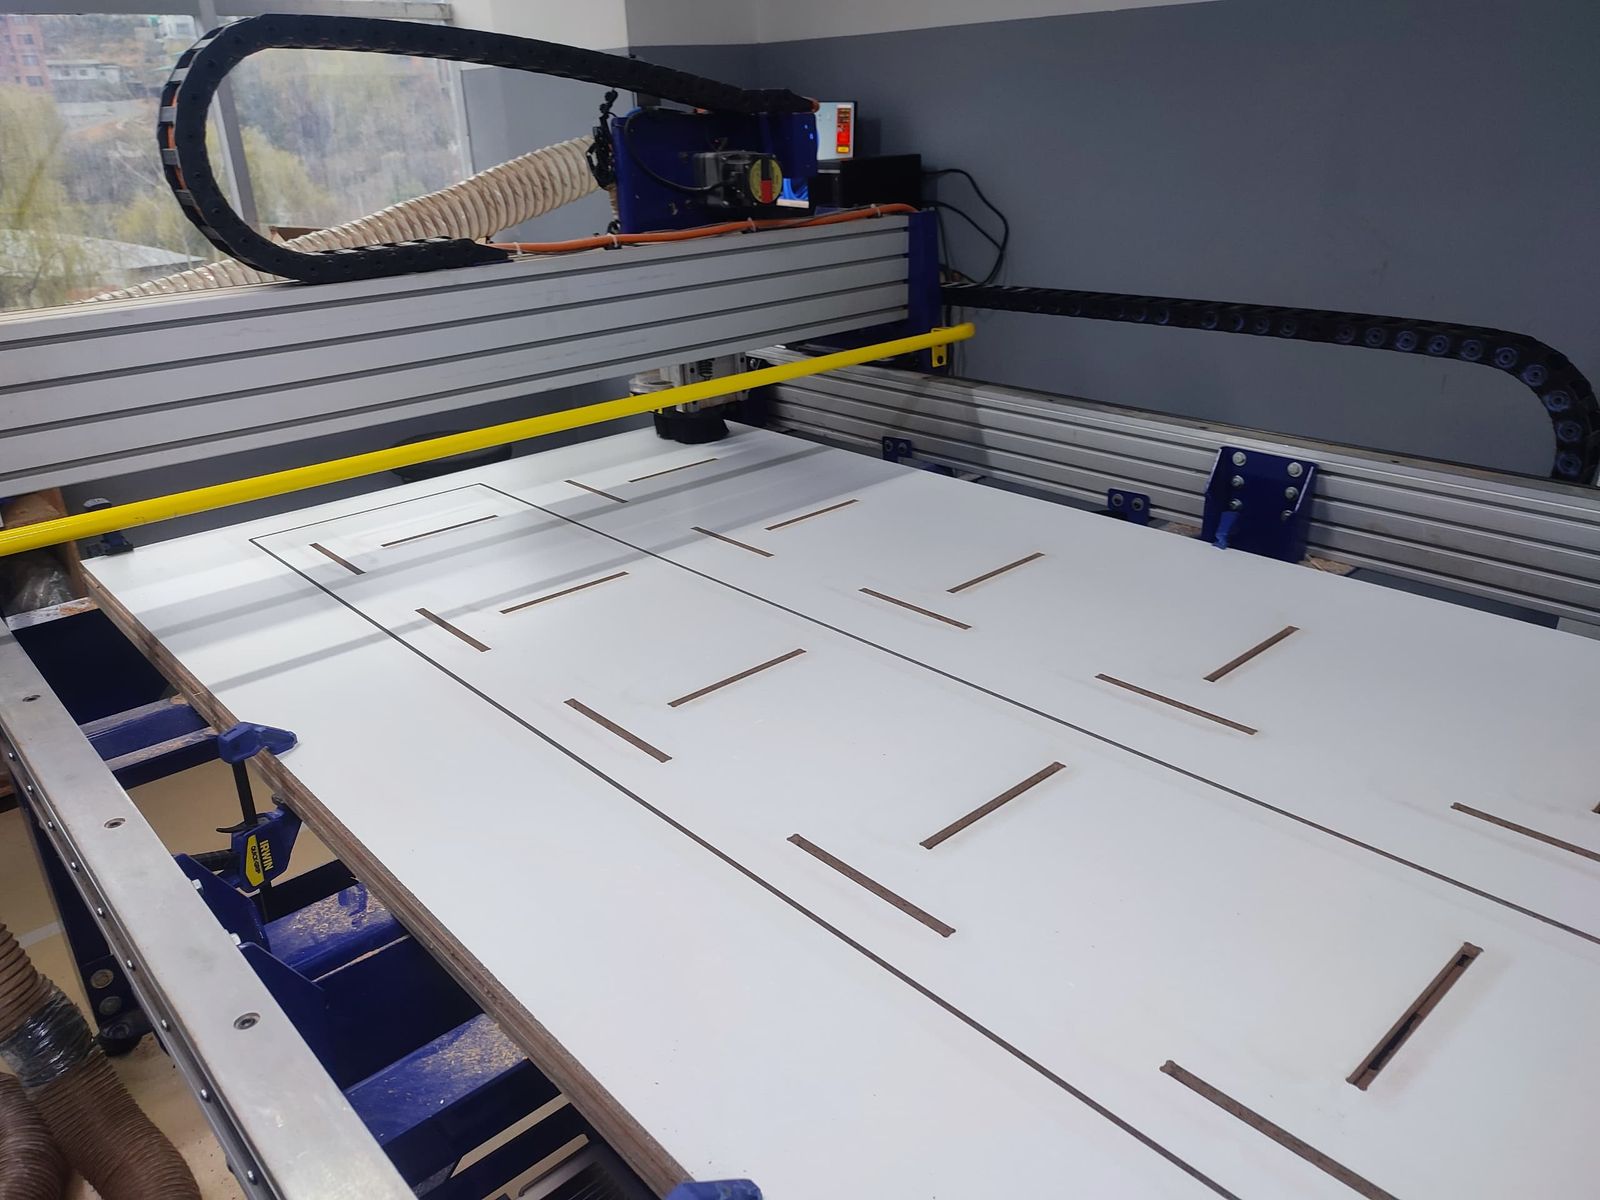
Completed cutting the compartment parts and taking out from the shopbot.
-
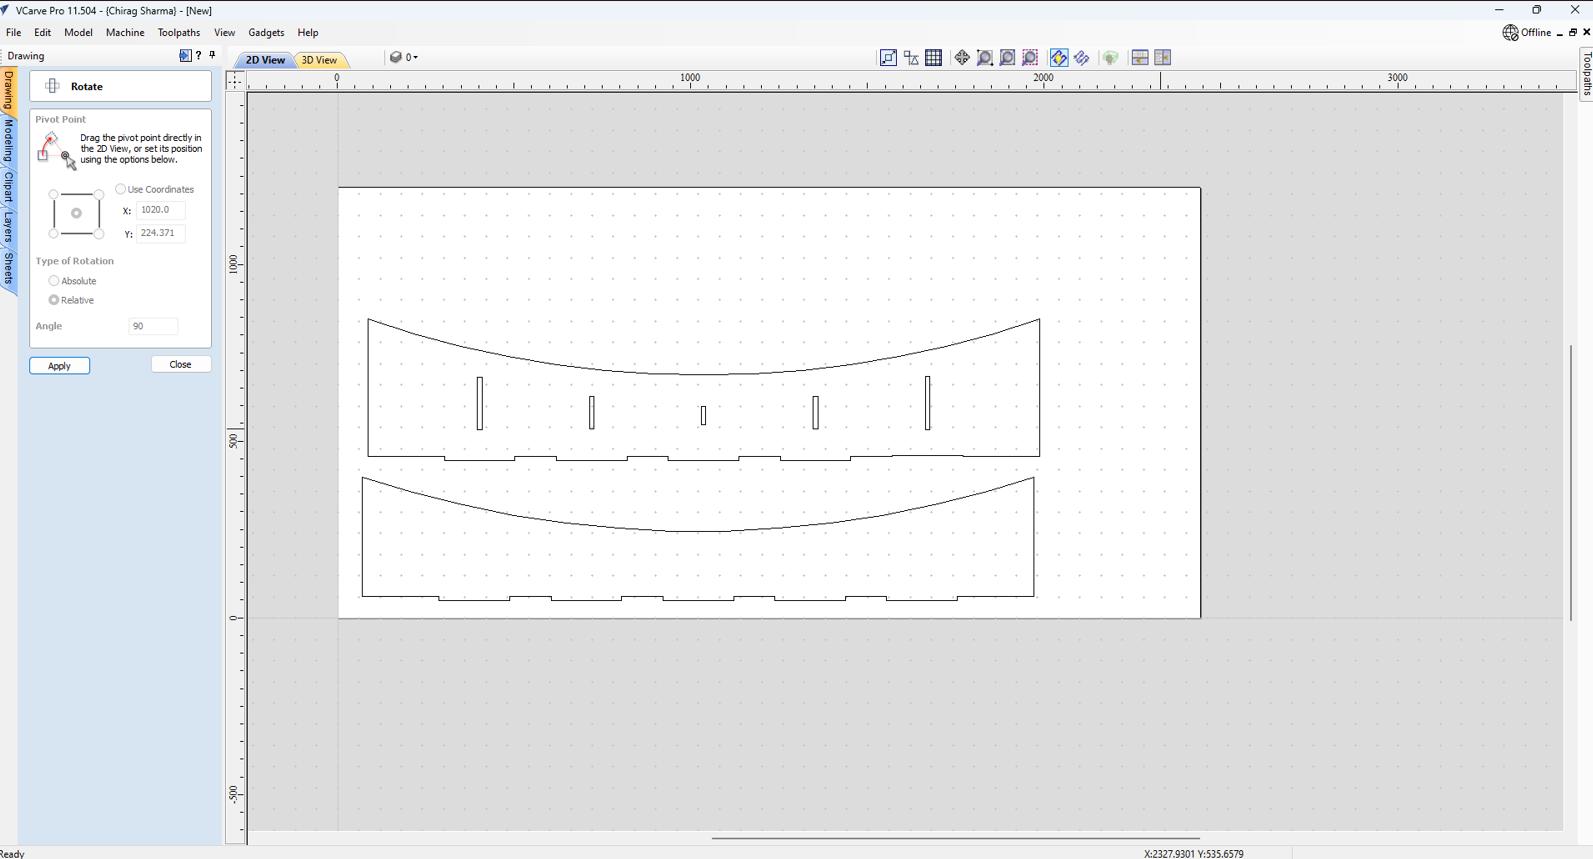
Preparing the files of remaining parts of my bookshelf following the same steps described earlier.
-
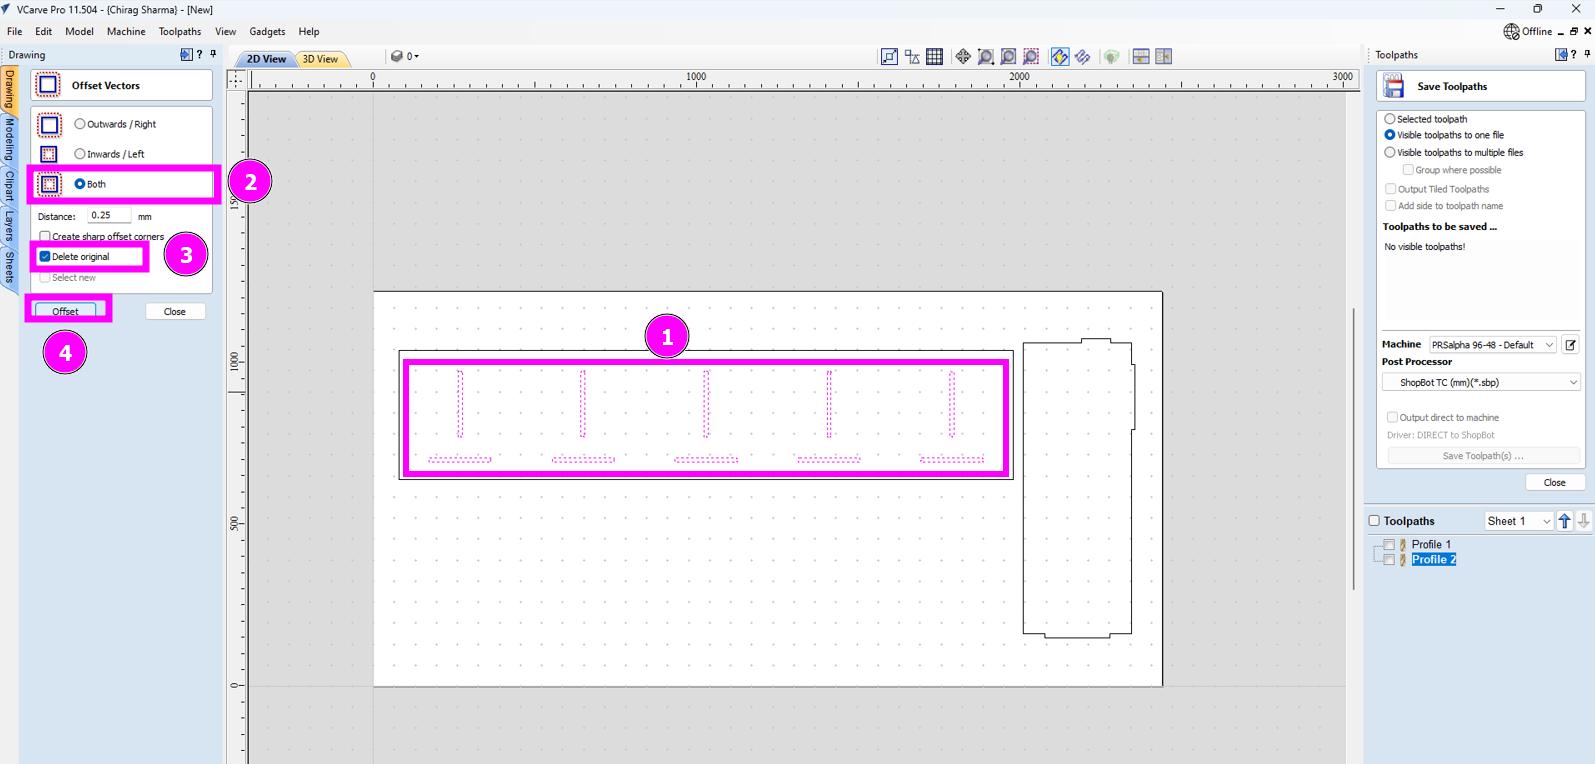
But this time, I have slots to handle. For that, some offset were given because we did some test on slot and fitting beforehand so that the parts will fit into the slots without much space and resistance.
-
Defining the number of passes. It is also important to note that we have to give “Inner” for machine vector because we don’t really need the parts inside the slot.
-
Now select the edges and create the profile.
-
Also don’t forget to give the tabs.

-
Now create the toolpath and save it.
-
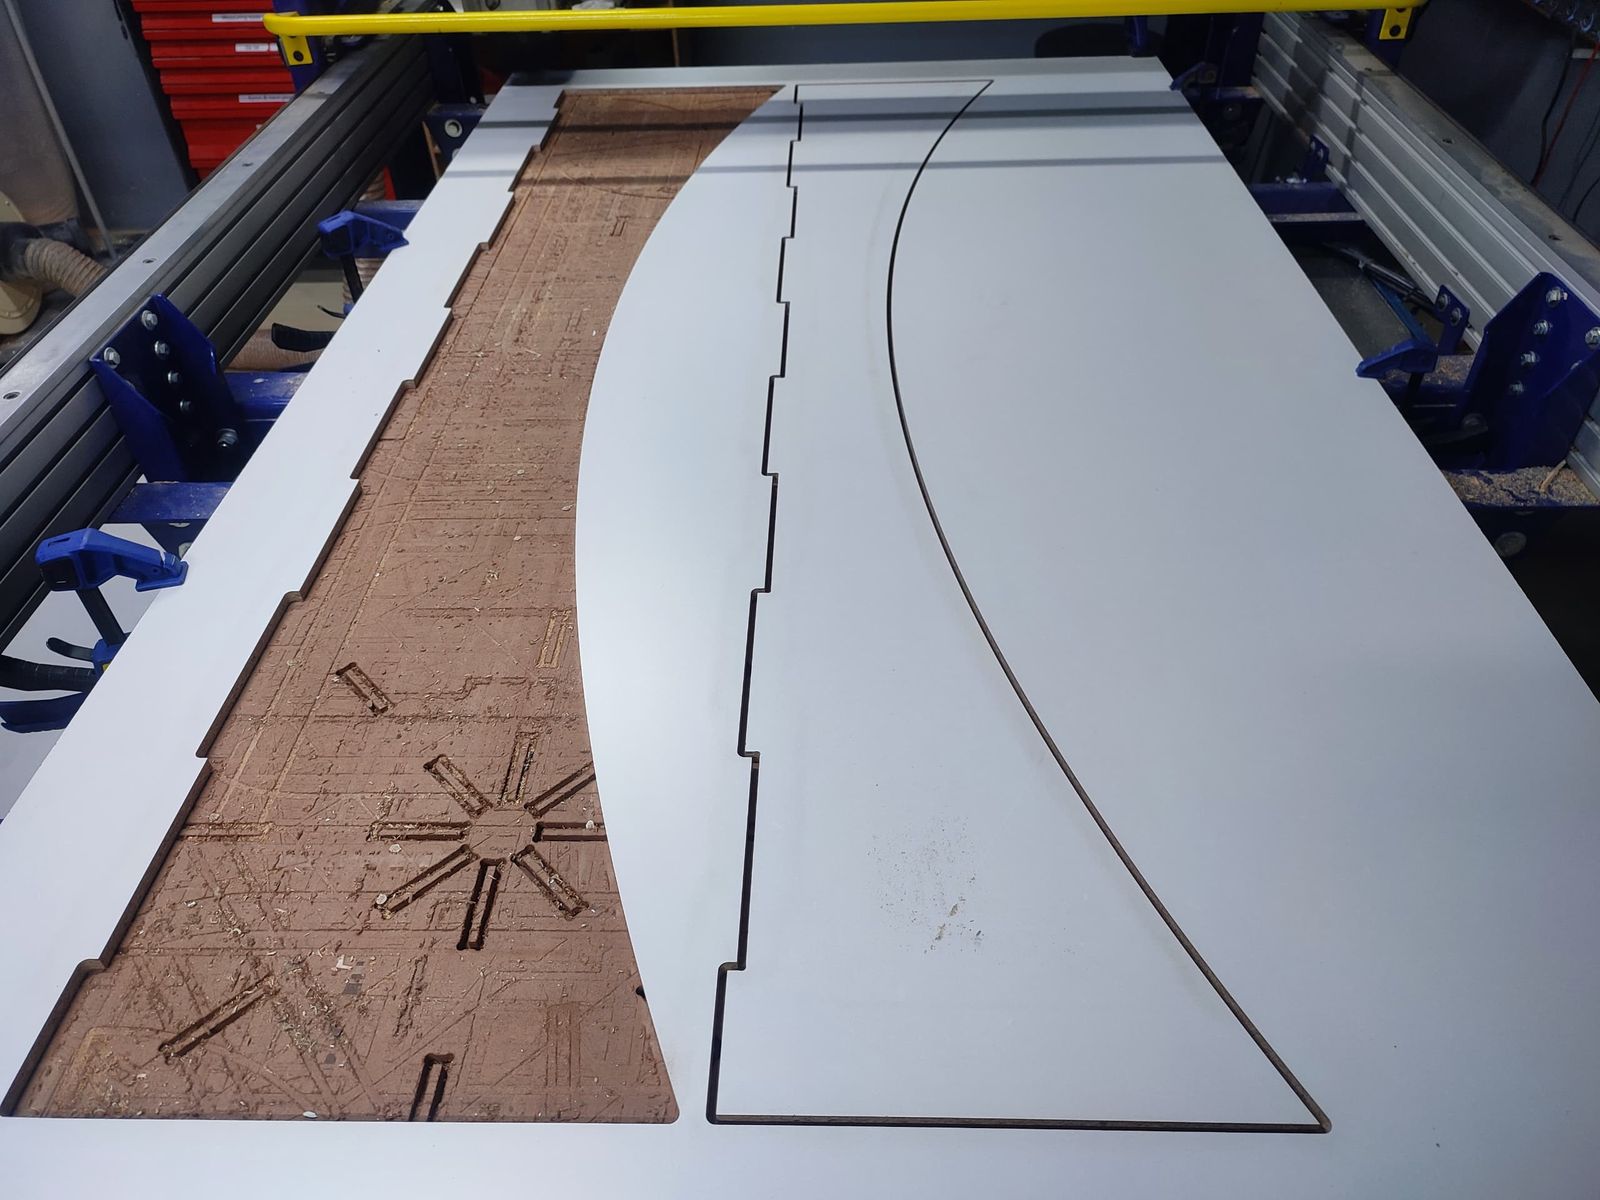
Finish cutting this parts as well.
-Now buckling up for the last parts. For this, I created two different profile; one for slots and one for edges. Created the toolpath and saved it. Then I spin the machine for one last time.
-
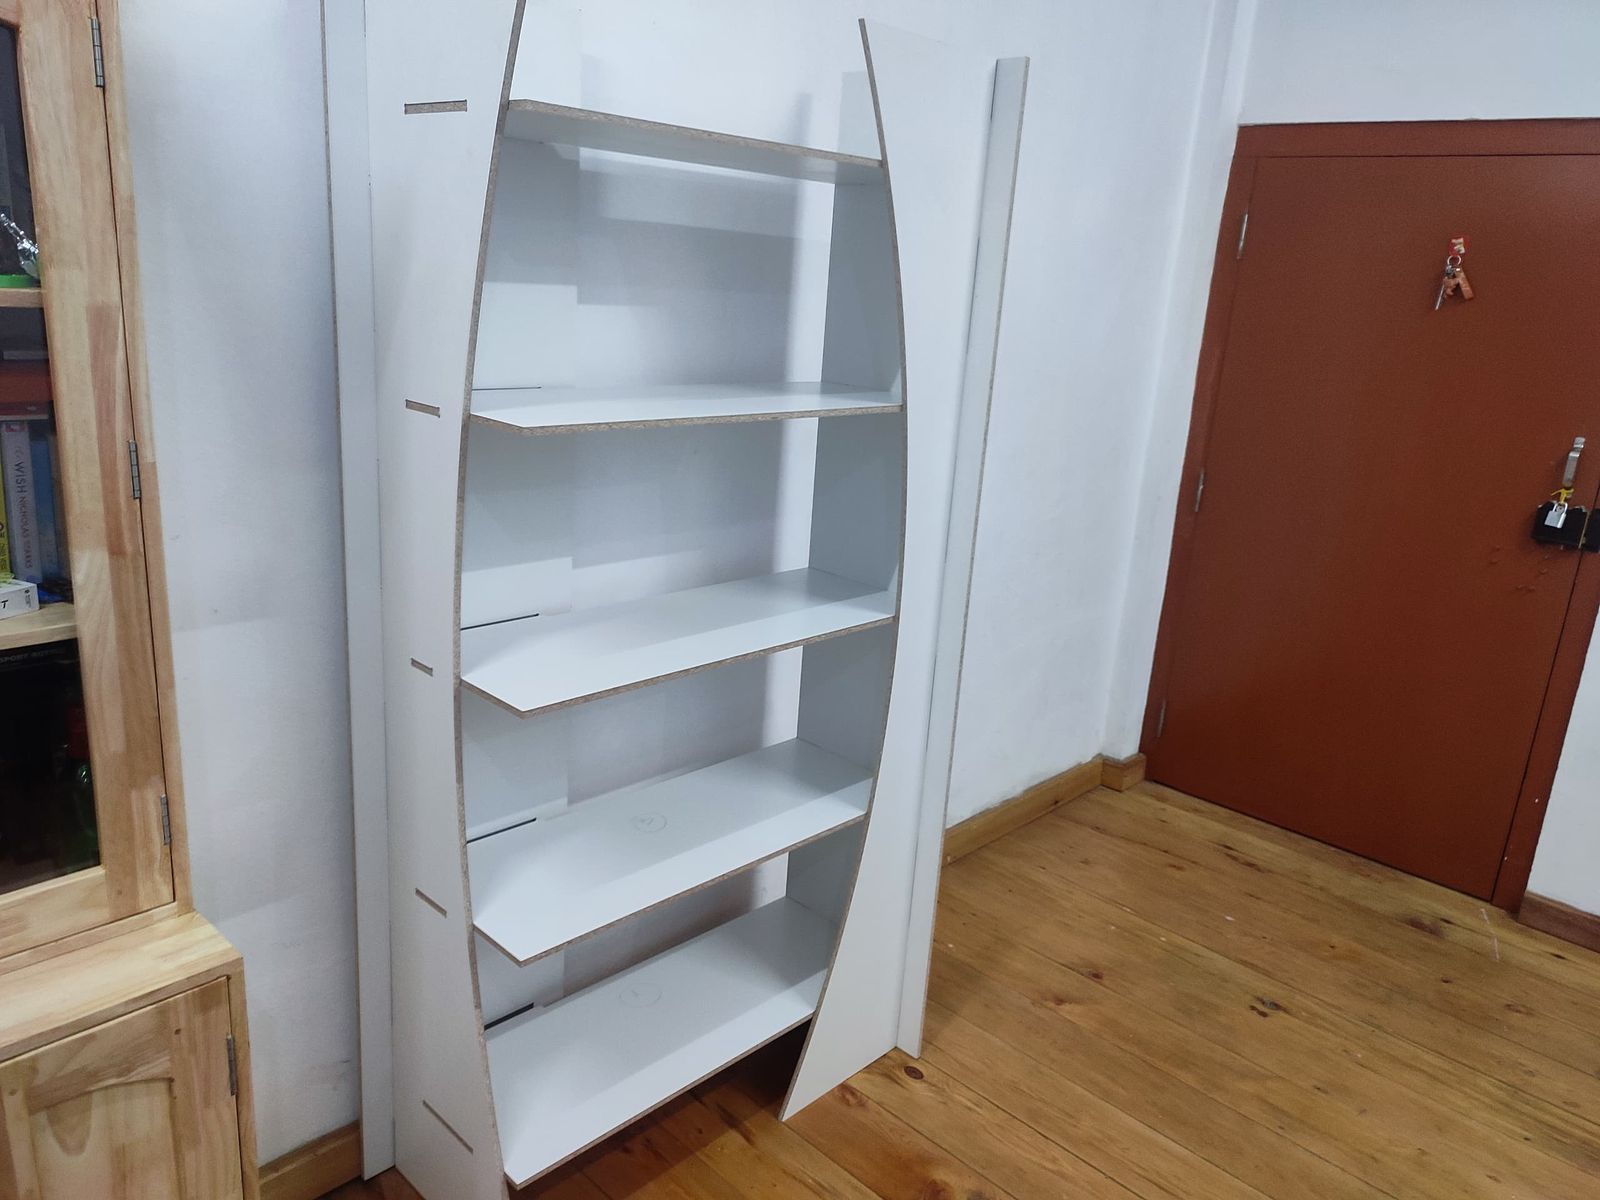
This is the parts.
-
Bookshelf Assembly Animation
-
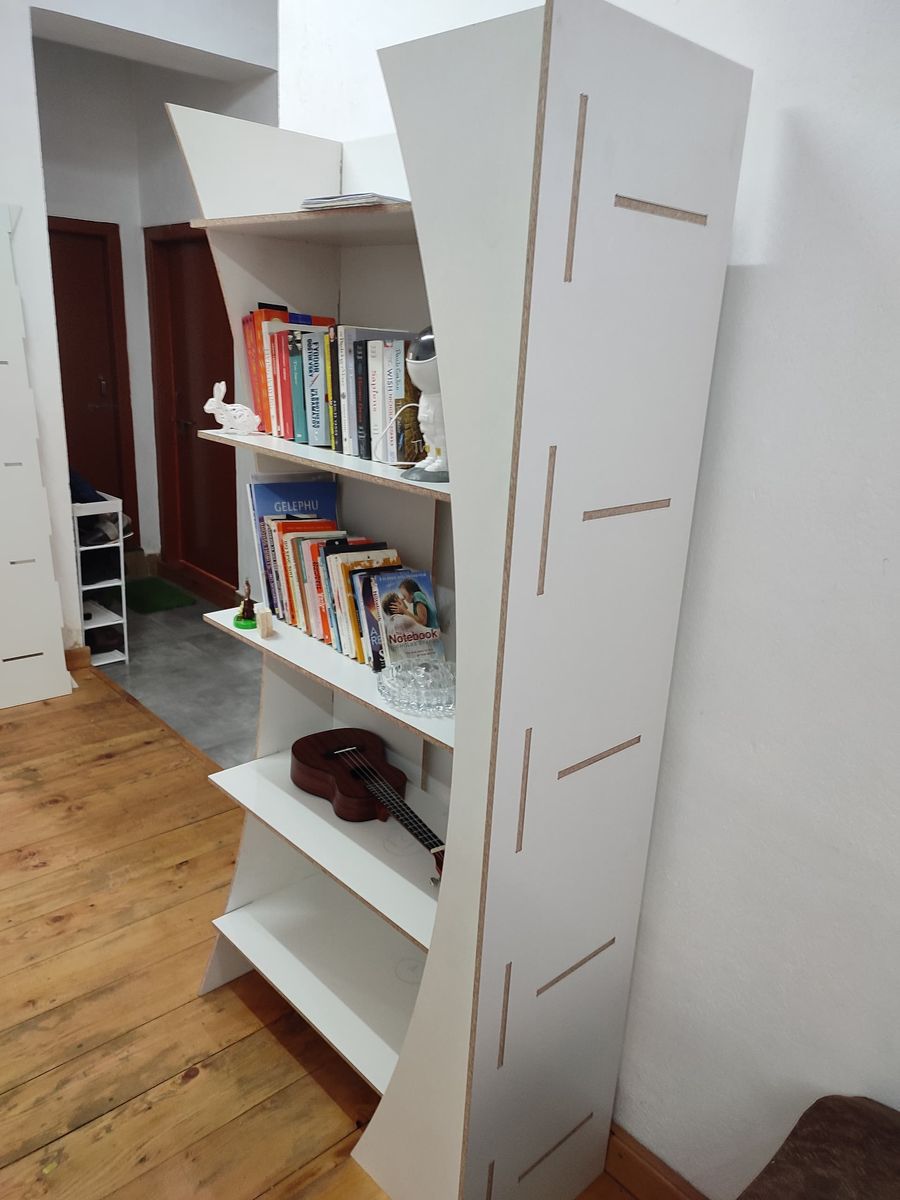
My bookshelf came out quite nice and I am quite excited to read more books and put them on my bookshelf.