This week's assignment was:
- Design and produce something with a digital process (incorporating computer-aided design and manufacturing) not covered in another assignment, documenting the requirements that your assignment meets, and including everything necessary to reproduce it. Possibilities include (but are not limited to):
ORGANIZATION
Here I show how I organized myself for this week.
| Wednesday 8th: | Fab Academy classes, organization for the week and review of old documentation to understand the assignment. |
|---|---|
| Thursday 9Th: | Textile machine review, first steps in the embroidery machine software and discovery of embroidery techniques. |
| Friday 10th: | Logo design for garment embroidery, discovering the characteristics of the needles for the types of embroidery. |
| Saturday 11th: | Enter GLOBAL OPEN TIME to show my mistakes, resolve questions about the assignment and develop my embroidery on a garment. |
| Sunday: 12th: | Document everything developed and celebrate Mother's Day here in Peru. |
| Monday 13th: | Review and correction of documentation. Update and changes for last commit. |
| Tuesday 14th: | Documentation and last commit of the week. |
ASSIGNMENT
COMPUTERIZED EMBROIDERY
BOARDING MACHINE - BROTHER PE-780D
For the development of the week's assignment I had to visit my colleagues Jesus and Silvana in their FAB LAB "GARAGE LAB" where they had the BROTHER PE-780D embroidery machine that they invited us to use since they had not used it much either. Here are some specifications of the machine I used for the assignment.
| STITCHES X MINUTE: | 650 x minute |
|---|---|
| MAXIMUM EMBROIDERY AREA: | 13cm x 18cm |
| AUTOMATISM: | Automatic winder and Automatic threading. |
| CHARACTERISTICS: | Sensor and thread cutter and card reader USB ports. |
INSTALLING SOFTWARE WILCOM EMBRIOIDERY STUDIO
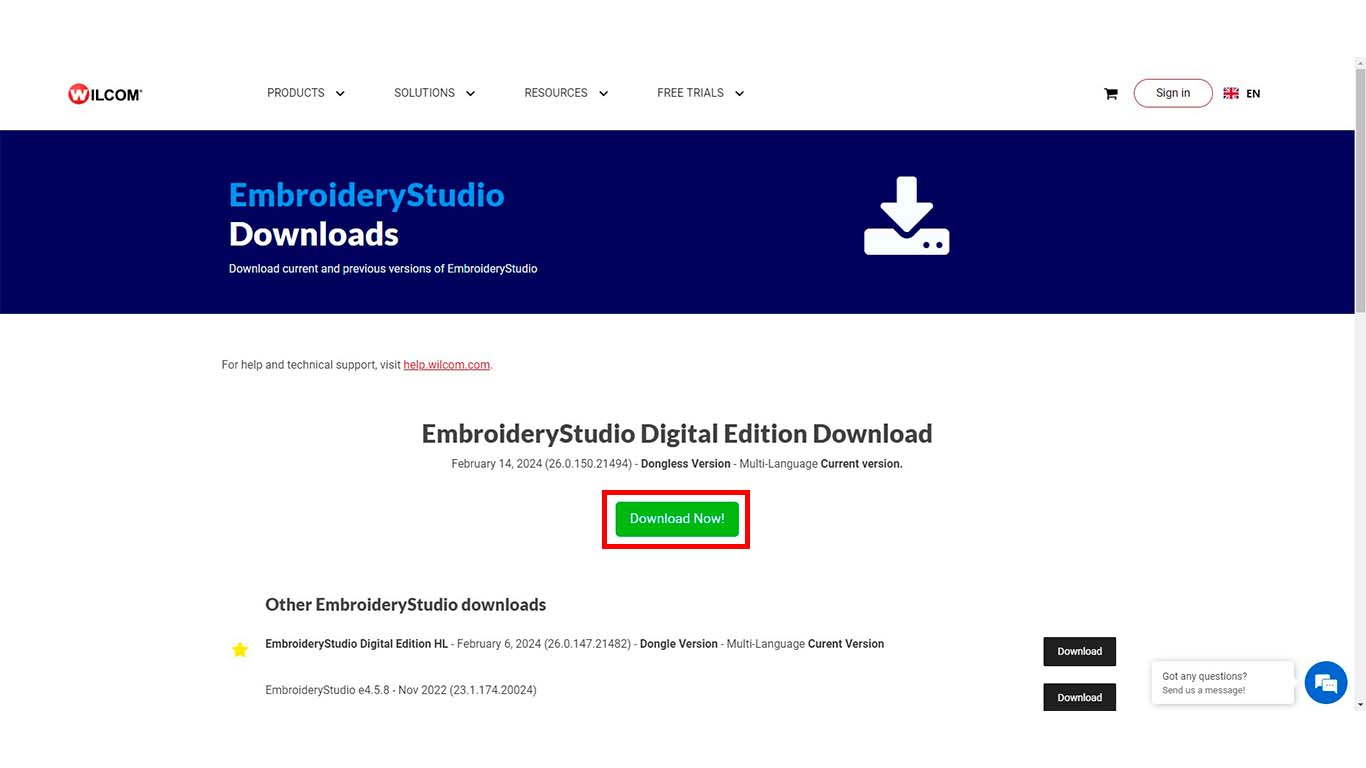
To start working with the machine I had to download the WILCOM program to develop my embroidery design of any design I wanted to make. Here I show you the installation of the program.
First, we search our computer for the WILCOM program and we can enter the following link where we will click on DOWNLOAD NOW.
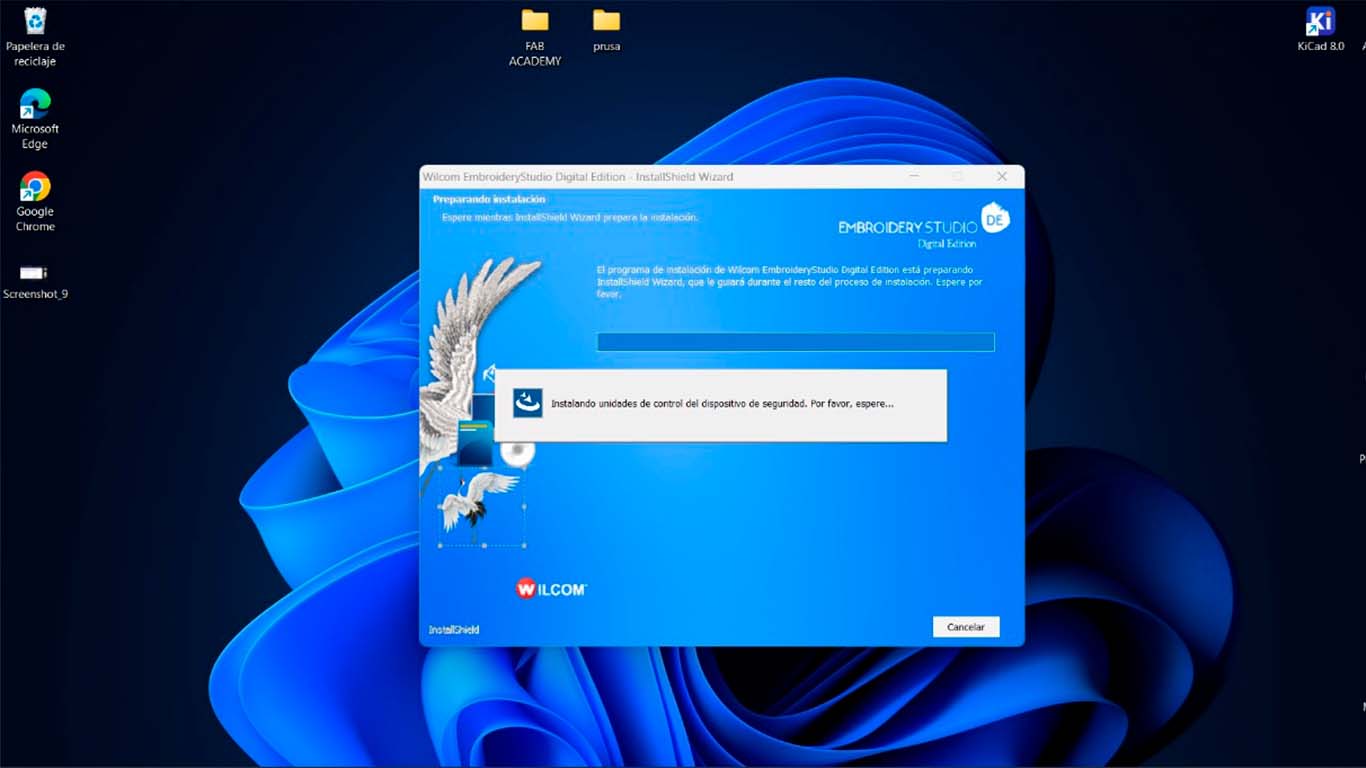
After being able to download the program installer. We open the file and we will begin the installation. First the software will do some checks on the machine and specifications of our computer.
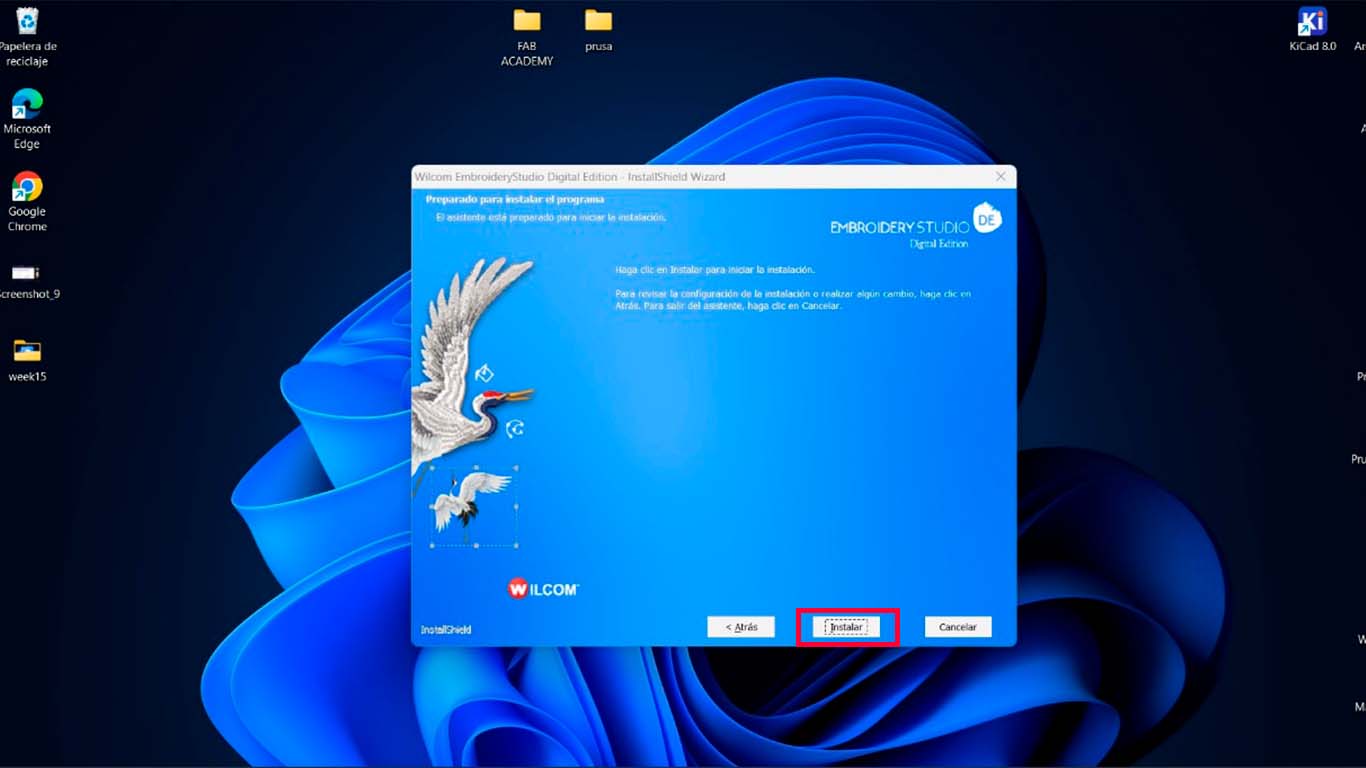
After the software verifies that our equipment meets the minimum characteristics for the installation of the program. The installation buttons will appear. Here we click on INSTALL
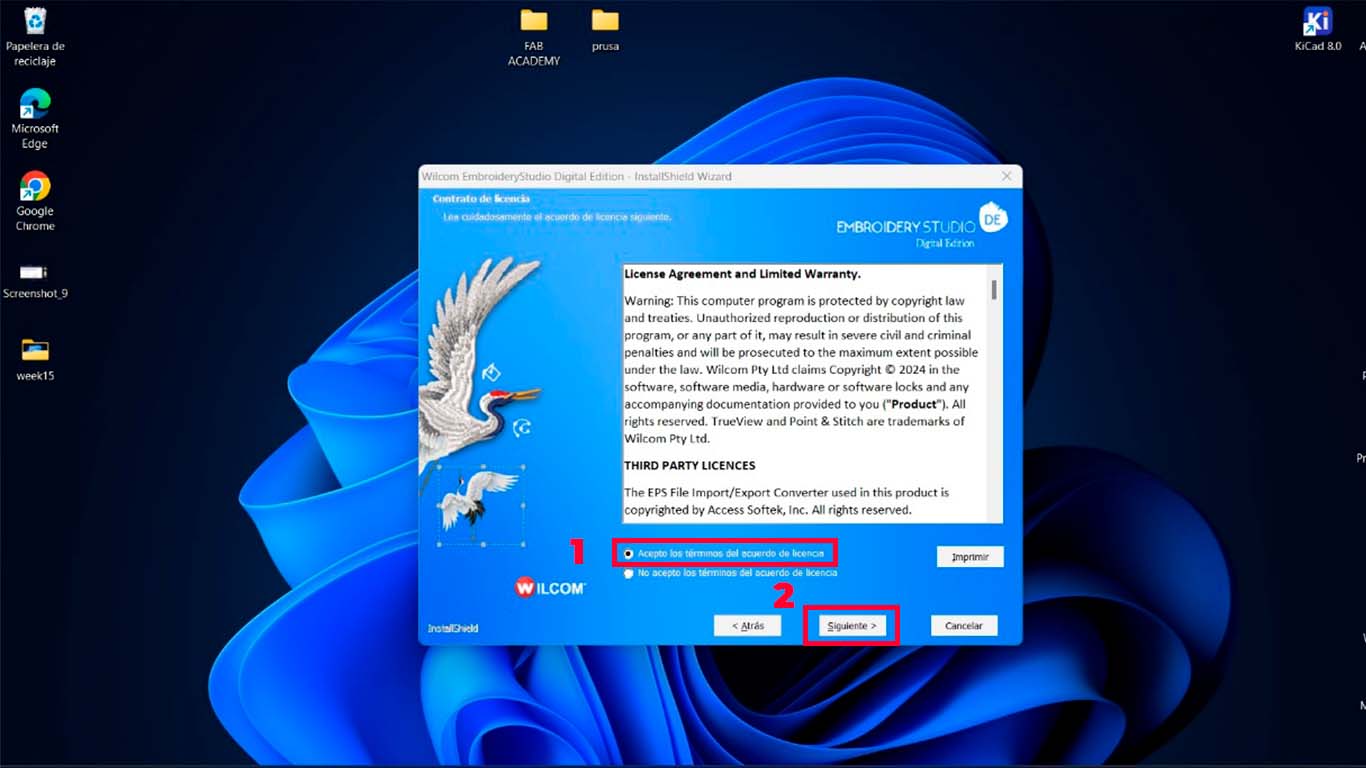
Some options appear to accept program licenses. First we will click on the FIRST OPTION and then we will click on NEXT.
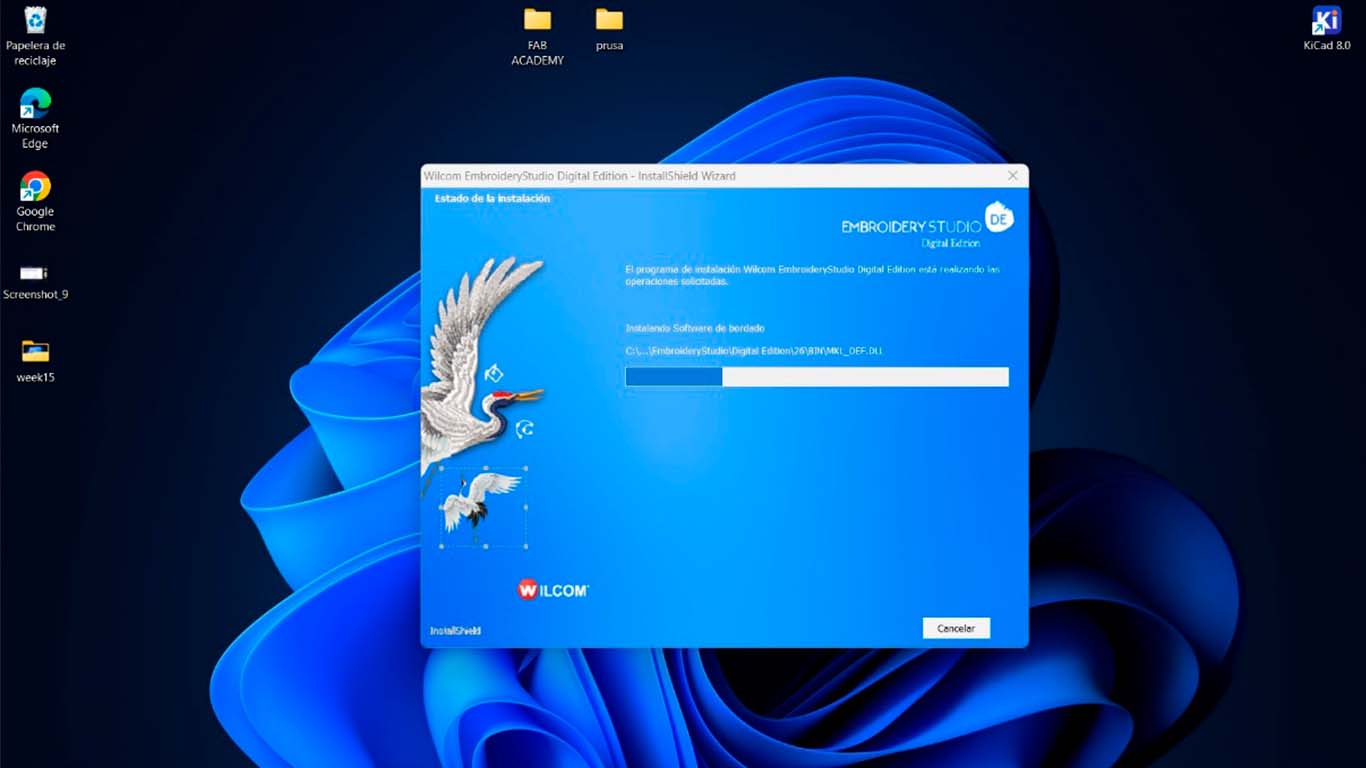
After completing the previous steps, the program will begin to install. Here it will take us 2 to 5 minutes to install the program.
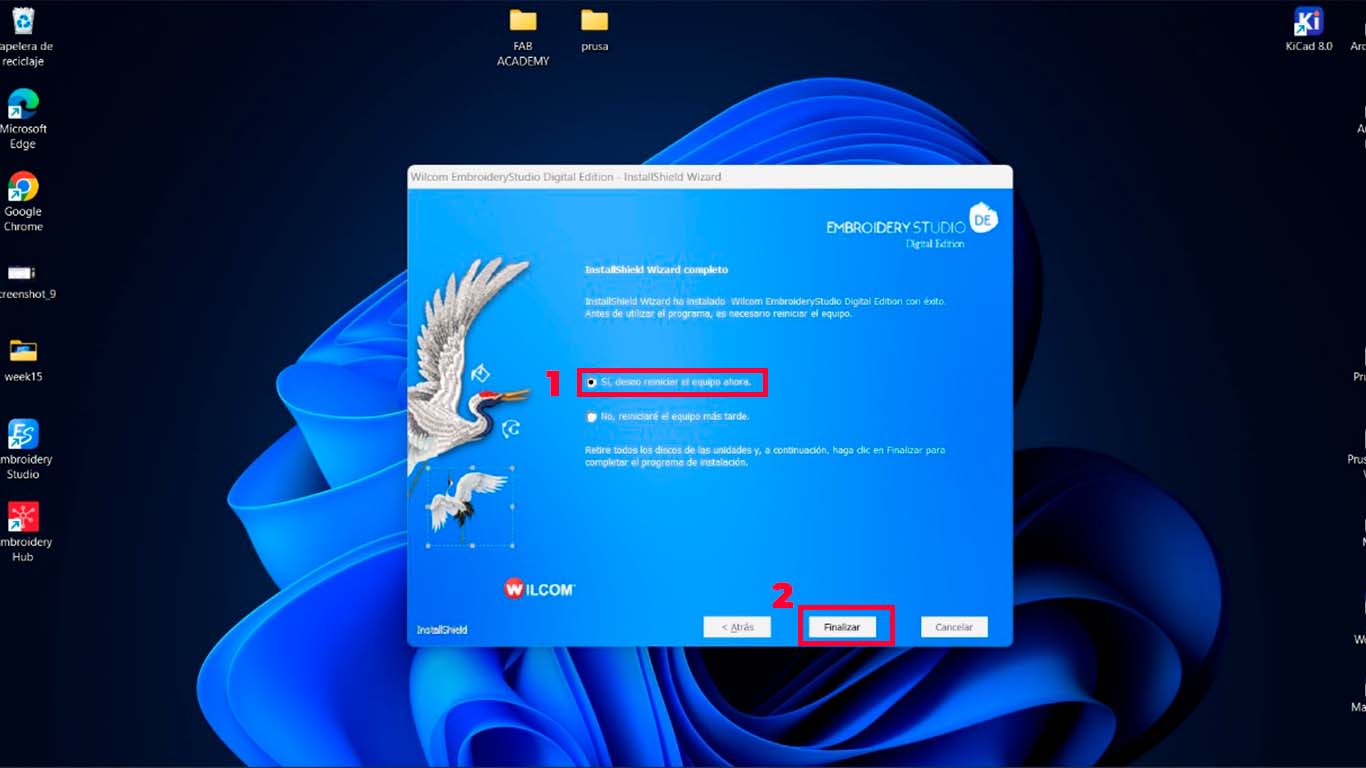
After the program has finished installing, a window will appear asking us to restart the computer. As a recommendation, it is better to click on the first restart option so that the program installs all the components and tools to ensure proper functioning of the software. And at the end, we finish it.
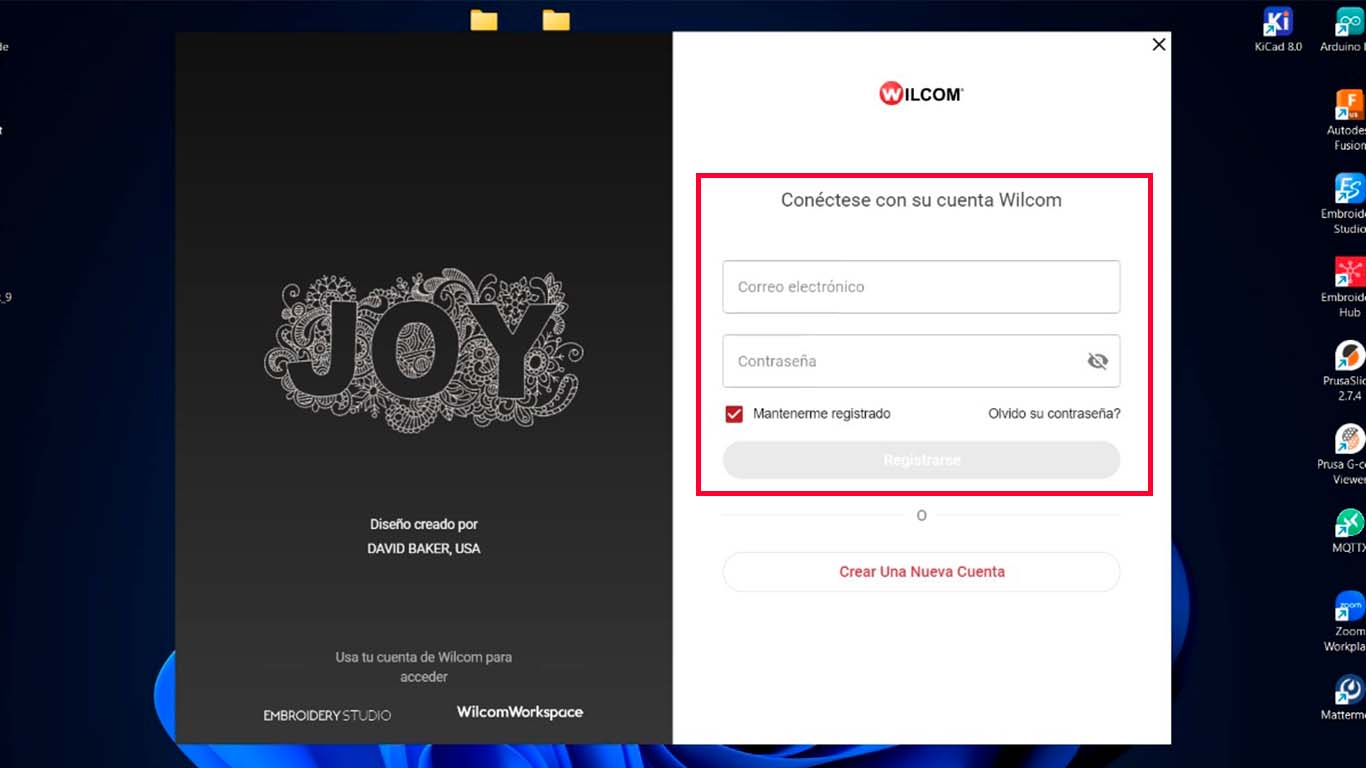
After restarting the computer, we proceed to open the program and the following window will appear where we must register with an account that we created before on the program page or we can create it here. It is important since it gives us a 14-day trial to use the software.
After creating the account or logging in with one we already had, we entered the program and this would be the WILCOM software that is used for textile embroidery designs. There are many programs, but by recommendation they told us that this is the most complete. Here you would be ready to receive any design and start working to send it to the machine.
EMBROIDERY TESTS
To start learning about embroidery and the types of fillings that exist, I started doing some filling tests since they were what I would need to achieve my design for the assignment. Therefore, with the support of my colleague Silvana, we decided to develop some tests with the FAB ACADEMY logo. We wanted to know what was the cleanest type of filler for embroidery that the machine had. Here the process of it.
FILLING TYPES
First we import the fab academy logo to the WILCOM program, as a JPG. In my case, I saved it to the desktop. After that we click open.
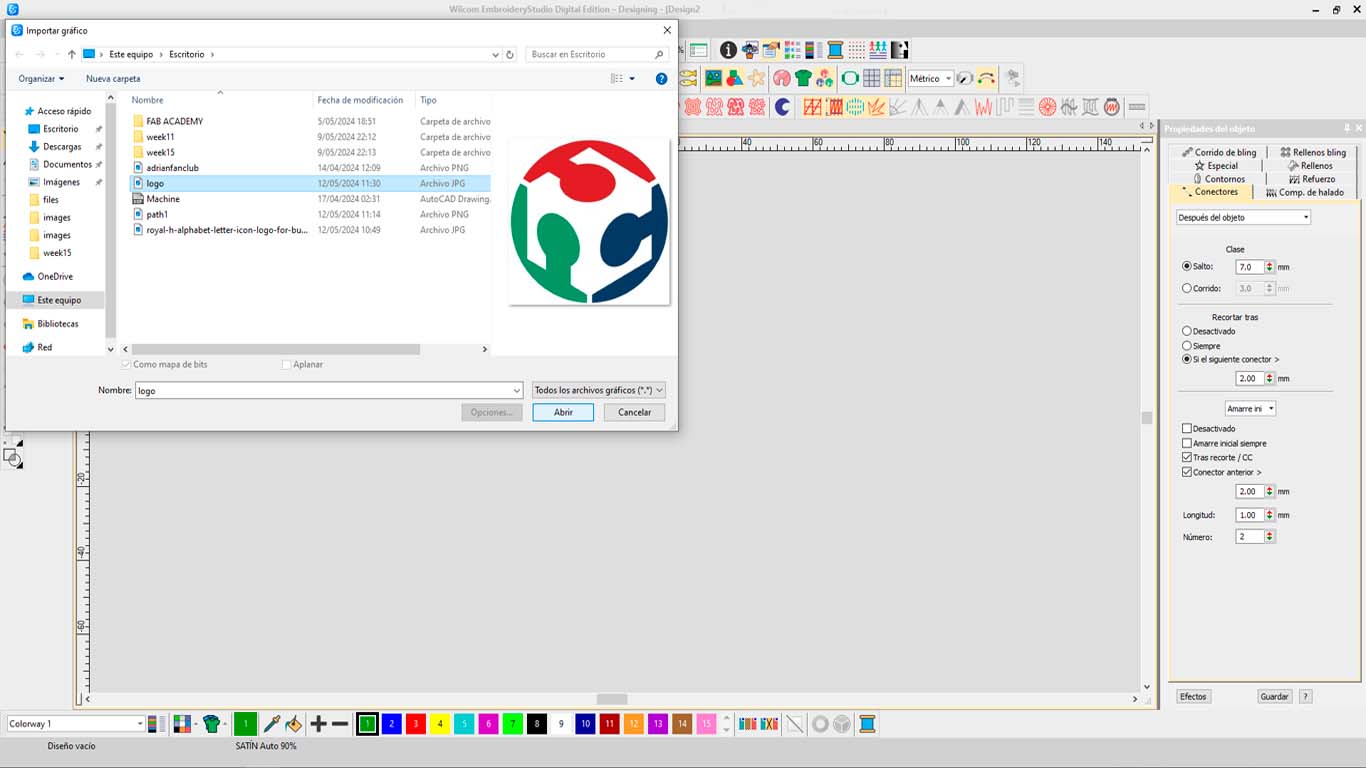
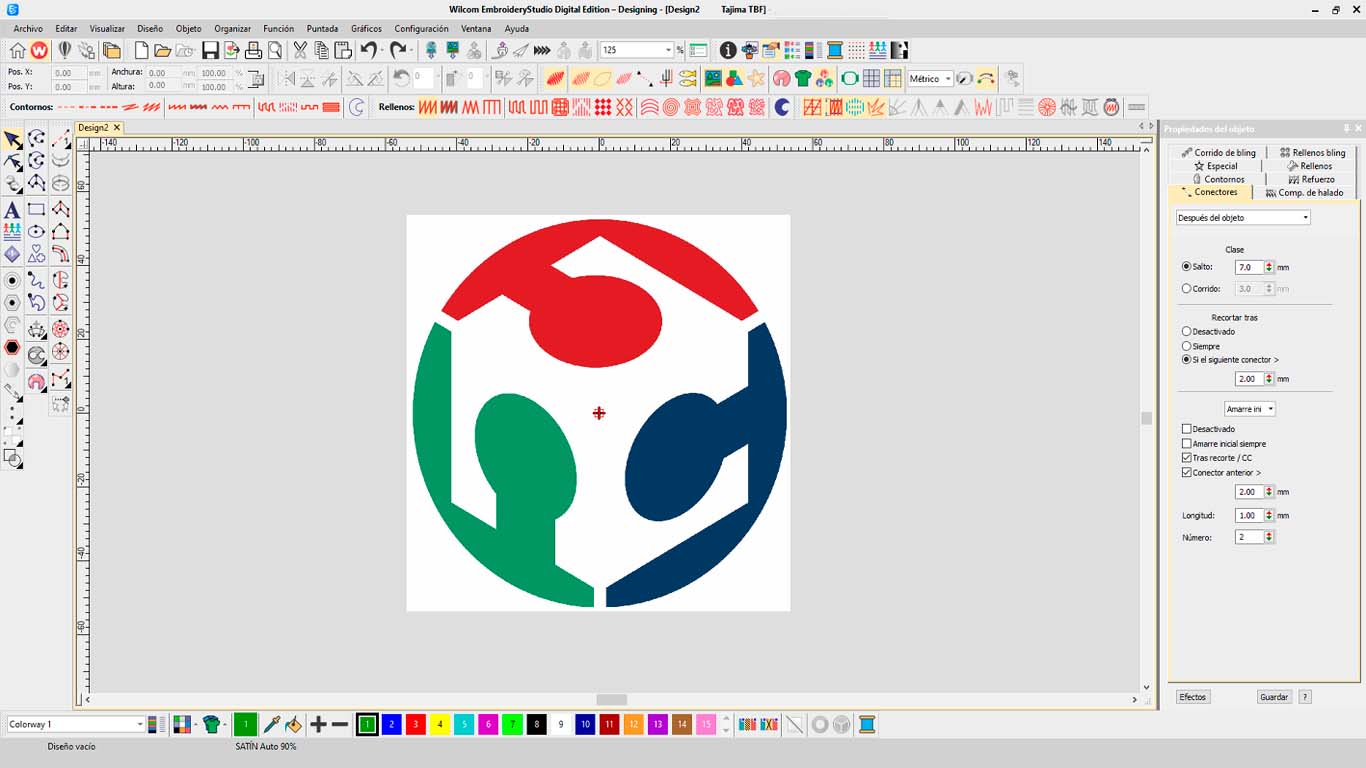
After importing the FAB ACADEMY logo into the program, we will click on the "INSTANT SMART DESIGN" tool that will show us the seams that the program reads as fillings and will show us a preview of what the embroidery of the bodies or bodies looks like. parts of the logo. Here we can see it in the second image.
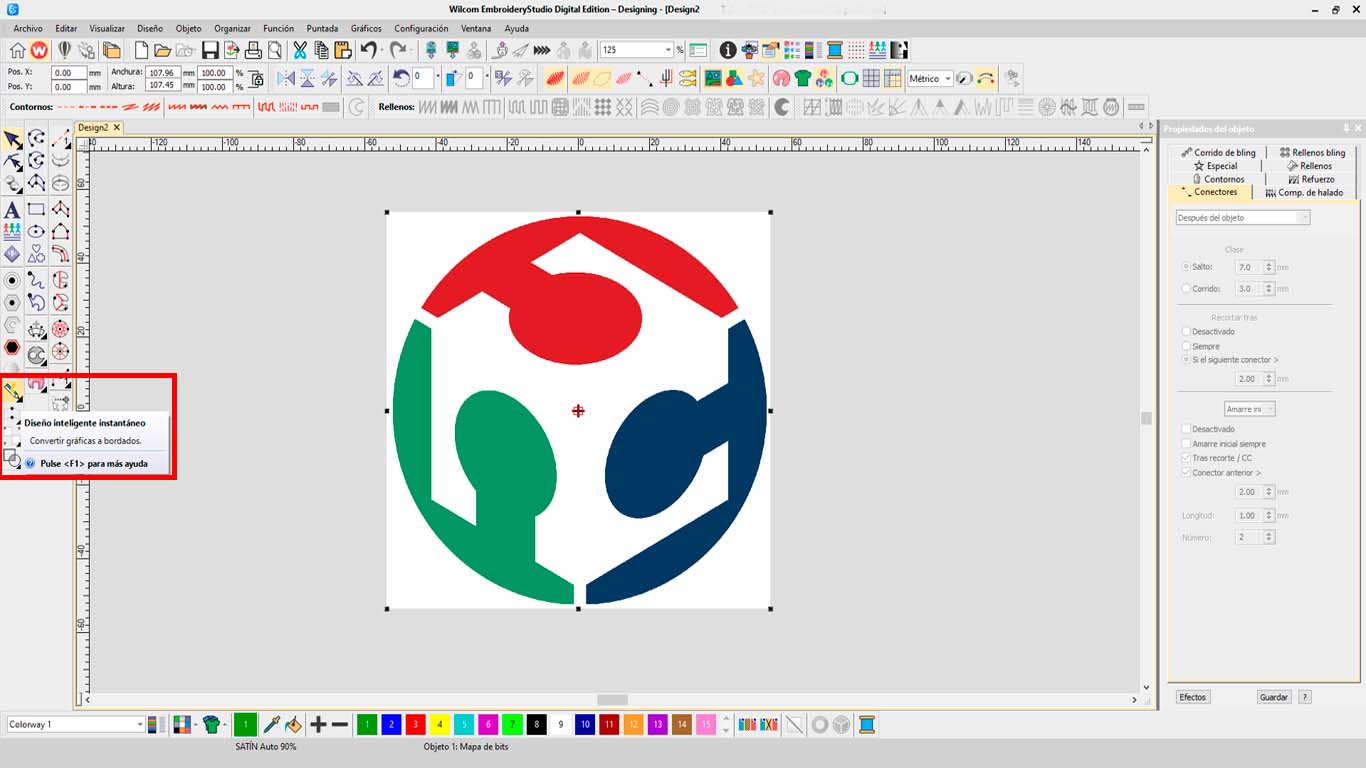
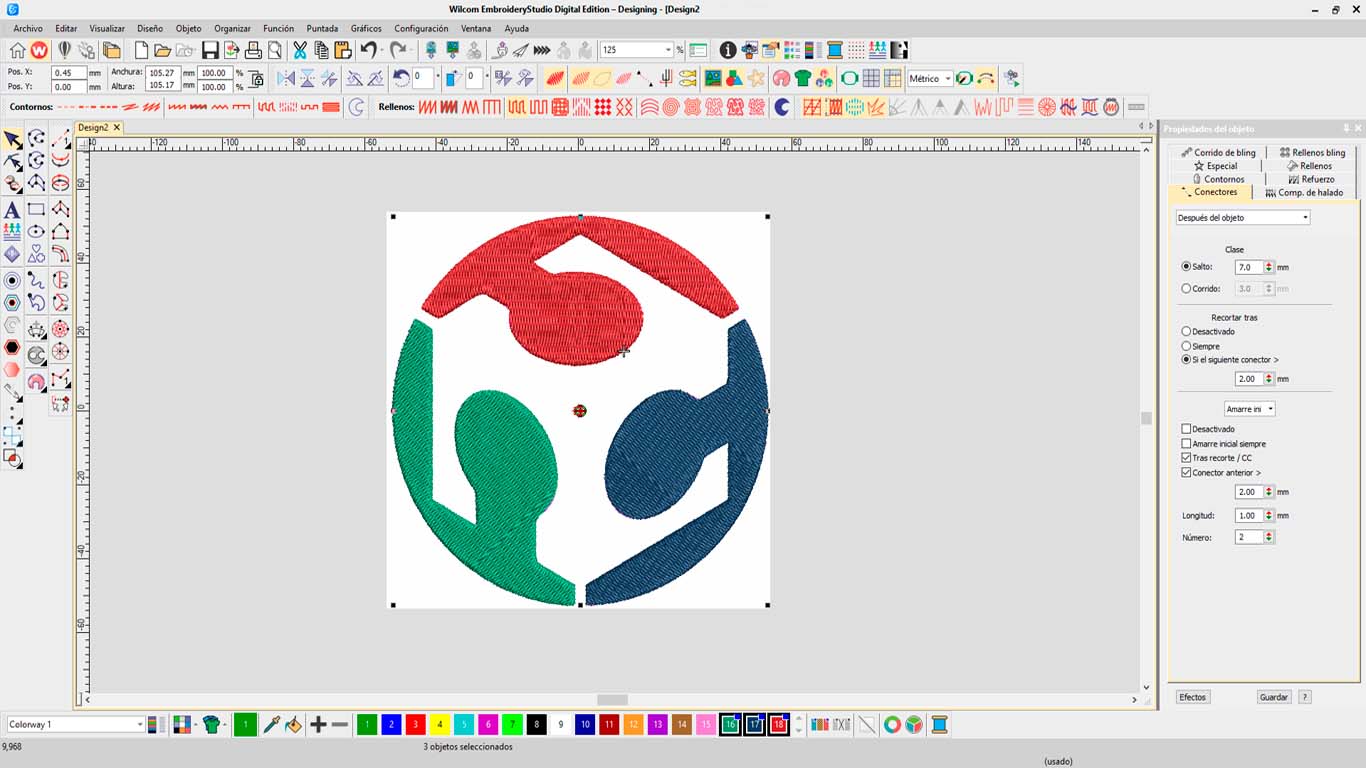
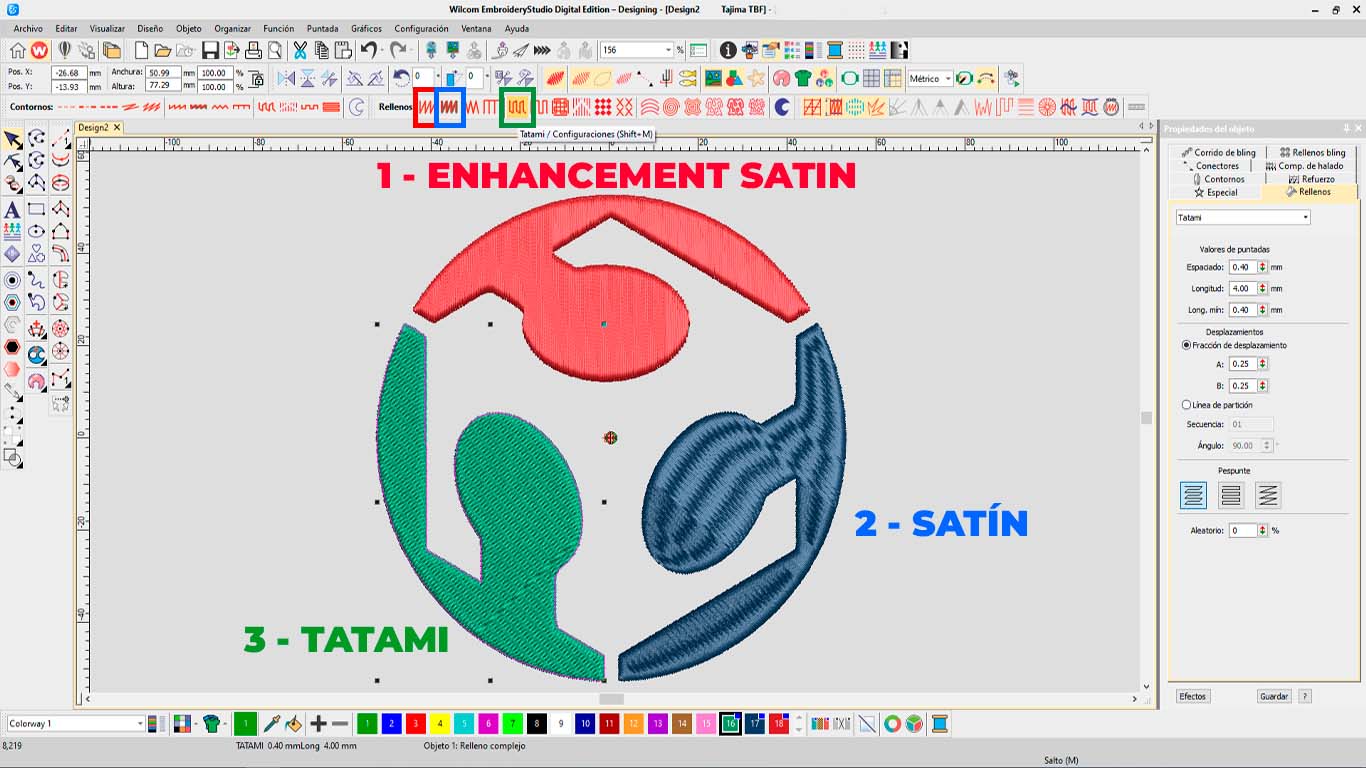
To change the types of fill that the program offers us, we go to the top of the tools, where they mention "FILLING" here we can change and choose the type that seems relevant to our design. For my test I used the 3 types of filling that seem most compact to me and comply with an embroidery. Here is a screenshot of the fillings I used.
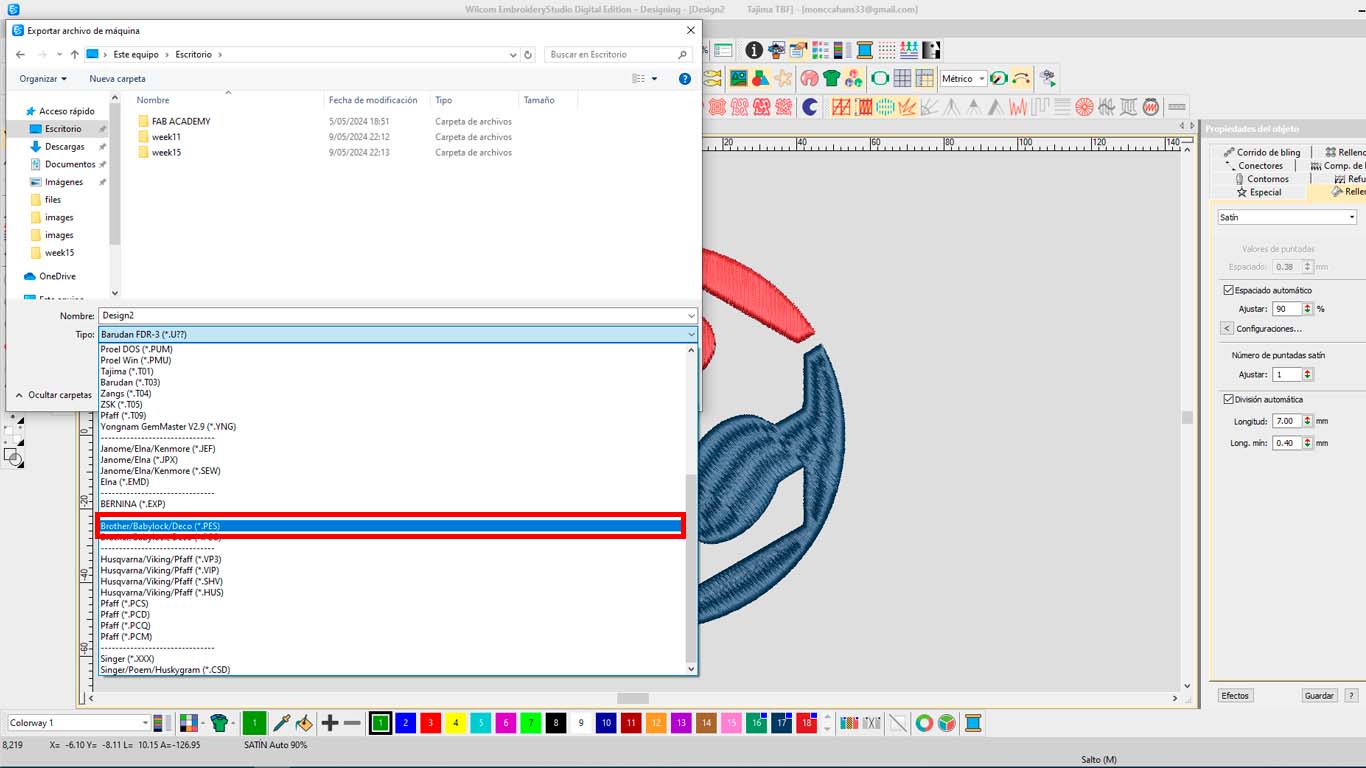
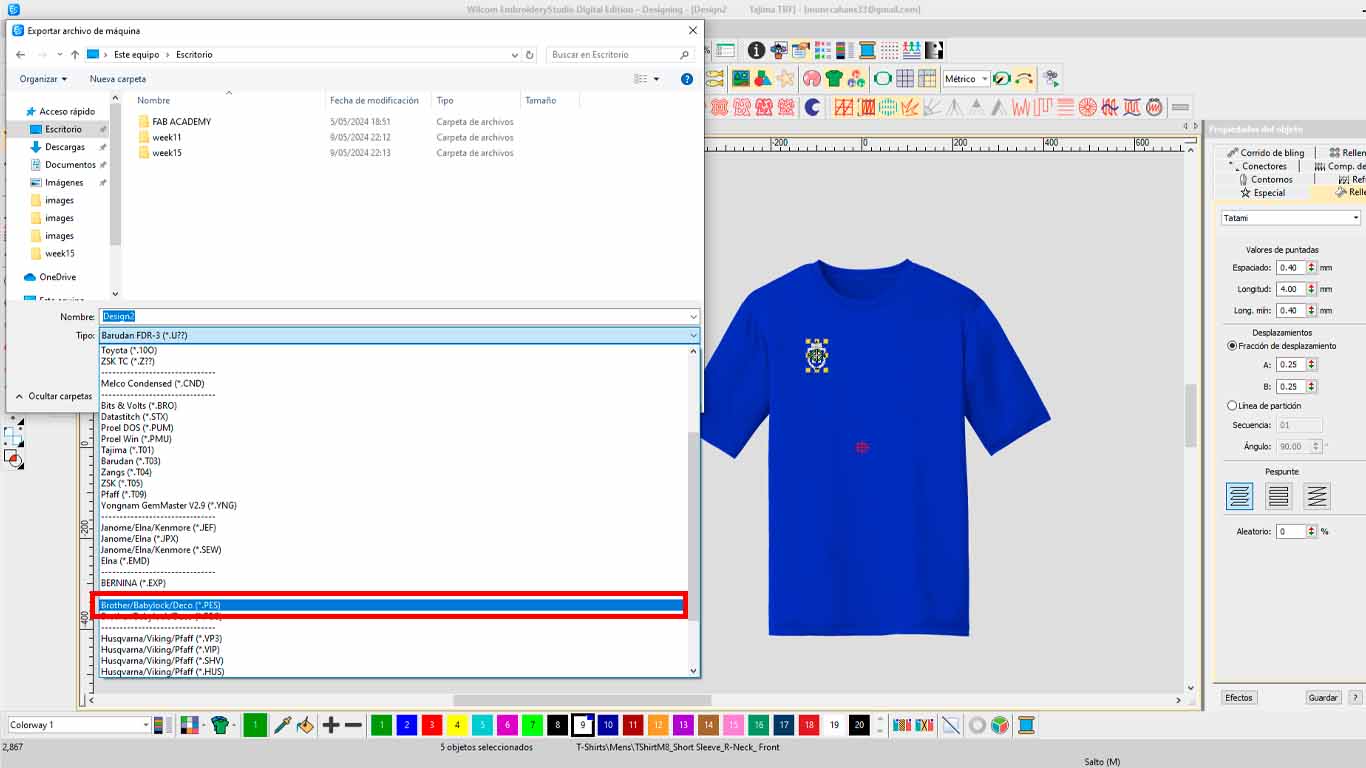
After making the changes, we will export the file that we designed to send to the machine via USB. To do this, we click on the EXPORT tool.
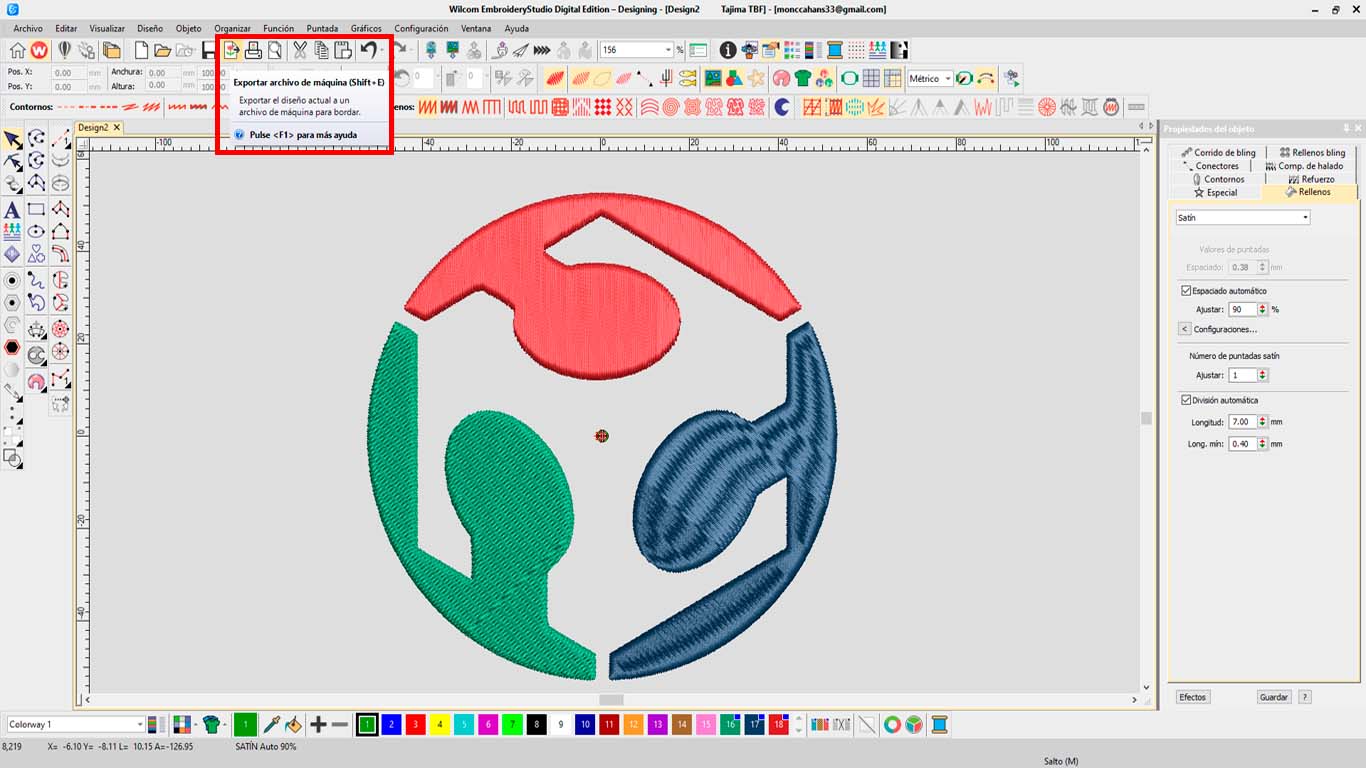
After clicking it, it will appear where we want to export the file and what extension. In this case, we will choose the USB that we are going to place in the machine and the BROTHER PE-78D machine accepts formats (PES) which is what my colleague Silvana mentioned to me, so I will export and ready to start the filling test in the machine .
On the other hand, my colleague Silvana carried out a test with letters, type of filling and contours. Here she left the link to her documentation that has very good information about this. SILVANA'S PAGE
READYING THREADS FOR TEST TEST
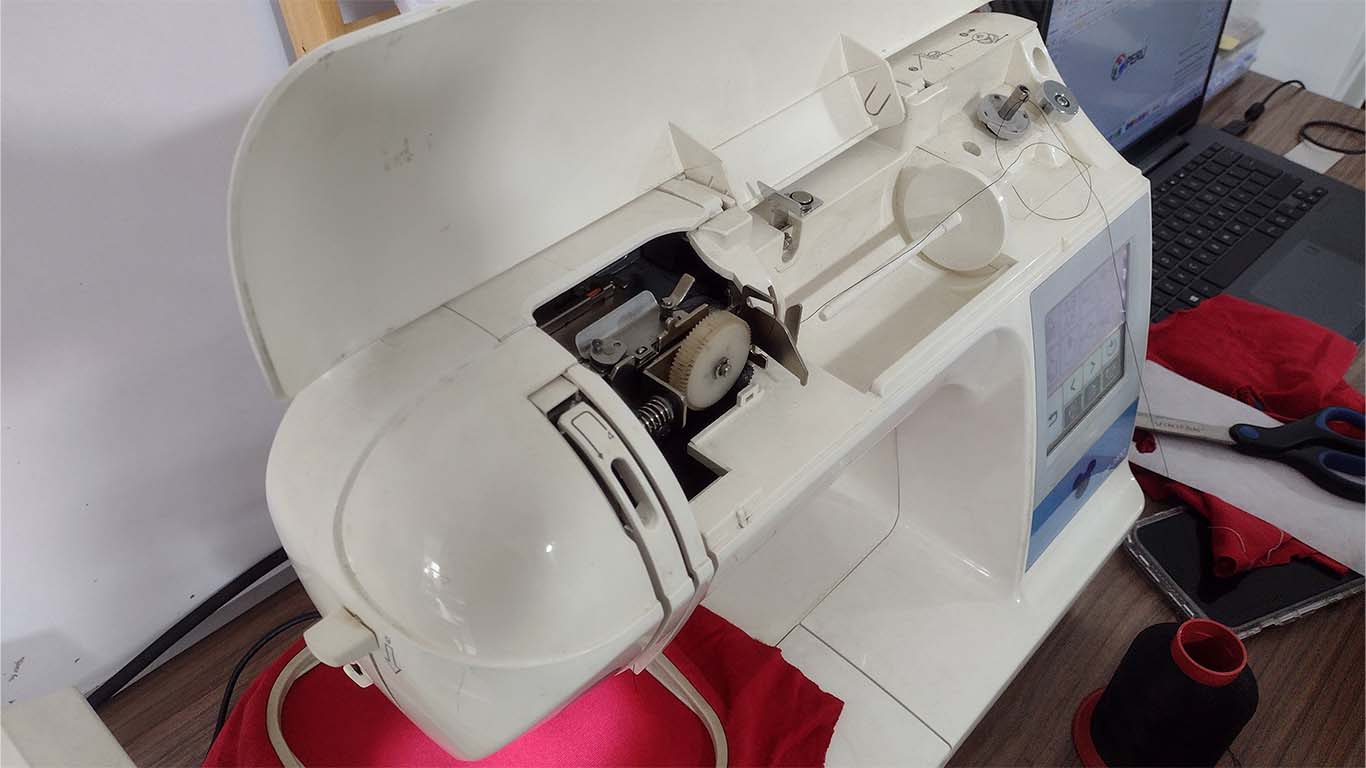
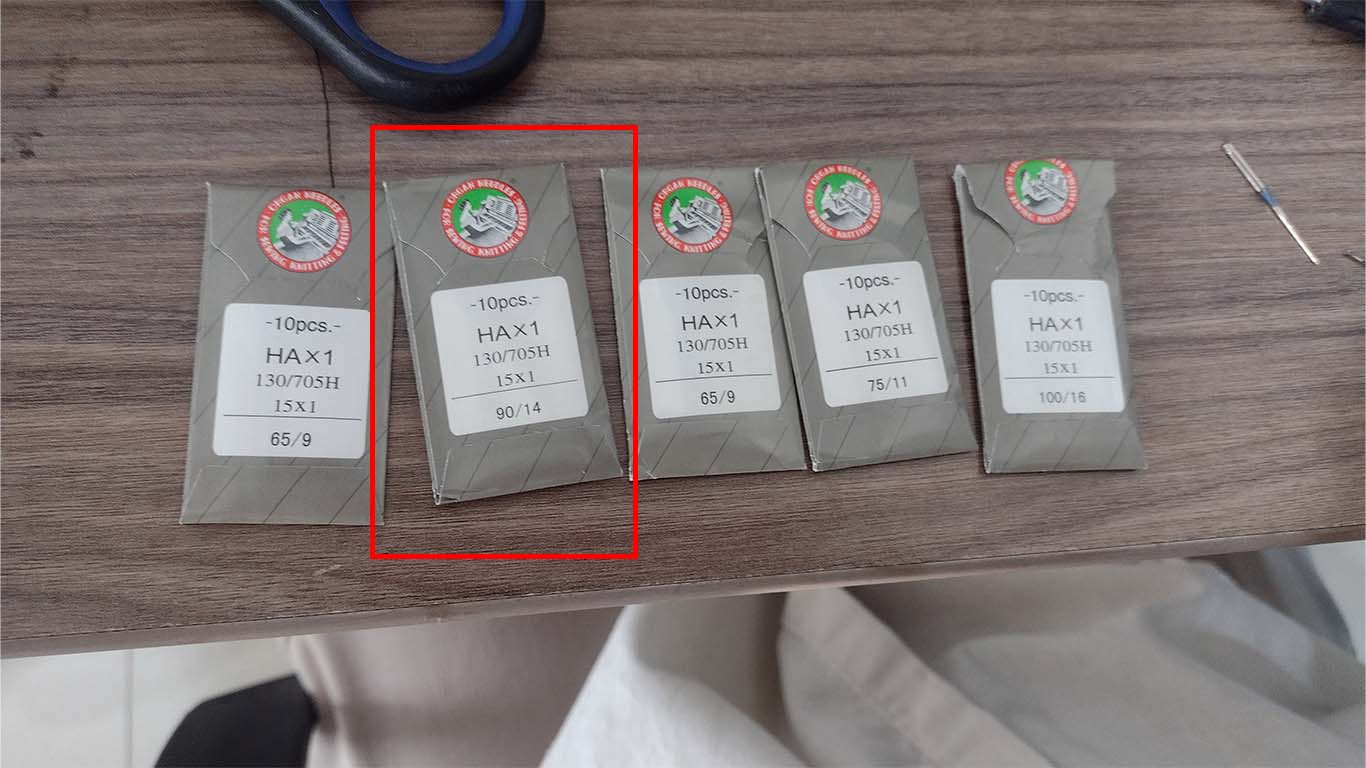
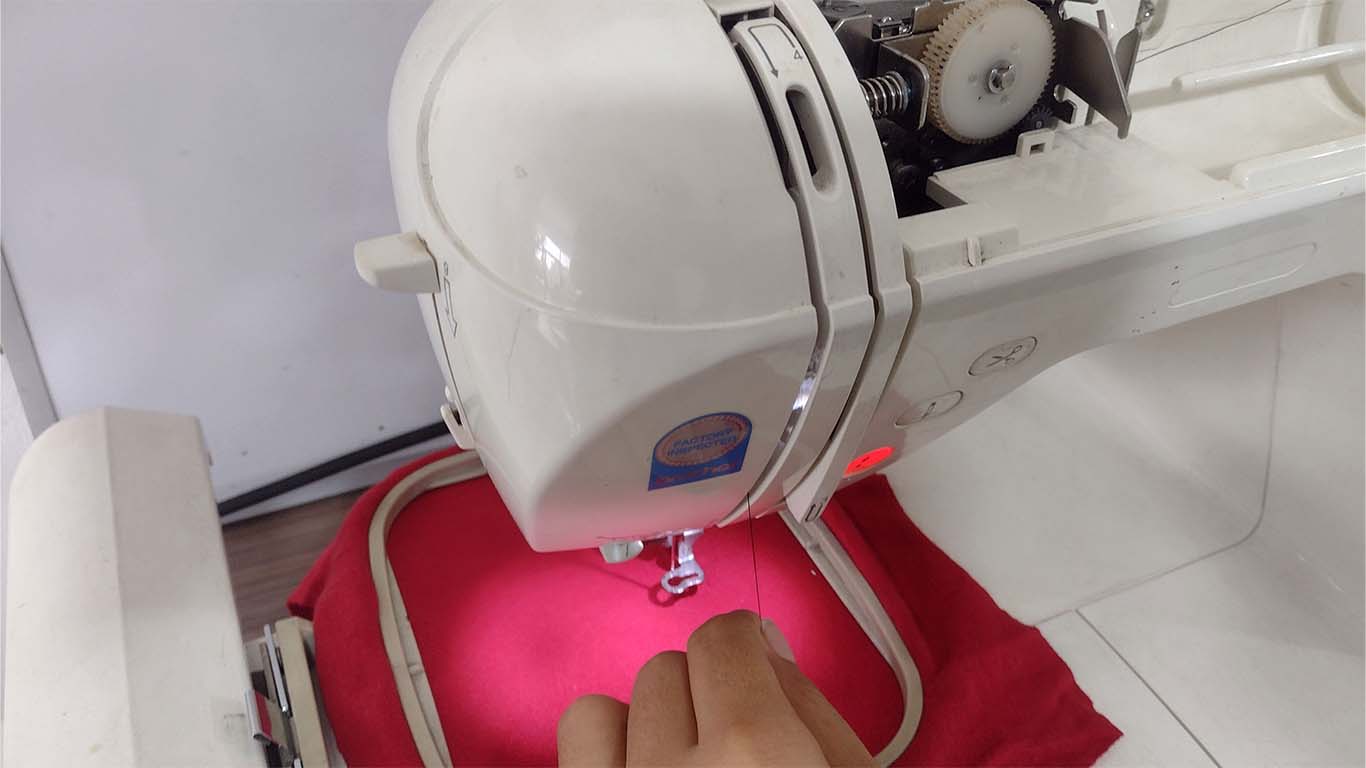
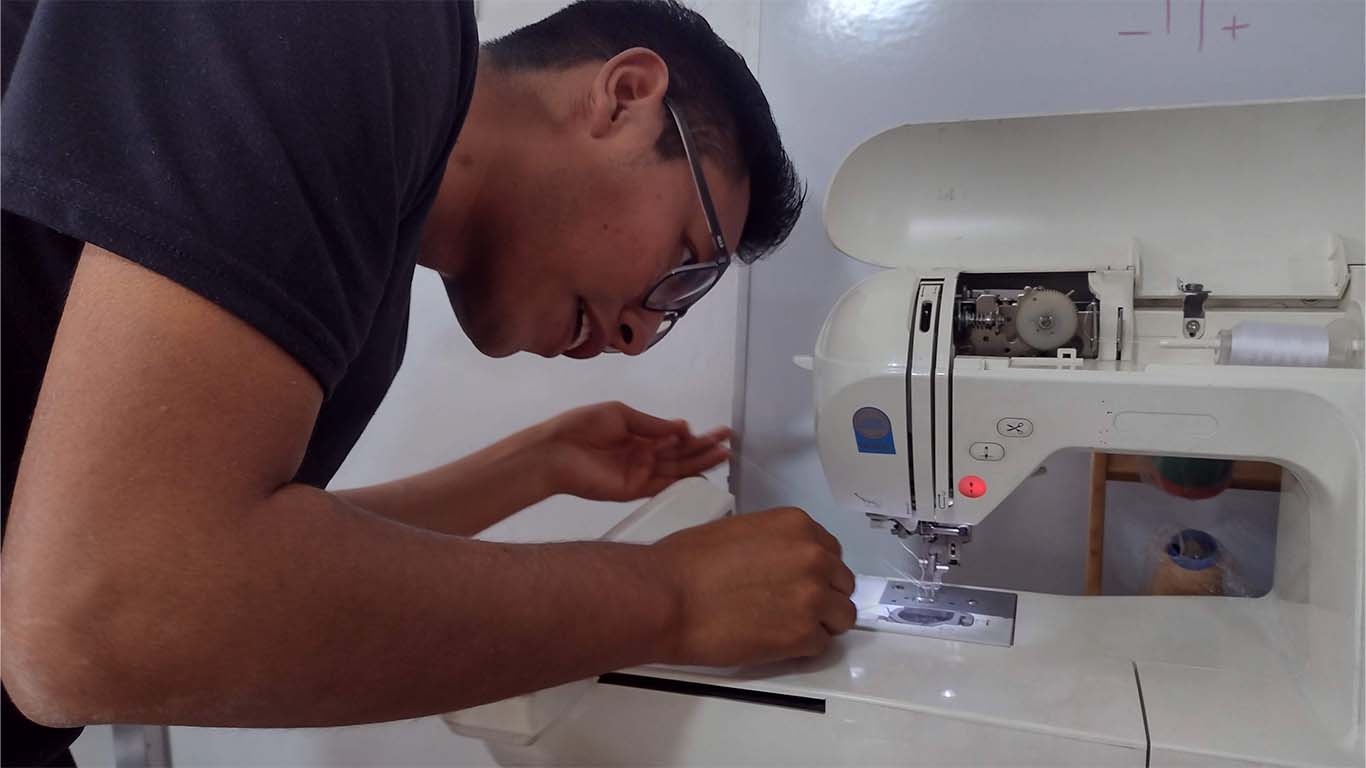
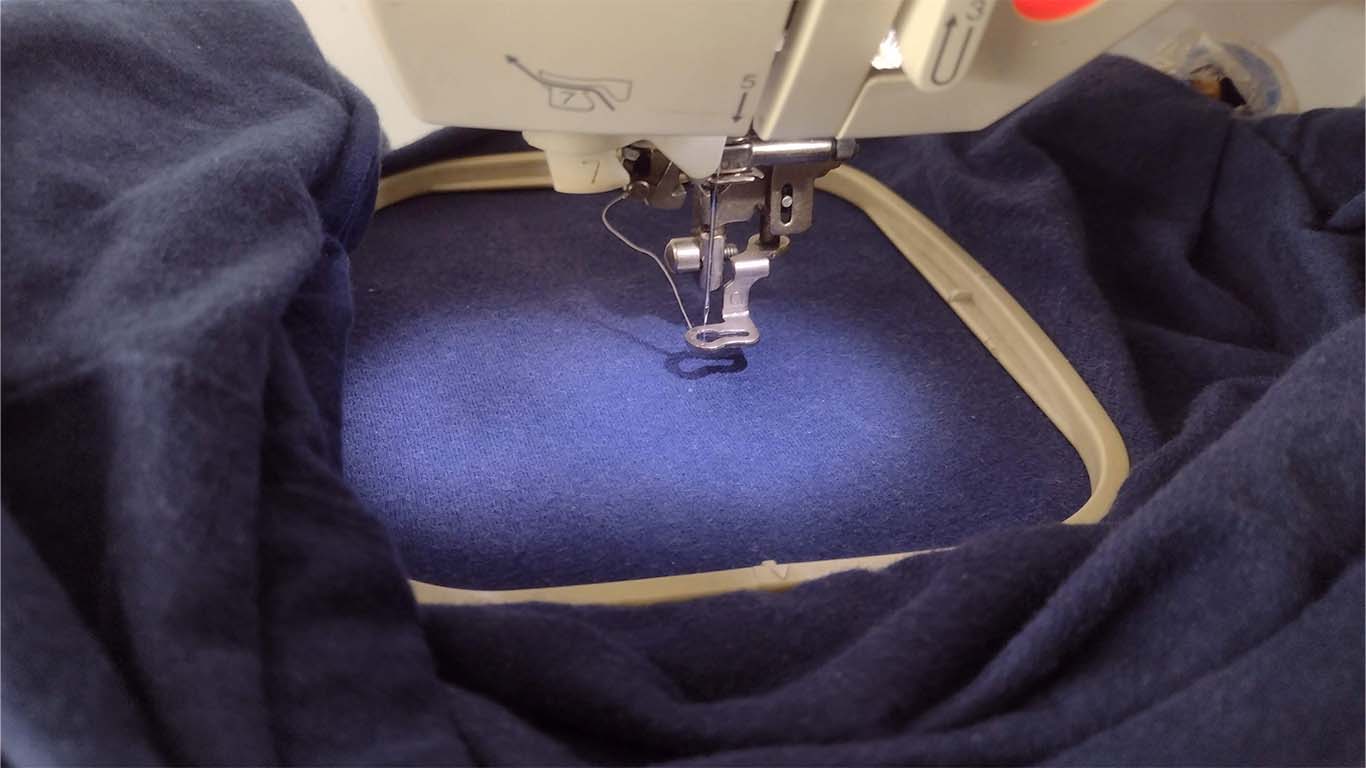
After obtaining the design and exporting it to the USB, we move on to preparing the thread that we are going to use for the test. In this case, we will carry out the test with a black thread and with the 90/14 needle that the machine came with this needle and recommended according to the type of fabric we were going to use.
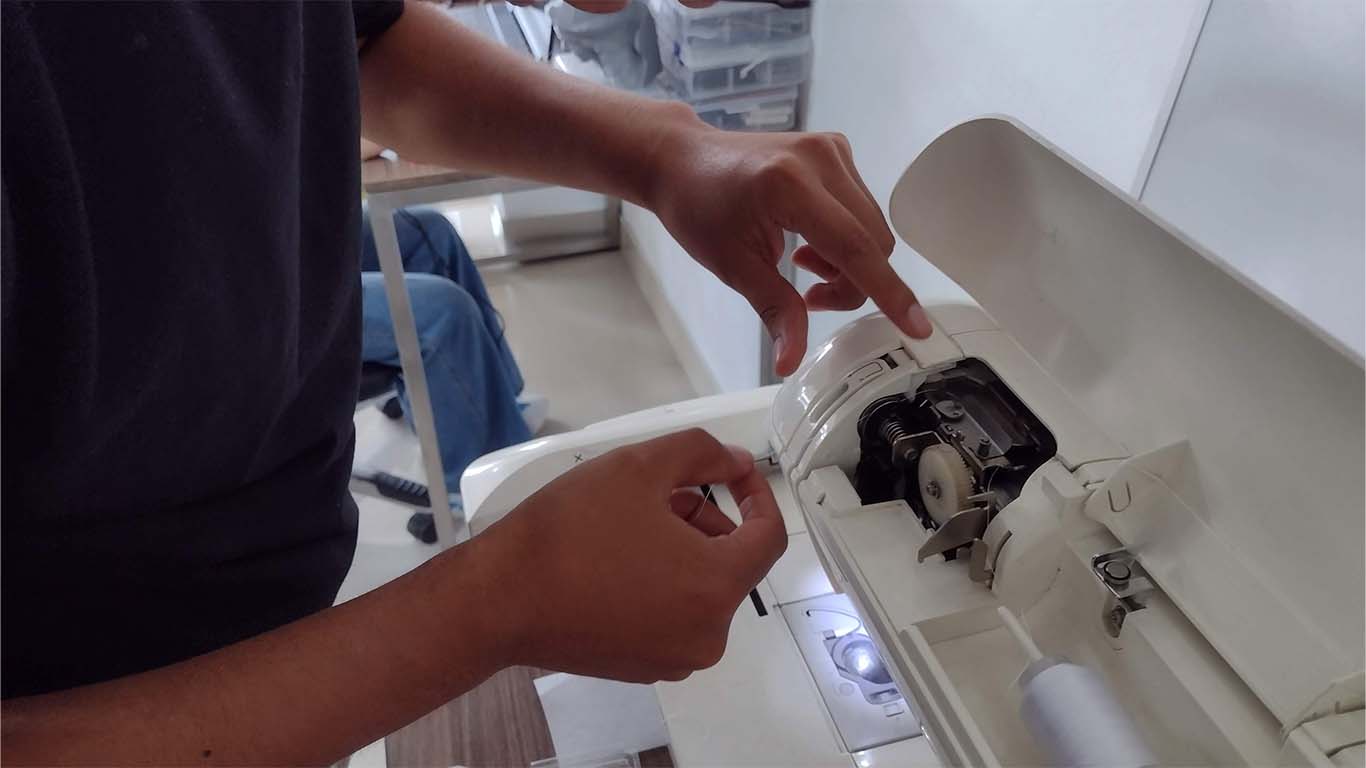
The machine presents instructions that tell us where we should locate the route of the thread that we are going to use for embroidery. Here I will show the process of how we guide the thread so that it can reach the needle.
First, it tells us that we have to go through the arc that has the first point of the machine. Here is an example photograph:
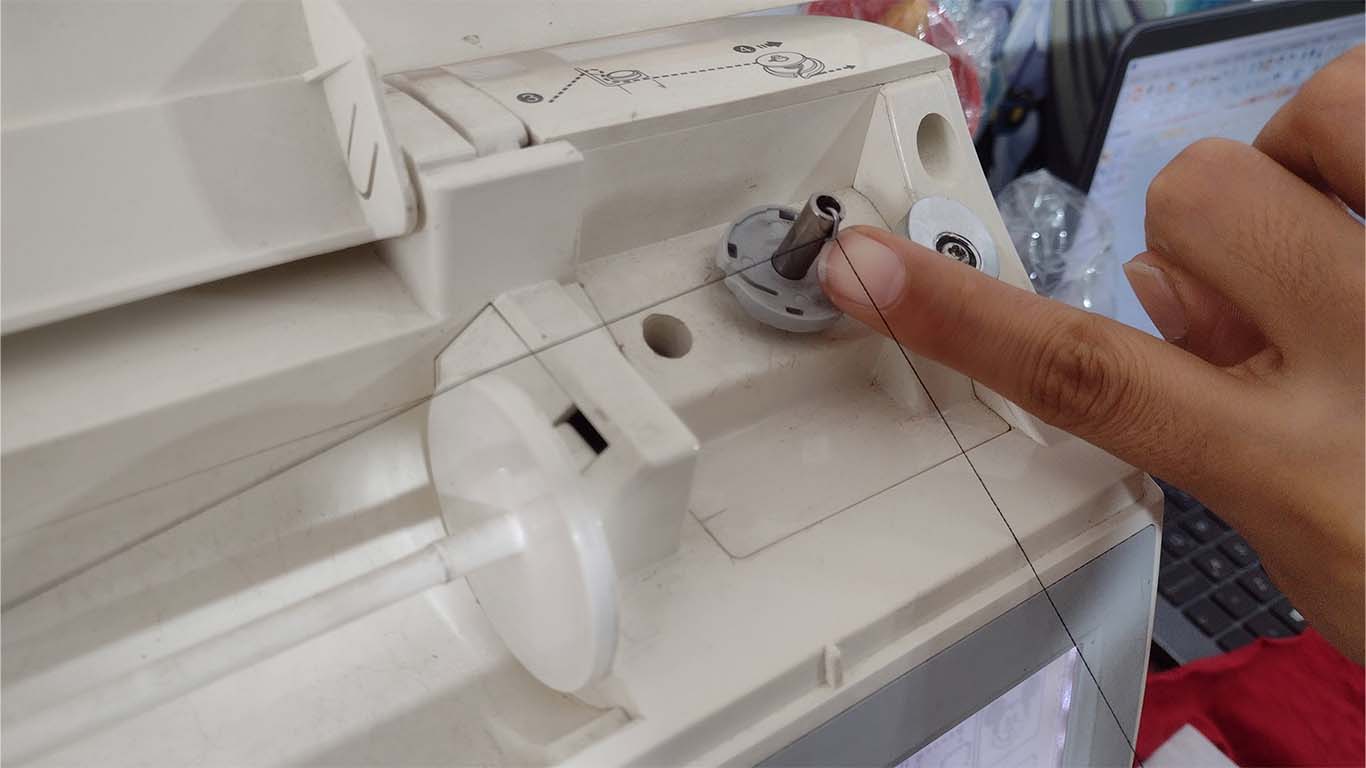
Following the route, we will pass another point where we must secure the thread to prevent it from getting stuck or cut.
Then we have to ensure its location by the knob located near the machine's motor that will change the direction of the thread so that it heads towards the needle.
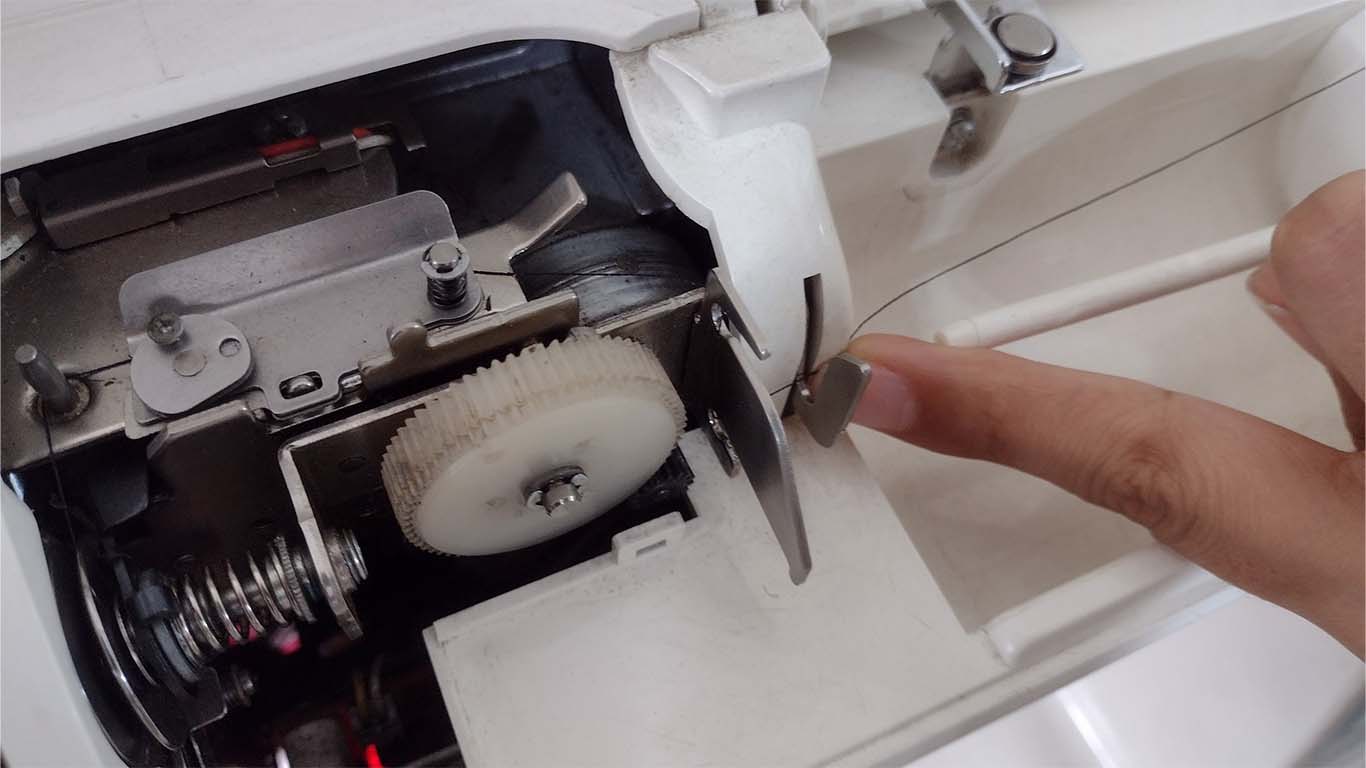
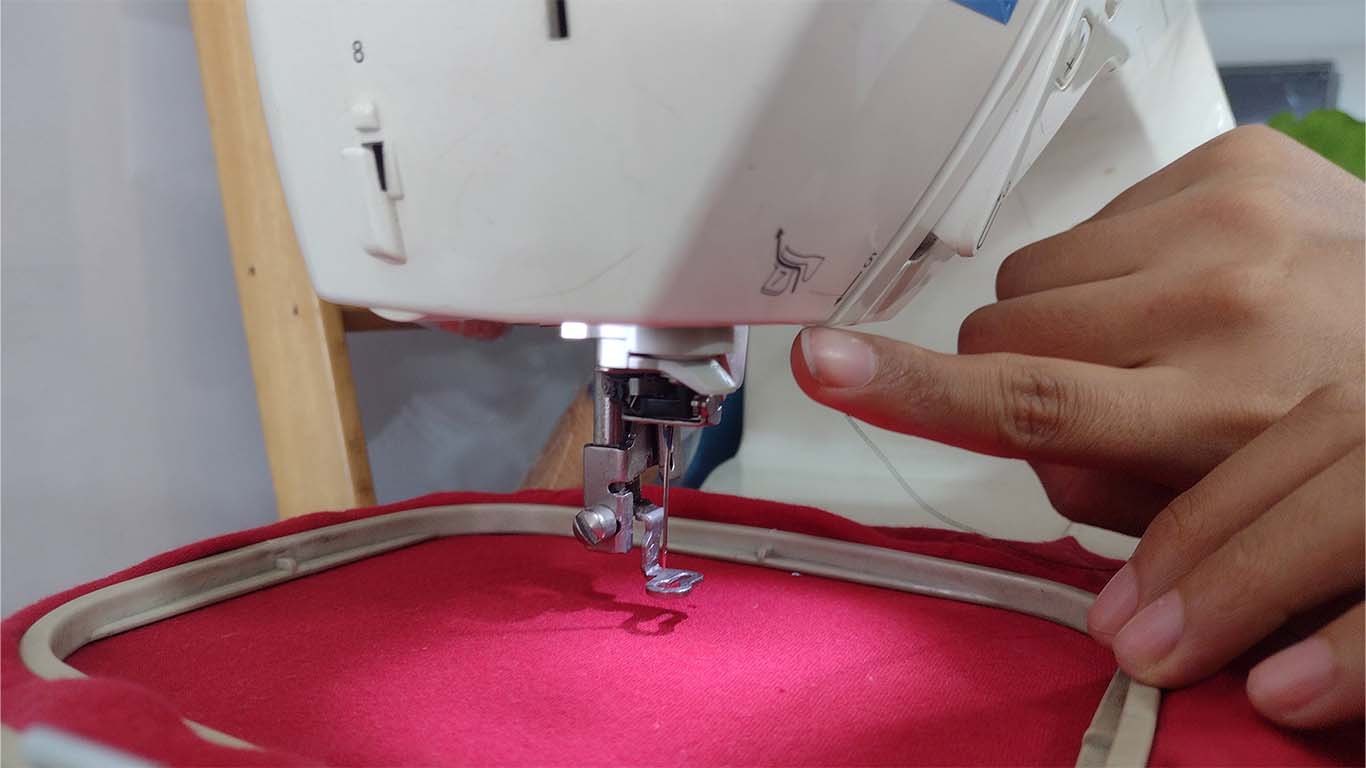
In addition, we have to go through this ZIG ZIG-shaped path that has a thread detection sensor that allows us to know when the THREAD suffers a cut.
Finally, we have to pull the thread into the water to pass it through a hole that has the needle at the bottom that makes contact with the fabric and at the bottom to prevent the embroidery from being lost. The final result in photograph N°2
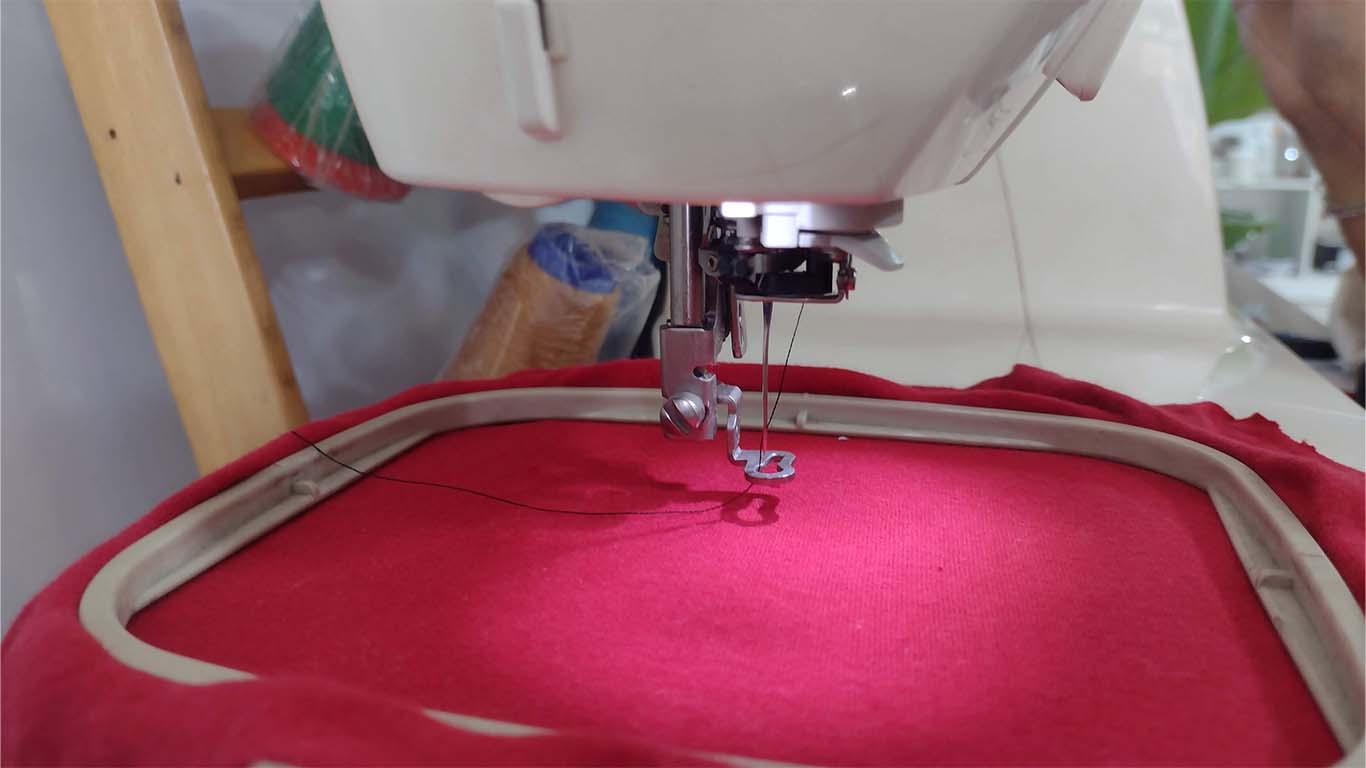
EMBROIDERY
After checking that the thread is connected and traveling correctly through all the points mentioned in the machine instructions, we will proceed to perform our filling test. Here is a screenshot and video of the process.
RESULT
The result surprised us, we could see what the differences in the fillings would be like and that the SATIN fillings did not turn out as well as we wanted. The TATAMI Filling came out better and shows better quality for embroidery for the fabric we used. In addition, there are no loose threads, everything was correct. So I'll stick with the TATAMI filling for my embroidery.
SUPPORT AND FEEDBACK
GLOBAL OPEN TIME
On Saturday I joined the GLOBAL OPEN TIME group as always with Adrián, Rico, Pablo and the other colleagues. This week they recommended that we work on the final project and they also gave me some scope and recommendations for my final work. Rico, Pablo and Adrián always supported me with it and also gave us some tips with the embroidery machine and what we had to show. Thank you teachers for your weekly support, it is interesting to share 2 hours to learn more... Here is a screenshot of the cell phone that I took because I was on my way to Garage Lab.
DESIGNING MY LOGO
DESIGNING IN INKSCAPE
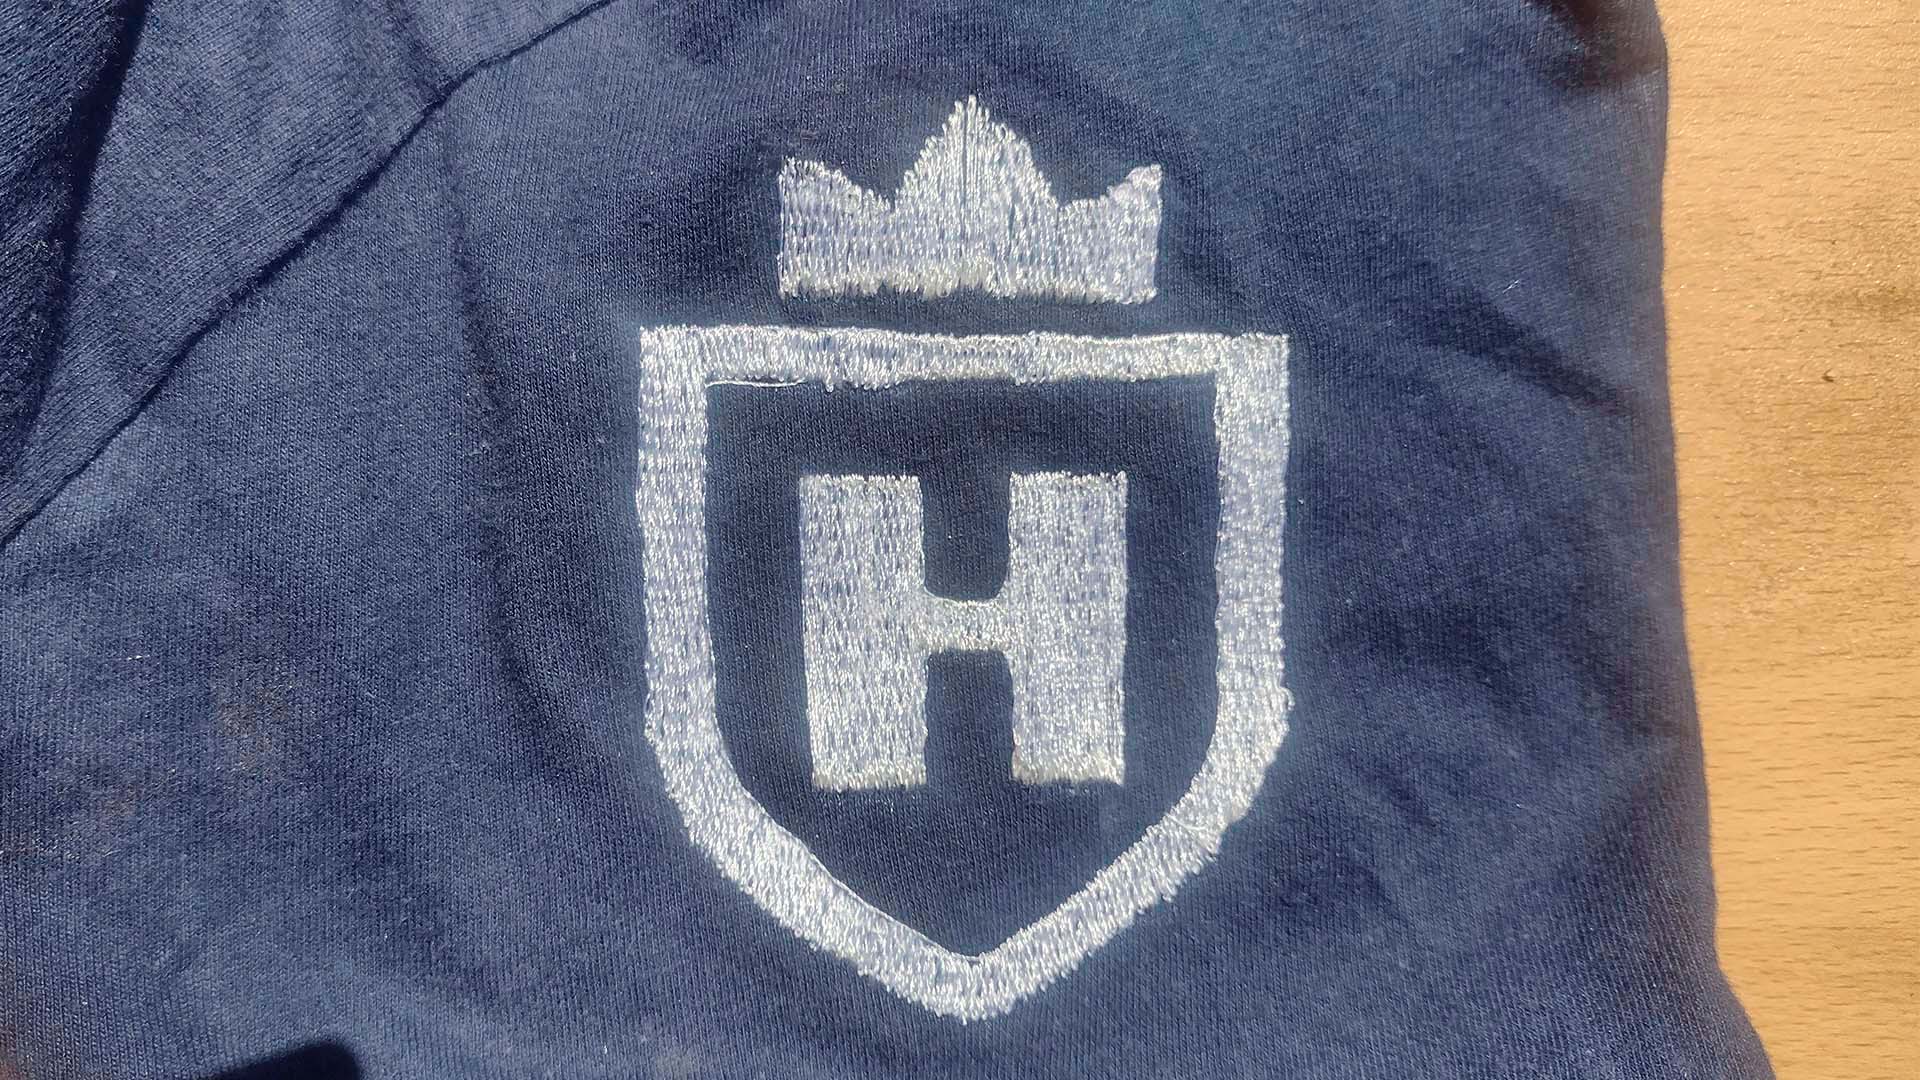
For the assignment I wanted to develop a logo with my name or something that identifies me. I really like soccer and soccer jerseys. When I heard that I could do embroidery on fabrics, the first thing that came to mind was that. That's why I started designing a soccer team shield logo. Here the design process in INKSCAPE.
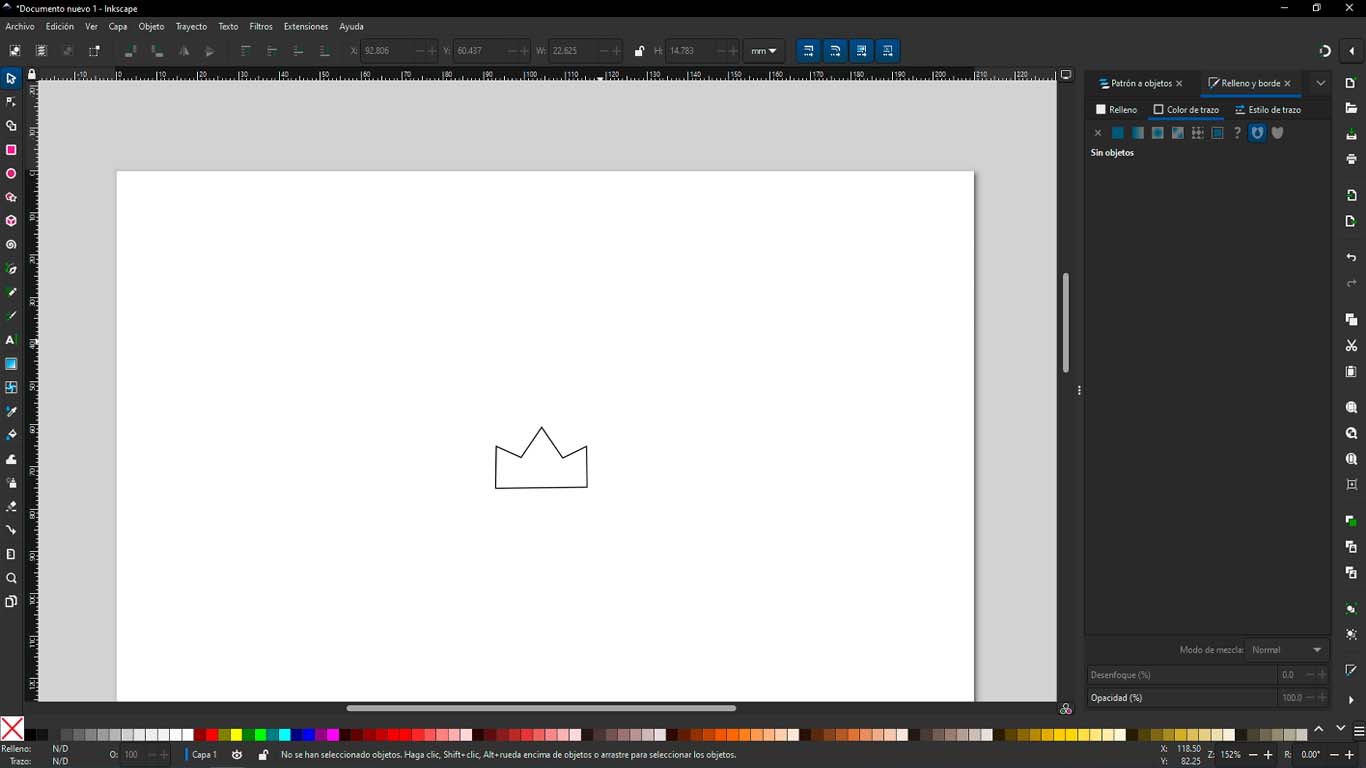
First I wanted to have a crown on my shield similar to the one REAL MADRID has, I wanted to make a basic design so as not to complicate things because I didn't know how to use the machine very well. So I started designing a crown.
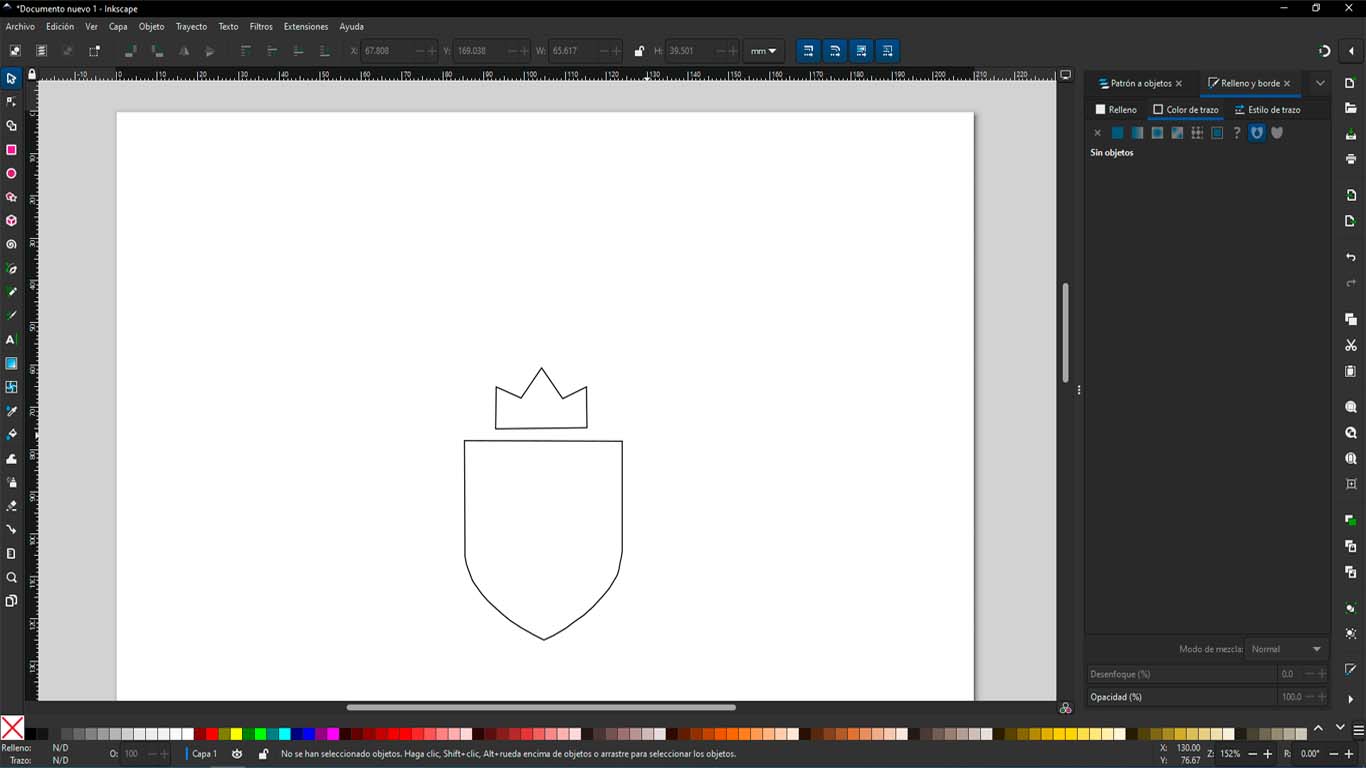
Then I started to design the body of the shield, I started by designing something circular but I didn't like how it went with the crown, so looking at some examples, I ended up with the shape that I show in the following image.
Then I wanted to add my name or some acronym and I liked to just put the letter H for HANS. I liked how it looked and I just needed to place all the components of the shield correctly.
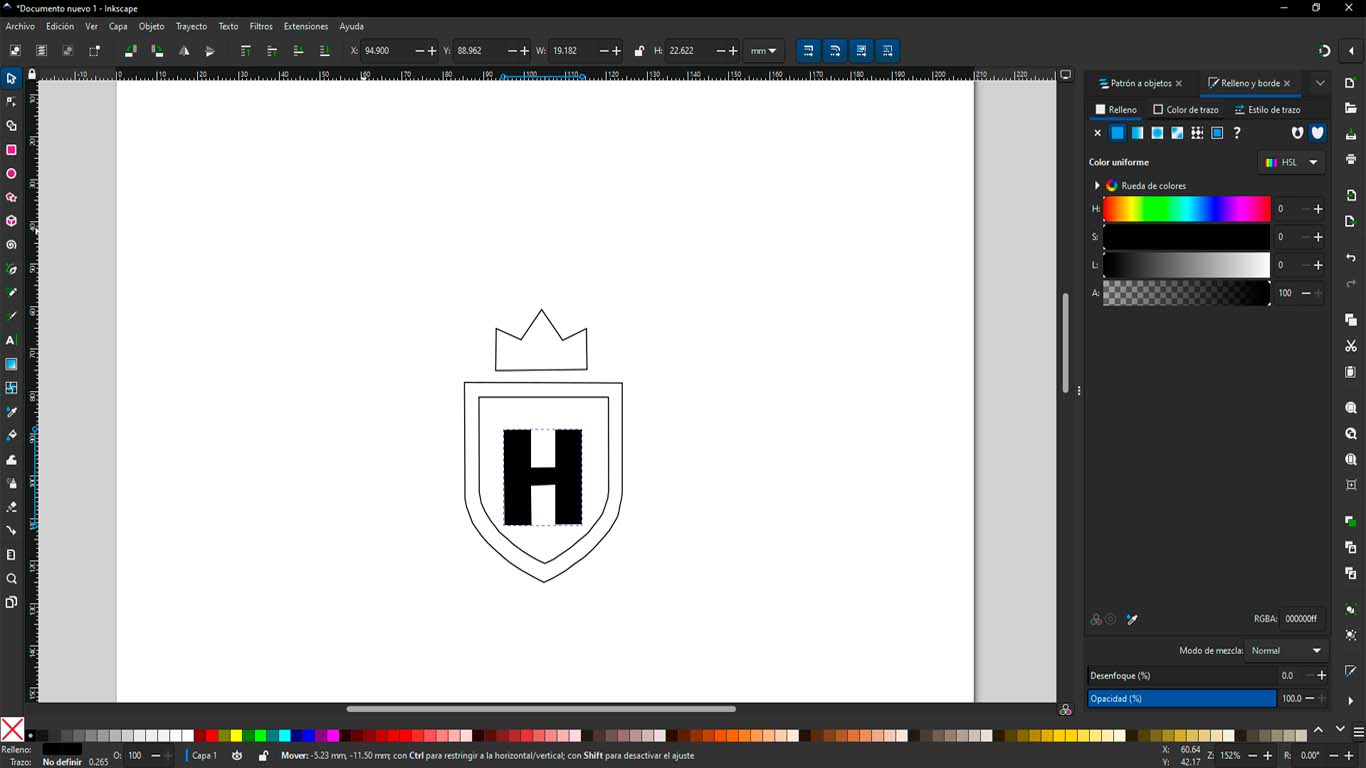
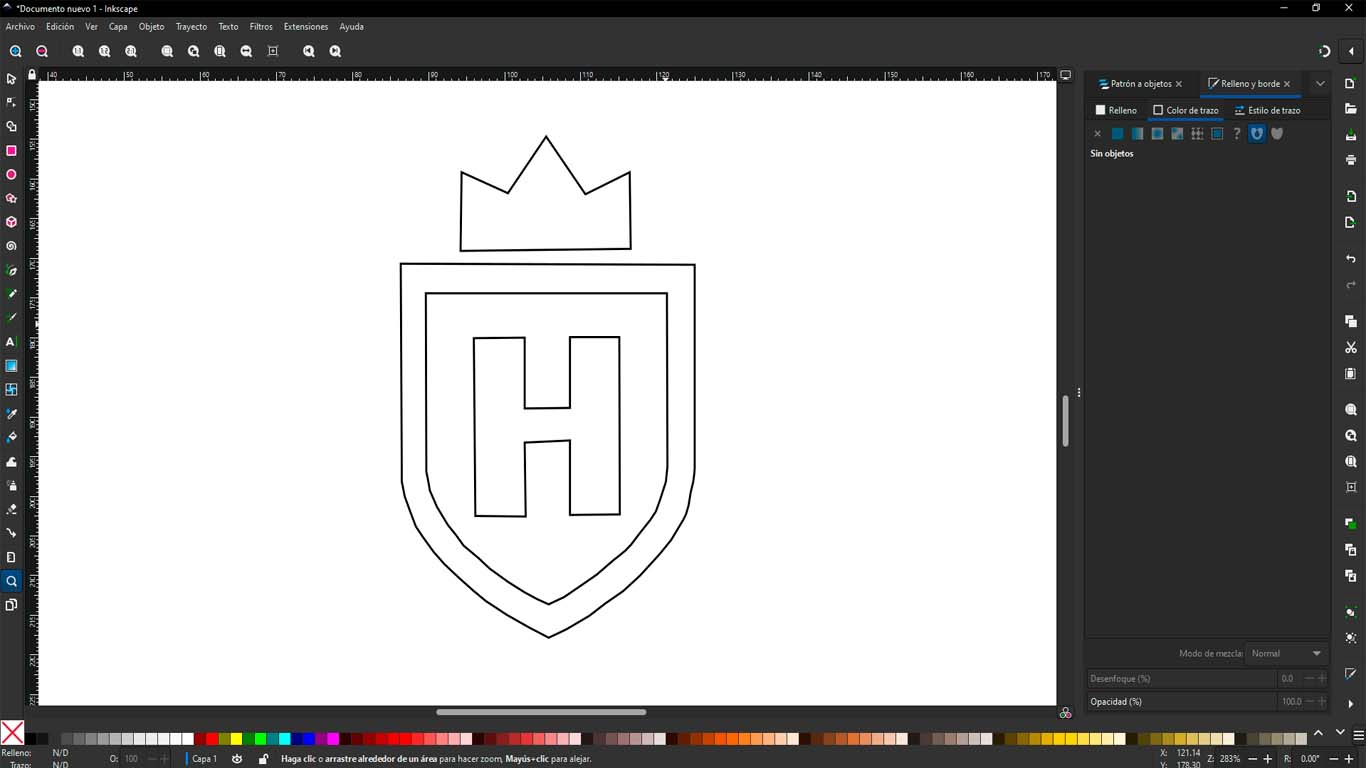
Finally, after arranging and seeing some modifications to the rounded edges and getting everything properly straight, I got my logo. Here is a final screenshot of my logo. I will save this as a vector to export to the WILCOM program.
EXPORTING FOR WILCOM PROGRAM
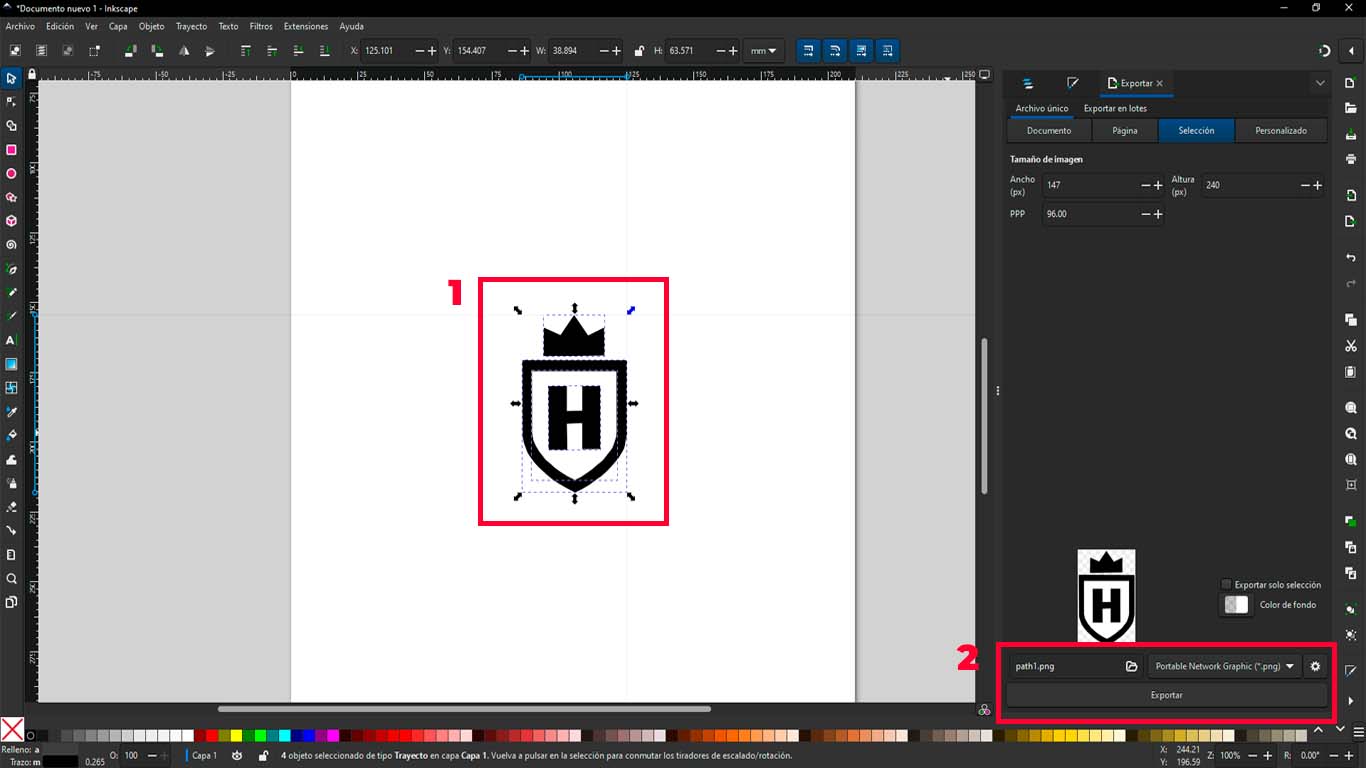
To import our designs into the WILCOM program, these can be JPG or PNG images. In my case I will export in PNG because it is not a solid drawing. To do this, first we select the entire design made in INKSCAPE and then click on export. In box 2, we must change the characteristics to export in the extension we want, in my case PNG.
After exporting the design, we open our WILCOM program and look for the "IMPORT GRAPHIC" tool at the top of the tools, click here.
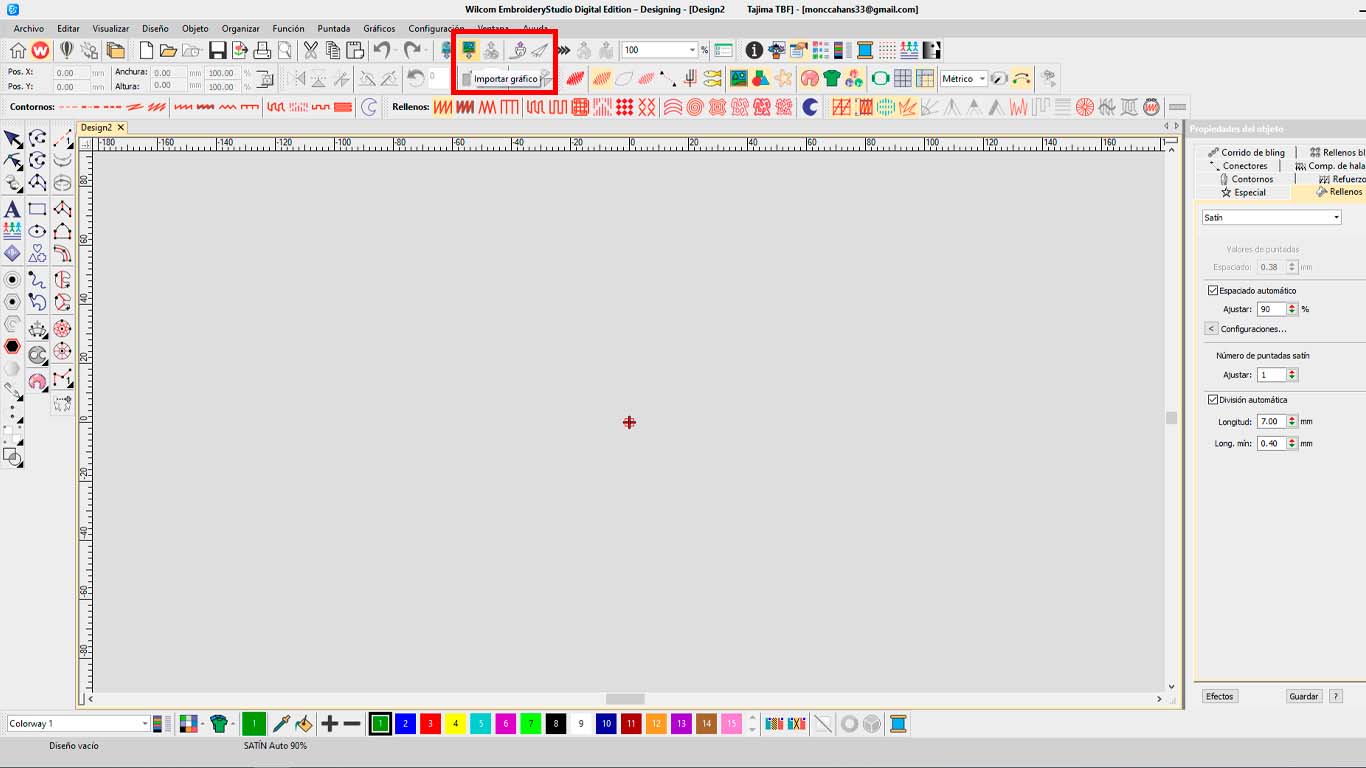
A new window will open where we look for the file that we exported from INKSCAPE. In my case I saved it to the desktop and clicked open.
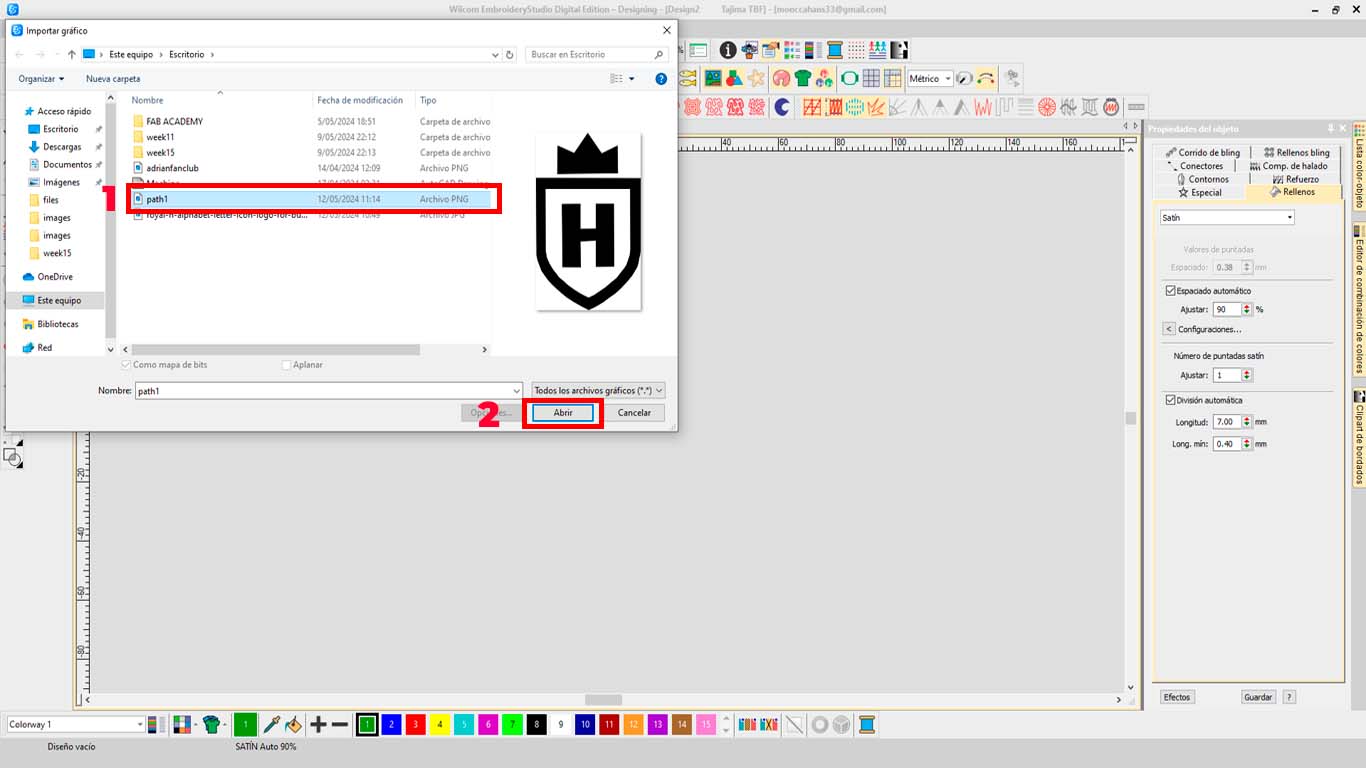
Finally, our design will be imported into the WILCOM program, here we will begin to configure the types of filling, borders and everything about embroidery.
EMBROIDERING MY LOGO
To start configuring my logo in the WILCOM program and start embroidering, I made the following configurations, here is the process:
CONFIGURATE WILCOM PROGRAM
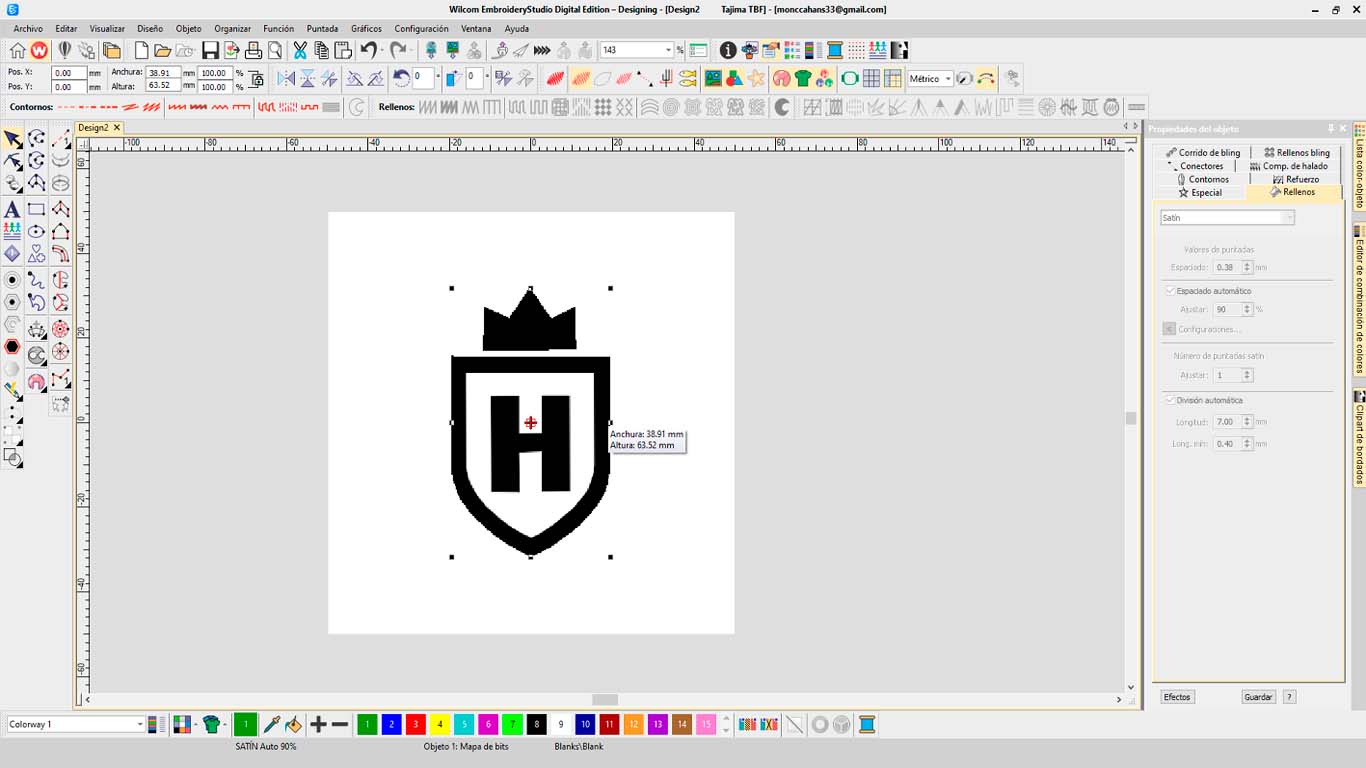
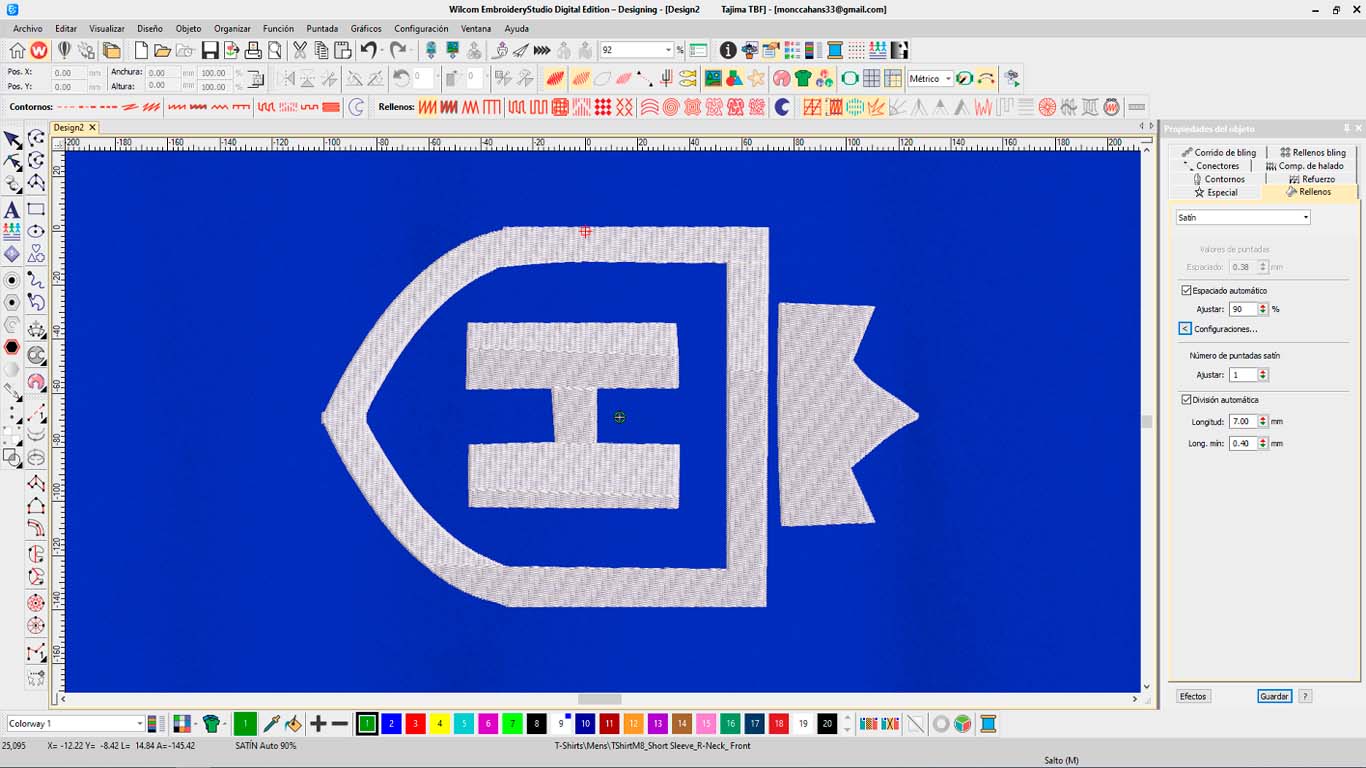
First we click on the instant intelligent design tool, which will use the colors to preview the fill that my logo will have. In this case I only want the black color of my logo.

We can see that the logo has a fabric texture, in this case I have not yet chosen the type of filling I want. For now it only presents me with a default fill style.
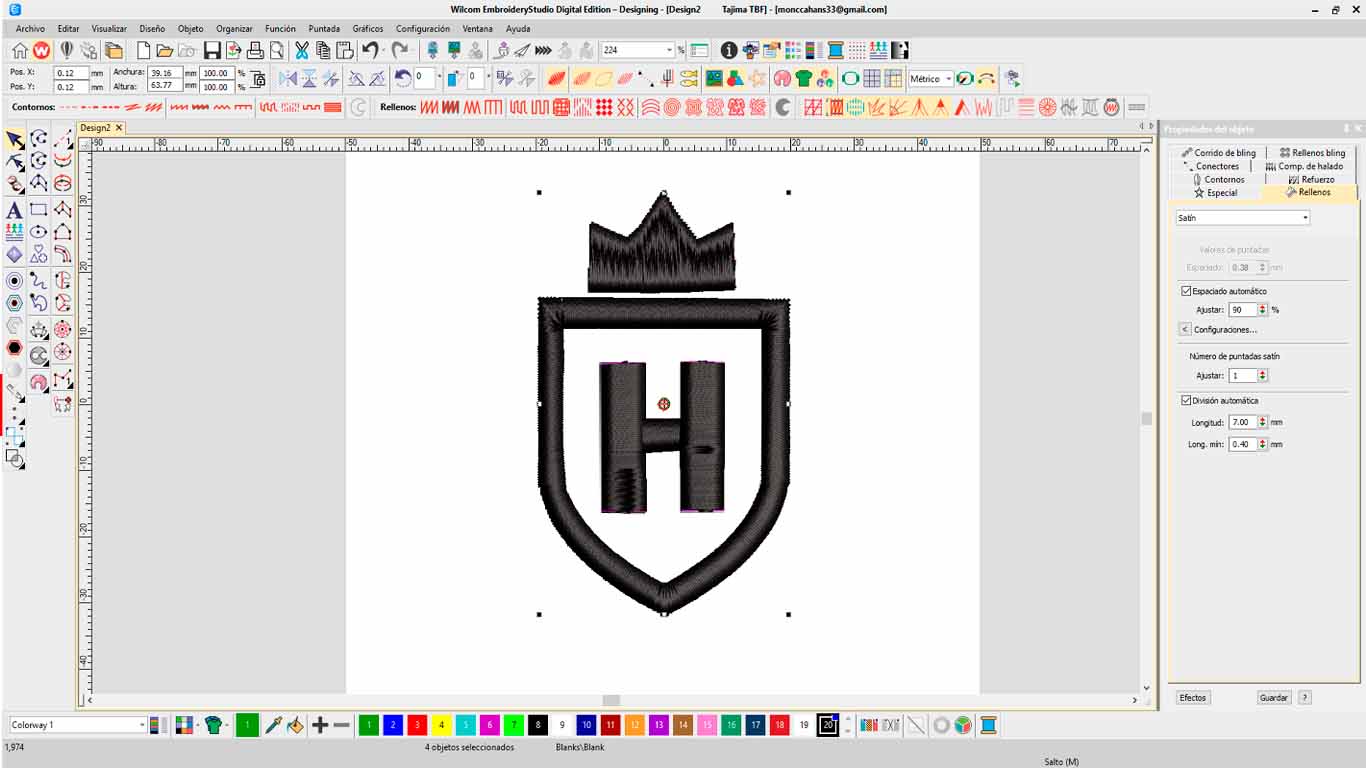
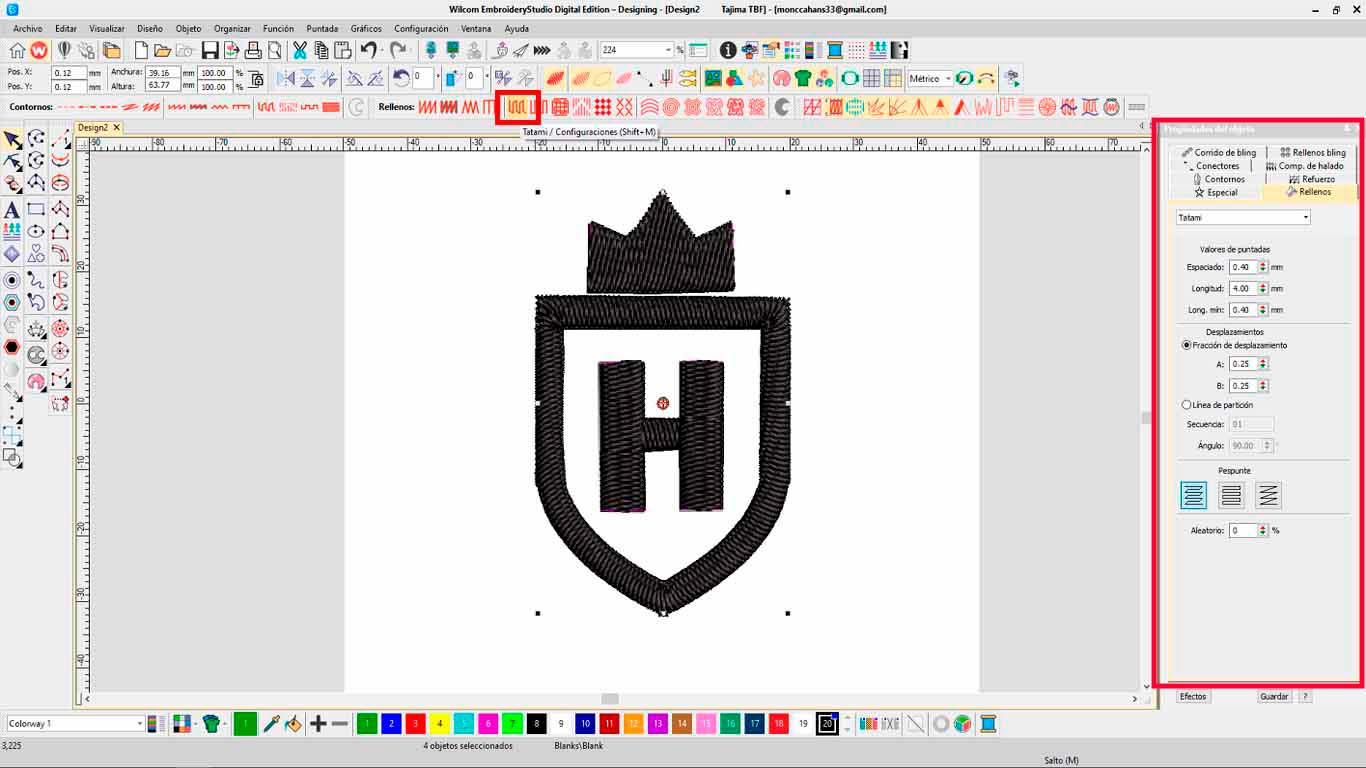
Next we move on to the tools located at the top of the work area. I chose the TATAMI type of filling which is the one I liked the most from the test shown above. I'll keep that filling. Finally, on the right side of the work area we can make some modifications such as the border of our embroidery, a size that is important to change.
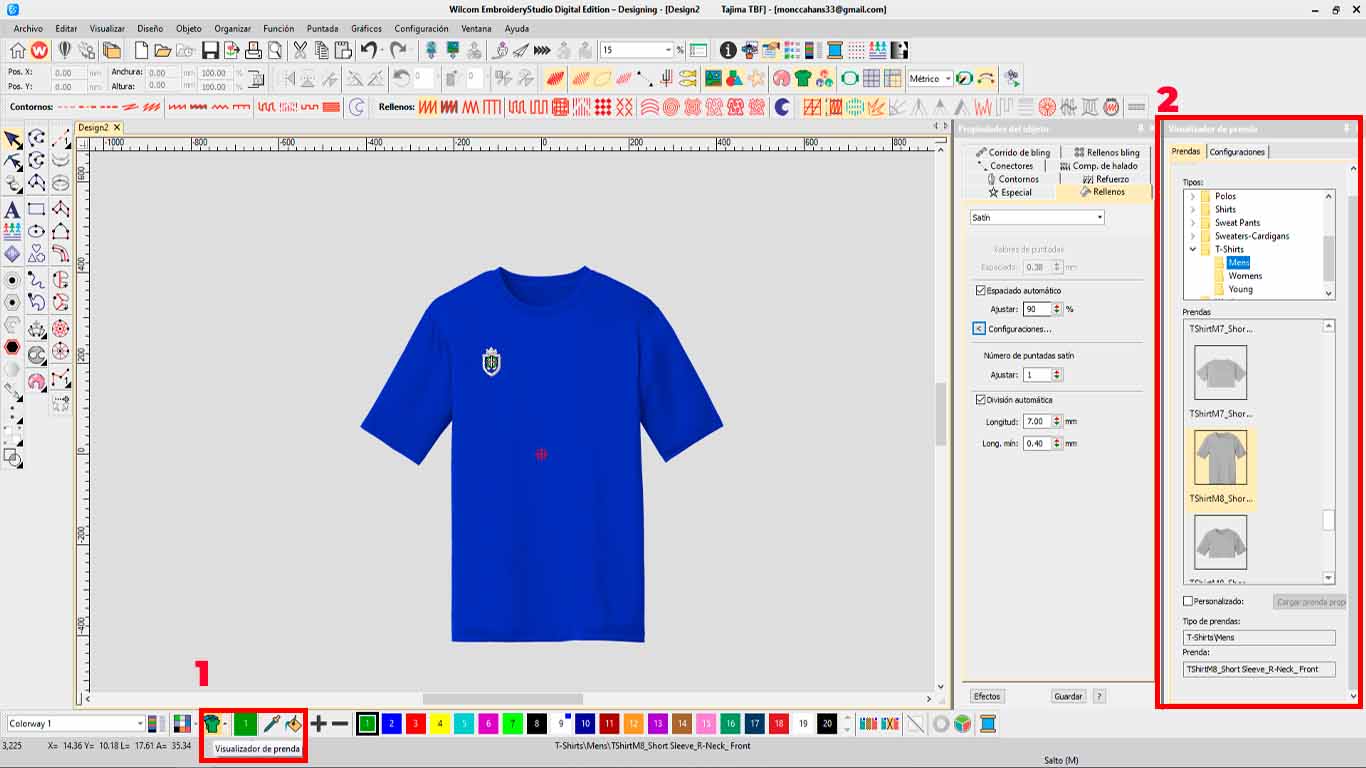
Reviewing a little more about the program, I found a tool that gives us a preview of what our embroidery would look like on a garment. In my case I will do it in a blue polo shirt. To be able to preview and change the embroidery color, you can click on the lower "GARMENT" tool and a series of options will appear to show and see how our embroidery would appear on any type of garment.
Finally, after configuring the filling, separation, and borders, we move on to export in PES format for the embroidery machine.
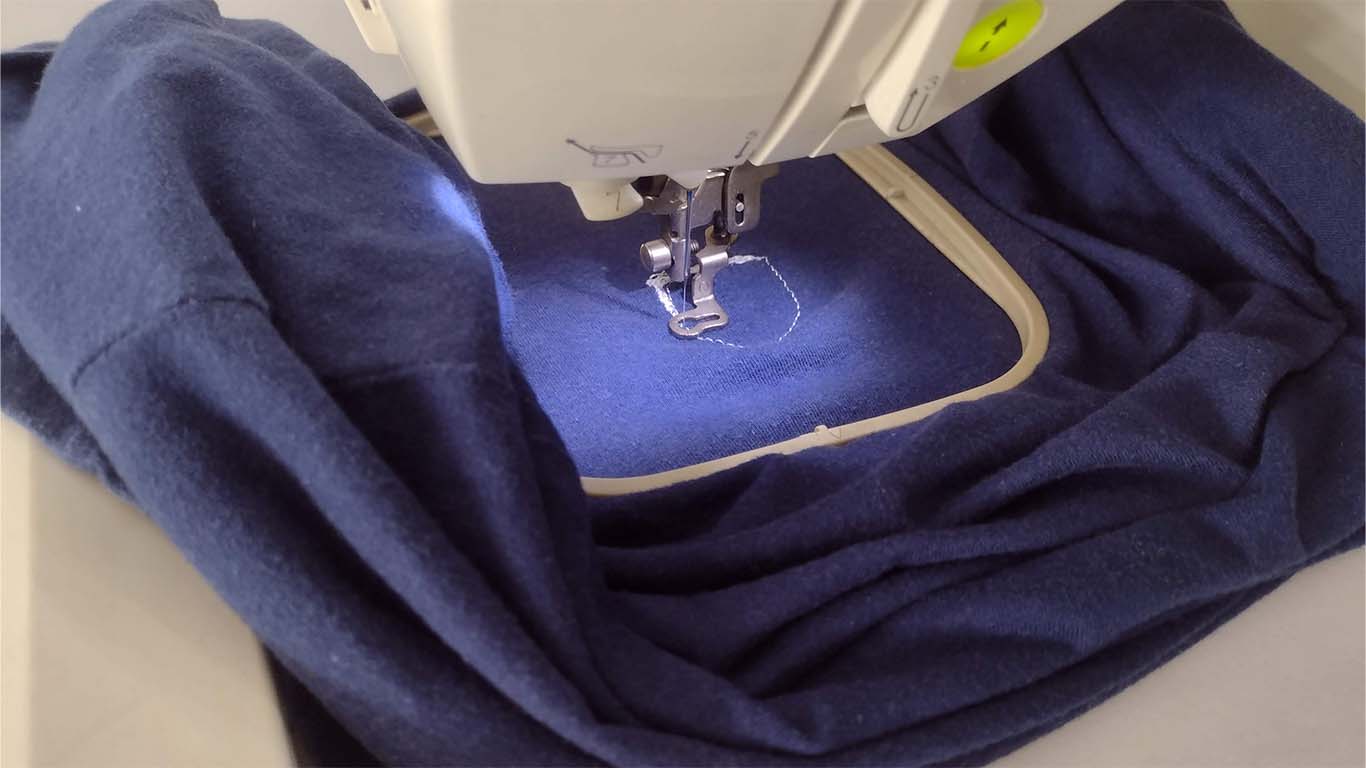
THREAD CHANGE AND MACHINE PREPARATION
Before starting to embroider I have to change the thread to white since my shirt for the next assignment is blue. So I decided to use the color white so it can be noticed.
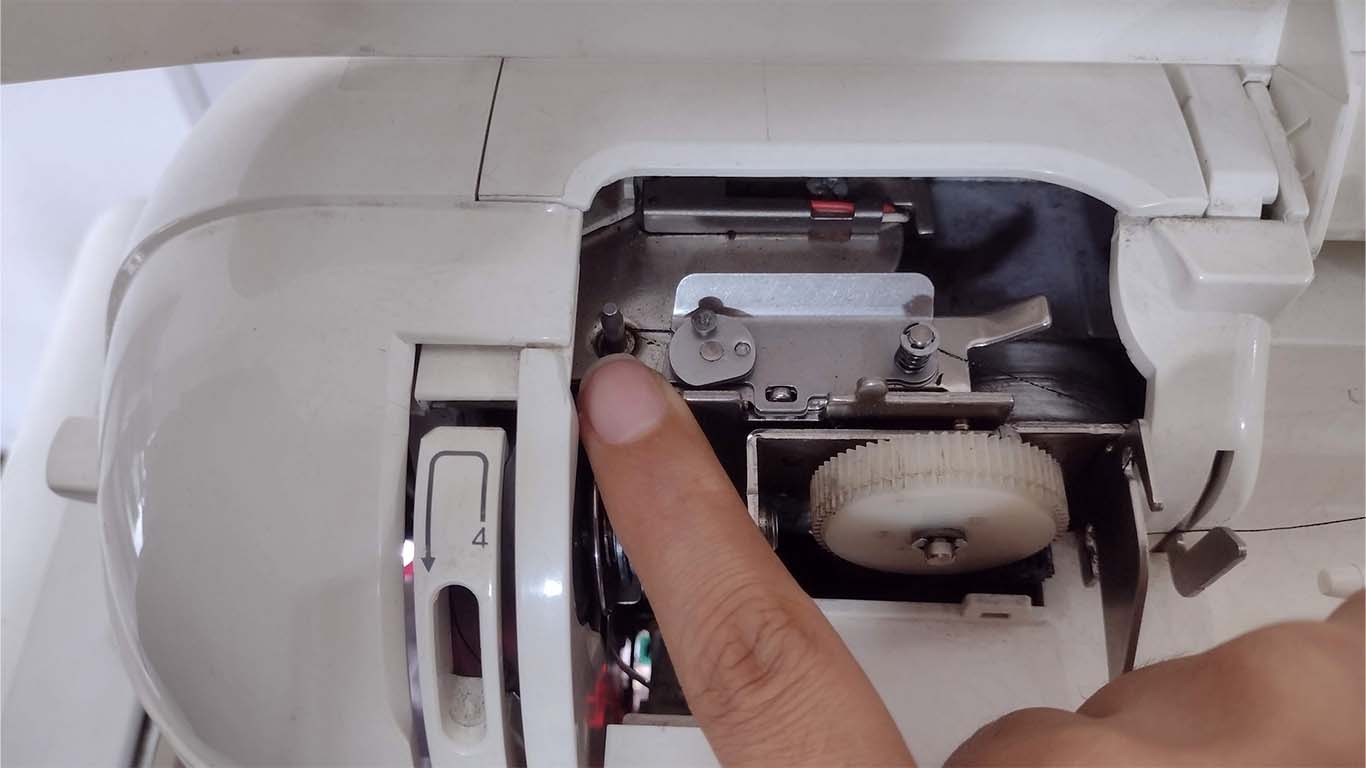
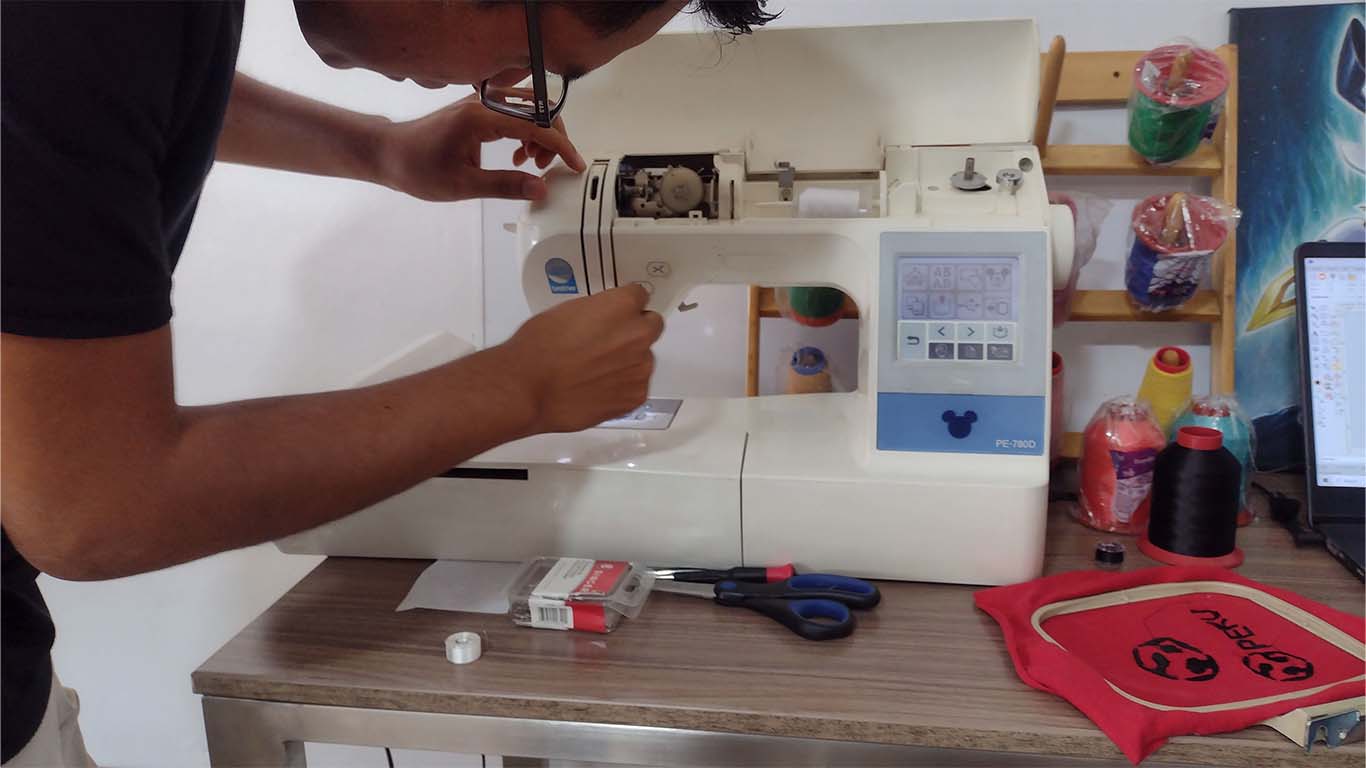
To prepare the machine, first I have to change the color of thread that we are going to use and we have to follow the route that the machine manual recommends. Here's a photo when I'm starting to place the thread.

Then we have to check that the entire first part of the thread is well along the established path or route, and here we will move on to the needle part. Here's a photo of me making the change of direction.
Then we begin to place the thread through the ZIG ZAG part of the machine, where the thread sensors are located. Here we have to do it carefully because the thread broke every so often.
Finally, we put the thread through the hole in the needle and leave a small section of thread so that the machine can start working correctly.
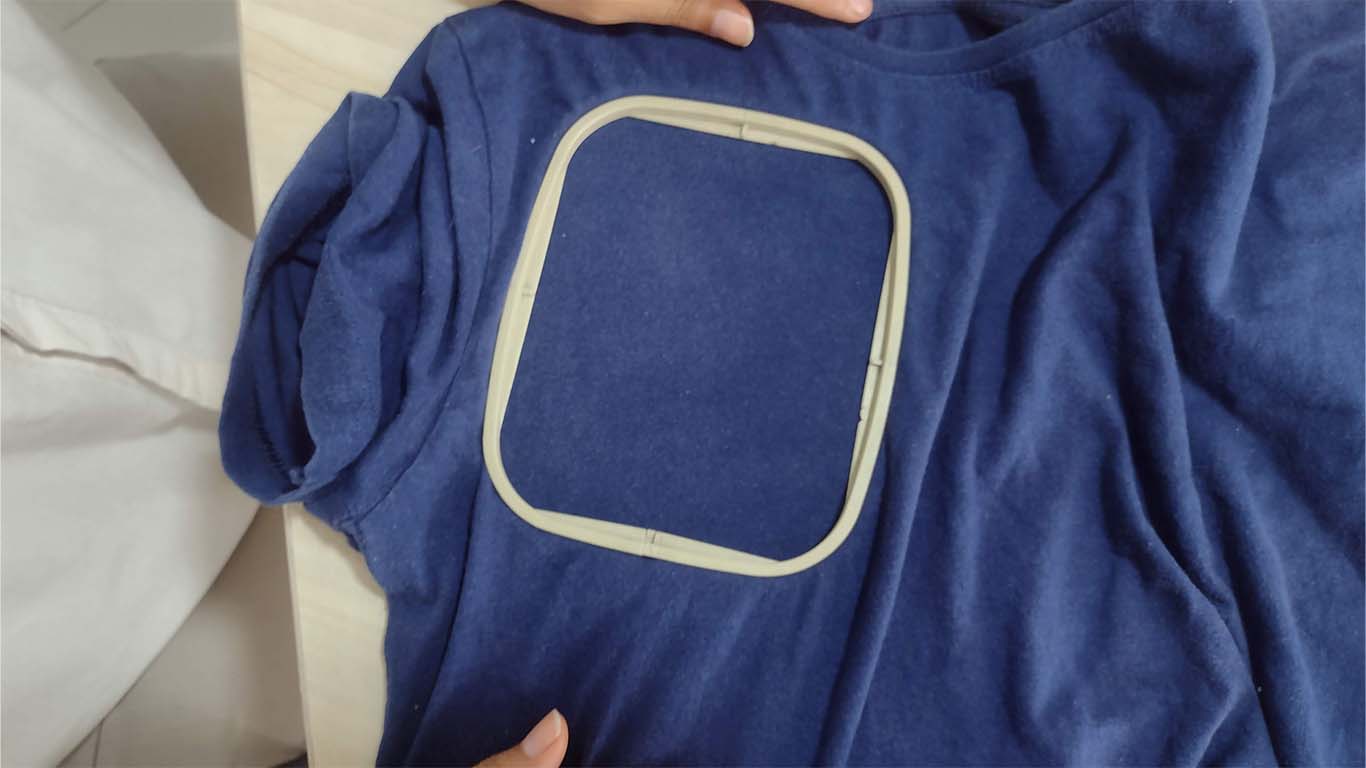
On the other hand, I also had to prepare the frame of the machine. This part of the machine is where the fabric is placed very taut so that the water can work and prevent damage to both the water and the fabric. First we locate the place where we will place our design and begin to place the frame.
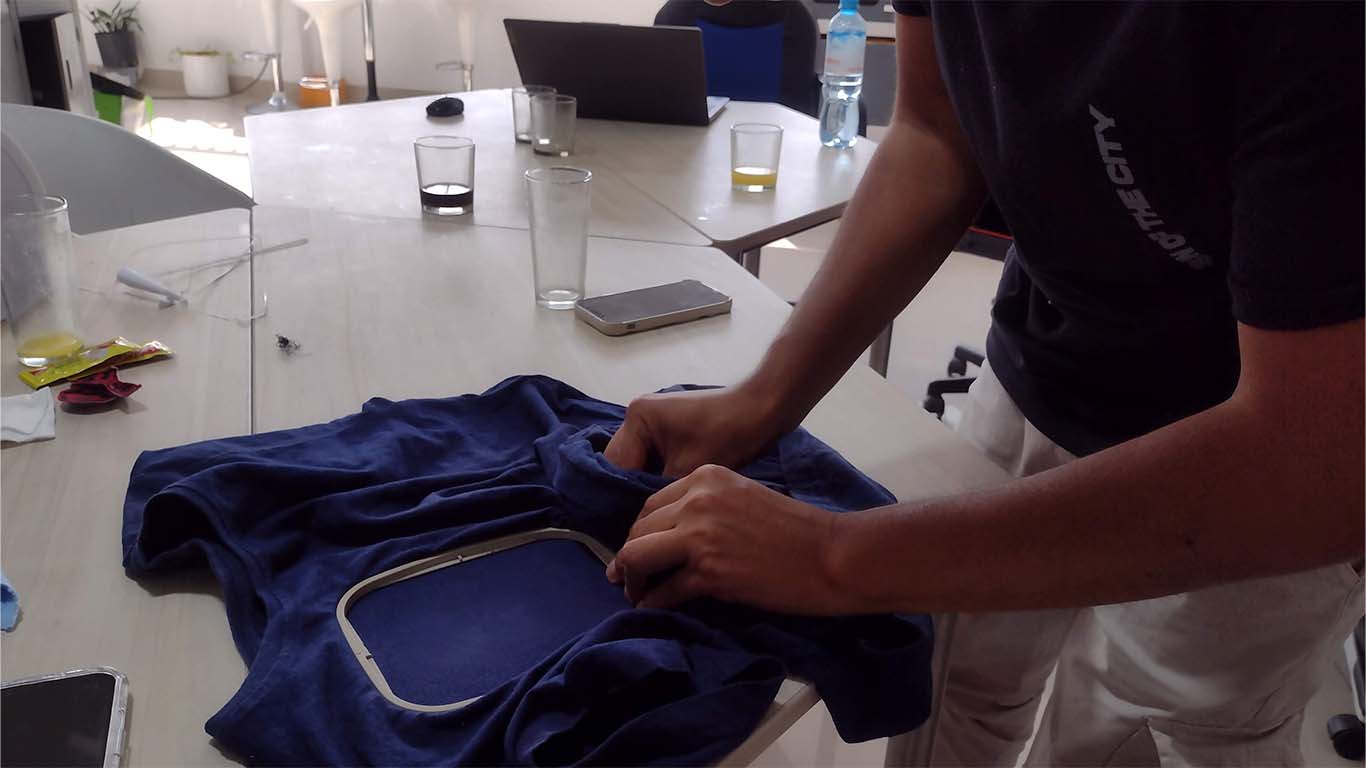
Then we begin to adjust the screw on the lower frame to ensure the grip of the fabric and avoid damage.
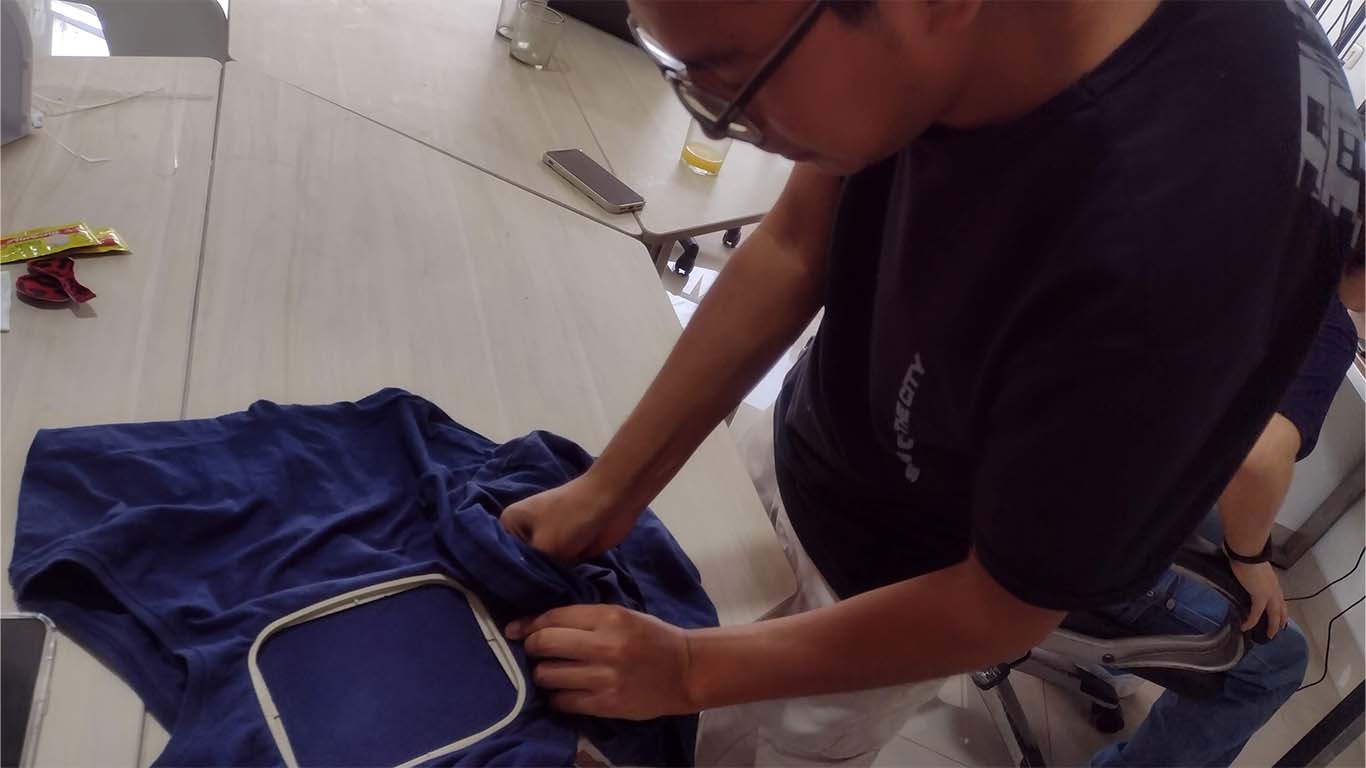
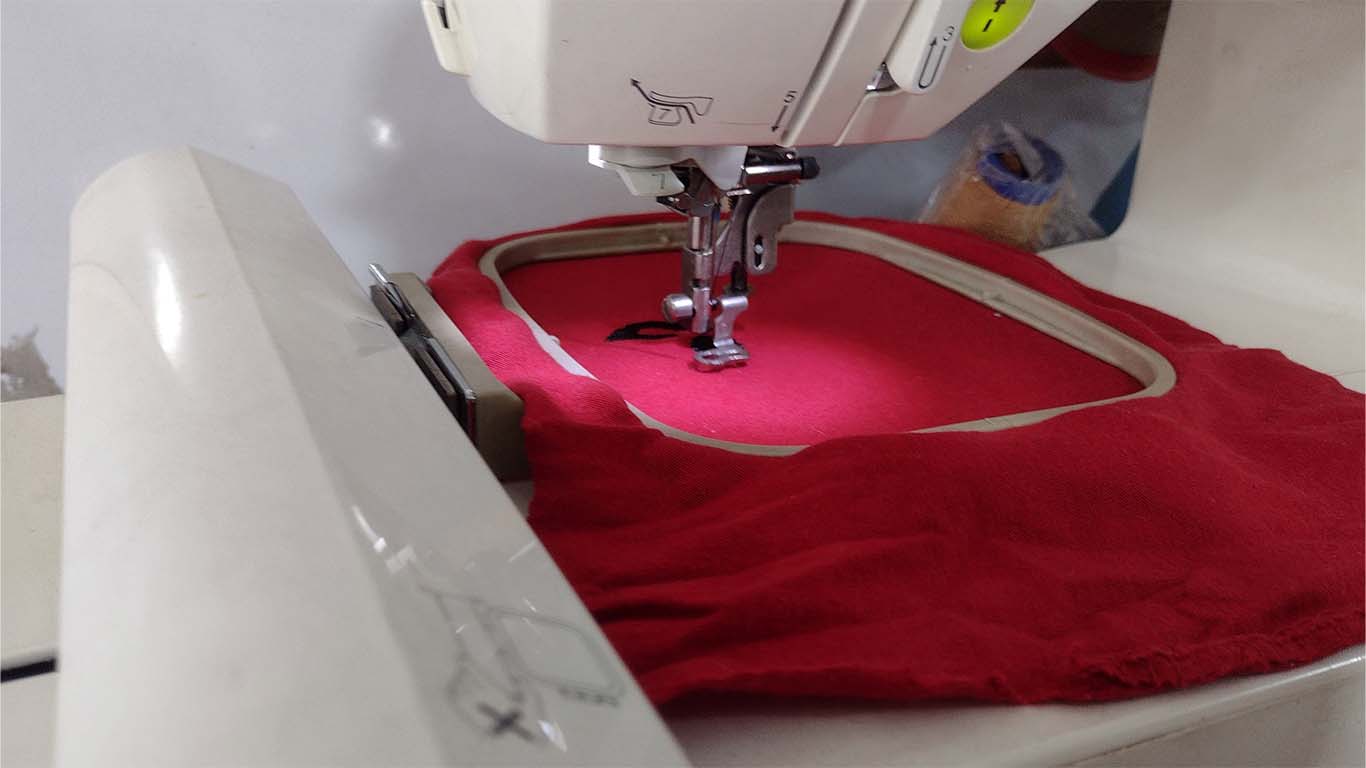
Finally, after securing both frames very well, we can see that we have all the fabric spread out and ready to start embroidering my logo.
ATTEMPT 1: FAILURE
In the first attempt at my design, it didn't turn out as expected, we had an error that we didn't know at that time what it could do. First I placed the hoop on the machine and the needle was ready to start embroidering.
After setting up the machine and sending the design, the fabric began to shrink and lose the tension of the frame. Here is a screenshot I took where we can see that the fabric inside the frame was wrinkled by the force of the machine that continued doing the embroidery.
Finally, we had to take it out to check what had happened and this is the result, the first part of my logo started to work but from one moment to the next it started to wrinkle and to prevent the needle from breaking we took it out. Here is a photograph of my first embroidery attempt. To look for the problem.
ATTEMPT 2: FAILURE
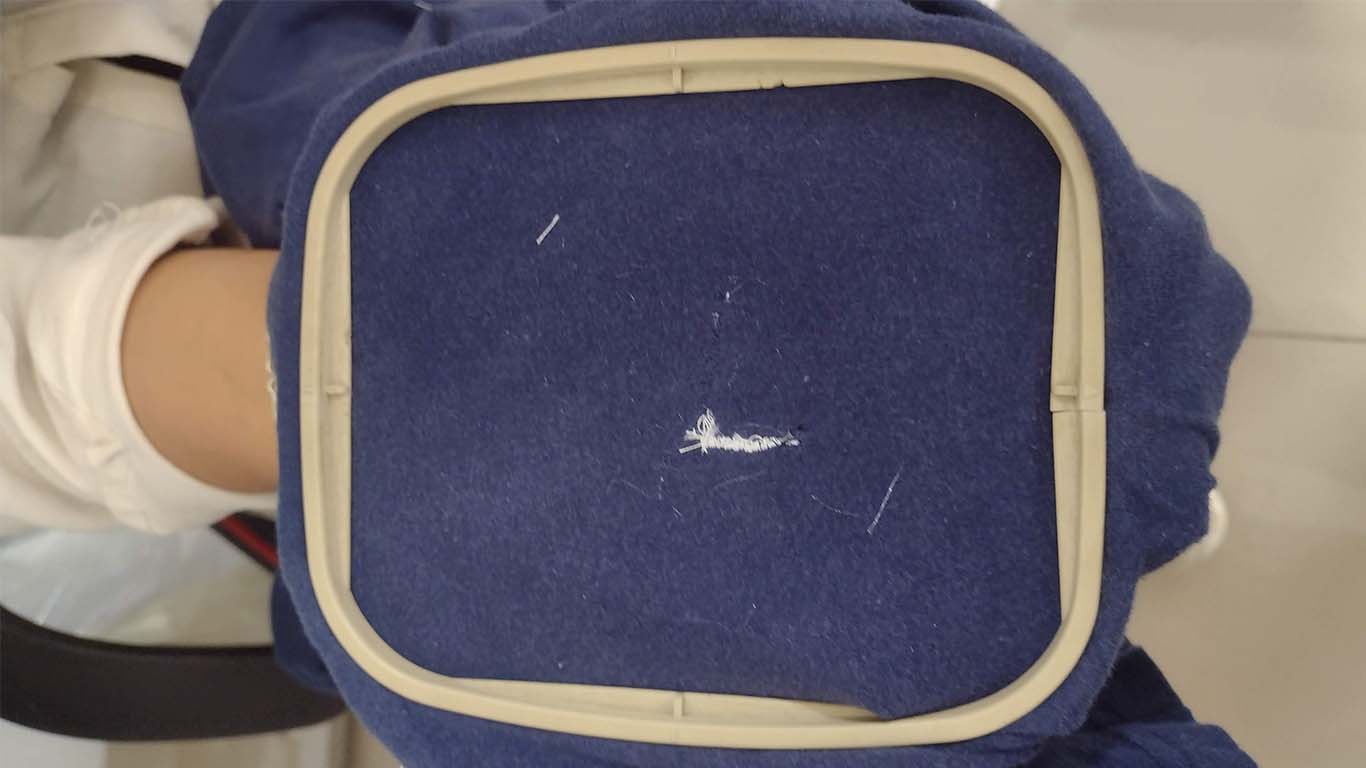
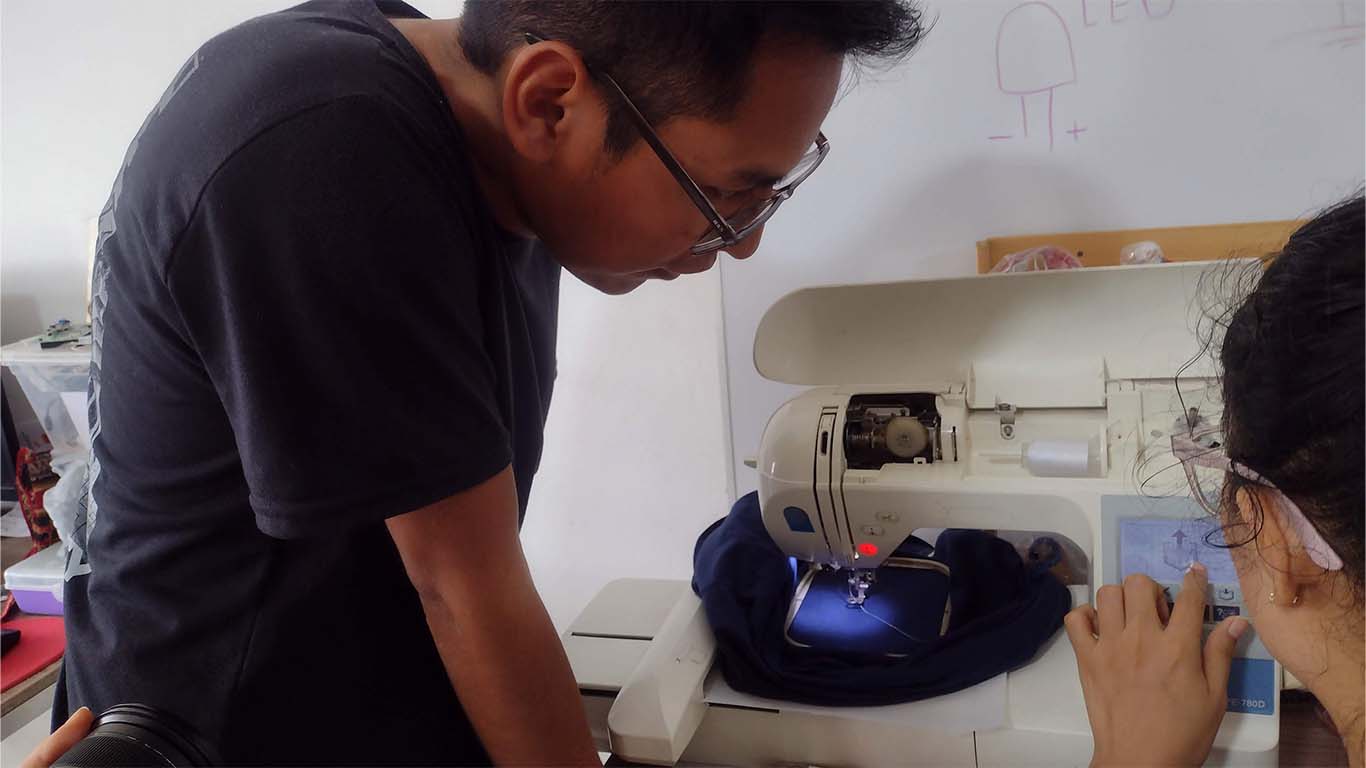
We checked all the steps we mentioned the machine and also checked the tension of the machine again and made a small change in the embroidery speed for filling. So I decided before making all my design to do some tests on the fabric of my polo because perhaps it was thinner than the ones we used in our test and needed another configuration. Here is a photograph with my colleague Silvana reviewing the machine settings.
So we sent it to embroider again and in the first part it went wrong. (LOWER PHOTO DESIGN) where only part of the logo was achieved and the thread broke. So I decided to make another one next to it and the shape of the logo could be achieved.
Here is a photograph of both tests that I carried out on my polo shirt, which perhaps we thought was the fabric. The 2nd time the shape of my logo came out but not as clear, it doesn't have the detail I wanted and it looked strange. So let's see what could be wrong.

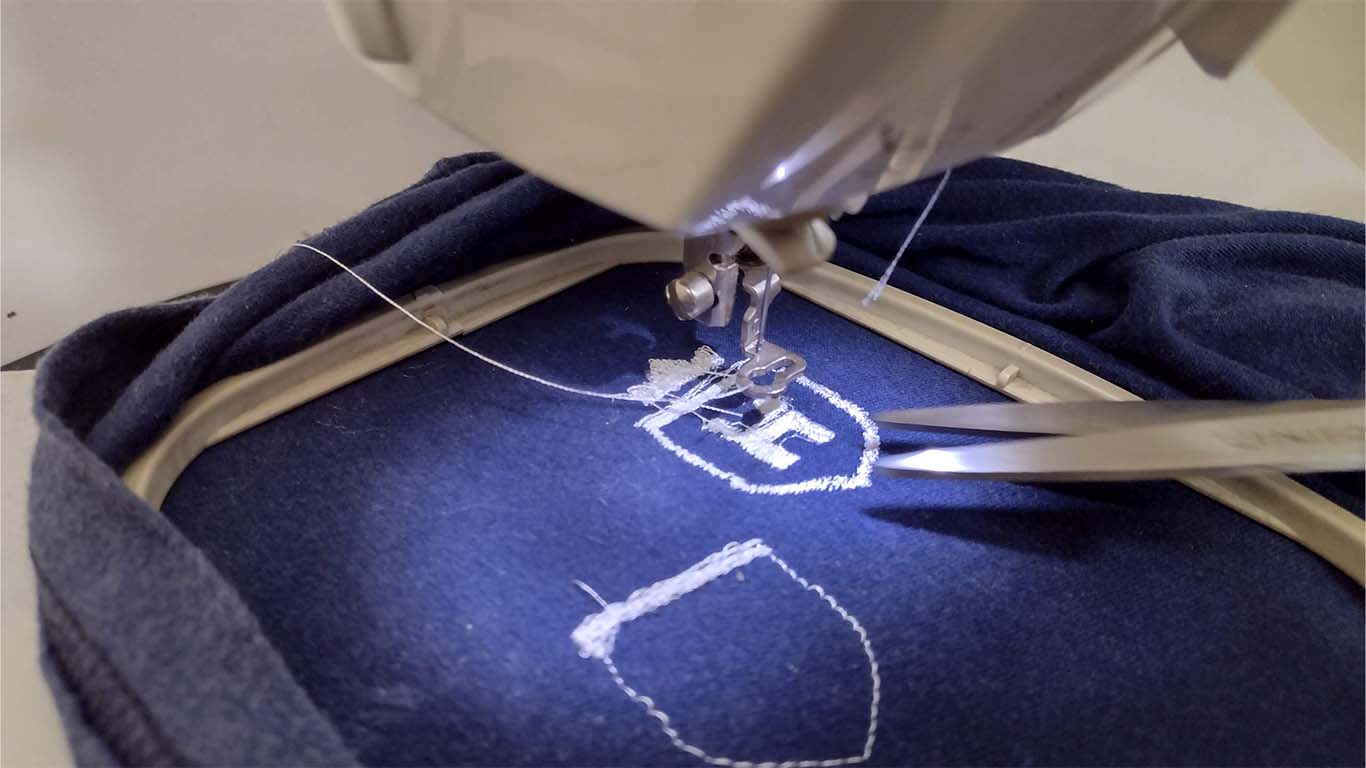
ATTEMPT 3: ACHIEVED
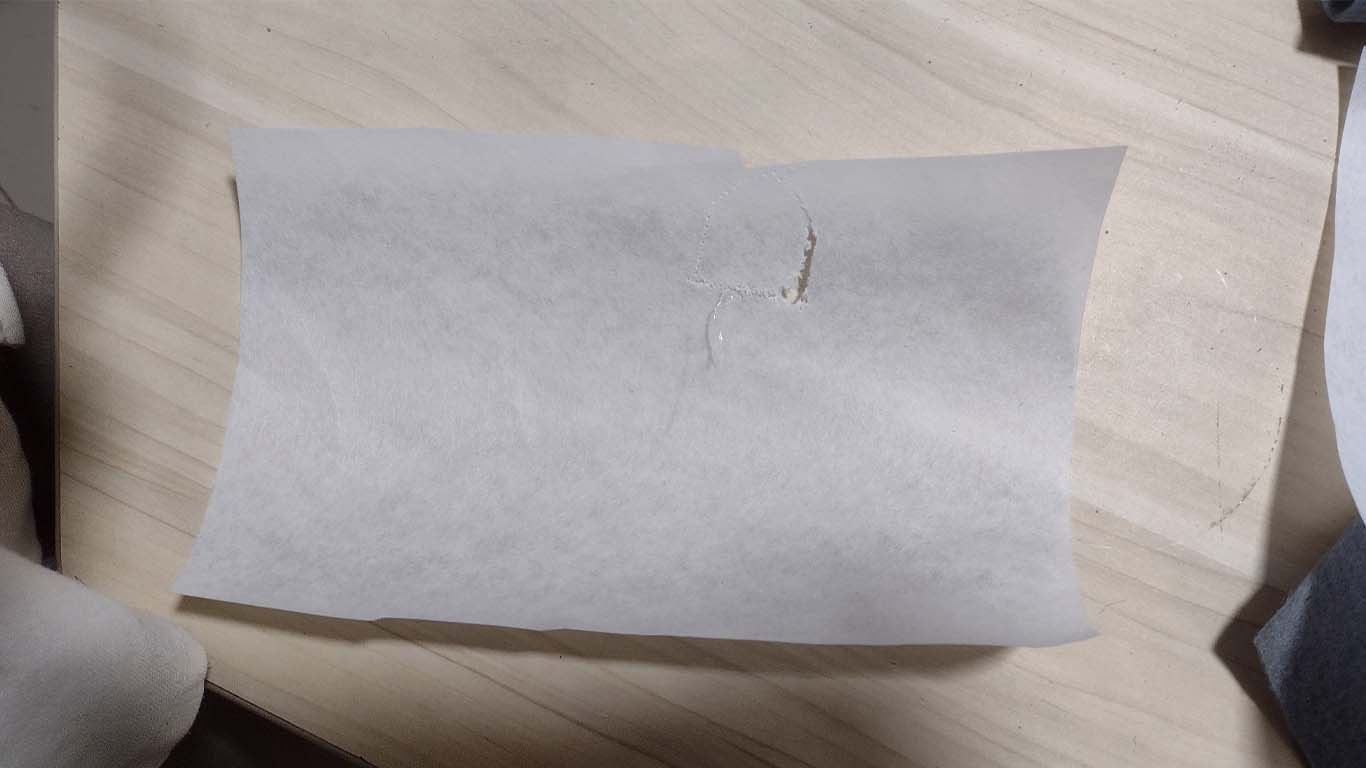
After reviewing all the configurations in the WILCOM program and also the machine manuals, we did not find any problems. Until Silvana mentions that we had forgotten to place the ADHESIVE PEEL. This is a component that is used in the textile world to make embroidery and ensure that the fabrics do not break and the finish is very detailed. Only here we had realized. Here is a screenshot of the ADHESIVE PEEL that must be placed under the fabric.
After making the previous attempts and failing, the front part of where I wanted to place my logo was damaged. So I decided to place it on the sleeve, it is very typical that soccer jerseys especially place logos on the sleeve. So I decided to change the location and here is the process.
Before sending it to the machine again, I had to rotate the logo horizontally in the WILCOM program because when putting it in the machine, the sleeve could not be placed vertically and I had to change the direction of the logo.
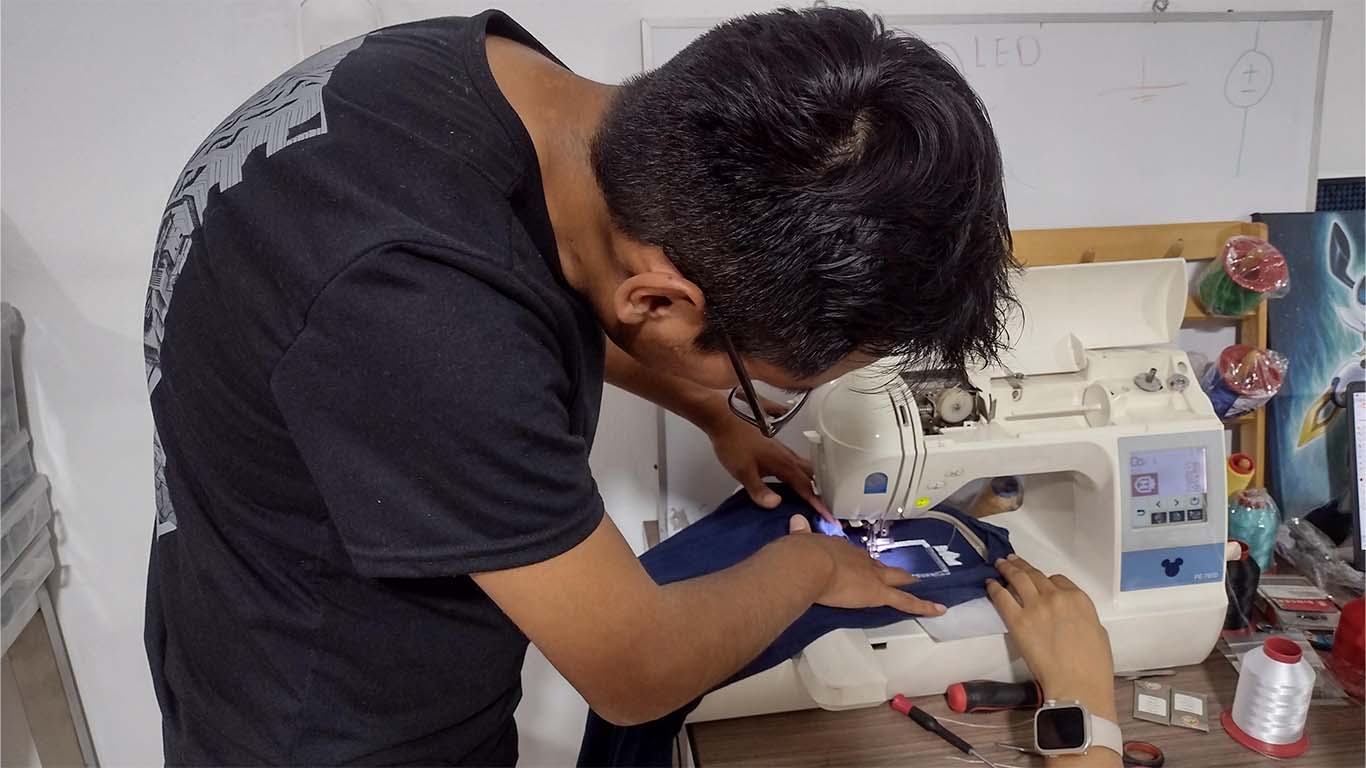
After having the design again, we sent it to the machine and now the machine began to do the job very well. Here are some screenshots and videos of the process that was achieved!!!
After finishing the embroidery on the machine, here is the final result, the result came out very well. Here is a video of when I take the embroidery and my polo out of the machine with the result.
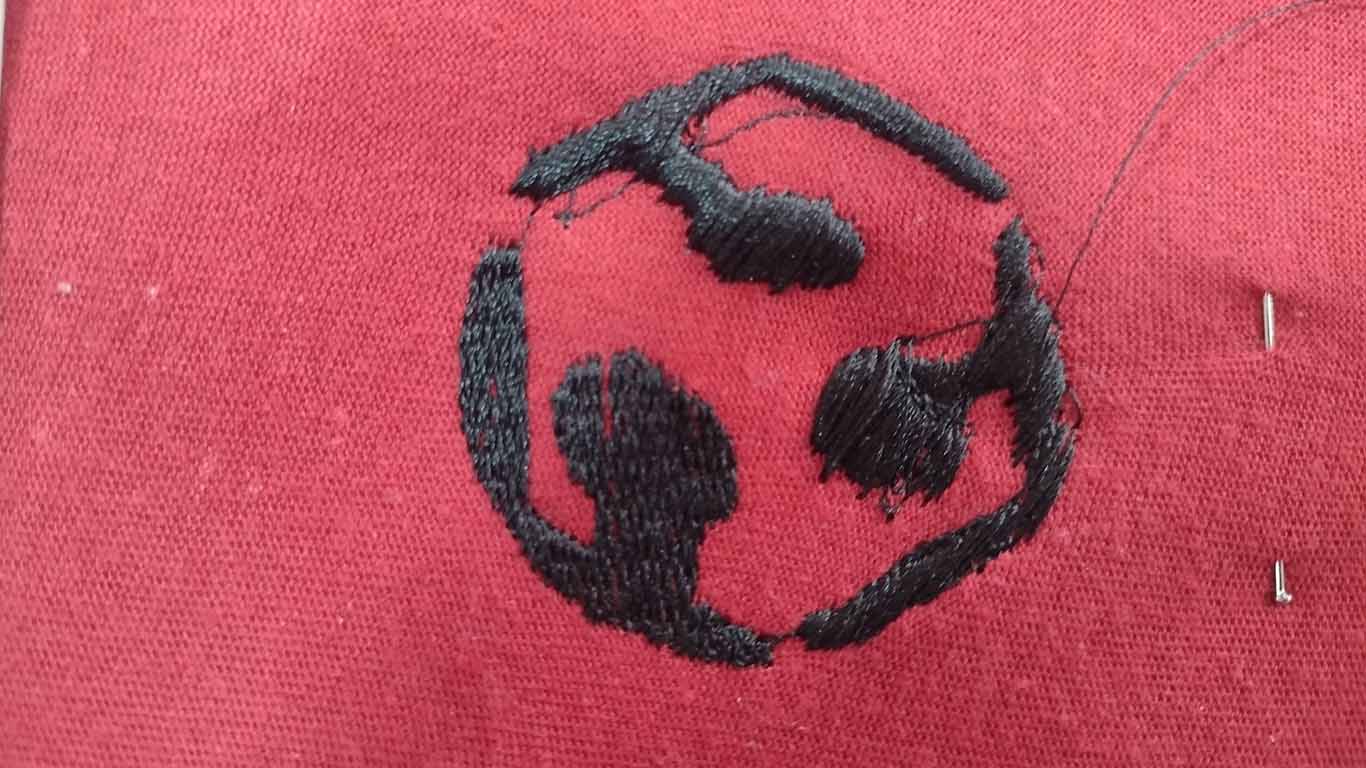
Finally, after obtaining the embroidery we can cut the ADHESIVE PELON that we put under the fabric and here is the result of the embroidery of my logo.
Here is a photograph of the final embroidery of my logo, it came out very well in detail. We only have to cut a little of the excess threads at the beginning and end of the embroidery.
CONCLUSIONS
This week has been very fun and, as always, learning. I had to leave the UCSUR fab lab to go visit my colleagues Jesus and Silvana at GARAGE LAB and see their laboratory to do this week's assignment. This week reminded me of my childhood when I played soccer and saw that embroidery was characteristic of sports polo shirts, so I made a design based on it. To conclude, I would like to say that it is also a week of innovation and design because we can achieve many things with textiles, embroidery and etc. Getting to know this machine and the way it works seems very interesting and very characteristic to me, fashion is one of the things that also attracts me and I have learned a little about it, thank you FAB ACADEMY for so much teaching. Finally, I was able to develop my logo and seeing it come true is very interesting, I just want to thank the very committed group and always supporting us week by week to achieve this FAB ACADEMY.
FILES
Here you can download all the files that I have made for the following assignment: