🖨️Week 5: 3D Printing and Scanning
Project Heros
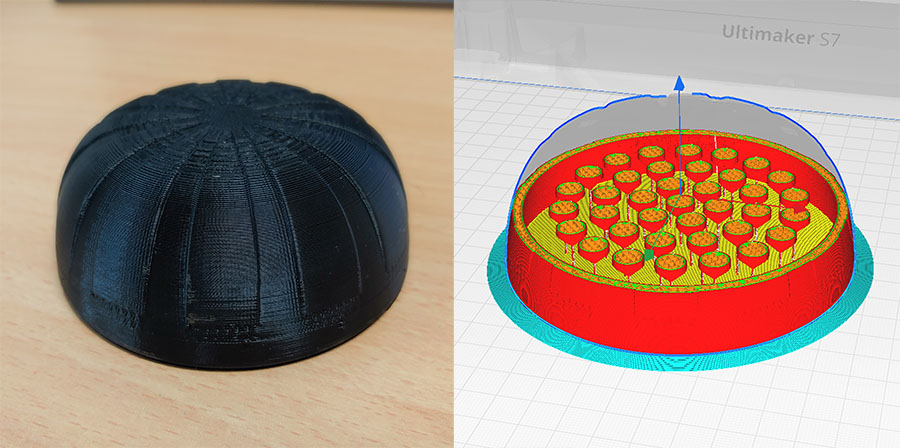
3D Printed Shaker (with slicer view of internal beads):
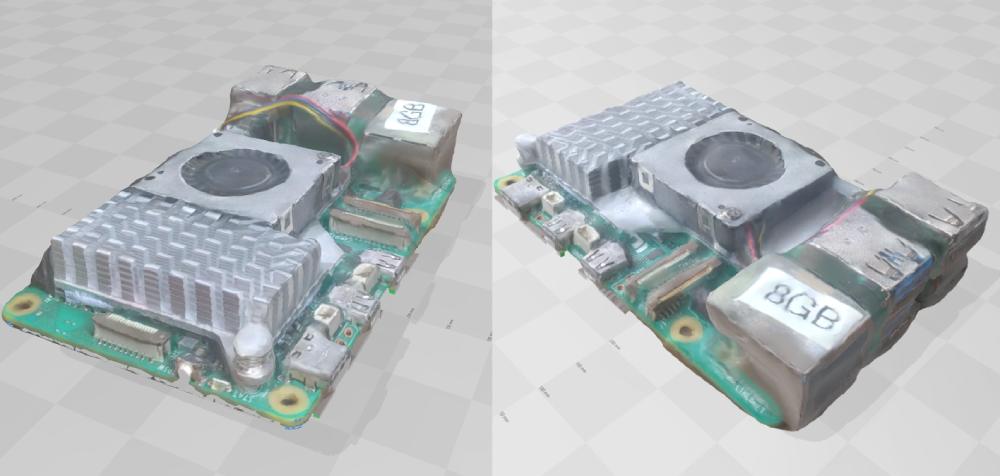
Raspberry Pi 5 Photogrammetric Scan:
Group Assignment
This week's group assignment was to test the design rules for our 3d printer. I have owned a Prusa Mk2 since 2016, but it was a good exercise and experience to see the capabilities of a more engineering grade printer. I have heard people use the phrase "the ultimaker experience" and now I think I understand it. Having 8 years of experience on the same printer, my entire design workflow has been adapted to the capabilities of my mk2 printer, to avoid overhangs over 45 degrees, bridges longer than 20mm and to always give 0.3mm in tolerances. But with the S7 we will be using for machine building week (which we plan to largely use 3d printed parts), I am now able to push these design limits further, greater overhang angles, longer bridges, and tighter tolerances, and that will give us more freedom in the design of our parts.
Designing the Shaker
This week we will be modelling and printing a print-in-place marraca. Or atleast I will try to... I've owned a 3d printer for over 8 years now and 3d printing has already worked its way into my workflow and design process. So this week I thought I would try something new and try to make a print in place marraca, with the beads being printed in an enclosed shell. The beads will sit up on a thin extrusion and should hopefully snap off if I hit the marraca (but lets hope the beads snap off before the marraca cracks open). This whole model is optimised for 3d printing and every feature made has 3d printing in mind.
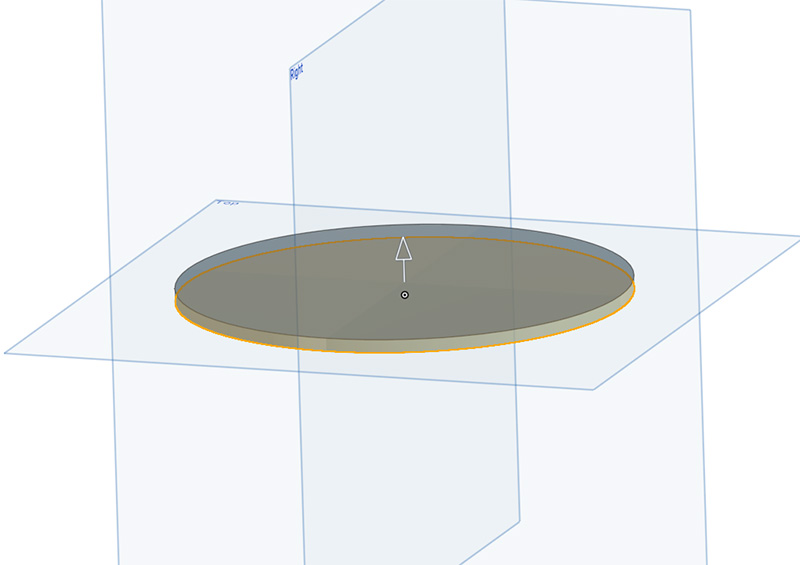
In onshape I sketched and extruded this circular plate which will sit on the print bed and give us some nice adhesion.
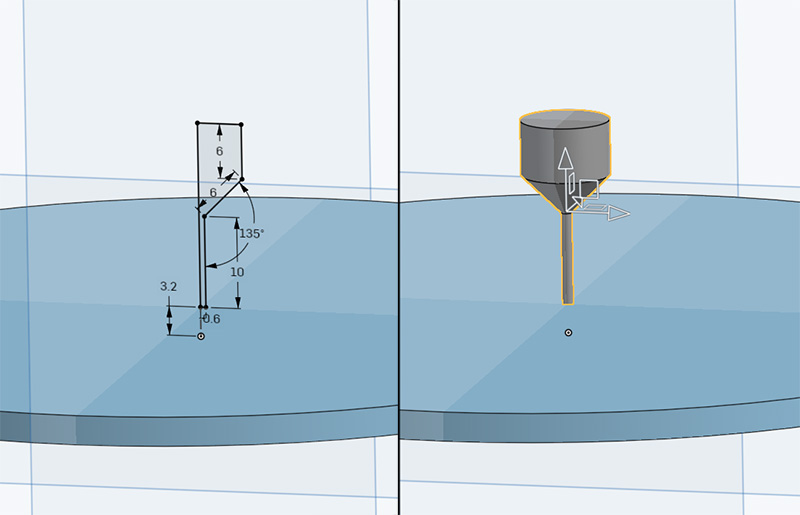
I then sketched and revolved the bead around. The stem of the bead is as thin as my 0.6 mm nozzle will go, and its tall as it will make it easier to snap off, but not too tall that its unstable to print. The bottom of the bead is also at a 45 degree angle to prevent any overhangs.
I then copied the bead over and gave it 3 mm clearance, it should be enough of a distance to snap off, but also pack them tightly.

I then used the circular pattern tool to create as many as I can fit in a ring.
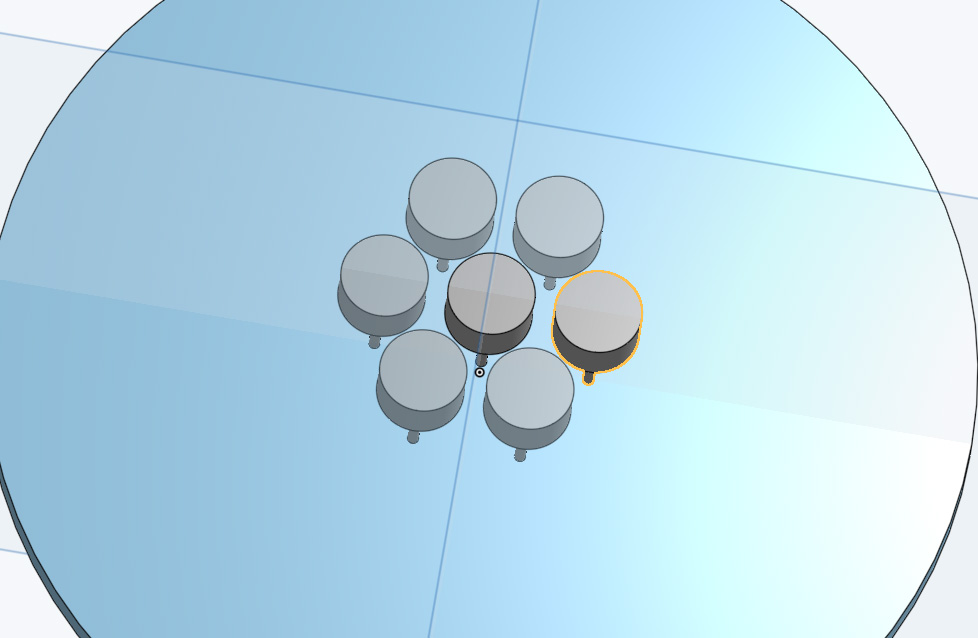
And I repeated that another 2 times to create my circular array of beads.

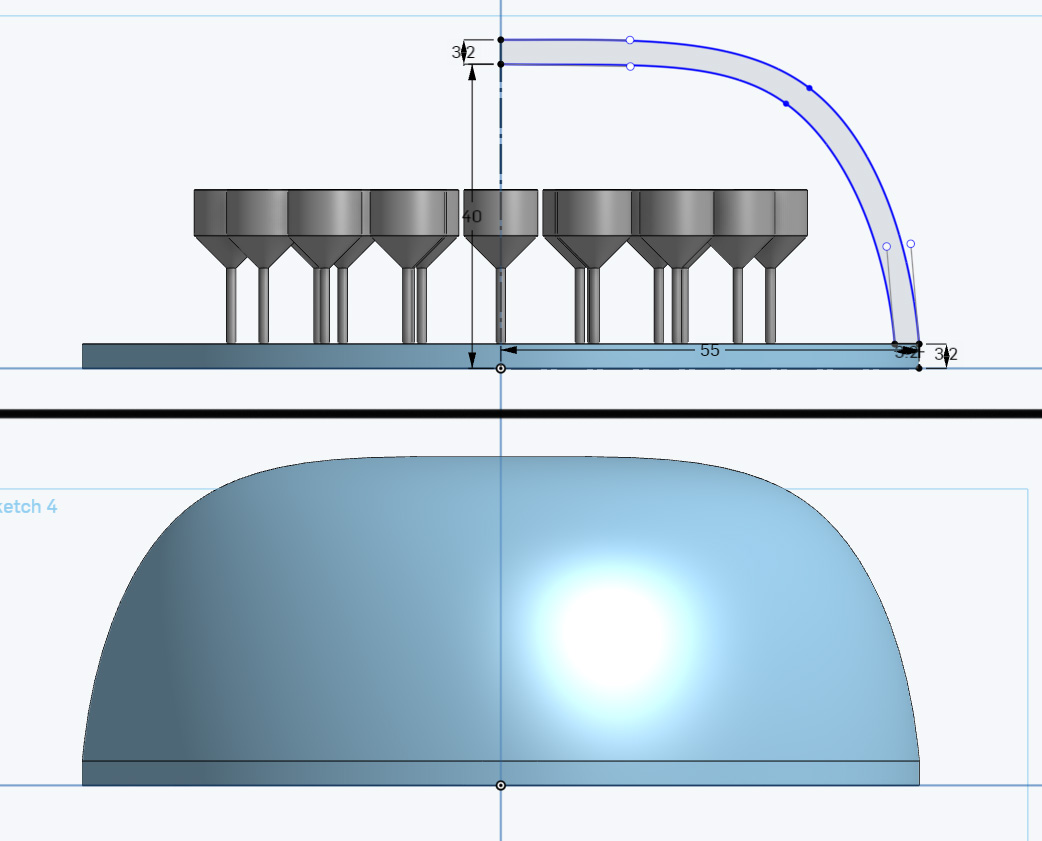
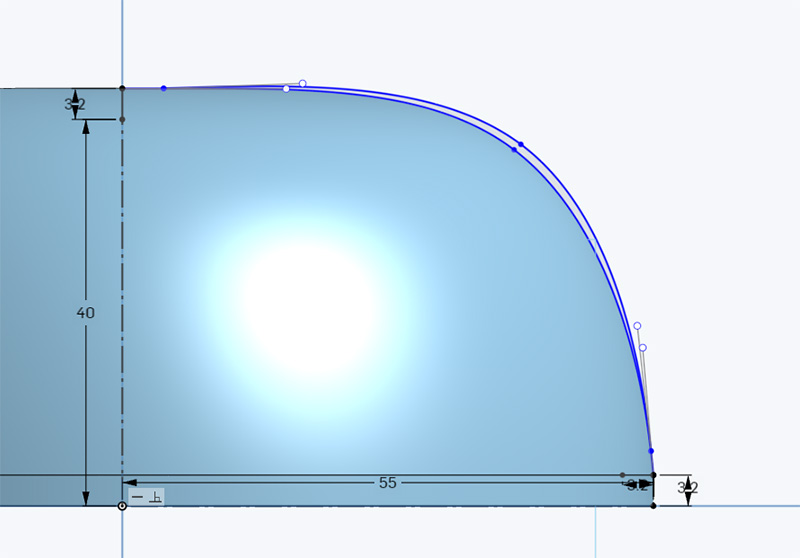
Then using the splining tool, I created this nice curve on the outside which I extruded. I am not an expert in ergonomics, but I really wanna try to use the abilities of a 3d printer to make something nice to hold. This encloses all the beads and means that this object is no longer possible to be made with subtractive methods alone.
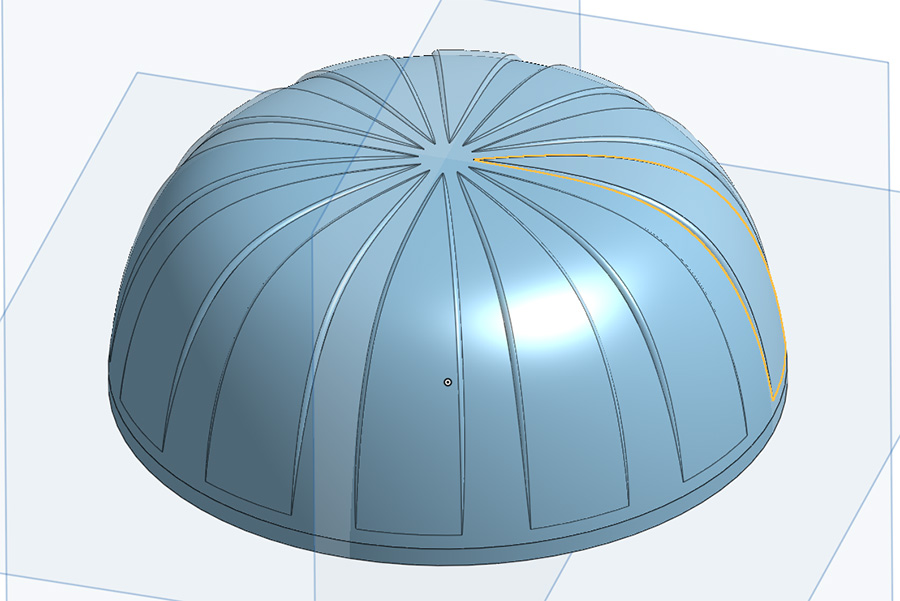
I then made this little sketch on the outside of the dome.
And then revolved it around 20 degrees and curved off the edges. Then I used the circular pattern repeat to create these grips. They look a little jank in the model, but I think when its printed it will turn out better. This feature would be difficult with traditional methods, but a 3d printer wont notice the difference.
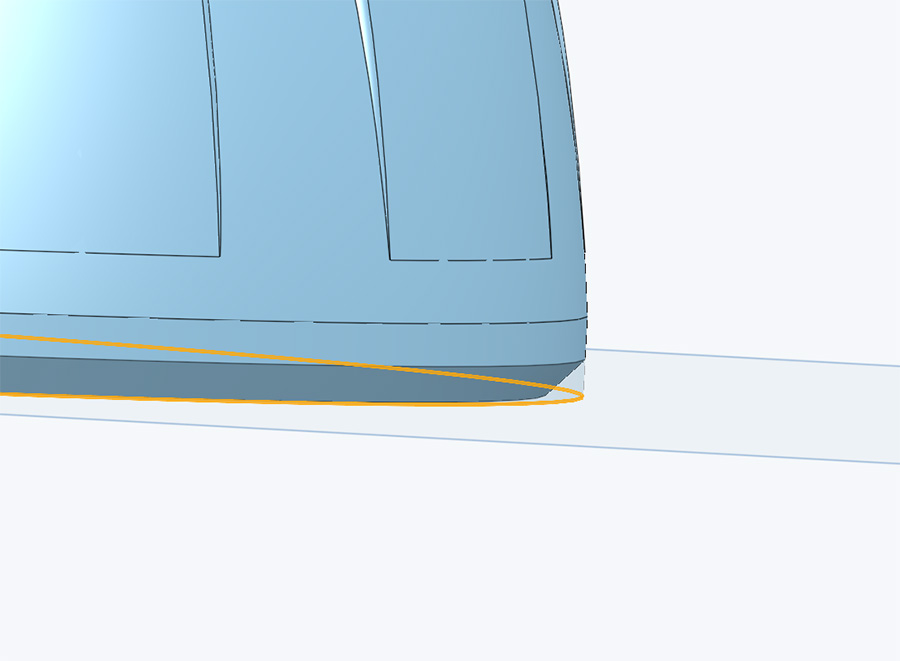
And to top it all off, I put this slight chamfer on the bottom to get rid of that sharp edge and make it more holdable. I used a chamfer here because if this edge was rounded, it would produce an nasty overhang. But the chamfer gives us a nice 45 degree overhang that is printable.
Printing the Shaker
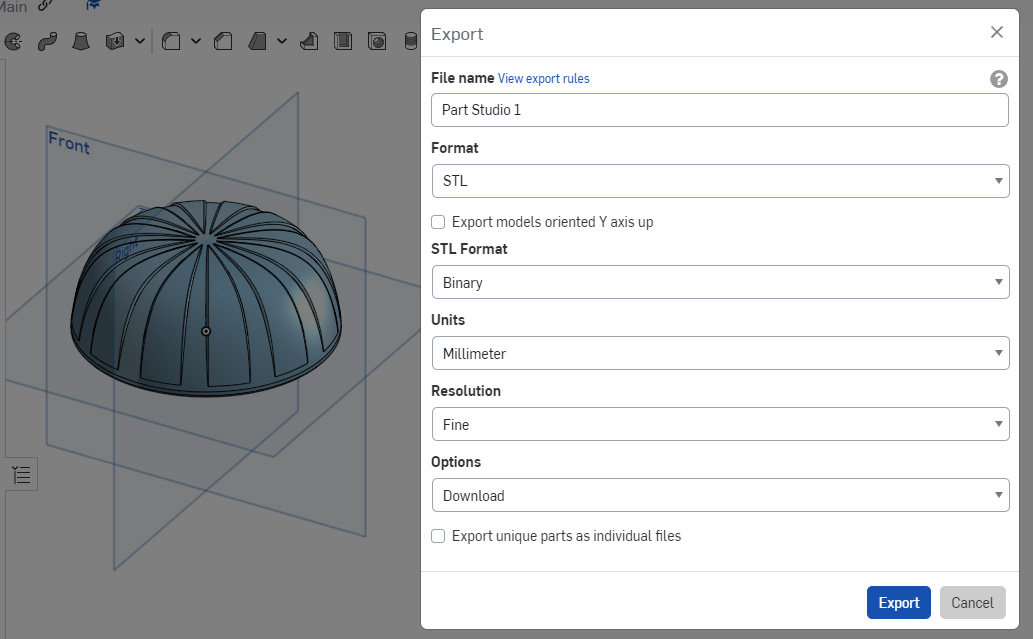
I first exported the part from onshape as an STL, ensuring that it was in the highest resolution and in the correct units.
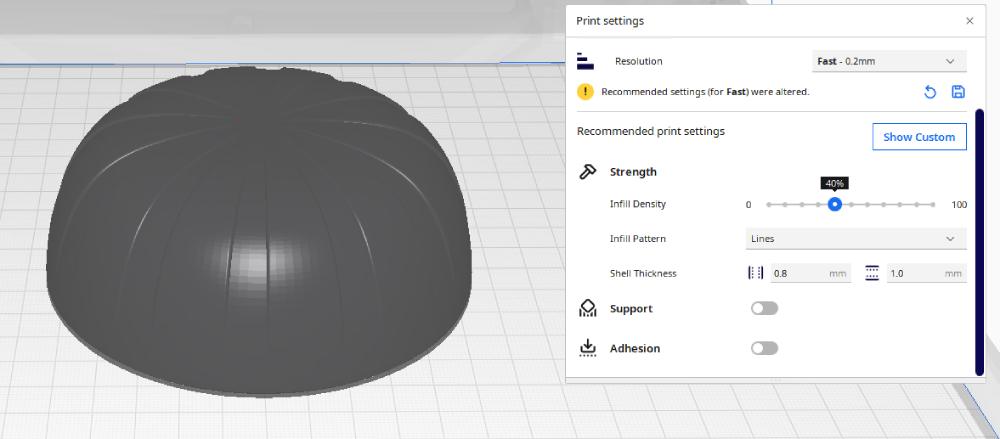
Then I loaded imported it into Cura and selected the UltiMaker S7. Then I left it on the default 0.2 mm layer height as it is a good balance of detail and speed, and bumped the infill density upto 40% to try and give the beads on the inside a little more weight. This model didnt need supports because it was designed to not need them, and the large flat surface removes the need for rafts. I am also using PLA, it's what was loaded into the machine and I would rather use PETG because of its better mechanical properties (its less likely to crack open when I whack the shaker to dislodge the beads), but its also a good experiment to see if PLA is up for this type of job.
I then exported it, whacked it on a usb, then printed it on the S7.
(Timelapse here of the print)
After a few hours it was finished as I carefully took it off the print bed. The process of removing it from the bed seemed to already snap off a few beads on the inside, so I was very hopeful that this was going to work. I gave it a solid tap (I forgot to record and was too excited sorry), and it sounds like a good chunk of the beads dislodged on the inside, all while not cracking the PLA.
And it seems like it worked! It shakes and makes sound, after playing with it a little I found that pressure can be applied to the bottom surface to dampen the sound of the marraca. I'm quite happy with how this turned out and if I were to repeat it again, I might adjust the beads to be a bit smaller and in greater quantity to improve the sound of it.
3D Scanning an Object
Photogrammetry is a method of 3d scanning an object with nothing but a collection of photos from multiple angles. Although we have access to LIDAR-based scanners like the Einscan, I wanted to give photogrammetry a go as I haver previously used it in 2014 and wanted to see how much it has progressed since. To do so I used Polycam, an app available on IOS and Android. It has a free trial version that allows for a limited amount of captures, and for it to only be exported in the .GLB format, which is good enough for our needs.
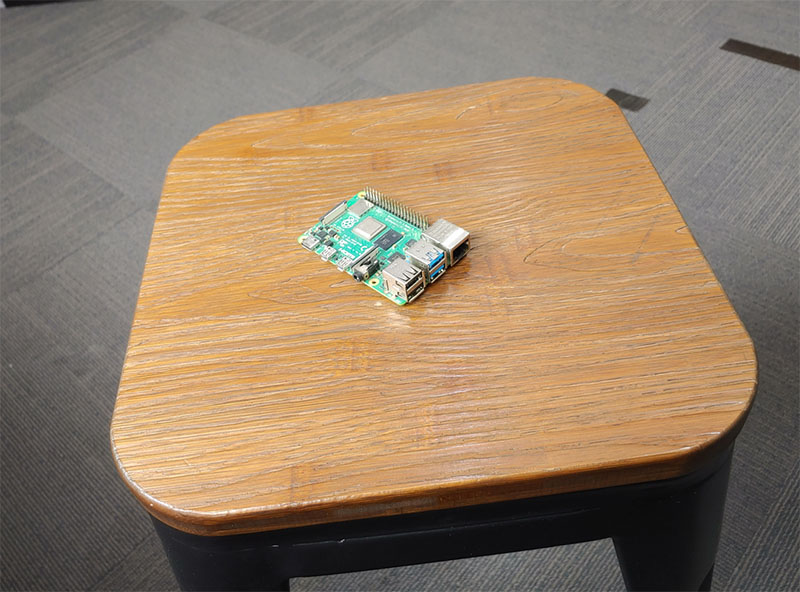
I installed the app, and started a new scan using the automatic photo mode. I place the Pi in our studio which lit it from all sides fairly well, and then took photos around it from every angle, about 200 in total.
After processing and exporting in the highest quality detail, I imported it into 3D builder, a free lightweight model editor for windows (this program may of come preinstalled with Windows 10).
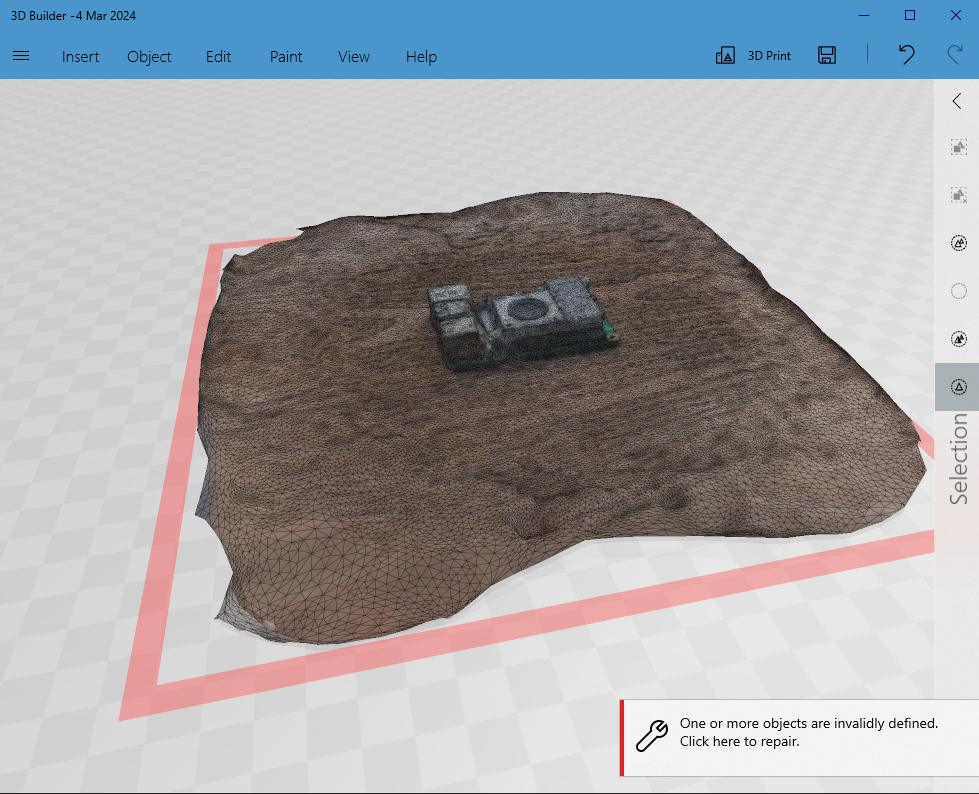
From here I cleaned up the mesh by inserting a shape and scaling it to cover the section I want to remove.
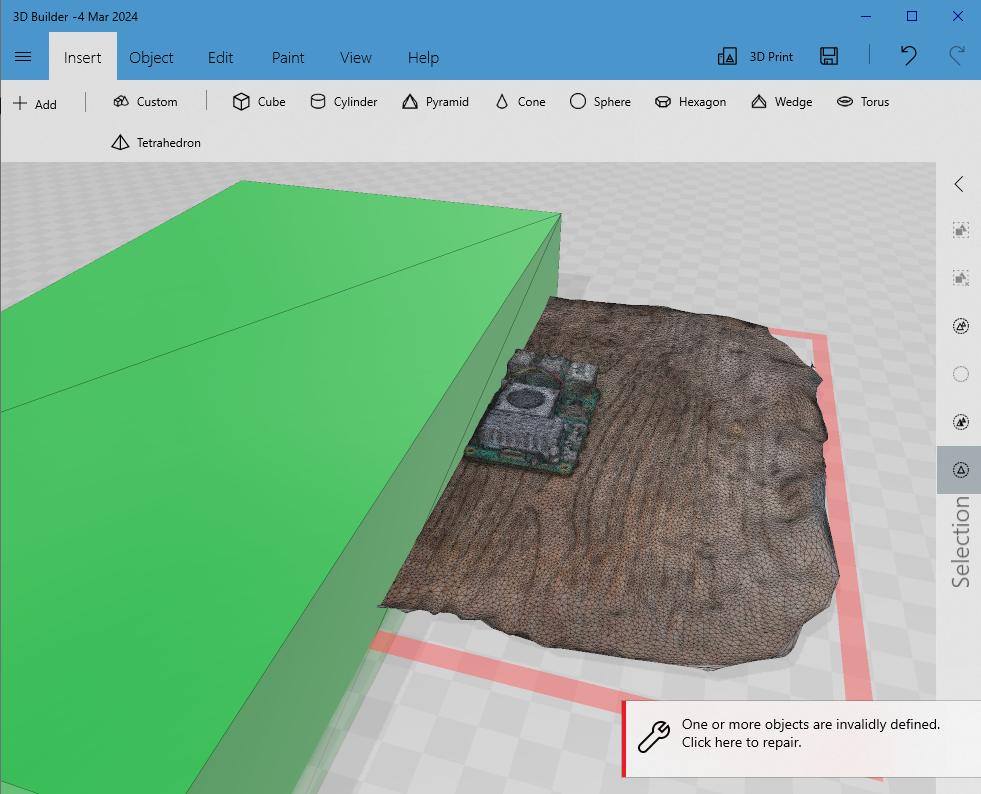
And then using the subtract tool on the shape to remove the volume that it intersects the scan with.
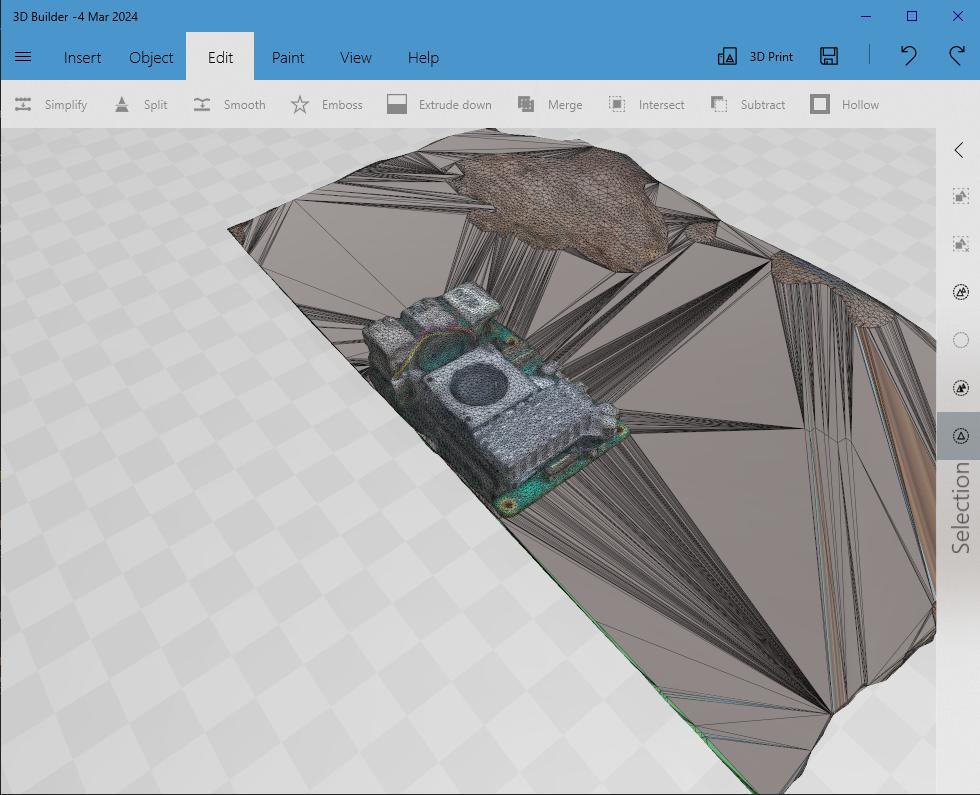
After doing this a few times, I was able to trim away the excess surfaces generated in the model and by making a flat cut on the bottom, was left with a now printable file. Overall this is alright considering that it was scanned with nothing but photos. The model is funny with how low poly and mashed it is, but this it was done with one of the lowest entry points of 3d scanning. With just the addition of a distance sensor, this process becomes quite detailed - even with just the lidar on an newer iPhone. However, I reckon that in the future with the help of neural networks phototelegrammetry will be a more viable option as we are already seeing some exciting stuff with meta already being able to generate a 3d model with a single photo. Who knows, the implementation of ai might make lidar on 3d scanning not-compulsary, but it definitely has improved over the last 10 years.
I could not get the final scan with texture to be under 10 mb, the lowest I could get was 21 mb. So I have instead uploaded the .stl file which doesn't have the texture on it, but would be enough to 3d print.
Files
Link to Onshape Shaker
Shaker Step file
Shaker STL
Raspberry Pi 5 Photogrammetry Scan