📜Week 1: Principles, Practices and Project Management
LLM Prompt
This weeks work was co-produced with the help of the Chat GPT-4 LLM . I created a new chat specifically for this whole week and provided it with an intial prompt to provide context for this weeks assignment:
I'm currently enrolled in fab academy for 2024. As a bit of background I am building a resistor/led vending machine and I am a recent mechatronics graduate with a background in maker education. I have another chat dedicated to the project side of things, but this chat is dedicated to the documentation side of it. As a part of our first weeks assignment we must use MkDocs to build a personal website. This site is hosted on gitlab and we will need to use git to manage this repository. I am using windows 10. The first task this week is to get the site live, make a little page about me, and also create a tutorial showing our process of setting up and using git + mkdocs, so that we can demonstrate our knowledge of it, and for it to be a tutorial for others. My knowledge of markdown is probably a 8/10, my knowledge of mkdocs is a 1/10, and my knowledge of git is a 4/10. This is just context for this chat which I will use to complete these tasks.
My first question is...
From this context, I could prompt any simple questions like "How do I change text colour?", or "Is it possible to add an icon to my site?"
GitLab Tutorial
Through out this course we will be using GitLab to host our personal website, which will be used to document and store student's work on. GitLab is a repository that allows users to commit their work to it in stages, and allows for the ability for to revert back to a given point like a checkpoint (which was hugely helpful in getting a theme working on my site).
Besides allowing you to push and pull your files to a remote repository with a catalogued and retrievable version history, GitLab allows users to branch off work. This means that you can try something experimental or start work on a new module in an environment that is branched off and seperated from your main, and you do not have to worry about disturbing or breaking anything because you are in an isolated "test chamber". Then when you are ready, you can merge your branch back into the main. This branching is also mightily helpful when having multiple people working on the same project.
Now lets look at how to get it going.
This section is sourced from: the GitLab docs page
Step 1: Setting up GitLab
1) Install Git for Windows from
2) During the installation process, you will be prompted with install options. All of these can be left on the default/reccomended ones. The only install setting I changed was the default text editor as I am more familiar with NotePad++, but you can select which ever you are more comfortable with (or you can also leave this on default)
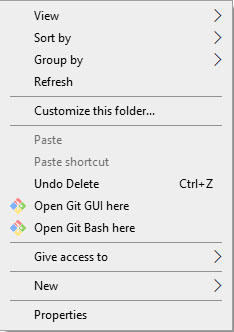
3) Now we need to set up our GitLab credentials. Anywhere on your computer you should now be able to right click on your desktop or in a folder and select "Open Git Bash Here".
In this window set up your credentials with:
git config --global user.name "username"
git config --global user.email "your_email"
(Pro Tip: you might not be able to copy and paste into the bash window, but you can right click paste and sometimes insert to paste)
Your username will most likely be firstname-lastname, so I would type in:
git config --global user.name "jaryd-giesen"
And your email is just the email that you have used so far for FabLab related things. You can check if you have set this up correctly with
git config --global --list
You should see your name and email you punched in.
4) Generate SSH Key
We are now going to generate an SSH (Secure Shell) key that will allow us to access our GitLab repository. In the Git Bash terminal punch in:
ssh-keygen -t rsa -C "$your_email"
with the same email being used as before (the $ sign is not a mistake). This will of created a file called id_rsa.pub, and we will open it with:
cat ~/.ssh/id_rsa.pub
And then copy it with:
clip < ~/.ssh/id_rsa.pub
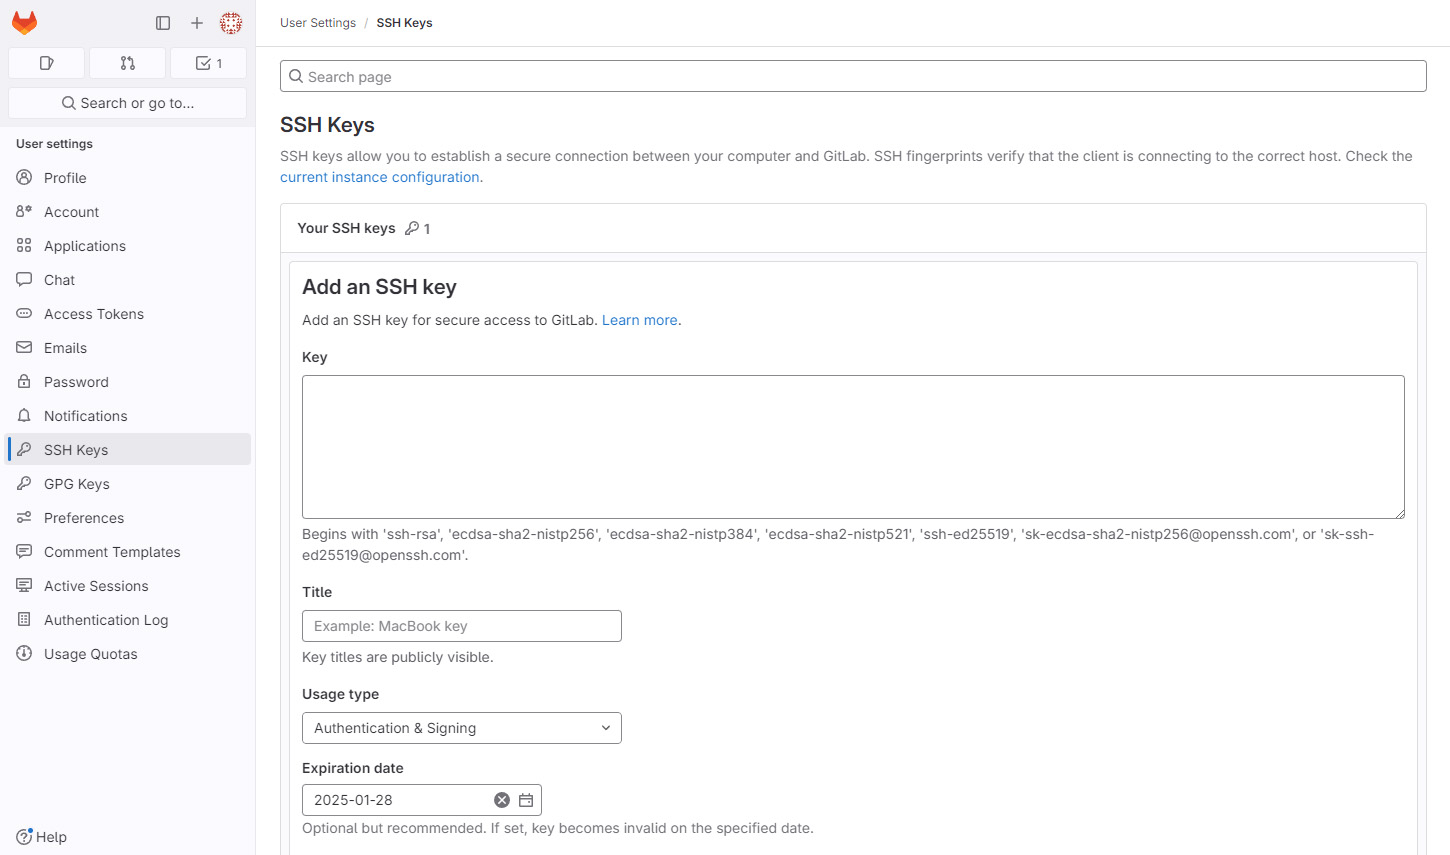
Now head to your FabCloud GitLab repository on (you can find a link in your email), and head to SSH Keys under settings. Paste in your key, give it a title, and set the expiration date if you want. This will now allow your computer to access the remote GitLab repository.
5) Cloning Repository
On your Gitlab repository there is a template to get the gitlab pages site going. We are going to use Git to clone that template to our local computer. Find a file location on your computer that you wish to work out of. I chose my desktop as its easy. We will need to open Git Bash again in that folder as this will ensure that we will clone to that location (so I just opened a git bash on my desktop). Punch in this command:
git clone "name of repository"
The name of your repository will be something along the lines of:
git@gitlab.fabcloud.org:academany/fabacademy/2024/labs/lab_name/students/firstname-lastname.git
You can copy this name of the repository by heading to the main page on your GitLab, and under the code button (with the drop down arrow), it will be under "Clone with SSH". This should of created a new folder called something like firstname-lastname.
6) Doing a Test Push
So the file we have right now is a clone of what is on the repository, but any changes that we make to it here aren't immidiately changed on the repository, we need to "push" the changes we make locally to it. Close the Git Bash window and go into the new folder, then open it again inside of it - this ensures that we are working in the correct directory. Then create a new text file and call it something like test.txt. This is our mock change that we will push to the repository.
In Git Bash there are 3 steps to pushing it to the repository. First is to select the files that we wish to push. We can select all the files that have been created/modified with
git add .
Now that our test file has been staged, we can commit it with:
git commit -m "test commit"
The -m signifies that we are pushing it to the main/master branch, and the "test commit" is just a helpful little not your can write to explain what this commit is. You can write anything as long as its in the quotation marks.
Now we will finally push it to the repository with
git push
If you head to your GitLab repository and you should now see that the test file is now shown there (you might need to refresh the page if you've had it open). This is the process we will be using to push all of our work to the repository.
Creating an MkDocs Site
For my site, I used MkDocs as recommended by our instructor Claire from Lake Mac FabLab.
I've had previous experience with MarkDown in applications like Obsidian, and MkDocs is a fantastic python-based site builder that is focussed towards project documentation.
Having never used MkDocs before, I found it a breeze to set up following the user guide from their site.
1) Setting up MkDocs
Ensuring that python is already installed, you can install it from a CMD terminal with:
pip install mkdocs
and once its done you can check that its installed with:
mkdocs --version
In the CMD terminal, change the directory with the "cd" command to the file location you want to have your site in. For the sake of easiness, I didn't do it to my local repo clone just yet, I wanted to get it going locally first, then get it online - to break it down into troubleshootable steps.
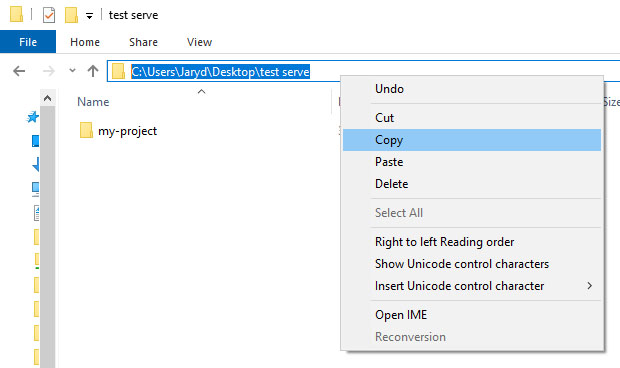
(Pro Tip: You can copy the directory location that you want from the file explorer, just click the )
Once you have navigated to the file location punch in:
mkdocs new my-project
Which will create a new file of our site. We will then need to change into the directory of the file we just created. Then we can build the site locally with:
mkdocs serve
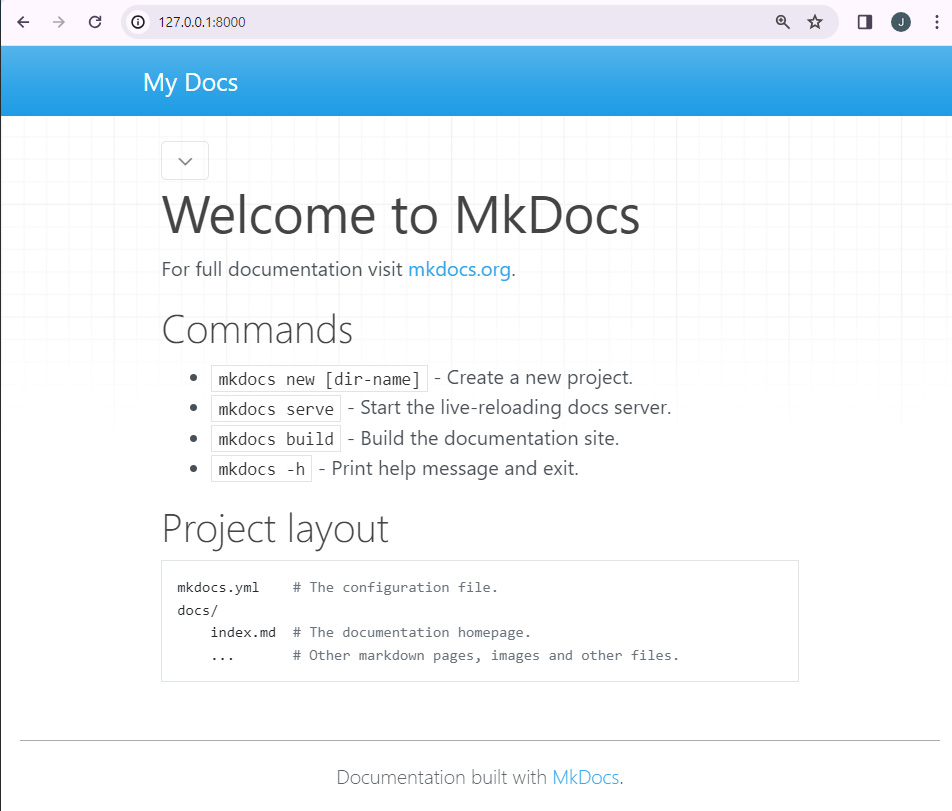
Which will create a locally hosted site preview of the site. Whilst this is running, any changes we save to our site files will automatically be updated in the preview (which is an IP adress that it will spit out, just punch it into a browser). You should see something like this:
2) A Crashcourse on MkDocs
YML file
In the main folder you will see a file called "mkdocs.yml". This folder is a kind of configuration file for your site and you can specify things such as:
- Site Name and other important info like that
- Theme and theme settings (we will get to that real soon)
- Site Structure (what pages are on your site)
Pages
Each page on the site is a ".md" file. Your home page will be index.md by default. In these ".md" files we will place all of our markdown to build the content of our site.
You can create a new page by placing it in the "doc" file, and call it something apropriate. For example, my about me page is called "about.md". You can create a link in a page to another with the structure:
[This is my about me page.](about.md)
Inside the square brackets is the text of the clickable link, and inside the curved brackets is the page that it links to. For example, that code looks like this:
Markdown
The best place I've seen all the syntax that markdown gives you is on markdownguide.org.
Markdown is extremely easy and human readable, and 90% of my site uses headings, text and number lists which looks like:
# This is a heading 1
## this is a heading 2
This is just regular text
1) this is an indented list
Which looks like:
This is a heading 1
this is a heading 2
This is just regular text
1) this is an indented list
3) Getting Your Site Live Helpful source: GitLab MkDocs Page. You can now either create a new project in your repo folder, or you can copy the files from the project we made to your repo folder. Once the files are in there (at the top-level of the repository), we are going to tell gitlab to use MkDocs by first editing the ".gitlab-ci.yml" file, which should be changed to:
image: python:3.8-buster

before_script:
  - pip install -r requirements.txt

pages:
  script:
  - mkdocs build
  - mv _site public
  artifacts:
    paths:
    - public
  only:
  - main
In this, we now have the "- pip install -r requirements.txt" line, which will execute any python commands we put in "requirements.txt". We will tell it to install MkDocs by placing in there:
mkdocs==1.5.3
Place in what ever is the most current version of MkDocs, this line might also be the only thing in that file.
There should also be a file called ".gitignore". If there isn't, create it and add this line, if there is already, add this to it:
public
Then in your "mkdocs.yml" punch in this line somewhere:
site_dir: _site
Now if you add, commit, and push this, your site should now be live! You can find the link to your site on your gitlab repo site.
4) Theme'n It Up If you enjoy the default MkDocs theme thats fine, but those of us with taste will want to change the theme of it. You can find a cool list of themese here. I went for the [Simple Blog theme] (https://github.com/FernandoCelmer/mkdocs-simple-blog) by Fernando Celmer.
Getting this theme installed was by far the hardest part for me and my sources for this section are the braincells that fired from me banging my head on a concrete wall for 3 hours.
The way that worked for me was to download the zip file of the theme. This will give you an entire MkDocs project file template. I then copied over the esssential things from the theme. In my case it was "setup.py", "mkdocs_simple_blog", "scripts", "template", "mkdocs.yml", and "requirements.txt".
Just be aware that you will need to ensure that the "mkdocs.yml" and the "requirements.txt" file both have the same additional lines from step 3. Also the "mkdocs.yml" file likely has some theme options in there (like font, colour, dark/light mode etc.)
Push this to gitlab, and you should now be able to see your theme on the site.
Final Project: Leo
Leo is a project that I have been planning for many months now and my project will be a first version of it. Leo is a home assistant droid that can be purposed for simple needs around the house. Most home assistant robots tend to fall in the gimmicky / not useful category, but leo will be a platform that can be upgraded over time to suit custom tasks. For example, an early task may just be to travel to each room, measure the temperatur / humidty and communicate to open the homes electric windows as needed. It might also have a speaker onboard and follow you around with music, it might be given a camera to be able to monitor the home remotely.
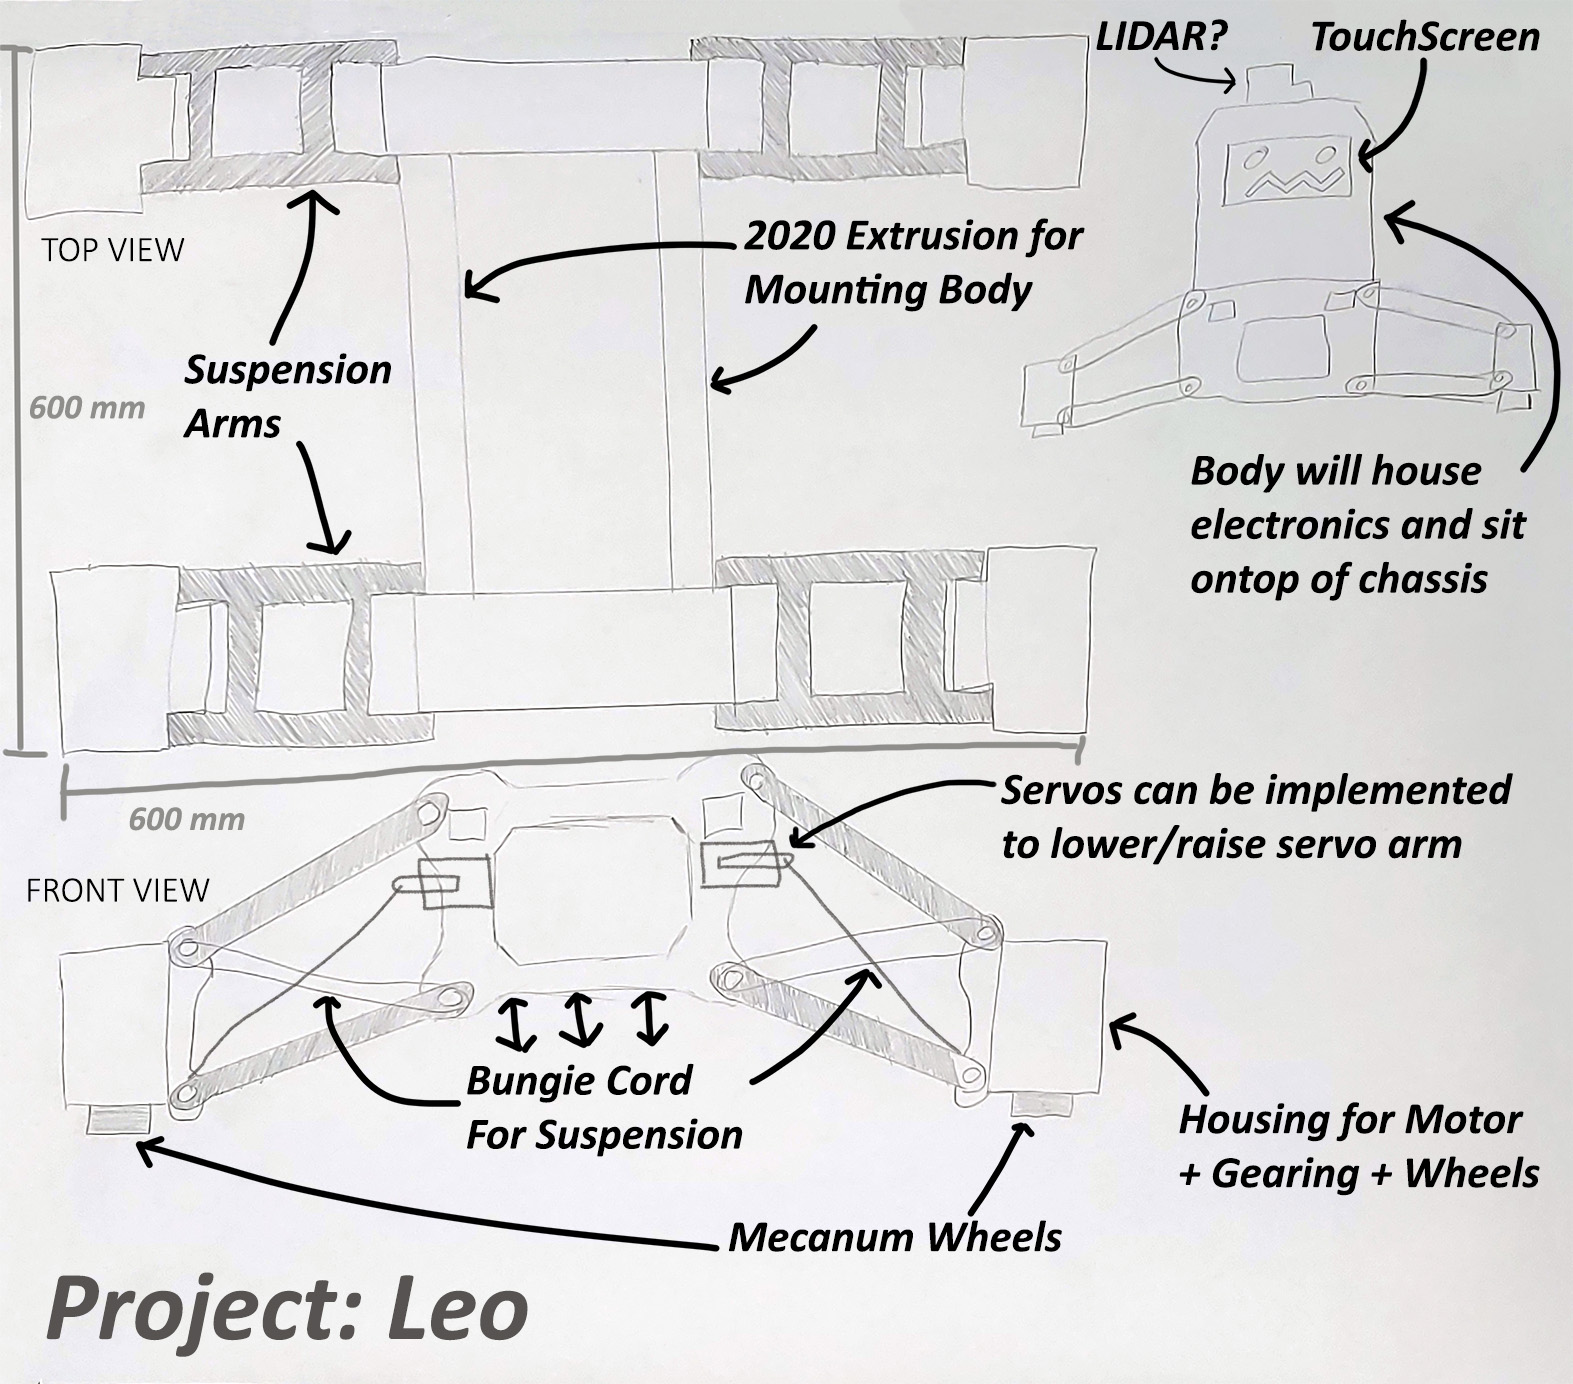
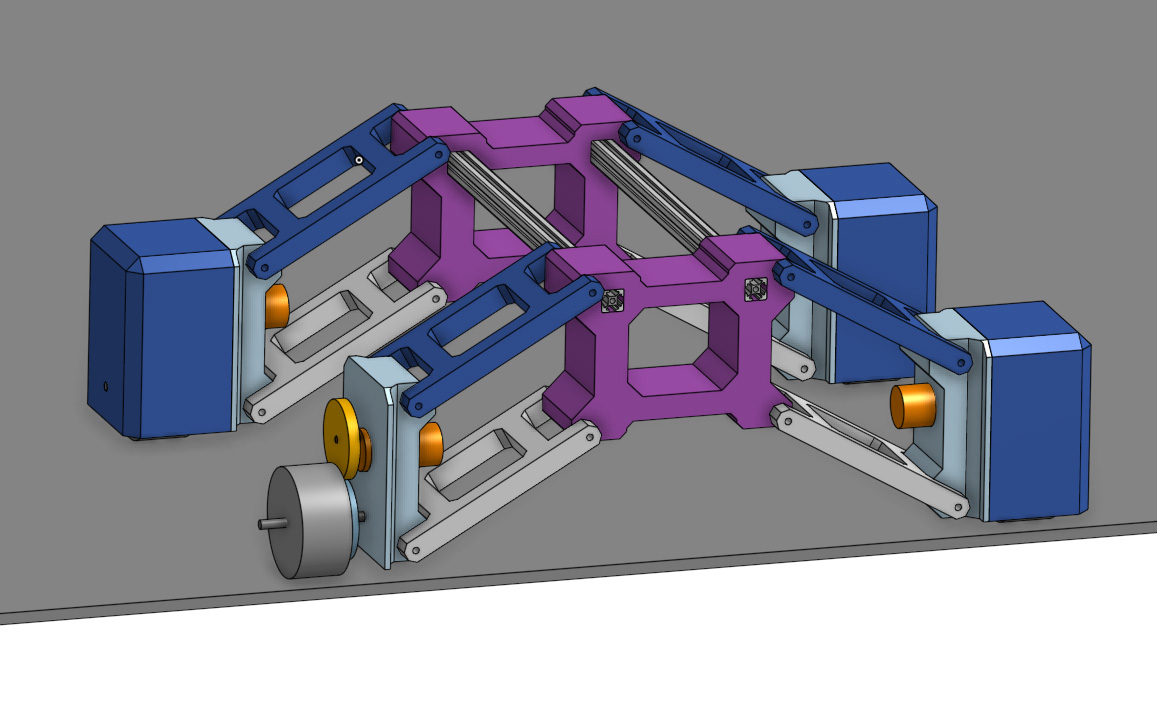
For this Fab Academy project, I wish to atleast get the drivetrain going, and a simple body ontop, maybe with a touchscreen and some simple sensors. It will use mecanum wheels to give it incredible mobility, and a suspension system that will alow it to lower and raise each leg (the suspension system was inspired by this James Bruton robot). Part of the project is to give it a personality. A touch screen with a face, coupled with the ability to manipulate each suspension arm to dance around with, should give it enough to express some sort of personality.
The project is a lot less involved than it seems and getting a basic chassis going is straight forward, some 2020 extrusion, 3d printed parts, motor + drivers, servos and mecanum wheels. The body is an infinite scope creep project, but a simple implementation with a raspberry pi, 3d printed shell and touch screen is achievable.
My drawing is terrible so I have jumped the gun a little and gone ahead and modelled the chassis in onshape, it paints a clearer picture of it: