Week 6 - Embedded Programming
For this week we were asked to write a program for a devlopment board (Which you have to create and design yourself!). Additionally we have to make it interactable by the usage of a simple input and output devices. and communicate with it(either wireless or wired). I feel as if my head is going to burst with the amount of knowledge i am going to gain through this! Hopelly I dont lose my mind doing all of it. Let all my mantras be worth it, let it all give me blessings.
Neils lecture
We now also have the Master Mind himself. Dr Neils lecture was probably one of the most informational lecture I have ever sat for. I didnt know that micro controller had different types and all different types and variations that had different properties such as the amount of memory. Don't even begin discussing on the data sheets we have to learn for our group assignment. Ohhh lord, please spare me the hardships of this all. ALthough thinking back about it, there is no fruit that come without hardwork!!!!
Assignments
This week has a pretty self explainatory assignment, but either way I am going to elabourate on it as I need more content 😀. So lets begin!
✓ Firstly we have to design a dev board.
✓ Then we have to mill and program the board.
✓ We also were tasked with programming a board that we made.(for me it is the seed xiao rp2040 board that I created in the week of electronic production)
✓ We also have to make it interactable(Input/Output)
group assignment ❤
Ohh, now we have the group assignment. It may be the bane of my life as we have to go through an entire data sheet as our assignment!🤯
✓ We have to the data sheet of your micro controller
✓ Compare the performance and the devlopment work flow for other architecture(I have no clue what that means🥲)
Schematic creation
Now Lets delve into the wrold of schematics! This is the very first platform where you can start the designing of your circuit board. Firstly lets get into What I am actually going to create!
We were asked to choose a micro controller form the embedded programning page. It will also give you the minimum required schematic for your micro controller.
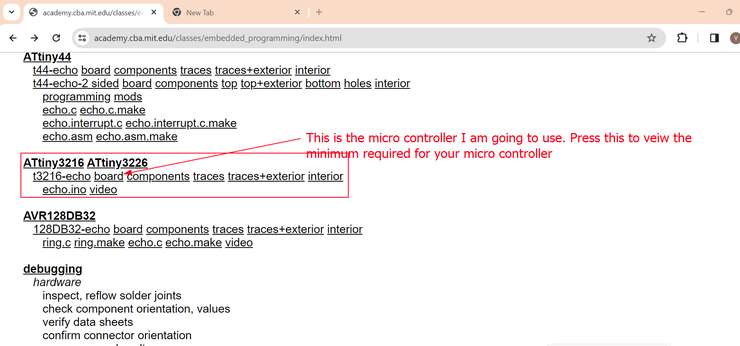
This here is the page where we can choose our micro controller and it gives us the minimum possible for the microcontroller to work. As all of you can see I chose the attiny 3216 micro controller as it has a lot of different pins that can be usefull for all the sensor I might use for my final project.
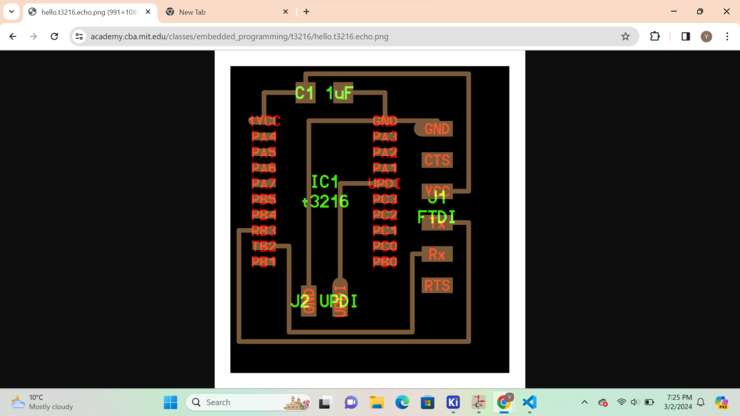
We now have to create a schematic design that mirrors this designs as this is the minimum required for the micro controller. After that we can add on to it with the components that you want to add 😀!
This is the schematic design that i created😀. I created this by firstly copying the design that is in the page of the embedded programming. I opened my schematic editor. The editor I used is KICAD. Then I added extra components such as connectors and LEDs so that
This tutorial consists of everything that you need to know to fully use kicad.
My actual schematic 😀
Firstly as I mentioned, I copied the absolute nessary schematic from the embedded programming page. With that I also added my own additional components to it.

The components I added to my skematic for my circuit board were.
✓ a conn 01x06 pin
✓ a conn 01x04 pin
✓ a conn 01x03 pin
✓ a power led
✓ a programmable led
✓ some extra 0 ohm resistors.
Wow, that was a lot of extras 🥲. Still then each and every one of the extra components added are to do a specific task. Both the power and programmable led are for assurance for whether the board works or not. While the pin are mainly to control sensors! I made this board with my final project in mind, cause of that each of the conn pin header is relative to a sensor from my final project.
1x6 pin header - This is for the NPK sensor which requires 6! pins, (Thats a lot 🤯)
1x4 pin header - This is component is for the I2C LCD which has four pins.(Thats a bit easier🥲)
1x3 pin header - Lastly this is for the comparative soil moisture sensor(This is the easiest😋)
Now that I've had enough content, lets get moving on to what is probabily the most painful part of this week, PCB CREATION🥲
You may also be wondering why my schematic looks like that? Well the reason for that is the fact that micro controllers have different pins that allow for differnt properties and each of those properties have to match with the devices that I will use in the future. For you here is also an image of the pinouts of my microcontroller.

PCB creation 💀
(Ohh lord, please have mercy on my soul).
So before we get into editing our PCB, We have to convert our schematic design to our PCB editor. To do that we have to go to "tools" and then "Update PCB editor form schematic".
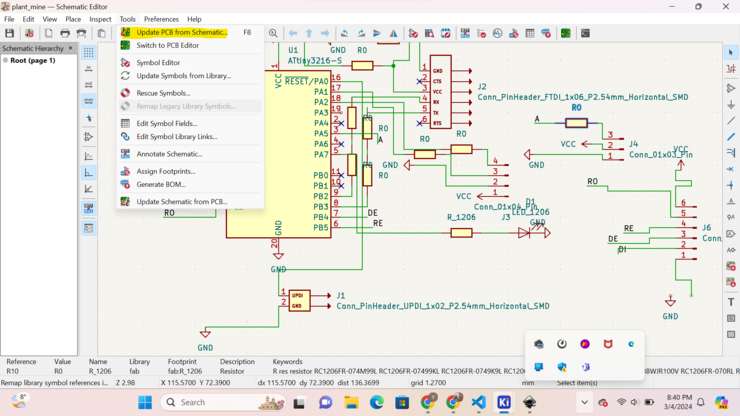
Now lets begin!!!
This is my very first attempt, and.... it did not work out the way i envisioned.

Ohh... When I realised I couldn't, in any way get the last wire out of its place. My heart just sunk and it felt as if I had aged a thousand years!😭.
I had to get this done so I didnt give and continued onwards! After what seemed like an eternity, I finally finished with the PCB editing. Thank lord!!

Converting to RML file!
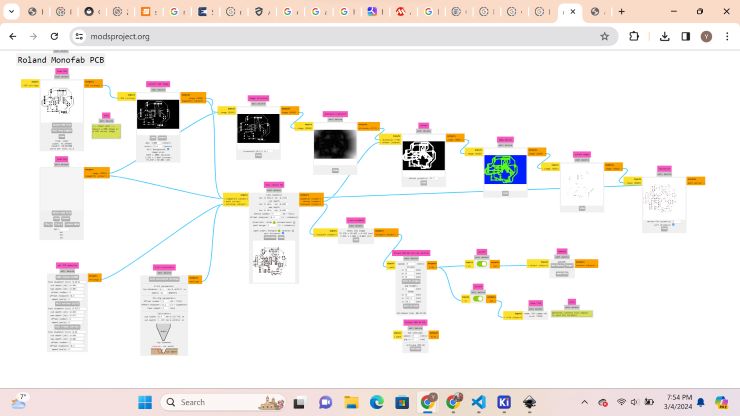
With the hardships behind us, lets get into creating the RML file. This how the code looks!

This is how the RML file looks for both the edge and the traces
Traces
Interior
 .
.
Milling😰
OHH... Great Buddha, Great God and Great Monks. Please have mercy on this little boys soul as he ventures far beyound his comfort zone!
This is always the scary part for anyone creating a PCB. The countless ways in which things could get messed up and you ending up with a broken mill bit!
With all the necessary steps taken into place and more a half of my life wasted on this. This is how the milling went.
After close inspection of the board I noticed that the milling machine didnt cut the board properly as not all of the copper plate was milled by the machine. I almost fainted when I noticed that and was scared for my life😰!!

Later when my instructor,Anith Sir arrived. He suspected that the copper plate and the scarificial bed werent stuck properly which cause the problem. Additionally he also mentioned that the board might still work as the point of the board that didnt cut properly wasnt colliding and interupting with the rest of the board. Sir suggested that I would have to make sure that isn't with the rest of the design by the use of the multimeter💀!
After a scary process of checking using the multimeter, IT WORKED!
Now we have to scolder the components onto the board. After like what took like 30mins of me just sitting on my chair and scoldering, This is how it looks!😌. I also tested if whether it worked or not by the use of the power led(Thankgod I put that, It worked like a charm!)
Programming
Now lets get into the main assignment of this week is programming a board, For that as I mentioned previously I will be using the seed xiao rp2040 board that I created in week 4 😀.
Firstly I have to install the arduino uno libary for the seed xiao RP2040 board. For that I refered to the quentorres page that is in the instructor bootcamp documentation. Ohhh.. if you also want to veiw the documentation click here
Now lets get into setting up our arduino IDE to start programming.😎 To start off, we first have to insert the url of the additional board we are going to add(one of which is the seed xiao rp2040). First we have to go to file>prefences then you just have to insert the link below

After inserting the link you have to download the board manager. To do that we have to go to tools, boards and then you have to press on board manager.
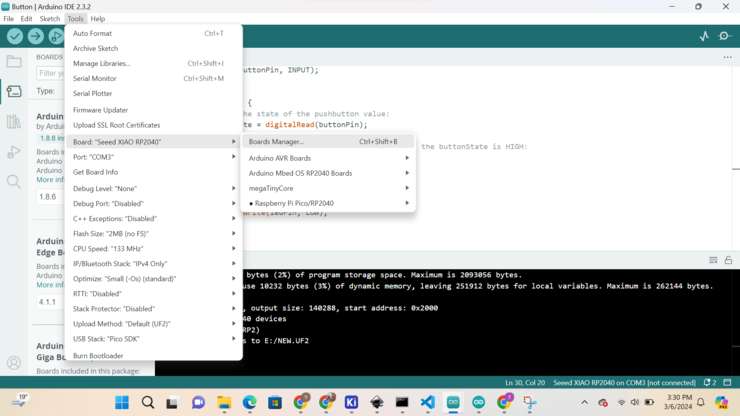

Now I selected the board I was using by going to tools then to board and then selcting the raspberry pi pico/2040. After all of that we can now finally select the board that I am using.
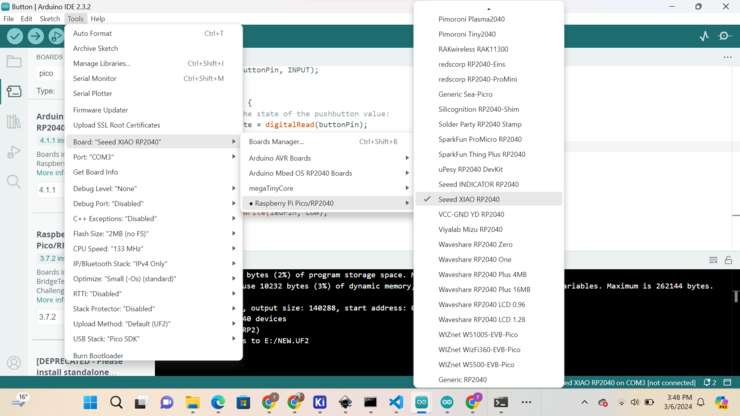
Now after that I can simply start programming my board😀.
This is the code I will be using. I am using the blink code but I had to make some changes that inculded changing the variables such as the buttonpin and ledpin. (buttonpin=27, LED=1)
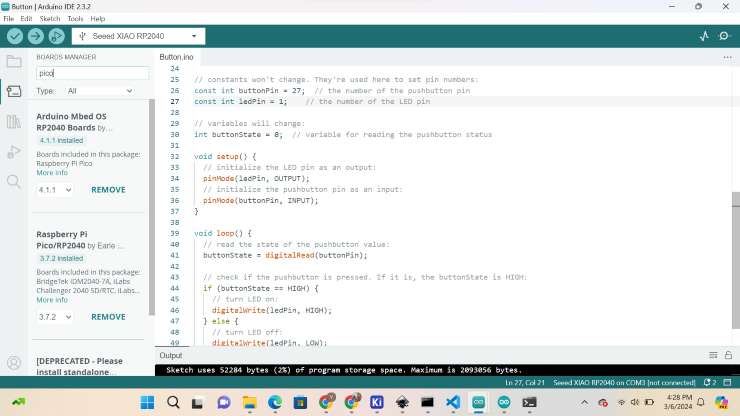
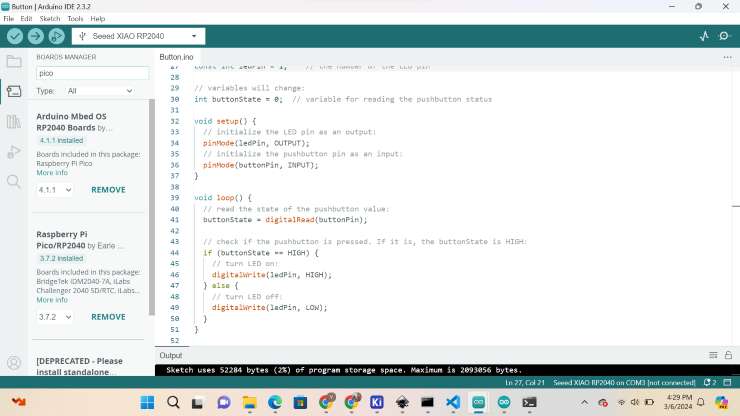
Lastly this is how it looks!
      // constants won't change. They're used here to set pin numbers:
      const int buttonPin = 27;     // the number of the pushbutton pin
      const int ledPin =  1;      // the number of the LED pin

      // variables will change:
      int buttonState = 0;         // variable for reading the pushbutton status

      void setup() {
        // initialize the LED pin as an output:
        pinMode(ledPin, OUTPUT);
        // initialize the pushbutton pin as an input:
        pinMode(buttonPin, INPUT);
      }

      void loop() {
        // read the state of the pushbutton value:
        buttonState = digitalRead(buttonPin);

        // check if the pushbutton is pressed. If it is, the buttonState is HIGH:
        if (buttonState == HIGH) {
          // turn LED on:
          digitalWrite(ledPin, HIGH);
        } else {
          // turn LED off:
          digitalWrite(ledPin, LOW);
        }
      }
This is the code I used to make my board blink. From the code there are mainly 2 parts:
- Setup :This part of the code includes the initilizing of the pin varible and then initilizing another varible to know whether the button is pressed or not. (NOTE:This varible (buttonState) was first initilized as 0 but when it is pressed, the varible increases it value. Through that we will be able to dictate whether the button is pressed or not).
- Main :This part of the code incluedes the void setup() where you initialized the varibles previously. But msinly it includes the void loop. In the void loop if the buttonState is high the LED should turn on and then vice versa.
Next I want to test programming using my own goard. For that I needed to setup my programming station. The attiny 3216 uses the UPDI comunication protocal to program the chip. For more information about the updi programming protocal go to my electornic design where I talk in depth into it. --> electronic design
For even more information about the UPDI programming protocal go to the this link here --> tutorial
this is the code I used for the above video
      // the setup function runs once when you press reset or power the board
      void setup() {
        // initialize digital pin LED_BUILTIN as an output.
        pinMode(3, OUTPUT);
      }

      // the loop function runs over and over again forever
      void loop() {
        digitalWrite(3, HIGH);   // turn the LED on (HIGH is the voltage level)
        delay(1000);                       // wait for a second
        digitalWrite(3, LOW);    // turn the LED off by making the voltage LOW
        delay(1000);                       // wait for a second
      }
This is the simplest code I could come up with. Also it is a very accurate way to dictate whether the board is working as wanted or not.
A simple code that first identifies the pin on which the LED is connected to and then makes it blink on a period of 1 second.
Hero shot of my board
