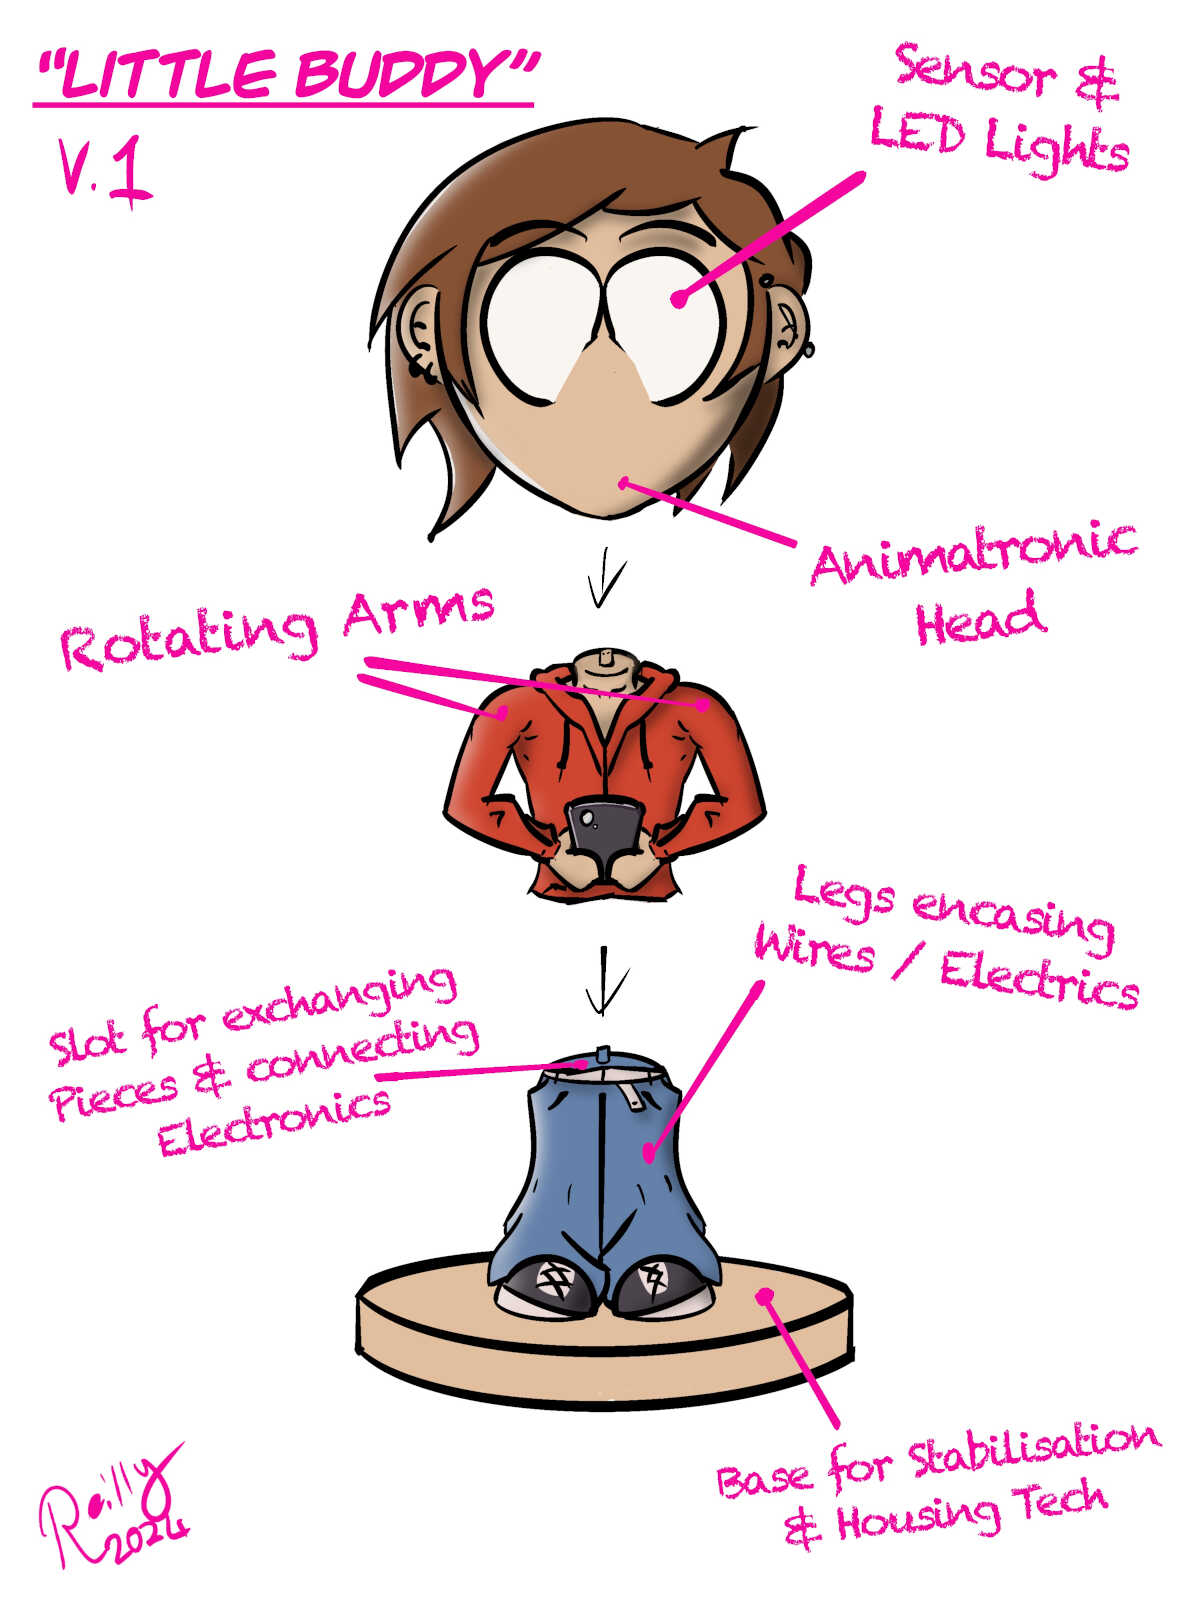
My Final Project - 'Little Buddy'.
Fab Academy Final Project Proposal:
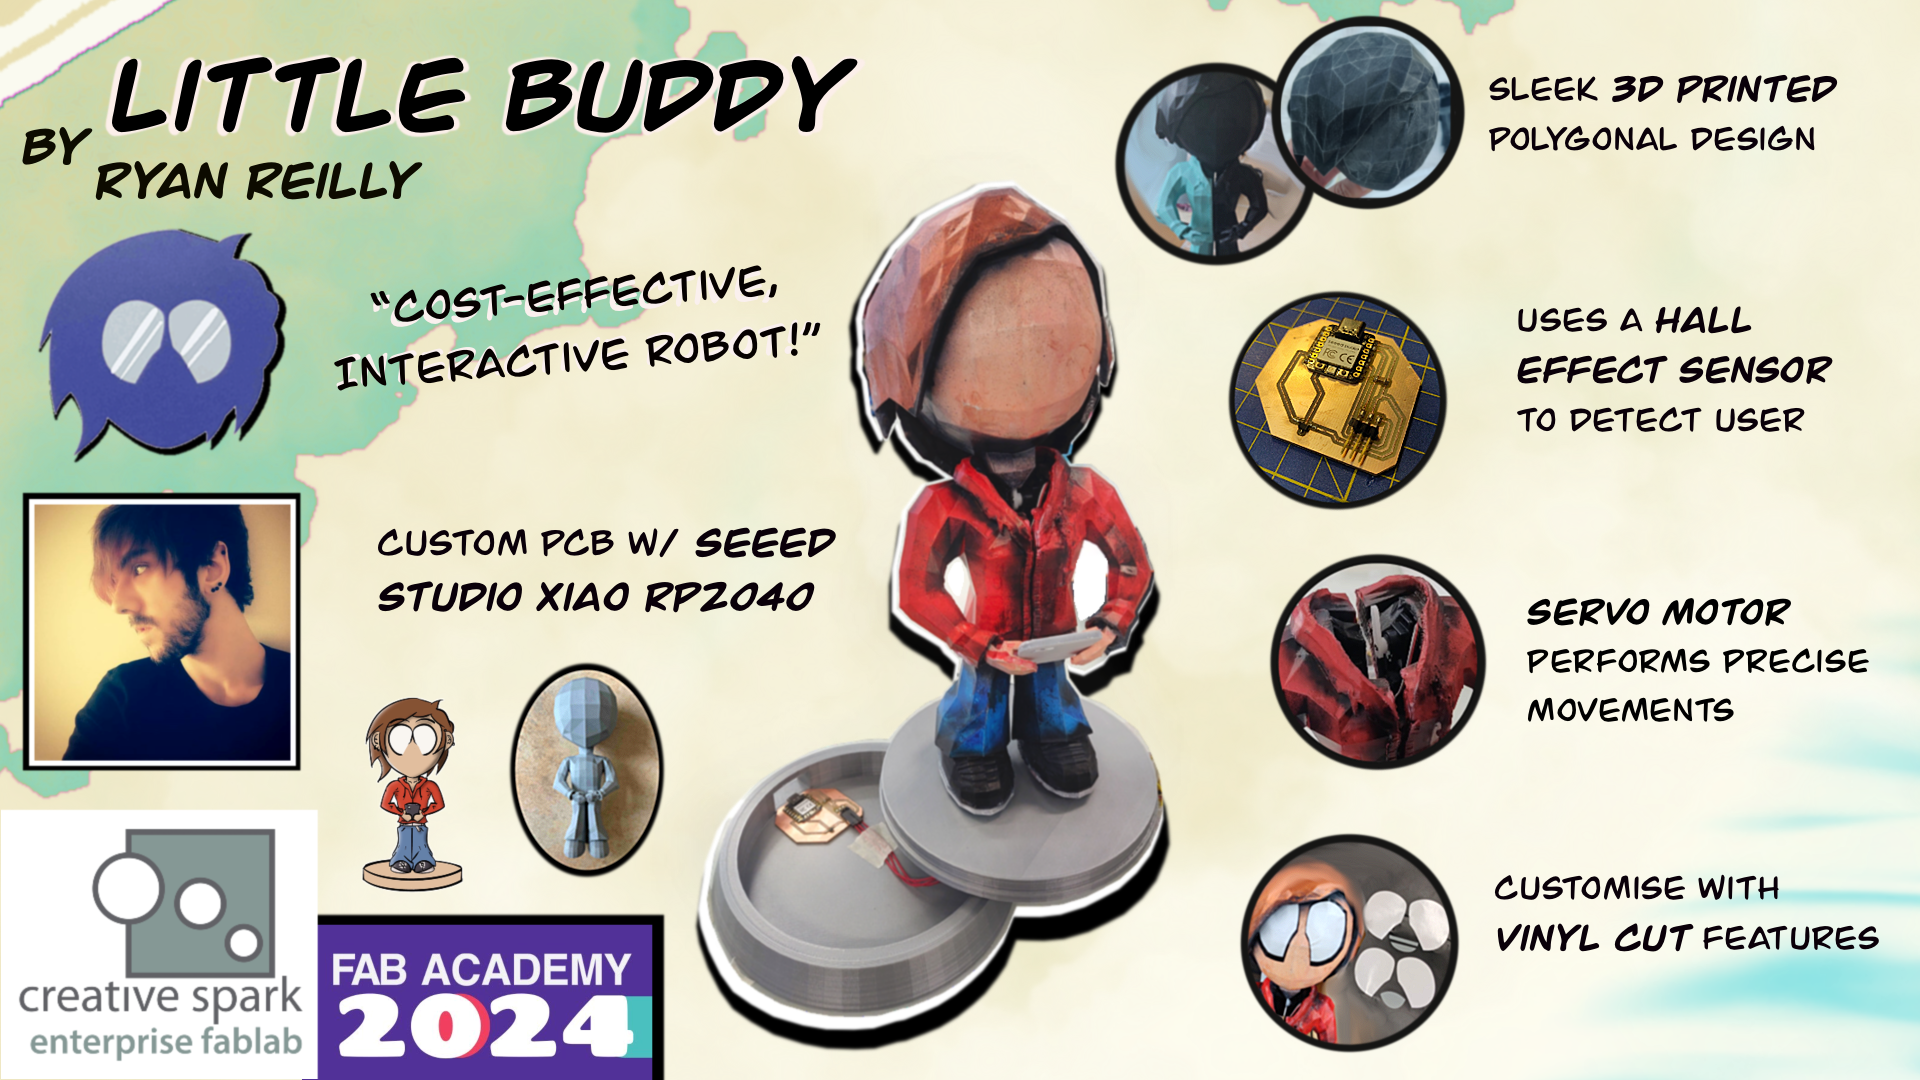
Designed in Blender or CAD software, using 3D printed Resin or PLA, as well as a circuit board or by other power-connected means, I plan on designing a new type of figurine or robotic desktop companion with the intention of making it cheap and affordable to consumers while potentially reducing stress levels from use.
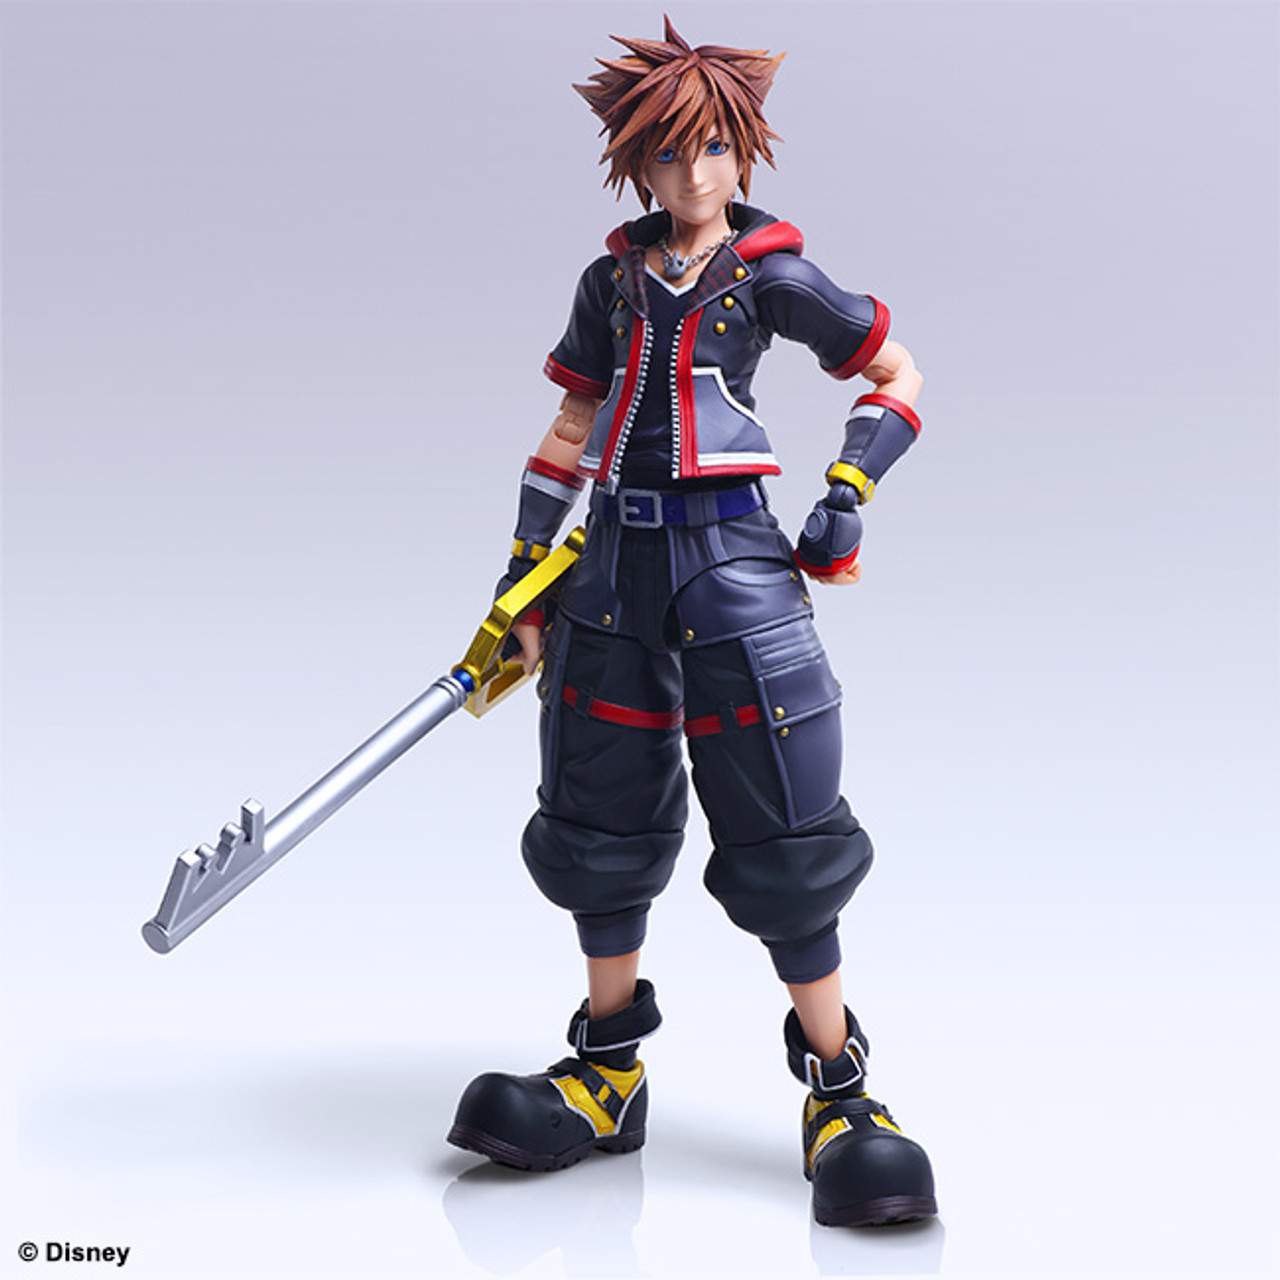
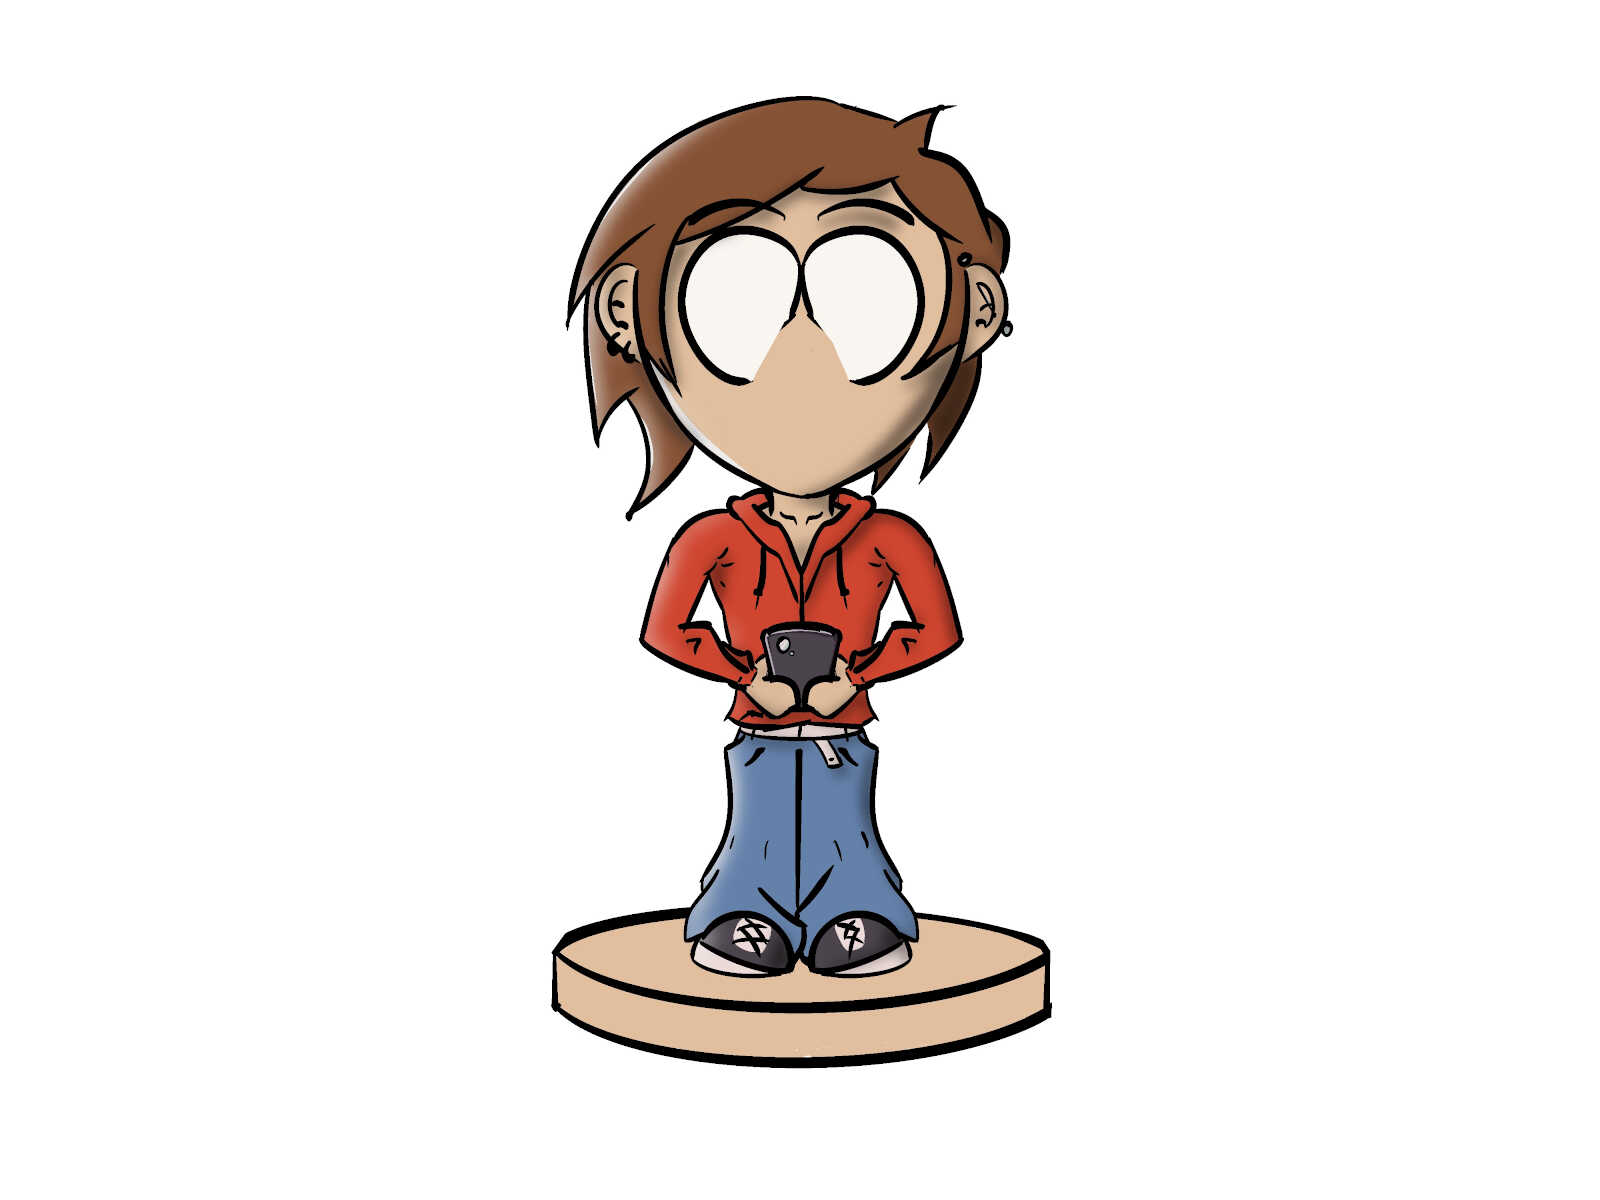
A cross or midway point between maneuverable ‘PLAY ARTS’ figurine or stationary ‘Funko POP’ figures and a Smart Robot Assistant such as ‘Vector’ from Anki. A figurine meant for display in a home or work area that’s pleasant to look at while being moderately interactable.
These are some ways it could be designed to be interactive or visually stimulating:
- By touching either a hidden or visible button / sensor, the character will come to life, occasionally animating and interacting with the user.
- Lights could also be used to enhance interaction or design.
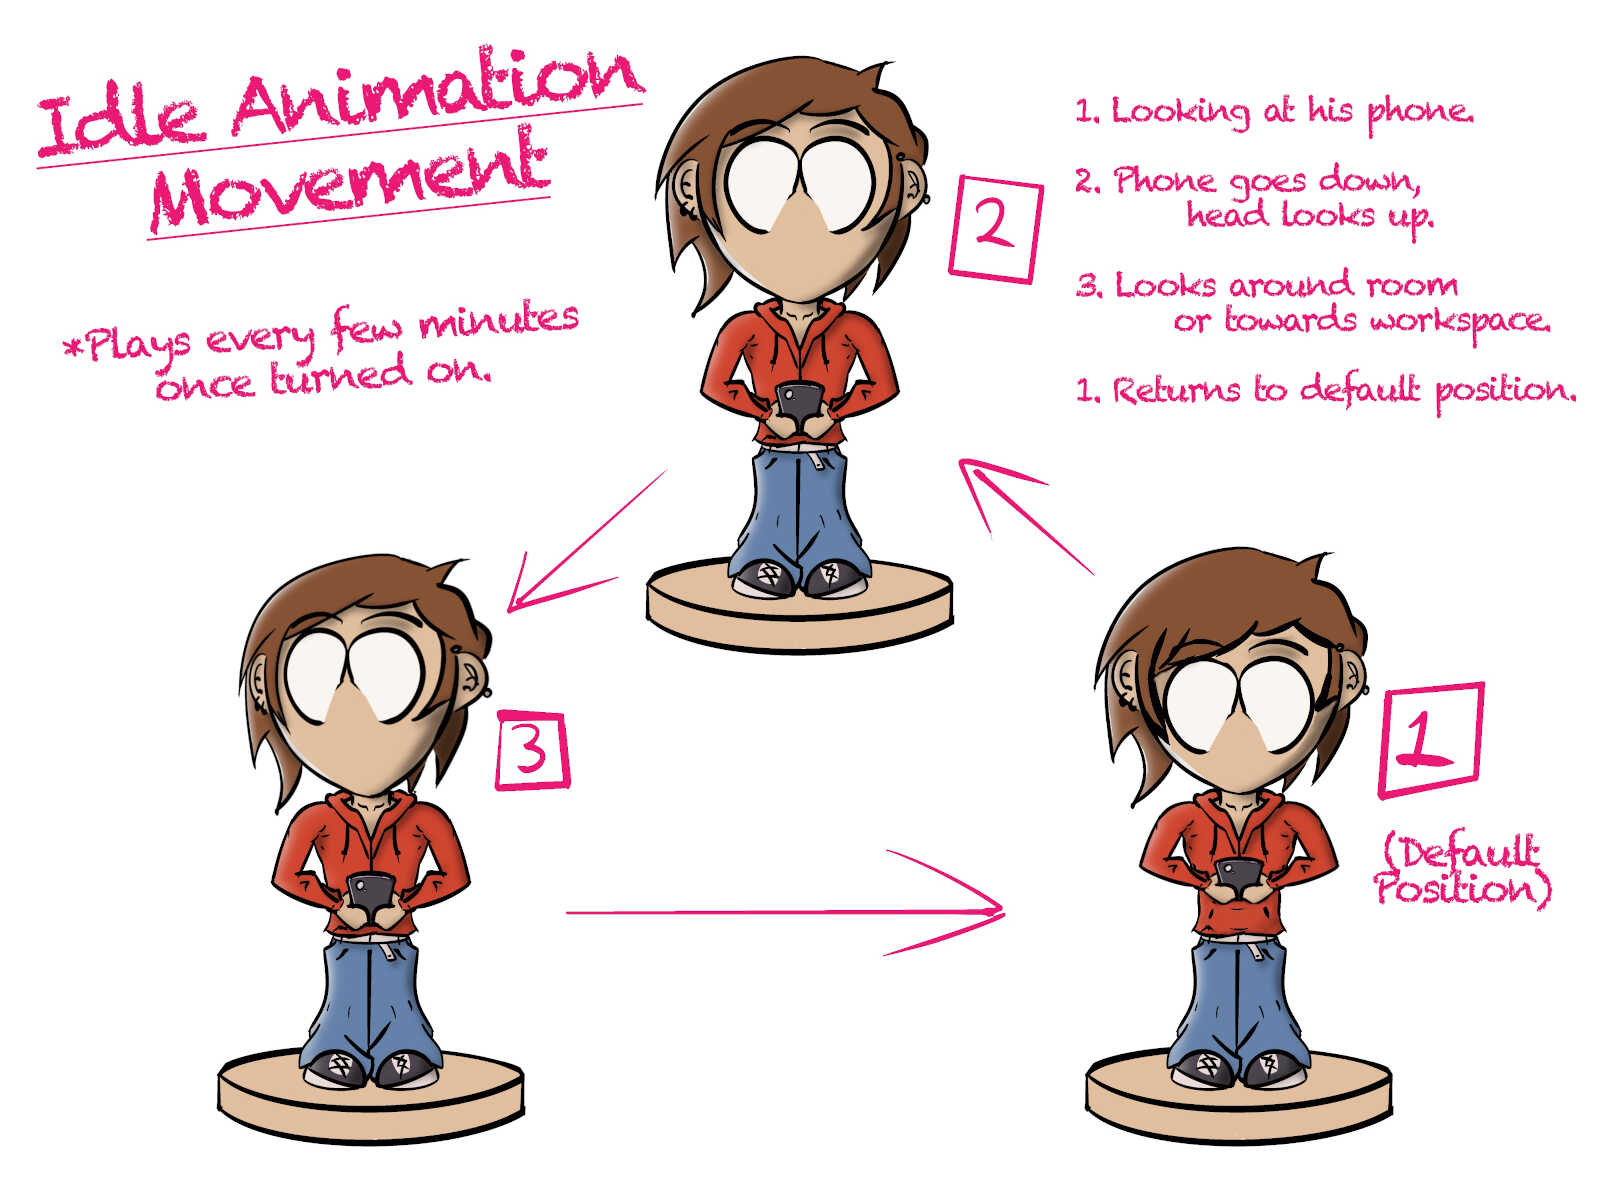
- Occasionally the statue could awake from its slumber or stance to perform an ‘idle animation’, with the intention of making the user feel as though they have a little buddy working alongside them. This type of animation is constantly used and represented in gaming. An indication that the character you are controlling is patiently (or impatiently) awaiting your input.
Steps would be taken to reduce movement noise or sporadic movements, as to ensure not to frighten the user. For this project I would need to enhance my technical ability and knowledge of circuit boards, which I hope to get guidance from or through the Fab Academy.
___________
Topic Index:
___________


Inspirations for the 'Little Buddy'
Vector / Gizmo / EMO AI Desktop Companions.
Designed as a cute companion that’s interactable. These robotics are expensive as they are highly intelligent, interactable and versatile. Using the same concept as these robot companions, but without the expensive range of interactivity and internet usage. ‘Little Buddy’s are also designed to be Human/Humanoid to make them more relatable and less robotic. A mid-way point between a desktop AI companion and stationary POP figurine.Play Arts Figurines
Fully movable and highly desirable quality with the unfortunate price tags ranging from €200 - €1000+.Robotic Arms.
Some humans may seem disinterested, creeped out or keep walking after seeing a robotic arm. Other humans may wave to it, say ‘hello’ or try to shake its claw-hand. My ‘Little Buddy’ are for those humans that may find something relatable about these robotic designs, seeing them as a friend, enemy or pet. I seek to further explore relations and reactions between humans and robots through my product.Eastern / Western Character Design.
- Designs inspired by Eastern character design found in Manga, Anime, Gaming. With influences from Damone Alburn’s virtual band ‘Gorillaz’, Mark Crilley Artist on YouTube, Tetsuya Nomura Character Artist from Square Enix Game Design.Modern Day Society using phones as an extension of themselves.
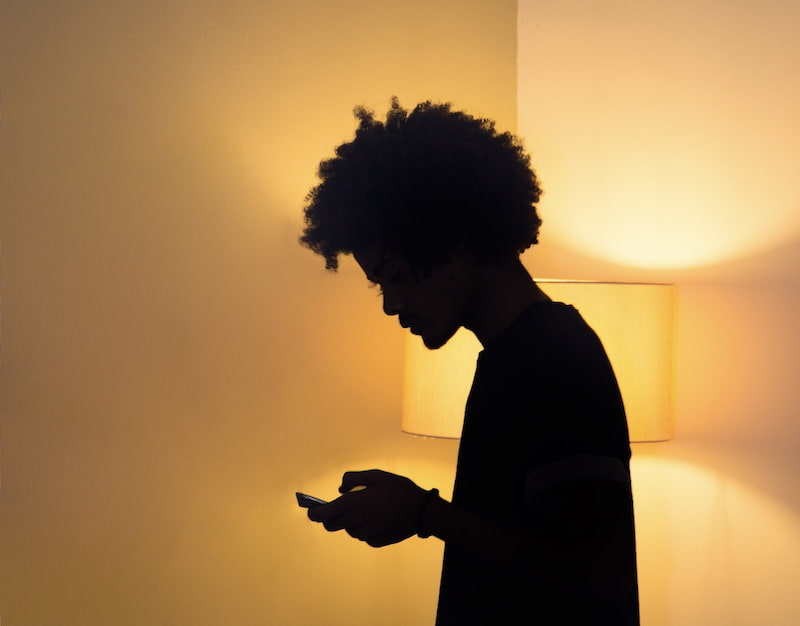
Not a critique or statement on modern day society but as a relatable form of engagement. Seen and been in past relationships where the ‘ideal pastime together’ would be one person playing video games while the other scrolls on their phone - seemingly distant, but in fact, just happy to be with each other.Animation in Game Design such as ‘Idle Animations’.
A famous example would be in Sonic the Hedgehog (1991) where the character ‘Sonic’ would impatiently check his watch & tap his foot while staring at the player if no movement has been made after so many seconds.Concepts explored in “Hello, Robot” (2017) are going to be further explored and experimented with. Human relations & interaction will be investigated and discussed.
"Little Buddy is not a Robot. It is not a Slave, its purpose is not to Serve - it just wants to hang with you, working on your own stuff together!"
___________
Early Plans for Development
___________
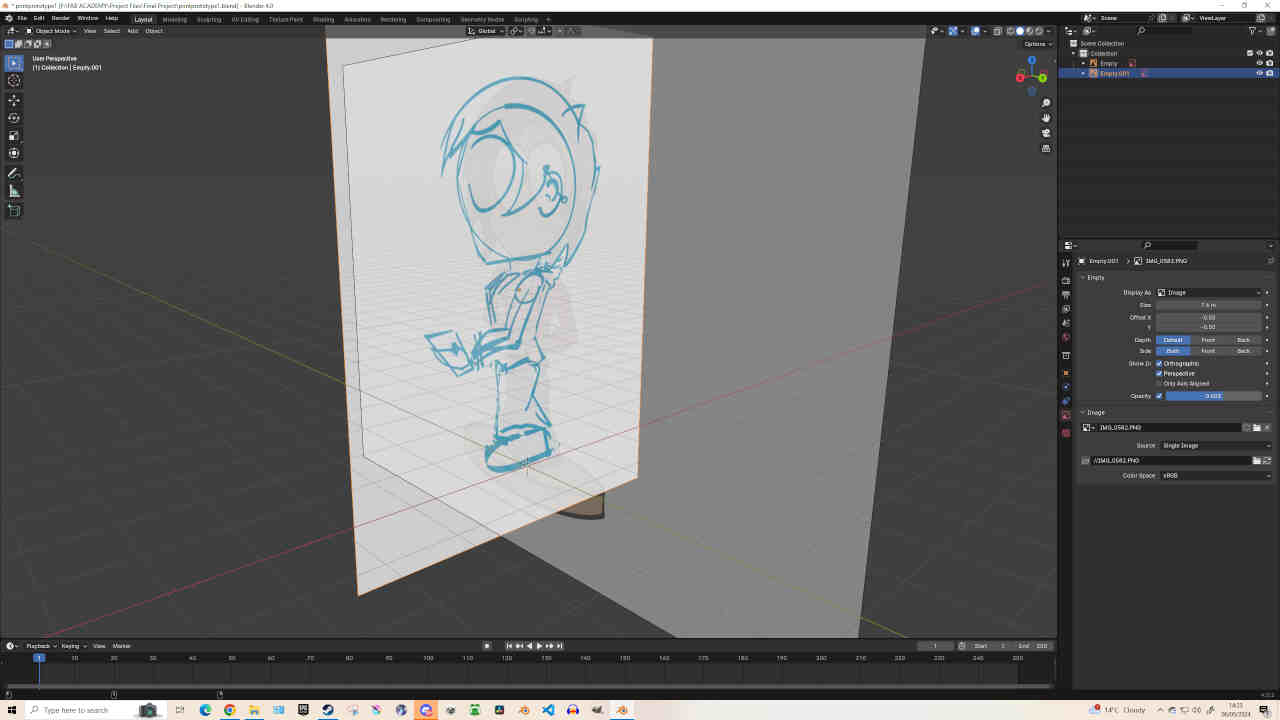
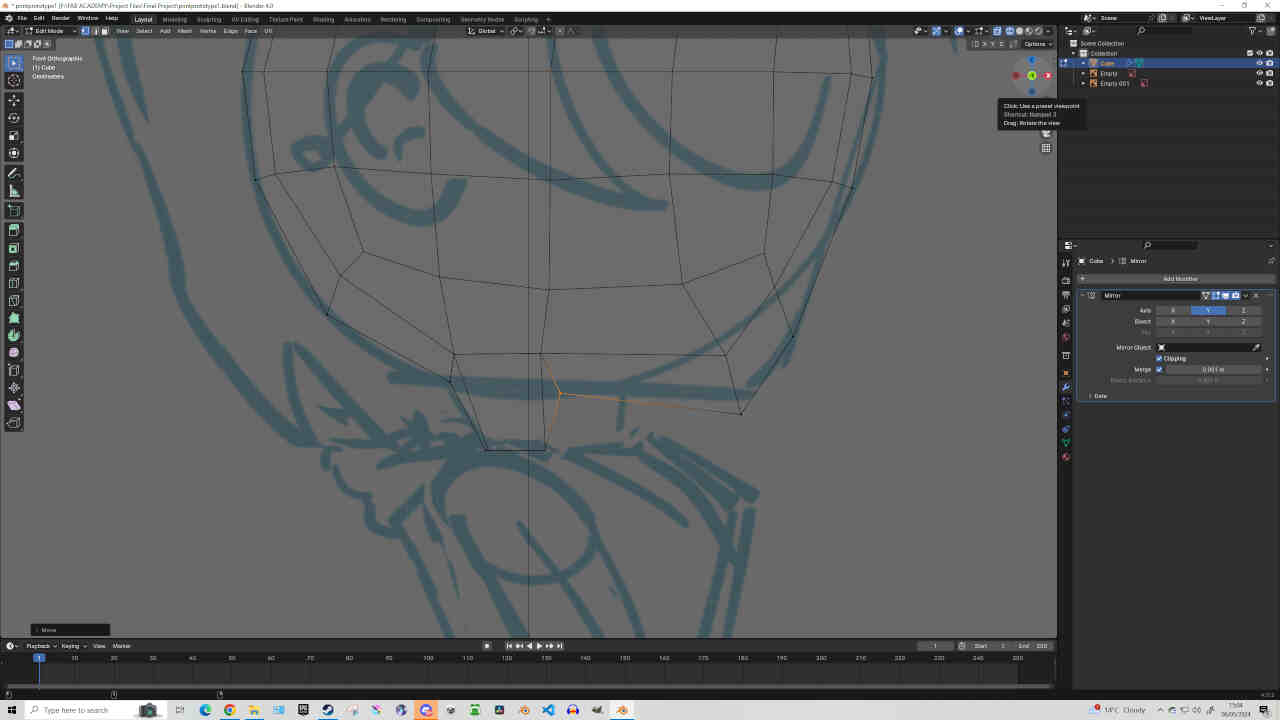
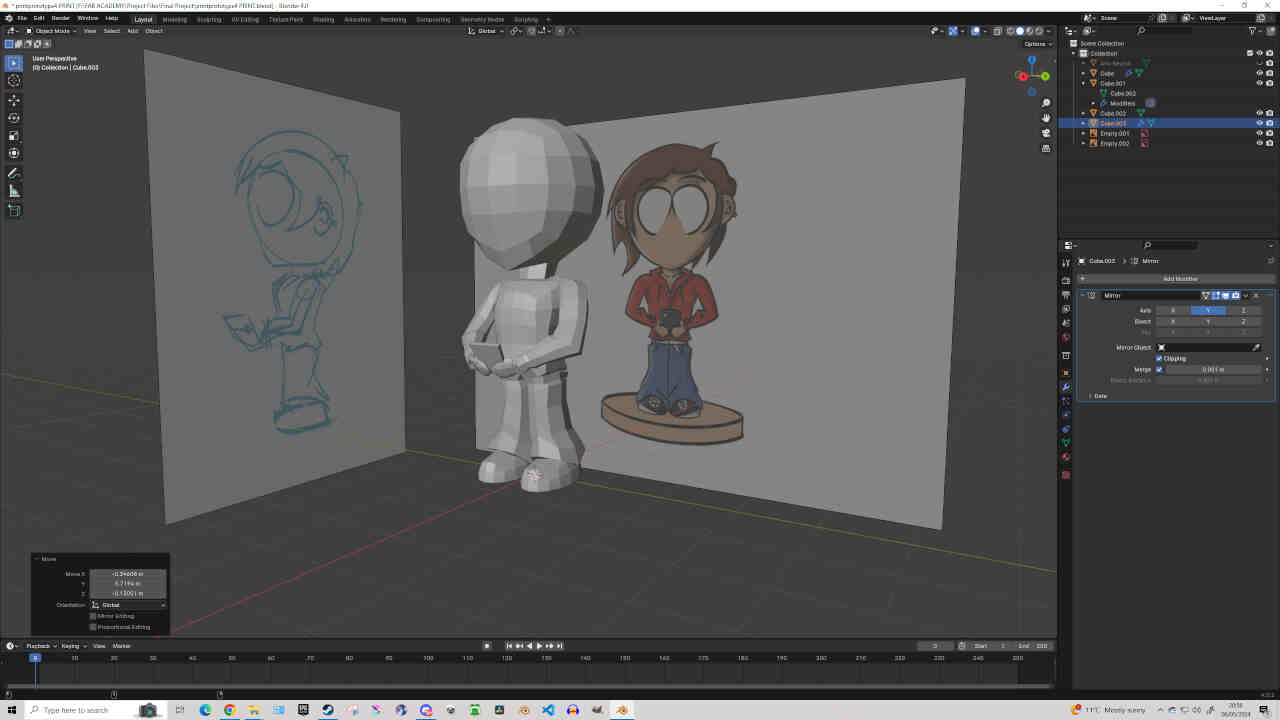
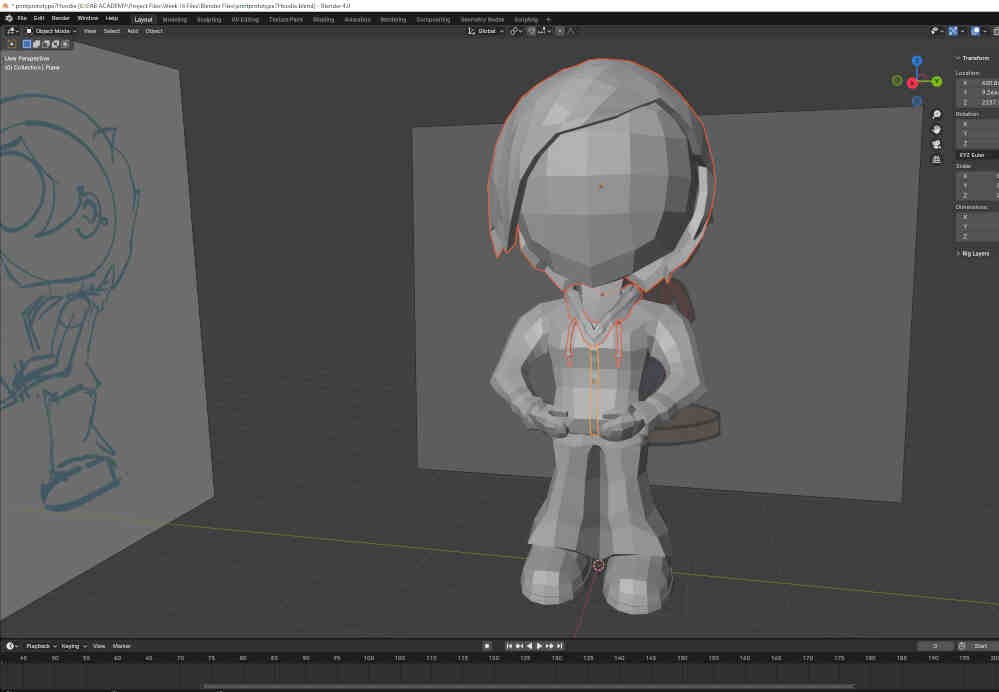
2D Concept Designs and 3D Modeling
Designs were created for my final project using Procreate & details basic components and movement. Add Concept Designs.
___________
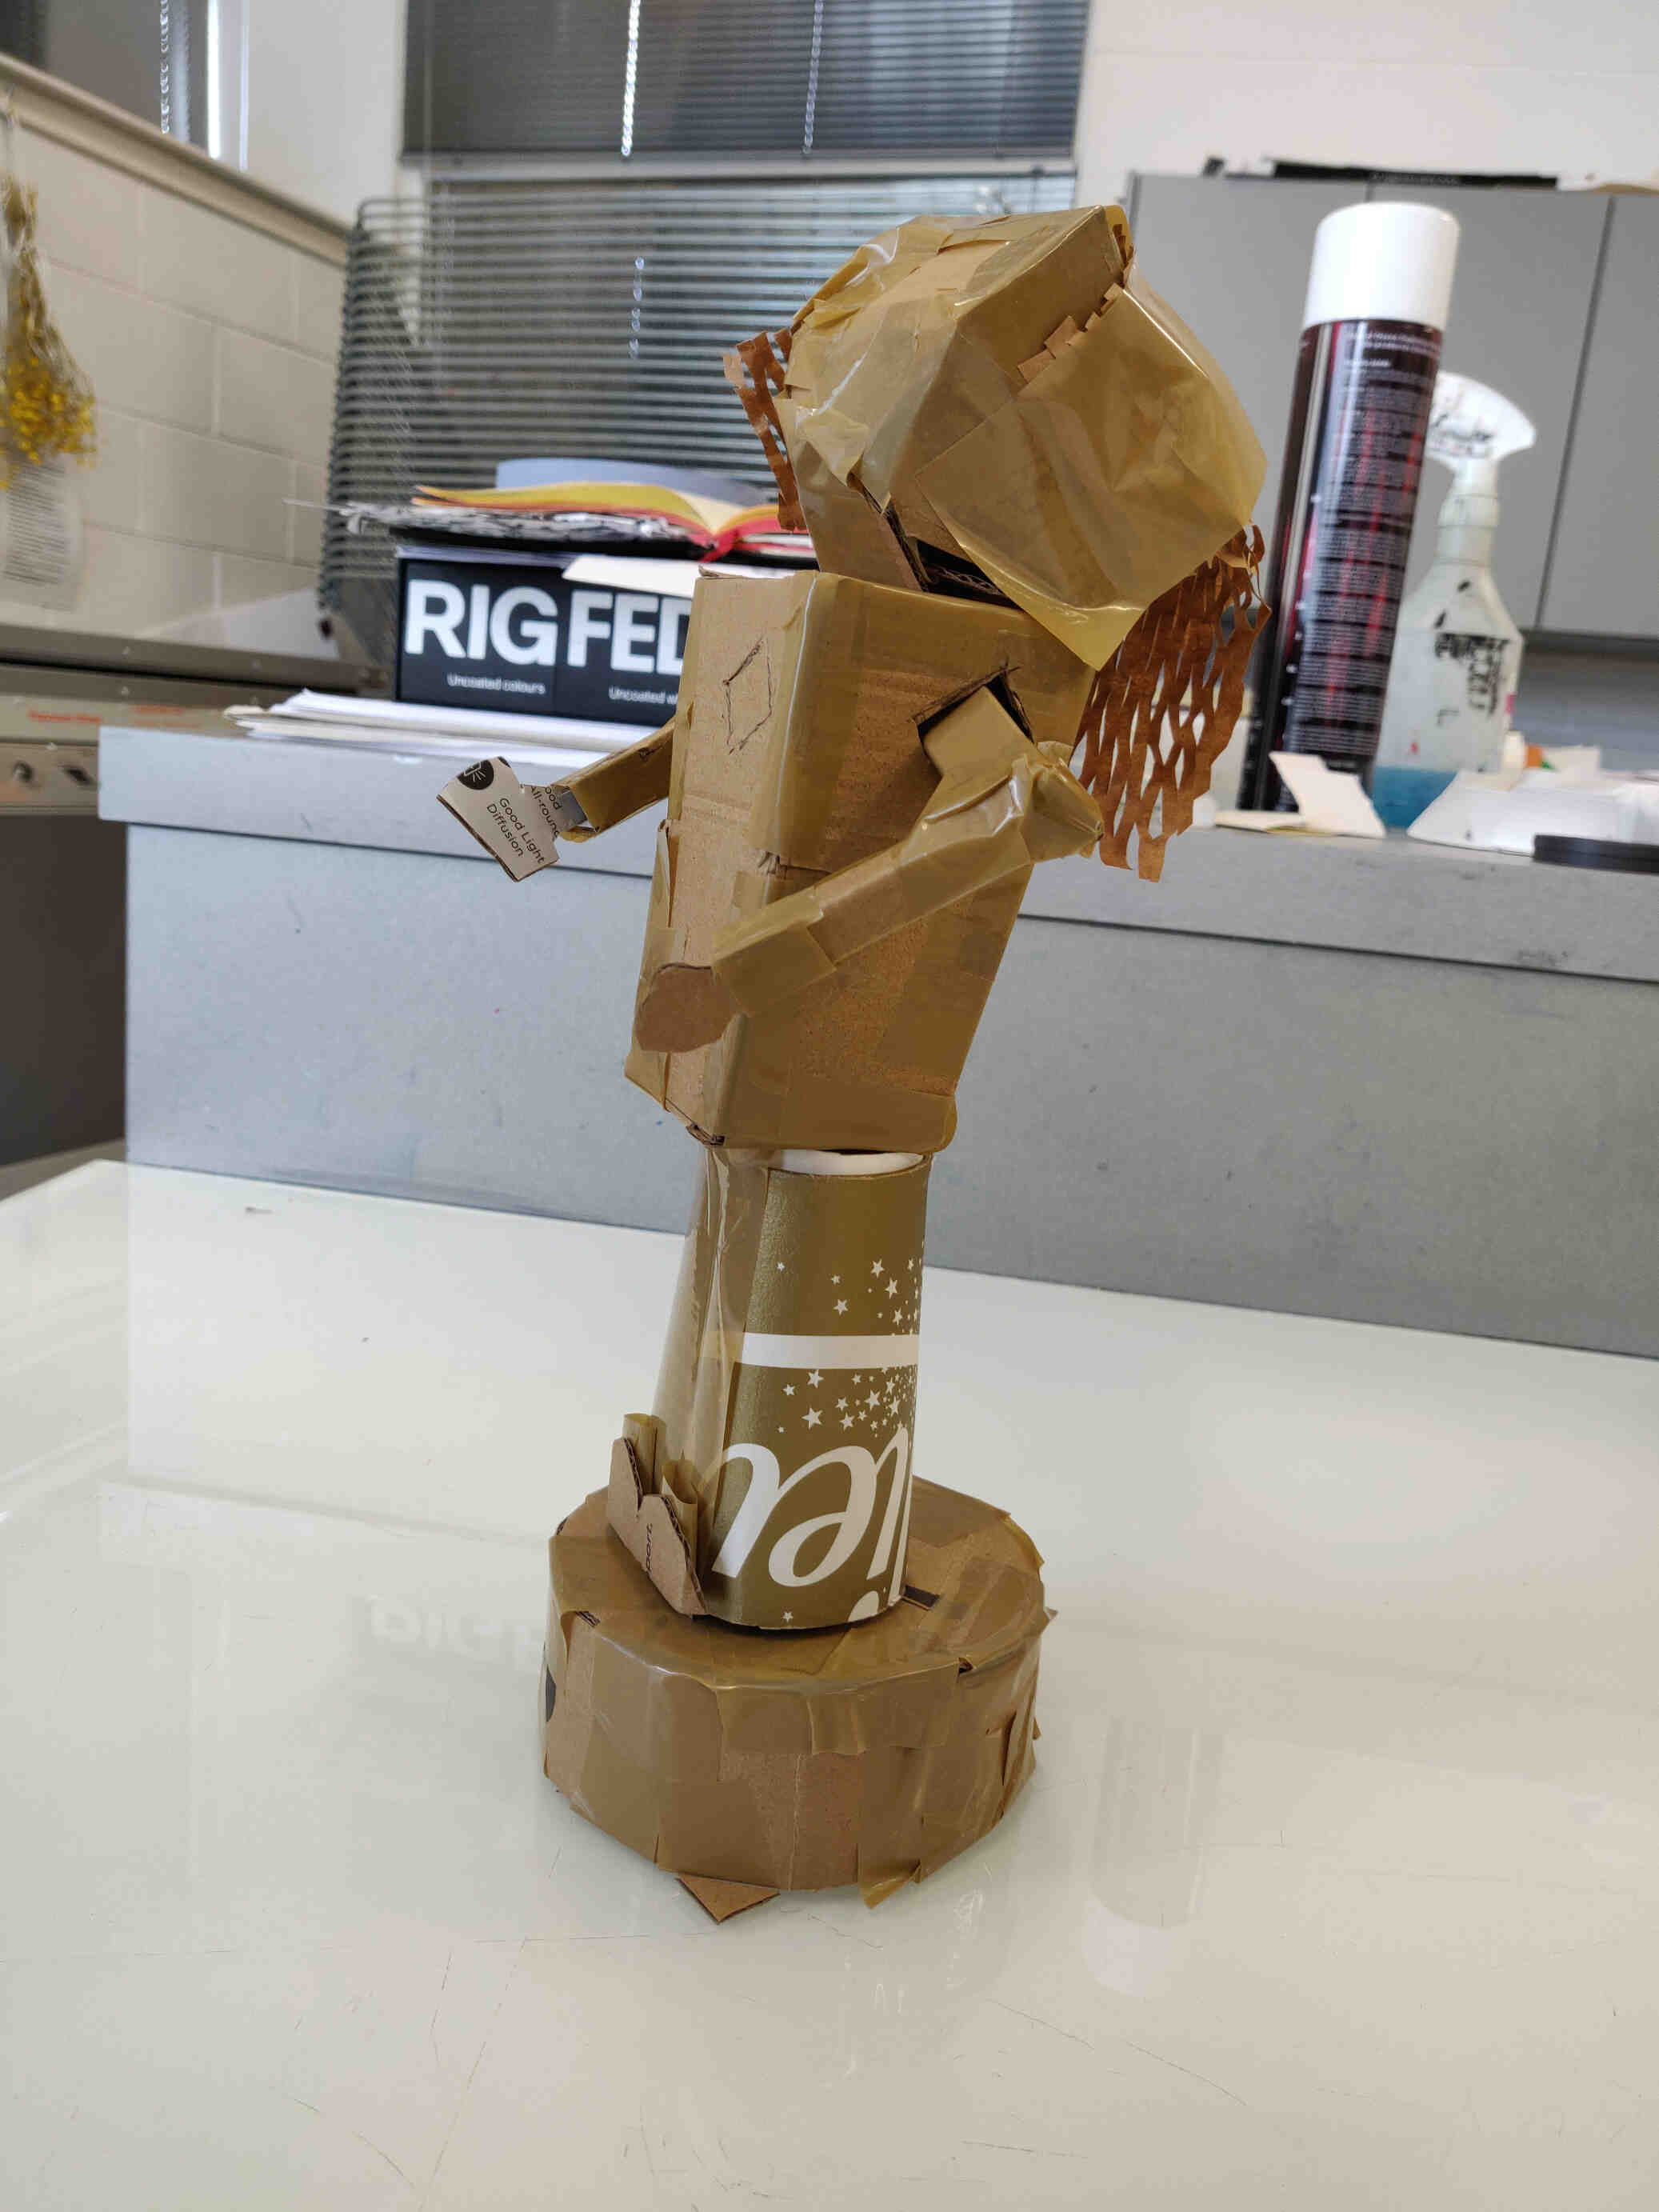
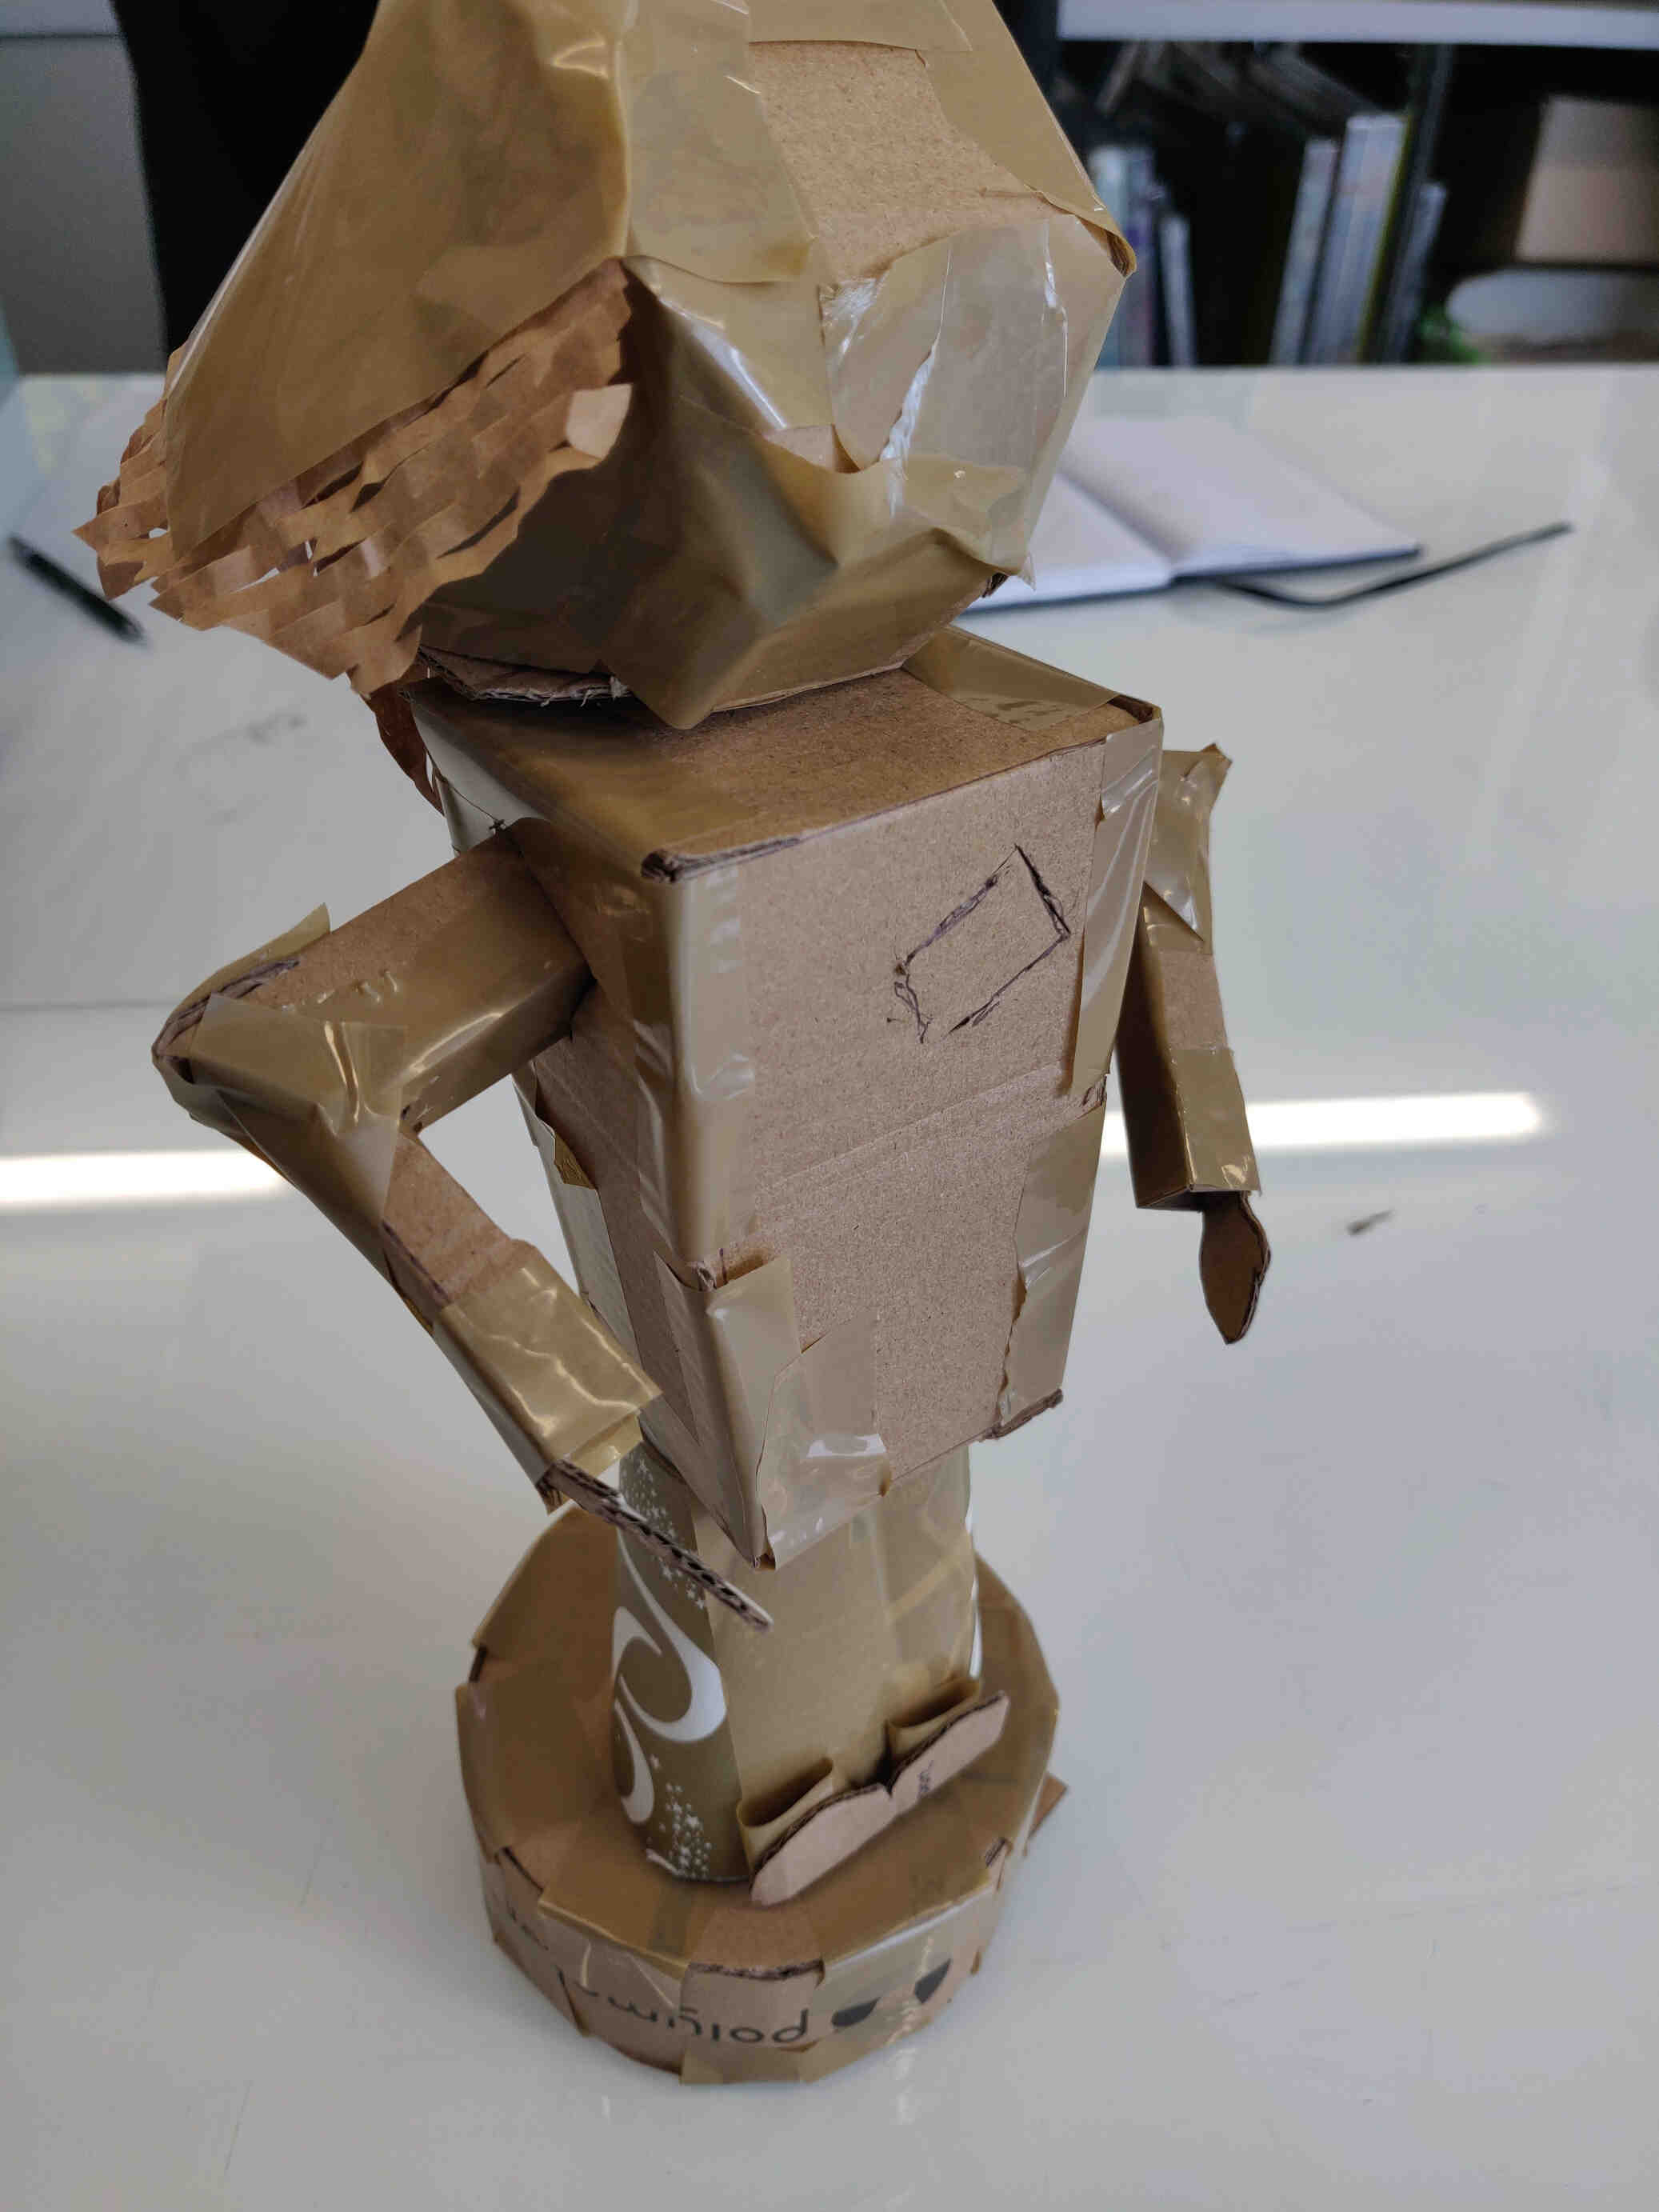
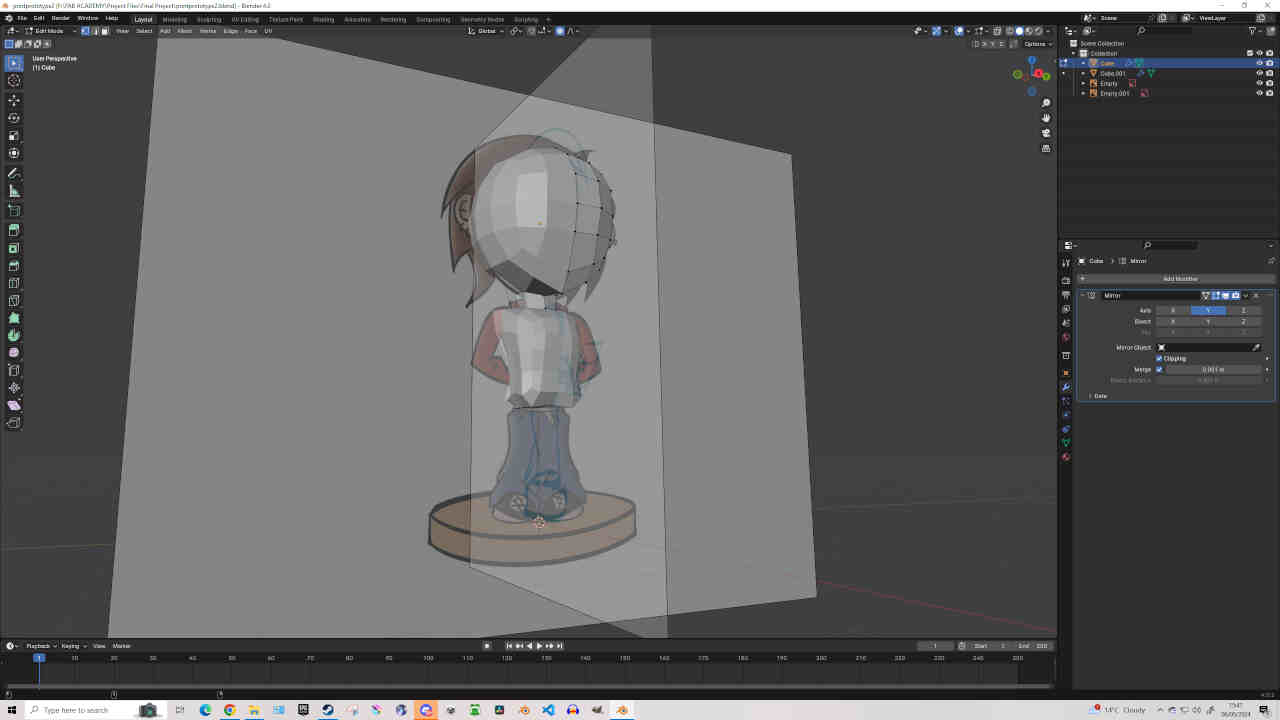
3D Early Render & Cardboard Prototype
___________
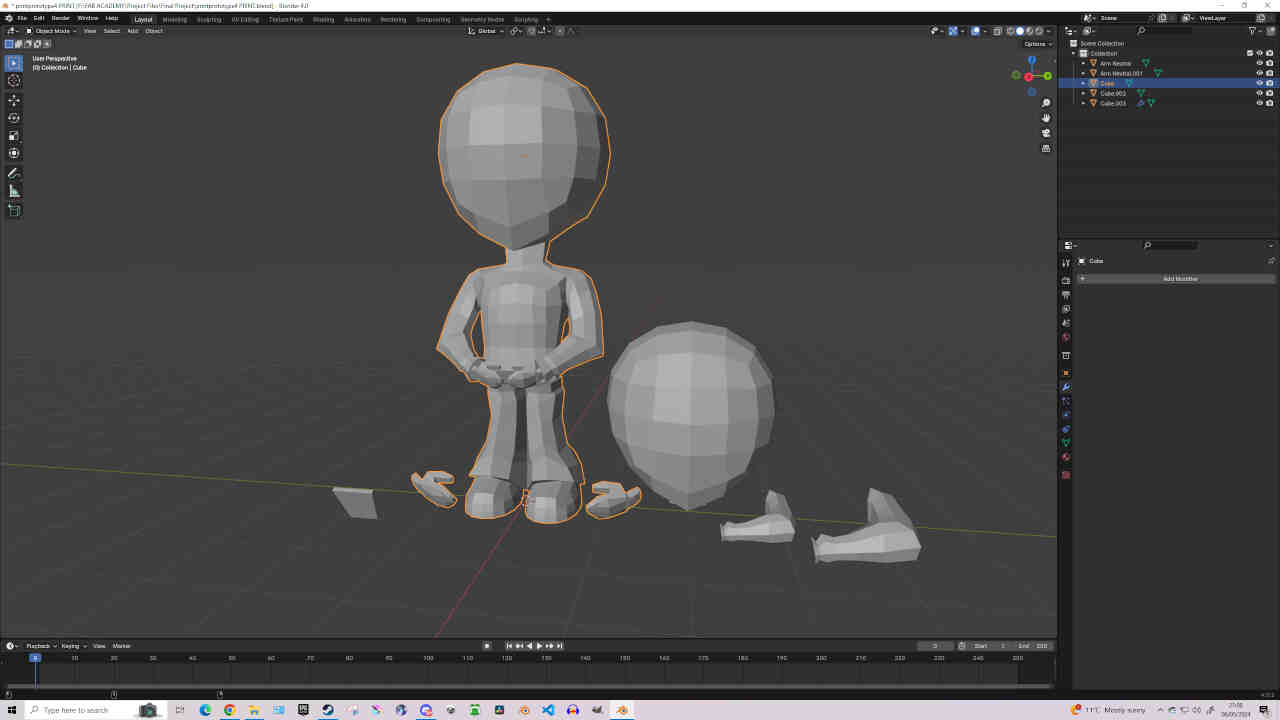
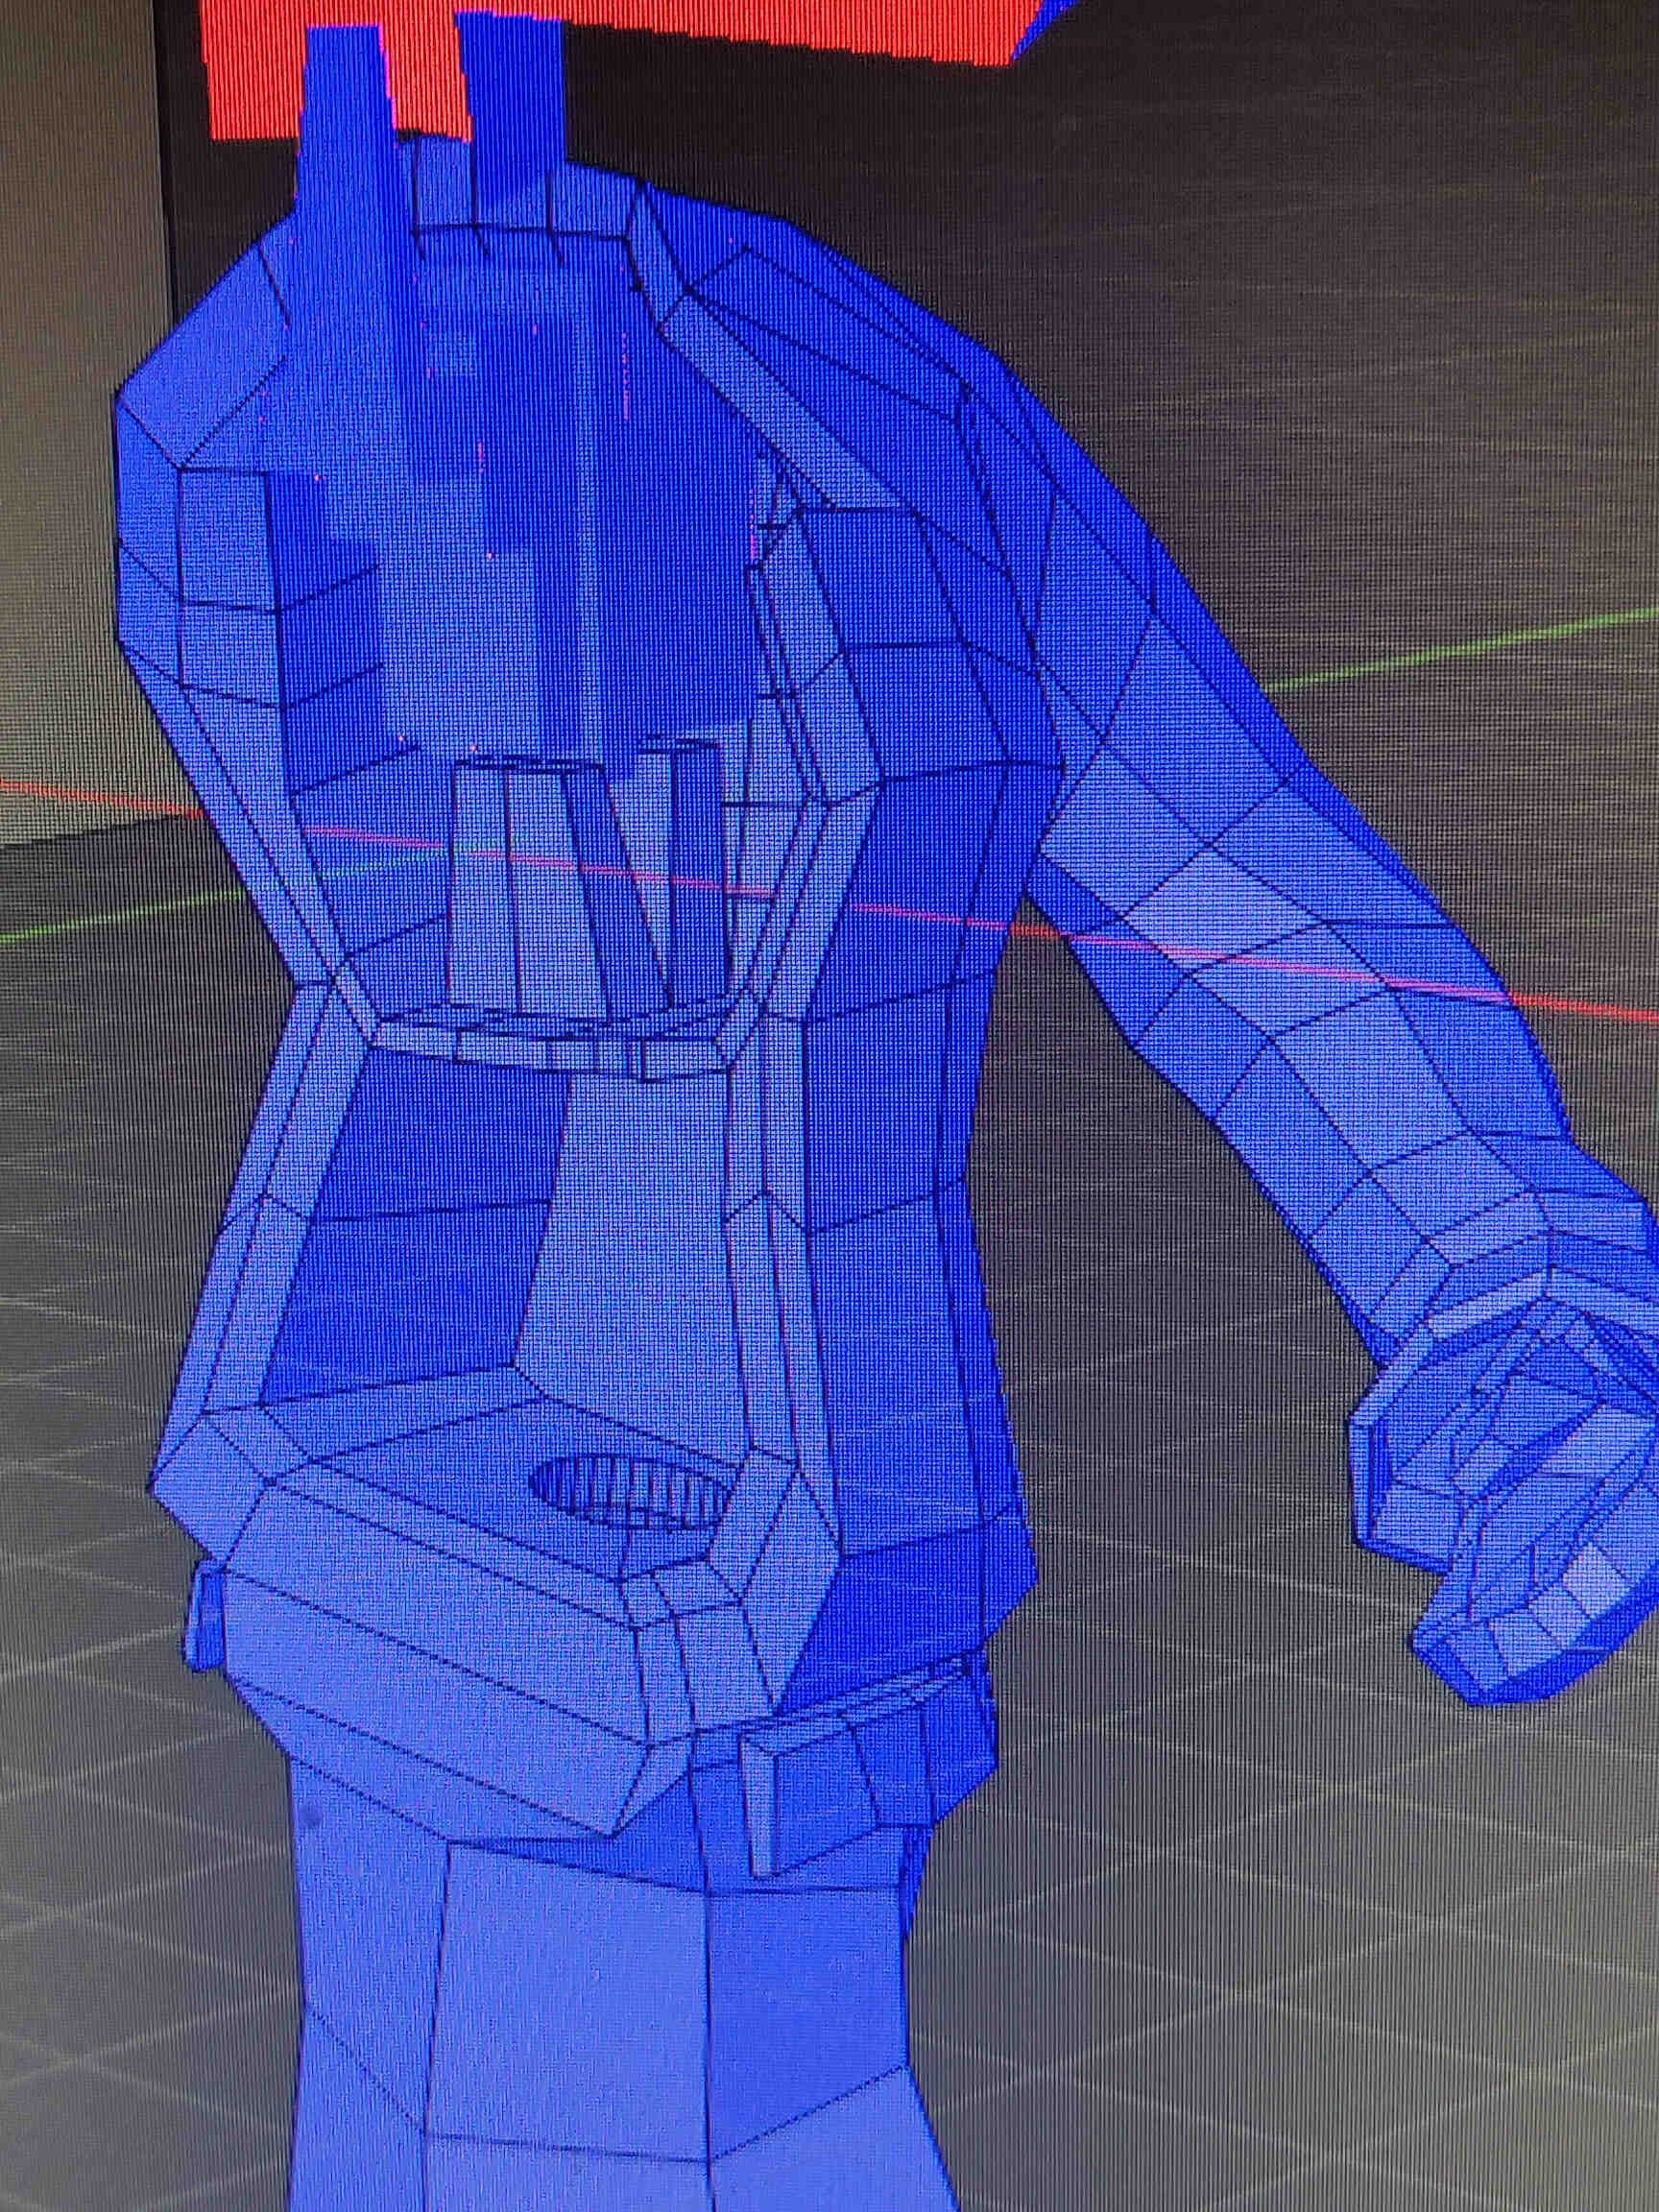
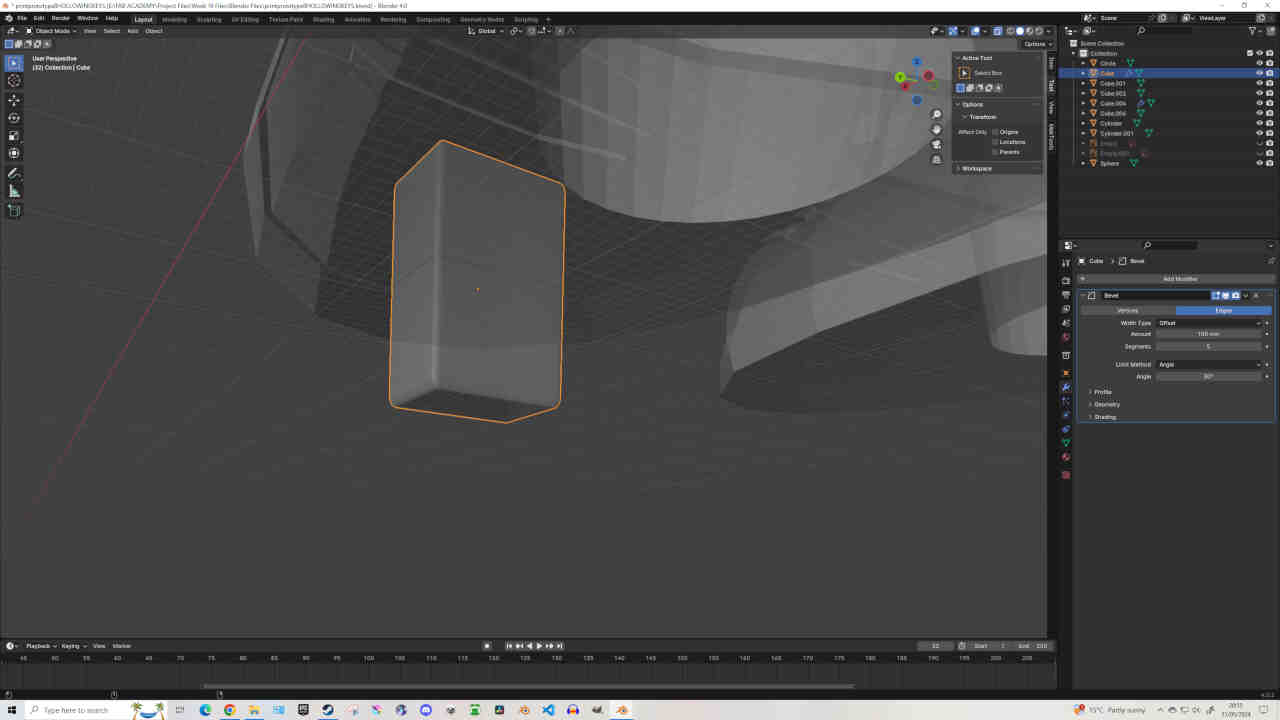
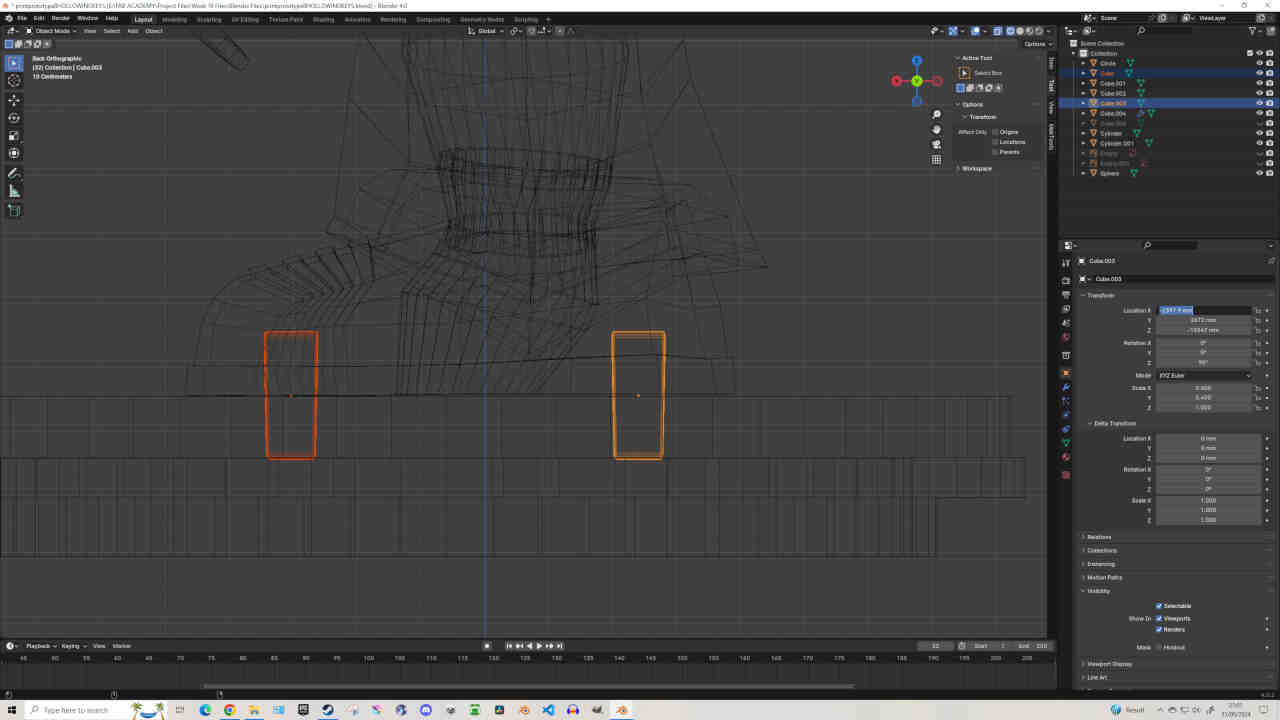
3D Design & PLA Print Prototype

___________
Midterm Review
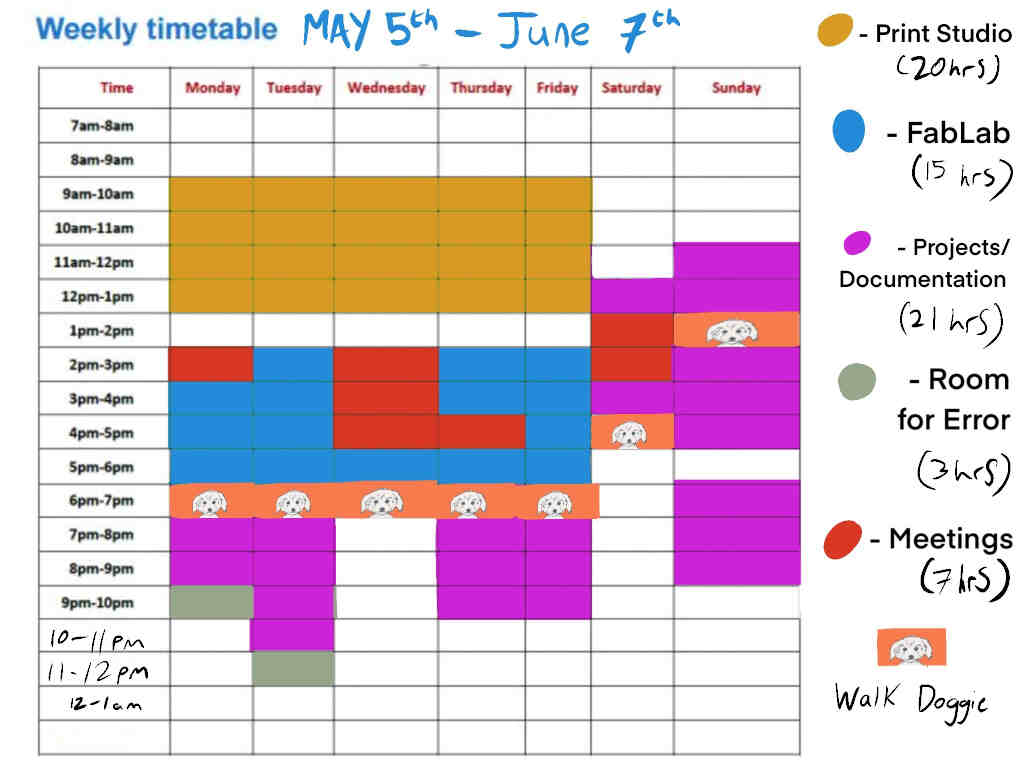
Final Project Timetable (Old)
Final Project Timetable (New)
___________
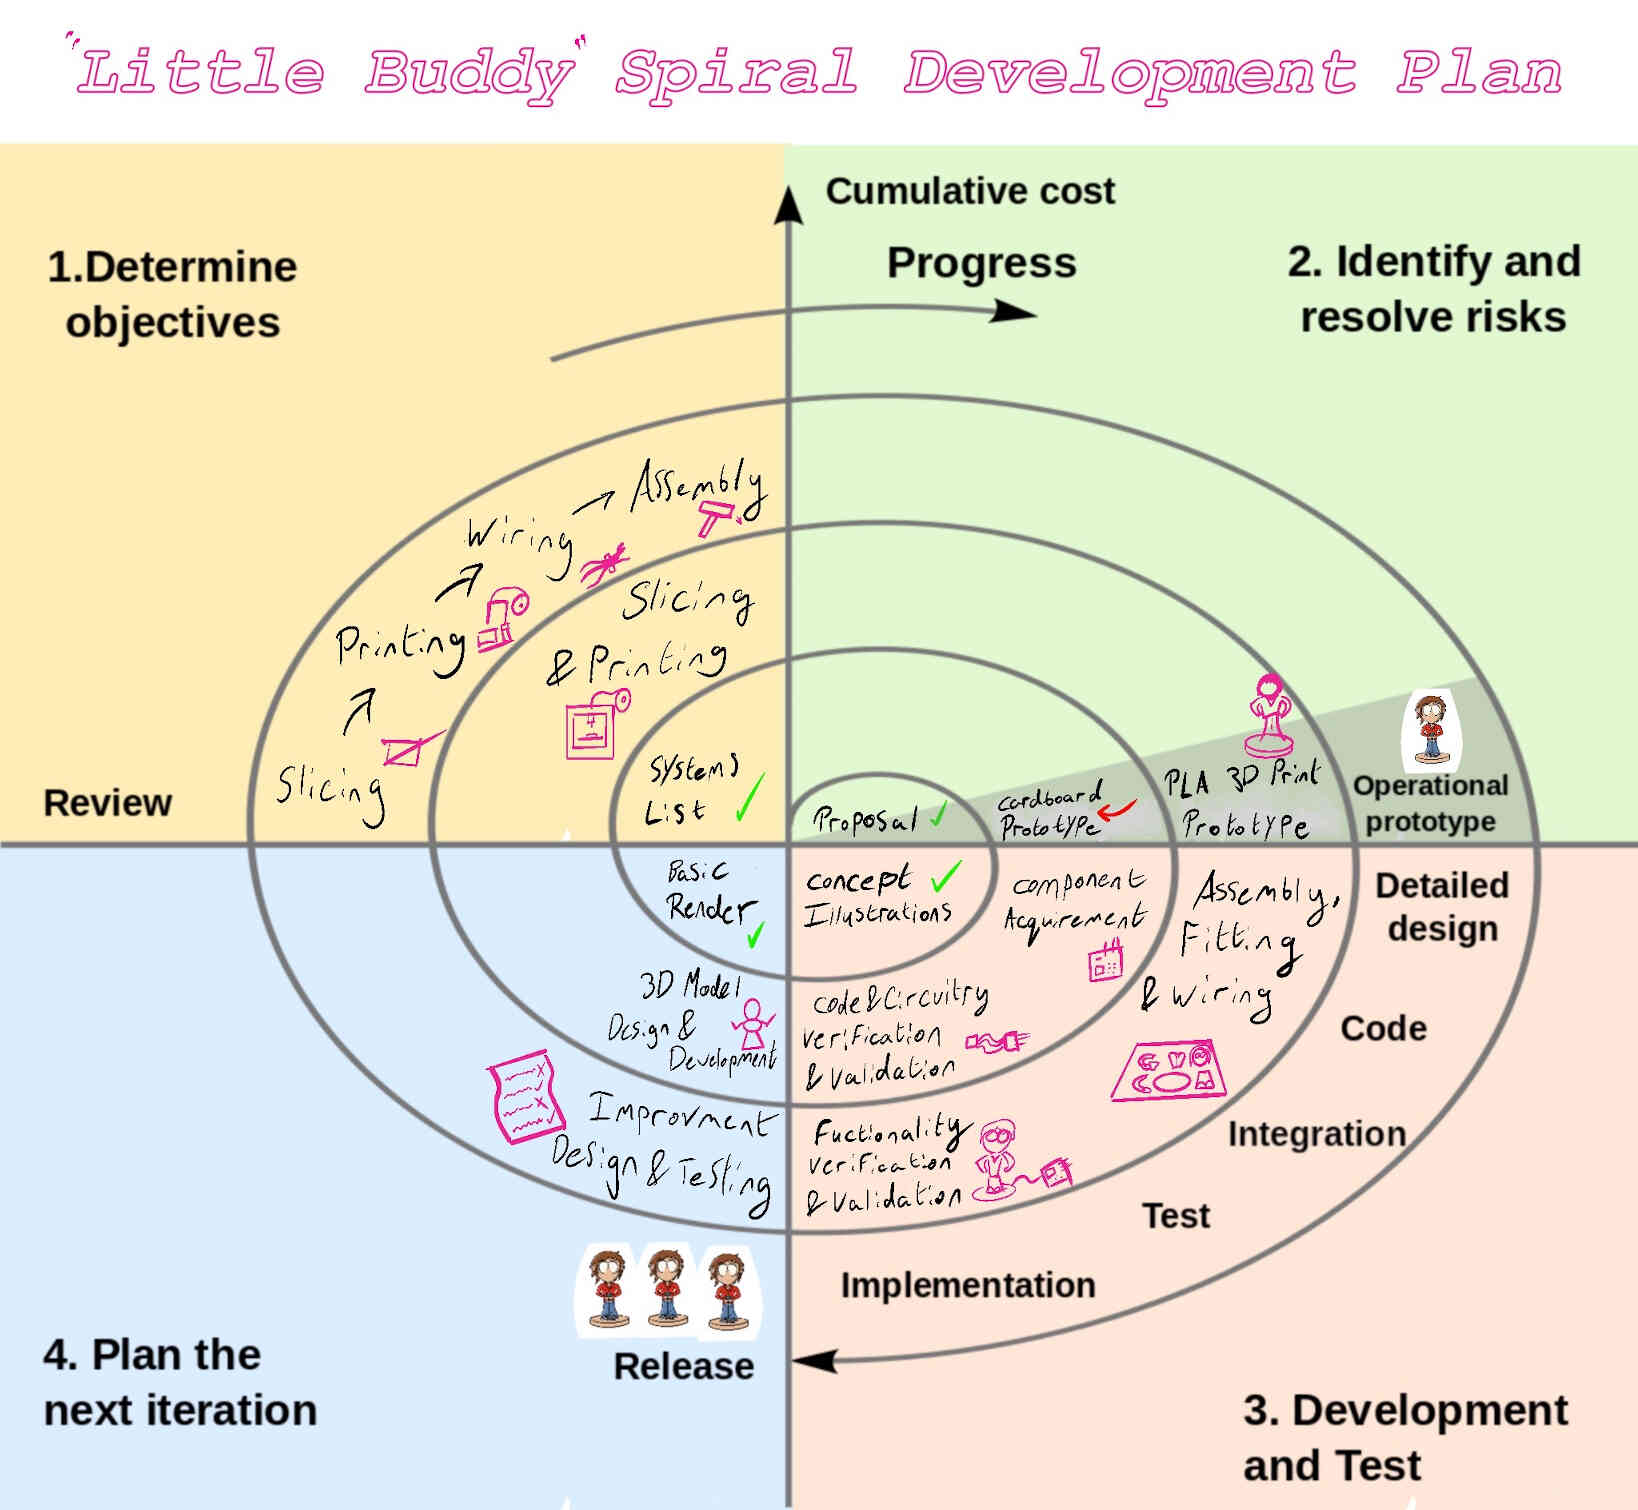
Systems List & Iterations
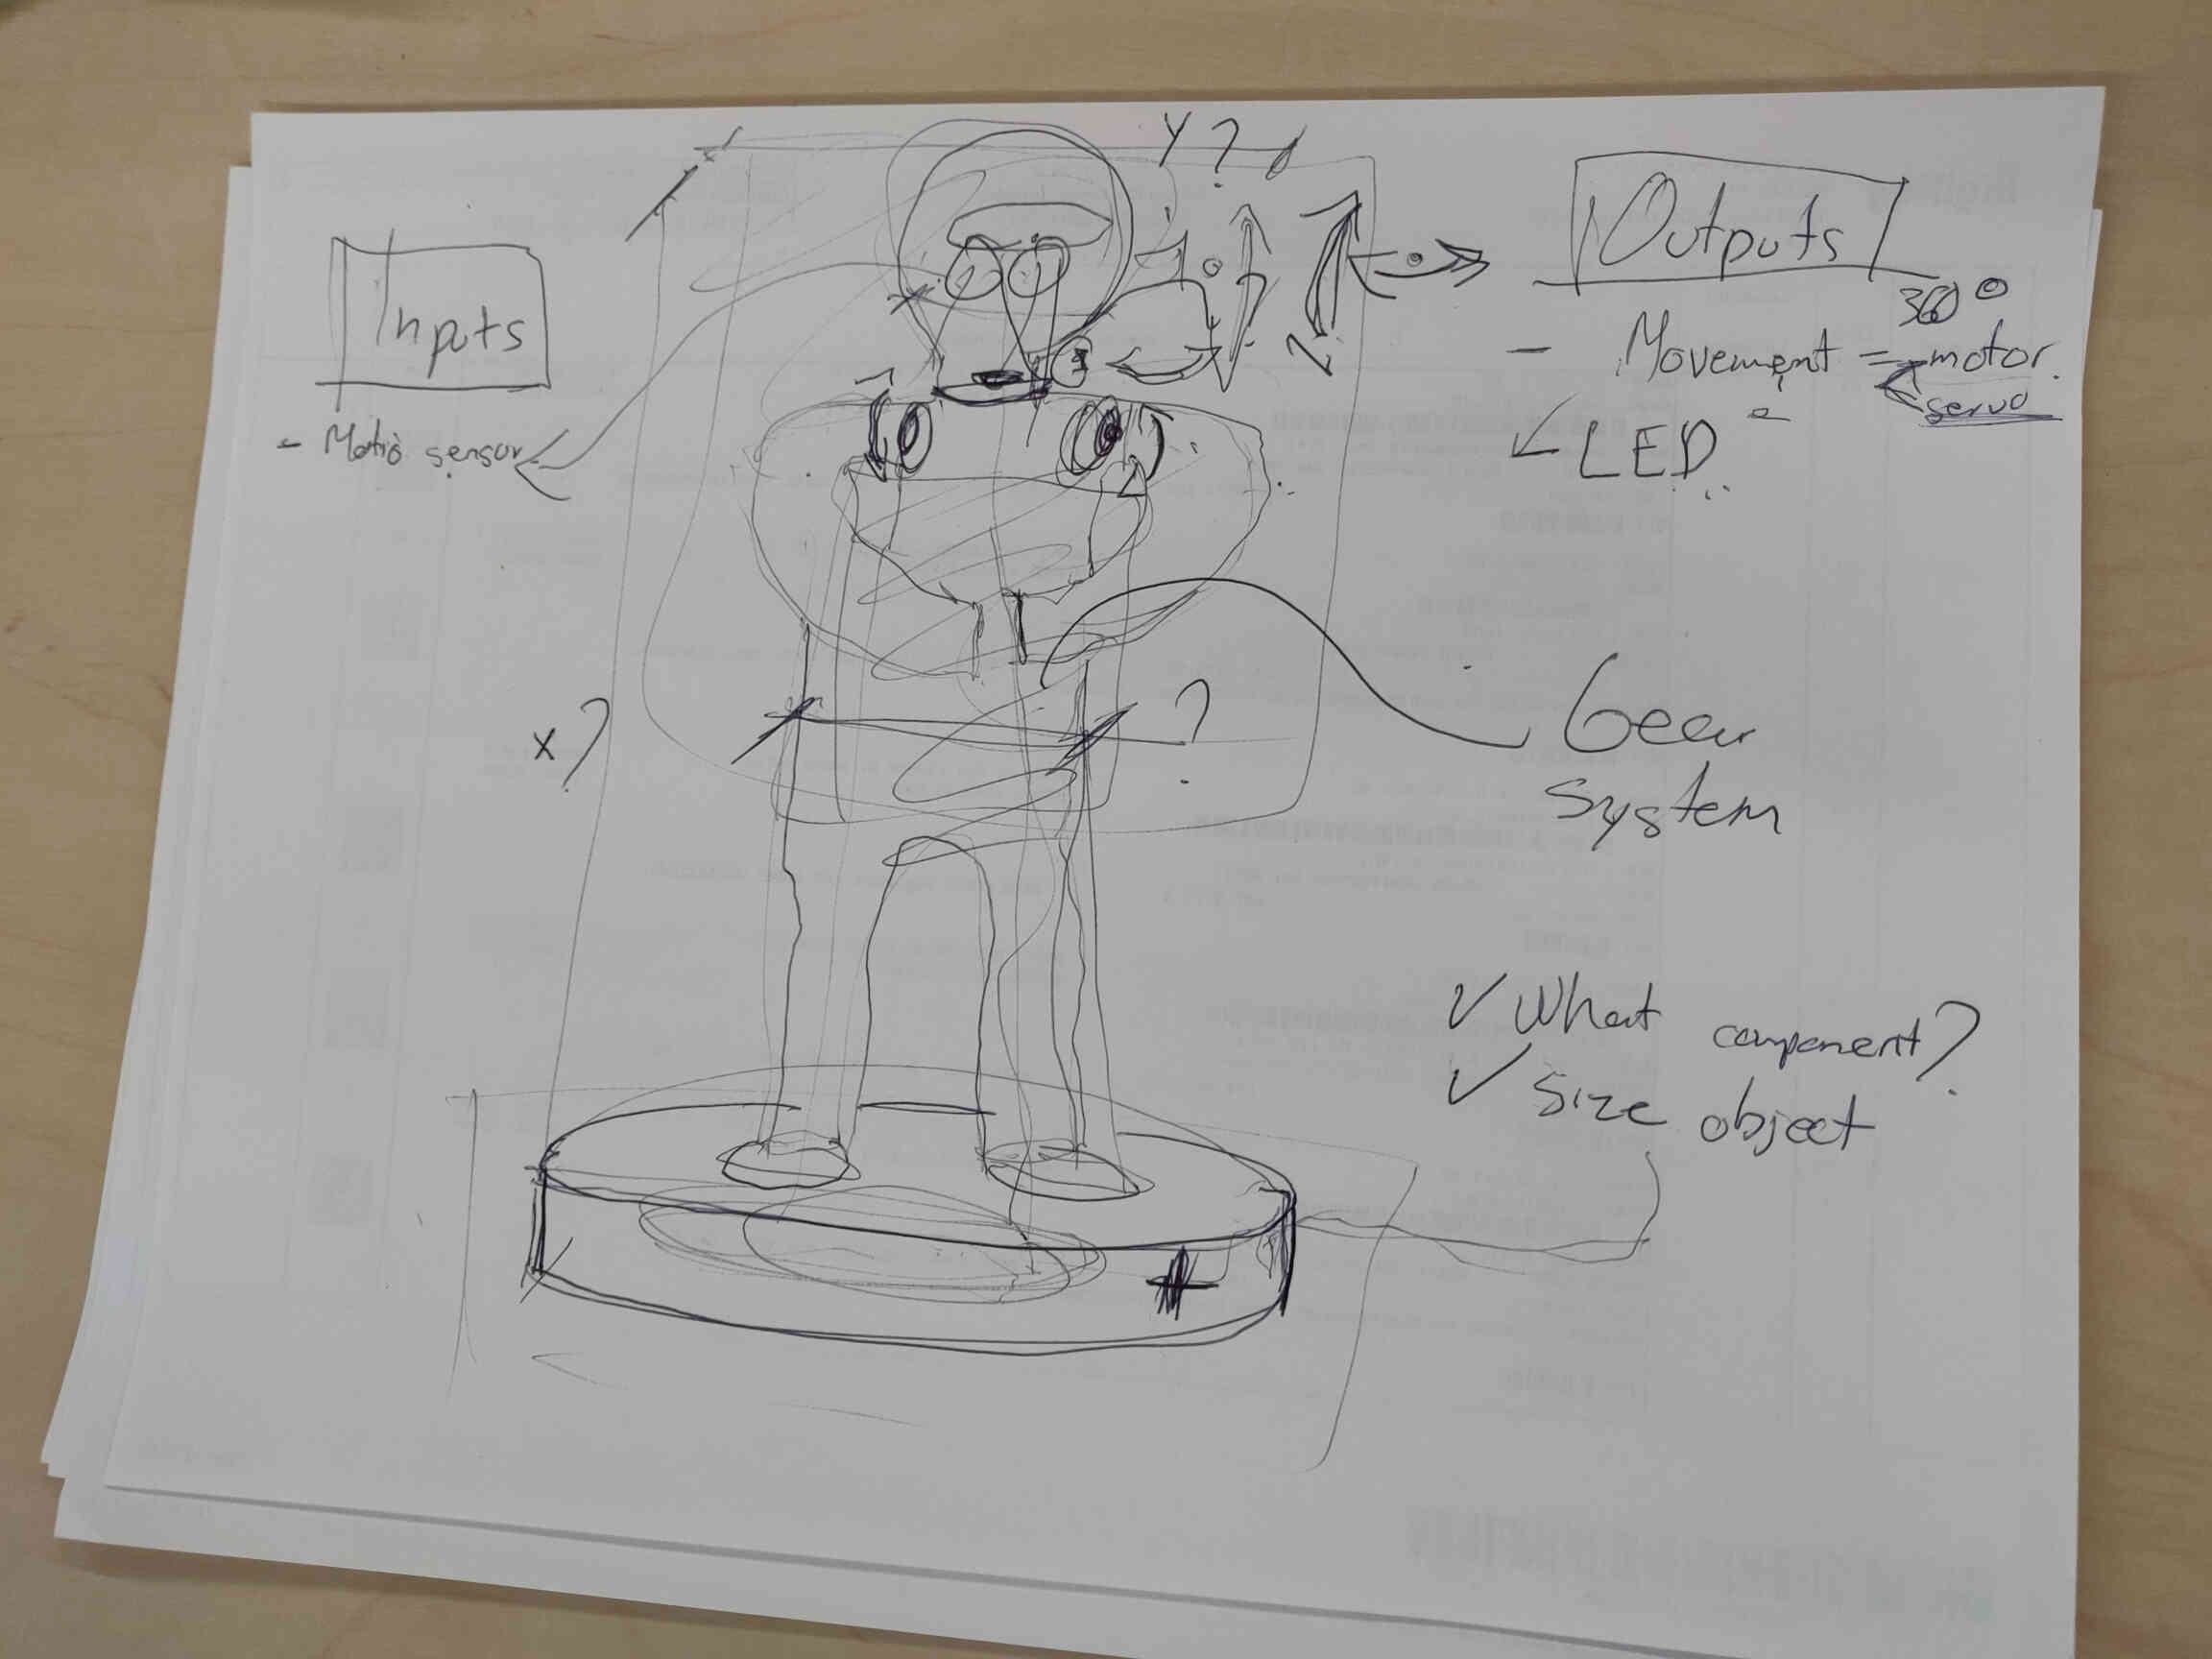
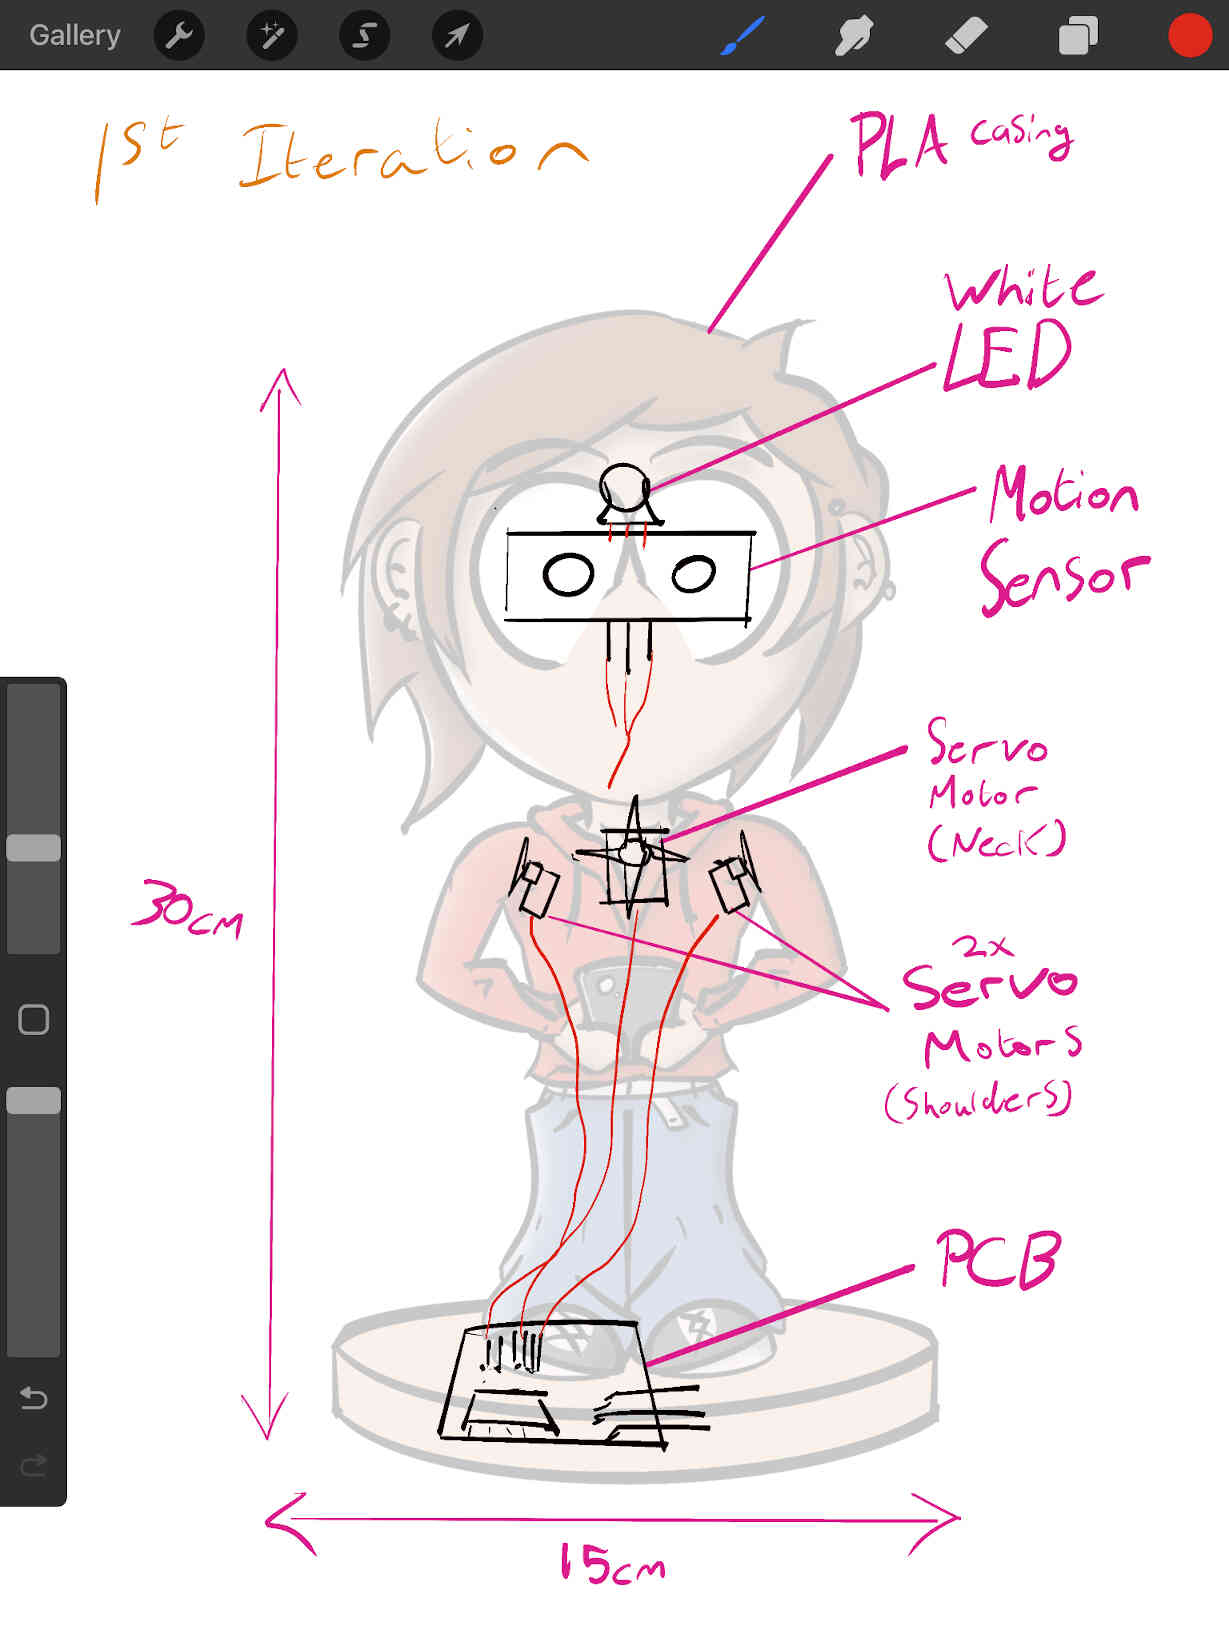
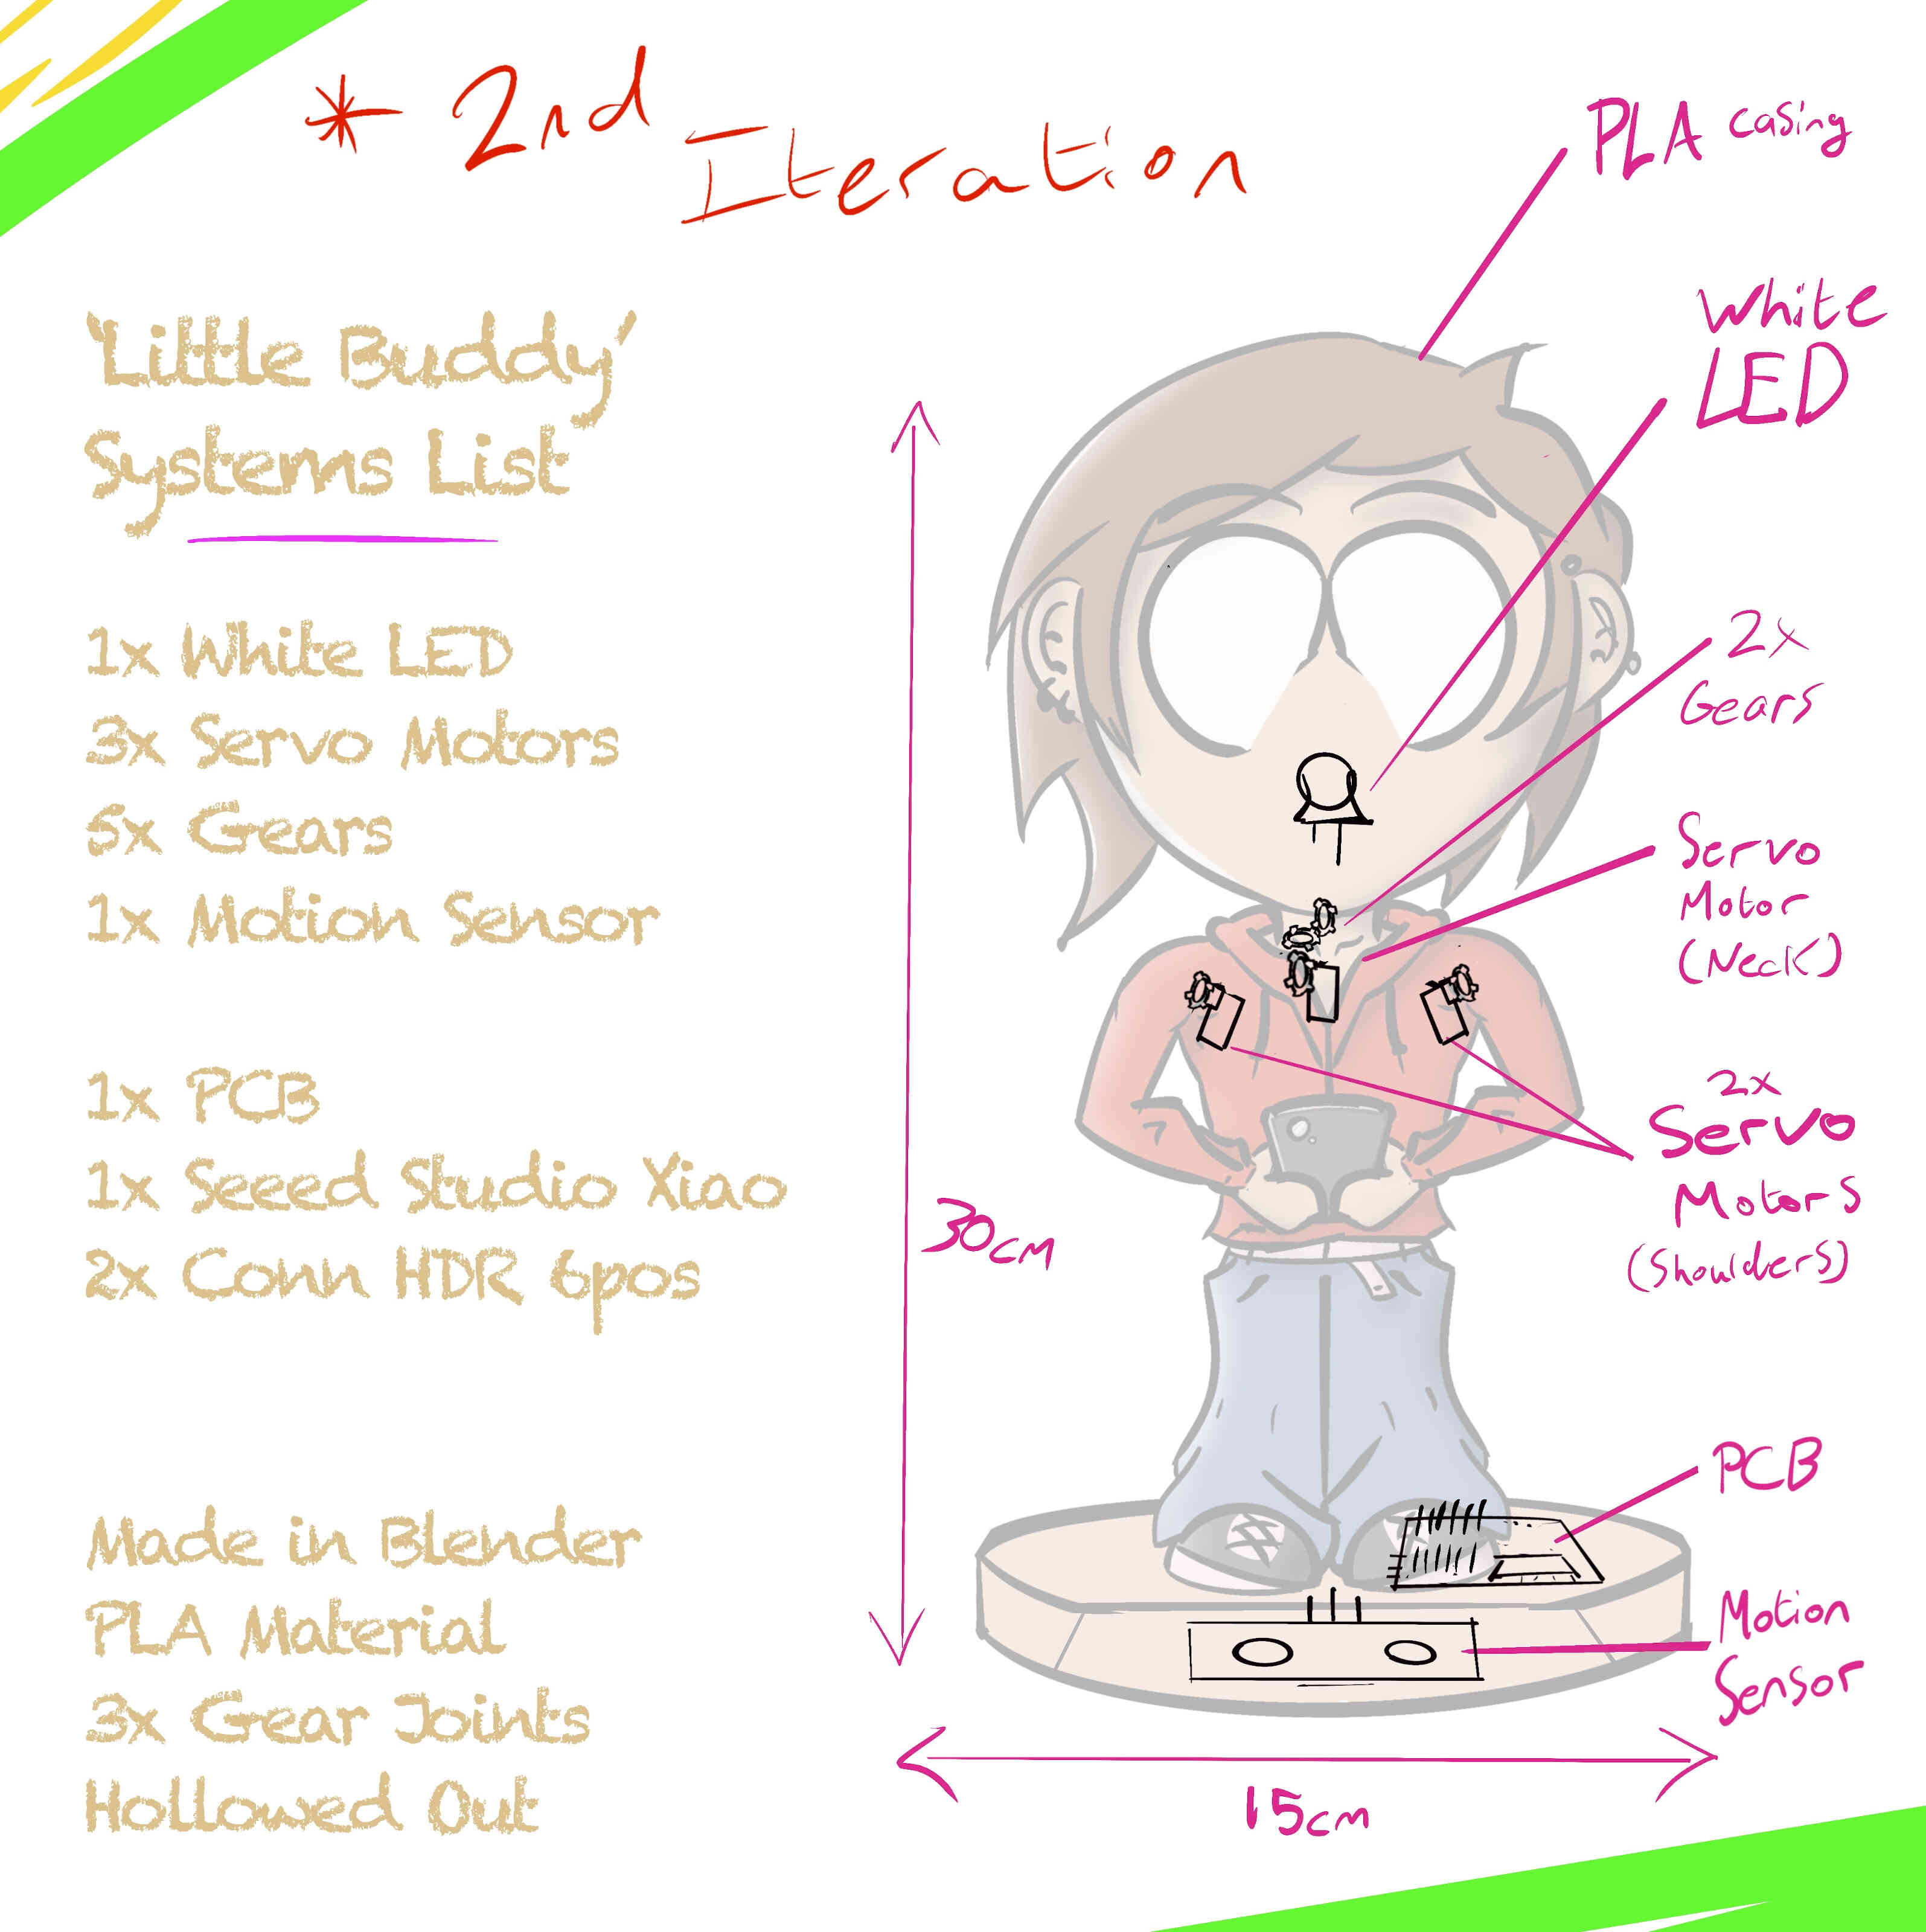
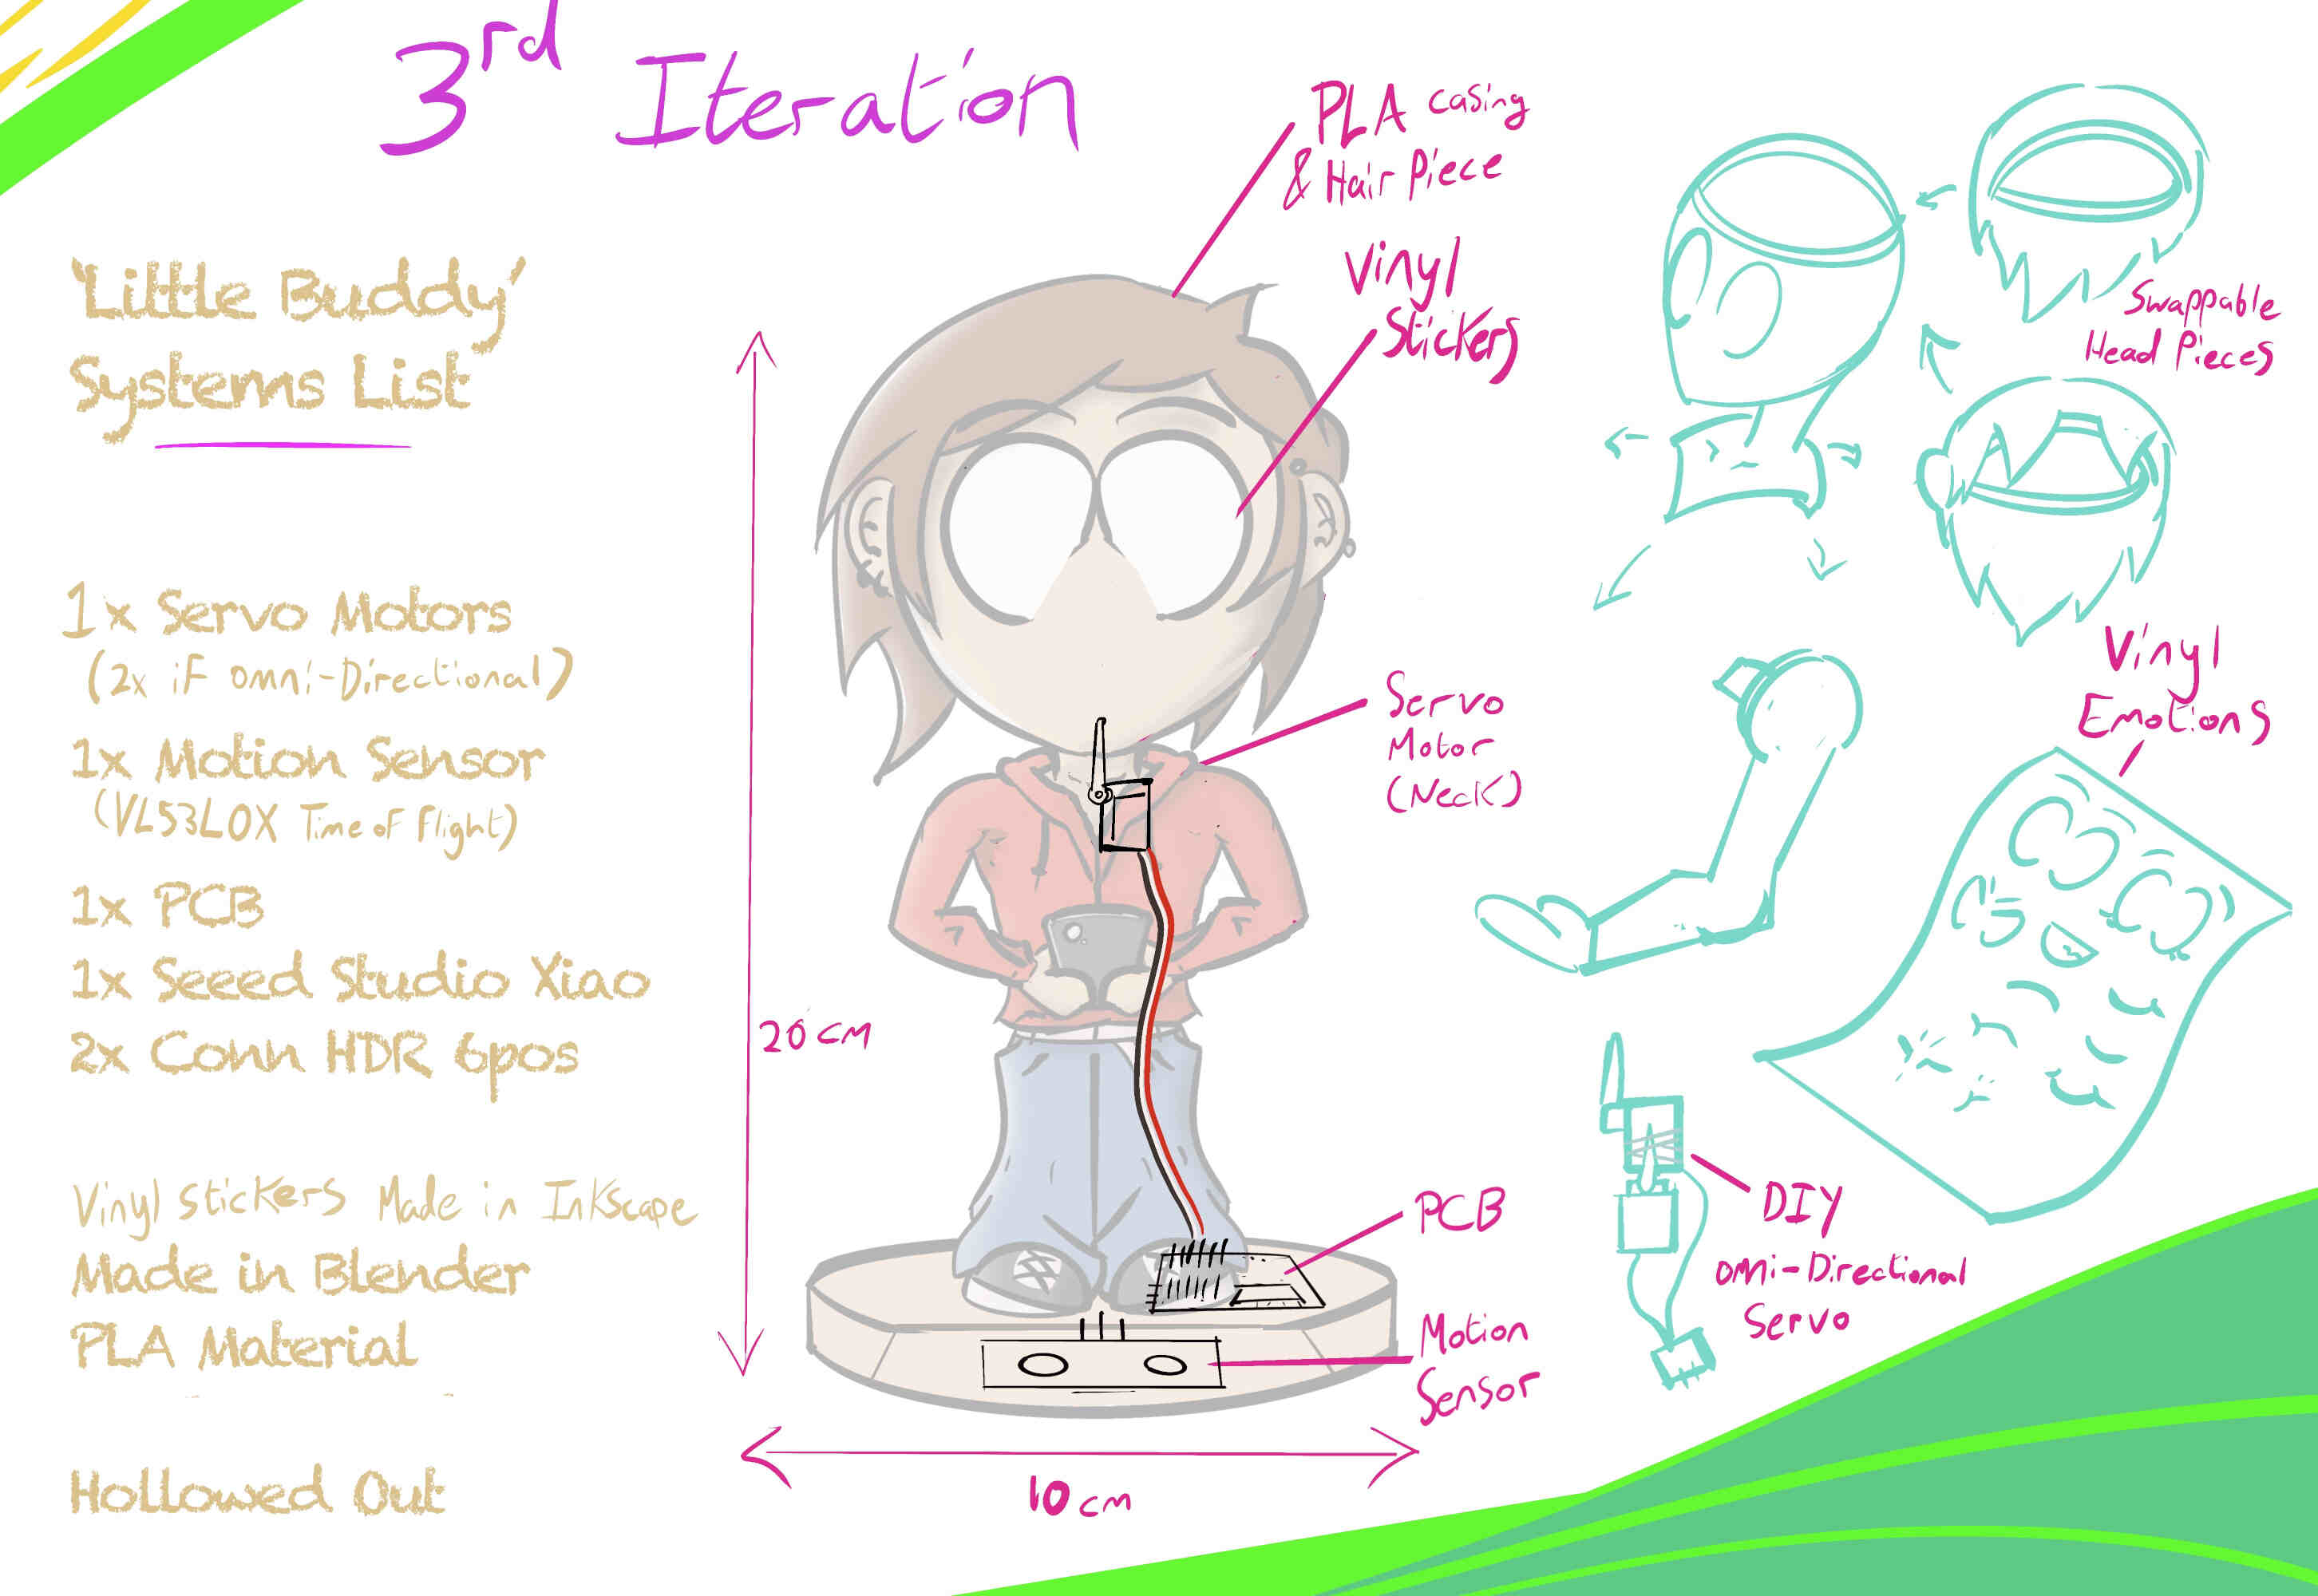
Spiral Development Plan
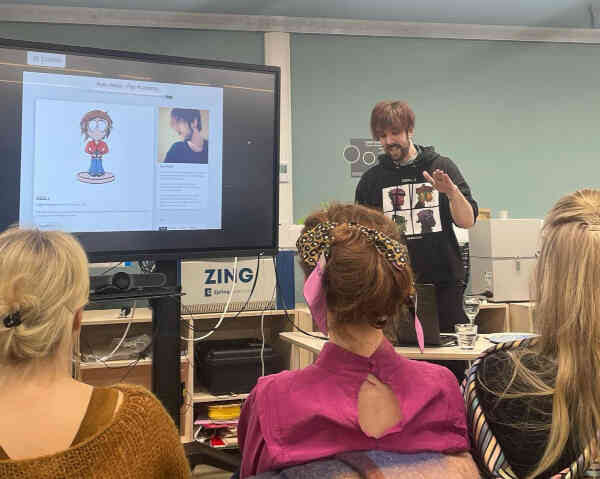
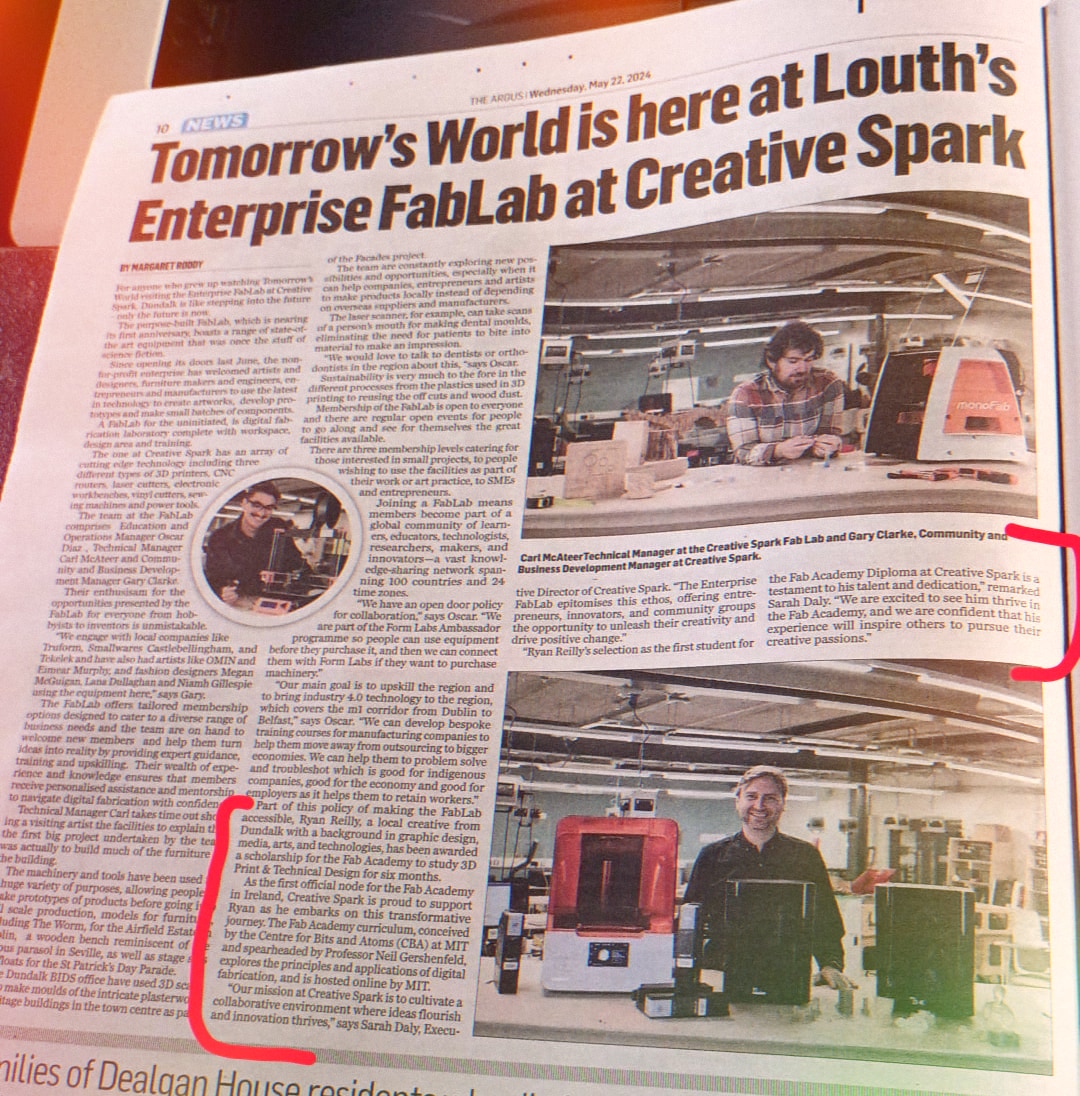
Fab Academy Presentation & Featured in Newspaper
___________
Week 16 - System Integration
Week 16 was an entire week dedicated to System Integration where I put a heavy focus on making my Final Project 'Little Buddy' be as clean, tidy and fuctional as possible with a lot of time put into measurements and wire routing. Click HERE or the title above to see the progress made during this week!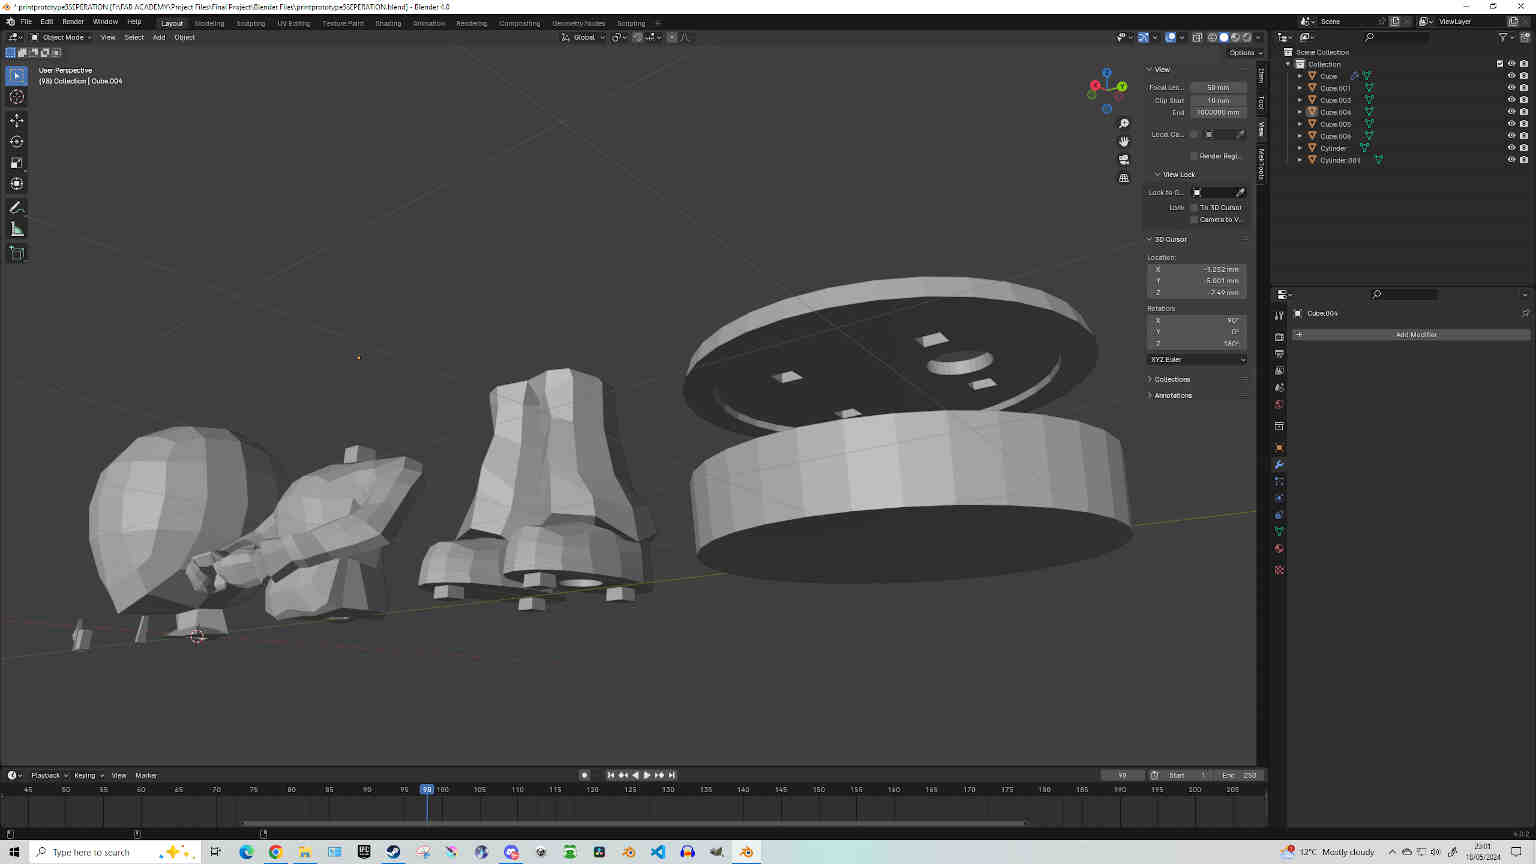
___________
Week 17 - Applications and Implications
Week 17 was an entire week dedicated to our final project development, but also had a few very important questions that needed answering. Click HERE or the title above to find the purpose within this project!!___________
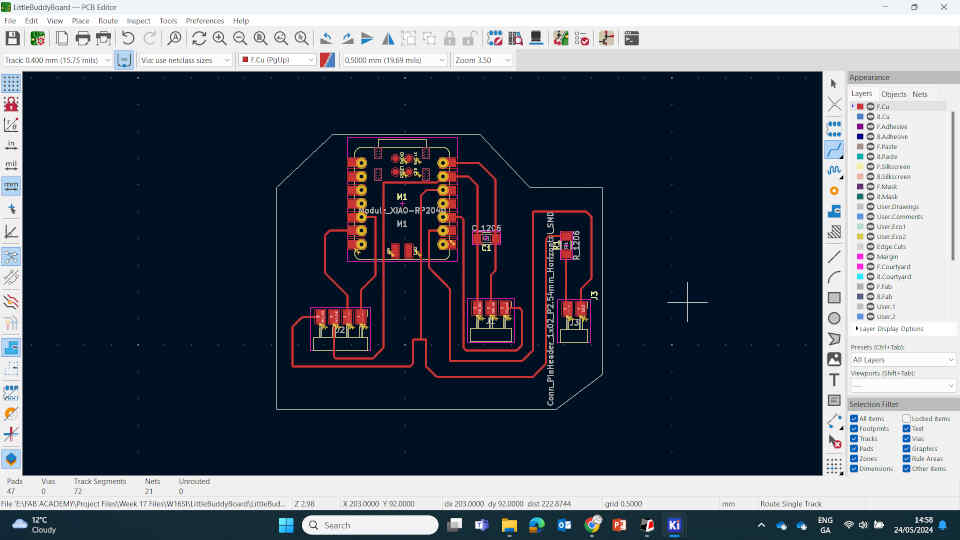
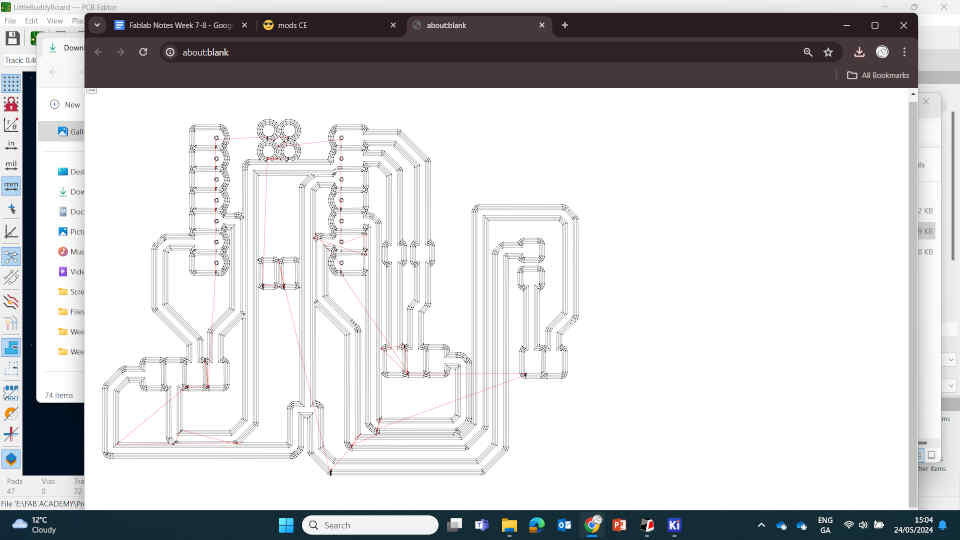
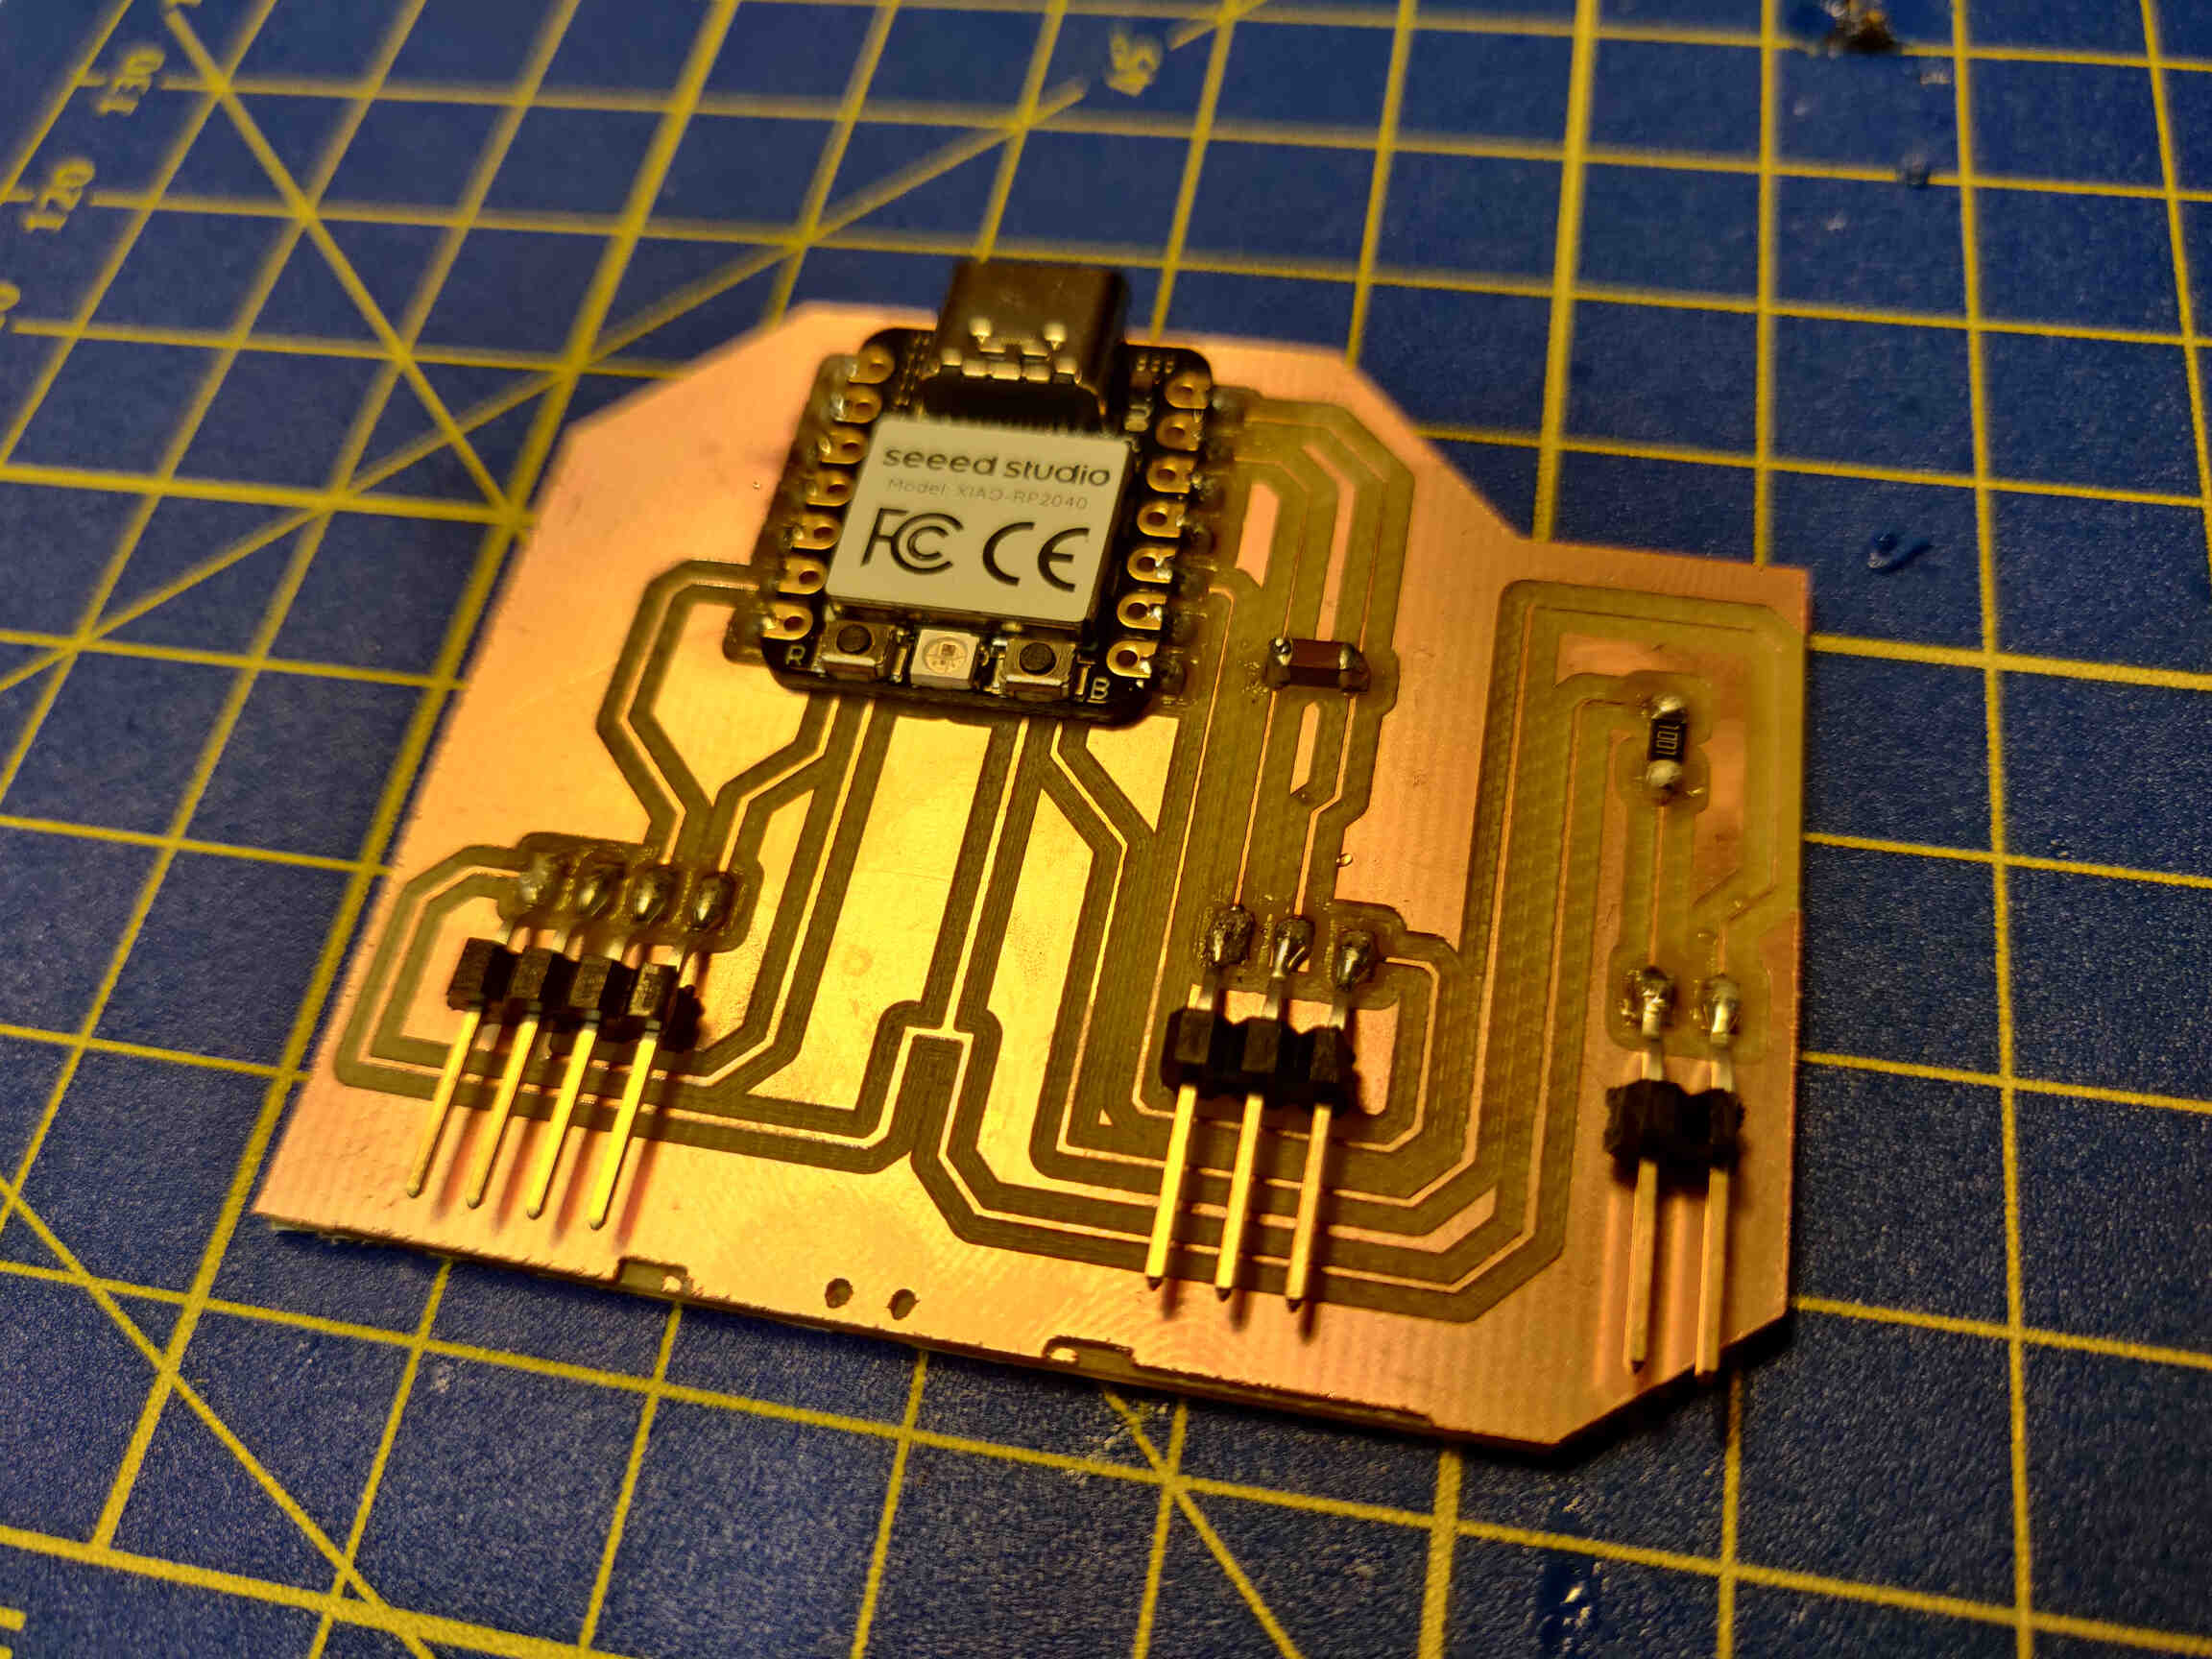
PCB Design, Production & Development
PCB Design (KiCAD)

Above is the schematic for my custom made PCB - however I did eventually change the microcontroller diagram to an alternate Xiao RP2040 that seemed more appropriate.
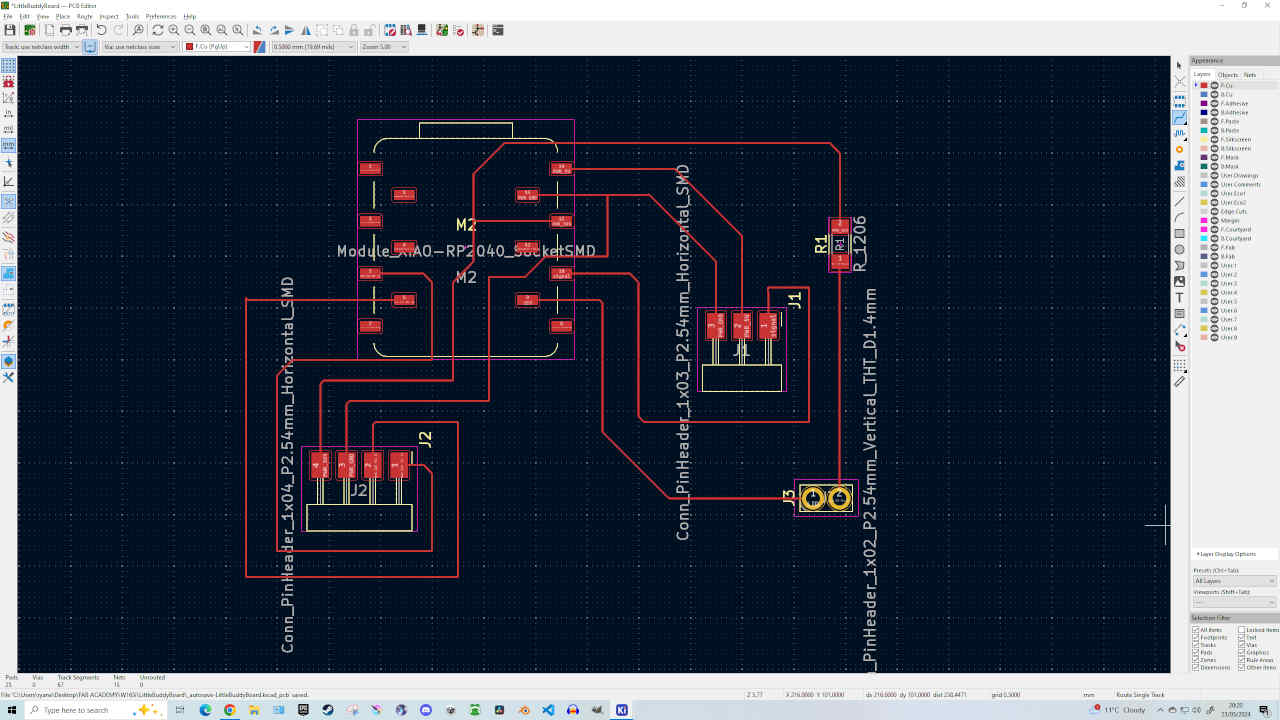
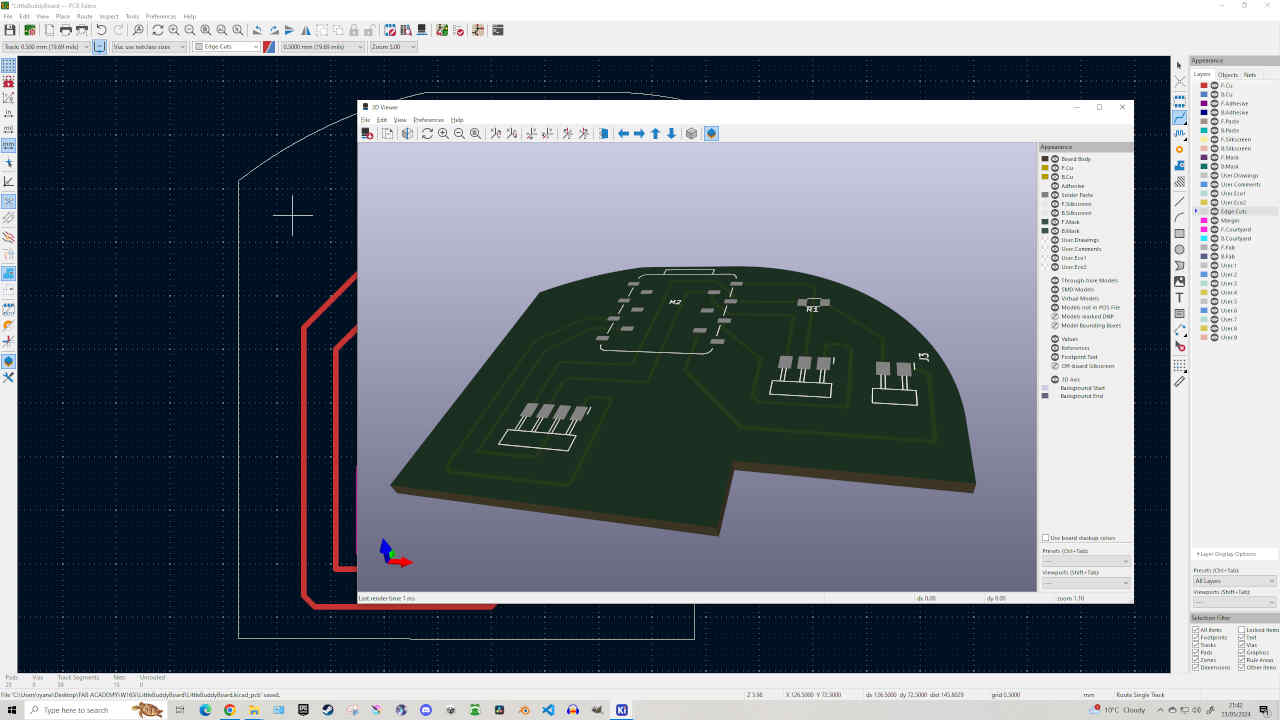
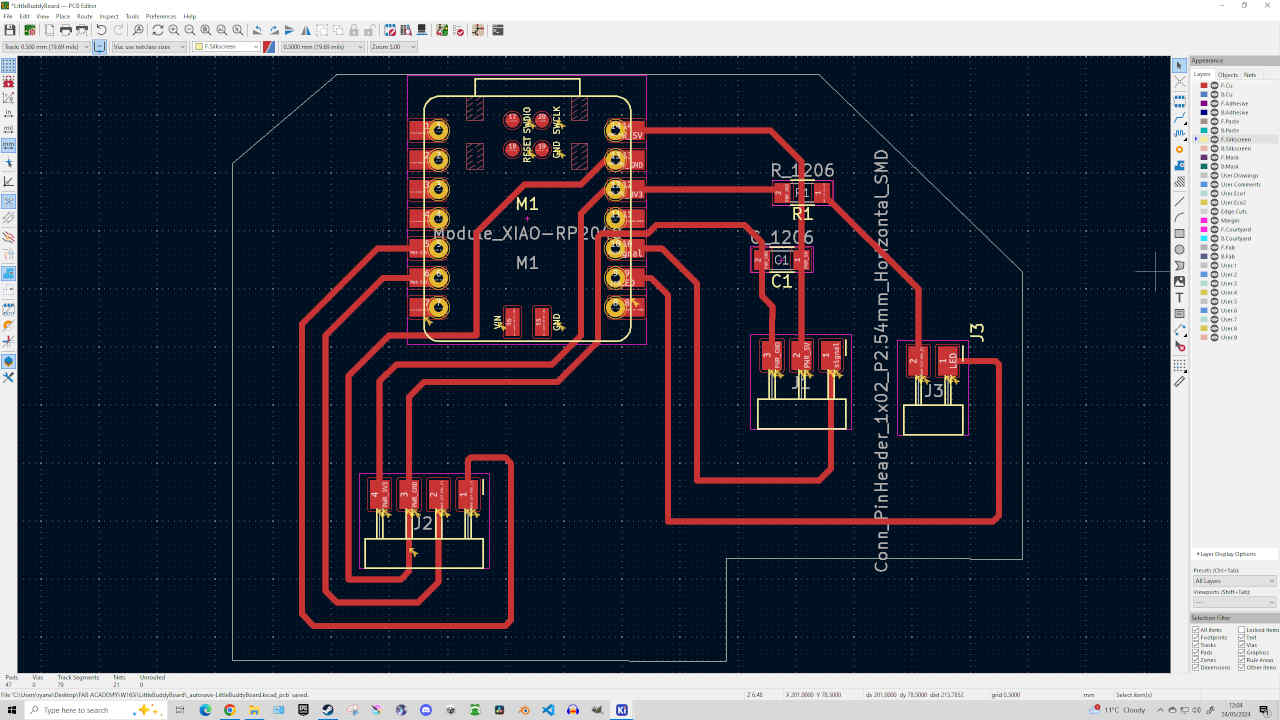
I went through various iterations of the PCB design before I came to my final design. I wanted the traces lines to be bigger but there were also 1 or 2 trace paths that were very difficult to work around, leading me to thin the lines and revise my structure. The last thing I wanted after all my electronics / programming issue was to have a dodgy circuit board made in haste without thought. Below is the Final Result and its toolpath calculated from Modsproject.ie.
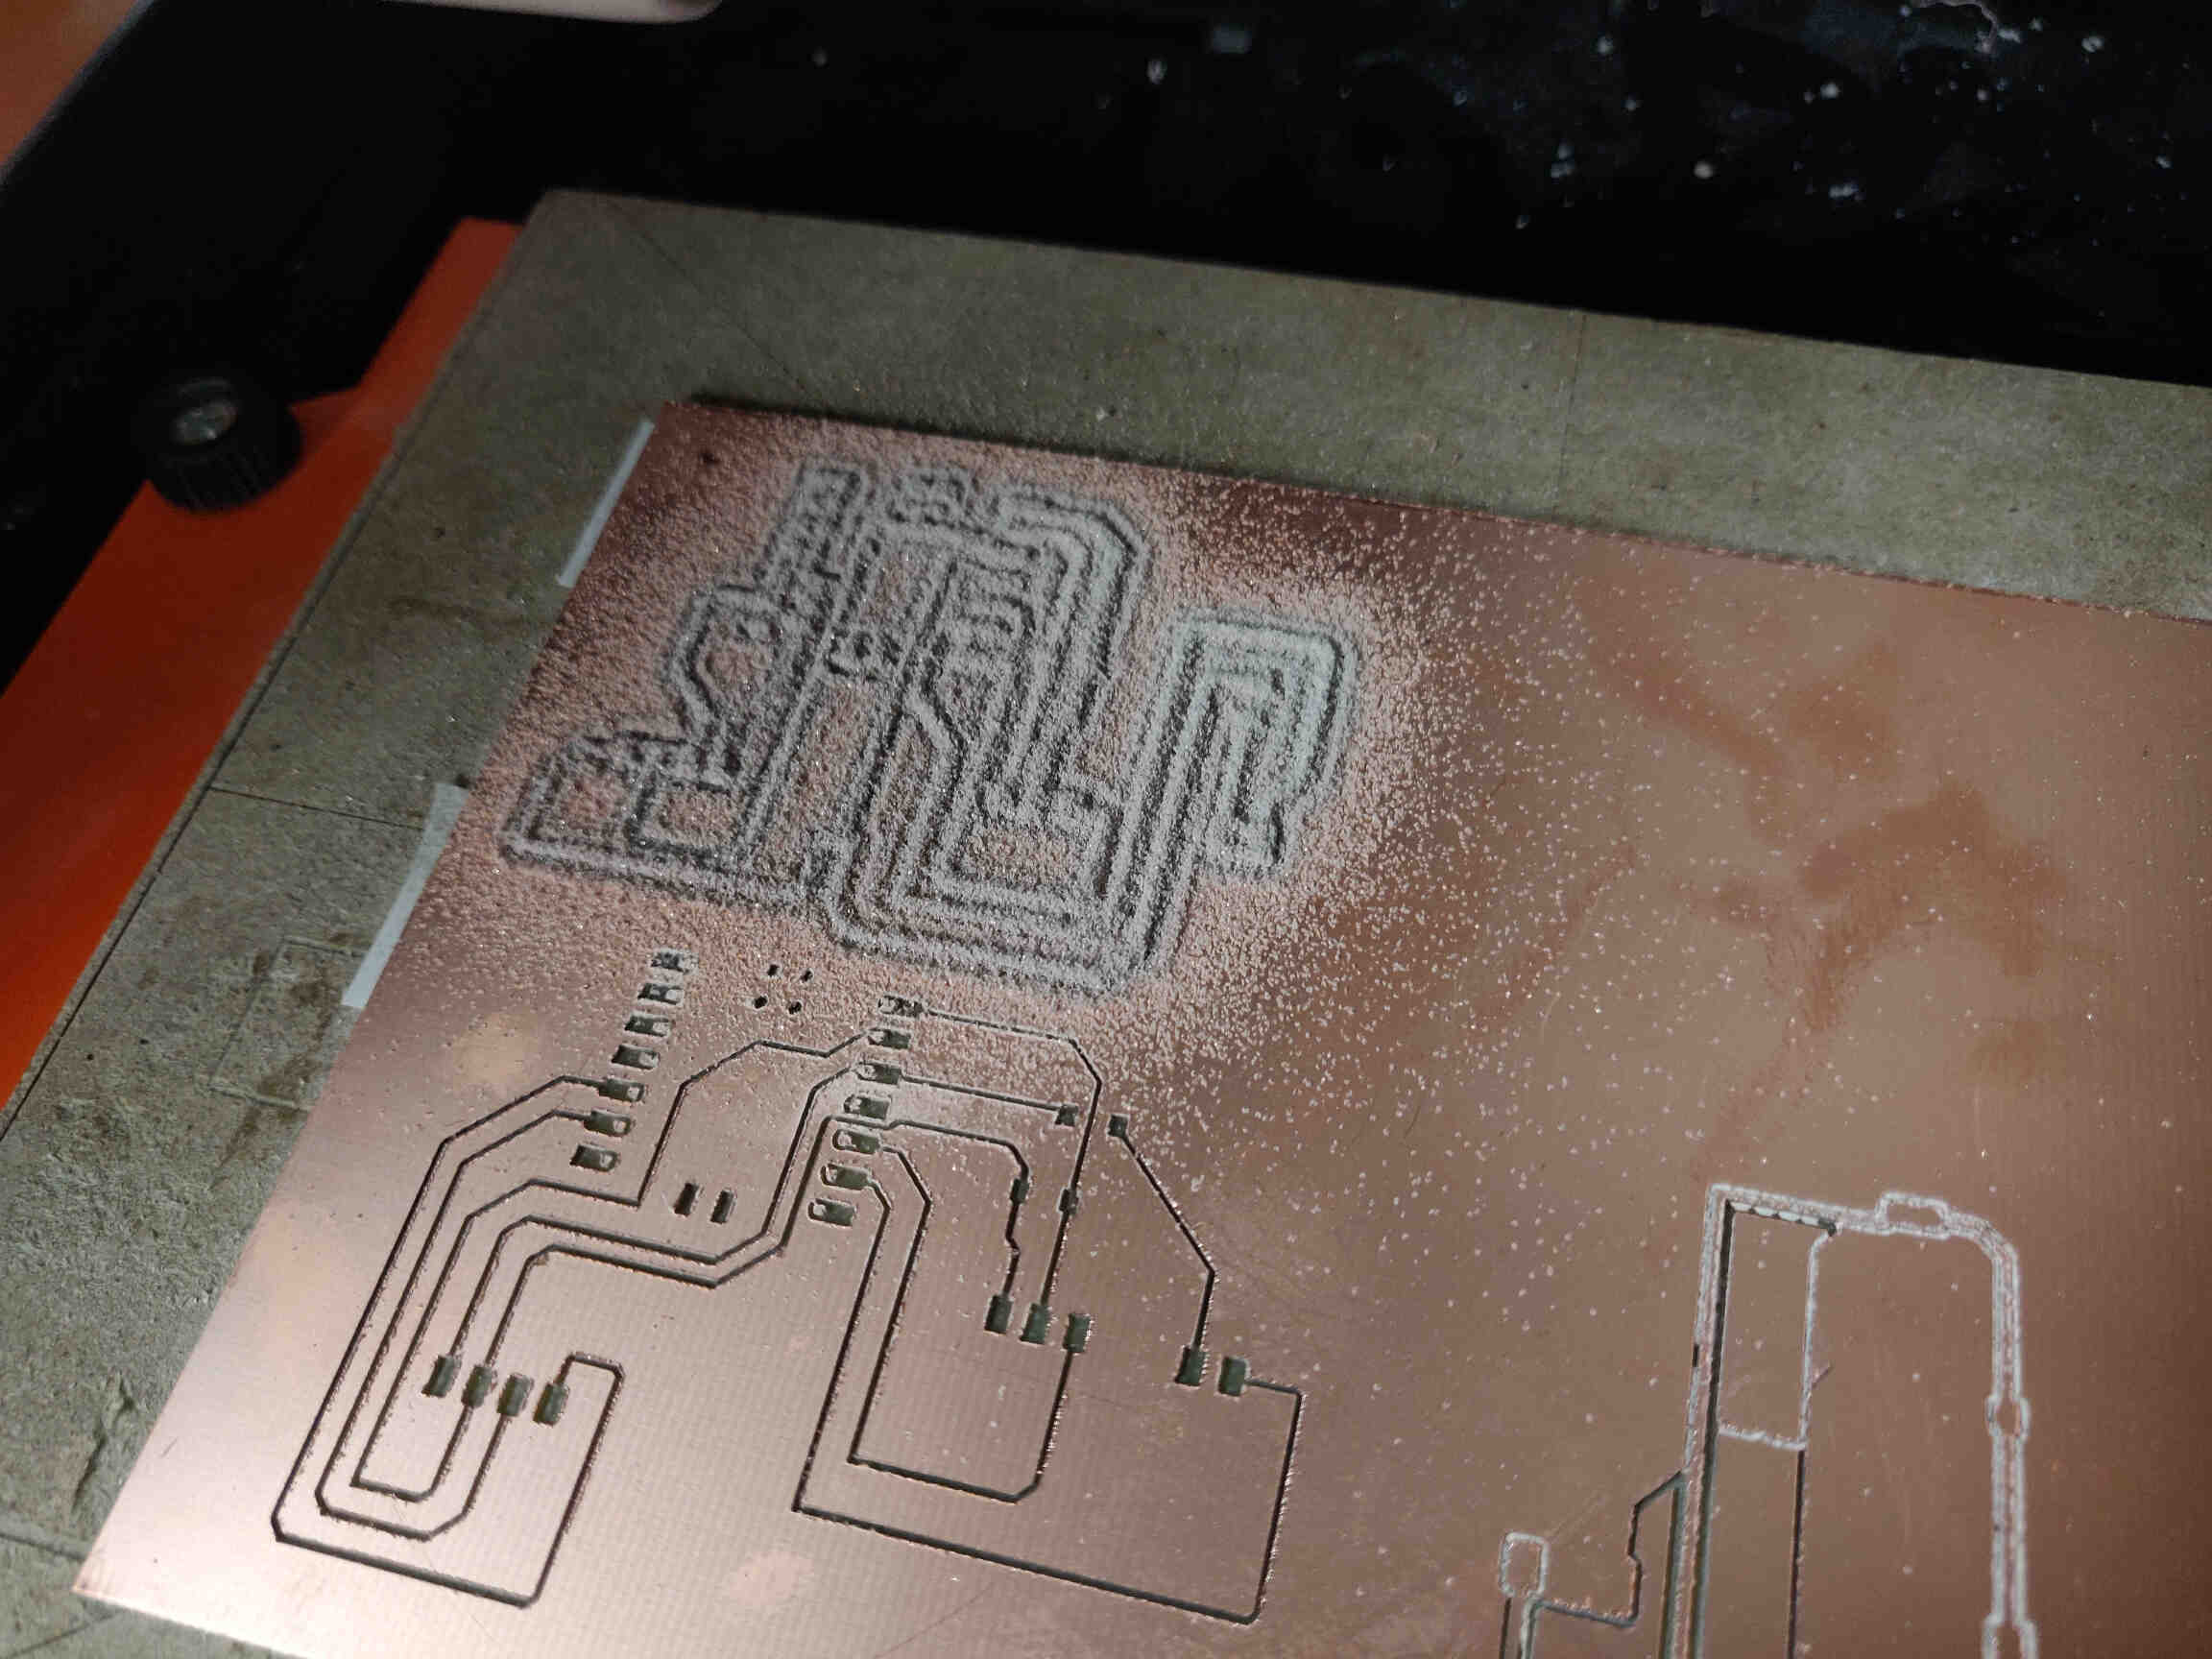
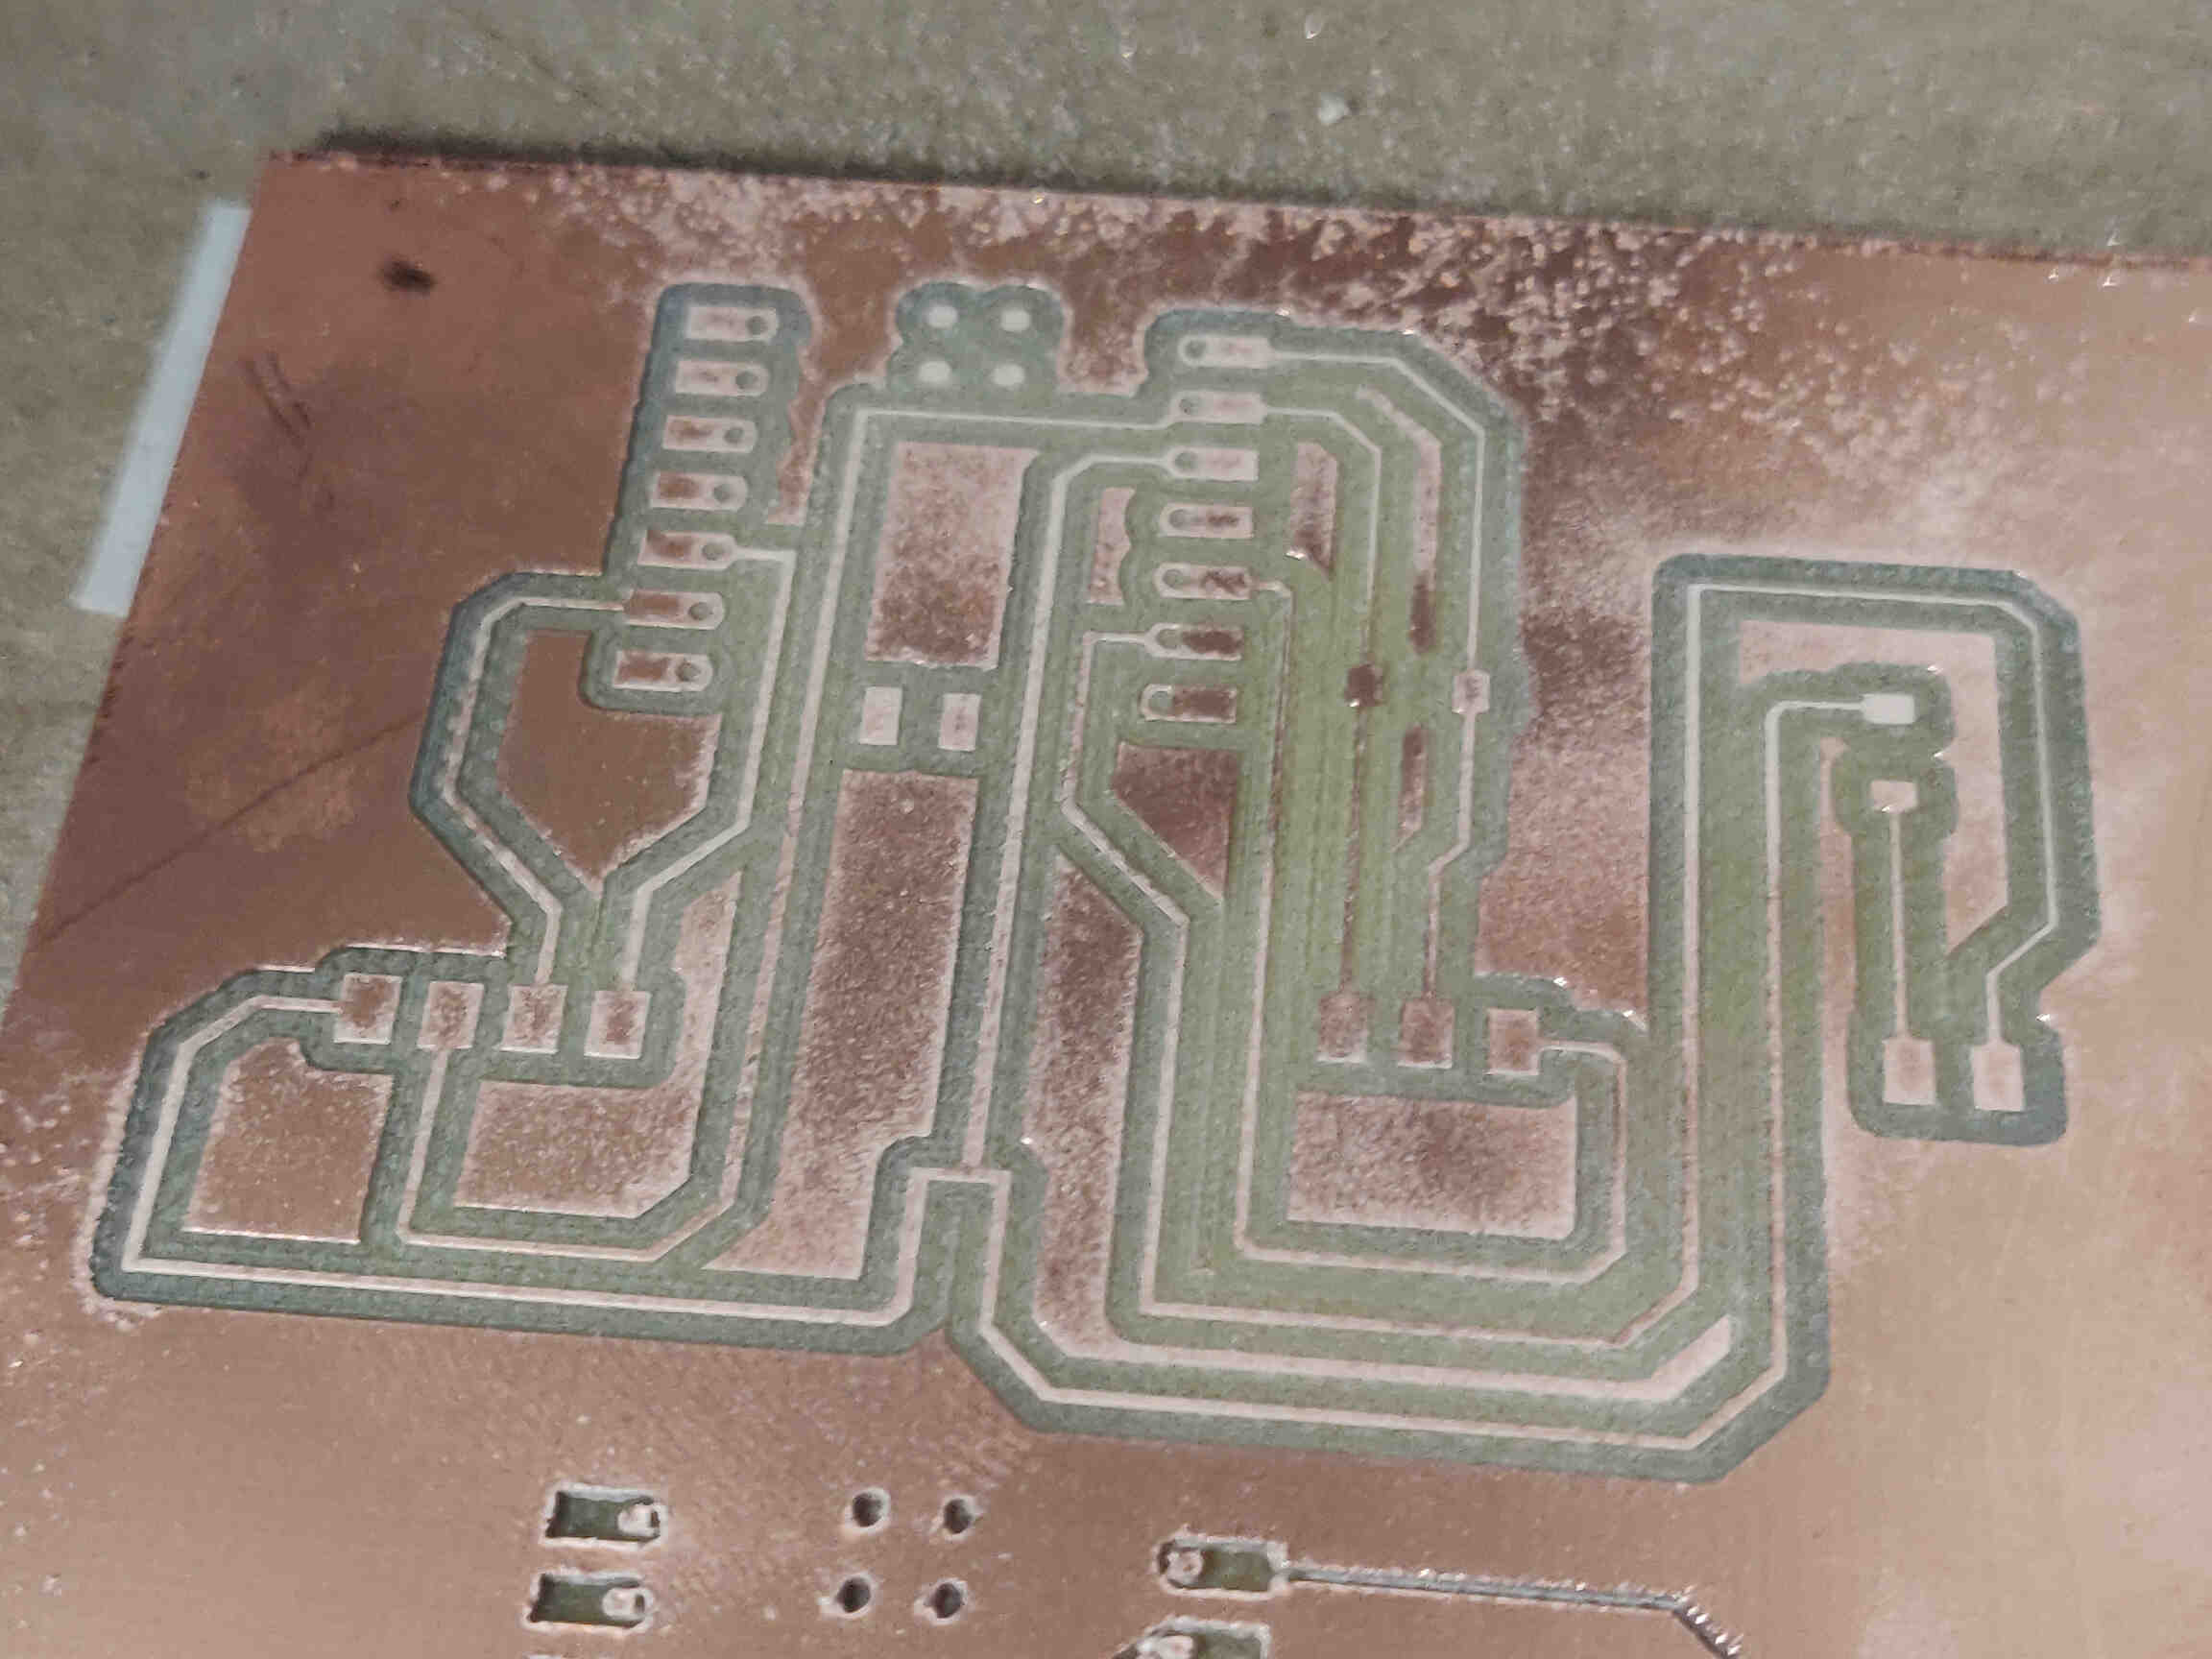
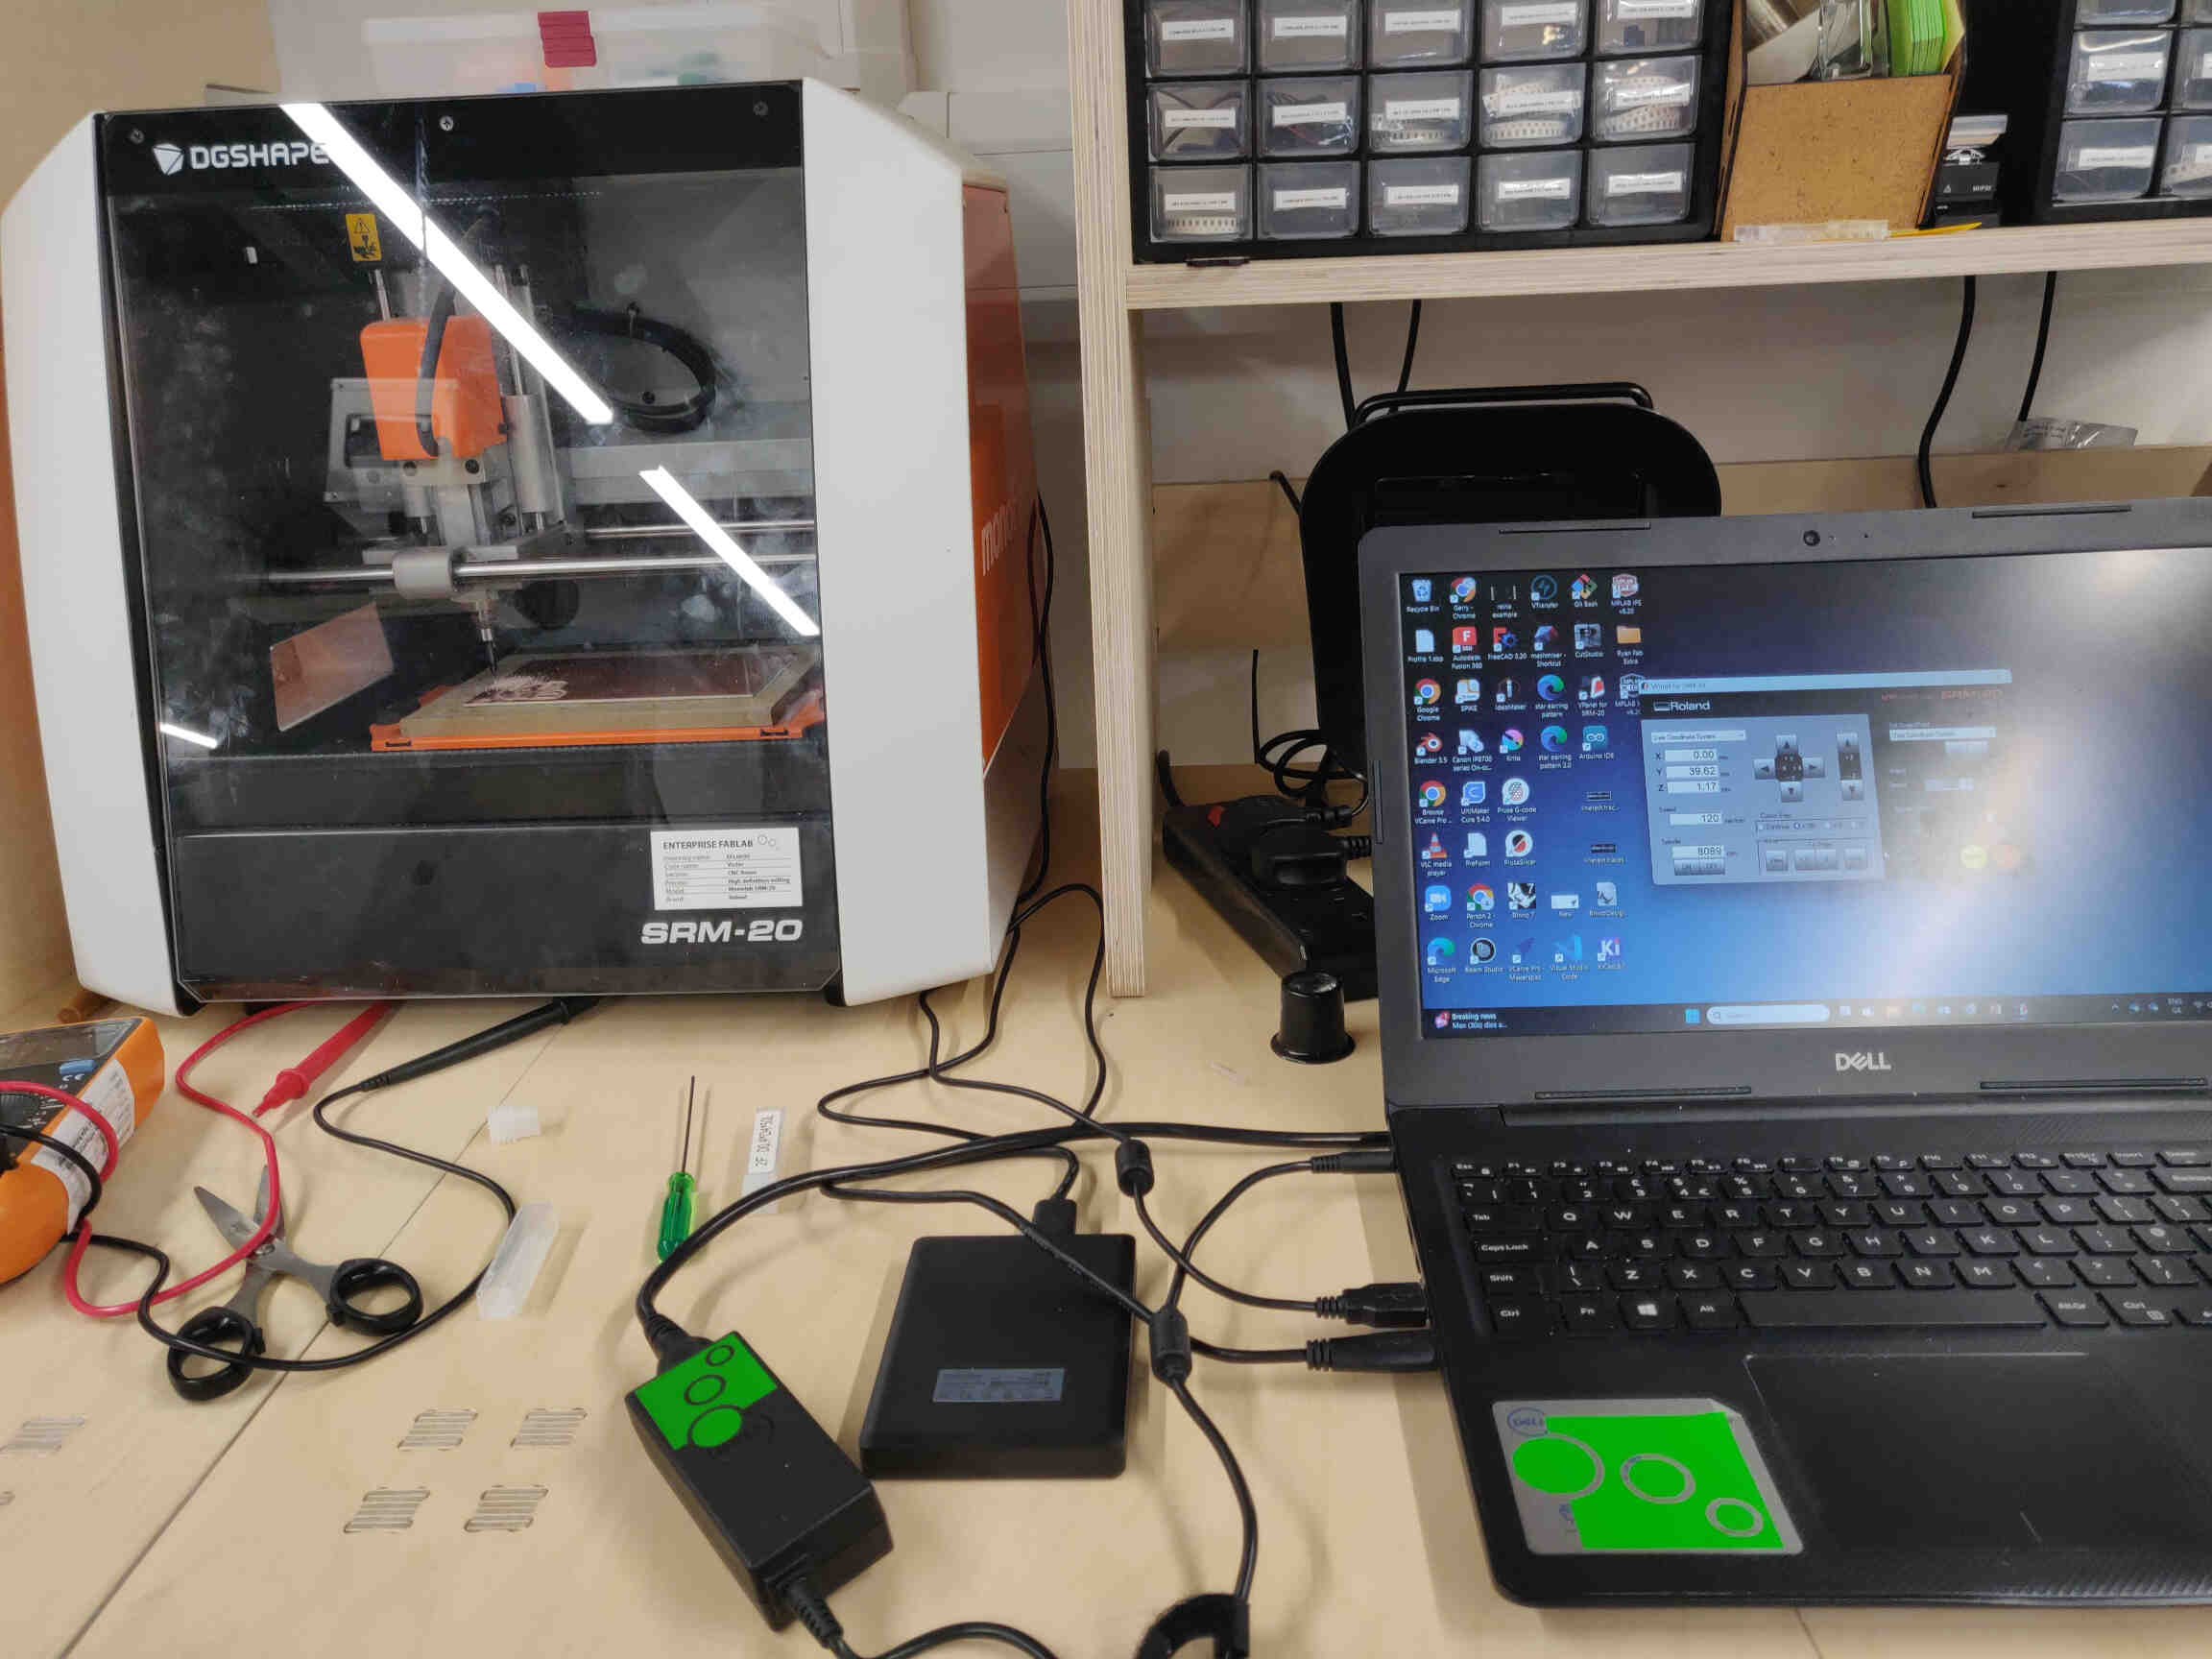
PCB Milling and Soldering
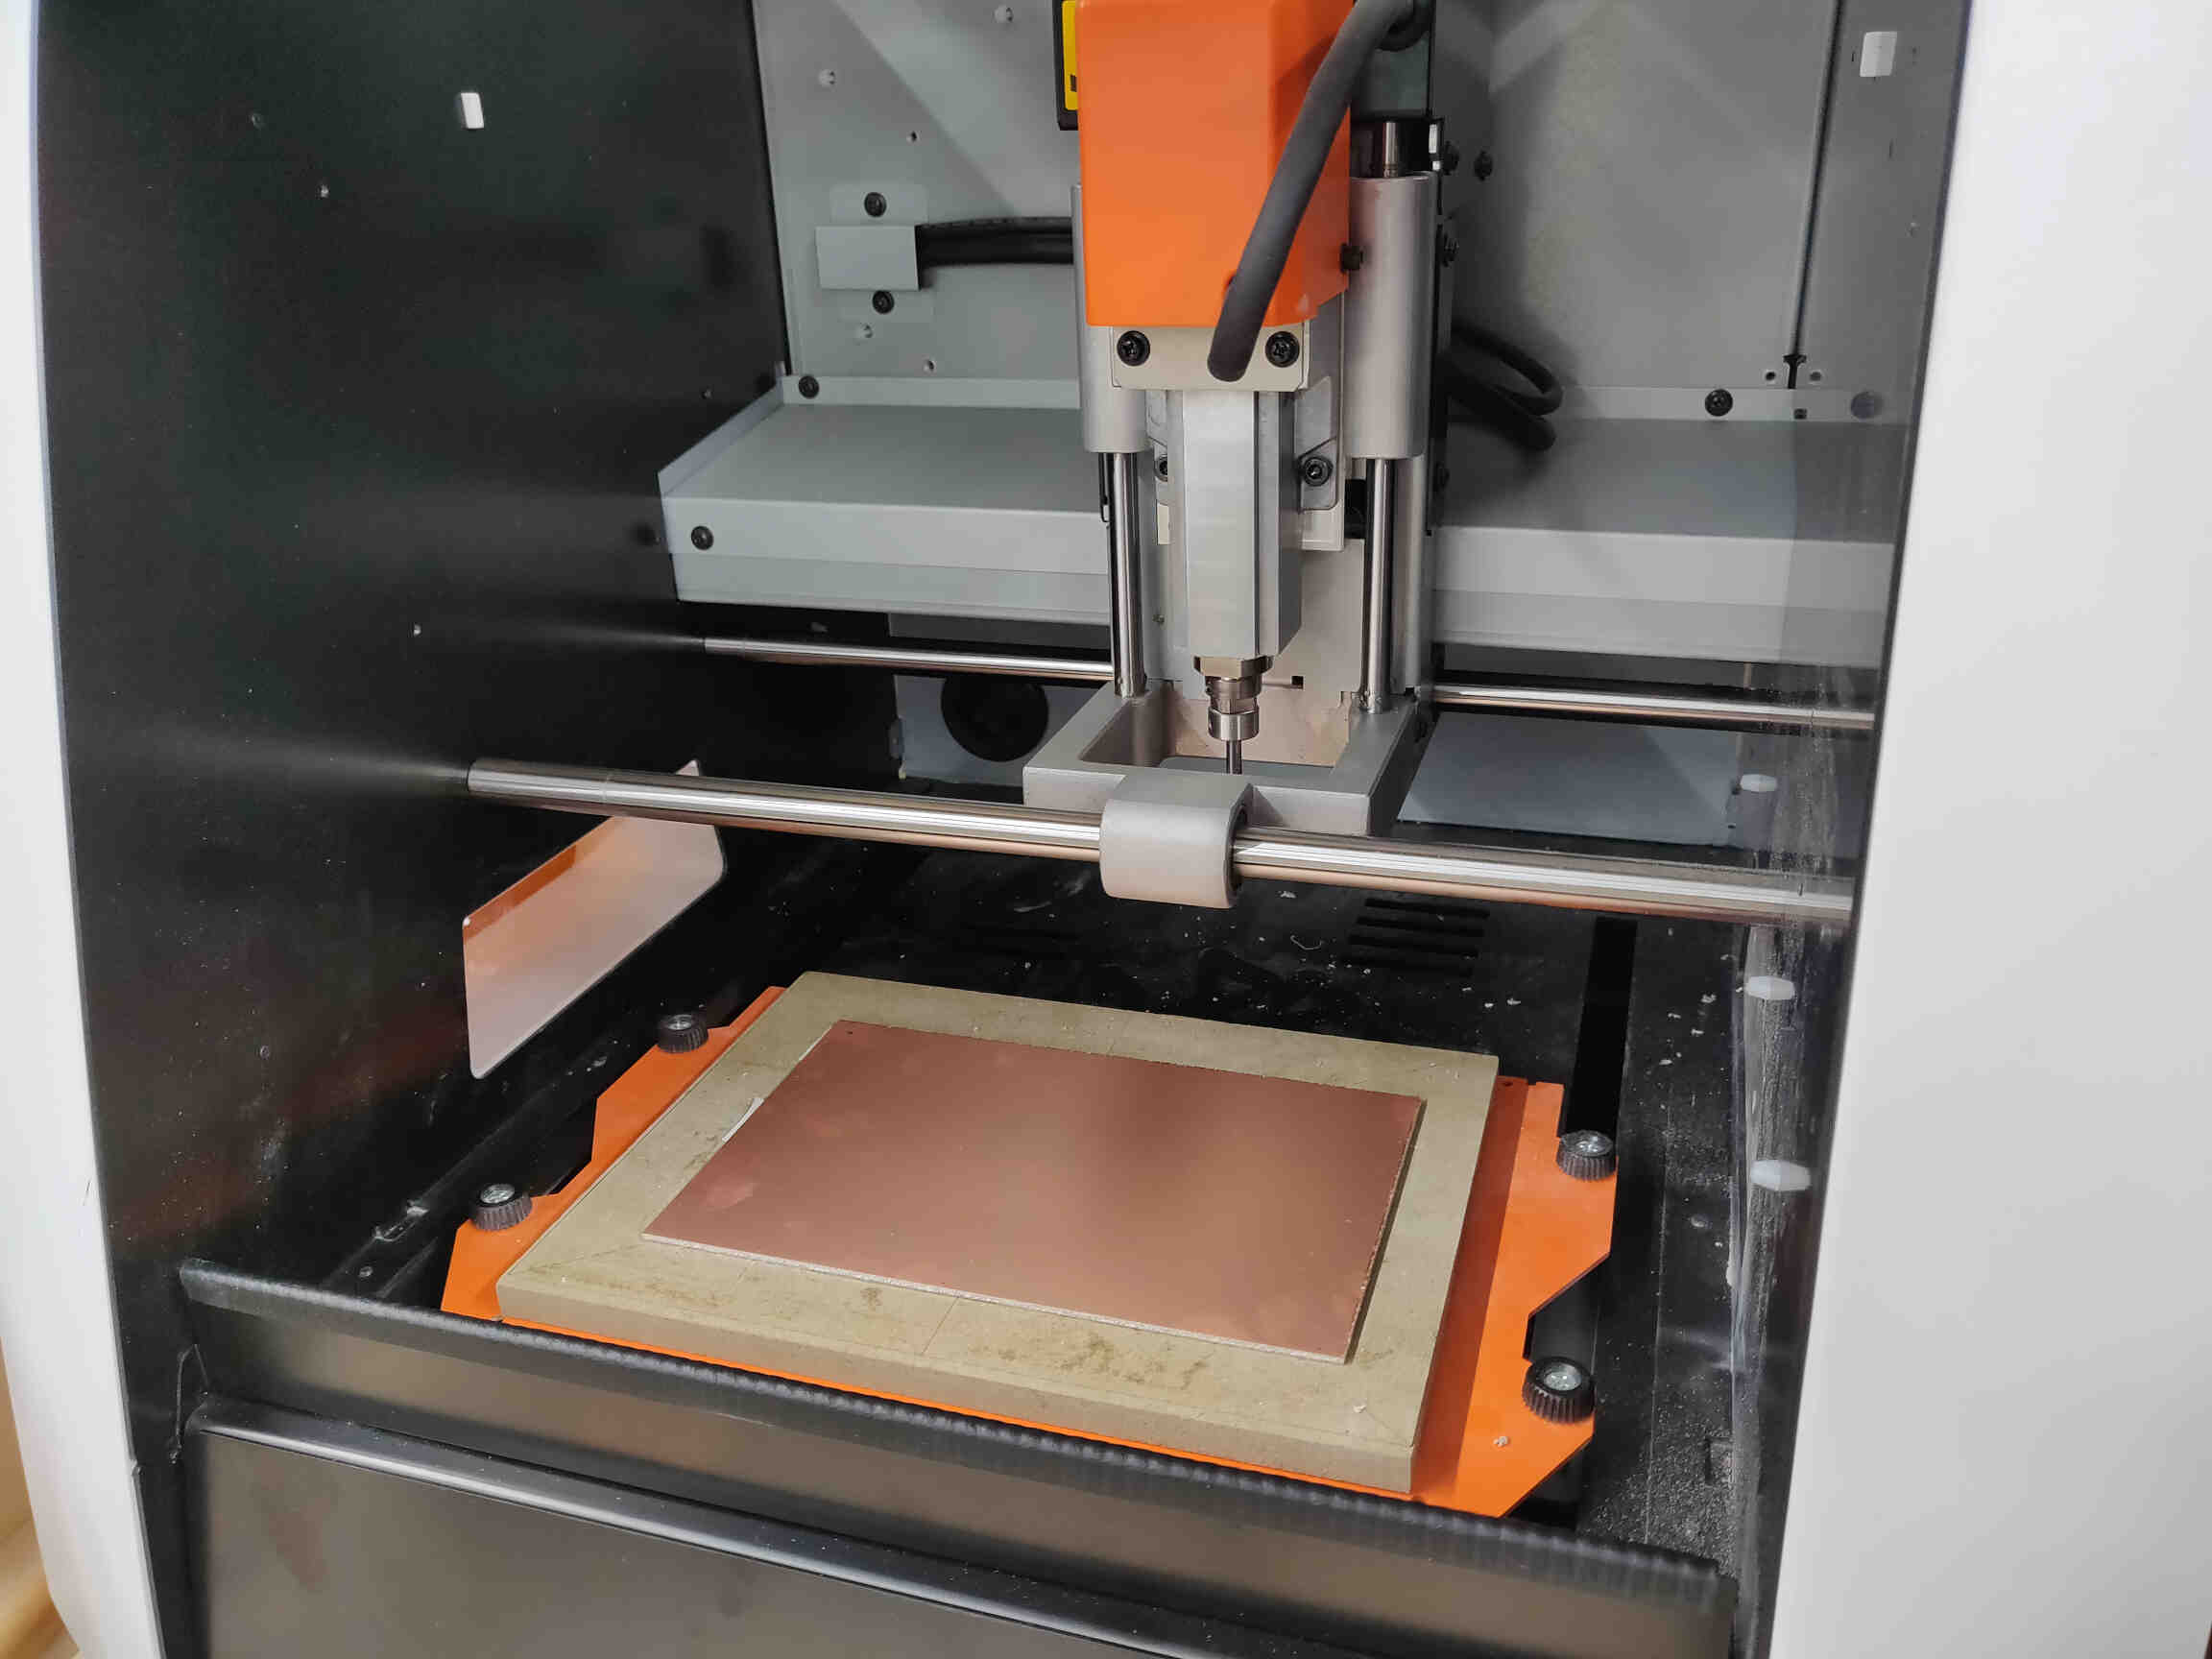
Even after all these weeks of milling PCB's, there's still room for mistakes!
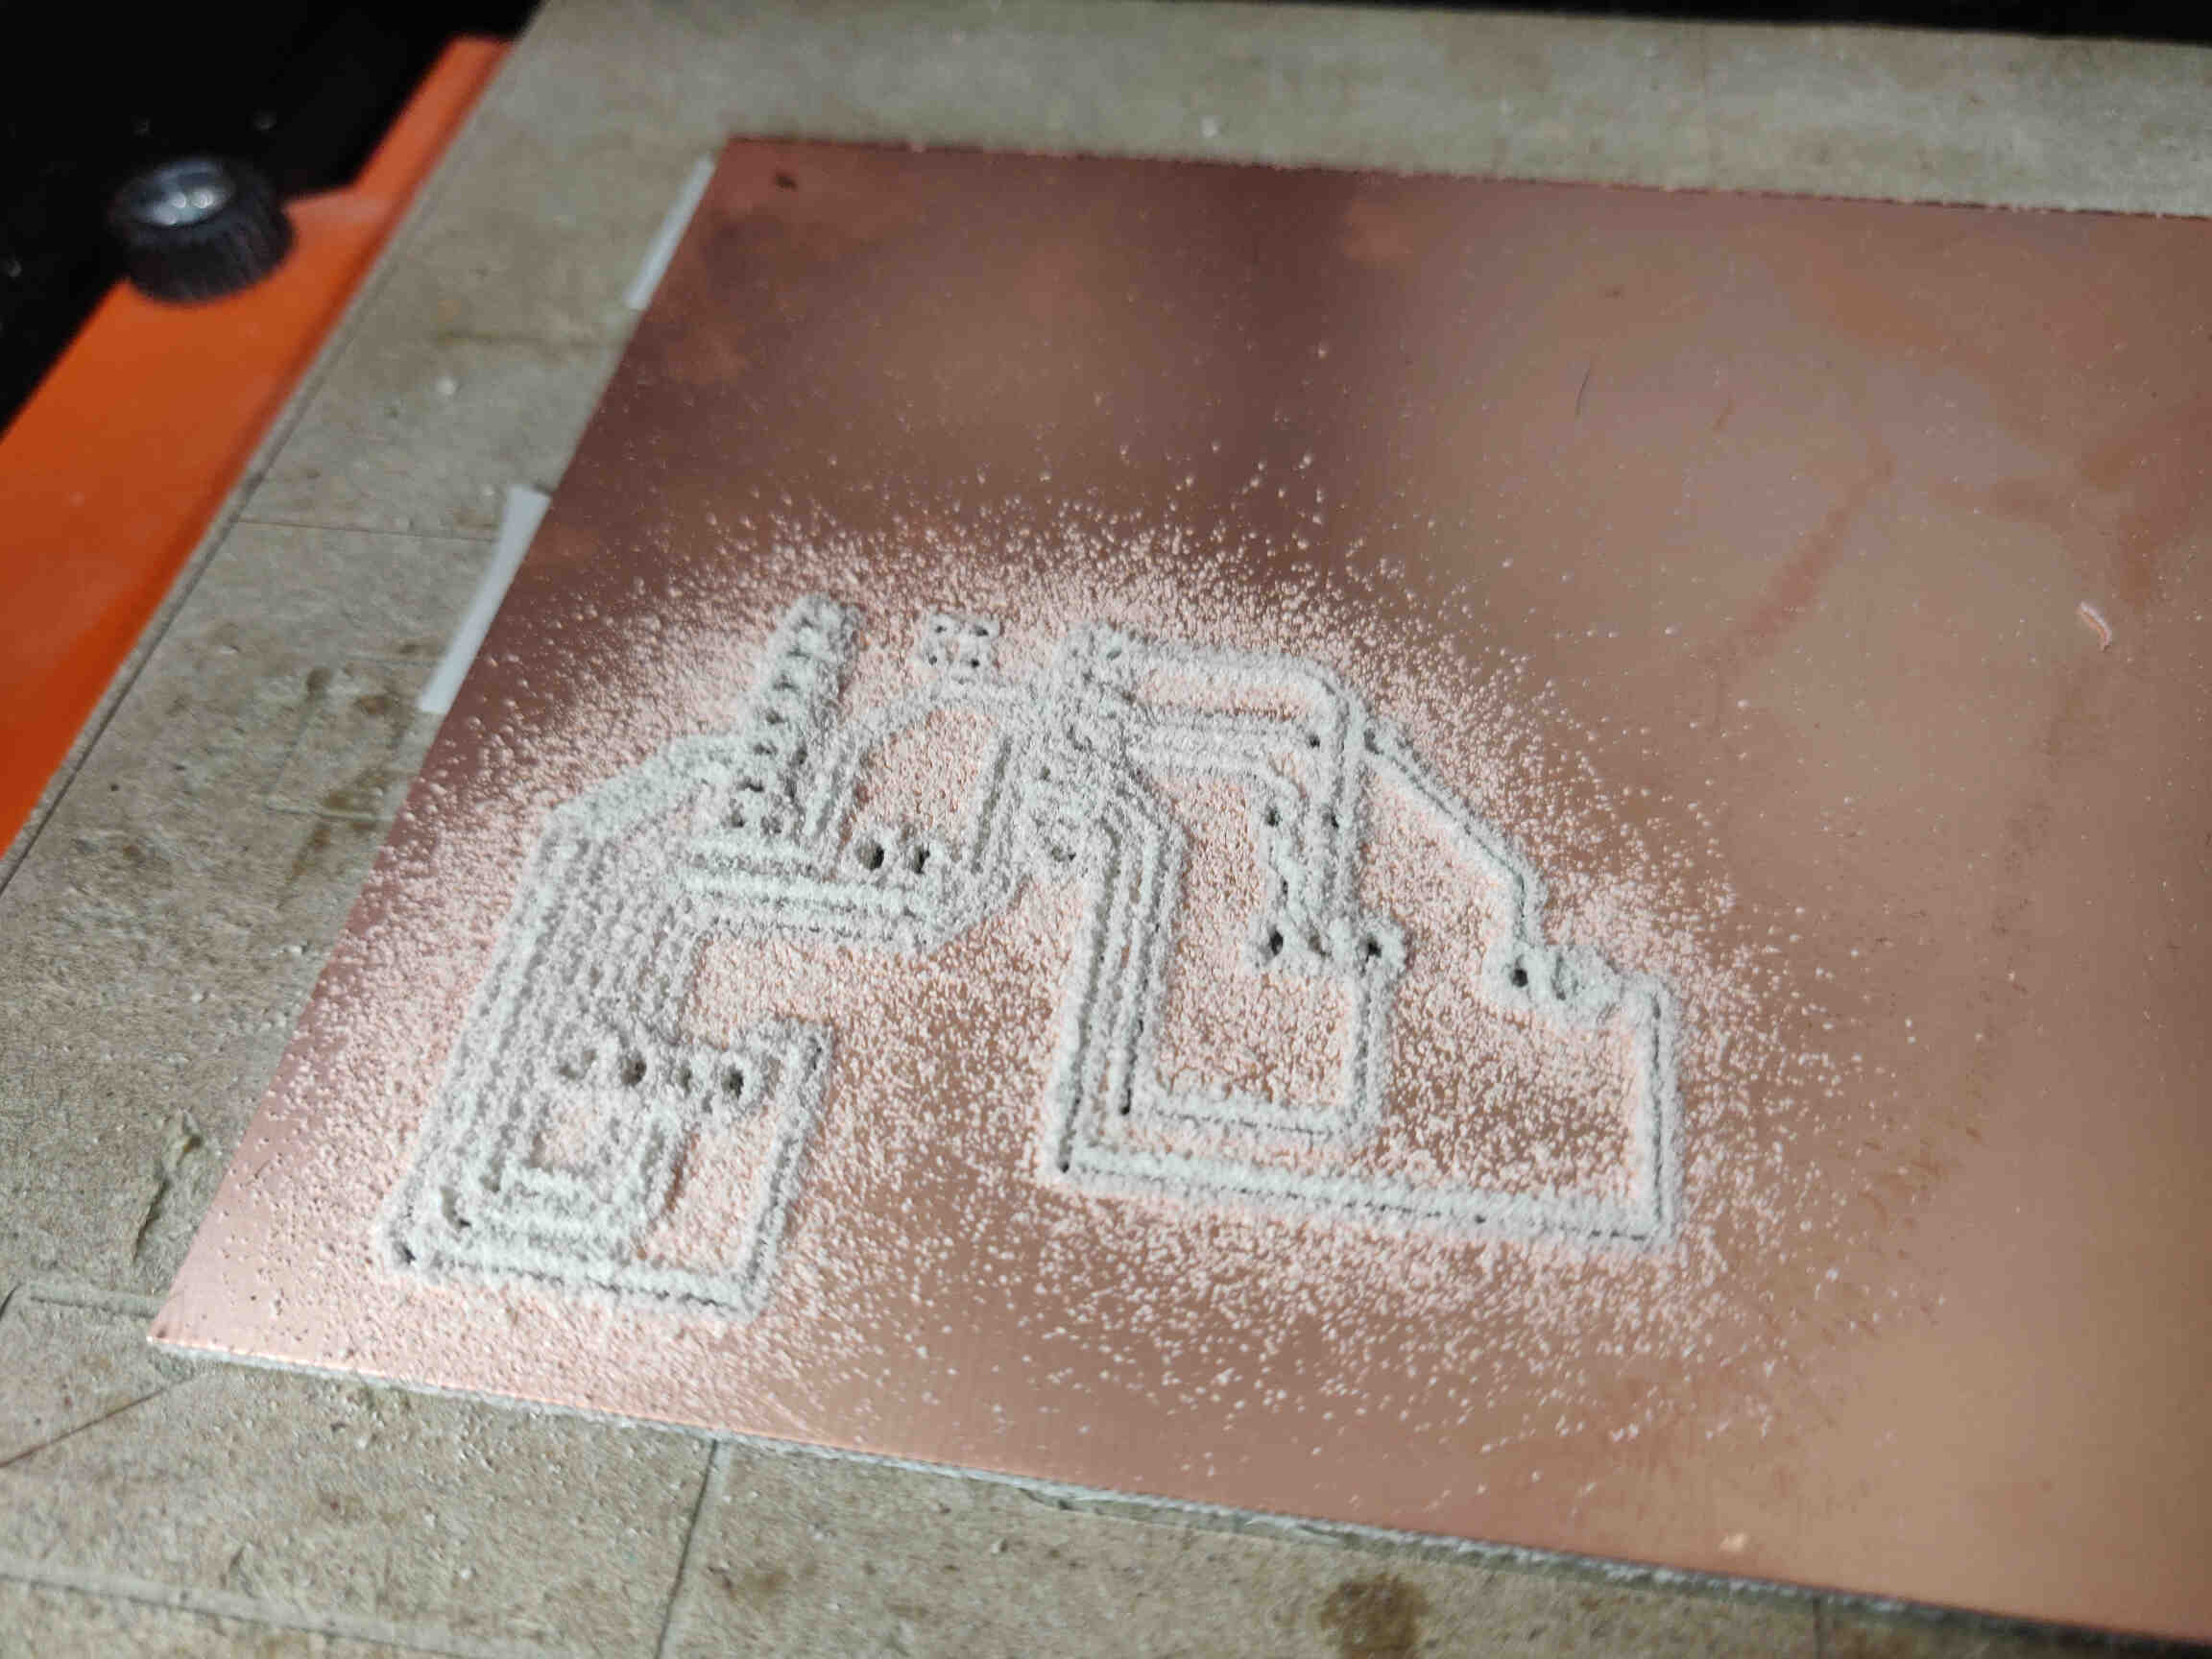
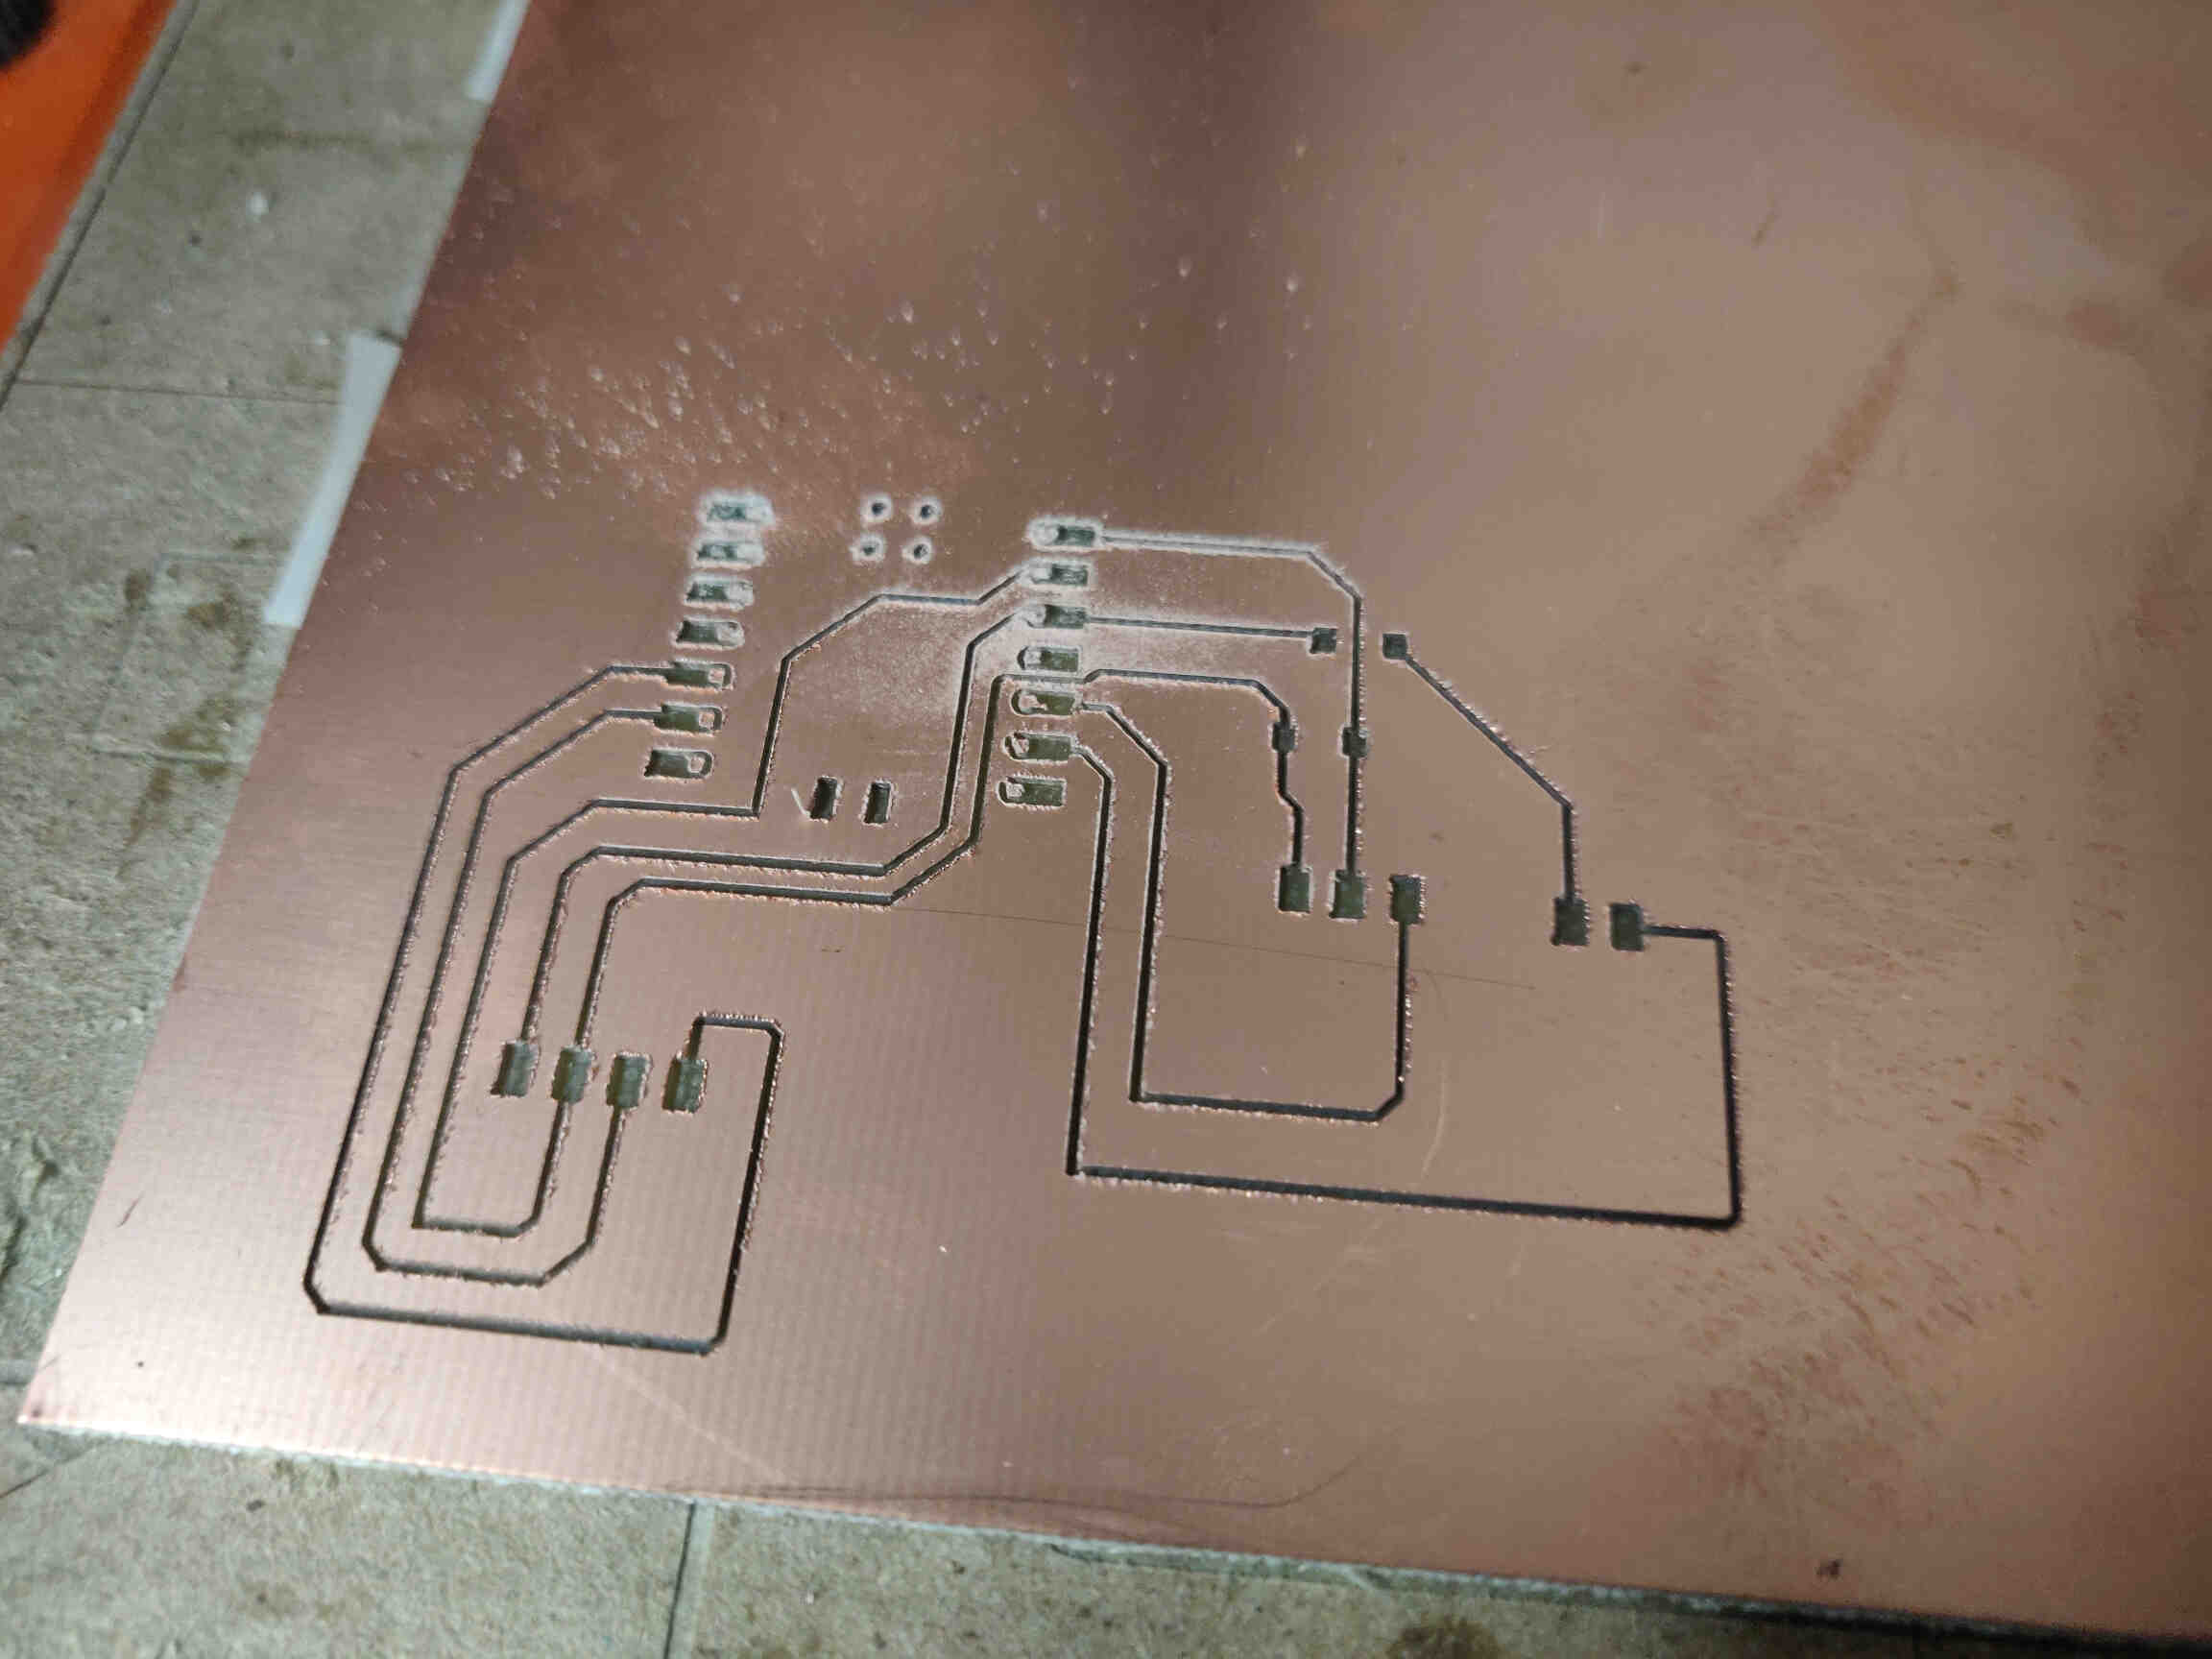
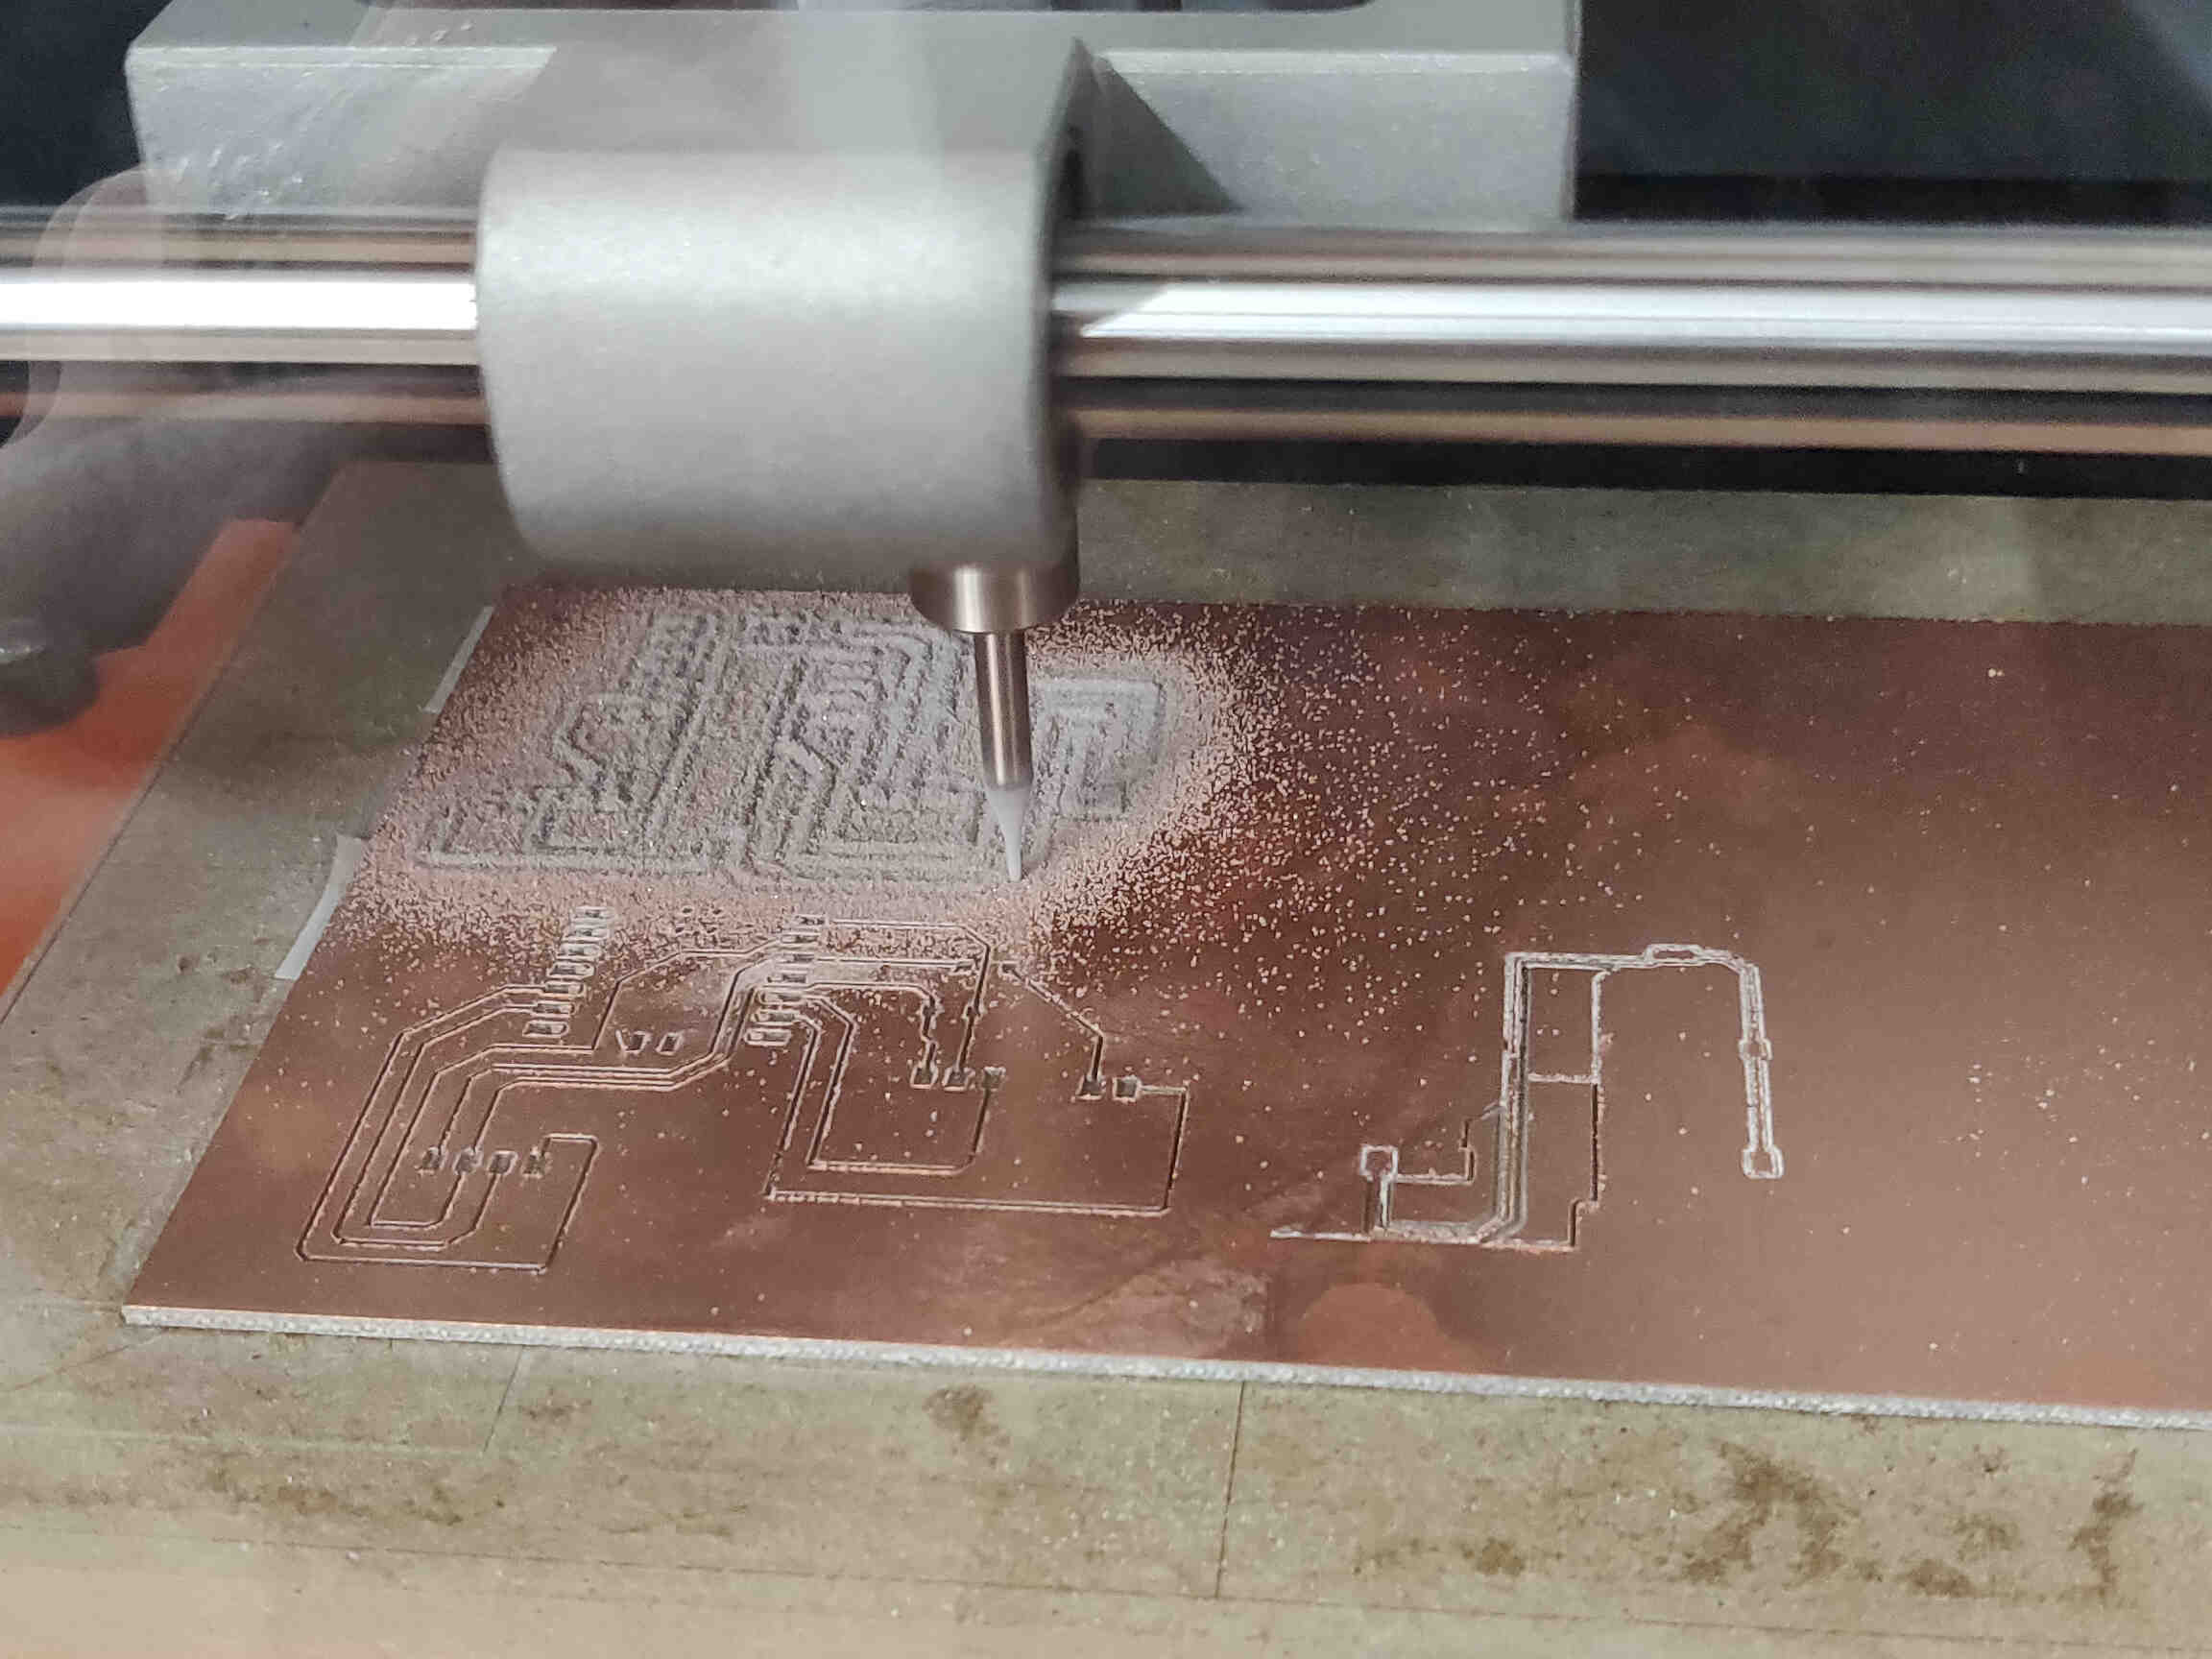
My first attempt I forgot to invert the SVG file on Modsproject, so that led to embarassing results. Also on my 2nd attempt, I finally broke an End Mill! It doesn't sound like a victory, I know - but I was warned on Week 1 that I would probably break a few on my Fab Academy journey, but I got this far and only broke the End Mill on my final PCB mill. I can't help but smile at that! :D
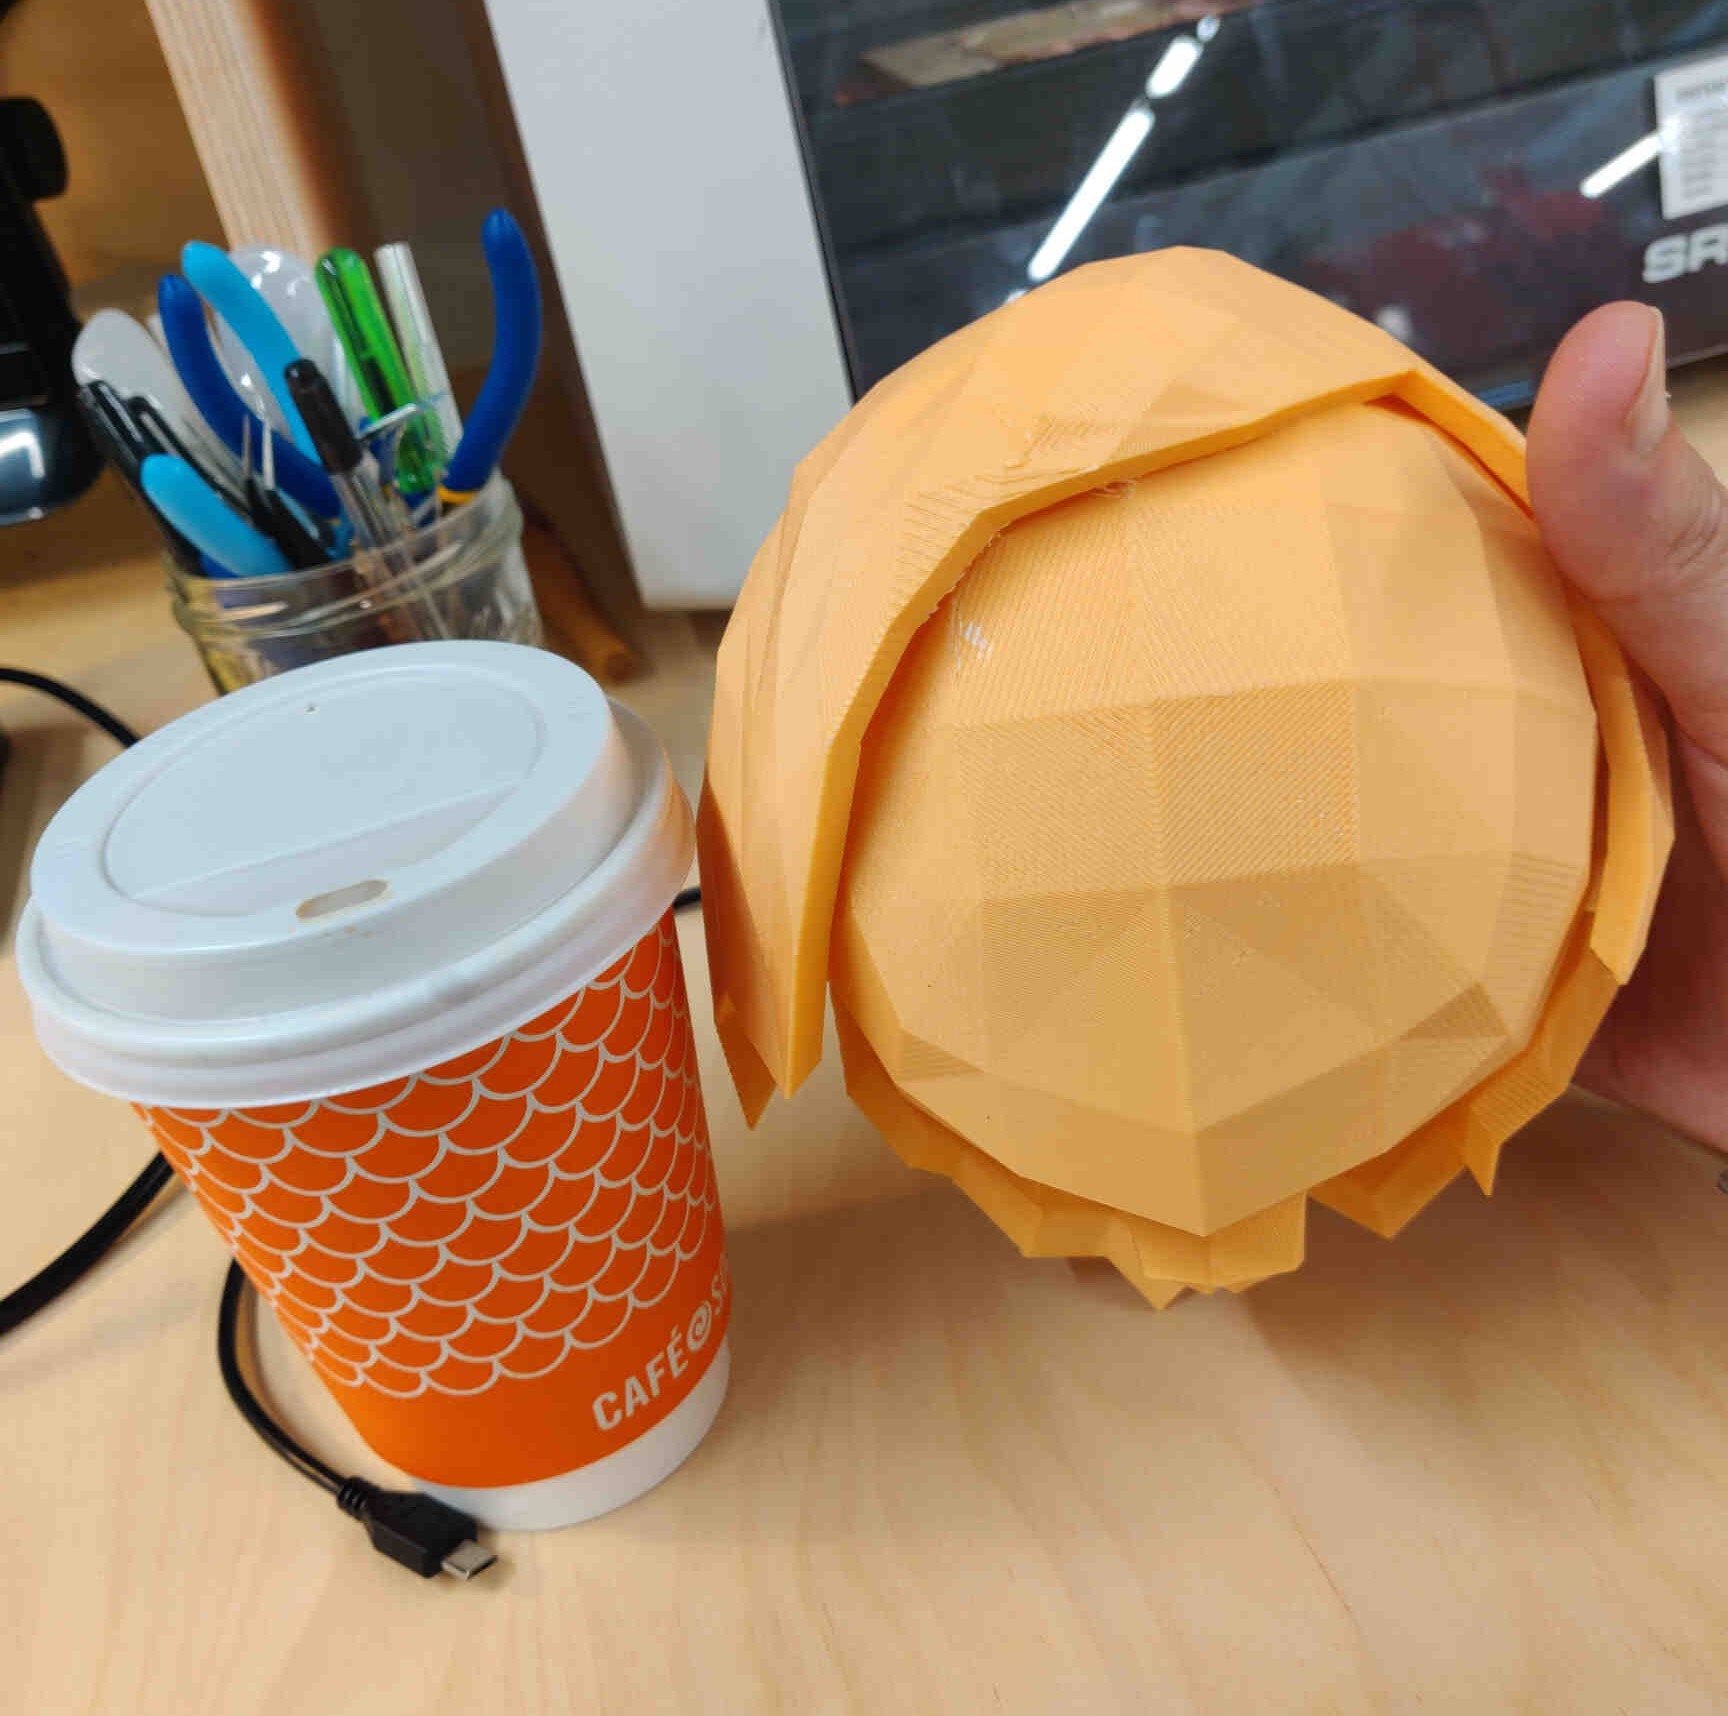
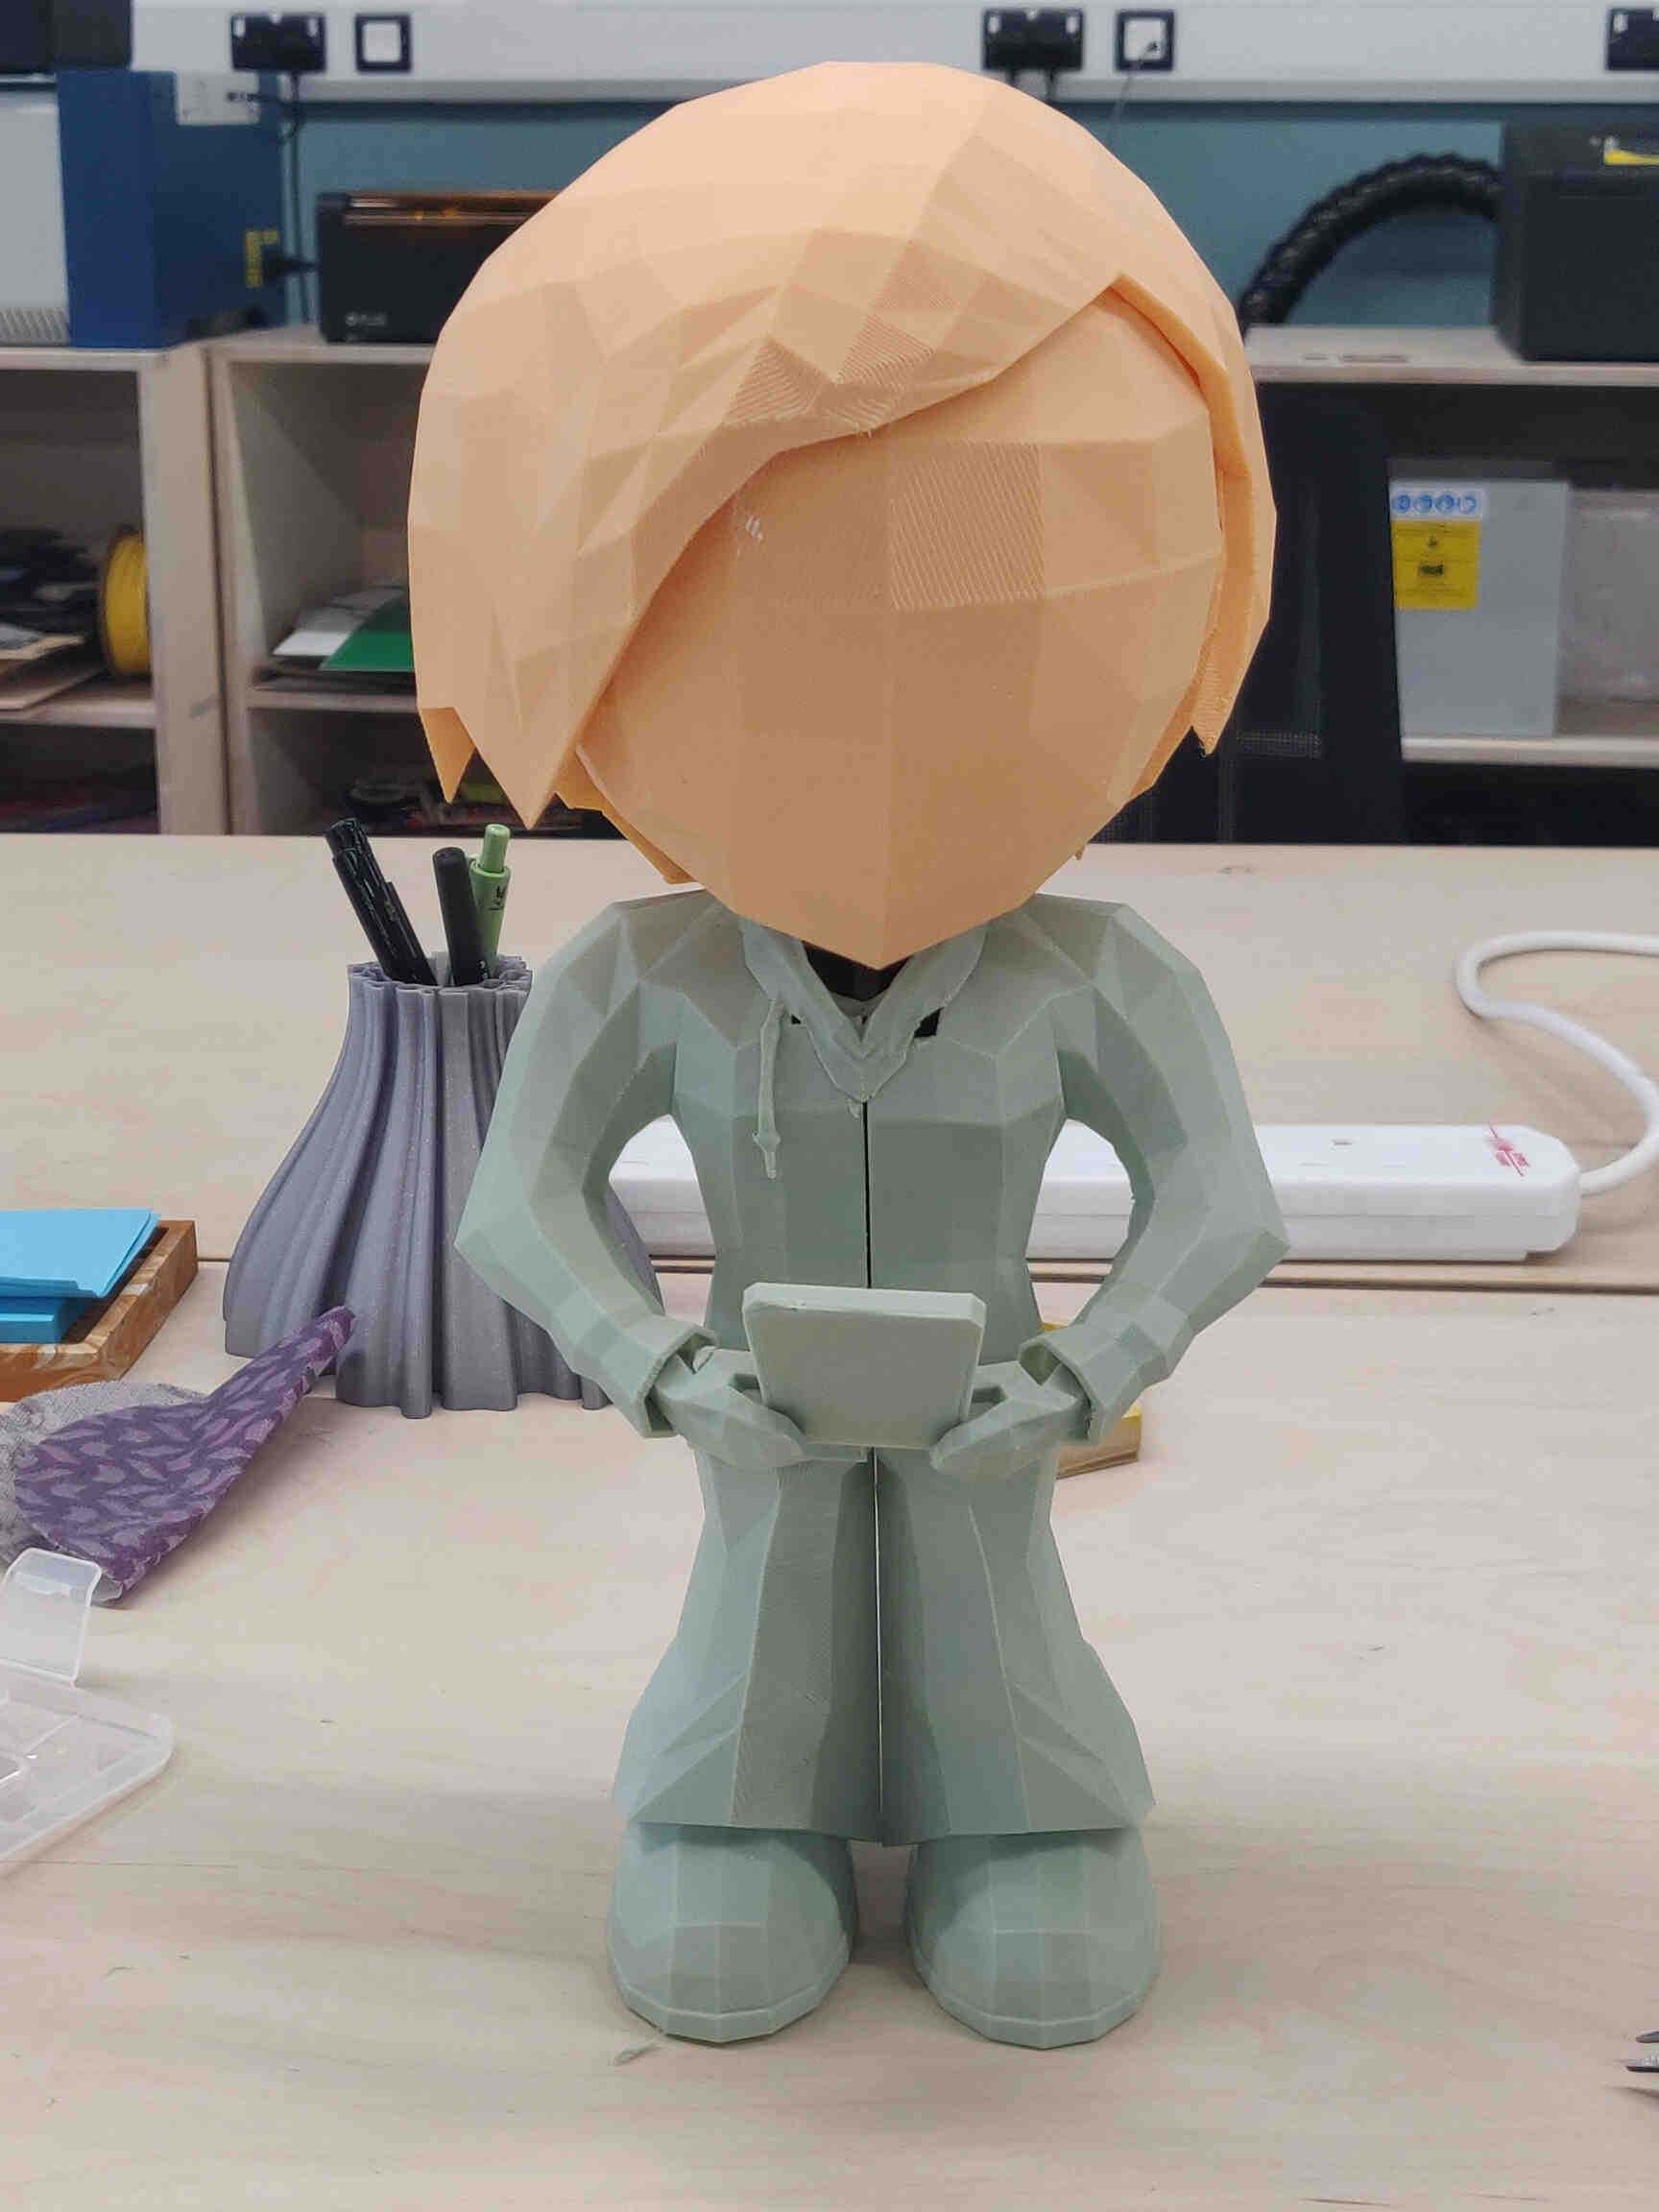
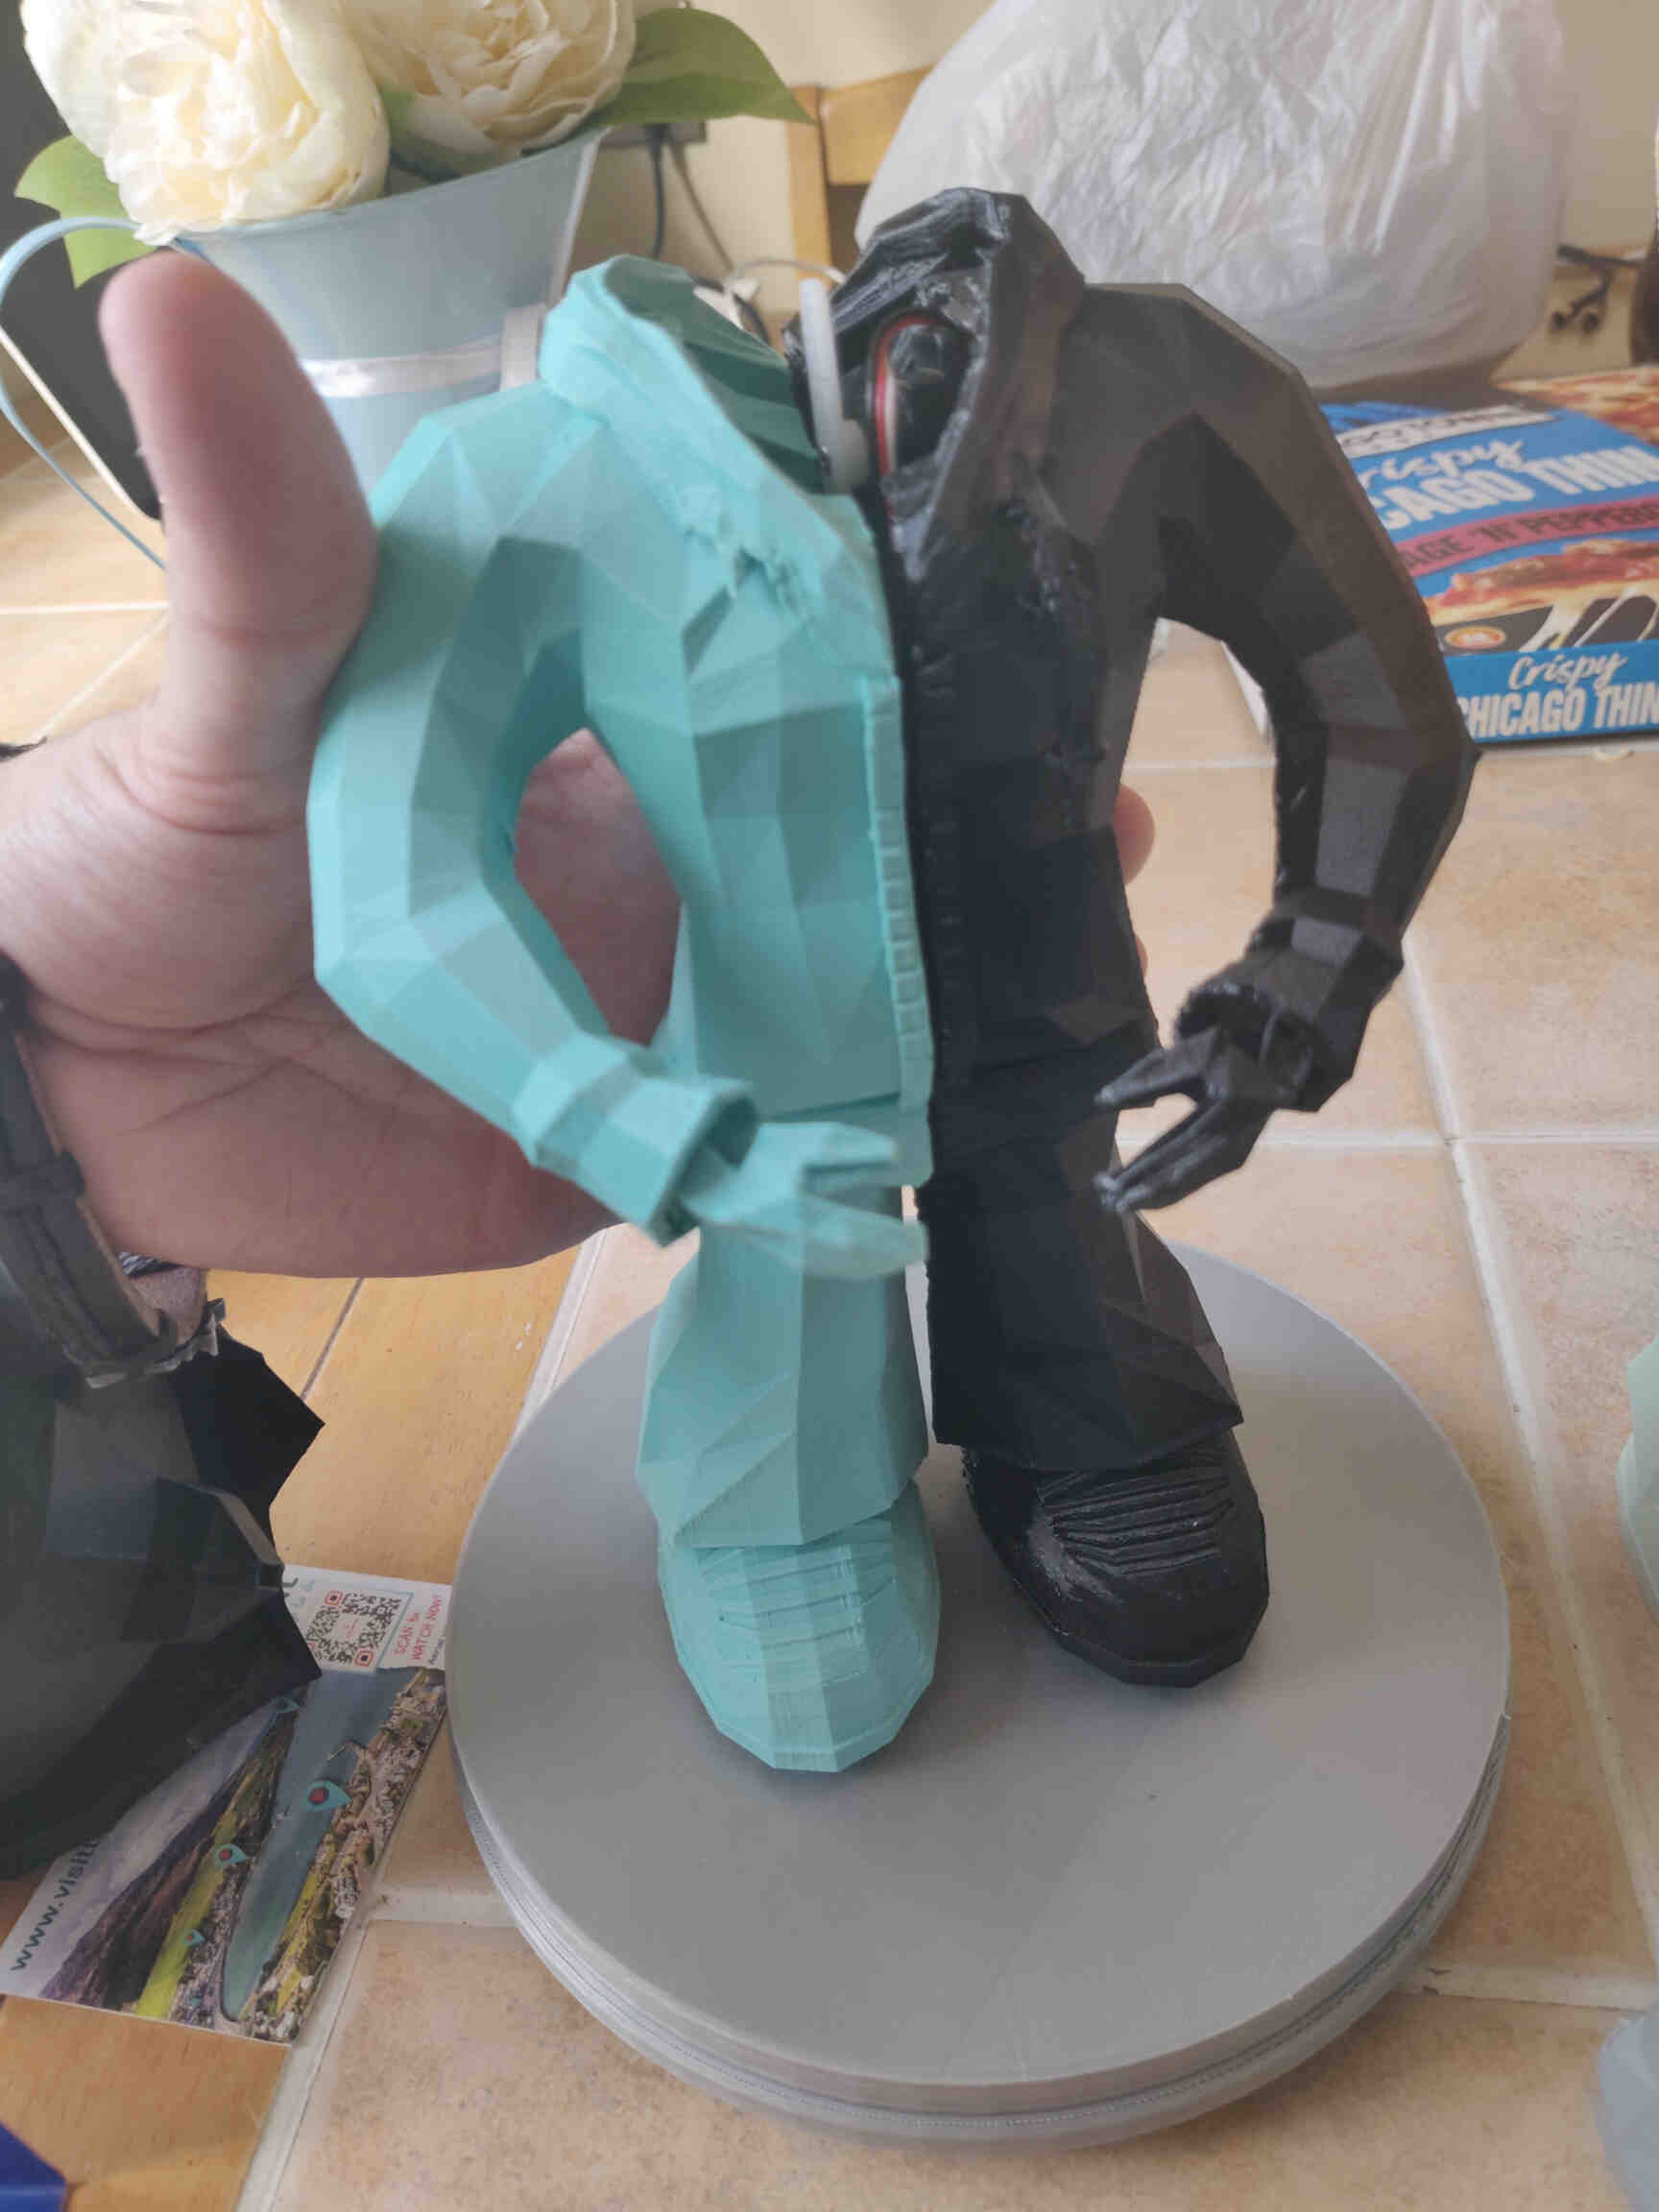
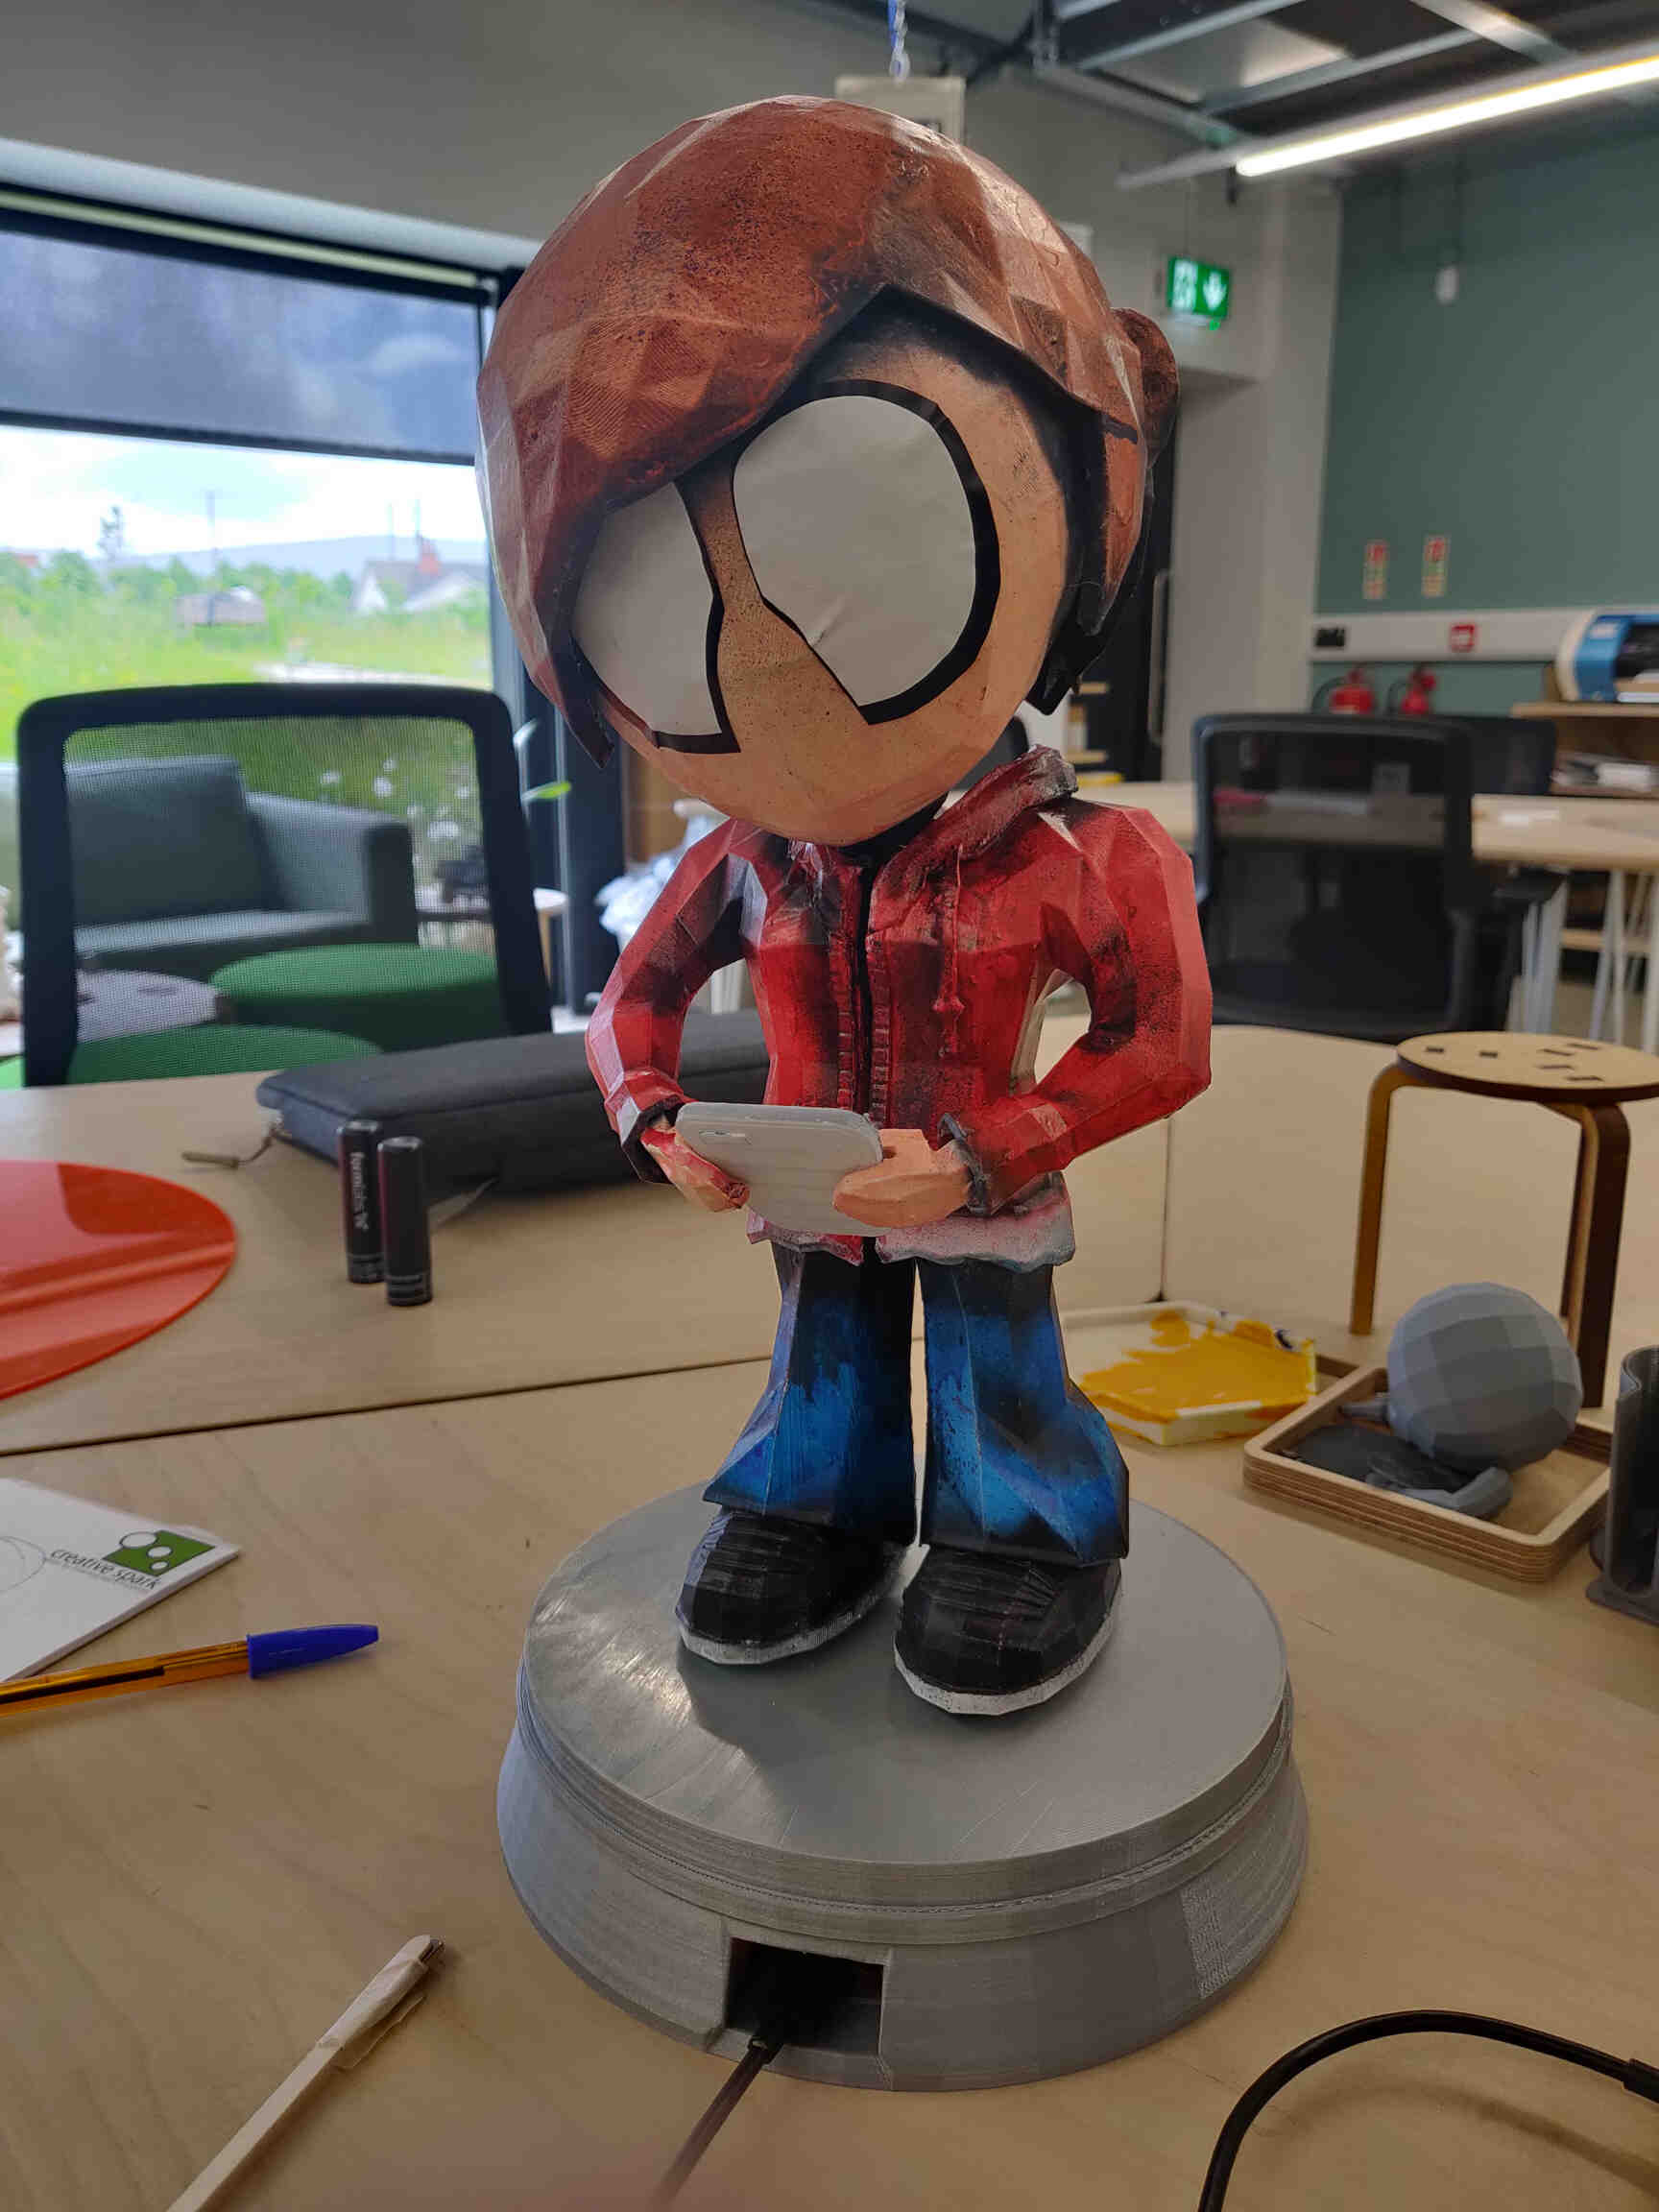
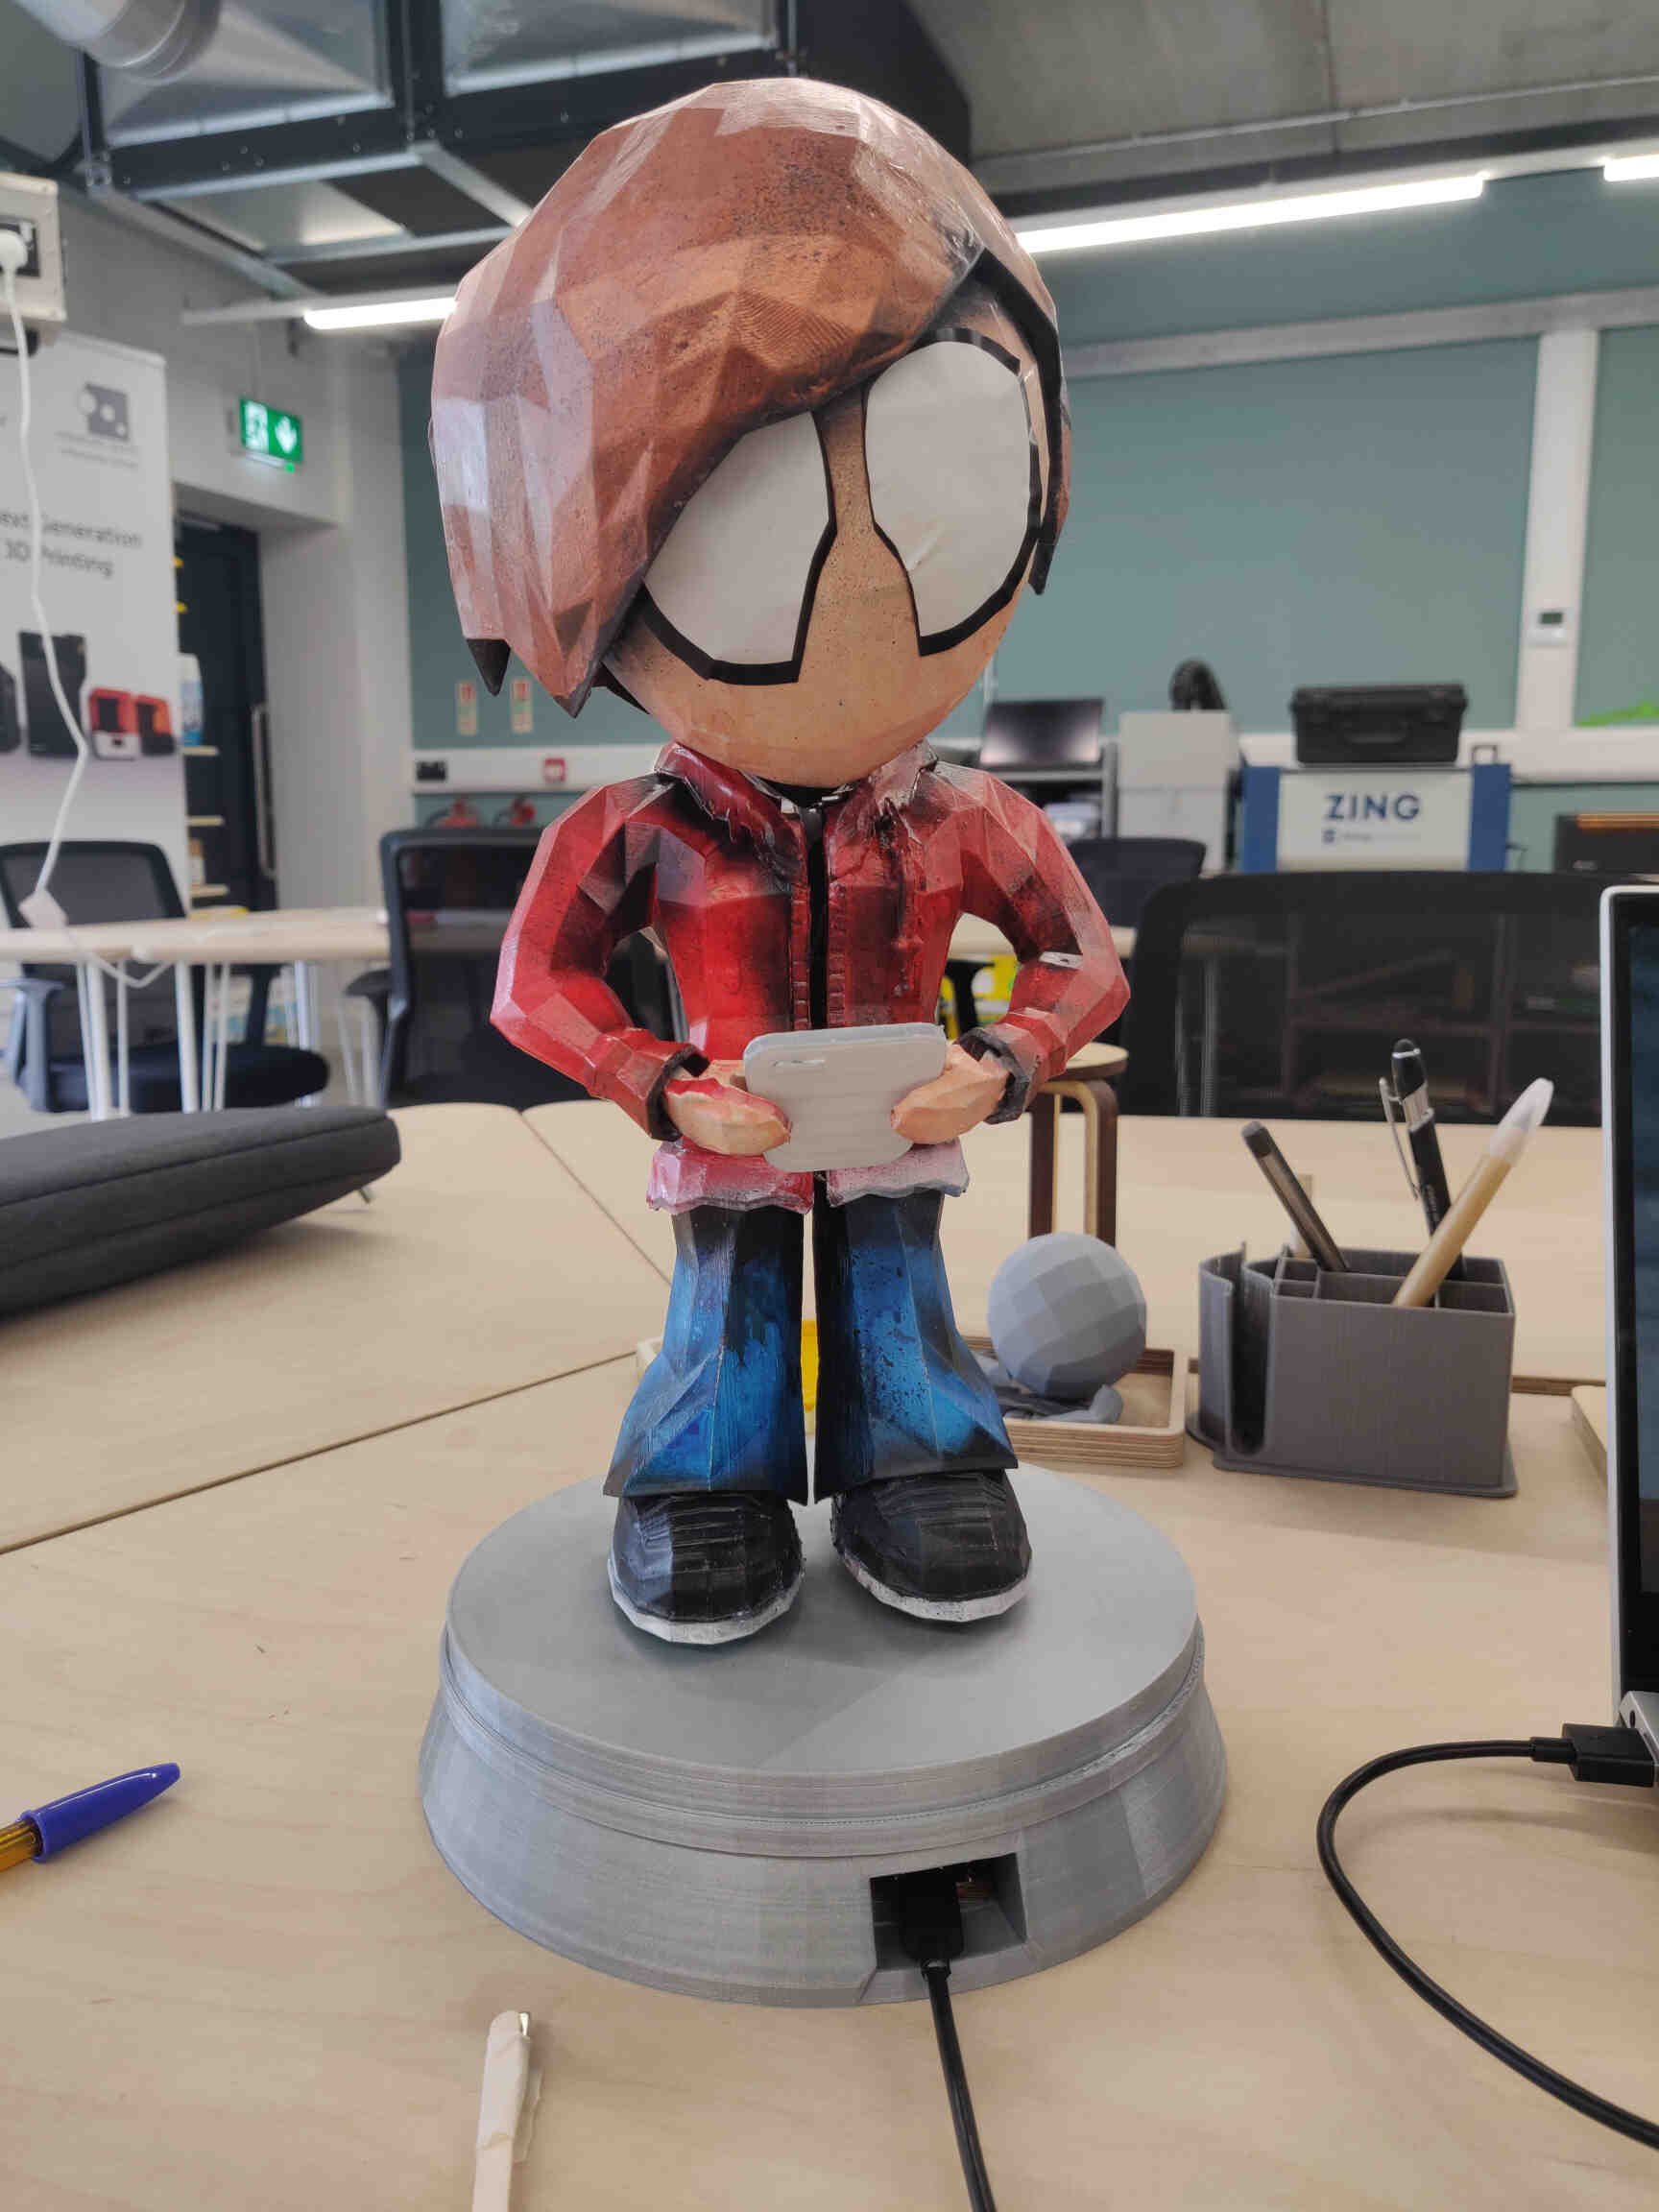
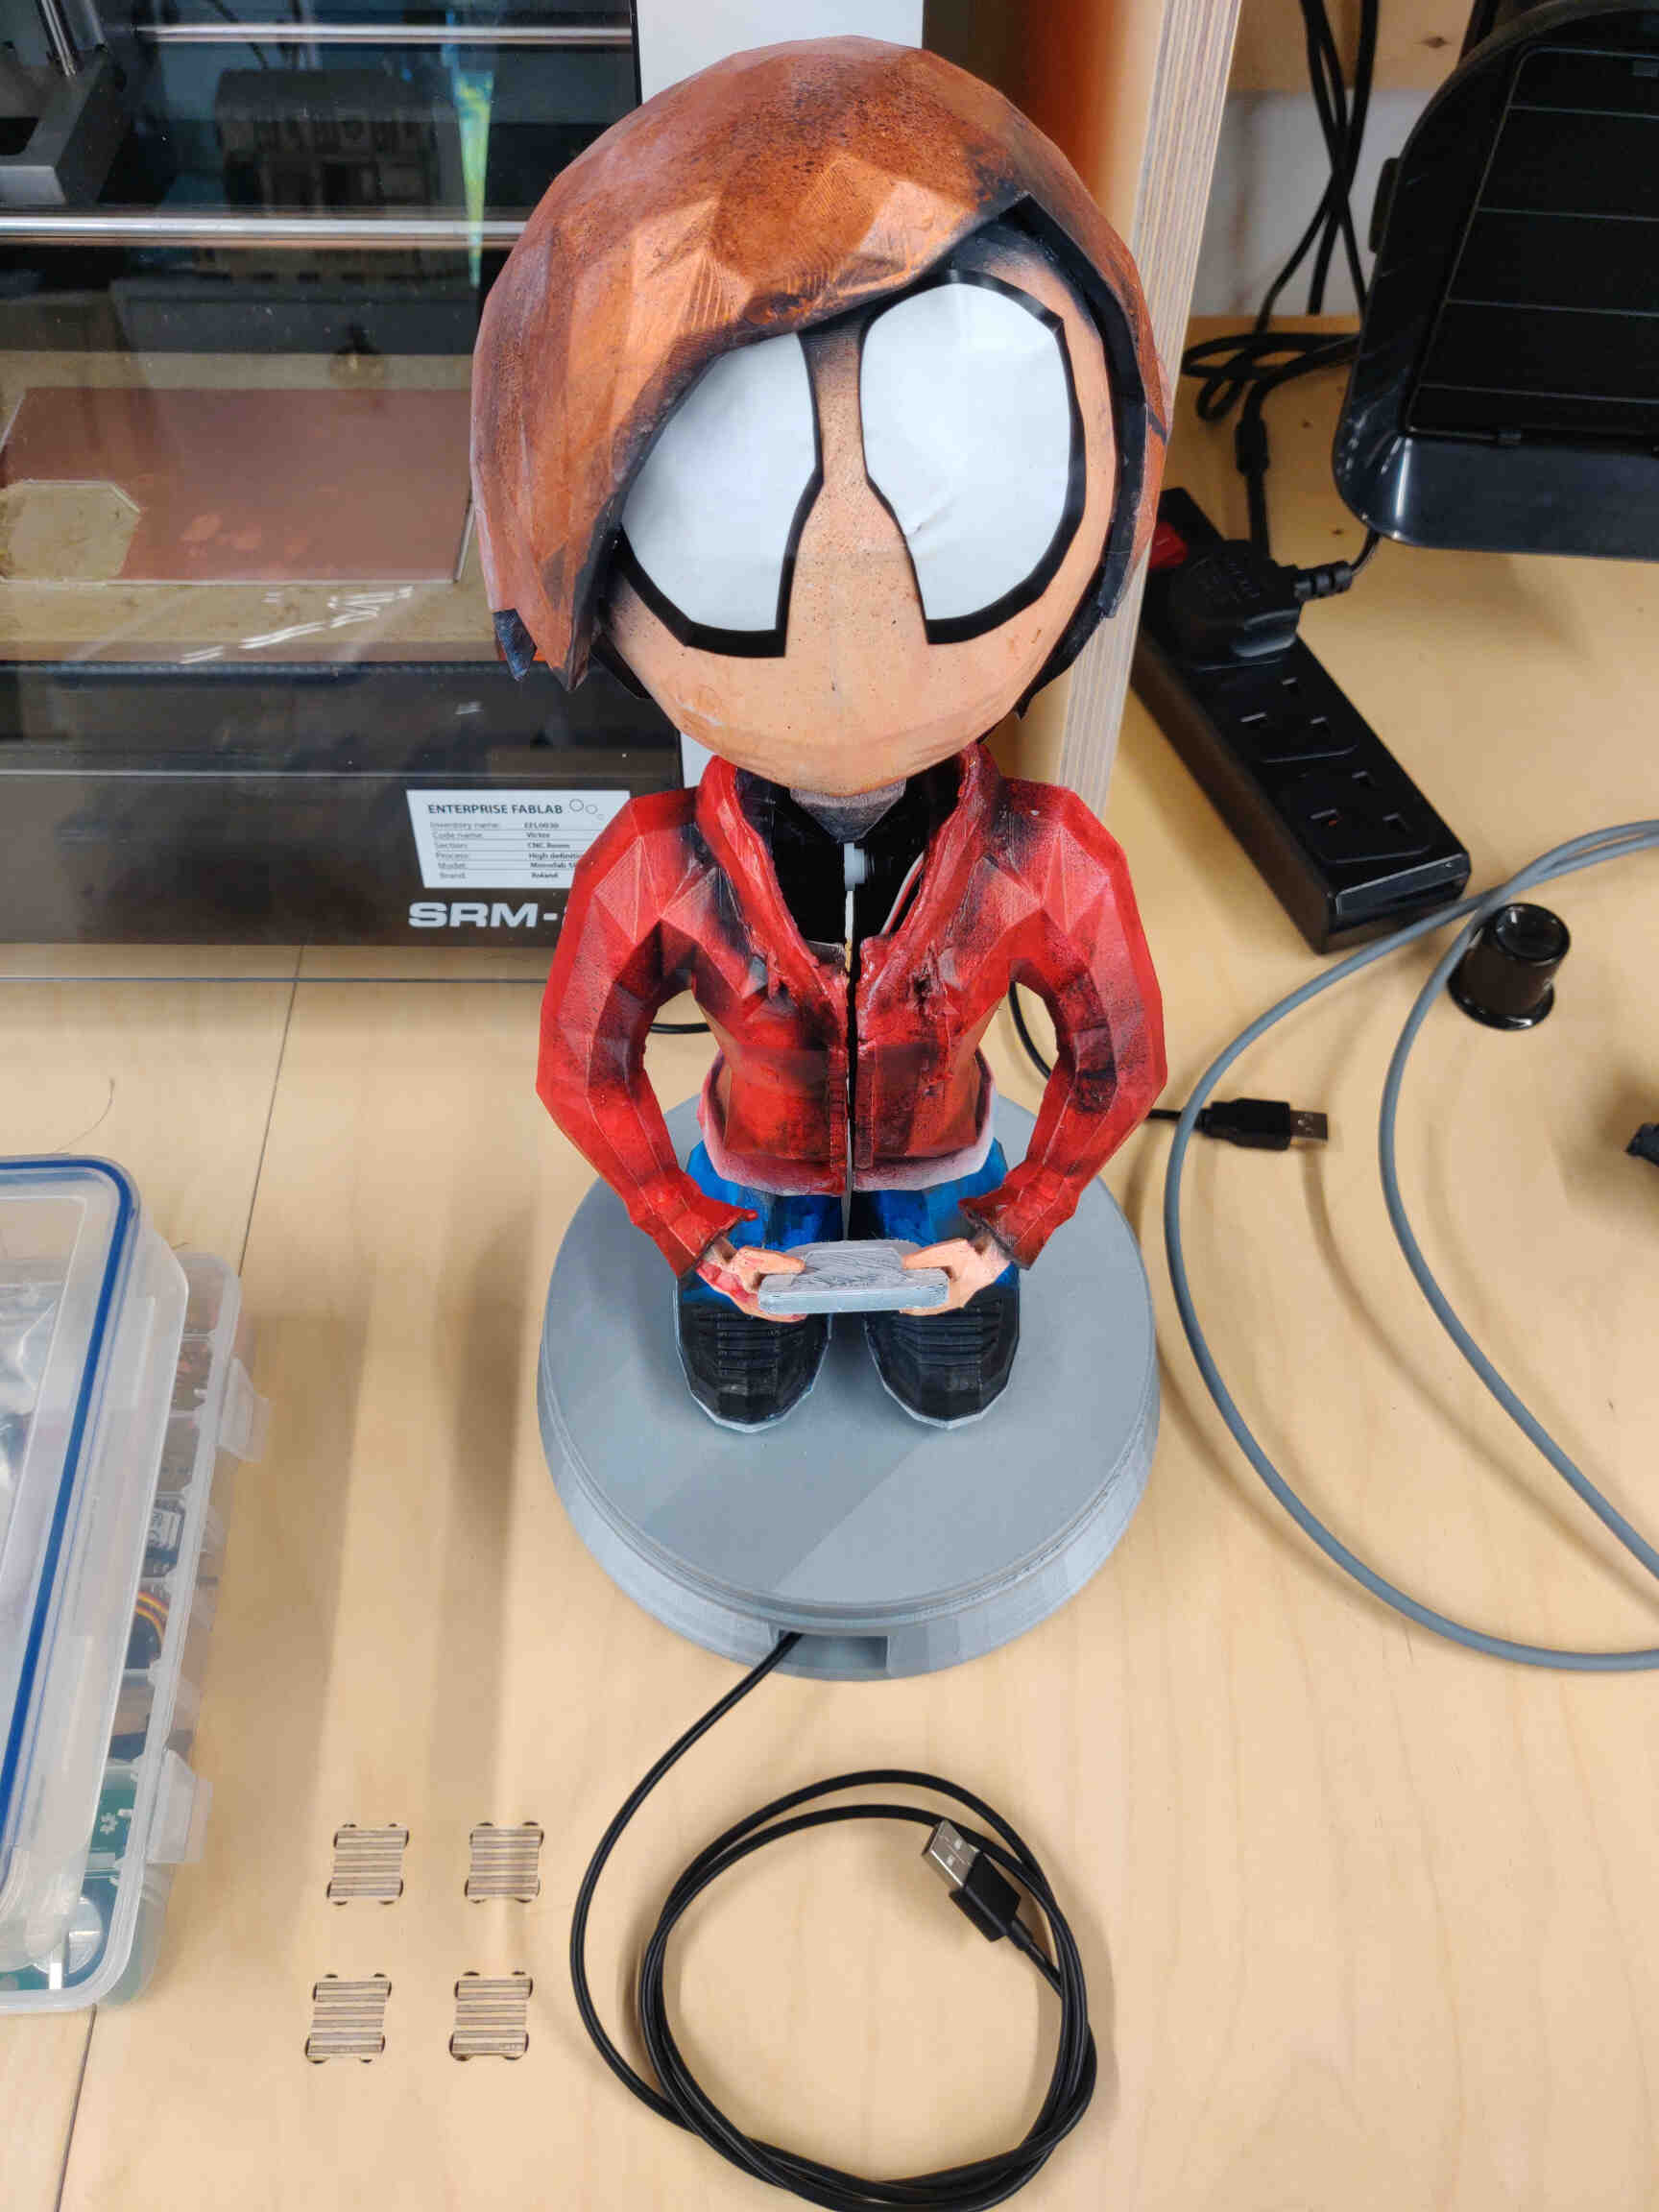
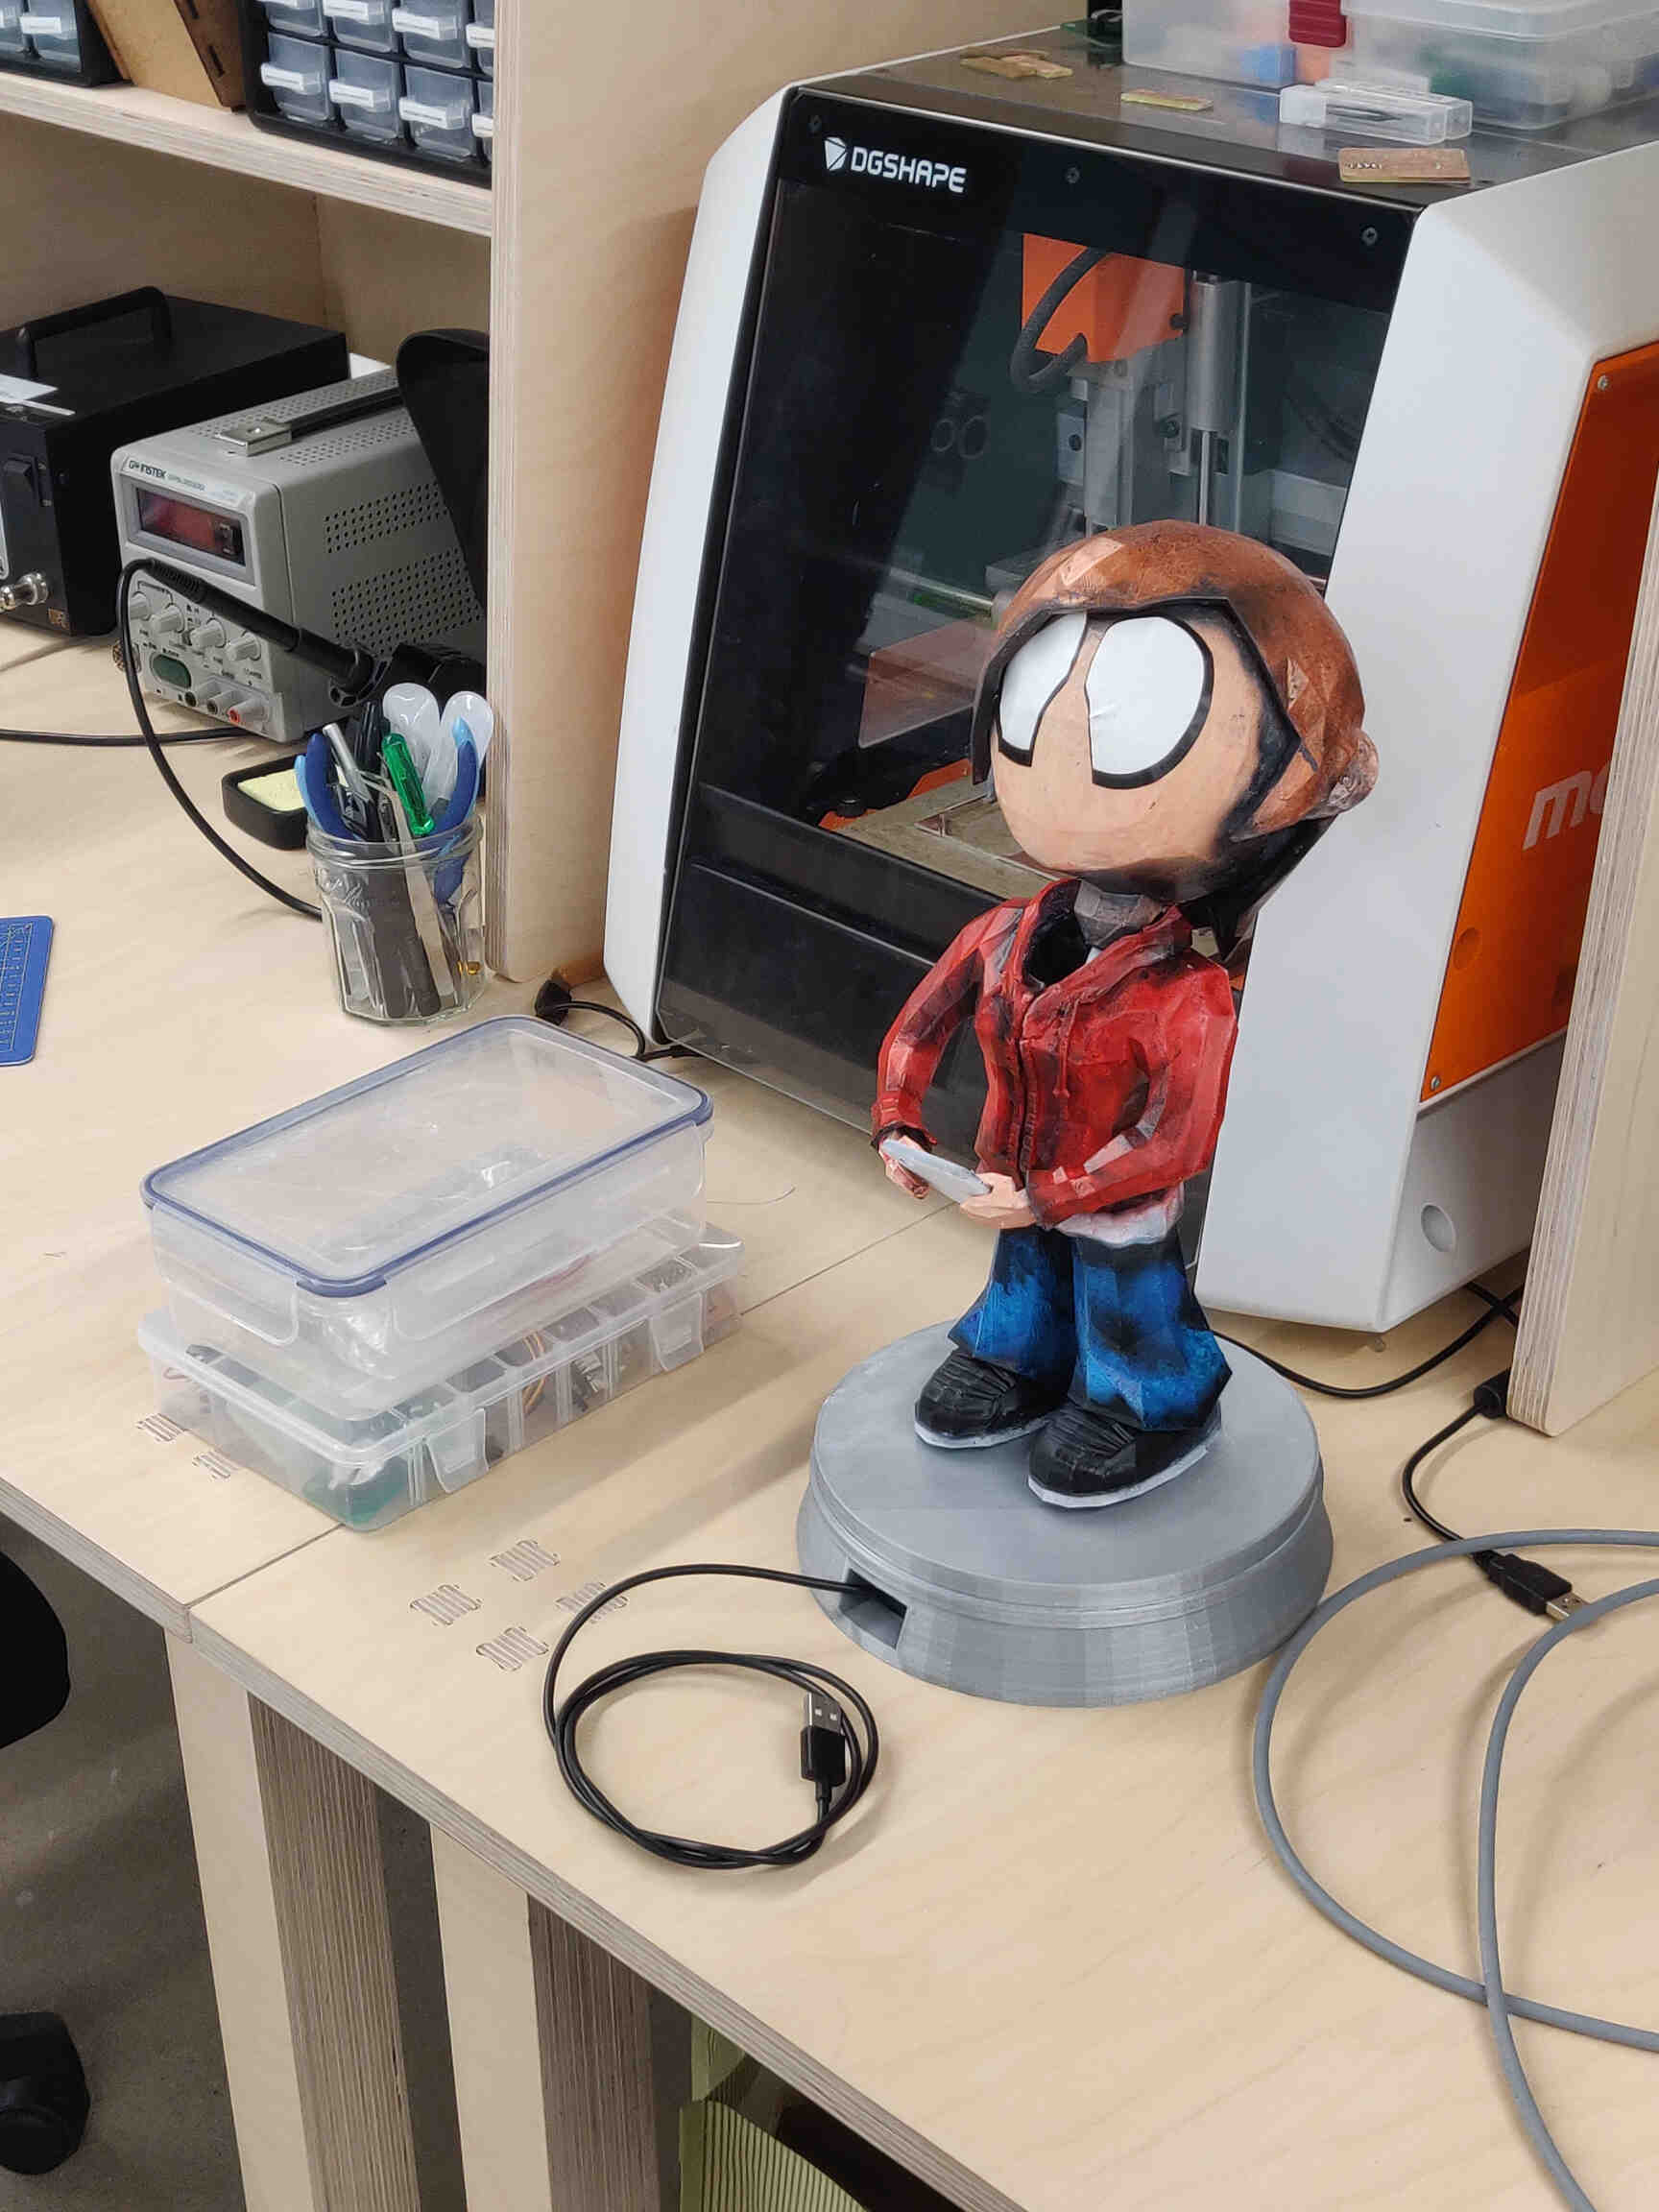
Updated Model Design and Final Prototype Print
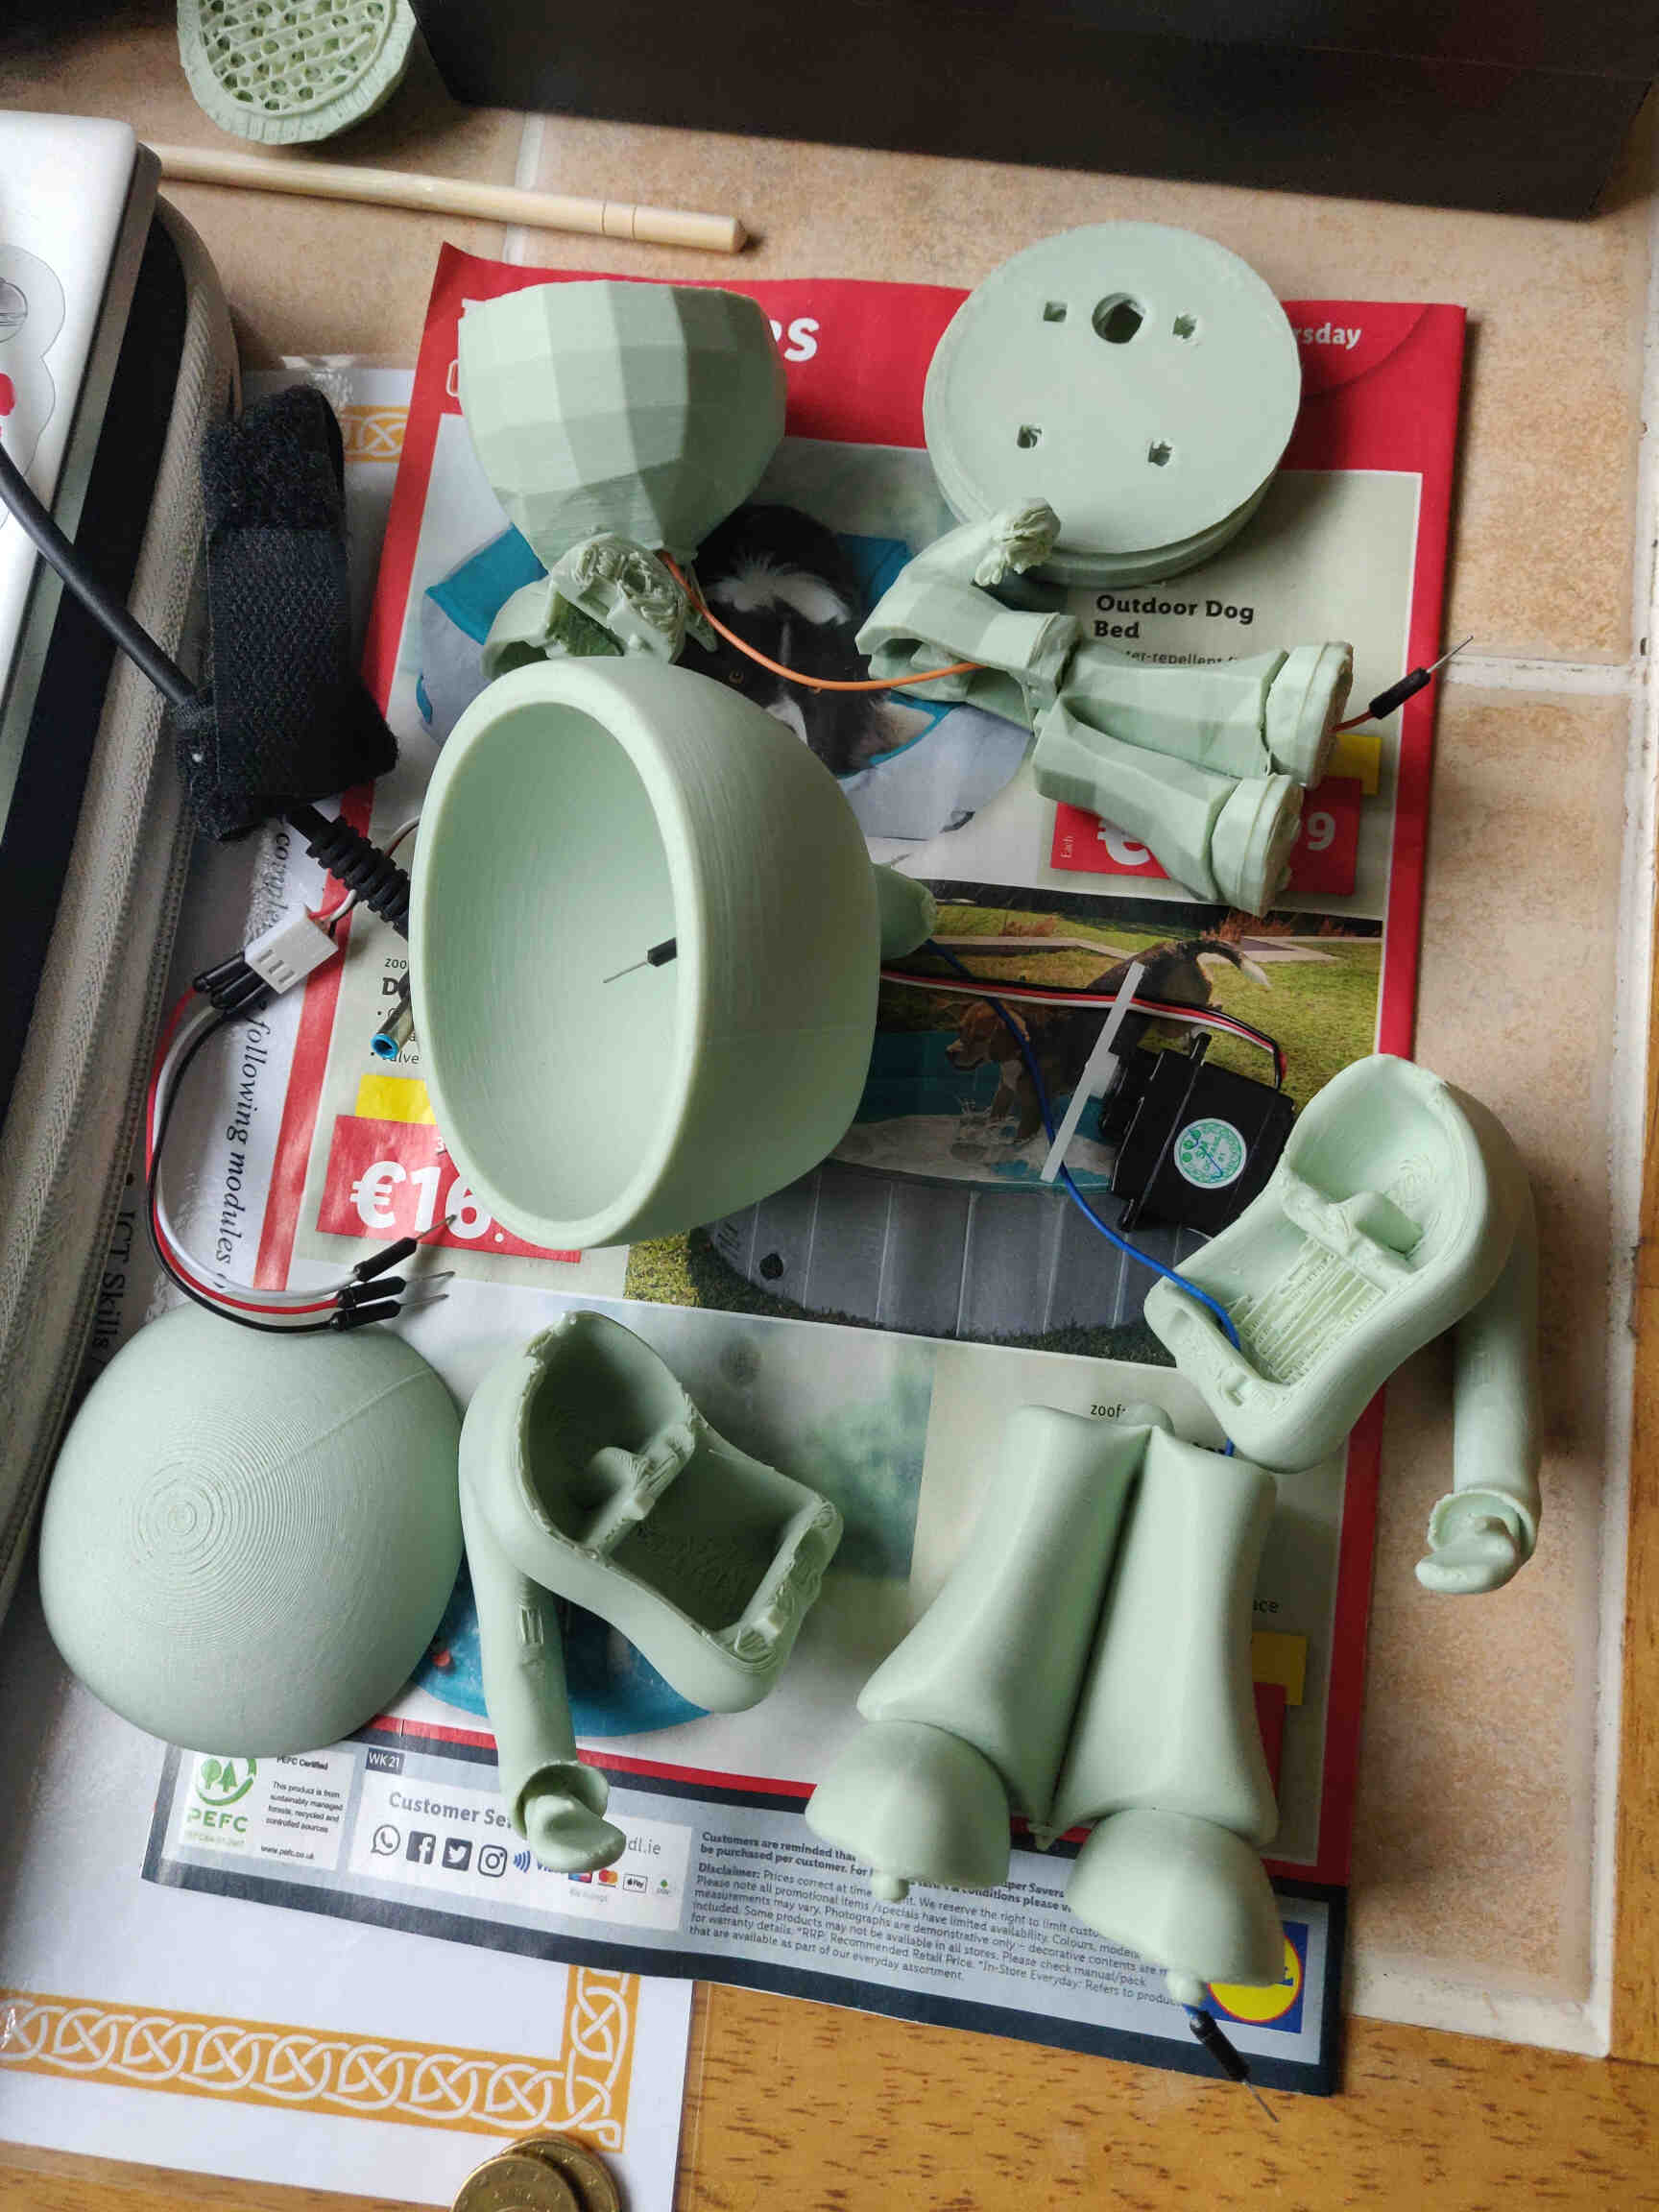
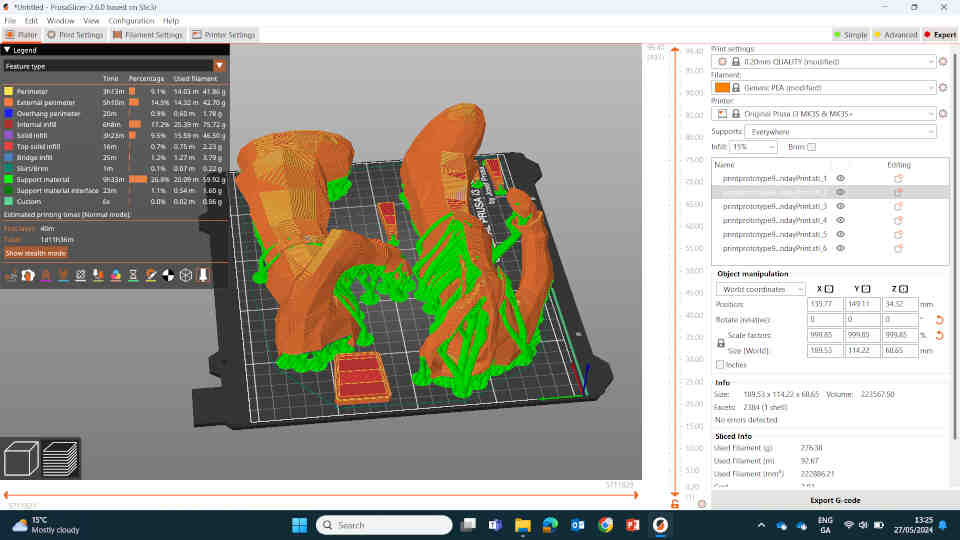
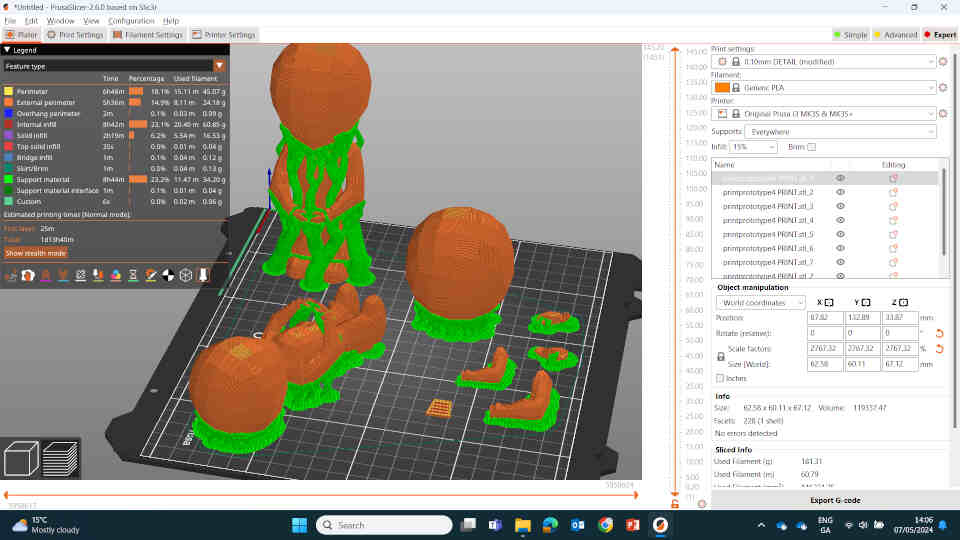
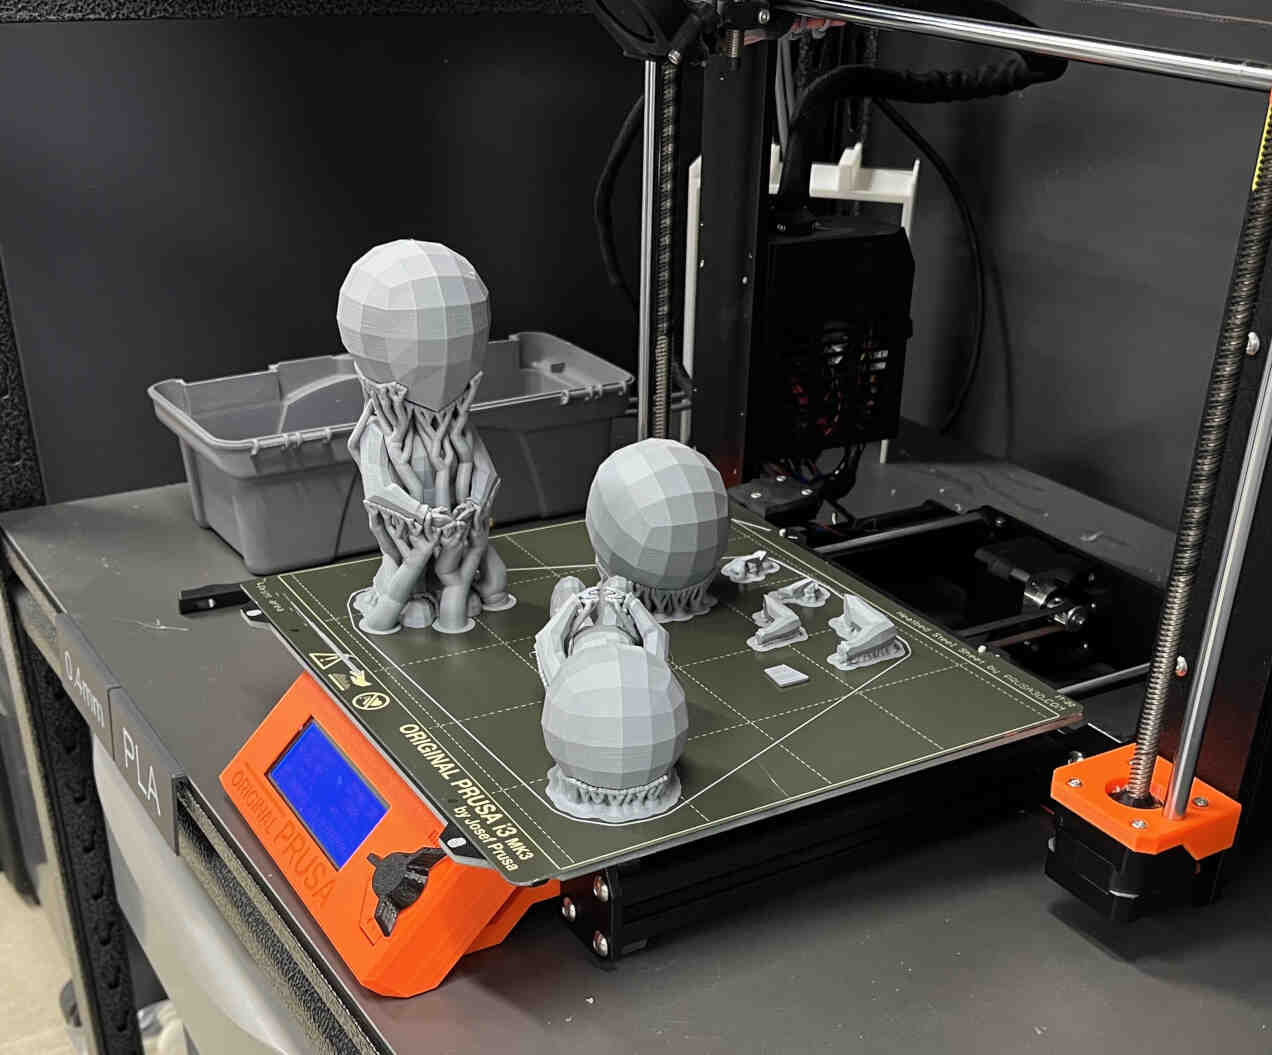
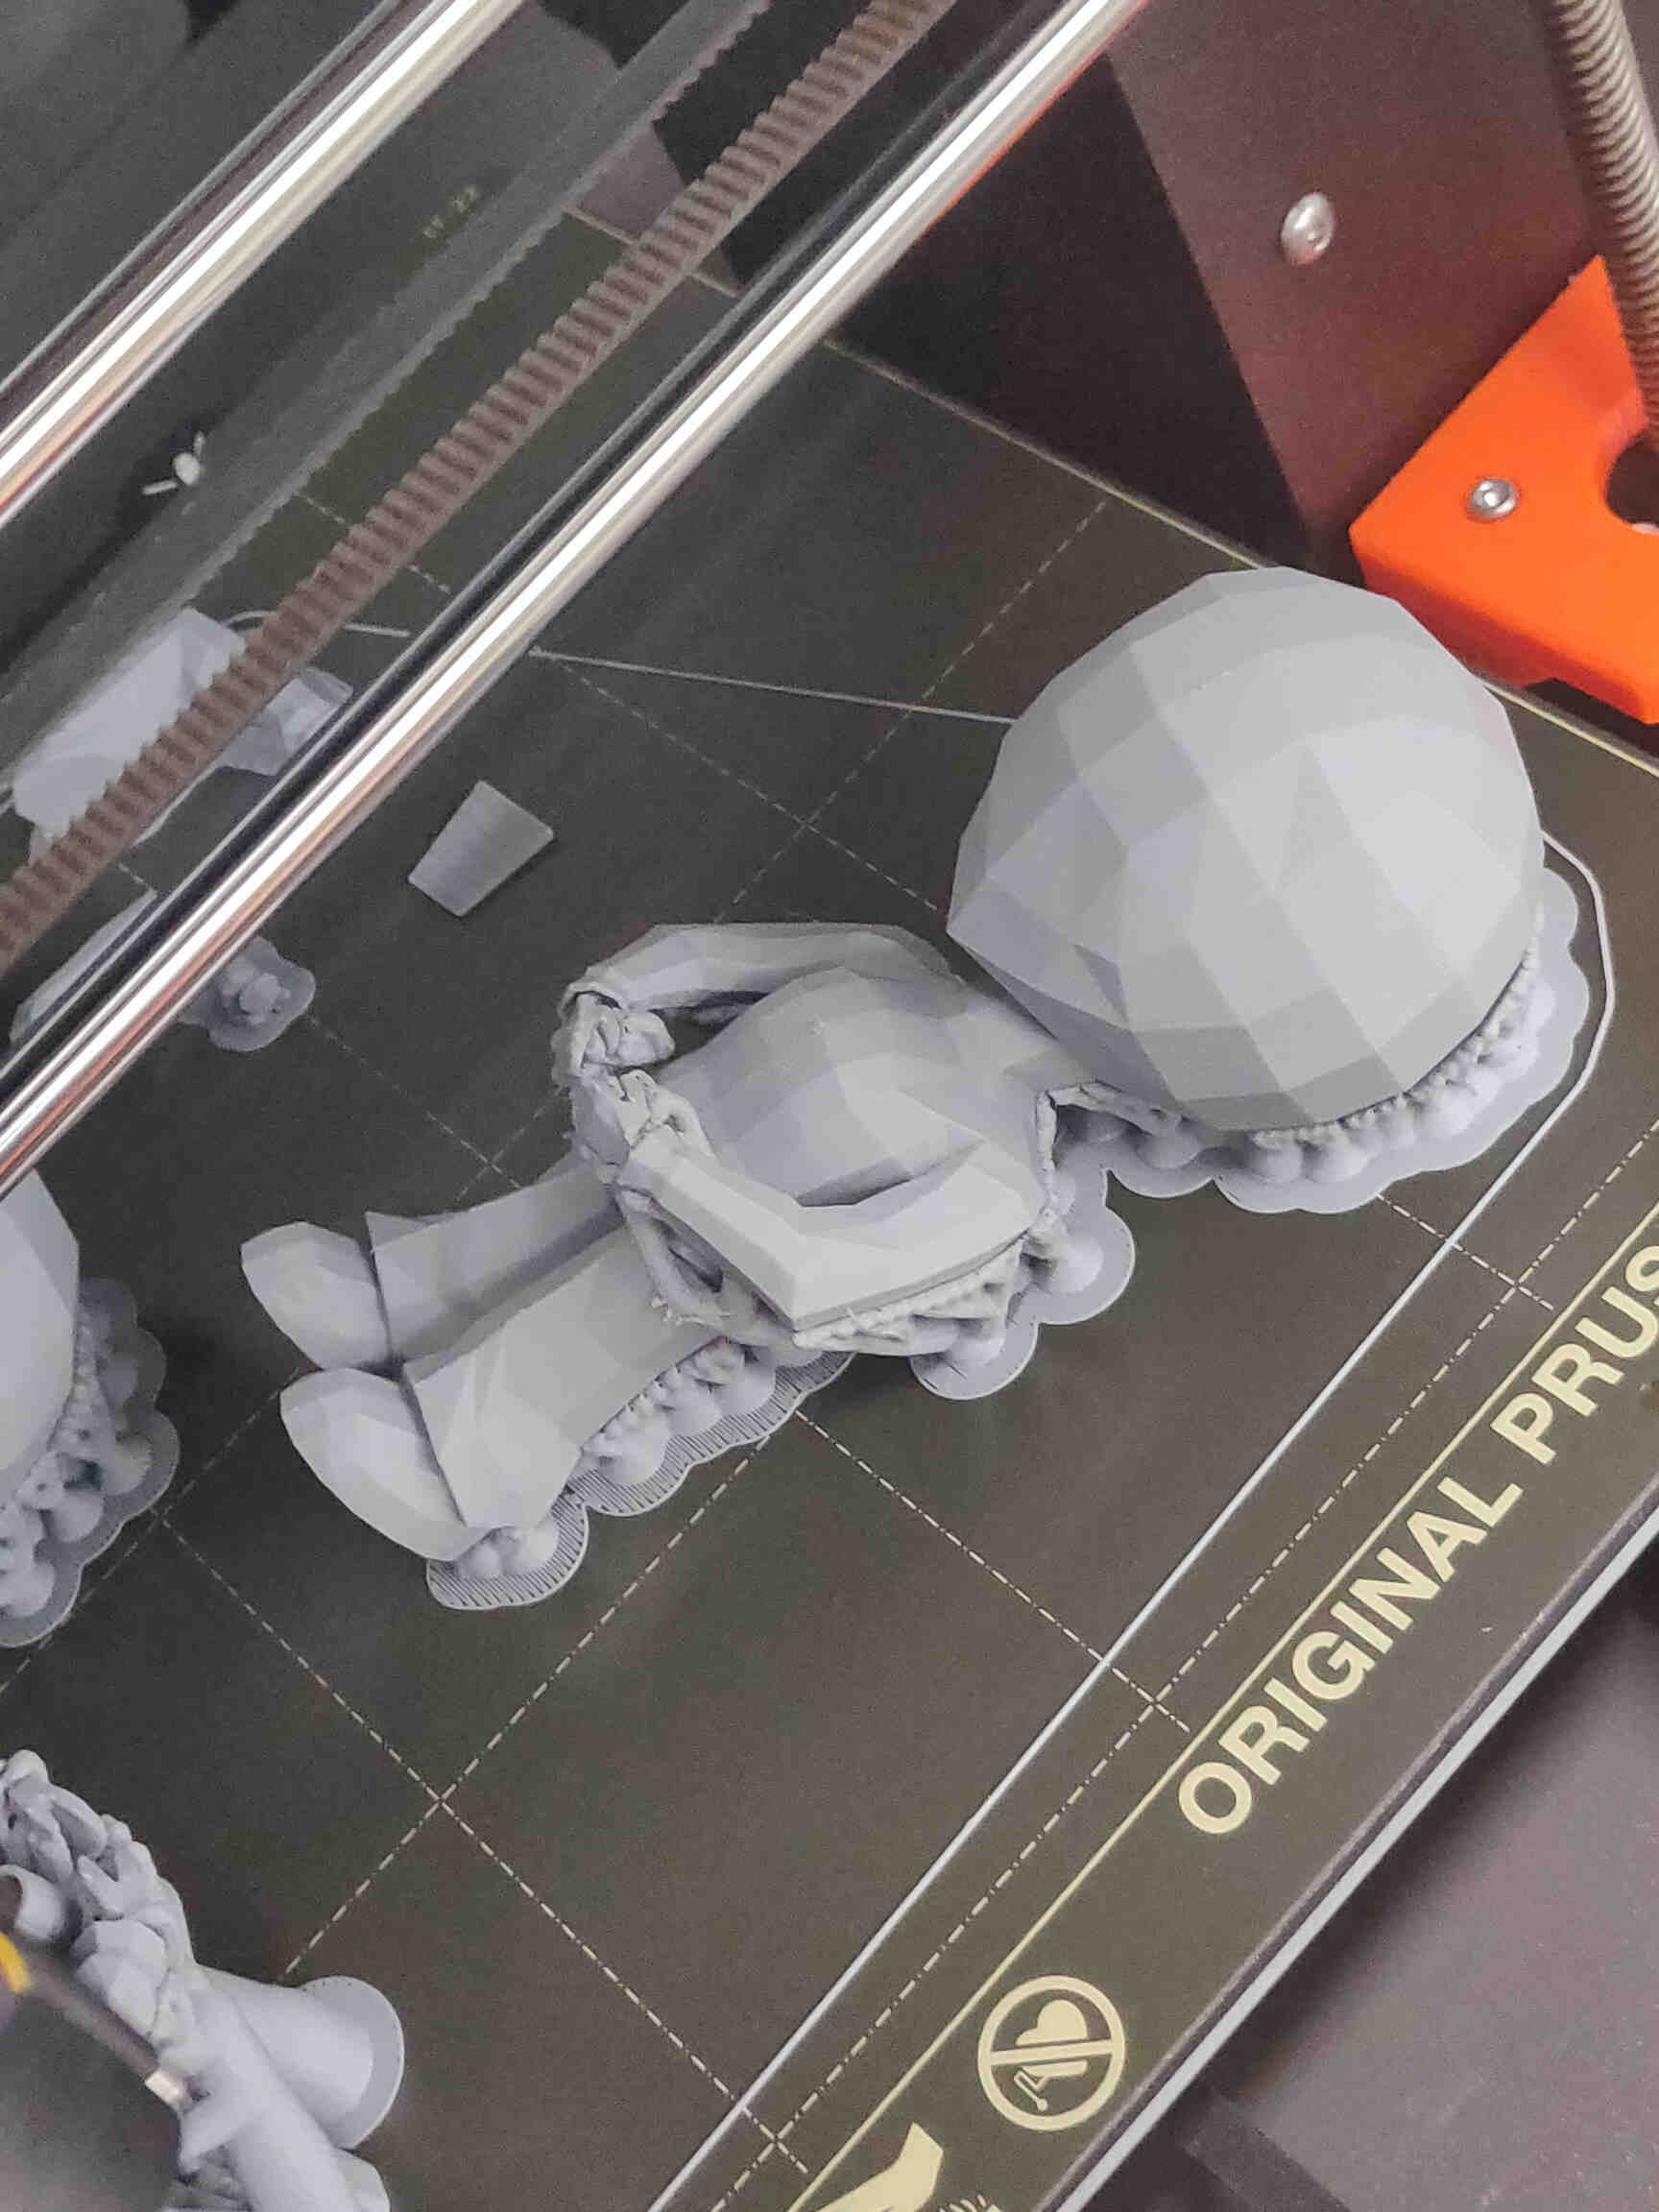
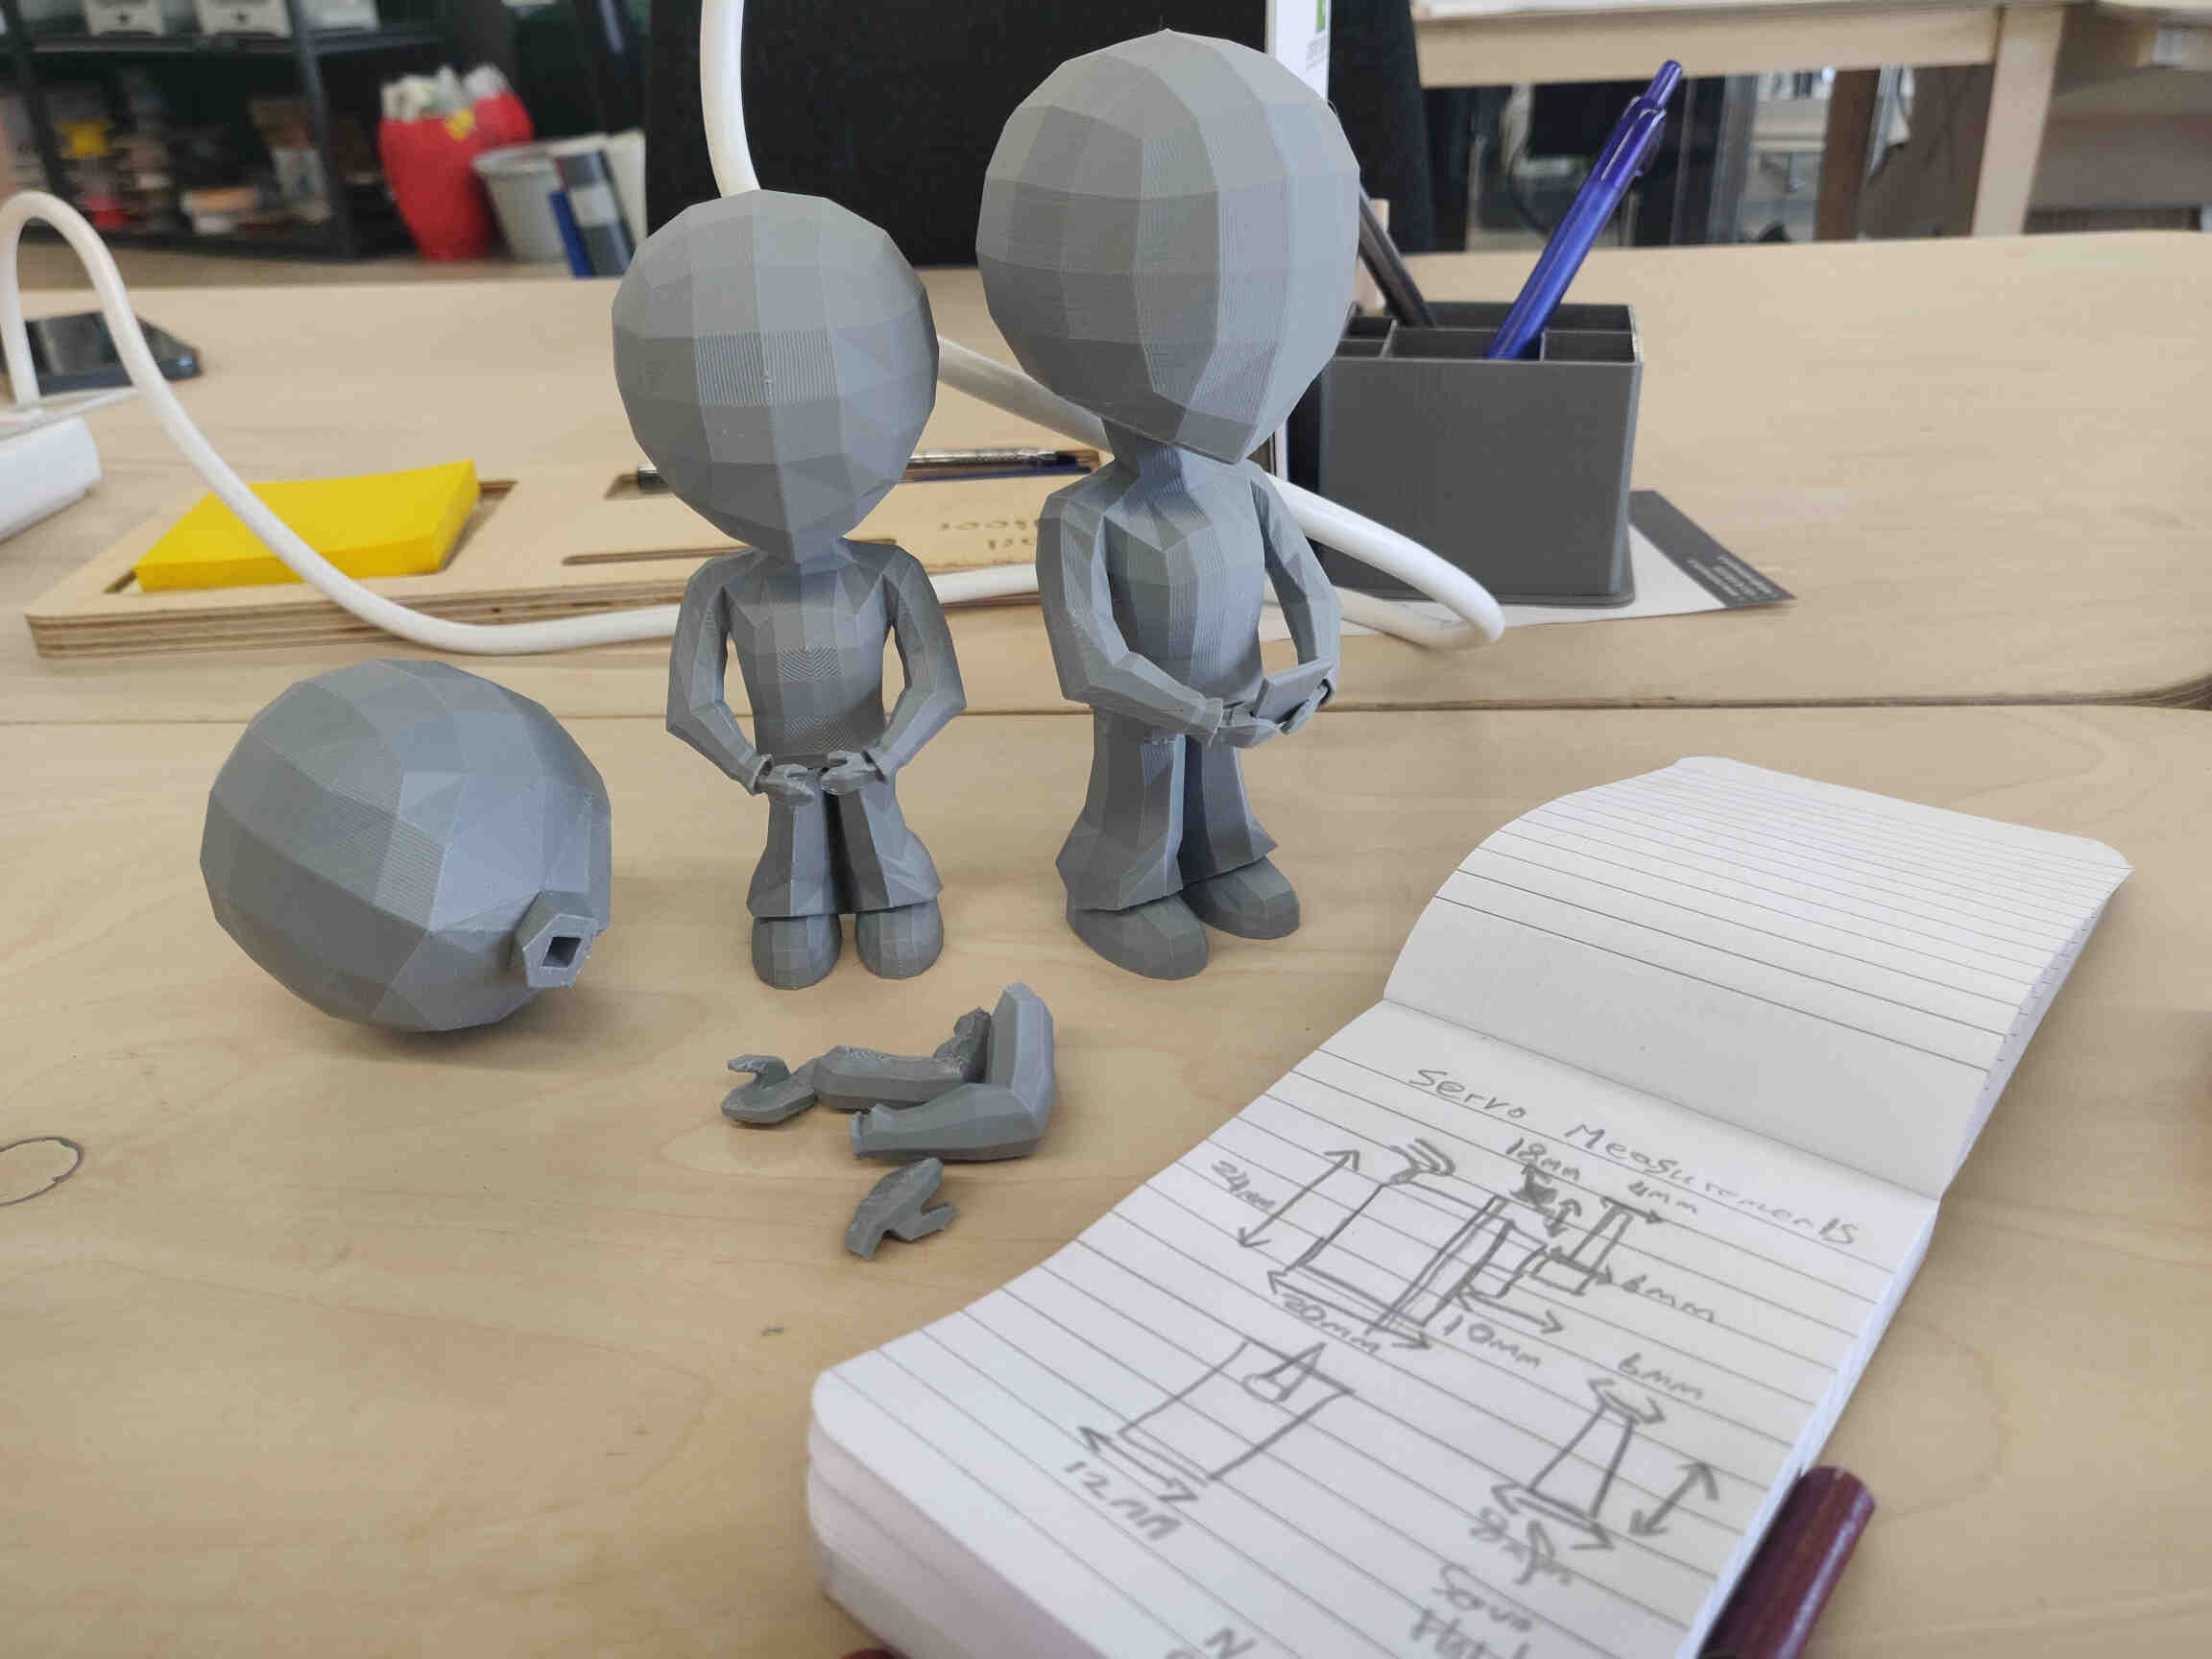
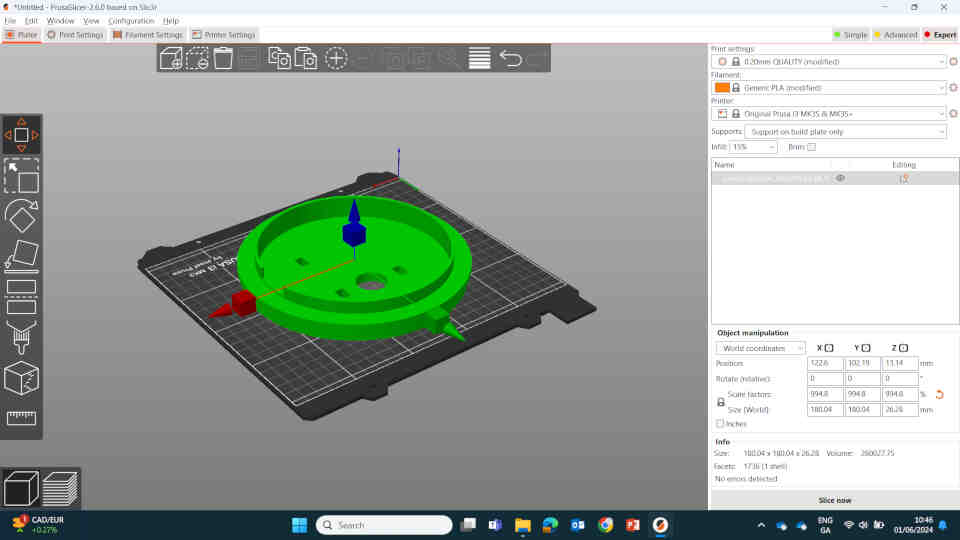
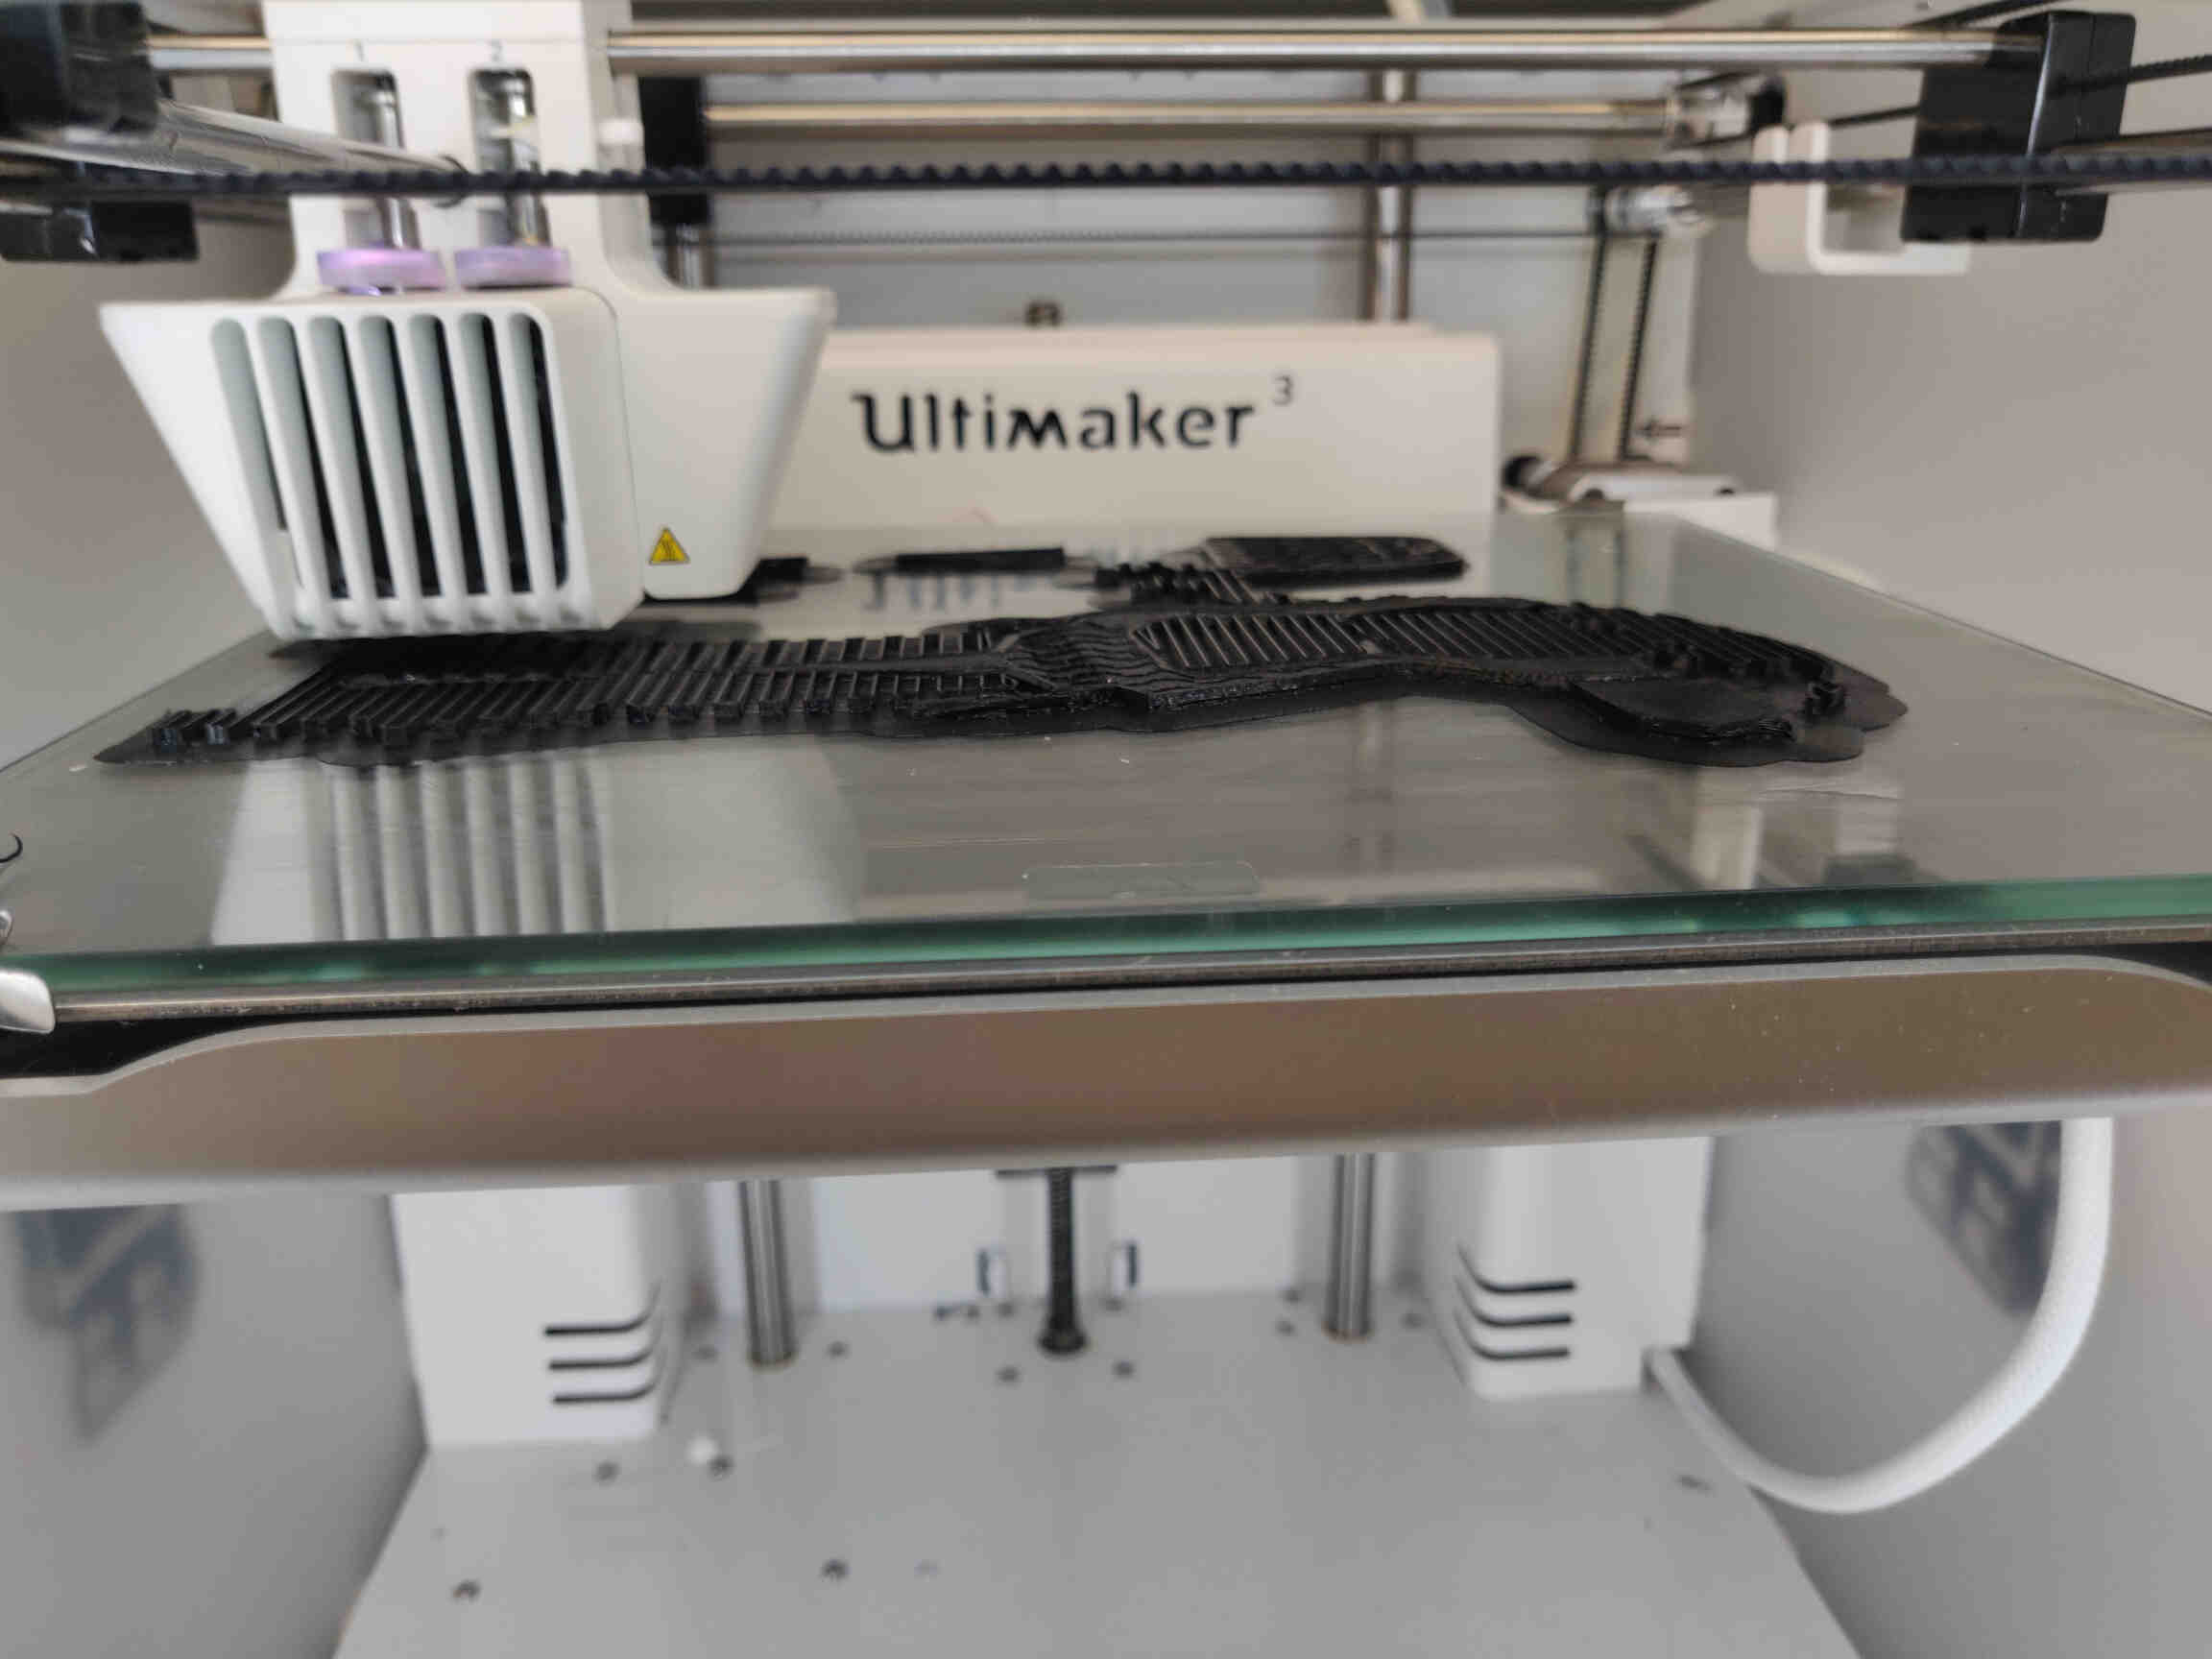
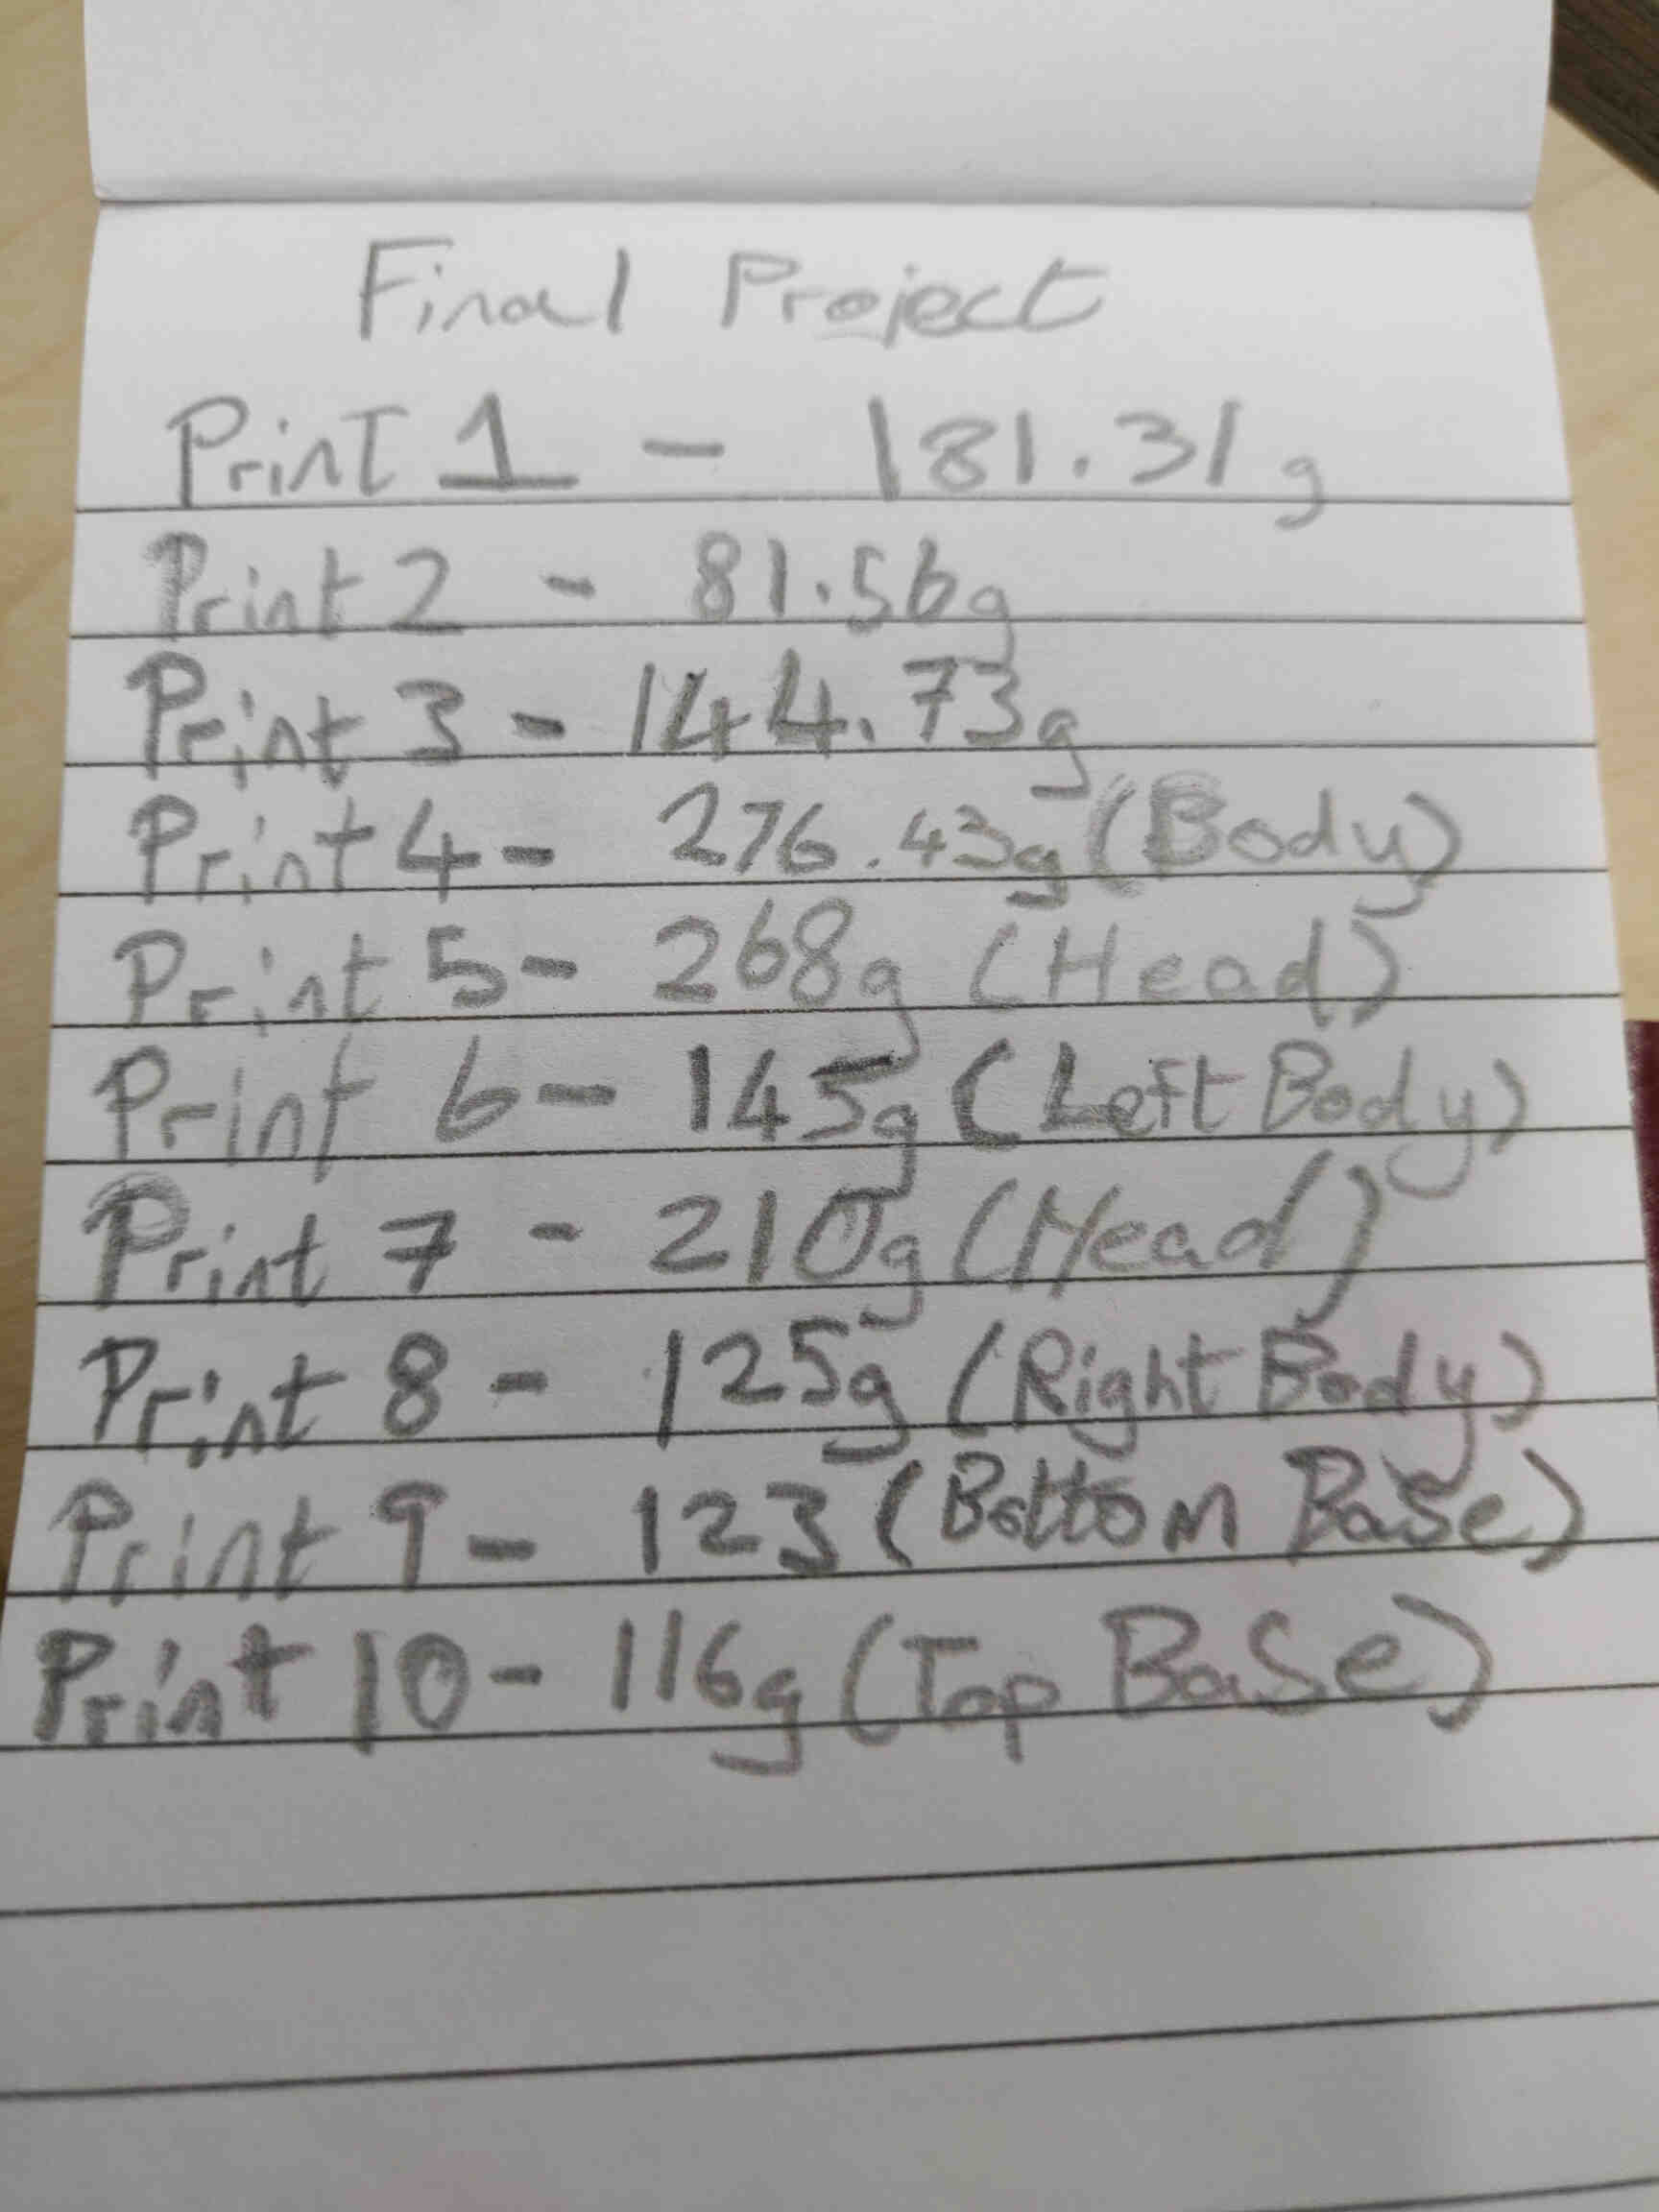
The body of the model alone at 15% Infill at 0.20 Detail cost 278g of PLA Filament Material and took a total of 36 hours to print using a Prusa Printer. So I needed a second printer to do the head. Since we only have one Prusa machine, I brought the Head model into Cura and set the Ultimaker3 Extended to print. The Head model alone at 10% Infill at 0.20 Detail cost 246g of PLA Filament and a whopping 25 hours to Print.
I think it's fair to say I have only enough time for 1 more print before the deadline. We're in the Endgame now...
Final Prototype Results
What’s left to do?
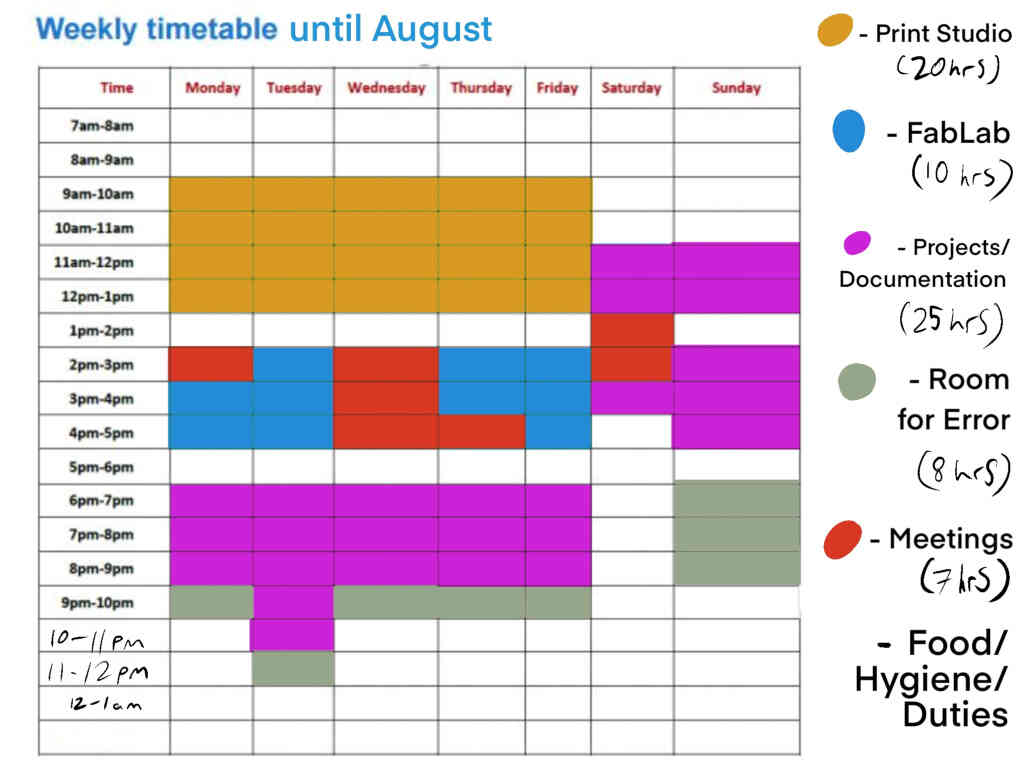
Timetable / Schedule for the Final Push!
Thursday 30th: Programming Servo & ToF / FiS Exhibition
Friday 31st: Final 3D Model Re-Design
Saturday 1st: Start Final 3D Print / Upload Slide
Sunday 2nd: Inkscape Designs / Slide
Monday 3rd (Bank Holiday): Writing Video Script / Recording / Start Video Edit
Tuesday 4th: Vinyl Cutting / Assembly / Fitting / Wiring / Testing Design / Painting Model
Wednesday 5th: Finish painting Model / Filming / Video Editing / Upload
Thursday 6th: Final Documentation & Upload
Friday 7th: PRESENTATION!
___________
Week 18 - Invention, intellectual Property, and Income
Choosing my License & Dissemination
Why did I choose this license?
I felt this license to be appropriate due to the influence older interactive/non-interactive figurines had in the creation of "Little Buddy". It allows other creators to use and expand the product as long as they give appropriate credit (must provide the name of the creator and attribution parties, a copyright notice, a license notice, a disclaimer notice, and a link to the material) to Little Buddy and its Creator (Ryan Reilly @ No Purpose Indie). It also prevents other creators from performing the undesirable act of adding new restrictions and limitations to the product's current license.
How & Where can this product be sold?
This product can be manufactured for consumer use and sold at Pop-up Gallerys and Markets. It could also be sold through various digitial markets such as Amazon, Etsy, or through digital shop tools found within YouTube, Instagram, Ko-Fi, etc. Advertisements in the form of digital and physical can be designed and shared locally or through previously mention social media and services.
What can be done with the Product Files? (found below)
These files can be shared, remixed, adapted and/or sold through 3D Model sites such as Cults 3D and Thingyverse and long as appropriate credit is given.
How can this product be improved / expanded upon from here?
Little Buddy v1.0 has reached a functional and aesthetically pleasing state - but there is much that can be improved & expanded upon...
___________
Week 19 - Project Development (The Final Push!)
Wednesday 29th
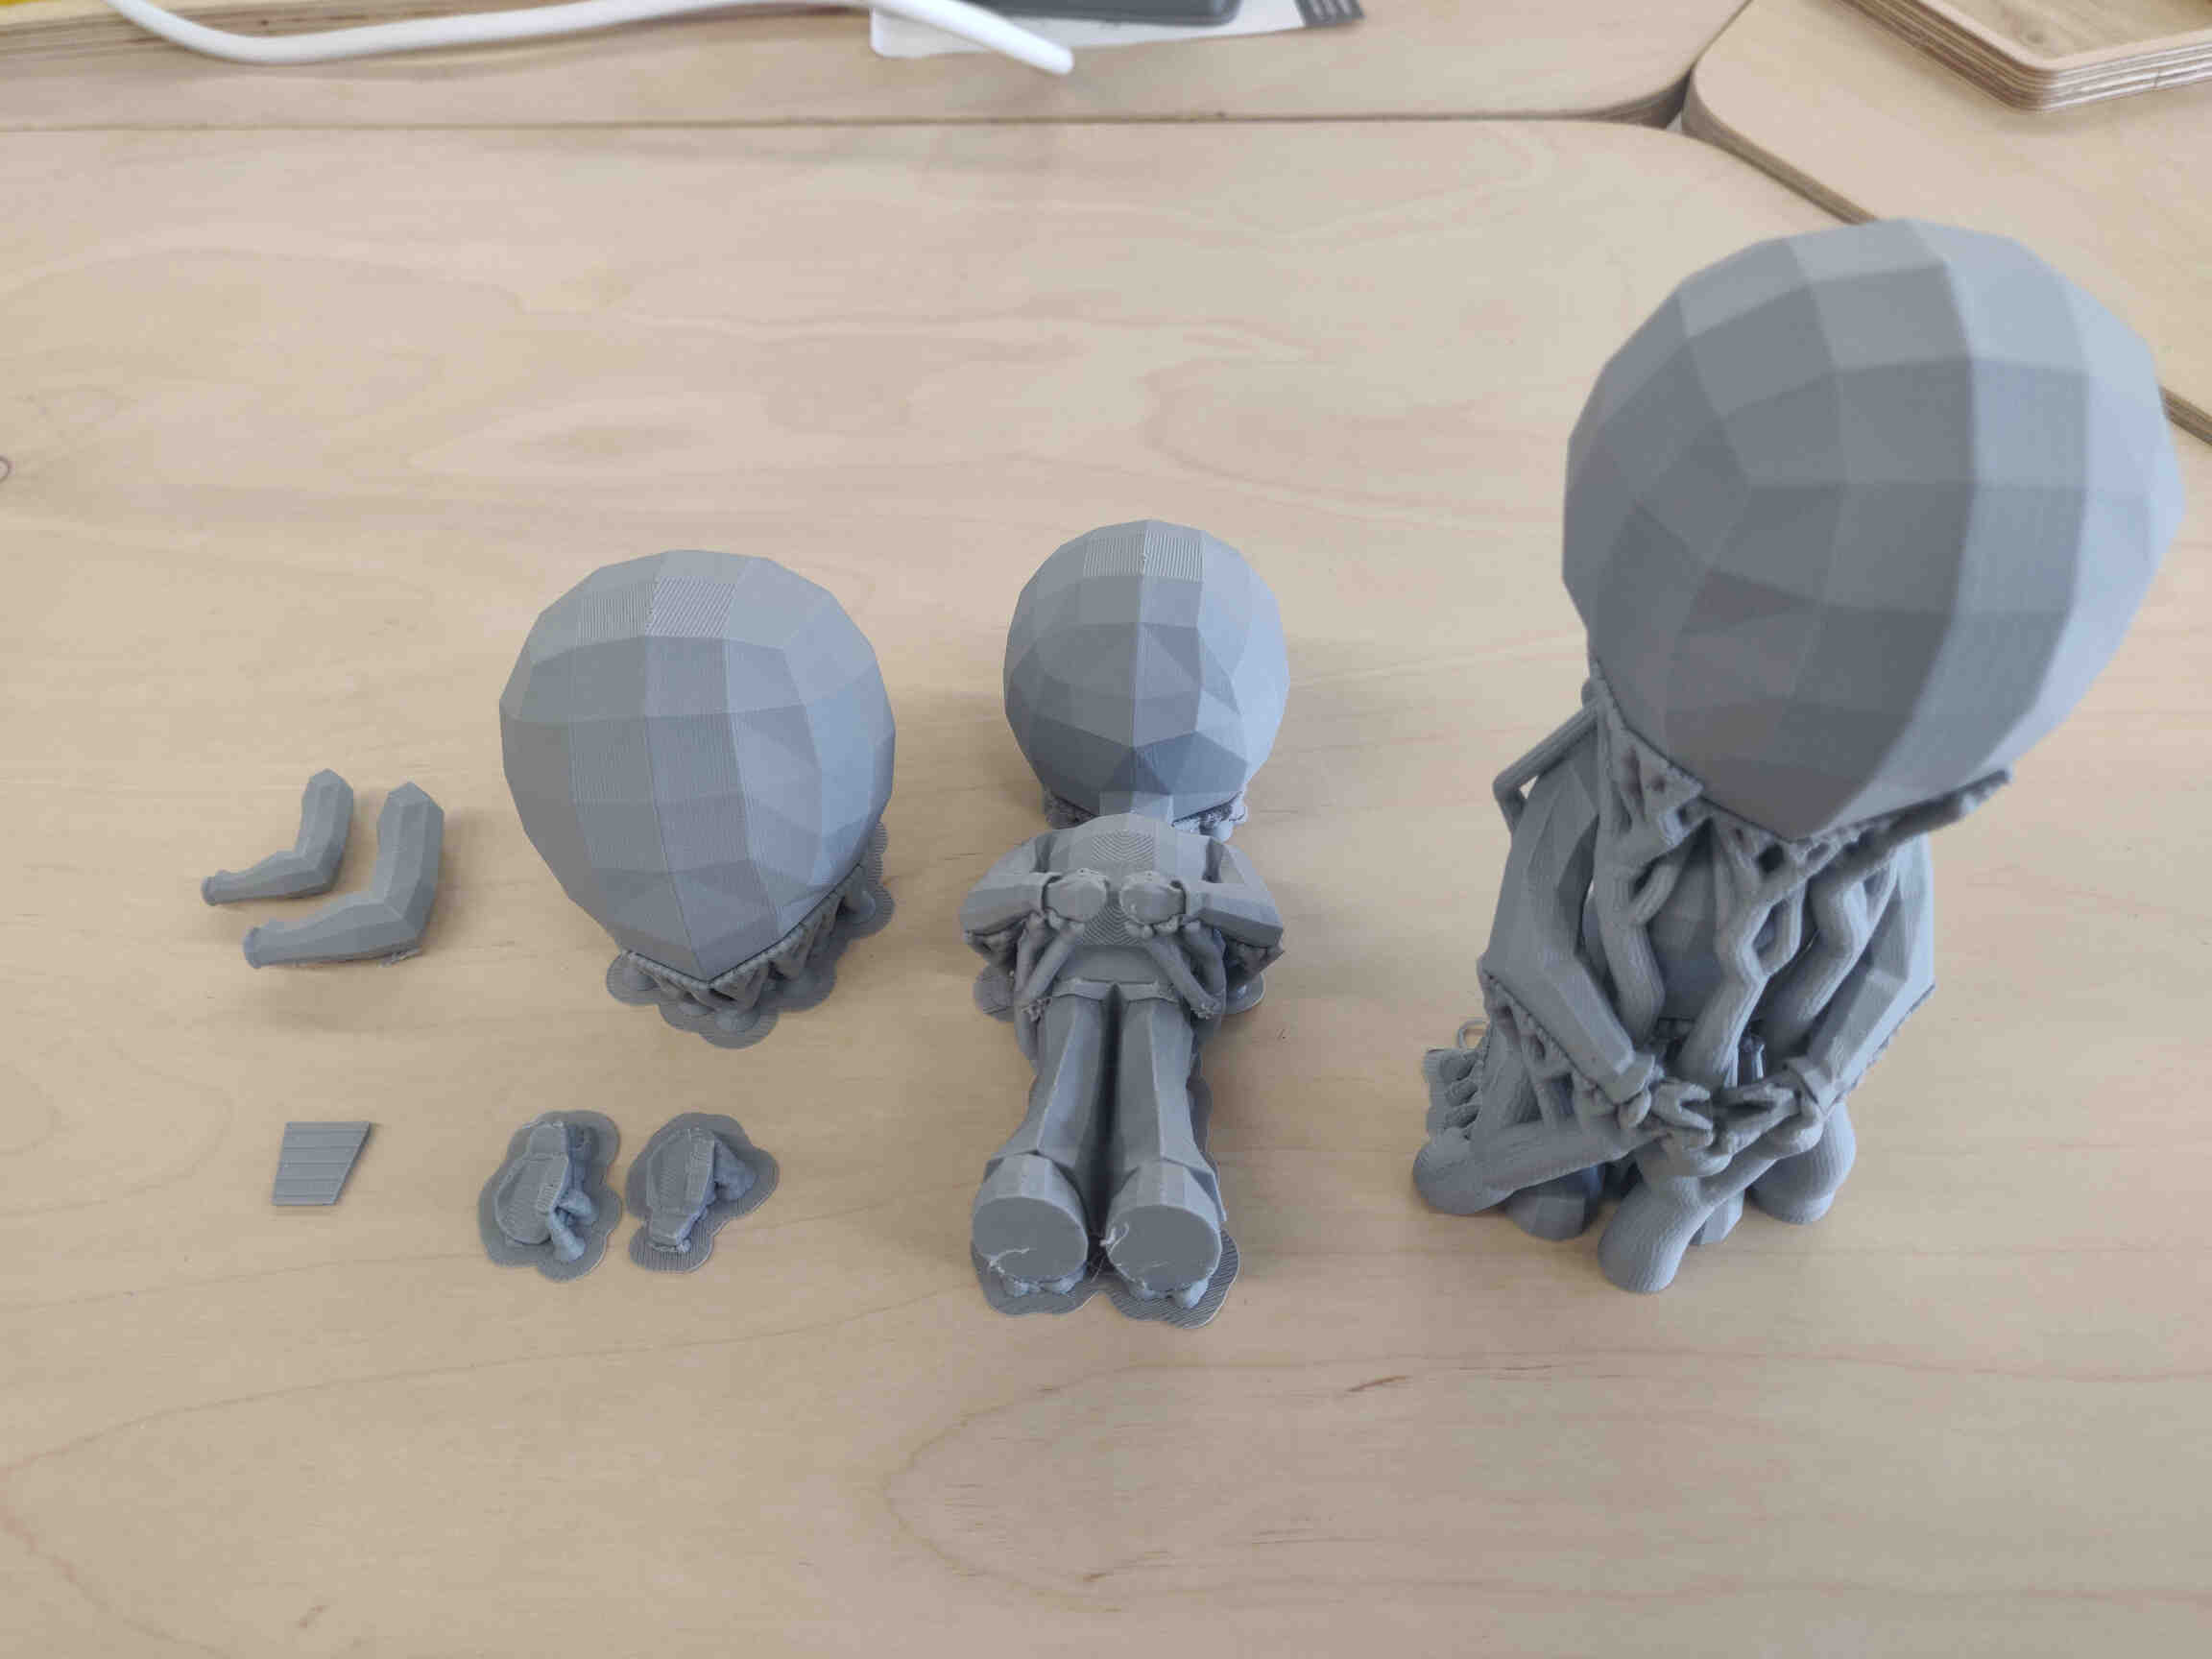
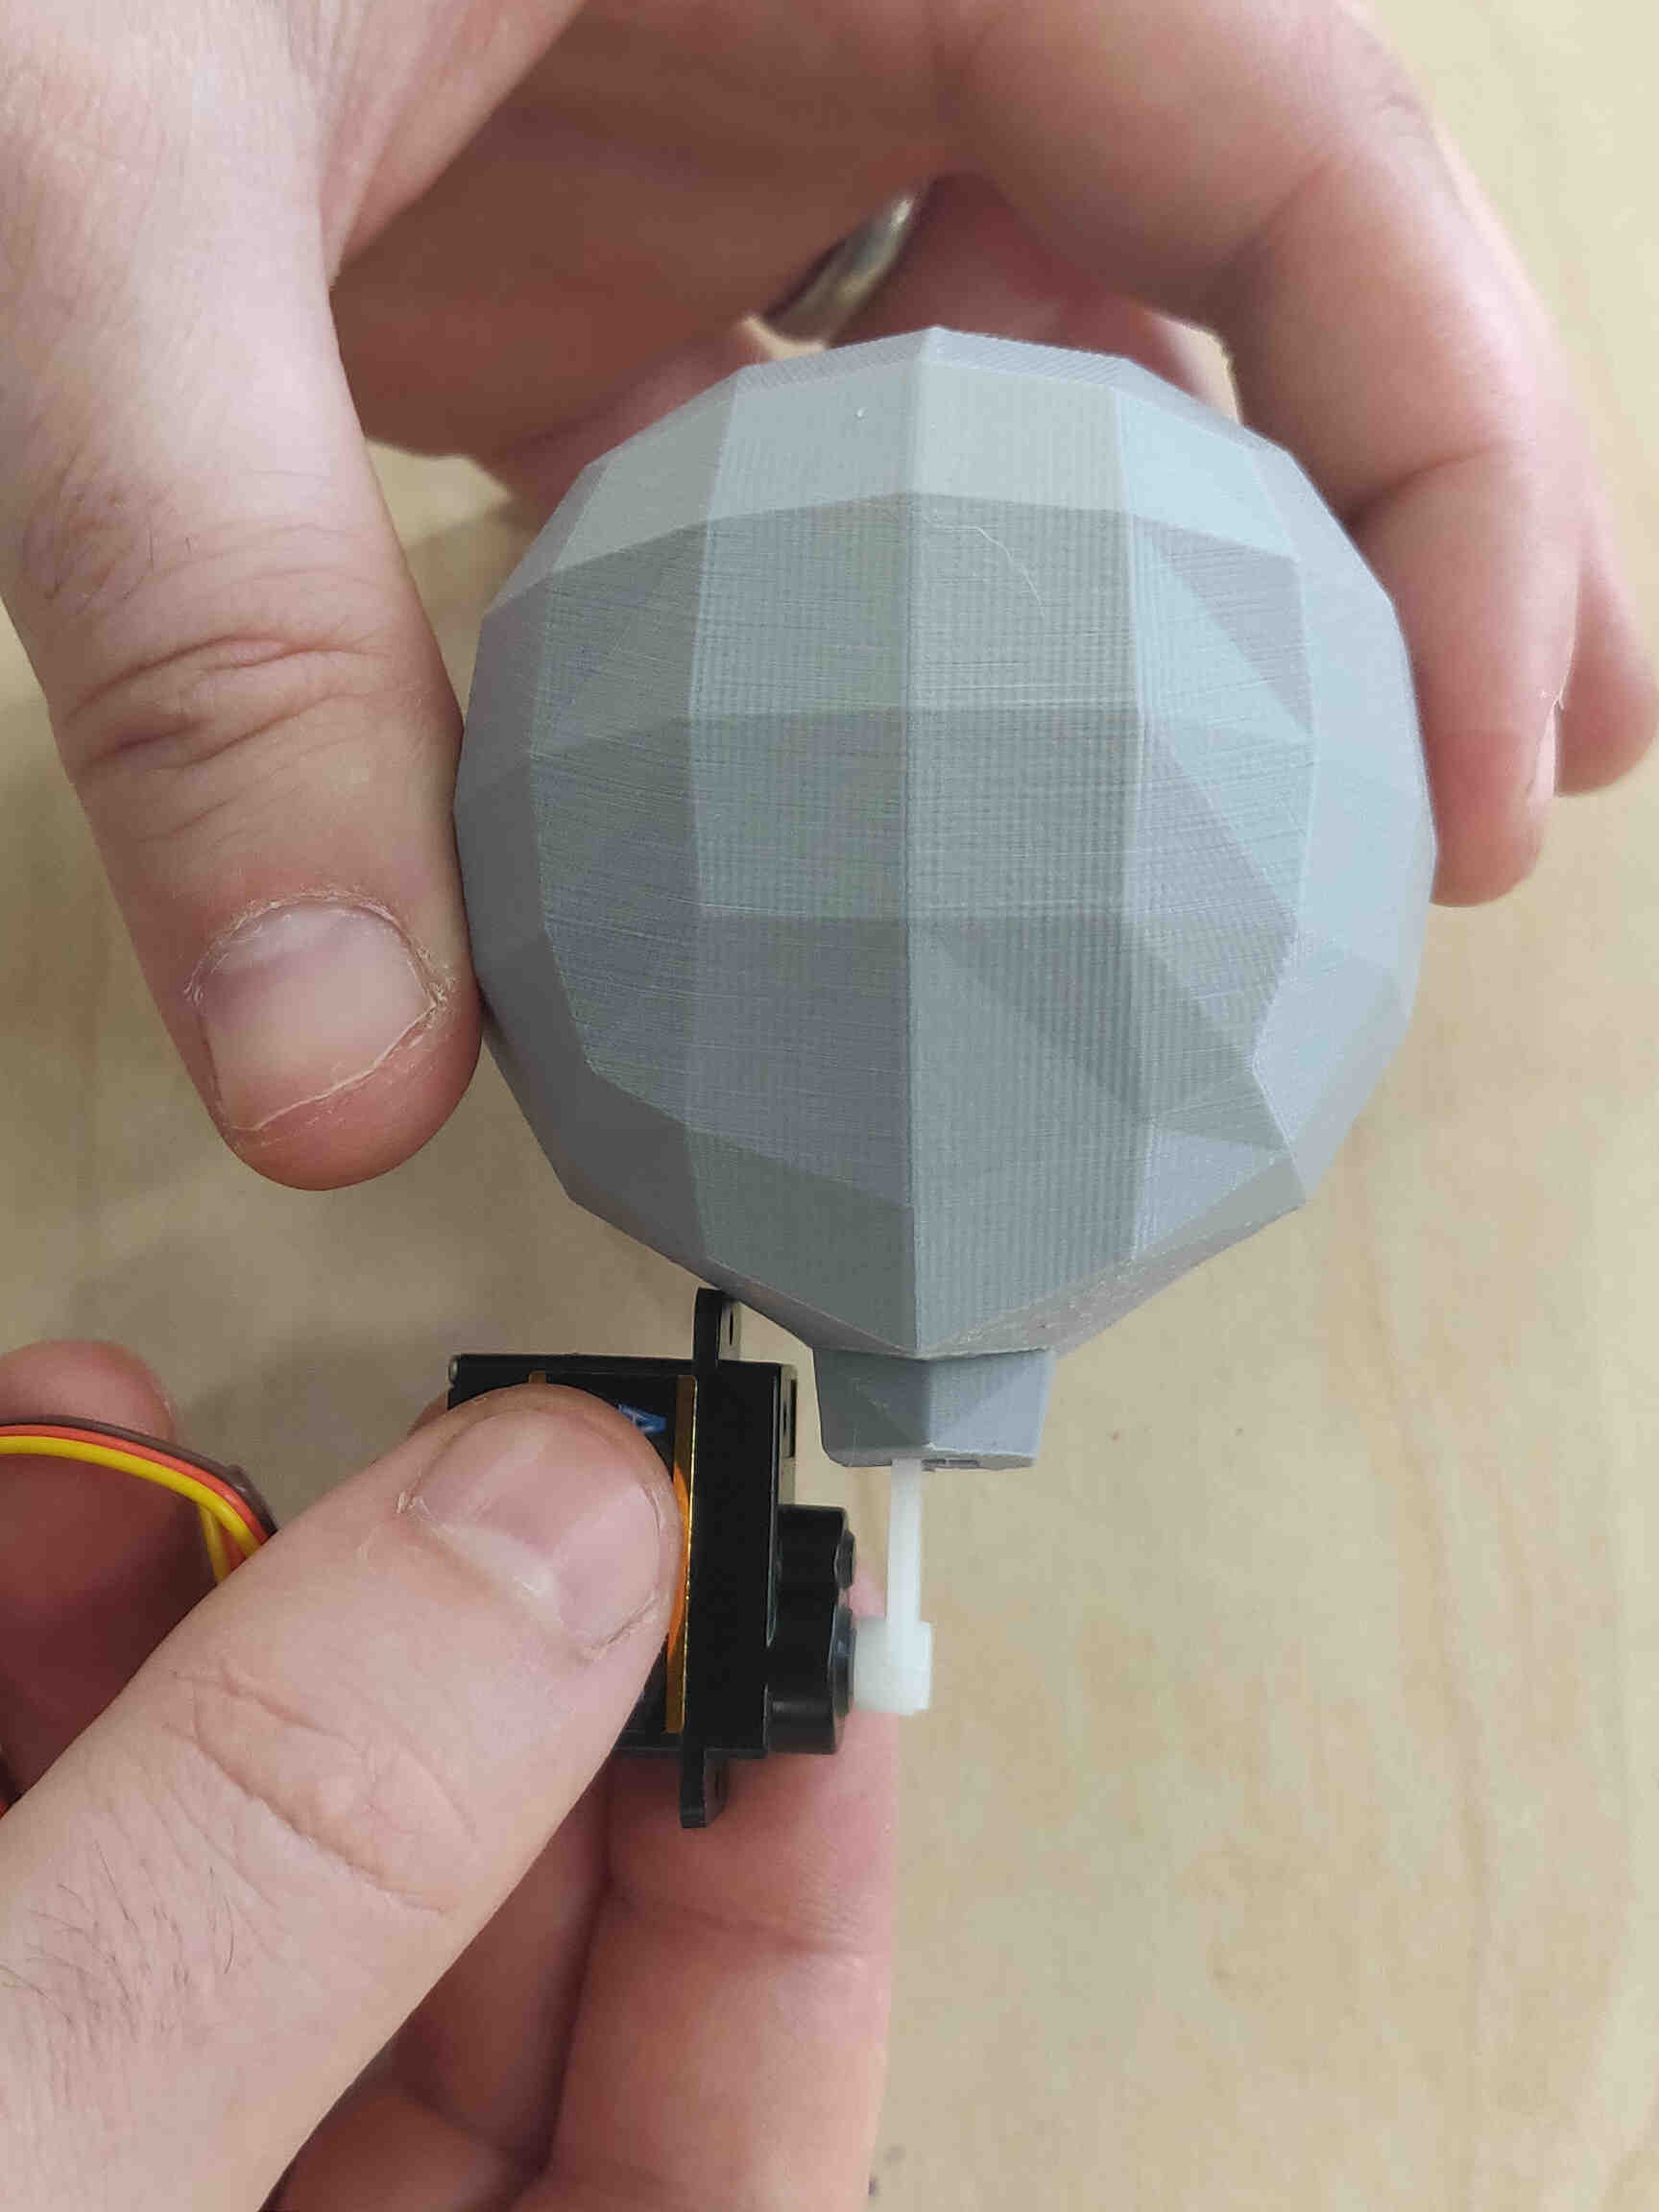
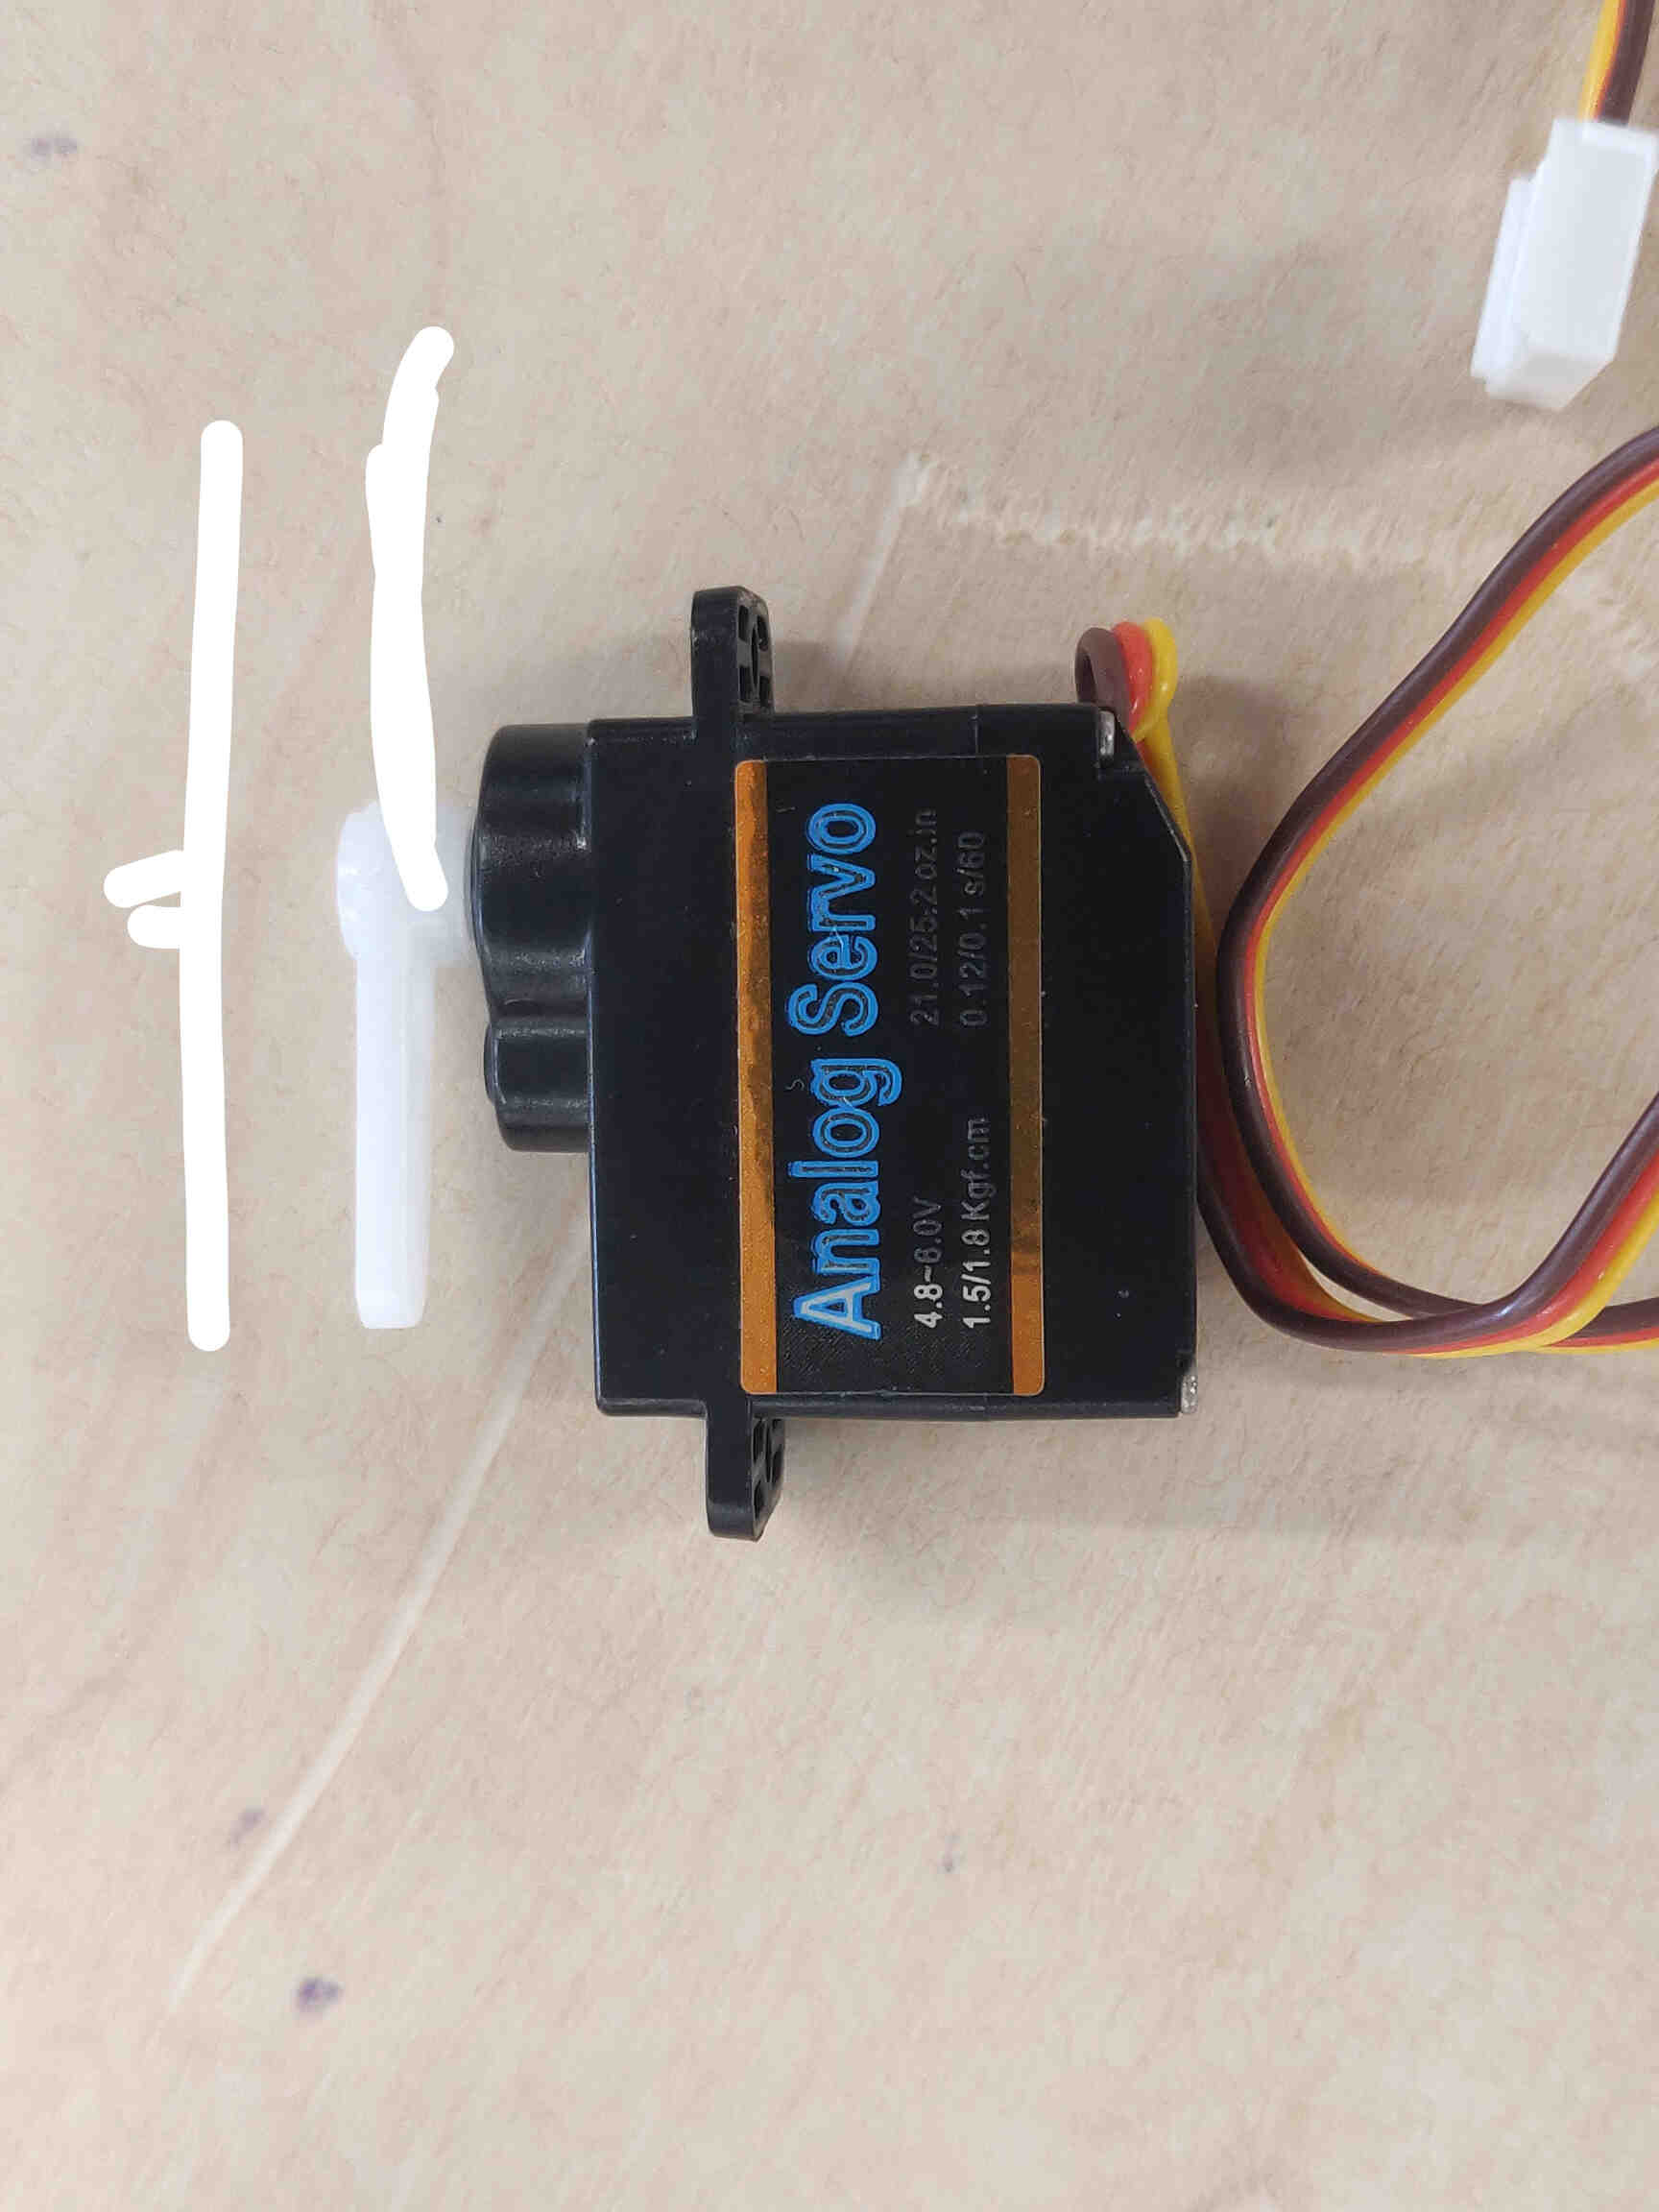
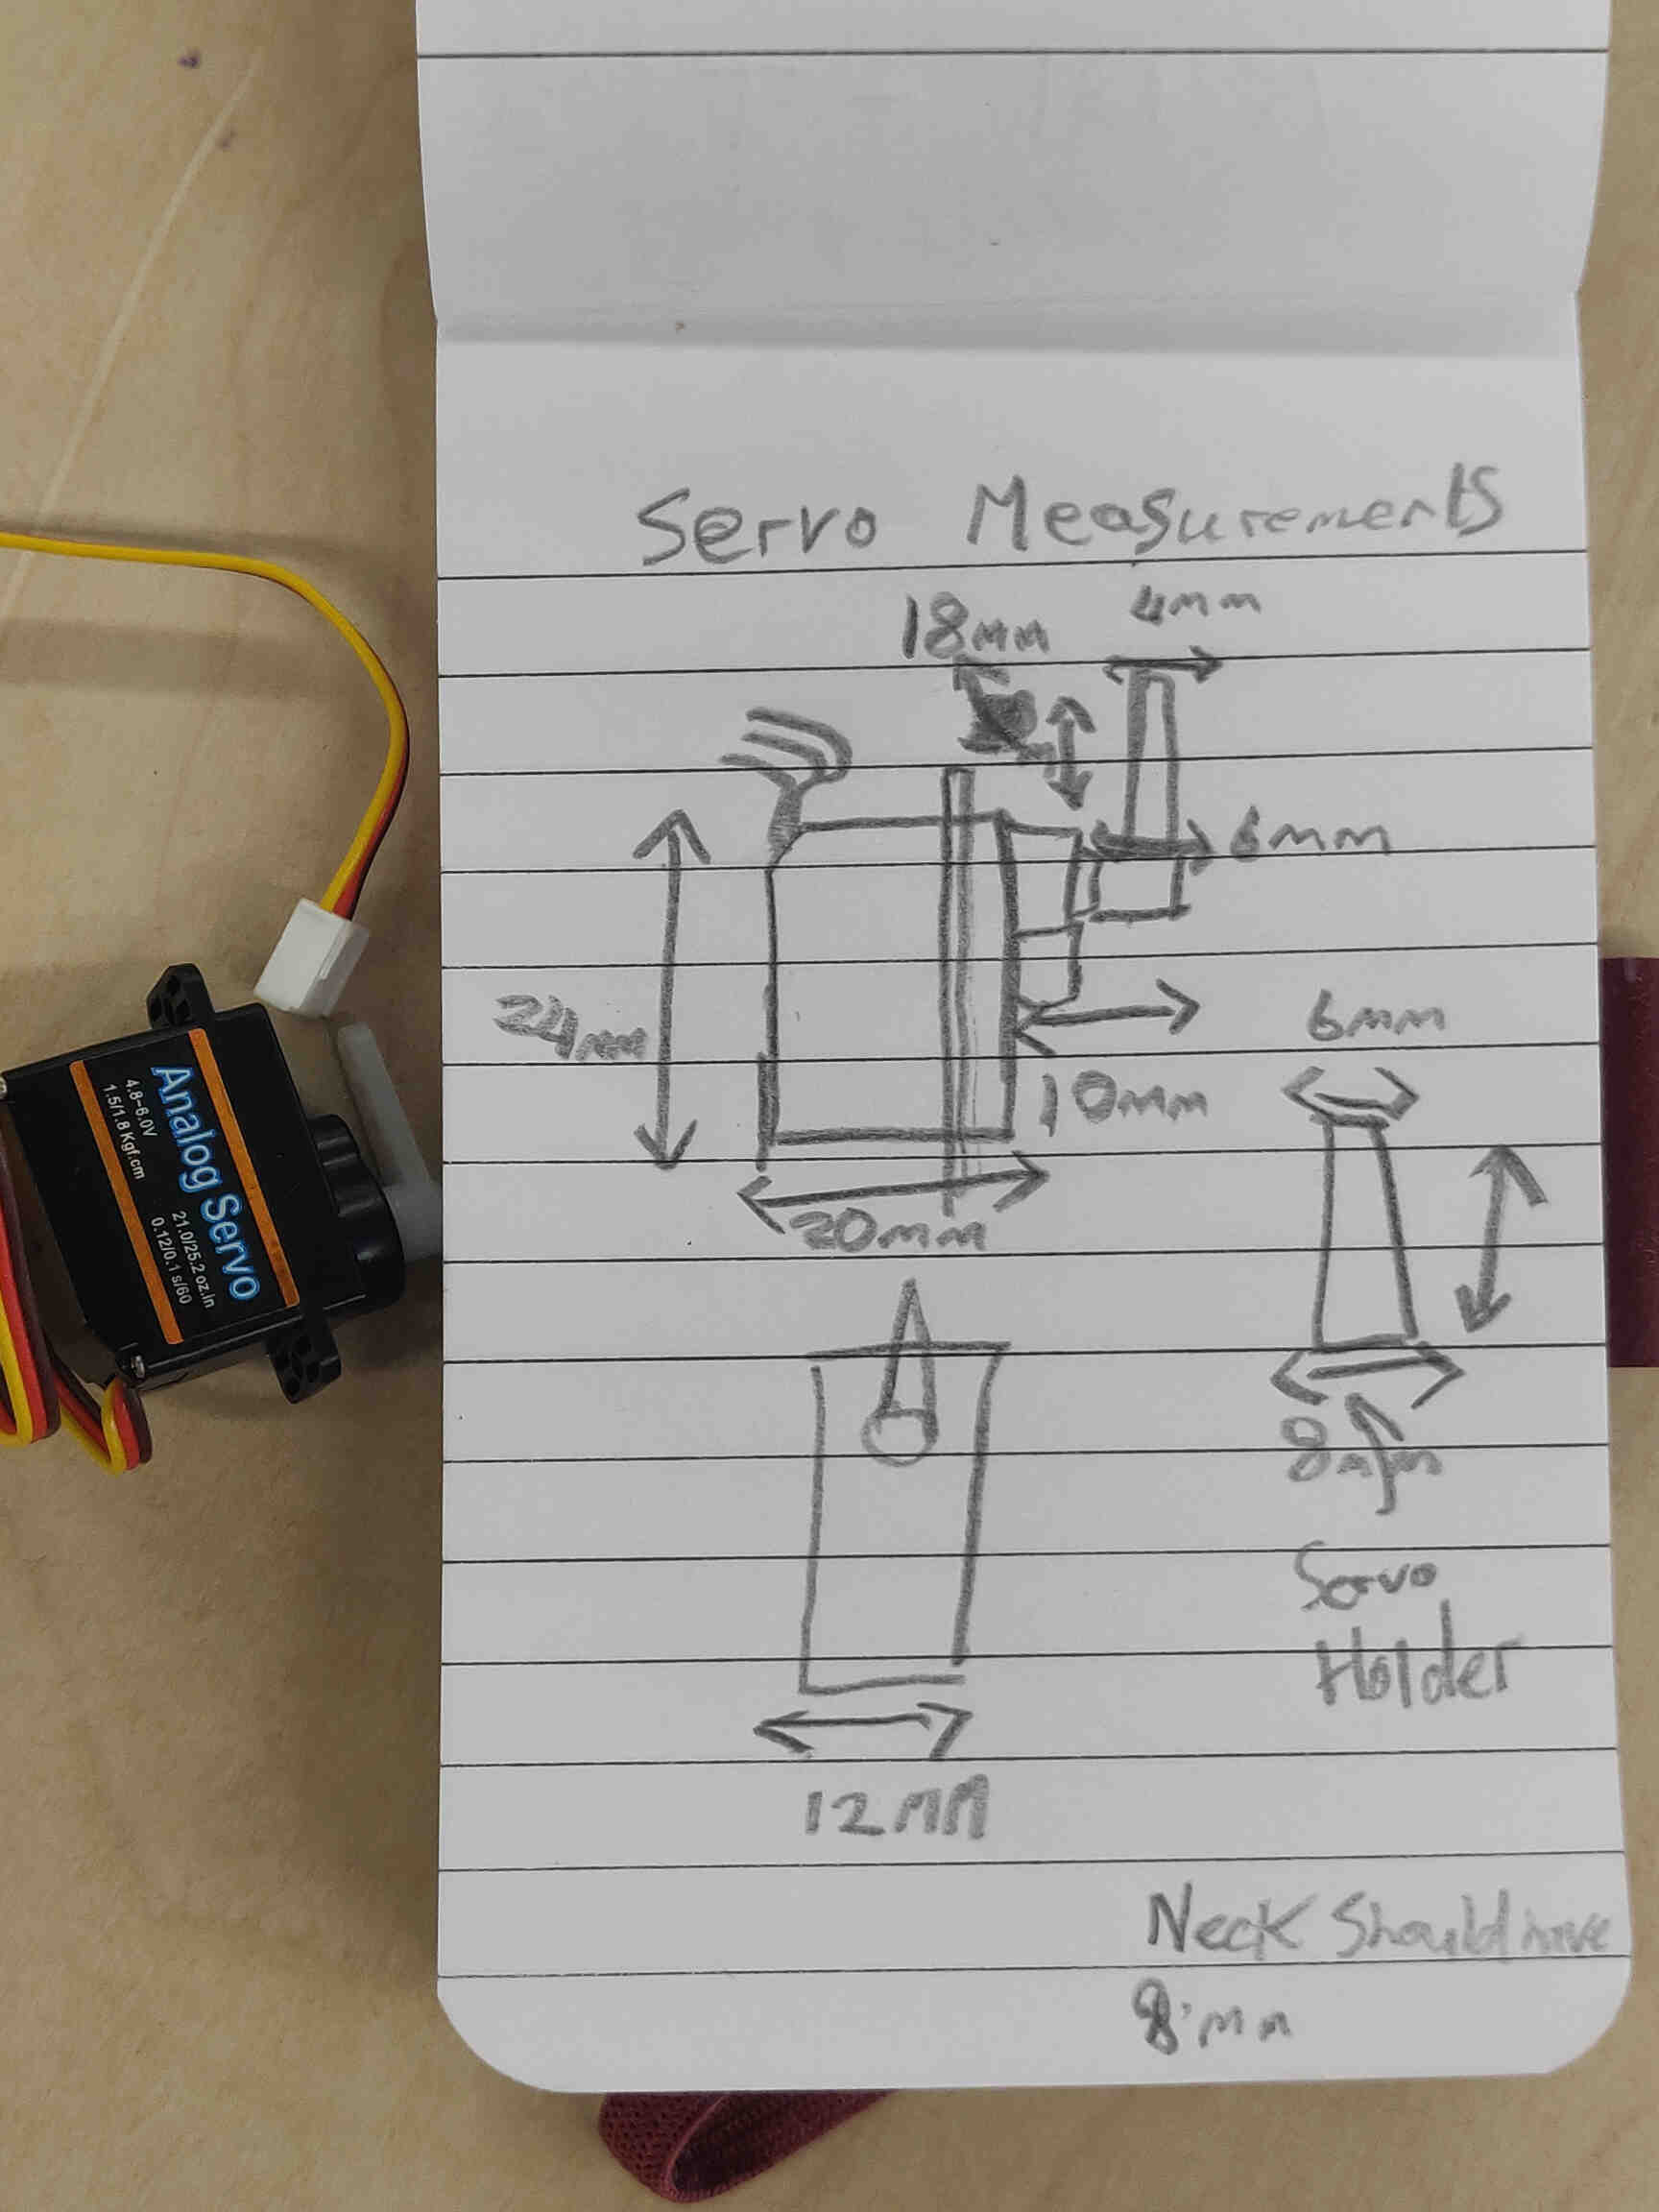
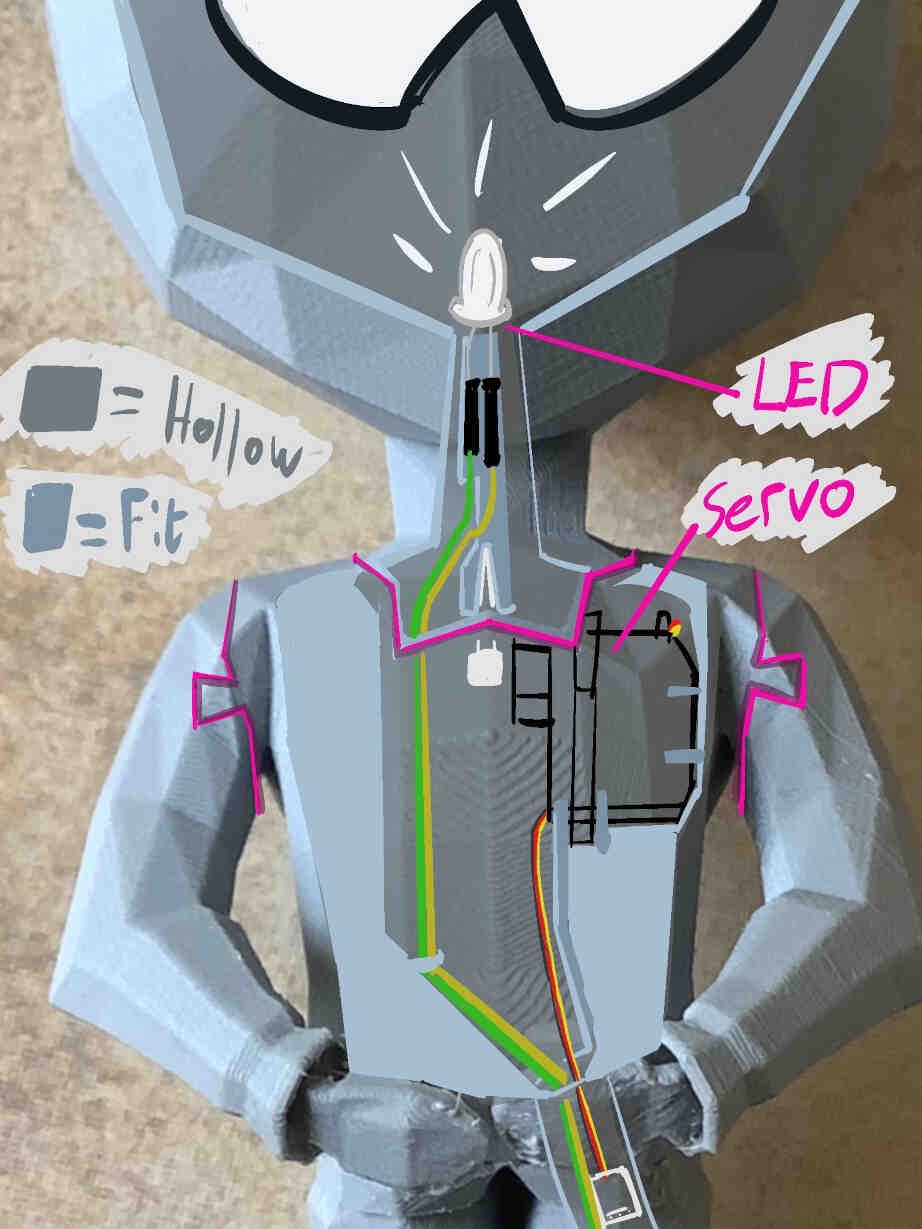
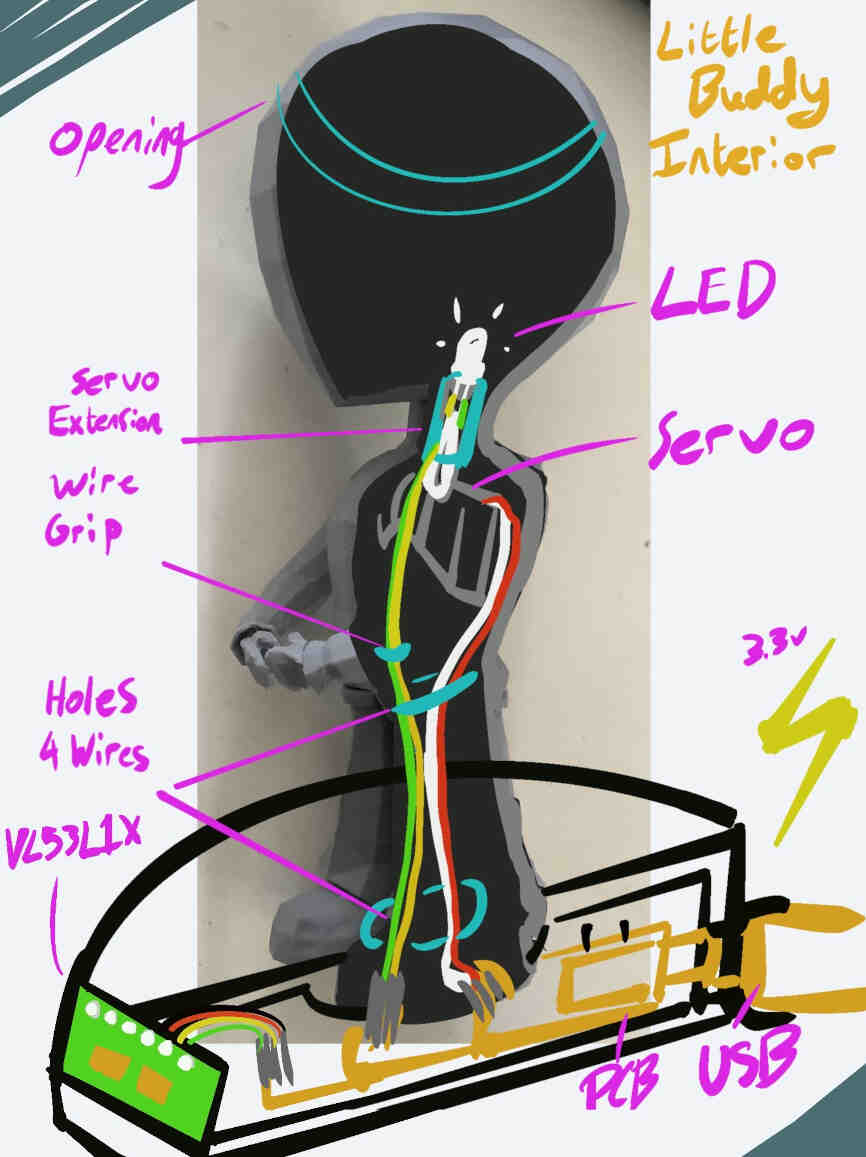
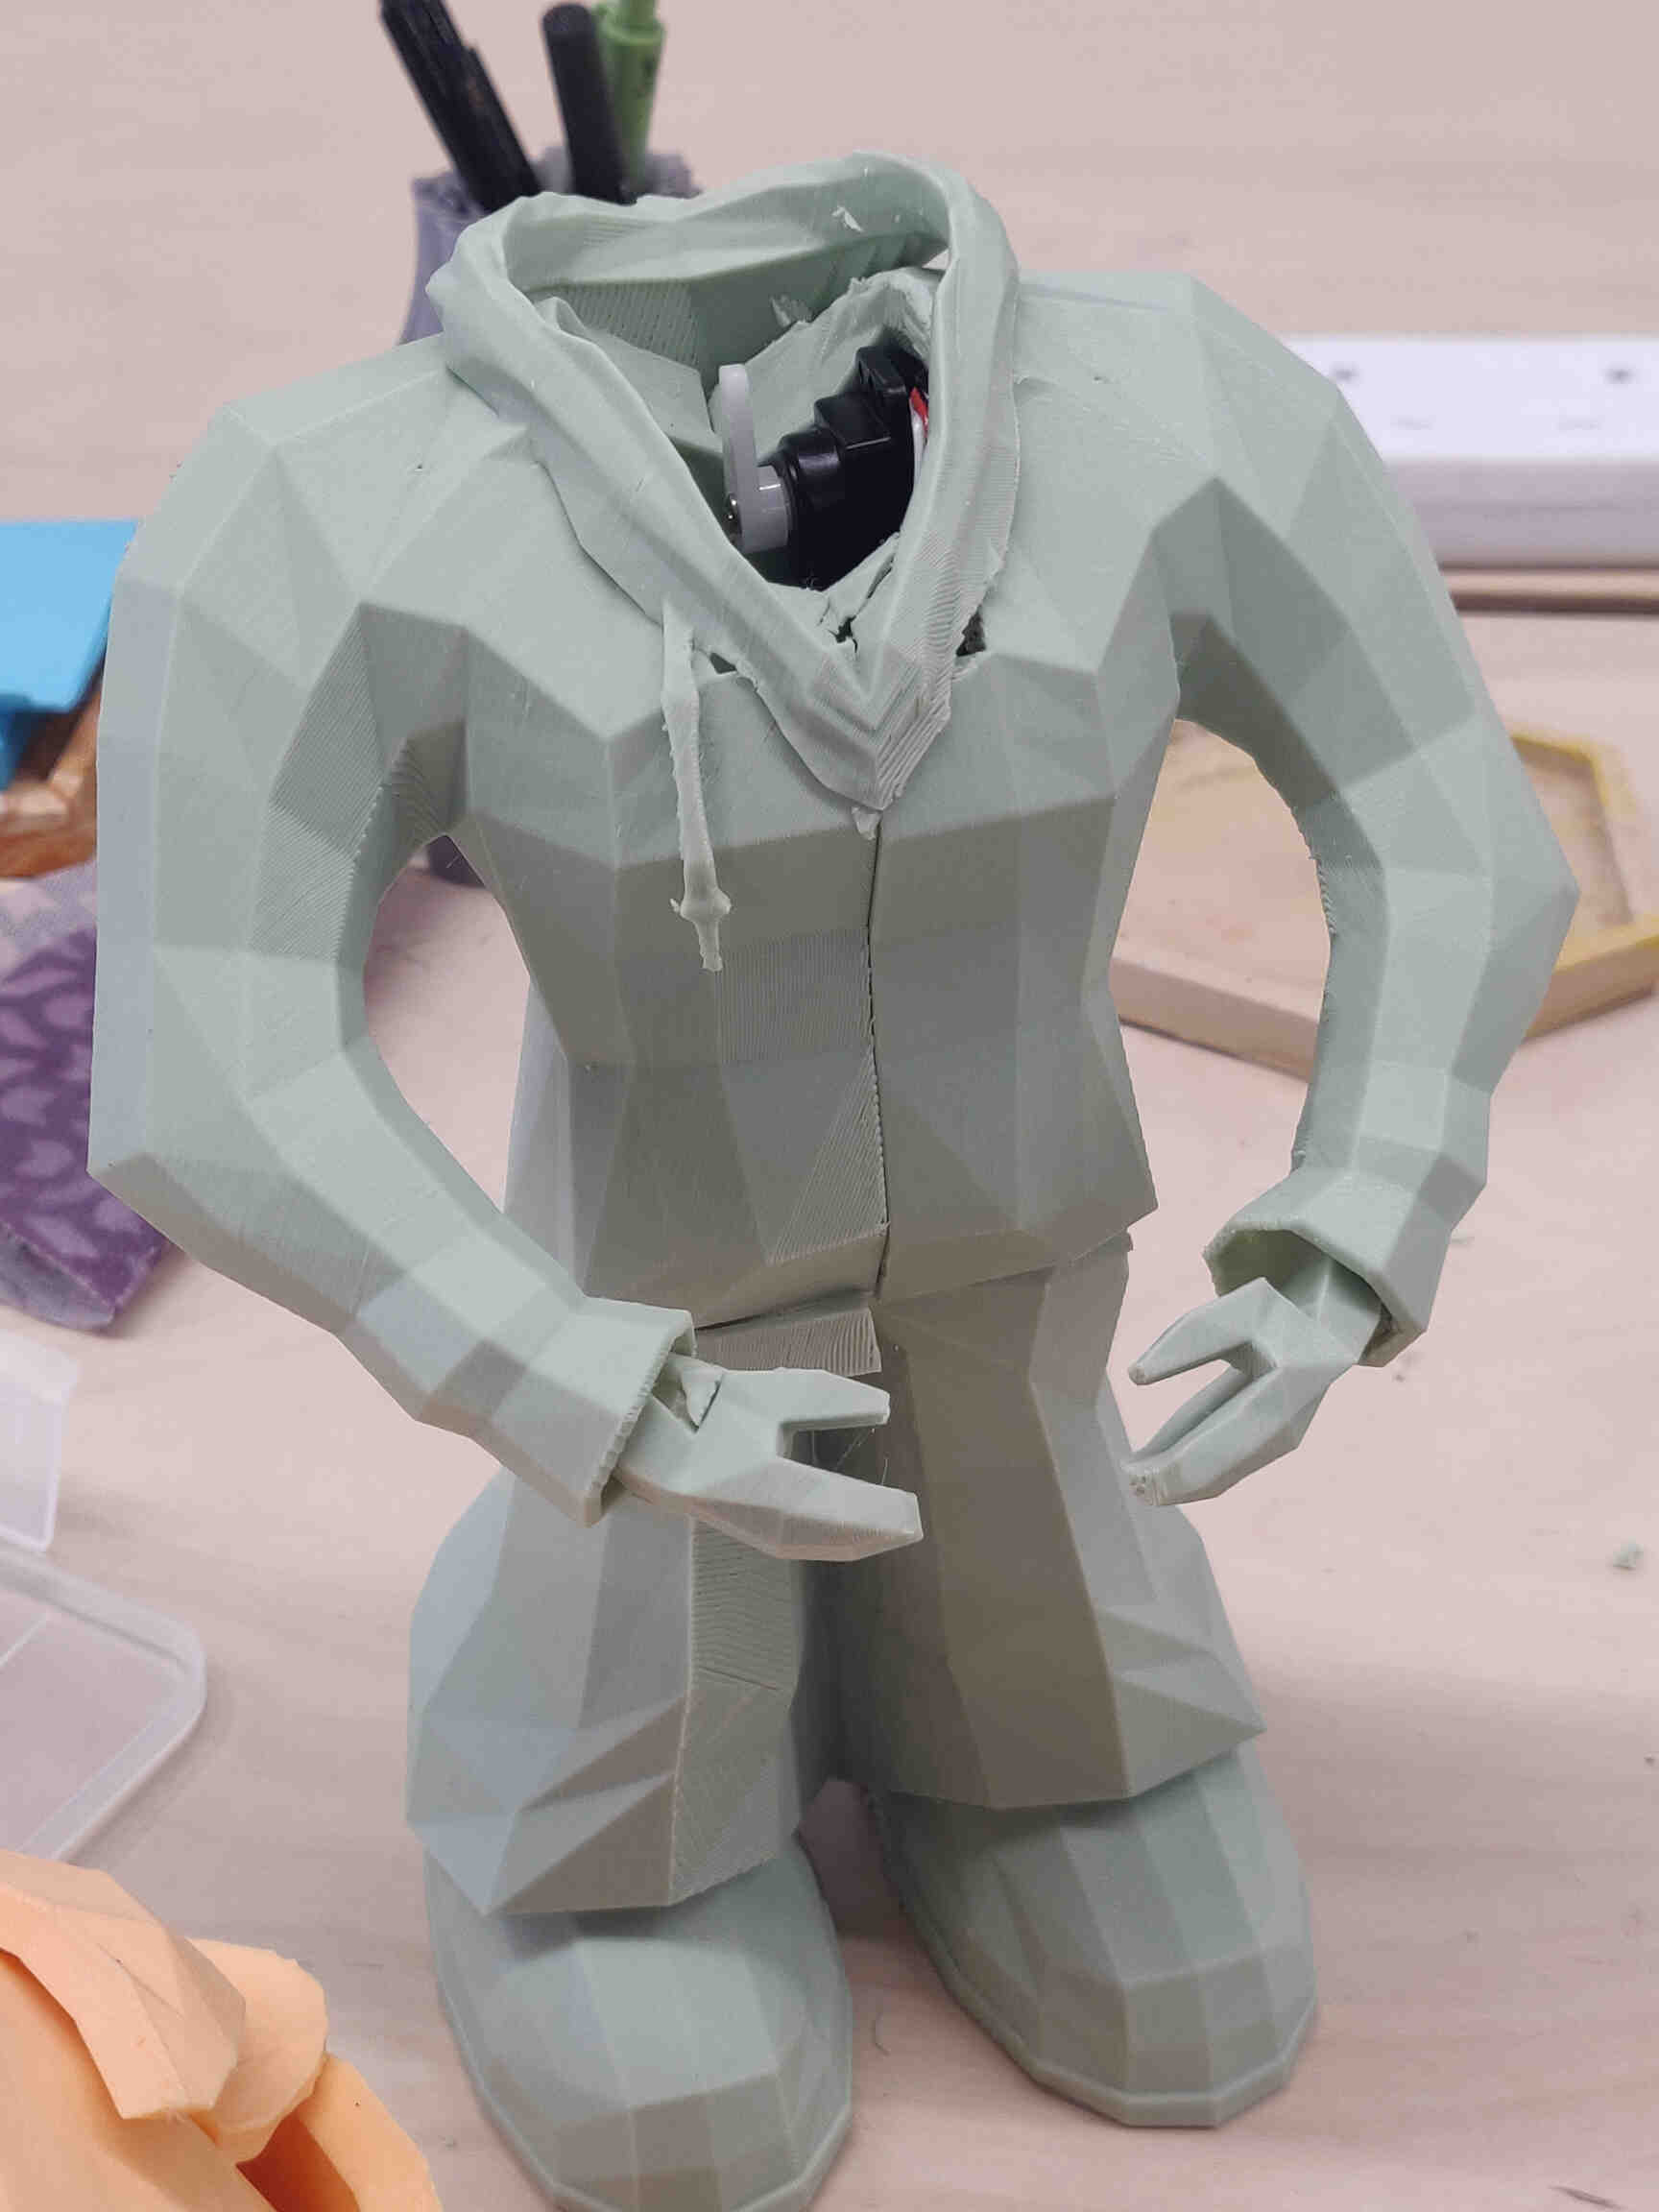
Collected my Body Model pieces in the Fablab. Removed supports and assembled the pieces together. I spent some time analyzing possible improvements and sanded some areas that had design issues I didn't account for. I was really happy to see the servo motor fit into the insides of the shoulder almost perfectly and can hold the weight of the head - but barely! The servo slot in the neck could be massively improved as it currently wouldn't be able to hold the head upon movement. Thankfully the wire routing is working as intended, however an unintentional wall was built inside the leg that I needed to drill through. I intended on fixing what causes this.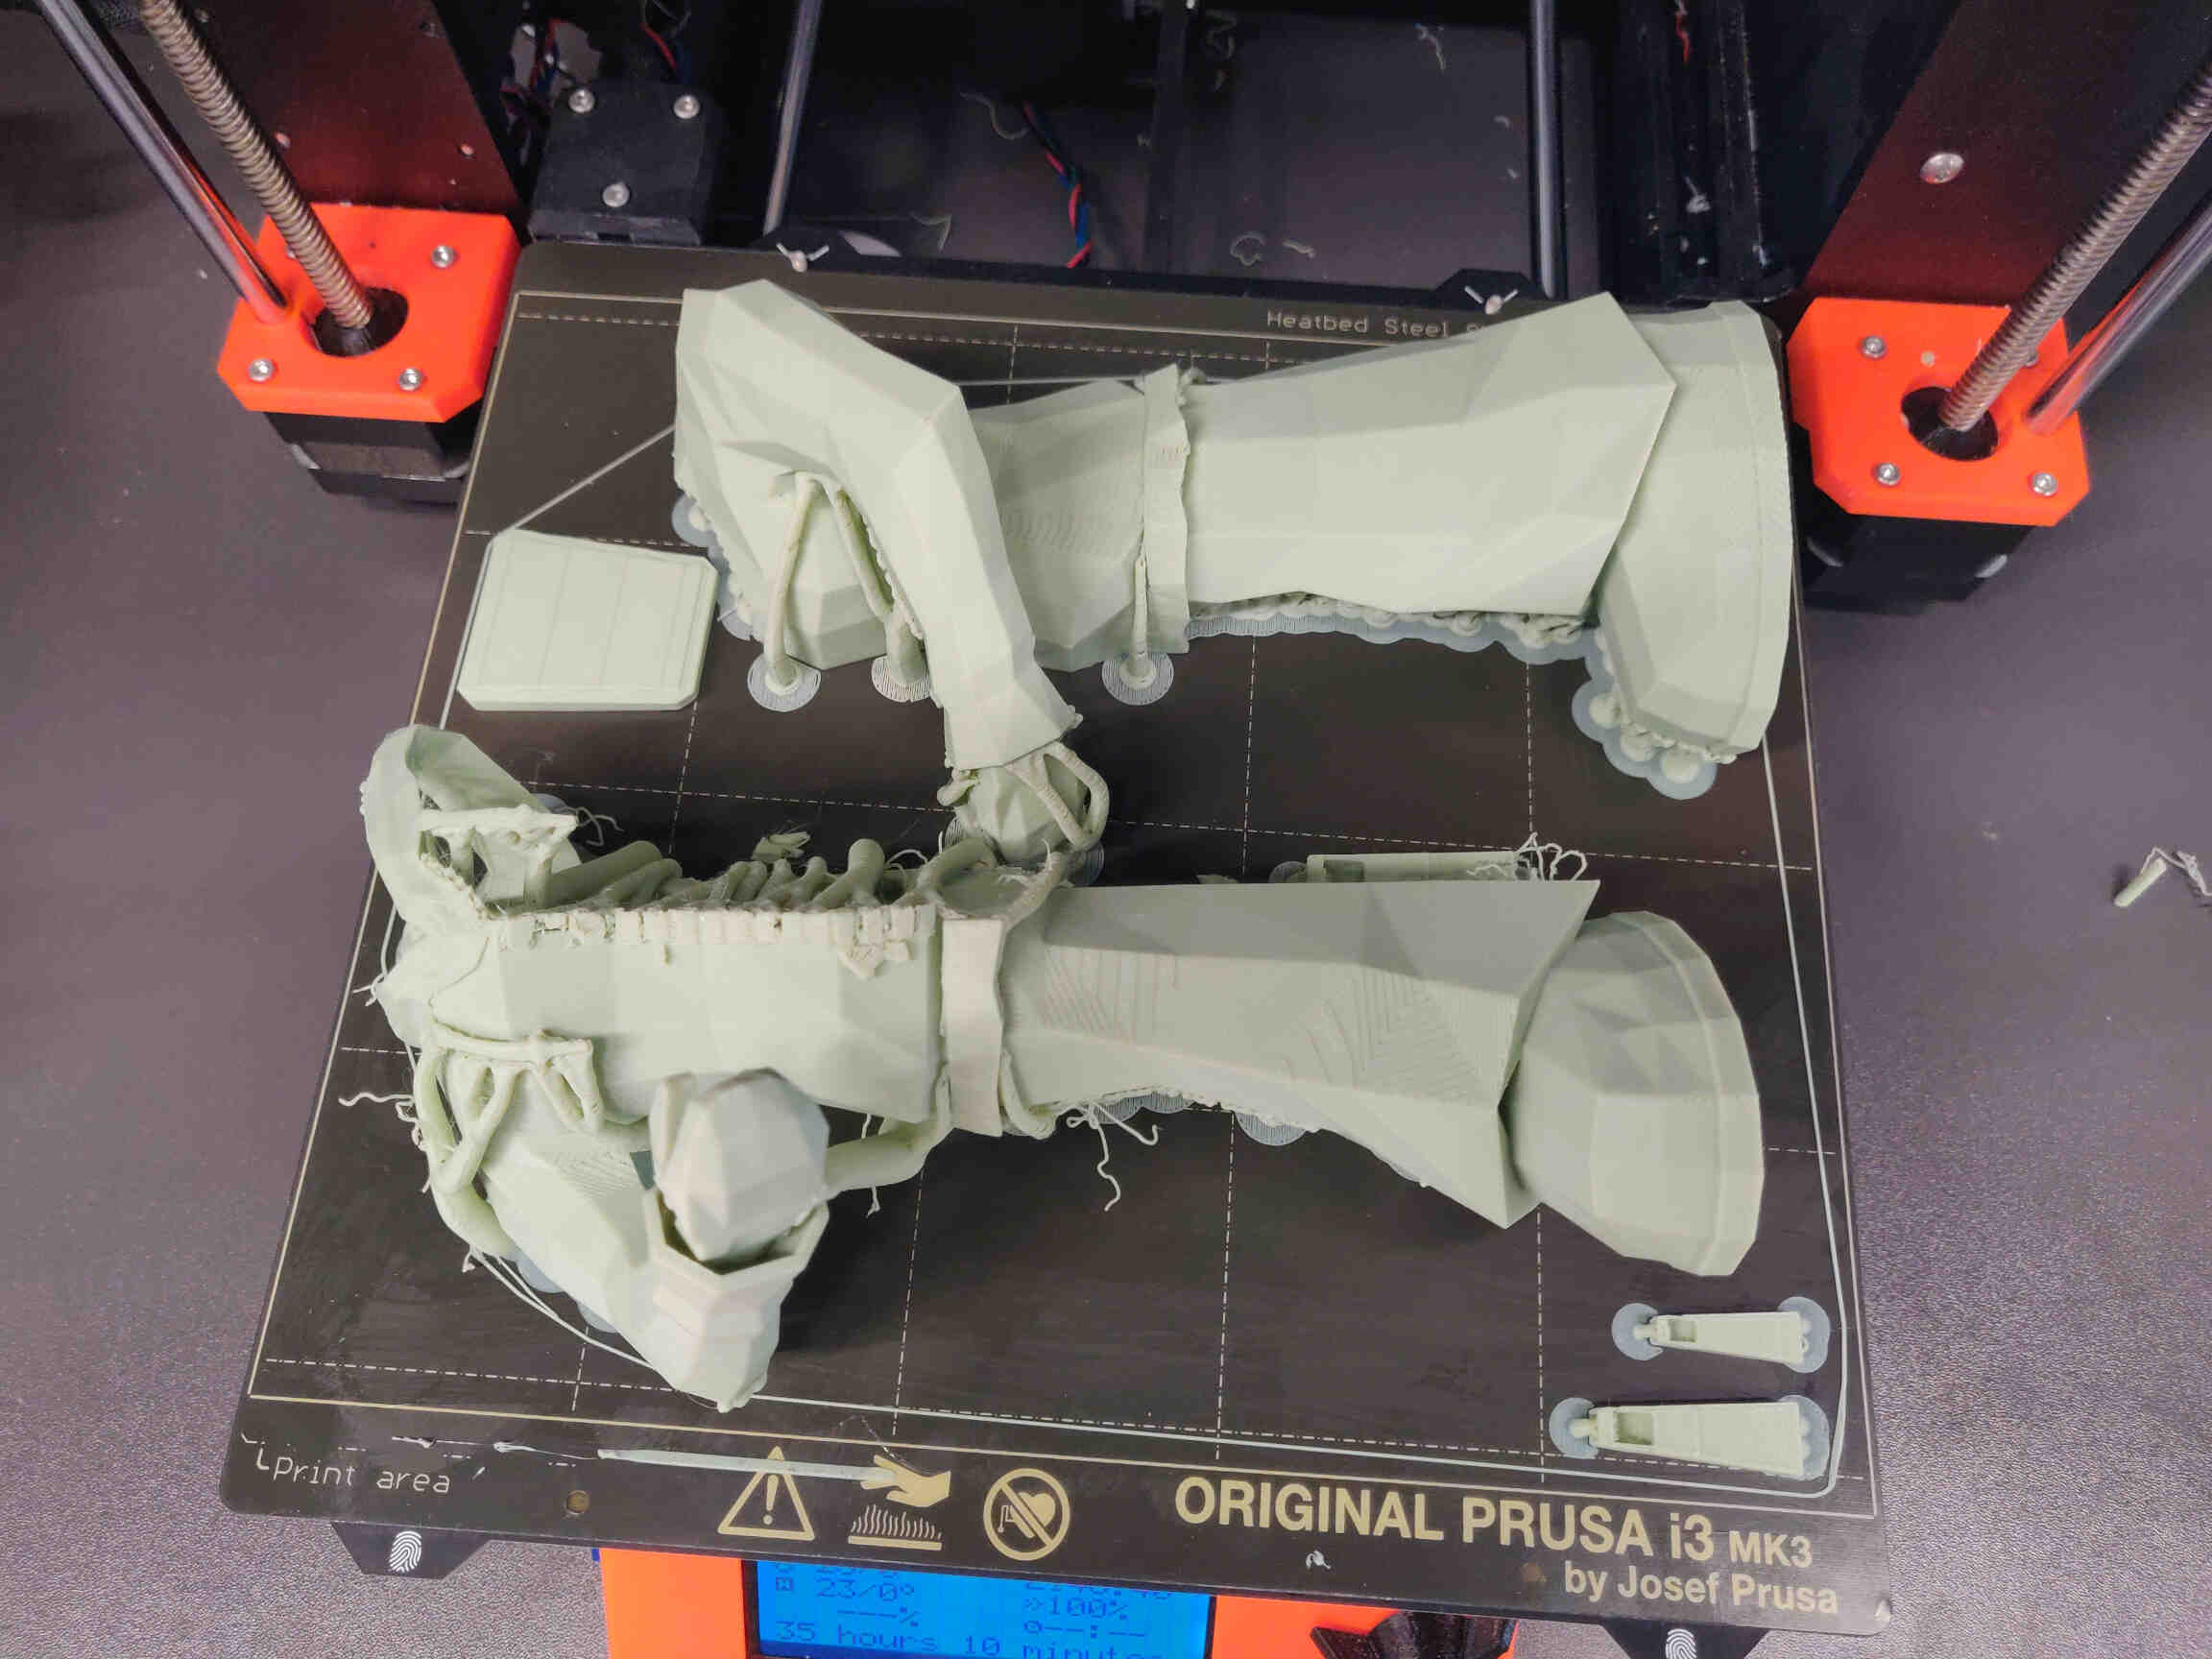
Afterwards was my final Wednesday meeting where we got our final guide from Neil and a look at everyone's final projects. The Final Stretch Begins!!
Thursday 30th
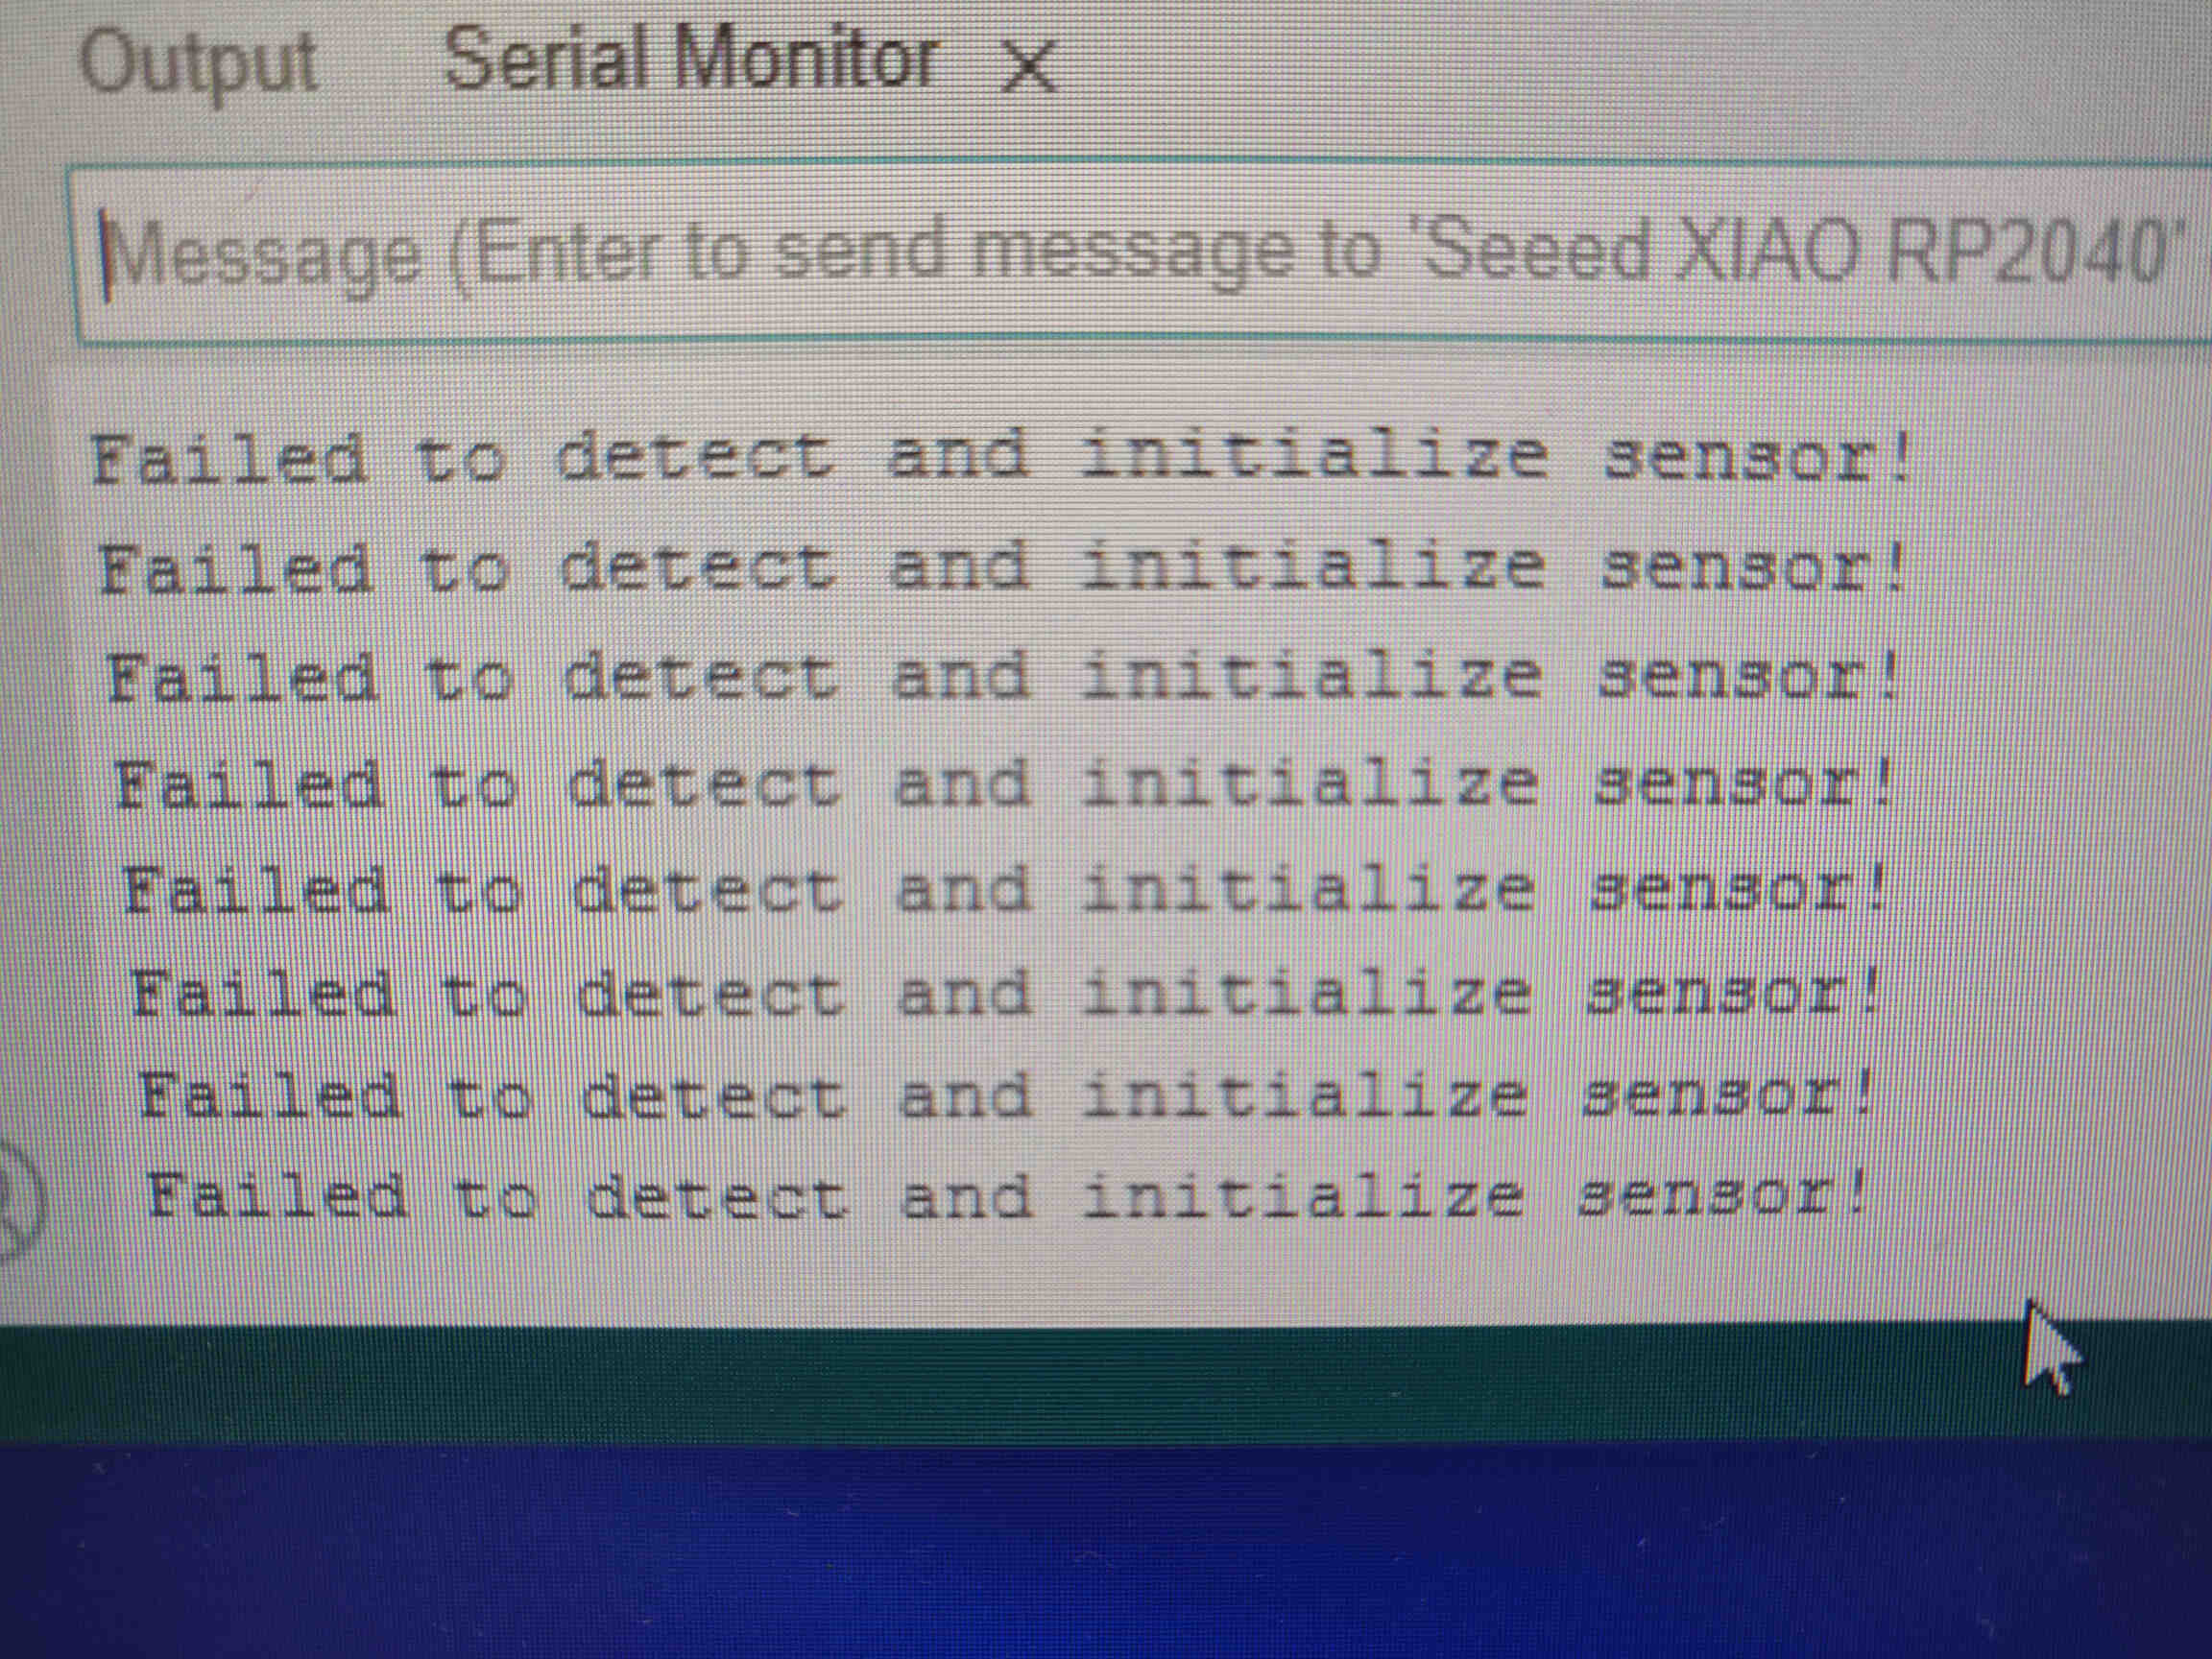
I spent all of my morning trying to fix the “Failed to Detect Sensor” issue from my VL53L1X ToF Sensor. After hours of debugging (swapping wires, pinpoints, components, changing code, trying on different computers, etc) I made the decision to follow Rico and Adrian's advice to use another sensor. I have to ultimately make sure the project WORKS for both the Video & Presentation. So after some investigation with instructors, I decided to use a Hall Effect sensor, which I found a couple of in the lab.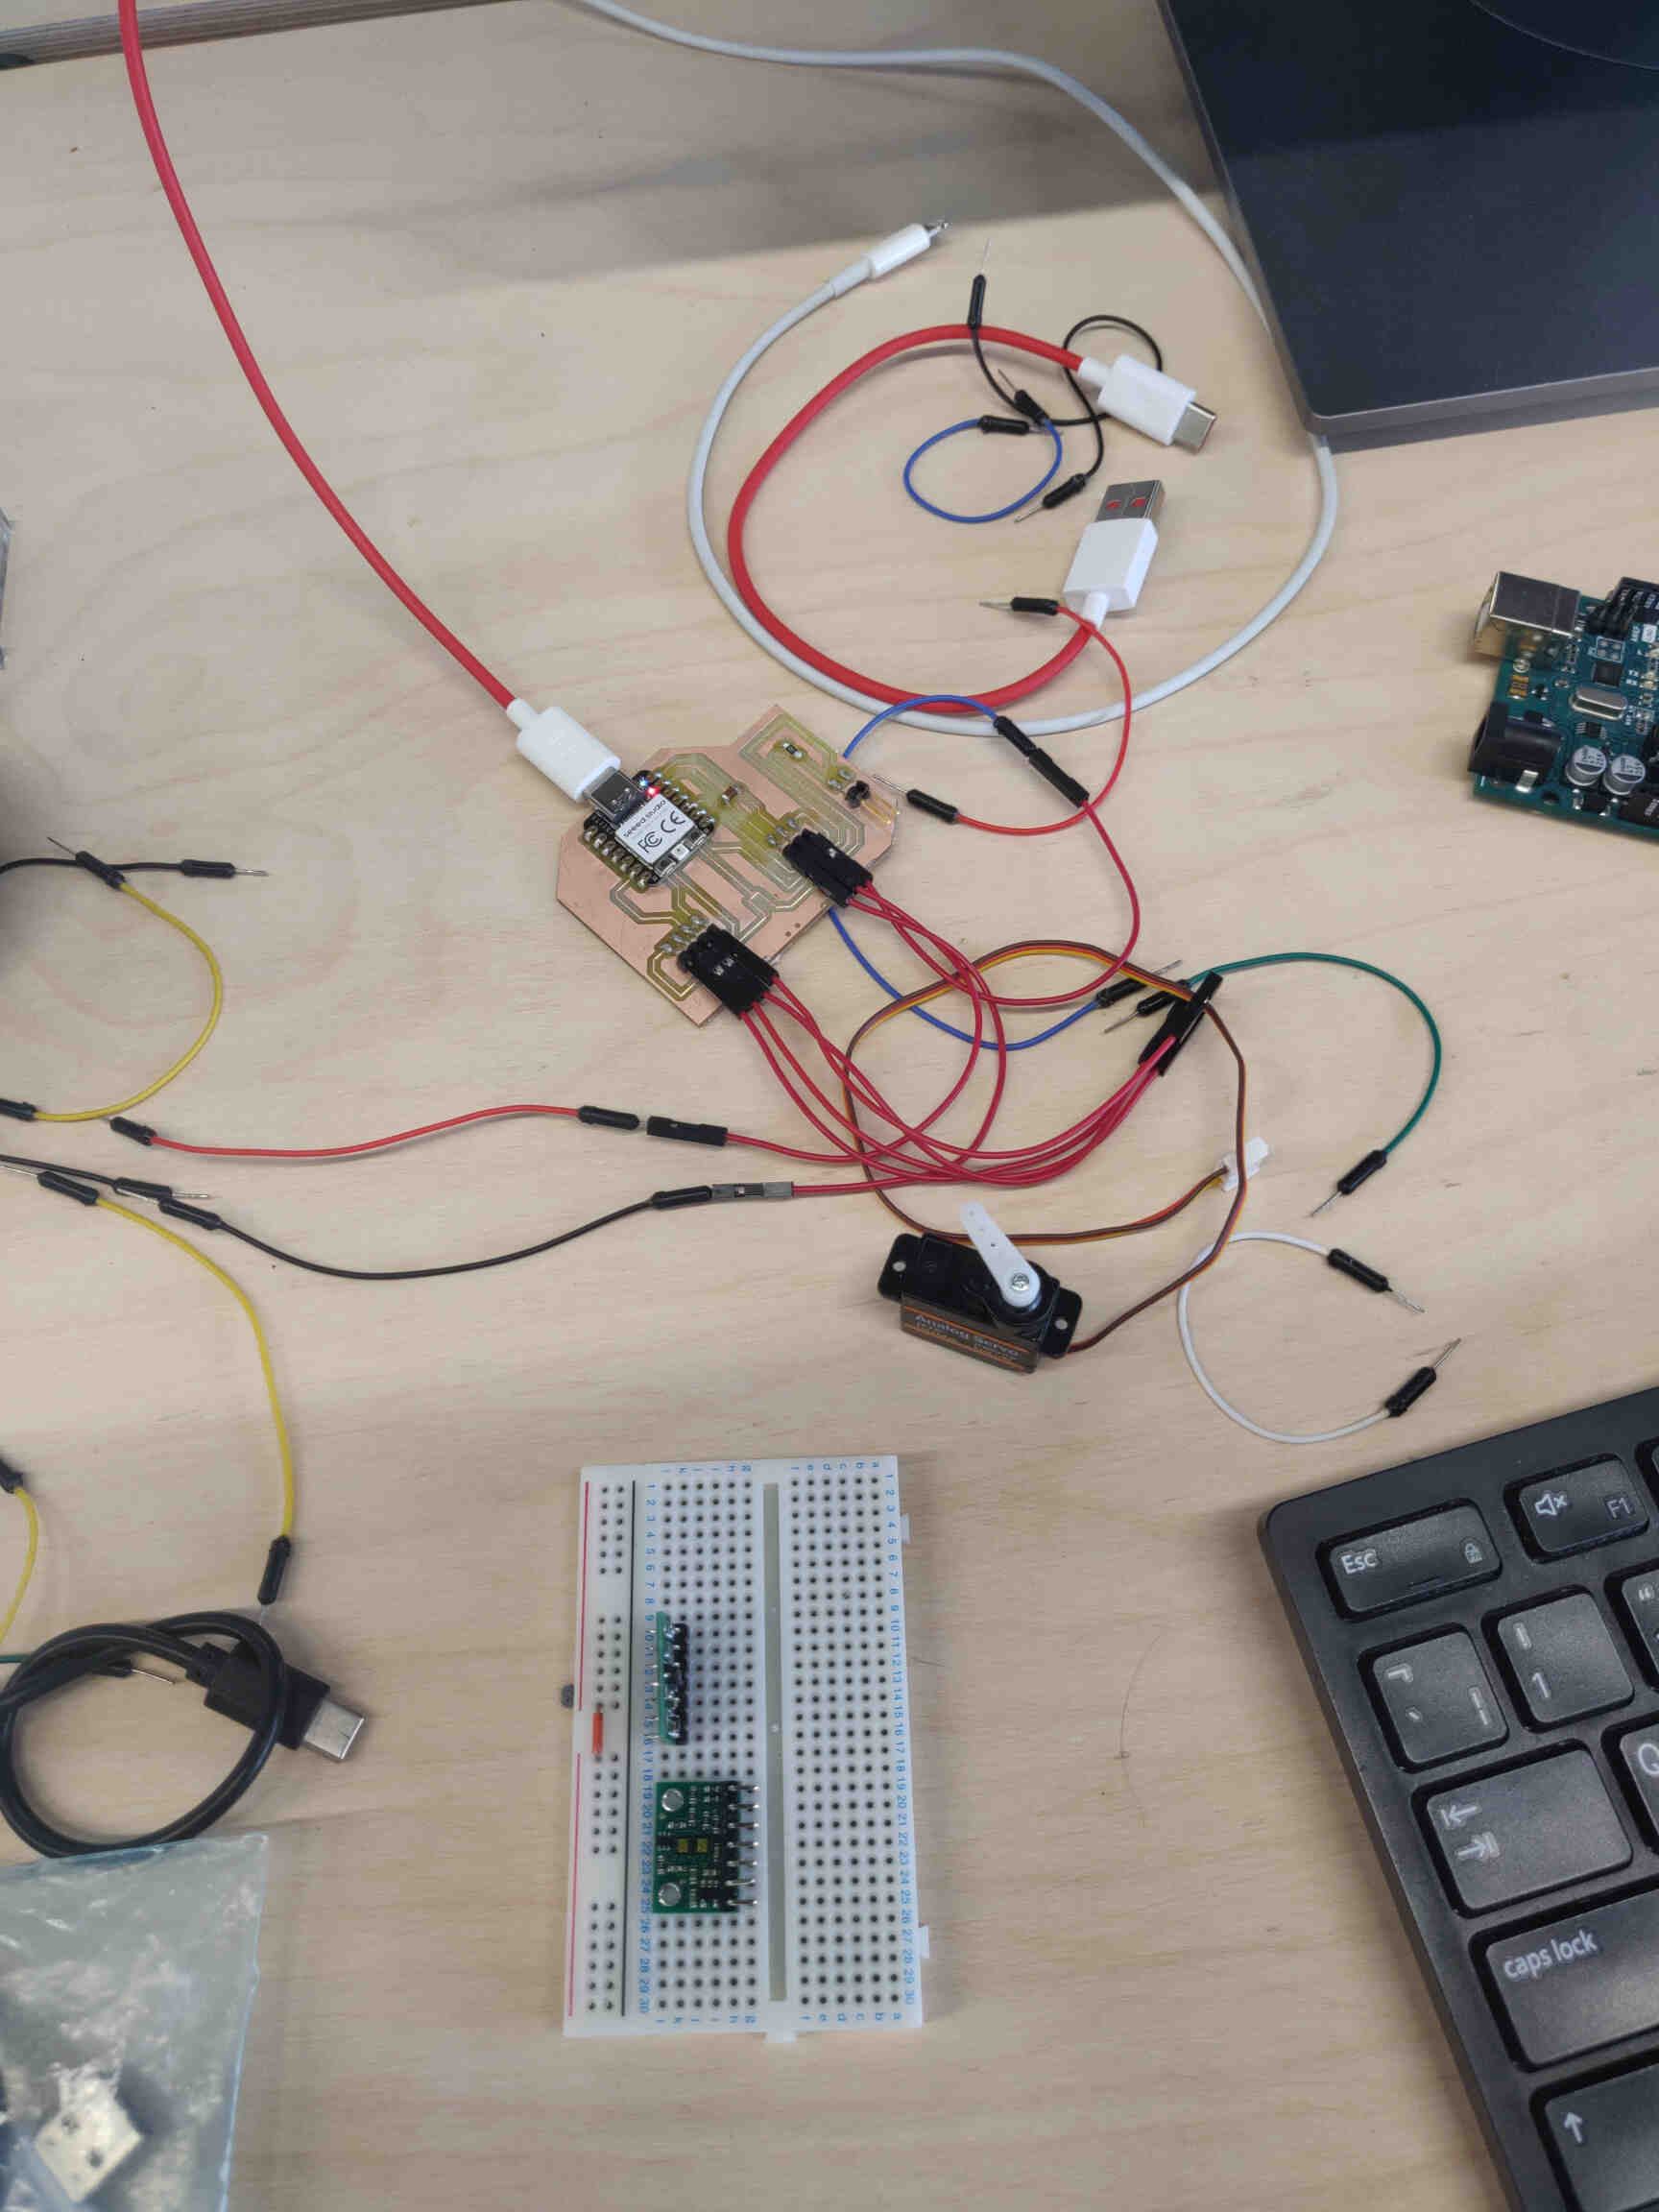
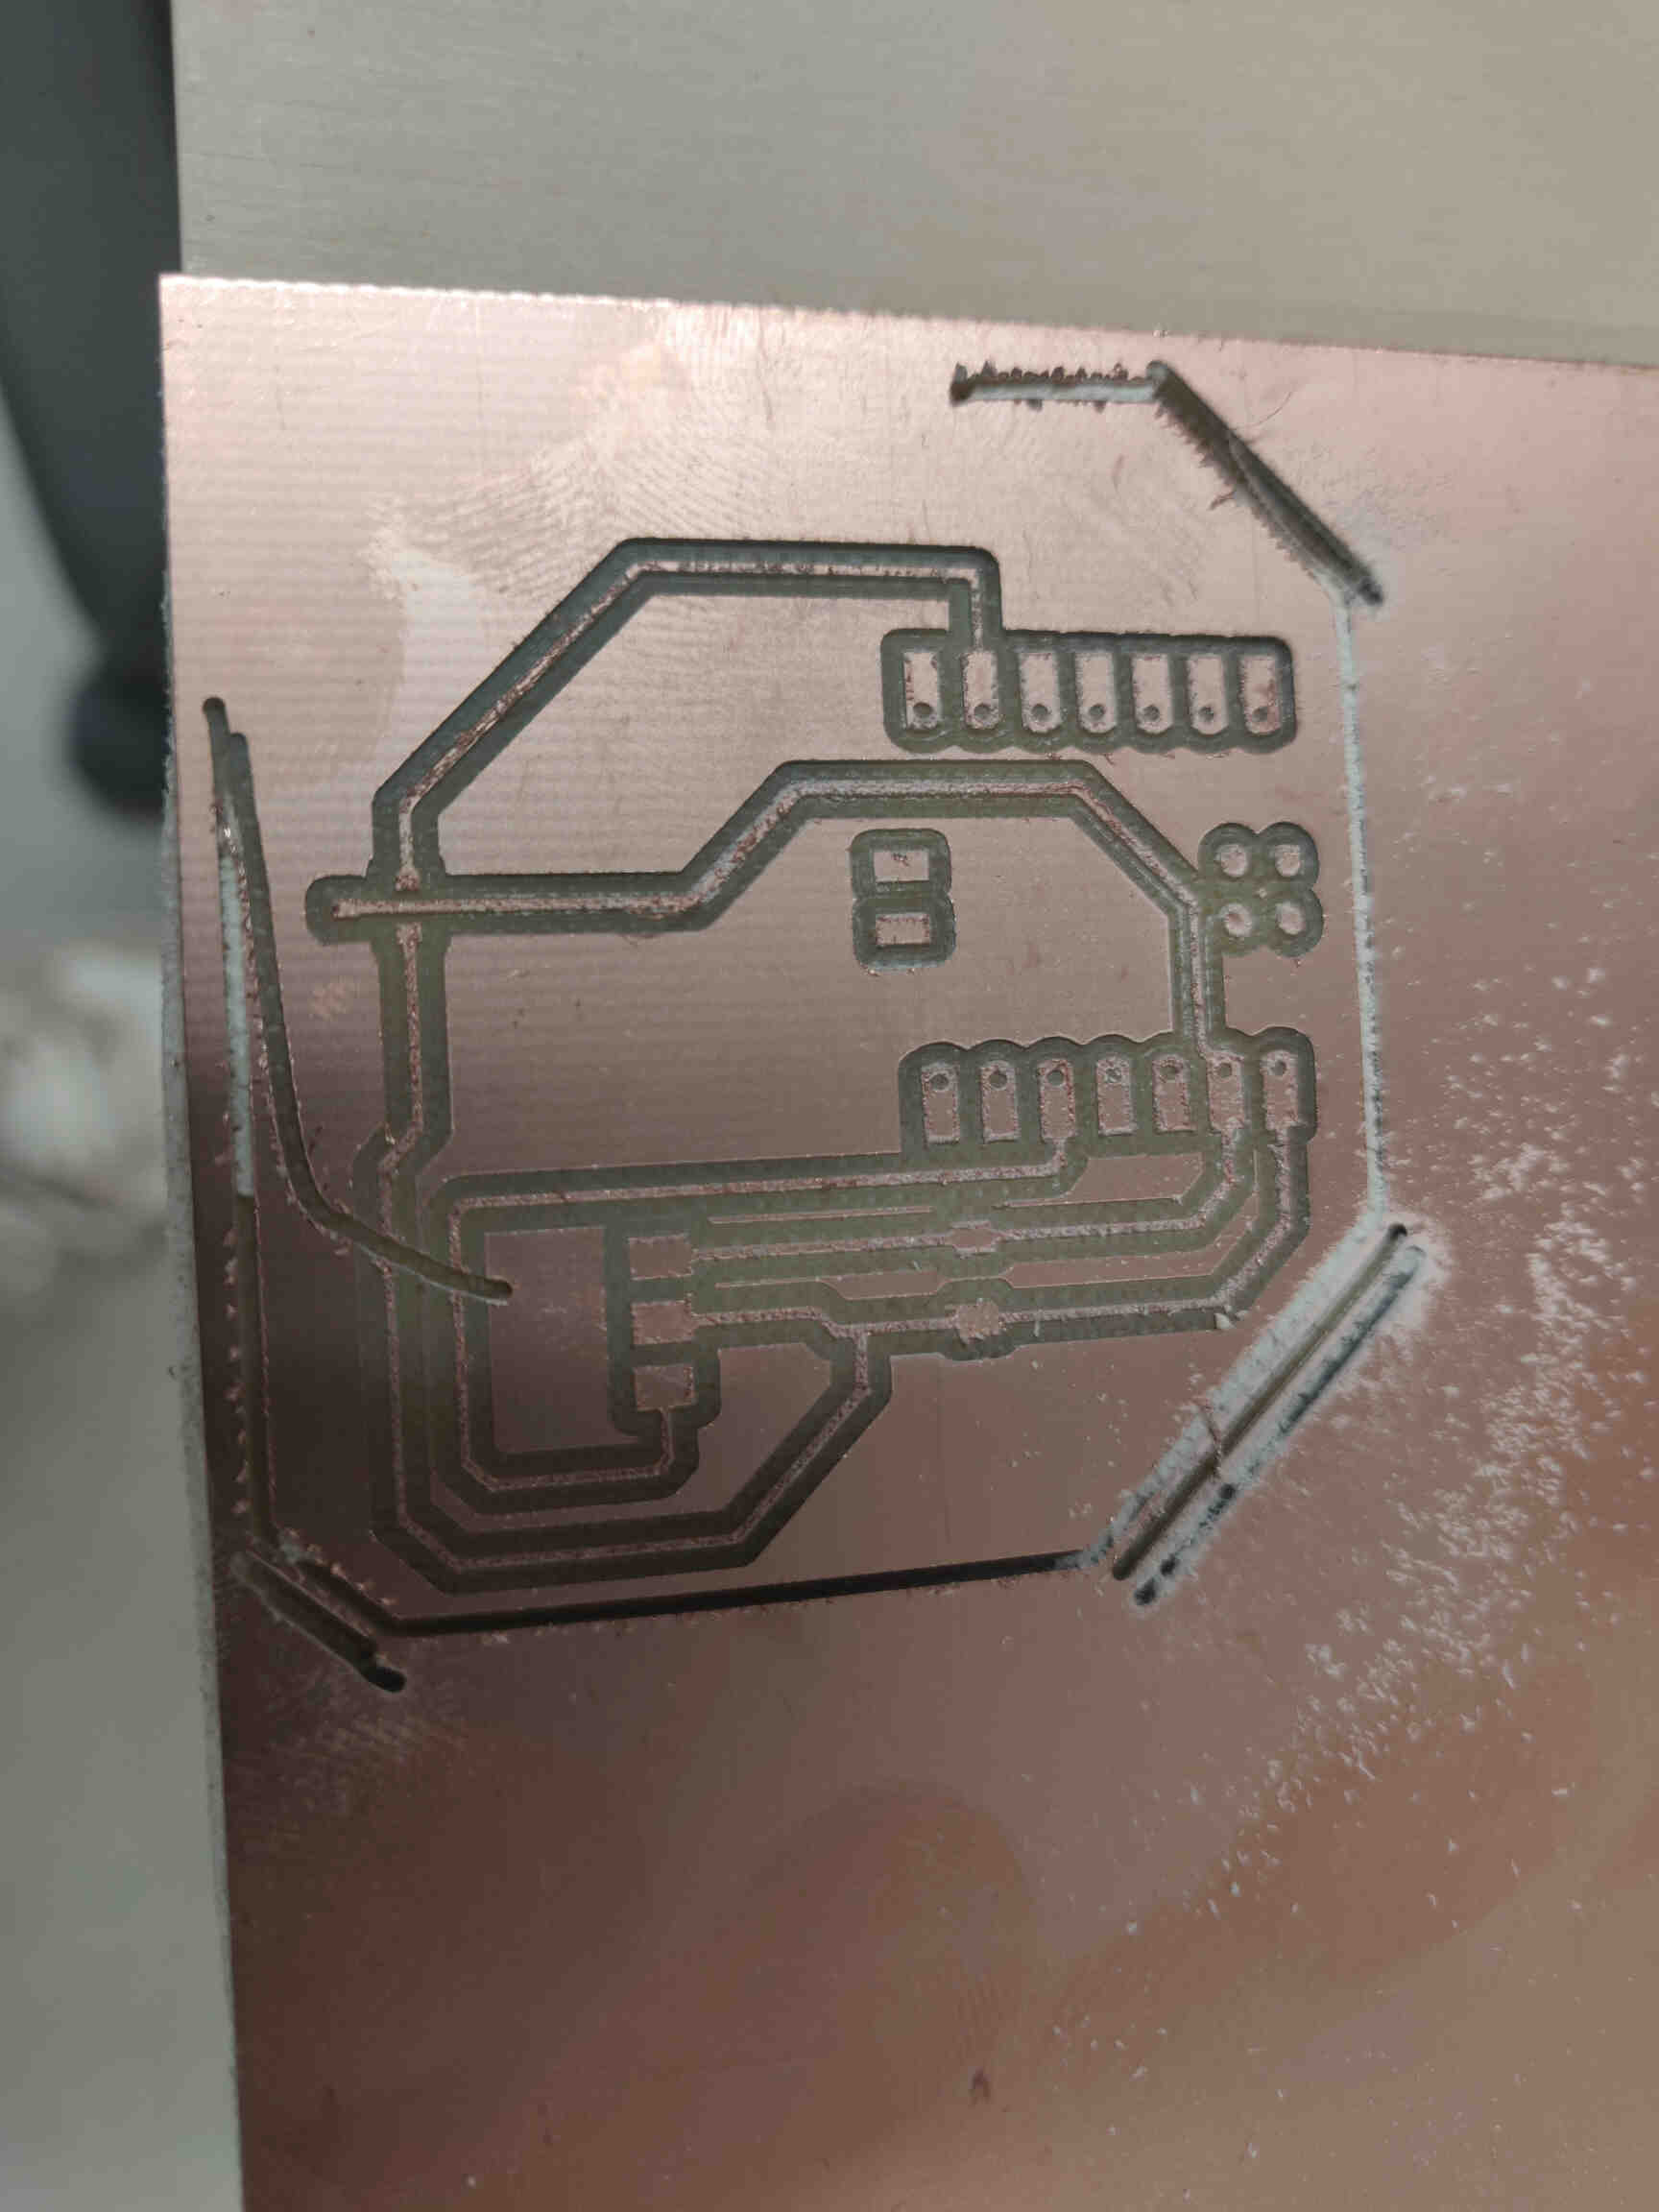
There was an issue with this however. The only Hall Effect components I found were Surface Mount, so I needed to design and mill a new PCB, which I got to immediately. I designed the new board in KiCAD and brought my files into Modsproject.org where I made their toolpath files. I used the Roland SRM-20 to mill a new board but due to complications it was destroyed.
The copper plate needed replacing, which I did but in my haste I picked a double sided sellotape that was too weak for this process, so during the Outline Cut the mill dragged the copper plate along the base and cut through the traces. The Fablab was 15 minutes away from closing so I had to leave in defeat. Yet, I organized with the instructors that I could open up the Fablab on Saturday to set up my final prints and finish milling & soldering my circuit board.
Friday 31st
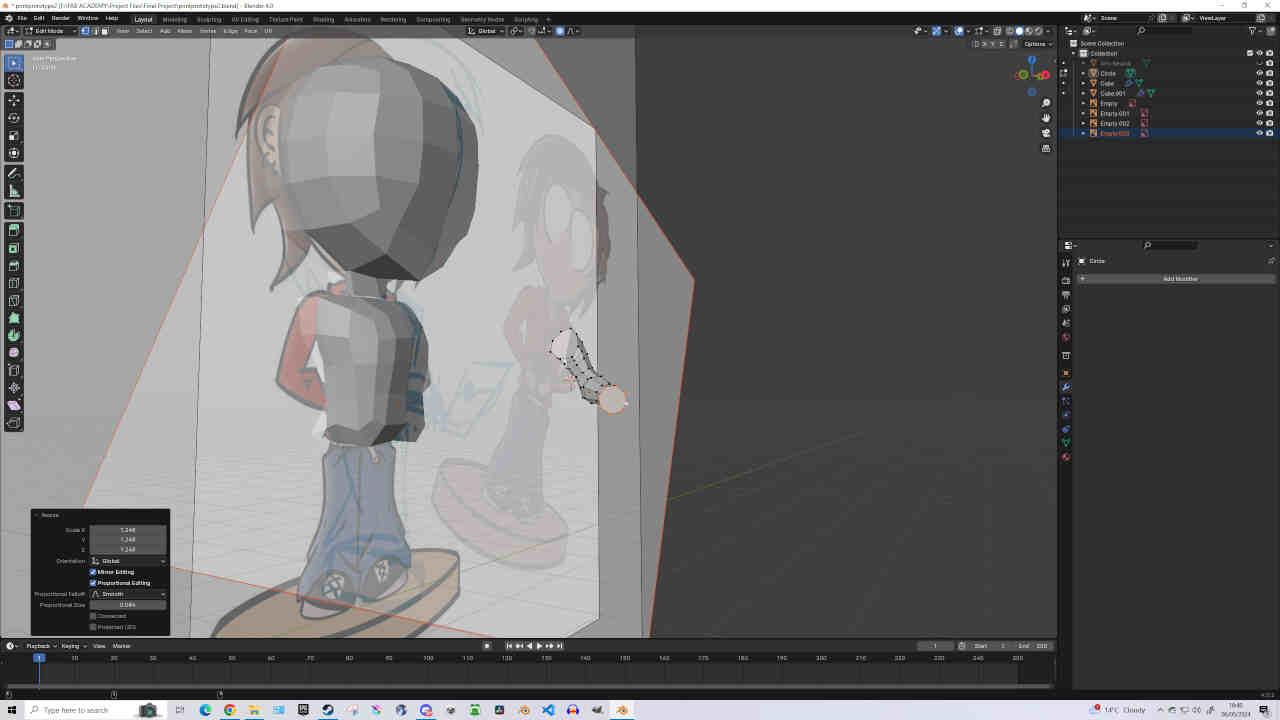
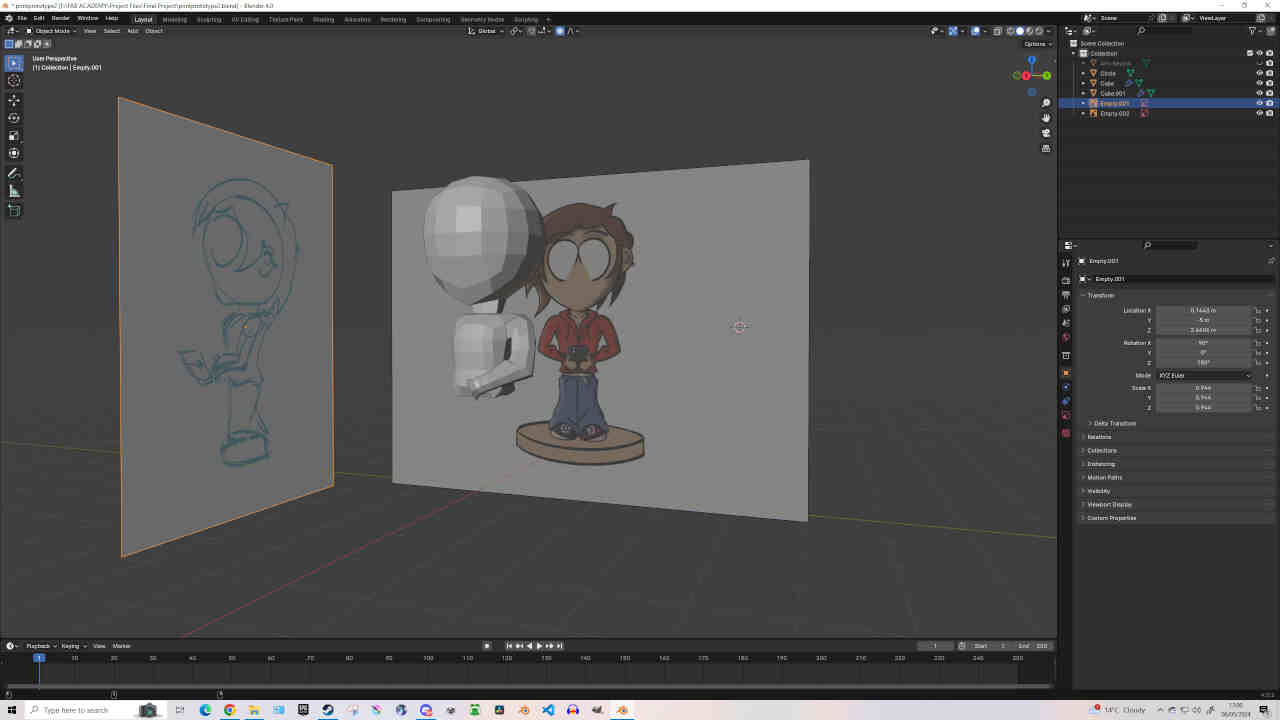
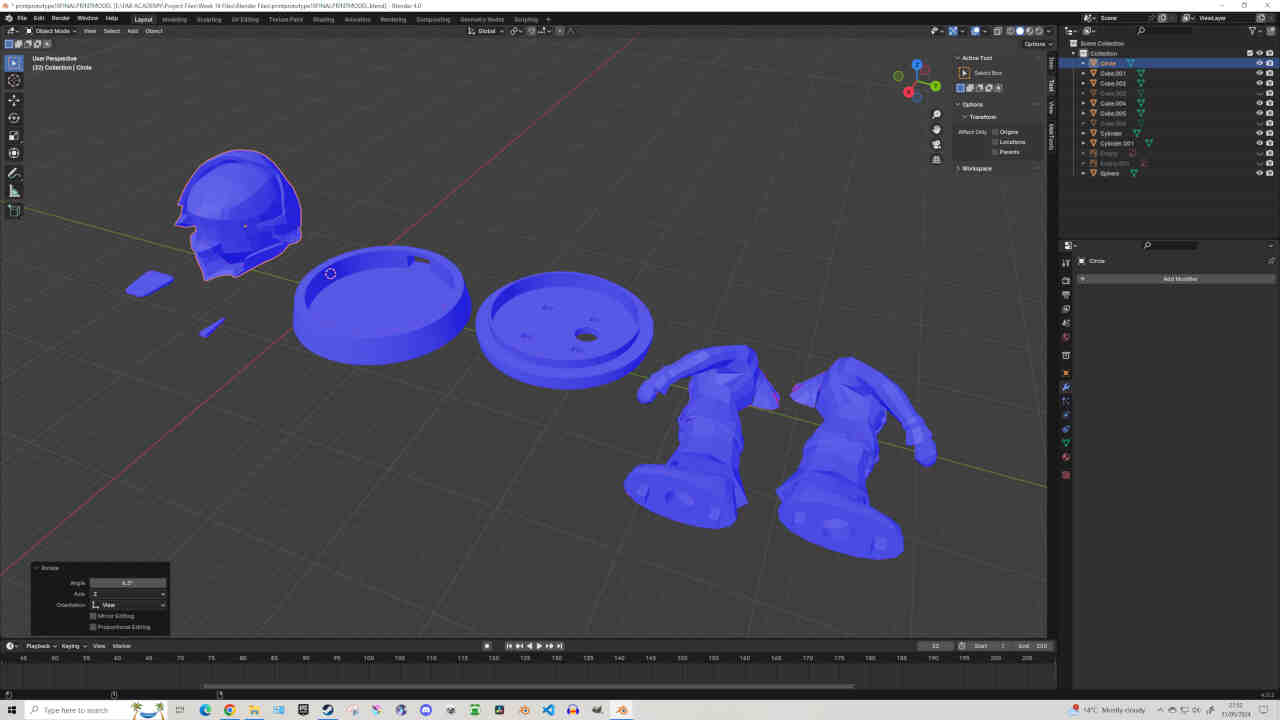
On Friday I dedicated the entire day to updating my “Little Buddy” model in Blender. I was nervous about this day as the deadline approaches, whatever change or mistake I made would be final as I only have enough time for one more print and as I said before, I've found Blender’s measurements to be unreliable - though I've roughly found that the correct measurements end up being 100x the size of Blenders measurements. Going by this idea, I ended up getting the sizes I needed.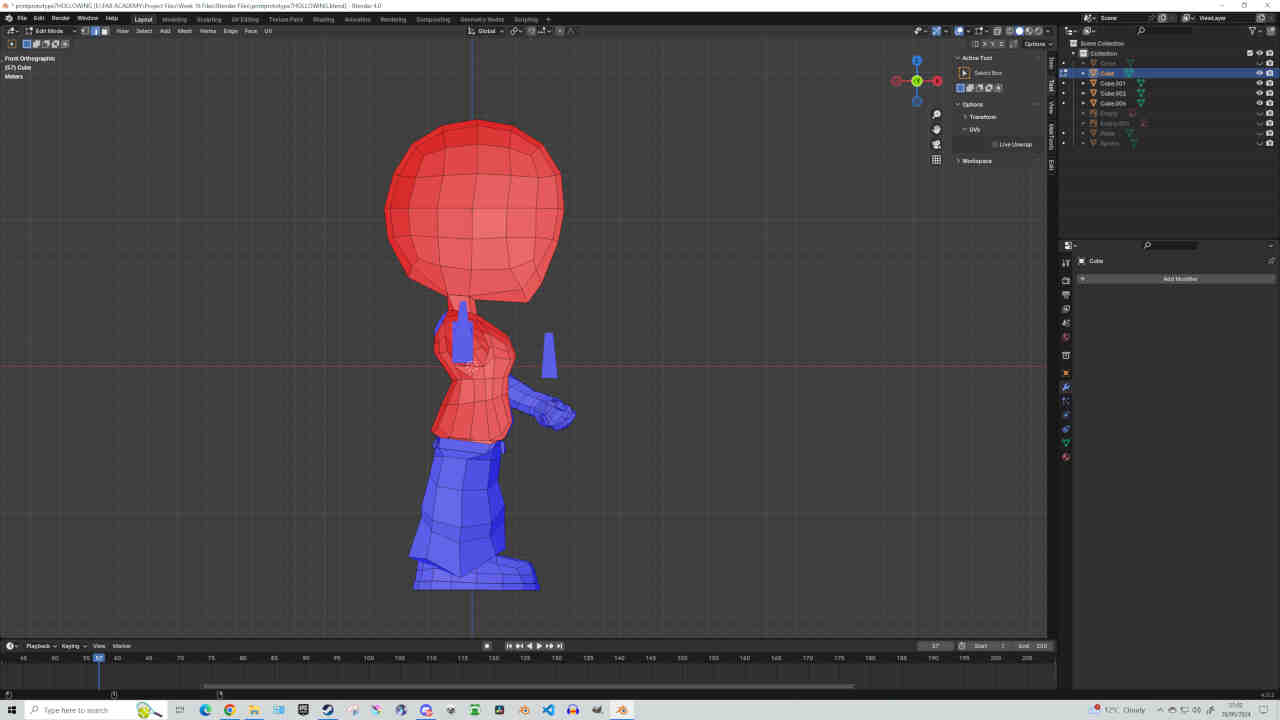
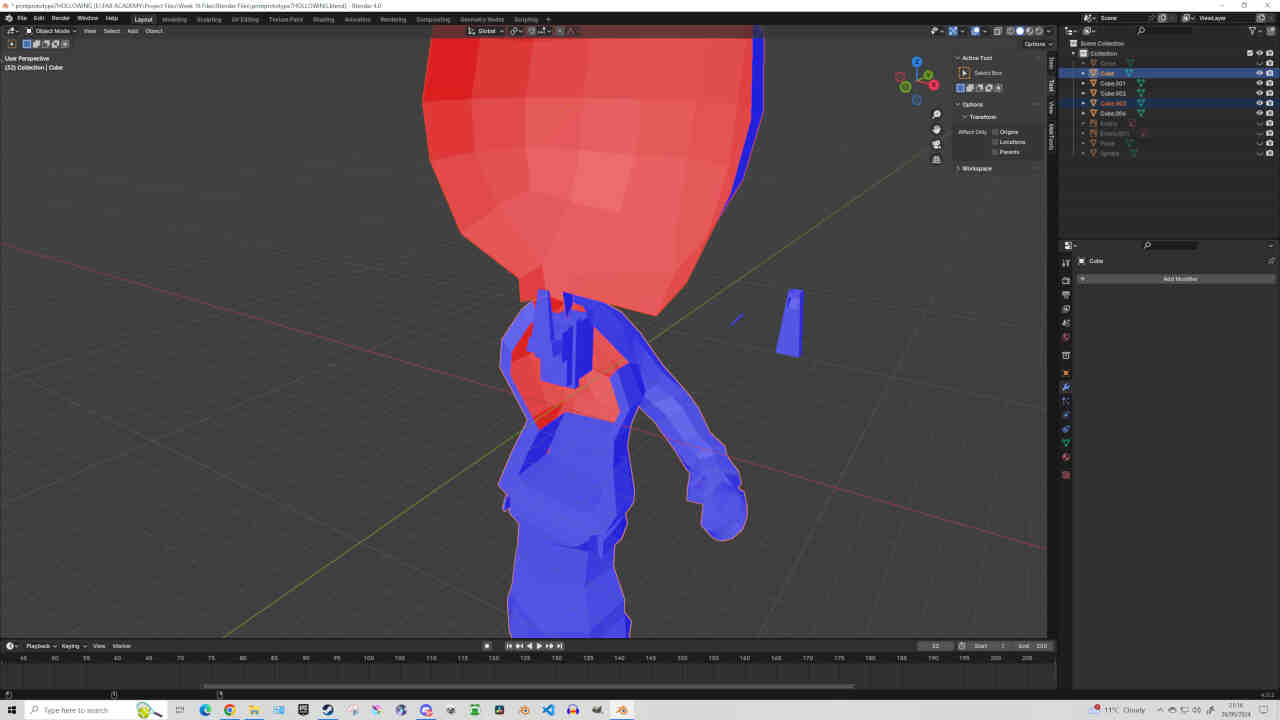
Updates to the overall design include:
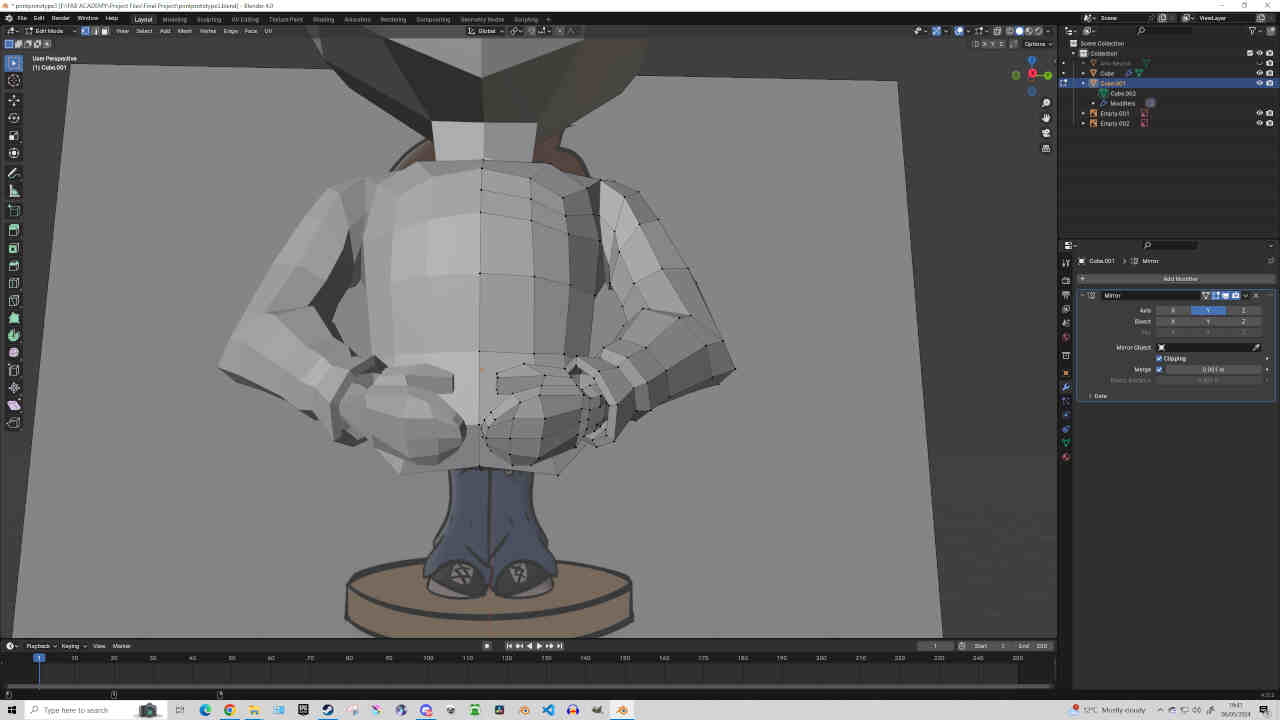
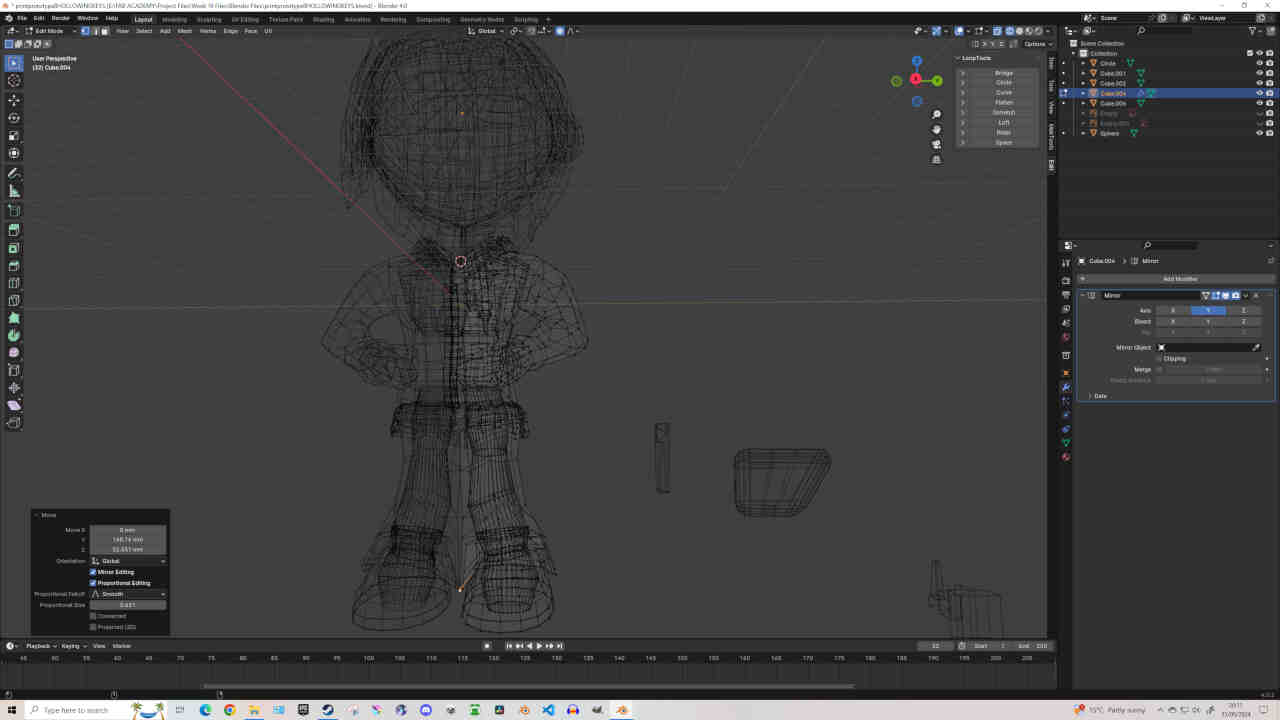
- Widened the Wire Routing area through the leg and up to the waist and fixed the repeating issue where a wall was formed inside the leg routing due to open faces between the Foot & Leg models. (Fixed by using the Extrude, Scale & Merge tools to form ONE Leg & Foot model.)
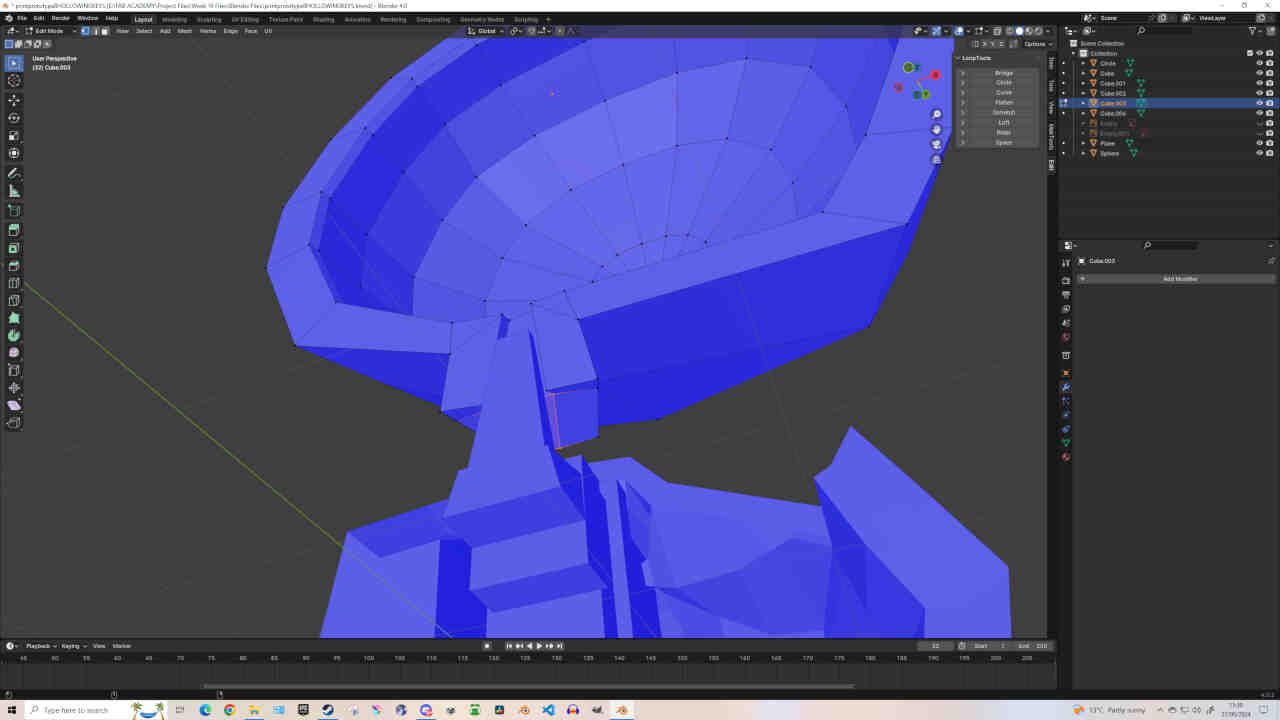
- Separated Body Model down the middle and removed keying from the legs and chest as I've altered the methodology of locking the model pieces in place. Manually Subdivided model using Loop Cuts and by Extruding / Merging Vertices and Deleting / Filling Faces.
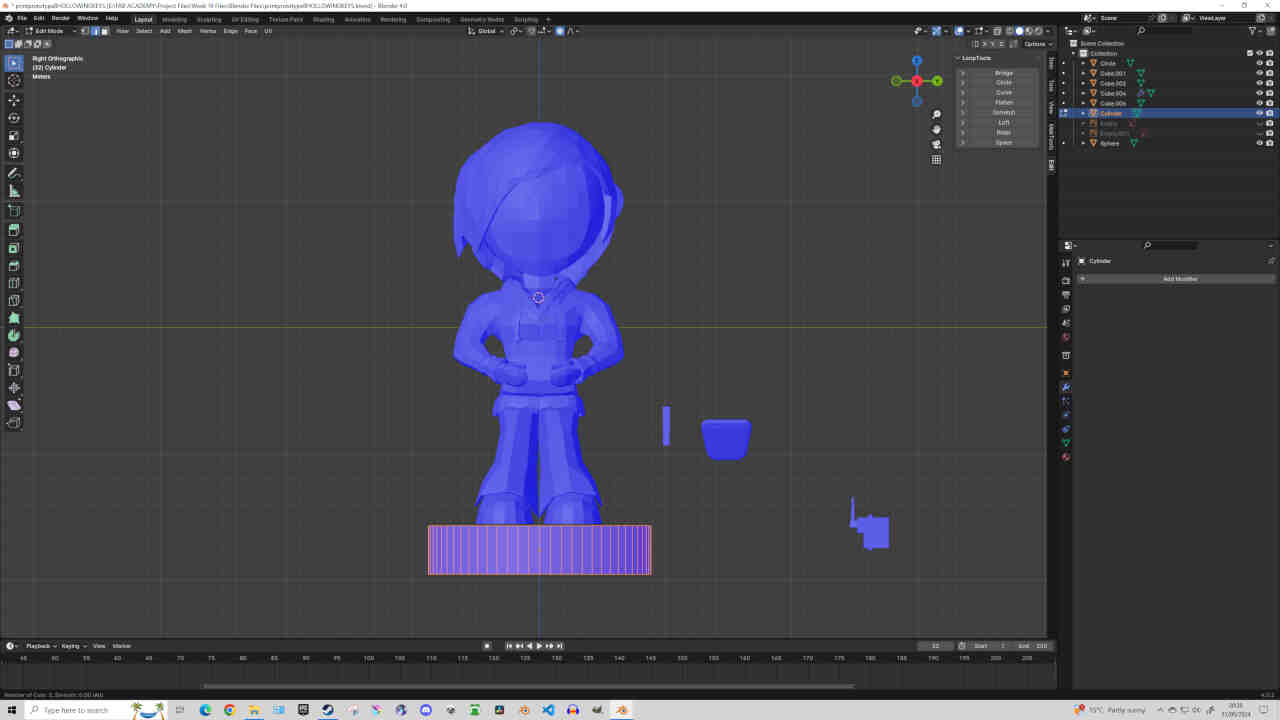
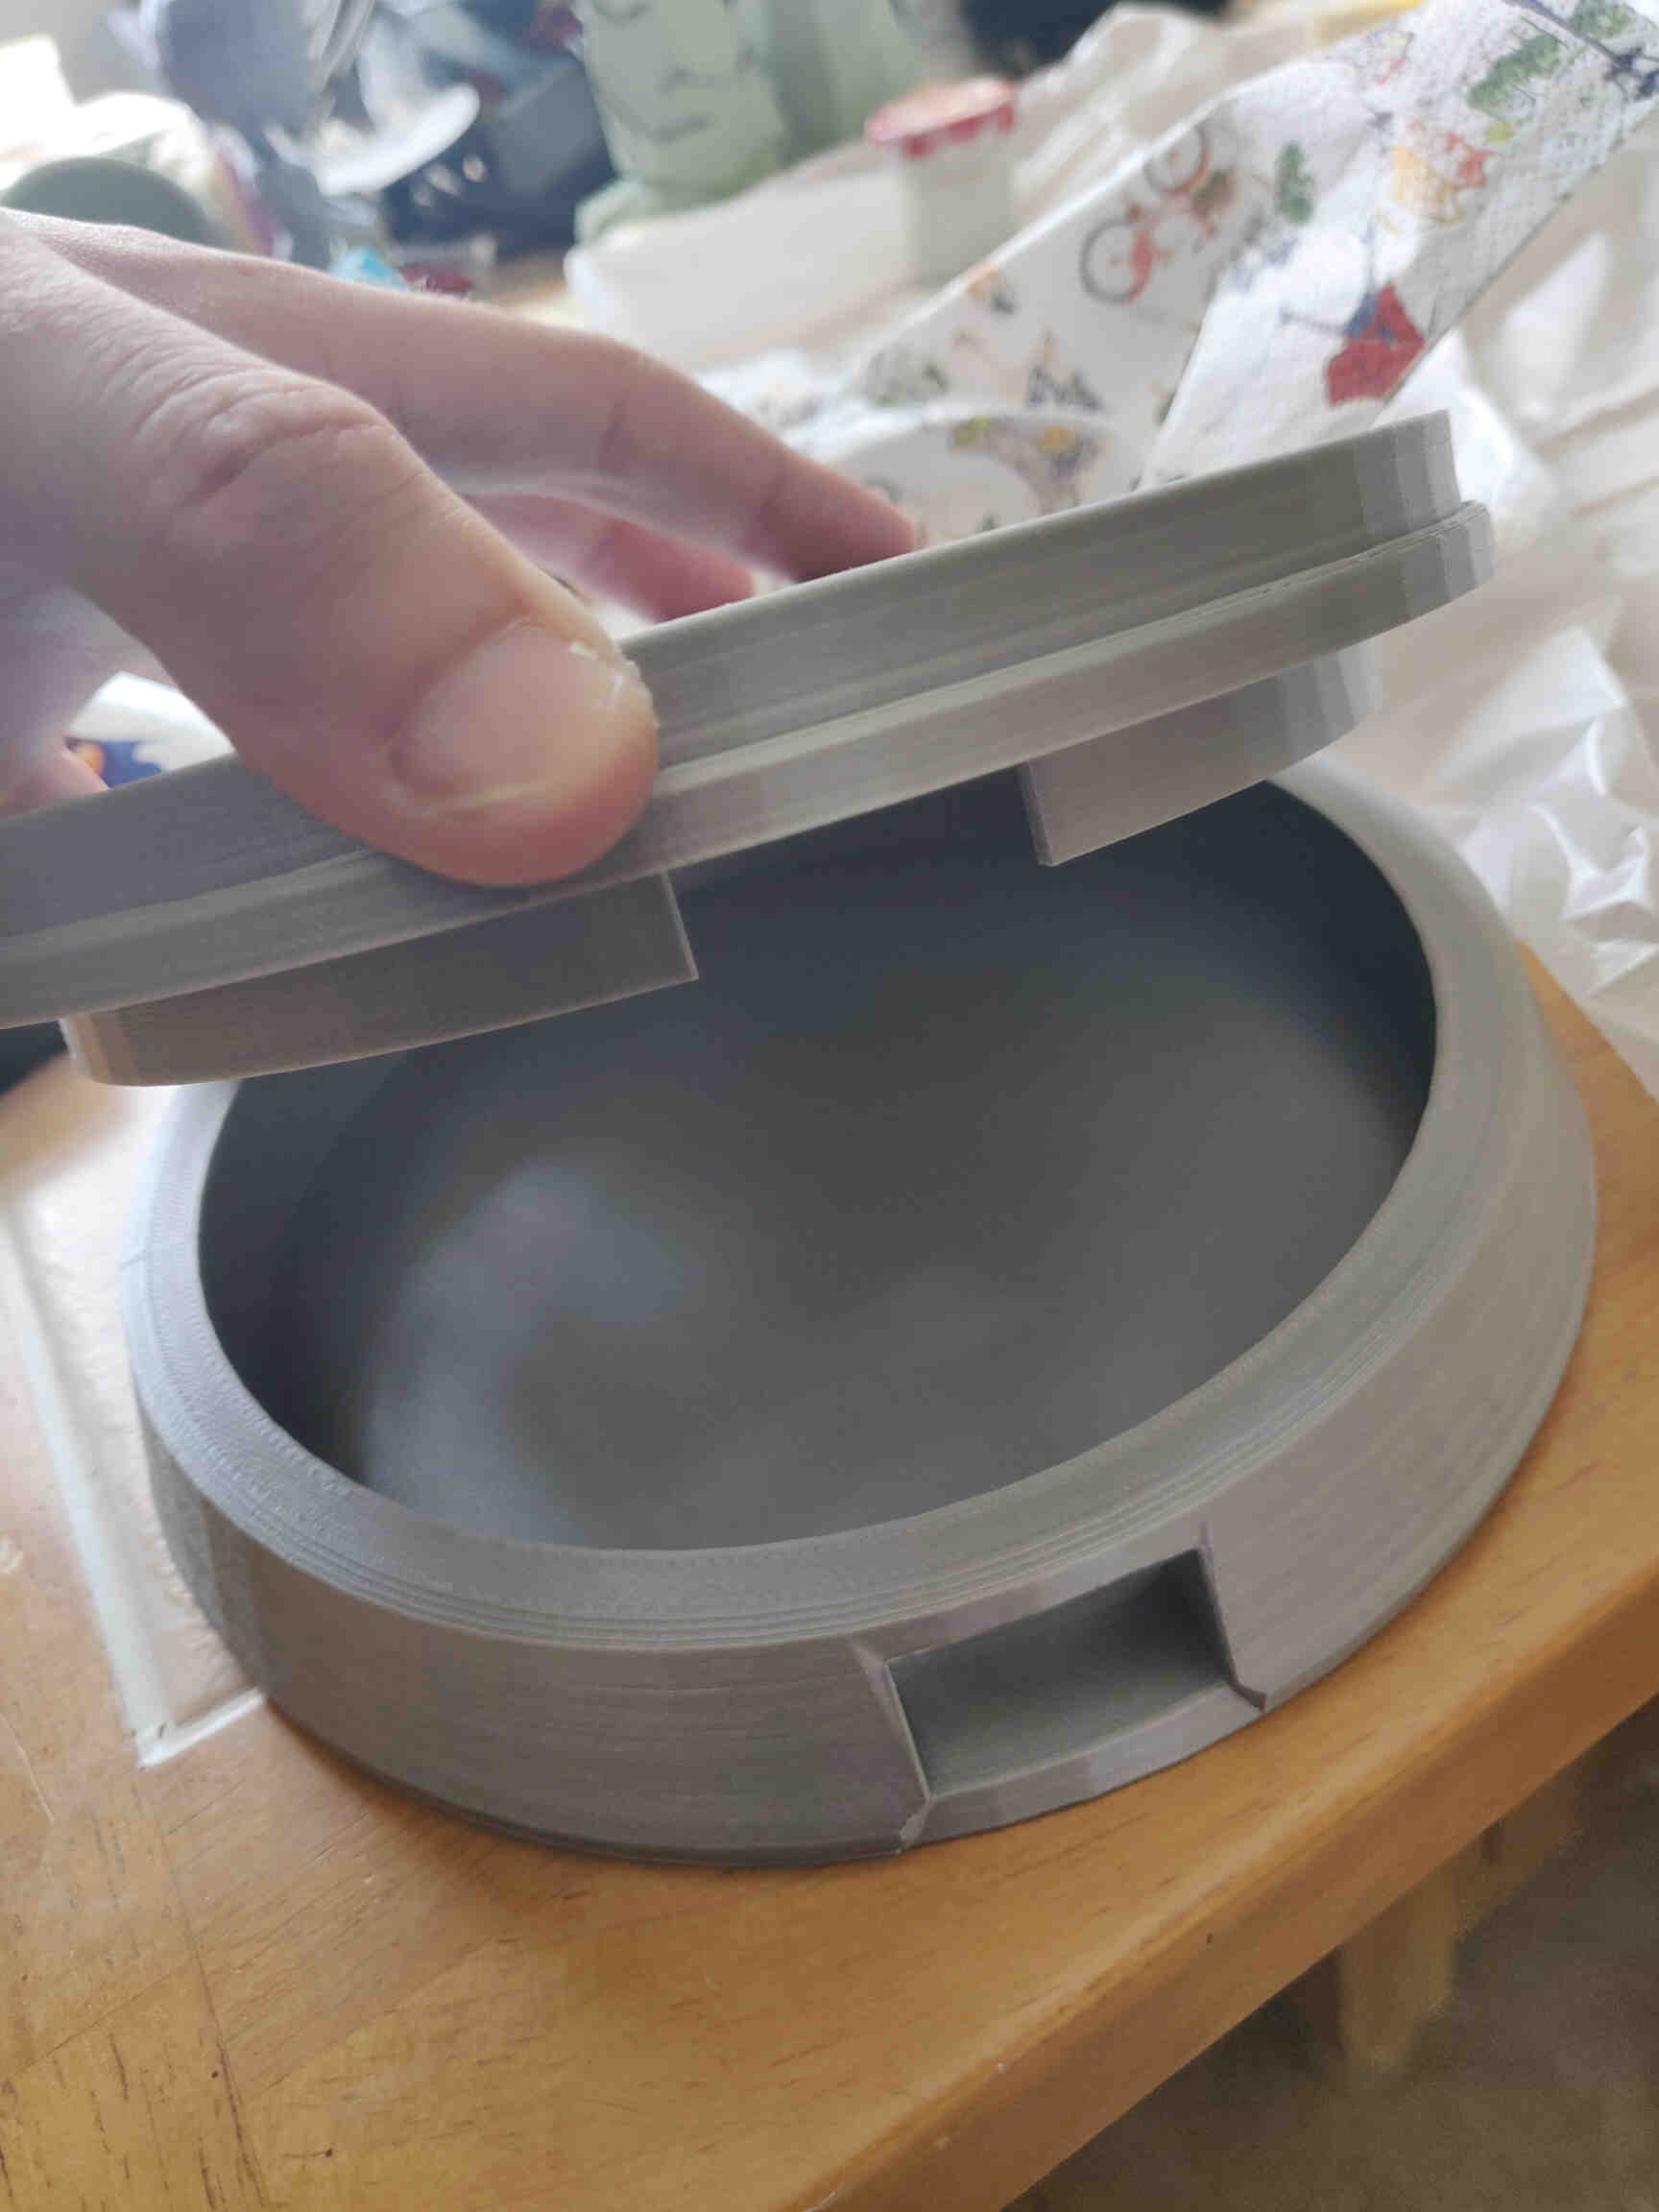
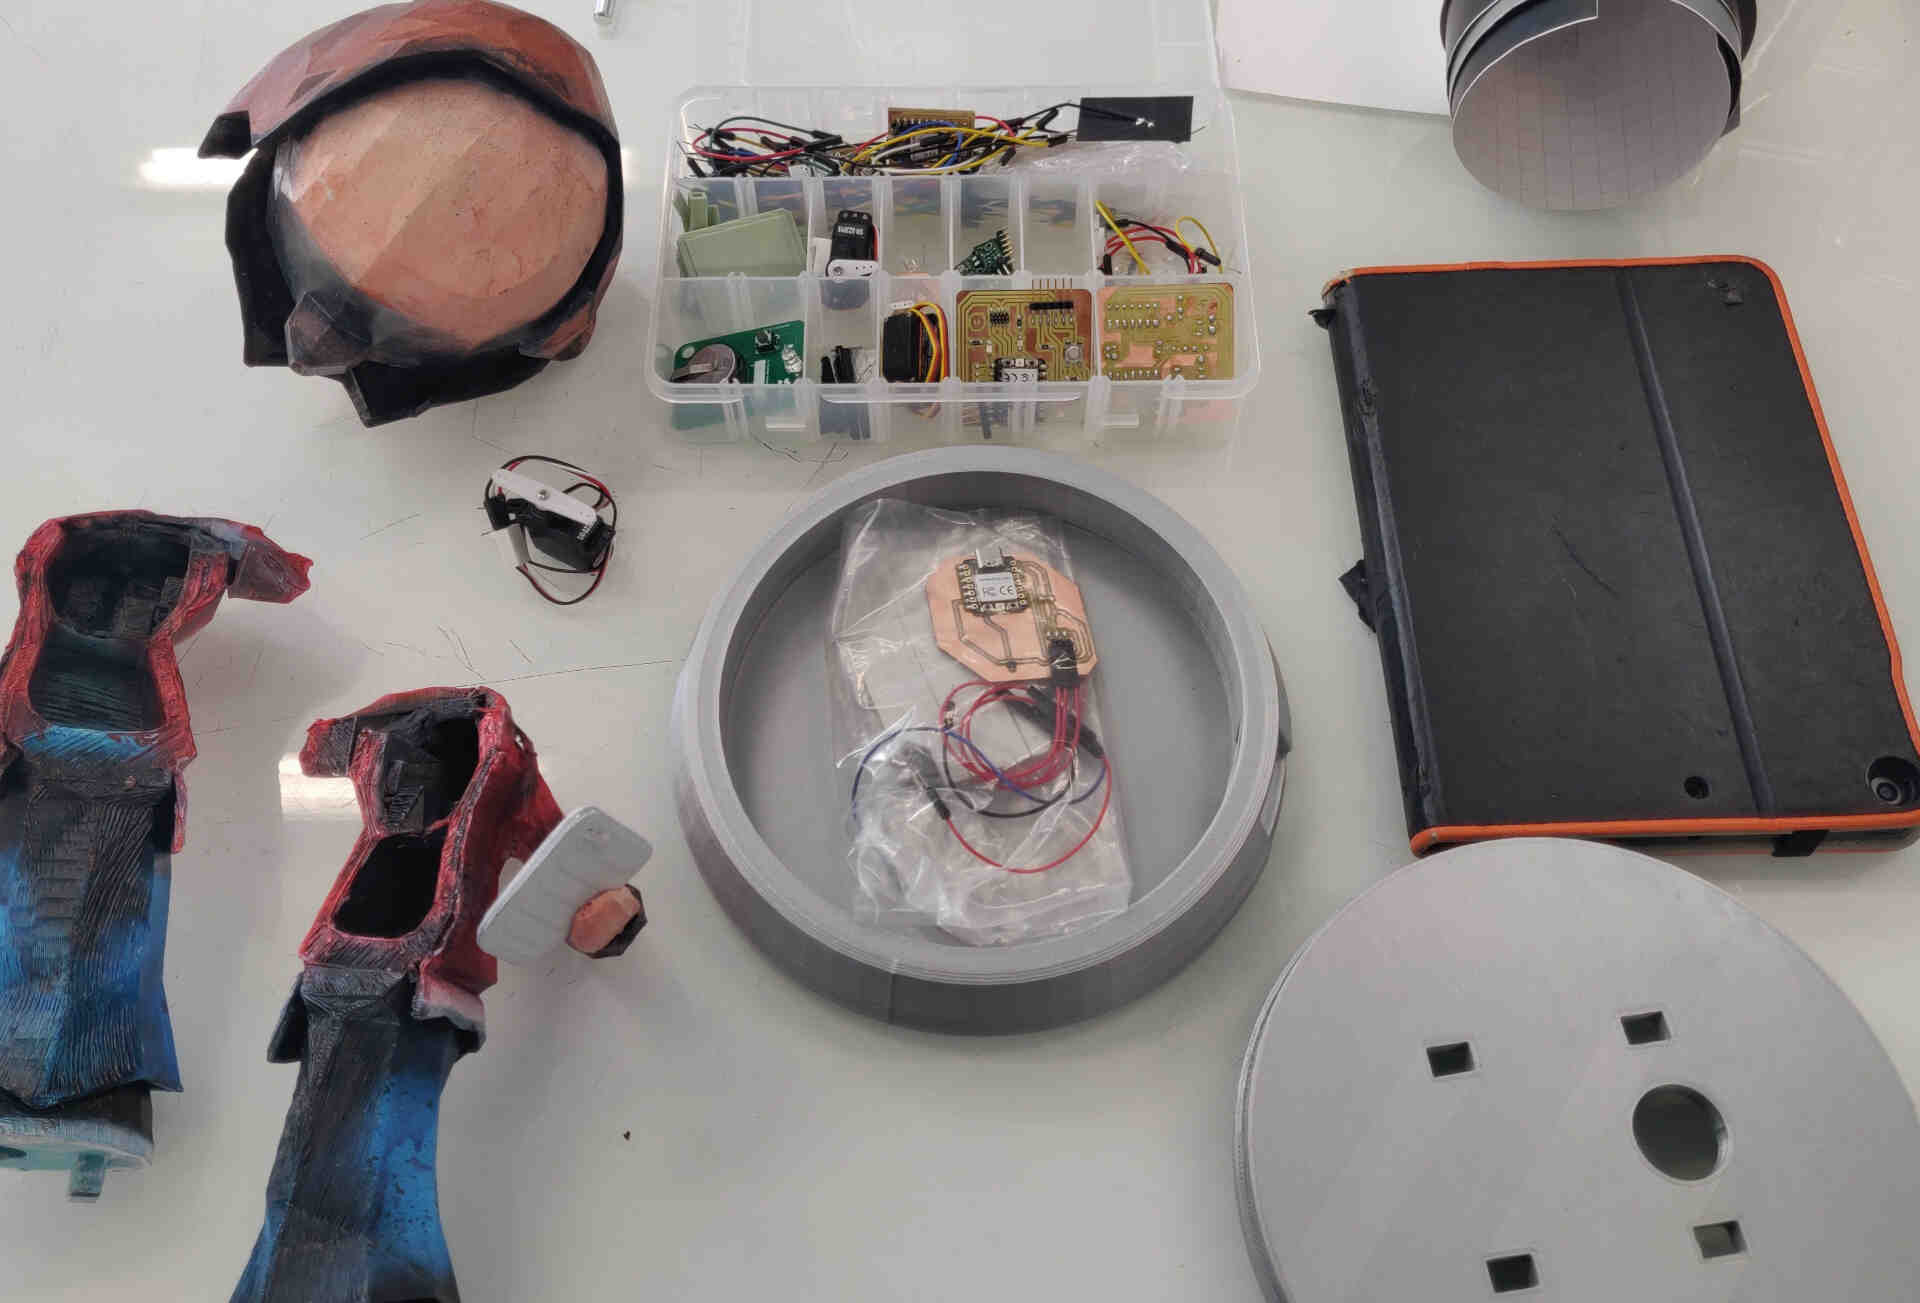
- Designed a base with locking keys connecting to each foot (created using Boolean, Taper & Bevel modifiers). Base was also designed to hold a VL53L1X Time of Flight sensor, but was later designed to accompany a Hall Effect Sensor.
- Redesigned neck extenders for the servo motor.
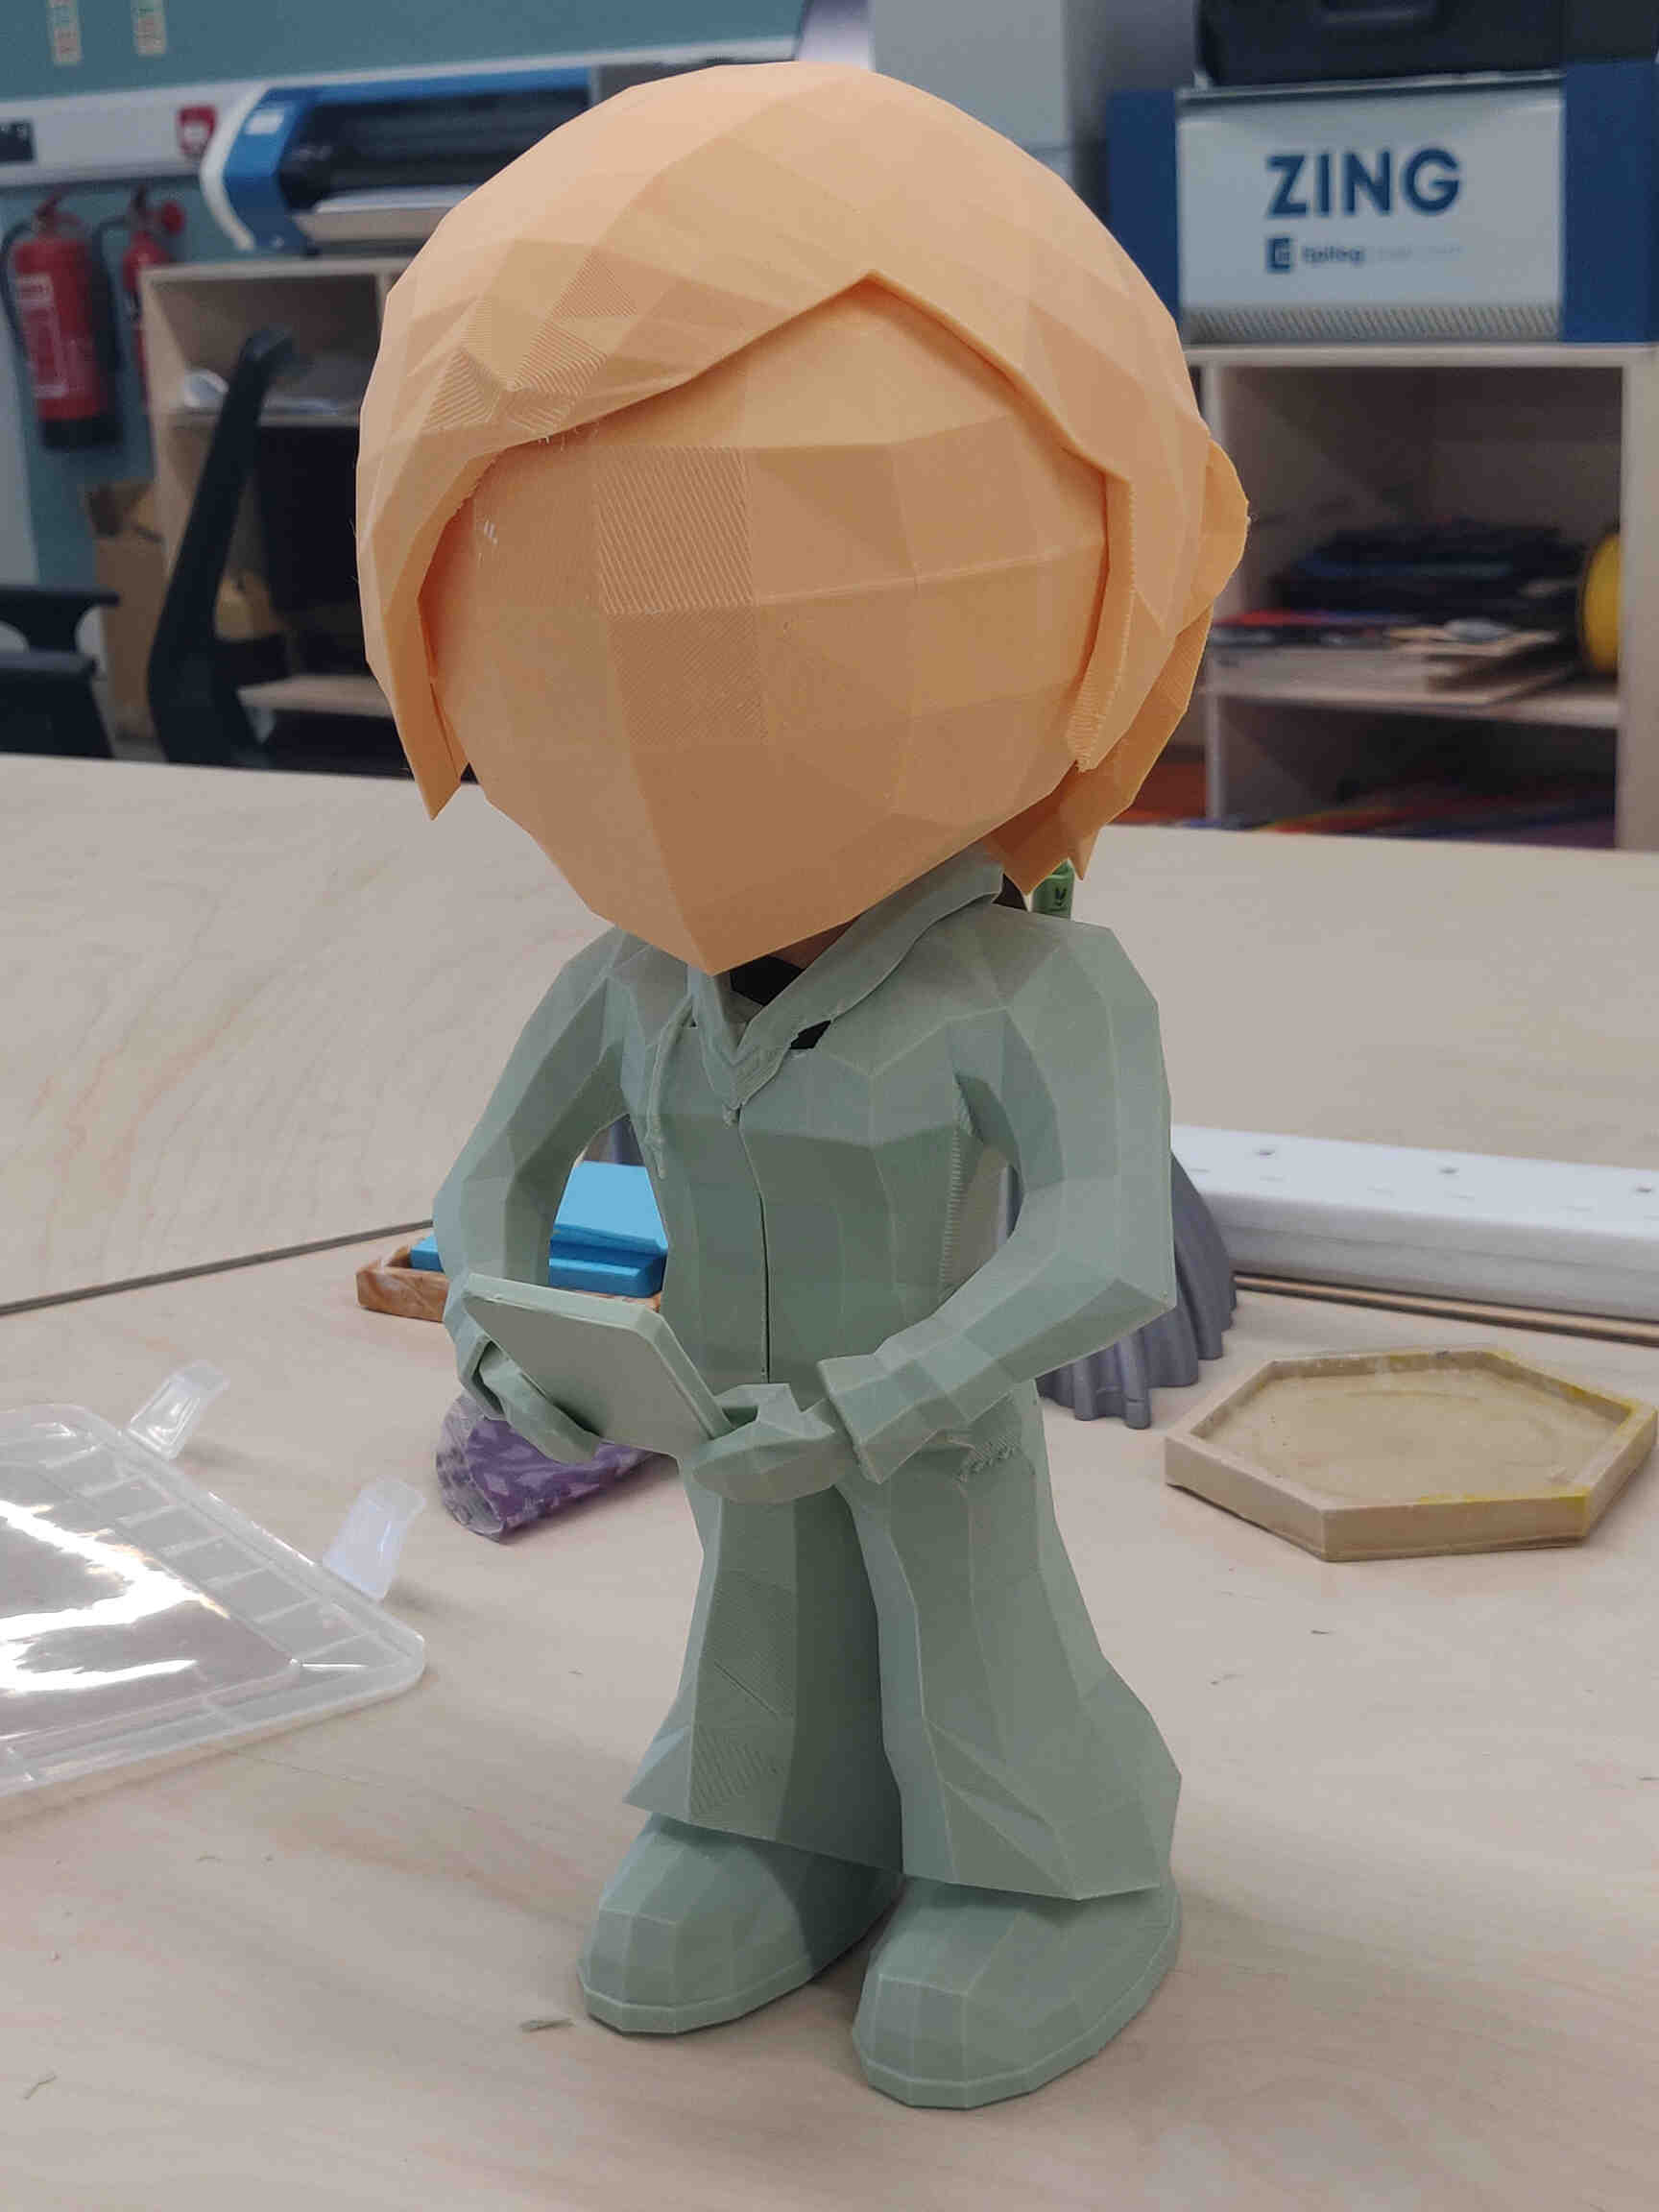
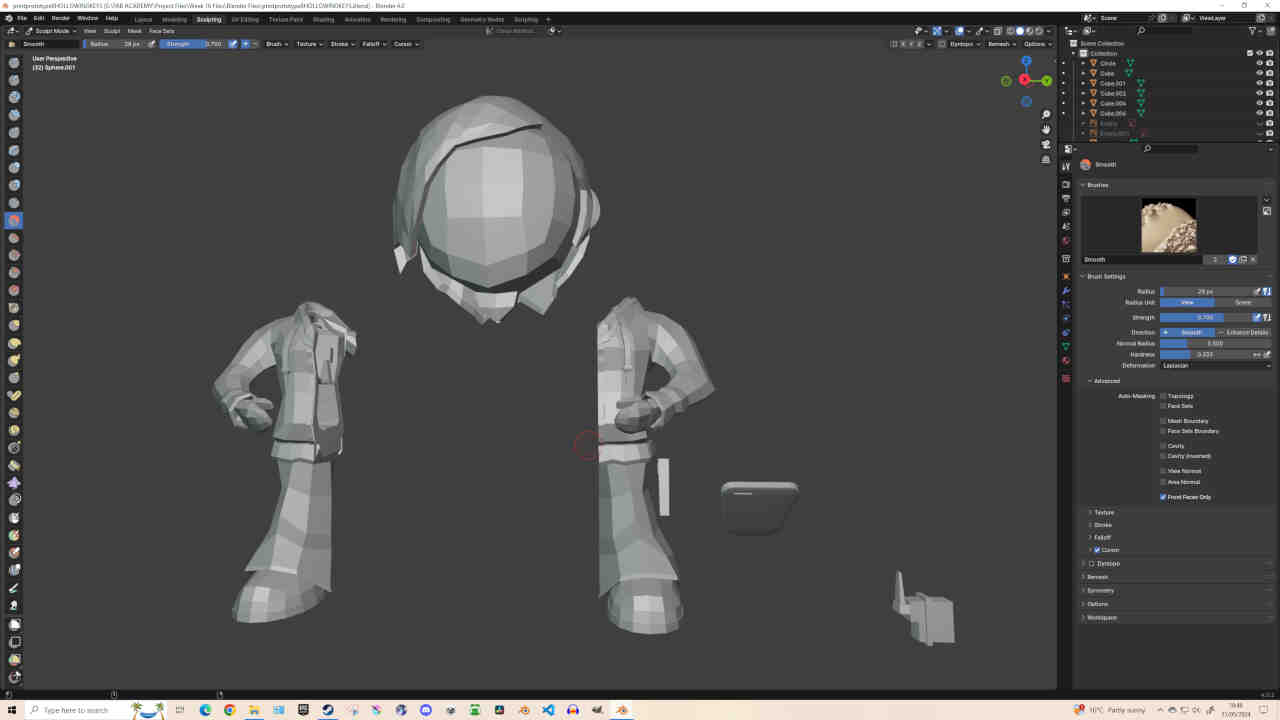
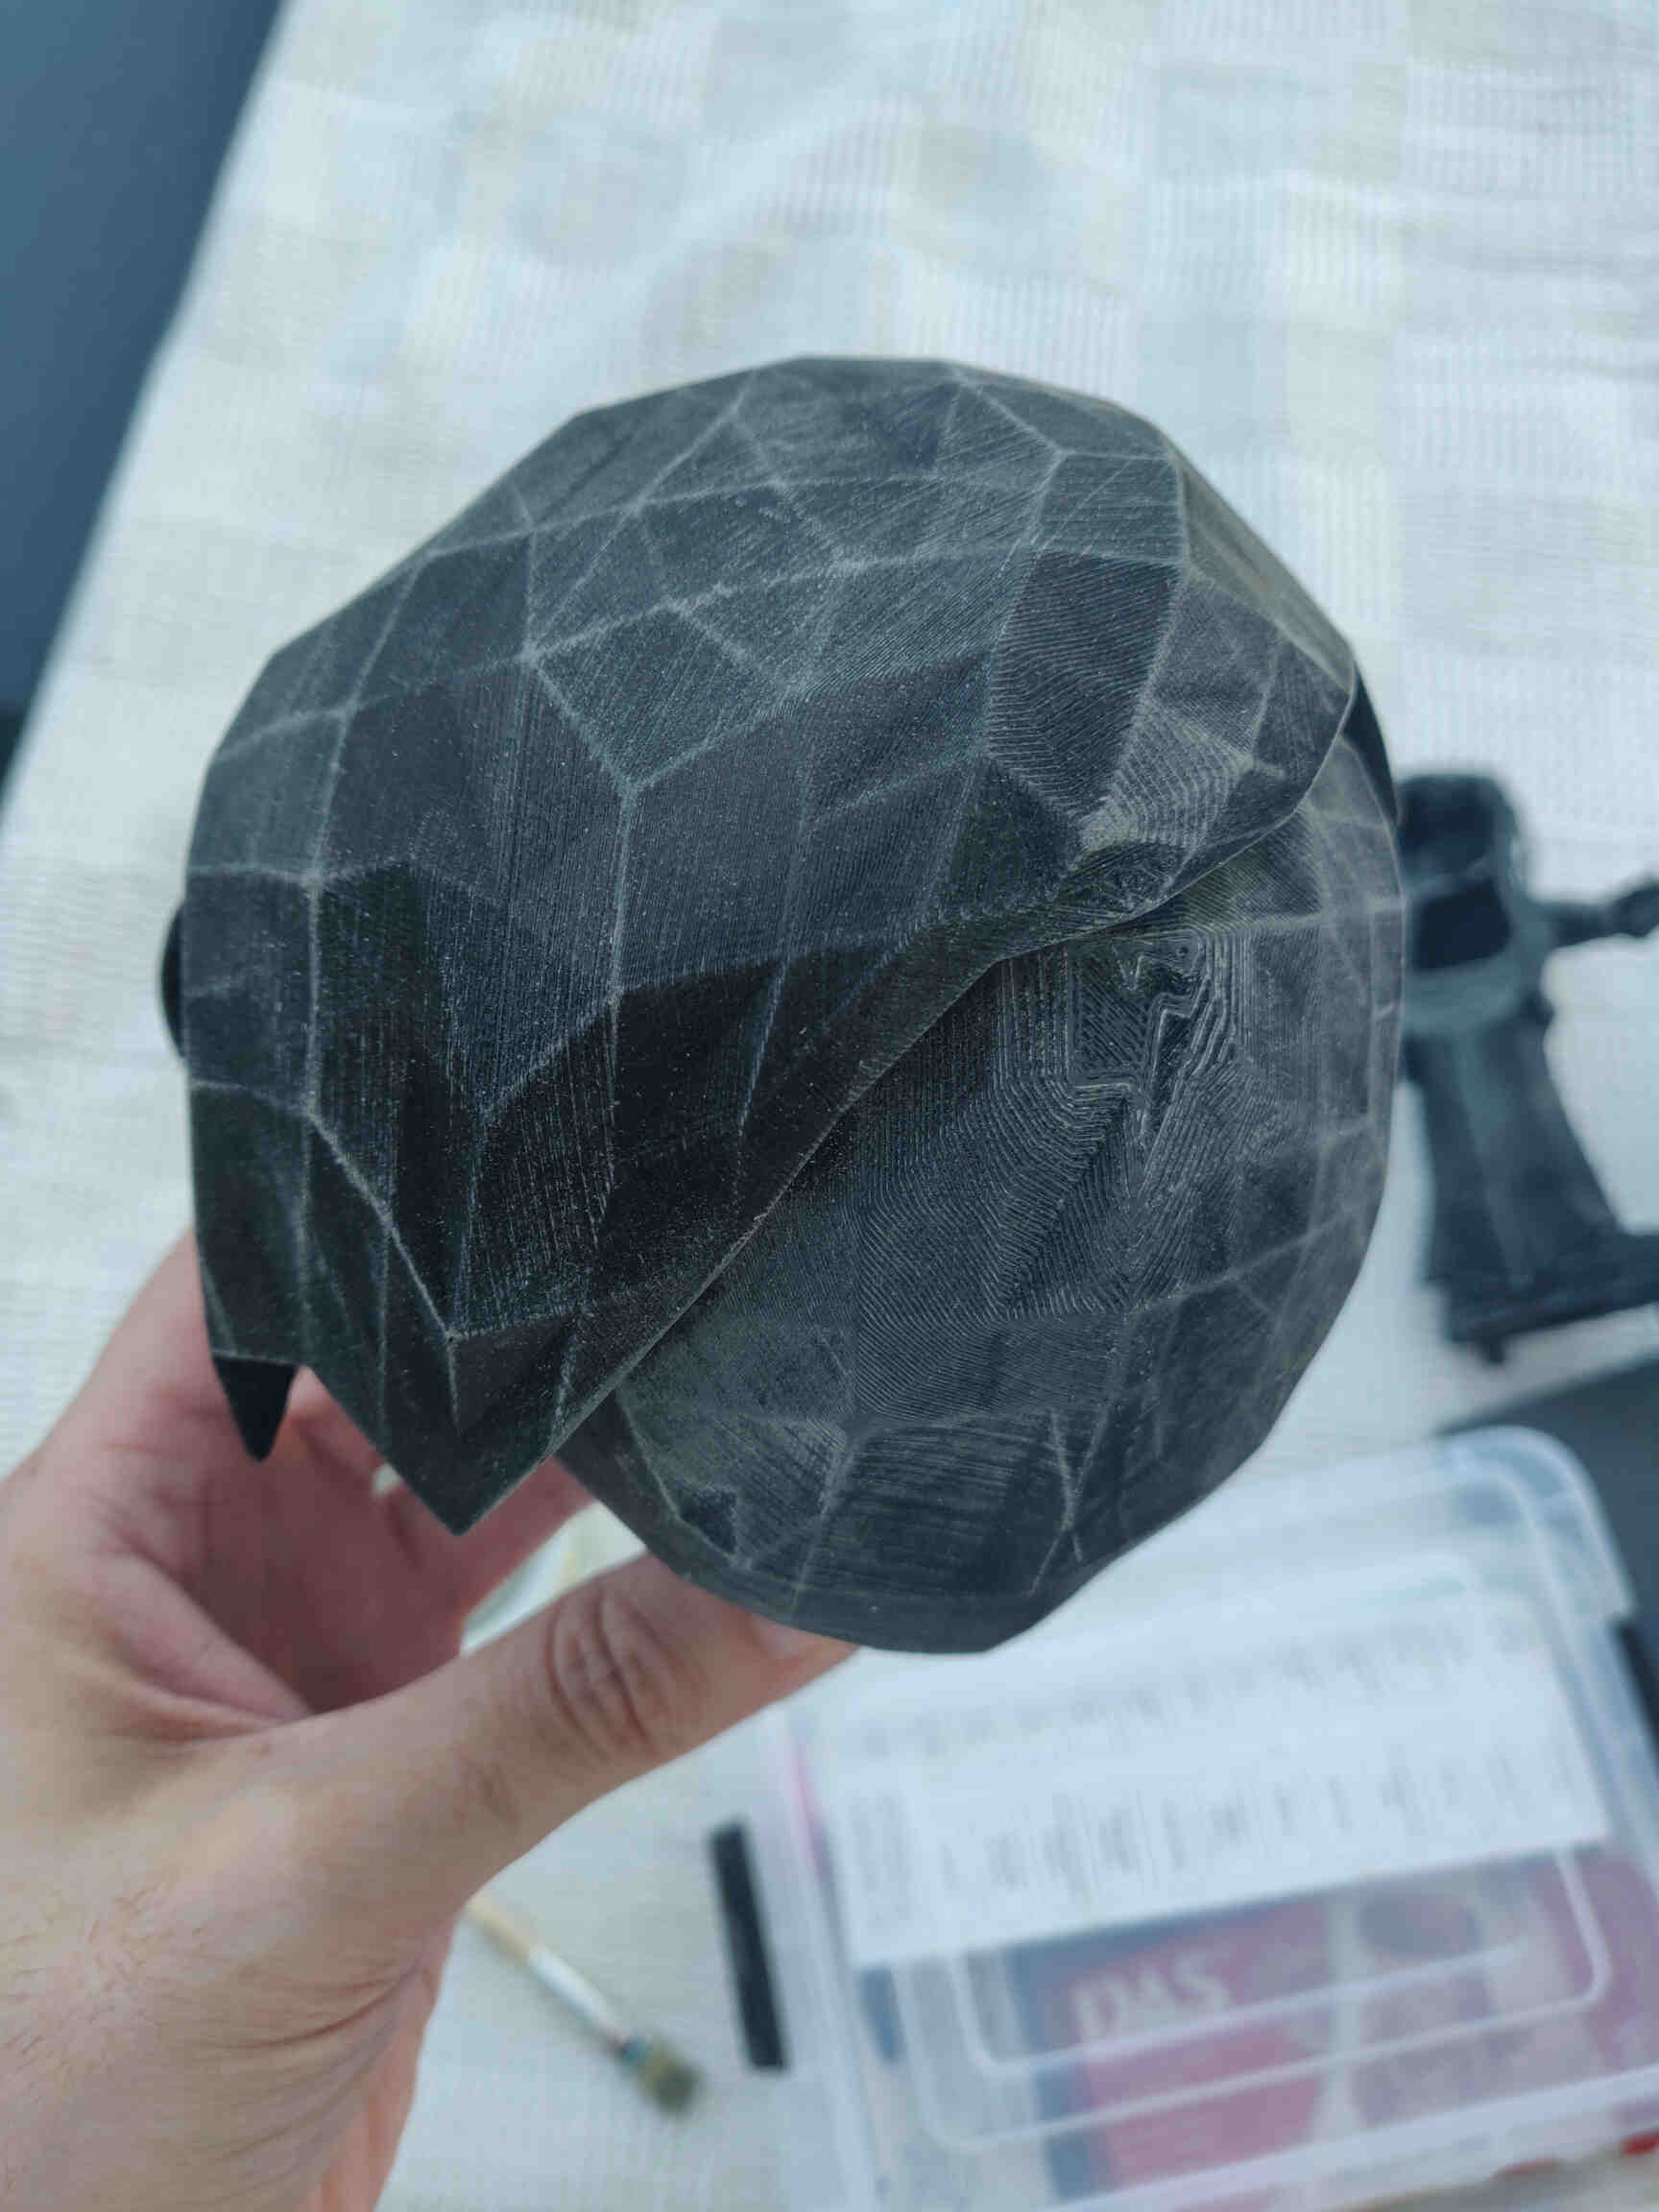
- Rescaled and further hollowed out the Head Model for better stability and weight distribution. Also closed the hole inside the head model for the LED’s inclusion as that idea was removed due to being unnecessary.
- Updates chest, hair and hoodie design for better aesthetics and to further avoid collision during movement.
Saturday 1st
Opened up the Fablab and spent all day setting up my final prints and completing my Hall Effect circuit board.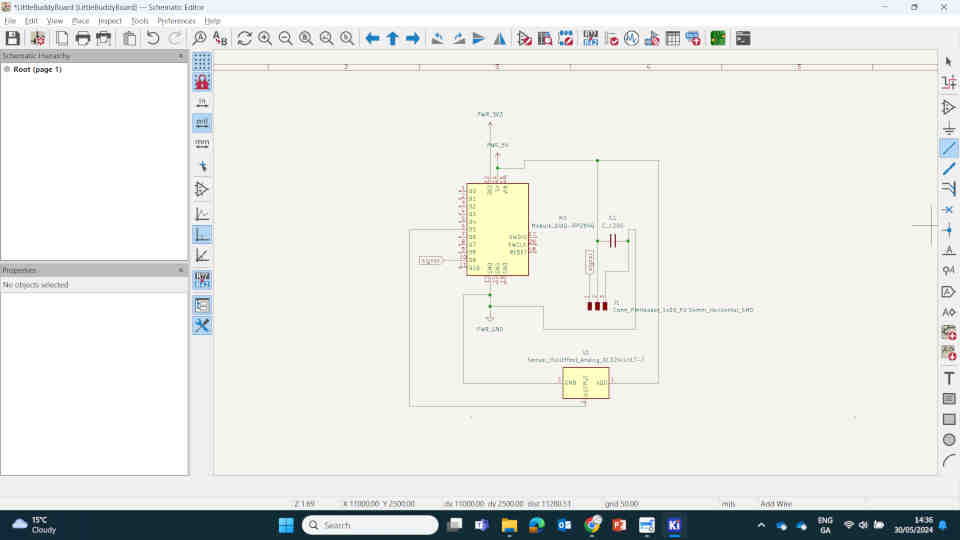
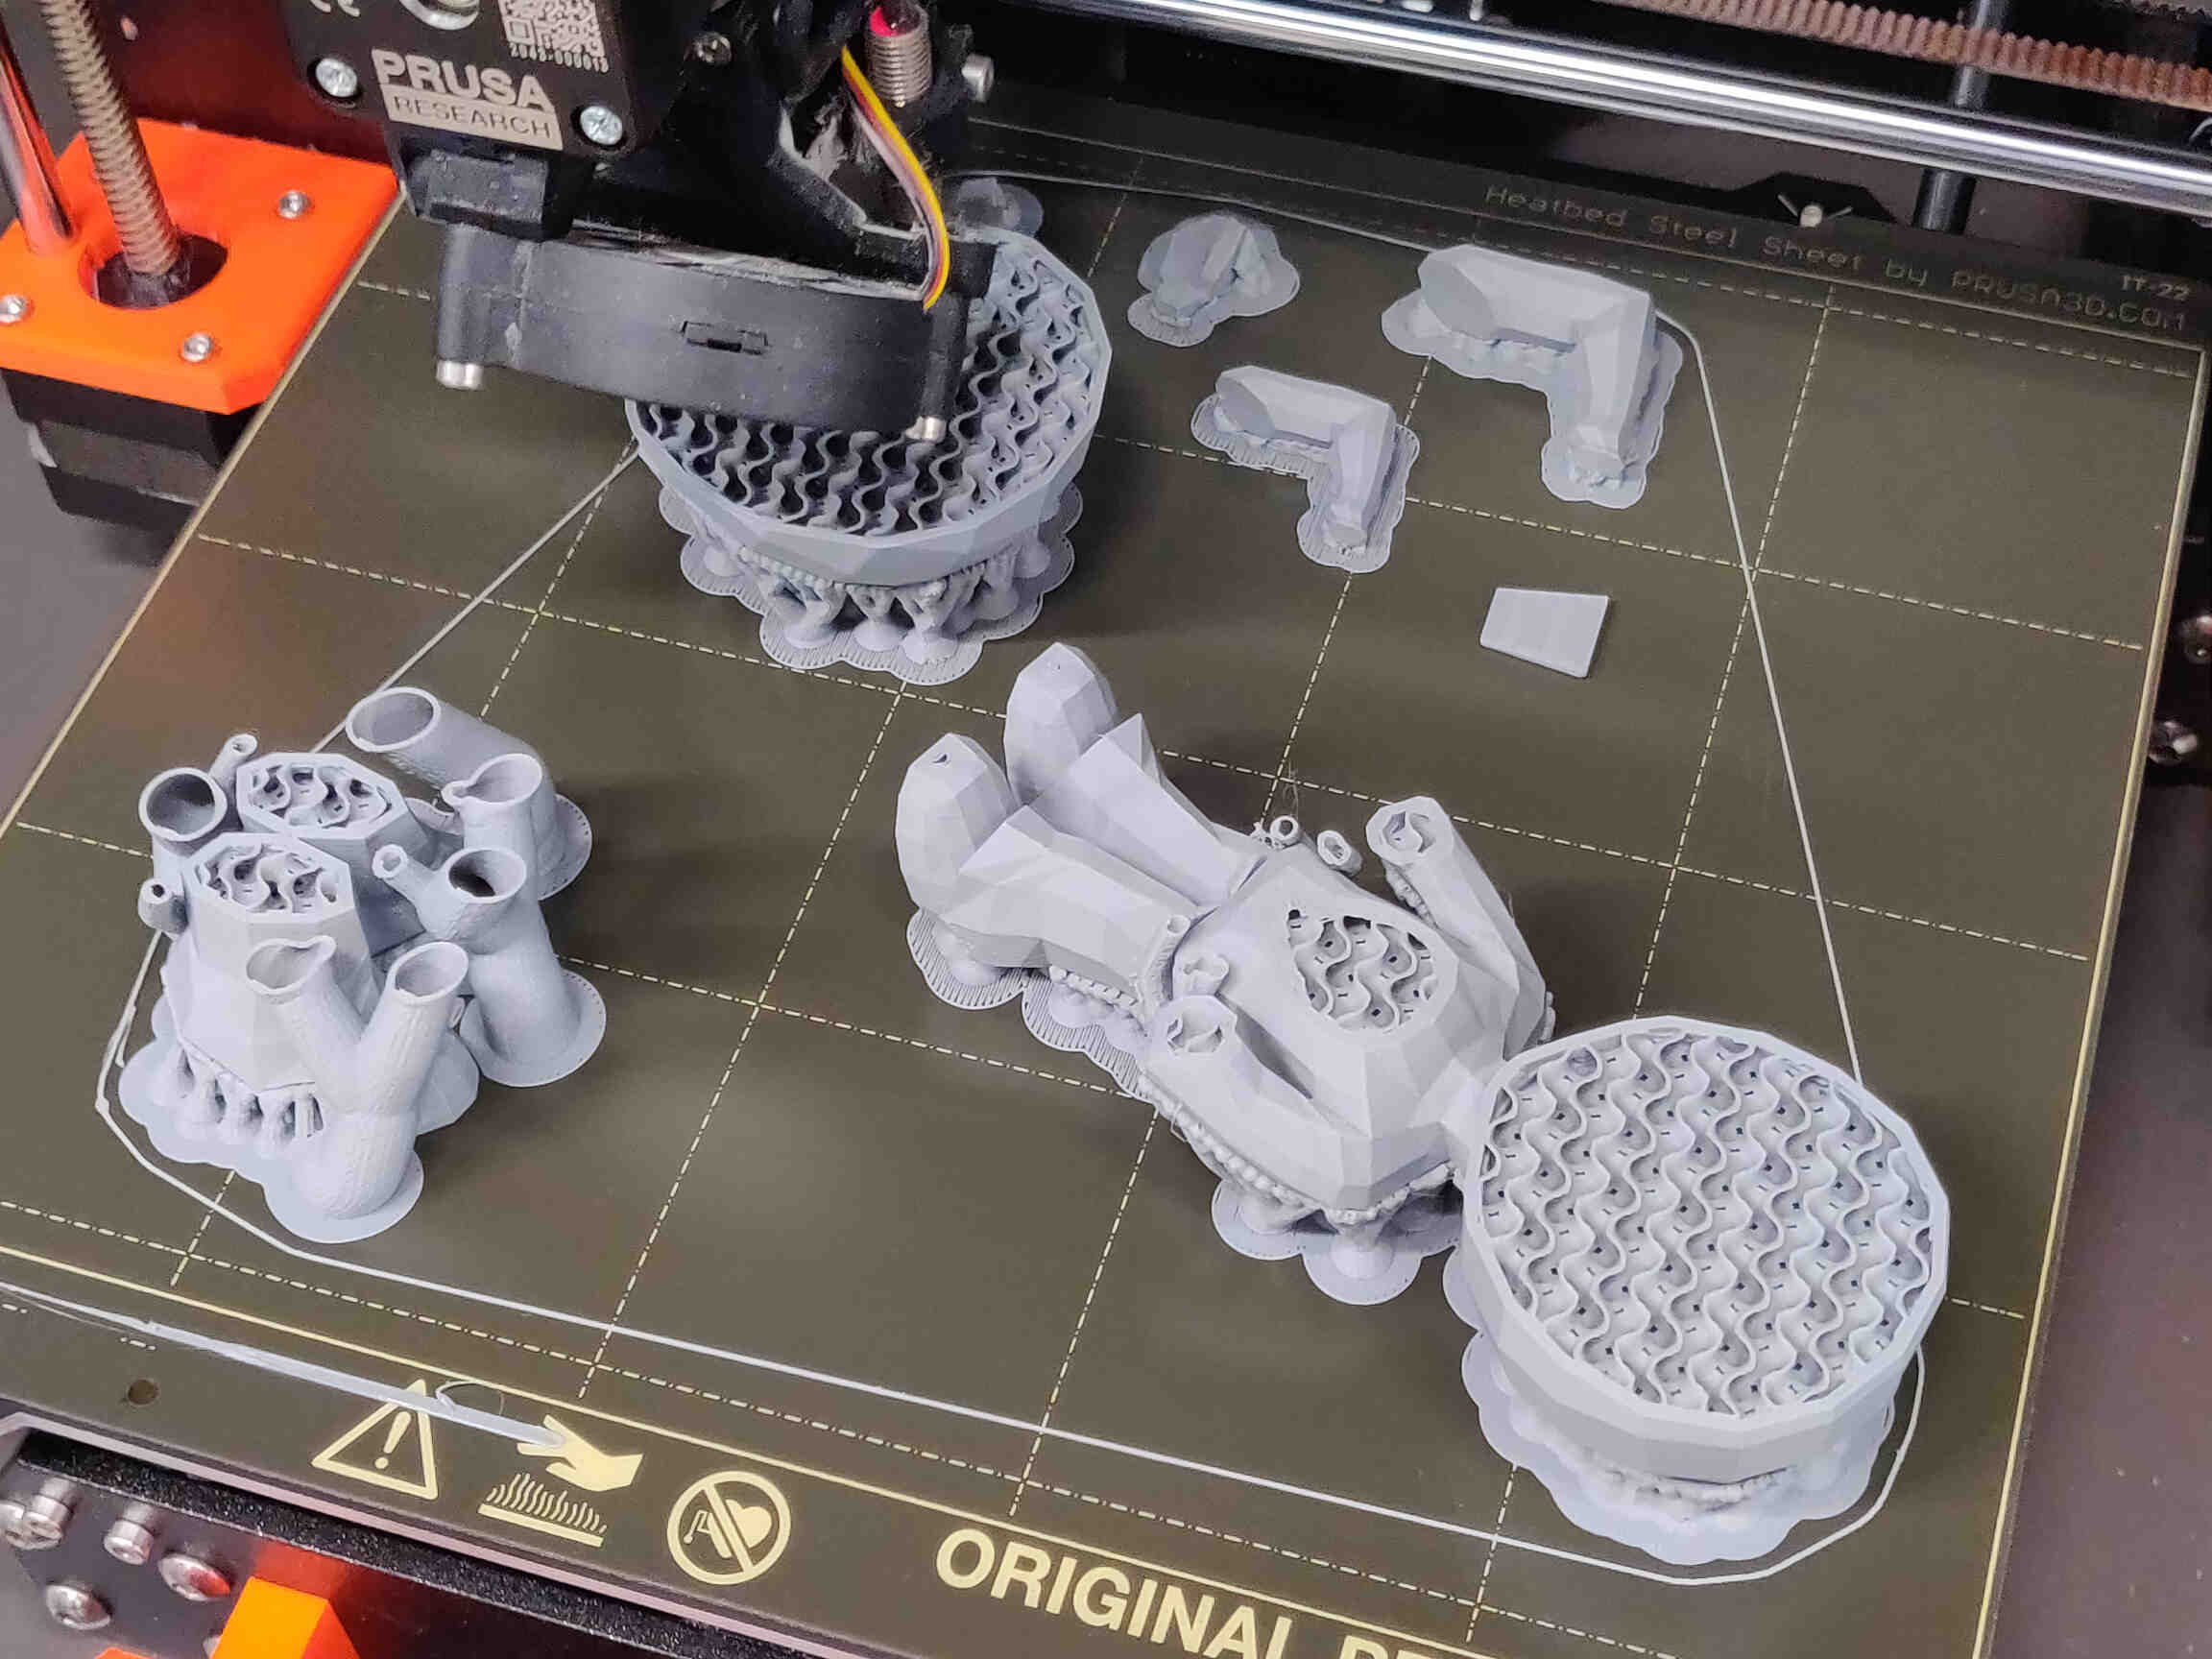
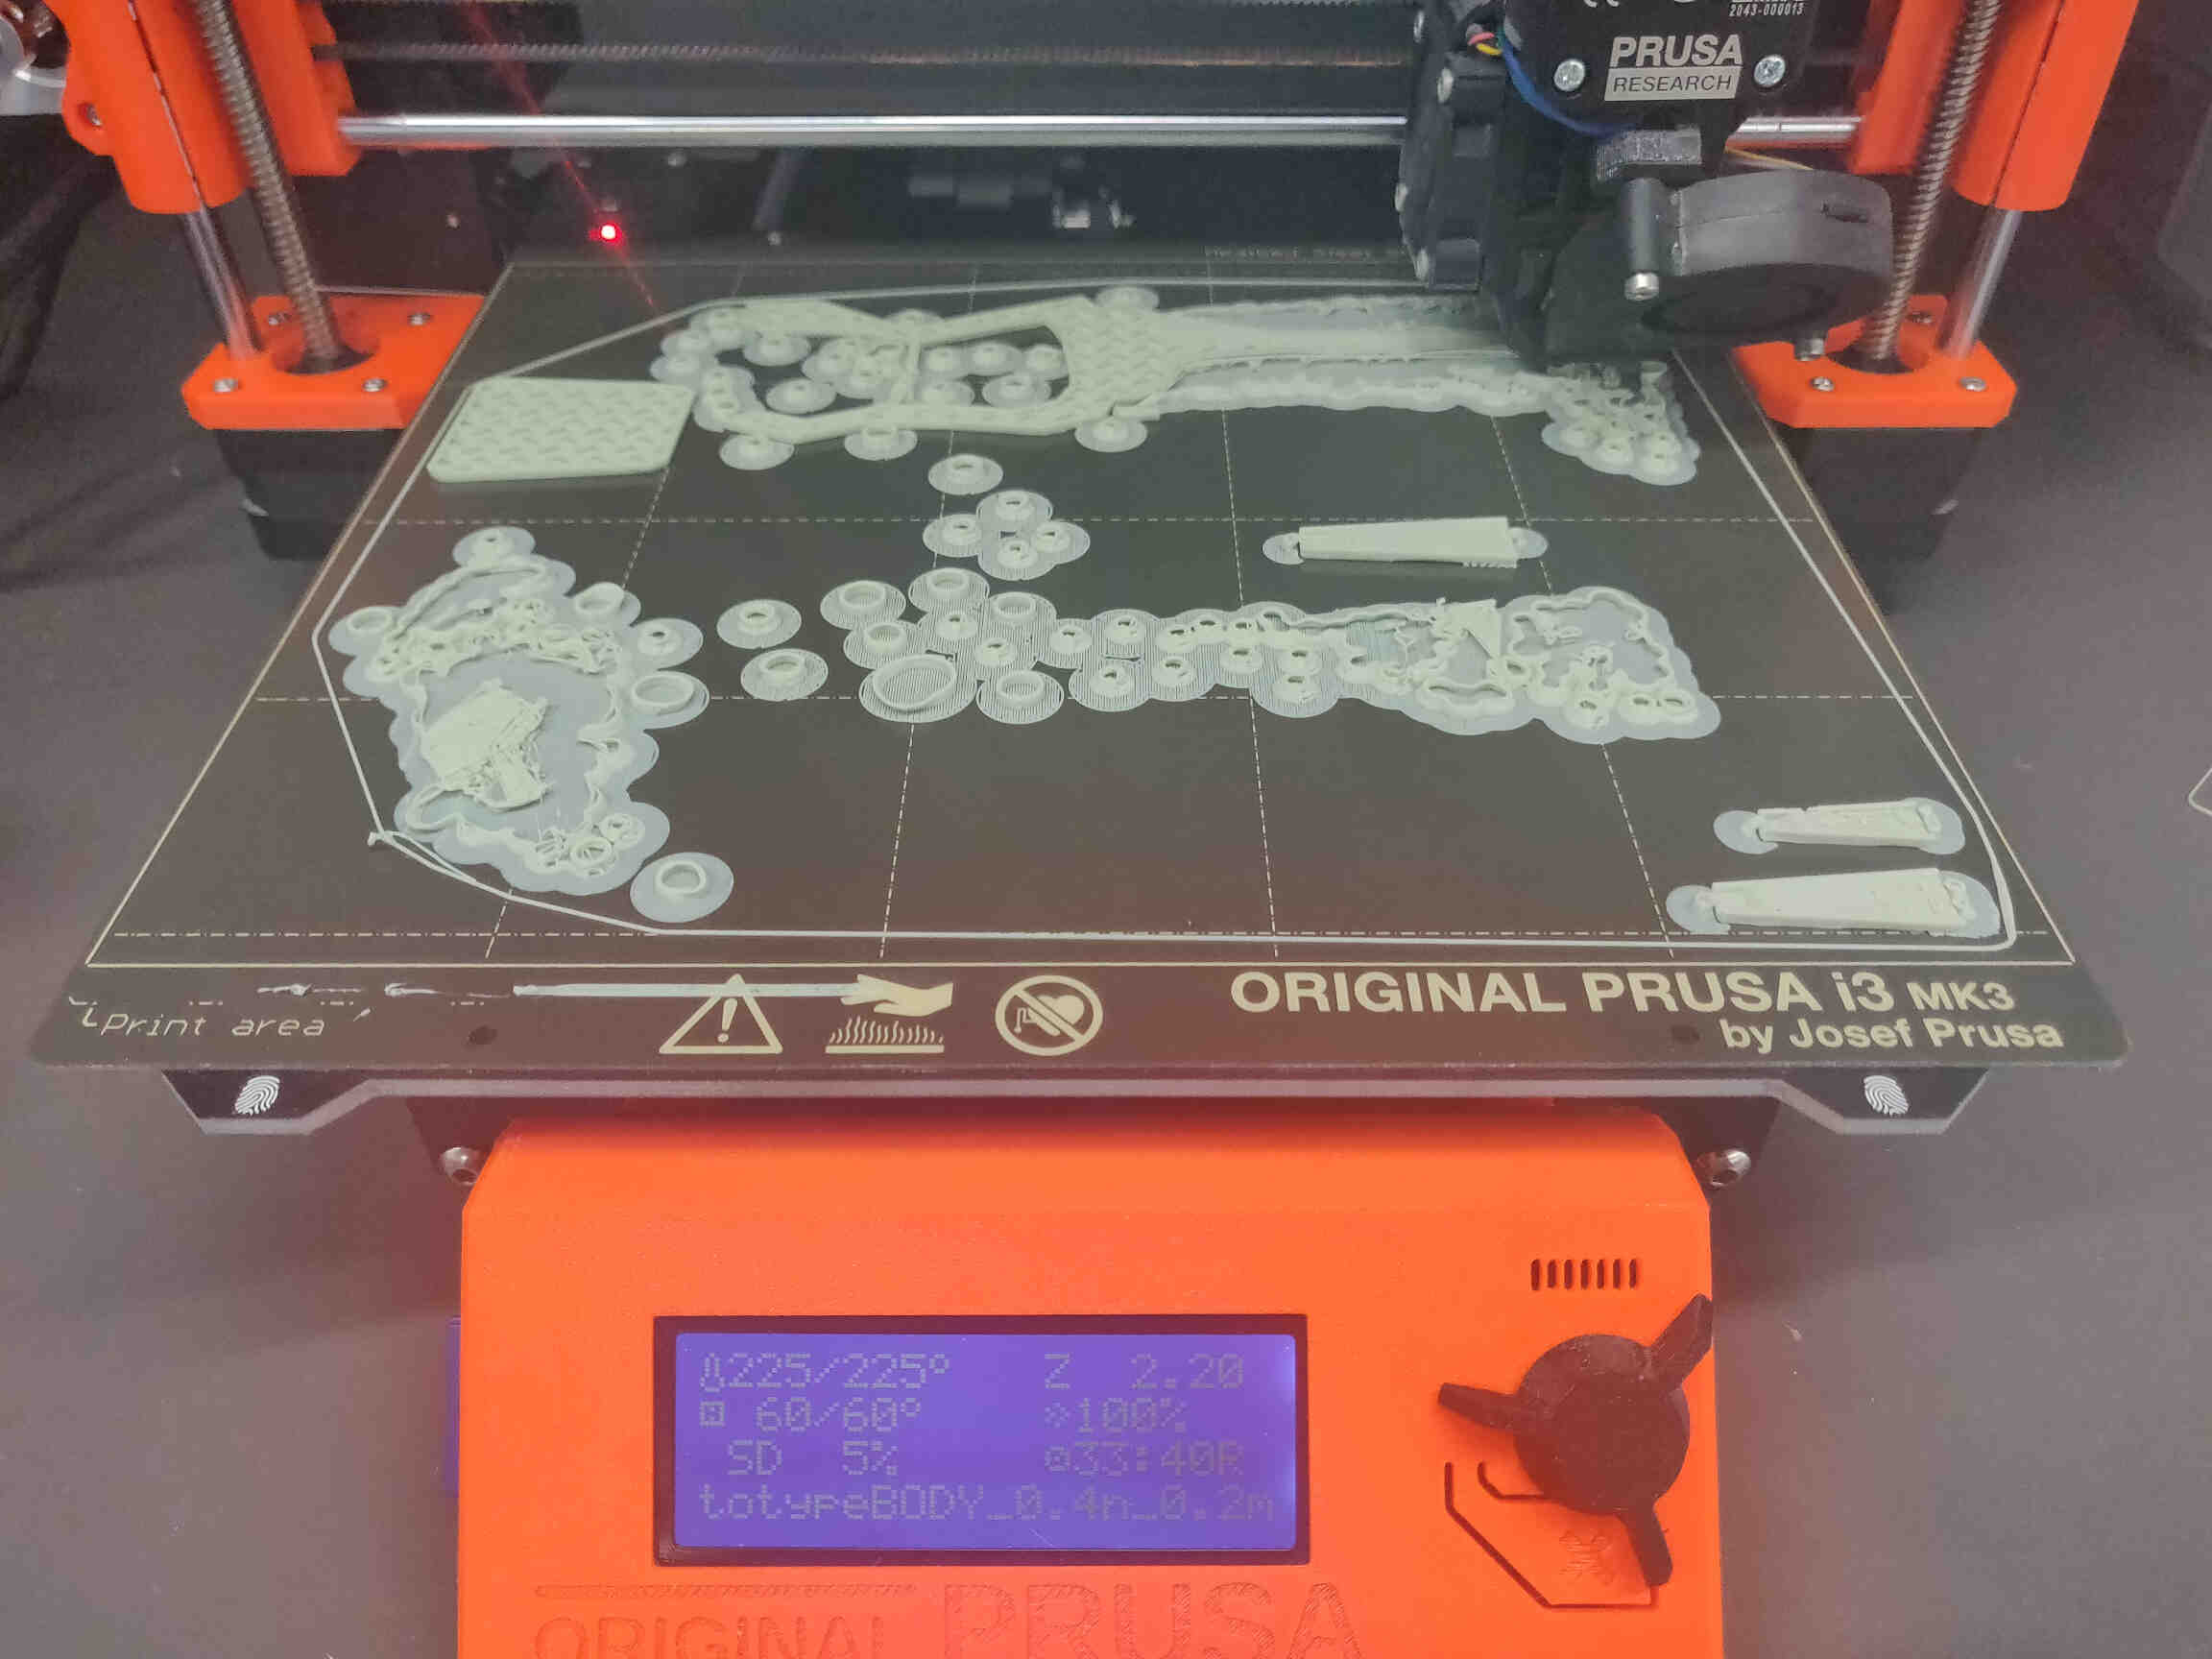
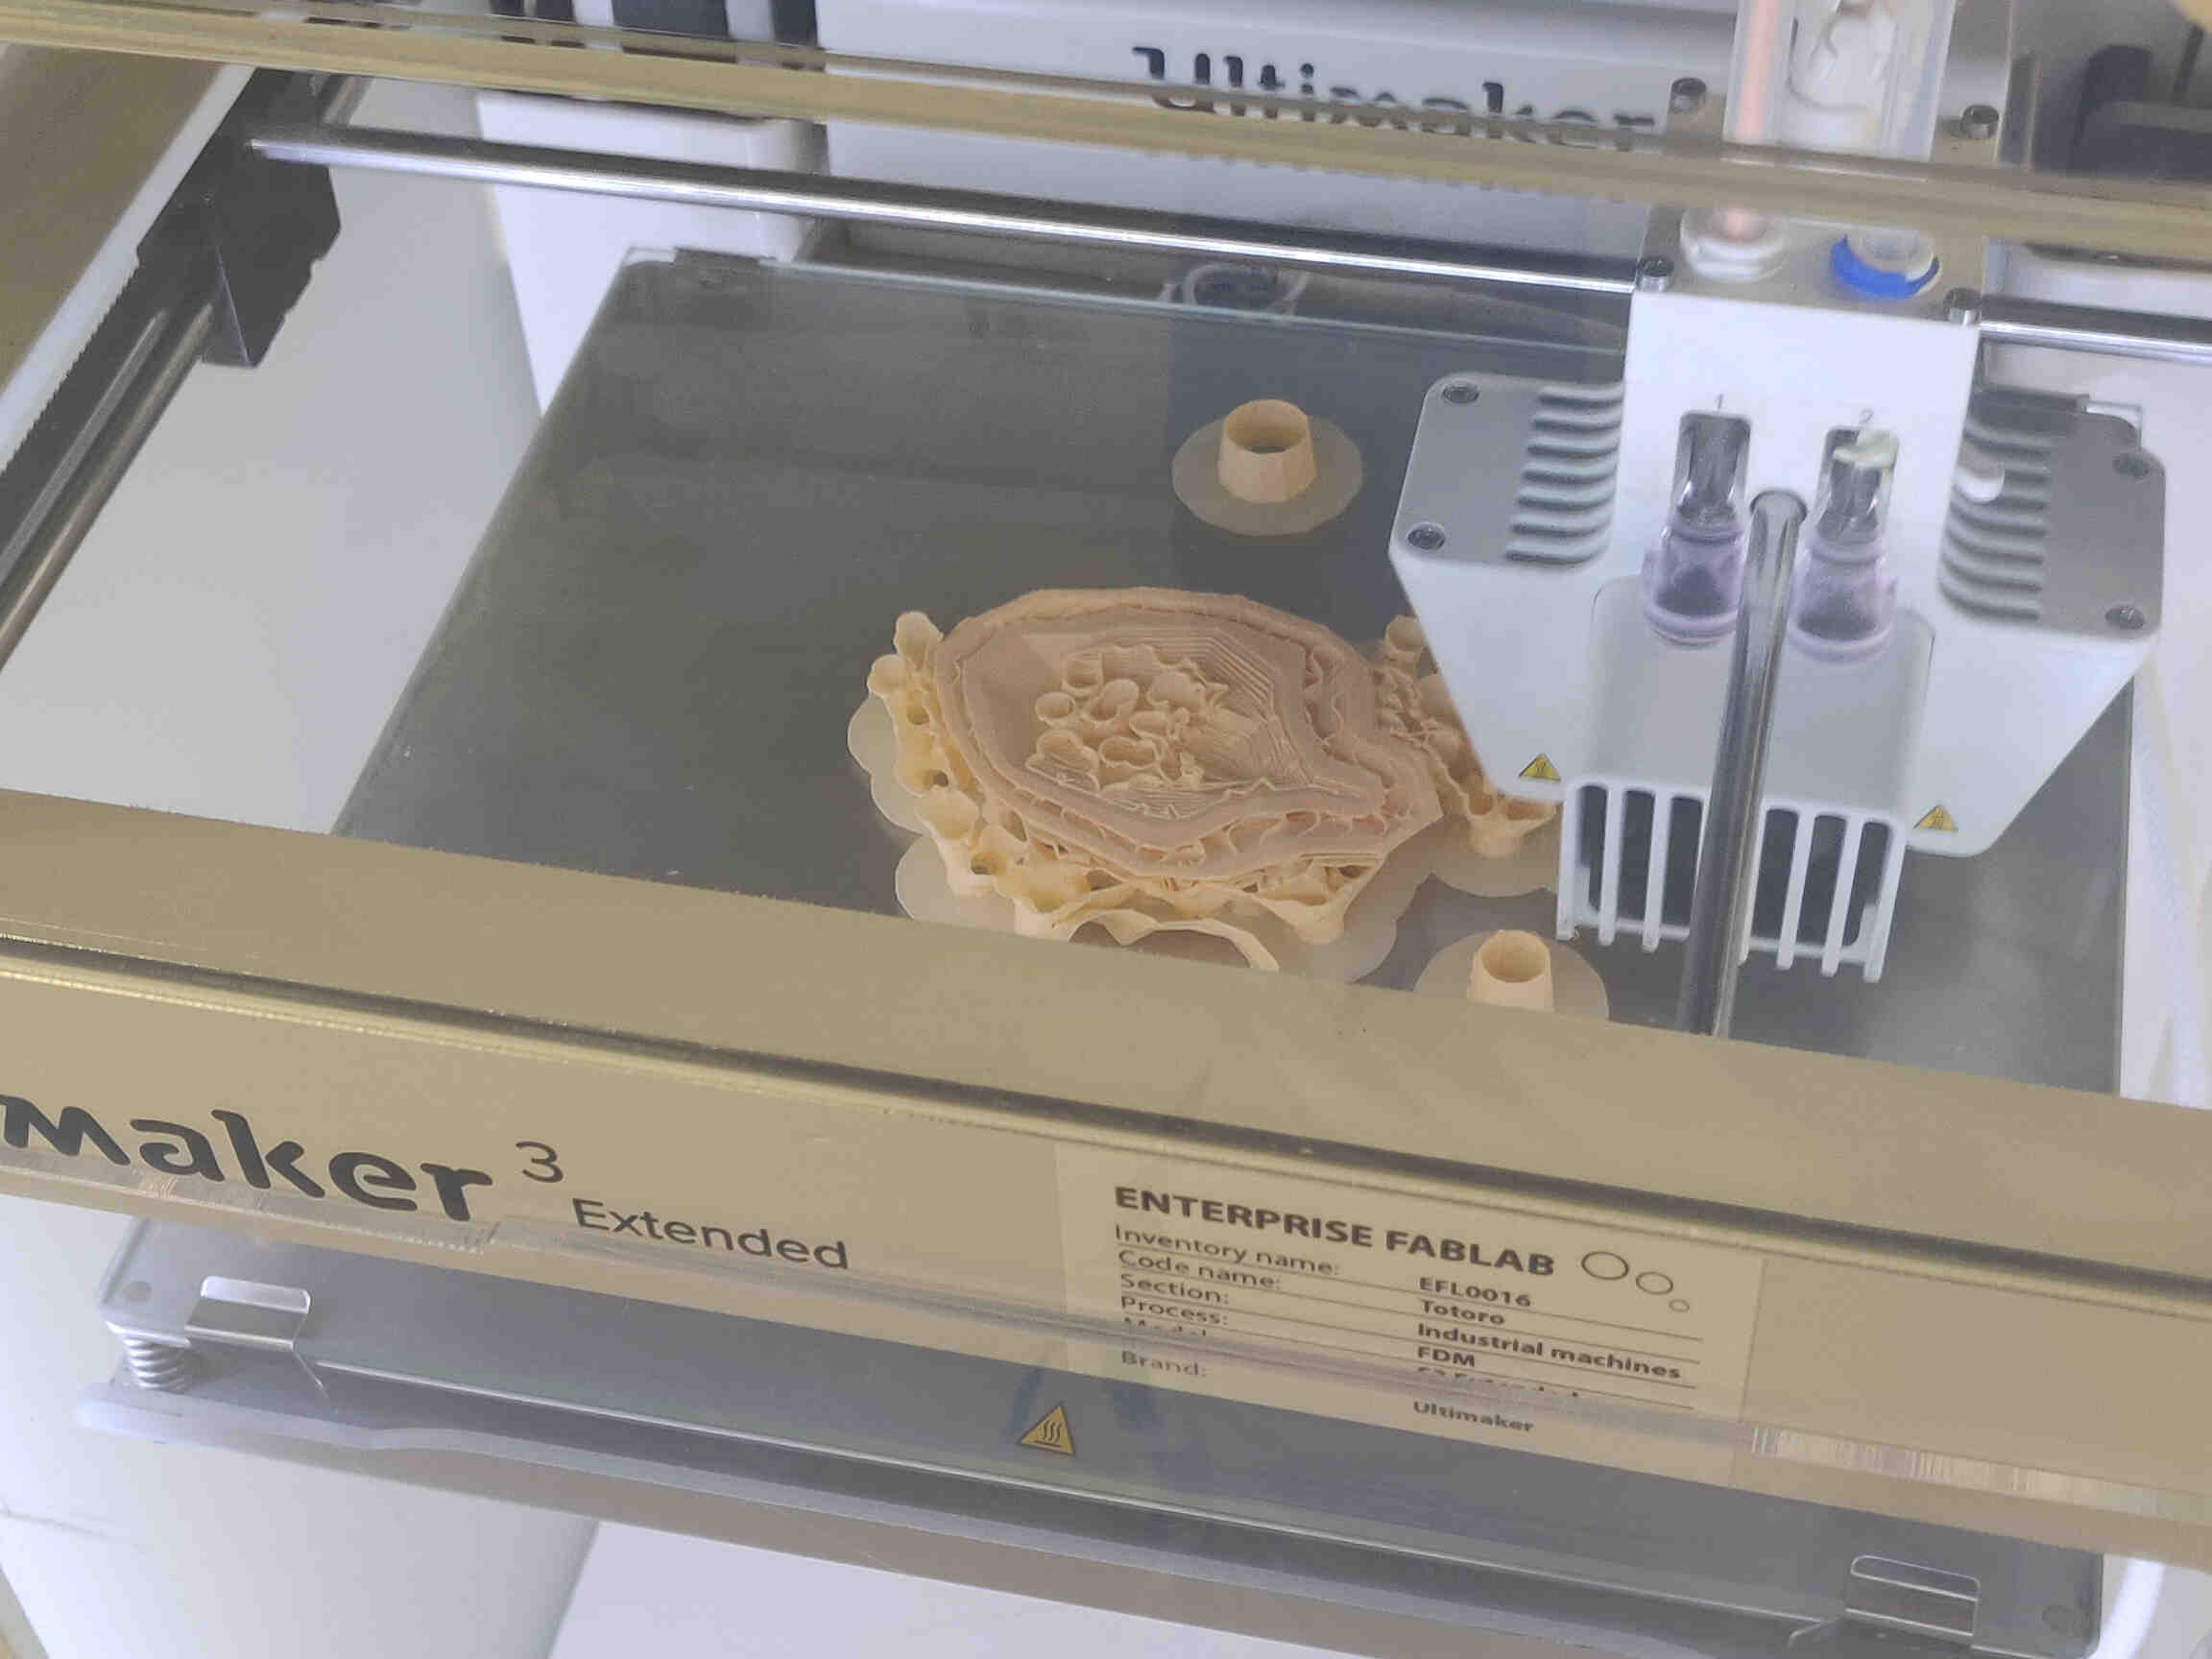
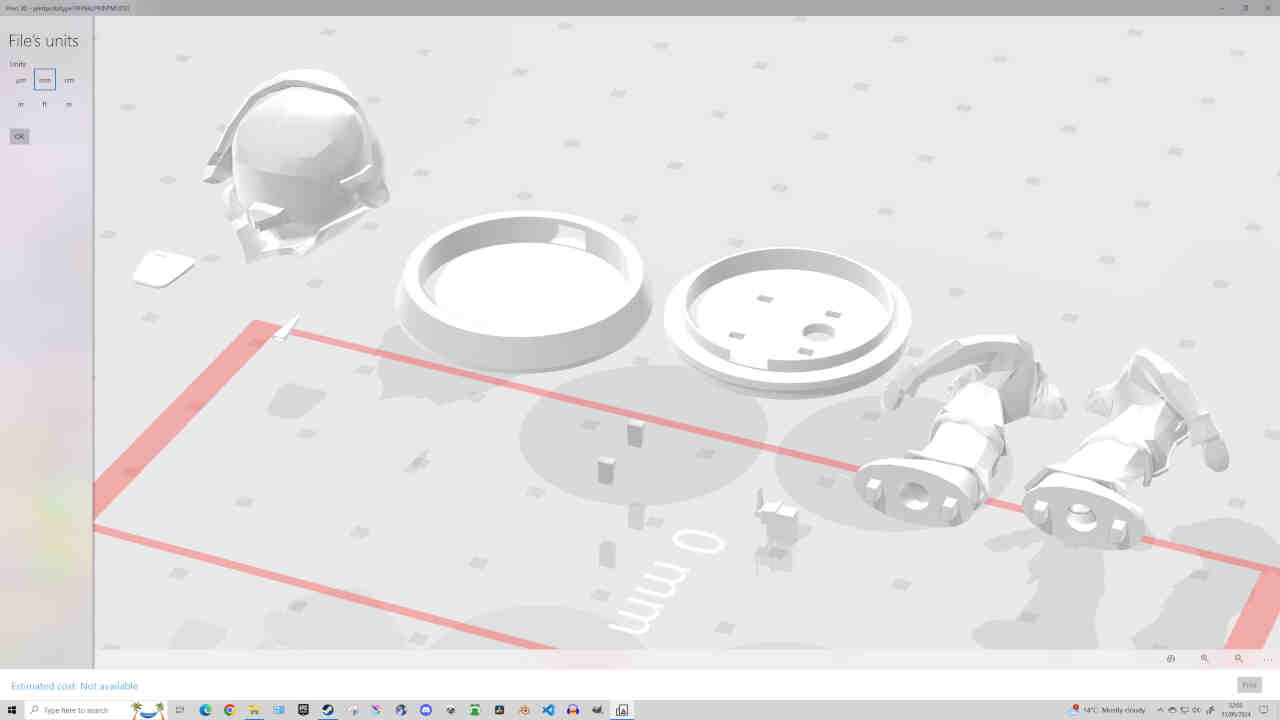
First surprise of the day was noticing the Prusa Printer was out of commission and several of the printers I was used to were relocated to the SEEK Festival Event in town. So I had to spend the morning refreshing my knowledge on Ultimakers, preparing STL models through Prusaslicer, slicing in Cura converting files, replacing filament and restarting prints.
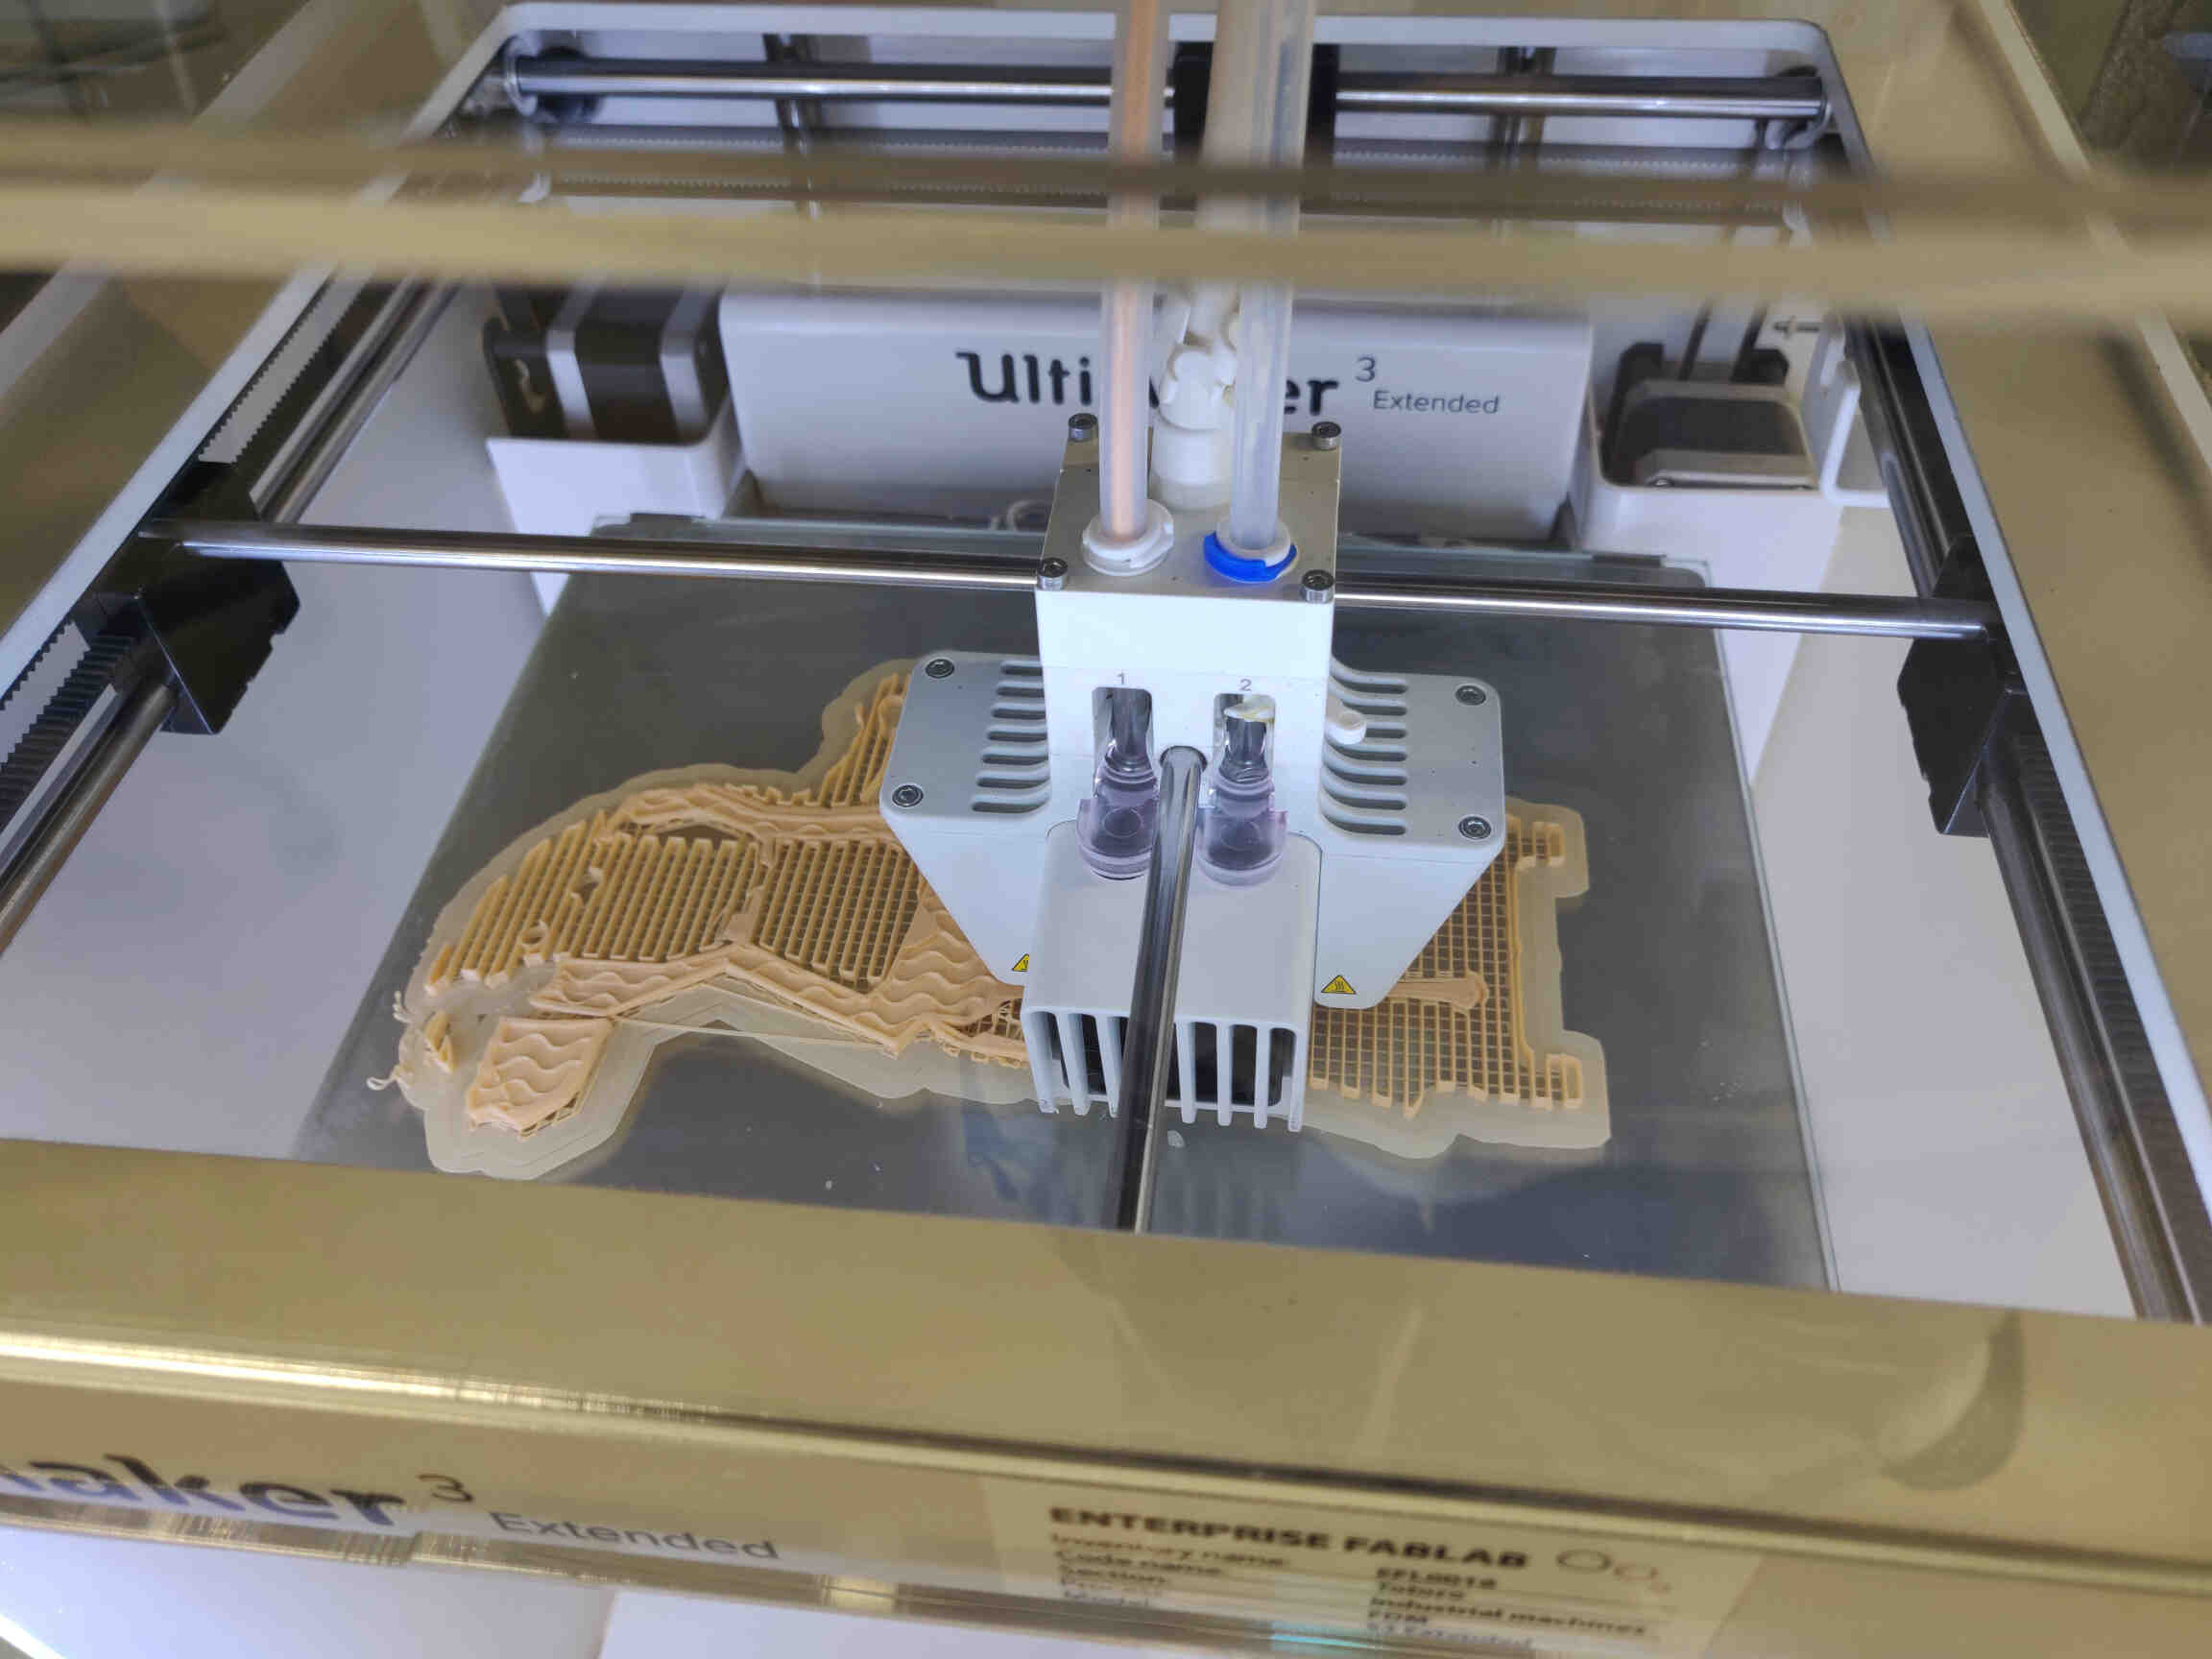
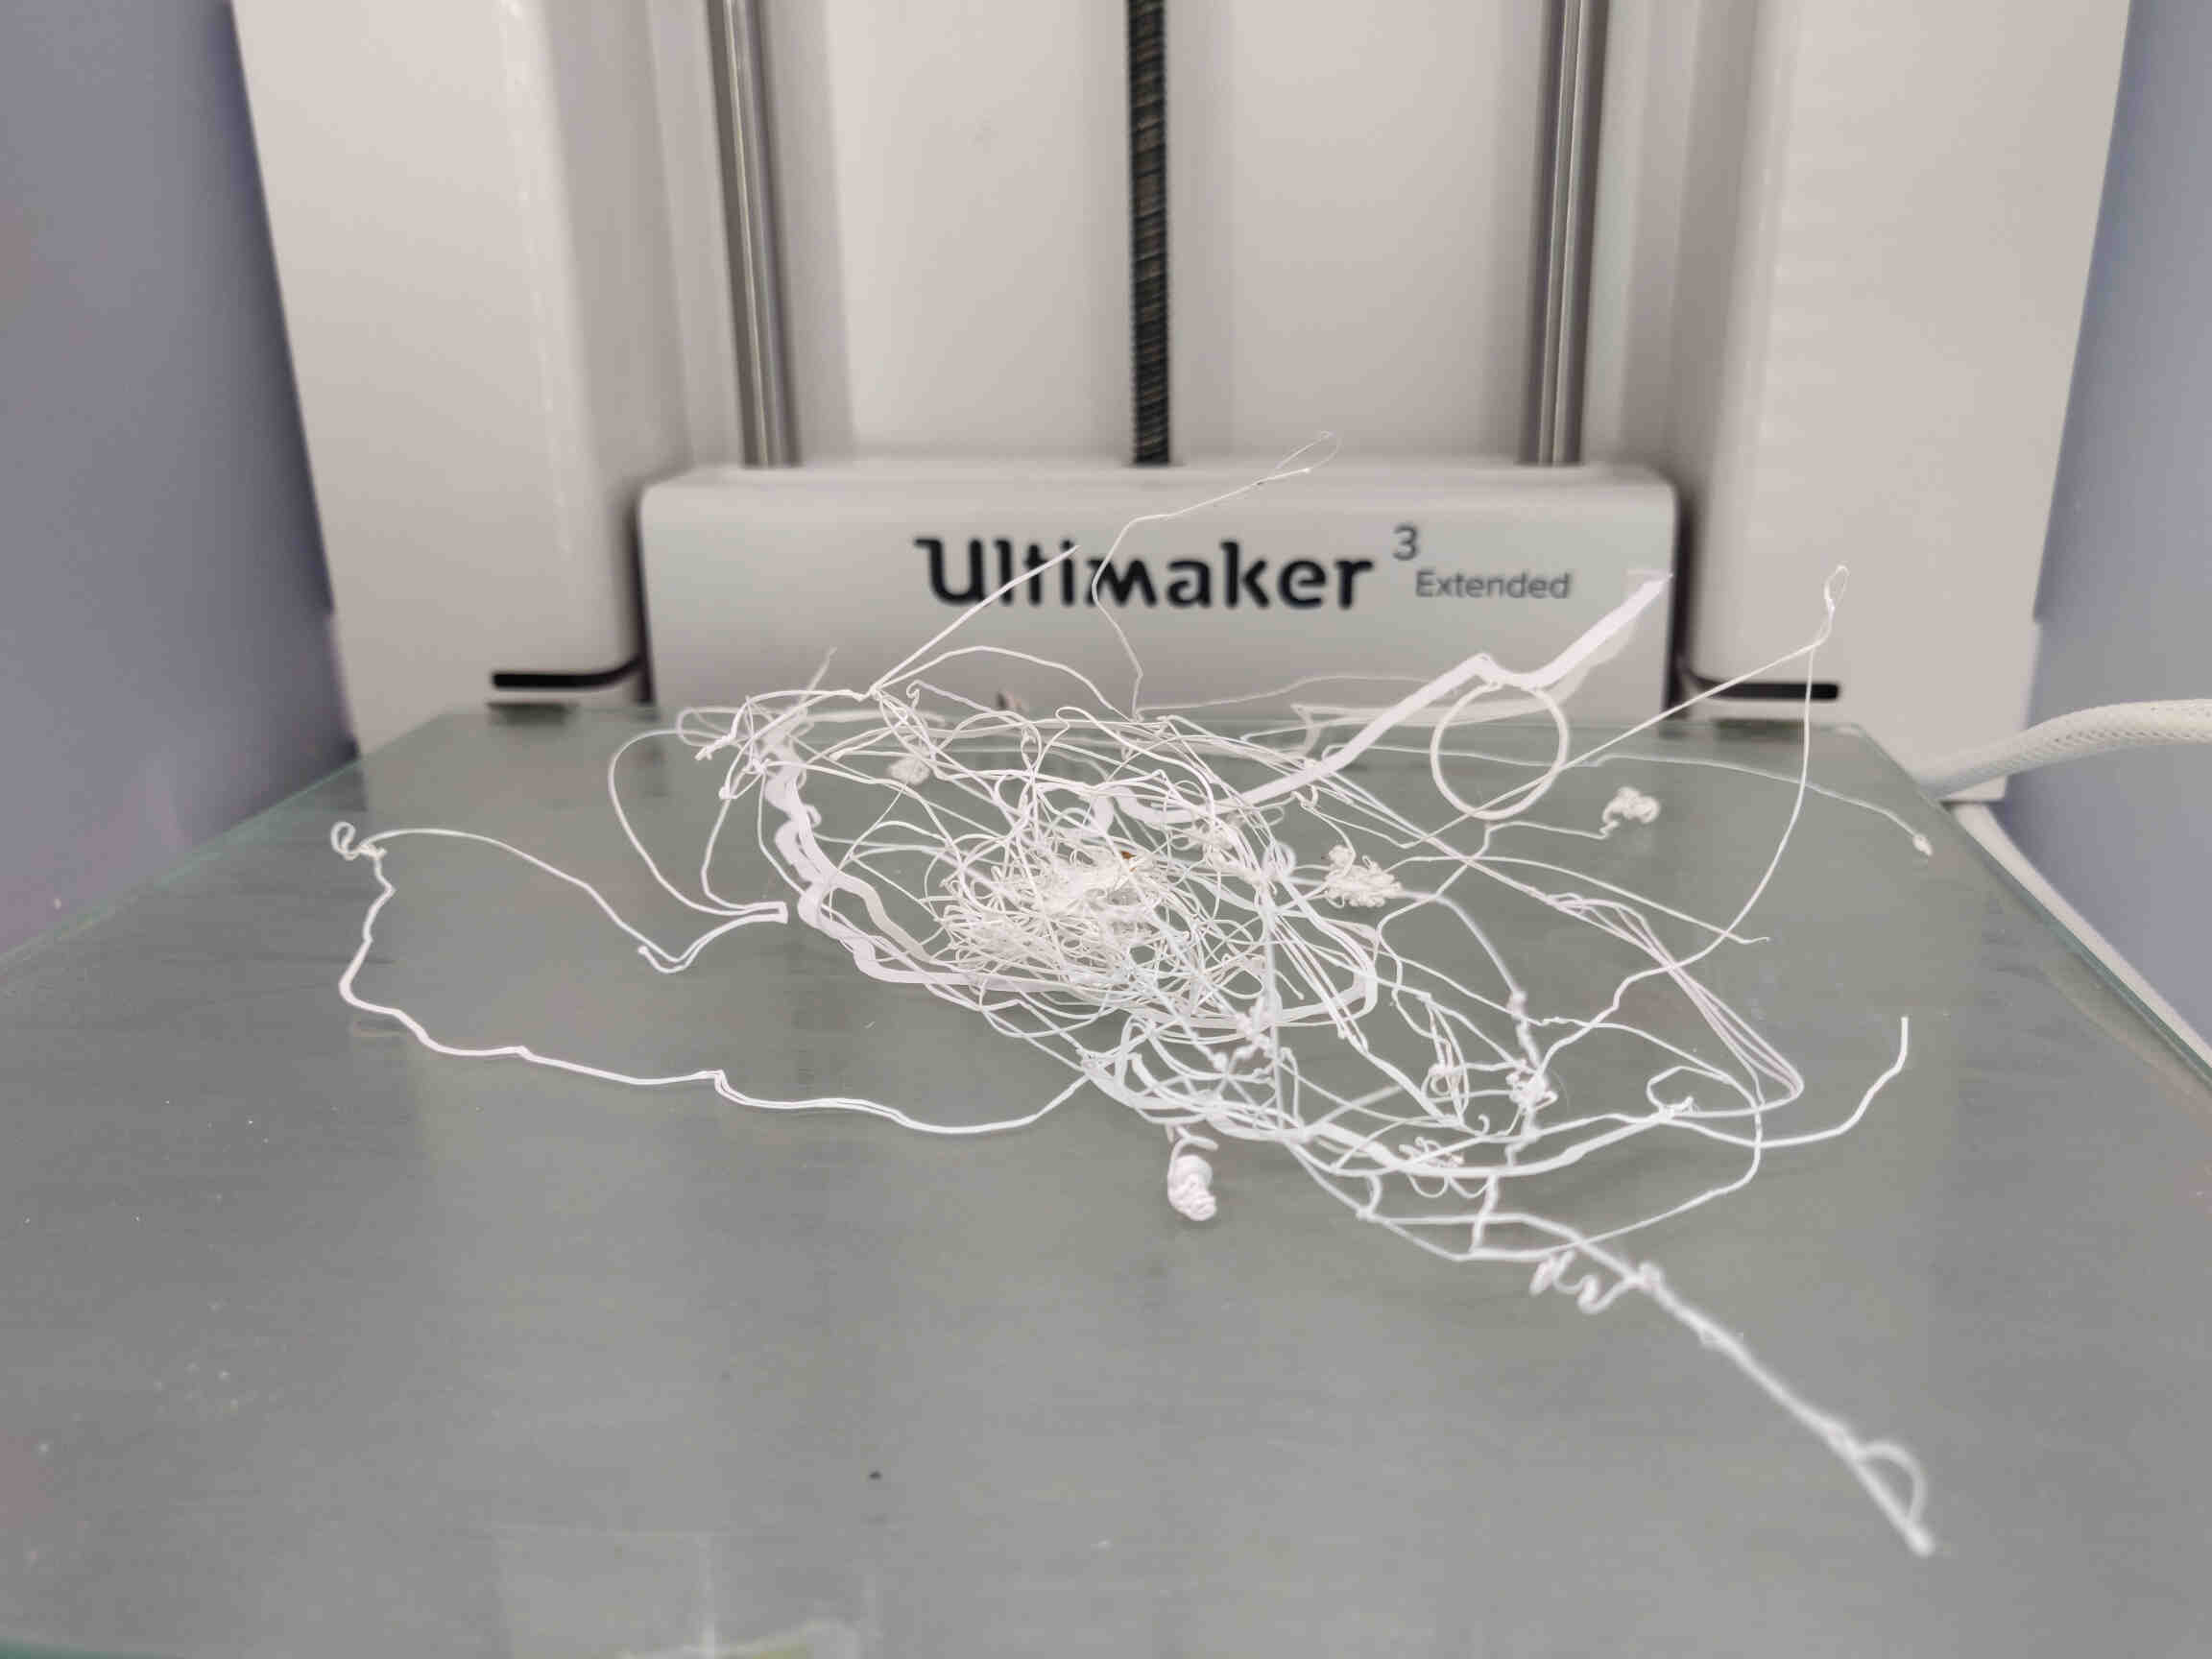
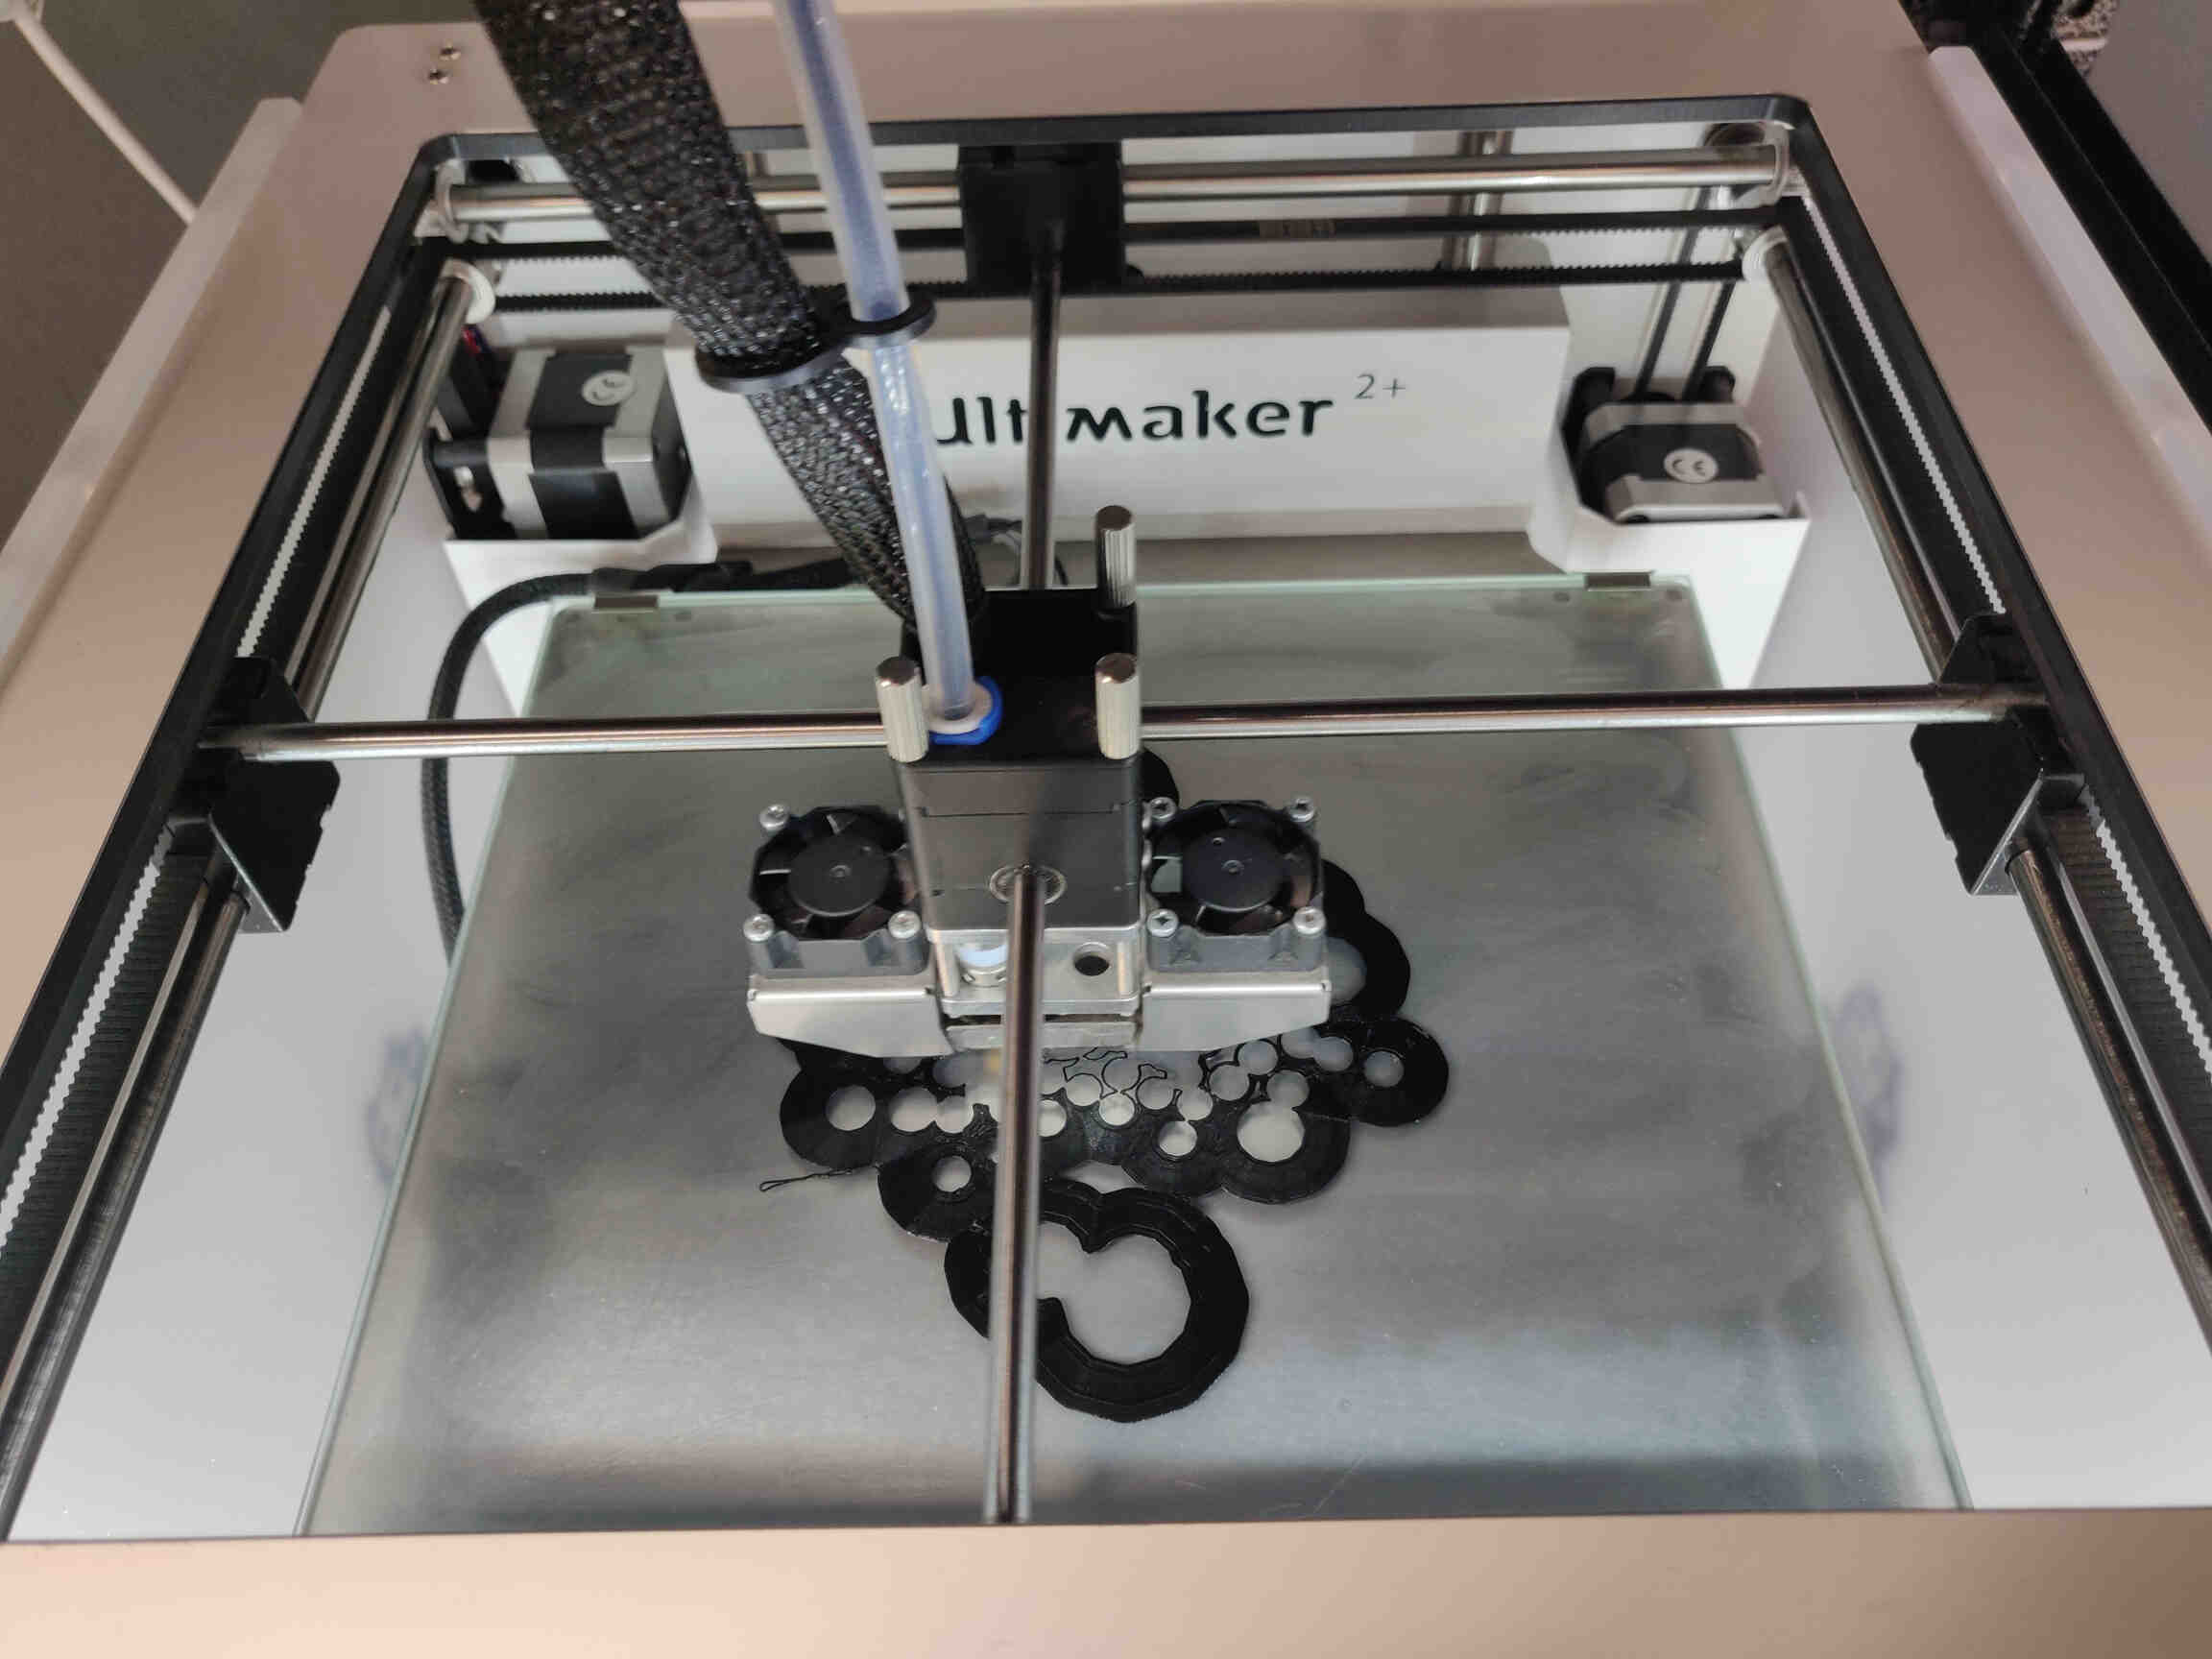
I ran into major issues with the Ultimaker 3 Extended as the filament refused to stick. So much so that if left alone for 30 minutes it would cause a clog and fry the circuits. I restarted the print close to 8 times, each time attempting something different (raising/lowering bed temperature, increasing nozzle temperature, adding more/less adhesive, converting files, etc). I couldn't get it to work but later discovered it was the fresh white filament I used that refused to stick. I was using PLA 2.85 diameter filament which is what I needed, so I just swapped out the white for a different colour and that fixed the issue - it started sticking perfectly.
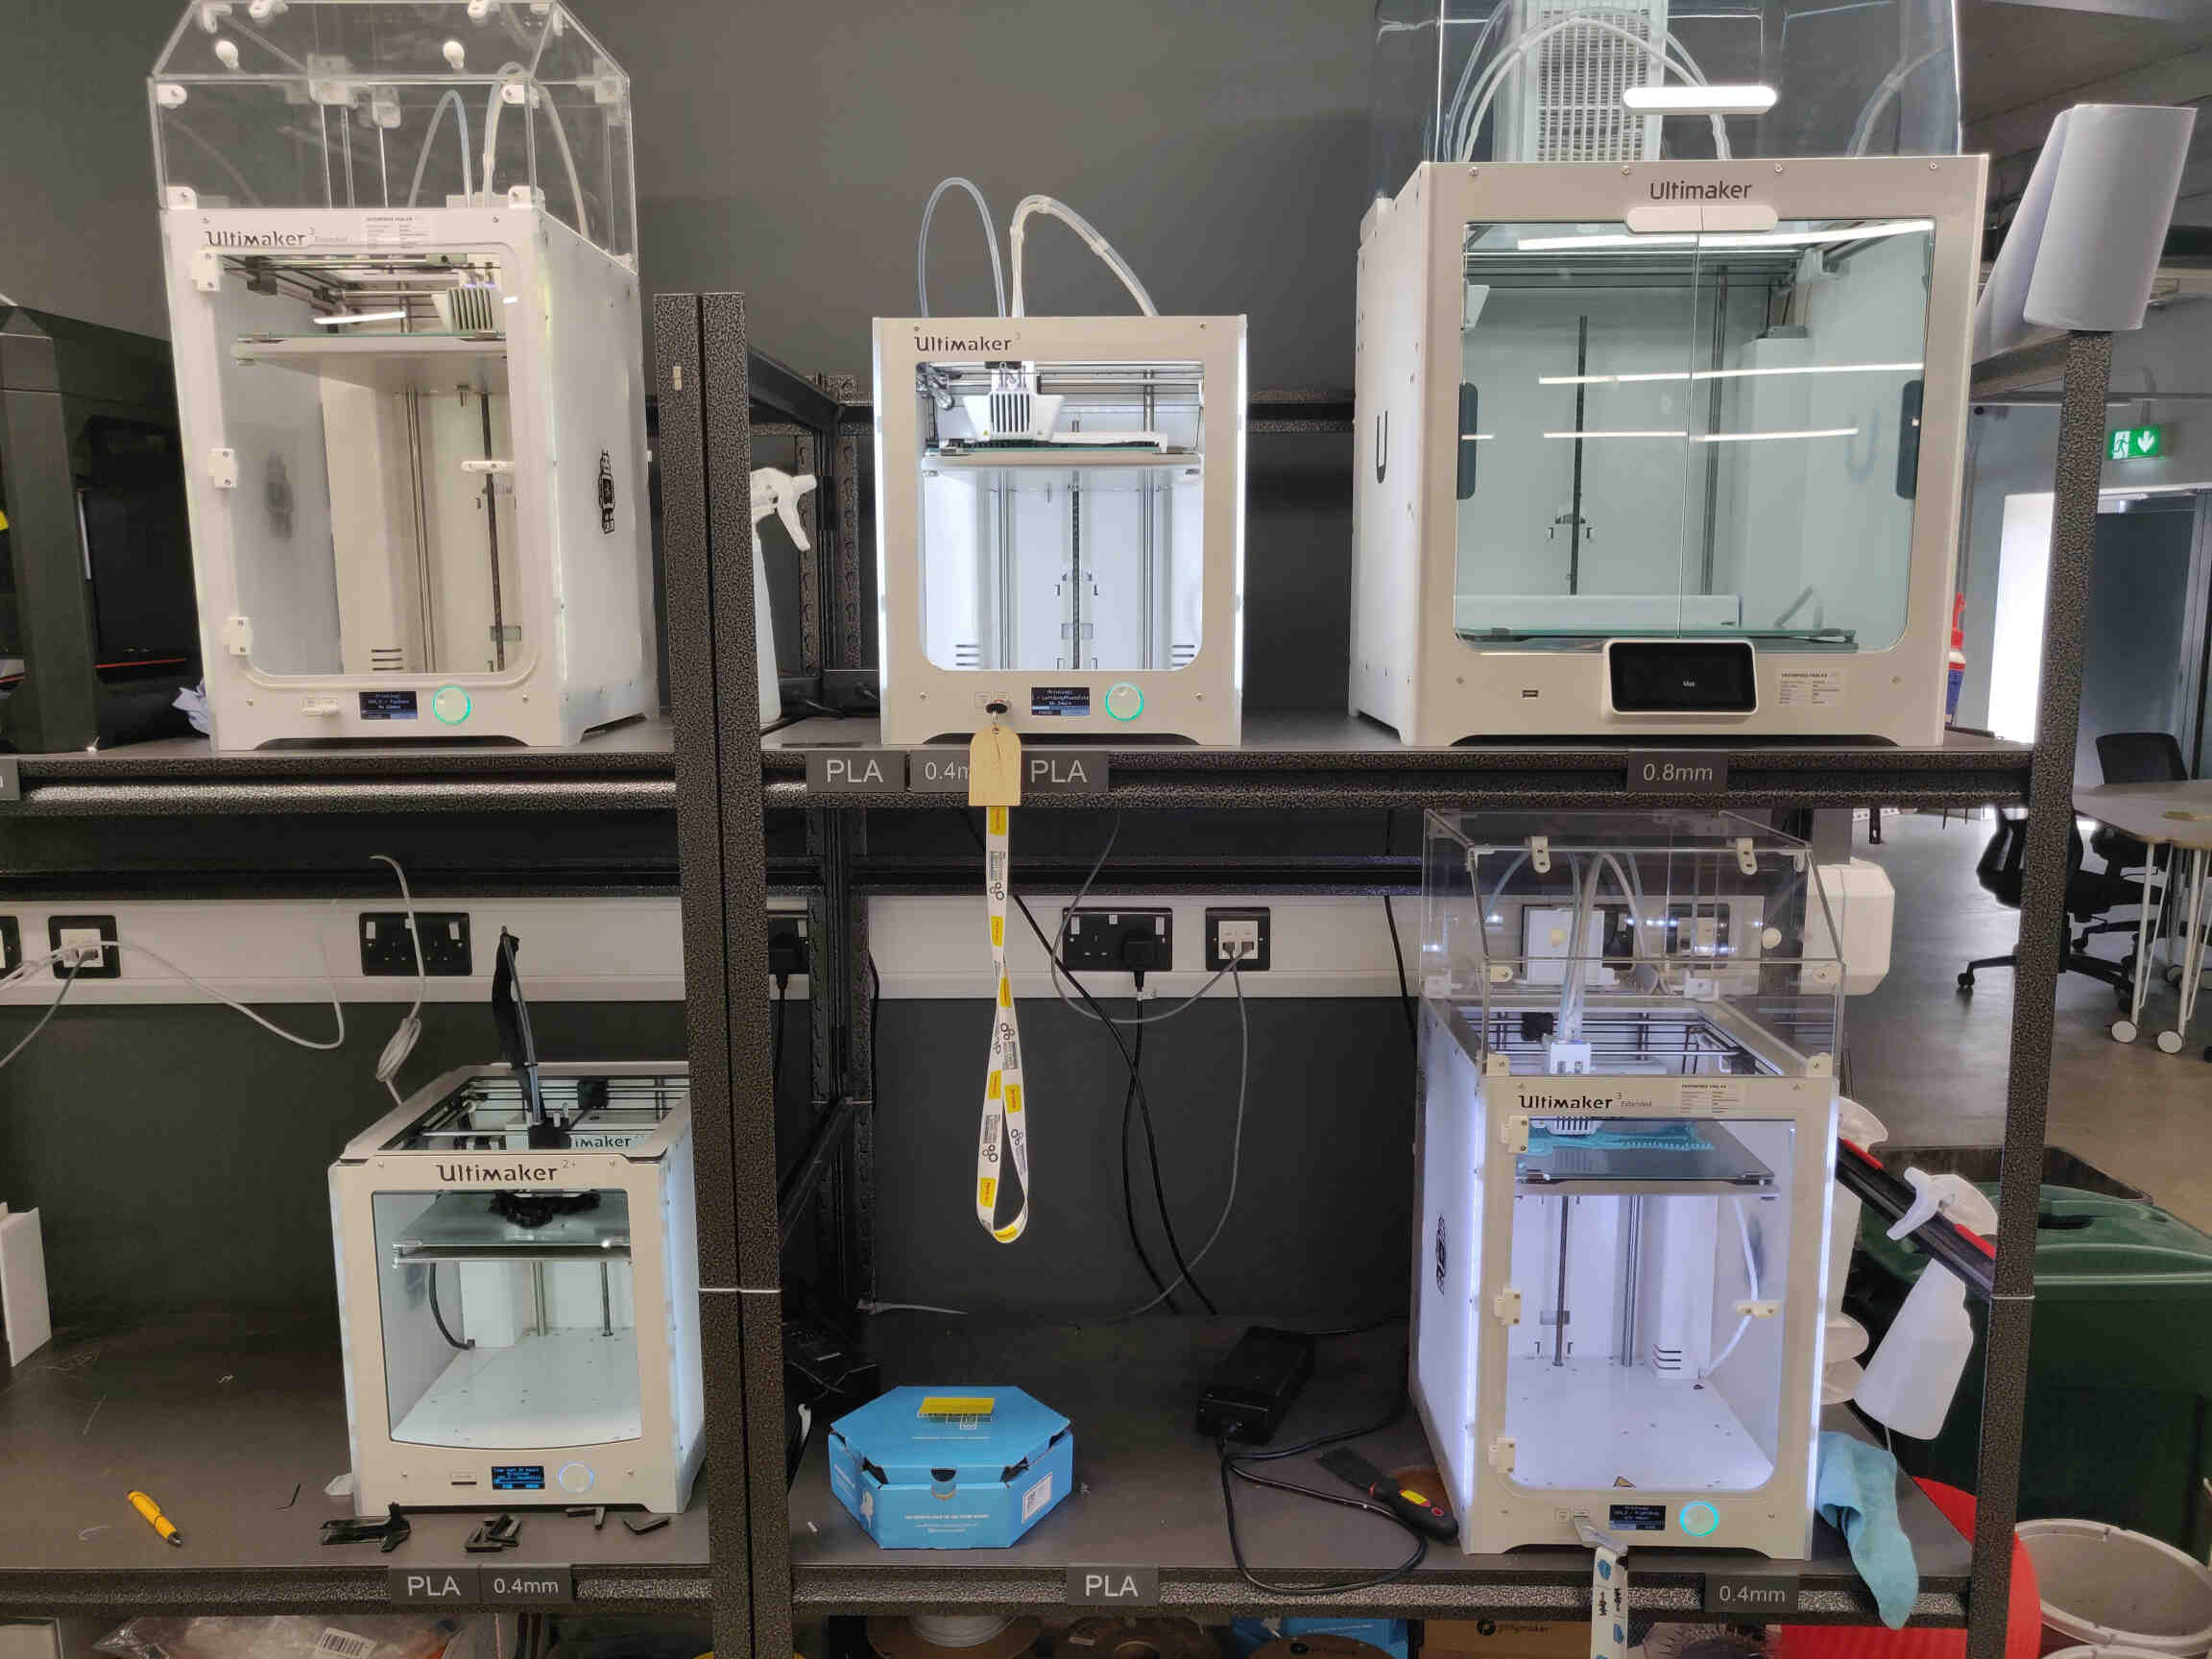
In total I set up 4 out of 5 prints I needed on an Ultimaker 2+, two Ultimaker 3 printers, and an Ultimaker 3 Extended. The final piece would have to be printed after the bank holiday.
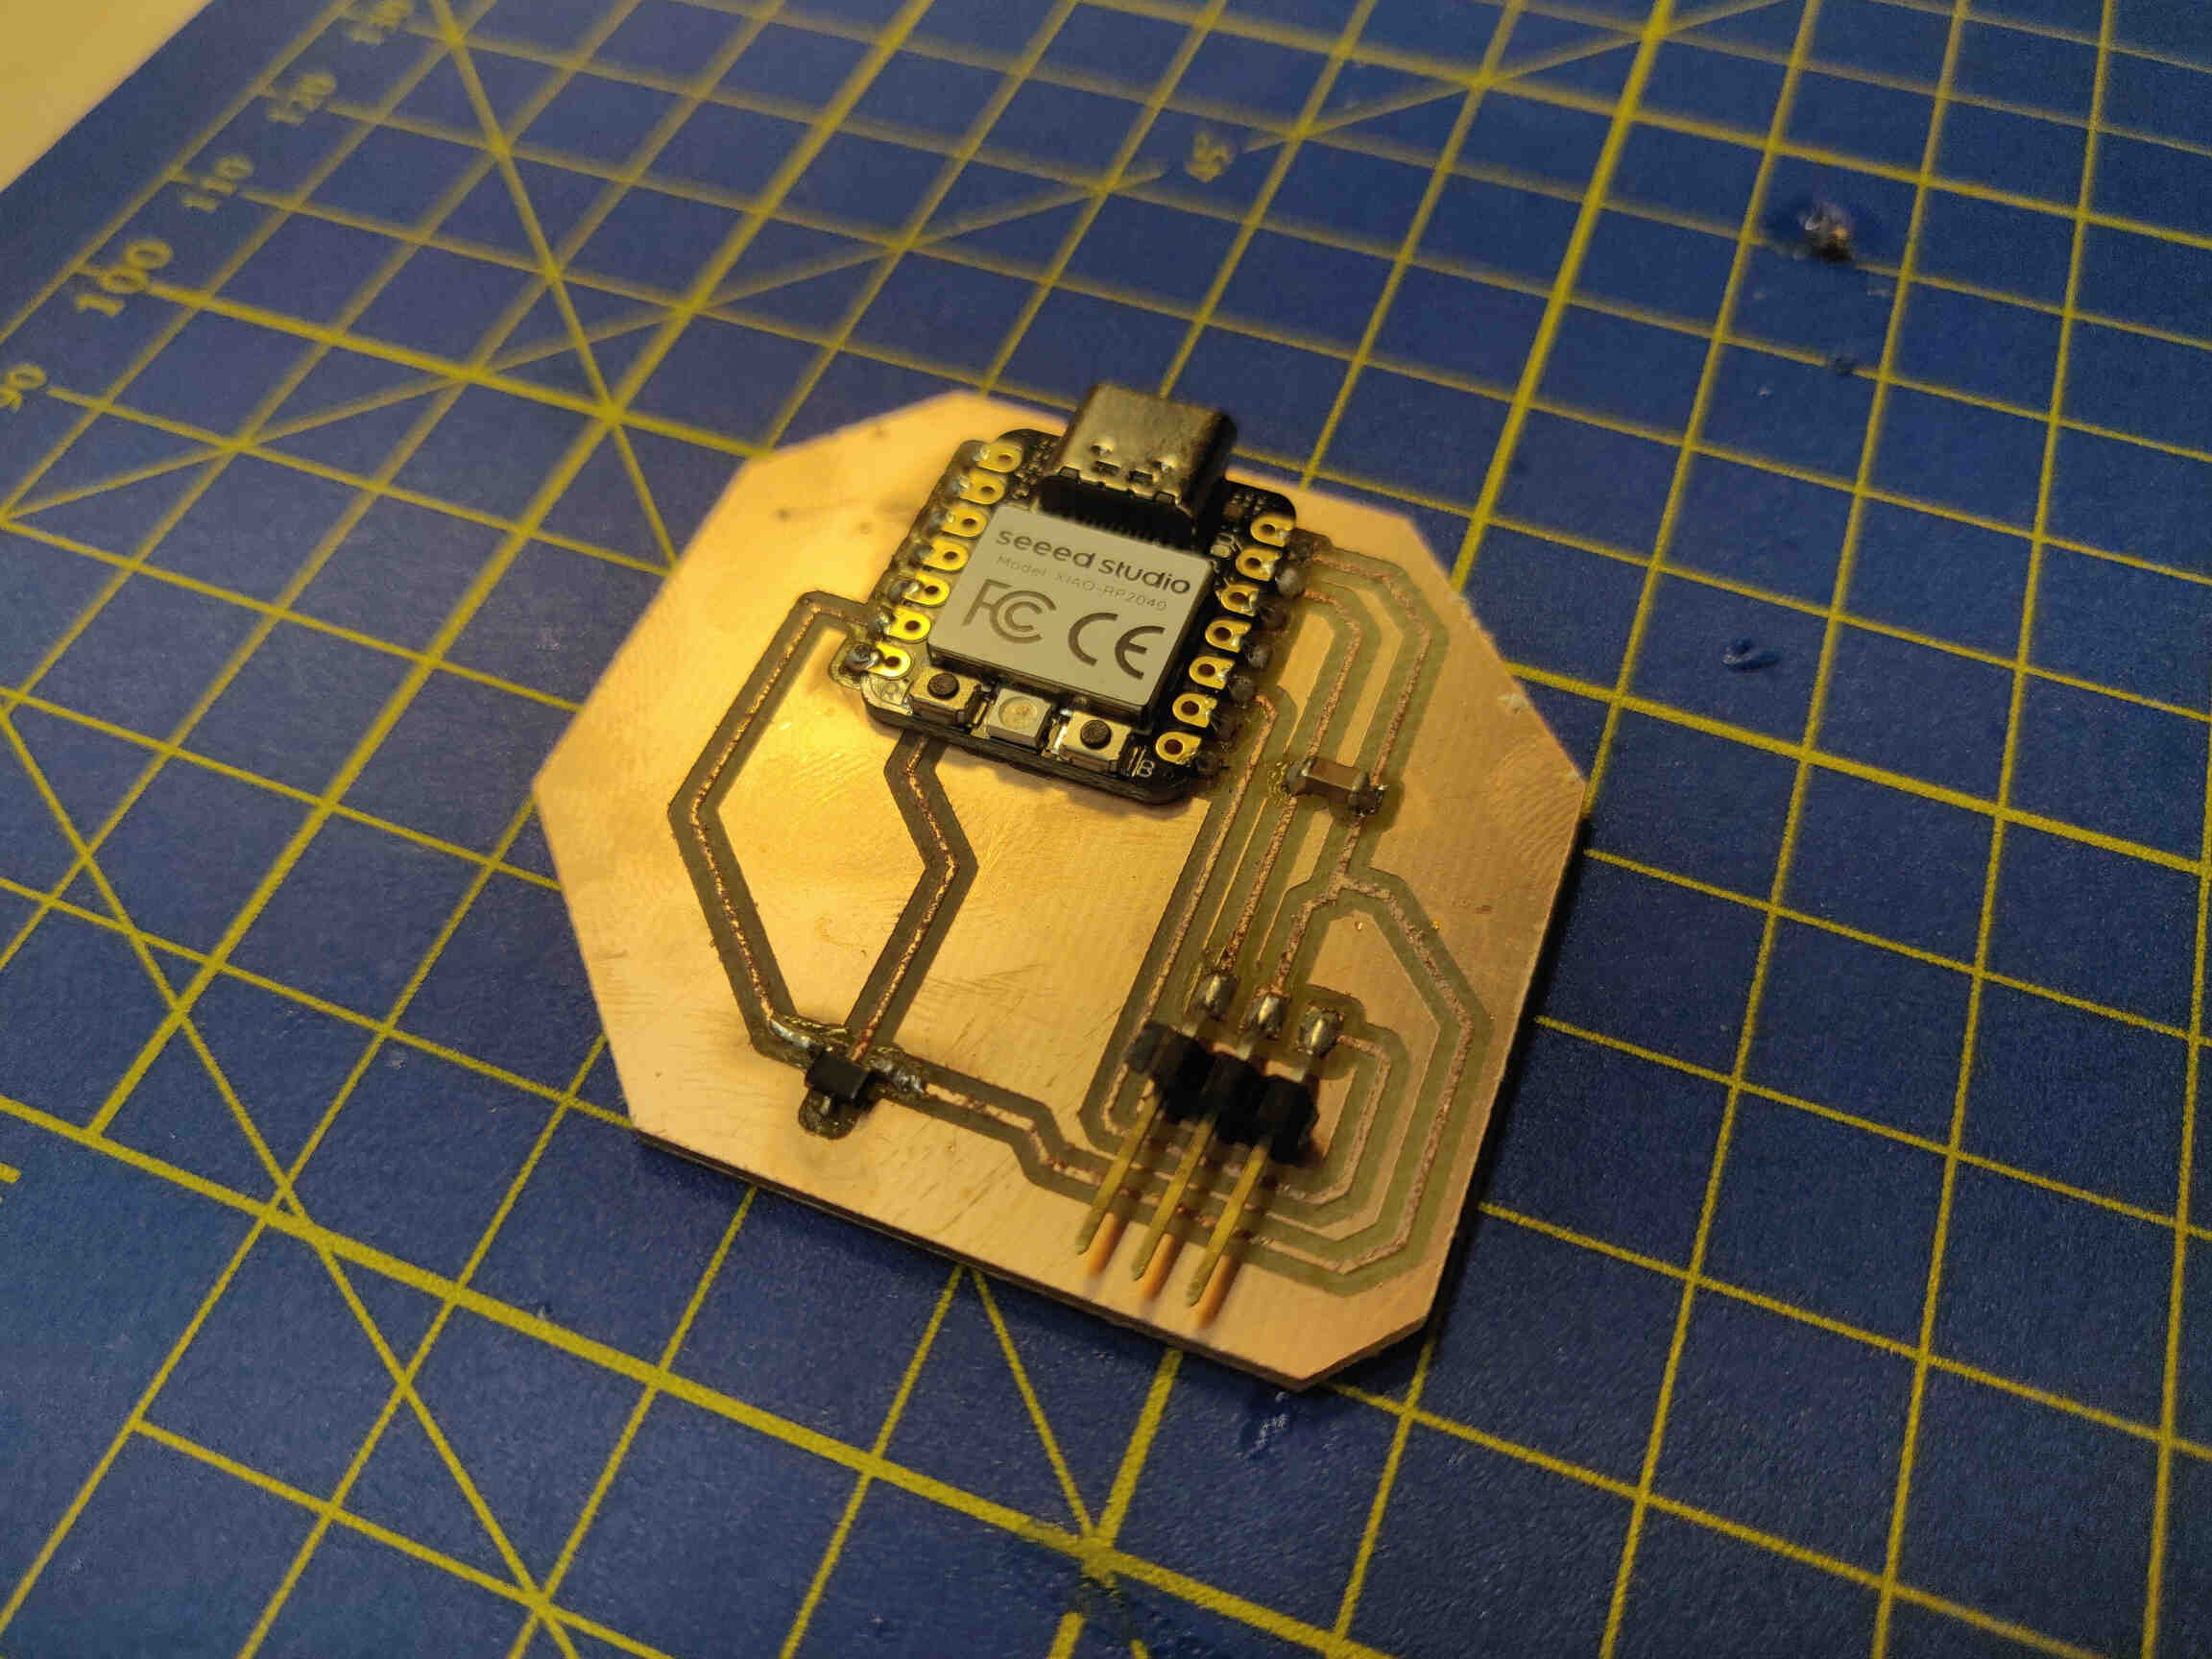
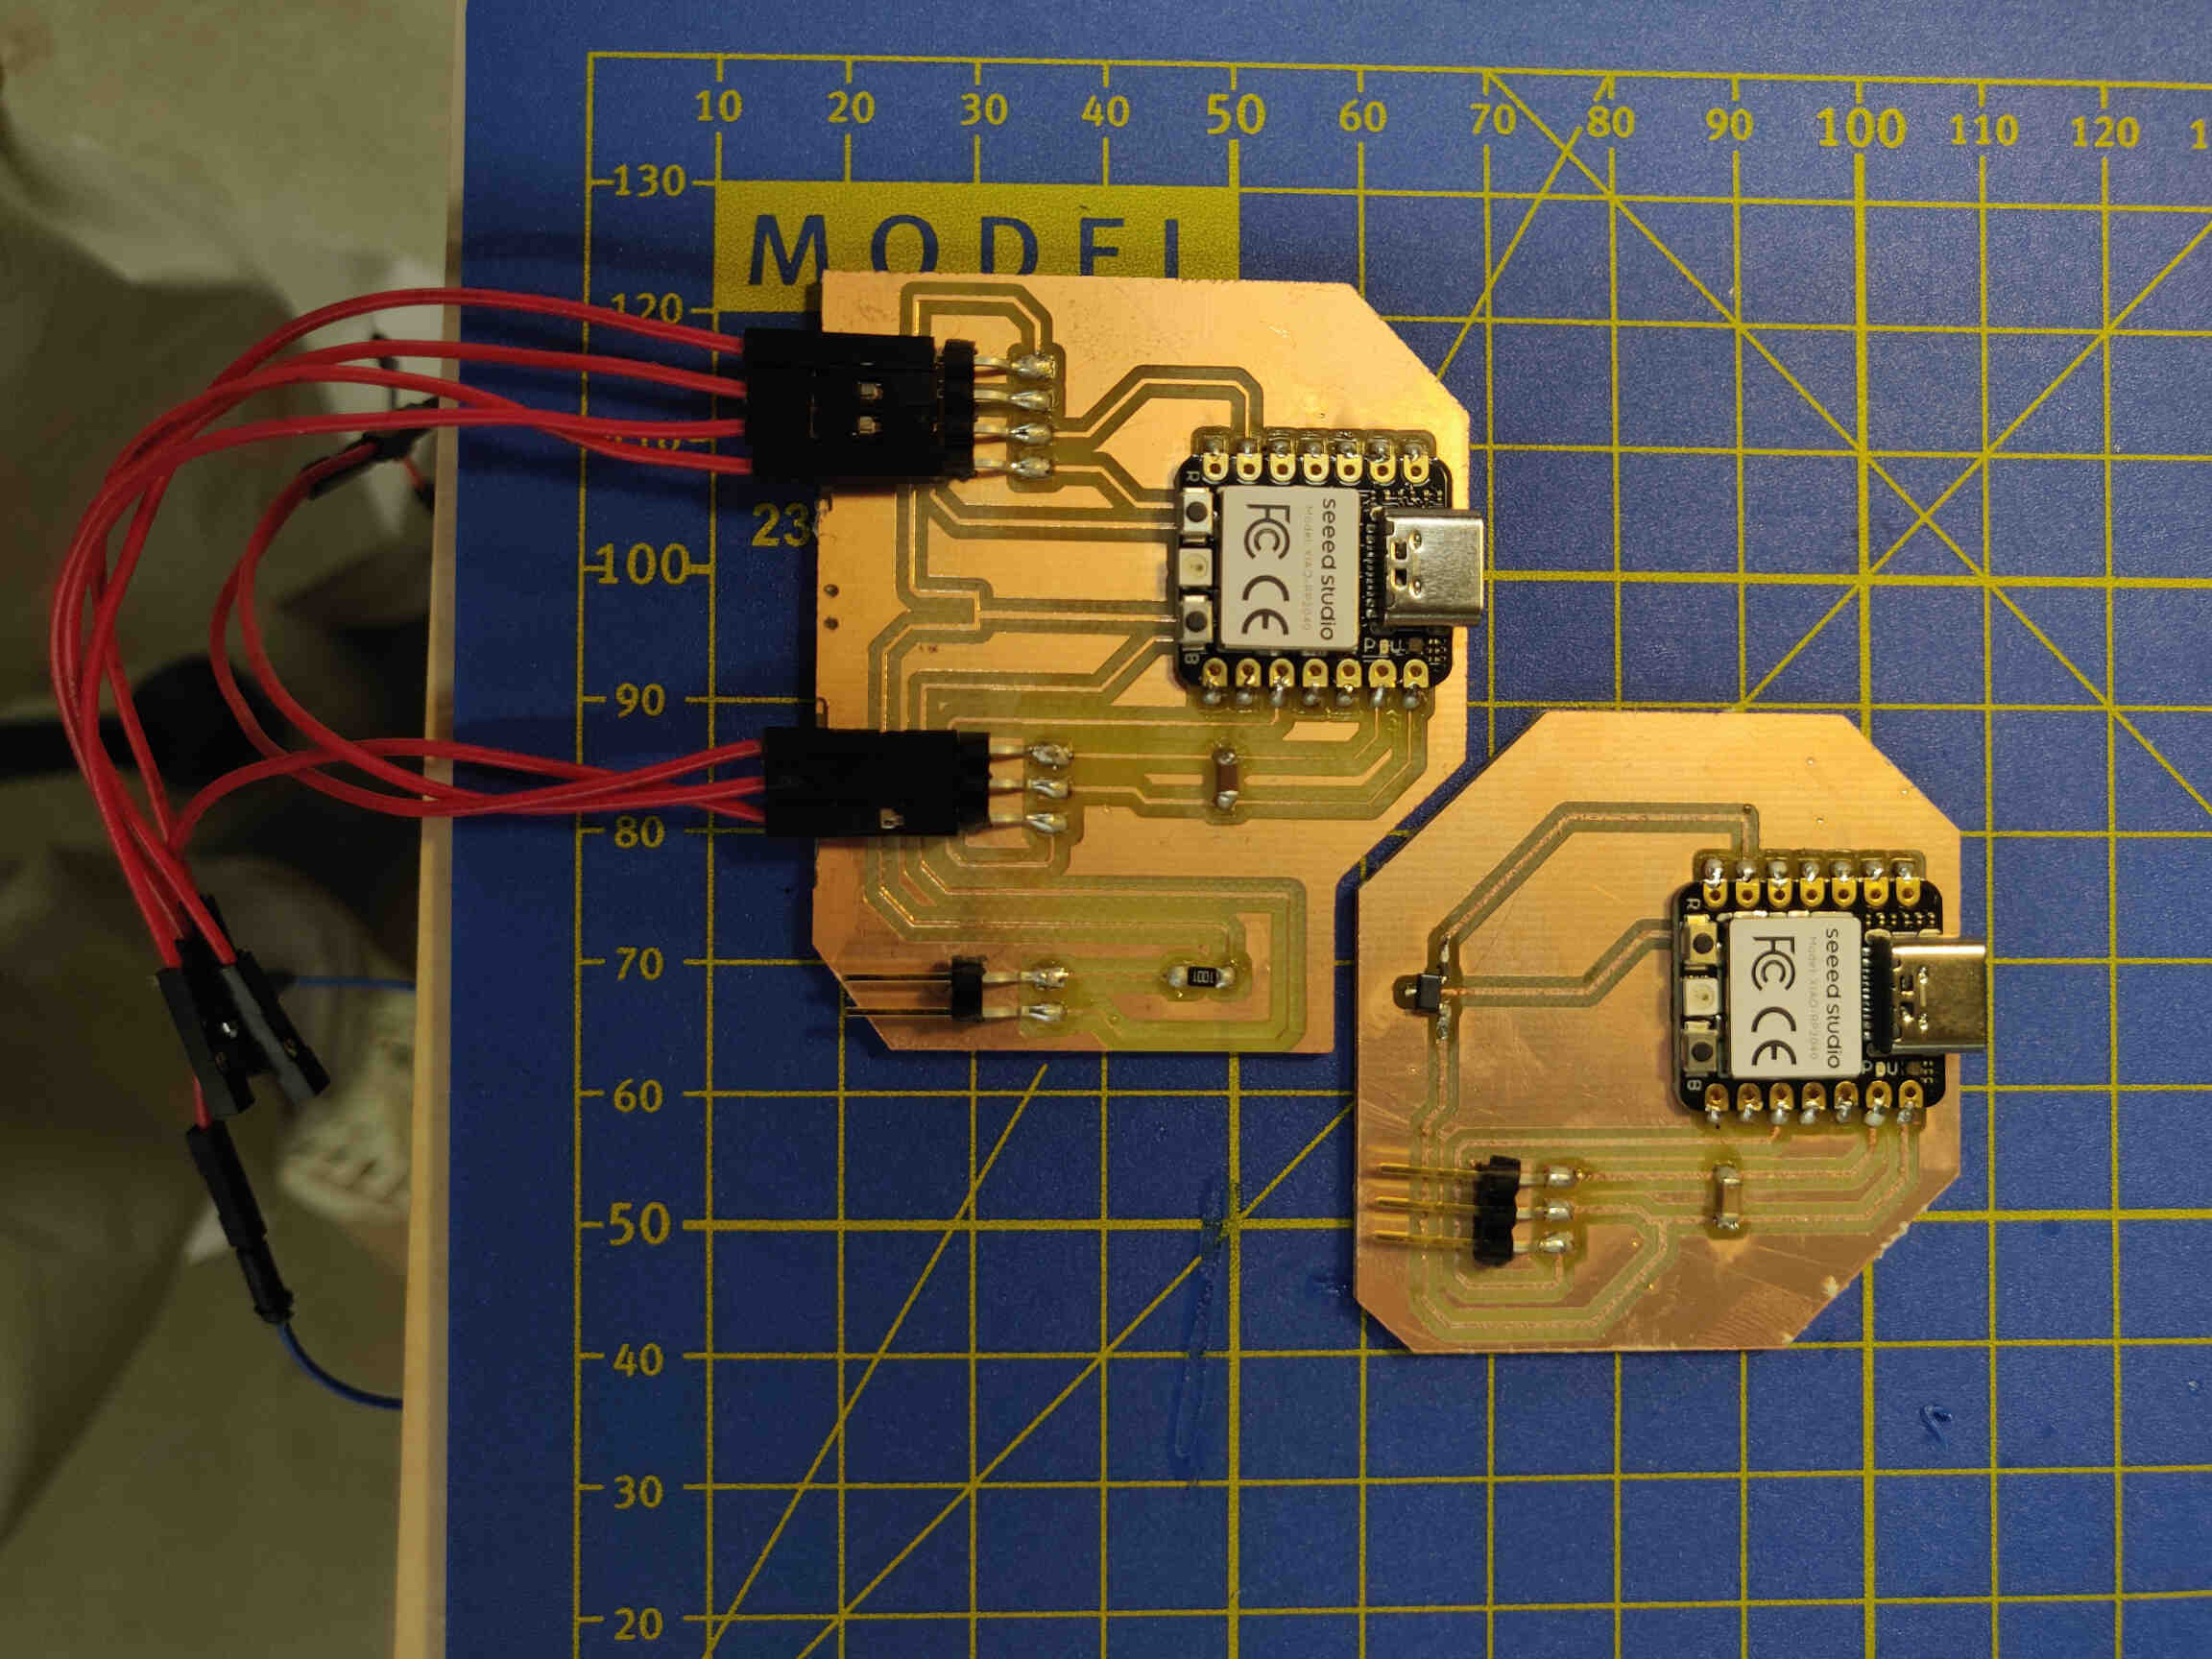
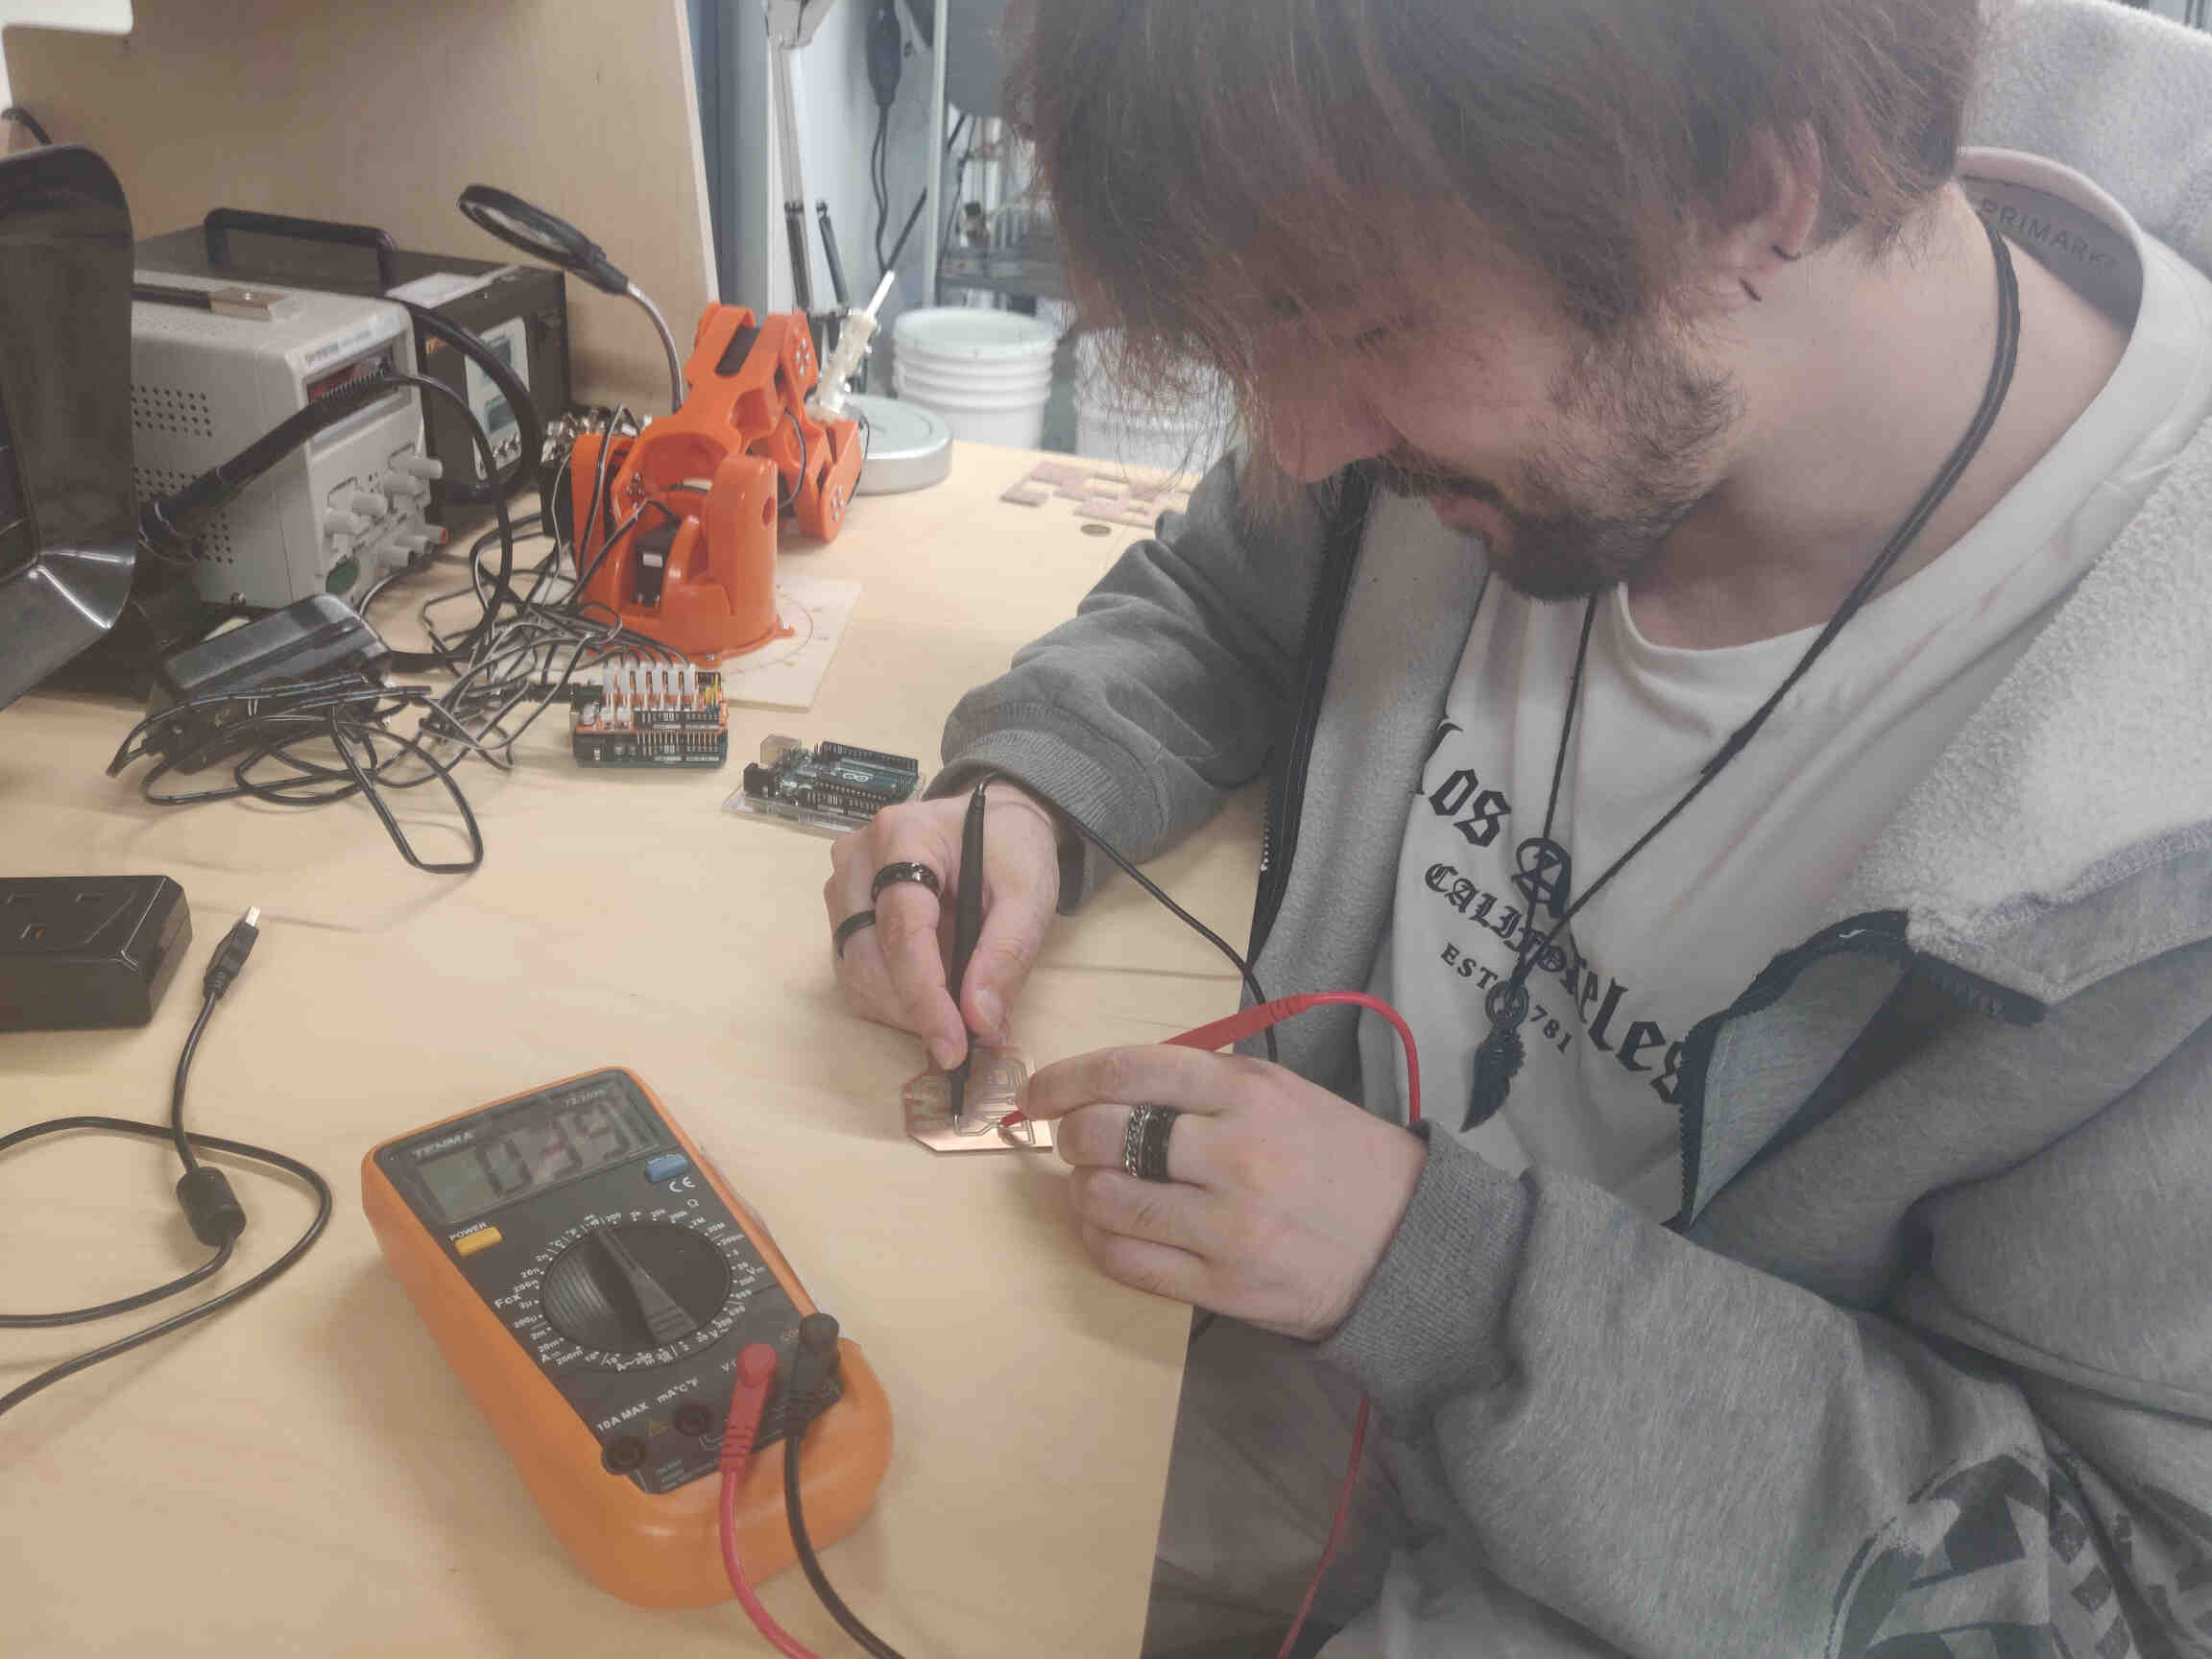
Milled Hall Effect PCB & Soldered components without complication, though the ridiculously small Hall Effect sensor was the hardest component to solder so far. Tested with Multimeter and everything connects just fine!
Sunday 2nd
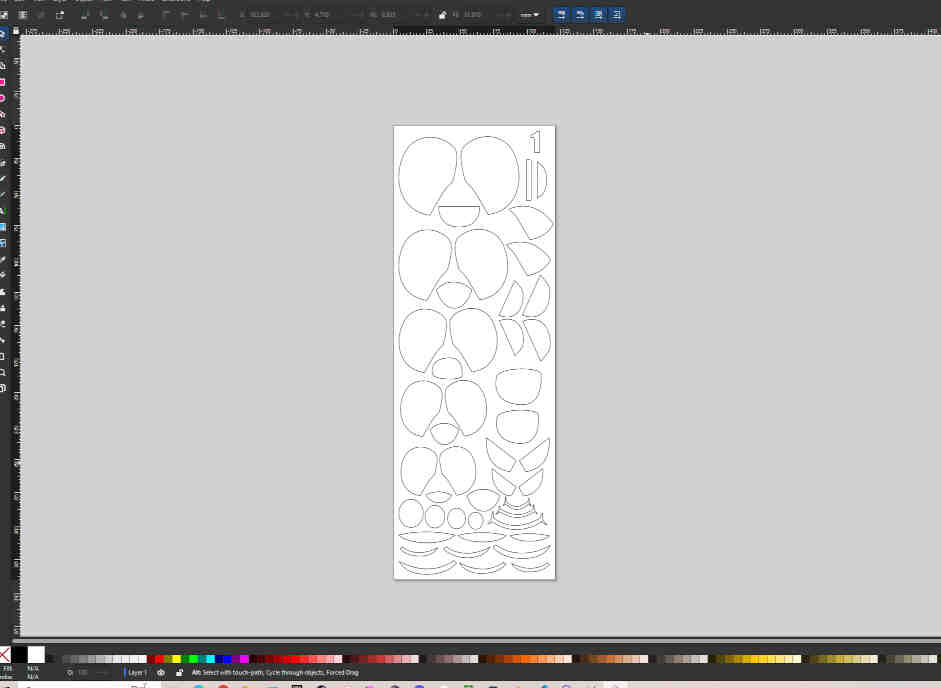
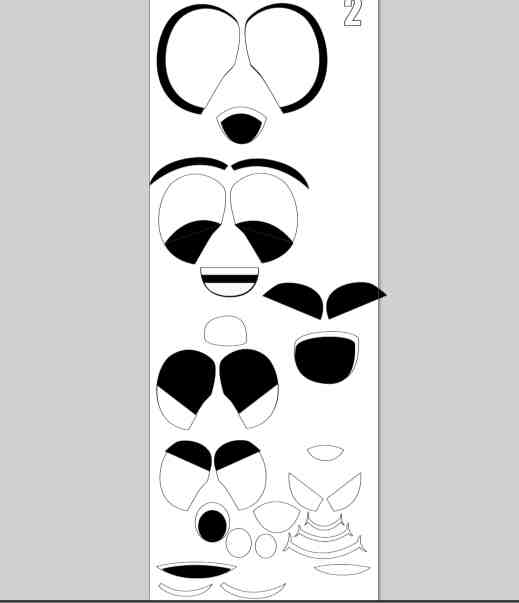
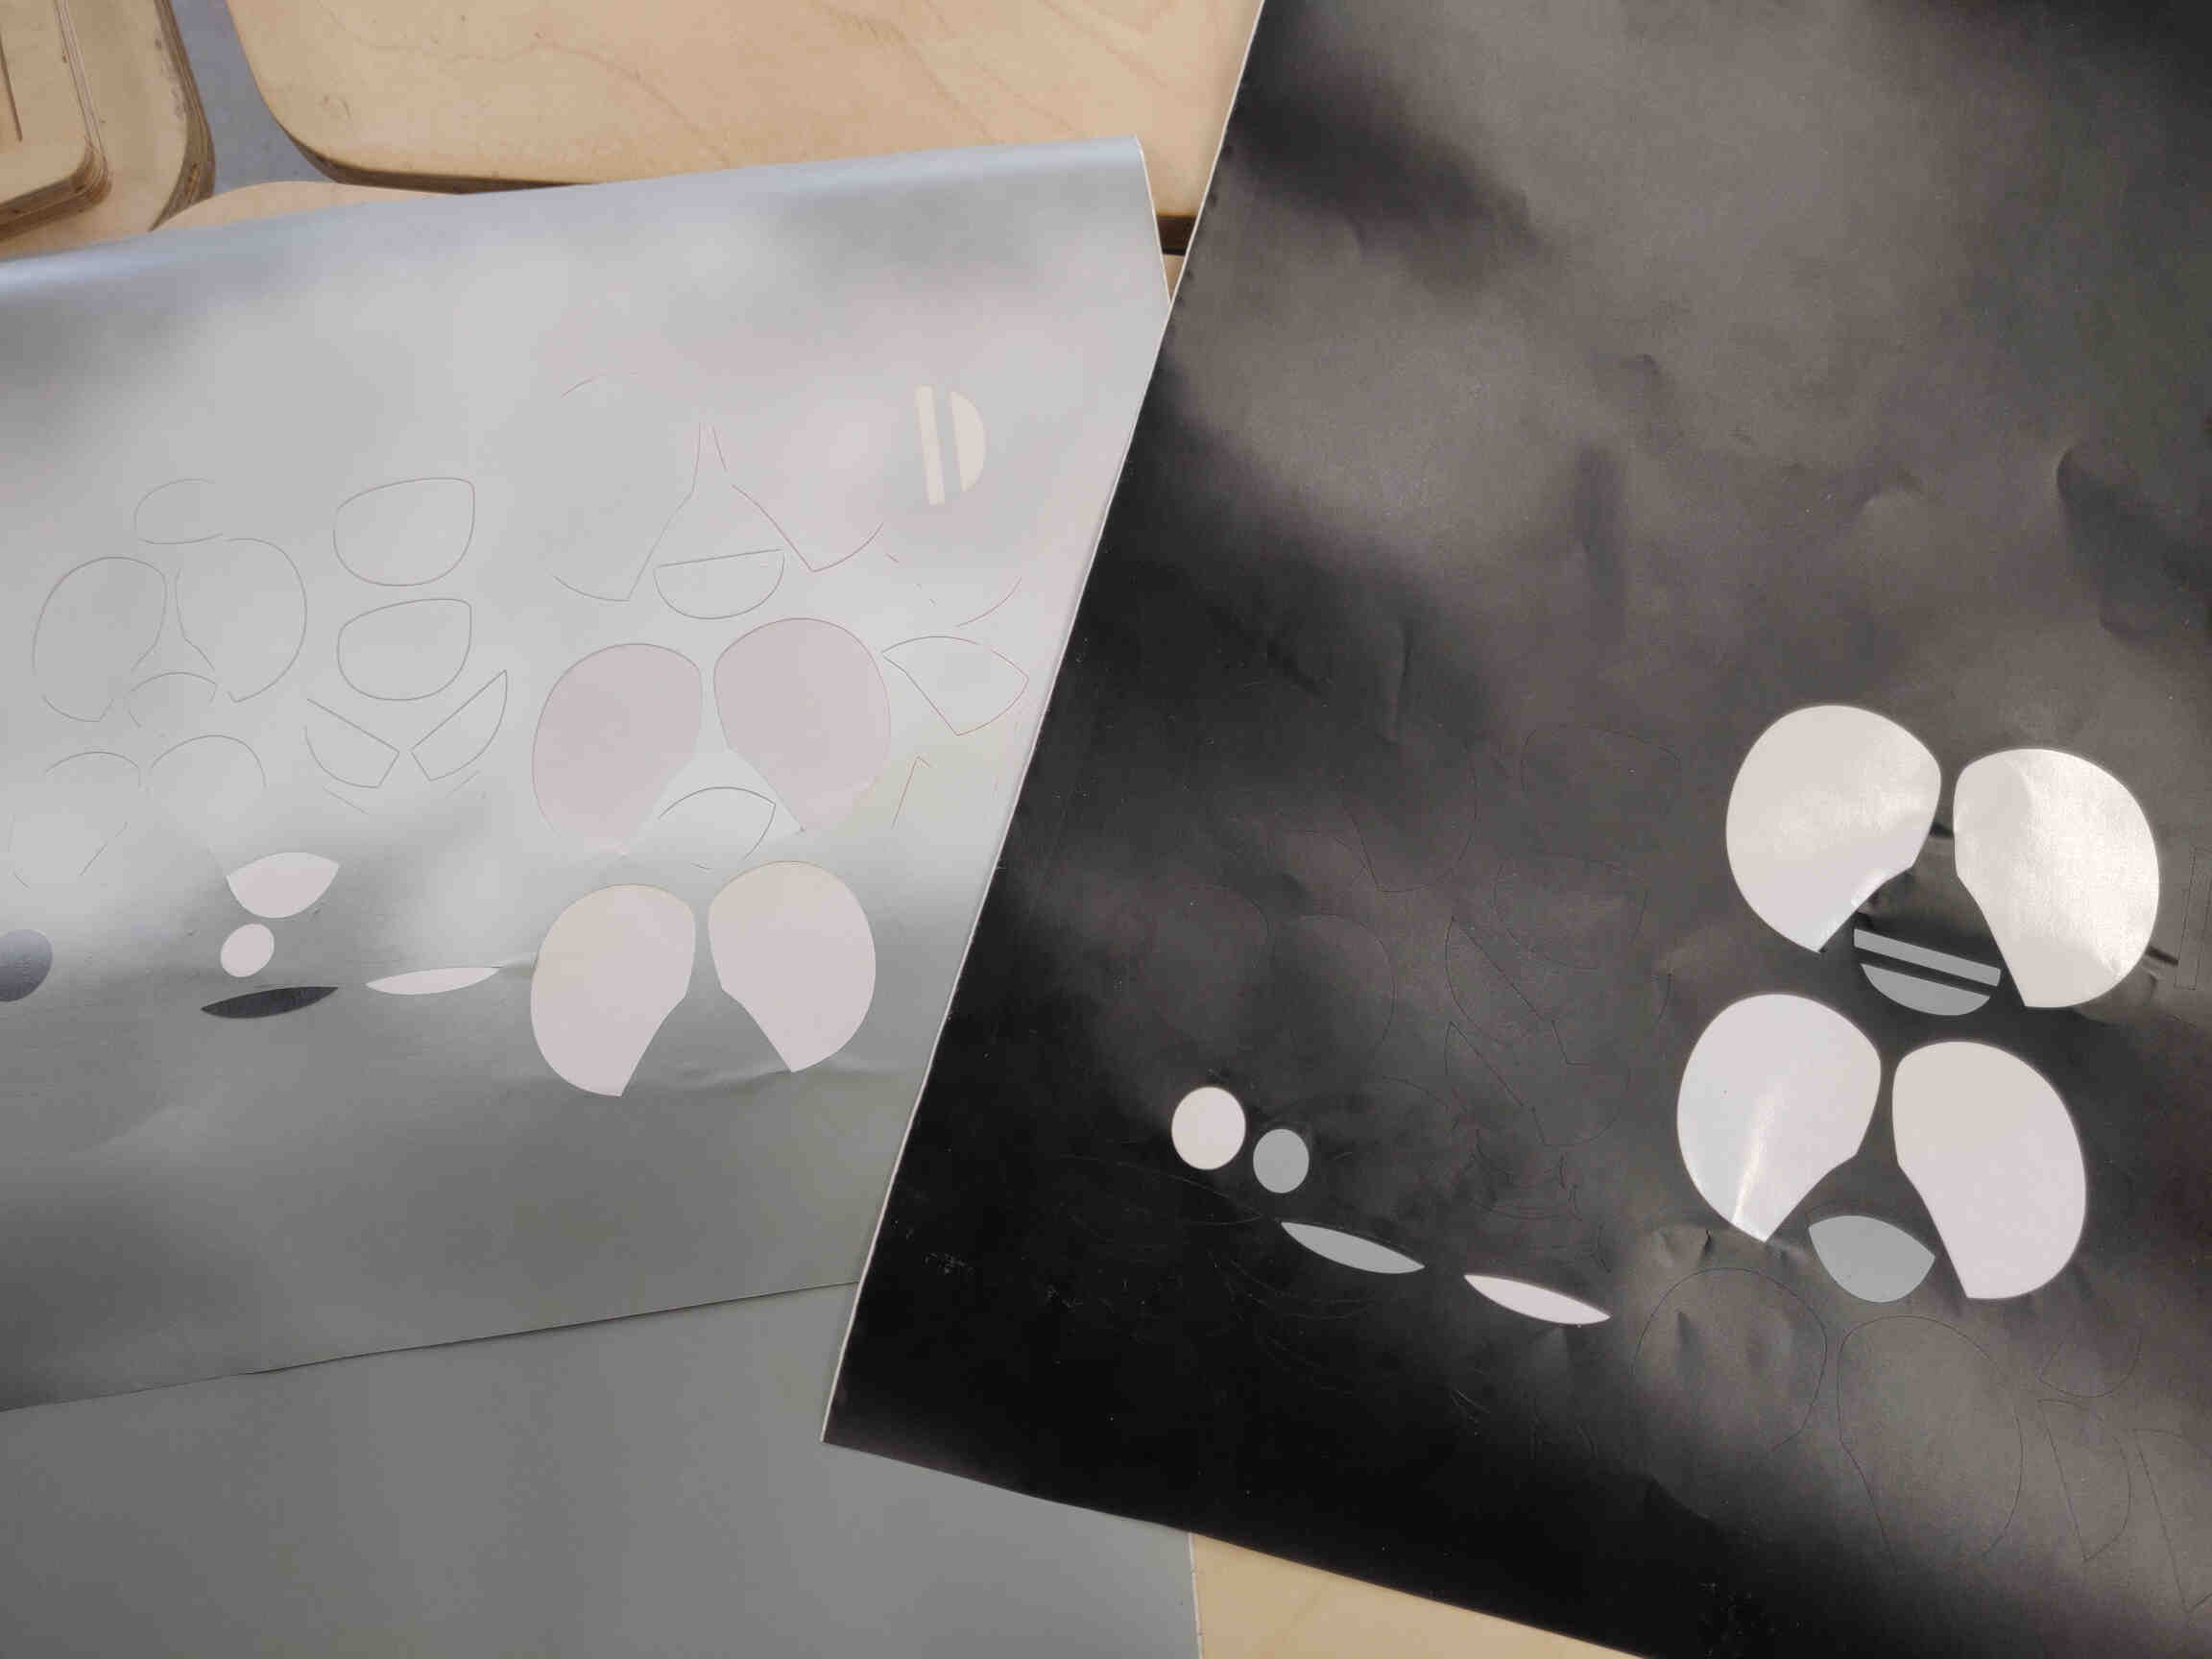
I designed the Inkscape files for Vinyl Cutting the model’s eyes, to meet the 2D Design requirements. I also designed 2 boards with various eyes and mouths in many shapes and sizes so that they can be cut on Black & White Vinyl, creating a comic-like appearance.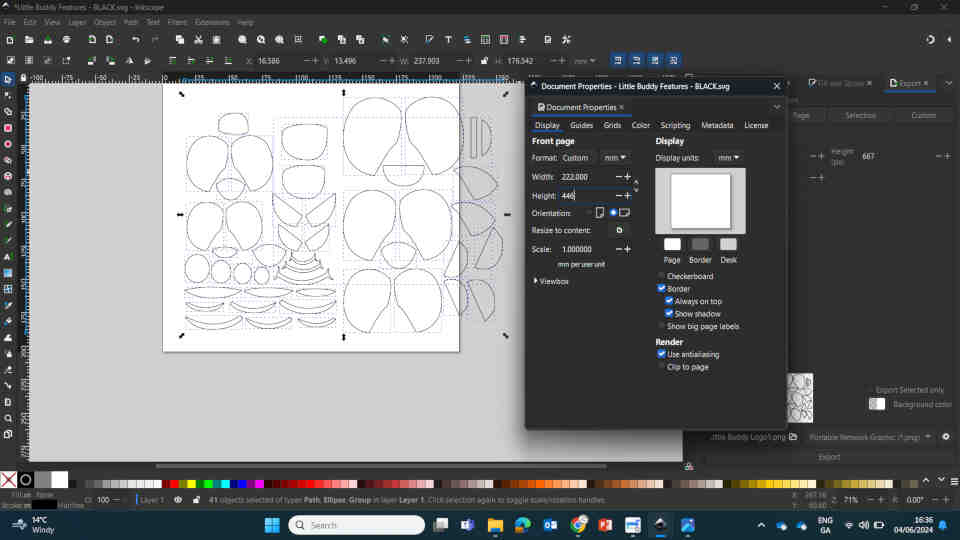
I also tested the Hall Effect Board with Servo Motor using code acquired from ChatGPT v4o as a baseline.
(Acquired through ChatGPT v4o, June 1st, 2024)
const int hallPin = 9; // Hall effect sensor output pin
const int servoPin = 2; // Servo control pin
Servo myservo;
int sensorState = 0;
void setup() {
pinMode(hallPin, INPUT);
myservo.attach(servoPin);
myservo.write(0); // Initial position
Serial.begin(9600);
}
void loop() {
sensorState = digitalRead(hallPin);
if (sensorState == HIGH) {
myservo.write(90); // Move servo to 90 degrees
Serial.println("Magnet detected");
} else {
myservo.write(0); // Move servo back to 0 degrees
Serial.println("No magnet detected");
}
delay(100); // Debounce delay
}
Code for ‘Acknowledgement Animation’
const int hallPin = 7; // Hall effect sensor output pin
const int servoPin = 4; // Servo control pin
Servo myservo;
int sensorState = 0;
void setup() {
pinMode(hallPin, INPUT_PULLUP);
myservo.attach(servoPin);
myservo.write(0); // Initial position
Serial.begin(9600);
}
void loop() {
sensorState = digitalRead(hallPin);
if (sensorState == LOW) {
myservo.write(90); // Move servo to 90 degrees
Serial.println("Magnet detected");
delay(1500);
myservo.write(130);
delay(500);
myservo.write(90);
delay(4500);
} else {
myservo.write(0); // Move servo back to 0 degrees
Serial.println("No magnet detected");
}
delay(100); // Debounce delay
}
Finally I began preparing the Presentation Slide and video, though I still needed images & footage of the final product. I chose “Aetherfont FFXIV by Masayoshi Soken” as a backing track to give a more Japanese feel.
Monday 3rd (Bank Holiday)
I spent the bank holiday writing the Script for the video, Organizing Footage, creating a Shotlist & Updating Documentation.Tuesday 4th
Recorded Narration in Audacity for video presentation using a Snowball microphone then performed the editing in Audacity. Edits included: Cuts, Splicing, Raised Pitch & Speed, Equalized, Normalized, Noise Removal and Amplify .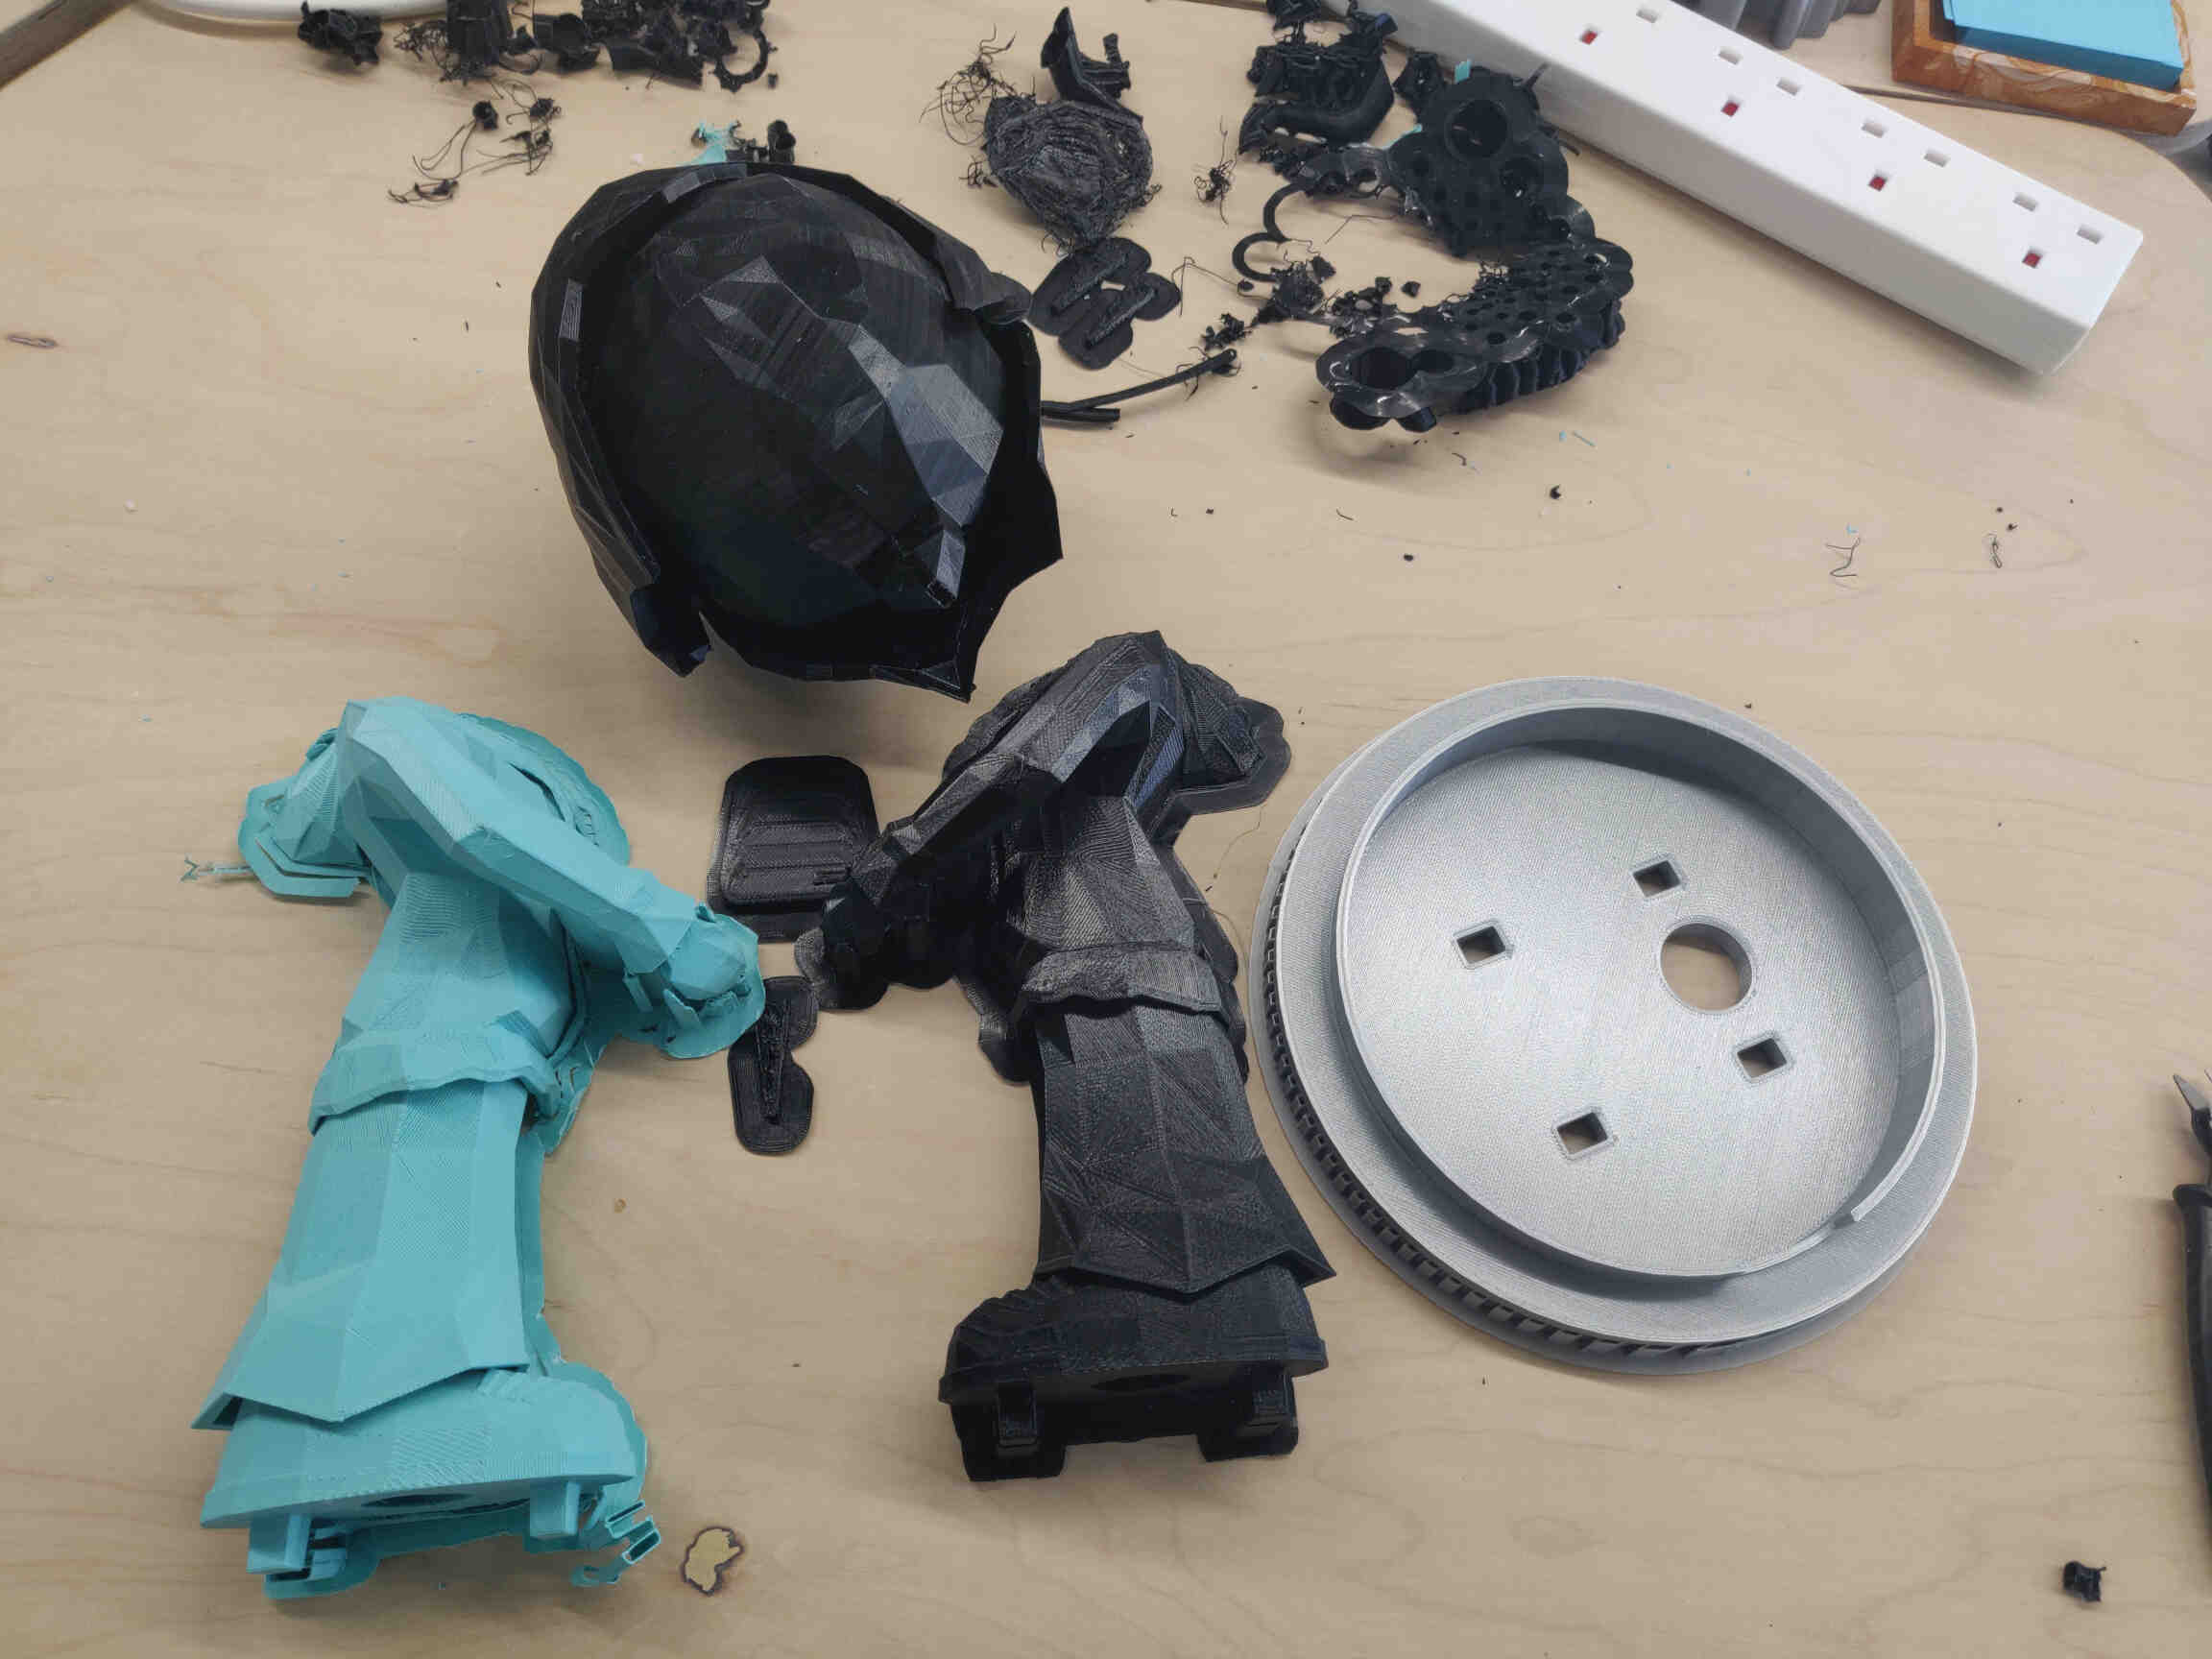
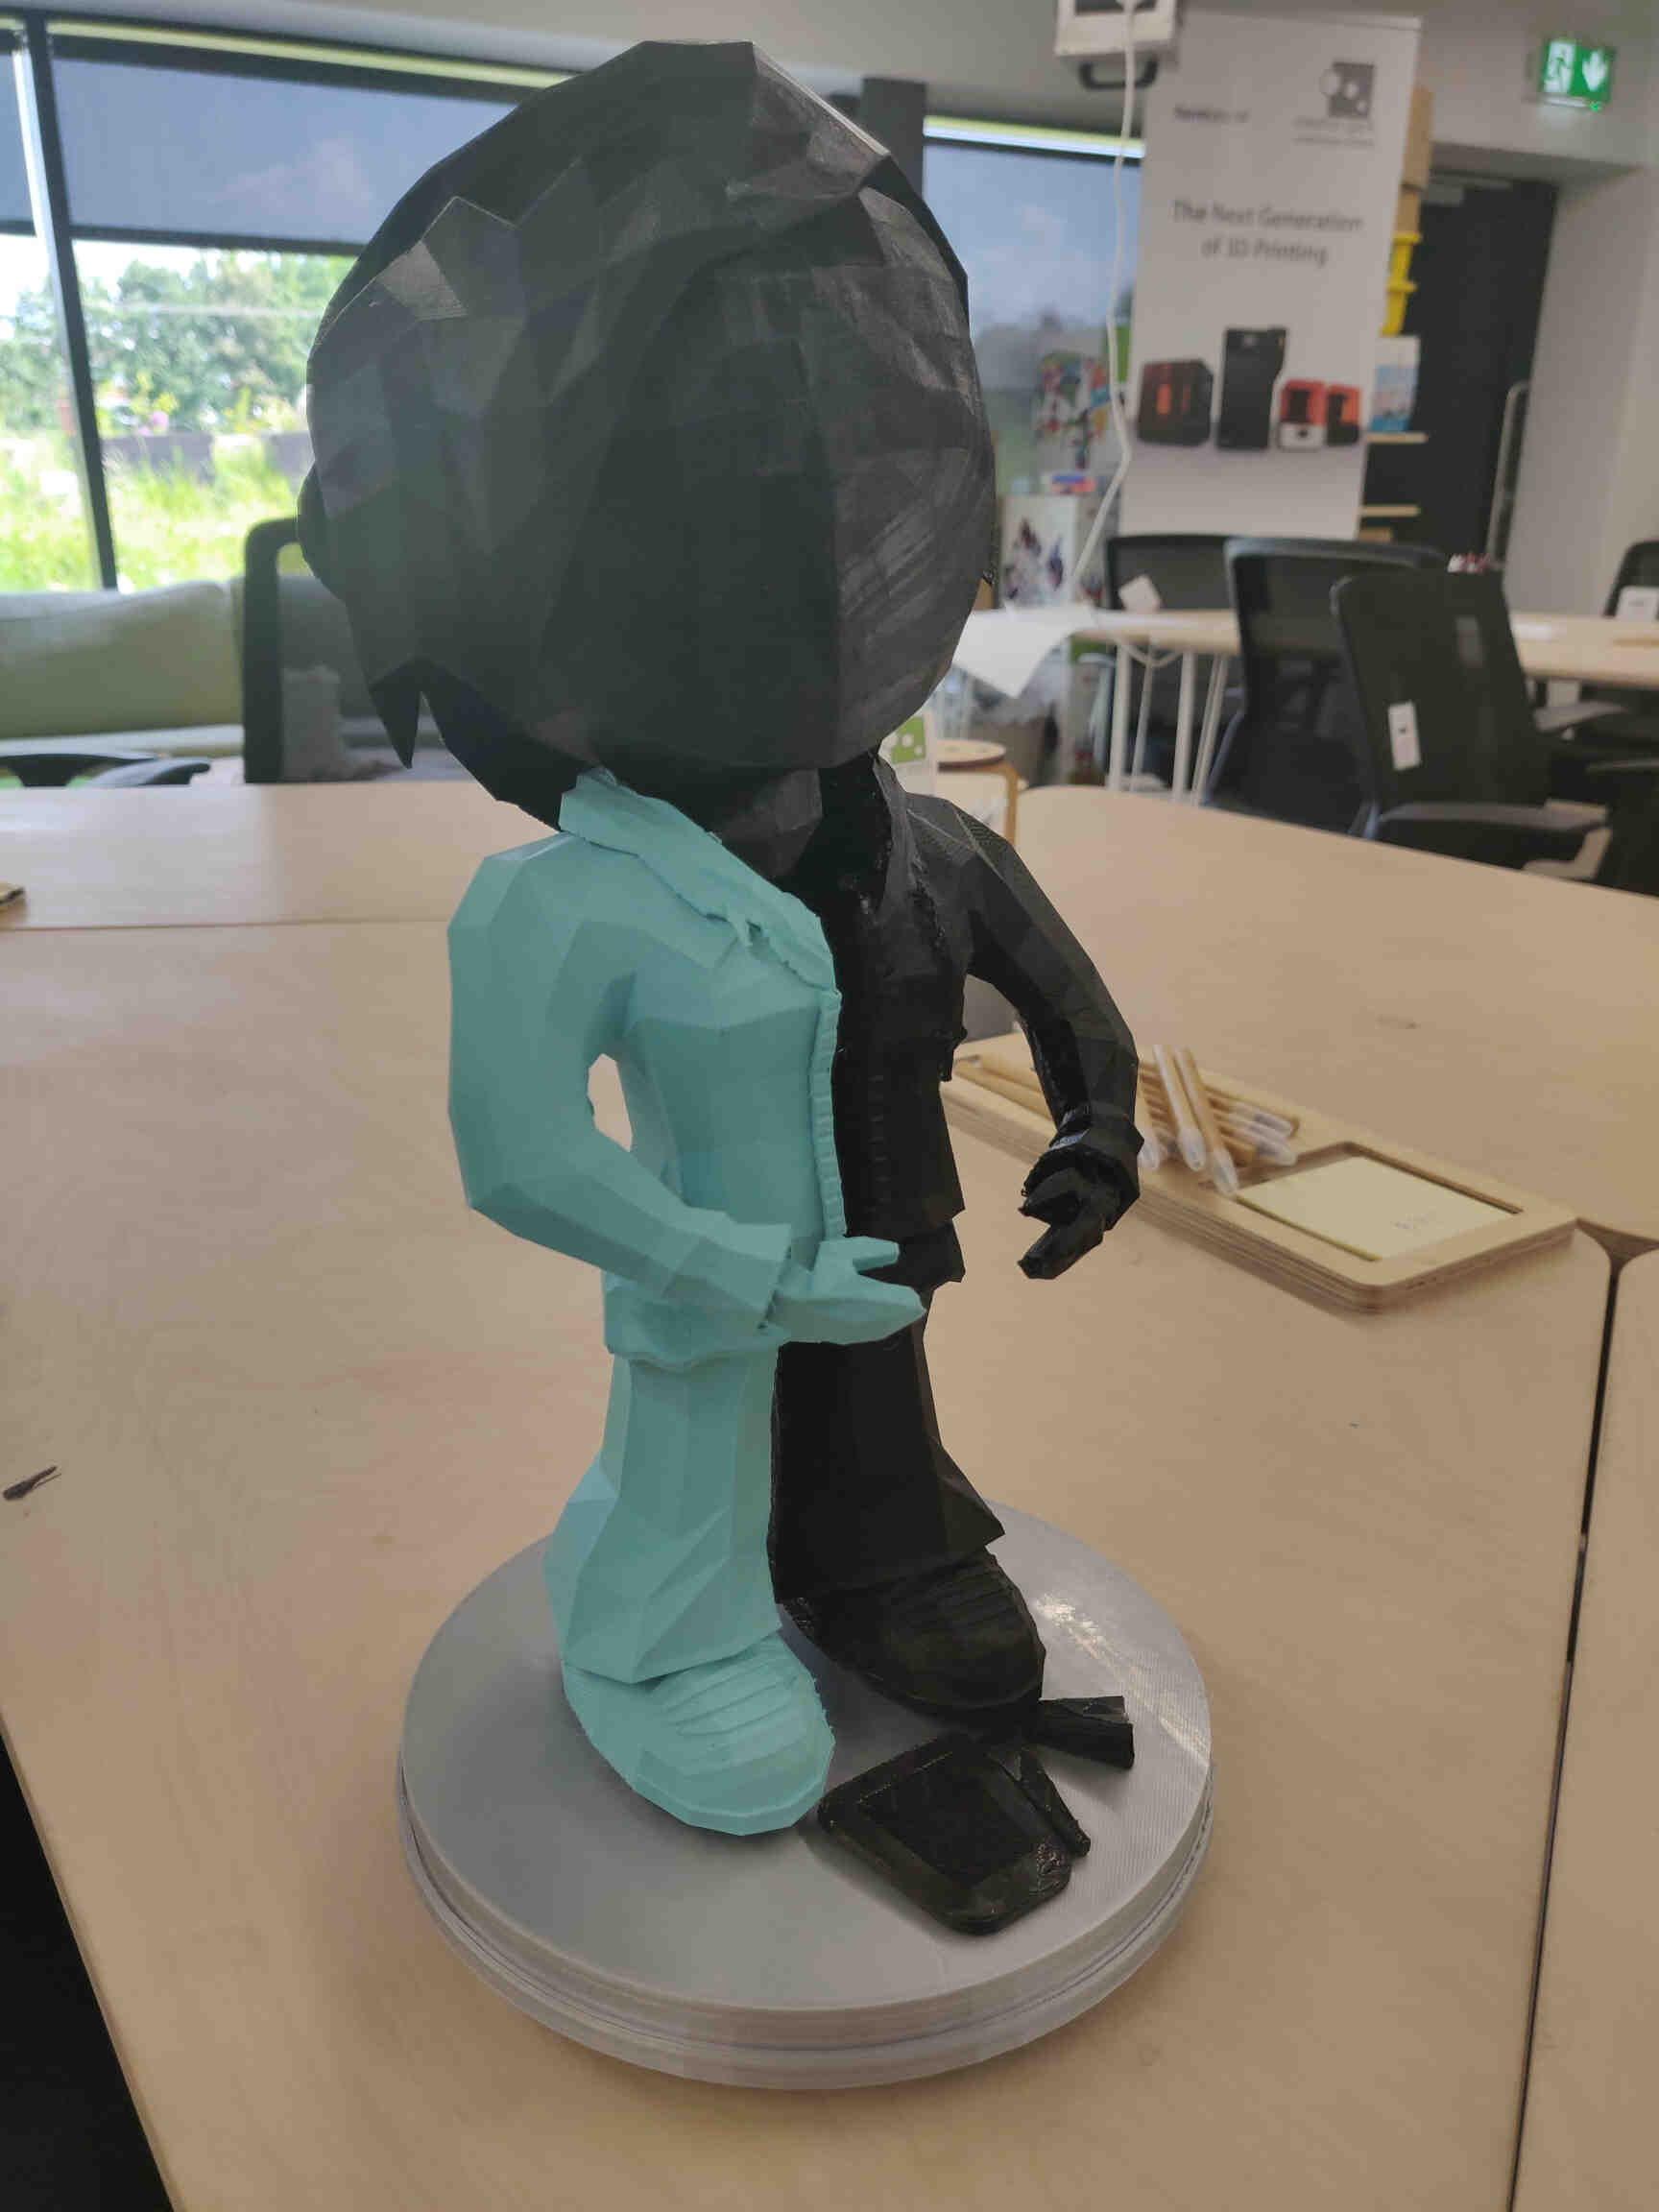
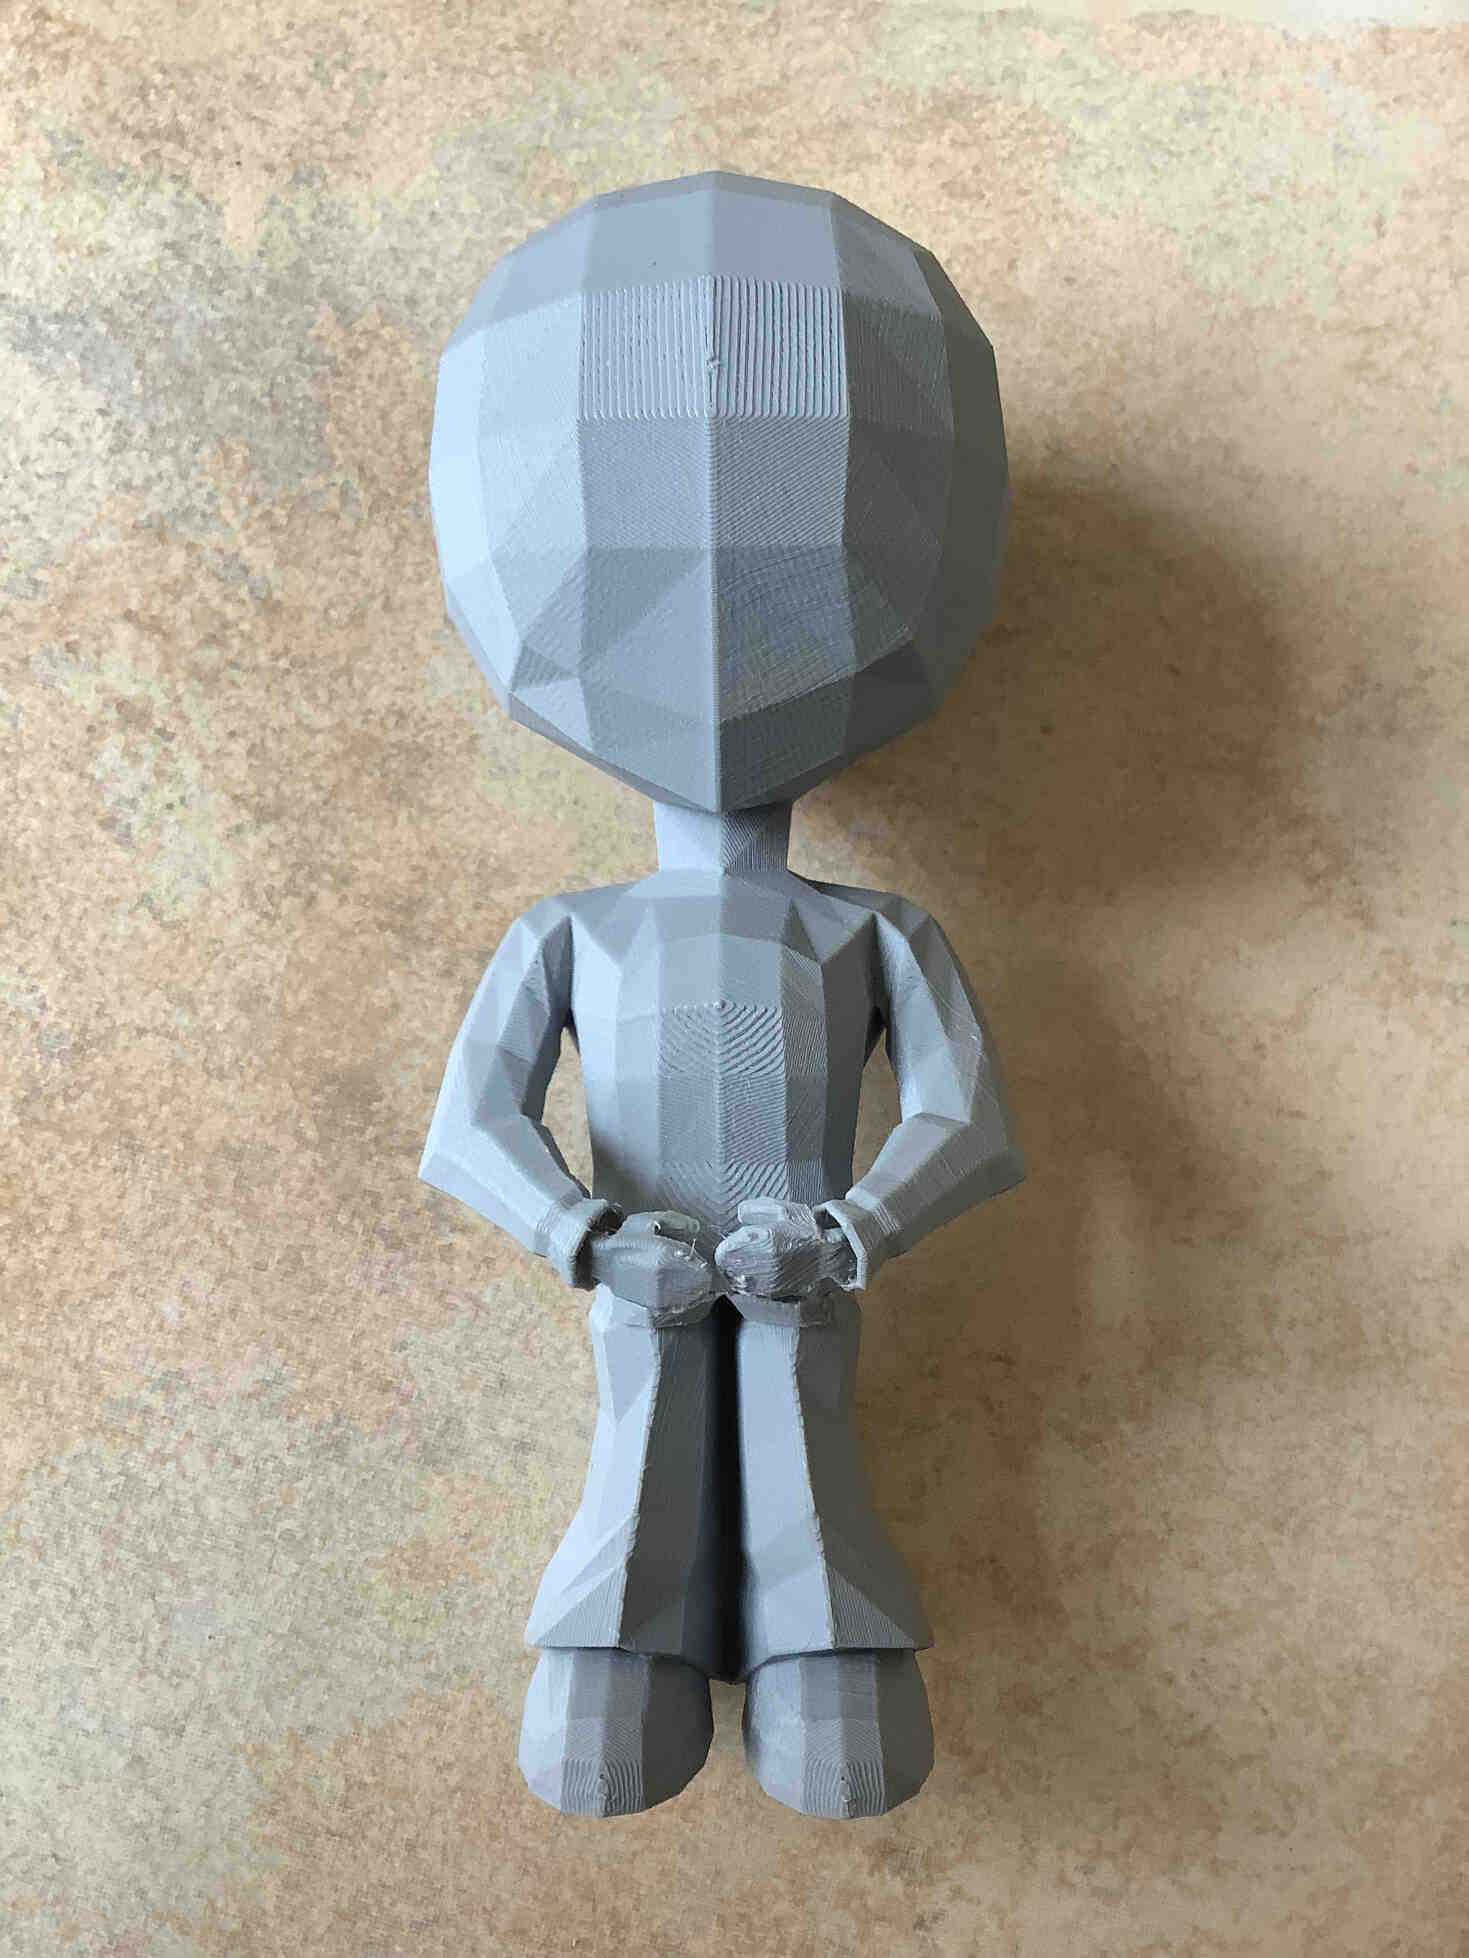
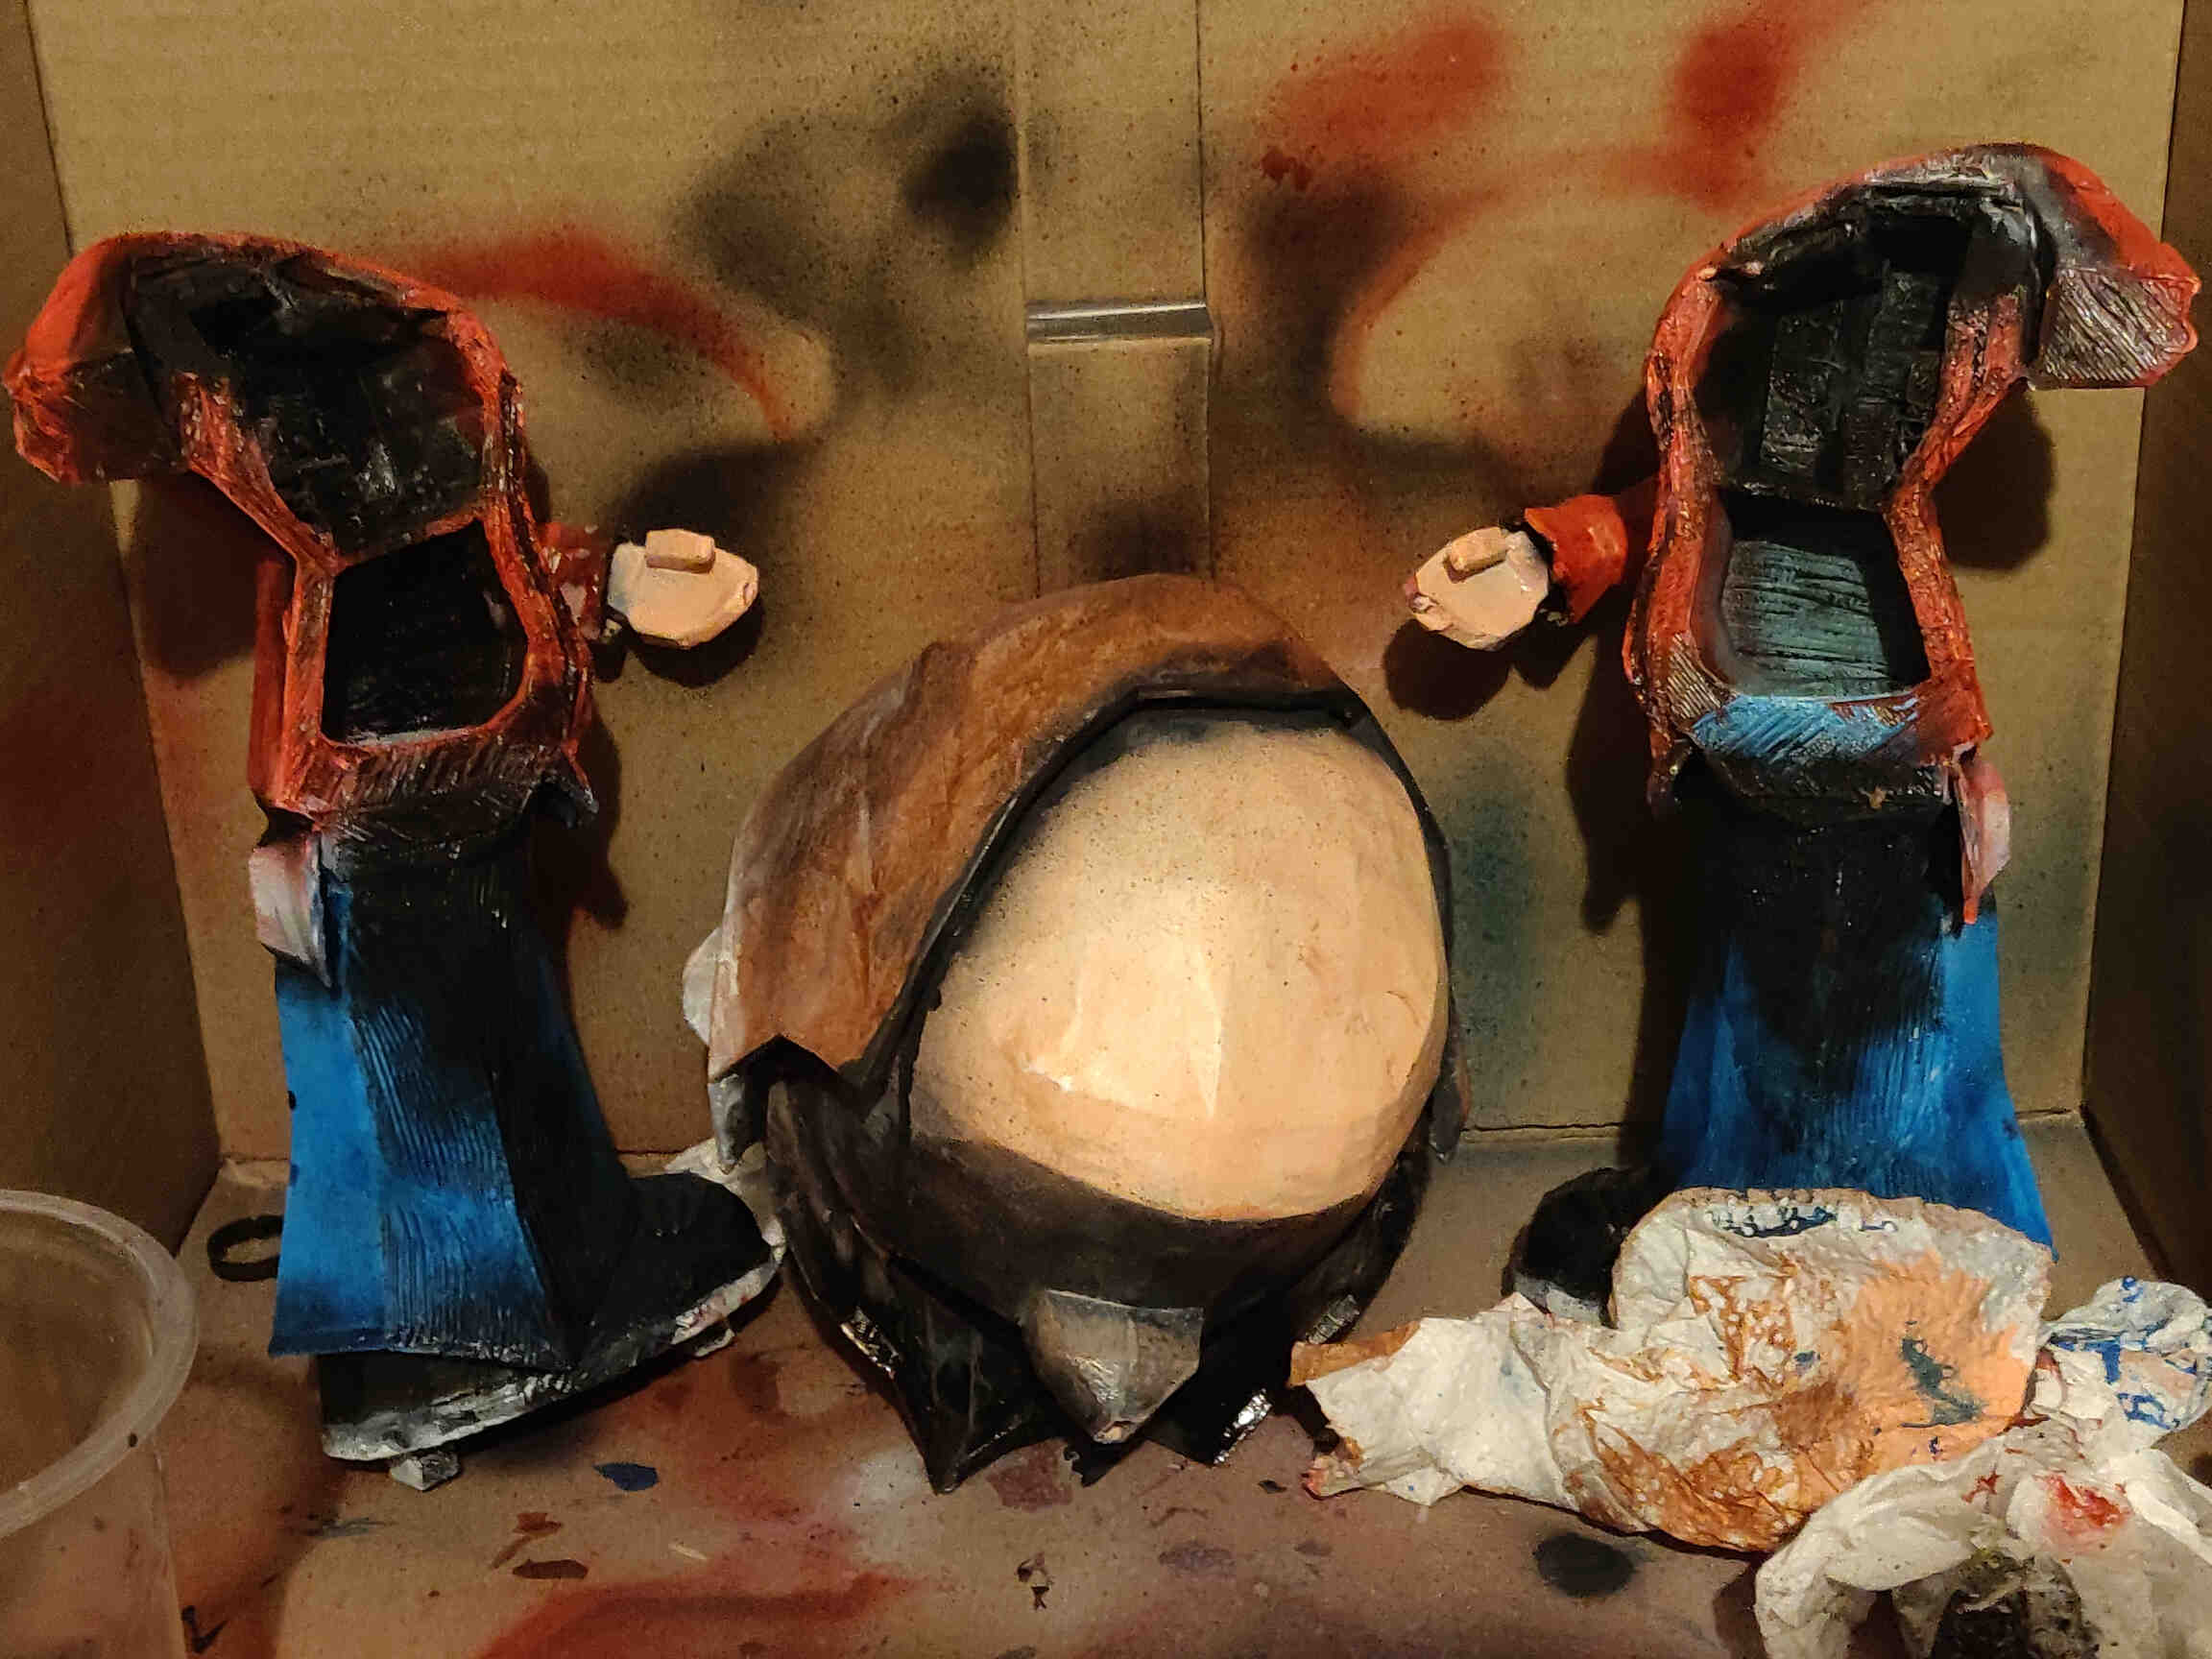
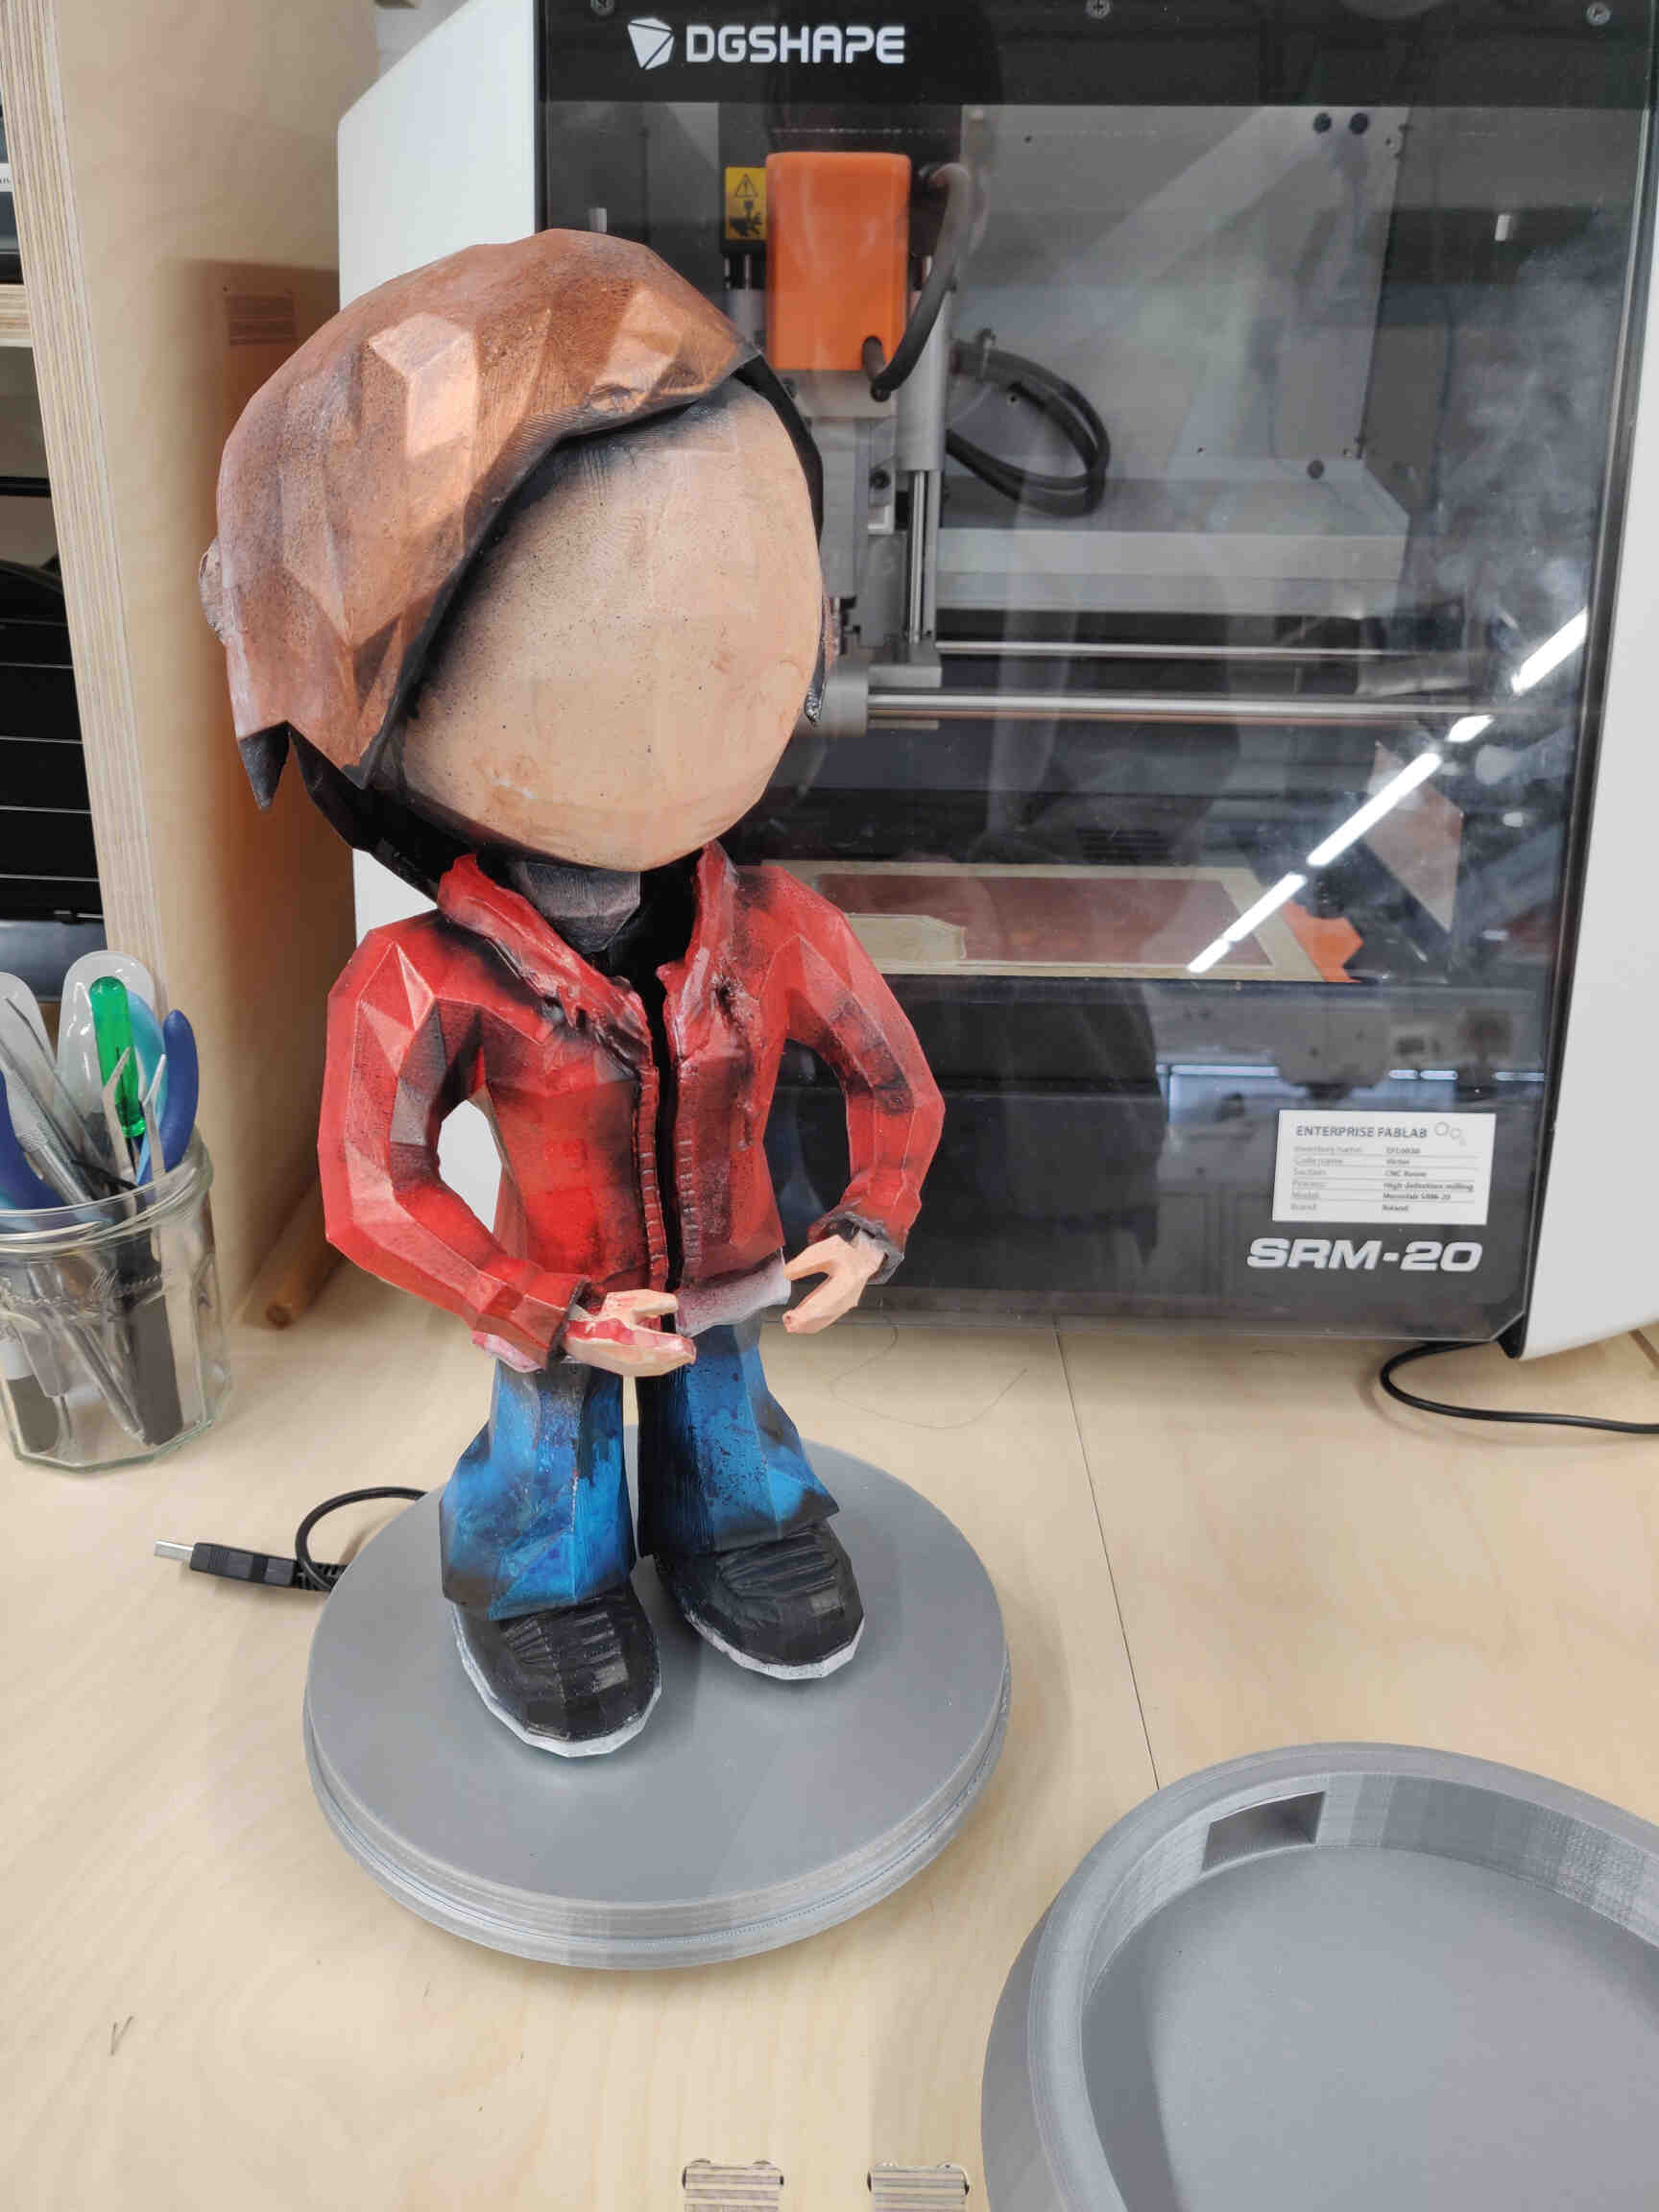
I shot footage of production results and collected my final printed model parts, then post-processed using sandpaper and clippers until the model was smooth but still kept its polygonal design.

I Tested Wire Routing to make sure everything fit into place - which it did. Head was unstable with quick servo movements but would become more stable after inserting one of my Neck Extender models through the gap in the neck.Then I coated the model with 2 layers of White Water-Based Primer.
Wednesday 5th
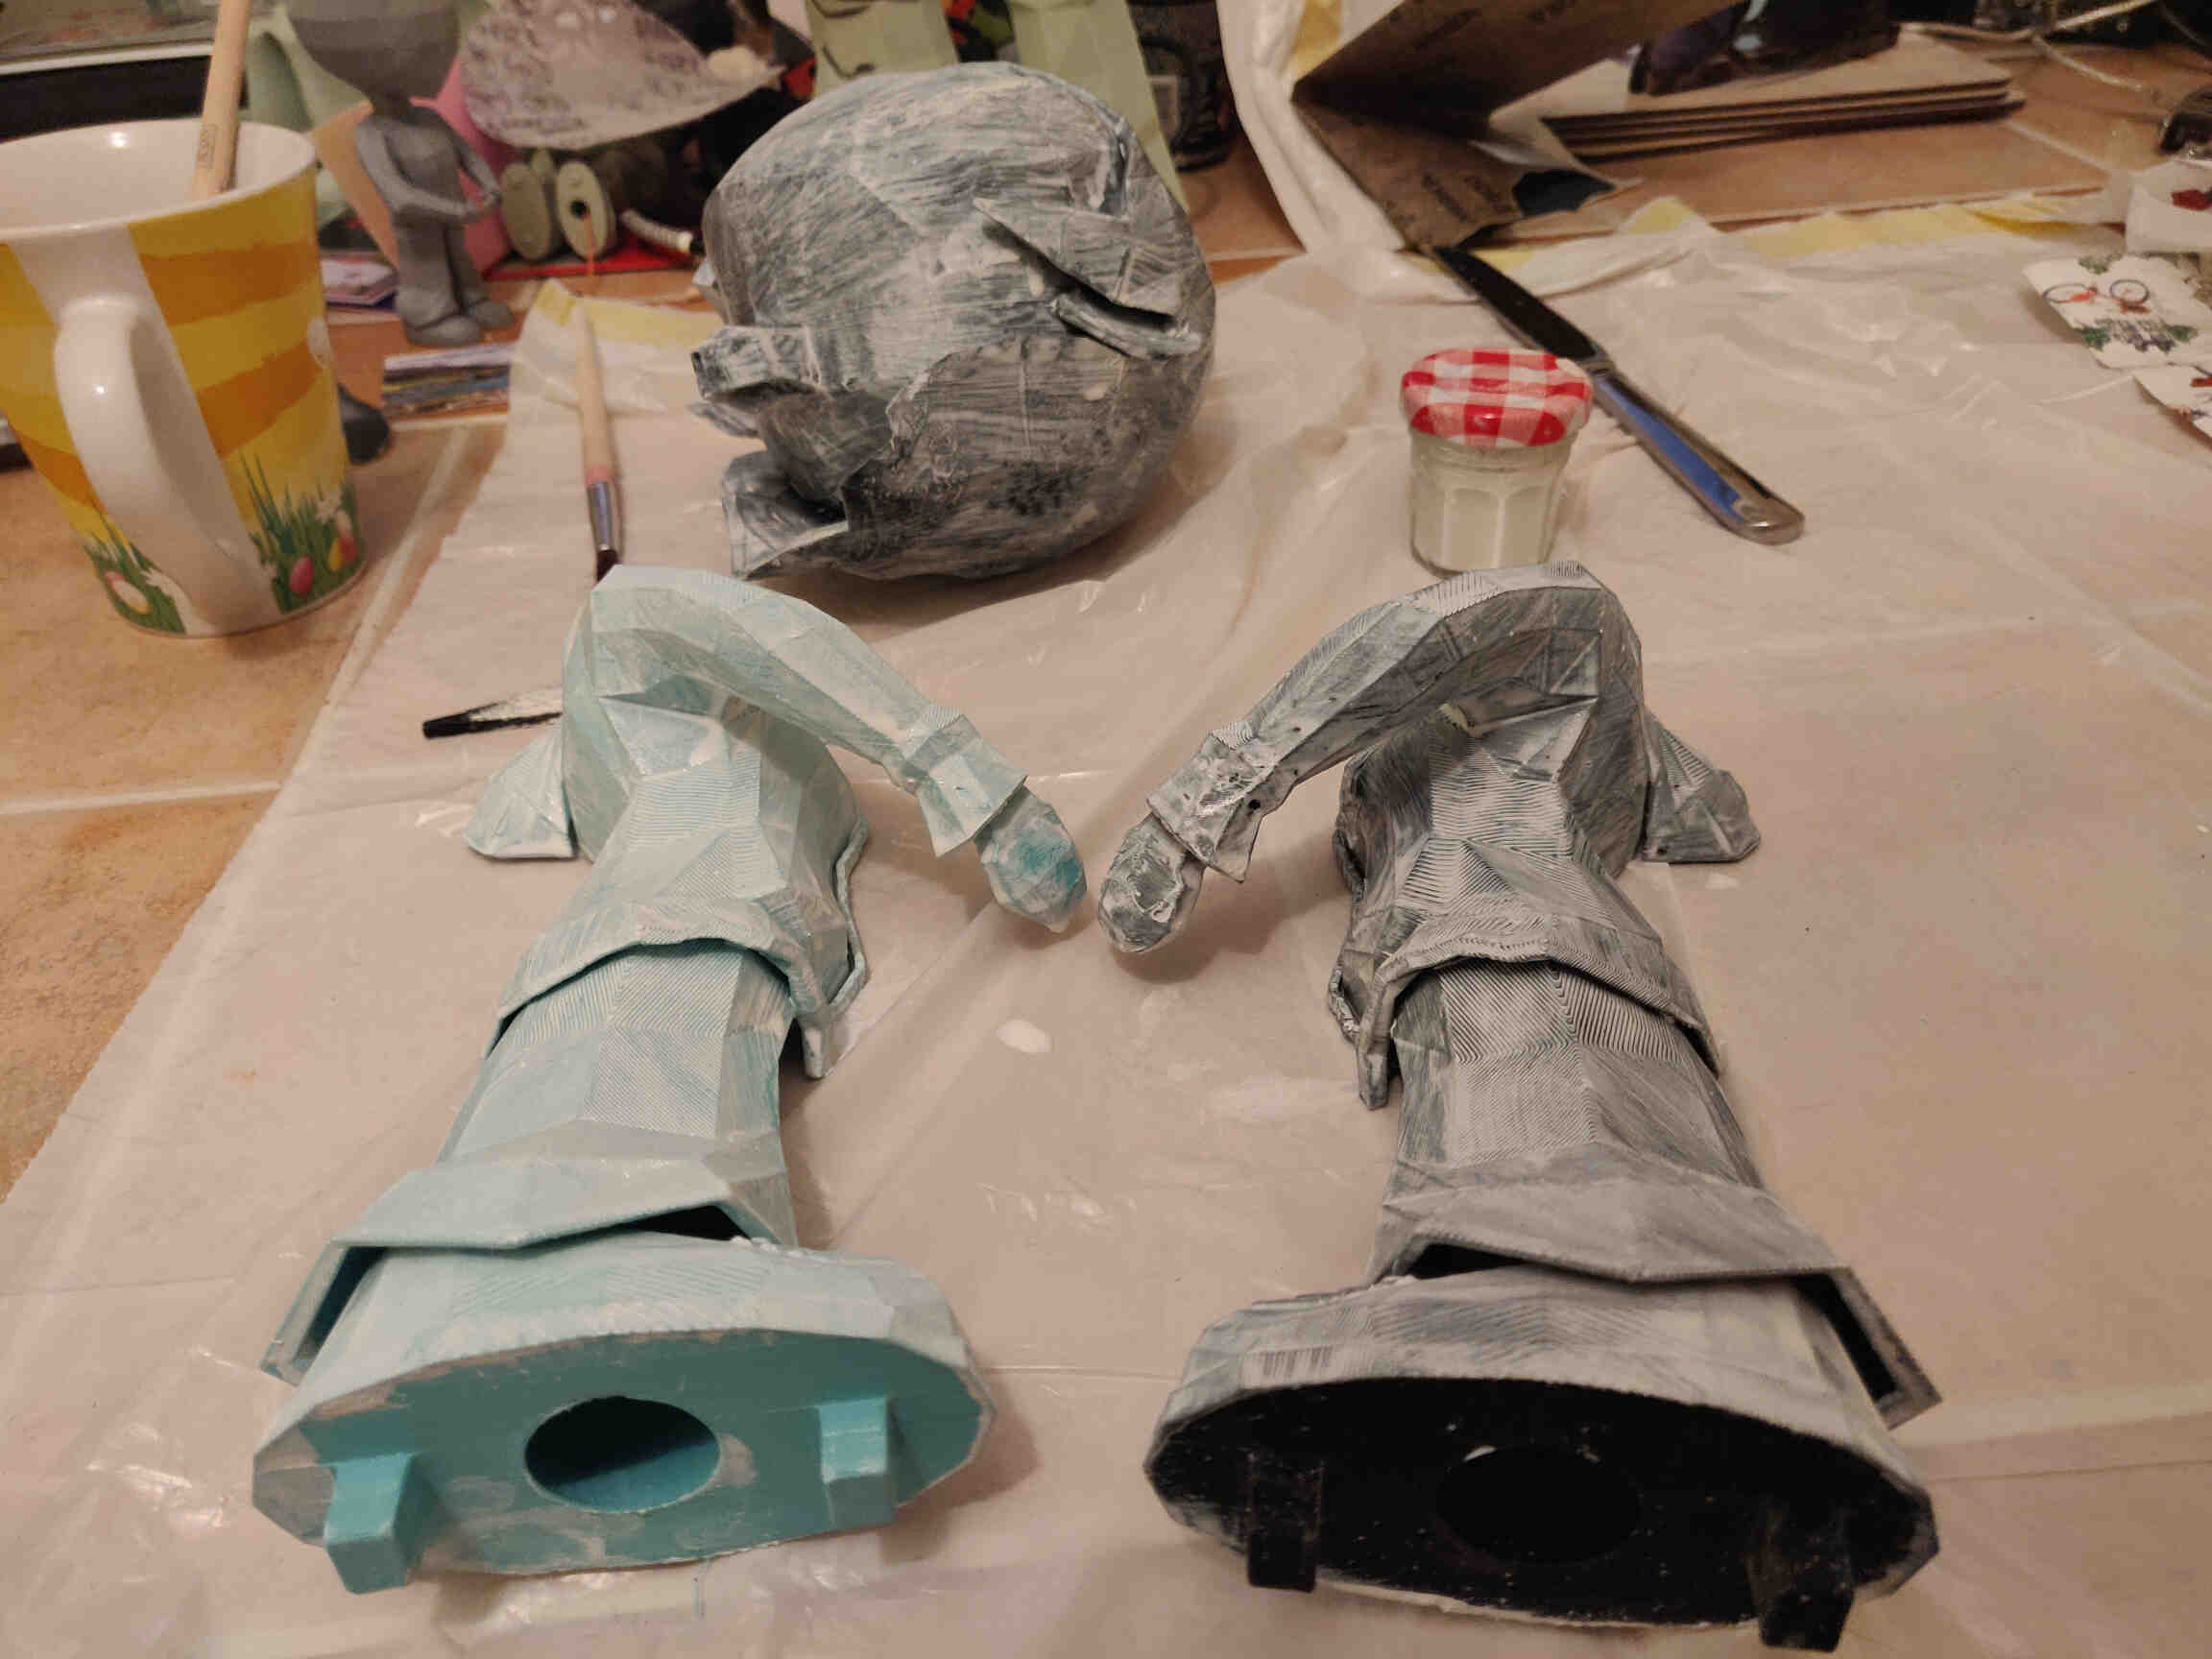
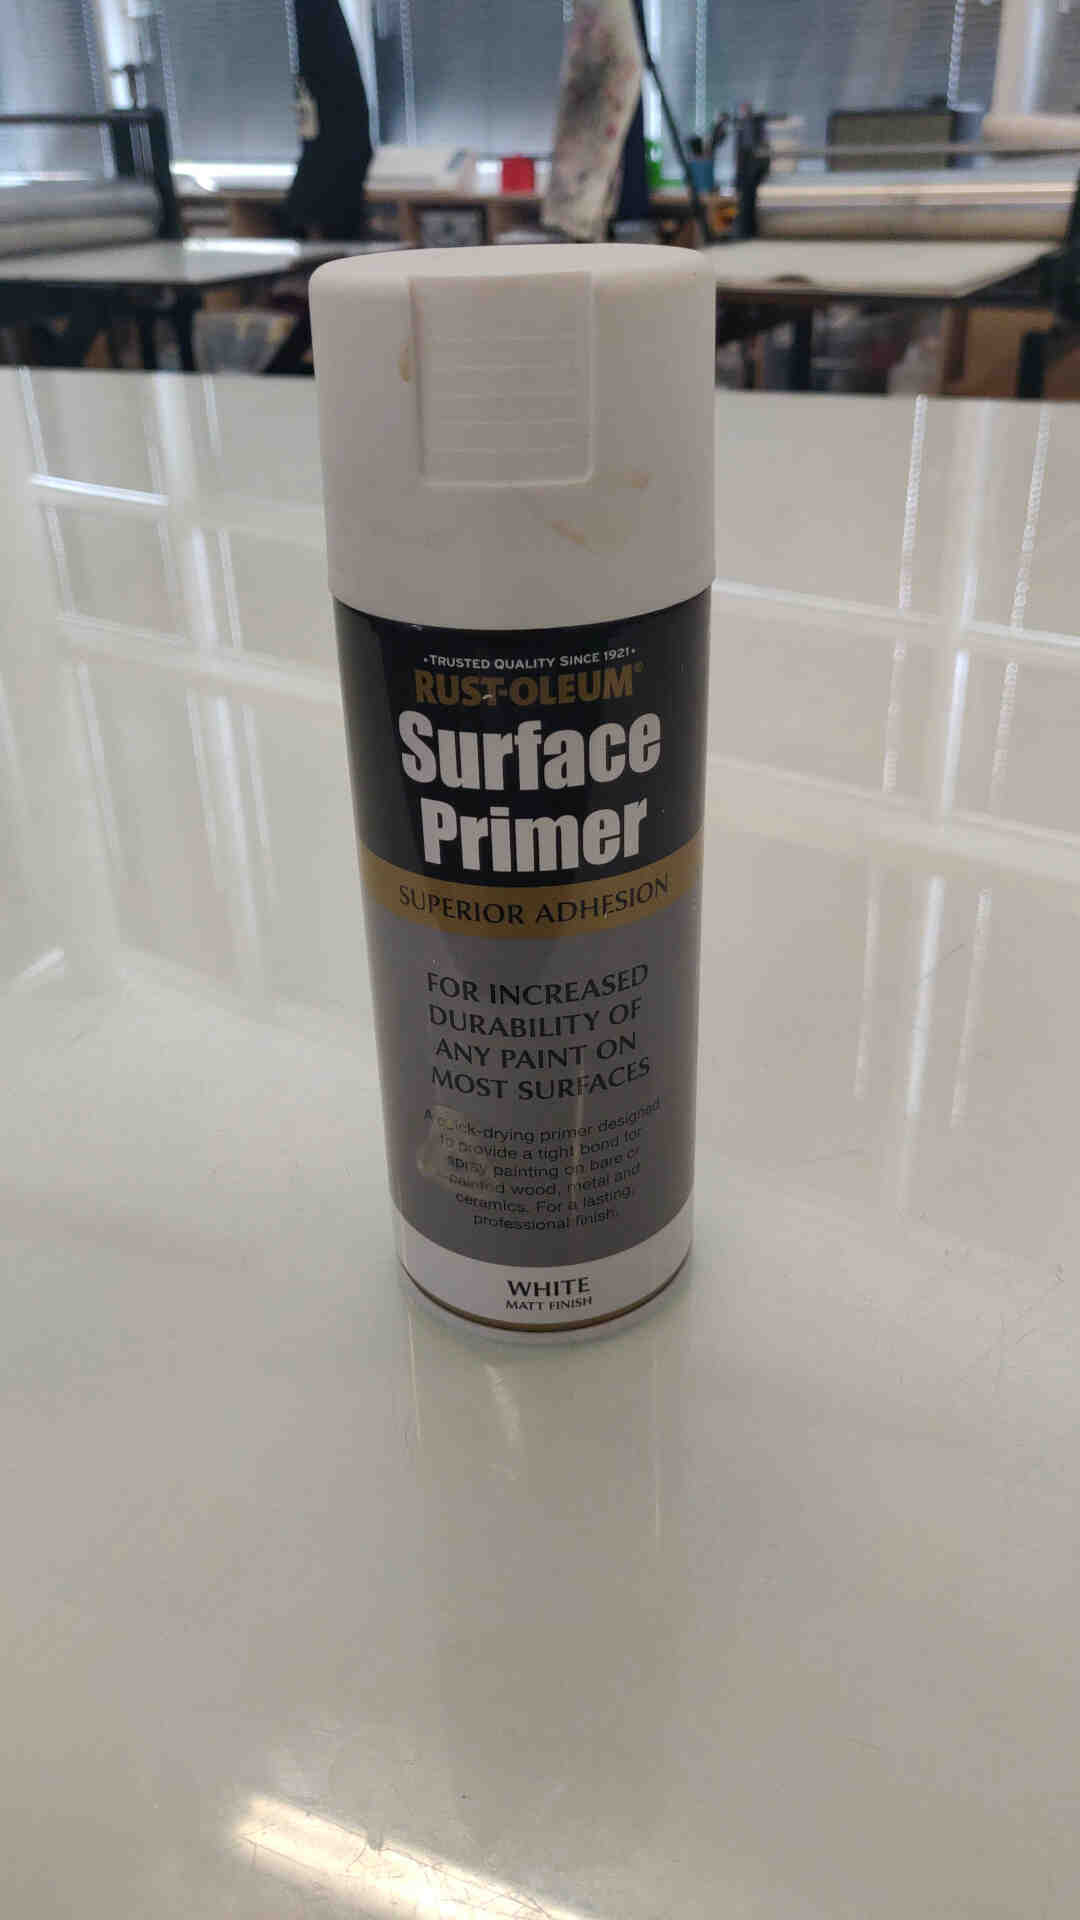
Printed updated base for Hall Effect sensor. Unsatisfied with the Water based Primer results, I washed off the weaker parts of the paint job, sanded the model further and coated the model in a Oil-Based Spray Primer that I acquired from a print studio. This primer would not only save my model but the 2D Vinyl later on.
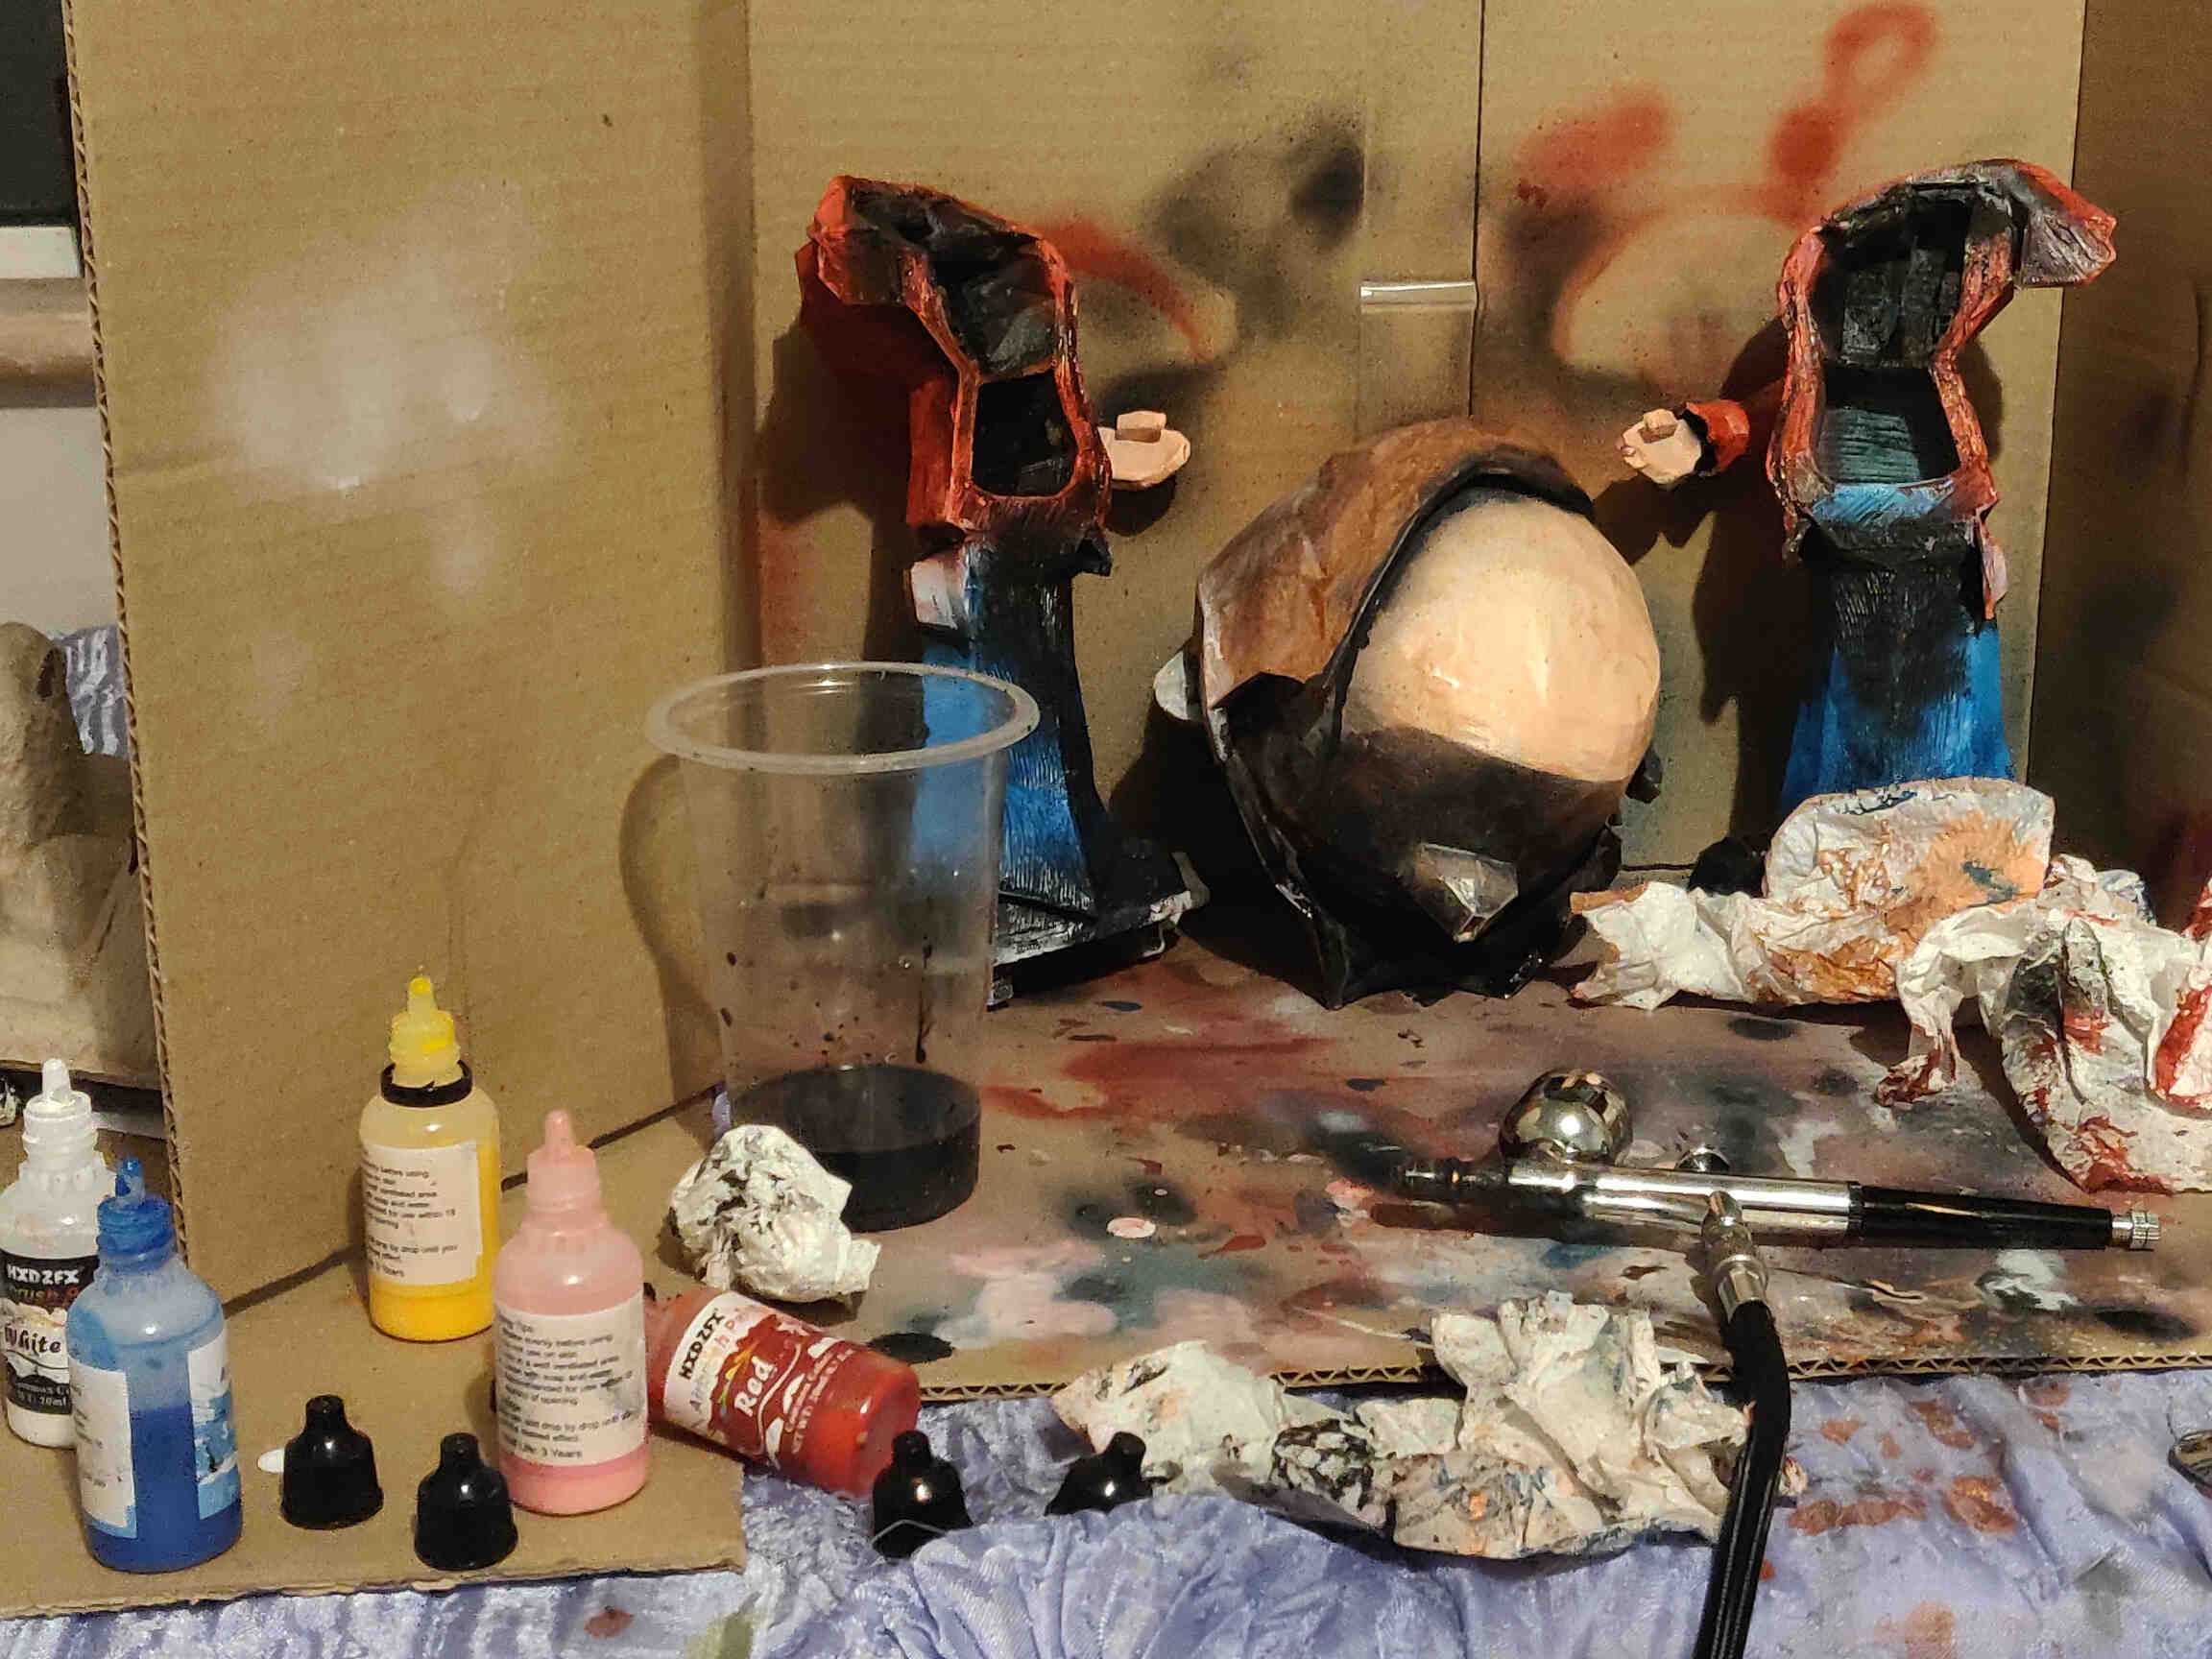
After leaving the model to dry after a few hours, I began Airbrush Painting the Model. This was my first time airbrushing and took some time and adjusting into the late night but I was pleased with the final result. I also Shot Footage of the sanding, painting and airbrushing process.
Thursday 6th

Today was the final day of work and there was plenty of stuff to do. I went into the Fablab and cut out my Vinyl designs black and gray vinyl. I couldn't get my hands on any white vinyl, only gray or transparent. After placing the vinyl on the model, I was wholly unsatisfied by the gray colour, so I sprayed a layer of that white primer on top of the gray vinyl sheets and it gave me the exact look I was going for.
Once I got home, I finished my presentation slide using Procreate using Adrian’s PDF presentation as a reference.
After taking my final shots for the video, I made the final cuts and exported the video using Davinci Resolve 18, then compressed the footage using Handbrake. Once I got the Video down to 7.5Mb and the Slide down to 2.2Mb, I uploaded them into the Root Folder in my website’s directory and *Git Pushed* them online. I managed to finish my Final Project at 2am the night before my presentation. Just in time!
Video Presentation and Slide
Little Buddy by Ryan Reilly is licensed under CC BY 4.0![]()
![]()
Friday 7th
I relaxed for the early morning at work and prepared myself for the Presentation at 4:20pm. I was delighted to find Neil and the student audience seemed delighted with my project with plenty of comments saying they want one of their own. The only feedback for improvements I got from Neil were ‘in the future make another attempt at omni-directional movement”.___________
Conclusion / Reflection
It’s unfortunate that I had to make so many concessions to allow Little Buddy’s functionality by the deadline. I made the very smart move (under Adrian & Rico’s advise) to do whatever I can to make sure the project is WORKING by the presentation due date. This included a last minute change from a Time of Flight Sensor to a Hall Effect sensor, as well as having earlier scrapped the idea of servo motors controlling the head and each arm, to simply just moving the head up and down. I feel like I could have done so much better on the electronics / programming end of the final project, however I expected a worse case scenario when it came to electronics, so I wasn’t surprised that I had to reduce the scale of the project.Overall I wish I could have gotten more dedicated one on one time with a software / electronics expert so that we could have ironed out the sensor issues I was having from Week 9 so that it wouldn't have snowballed so far, causing massive cuts to the final project’s functionality and capabilities. But as stated before, I was sure the electronic and programming end of fab academy would be my downfall - so the fact I made it this far is something I should be proud of, and not disappointed in.
There is one thing I was surprised and delighted with, and that was that I managed to make the final project look just like the concept illustration I drew in Week 1. I was hoping to make something that looked like it was pulled directly from a comic world or look ‘otherworldly’. I noticed this the most from pictures and when looking at it through the Zoom cameras - it really looks separate from our reality and I love it! Blending the 3D print with vibrant airbrush paints and 2D vinyl really made it pop!
Apart from that, I can’t even begin to remark on just how much I’ve learned throughout the course. Despite constant documentation, I still managed to spend so much time getting comfortable with processes and techniques that I never thought I would have the opportunity to have. By Week 6 I finally asked the question “What really IS a circuit board?” And now here I am several weeks later with the knowledge and practice to concept, design and produce circuit boards from scratch! - something that I would never have found myself doing otherwise. I even grew a fondness for soldering components after having a troubling start with faulty equipment in Week 6 - I'm not sure when I’ll get an opportunity to solder something again and that makes me sad.
I can just remember how intimidating week 1 was as it took me at least 3 weeks to wrap my head around Git Bash and Building my Website from scratch rather than using a complete template. Also the extra mile I went during 3D Scanning and Printing week where I gave myself a mountain-sized overload of documentation to get through within the week. I only started getting truly comfortable with my documentation progress around Week 7. Though there were lessons on this regard at multiple stages and learned a lot in regards to Time Management.
The GIMP/BIMP addon is still something I consider to be the most valuable thing I learned in regards to my personal projects. I just wish Handbrake was as user friendly and efficient as BIMP was. There is honestly so much I can bring to the table as an artist, freelancer, video editor, animator and designer - thanks to Fab Academy and all its instructors. I don’t believe I’ll pursue Technical Design or Electronics after this course, but what it brought to the table in regards to my own work, as well as the recognition within my own community and country has been insurmountable and I am very grateful.
Where to go from here? Not sure honestly, I like keeping things open-ended - though I have gained an interest in contacting game development studios and being their connection in regards to merchandising - both in the Traditional Print Studio and the Modern Fablab. I will continue my YouTube projects that I pushed back for Fab Academy, then aim to grow and enhance my skills as a 3D animator in Blender. Things are really looking up, and I’m excited for the road I have ahead of me for the first time in a long time.
____________
Final Project "Little Buddy" Project Files
Little Buddy - Project Zip Folder___________
This brings our 'Final Project' Journey to the End...
Thank you for viewing my Fab Academy Experience! ^^
Below you will find earlier concepts and research done at the START and MIDDLE of the course. Enjoy!
___________
Possible Features & Mechanics for 'Little Buddy'
- 1. Looks up and down from their phone. Arms need to rotate up and down from the shoulders to lift up their phone. Possibly disconnect both arms from the same motor if I want more types of movement / animations. *
- 2. Turns his head to look at the user’s workspace / computer / TV. Head or neck will have to be able to move UP, DOWN, LEFT & RIGHT at controlled movement speeds for better animation performance and fun movements. *
- 3. Will respond to the user’s hands waving in front of them by looking up and nodding before returning to their phone activities.
- 4. Behind the ‘Little Buddy’s eyes should have a sensor that can detect hands waved in front of them and respond accordingly. Sensor should be on the upper side of the eyes so that it can detect wave movement while looking down at their phone. *
- 5. Phone could have an LED light OR a 16-Bit lightbox to show the Little Buddy playing ‘Snake’ (1997). May need to exchange the Phone for a bigger ‘iPad-like’ device.
- 6. The Little Buddy’s eyes could have white LED lights to show when it’s on.
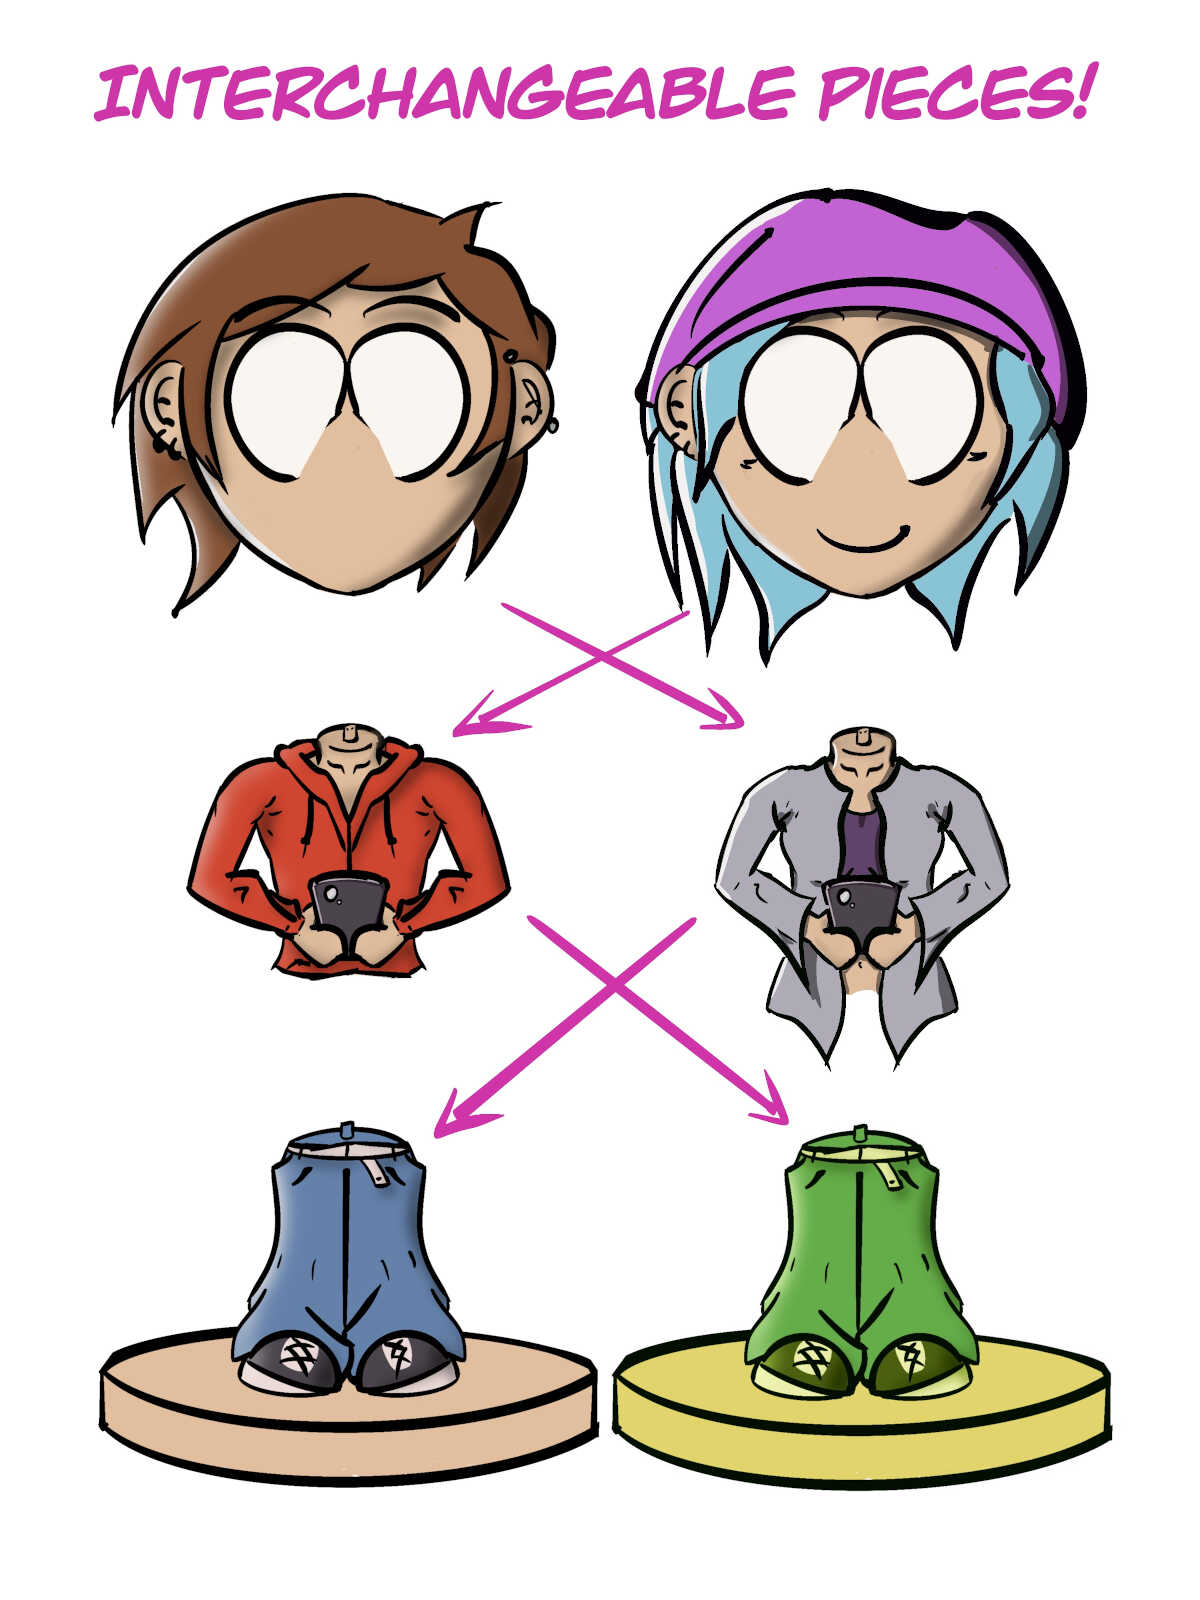
- 7. Legs / Chest / Head should be easily detachable and replaced at any time with other ‘Little Buddy’ body parts. (When turned off) *
- 8. Sound FX coming from speakers hidden in the phone, head or base. ***
- 9. Respond to the user covering up Little Buddy’s phone by slowly raising head in disbelief and even shaking head left & right in defiance. Little Buddy doesn’t interrupt your work so you shouldn’t interrupt theirs!!! *
- 10. Raise his phone to his ear to take a call on occasion. Arms will need separate movement mechanics and one of their hand/arm will need to be redesigned so as to not get in the way.
- 11. Can apply colour design after production with an Airbrush using Acrylic paints. Will need to set the colour somehow or use different paint types to make colour long-lasting.
- 12. Music plays from speakers located in Phone or Base and will nod head up & down. ***
- 13. LED Eyes could take form or shape to make them more expressive. (Angry/Happy)
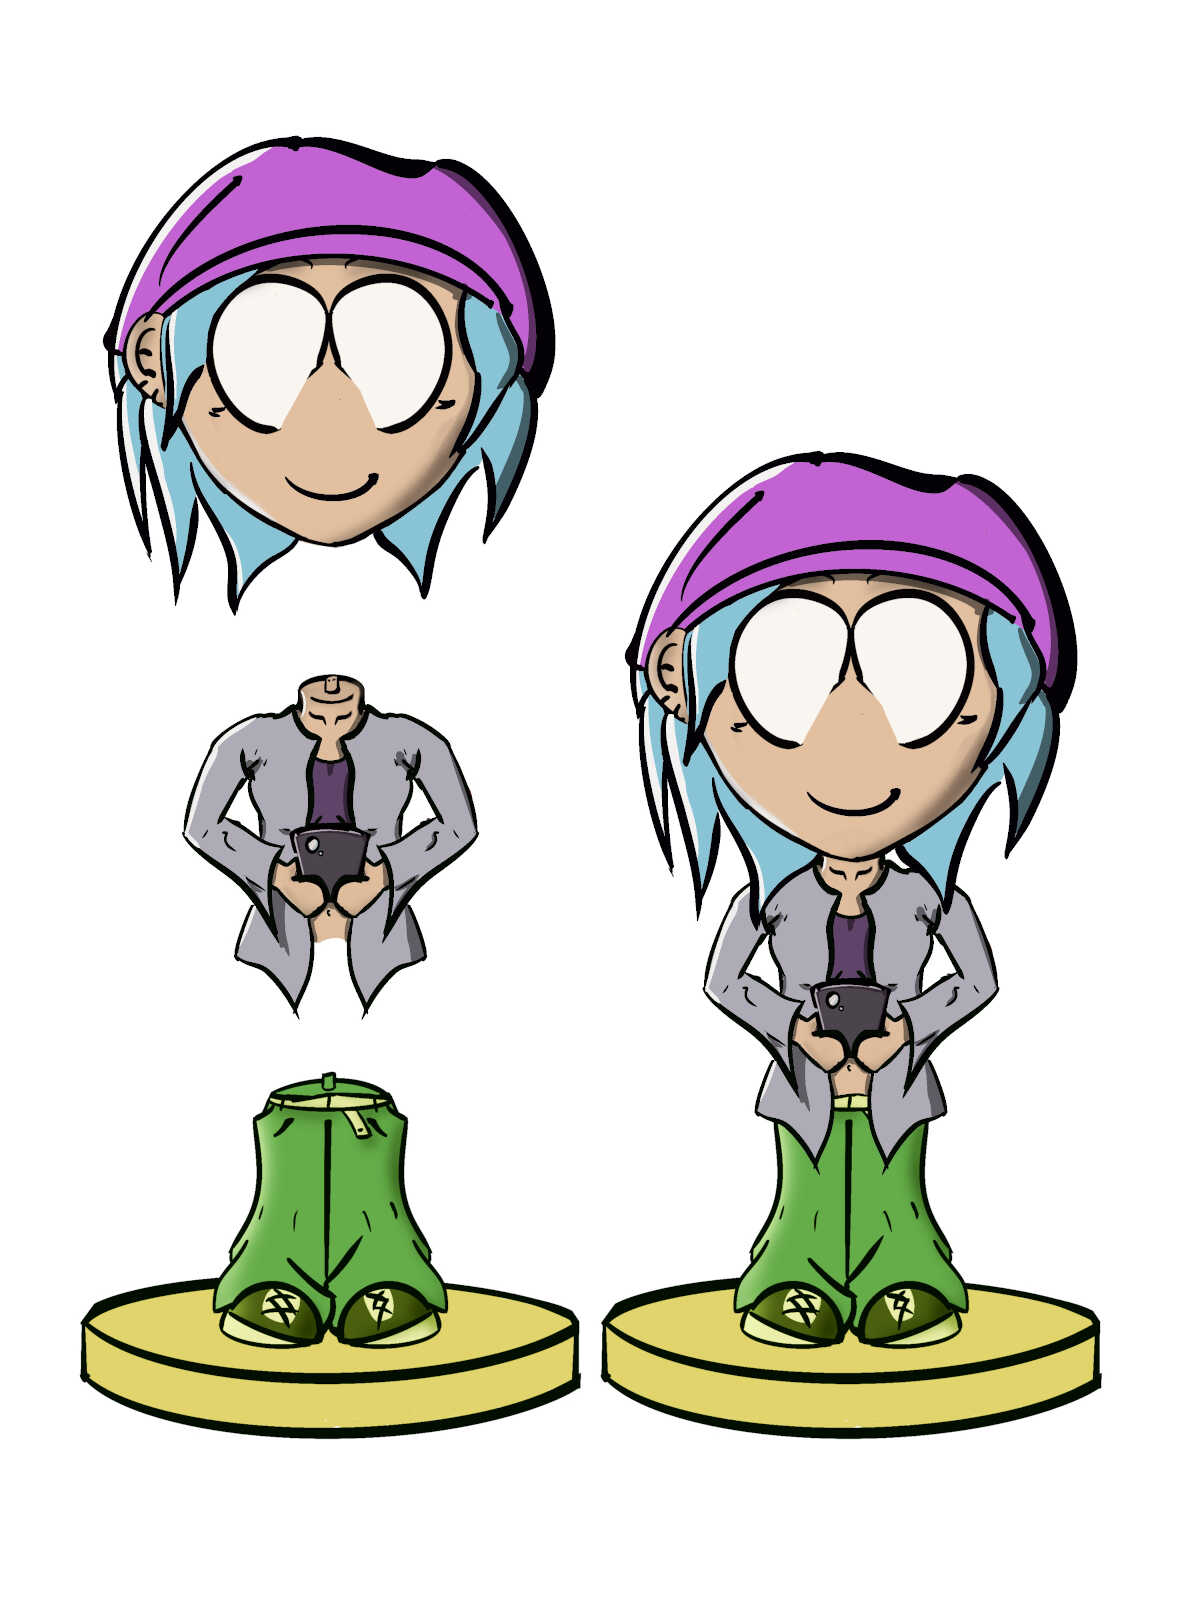
- 14. Male & Female should be available for the end of the project.* (Monster & Non-Binary designs still in consideration.)
- 15. Powered either by Batteries or preferably USB Charge port.
- 16. Smaller and Cheaper ‘Mini-Buddy’ version should be available. Half the size, No Robotics, No separated parts. Much more affordable with low production cost.
If ‘Little Buddy’ goes into consumer production, the intended / ideal price would be no more than €25 - €45. Likewise, the ‘Mini-Buddy’ should be no more than €10 - €25. If these products aren’t affordable to lower income consumers, then there’s no point in making this product at all as it goes against the intentions and goals of it’s creator.
* = Mandatory for my own satisfaction and ideals with Project.
*** = Possible feature, but goes against Creator’s intentions and/or ideals for Final Project.
___________