Assignments
This week I worked on defining my final project idea, getting acquainted with Git, GitBash & Gitlabs while starting the website's documentation process.
____________
Wednesday Meeting Reflection
Principles & Practices + Project Management
During our Wednesday meeting, we had a look back on the creation of digital communication, Birth of Computerised Machining, and the transition from business computers to personal computers.
“There’s no reason for anyone to have a computer at home.”We also took a look at the course: "How to make (almost) anything". Showed moments where bright young children came in creating applications that far exceeded the lecturer’s curriculum. Other topics discussed included the spread of Fablabs across the world and its growth, the current AI boom & Robotic Assembly.
Projects done here may seem small and inconsequential ‘but they are really the building blocks of the future’.
Extra: Some worthwhile notes for Final Project:
- You don’t fail when time’s up, you finish when you finish your assignment / documenting. 80/20 or 95/5 - Your final parts of your project will take most of the time. Write out Plan for Final Project Week by Week.
- Use compressed JPEGS for image uploads - not uncompressed jpgs.
- I need a 1 Page Slide & 1 Minute Video showing my entire working final project.
NO WATERMARK!!! DON’T HAVE MESSY WIRES!!! Keep them clean and contained. - I can use Image Magic / GIMP / KRITA to compress images.
____________
Concept Designs & Sketches
Designs were created for my final project using Procreate & details basic components and movement.
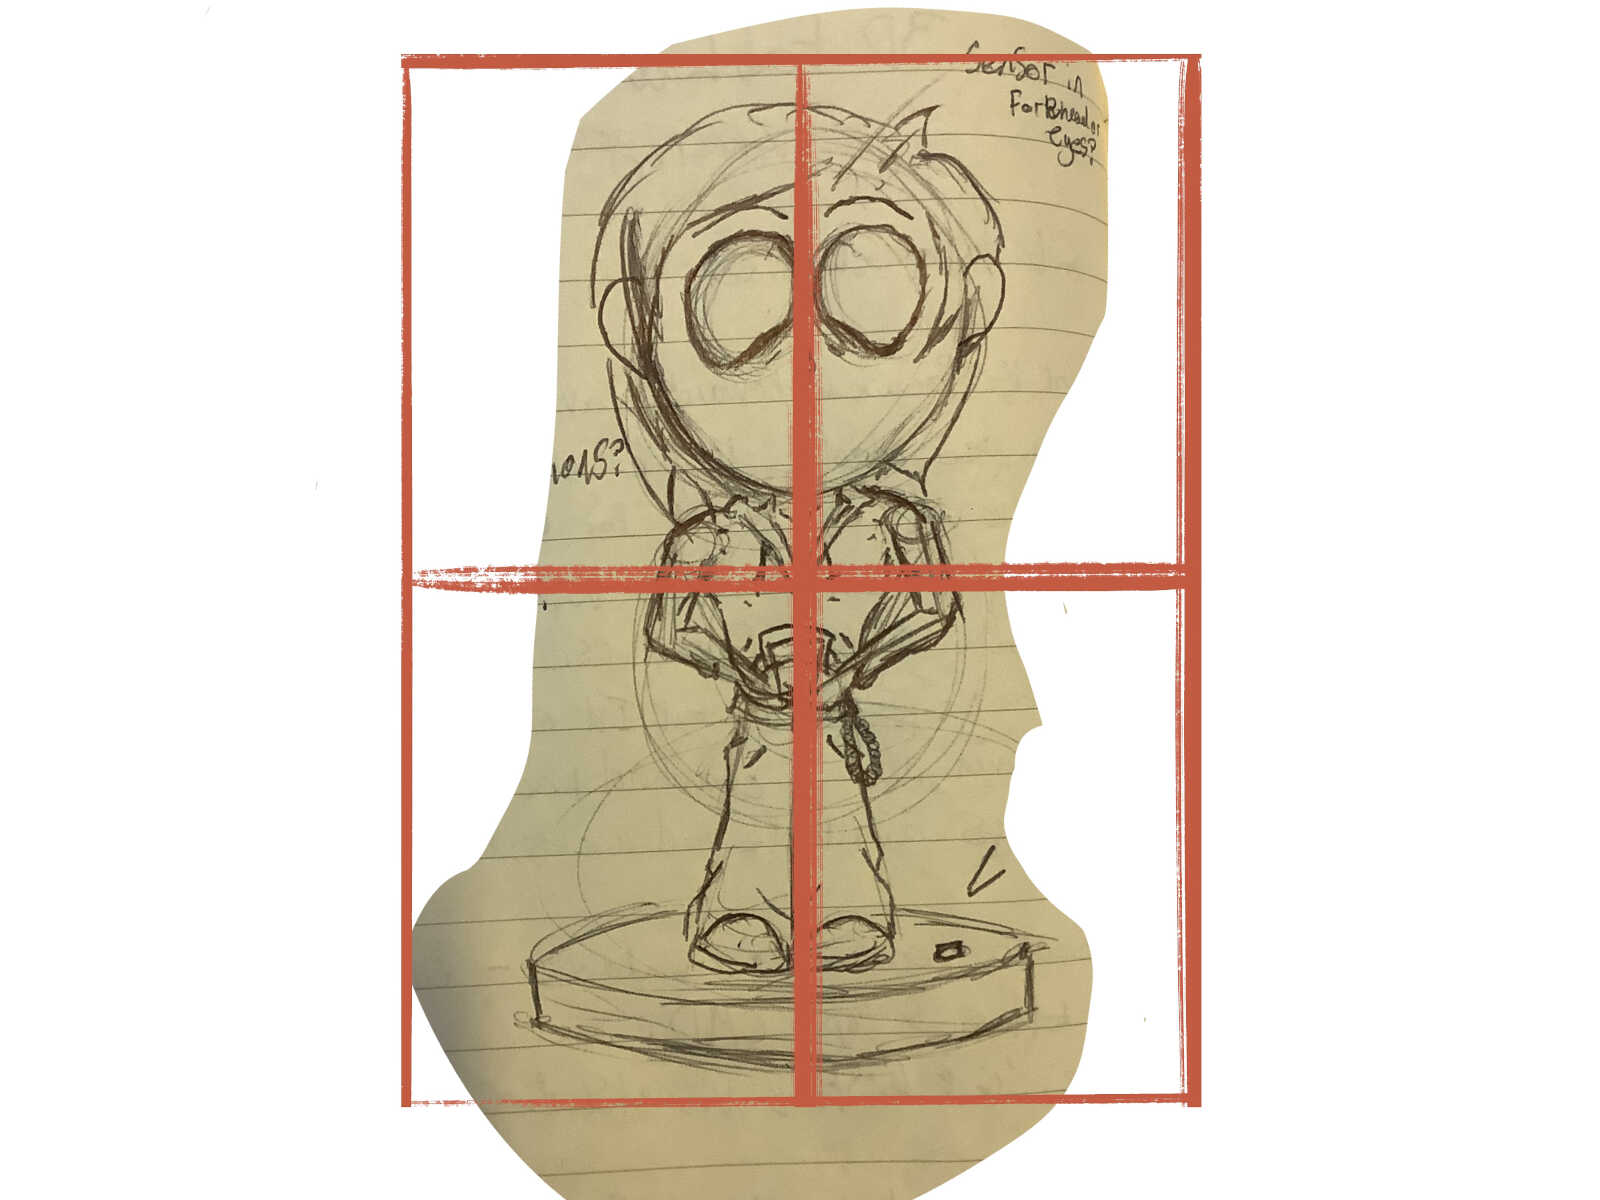
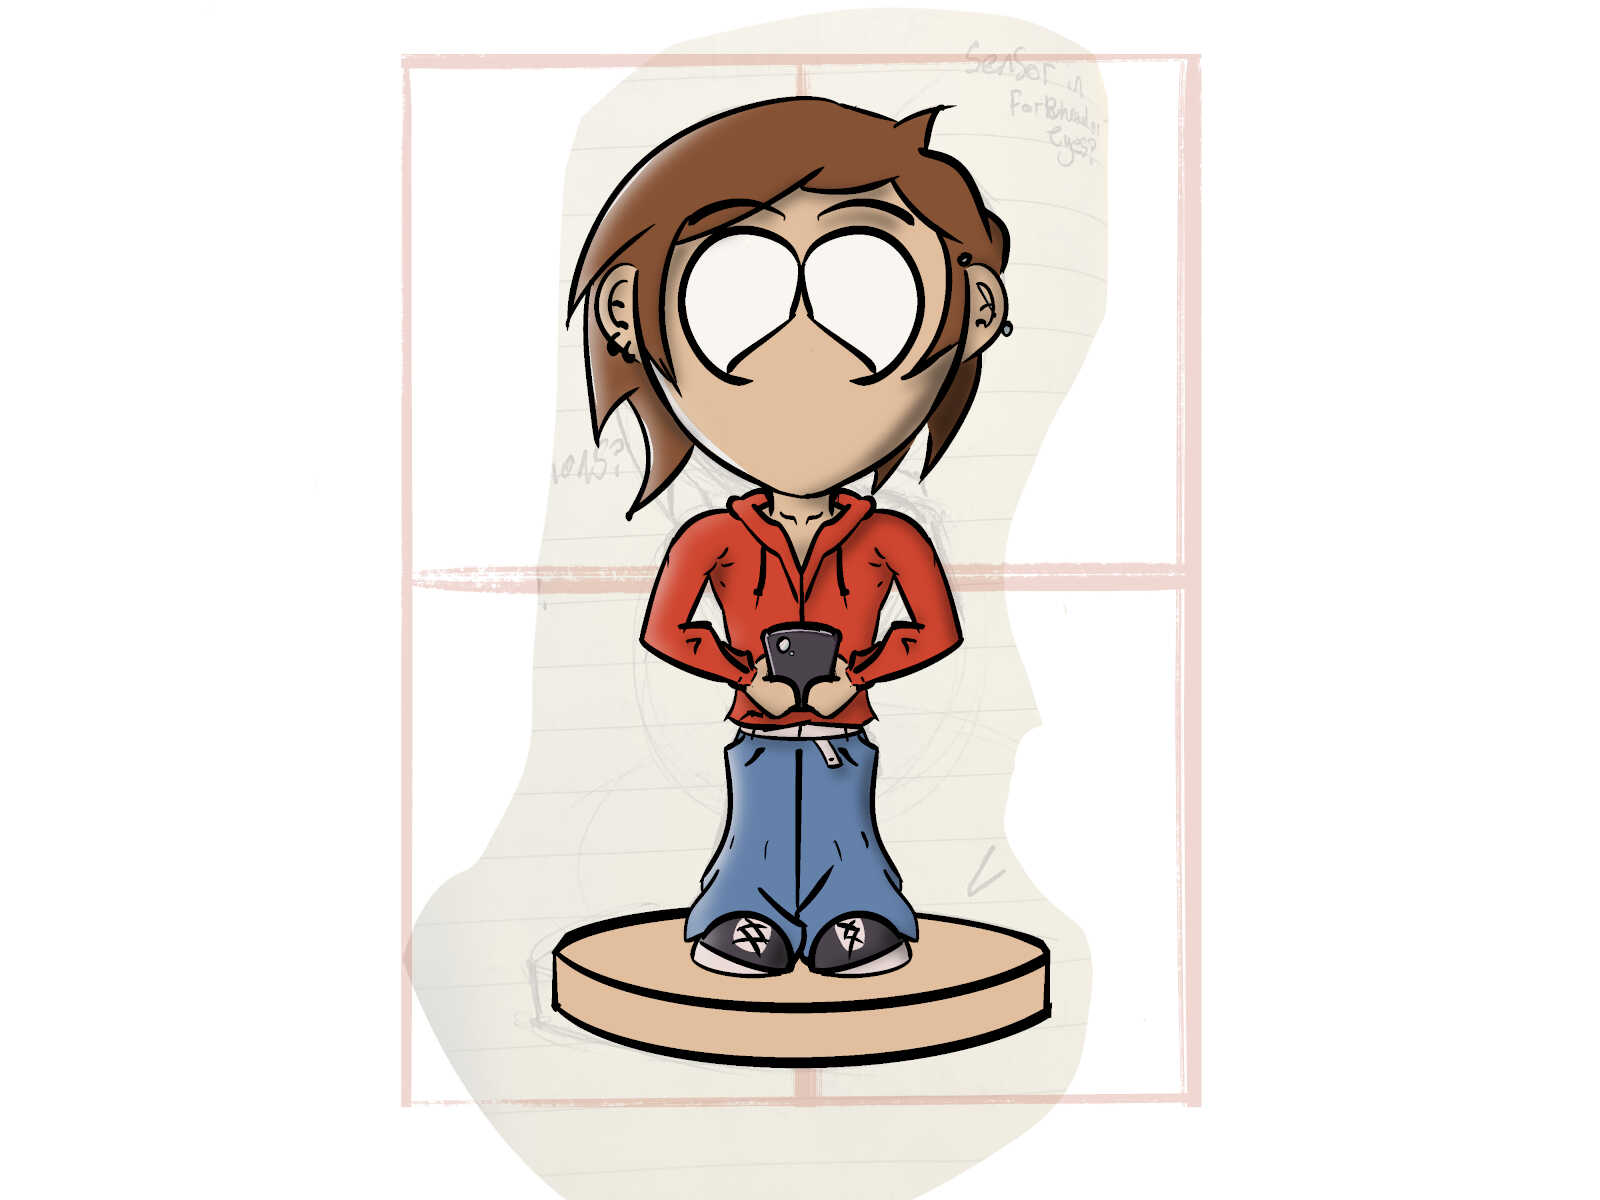
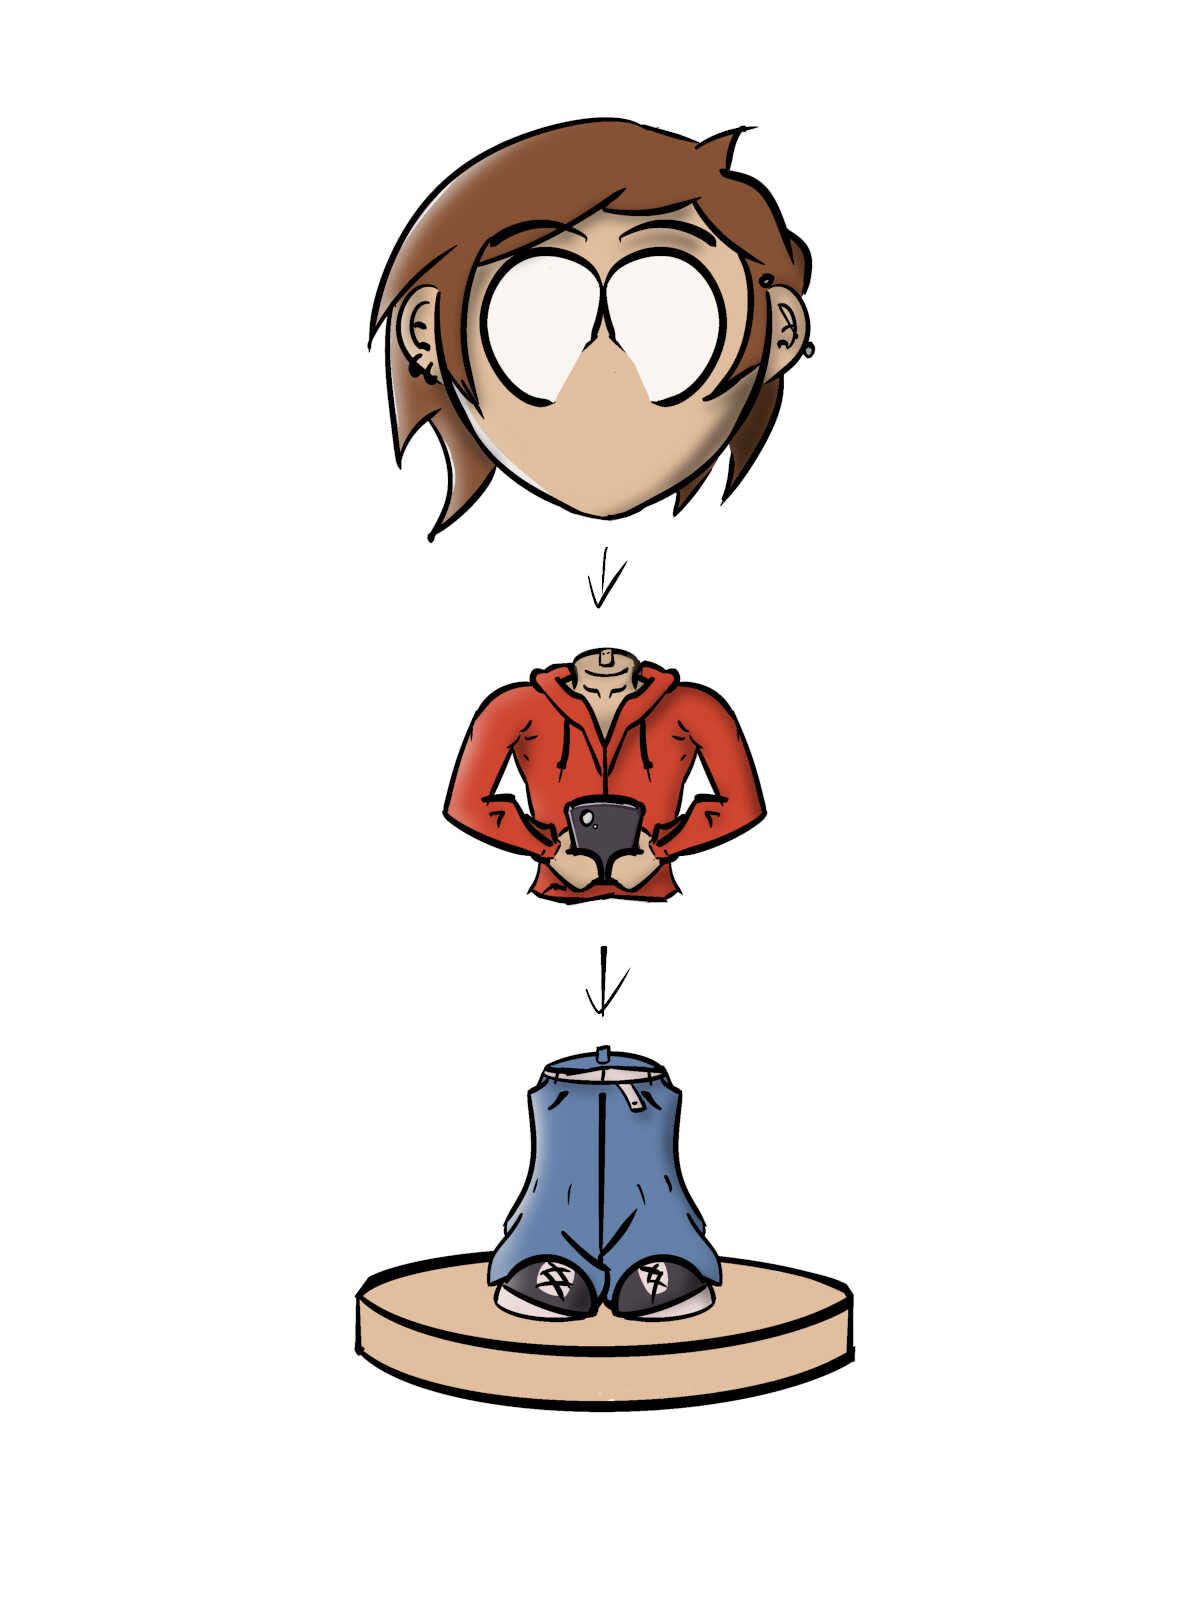
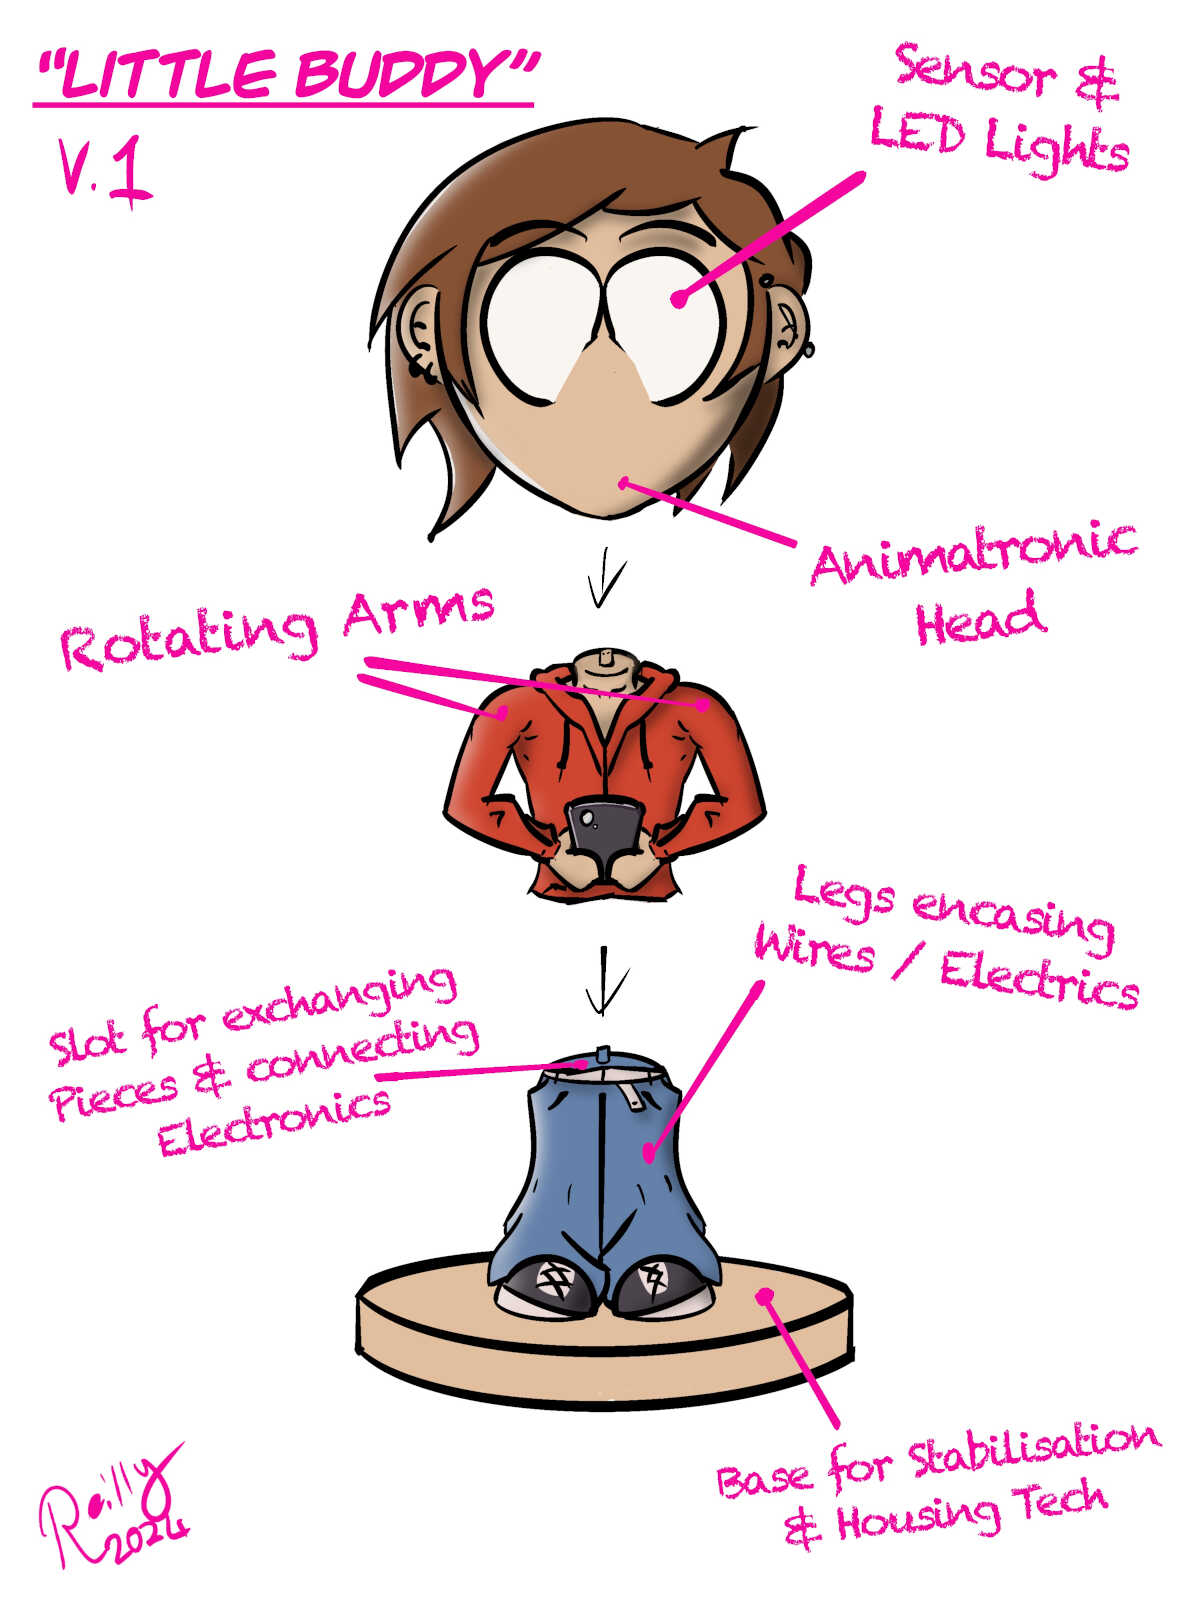
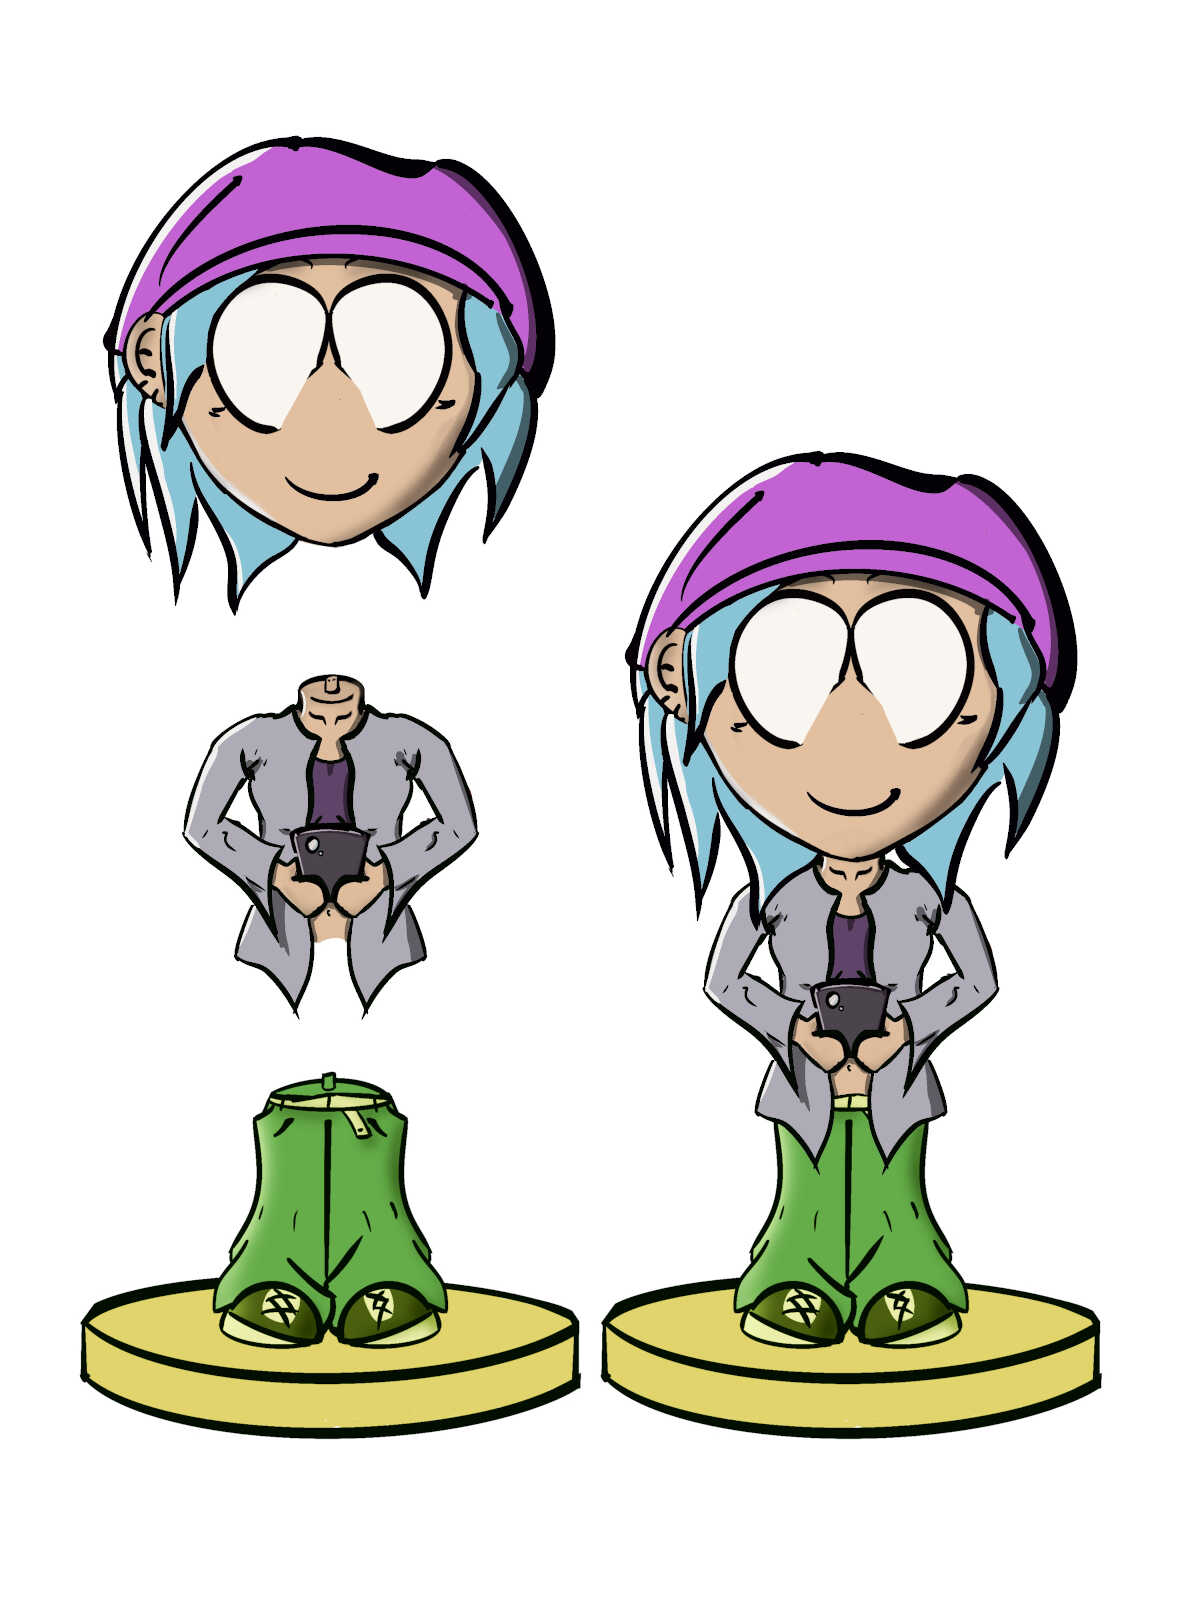
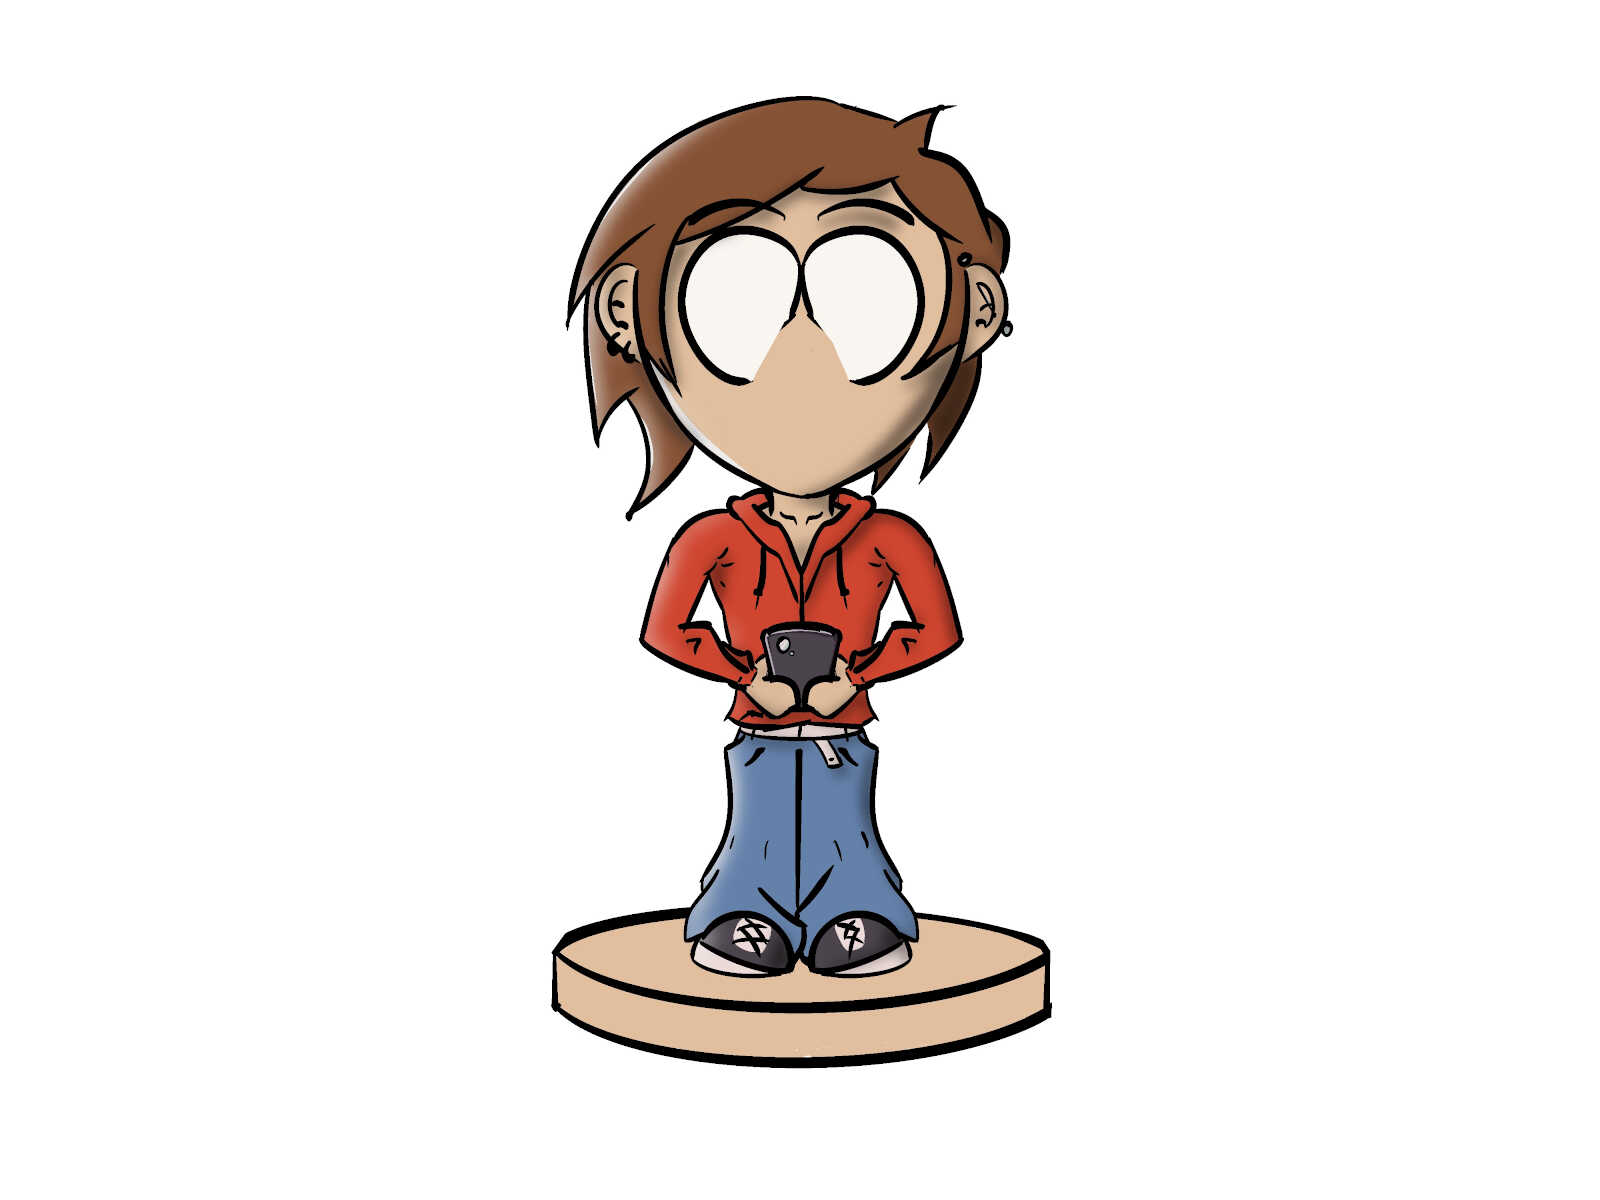
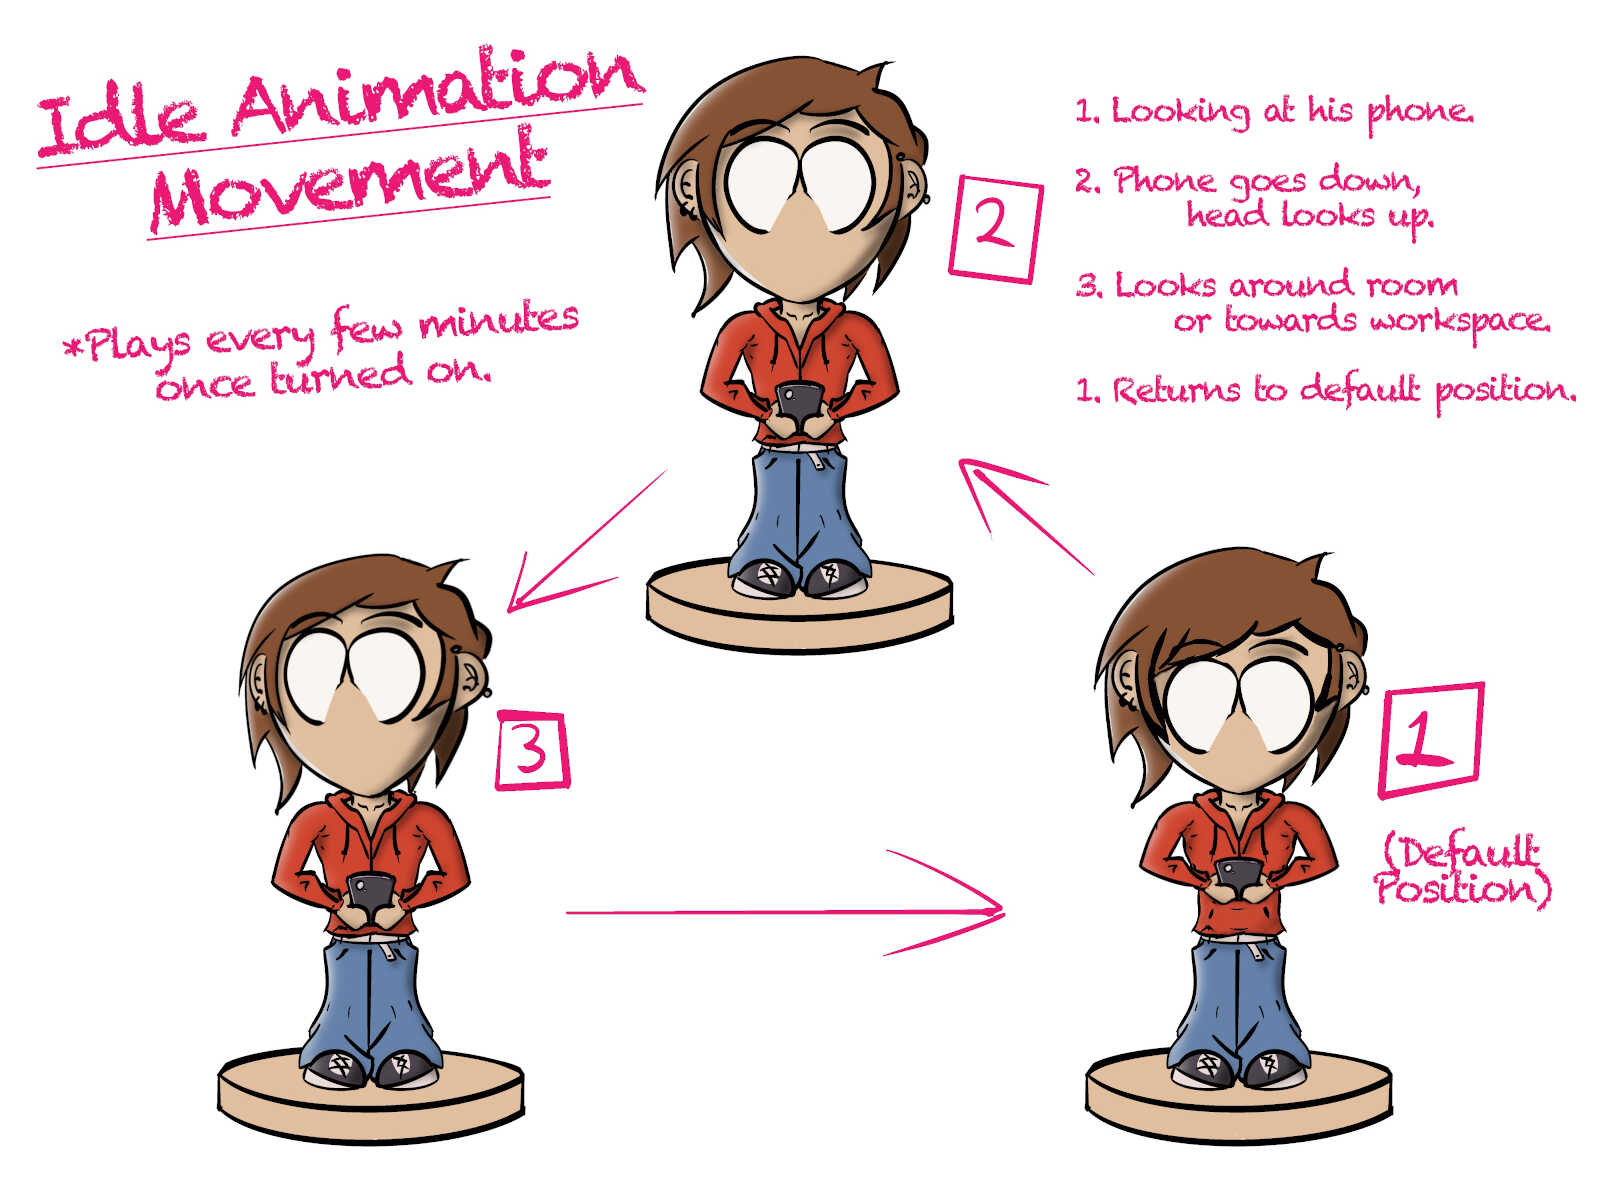
More information about my Final Project can be accessed here in the Final Project Page.
____________
Complete Web Design Overhaul
I had nervously planned to design my website from scratch as Fab Academy left me with an open template for my site. It was suggested by my instructor that I should look at w3schools HTML templates and use that code to relieve some of the heavy workload.
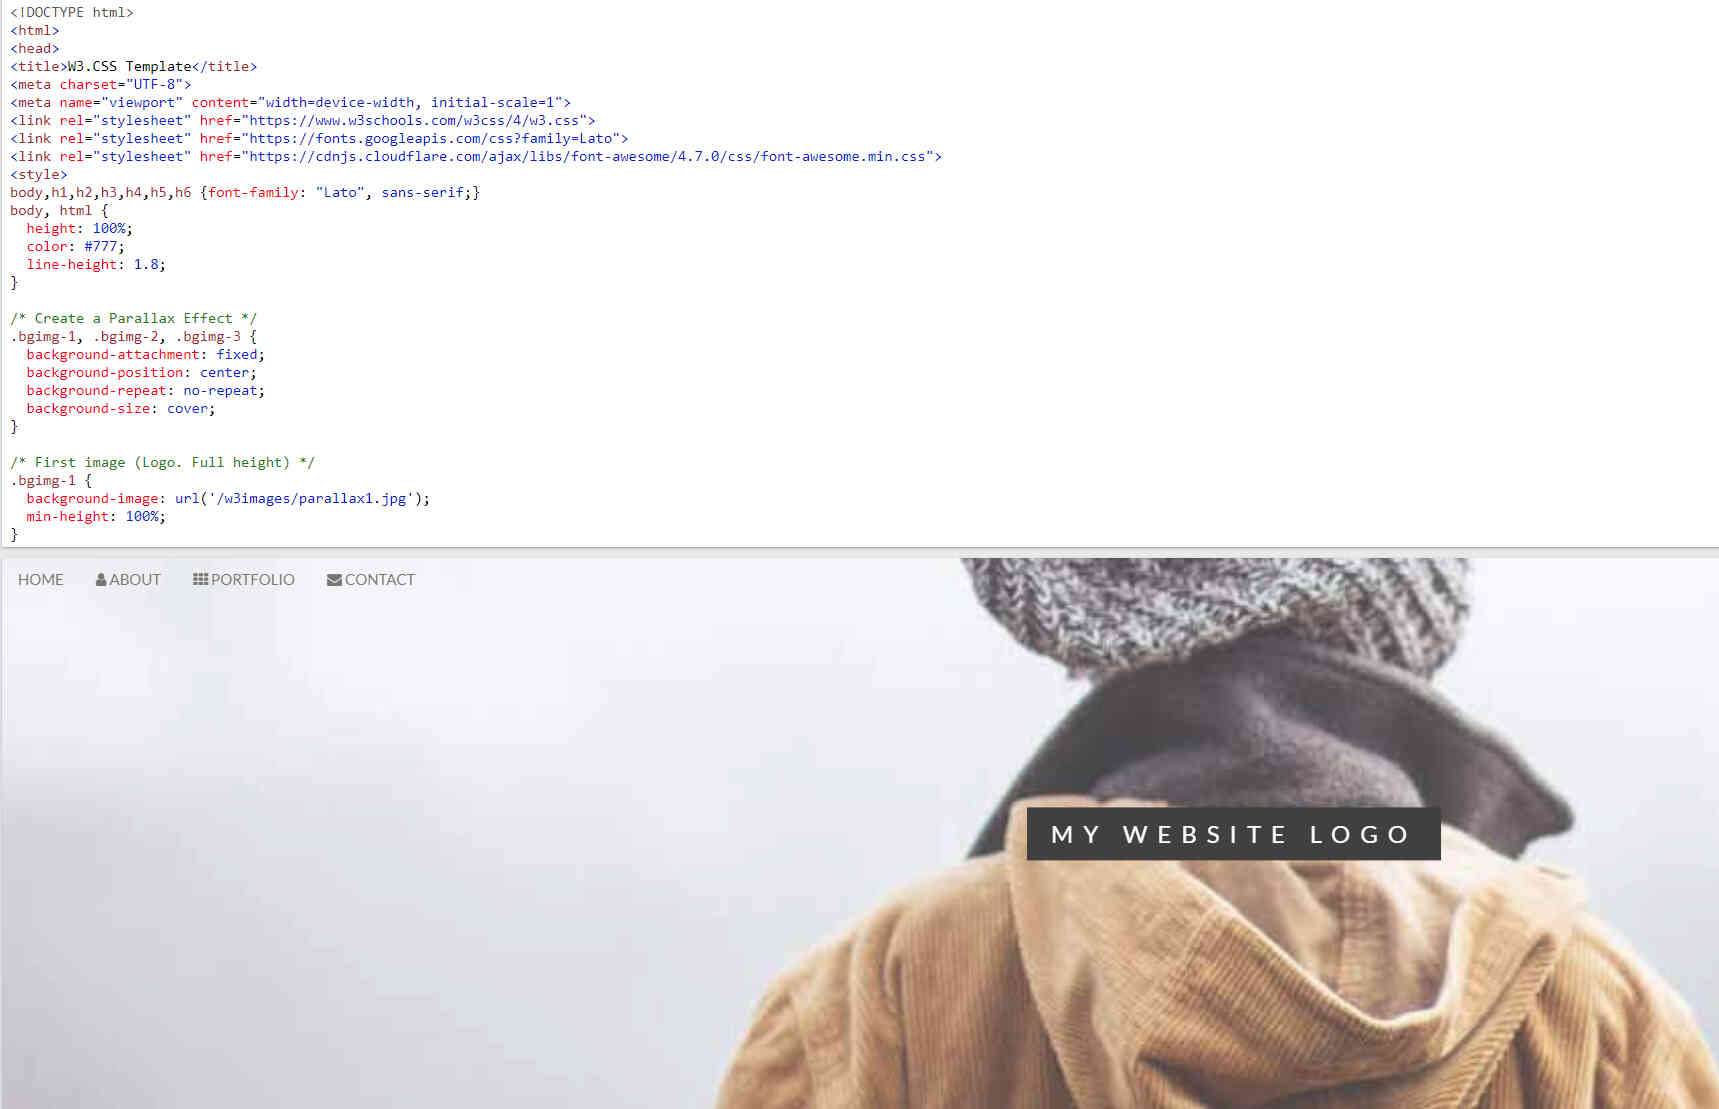
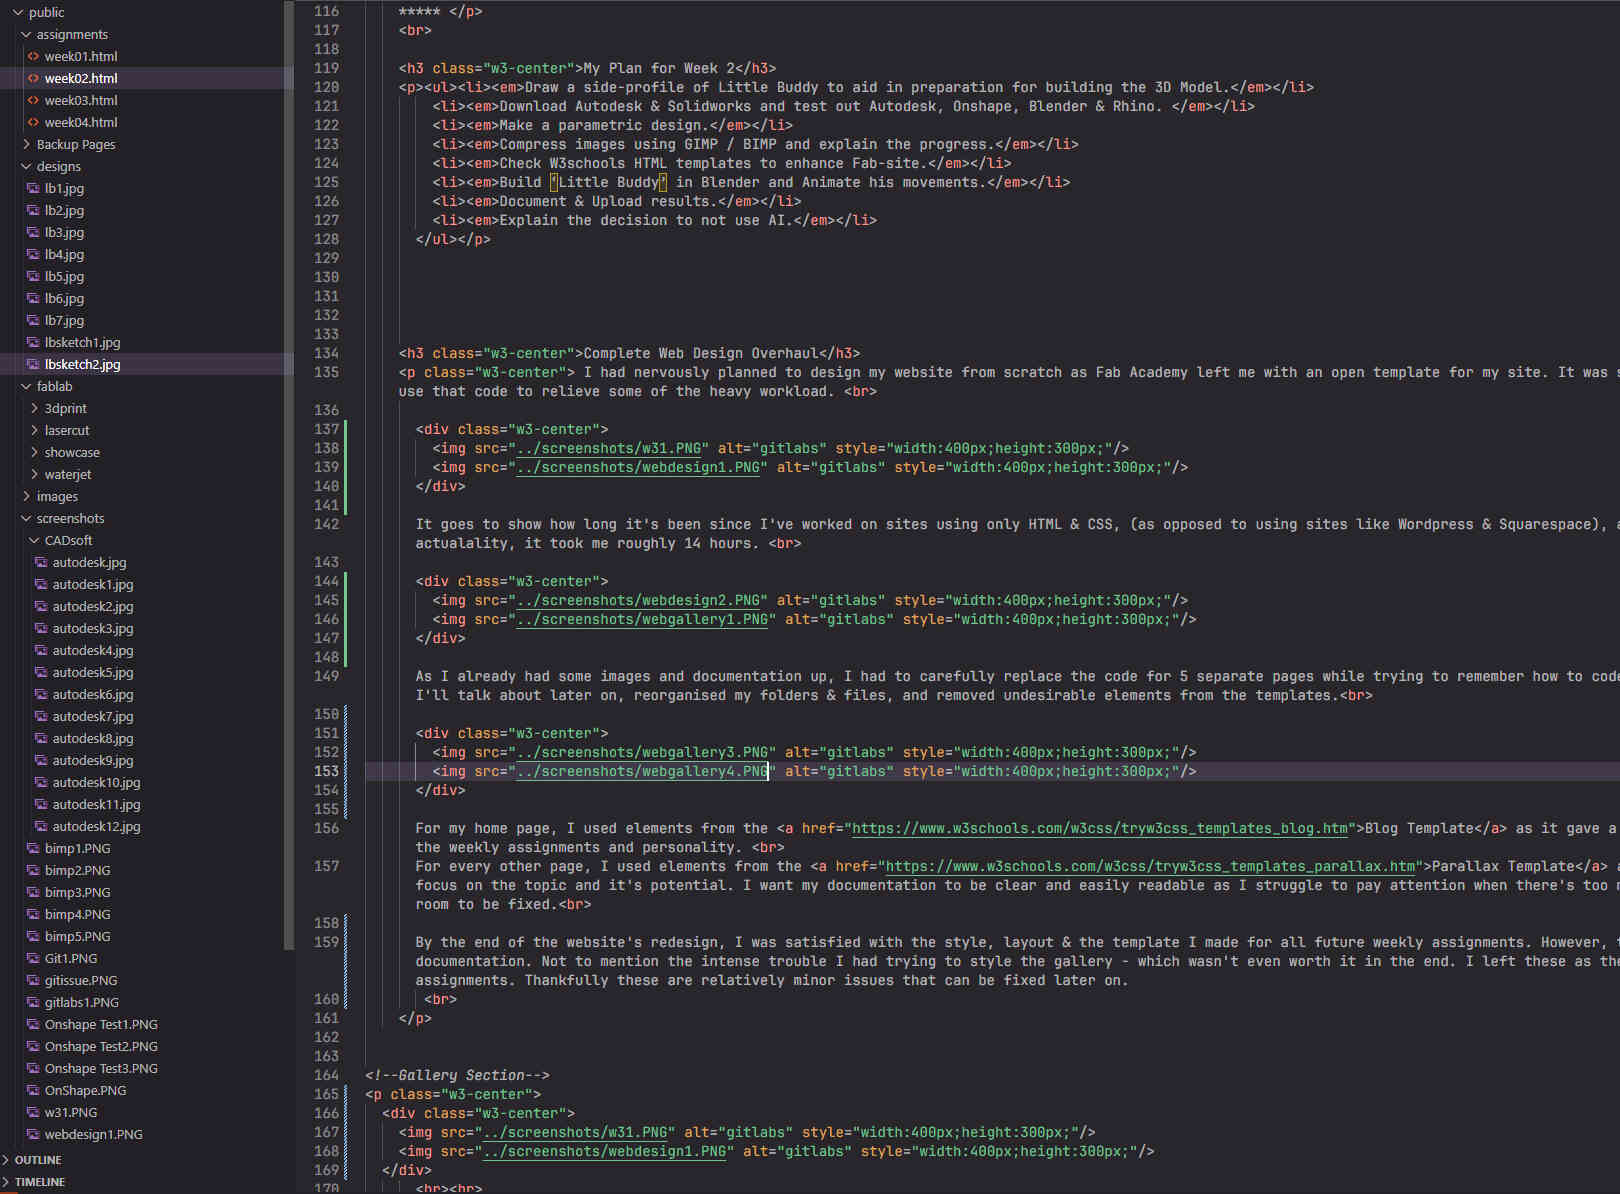
It goes to show how long it's been since I've worked on sites using only HTML & CSS, (as opposed to using sites like Wordpress & Squarespace), as I expected my website redesign would only take about 1-2 hours to do. In actuality, it took me roughly 14 hours.
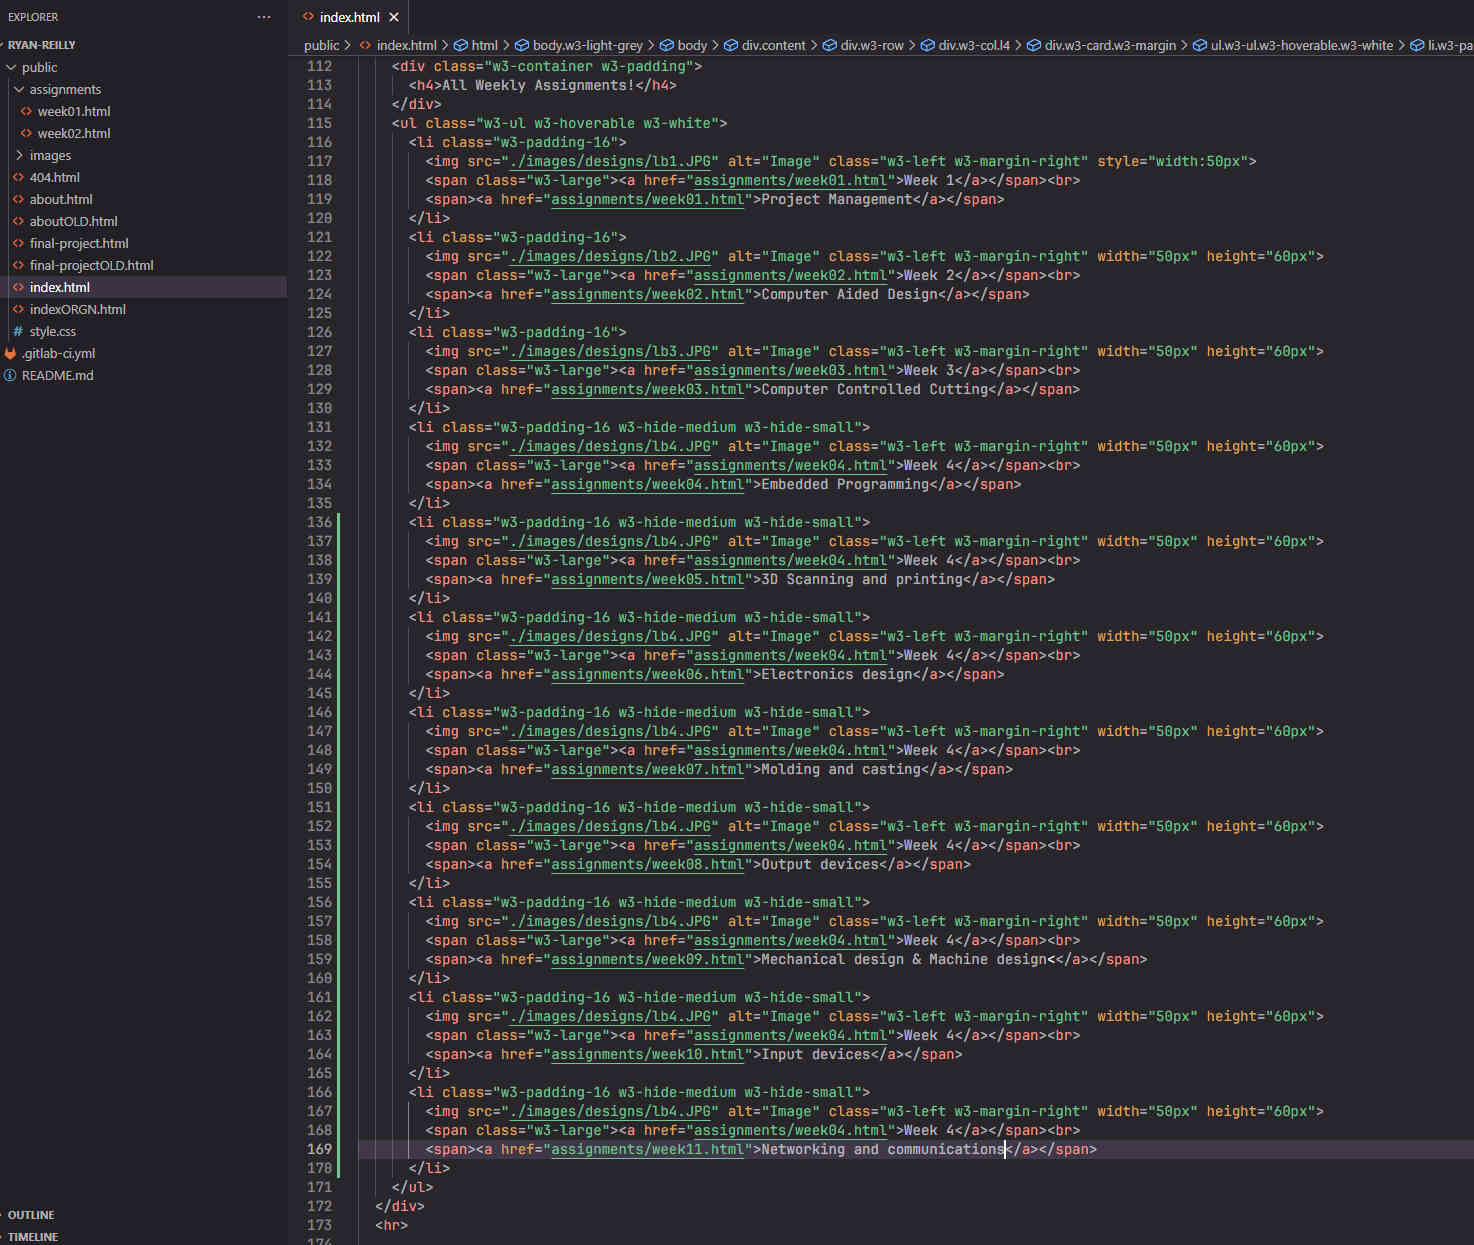
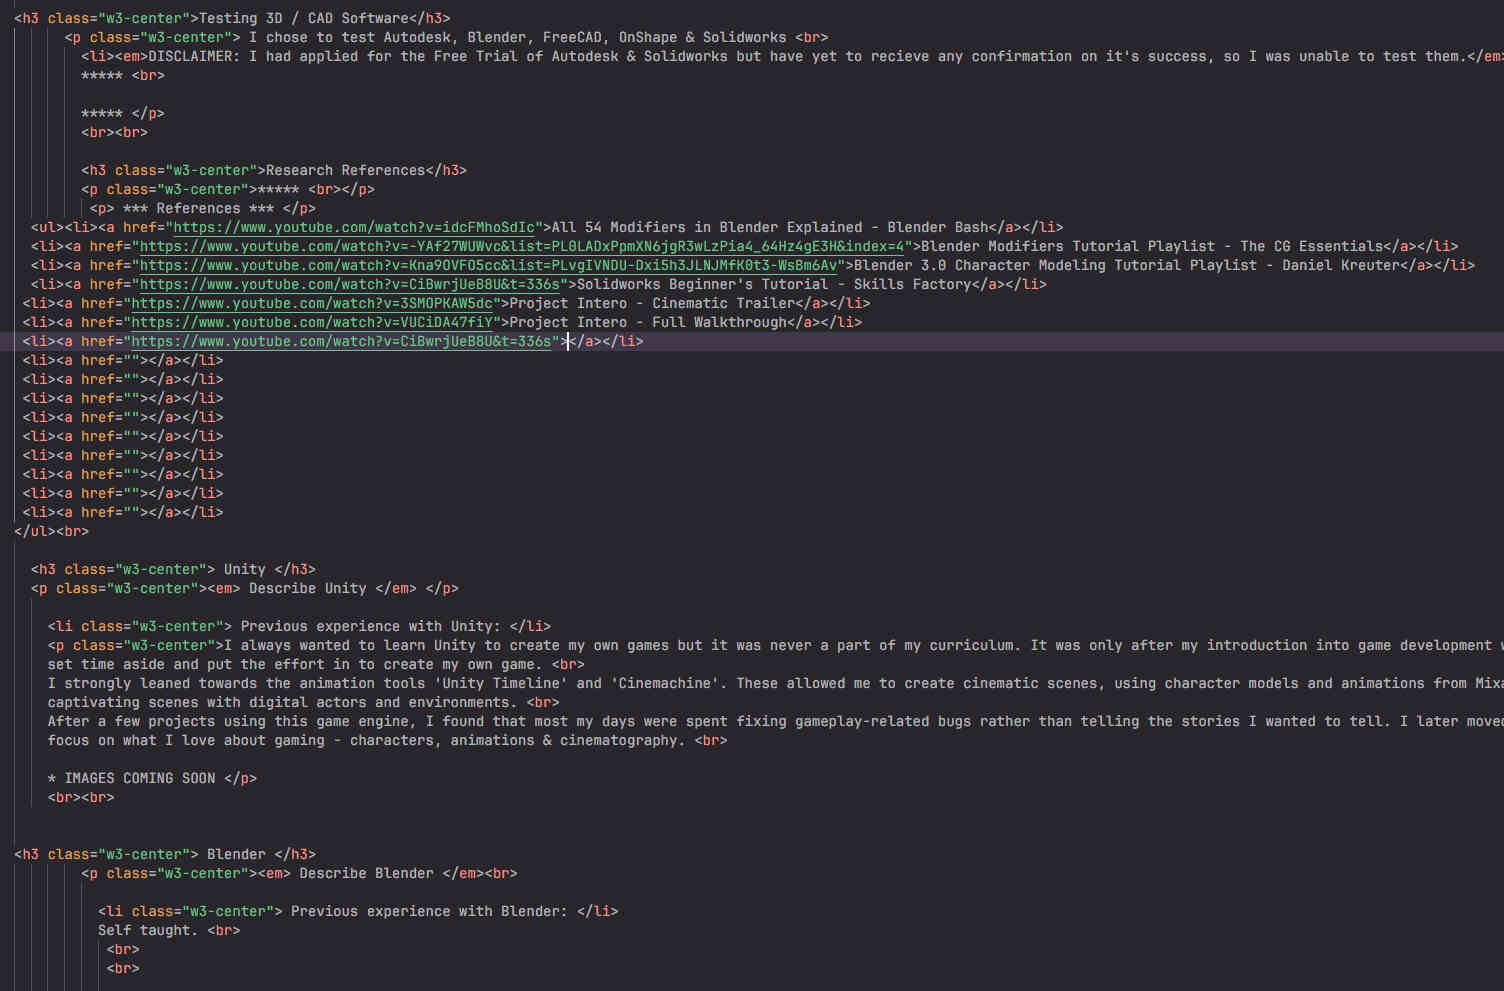
As I already had some images and documentation up, I had to carefully replace the code for 5 separate pages while trying to remember how to code. Along with that, I tested out Batch Compression using GIMP & BIMP - which I'll talk about later on, reorganised my folders & files, and removed undesirable elements from the templates.
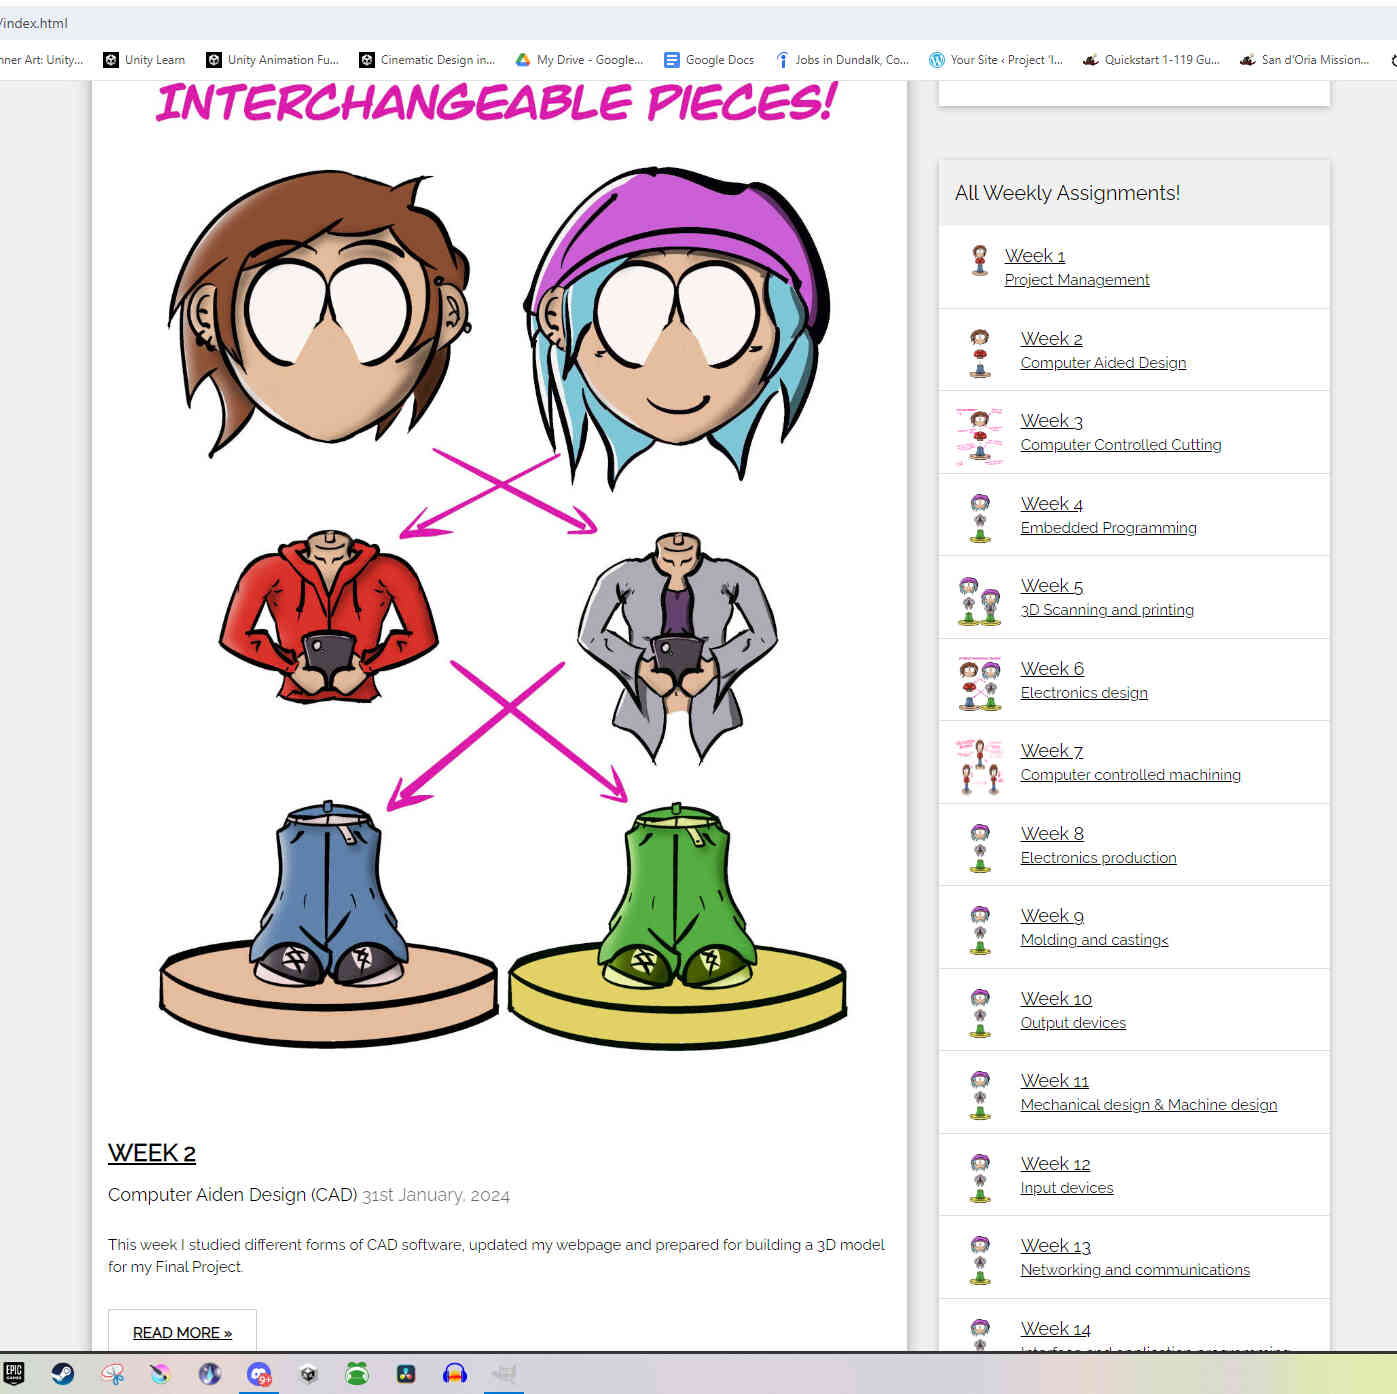
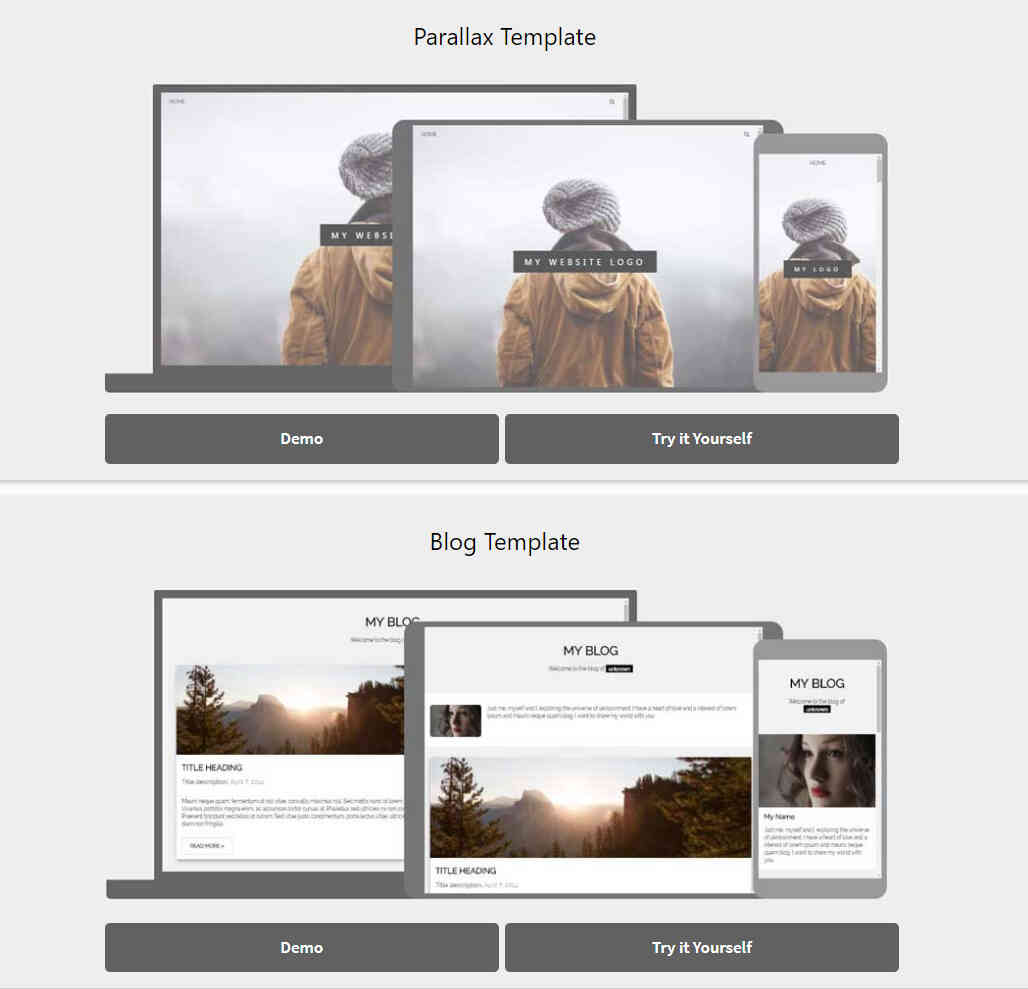
For my home page, I used elements from the Blog Template as it gave a comfortable, relaxed look to my website while also putting a heavy focus on the weekly assignments and personality.
For every other page, I used elements from the Parallax Template as it gave a slick and simplistic style of my documentation while putting a focus on the topic and it's potential. I want my documentation to be clear and easily readable as I struggle to pay attention when there's too much text on screen. This template did lead to border issues but left enough room to be fixed.
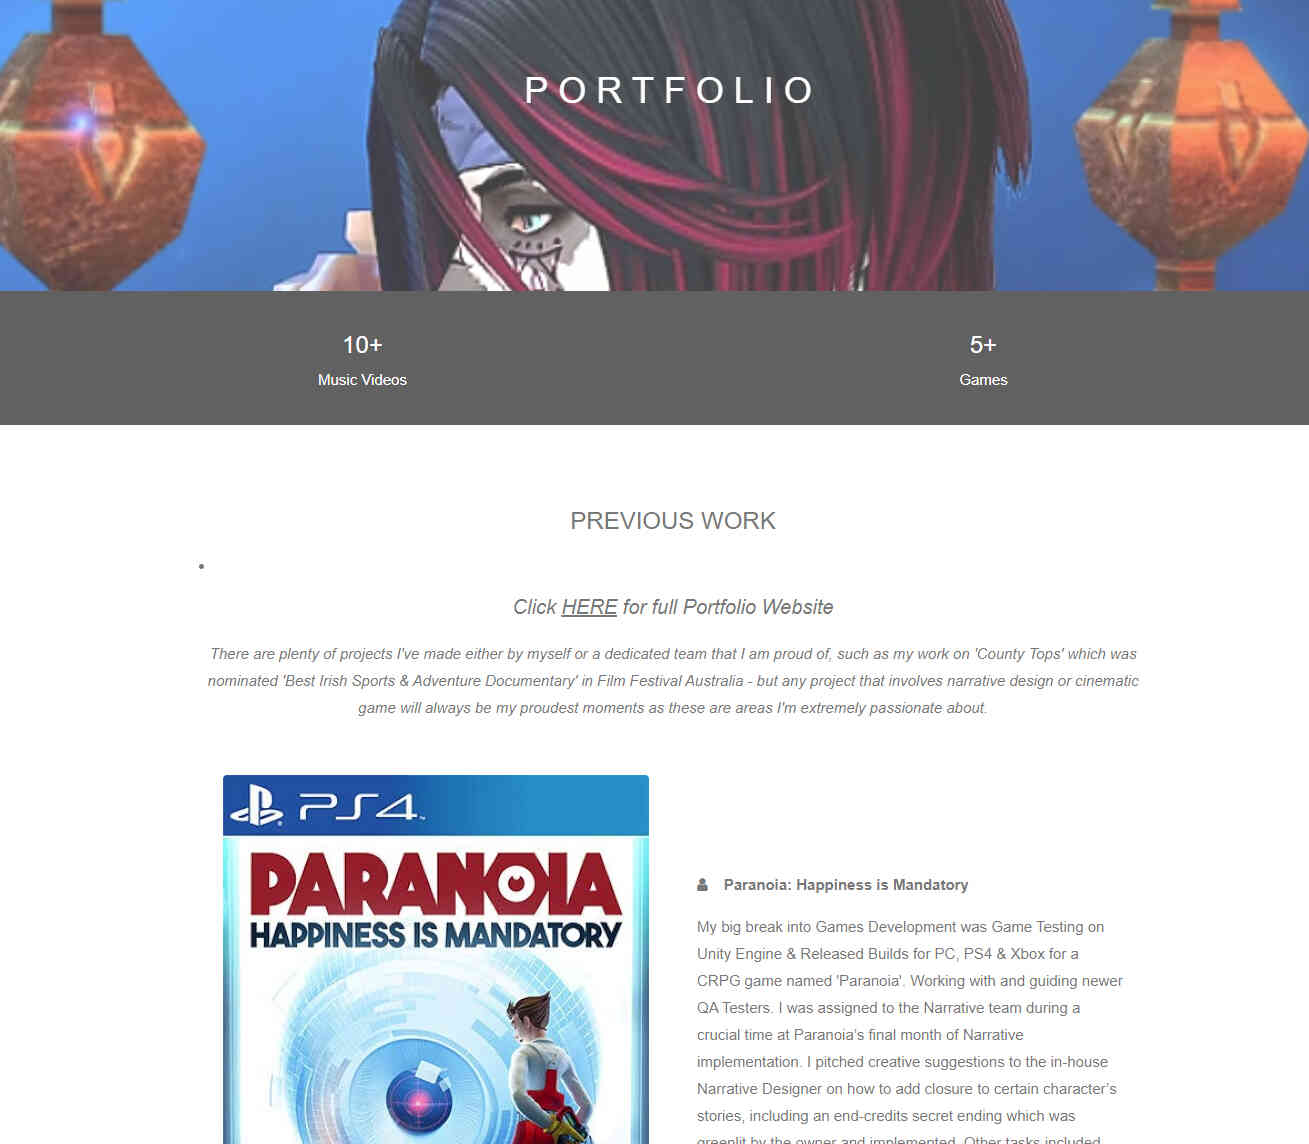
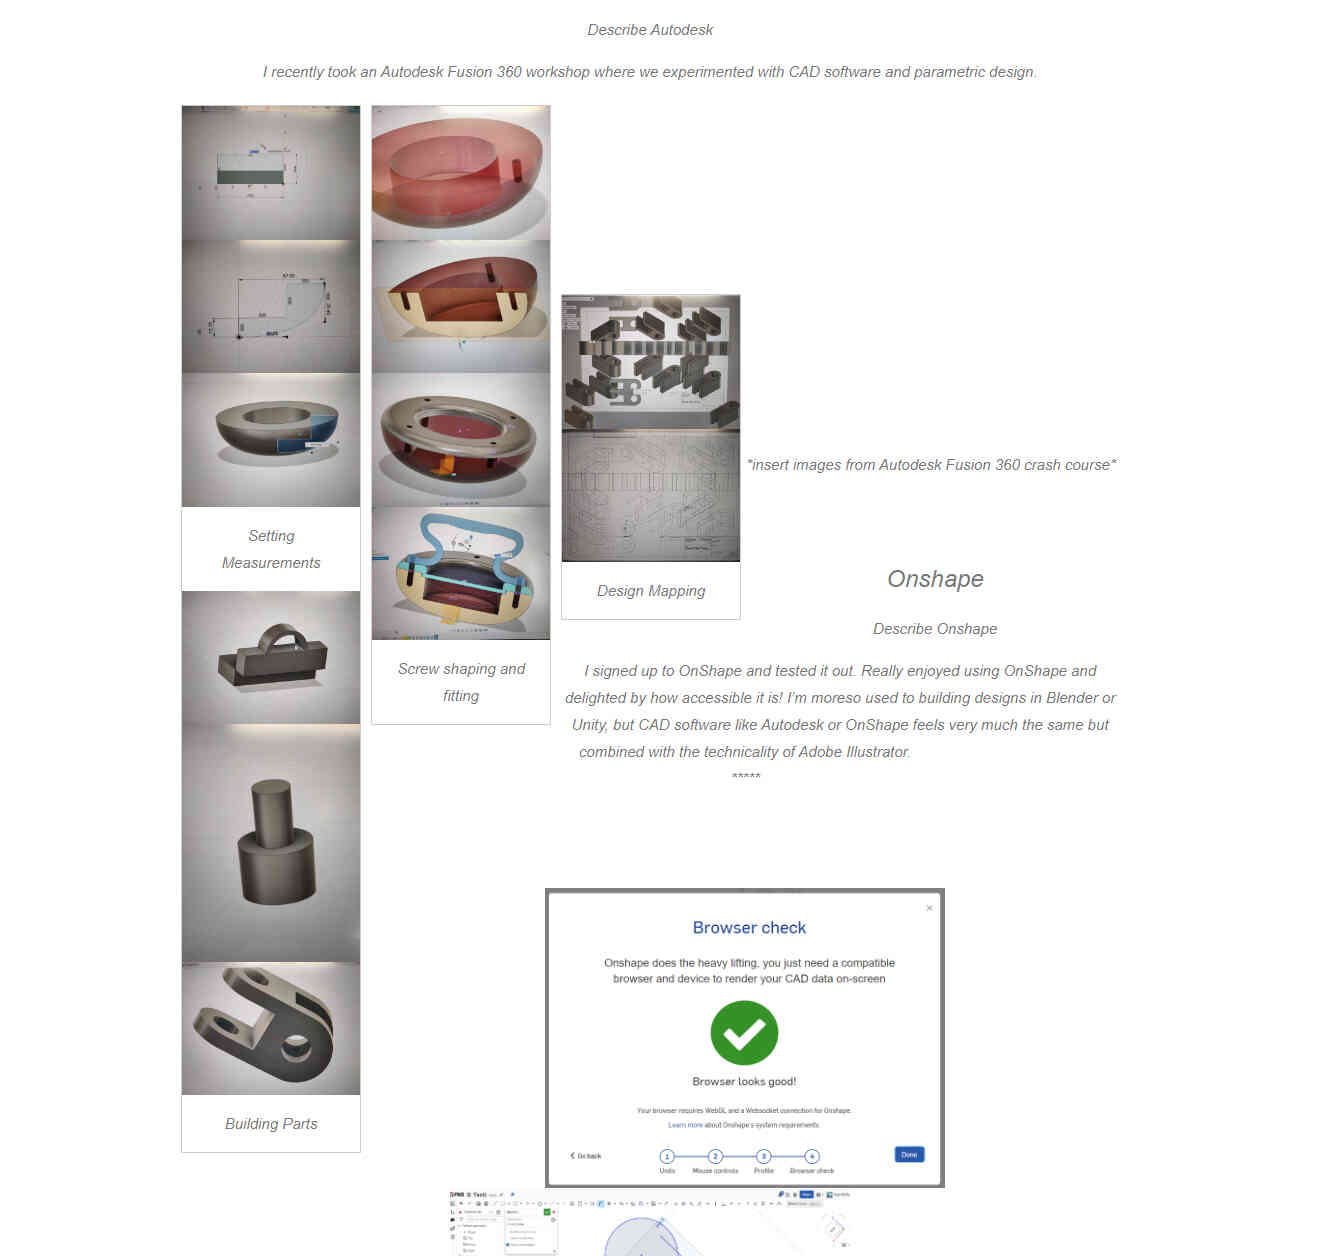
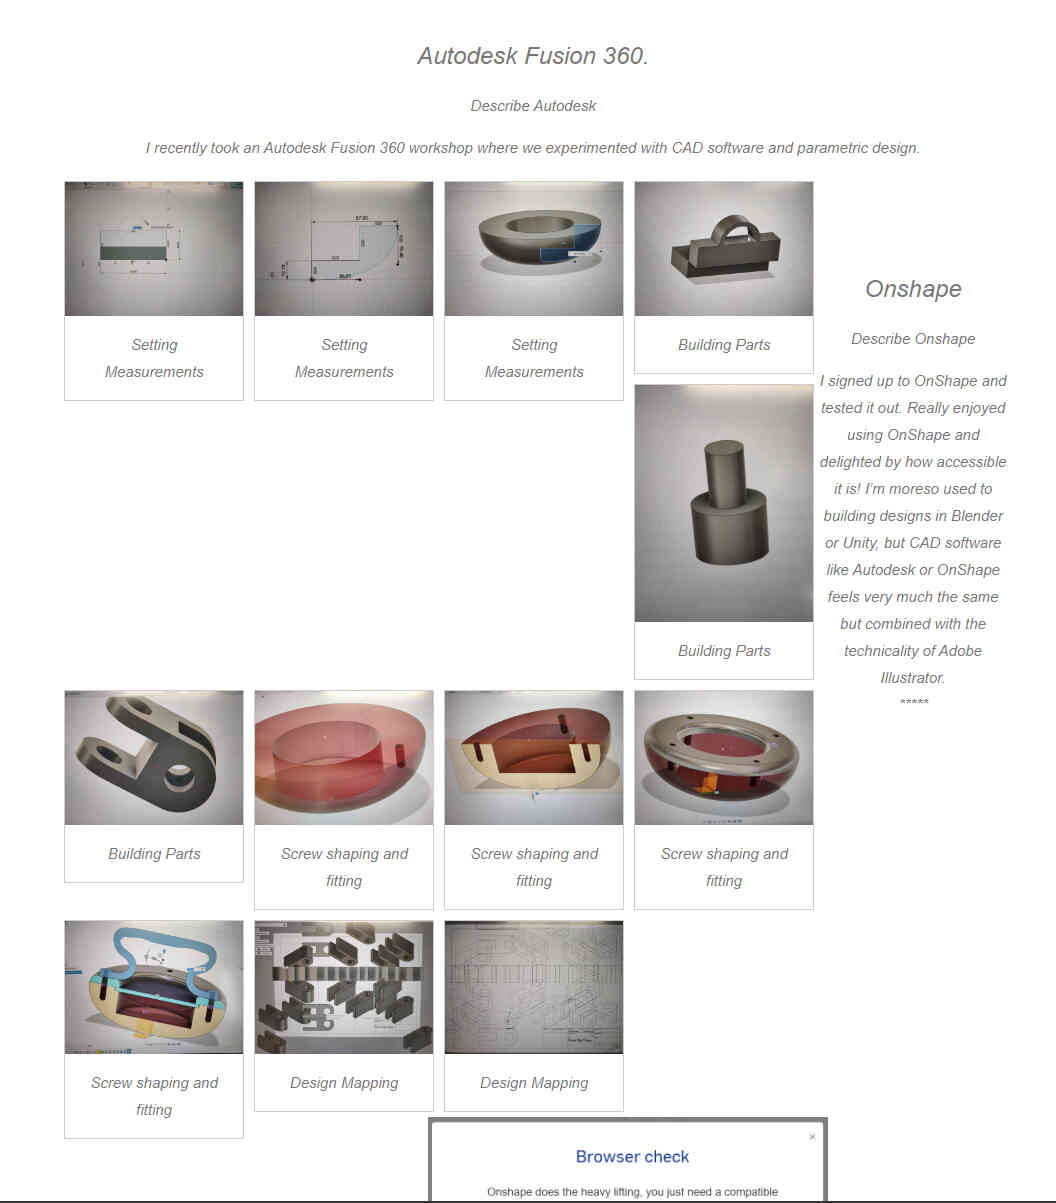
By the end of the website's redesign, I was satisfied with the style, layout & the template I made for all future weekly assignments. However, there was still issues with screenshot images, margins & borders and missing documentation. Not to mention the intense trouble I had trying to style the gallery - which wasn't even worth it in the end. I left these as they were as I knew I was running out of time to test out 3D software & complete assignments. Thankfully these are relatively minor issues that can be fixed later on.
____________
Research into Human / Robot Relations
Was given a book named “Hello, Robot” by my FabLab instructor which he found to be highly relevant and beneficial for my Final Project.
It describes the relationship between man & technology in the modern day era. It takes into account past inventions, concepts such as the ‘Three-Five Laws of Robotics’, science fiction and realistic relationships, the history & evolution of robots and the human responsibility to them and themselves.
In relation to my final project, the product I intend on making for my final project isn't considered a ‘tool’ but more a bond between Human and Artifact.
It's design is even styled as a co-worker or someone or something that is ‘in the same boat as the user'. Working away, side by side, keeping each other company.
____________
Information about Git / Git Bash / Gitlabs
 "Git is a distributed version control system widely used in software development.
It tracks changes in source code during the development process, allowing multiple collaborators to work on a project concurrently. Developers can create branches to work on specific features or fixes independently, and later merge those changes back into the main codebase. Git provides a history of changes, facilitates collaboration, and enables efficient code management. Platforms like GitHub and GitLab use Git to host repositories and enhance collaboration among developers.
 Git Bash is a command-line interface for Git on Windows.
It provides a Unix-like shell environment where users can use Git commands alongside standard shell commands. Git Bash allows developers to interact with Git repositories using command-line instructions, offering a consistent experience for version control tasks on Windows systems. It includes tools and utilities to navigate file systems, execute Git commands, and perform various tasks related to code versioning and collaboration." - (Written by ChatGPT v.3.5, 2024)
Gitlab issue reporting reminds me of my time as a QA Tester in Game Development. I believe we used Hansoft instead of Gitlab, but it was still very familar to me. In the same respect, Gitlabs Web IDE has a similar layout to Textwrangler and Visual Studio Code. I have experience in Web Design, so I felt very comfortable navigating the code. The concept and use of ‘Git’ is what stumped me the most this week. I’ve experience in Web Development using Textwrangler, Notepad, Visual Studio Code, Wordpress, etc and yet wrapping my head around what ‘Git’ was proved fairly difficult.
Researched what ‘Git’ is through several videos listed here ->
- Git and GitHub Tutorial for Beginners - Kevin Stratvert
- Git Tutorial for Beginners: Learn Git in 1 Hour - Programming with Mosh
- GitLab & Version control - Fab Academy
Gitlabs via Web IDE
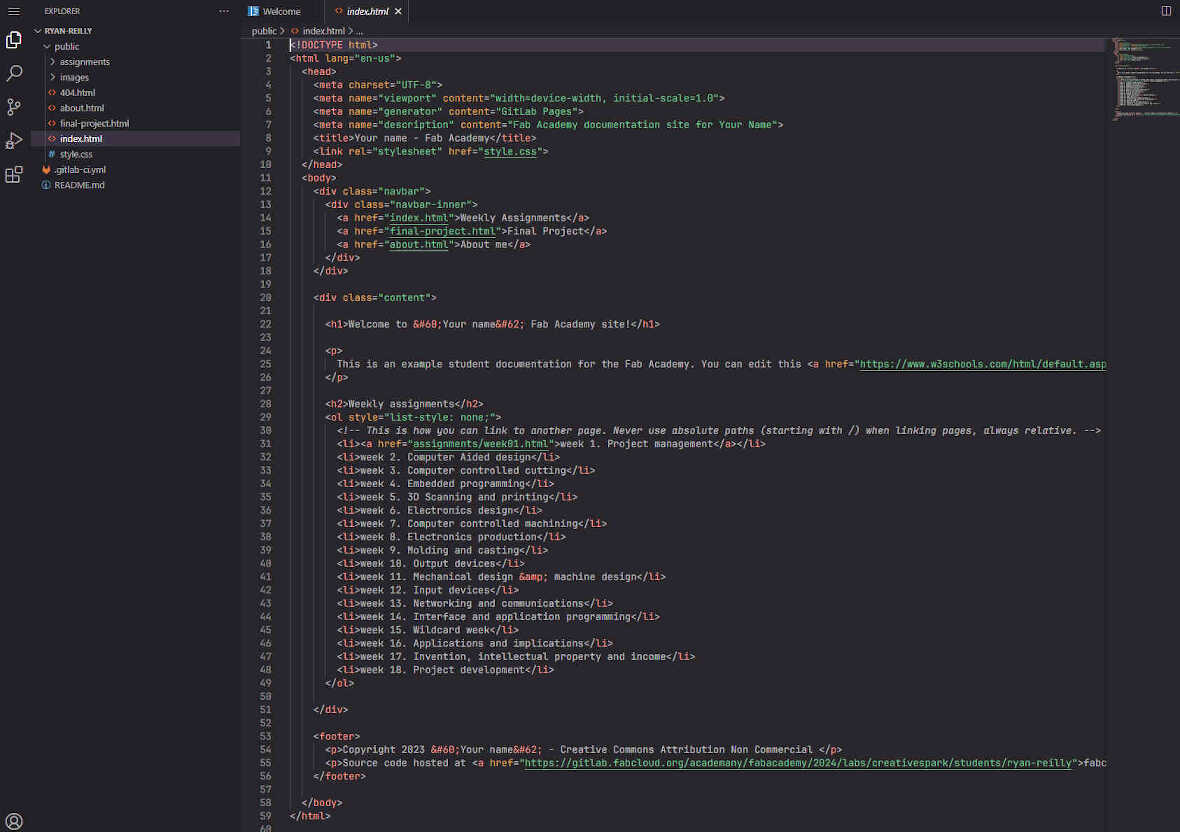

To test it out, I made several changes to the website, including adding a ‘Week 2’ page, changing names, adding background info and an image - which may or may not be too big. Then I learned to commit changes, where everything went smoothly. On the Gitlabs Projects page, go to Menu -> Build -> Pipeline. Here you check if your commit has uploaded. I thought I might have overestimated git’s complexity - until I had to download git onto my desktop computer and that’s where I ran into trouble.
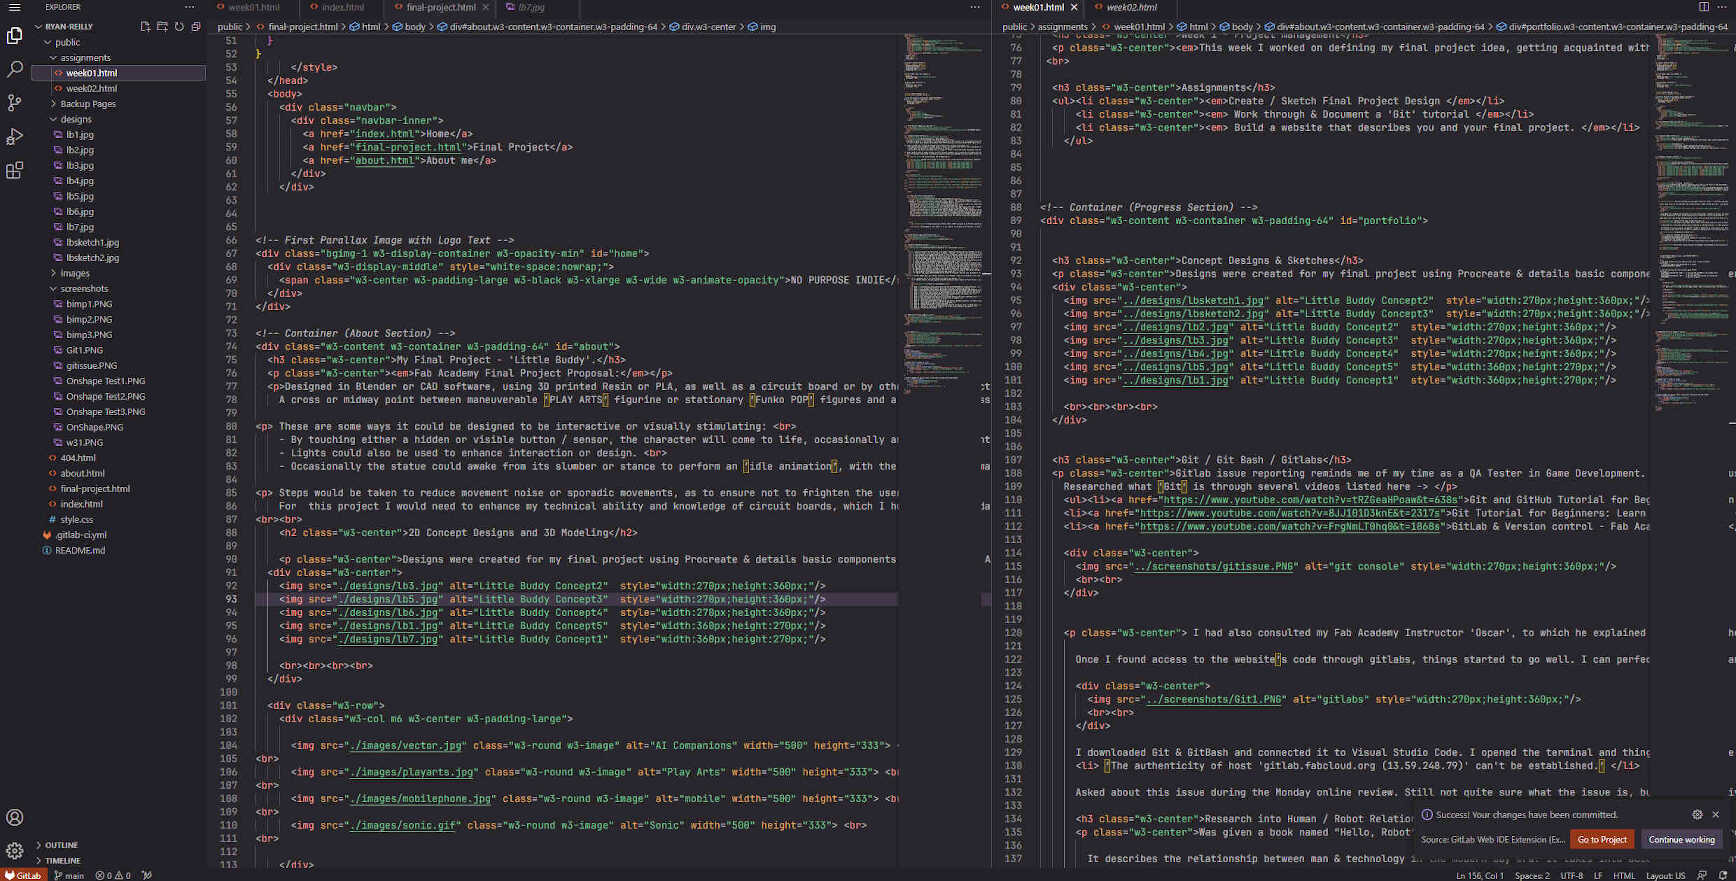

EDITOR'S NOTE: Asked about this issue during the Monday online review. Still not quite sure what the issue is, but I’ve been given several options in testing it out. Also asked if I could proceed with gitlabs’ Web IDE instead of using the command line locally. The Web IDE layout is totally familiar to me whereas the command line isn’t. They suggested I will need to update locally eventually to reduce frustration as committing all your pages in the future can lead to a lot of hassle, but doing it locally is not a requirement. Therefore I can continue my projects with Web IDE for now until I get used to it locally - which is music to my ears. Though I would need to figure it out, as it will be beneficial for documentation and web design later on.
____________
Git Tutorial
After installing Git Bash For Windows, I created a new folder on my hard drive called “Git Bash”, Right-Clicked inside of it (on the root folder named 'ryan-reilly' above the 'public' folder) and hit ‘Open Git Bash from here’.
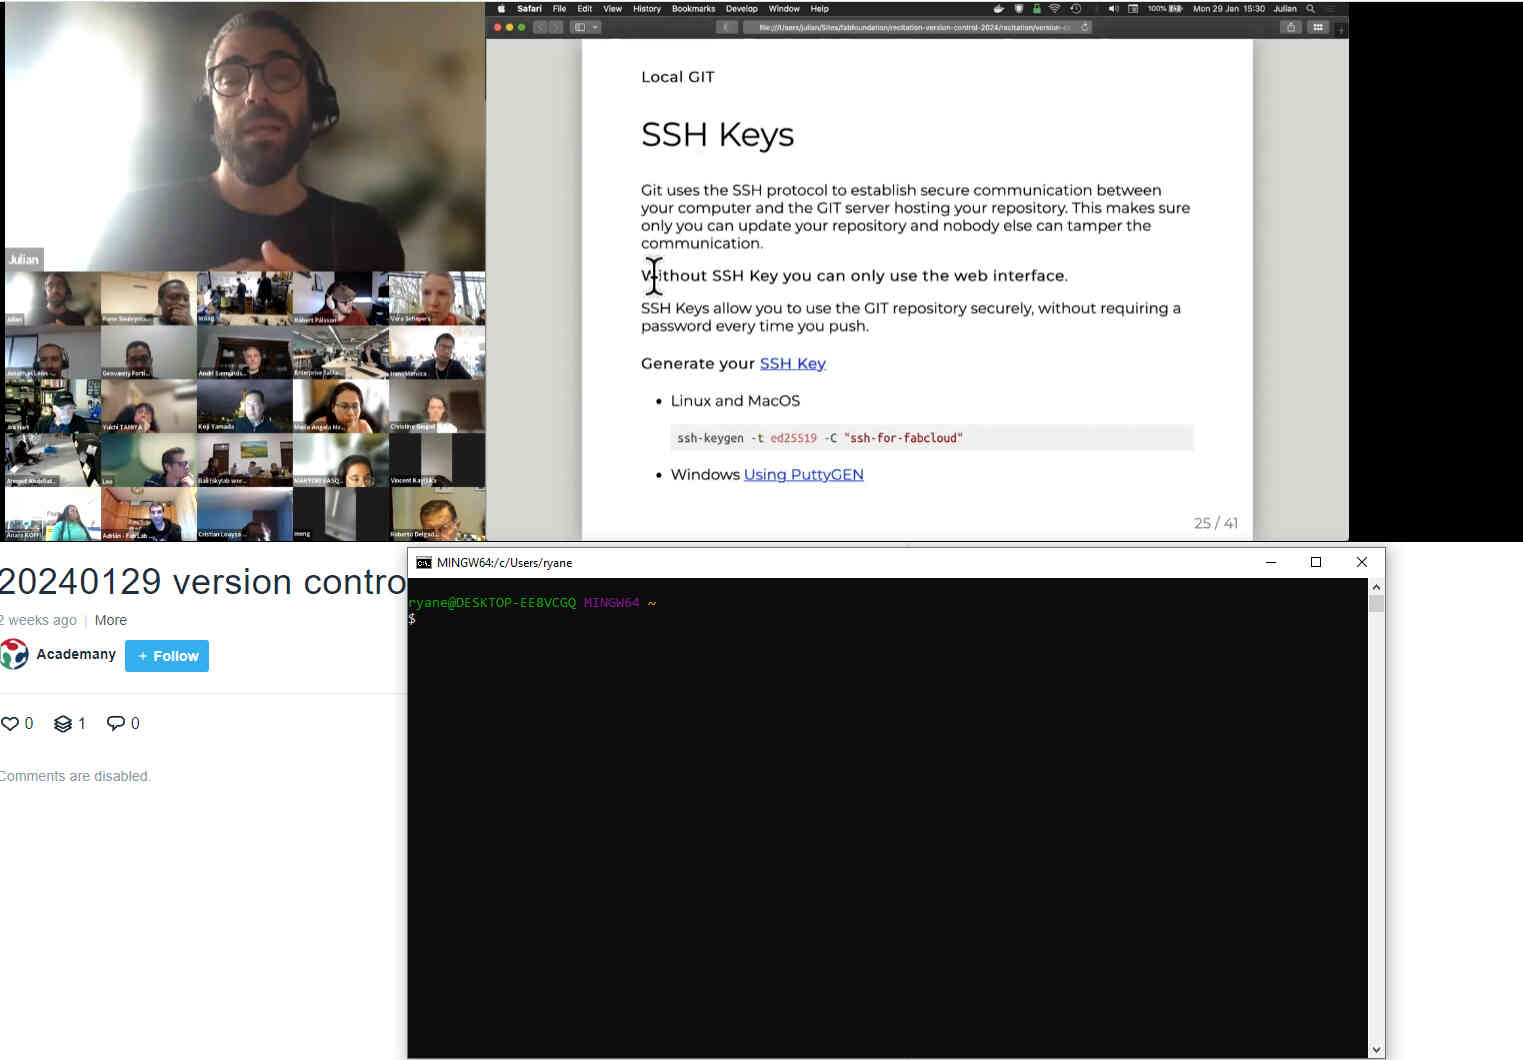
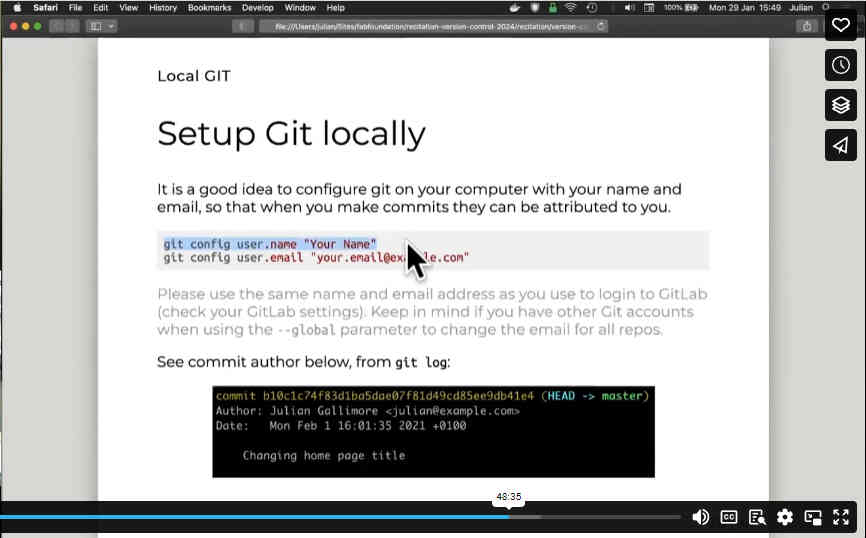
It is recommended at this point to enter your name and email into Git so it can find and authorize your files. You can do this by typing git config user.name "Your Name" then git config user.email "your.email@gmail.com". See image below for details.
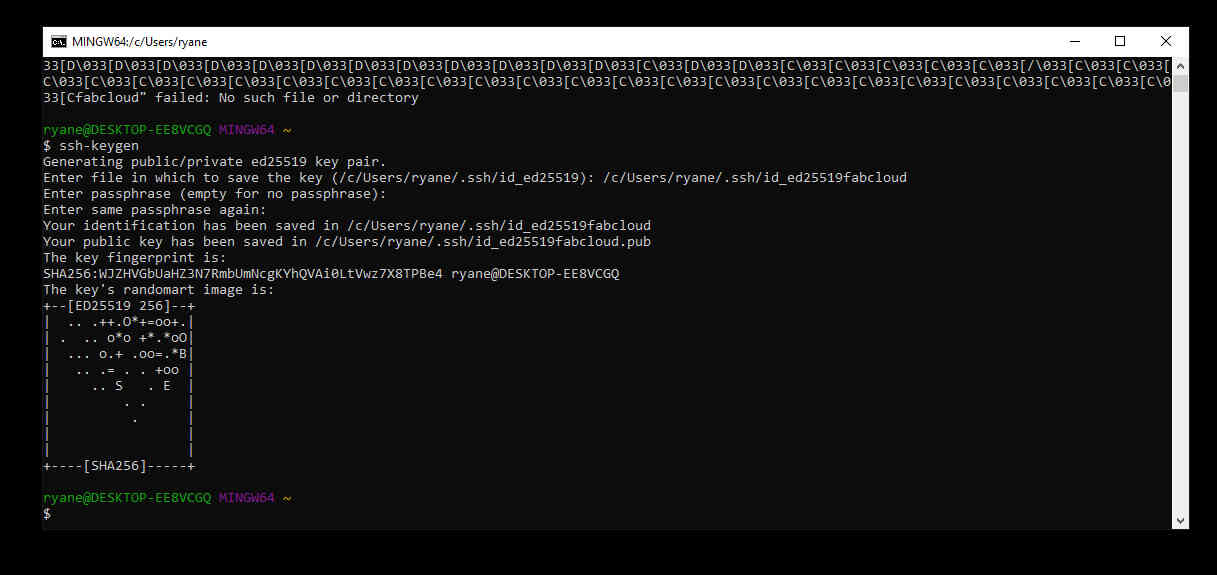
In Git Bash, start off by typing ssh keygen to generate your public keys. It will return with a file path. Copy the file path and paste it just ahead of the original. You can attatch a name to the end of it. I called mine 'fabcloud' as I was trying to follow Julian's example to the letter. It will ask for a passphrase twice, which we don't need, so just hit Enter twice. If successful, Git will save this path and generate a public key. It should also give you some 'randomart' like as seen below:
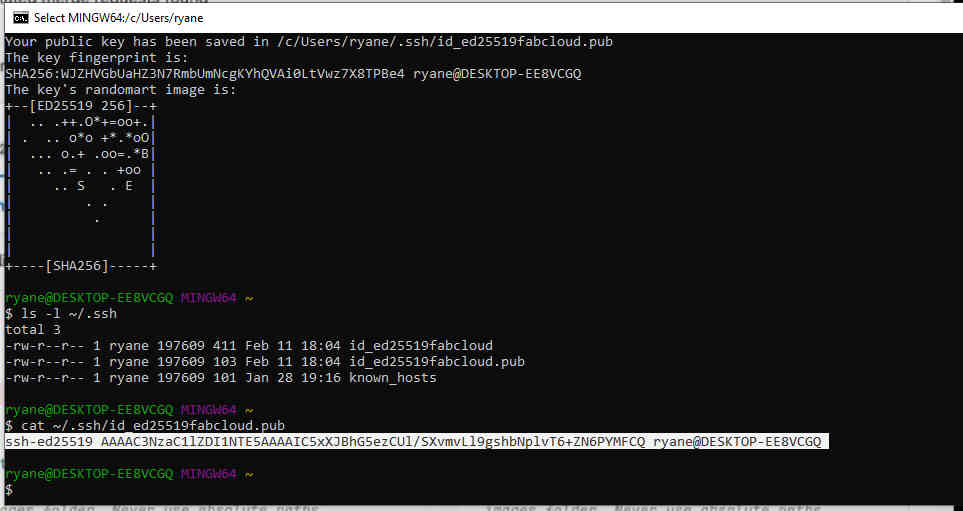
Copy the public key (which ends in .pub) and hit ‘Enter’. Then Copy the longer public key that gets generated (highlighted in the screenshot below) and go back to your Gitlab repository.
You can do this from here.
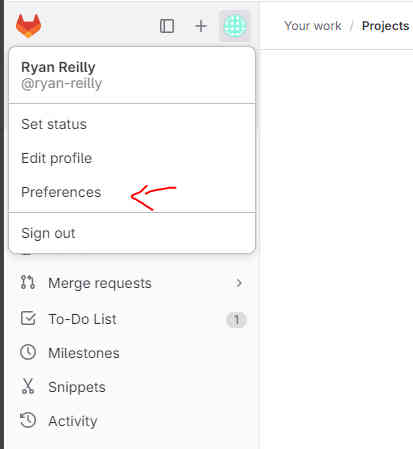
Go to the top left where your profile is and select ‘Preferences’. From here go to SSH Keys, select ‘Add new key’, then paste your public key into the large text box and hit ‘Add Key’. You can also give it a name for your logs. This allows Git and Gitlab to make a connection to find each other.
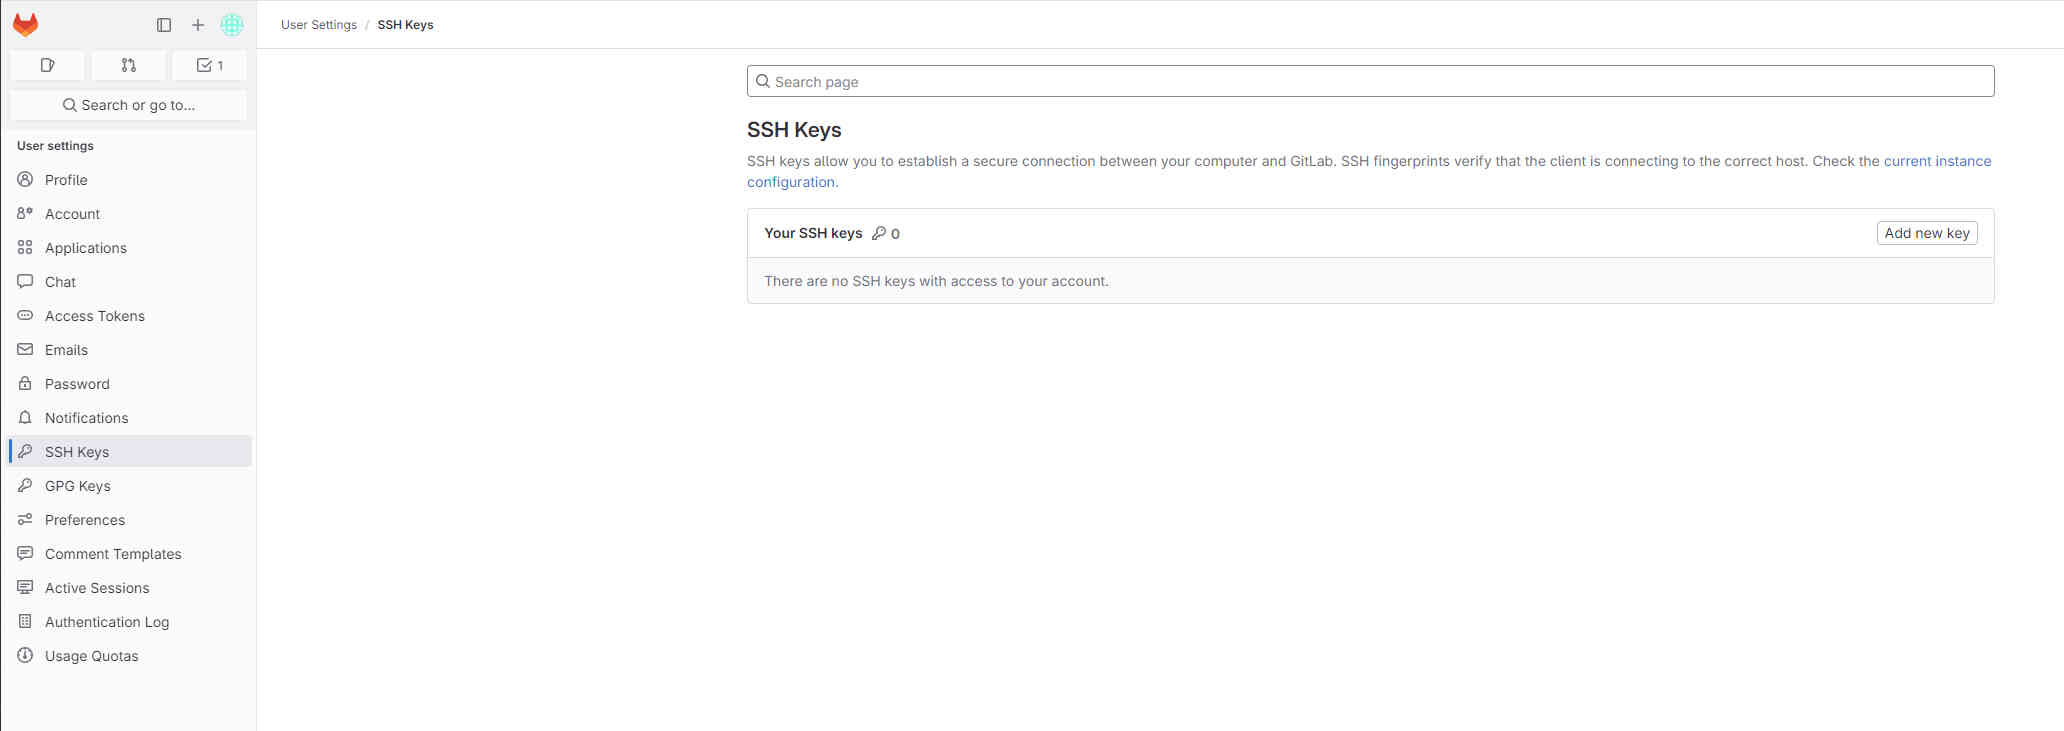
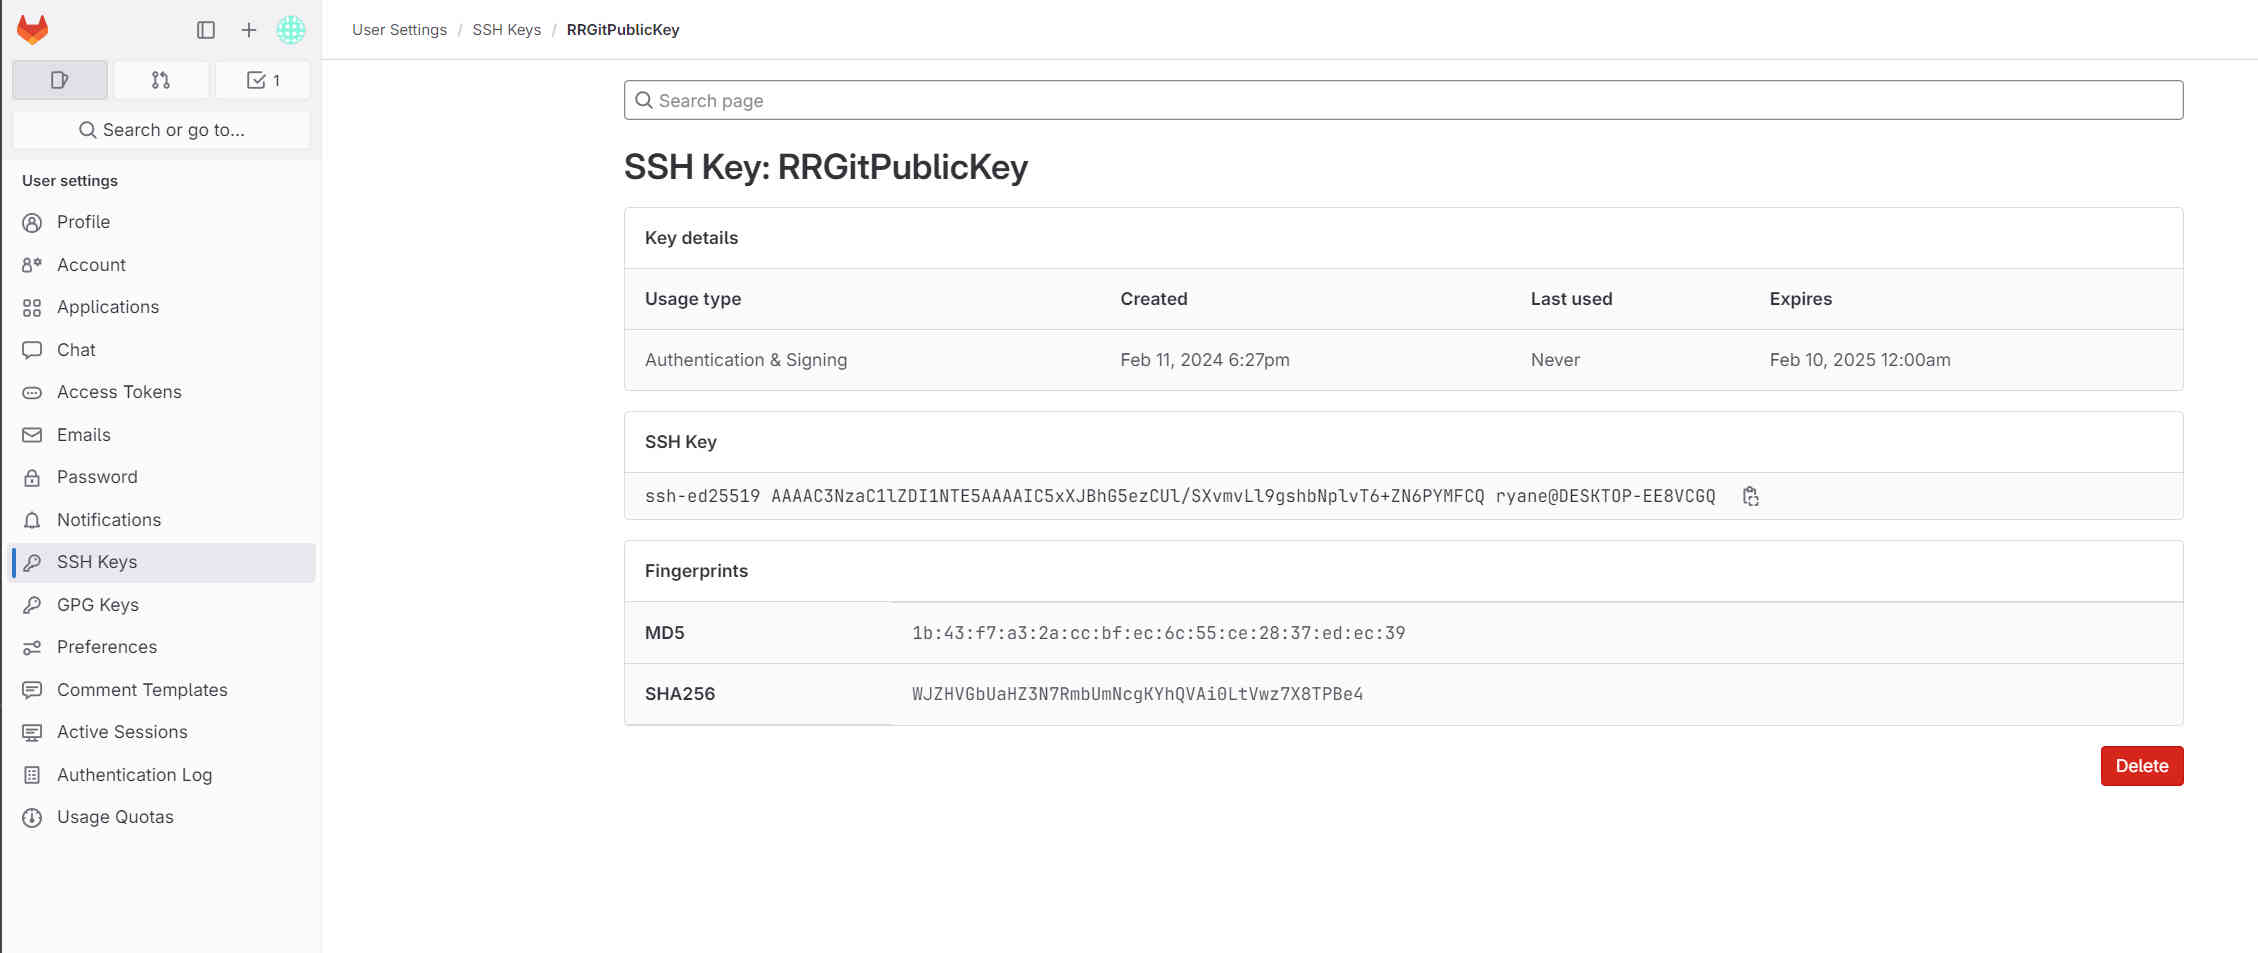
Git Cloning
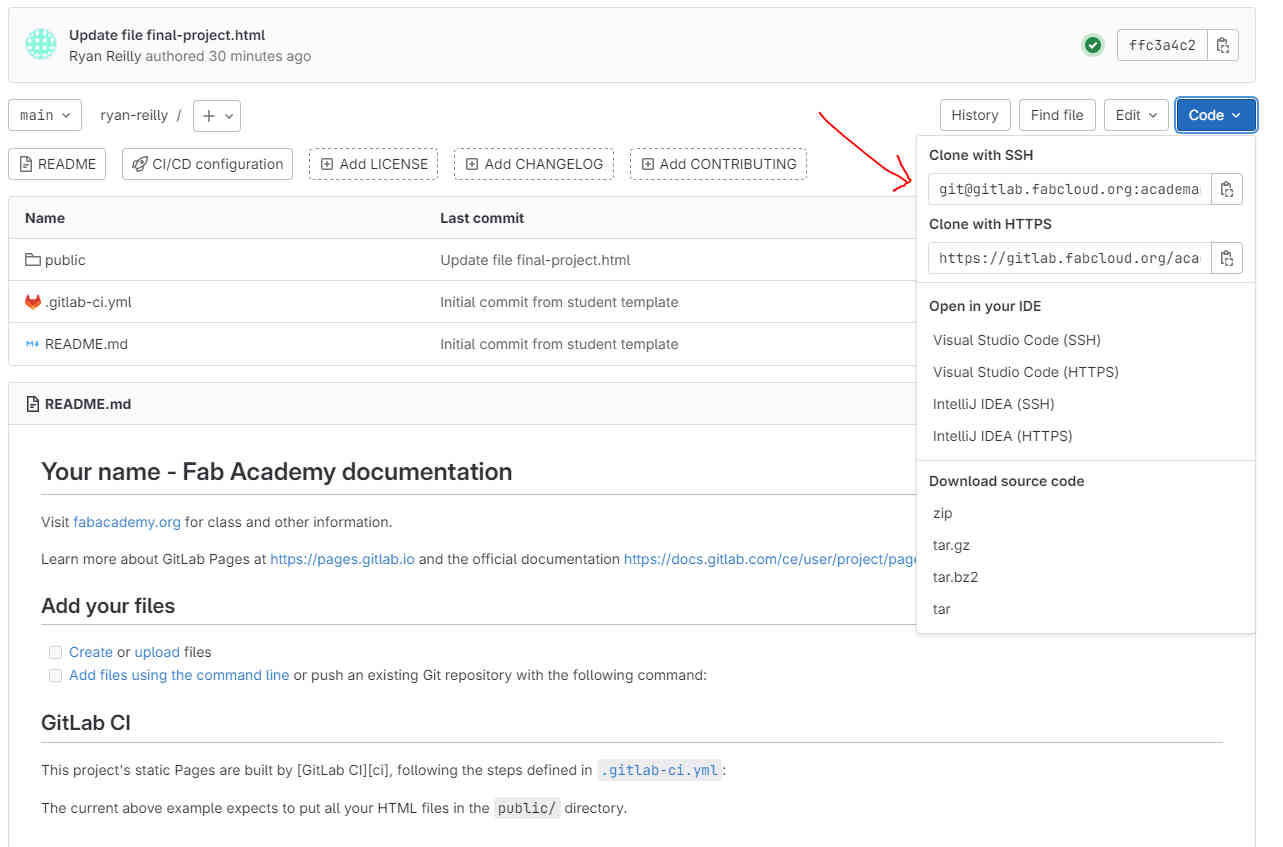
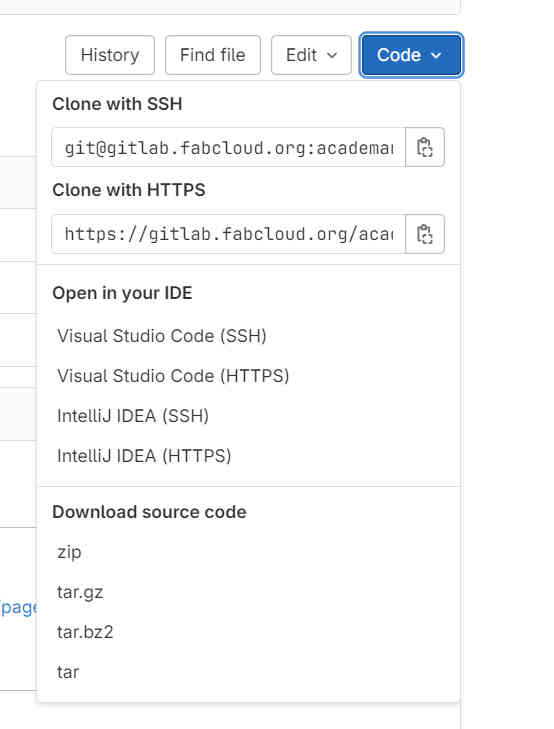
Now that a connection is made, the next move is to go back to your repository, click on the ‘Code’ button and copy your SSH Key to your clipboard.
You can now return to Git Bash and type git clone PasteKeyHere. It should look something like:
git clone git@gitlab.fabcloud.org:academany/fabacademy/2024/labs/creativespark/students/ryan-reilly.git
This is the part I’ve had the most trouble with.
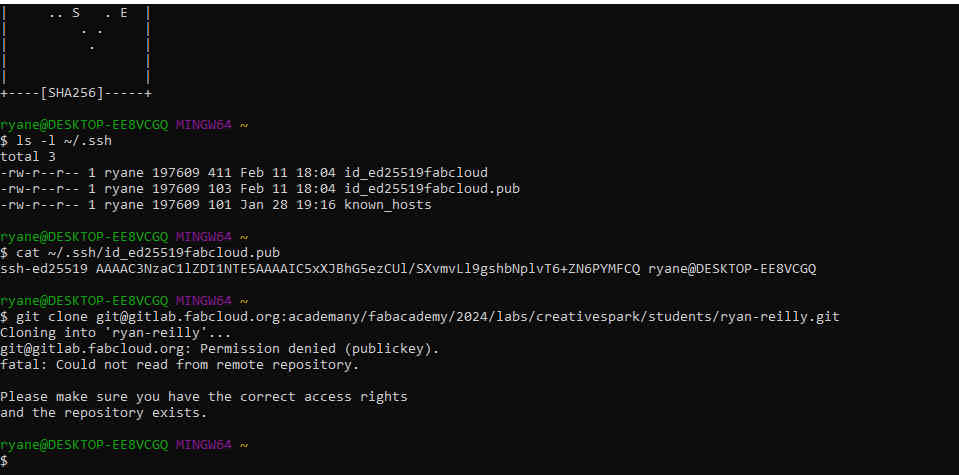
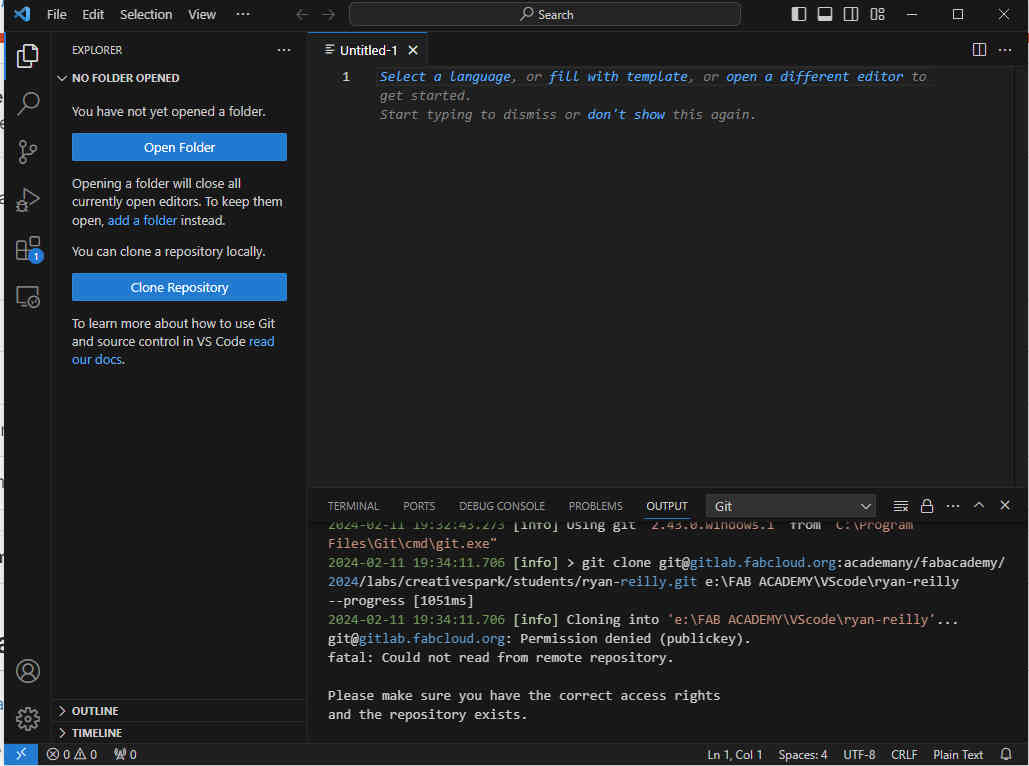
EDITOR'S NOTE: My main issue here was having constant errors on Windows with permissions denied after attempting to clone my repository. I had tried to fix this in so many ways, carefully studying the fab academy videos from 2023 and 2024 searching through several student tutorials over many many hours and it just came to failure. I tried Julian’s method of creating new vim file called ‘sites’ and attempted to edit the file (but through a non-vim console), tried ‘cmod 600’, etc just like he did but it came to no avail. It was getting to the point where Git was holding me back on my assignments by days despite its potential benefits.

Eventually I followed this quick and easy guide which finally let me clone my repository. The difference being I cloned the HTTPS rather than the SSH key. It probably wasn’t what I was supposed to do but I finally git cloned my repository, so I have to call it a ‘win’.
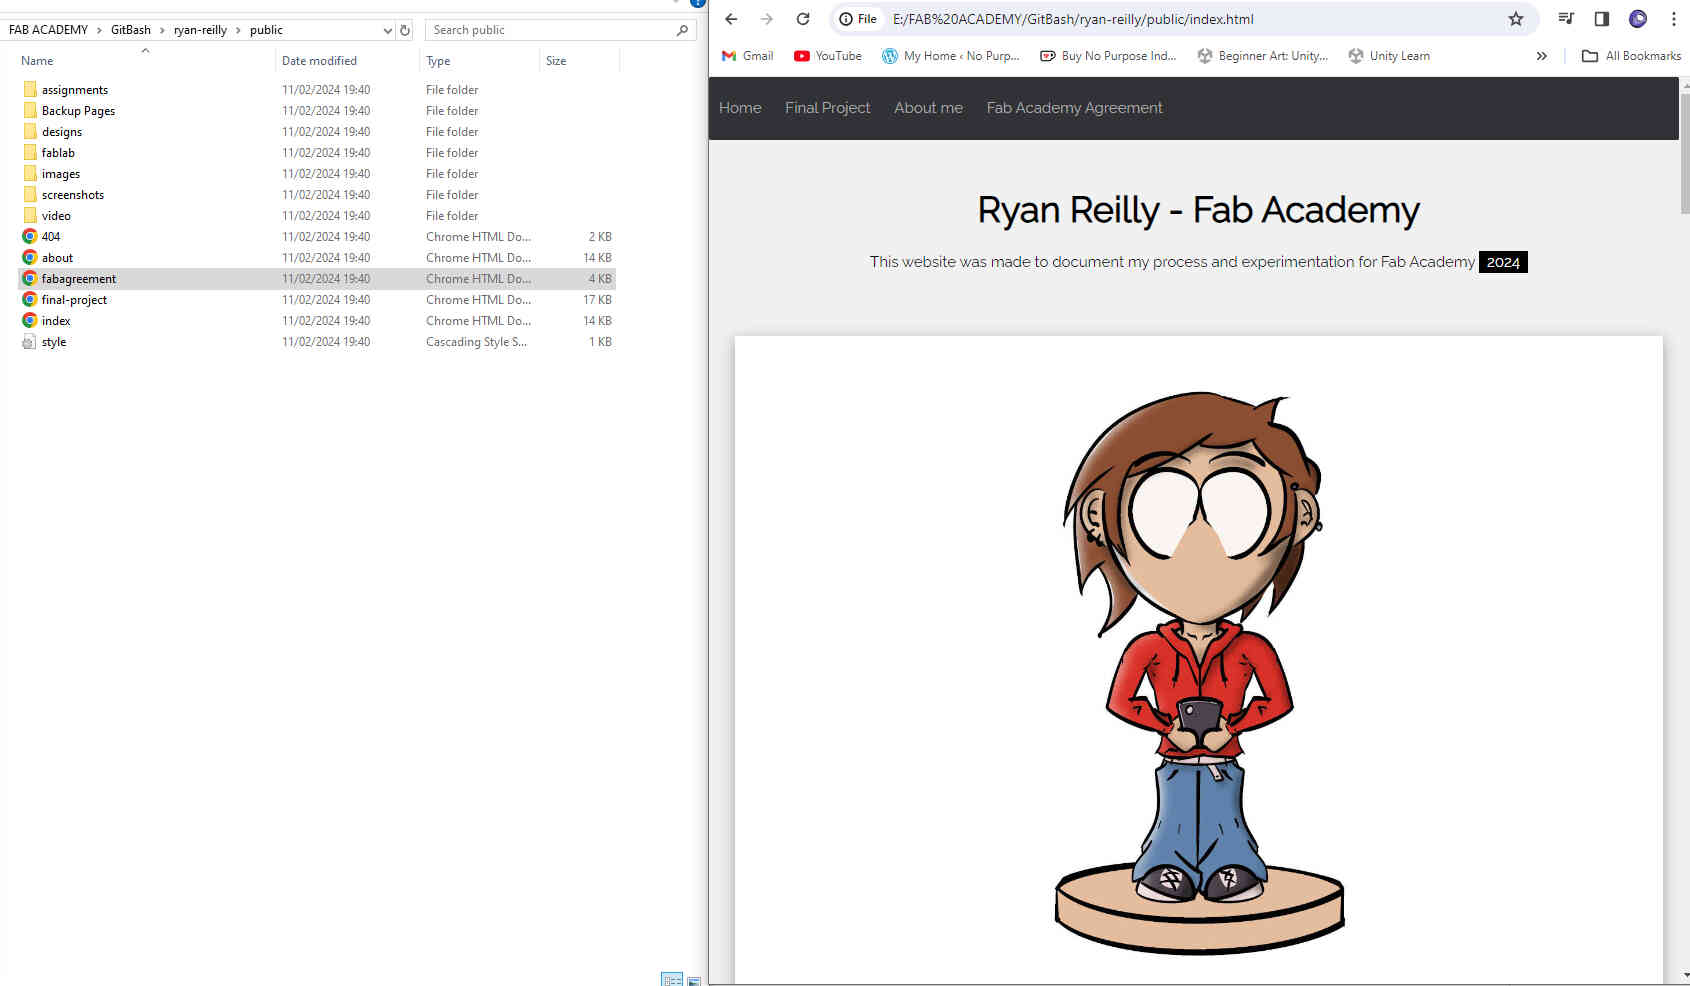
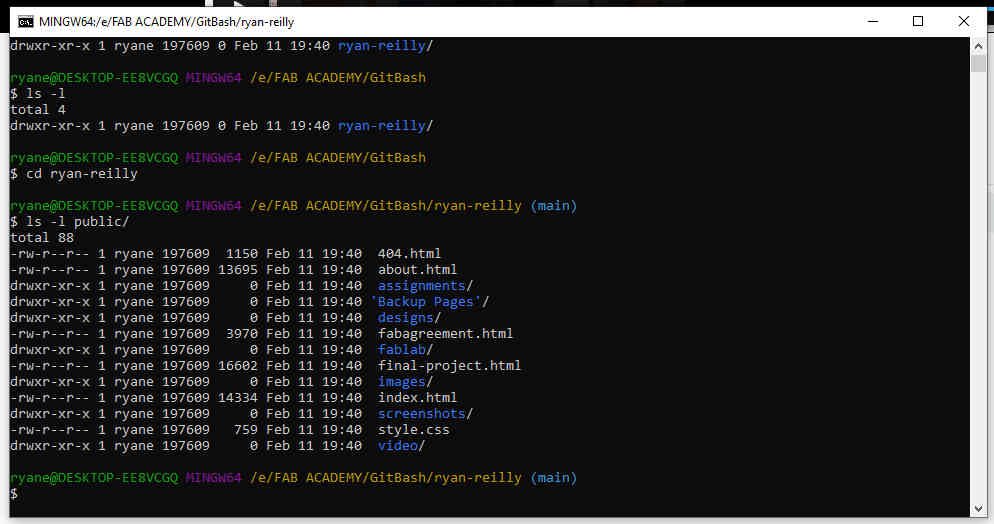
Before we get to committing, access your local repository folder within Git Bash by typing: ls -l and click Enter. This will highlight the name of your folder in blue. To open it, type: cd FolderName .
then type: ls -l public/ to open your public folder with all your web files.
Git Committing
I couldn’t find the code necessary to open Visual Studio Code within Git Bash, however I was able to open the fab academy ‘public’ folder through Visual Studio by selecting Open Folder in Visual Studio's Explorer tab. But I want to make sure that they are both connected. To test this, I changed my name on the index.html file from ‘Ryan Reilly’ to ‘Rick Roll’.
By typing git status into Git Bash, it confirms that I have modified a file and recognizes it.
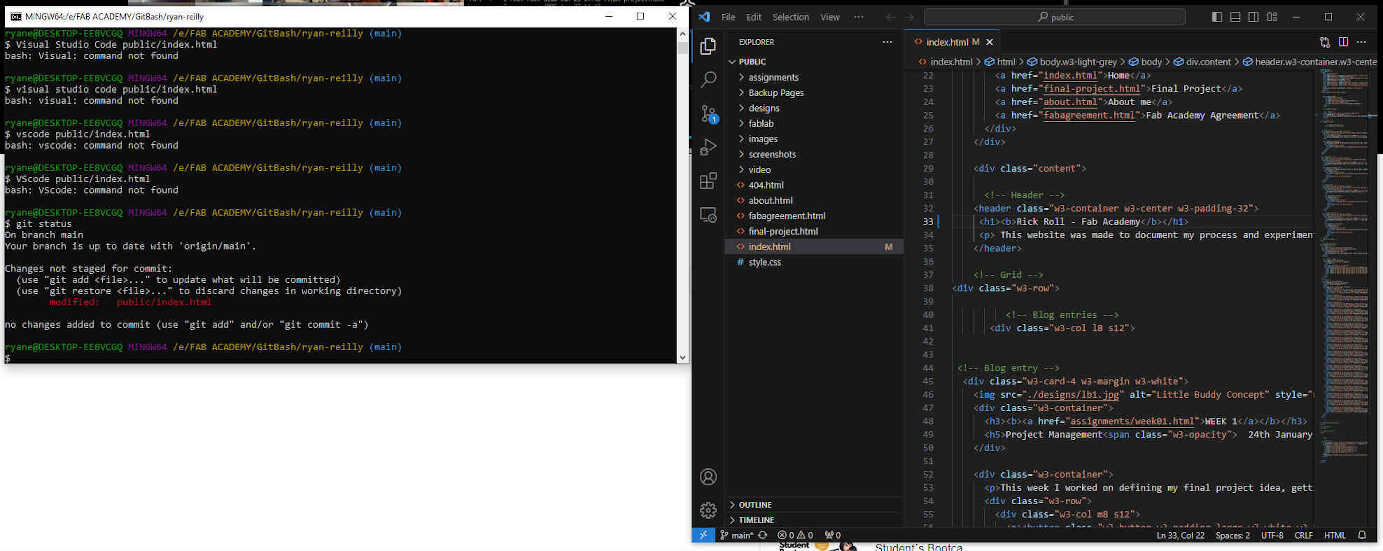
Typing and entering ‘git add public/index.html’ will add your page to a type of ‘staging area’ - somewhere between storing it locally and fully committing it to your page. Type and enter git status once more and you’ll see the index.html file appear in green. Meaning it’s ready to be committed.
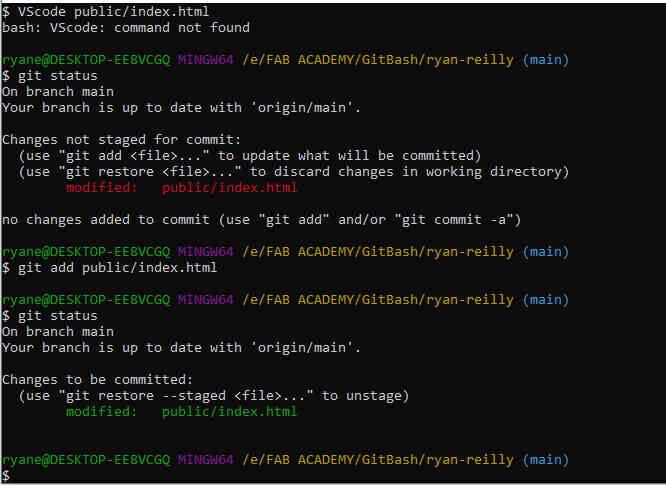
To do this, type:
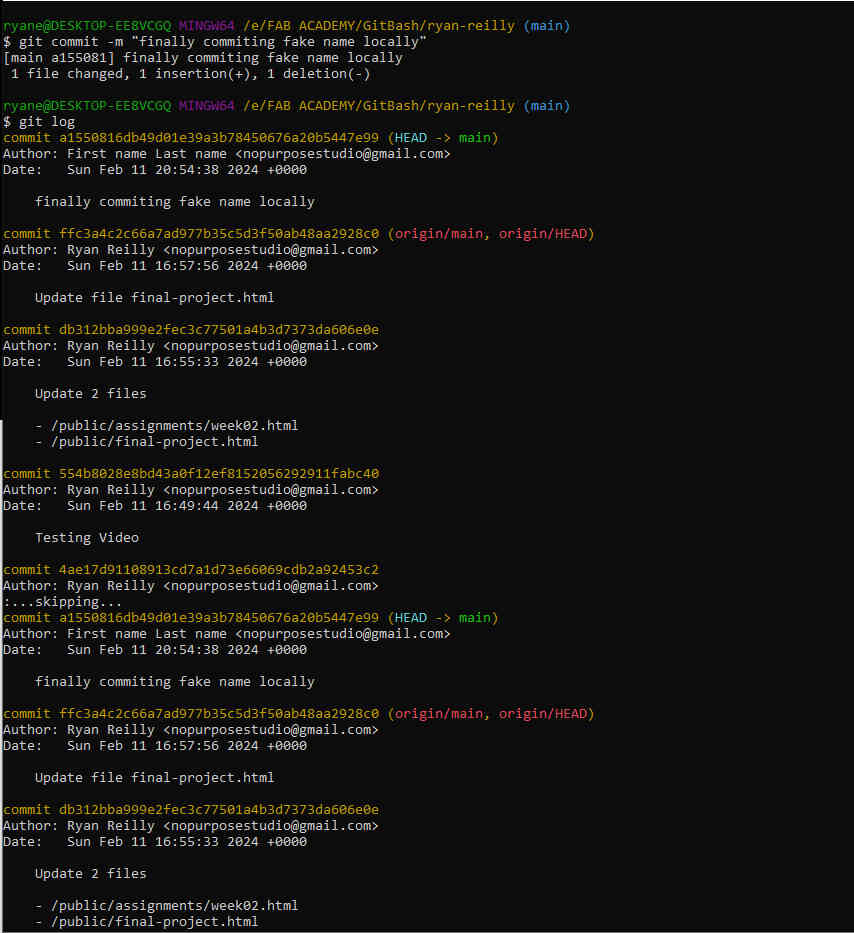
Git commit -m "TypeMessageHere"
This will commit the change and allow you to leave a message referring to that update.
To check if this worked, I typed git log which will show all my recent commitments so far.
It now shows my dreaded 221 commitments I made so far through Gitlabs.
Forgive me for I have sinned.
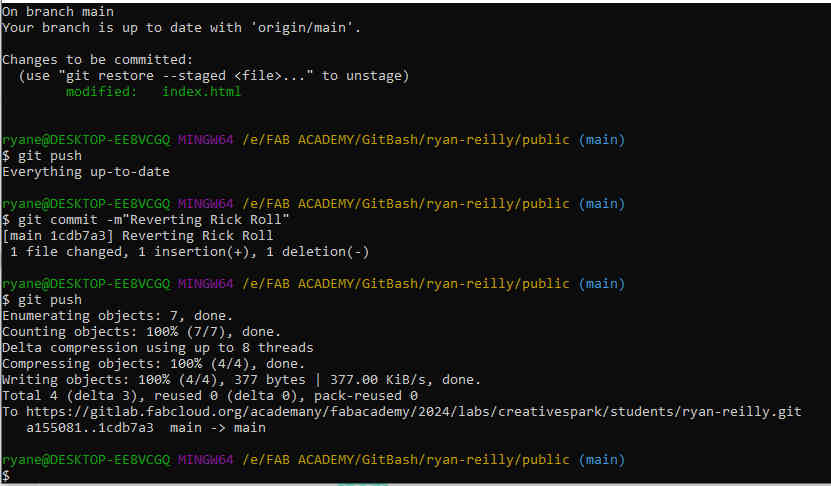
Finally the last thing to do is ‘push’ your website onto the online repository - essentially fully committing your live website. This can be done by typing git push within Git Bash.
Make sure you are on the correct file path! It may warn you that authentication is required and Gitlabs will ask for your password - presumably due to copying the HTTPS Key rather than the SSH Key. A very small price to pay. But once entered, you can check your project commits on Gitlabs page to see your success.
EDITOR'S NOTE: I can confirm months later that it has been working flawlessly.

Following my previous actions, I reverted my name back to normal in Visual Studio Code, then Git Added/Commited/Pushed it back onto the website. I call that a job well done!
____________
Conclusion / Reflection
The Concept design illustrations for the Final Project were made straight away as I had a pretty clear idea of what I wanted it to do and what it should look like. To adjust to what would be a very intensive 6 months, I focused in on something I knew how to do, with a software like Procreate that I am comfortable with, hoping that it would set me on a decent workflow while having a set base on what I am working towards.
I normally felt comfortable with Web Design, especially when designing it from scratch, but it had been years since I designed my last website without Block tools that you would normally find in Wordpress or Squarespace, so it was a little daunting to only have a week to adjust back into web development and have a running site to house all my progress. After spending more time than necessary to create my website, it was recommended that I used templates from w3schools to make things easier. It definitely reduced the pressure but took a lot of time to understand the tempate’s structure which eventually led to some design complications where I couldn’t find the source of some issues such as a tight border and a non-responsive site. Despite these annoyances, the site is still fully functional, if not a little unintuitive. But as we are on a strict time schedule, I had to leave it as it is for now and intend on fixing it up later.
Researching Git was incredibly confusing and intimidating as even after watching hours of tutorials and descriptions, I still couldn’t understand what git was or what it’s used for, (mainly in how it relates to my fab academy work). It took 3 weeks before I managed to get my repository set up. In that time I constantly edited my website through Gitlabs IDE which led to an oversize in repository memory which I had to fix in the later weeks. My instructor later told me that I needed to structure my documentation to detail a Git setup Tutorial that others could follow. This required a good bit of revisiting but I eventually got it done. I spent weeks talking about how much I hate Git but now that it’s all set up, I totally understand its uses and necessity. It certainly makes web designing so much faster. Though the 10mb limit per week seems too low and can lead to a bit of anxiety and over compression on videos, but again, I understand its necessity.
Overall it was a daunting realisation on how much work needed to get done on time every week. Neil said to expect to put in 25-30 hours each week, but it’s looking more like 40hrs per week. Mix this with my 20hour part time job and personal responsibilities, the next 6 months would be very tough. If anything, it confirmed something that I was worried about - that I wouldn’t be able to continue any of my personal projects until AFTER I complete Fab Academy. This was upsetting as I had to give up some major opportunities but in the end, Fab Academy is providing me with the exact type of knowledge and productivity needed for personal and professional skills and projects in a field I love - which makes the course invaluable.
____________