Week 7 - Computer-Controlled Machining
learning about Joints
Vanessa from peru came to our fab lab to teach us about 50 different joints and the super cool stuff that can be made with only joints and no other methods of attachment. Using this knowledge I applied it to my final project as my solo assignment for this week.
My final project page goes more in-depth about joints if you are interested in the problems I encountered.
Learning how to use the genmitsu, my home CNC machine
Before I started using candle, the CAM software for the genmitsu, I got the driver and candle software by following this tutorial.
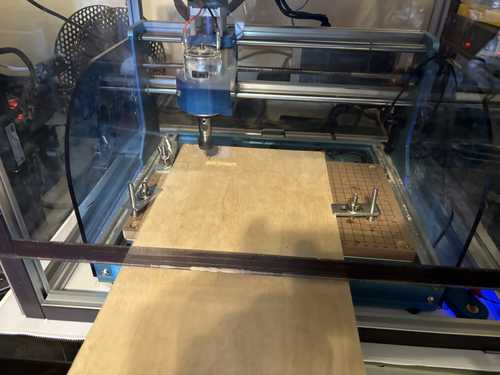
I also learned how to use the Z probe and cut out a test design to ensure that I was using the machine properly. Below is the machine and the file I cut

Creating my final project boards using the big ShopBot CNC
I used a ShotBot Alpha to CNC my final project plates which I used for this weeks assignment.
CAD
I used Onshape to create the 3D model of my frisbee shooter plates that I CNC'ed during this week. I go further in depth into issues and how they were created on my final project page if you are interested. One side note that I would like to mention here is that I used finger joints throughout the design to hold the 2 pieces of wood together.
CAM
To CNC a 3D or 2D object, you need to run it through a CAM software. Within the CAM software, I assigned toolpaths to areas and lines which tell the CNC where and how to cut the wood. When using creating toolpaths, there are a few factors you need to be aware of.
Tabs
Whenever I had to cut something big out, rather than spending an our reducing the material to wood chips, I instead cut on the inside and use tabs to keep the big piece in the middle from interfering with the rest of the cut.
Inside, Outside, or On?
When doing CAM, it is important to understand what these 3 terms mean. To start, the Outside toolpath is typically used for outline cuts and leaves the border of the wood being the 3D designs border. Secondly, the Inside toolpath is used mainly for pocket cuts as it only removes material you were planning to remove anyways. Finally, the On toolpath isn't used a ton because when using, you need to account for the radius of the bit removal from where your path is.
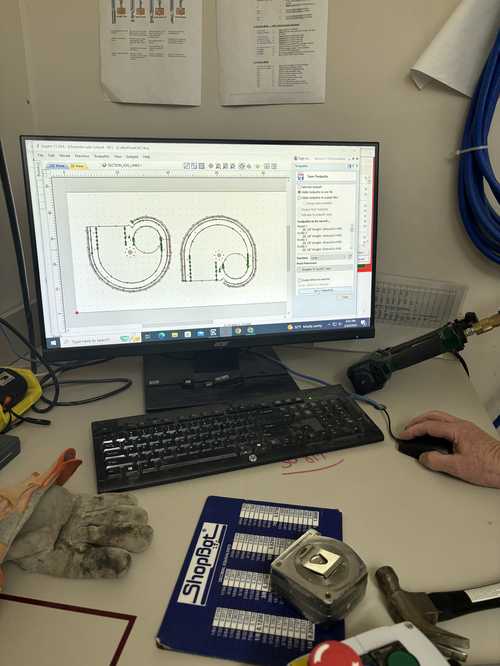
My Toolpath on CNC computer
CNCing the board
I used a ShotBot Alpha to CNC my final project plates which I used for this weeks assignment.
-resized.jpg)
Air Cut
Before I CNCed my plates, I set the Z axis zero 1.5 inches above the board thickness and
issues encountered
During the conversion from 2D to 3D cut-paths in aspire, I frequently had parts of a big line that would have the cut path on the wrong side. This was because aspire uses Left, On, and Right as their choices for where to cut with a ——- tool path. Due to these 3 options, what aspire might consider to the right from one line differs with the orientation of the other lines you selected. To solve this issue, anytime I ran into it, I created separate tool paths for the part that wasn’t working and just put it after the original one.
When, uploading from aspire to ShopBot software, I ran into a “Fake” issue. When I uploaded my file onto the software, there was a exclamation mark by the name and a star under “required”. Me and my teacher researched this issue and found little information. However, what I did find out was that the code that popped up when I clicked on the exclamation mark was not an error code, but just the first 10 lines of code in the Gcode. I also found that others from fab had files that had these 10 lines in it yet didn’t document any error regarding it. This told me that perhaps the mark wasn’t an error and was just a warning. When we clicked play on the air cut, the machine worked as it was supposed to. Hurray!
CNCing Video and post-CNC work
After the CNC job finished, I proceeded to remove the tabs on my pieces and the brads in the wood.
-resized.jpg)
-resized.jpg)
Then, I went outside of the CNC room and used a dremel to ensure everything was nice.

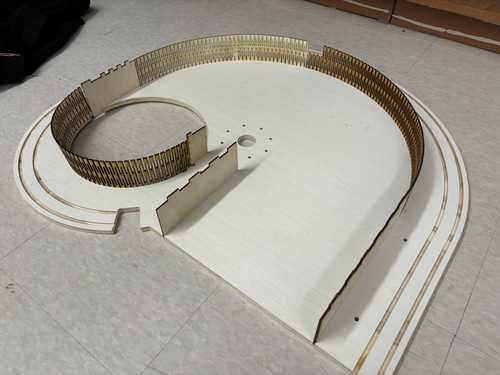
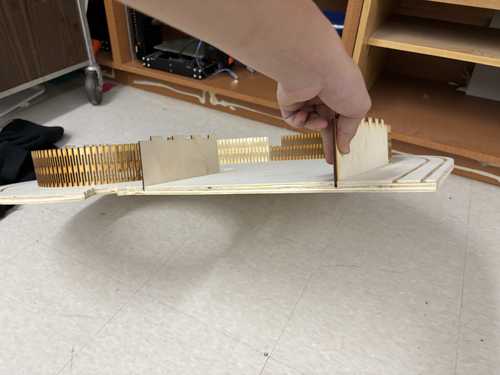
Finally, I laser cut the joint pieces and jointed the pieces together. I purposefully left off the top so I can do the electronics, screws, ect.
Group Project - Testing the Capabilities
Reflection
This week, I learned a ton on how to operate, start, and cut wood using both the big and medium sized CNC machines. I also learned of different zeroing types, joints, and that 1/2 inch wood is almost never 1/2 inch. This week also progressed my final project which was super useful and I can't wait to CNC more furniture and builds in the future.