Input Devices
Assignment 11 - Fab Academy Barcelona

This week I:
Distance Sensor with Barduino
In class we were introduced to various input devices. For my final project, I'm designing a device that let's you "feel" what's behind you. I decided to use distance sensors as an input - the device will translate objects approaching behind the user into a pattern of vibrations. For v1, I'm experimenting with a VL53L0X Time-of-Flight (ToF) sensor. It uses lasers to measure absolute distance up to 2m, regardless of reflective surface.
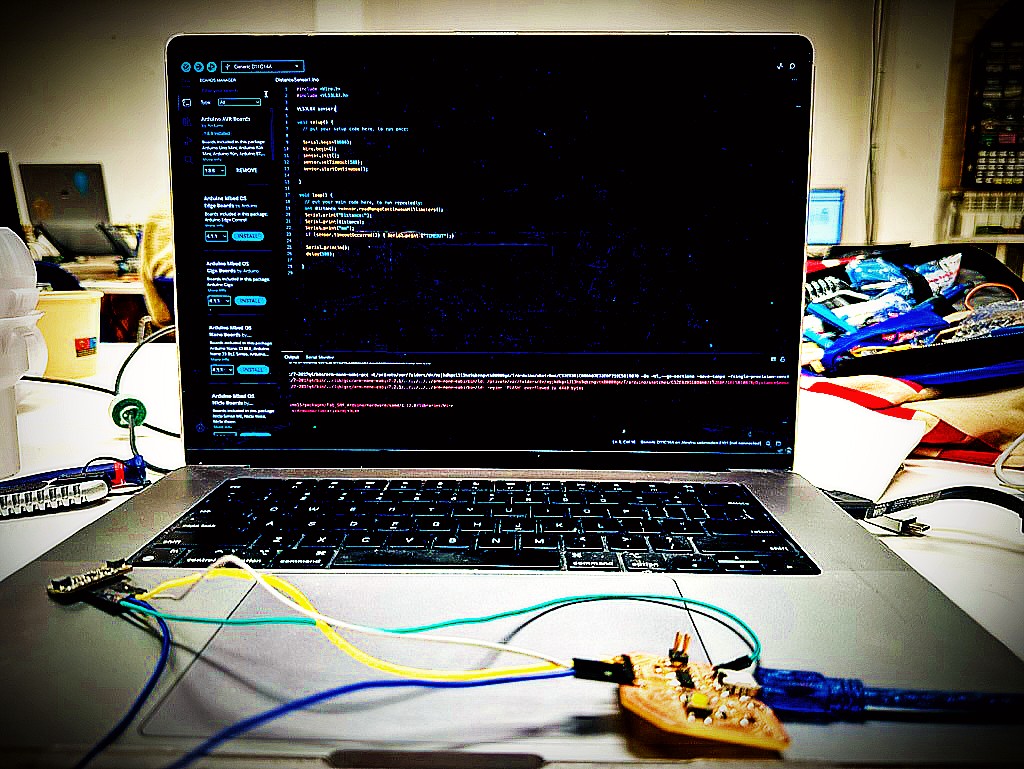
I was having a bit of trouble with my dev board, and so I tested the sensor first using the Barduino. It was relatively easy to match up the 4 pins on the VL53L0X to the corresponding pins on the Barduino: voltage, ground, SDA, and SCL (Clock).
I found a Youtube tutorial on how to write a simple program for the ToF sensor. With it's help I wrote and debugged the following program (see below), compiled, and loaded onto the Barduino. This included adding the VL53L0X library. I had some trouble getting the board to connect to my mac, but otherwise the process was pretty smooth. The program read out distances accurately at short distances, and less so over 2 meters (it's rated up to 2 meters). However for the purposes of my final project, this works perfectly as I only want to detect objects that are getting close to the user (otherwise there would be too much noise).
To connect the VL53L0X there are 4 pins that need to be connected (when only using one sensor with a single address). When connecting the sensor with the various boards described below I connected these 4 pins:
- Voltage - the sensor is rated for 2.6-3.5V; where possible I connected the voltage pin to 3.3V on my boards.
- Ground
- SCL - Serial Clock Line
- SDA - Serial Data line
While the sensor has more pins, these are the only 4 required to be connected to run a single sensor. Moreover, these pins do not have to be specifically instantiated in the code once the VL53L0X library is included.
SOURCE CODE & PROGRAM
Code block created with help of ChatGPT.
#include <Wire.h>
#include <VL53L0X.h>

VL53L0X sensor;

void setup() {
    // put your setup code here, to run once:
    Serial.begin(9600);
    Wire.begin();
    sensor.init();
    sensor.setTimeout(500);
    sensor.startContinuous();
}

void loop() {
    // put your main code here, to run repeatedly:
    int distance = sensor.readRangeContinuousMillimeters();
    Serial.print("Distance:");
    Serial.print(distance);
    Serial.print("mm");
    if (sensor.timeoutOccurred()) { Serial.print ("TIMEOUT");}
    Serial.println();
    delay(100);
}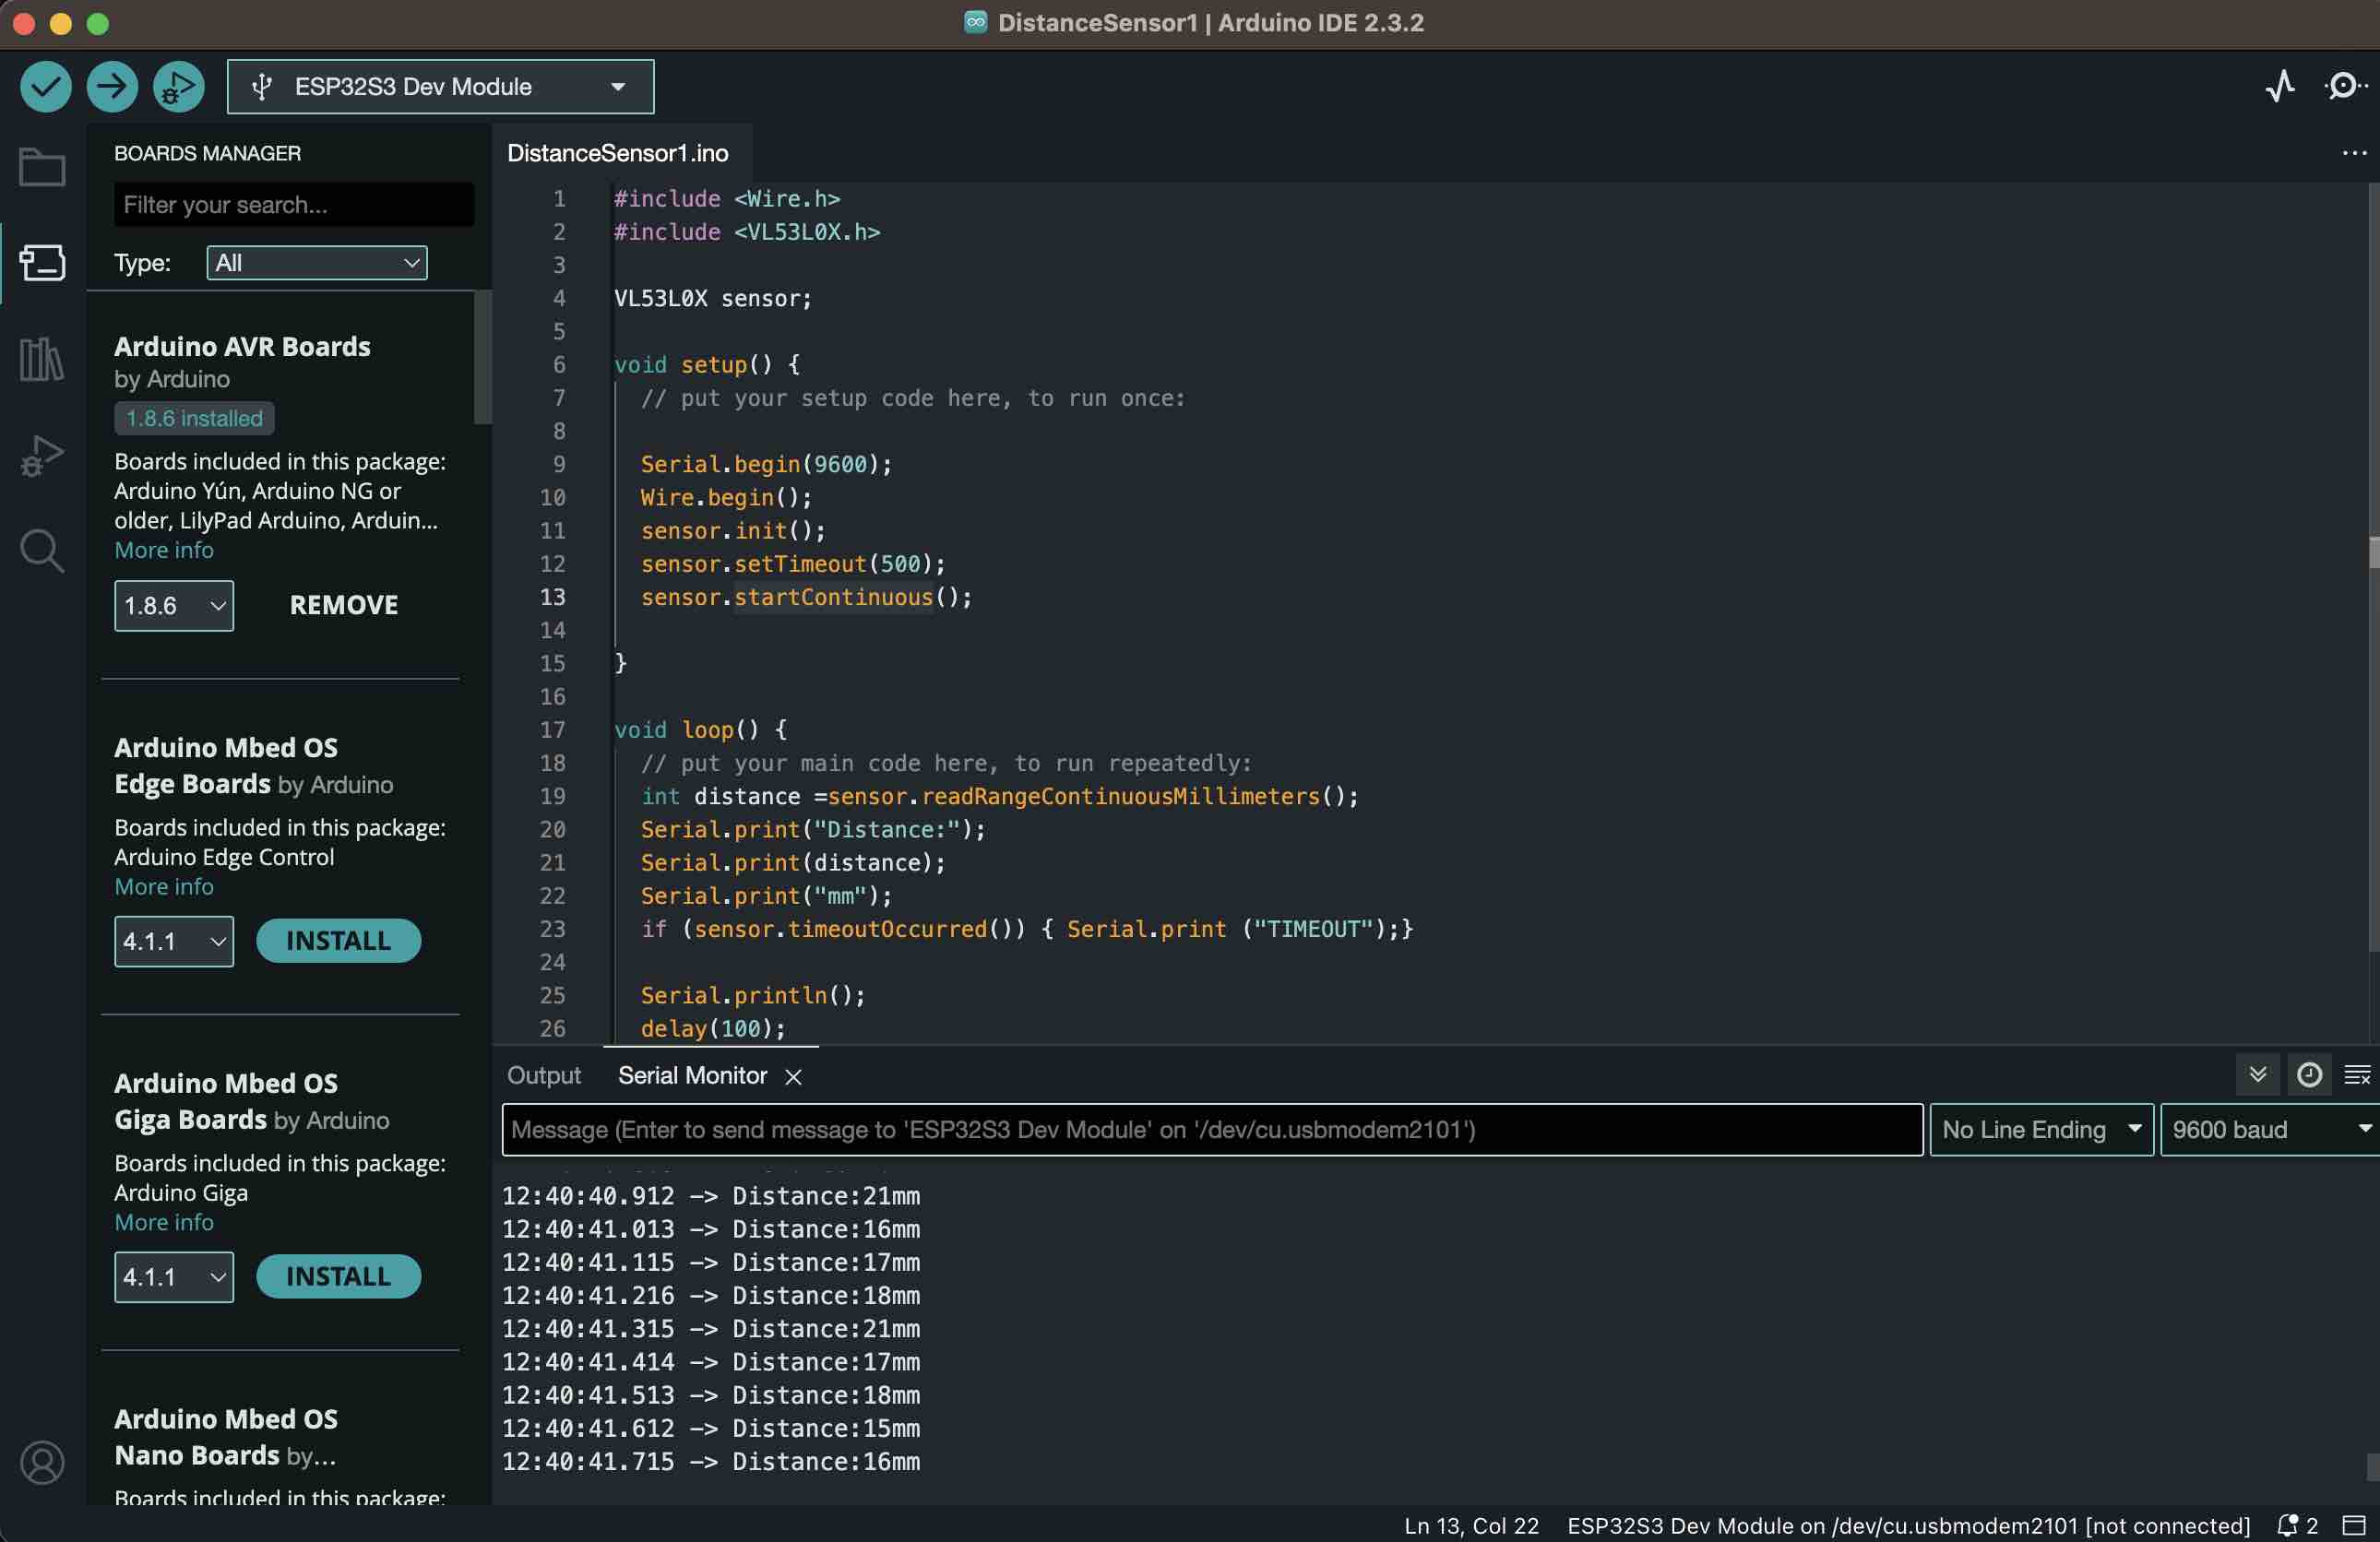
PROGRAM IN ACTION
Distance Sensor with Dev Board
After successfully using the ToF sensor with the Barduino, I tried it on my SAMD11 dev board. You can see documentation on getting that board to work here.
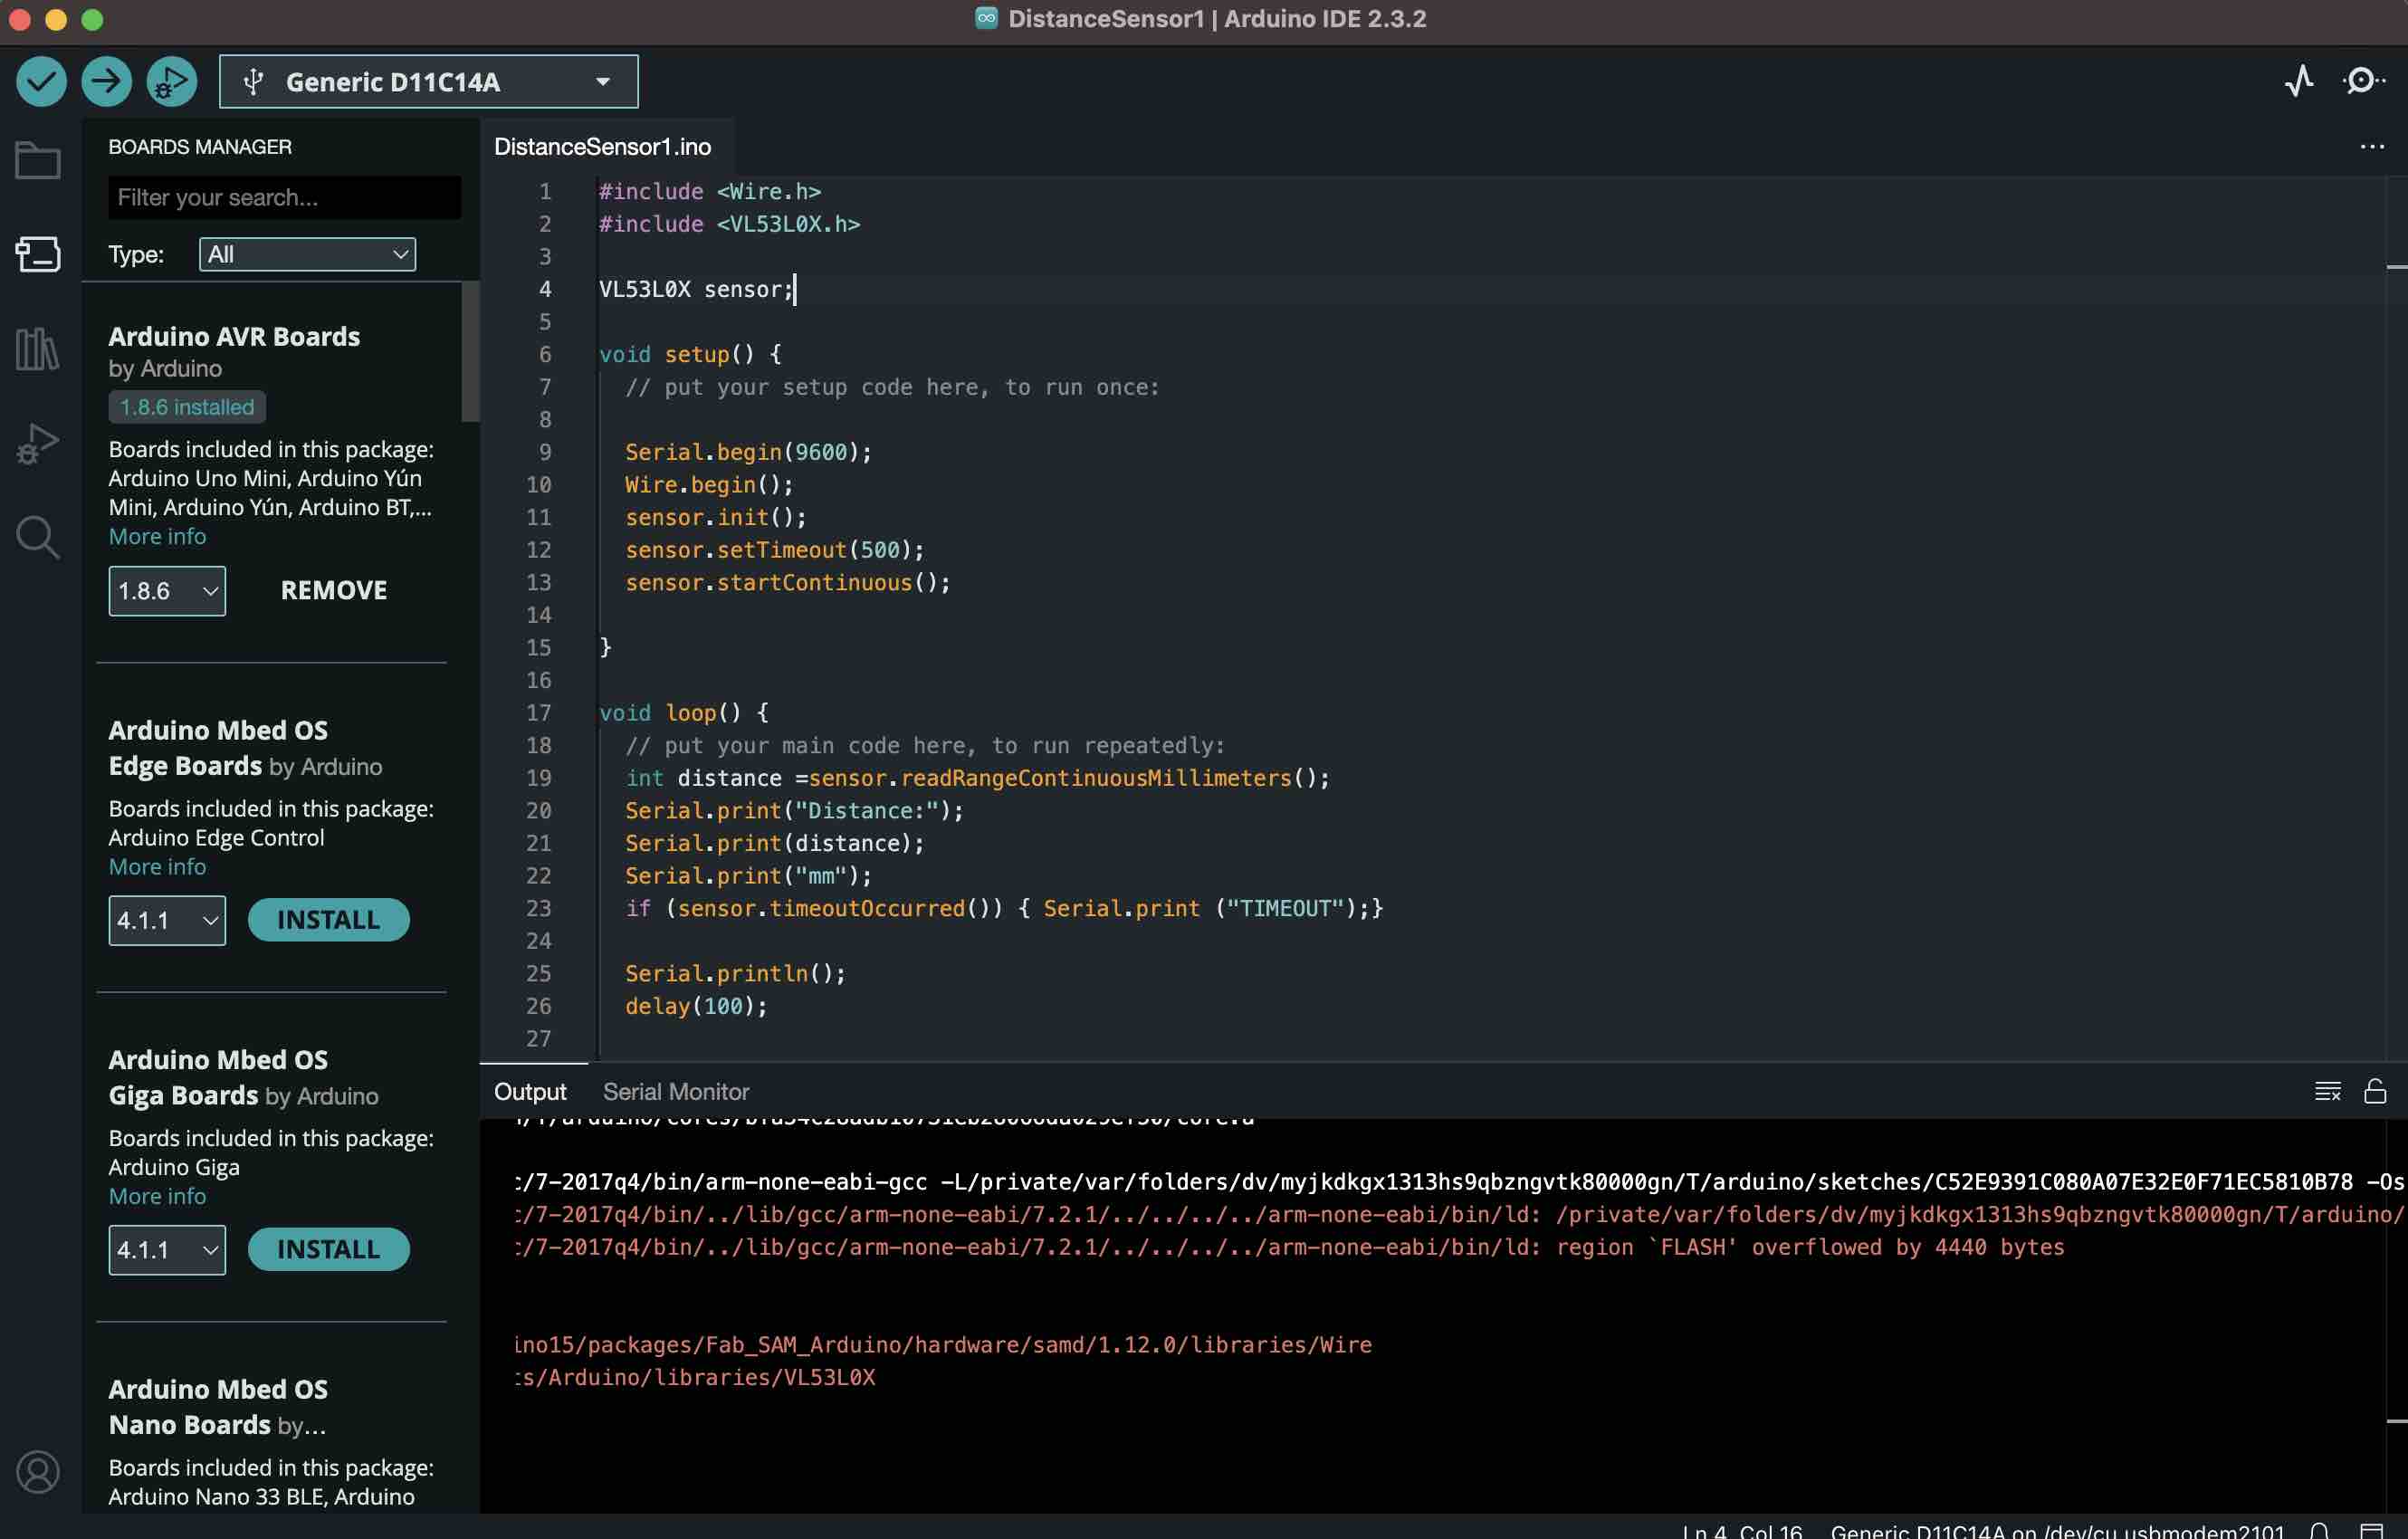
I realized that I forgot to add a voltage pin to my board, so I soldered a wire onto a 3.3V trace. I then connected up the board matching ground, voltage, clock, and data pins. I tried loading the same program as I loaded onto the Barduino, but the flash memory was not large enough to accommadate. I then tried loading without the bootloader (after messaging with Adrian Torres on mattermost). However the flash memory was still not large enough.
CONNECTED BOARD & SENSOR
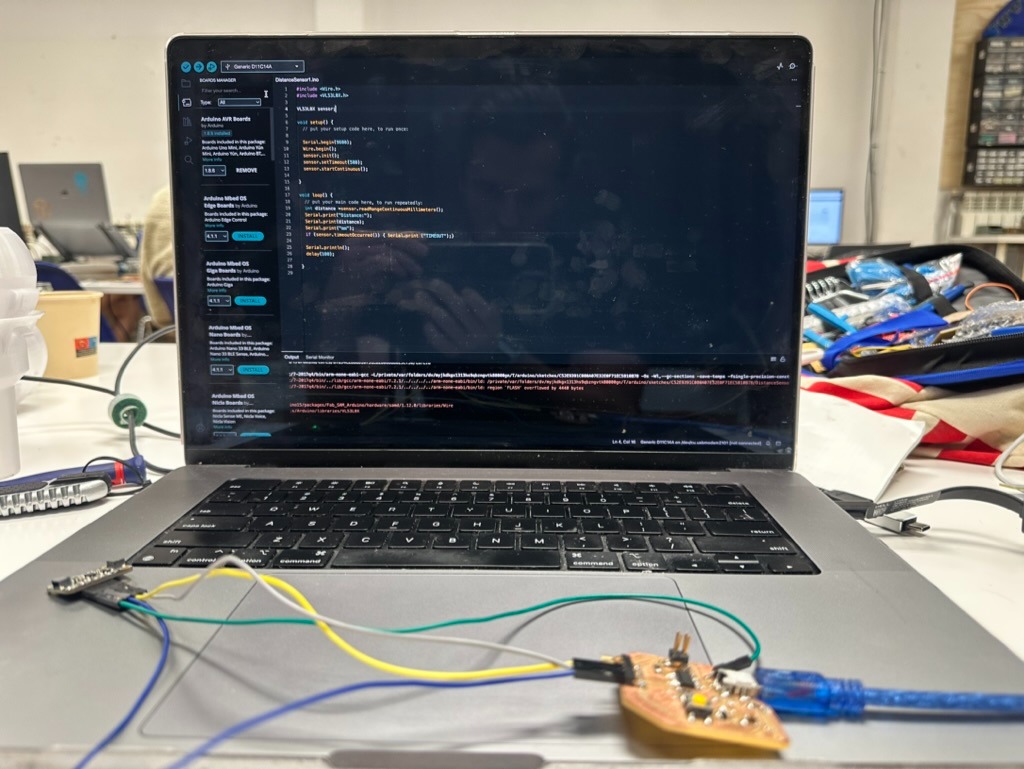
COMPILING ERROR - NOT ENOUGH FLASH MEMORY
Key learnings thus far are that the Vl53l0X ToF sensor is accurate enough to work well for my final project. It's also small enough that it can be used easily in a wearable device and has an appropriate range and sensitivity. I'll consider using several (2-4) in an array worn on the back in my final project to sense objects in different directions.
I then created a new dev board with the XIAO ESP32S3 MCU (See design in Outputs Week.) - it has more memory and built in wifi/bluetooth capability which will be useful in designing a suite of connected wearables with memory to accomodate. I was able to successfully load the program and get the ToF sensor working.
WORKING ToF SENSOR WITH ESP32S3 DEV BOARD
Group Assignment
The group work can be cound here. We tested both a digital and analog Hall effect sensor - these sense magnetic fields.