15 Wildcard Week - Digital Embroidery
This week's assignment is to design and produce something with a digital process not covered in another assignment, documenting the requirements that your assignment meets, and including everything necessary to reproduce it.
"Doña Lechuga" merch
Since in Molding and Casting Week I fell in love with Doña Lechuga I decided to create some merchandise this week with digital embroidery. Our lab's machine is a Brother Inno-vis (please find all details in our lab's documentation), which requires a five step process.
- prepare a .pes file
- choose cloth and prepare hoop
- set up the machine
- start embroidery
- final patch :)
File preparation with Inkstitch Plugin

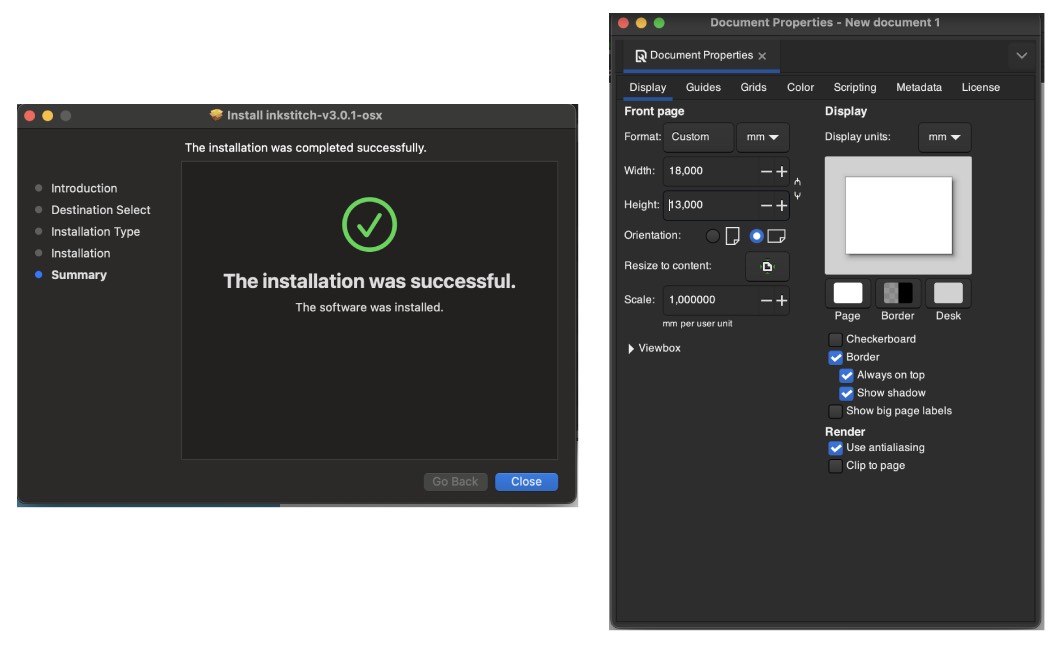
In order to prepare a .pes file I used the Inkscape plugin Ink/Stitch. First I downloaded it and restarted Inkscape in order to be able to use it.
Next step was to create a new file and change the document properties to match the hoops size under File/Document Properties: switch format size to cm and input the
size of the hoop. In my case I used the smaller available hoop that comes at a size of 18x13 cm. Keep that step in mind - else the machine won't be able to output the file.
Than I could start designing:
I exported the lettuce shape from my previous assignment as a .svg from Rhino and imported the outline into inkscape. While the plugin does a lot of work for you, keep a few simple rules in mind, when designing for digital embroidery:
- understand that you will loose detail with reduzed size, even if it's a vector graphic
- mind the layer stacking: the machine will first output the lower layer and work it's way up
- combine shapes using boolean operations to avoid overlap, which will influence the outcome
- optimize the file to have maximum 2 colours and 2 stiches on top of each other
- make sure you only need to change the thread once (e.g when you create a pattern"

For my design I choose the lettuce as a base shape and changed the parameters of the stitch under Extensions/Ink/Stitch/Params/Fill Stitch
to a Circular stitch. Remember to close the plugin's pages before opening a new one - my Inkscape got stuck and i had to redo the file from scratch.

As a top layer I choose some writing: mangia lechuga #Doña. There is no need to create a text layer upfront, you just input the text in the plugin:
Extensions/Ink/Stitch/Lettering. I choose one of the fonts the machine suggests: Glacial Tiny 60 AGS and added trims after each letter.

Once I was done I previewed the whole file under Extensions/Ink/Stitch/Visualize and Export/Simulator Realistic Preview and checked for the
above mentioned parameters. Since that was fine I exported a .pes file under File/Export and saved it on the USB drive that belongs to the embroidery machine.
Hoop preparation

Since I wanted to create a patch I choose a white steardy cloth and cut it as well as the supporting material in shape to have minimum 5 cm of access around the hoop. To load the hoop first put the supporting material and on top of it the choosen cloth, put it on the bigger part and press the smaller piece inside and fix it with the screw. Finally pull the edges of the cloth straight to avoid wrinkles and create a smooth surface.

Machine set up

I choose a green thread for the lettuce shape thus I first loaded that one in the machine following the nine-step path indicated on the machine. Furthermore I checked the bobbin, if there was enough thread, but even if there was not the machine remembers at which point it ended and restarts from there. Last but not least I loaded the hoop into the machine and fixed it as indicated.
Start Embroidery

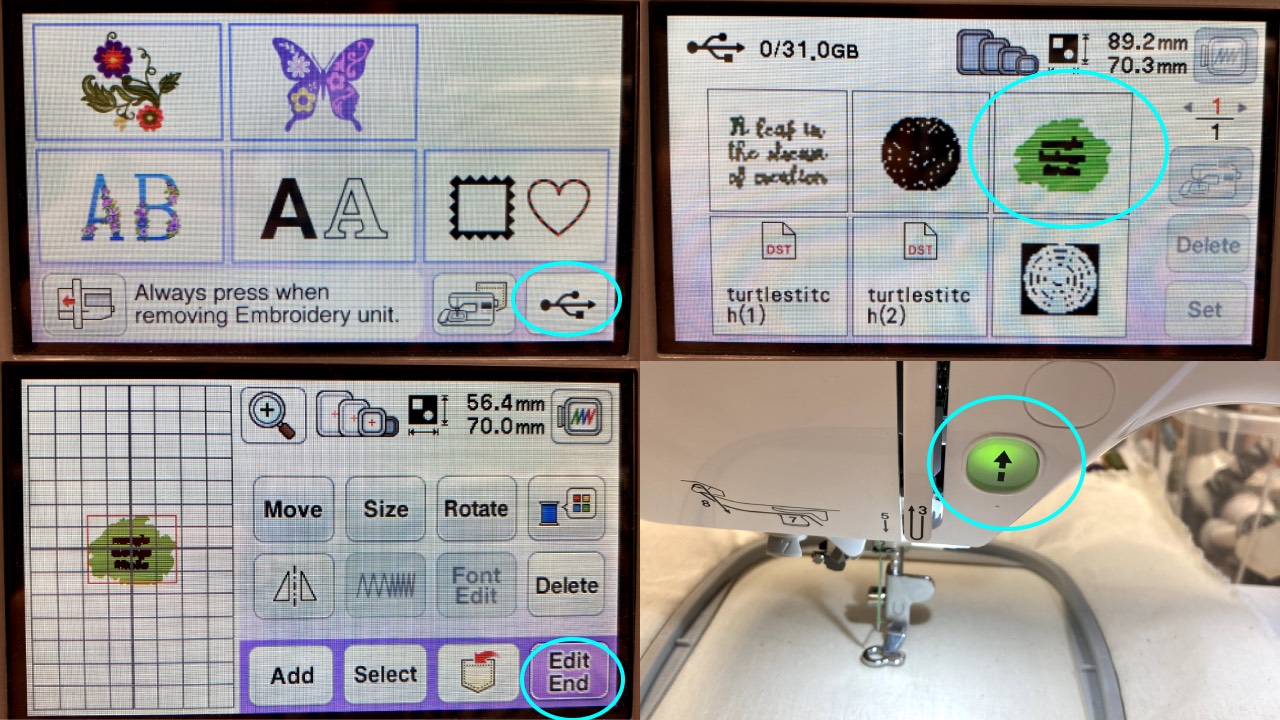
Once the machine is switched on and the USB is plugged in a little USB symbol is available on the screen and previews all files on the drive. I choose my file
and initially still had the previous file selected as well, so I deleted that one and clicked Edit End.
After I clicked to lower the foot - I searched for 5 minutes, where I could start the job. Being fully digitally immersed I expected the "START" button to be on the display. Having a look into the documentation revealed that it's simply the green button on the machine!

The total embroidery took 24 minutes and after 18 I changed the thread to the font's pink colour.
Final patch

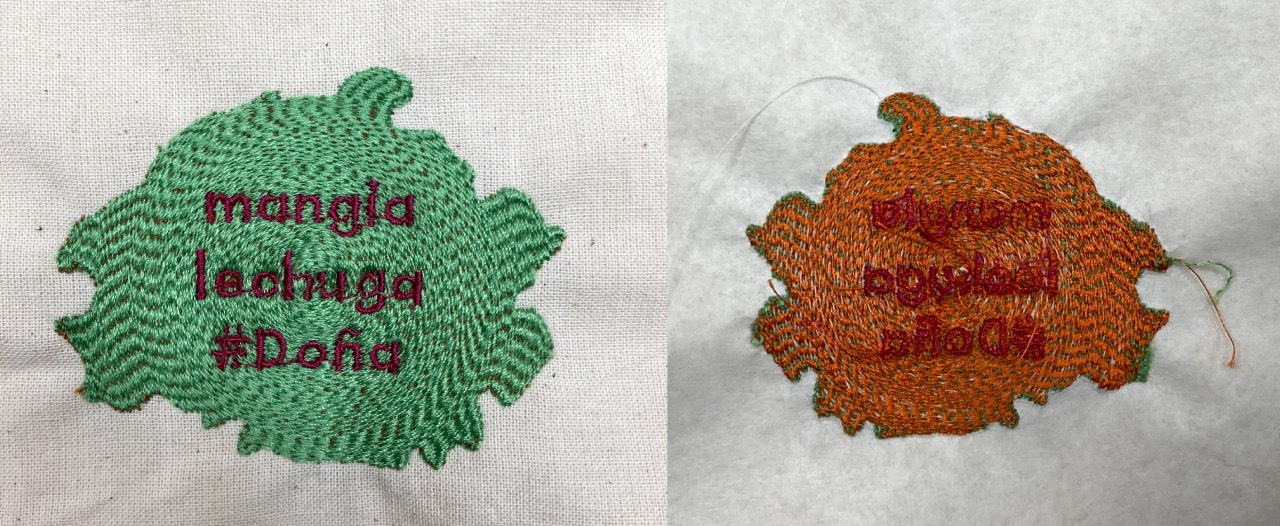
The final patch warps a little bit, because I used the circular stitch and I forgot to put the outline stitch for a perfect finishing. But I am happy with the result of the first "Doña merch".
Lessons Learned
- keep in mind to use the right bobbin else the thread will keep ripping
- choose adequate threads - some are to slippery
- if you select an element in inkstich, only this one will be previewed