Select a post to read
Articles
Week 18: Porject Development
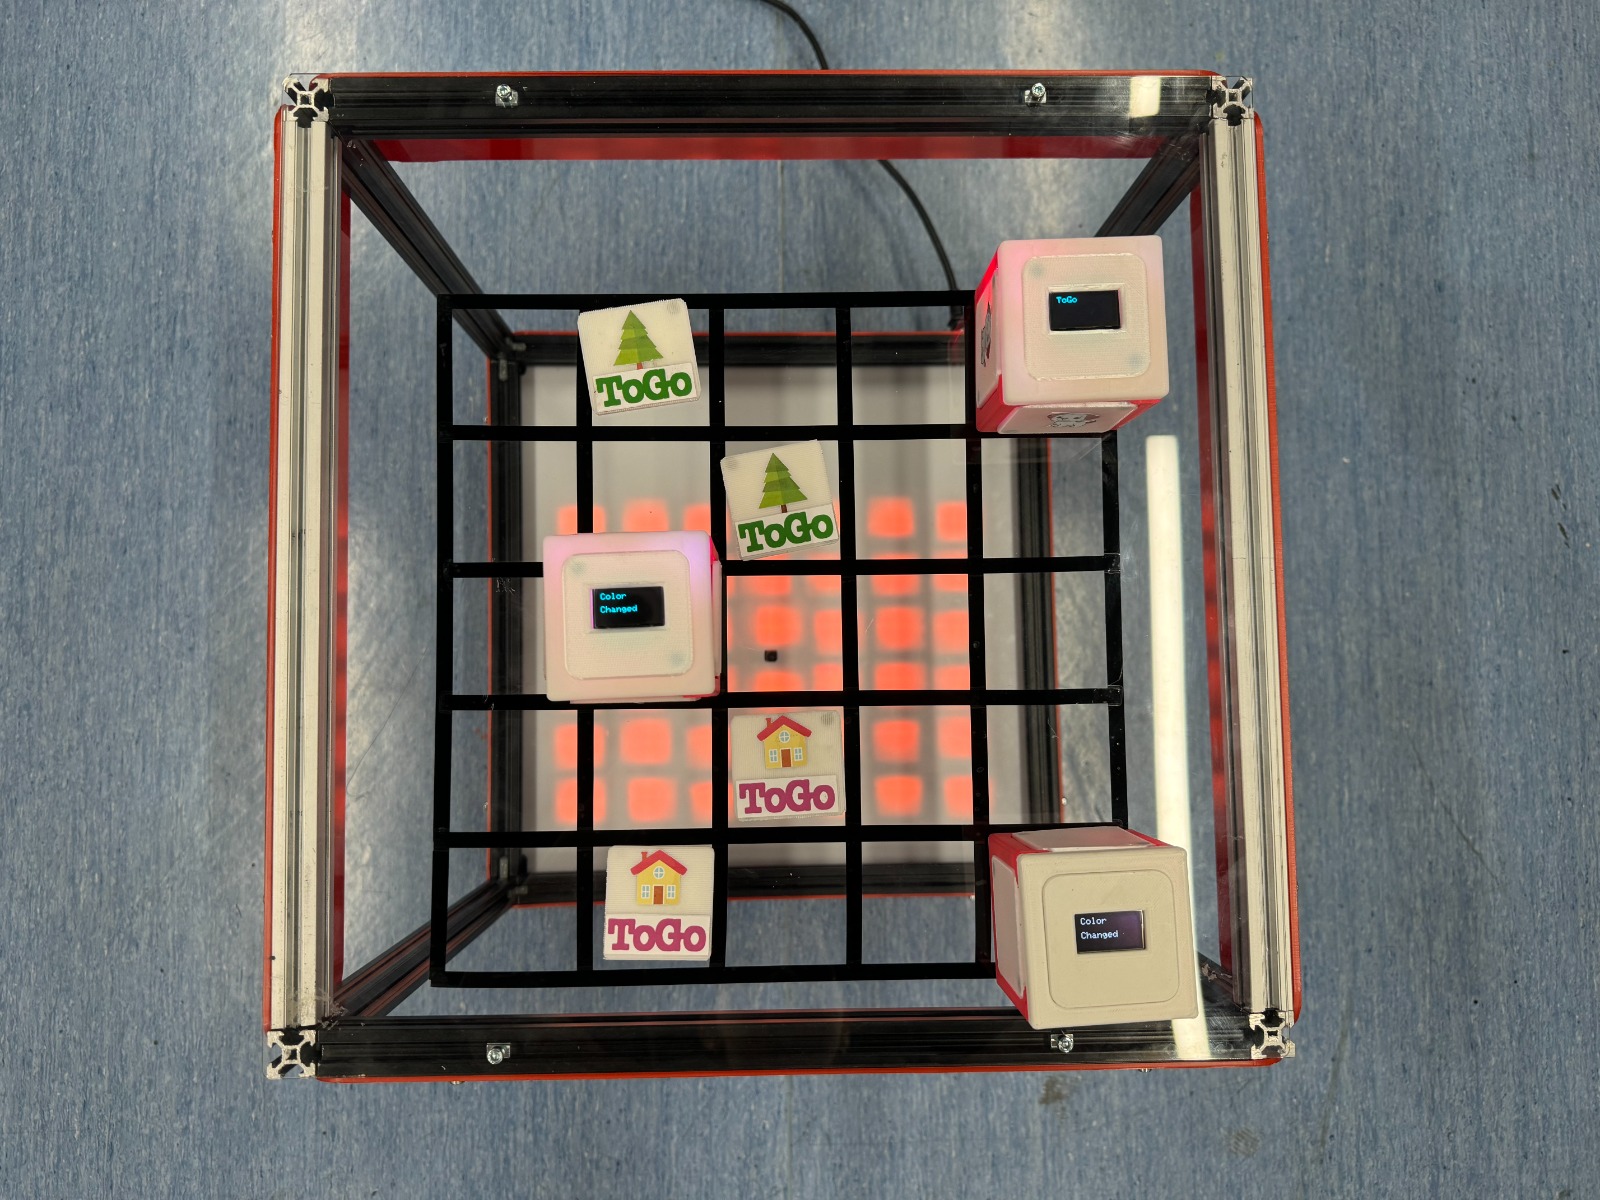
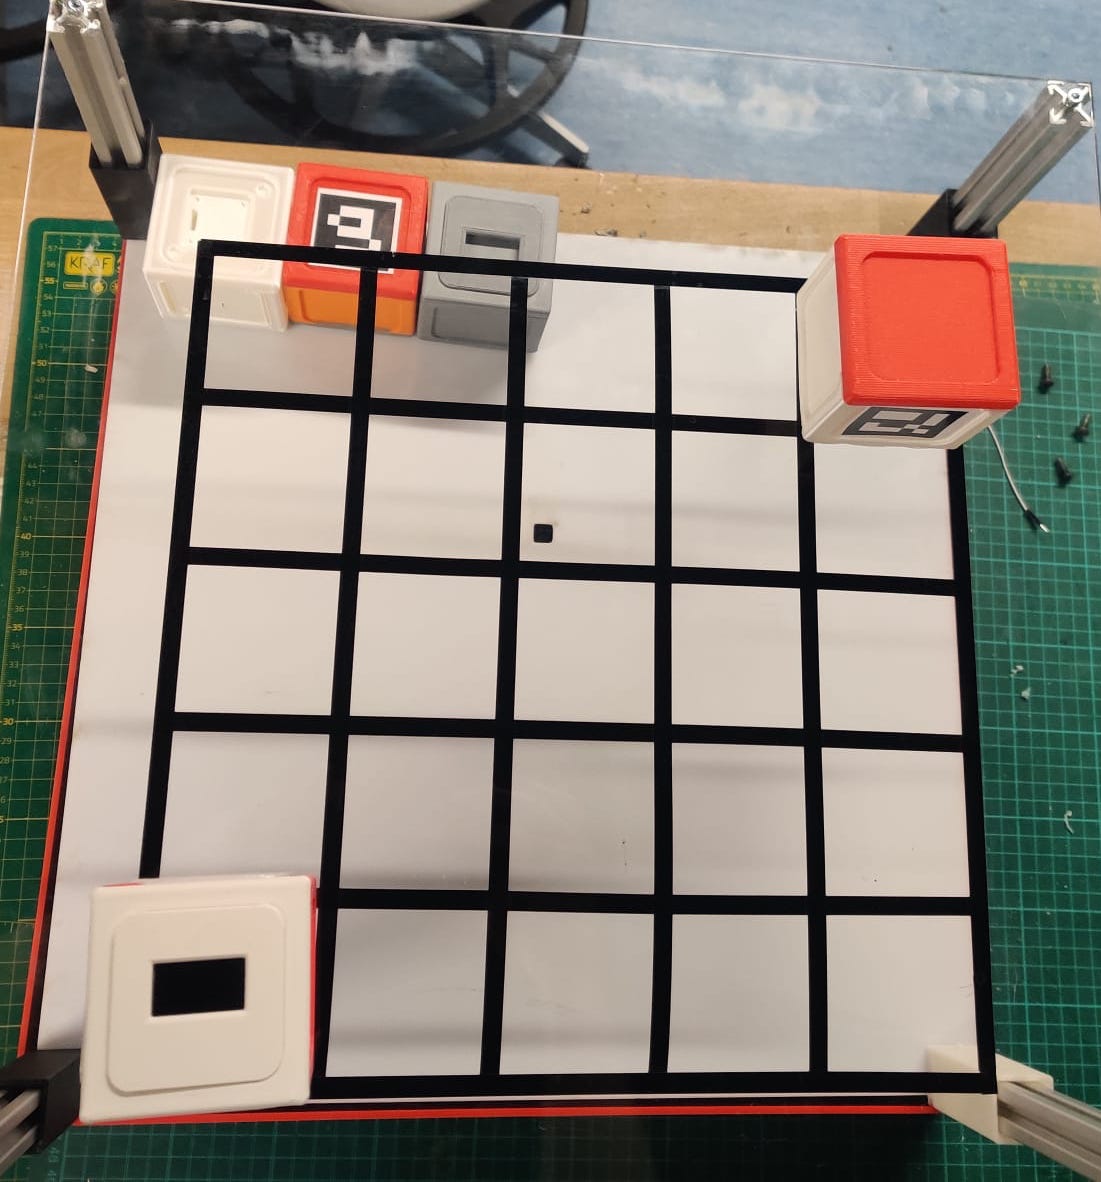
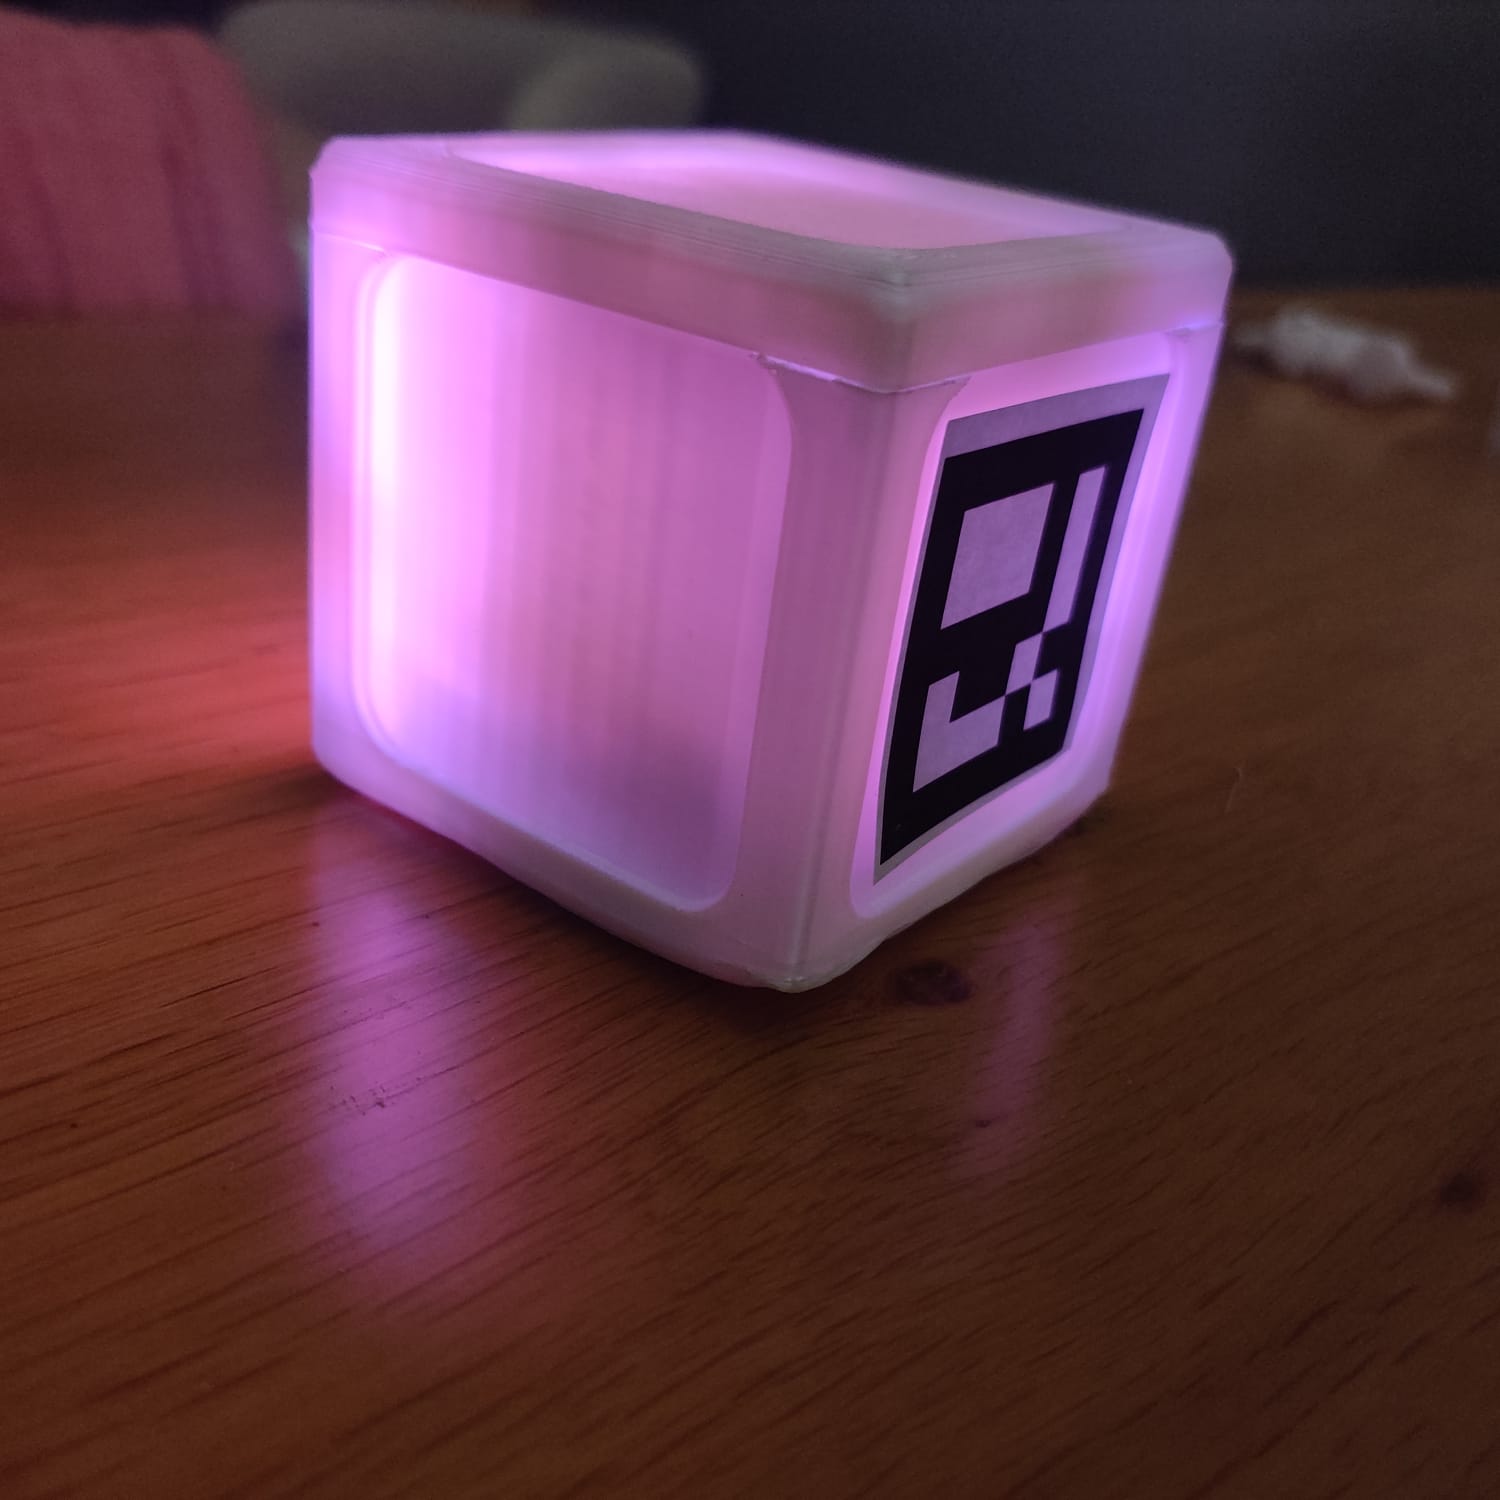
Project Development: ToGO Completed Tasks Cube Design and Fabrication
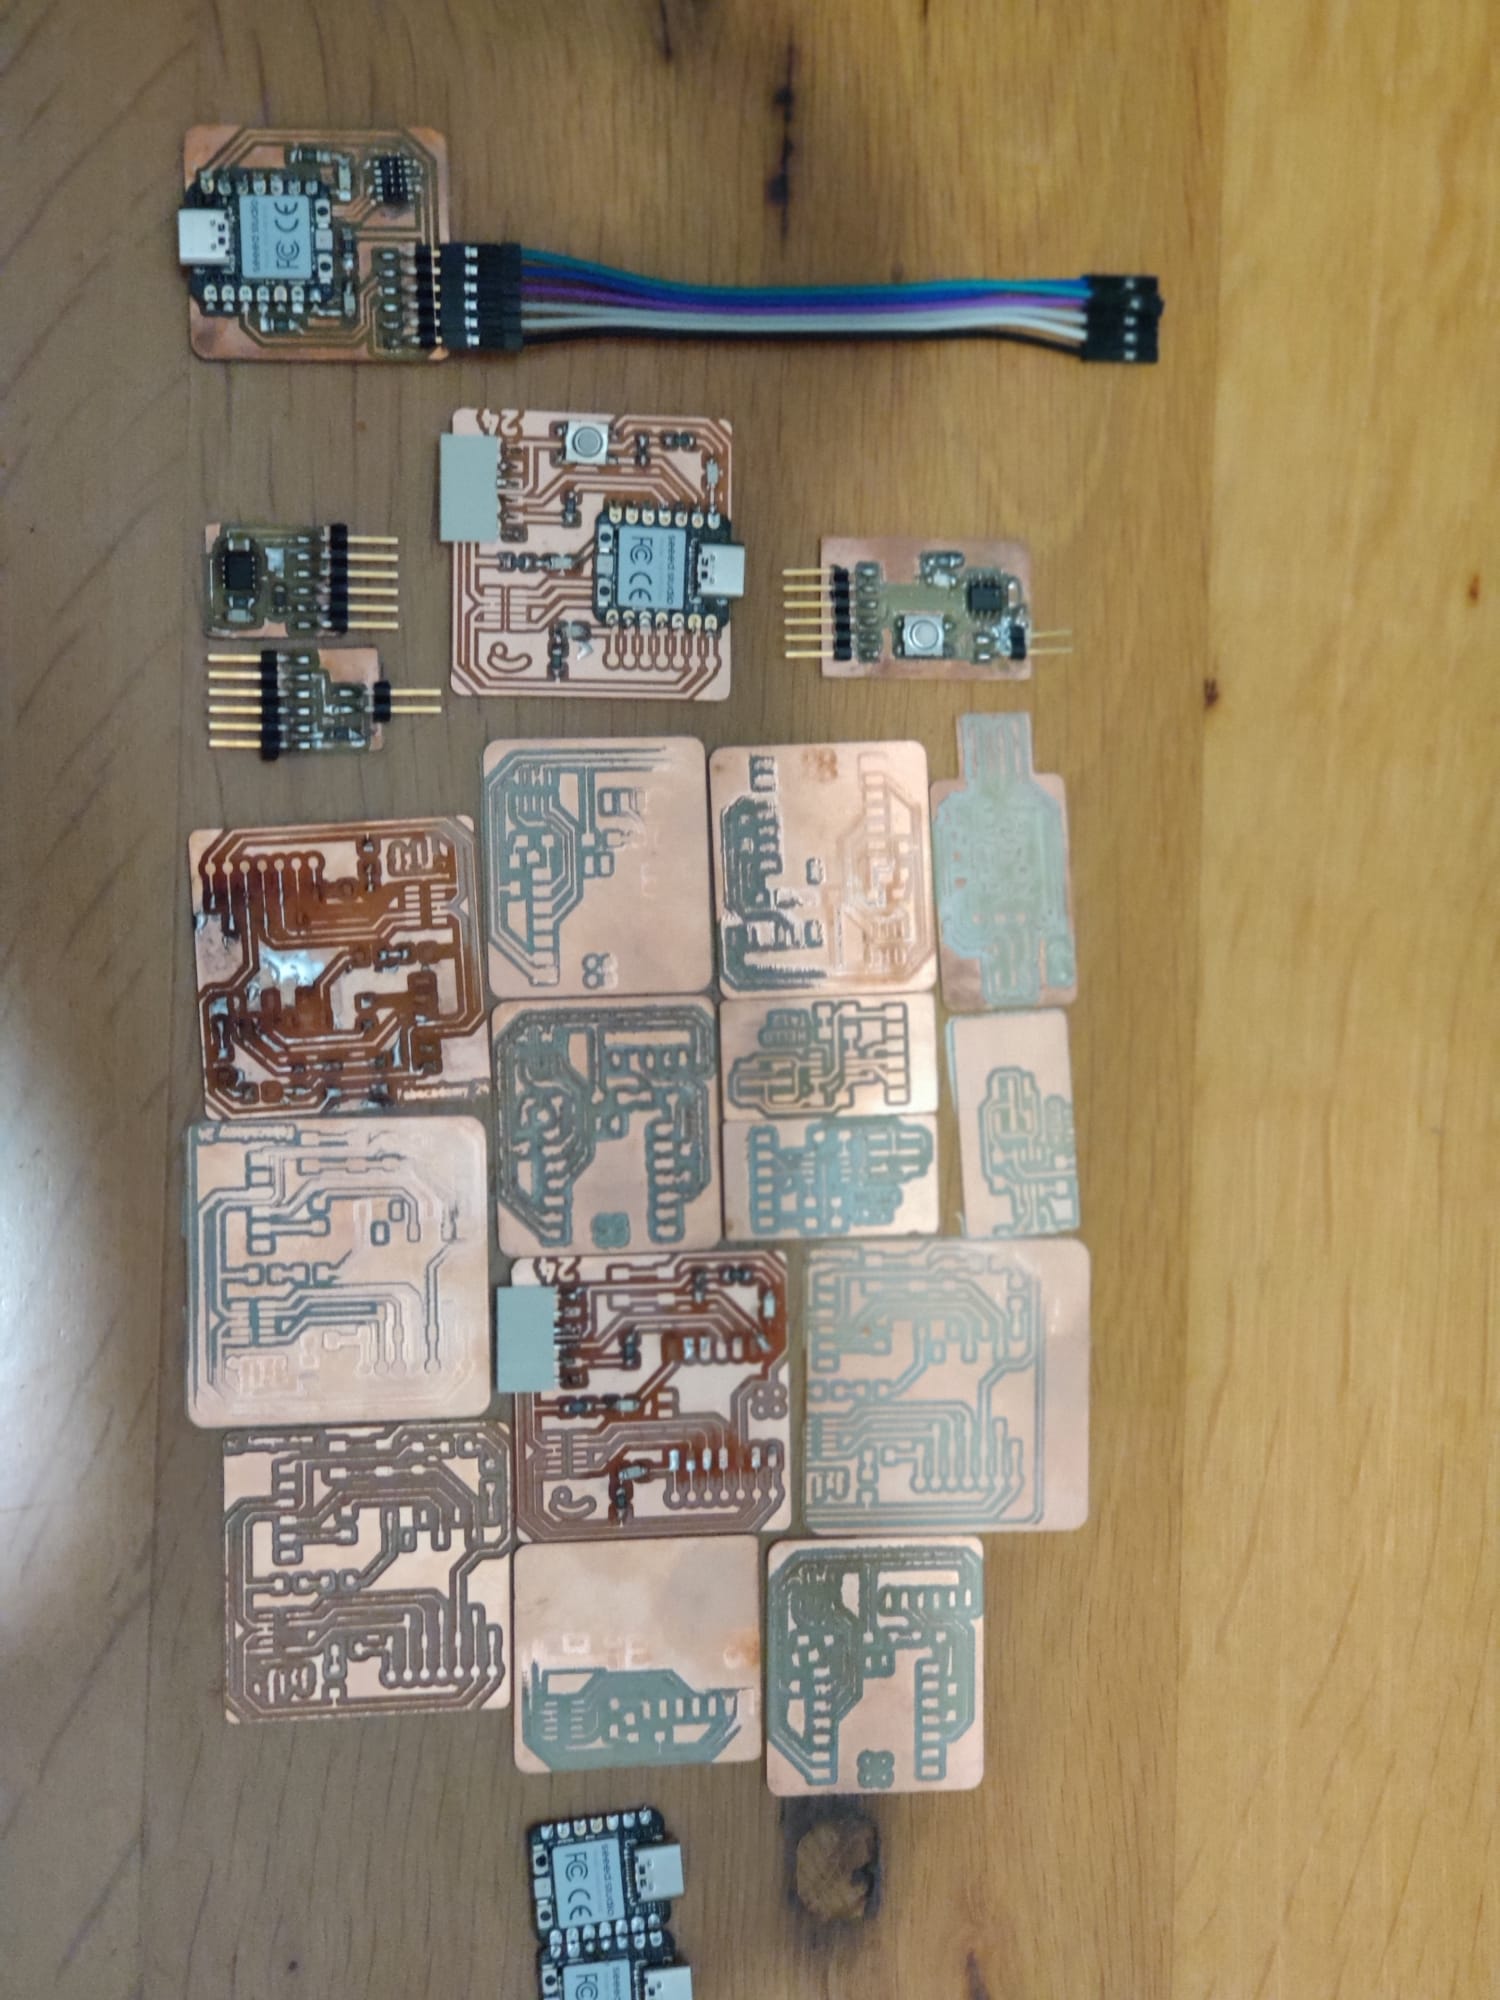
3D printed cube enclosures with magnetic covers. Custom PCBs designed and fabricated using KiCad and Roland SRM-20. Integration of ESP32-C3 microcontrollers, OLED displays, and WS2812B LEDs. Board System Assembly
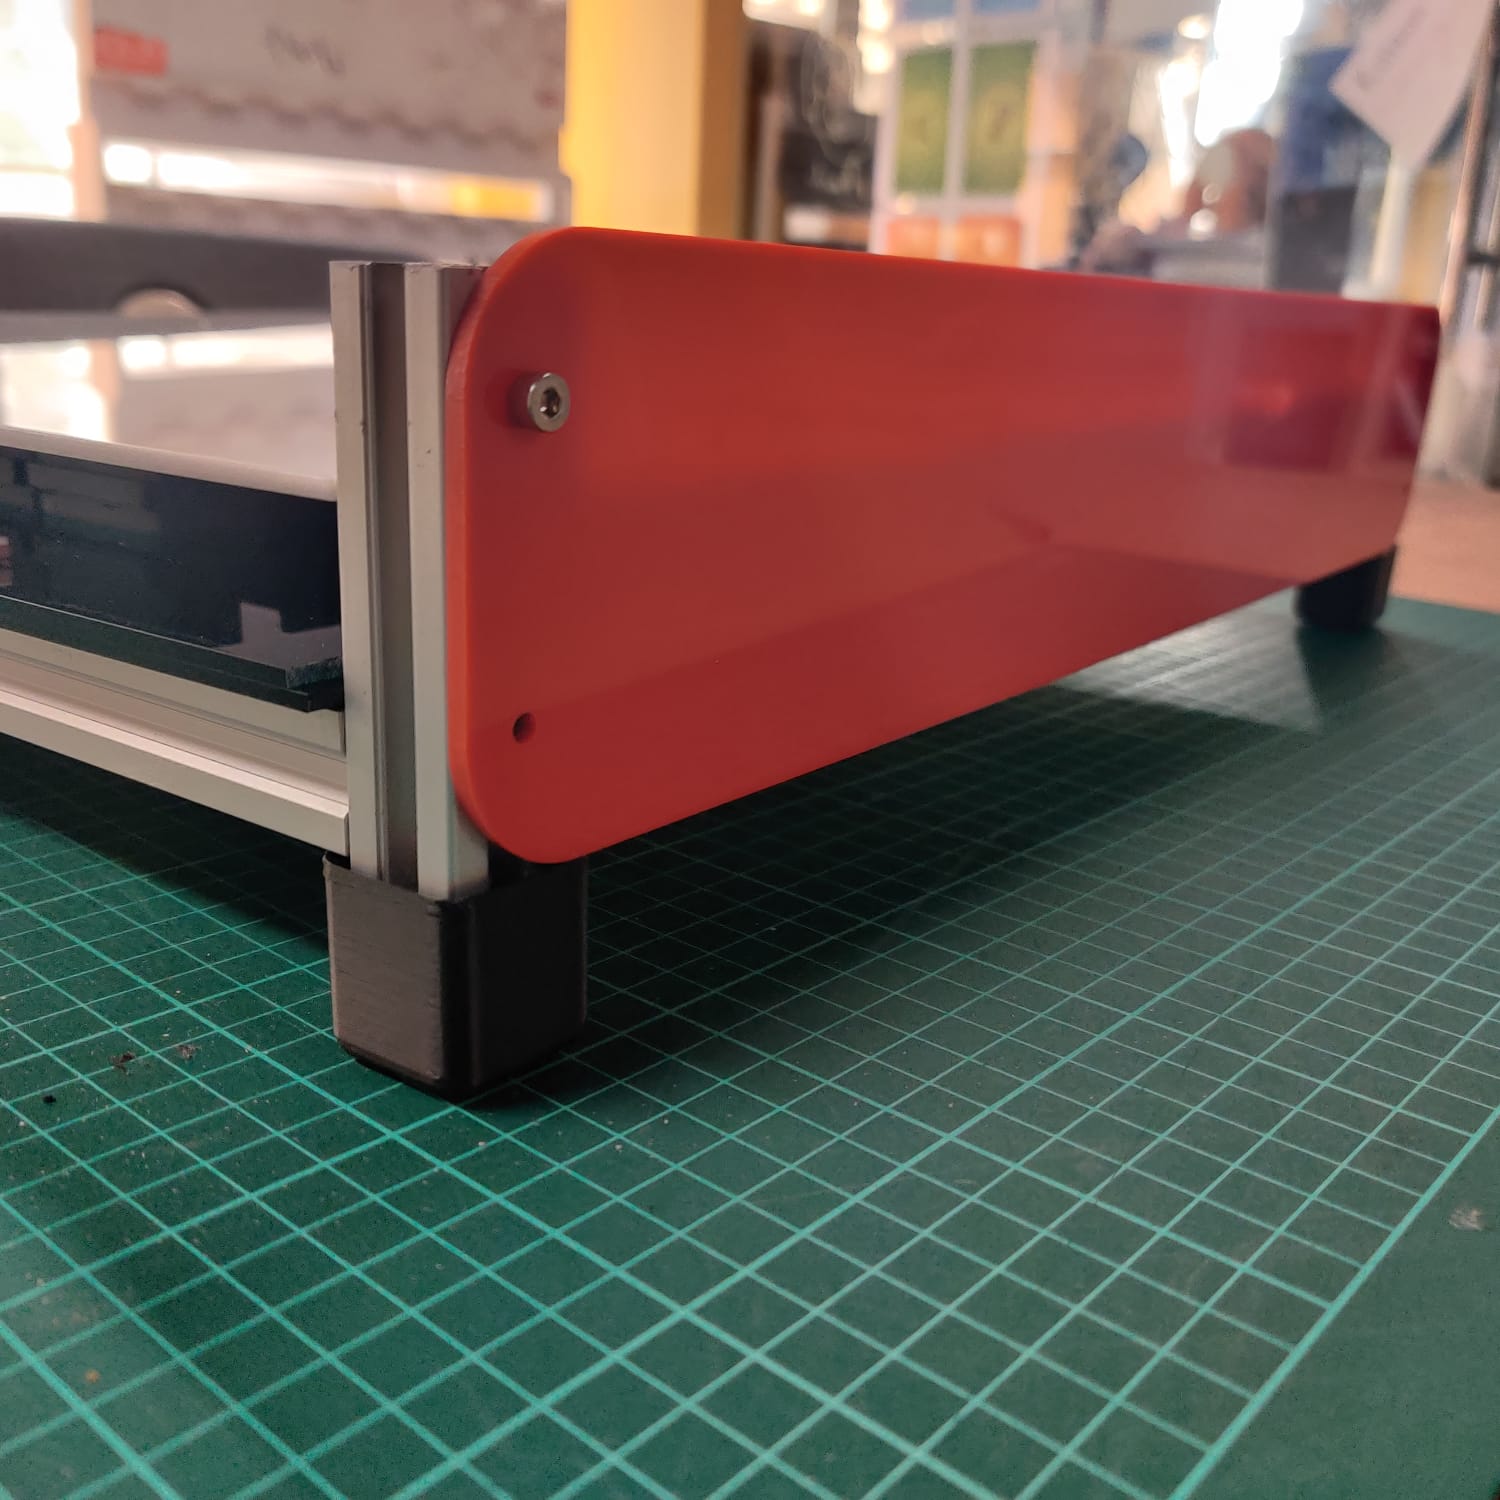
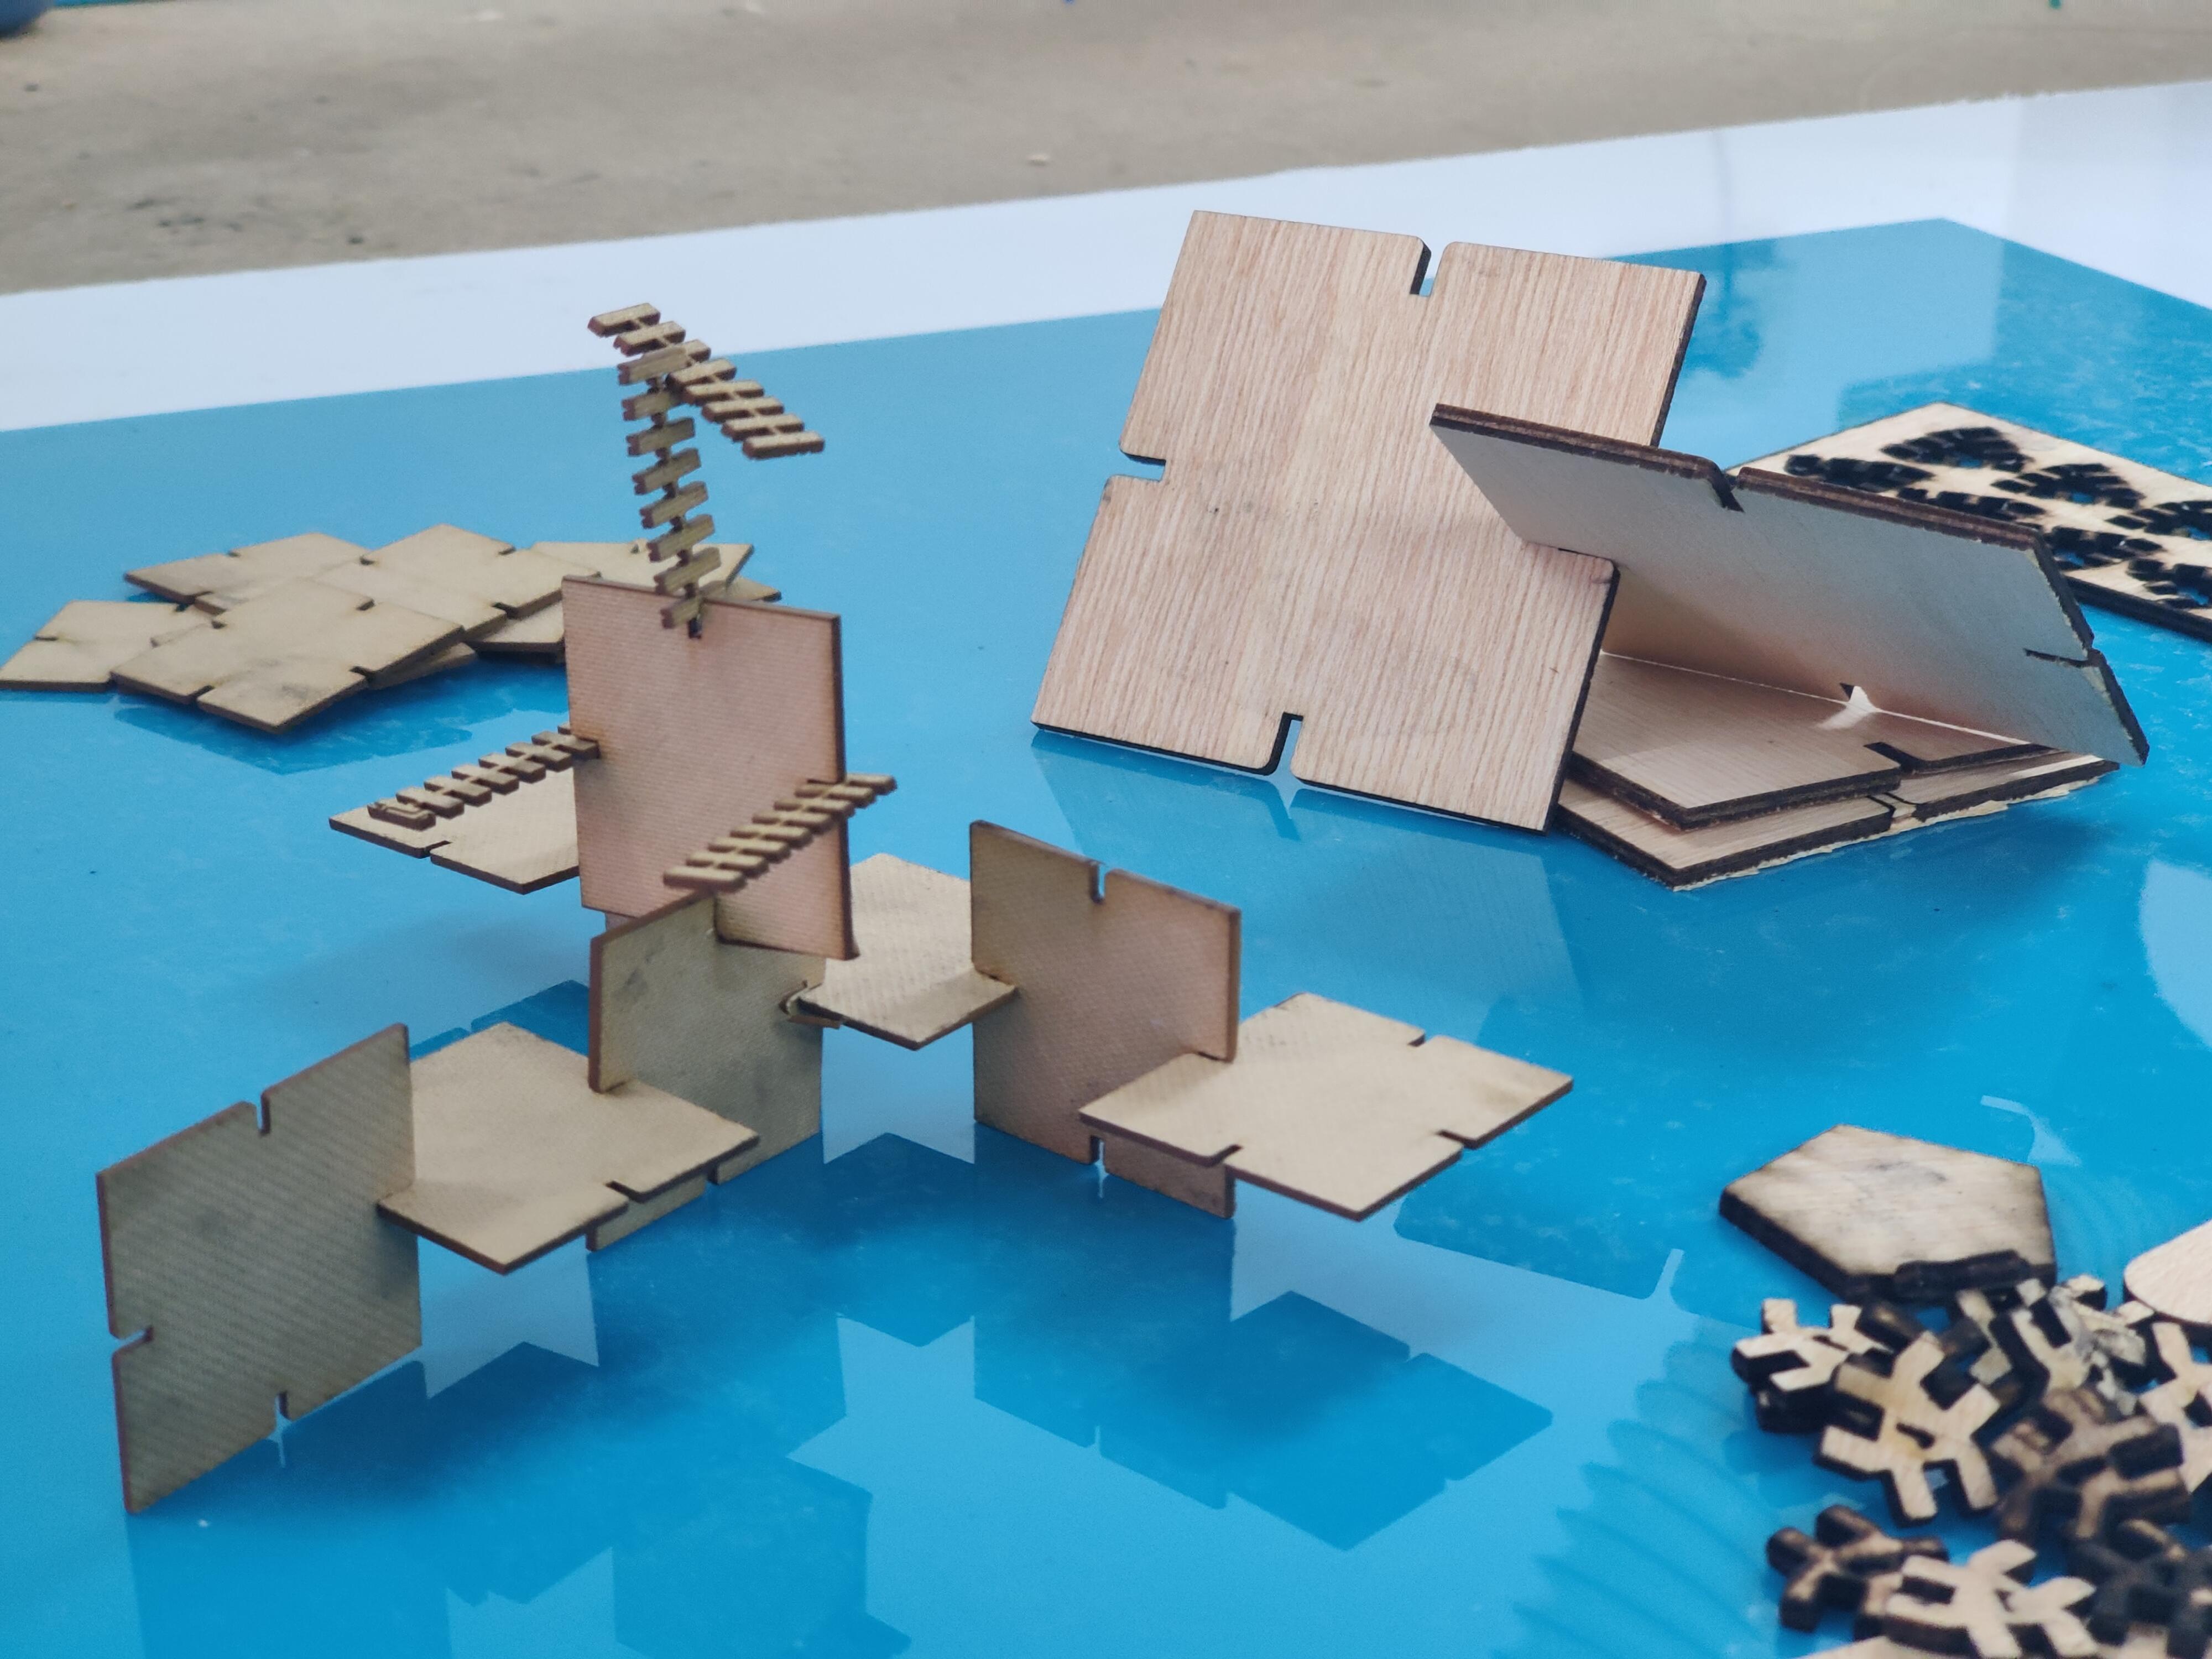
Construction of the board using 20mm x 20mm Sigma profiles and plexiglass sheets cut with a laser cutter. Installation of 42 WS2812B LED strips on the board. Power management for the LED strip and Raspberry Pi with a single on/off power supply.
Week 17:Applications and Implications
Project Document What will it do? The project “ToGO: Find Your Path” is an interactive and educational tool designed to teach algorithmic thinking and problem-solving skills. It involves a game where users place physical cubes on a board to find the shortest path from a starting point to a finishing point. The game uses ArUco markers for cube recognition and provides real-time feedback via a web interface, making it an engaging way to learn about algorithms.
Week 16:System Integration
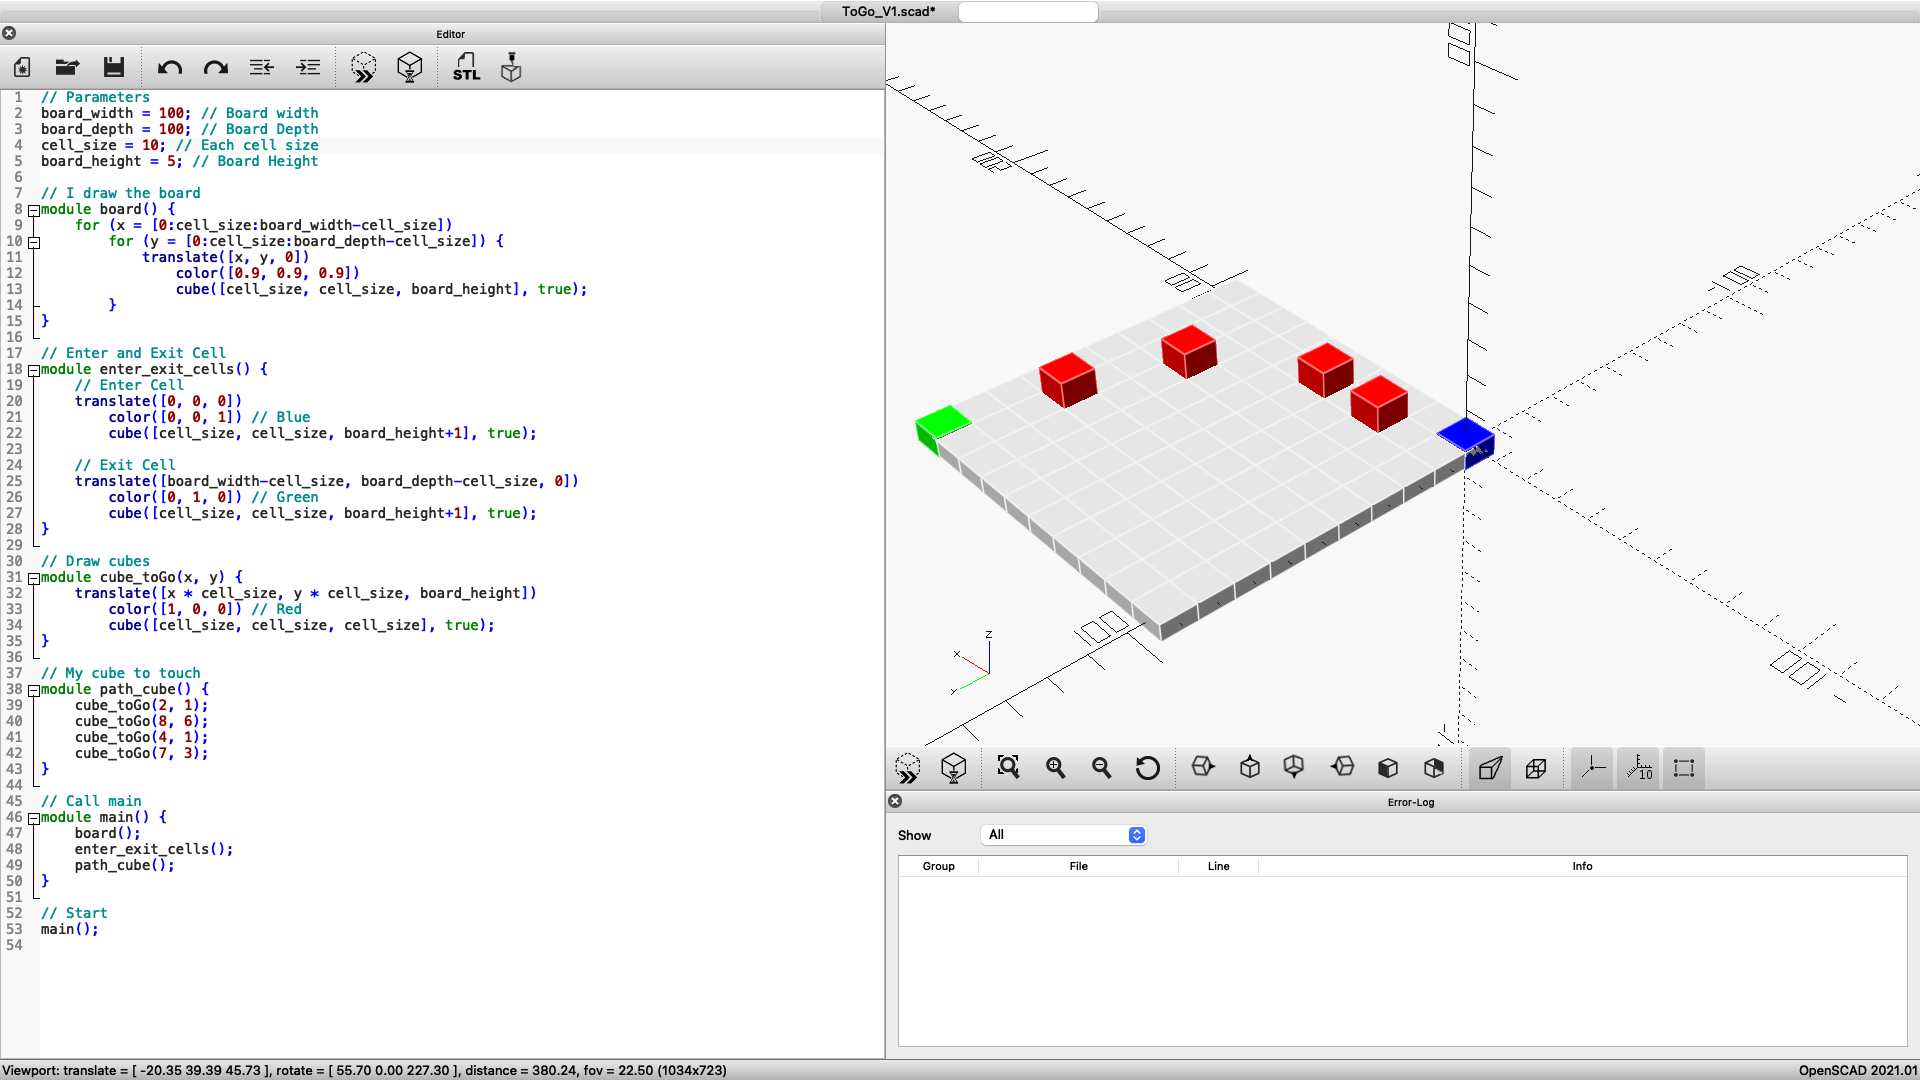
Project Document 6. Design Togo Board Togo Board Design Cable Management ToGo Cube Desıgn ToGo PCB MOdule ToGO Cube + Board BOM (Bill of Materials) PCB Cube Part Name Quantity XIAO-ESP32C3 1 LED_1206 2 C_1206 (Capacitor) 1 R_1206 (Resistor) 2 LED WS2812B 1 Conn_PinHeader 2.54mm 5 Lipo 3.7V 1000mAh 1 Step-up Adaptor 1 Board Electronic Part Name Quantity Raspberry Pi 4 1 Raspberry Pi Camera 2 1 WS2812B LED Strip 42 3-Pin Pigtail Connector 6 Adaptor TDK 5V 2A 1 Power Adapter 5V 3A 1 Mechanical Equipment Part Name Quantity Board Profile Sigma 20mm x 20mm 5m 3mm Plexiglass 3D Filament M4 Screw Detailed Descriptions and Notes PCB Cube XIAO-ESP32C3: ESP32-C3 microcontroller module.
Week 15: Wild Card
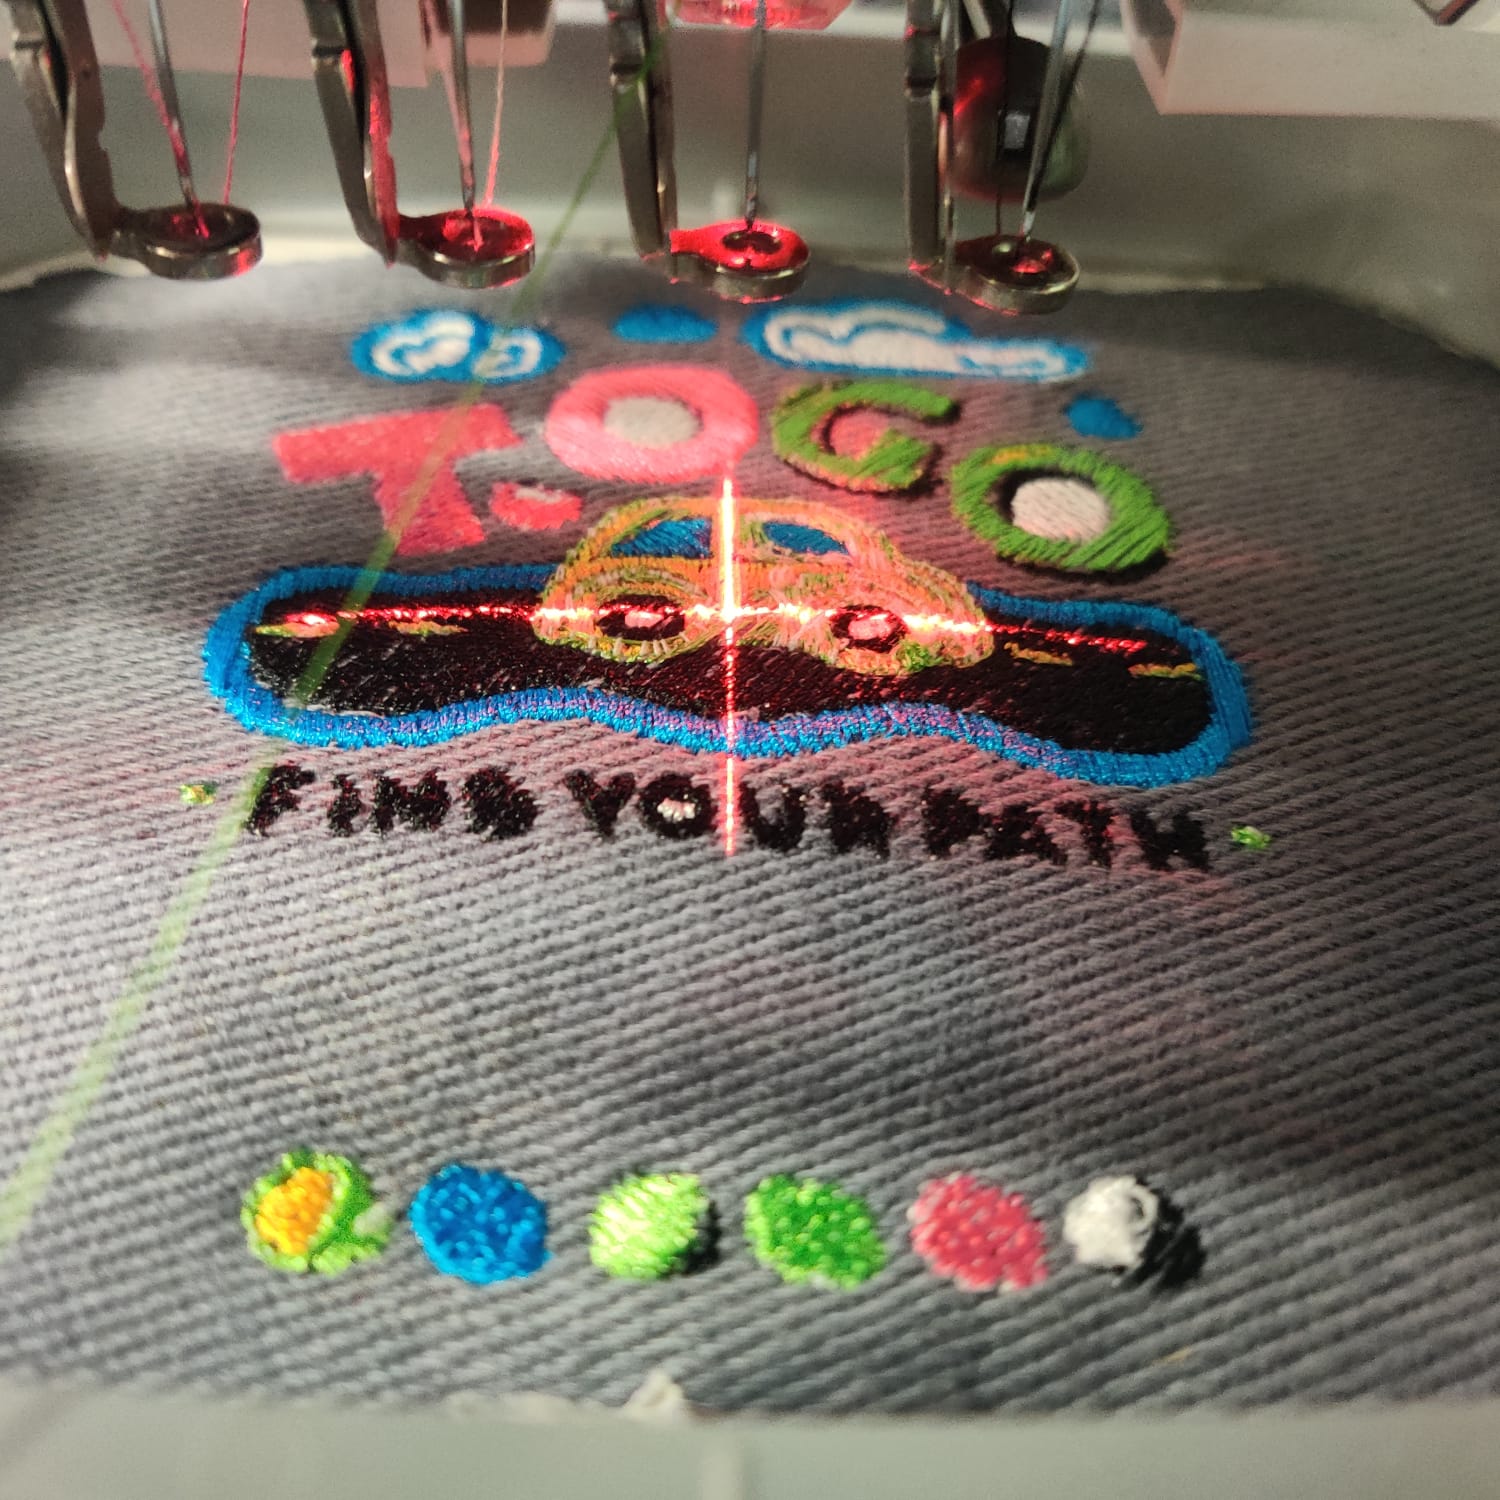
Project Document - Embroidery 1. Introduction This week, I worked with the Brother PR680W embroidery machine available at the Fablab. My goal was to experience two different projects. First, I created an embroidery of the logo I designed for my ToGo project on an apron. Second, I conducted research on “computational embroidery” and created a piece using the block-based Turtlestitch program.
The Brother PR680W is a versatile embroidery machine known for its precision and ease of use.
Week 14: Interface and Application Programming
Project Document - ToGo Pathfinding Project 1. Introduction “The ToGo Pathfinding Project utilizes a Raspberry Pi 4 and Raspberry Pi Camera 2 to detect ArUco markers and calculate the shortest path on a grid while lighting up the path on LED cells. The system controls LEDs via ESP32-C3 modules embedded within cubes that are marked with ArUco markers. The project incorporates a Flask web framework for inter-device communication and control via a user interface.

Week 13: Networking and Communications
Networking and Communications This week, I focused on setting up and testing the network system that will be used in my ToGo project. The primary goal was to establish a robust communication network between multiple ESP32-C3 microcontrollers and a Raspberry Pi 4, which acts as the central controller. This setup is crucial for ensuring responsiveness and reliability in signal handling as the ESP32 devices receive and execute commands based on numbers detected from Aruco codes through a connected camera.
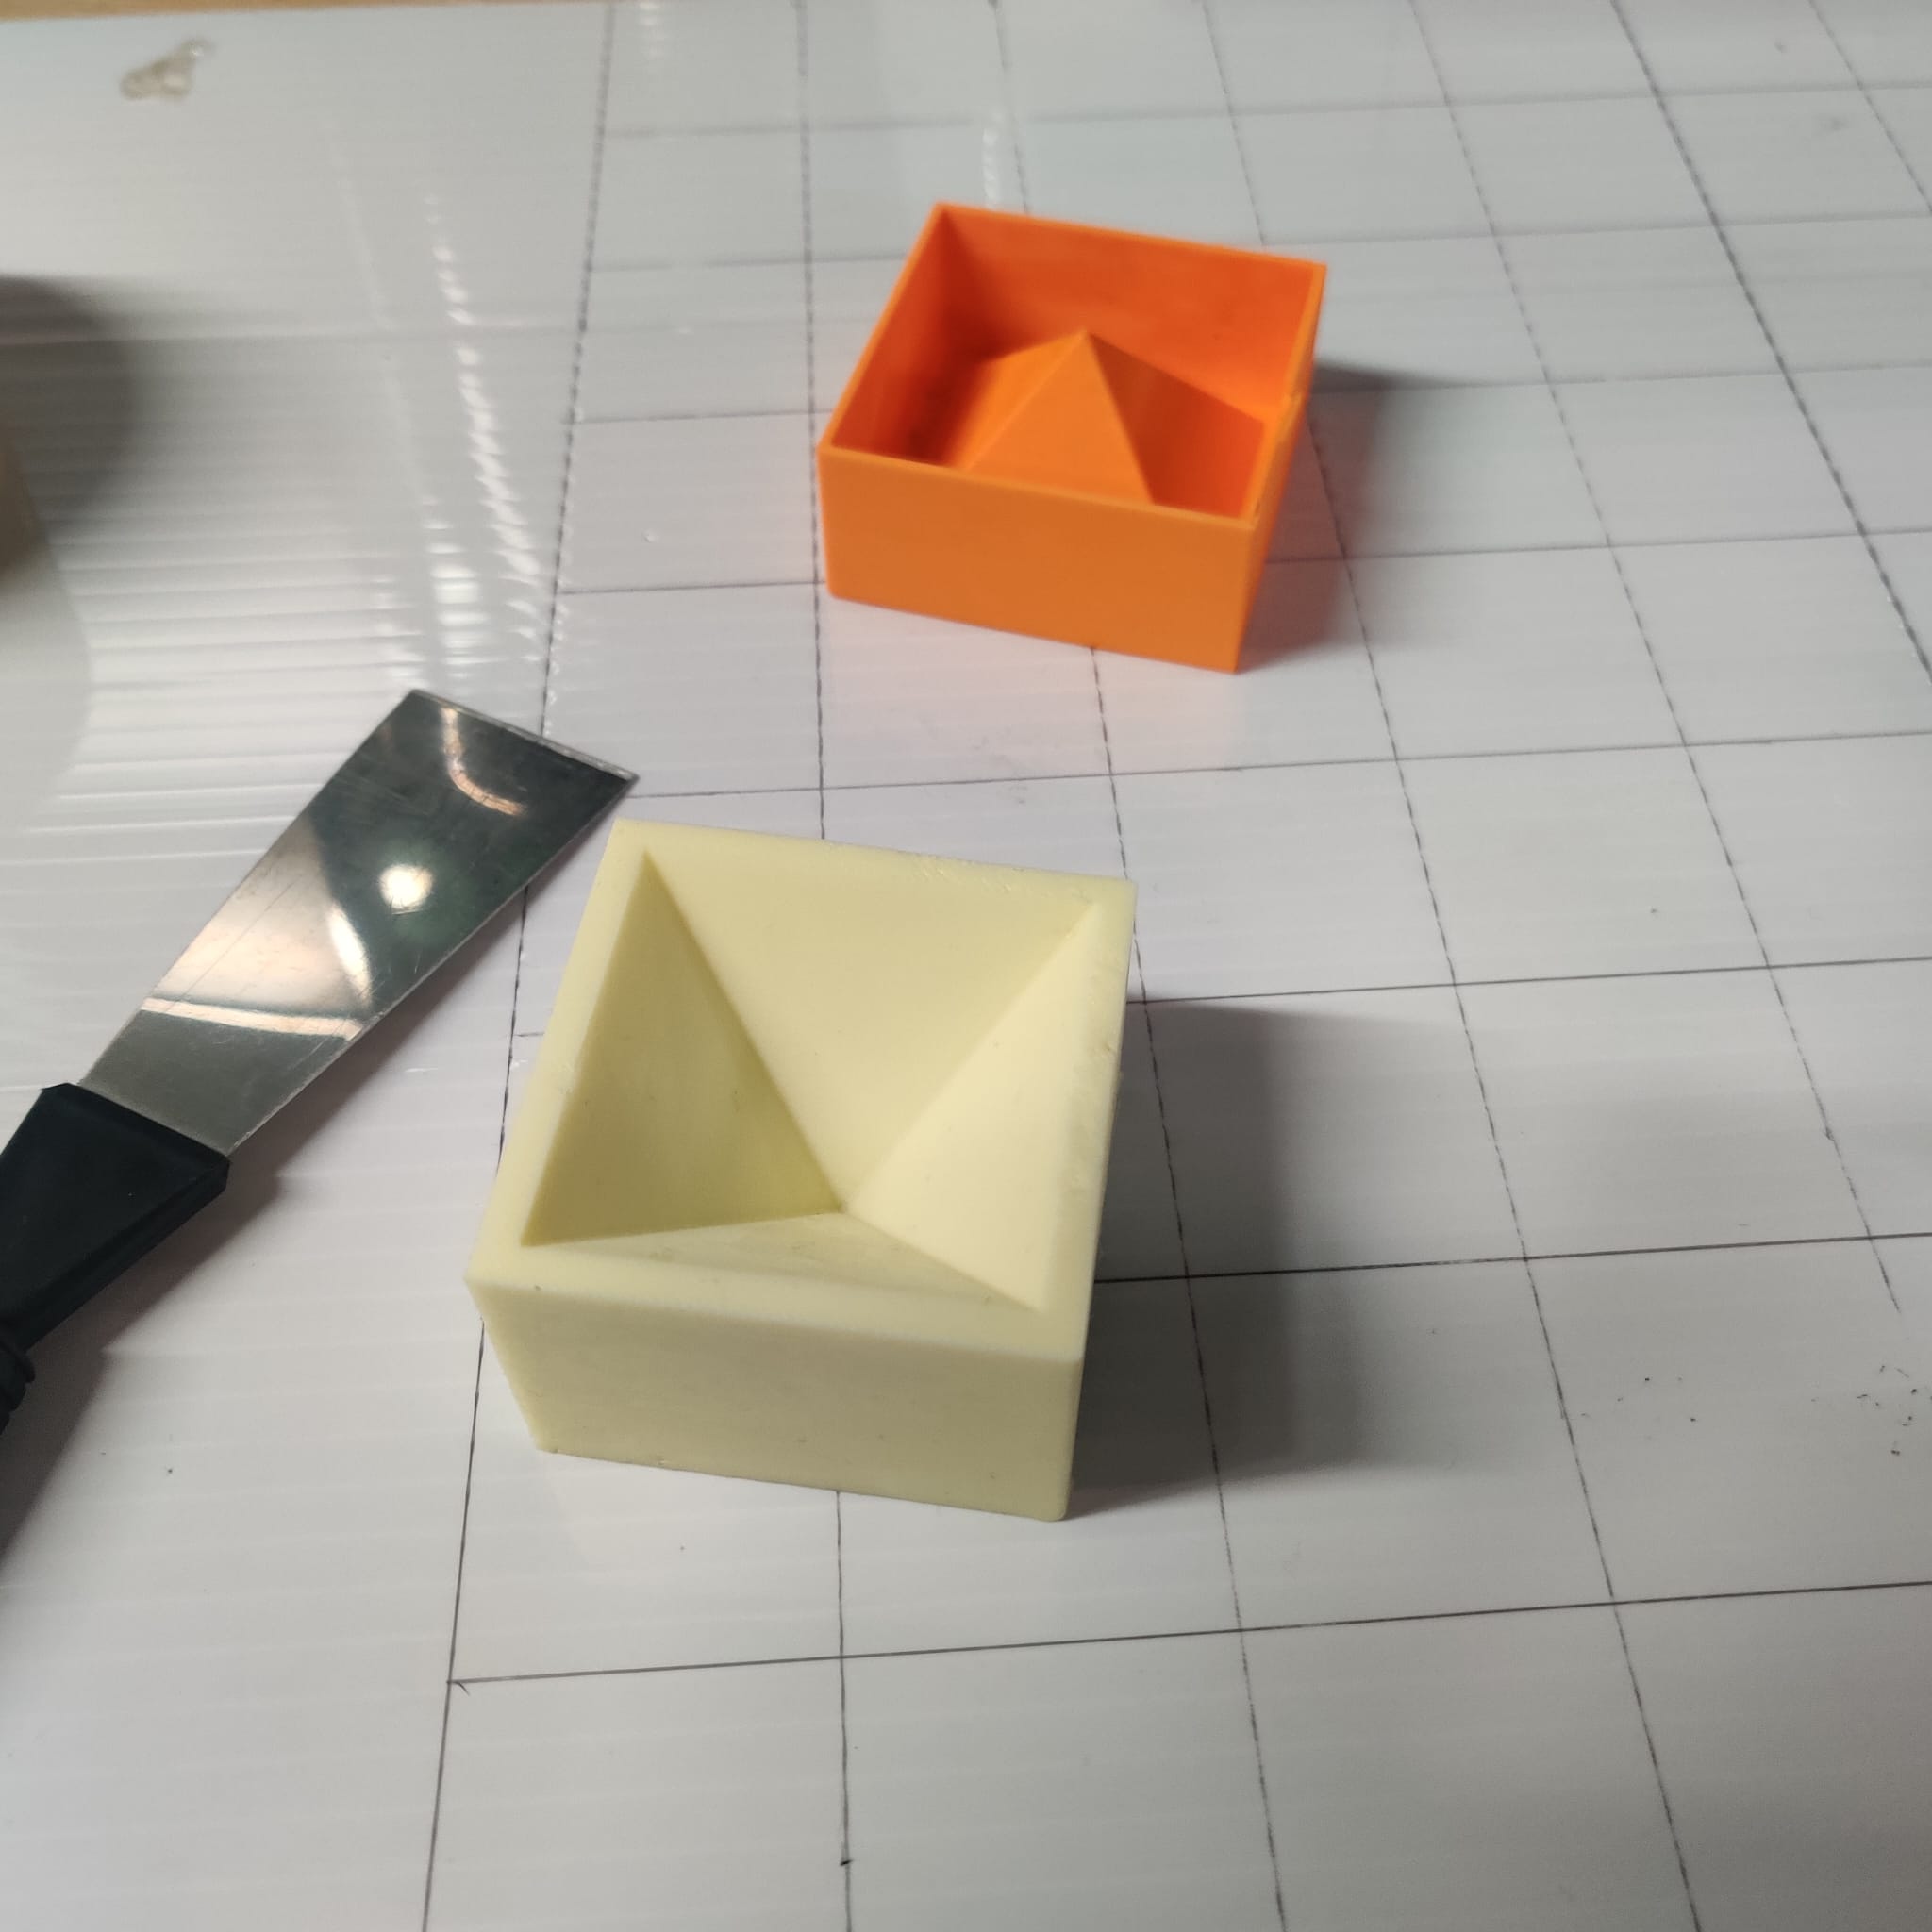
Week 12: Molding and Casting
Molding and Casting This week, I experienced molding and casting. My goal was to go through the various stages of mold and casting. I experienced molding by trying products from different vendors. First, I created a mold with a 3D design I made. Then, I performed casting using this mold.
Group Assigment Page This week’s group assignment explores the properties of the molding and casting materials. group assignment link 🚀
Week 11: Input Devices
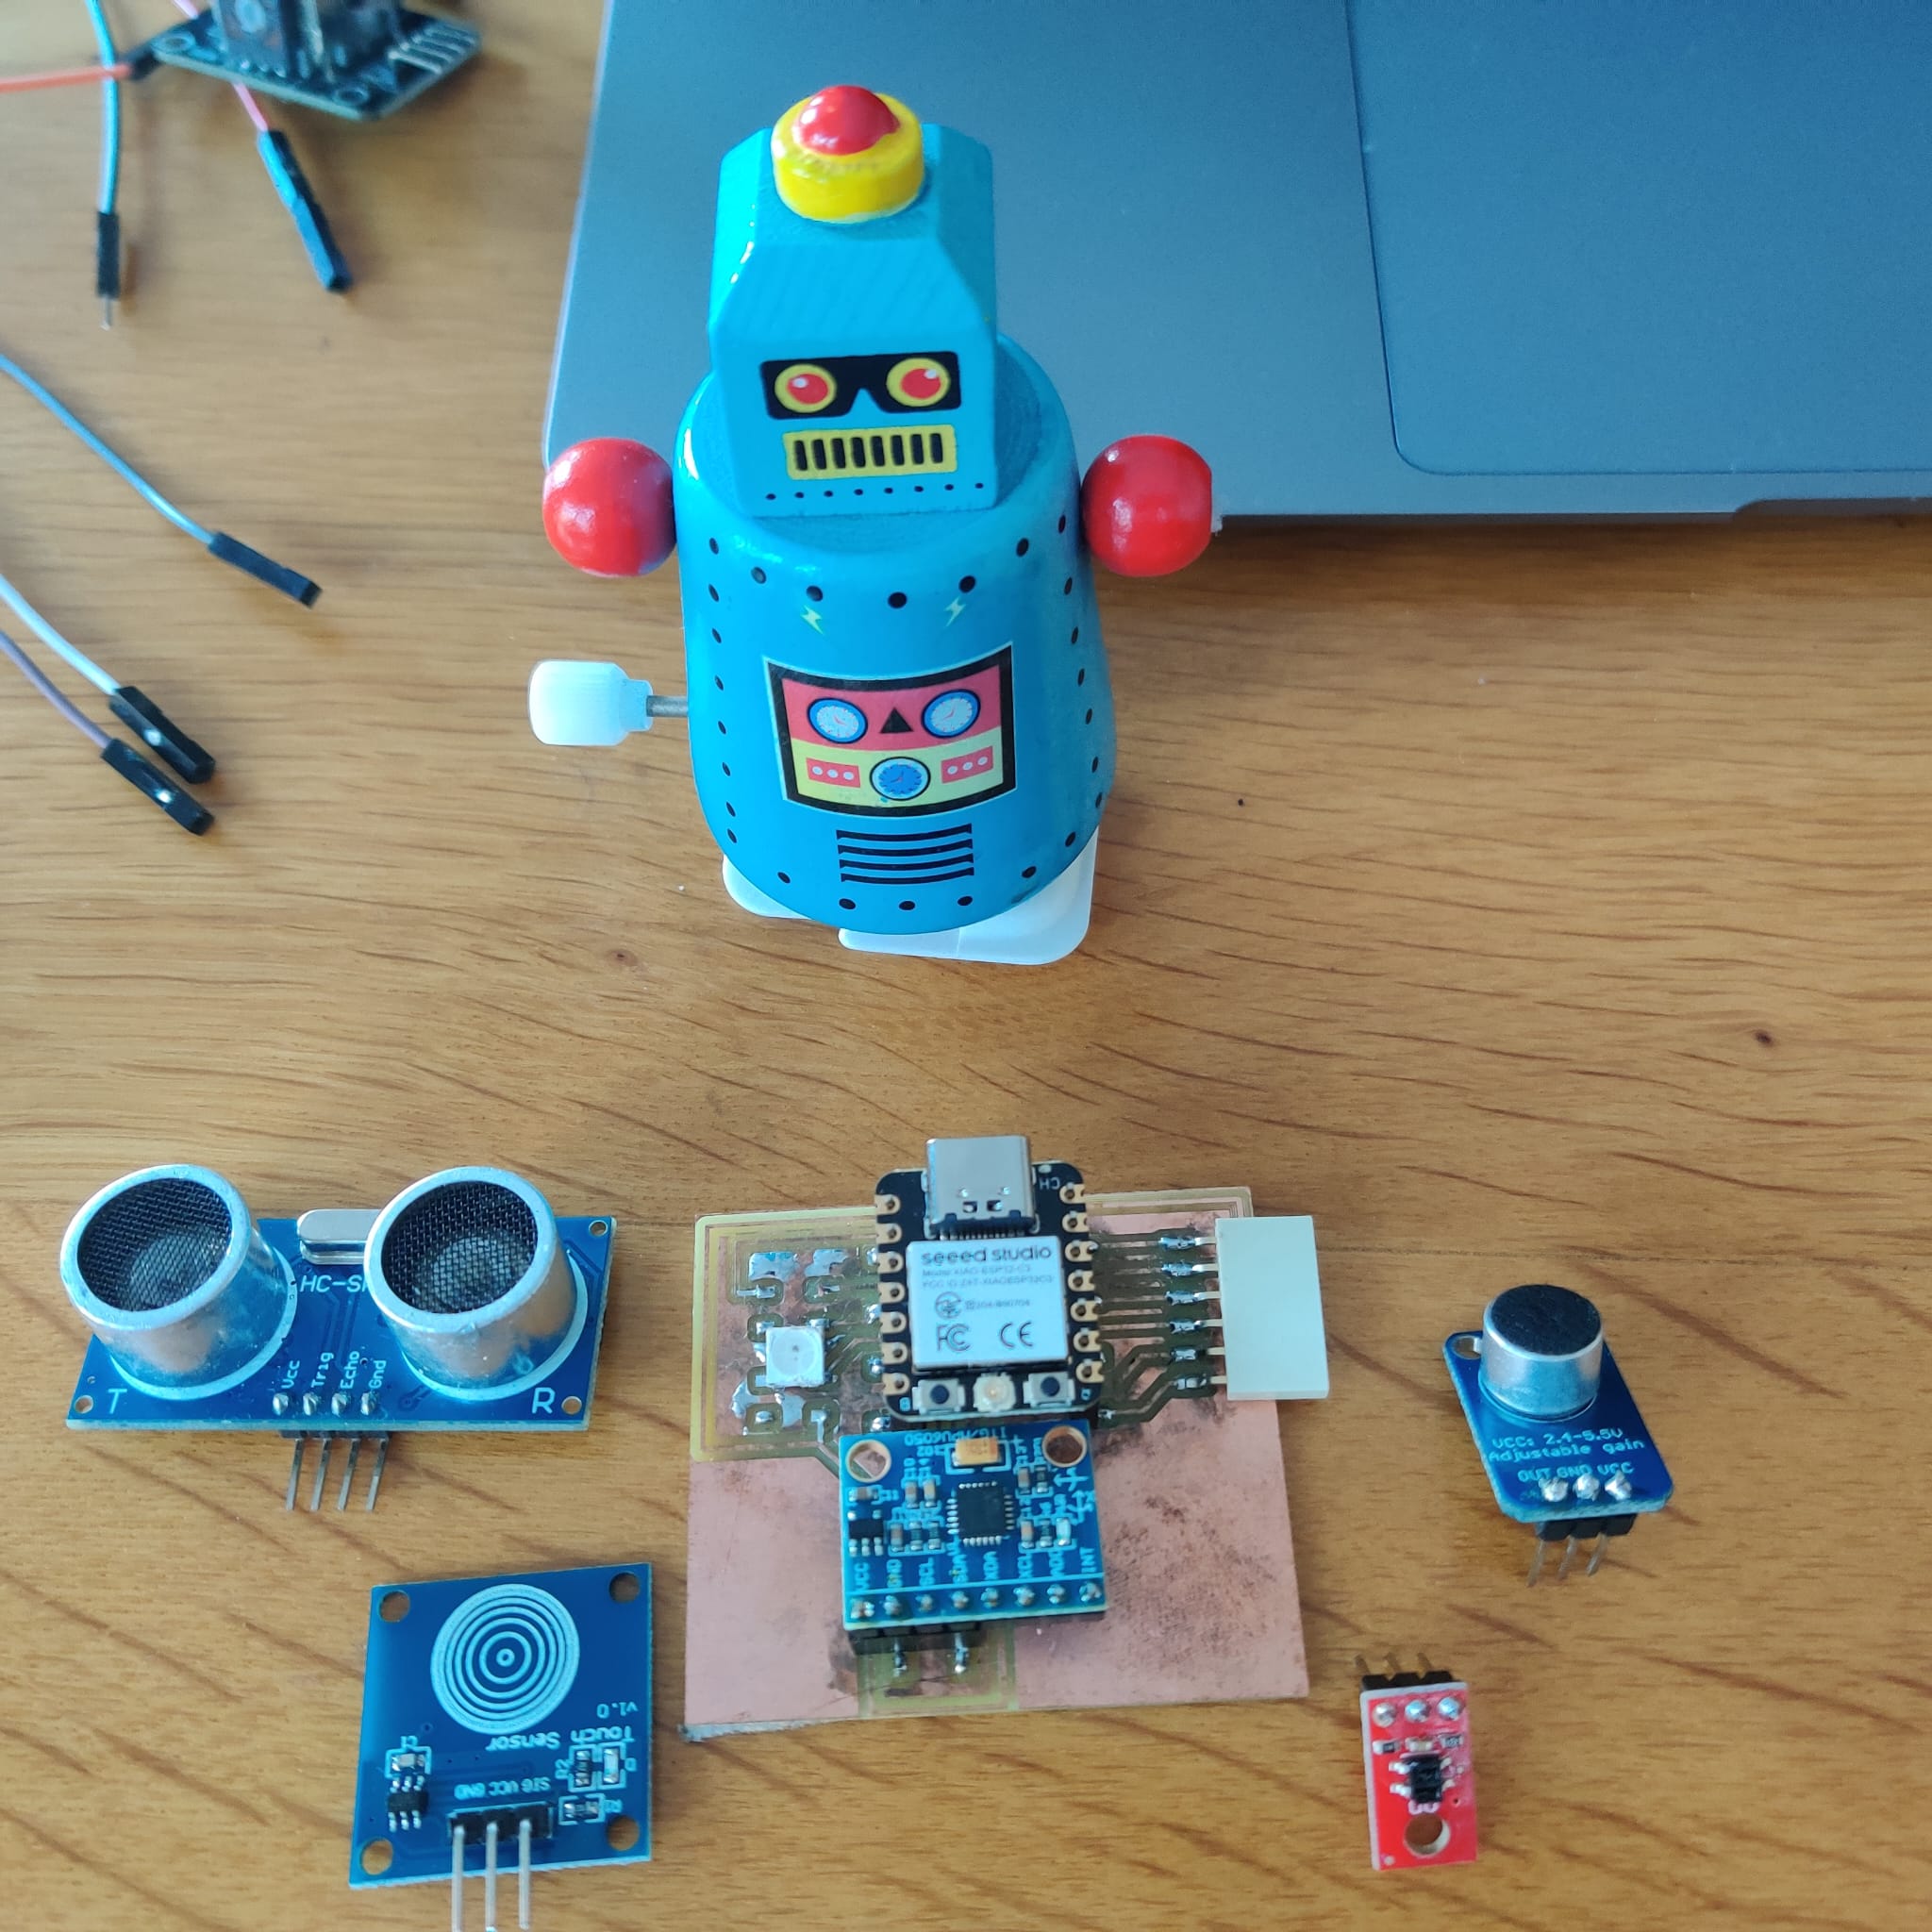
Electronic Design This week, in the input device project, I tested various sensors on the PCB I designed. I used the MPU6050 - Gyroscope/Accelerometer, TT223 Touch Sensor, HC-SR04 Ultrasonic Sensor, Adafruit MAX4466 - Amplifier, and QRE1113 Line Sensor.
Group Assigment Page group assignment link 🚀
Greeting KiCad MPU6050 6 Axis Acceleration and Gyro Sensor Using the MPU-6050 sensor, I embarked on a project to simulate directional movements. Initially, I discovered the necessity to filter the raw data provided by the sensor to enhance accuracy and reliability in the simulations.
Week 10: Machine Building
Machine Building Group Assigment Page “This week marks the Machine Building week at Aalto’s Fabacademy, where I’m participating remotely. Venturing from Istanbul to Aalto for two weeks, this period offered me a unique opportunity to immerse myself in hands-on experience and collaborative work under the guidance of our mentor, Kris, alongside my incredibly talented group mates. Our time in Aalto’s lab was not just educational; it was filled with moments of fun and incredible learning.
Week 9: Output Devices
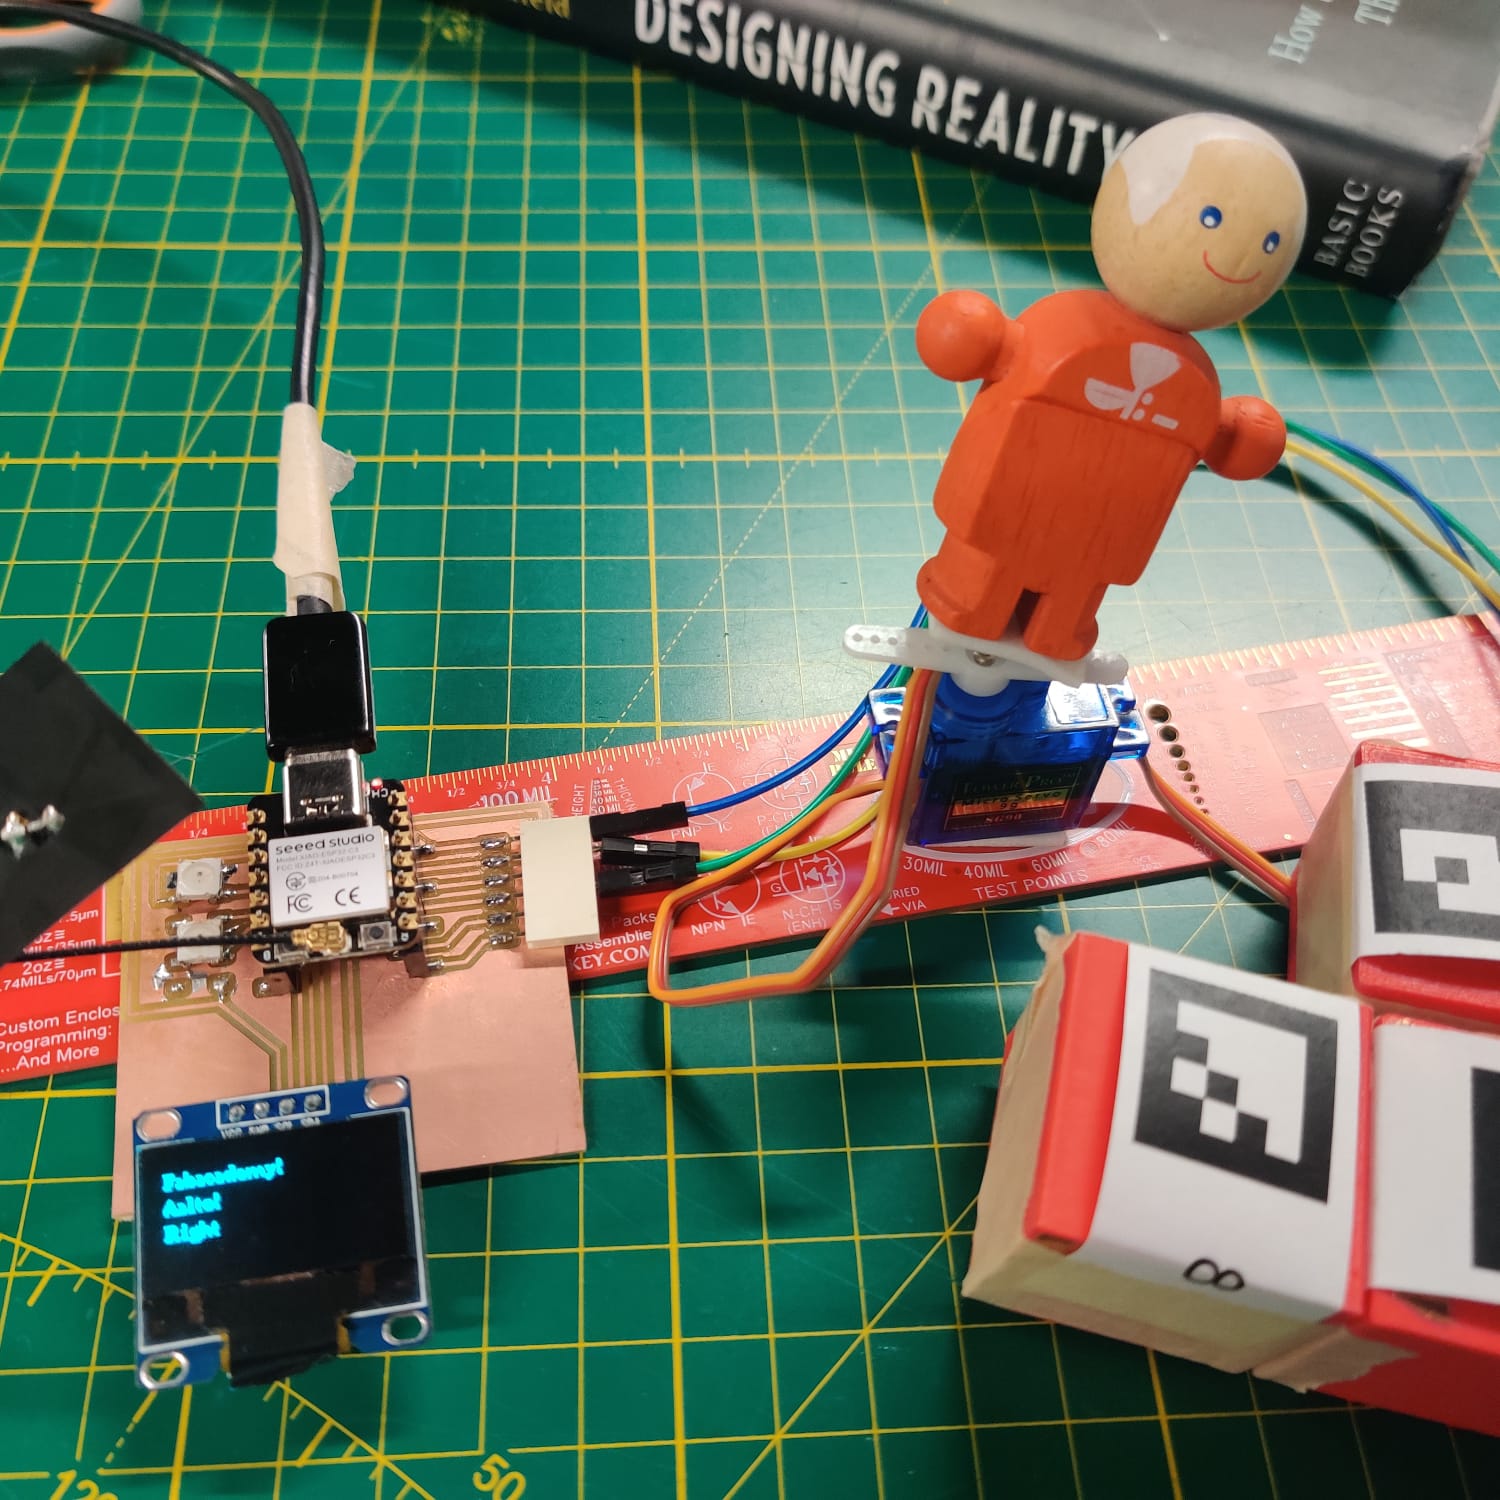
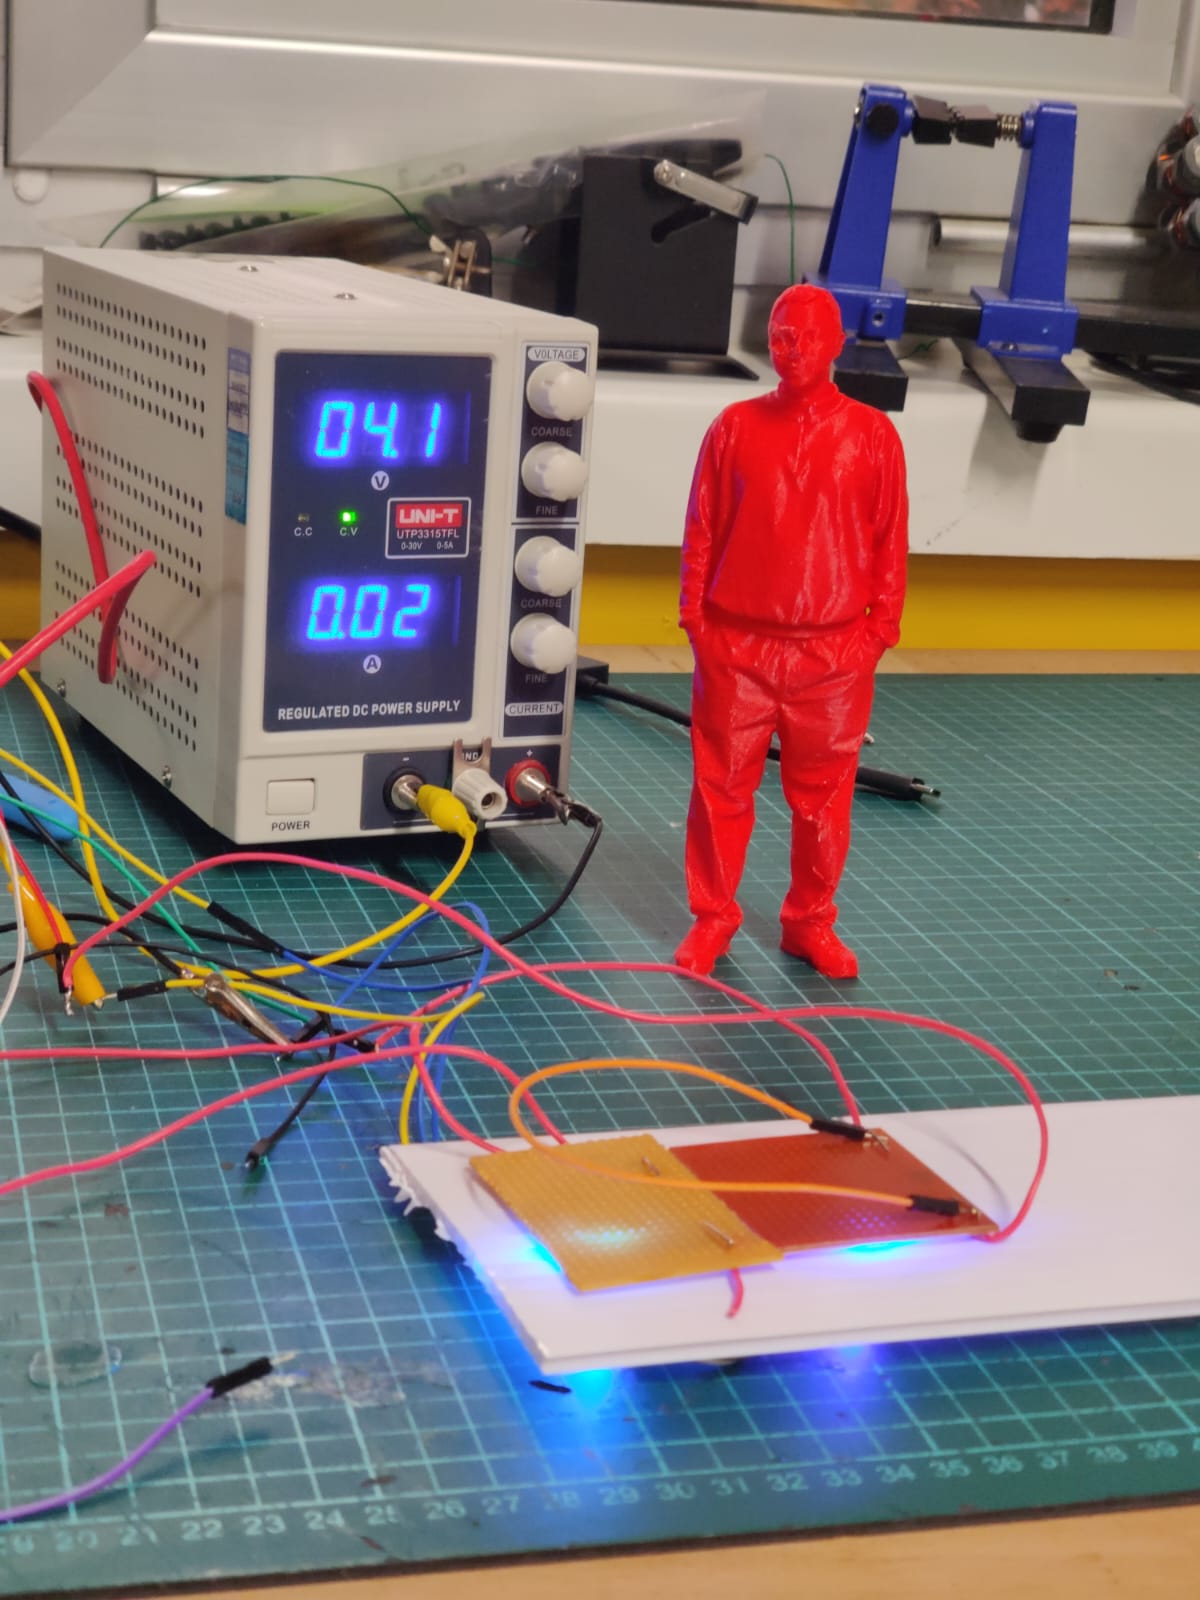
Output Devices The objective of this project was twofold: to gain hands-on experience with various output devices and to test the PCB designs embedded within the ToGO cubes as part of my final project. I explored the use of RGB LEDs, servo motors, and displays as output devices, integrating them into my designs to understand their functionality and application better.
Group Assigment Page group assignment link 🚀
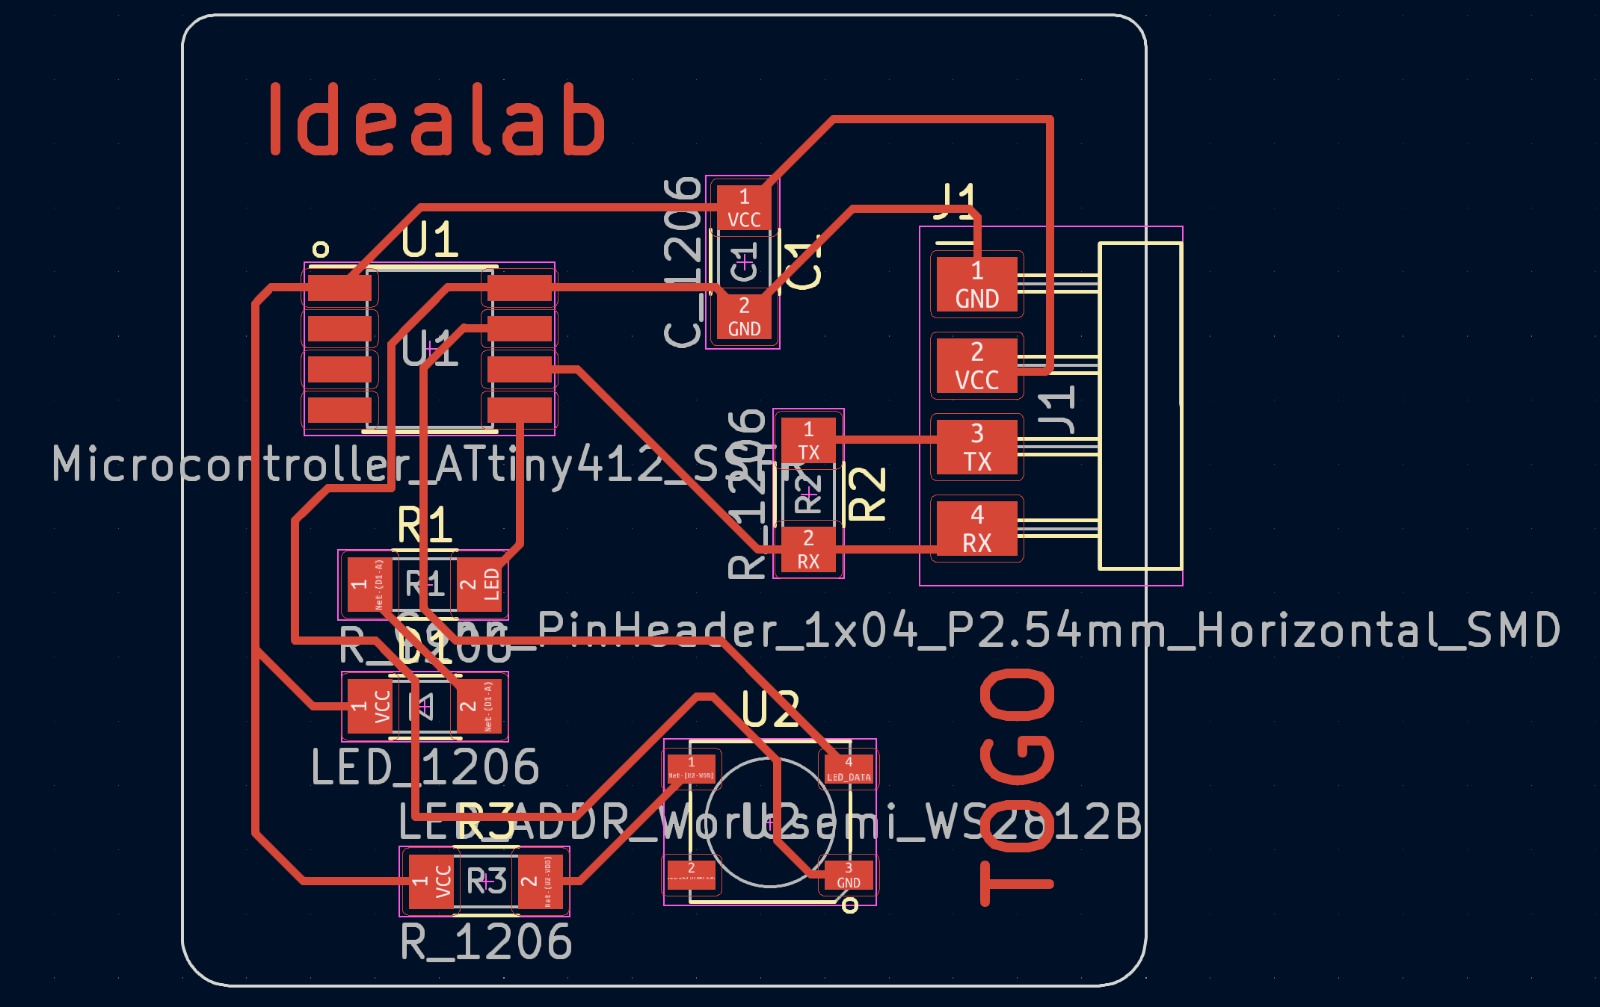
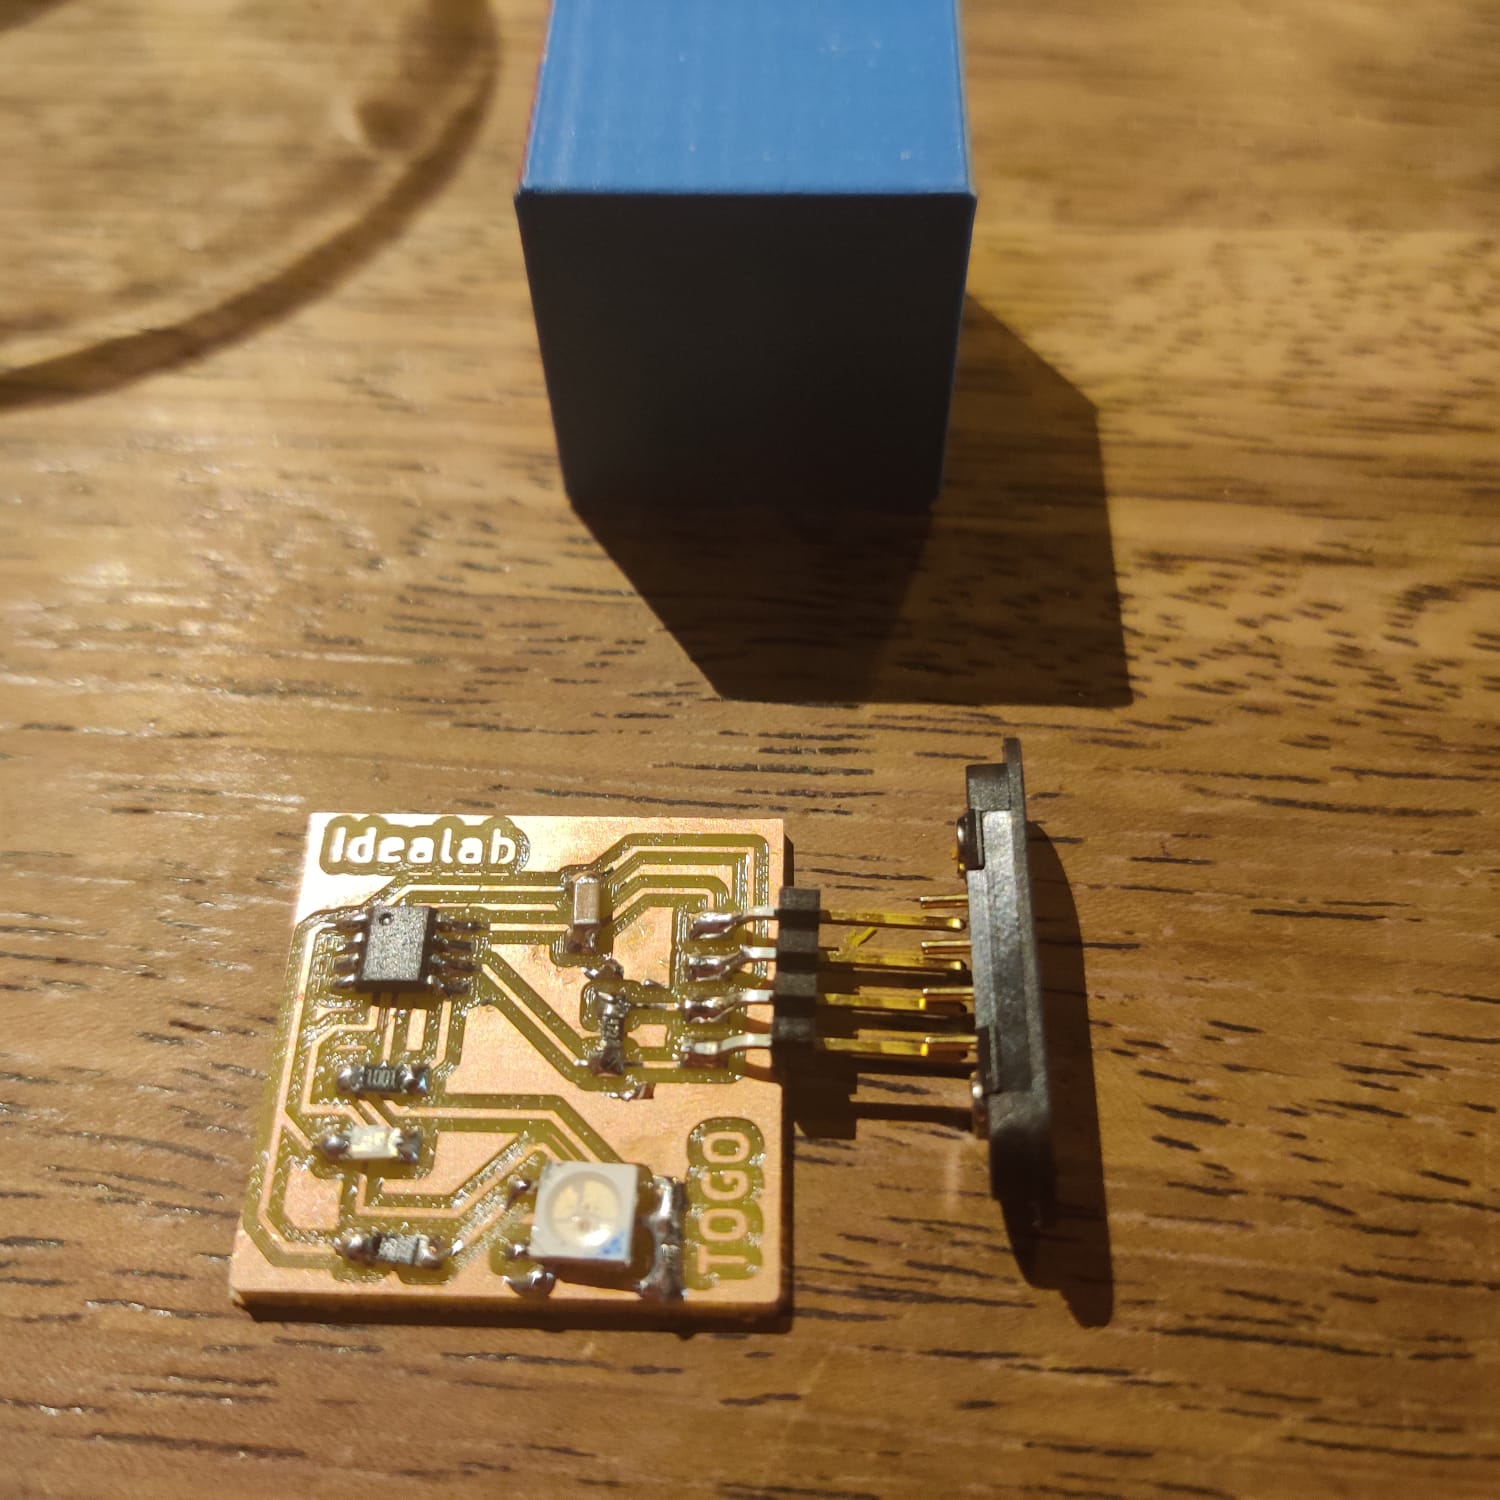
Welcoming KiCad into Output Design For the ToGoV1 project, I planned the integration of 2 WS2812B RGB LEDs, a 1X04 pin socket for the display, and a 1X06 pin socket output from which I intended to experiment with a servo motor.
Week 8: Electronics Design
Electronic Design This week was dedicated to electronics design, focusing on components, circuits, and designing with KiCad. I can divide the explanation into two stages. First, for my ToGo project, I attempted to develop a prototype in KiCad that would allow RGB LEDs to light up inside each cube, thanks to the ATTiny412 microcontroller. The second stage involved my opportunity to be at Aalto. As a remote student, I’m affiliated with this location.
Week 7: Computer Controlled Machine
Computer Controlled Machine This week passed with design, milling, and assembly activities. I designed a Cricut table and created this design in Fusion 360. I had the opportunity to experiment with different speeds and cutting tools, test various materials, and learn about the operating principles of the CNC machine in a very lively environment.
Group Assigment Page This week’s group assignment
Cricut Desk My project was designed to meet the needs of the Idealab Fablab and to develop our own ecosystem.
Week 6: Embedded Programming
Embedded Programming This week, I had the opportunity to experiment with the RP2040 and Attiny 412. The most significant aspects of this experience were reading Datasheets and understanding the basics of assembly programming, communication protocols between electronic components, and gaining hands-on experience with microprocessors.
Group Assigment Page This week’s group assignment
Programming with Attiny 412 This week, I conducted experiments using the Attiny 412. This provided an opportunity to delve into reading Datasheets and grasp the fundamentals of assembly programming, communication protocols between electronic components, and experience with microprocessors.
Week 5: 3D Scanning and Printing
This week, I delved into the workings of 3D Scanning and tested my designs through 3D Printing. I specifically observed the printing results for designs with angles beyond 45 degrees. When it comes to 3D scanning, it’s crucial to be aware of certain tips and tricks. I conducted tests in three stages, experimenting with different filaments, and the 3D printing processes on Creality and Bamboo printers. I also gained practical insights into troubleshooting and repairing printers during printing failures.
Week 4: Electronics Production
This week at Fab Academy, we focused on the precision of electronics production, particularly utilizing the Roland MonoFab SRM-20 for PCB milling, soldering, and understanding PCB design.
Group Assignment Page In our group assignment, we explored the effective use of the Roland MonoFab SRM-20 and documented key considerations.
This week was incredibly fun. Adjusting the SRM-20 and achieving a smooth PCB print required significant effort. I discovered a 0.4mm tilt in the plate using calipers, but eventually, I succeeded in printing correctly after numerous tests.
Week 3: Computer Controlled Cutting
This week at Fab Academy was all about mastering the precision of computer-controlled cutting. I dived into the realm of parametric designs and explored the capabilities of different cutting tools, from the meticulous laser cutter at our local Fab Lab to the versatile vinyl cutters.
Group Assigment Page This week’s group assignment covers kerf values, power, speed, frequency through various tests with Epilog. Burak and Sara did it in the Aalto and I tried remote.
Week 2:ComputerAidedDesign
3D Design OnShape for ToGO prototyping In the quest to create an engaging and prototype for the ToGO , I turned to Onshape for its CAD capabilities. I tried onshape’s features like Sketch, Extrude, Fillet, Chamfer, and Assembly, I was able to bring the ToGO cubes to life with precision and creativity. With Onshape’s Extrude function, the two-dimensional sketches transformed into three-dimensional reality. The Fillet and Chamfer tools added the necessary aesthetics and ergonomics to the cubes.

Week 1: Project Management
Git, Github, HTML,CSS, Framework, Template, Markdawn, more failure time .)
Fail: Hugo and Gitology – A Race Against Time Adventure! Fail hours : +15 Fail commits: 29 This week, I dived into Hugo and immediately realized how important time management is in our 20-week Fab Academy journey. Starting out, editing the Hugo template seemed easy, but as I got into it, I faced some challenges. Transferring what worked well locally to Fab Cloud took longer than I expected.