13. Networking and communications
Group assignment for this week:
- Send a message between two projects
The documentation of group assignment can be found on our group work page.
In group work, we used my and Petra's boards to do the group assignment for the week. Neither of us were familiar with the topic, so luckily we got a tip from another group about Software Serial tutorial we could try out. A good thing to remember is to download the code to both boards and to power them both from own power sources. It was a great feeling when we succeeded in the group assignment, which was not the easiest task for us, as we are both such beginners in programming and electronics.
Individual assignment for this week:
- Design, build, and connect wired or wireless node(s) with network or bus addresses
Connecting wired nodes
This week it seemed to highlight the fact that my understanding of programming is only just at the very beginning and so far I have managed to understand simple code, but now all the terms seem strange and I feel blinded by the code. And it's no wonder, I haven't had much time to learn much about programming, but I'm interested in learning it. In a better time, I'm sure I'll learn more.
I guess these are still basic stuff, if you know how to code even a little bit, but for me the help of the instructor has been invaluable, thanks for that. Programming is not very fast when you have to check almost every line with a "dictionary". By the way, Arduino Reference works well as a dictionary.
For the individual assignment, the instructions were that a combination of nodes had to be used, of which at least one had to be designed and fabricated by you. Petra and I decided to lend each other our boards. The boards were designed in week 6 and made in week 8.
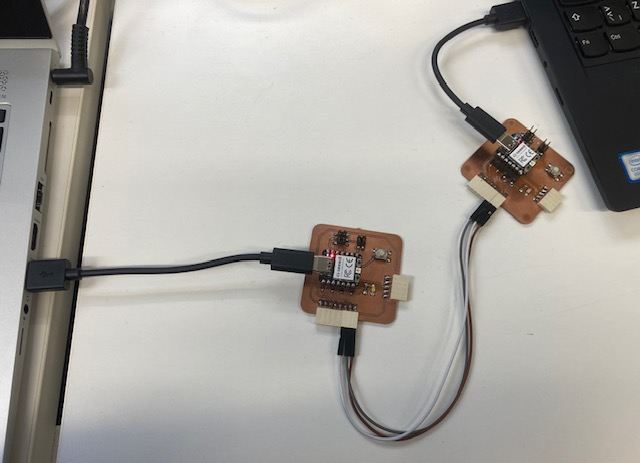
As I learned from the group work, I cross-connected the Rx and Tx pins of the boards. I also connected the Grounds with a jump wire. Both boards were powered from the computers using USB cables. The setup is in the picture below.
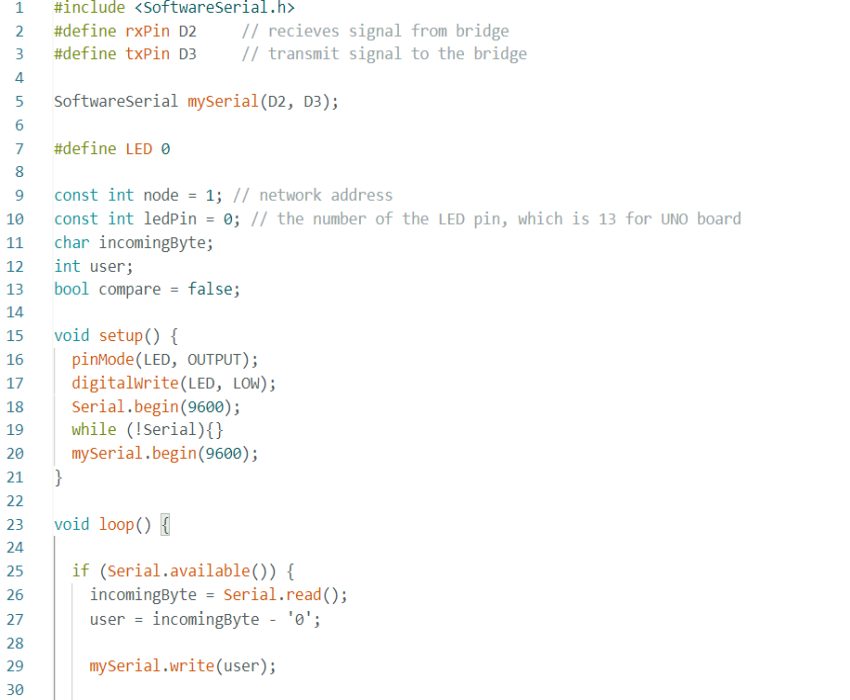
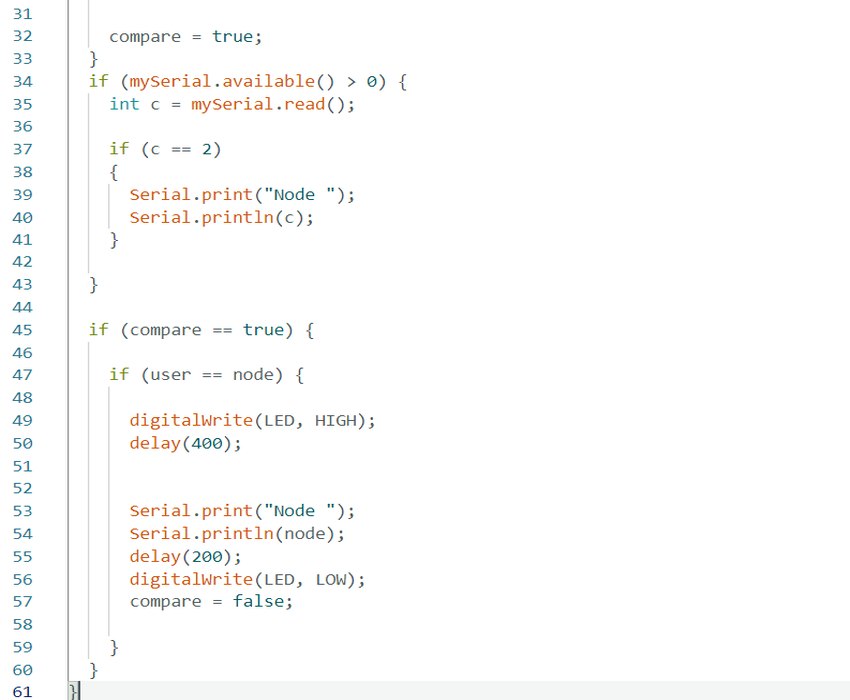
Our instructor gave us example codes that we could use for this assignment. So I copied first the host code into the Arduino IDE and in the code I defined the D2 pin as Rx and the D3 pin as Tx. I used my board as a host and uploaded the code to the board. The full code is shown in the pictures below and can be downloaded at the bottom of the page.
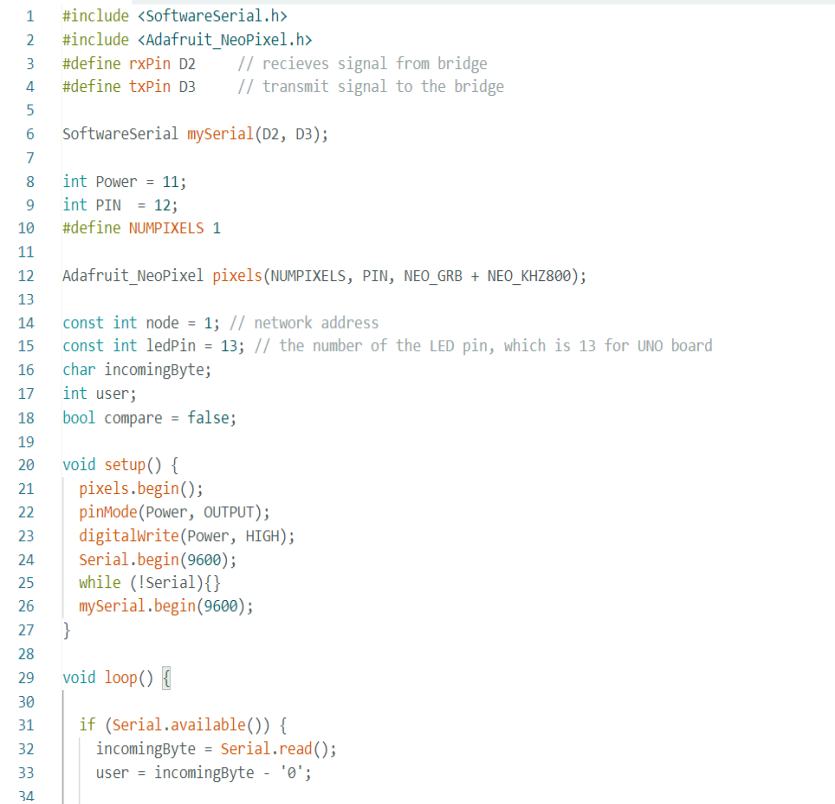
|
|
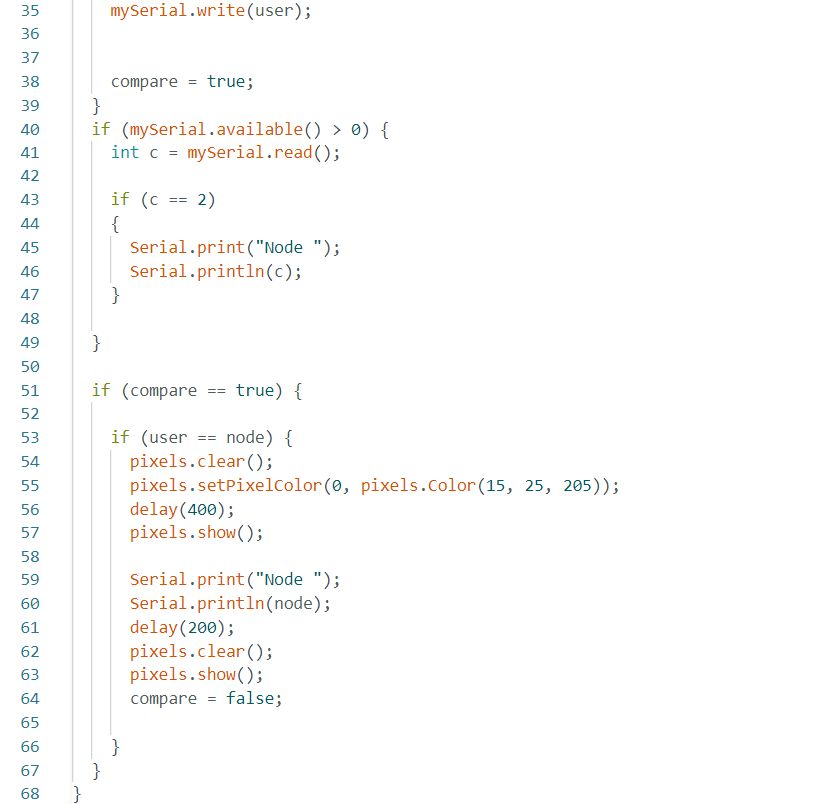
Next, I copied the code for node and uploaded it to the other board. The full code is shown in the pictures below and can be downloaded at the bottom of the page.
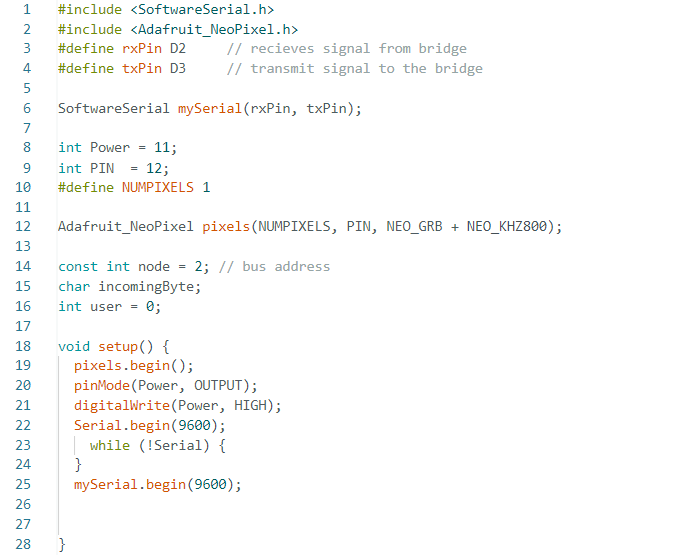
|
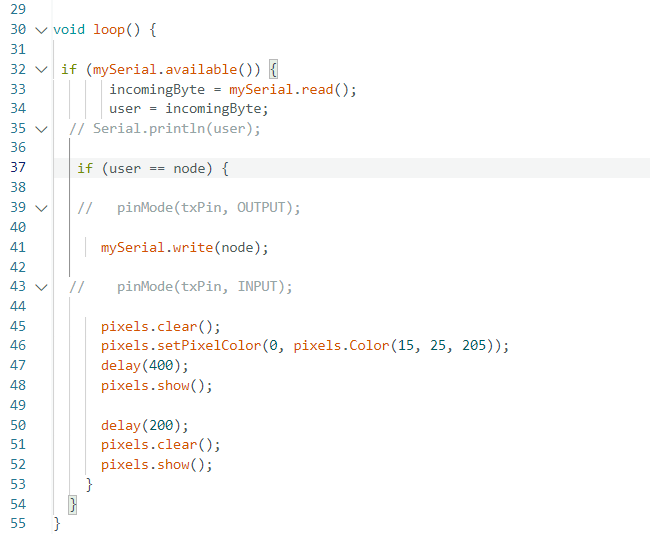
|
When I sent message "1" in serial monitor, the reply was Node 1 and the RGB LED on my board flashed. When I sent message "2", the reply was Node 2 and the RGB LED on Petra's board flashed. Video below.
When Petra first tested this task, for some reason Node 2 did not respond at first, but suddenly started responding. There shouldn't have been a problem with the codes once the instructor had got them working. Both also got enough power. So in the beginning there might have been some small connection problems. But after a bit of wondering and waiting, it started to work. Yay!
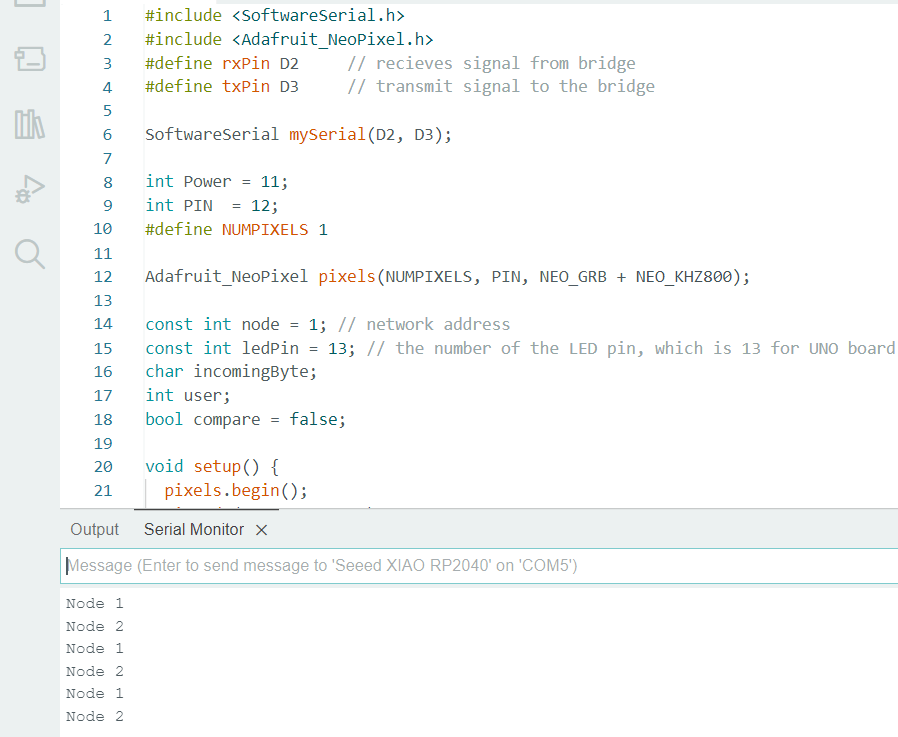
The picture below shows the responses of Node 1 and Node 2 on the serial monitor when I alternately sent the "1" and "2" messages.
Petra and I decided to challenge ourselves a bit more and we wanted to modify the given code so that the external LEDs on our boards would flash. One of us edited the host code and the other the node code. And together we thought about what should be changed and what should be removed. At least everything related to the RGB LED had to be removed.
The external LED was on pin D0, so we defined the LED on pin D0. In the void setup() we set the LED as OUTPUT and assigned it to LOW, so that it would be off at the beginning. For the void loop() to flash the LED, we looked at tips from previous weeks. The full host code is below and can be downloaded at the bottom of the page. In the picture below left, line 10 still has "which is 13 for UNO board" by mistake, but this has been removed from the download code.
|
|
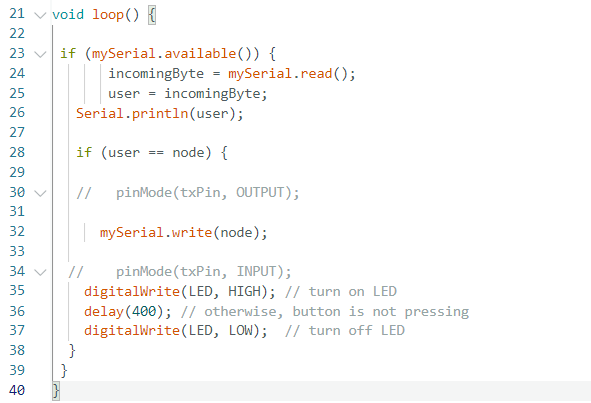
The full node code is below and can be downloaded at the bottom of the page. In the picture below right, line 36 still has "otherwise, button is not pressing" by mistake, but this has been removed from the download code.

|
|
We got the codes working and now in response my board was flashing an external white LED and Petra's board was flashing an external green LED. We did it! The result can be seen in the video below.
Download RGB LED Host code .txt file
Download RGB LED Node code .txt file