10. Mechanical design & machine design
Group assignment for this week:
- Design a machine that includes mechanism + actuation + automation + application
- Build the mechanical parts and operate it manually
- Actuate and automate your machine
The documentation of group assignment can be found on our group work page.
Our top team consisted of Petra Rutanen, Tapio Lappalainen and myself. Check out their individual contribution on their websites! Tapio wrote the code and he had the best understanding of how to build such a gripper. Petra also used Fusion to design important parts for Teppo and made a great presentation slide.
Our group work went really well, we succeeded together with both laughter and a little struggle! We could divide tasks well, both independently and when working together. We also did a lot of group work together, as it was easier to test the parts together and make conclusions for further work.
Individual assignment for this week:
- Document your individual contribution
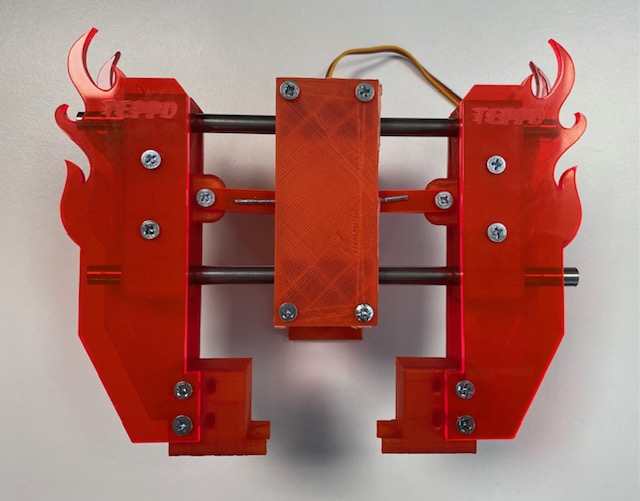
Our machine: Teppo the Gripper
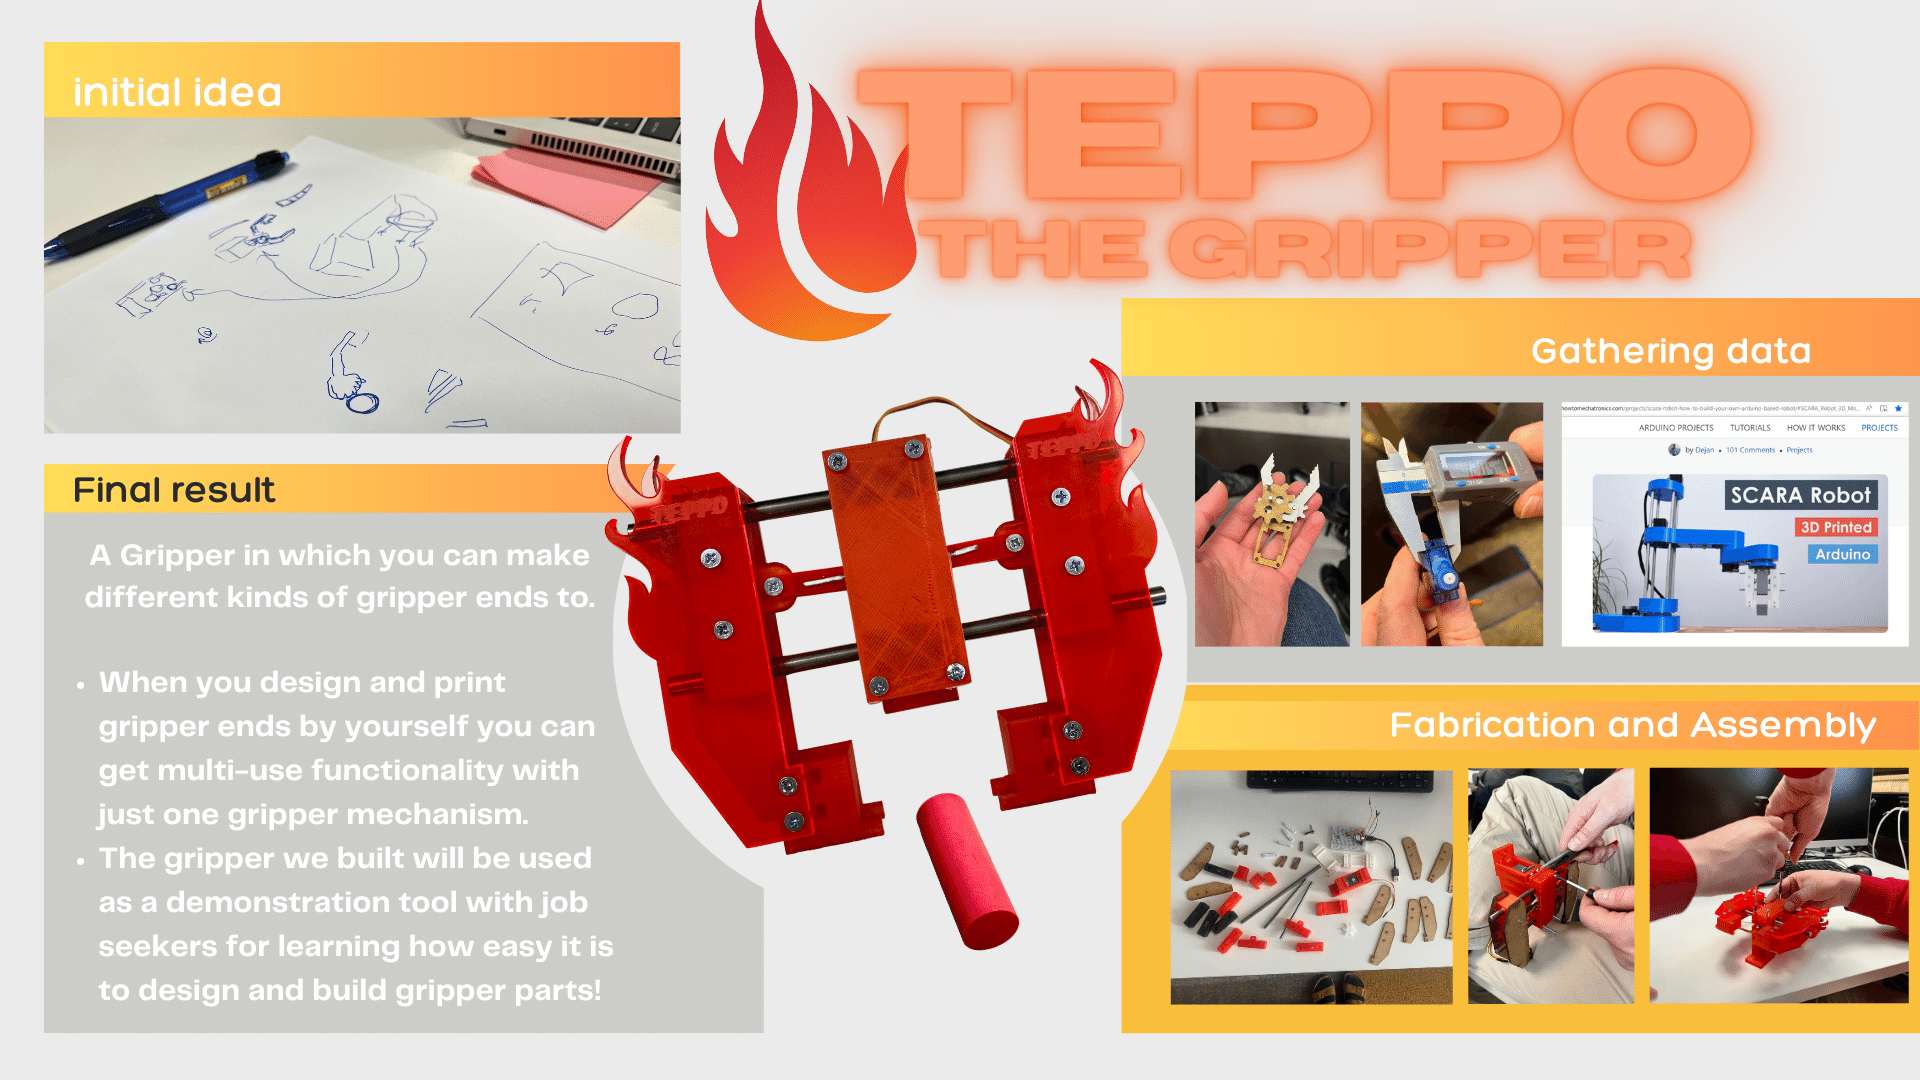
Our group work idea came from Tapio, who noticed that some kind of gripper could be useful for BusinessAsema's new project next autumn. One aim of the new project would be to give possibilites for job seekers to learn how to design and fabricate their own gripper parts, especially the end parts. For that purpose, we thought it would be good to make a prototype of a gripper.
Tapio already had some knowledge of grippers, but escpecially me and Petra wanted to see some examples of grippers to understand the mechanisms needed. We did some research on the internet and tried one small linear gripper at first. Then we continued researching and found interesting Arduino based Scara robot. We used this as one of the starting points when we started to design parts for our own gripper.
Individual contribution
My individual contributions to this machine project were:
- Mechanism slider 3D design and printing
- Casing for the servo / Gripper body 3D design and printing
- Participation in the assembly of Teppo
- The flame effects on Teppo's hands
- Presentation video
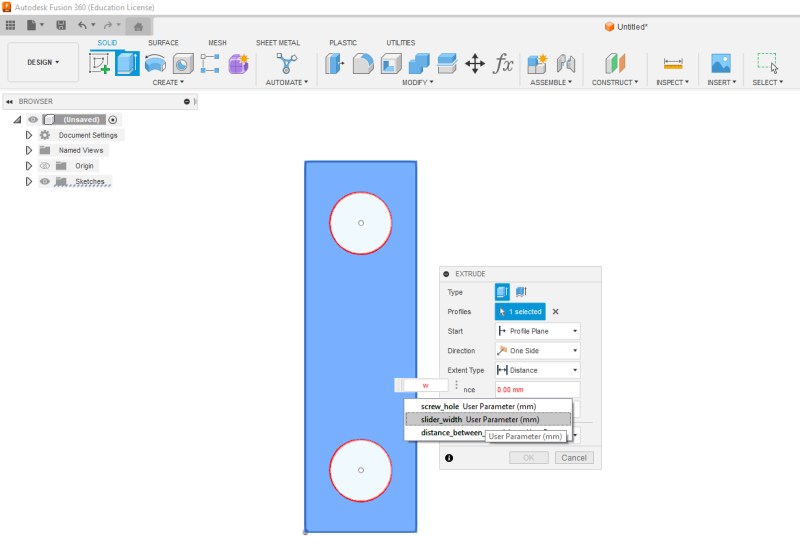
Mechanism slider 3D design and printing
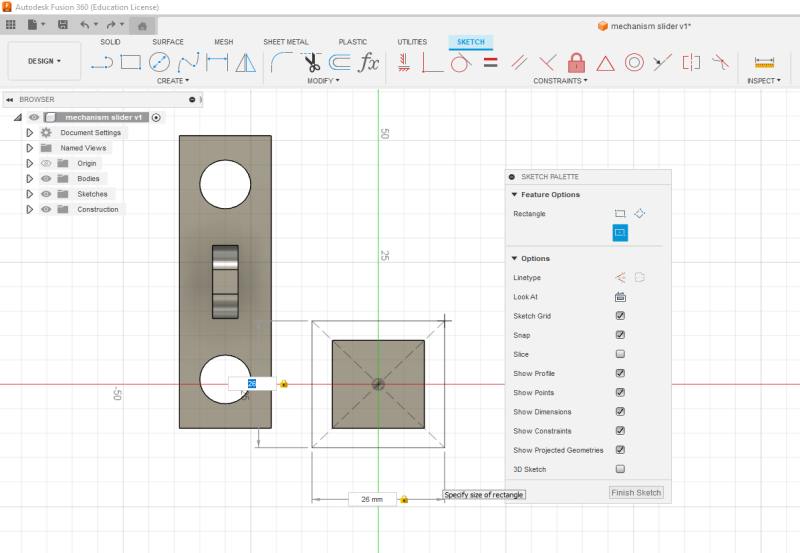
For the mechanism slider I first set up the paremeters, so it was easier to change the dimensions later. I created a 2-points rectangle sketch with two circle sketches for the steel rods inside. Then I exruded the sketch. Picrure below left.
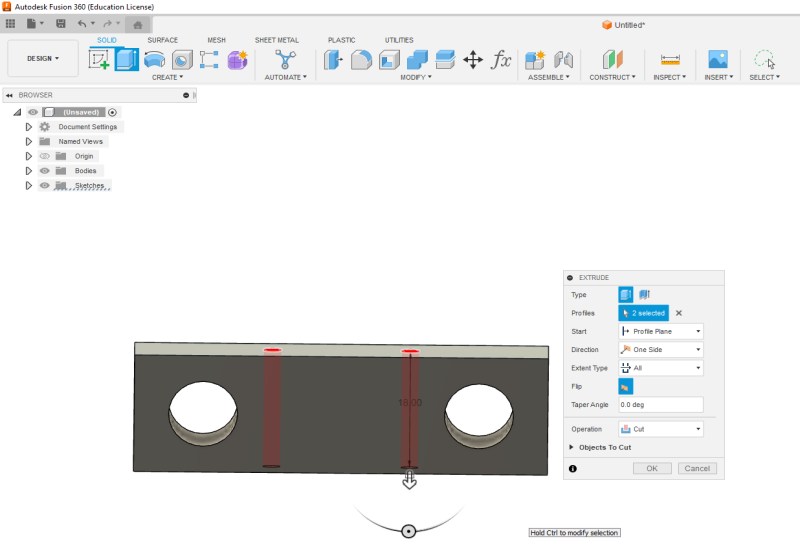
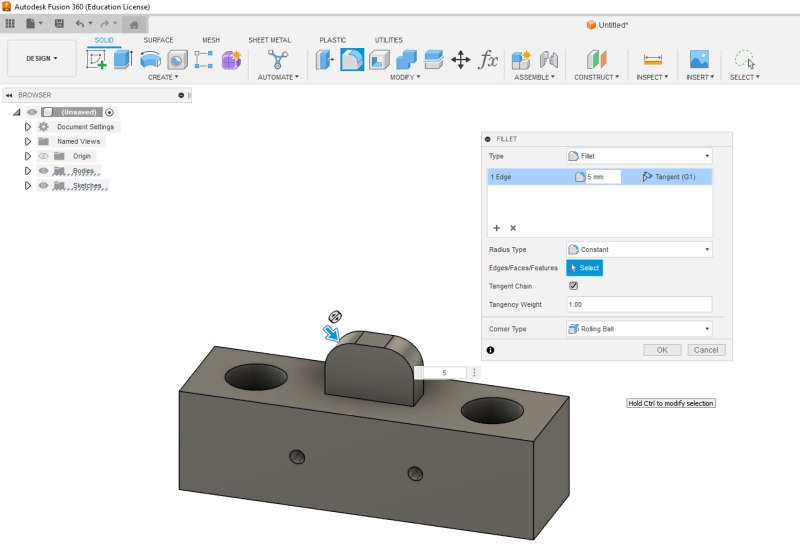
Next I created circle sketches on one of the faces and cut holes through the body. These were for the bolts. Picture below right.
|
|
I created an extra part into body for attaching the links. Picture below left.
I also started designing the ends of the gripper's hands but I didn't know at this stage how Petra had designed the hands so I didn't design them completely. And when we met for the first assembling, Petra had also designed the ends, so we used her design. But I'll still describe in a few words and pictures how I started to designing the ends.
I created a 2-points rectangle sketch and extruded it. Next, I created an offset plane that I could use to build the other half of the end. Picture below right.
|

|
I created a 2-points rectangle sketch into the offset plane. The sketch was some millimeters wider than the other half of the end. Picture below left.
Then I finished the end with the Loft tool. Picture below right.
|
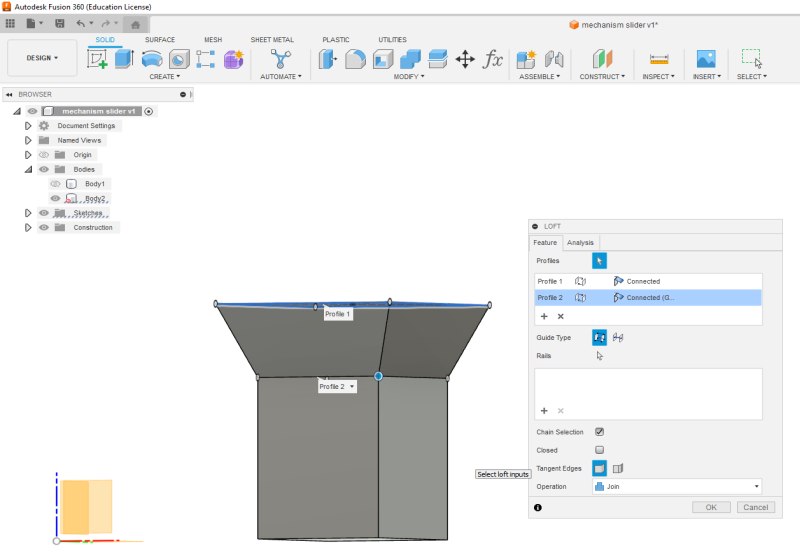
|
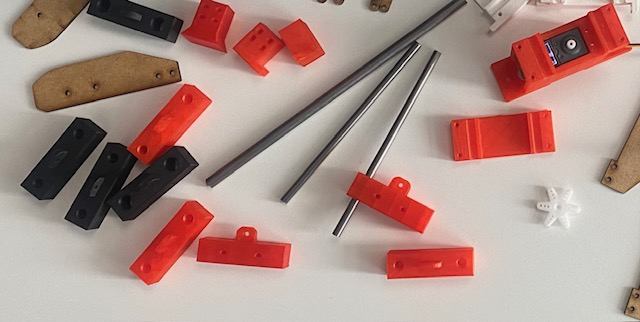
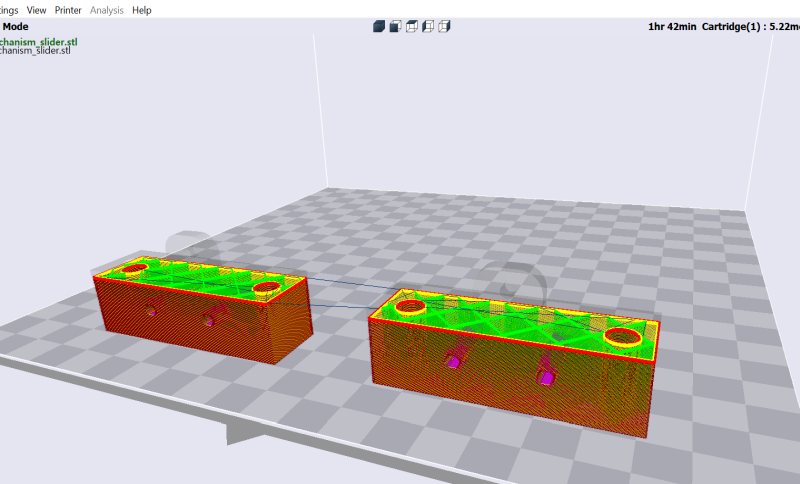
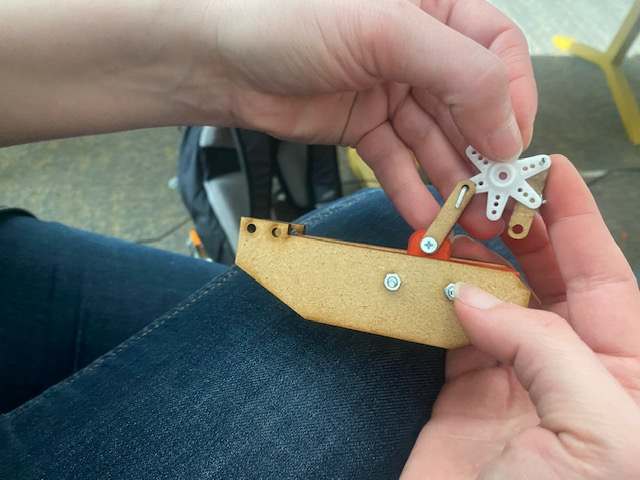
After the test assemblies, I changed the spacing between steel rod holes and also the diameter of the holes, because we decided to use lighter 6 mm steel rod. I printed a total of four different versions because of these changes. In the picture below you can see the parts I printed and also some other parts of the gripper.
I used Sindoh Wox dp201 3D printer and 3DWOX slicer to print the mechanism slider parts. The filament was PLA and I used printer's default settings. I only set infill to 10% for the first test, but also used the same infill later, because parts felt strong enough with this infill. Printing two sliders always took about 2 hours. Picture below.
Download mechanism slider F3D file
Download mechanism slider STL file
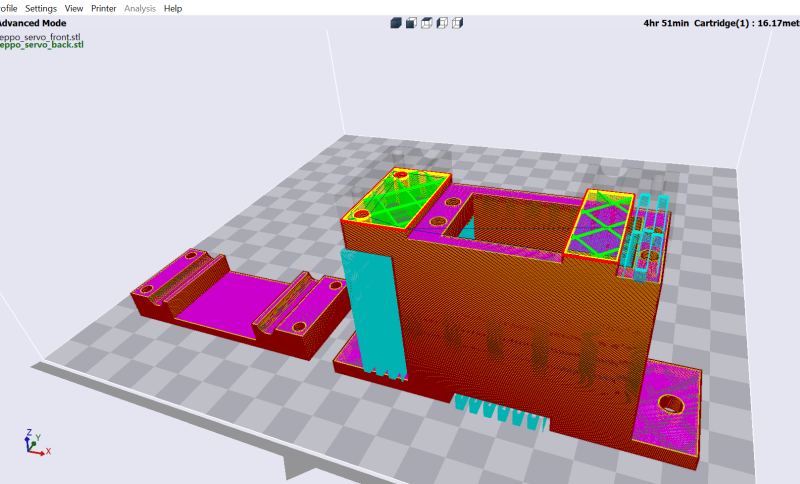
Casing for the servo / Gripper body 3D design and printing
In the video below you can see how I created the front and back pieces of the gripper body. To do this, I took measurements of the servo and created rectangle and circle sketches, that I either extureded or cut out.
I also used Sindoh Wox dp201 3D printer and 3DWOX slicer to print the gripper body parts. The filament was PLA and I used printer's default settings. I set infill to 10 %. Printing took about 5 hours. Picture below.
Download Teppo's body F3D file
Download the back of the body STL file
Download the front of the body STL file
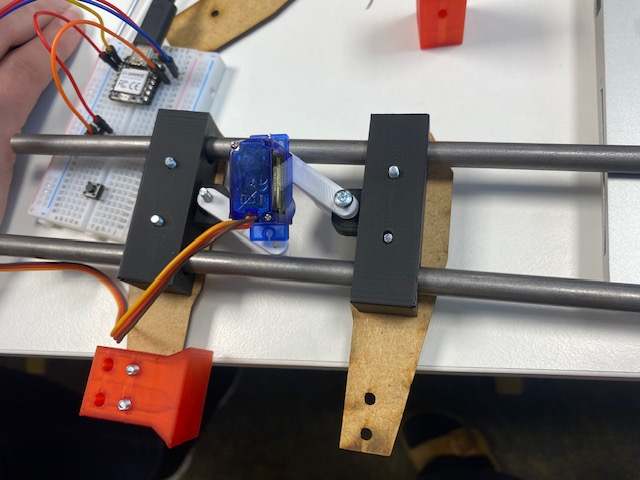
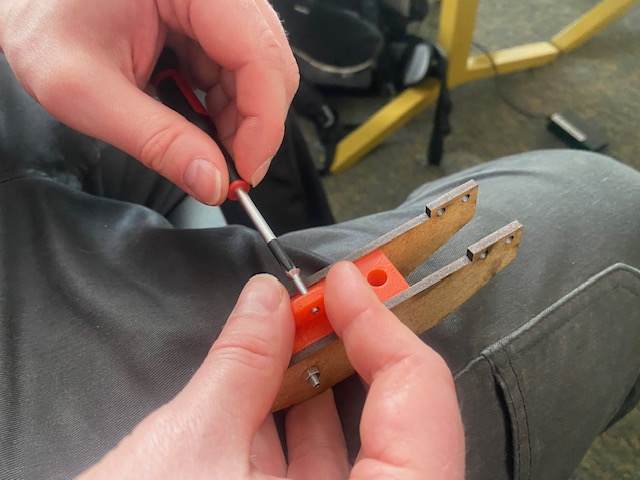
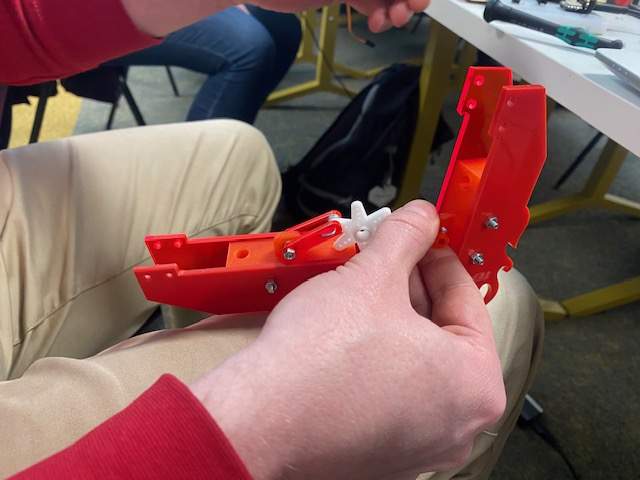
Participation in the assembly of Teppo
Together we did the assembly tests of the Teppo and also the final assembly. In turns we screwed and unscrewed the bolts. Below are a few moments from the first tests. It was really exciting to see how the parts worked in the assemblies. More information about the assemblies can be found on our group work page.
|
|
I was also in the role of photographer at many moments, so even thought you can't see my hands in the pictures, I was also assembling. :D In the picture on the right below, you can also see the final parts being assembled. It was great to finish the look of Teppo with all the red/orange parts!
|
|
Teppo's flame effects
I think, if I remember right, that the flame effects was my idea and it came from the fiery colouring of the gripper parts. I think it was a joke at first, but isn't that how good ideas are born... sometimes... maybe...
Since I had this brilliant idea in the last hours of some evening, I didn't get to save any of the design steps. I found the flame image from Vecteezy website and started editing in Inkscape. I traced flame image into a vector, fill off/stroke paint on, edited it to the right position and size and finally made a union with Petra's original design. Picture below.
I also found a nice fire font from dafont website and wrote the name Teppo in the hands of the gripper.

Presentation video
I decided to make presentation video easily with iMovie, because I had taken a lot of pictures and I found it easier to create the video first on my phone because I had the pictures ready there. I made a simple presentation video that tells the story of making the wonderful Teppo. You can watch the presentation video on our group work page.