
a short description of the assignment for this week
to learn / to do
- Demonstrate workflows used in the chosen process
- Select and apply suitable materials and processes to do your assignment.
the process
group assignment
For the group assignment, we experimented with epoxy resin (SMOOTH-ON Tarbender) and different materials. Paola used burlap to create a frisbee. Ben used fiberglass in different ways. I experimented with cardboard and paper.
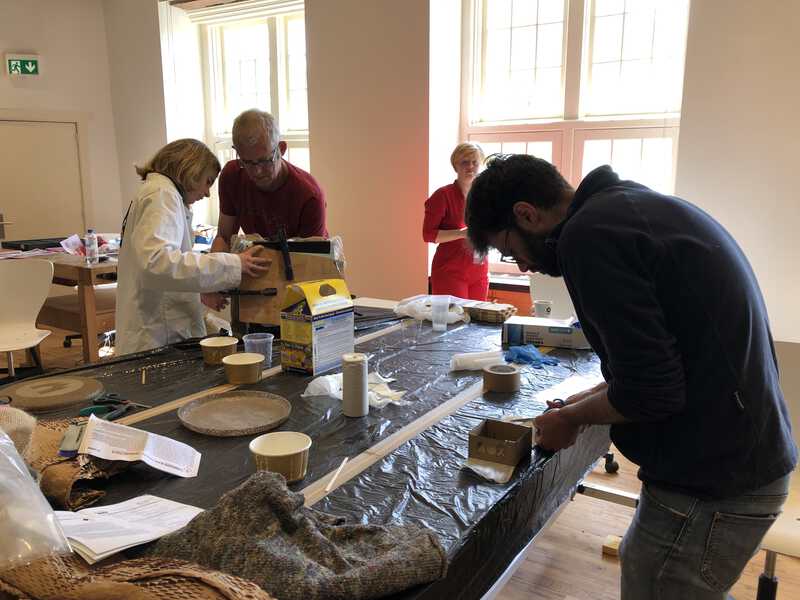
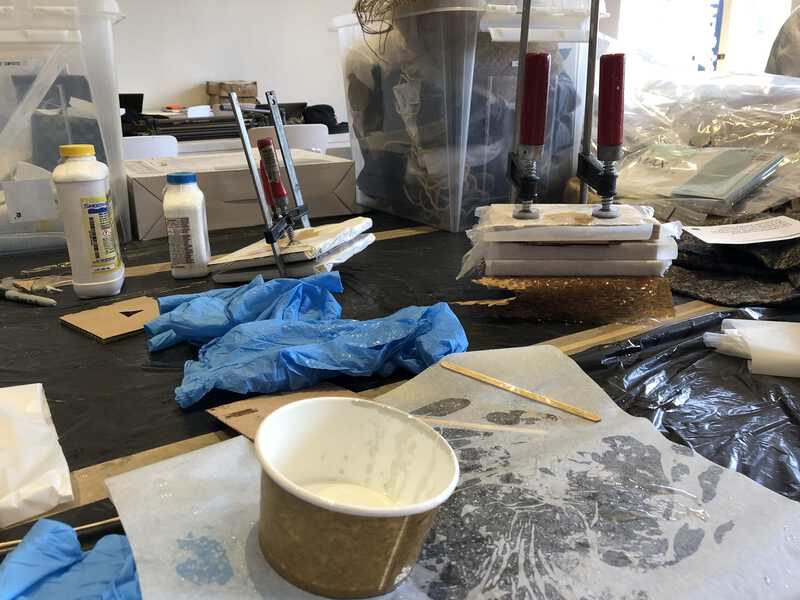
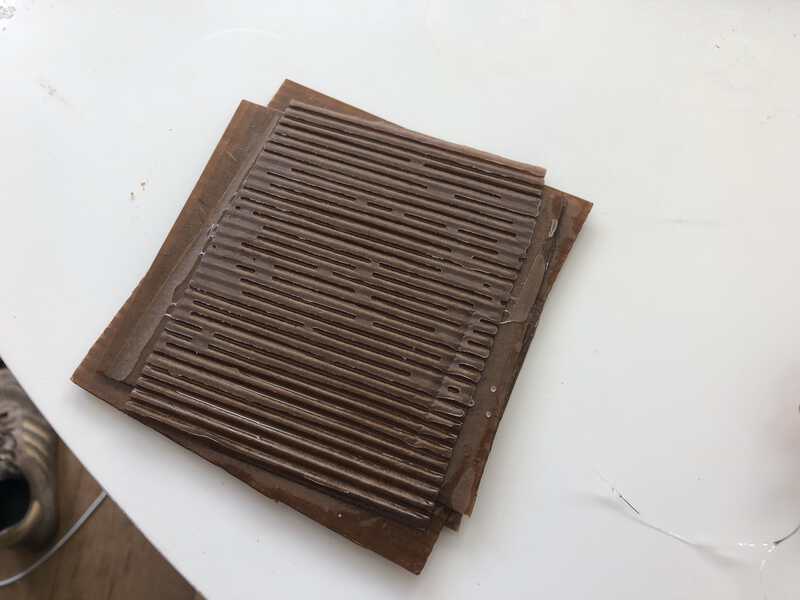
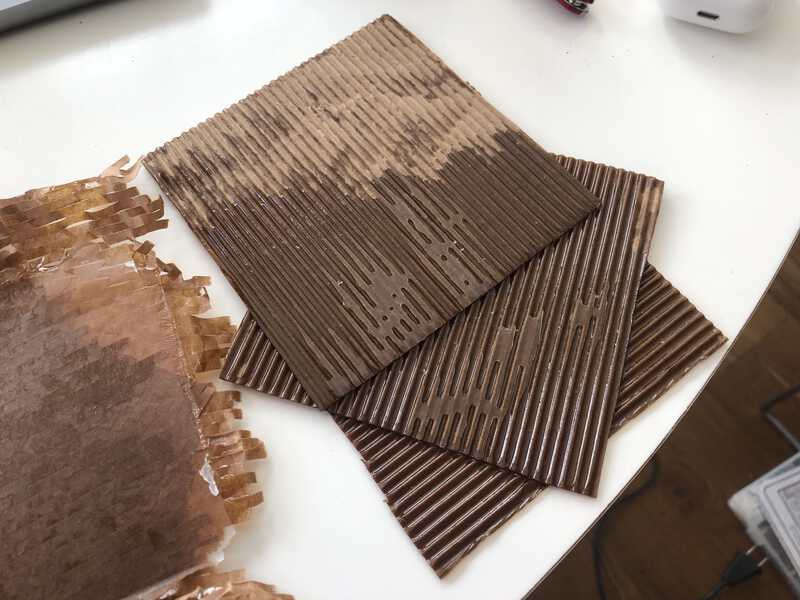
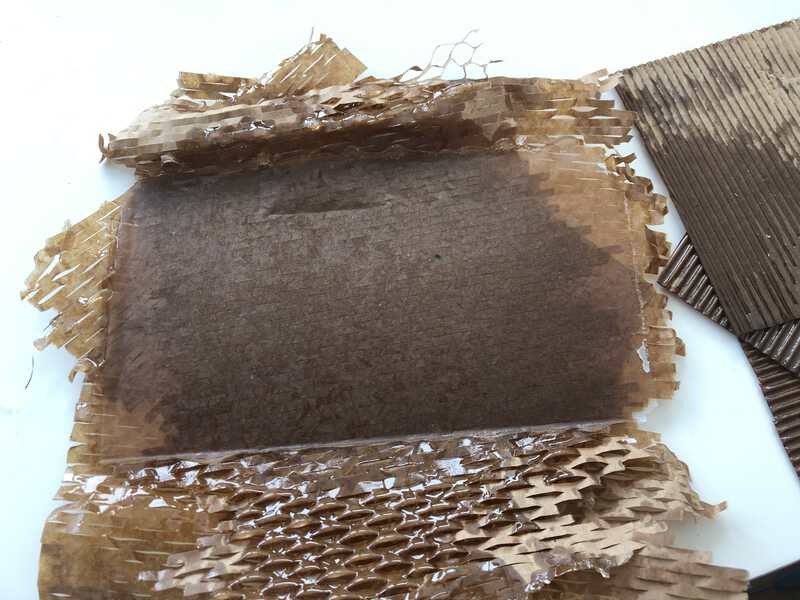
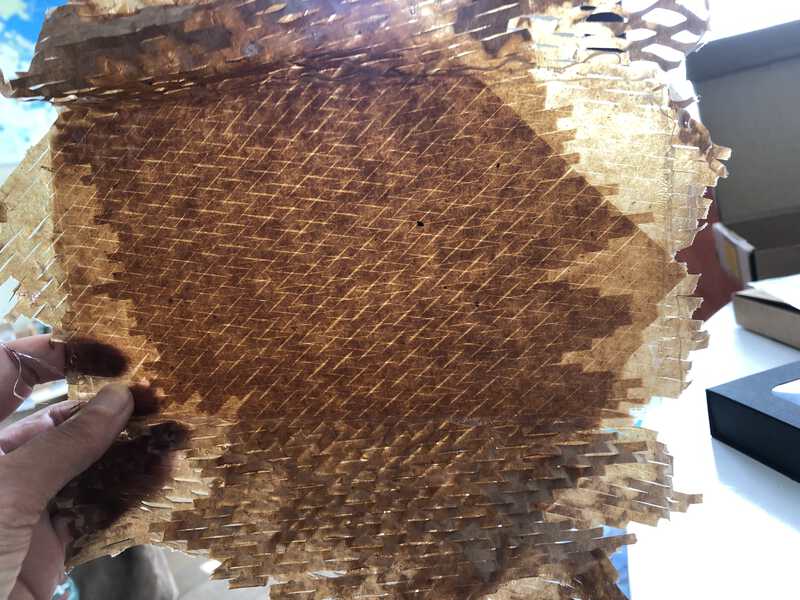
I used corrugated cardboard in 3 layers and put one version in a press. I left the other to dry without pressure. The pressed cardboar is slightly sturdier.
The paper I used was had a cut pattern in it, that gives a nice see through effect. Here I also used three layers. Because it is much thinner than the cardboard and also has no reinforcement, it stays flexible.
individual assignment
I want to use this assignment to create the clockface reservoir for my final project with epoxy and cloth or glassfiber.
Fusion
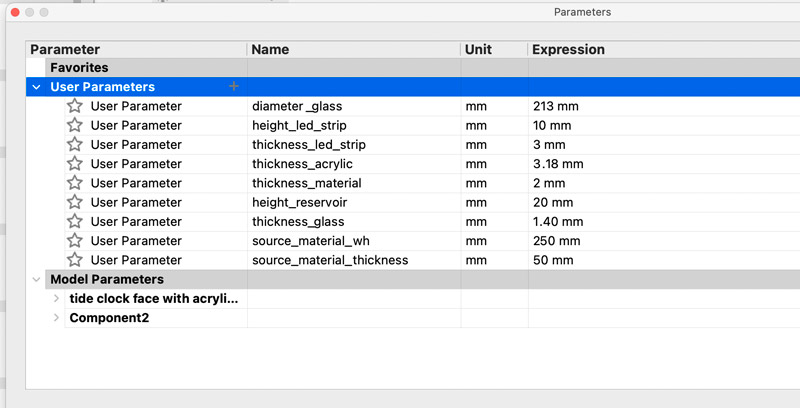
In Fusion, I start with creating the shape of the clockface reservoir. As starting point, I take the diameter of a clock that I bought, which is 23cm or 230mm. So I start with a circle in that size, that I extrude to the height that I want the reservoir to be. I calculated this height based on the width of the LED strip that I will use in the clockface (10mm), the thickness of an acryllic sheet that I will use to cover the LED strip (3.18mm), the thickness of the glass that I have (1.4mm) and ofcourse the height of the reservoir itself (20mm). For the thickness of the material itself, I use a value of 2mm. I create parameters for all these values in Fusion, so that I can easily change it later on.
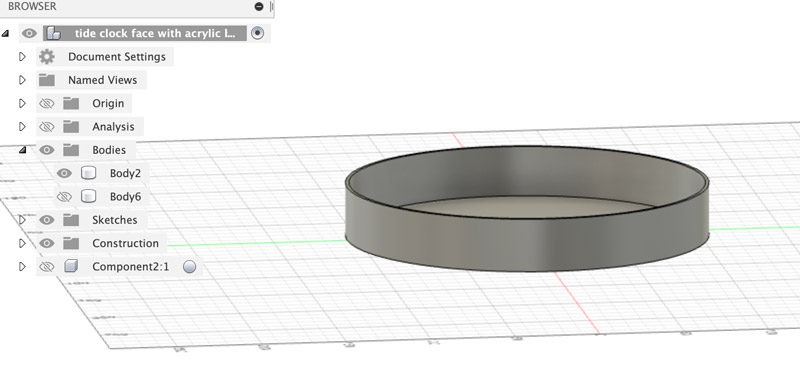
The shape is pretty simple, basically a cylinder with a base.
Next step is to draw the material around it, so I can subtract the reservoir shape from it. For that I draw a centered rectangle, and extrude it with the height that the material is going to be (50mm). In the image below you can see both bodies, I used the Section Analysis tool to get the cut away view.
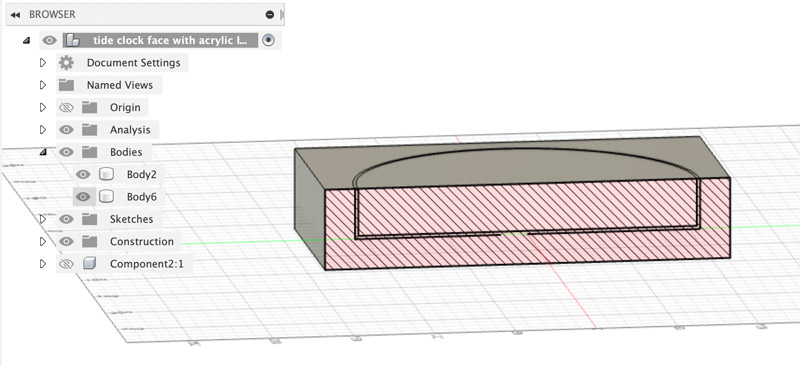
Then I used the Combine tool to cut the reservoir (tool) body out of the material (target) body. This results in two new bodies, that I call inner mold and outer mold.
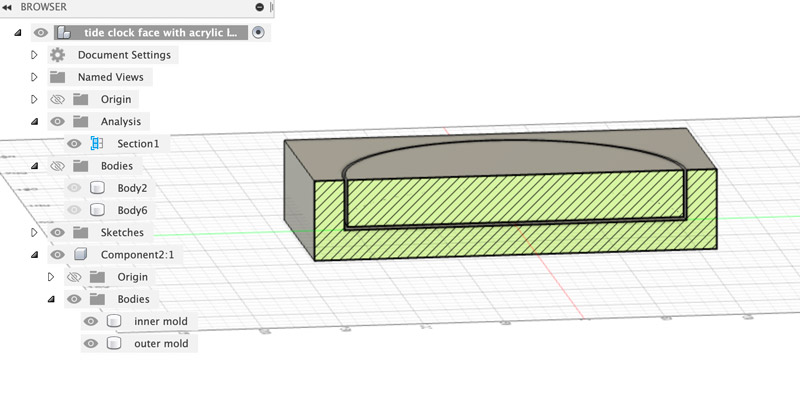
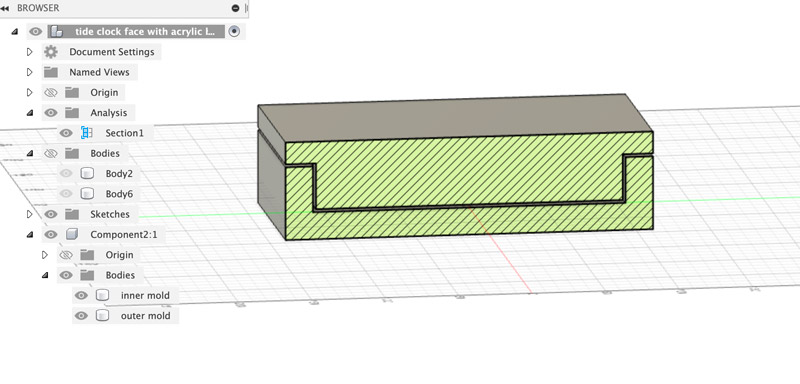
I extrude the inner mold a bit (to create some room for material so the inner mold can really be pressed down) and add some extra material to the top to make it easier to use in a press.
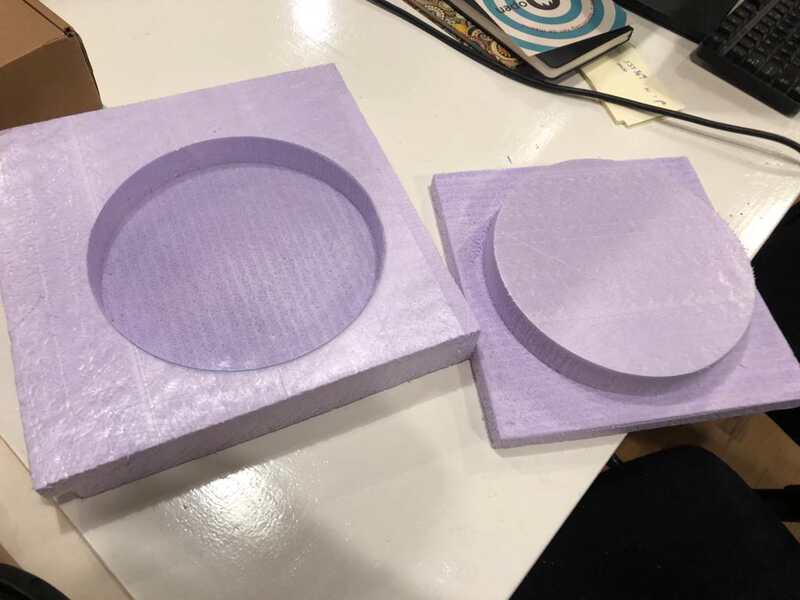
Then I rotate the inner mold so that it is next to the outer mold. I make sure the top of both molds is flush with the top of the material, to minimize the amount of clearing that the ShopBot has to do.
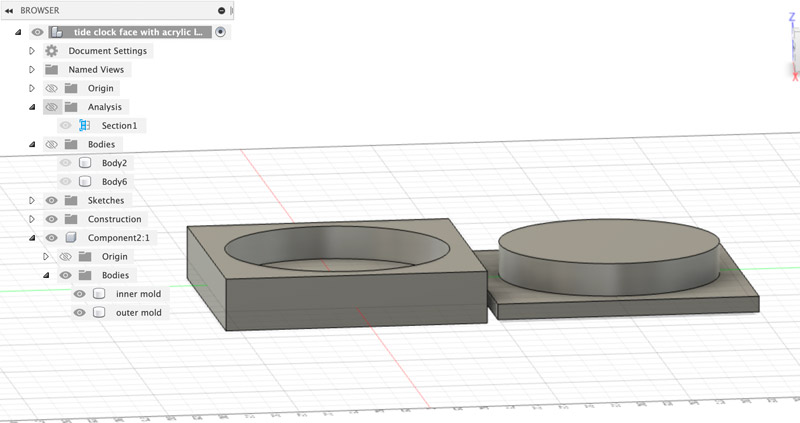
With the measure tool, I measure the total width of the molds (610mm) and the height (300mm) and export the design to .stl so I can import in in VCarve.
VCarve
In VCarve I setup the material with 300mm for the width and 610mm for the height.This is inversed from my Fusion360 design, because the ShopBot at Waag has reverse axes. I take the bottom left corner for XY datum position. For material I use a thickness of 50mm. Then I import the .stl that I exported from Fusion and press “Center Model” to center it nicely in the material.
I the proceed to setup the toolpaths. First the Rough Machining Toolpath. I use and endmill of 5mm for this, that I set to a feedrate and plunge rate of 70 mm/sec and a stepover of 80% (4mm). I leave the passdepth to 3mm, although in hindsight I could have set this probably to 5mm, since I will mill foam. I keep the roughing strategy to Z Level, Raster X and press calculate. The result is a toolpath that is estimated to take about one hour.
I then create the Finishing Machining Toolpath. I use the same 5mm flathead endmill for this. It will not give me supersmooth result, but I think it will be enough to use as a mold for epoxy with some glass fiber mat. For this toolpath I use a smaller stepover of 20% which comes down to 1mm. For both toolpaths I use a spindle speed of 10k RPM. I save both toolpaths and am ready for the ShopBot.
Going back and forth
I setup the machine and the job following my own “Handy Commands” ShopBot manual and start the job.
I takes a few ShopBot jobs (and Fusion designs with VCarve sessions) to get it all the way I want. Here is a list of the things that happened and how I fixed them:
a bit too short
Before installing the bit, I measure if the bit is long enough to get to the desired milling depth. It is.
After the rough job has finished I see dents and cuts where apparently the bit was just a little bit too short. I check Fusion and see that the depth is 28mm. I measure the depth of the pocket and see that it is 31.4 . Weird, 3mm to deep. I realise that I when I positioned the molds next to each other, I aligned them on the bottom. This gives a bigger cut depth to the “inner mold”, reason that the bit could not make it. I move the inner mold up up so they are aligned to the top.
shoddy finishing toolpath
After the rough cut finishes (now without dents) I start the finishing cut. This one takes a lot more time, and altough the surfaces get tuned up nicely, I see that the job does not do much good for the round sides of the mold, where the circle is. They get almost worse, and with more cuts. I let the job continue, hoping that I can tune it up later with some sanding. When I use VCarve later on, I see that the rough job does a profile step that the finishing job does not. The finishing job does not need it because of the small stepover and the small bit that is usually used. But I use a 5mm bit, that leaves a crude result without the profile step.
Final Shopbot run
Later on I realise that the mold I made is too small. So I have to redo both the design and the milling. Changing the design is easy, I made it parametric and so it is just a matter of changing one value (the diameter of the circle).
I export the new design and load it into VCarve. Learned from the first job, there are some things that I change:
- I set the profile step on the roughing toolpath to last.
This will smooth out the dents that were made from the rastering that the mill does to remove the material - I do not create a finishing toolpath because this does not have the profile option and will leave the dents.
Normally a finishing toolpath is done with a much smaller bit, leaving a finer result. But I use a 5mm bit and so the finishing toolpath only makes things worse. - I set the allowance on the roughing toolpath to 0 so it will remove all the material needed and does not leave some for the finishing toolpath
- I set the roughing toolpath to raster over the Y axis. This way, the millhead will move from left to right over the bridge to clear the material. This is much quieter (and more steady) than over the X axis, where the whole bridge will have to move.
After exporting the toolpath, I once again go to the Shopbot and start the job.
After a good hour I have finally my final milled molds and I am ready for creating the actual reservoir.
Epoxy and glassfiber
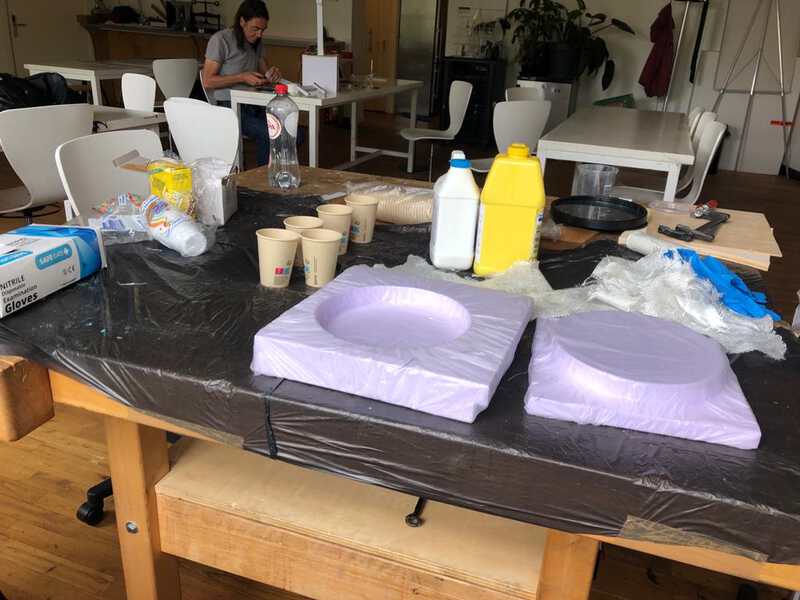
The next day I prepare everything for casting with epoxy resin and glassfiber mat. I take the neccessary precautions and wear a mask and gloves. Since there is only one measuring cup left, and I want to keep it clean, I use it to measure water that I pour into disposable cups. In the disposable cups I draw a lttle line so that I know how much resin component to pour in each cup before mixing. Then I make sure they are completely dry.
 everything ready
The epoxy resin that I use is Tarbender, and it consists of two parts in separate bottles: A and B, where B is the harder. For mixing, one needs to te take two of A (in volume) and one of B and stir it for a good 2 minutes. I want to have 210ml of resin, so I need 140ml of part A and 70ml of part B.
I use the 2 cups to measure both parts and pour both into a little tray. There I stir for two minutes and then the casting can begin.
As per the note I wrote to myself (it is in Dutch and says not to forget to cover the mold before use) I take some thin plastic bags and cover the molds so I can reuse them again.
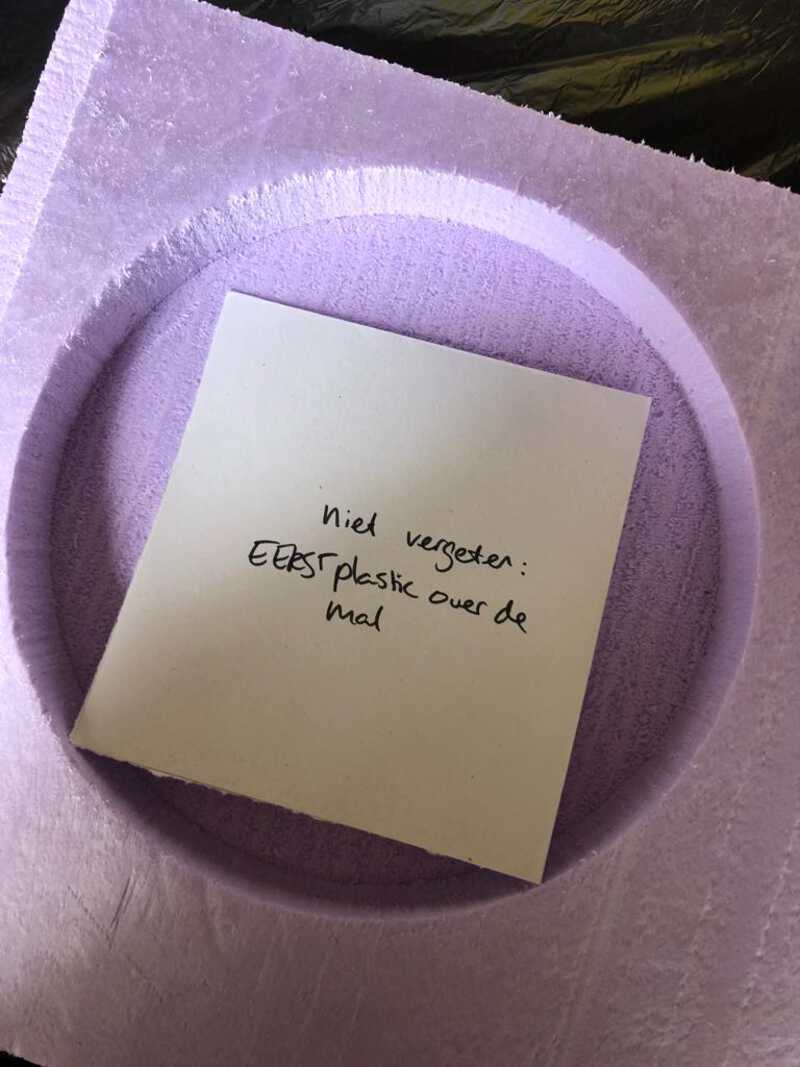 note to self
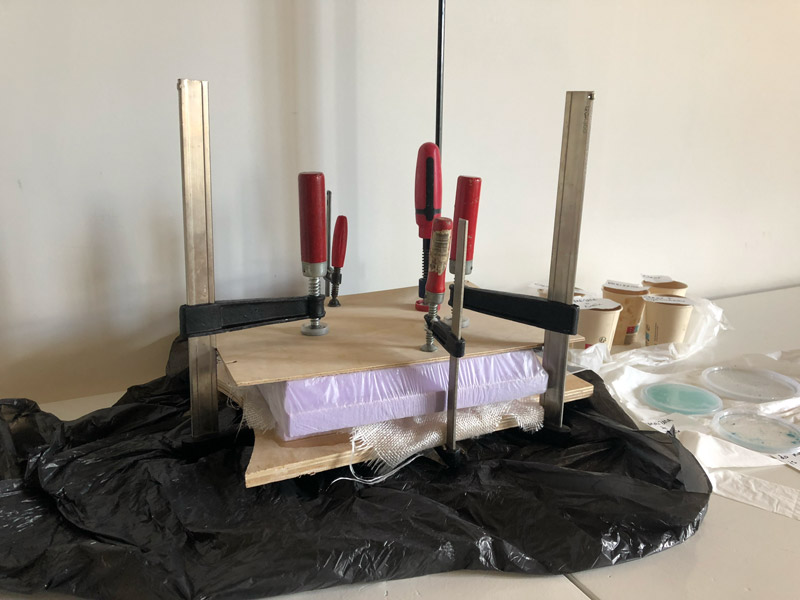
Then I place some glassfiber cloth on the inner mold and pour resin on it that I spread out with a plastic kind of spatula that I made for this purpose. I try to get the resin to stick to the sides as well. When I have covered the mold with the first layer, I add a second layer that I place diagonally to the first layer so there will be fiber in all directions. I again add resin to all surfaces and proceed to add the third layer. This layer consist of small pieces of glassfiber cloth, as I am using some leftovers. Again some epoxy and then it is time to press the outer mold over the inner. I need to press firmly because there is space for just 2mm of material between the molds. To keep the pressure going I add two wooden planks around the molds and use 5 clamps to clamp everything down. Then I set it aside to cure for a good 16 hours.
Unboxing
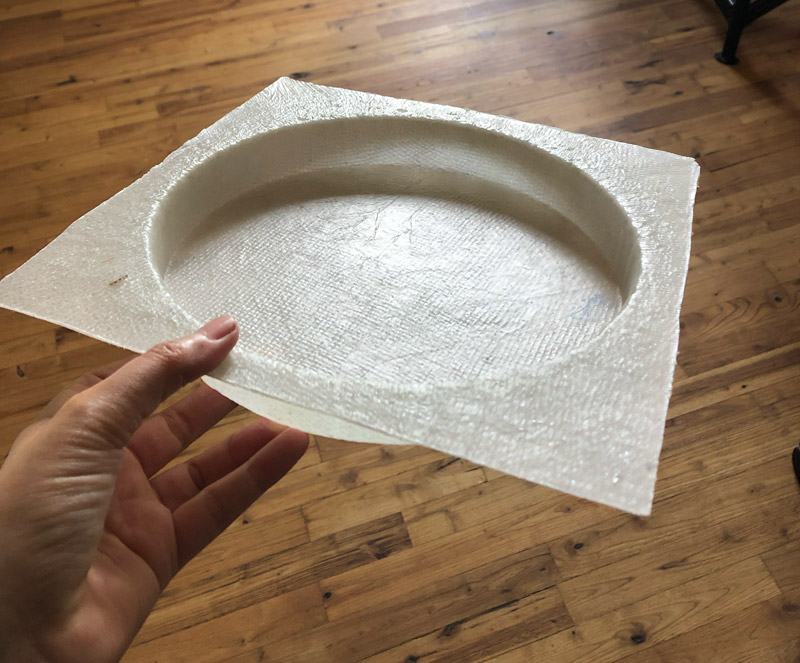
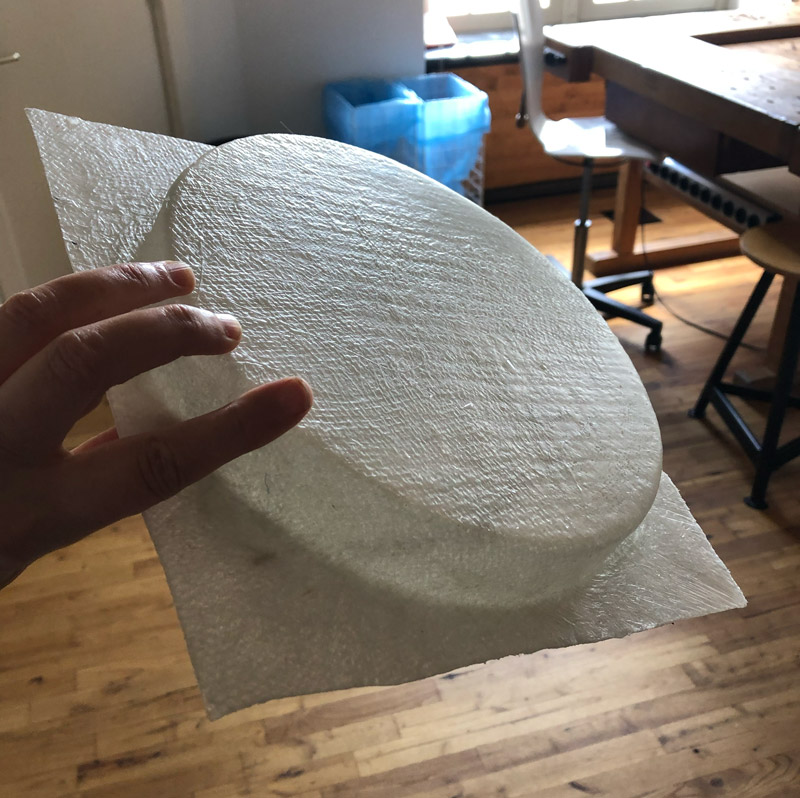
I had no idea what to expect when I returned the next day and got the clamps off. I had to use a bit of force to get the molds of. But all the hassle proved to be not in vain. In my hands I had a perfectly cast sturdy and professional looking glassfiber epoxy resin clockface container.
looking back
It was a long ride, that lasted more than a week. Working with the Shopbot takes a lot of time, and so does iterating through a design with it. Setting up the machine, waiting until it is finished, you should definately not be in a rush. Using epoxy also takes time. The process is messy, you have to be careful. And here again, a long wait before you can see the final result. It was worth it though, I am very happy with the (very simple) container that came out of it and that I am going to use in my final project.
What I would do differently next time is probably not using fiberglass cloth anymore. There were some leftovers at Waag, and it seemed to fit the marine theme of my clock (you can make boats with epoxy and fiberglass after all). The result is studry and strong, but I wonder if it would have been strong enough with just cotton or canvas anyway. And post processing would have been easier anyway, as I now have to be very careful when I want to cut/saw or drill in the container that I made.