Week 1: Project Management

"Give me six hours to chop down a tree, and I will spend the first four sharpening the axe."
Abraham Lincoln
It could be a lesson to apply every week of the course. If you jump onto the first tool you find to build the webpage, or you frantically begin to type git commands on your terminal without knowing very well what you are doing, later you will spend more time fixing the bugs and desperate about what is happening. So, lesson learned, I have to invest more time learning the theory and the tutorials.
Making a webpage, hello html again
I have a large experience managing websites, but more from the point of view of a team manager than a programmer. My programming skills are a bit rusty, but I have spent many hours choosing the best tools in the market to build a digital framework for my company, and I am aware of how critical that decision is. So it was worth it to stop for a moment and think:
What do I need it for?
To generate a website in which I have to publish weekly of my advances and projects. Let's say it could be a blog type website.
What is the file format?
In order to work properly in GitLab it has to be a static website, without a Database behind.
Requirements?
I have to edit it weekly, and the time spent on it has to be the minimum possible, so a CMS-like interface is welcome. Also has to be able to be eficient in terms of size of the generated files.
What options did I have?
-direct html+CSS editing:
good to learn more, not to long term weekly editing, specially if the website grows.
-CMS + static generators:
E.g. Wordpress+Gatsby. You could use just Wordpress as a CMS and later Gatsby will convert it to a static web. The cons are that you have to install both on your PC and it's not so easy to do it.
-Static website generators:
Specially since Google is rewarding ligth and fast websites, the static webcontent generators are becoming more and more popular. Some examples:
-Hugo
All of them are great tools, but no so easy to install and use, specially for non-software people.
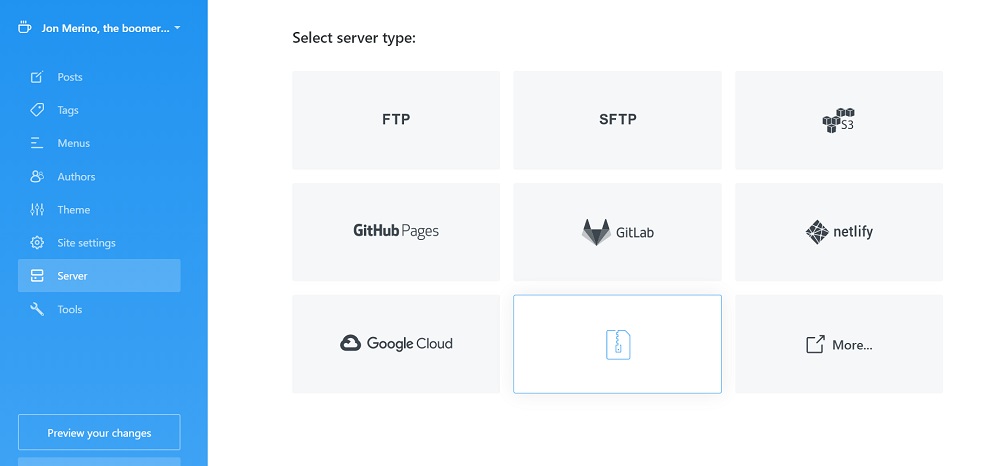
So I finally found Publii, a static blog generator really ease to use and install. Immediately I realize it was exactly what I was looking for, perfect for my needs.
Before using Publii, the first thing I did was to edit the html/CSS of some templates, remembering html again and testing if it worked at low level html editing. Once tested, i switch to Publii to build my website. In case anyone wants to use it, just some tips:
In server menu, select "manual deployment" as the server type
In Ouput directory you have to write the repository you are going to use in git:
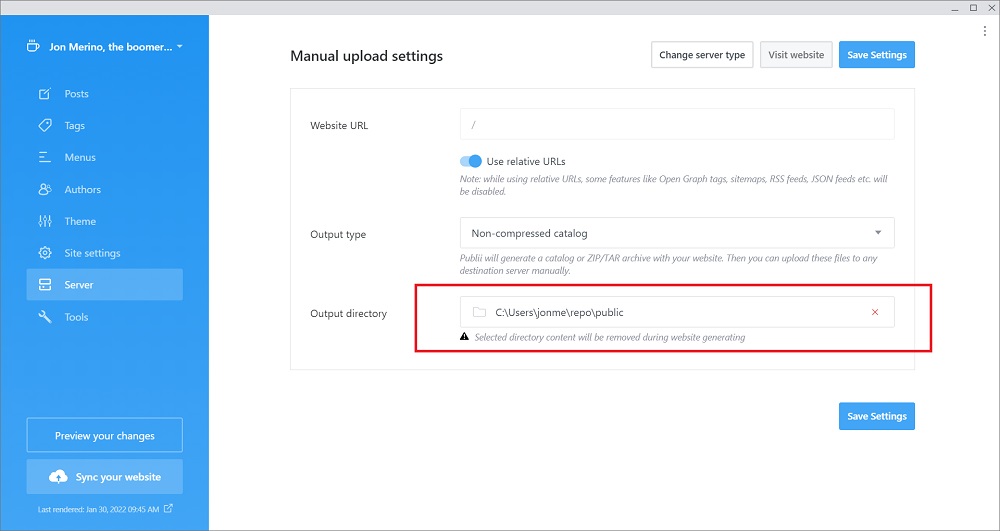
Let's have a look at the html files created by Publii:

To change themes, go to the upper right menu on the Themes page, and drag and drop the theme file on "Change application theme". In marketplace.getpublii.com you can find lots of them, including 10 free themes.

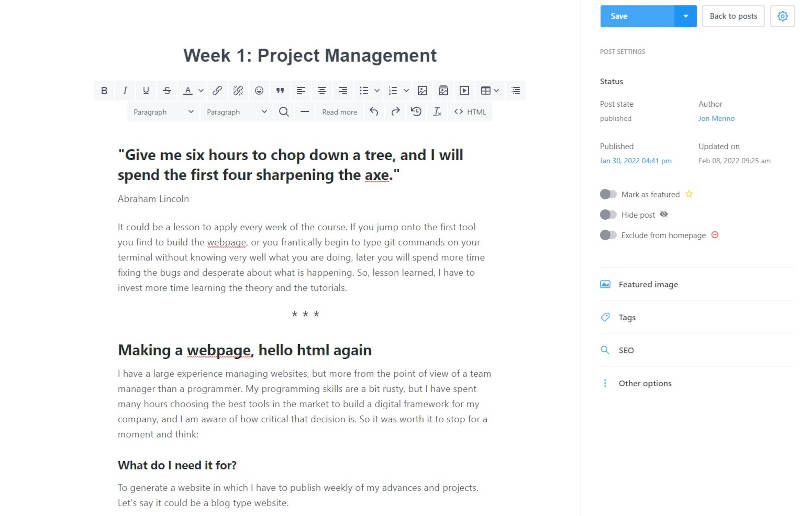
Once you select the theme, you can add any post in a WYSIWYG interface:
After you create the post, you can publish it saving the post and synchronizing the site:
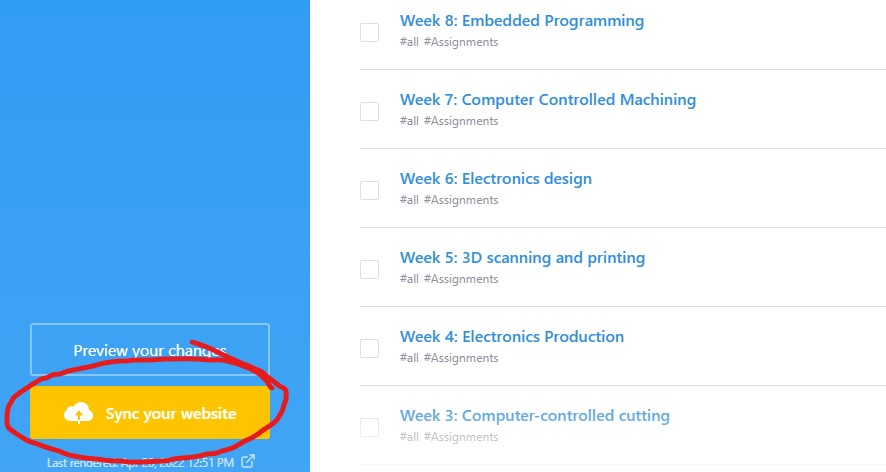
This refreshes the html files on the repo directory. In case you want you can also edit the html source of the templates on Publii. I did that to insert the videos:
....
<p><img class="post__image" src="file:///C:/Users/jonme/OneDrive/Documentos/Publii/sites/jon-merino-the-boomer-maker/input/media/posts/5/logo-skit-draw-2.jpg" alt="" width="564" height="262"></p><p>File:</p><p>SVG format: <a href="./skit logo v1.svg" target="_blank" rel="noopener noreferrer">skit logo v1.svg</a></p><p>Note: On the week3 I designed a <a href="./Logo nuevo v3 para vinyl.dxf">new logo</a>.</p><h4>Video generation and conversion</h4><p>I created an exploding animation in the Animation section inside Fusion360, selecting the components and recording the explosion of the pieces. The generated file was a .avi. Using the online converter <a href="https://cloudconvert.com" target="_blank" rel="noopener noreferrer">cloudconvert.com</a> I could generate an mpeg4 file of 410KB:</p><figure class="post__video post__video--21by9"><video width="100%" height="auto" controls="controls" data-mce-fragment="1"><source src="./skitv5v2.mp4" type="video/mp4" /></video></figure><p><a href="./skitv5v2.mp4">Exploding Skit</a></p><h4>Parametric design</h4><p>Finally I explored the parametric design a little bit, modeling a carved wood with the Skit logo. I used the option "change parameters" in Fusion360 to set up some user parameters (length, width, height, depth of the carving) and have a carved wood in the desired dimensions. </p><p><img class="post__image" src="file:///C:/Users/jonme/OneDrive/Documentos/Publii/sites/jon-merino-the-boomer-maker/input/media/posts/5/Parametric_design1.jpg" alt="" width="800" height="376"></p><p> </p>
...
Changing templates and themes
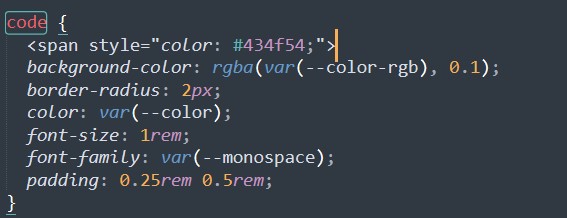
At some point I wanted to improve the style of the code sections, so I overrided the CSS files of the theme I was using (taste).
Theme overrides
Before we get into the 'How?' and 'Why?', we should familiarize ourselves with the basics about Publii's theme structure, as this will help us to more clearly see the benefits of overrides. If you've poked around your Publii website's files a bit (much easier to do with the website file location options that were added in the Publii Beta 3 release) then you might have seen that there are several file types that go into the creating a theme:
- .hbs files - To make our app's themes easier to get to grips with they're built using Handlebars, which works alongside HTML to create the structure of a theme. This makes the theme code more understandable for newcomers without giving up flexibility for people with a bit more experience.
- .css files - Handlebars gives us the structure, but it's CSS that gives us the style! CSS code is used to set the position of elements, give them color, shape and styling; all the stuff that gives a theme its character.
- .js files - Javascript is the backbone of the more complex features you find on the modern web; if you're interacting with a website beyond filling out forms and clicking links, then Javascript is probably behind it.
- .json files - JSON files are, basically, text files that are used to store data; they're used in Publii themes to store configuration settings, theme translations and the like.
You may run into a few more file types, but the ones covered above are by far the most common and essential. Now we know what kind of files are in the themes, we can take a look at just what overrides can do.
What are theme file overrides?
As we saw in the last section, each part of a given theme is controlled by a particular file type; so what happens if we want to make changes to the base style, or add some new elements to the structure? The logical answer here is that you can use the existing files; need to change the style? Open the correct CSS file, and add your changes. This method will work, but it won't take long until you run into a few issues.
The big one to worry about is updates; let's say you add your own code to one of the theme files; once an update to that theme is released, there's a good chance that the modified file will be replaced during the update process, rolling it back to the default and eliminating any changes you added before. Then there's the problem with tracking changes; with so many files making up a theme it can be easy to forget exactly which file has been modified with our own code; this problem gets even worse if multiple people are working on the project independently.
Overrides provide a solution to both of these problems, by allowing Publii users to create override files, which are essentially copies of the existing theme files that are stored separately, that will 'override', or replace, the original file. In a nutshell; when Publii creates the page layout using the theme files, it will check if there are any files in the override location, and will replace the existing theme files with these overrides.
By creating a separate location for the override files, it's possible track exactly which files have been modified, and keep a central, unchanging location for inserting your own code into a theme. And since the override folders are ignored by Publii except when building the website, you'll be able to keep your modifications backed up even during app updates. This way you can apply your own code to a theme without the risk of losing changes in updates, or struggling to keep track of which files have been changed.
How to use override files
Creating override files is simplicity itself; just follow these steps:
- Locate your website's theme directory; this will be in the path specified in the Site Location option in your Publii Global Settings; by default this will be C:\Users\yourUserName\Documents\Publii\sites.
- Inside this directory you'll see folders for each of your Publii websites; each website can have its own overrides, so open the folder for the site you wish to change. You'll see three folders; input, output and preview; the themes folder will be in the input folder, so open this, and finally, open the themes folder; this contains the themes currently installed for your chosen website.
- Now we need to find the folder containing the theme we want to create an override for, and note the name of the theme's folder. Then, we'll need to create a new folder in the themes directory, but name it themeName-override; for example, if you wanted to modify the Simple theme, which is in a folder called simple, then you'd create a folder called simple-override in the theme directory of your input folder eg. Documents\Publii\sites\your-siteName\input\themes
- simple-override |- index.hbs - Now ou're ready to start overriding files! You can override virtually any file from the theme simply by creating a copy in your new override directory; copy and paste the file from the original theme location into the override folder; if the original file was in a subfolder of the theme files, then the override copy should also be placed in a folder with the same name. For example, if we wanted to override the main.css file, which is in the themeName\assets\css folder, then we'd need to create an assets folder in our themeName-override directory, then create a css directory within that, and finally, create a copy of the main.css file in the css folder.
- With that done, the copied file in the override directory will now be used by Publii to build the website instead of the original file, so you can start adding your own code to the file as needed. Remember that you only need to add files that you want to override into the override folder; if a particular file isn't found in the override folder then the original file will be used automatically.


And now, git
Ok, regarding the web publishing tool I did it well, selecting a good one and taking my time to do it well. However, I had some problems with GitLab because I didn´t spent enough time learning the basics of it, and I launched onto doing it too quickly. I learned that it is important to verify in Gitlab that changes has been made, because all processes are executed by pipelines.
This is the process I did:
I created a repo file just on my user root directory. I went to that repo directory and executed the follow instructions:
~$git clone git@gitlab.fabcloud.org:academany/fabacademy/2022/labs/uemadrid/students/juan-merino.git
~$git status
~$git add --all
~$git status
~$git commit -m "Initial commit"
~$git push -u origin master
I think I did a pull when some changes were still pending, and it generated some kind of inconsistency, having a master git repository inside another master repo! So, when I tried to push I had this message:
warning: adding embedded git repository: juan-merinohint: You've added another git repository inside your current repository.hint: Clones of the outer repository will not contain the contents ofhint: the embedded repository and will not know how to obtain it.
After this I tried everything without success. The only way to fix it was to upload files manually to Gitlab and doing pull after that.
~$git status
~$git pull
~$git add --all
~$git status
~$git commit -m "Initial commit"
~$git push -u origin master
~$git add --all
~$git status
~$git commit -m "Initial commit"
~$git push -u origin master
Once I got it, as my website is static HTML, not Mkdocs, I deleted all the Mkdocs files in Gitlab and changed the .gitlab-ci.yml to support HTML files. Watch out!, with "."! with this content:
image: alpine:latest
pages:
  stage: deploy
  script:
  - echo 'Nothing to do...'
  artifacts:
    paths:
    - public/
  only:
  - master
You have to create a public subdirectory to store all the files of the static website. Also, in your local git repo you have to create this subdirectory having the static files.
And voila! my site is running...
In addition to that, we also had a session at the fablab to clarify some aspects of the web technology used. This is the diagram of it: