02 Week :: COMPUTER AID DESIGN

FabAcademy is like a huge pizza. If you don't slice it you can choke and have a bad digestion. It's important to slice it and examine each part, ask yourself what the ingredients are, how it was made, what it tastes like, and what you can learn for future projects. Each week's assigmment is like a slice of pizza.
Week Challenges
It is important to be clear about what we are going to work on this week. It is best to thoroughly review the assigment , the tutorials and the tools associated with this unit.
FabAcademy Challenges
- Model 2D (raster, vector)
- Model 3D (render, animate, simulate)
- Apply the learning to model your possiblefinal project
- Include your original design files
- Learn to compress your images and videos
- Document and post a description with your design files on your class page
Personal Challenges
- Practice 2D modeling (Inkscape and Illustrator)
- Practice 3D modeling( Fusion 360, Blender, Rhino)
- Perform a 3D simulation of the Final Project
- Implement the web page
- Develop a systematization and method in the collection of weekly documentation (documentation occupies an important part of the time we dedicate to FabAcademi, so the more structured we have it (weekly template, image compression, video, repos update, etc...; the less time we will have to invest in this part).
2D Modeling
I barely have any experience with 2D modeling programs, since when I have had to vectorize a drawing I have done it in Rhino. I think that 2D programs are more applied to illustration, vinyl cutting, etc... I still don't know all their possibilities, so I'm very attracted to start working with them.
1) Inkscape
I'm going to start with Inkscape . It is a free program that you can download for free. The best thing to do is to review the tutorials that appear on their website to familiarize yourself with the simplest actions.
The program does not seem complicated to me, although it is necessary to invest time in knowing where the different commands and orders are. I think that for the realization of infographics, graphs or drawings, it can be very useful. I attach screenshots of the drawing sequences.
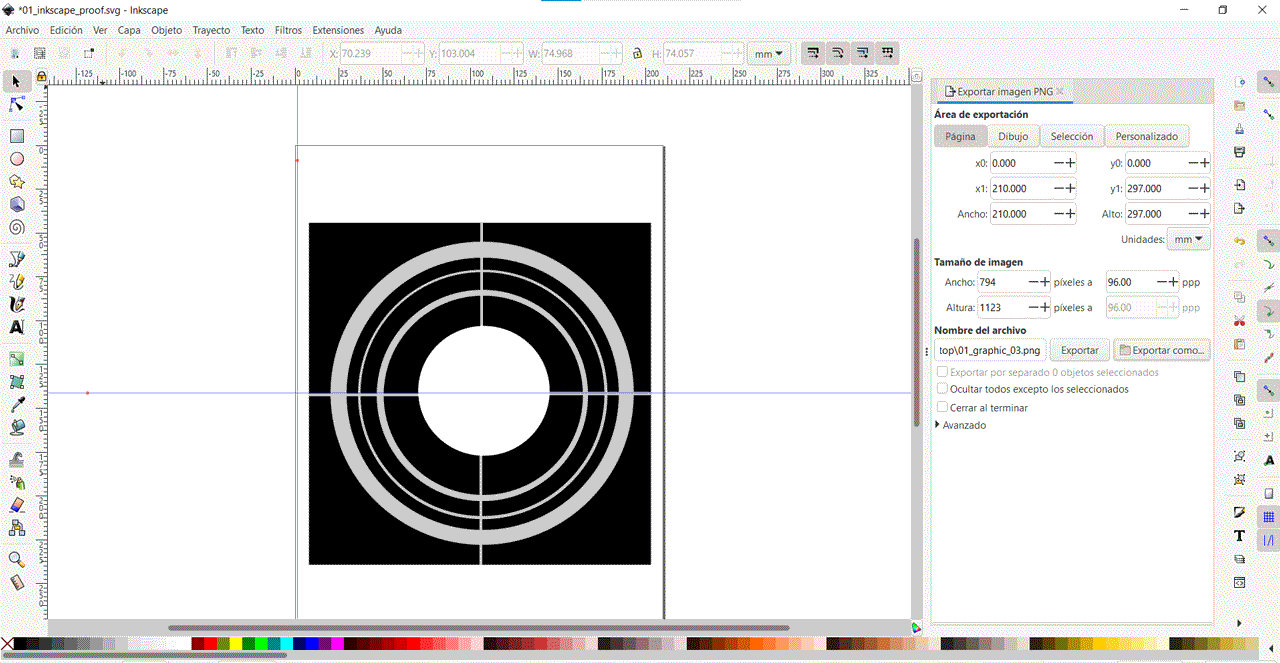
It failed to export because the image was not centered.
Final image to use as a reference image in the web Assignments.

Important: start working with guides if you want to draw concentric circles. You have to draw from back to front, if you do not yet control the layers. It is also essential to draw in the space of the page, because when exporting only saves as .png the part of the drawing that is in the paper area.
I will come back to the program to make tutorials and familiarize myself with the different functions.
3D Modeling
Although I have some experience with SketchUp (I particularly think that the renderings are very basic and unattractive) and Rhino (this is the program I usually use to simulate and model my projects); I want to try with the possibilities that other programs offer. To start with I have downloaded Fusion 360 and Blender and will try some basic exercises.
1) Autodesk Fusion 360
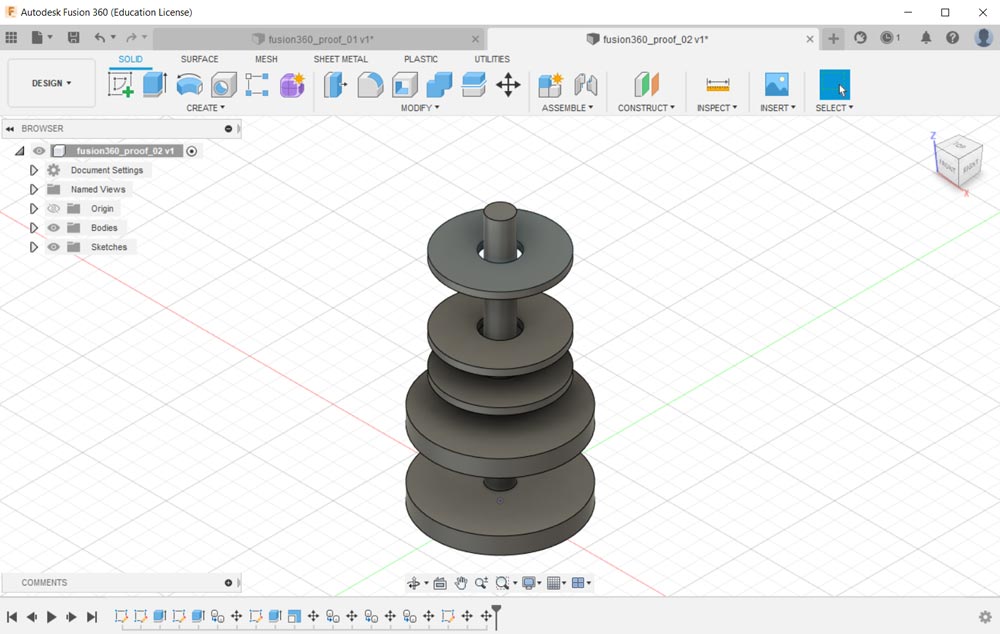
When I open the program, I look at the whole toolbar and... I don't quite know where to start. I start with a quick tutorial. In it I follow the steps and it allows me to get familiar with some of the tools: drawing, solids, extrusion, modify... As I don't have much time, I try to make a quick version of the volumetry of my final Project.
Remarks:
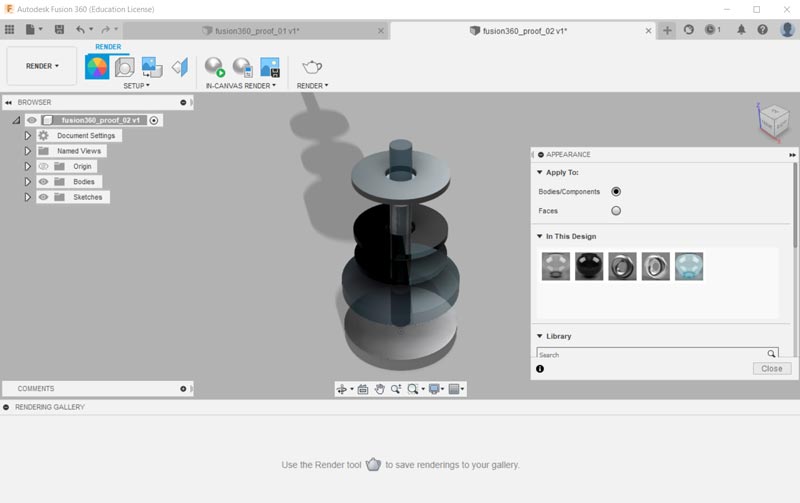
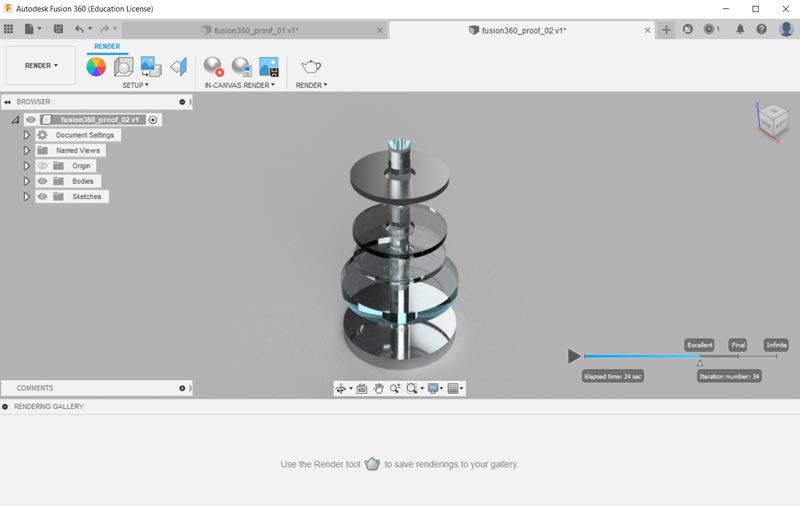
- The renderer is very intuitive and works very well, much simpler than Vray (Rhino renderer).
- The interface is completely different from Rhino, it takes a little time to get familiar with it.
- Interesting is the lower band that collects the history of commands you have used and allows you to make parametric modifications.
As soon as I have time, I will come back to the program. It seems to me an alternative that complements more complex aspects of Rhino.
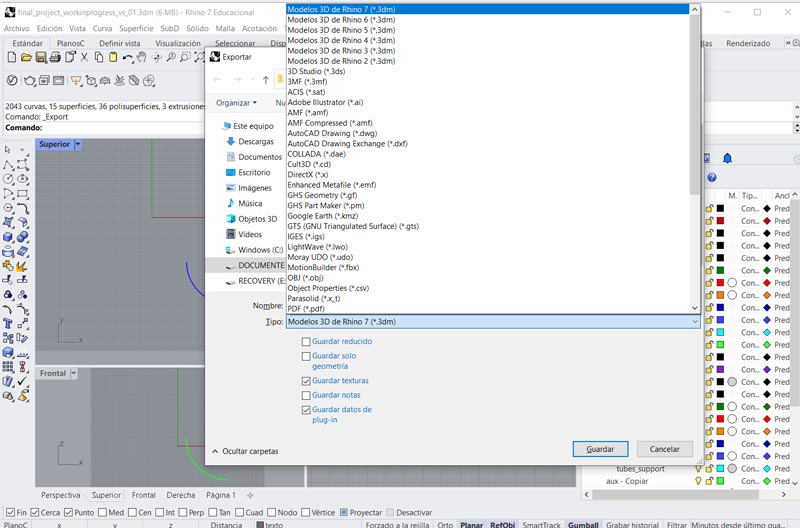
2) Rhino 07
I recommend to generate a structure of layers and sublayers to be able to better apply actions such as on/off; material properties, etc...
Layer organization
- New file, units millimeters.
- I generate a layer organization, differentiating in 2D and subfolders for each block of the project.
- I generate the same structure for 3D.
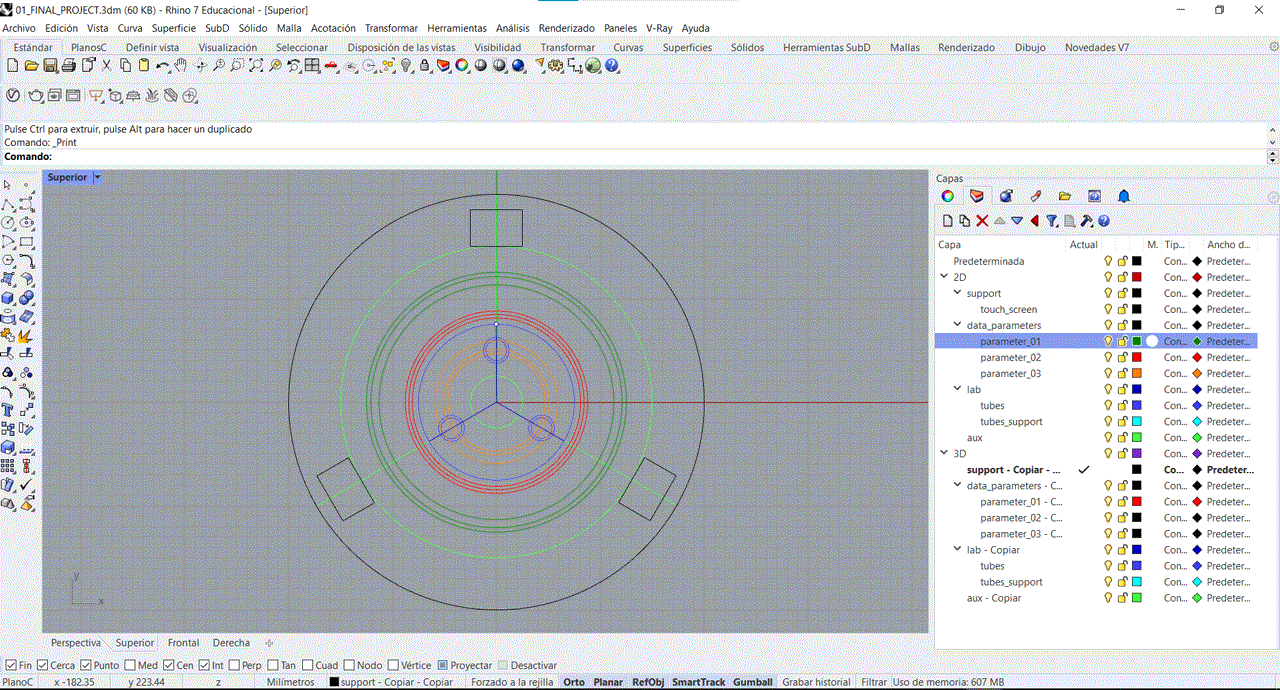
Drawing of curves and 2D elements
- We vectorize the main elements in the top view.
- We use the block of drawing tools: polygonal curves, curves, circles, etc..
- All these actions are performed in the 2d layers so that later when we model in 3D (plane curves, surfaces and solids) we can load the 2D block
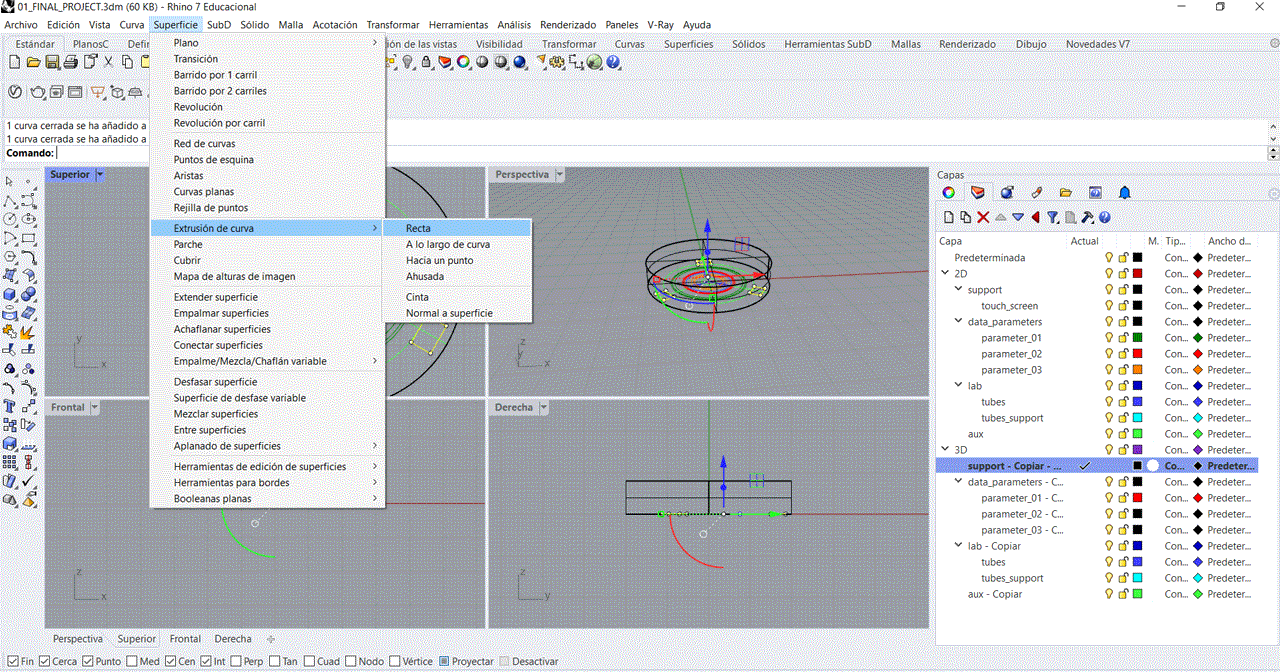
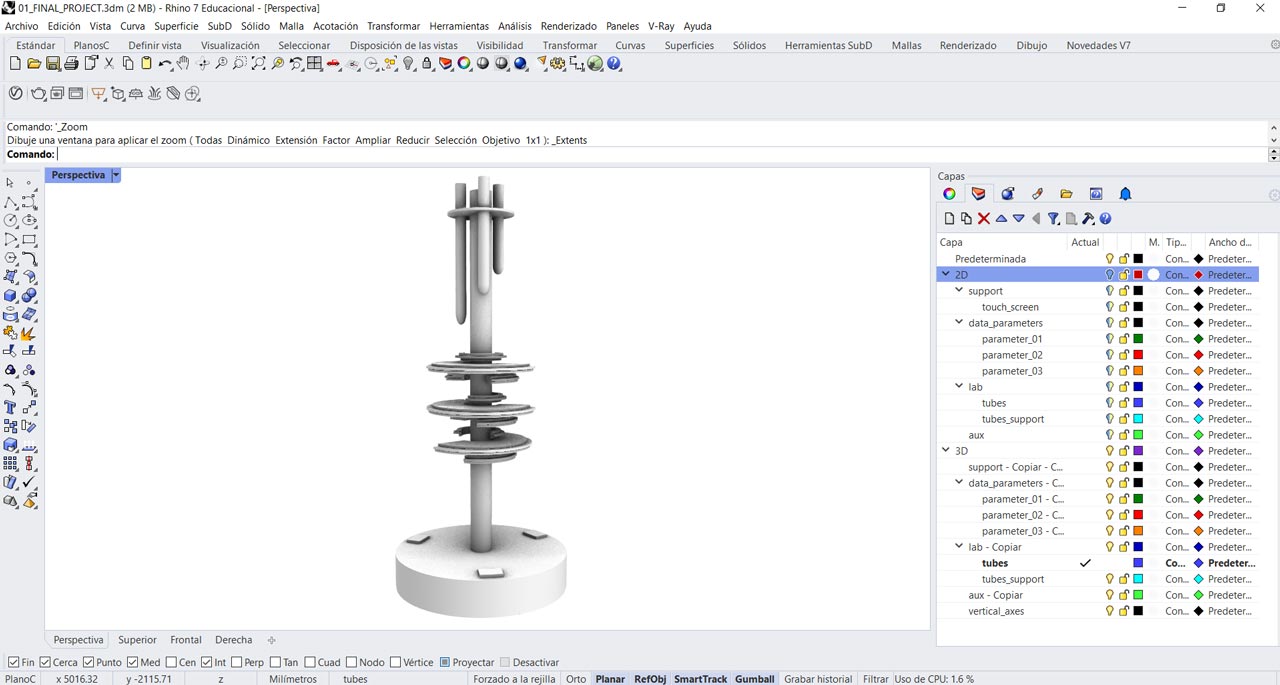
Modeling of surfaces and 3D elements
We will work on all these actions in the 3D layers
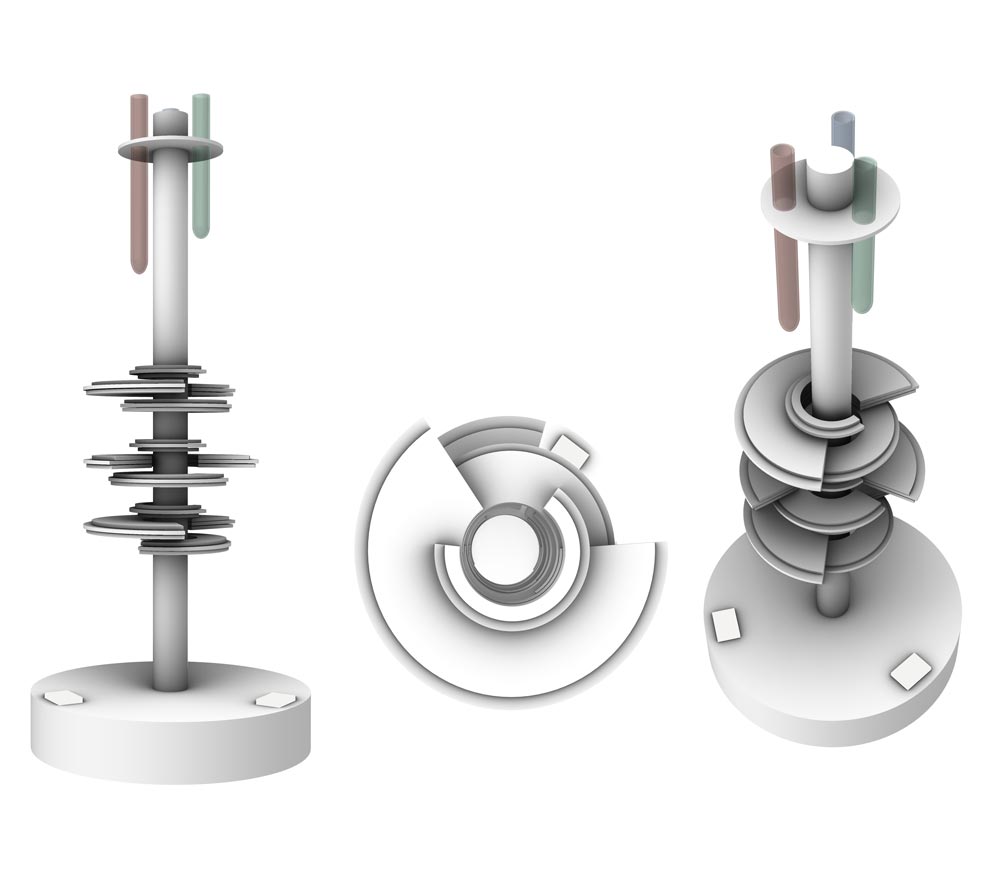
Modeling the base
- I start applying plane curves by selecting the vector I want to convert to surface.
- Once a plane curve is generated, it is selected and extruded to the desired height. Operations are worked on: Surface/flat curve /with the selected flat curve /solid/surface extrusion/straight/thickness that we need.
- With this sequence we extrude the different elements of our model.
- With Gumball we go up to the desired height / 4-window view.
Modeling of the circular rings
Note: For the realization of the data rings, we turn off the layers that we do not need for a better identification of the modeling.
- Cut tool/menu sidebar. Allows us to cut the vector image when a line intersects another.
- Vectorize the contour to form a flat curve with the desired shape and proceed to extrude it with a height of 5 mm (thickness of the methacrylate to be used).
- It is advisable to isolate the disk to be extruded, otherwise the operation will cause problems.
- Group tool / sidebar menu. Select the three extruded discs (parameter layer 01) so that they work as a block and allow their manipulation without making mistakes.
- Repeat the same operation for the other two remaining parameters.
- Duplicate the result to have different stages of the modeling development in case we have to modify something.
- Rotate tool. Left menu/ rotate 3D/ select the element and rotate it to the desired angle.
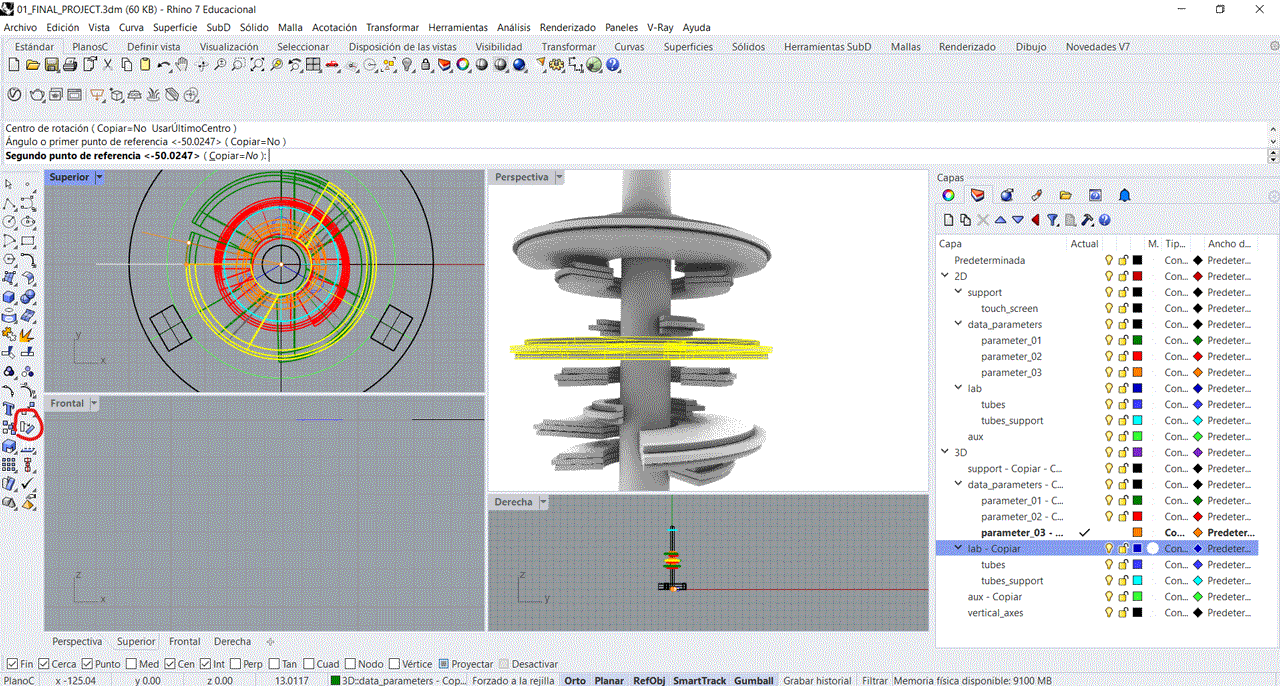
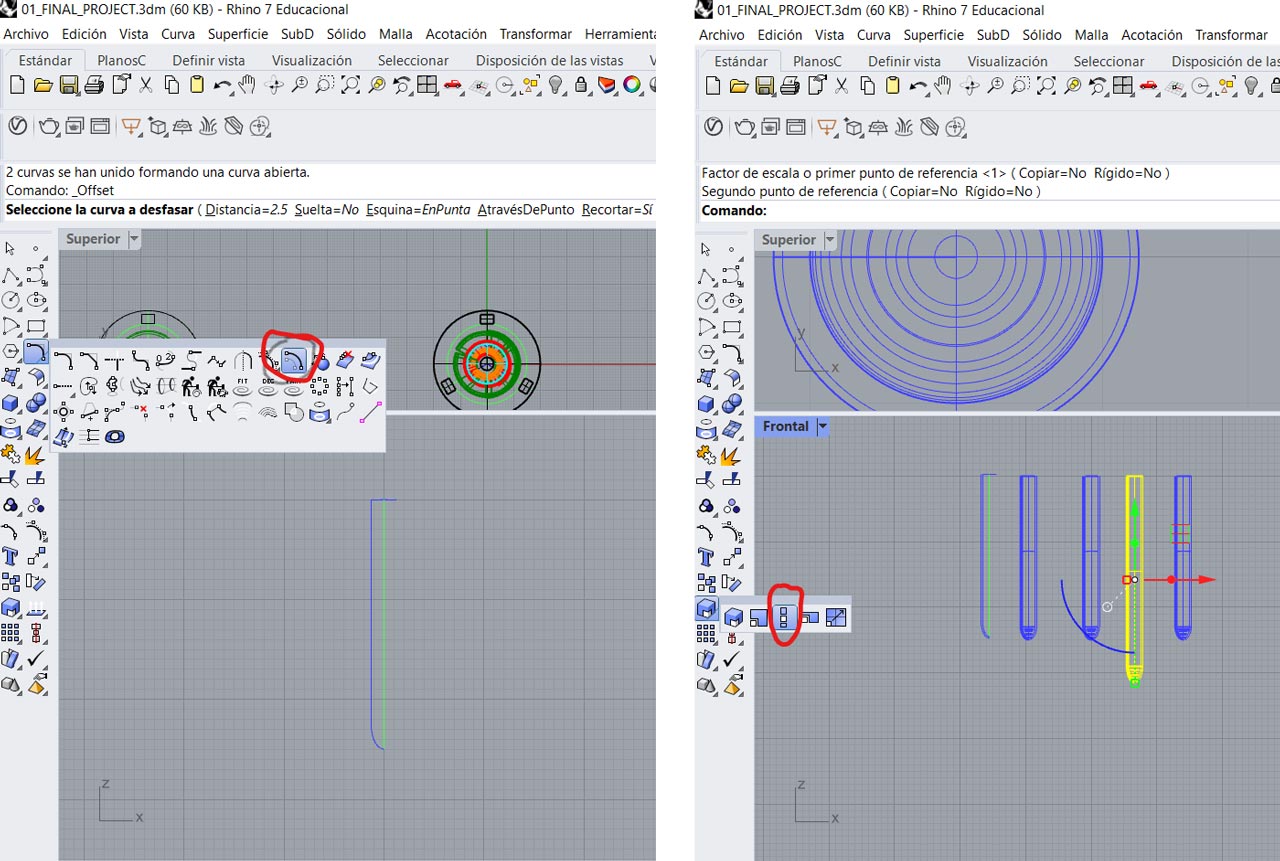
Modeling Lab Tubes
- Front view / draw symmetry axis / draw outer profile of tube (height 25 mm.)
- Left menu / modify curves / offset curves / 2.5 mm (glass thickness) / surface / revolution / symmetry axis / reproduce surface by rotation axis.
- For the specimen scaling, we copy three specimens. We use the 1D Scaling tool (we want to keep the thickness of the specimen, we only want to vary its height). We adjust the heights to the desired dimension.
- Move tool. Left menu / move / select the 3 specimens and place them in the front view at the desired height.
- Group the outer wall and inner wall of each specimen for better handling of the block.
Visualazing the modeling
In the perspective view we can see the volumetric result before applying materials.
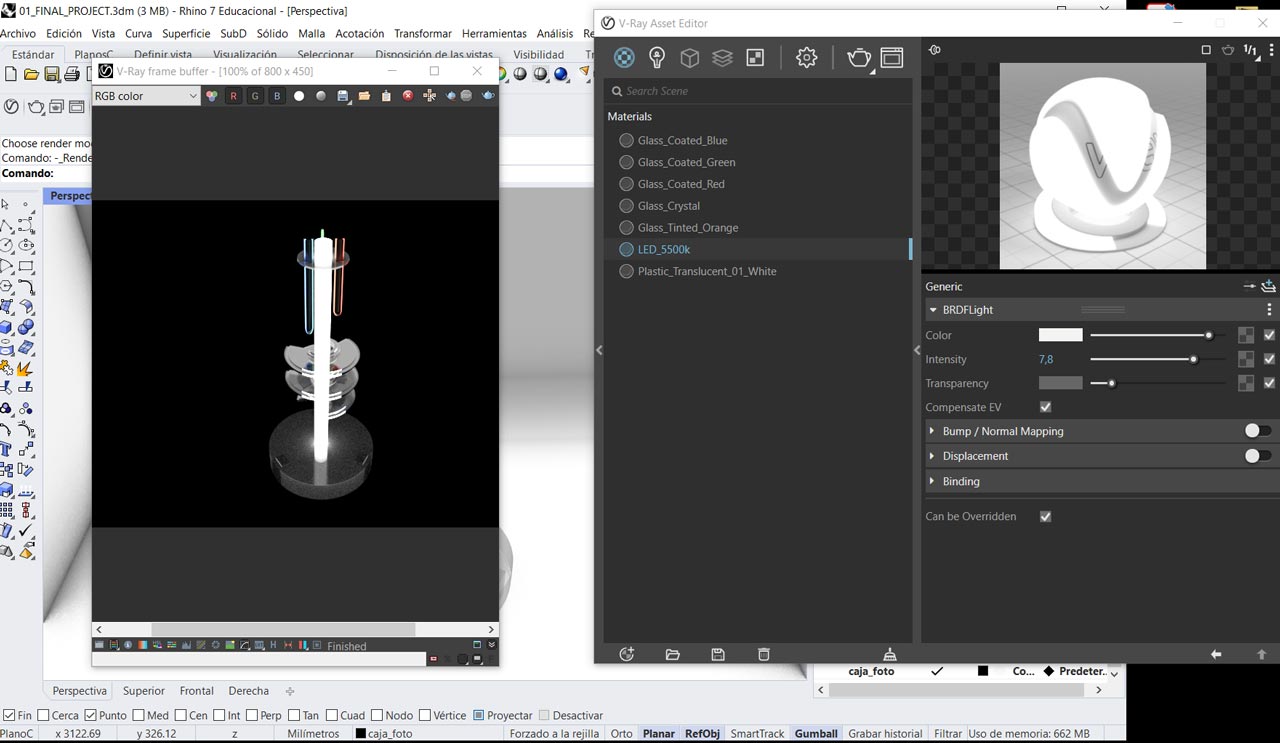
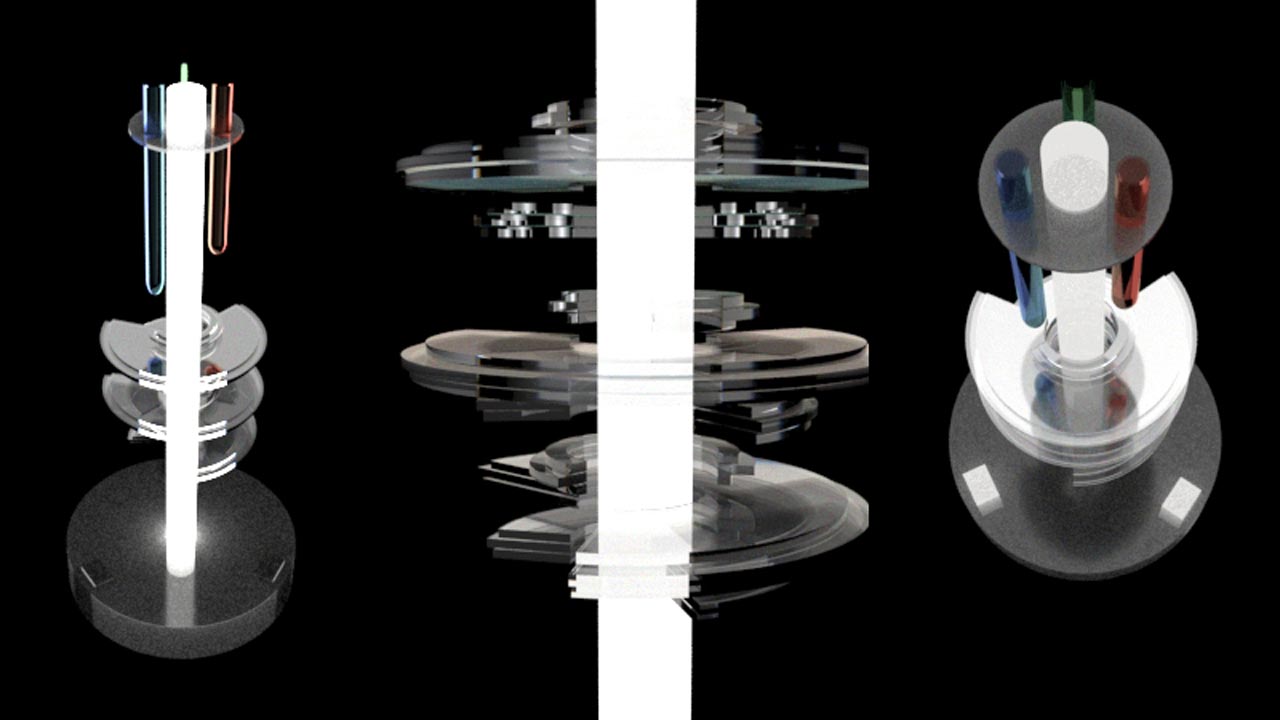
Applaing materials
When you have the elements sorted by layers it is easier to apply materials. You don't know what the material is going to look like until you render it. You have to keep trying until you find the rendering you like best. Omissive materials and lighting are tricky.
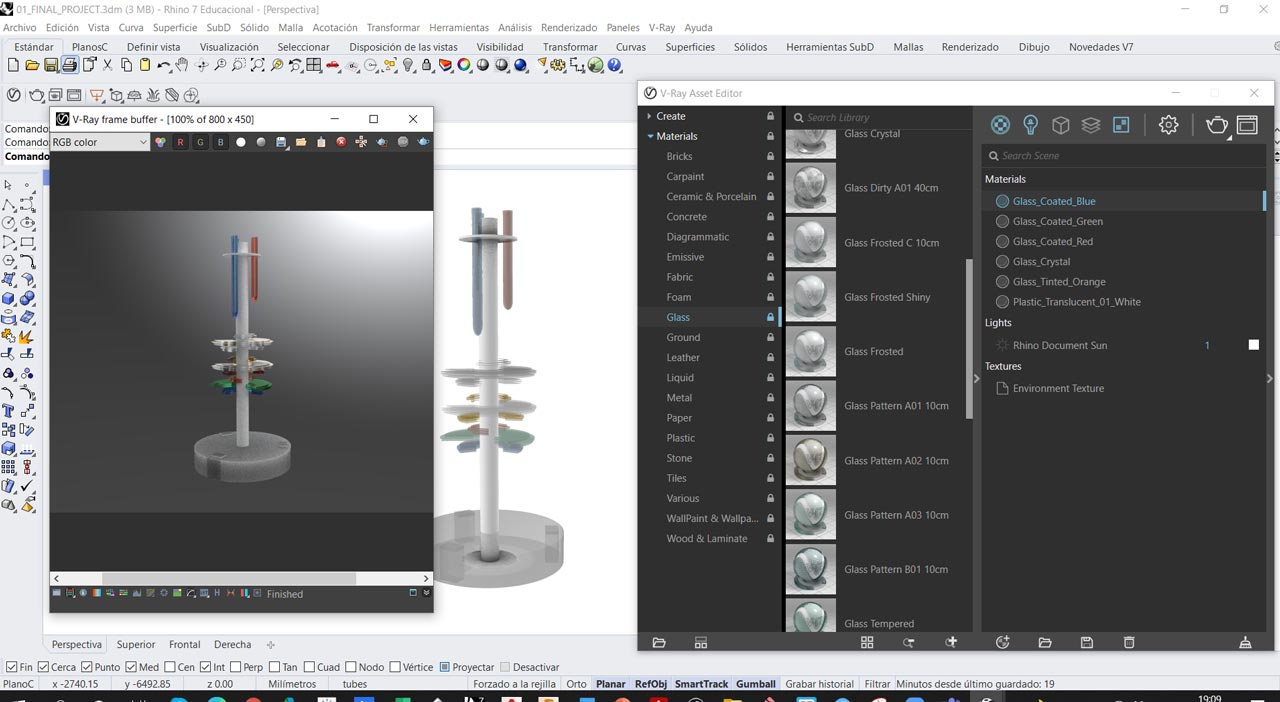
Rendering
I am interested in testing with the effects of emissive materials. Intensity and transparency tests are attached.
Problems
Rhino is a complex program, you have to be very concentrated and not make mistakes that can take you a long time to fix. I usually duplicate the steps of the work that I am modeling in case there is any mistake that I can access that stage of the work to continue.
VISUAL AND TECHNICAL DOCUMENTATION
After all the hard work of drawing and modeling in Rhino, it is great to generate all the visual documentation (both technical and graphical) in the views you like the most to be able to tell the story of your project.
Technical documentation with Rhino's 2D Drawing option

Images with basic Rhino renderer
Images with V-ray renderer
VIDEO EDITORS
Since I don't have any experience with video editing and compression, after seeing the FabAcademy recommendations, I ask a video editing expert who recommends the following programs:
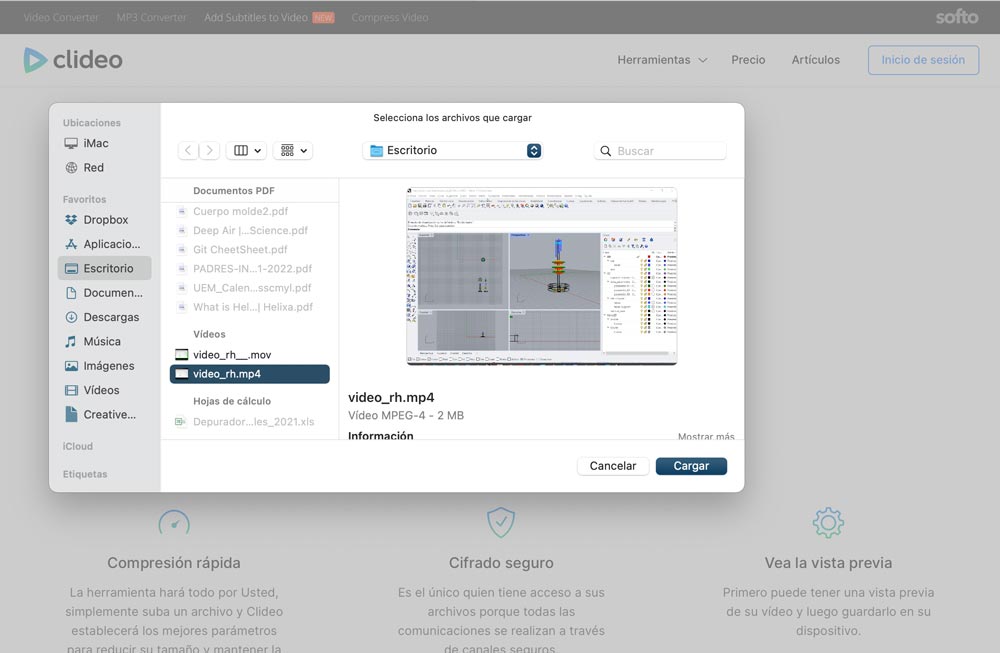
Video compression: Clideo (open source) . It is a very fast and easy to use online compressor. It has reduced a video from 1.88 Mg to 652 Kb. The only drawback I see is that it compresses leaving a watermark. If you want to remove it you have to pay :( I will continue investigating….)
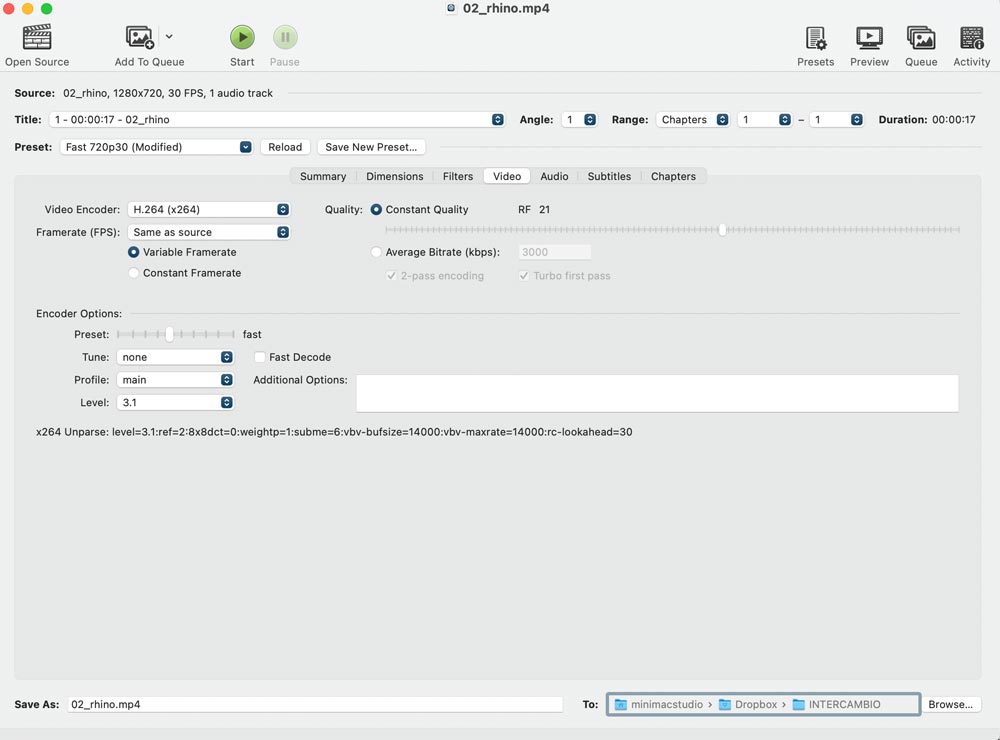
I have also tried with Handbrake. I really liked it is easy and intuitive. This are the paremeters used as a example:
- Format: .mp4
- Framerate: same as source
- Quality: constan cuality
Recording videos and screenshots: ShareX . I loved this tool is very intuitive and easy to manage. The screenshots are very fast and the video recording also uses a fairly low resolution. It is very usseful the quick access settings.


Video editing: After trying with different programs, I choose Adobe Premier Rush. It is not very difficult to manage and it is have many possibilities.
And here it is my first video upload!!