3D Scanning and printing
3D Scanning process:
3D Laser Scanning Process An object that is to be laser scanned is placed on the bed of the digitizer. Specialized software drives the laser probe above the surface of the object. The laser probe projects a line of laser light onto the surface while 2 sensor cameras continuously record the changing distance and shape of the laser line in three dimensions (XYZ) as it sweeps along the object.
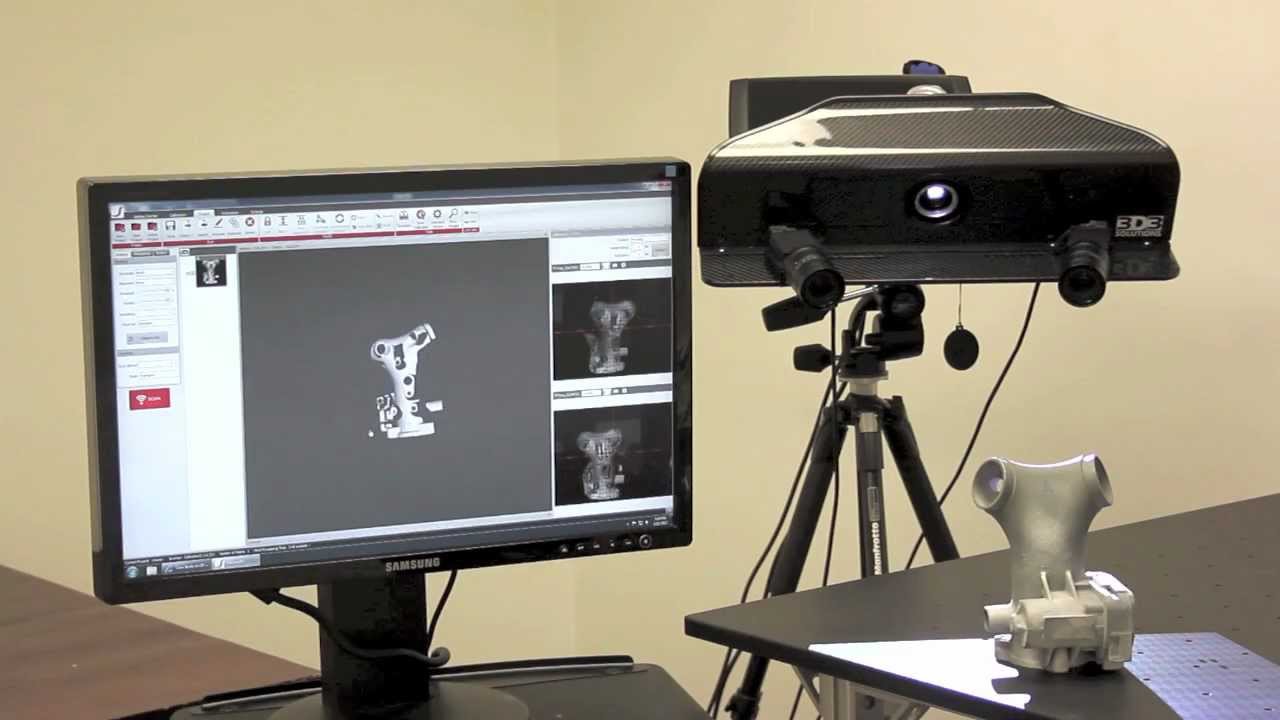
Image from ALL3DP.com : The Best 3D Scanning Software
The 3D scanner I used was Sense 2 from Intel.

Some specs:
Supported operating systems 64-bit Windows 8 or later
Operating range Min: 0.2m Max: 1.6m
Field of view Horizontal: 45° Vertical: 57.5° Diagonal: 69°
Operating temperature 10-40° C
Maximal image throughput 30 fps
Scan volume Min: 0.2m x 0.2m x 0.2m Max: 2m x 2m x 2m
Depth image size 640(w) x 480(h) px
Spatial x/y resolution @ 0.5m 0.9mm
Data interface USB 3.0
Hardware recommendations Intel® Core i5™ 5th Gen or equivalent processor (click here for details) RAM: 2 GB minimum 1280 x 1024 minimum screen resolution 4 GB available hard disk space
Dimensions 5.08(w) x 7.08(h) x 1.3(d) inches 12.9(w) x 17.8(h) x 3.3(d) cm
Color image size 1920(w) x 1080(h) px
Depth resolution @ 0.5m 1mm
USB cord length 6 feet
Warranty 1 year
Scanner Link Website: https://support.3dsystems.com/s/article/Sense-Scanner?language=en_US
Software: RecFusion
Software Link: https://www.recfusion.net/
Software:
The software used is RecFusion. It supports a wide variety of RGB-D sensors, such as the Intel RealSense and the Microsoft Azure Kinect. With the SDK you can use any sensor which provides depth and calibration information.
With RecFusion you can create 3D models of people, pets, furniture and many other objects, even your motorcycle! All you need is a depth-sensor like the Microsoft Kinect or the Asus Xtion. Just move the sensor around the object and you can see the model building up on your screen in real-time and in color. Use the built-in post-processing functions to prepare your models for 3D printing and publish your models on the web.

The model for test purposes is show next.

Open Recfusion for the scanning process.
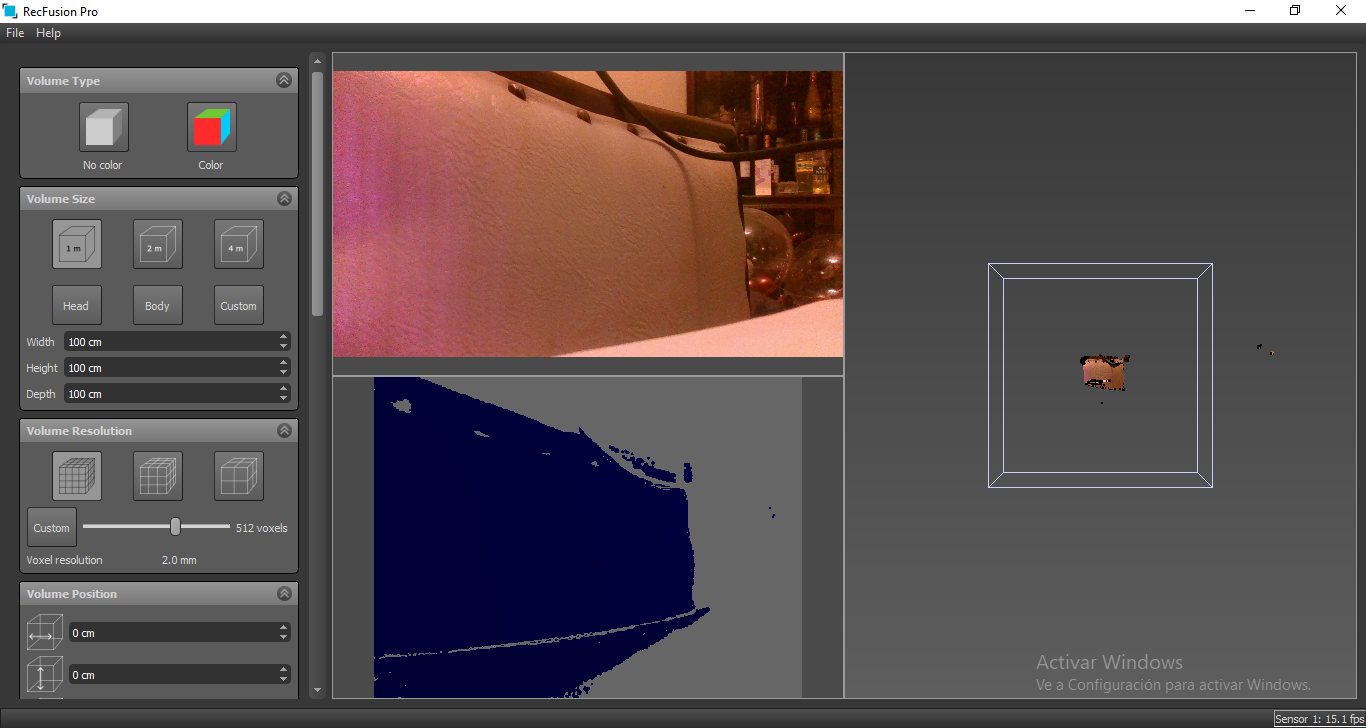
In the left side we have some parameters to adjust before the scanning process.
Volume type: Set to color
Volume Size: In this case 1m, becausethe small size of the object to scan.
Volume resolution: Set to high resolution, 512 voxels
Volume position: default
Sensor: Selected 3D sensor
Orientation: for ease, select Vertical
Depth format: set to max resolution
Color format: Select max resolution for best results.
Color settings like exposure, gain, white balance were set for additional adjustments.
Then, center the object with a good illumination and press Start Reconstruction to begin the scanning process.
Next, start to point the scanner to all directions of the object to capture the most of it.

When finished press Save Mesh, then save the model in STL format.
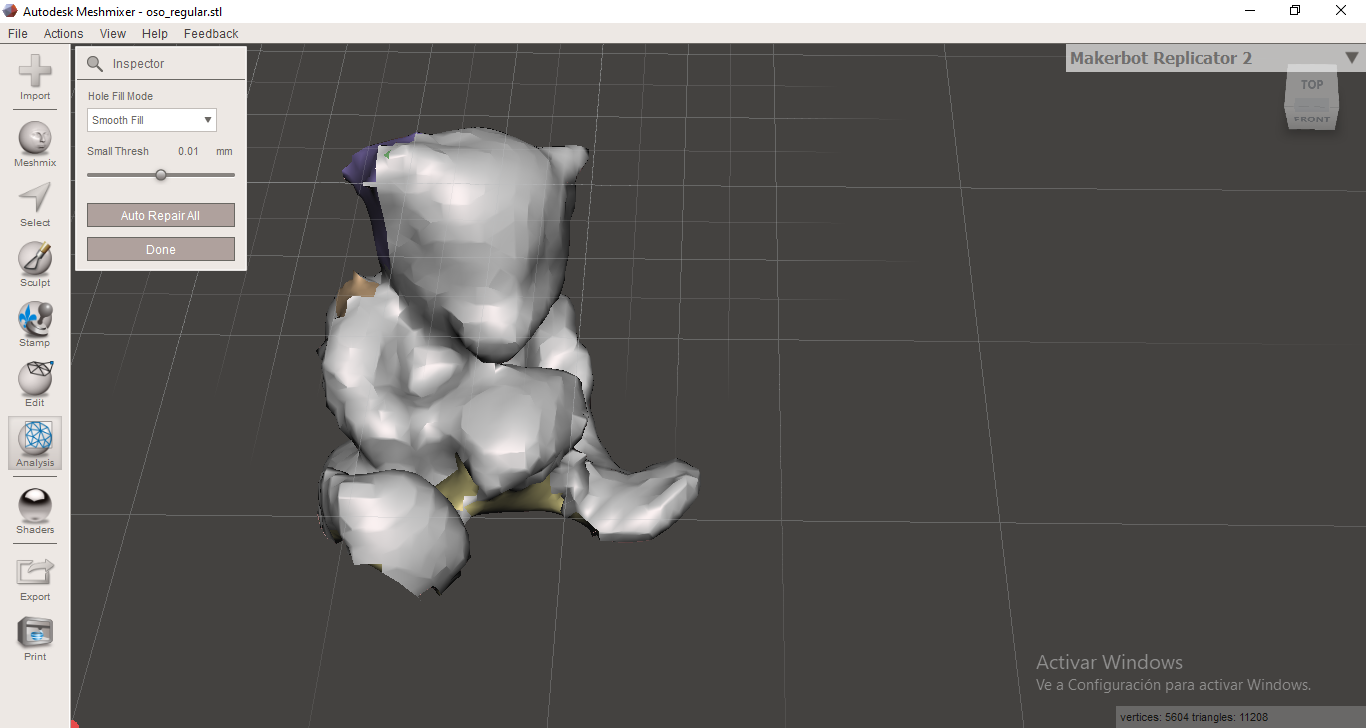
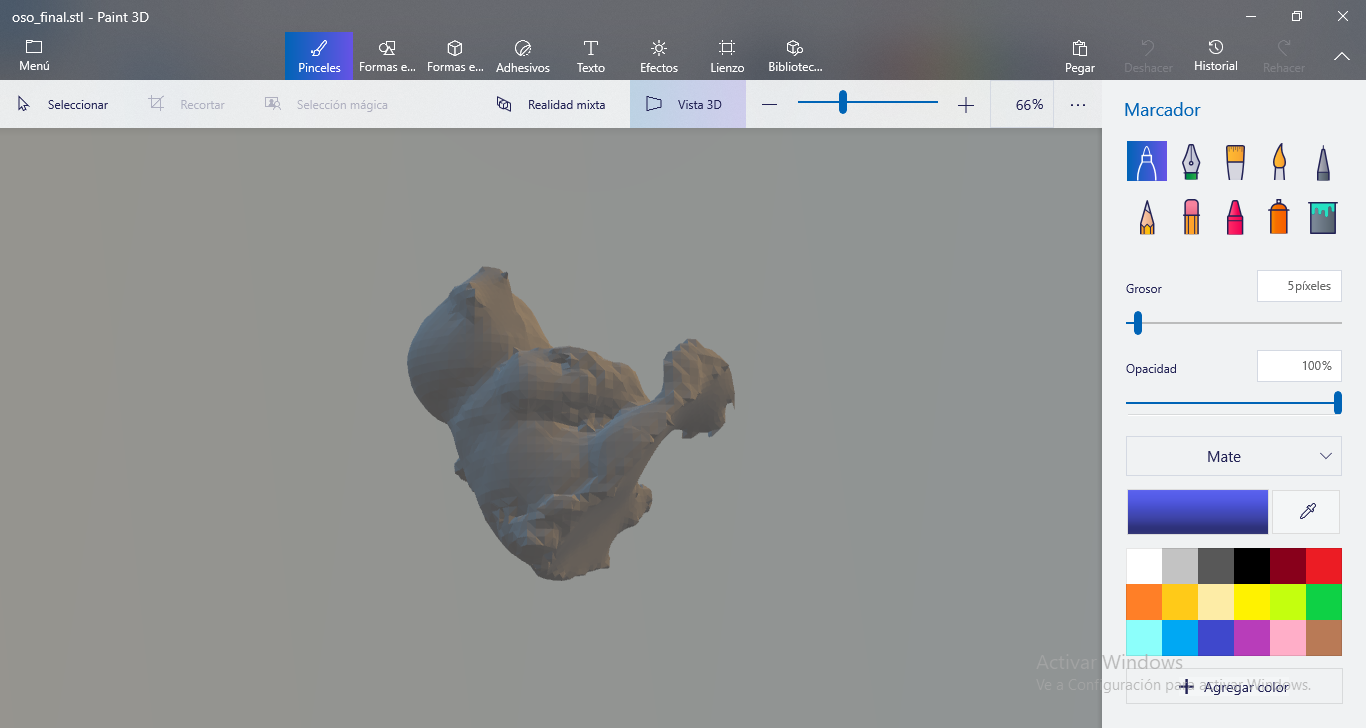
As we can see, the captured 3D model has a lot of imperfections, because of the environment. To correct them, we'll use Meshmixer software.
Import the STL model to open it Meshmixer.

This software is very intuitive, so select and delete the parts we want to.
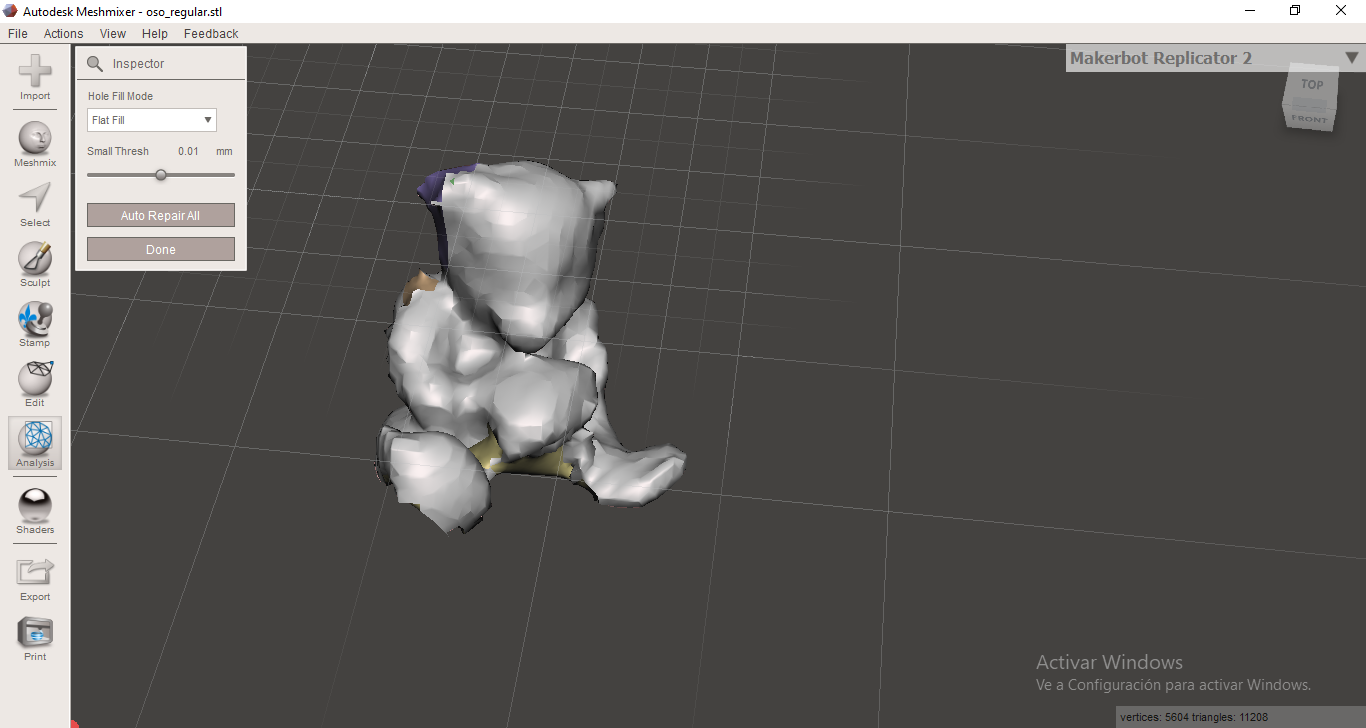
We can see the object has broken parts. This software can repair them. Select Inspector option, then Auto repair all, default parameters.
Then, save changes in this 3d model. Open in default Windows 3D Viewer to check it.
3D printing process:
3D printing is an additive process whereby layers of material are built up to create a 3D part. This is the opposite of subtractive manufacturing processes, where a final design is cut from a larger block of material. As a result, 3D printing creates less material wastage.
Software:
Cura Ultimaker was used for the 3D printing process.
Cura is an open source slicing application for 3D printers. Ultimaker Cura works by slicing the user’s model file into layers and generating a printer-specific g-code. Once finished, the g-code can be sent to the printer for the manufacture of the physical object.
The open source software, compatible with most desktop 3D printers, can work with files in the most common 3D formats such as STL, OBJ, X3D, 3MF as well as image file formats such as BMP, GIF, JPG, and PNG.
First, open Cura Ultimaker software, then import the STL file.
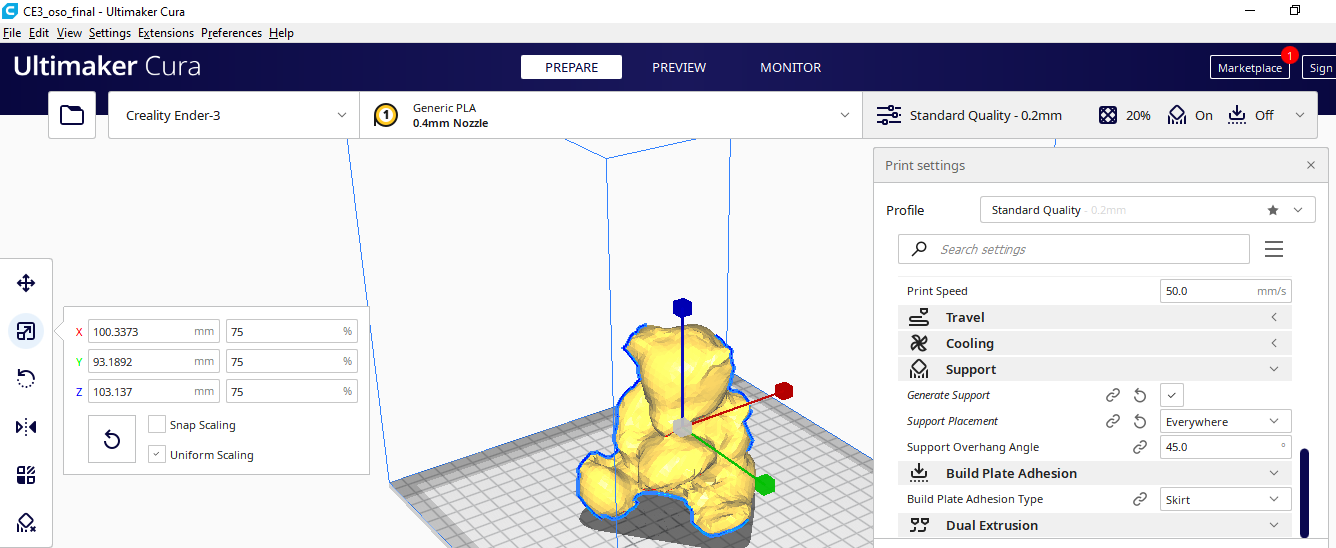
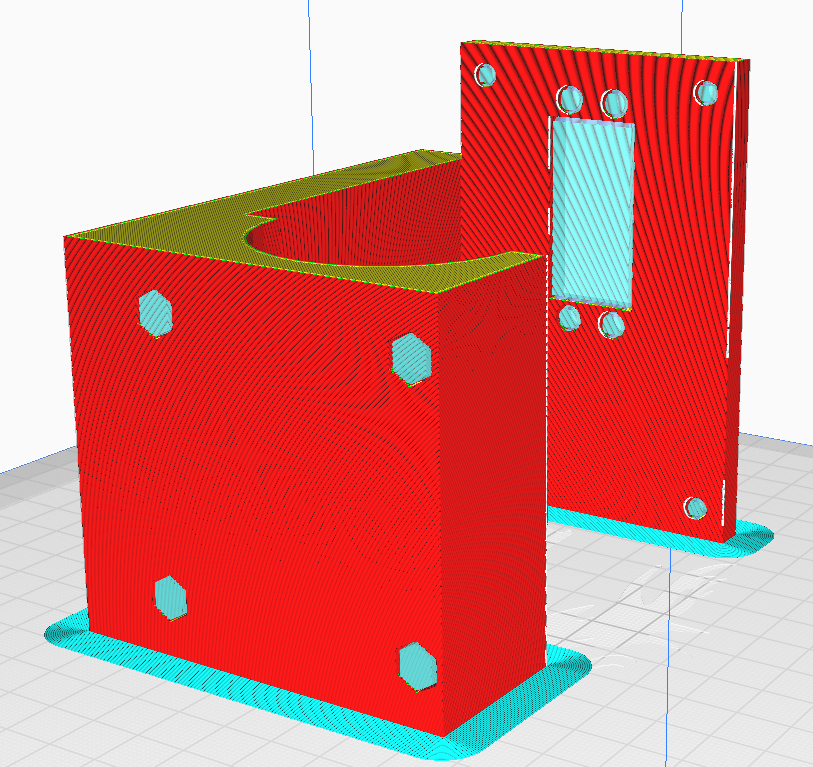
Check and adjust the 3D printing parameters, quality, temperature, fill, speed, supports, etc. Next, Slice the object.

Cura Ultimaker has a preview option to simulate the 3D printing process.
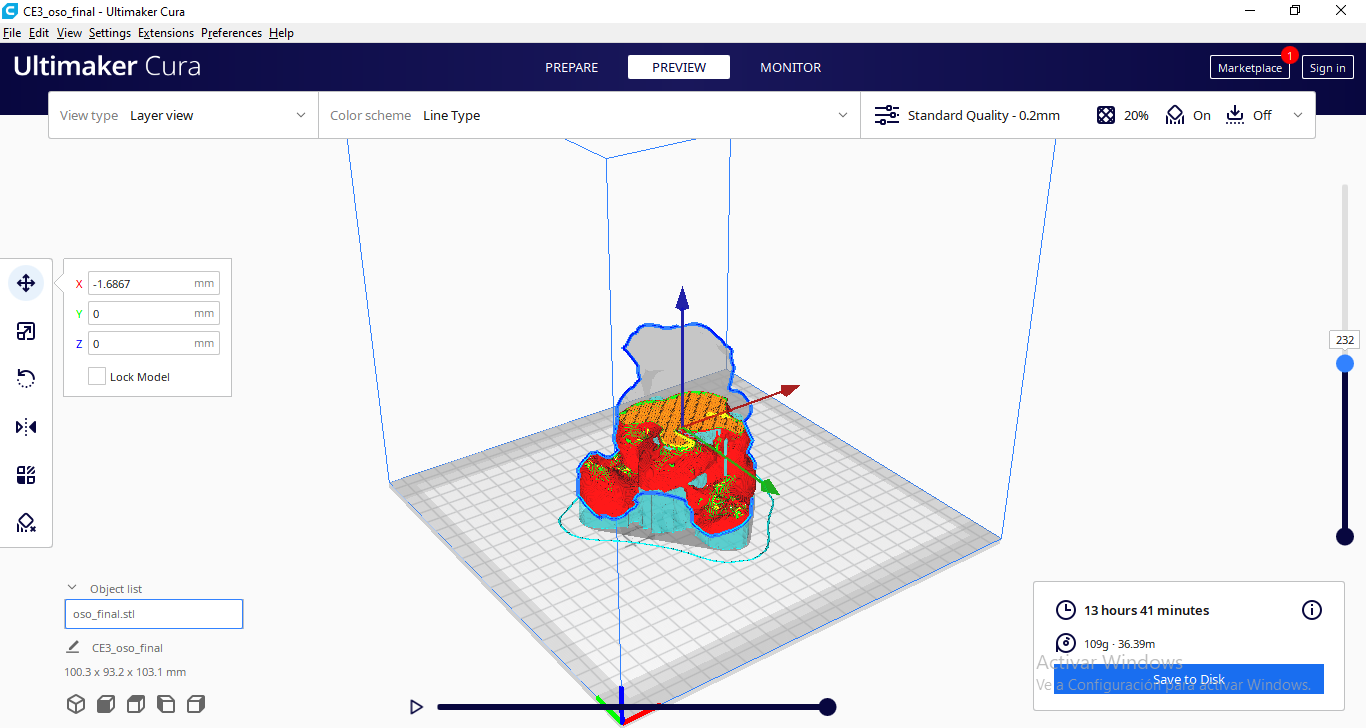

Finally, save the g-code file for printing.
Printing Parameter Tests:
For 3D print testing I downloaded a file on thingyverse website. That file is named 3D_Printer_test.STL
We'll see some parameters of 3D print. Using PLA Material, 1.75mm diameter, 0.4mm nozzle default.
Open Cura software to do this process:
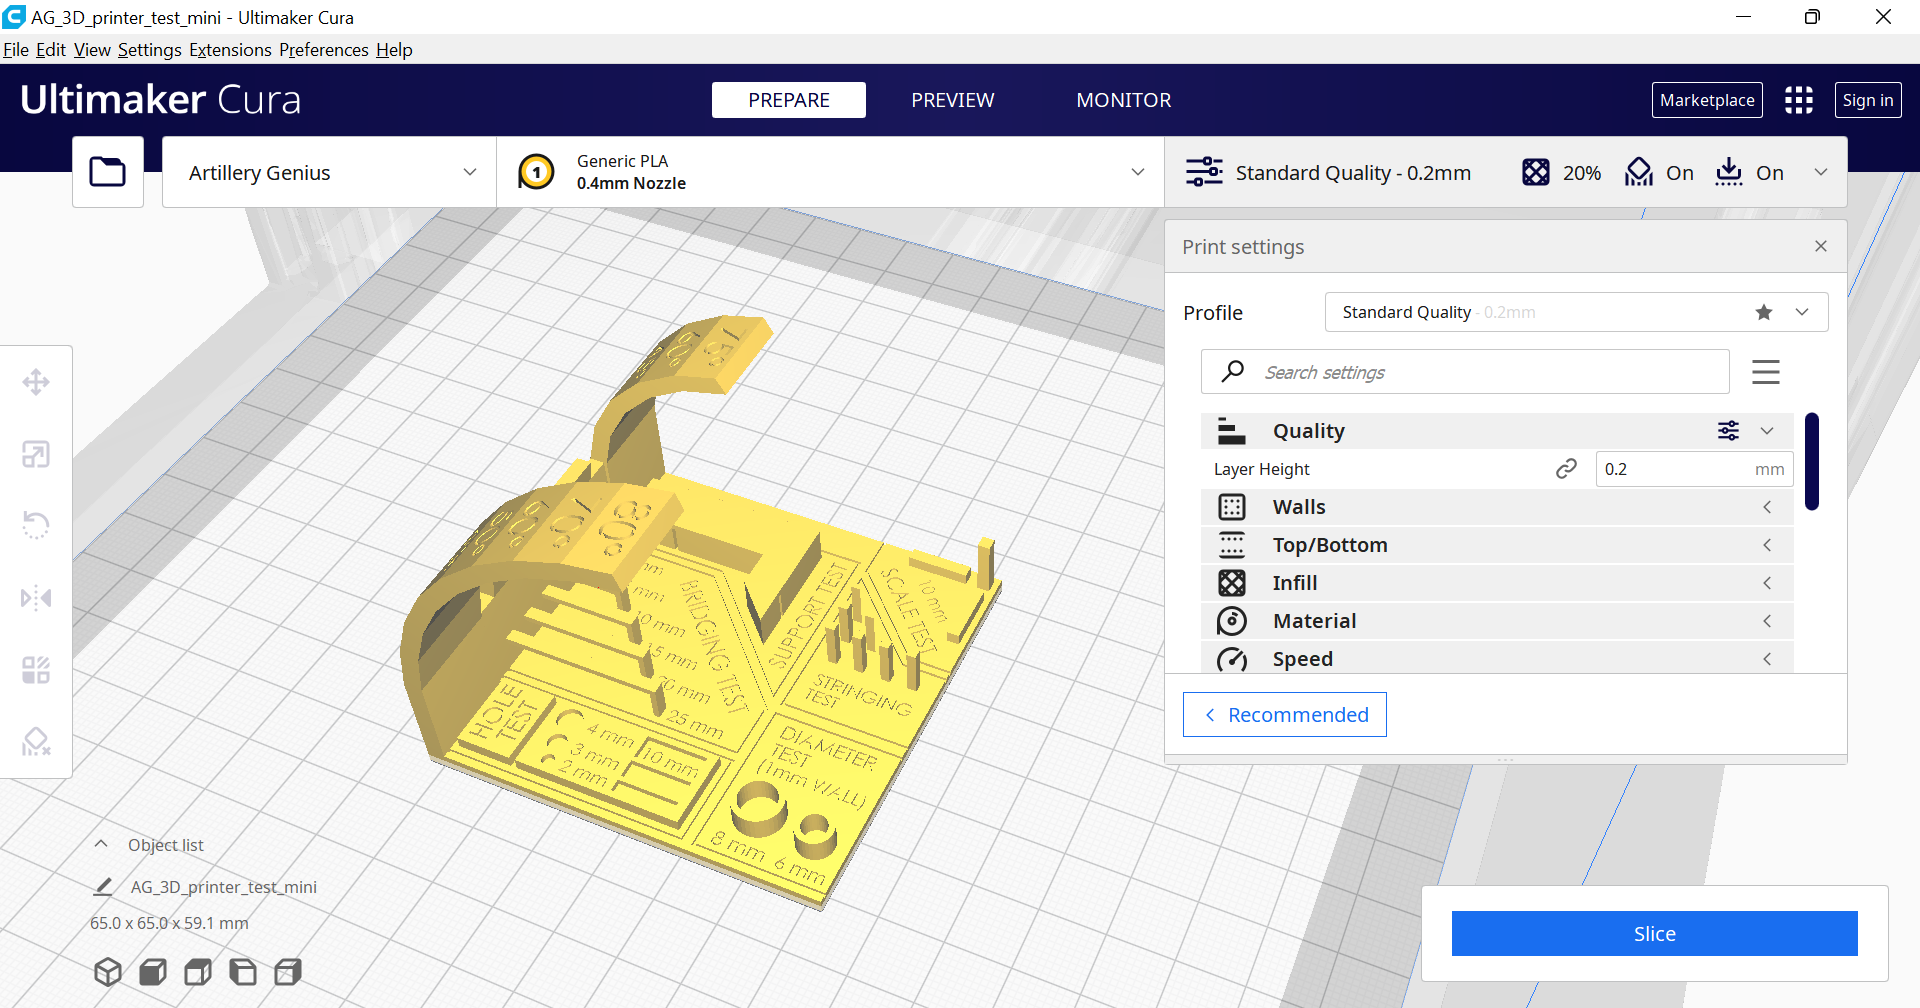
On top side, we can see the 3D printer model, filament type. On left side, the object modifiers. On right side, the printing parameters.
Before Slicing we can set the quality (low, standard, high), wall thickness, infill, temperature nozzle and bed, speed, supports and adhesion type.
In this case, standard quality was used for printing this piece.
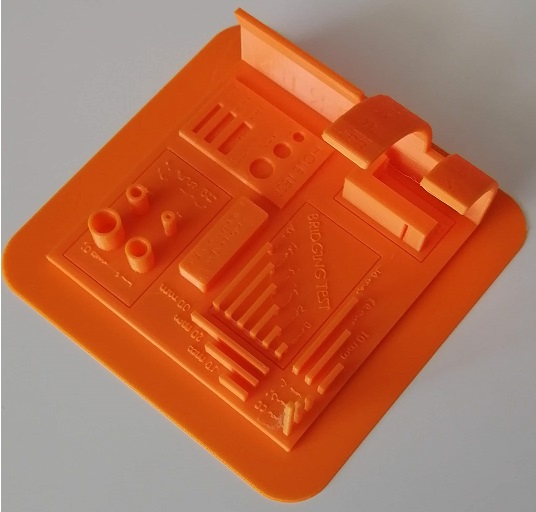
Upper curves and cilynders looks good.
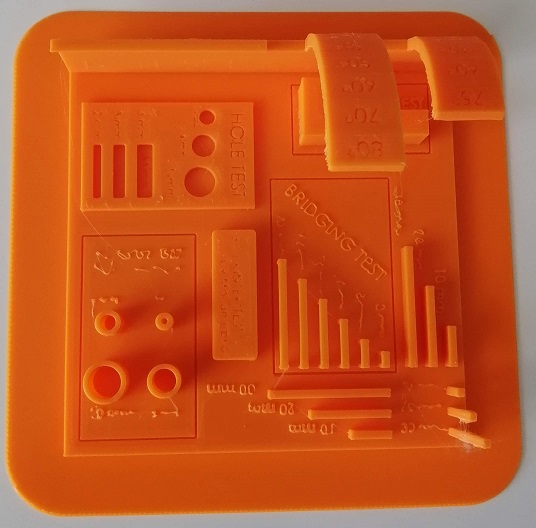 Walls and holes looks good
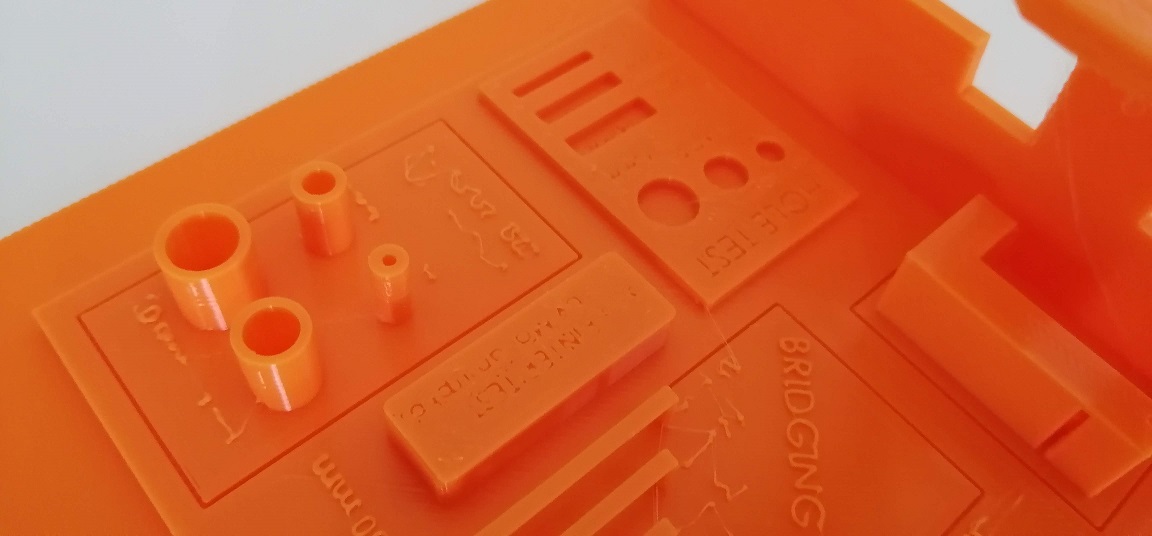
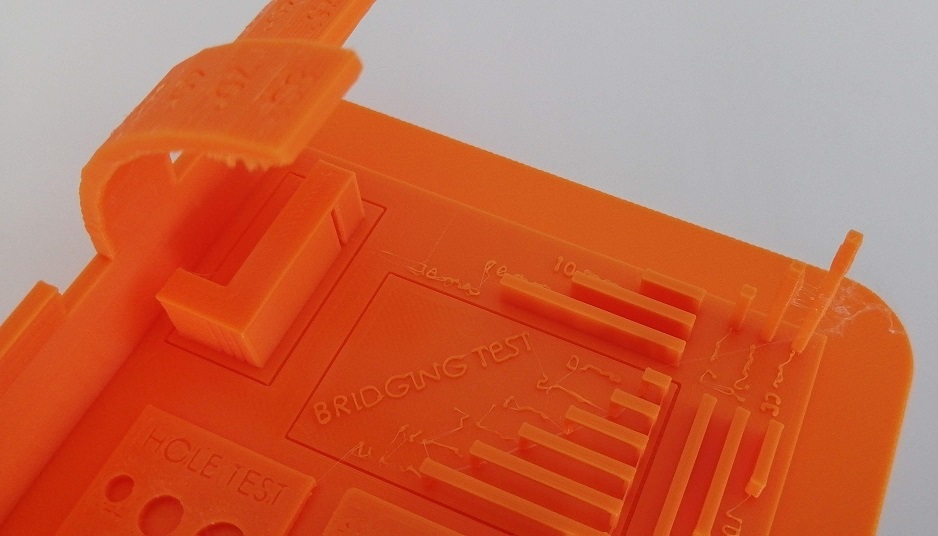
Some text require more precision
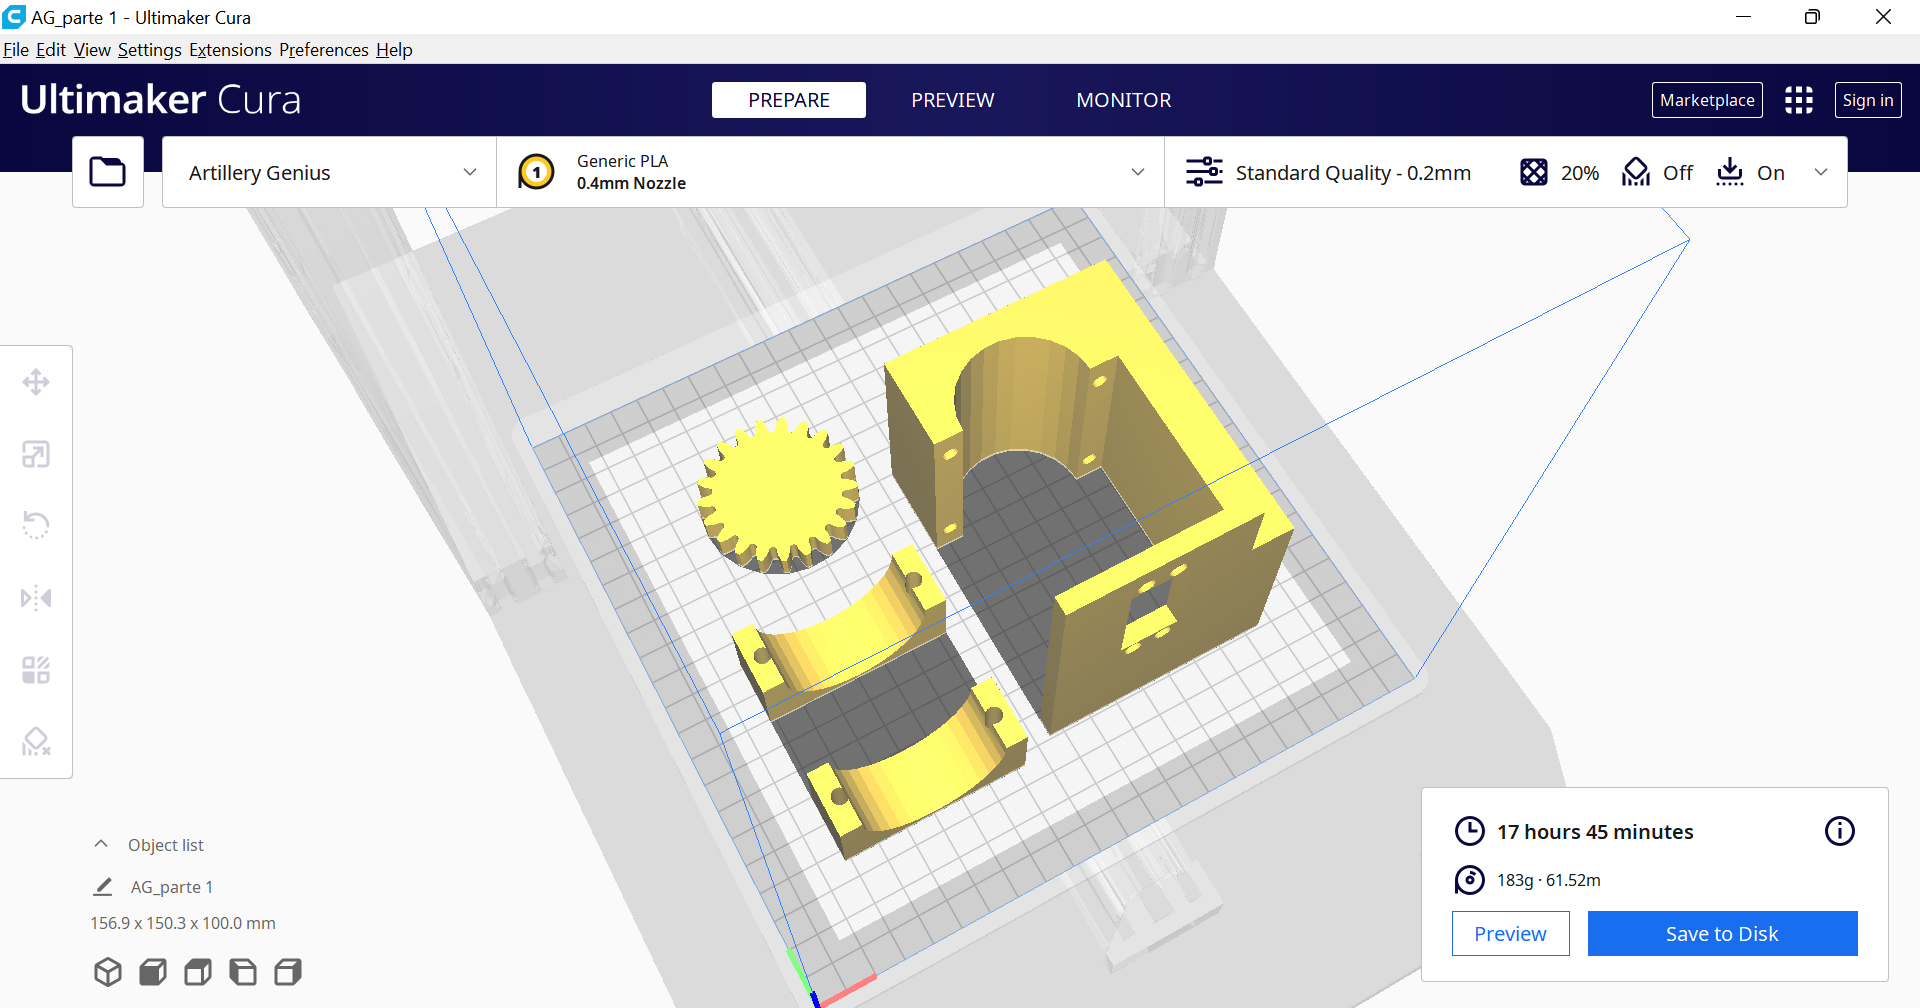
Design and print:
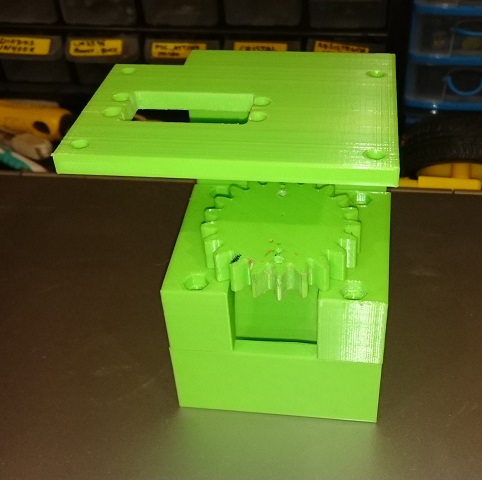
I've designed a 3D electro valve shell in AutoCAD software. It was created to mount on a manual valve controlled by a servo motor.
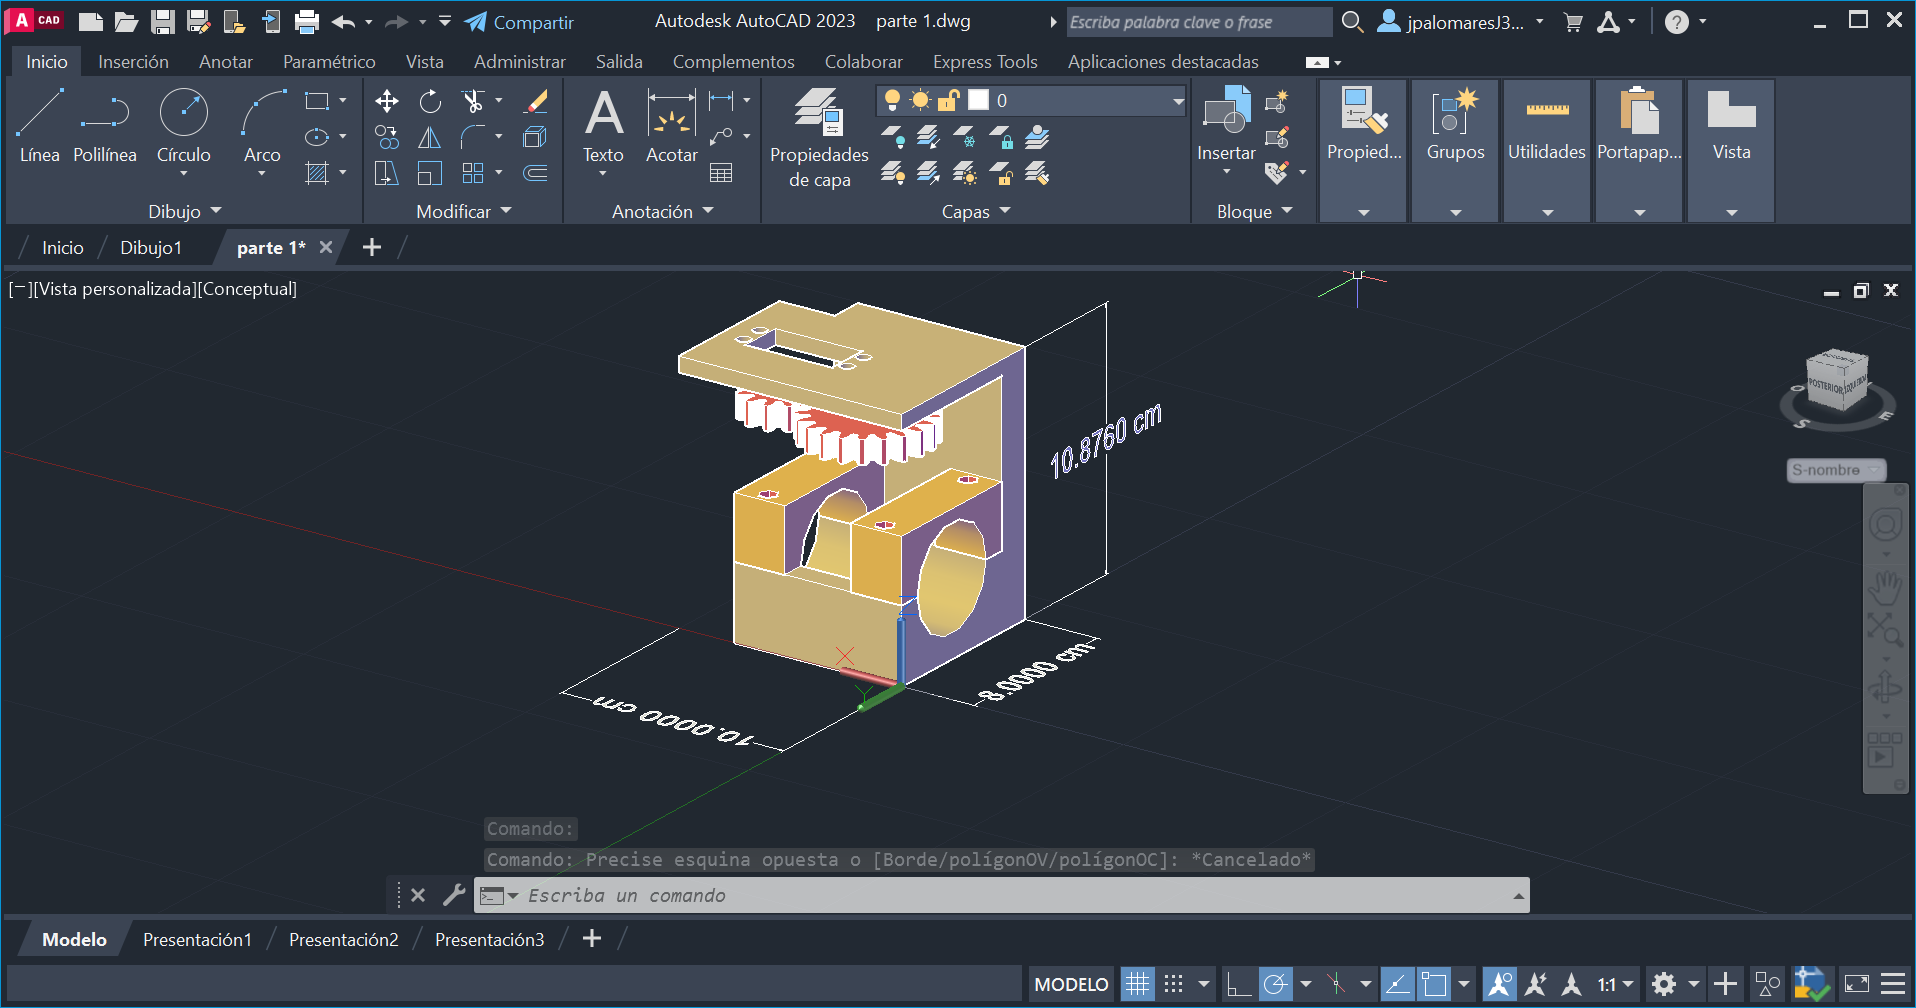
Final view of servovalve
Valve support design
This is the box for the servomotor

This is the top cover that serves to protect the servomotor
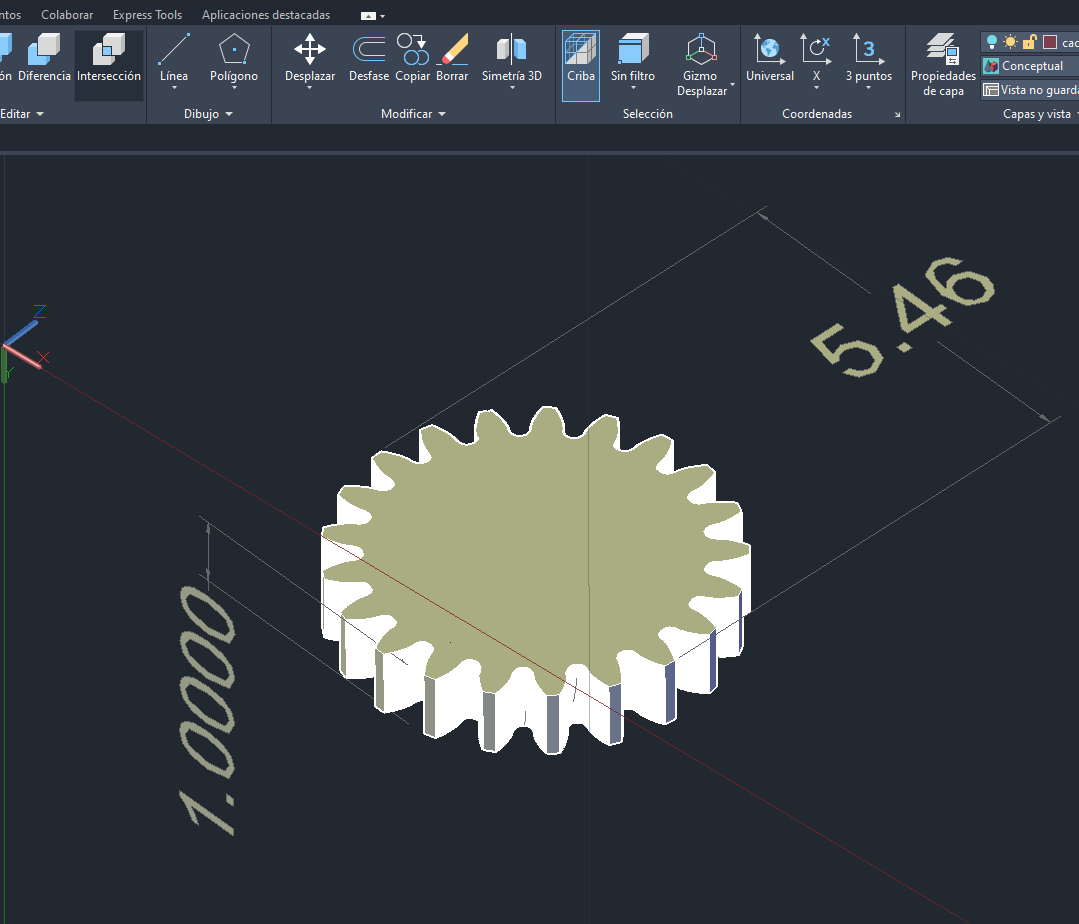
This is the opening gear
Then, it was sliced in CURA software.
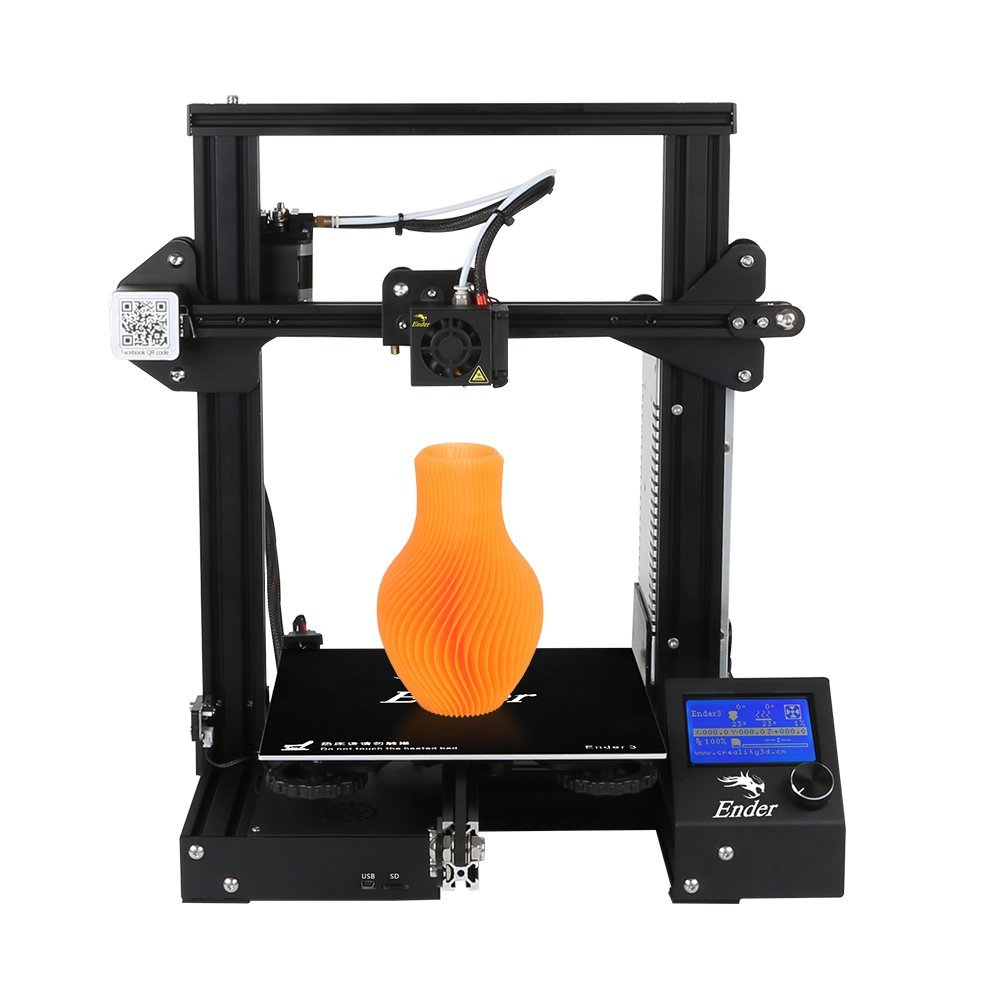
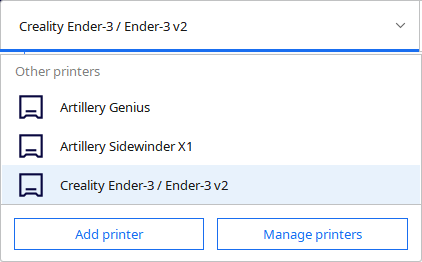
For the printing process I used an Creality Ender 3 brand 3D printer.
Here I will show some characteristics of the machine:
Print size: 220x 220x250mm
Two color support: This printer has a single nozzle structure, so it doesn't support two-color printing.
Acuraccy: The standard configuration is a 0.4mm nozzle, which can support an accuracy range of 0.1-0.4mm
3mm filament Support: Only supports 1.75mm diameter filaments.
Filaments support: It supports to print the PLA, ABS, PETG, TPU and other linear filaments.
Offlie support: It suppots online and offline to print, but in normally, we suggest to print offline that will be better.
Power consumption: The overall rated power of the machine is 270W, and the power consumption is lower.
Highest nozzle temperature: 250 degrees Celsius
Maximum temperature of the hot bed: 110 degrees Celsius
Continuous power off support: Yes,it does.
Material breakage detection function: No, it doesn't support.
Double Z-axis screw of the machine: No, it's a single screw structure.
Printing speed: The best printing speed of the machine is 50-60mm/s.
SO support: Currently it can be used in Windows XP/Vista/7/10/MAC/Linux.
Link: https://www.creality.com/products/ender-3-3d-printer
Printing Parameters
So, I've used the default profile for Creality Ender 3
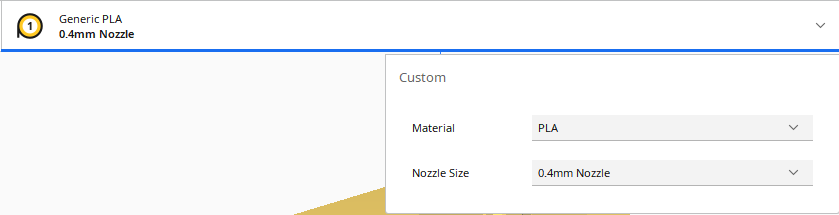
I've used standard PLA, nozzle 0.4 mm.
Then, I've selected de Standard Quality profile (0.2mm layer), Infill density 20% (default), Printing Temperature 200 Celsius degrees (value by manufacturer) , Build plate temperature 50 celsius degrees (value by manufacturer), Default speed 50 mm per second and Build plate adhesion type Brim for a secure print.
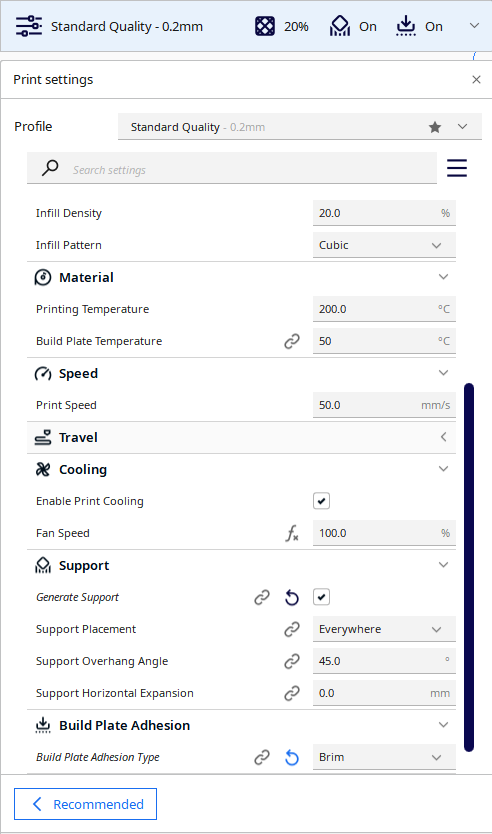
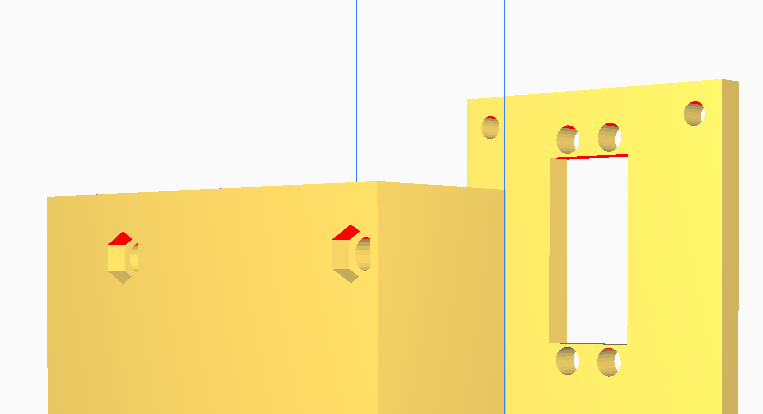
I used supports because the program shows me areas in red, and there are straight surfaces that require supports so as not to ruin the impression.
Finally, the printing was made.

Download
Files generated
Takeaways Assignment
- The 3D scanning process requires some conditions to achieve its purpose. A clear place is required where there are no other objects that the scanner could capture.
- I realized that I had to find an optimal distance between the scanner and the object to perform a more accurate scan.
- The ideal is to have a turntable that allows me to scan details in all their dimensions.
- In 3D printing I had to look at some important parameters. I realized that to save printing material I had to rotate the object in such a way that the software doesn't do as much support.
- For me the best adhesion on the platform is the BRIM type. That allows me to remove the piece more safely and quickly.