4. Computer controlled cutting
we work on 2D files:
- how to make parametric designs
- when and how to use a laser cutter/vinyl cutter
- files for our final prototype.
parametric designs
parametric design is ” a process of design any thing by based on algorithmic behavious that enables the expression of parameterd and rules that, together, define, encode and clarify the relationship between design intent and design response “
here are steps how I made it.
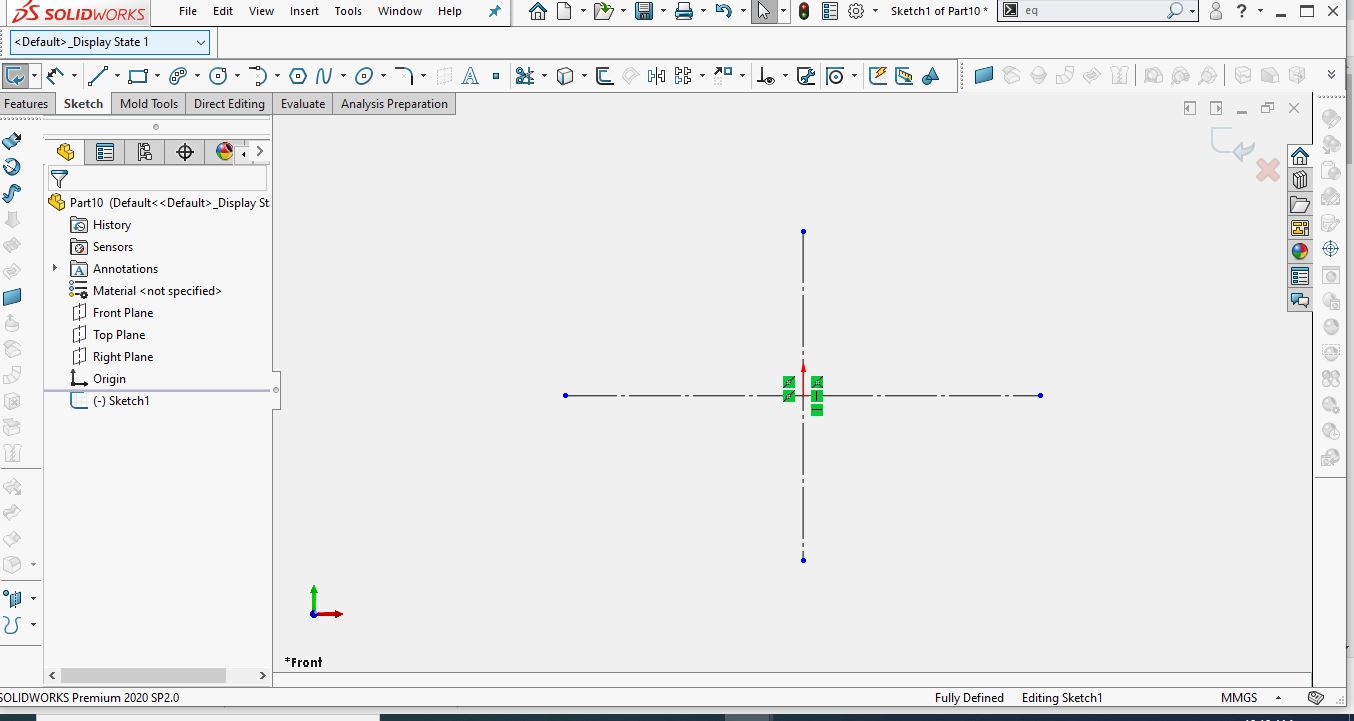
- I design my Parametric shape using relationships in solidworks 2020.
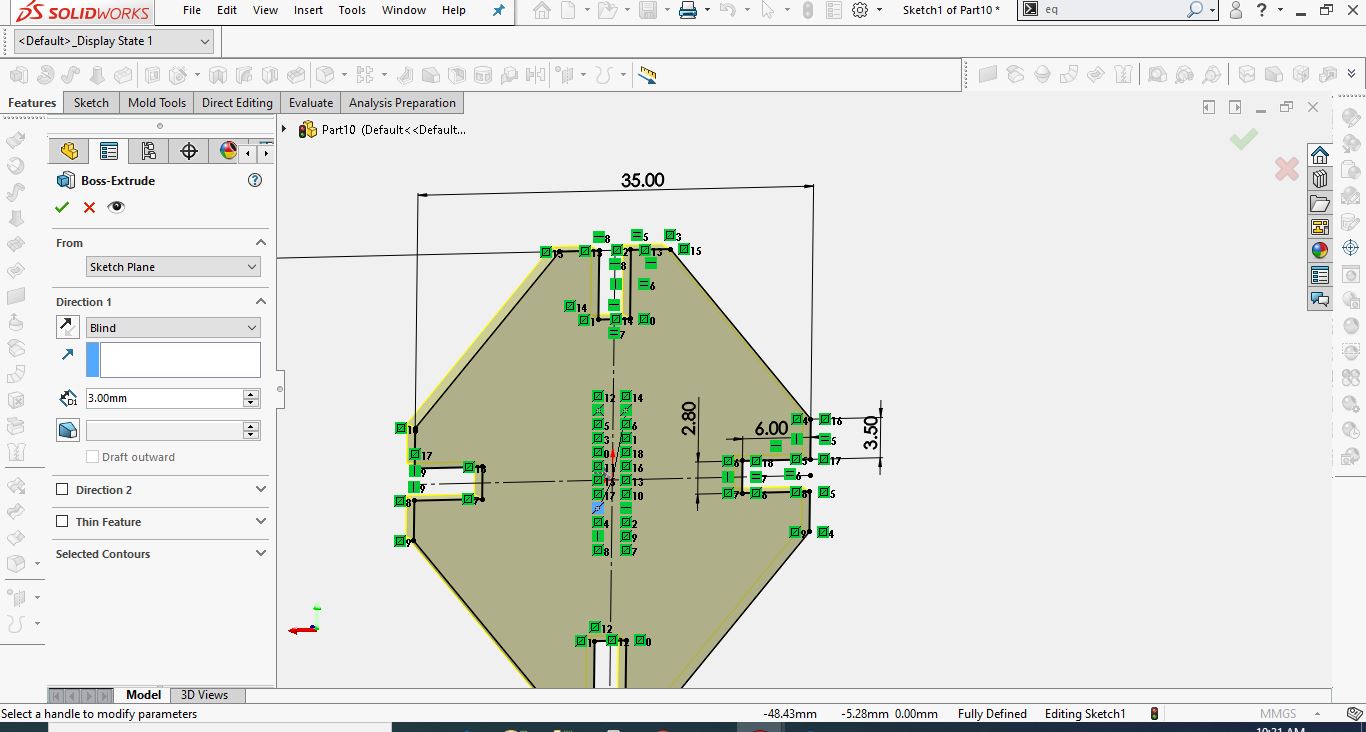
- Saving my 3D Design in DXF for lasercutting
- import saved DXF and multiply the models into cowelDraw for cutting them
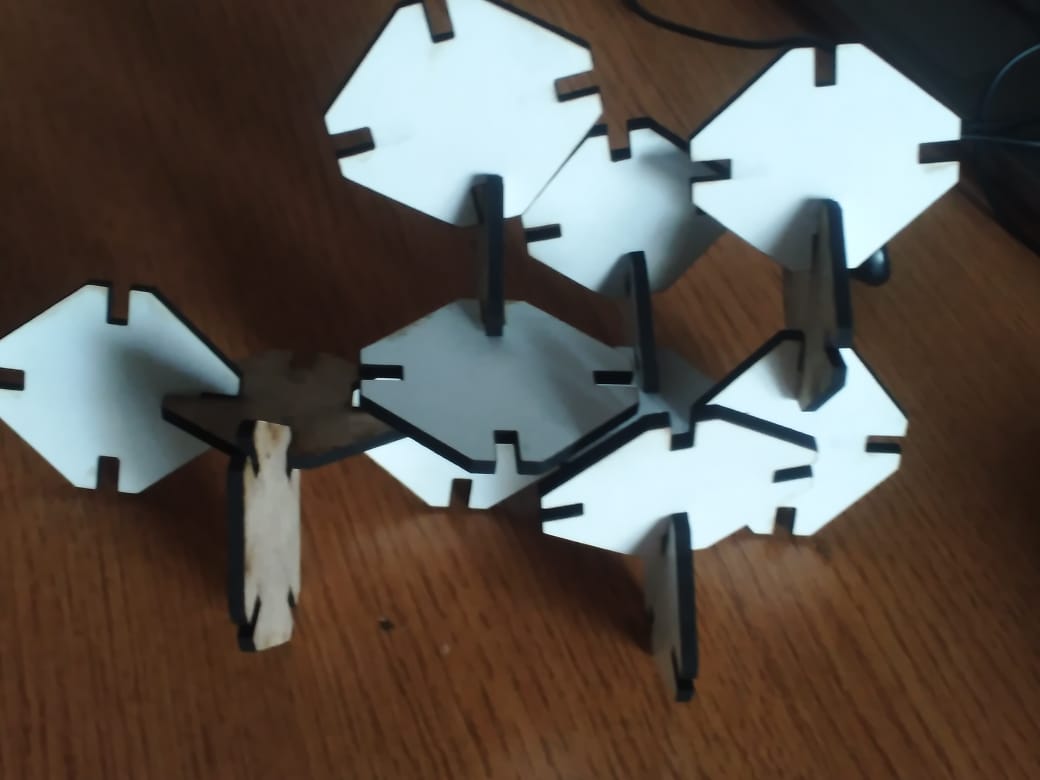
- I assembled the parts cut by lasercutter following the my design shape.
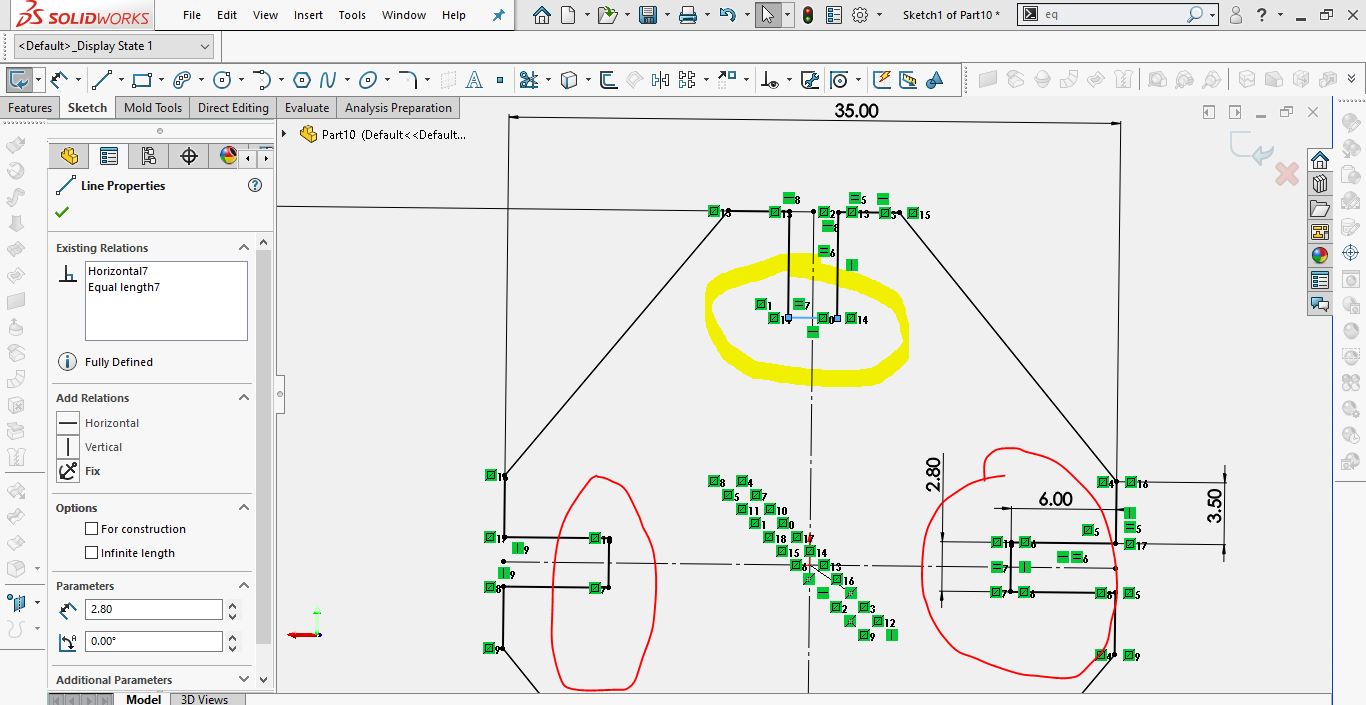
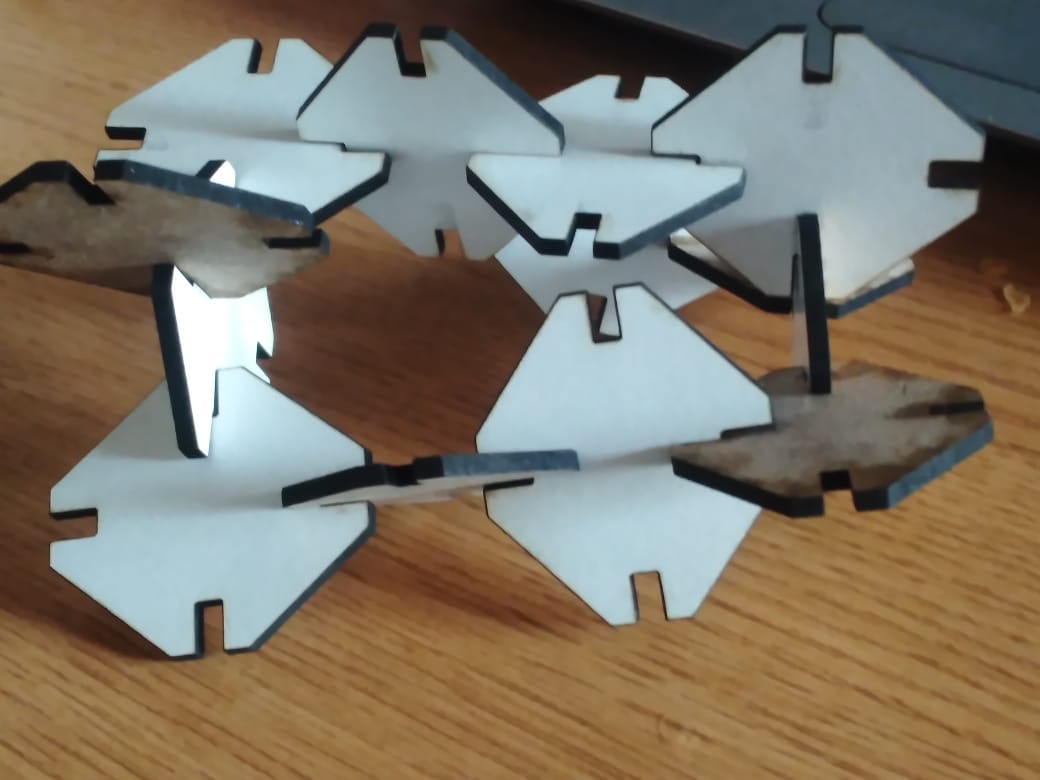 After correction of parametrics design of this assignment, i had to design and lasercut a parametric press-fit construction kit, which can be assembled in multipe ways. So I started designing a parametic form in “solidworks” using the line tool.
step1:
 After designing perpendicular line i start to design the model, I had to set user. parameters to make my model parametric responsible. The parameters measurement should be full defined when you change whole model should be change, long ,kerf and short were set by me according to the measurement of my model.
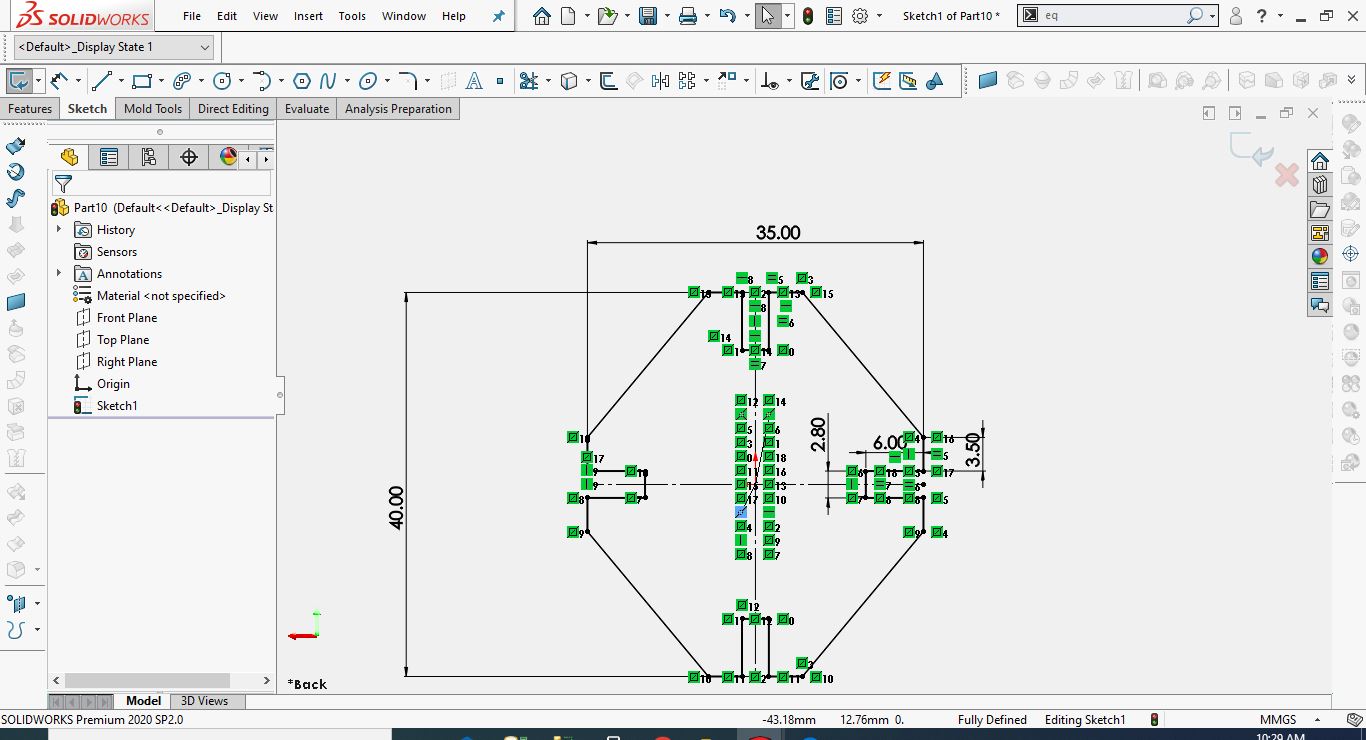 my model shows up containing mesurement fully defined with every line I have set in my sketch
 Now the only thing I had to do, to make my model parametric, was to bind the line highlited yellow color to his parameter in my case it is for example the line h to “short”. Then I simply binded every other line that hast to have the parameter “short” too to the line highlited red color.If I change the parameter “kerf” to 2,80mm, every side will change his lenght automatically.
When you change the lenght of yellow highlited the length highlited in red will change automatically
Now the only thing I had to do, to make my model parametric, was to bind the line highlited yellow color to his parameter in my case it is for example the line h to “short”. Then I simply binded every other line that hast to have the parameter “short” too to the line highlited red color.If I change the parameter “kerf” to 2,80mm, every side will change his lenght automatically.
When you change the lenght of yellow highlited the length highlited in red will change automatically
LASER CUTTING
The laser cutter is used to precisely cut 2d designs into different kind of materials. You can either cut or engrave in materials like wood, paper, cloth and acryl. The laser cutter is limited to a certain thickness of material but possible thickness changrs according to the strenght of the laser cutter. I will use a Epilog engraver with 50 watt power.
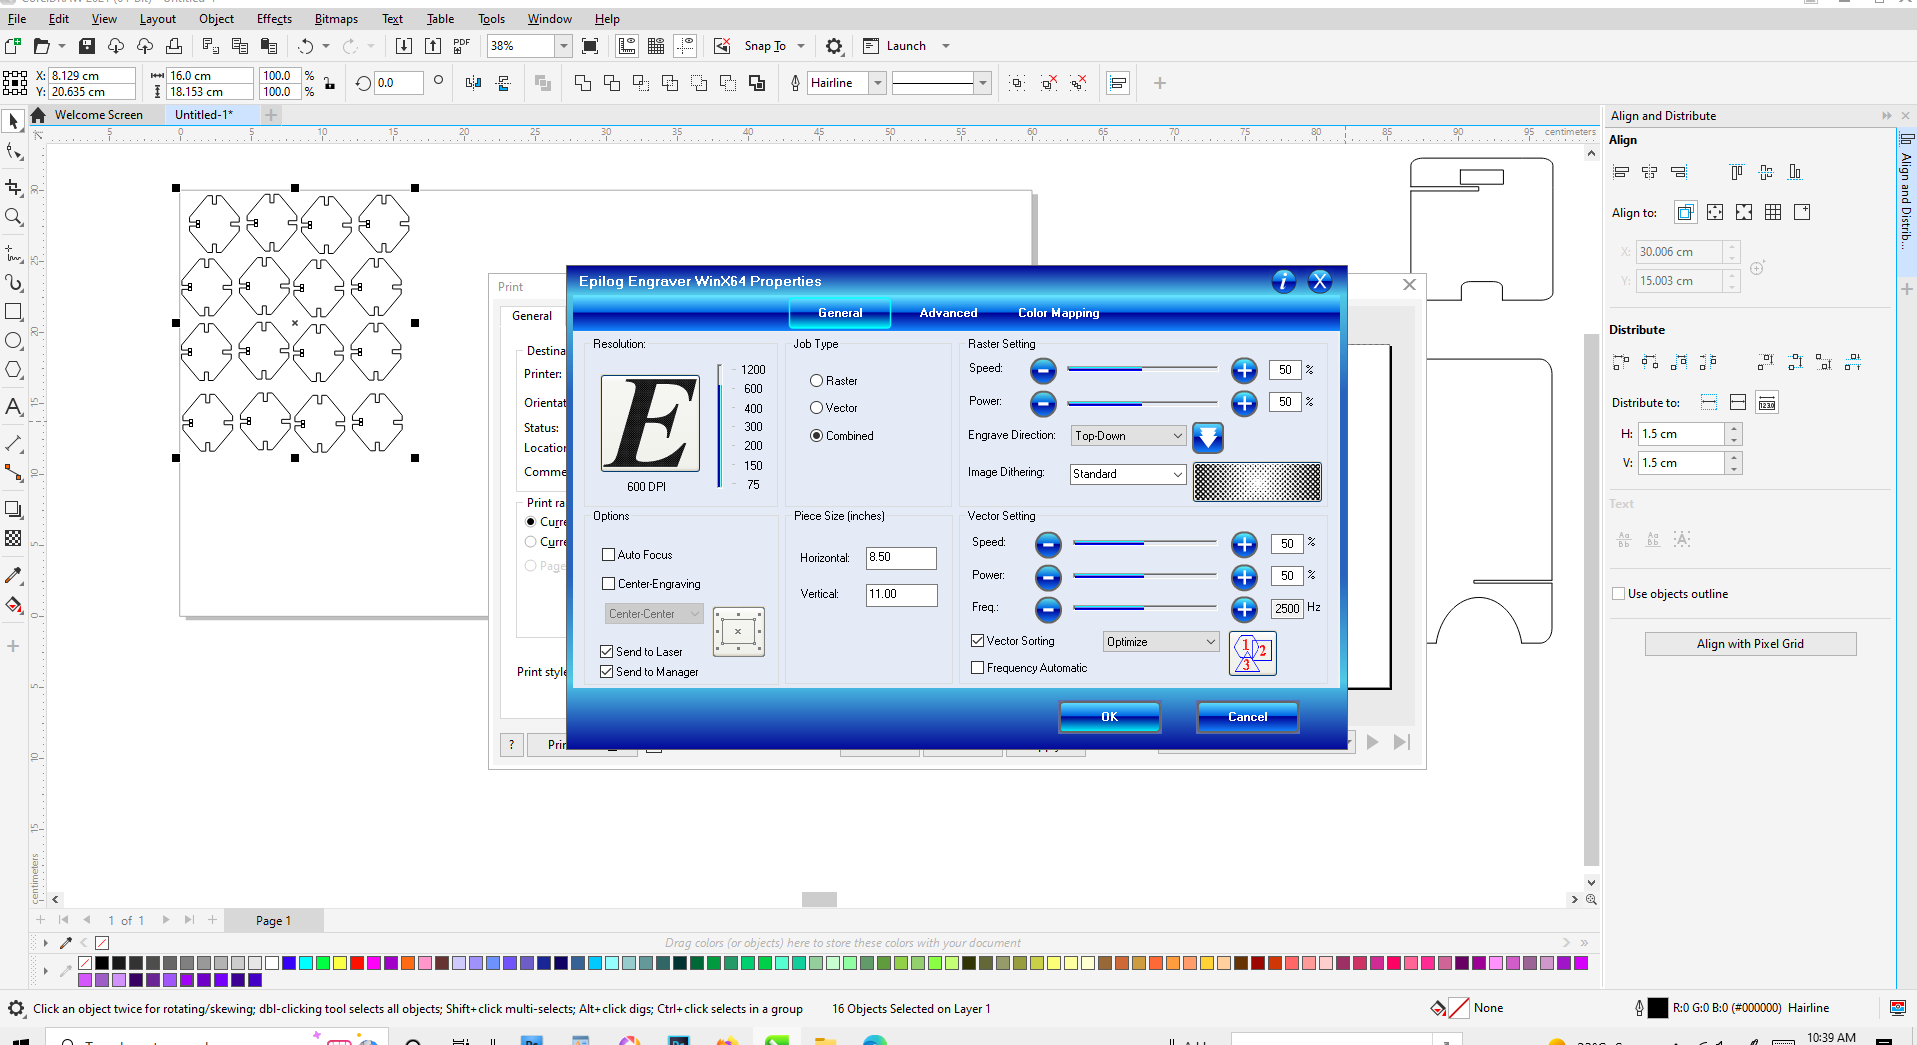 after setting i sent the job to the machine
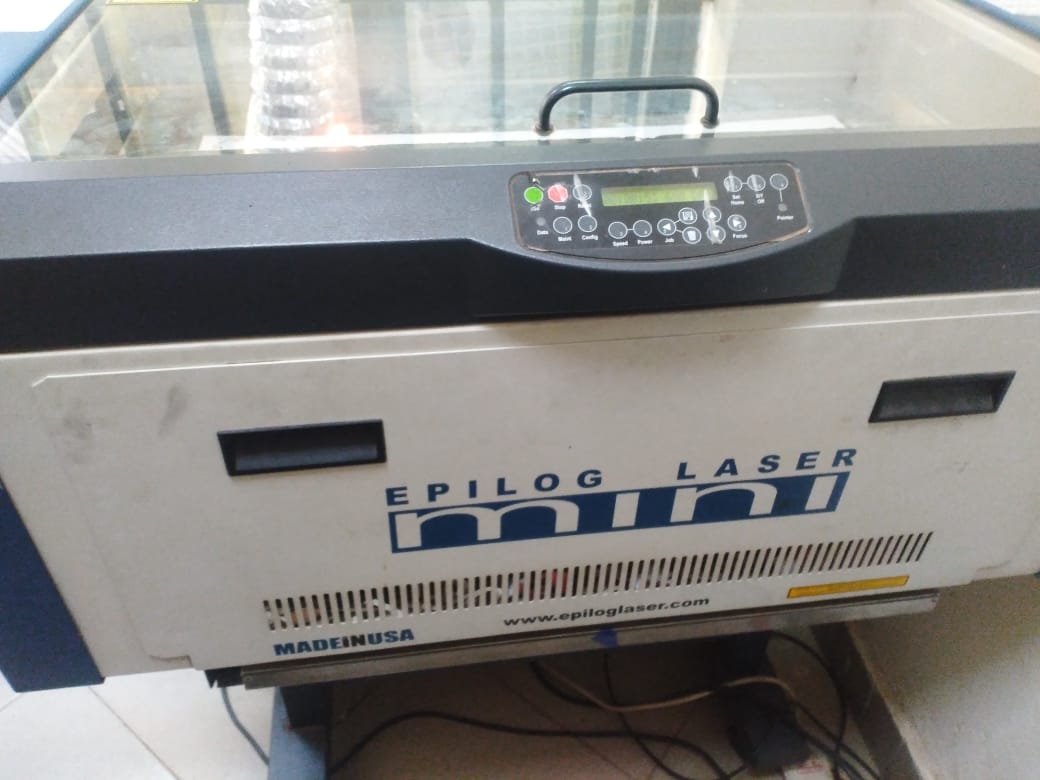 Here are photos showing how I made every step
the final shot
setting the equation ,global variable,and dimasions t
group assignment
Before starting my Fab’s laser cutting set consists of the following external machines:
characterize your lasercutter’s focus, power, speed, rate, kerf, joint clearance and types
  * Laser cutter
  * Air compressor
  * Fume extractor
Each of these machines are independent. 1. I started by opening the covers of the laser cutter and the cooler to blow out all the dust and clean the machines inside as much as possible.
- process involves in using the laser cutter laser can be used in different process like laser cutting, Raster engraving, vector engraving, 3D laser engraving,metal laser marking and photo-engraving let see the breif explanation of laser processes
LASER CUTTING
laser cutting is a precise method of cutting a design from any material using Computer Aid Design to guide it, you can found the three main type of laser commonly used in industry CO2 lasers Nd and NdYAG but in most fablabs even our fablab Rwanda have CO2 lasers.
RASTER ENGRAVING
laser engraving or laser ecthing is a process of marking where the laser head engraves or remove a partion layers from material by moving left to right slow down the material. which is known raster engraving.
VECTOR ENGRAVING
Vector engraving is a method of marking or scoring a material surface. Like the laser cutting process the laser beam will follow the path of vector strokes without cutting all the way through. The width of the stroke is made at the kerf of the laser i.e approx 0.2mm. To engrave thicker strokes, we would need to use the raster engraving method or de-focus the laser slightly.
3D LASER ENGRAVING
3D Laser engraving is a fantastic process that really pushes the boundaries of laser technology.It works in the same way as laser engraving , but when using the 3D setting, the laser will also adjust the power it applies to the material based on the tonal quality of the drawing (lights and darks). Black areas receive maximum power while the white areas do not get engraved. All the shades in between get a varying amount of power giving it a true 3D appearance. The laser adds sloped edges to the engraving at varying depths.
Metal laser marking
Metal laser marking is another method that involves the basic laser engraving process. During this process a special chemical marking compound is used. Surface depths cannot be achieved, the surface of the material is marked with permanent black marks. This process is mostly used for metal engraving but it also works well on other hard materials such as ceramic, marbles and stones.
Photo Laser Engraving
Photo laser engraving is essentially laser engraving but with a lot more detail. The laser reads the the tonal qualities of an image much like a printer. Black areas receive maximum laser power, white areas do not get engraved, the shades between the two get a varying amount of power. You can achieve some stunning results where we can engrave photographic quality up to 1200 DPI on many different material.
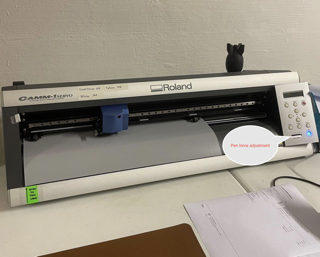
Vinylcutter
The Assignment was to cut somme thing on VinlyCutter, I found that VinlyCutter use CutStudio software which come with this Roland machine and it is machine used especially used to design stickers. To cut something on VinlyCutter we need :
Roland machine itself A computer with a design A material to use
There are steps helped me and you too you may follow them while cutting something on VinlyCutter:
First, I have loaded the material to use: There is an accessory behind the machine to help us to fix the material, there is a big white line and small ones on the machine, the first wheel should be at the midle of the big line and the second at the midle of one of the small lines keeping in mind that your working place is inside those two wheels then fix those accessories.
Long press a power button on the front of the machine, Select Roll and press enter then the machine will detect the size of your working area.
Adjust the blade:
UnScrul the lock and take the device which held the blade out, then take the material, the same as what you are going to cut darw a line on it, you will see that a line was drawn without passing through all the material which means it is good then put it back and the devices in its place when it fits lock it.
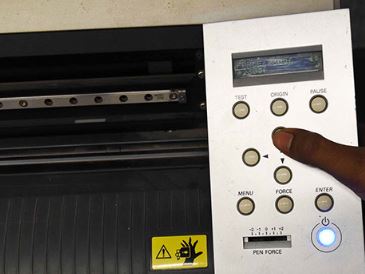
Set Force and Speed parameters:
Press MENU twice, UN SETUP will be opened through it go down with allow keys to CONDITION use Right allow key to set FORCE(I have used 1289) accordingly and use DOWN allow key to set SPEED(18cm/sec to 20cm/sec), all will depend on how hard the material to cut is.
Test: After setting up all correcly, you have to test if it will do your work correctly by long pressing Test button on the machine it will create a small box for you before sending your work.
Prepare your file for cutting:
Open CutStudio software and you will see an interface like a paper, it has a working area, you need to adgust your working area to do it.
Cut your design:
Import your design and resize your design to fit the cutting area, Right Click It then Select Image Outline and you may extract countour lines so that your design looks good Then keep the outline to be cuutted only and delete the orginal sticker then choose File, Cutting, and Ok and the VinlyCutter start cut your sticker.
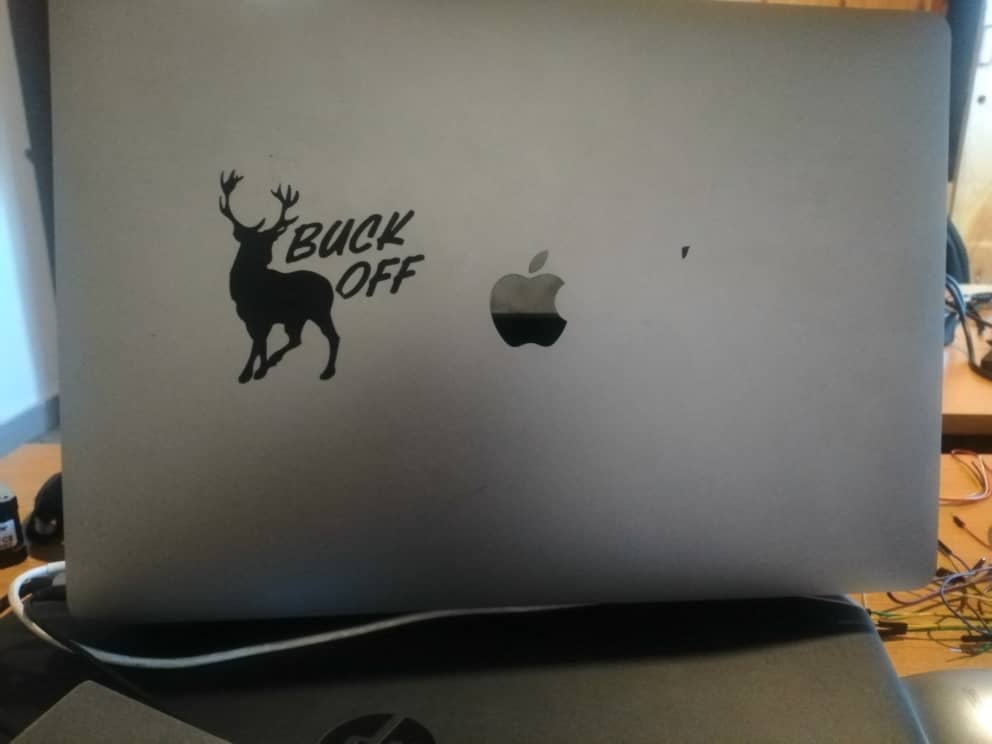
I have dawnloaded two stickers to cut them on VinlyCutter and I have cutted my logo designed in Gimp too and stick them on my laptop.
I decide to make some logo for my computer, I choosed the sticker from graphixmafia search engine.
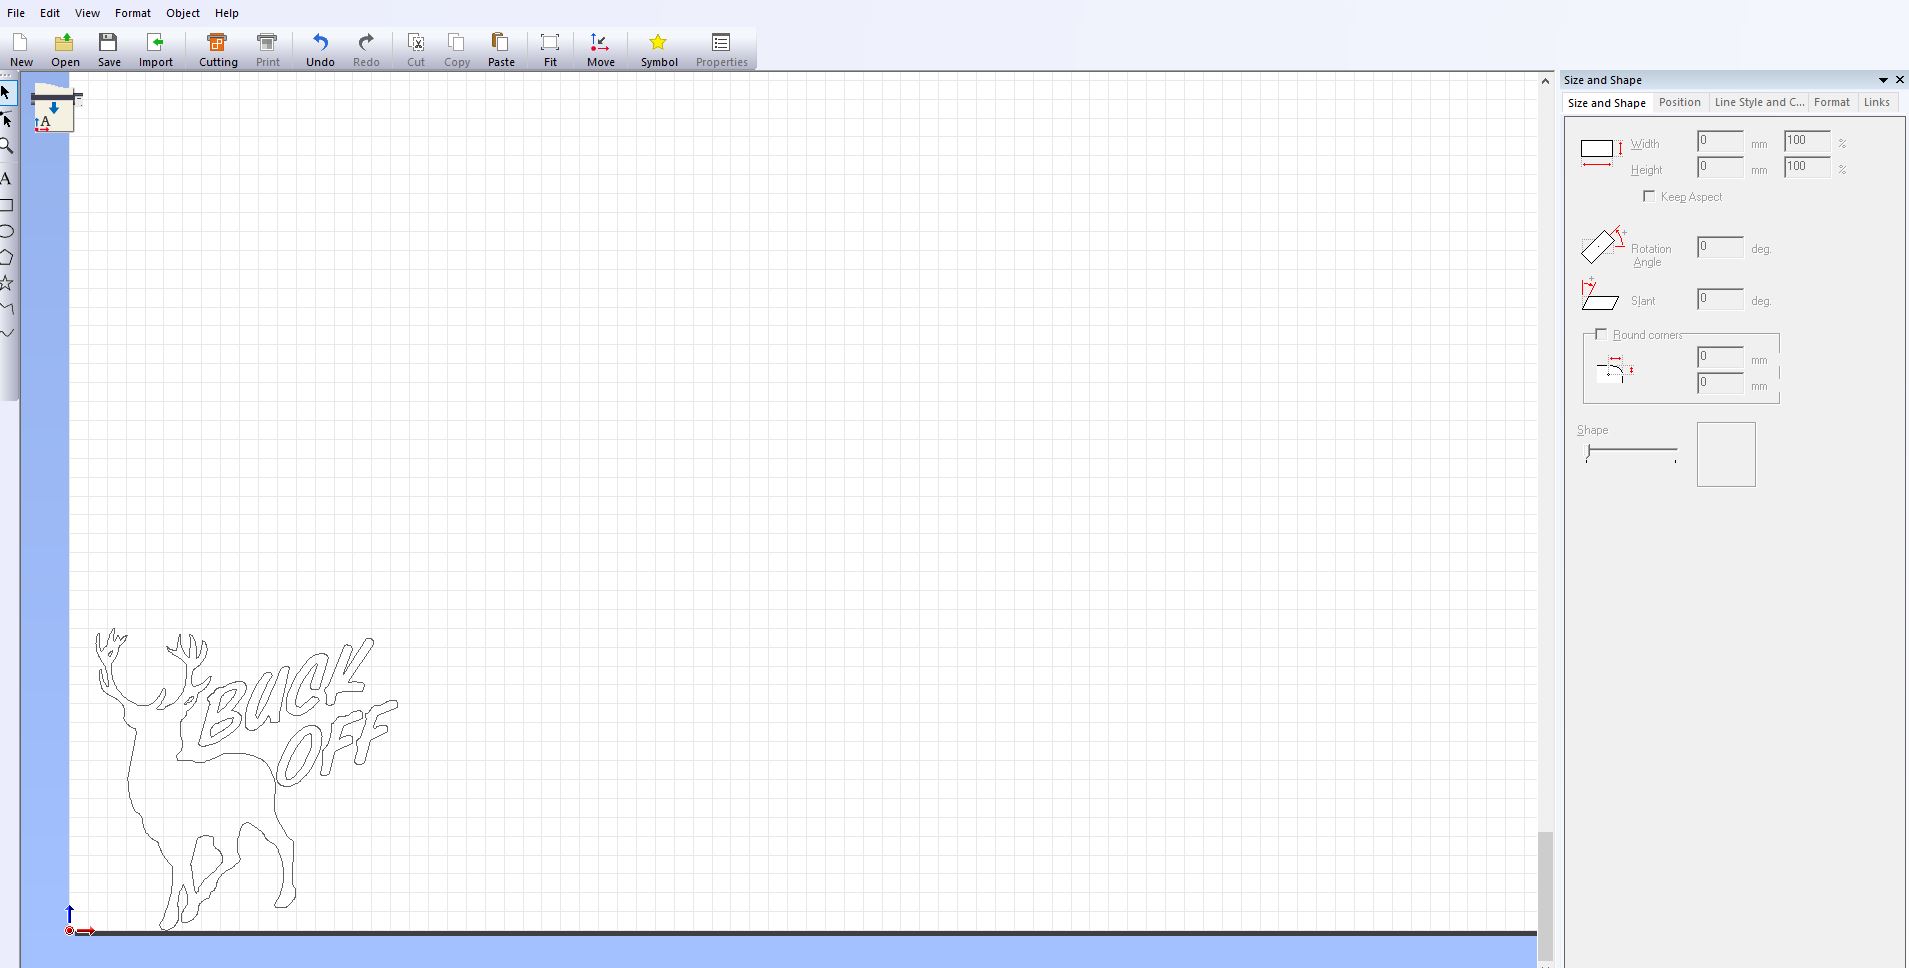
I downloaded the image of buck off sticker

I opened the cutstudio for editing
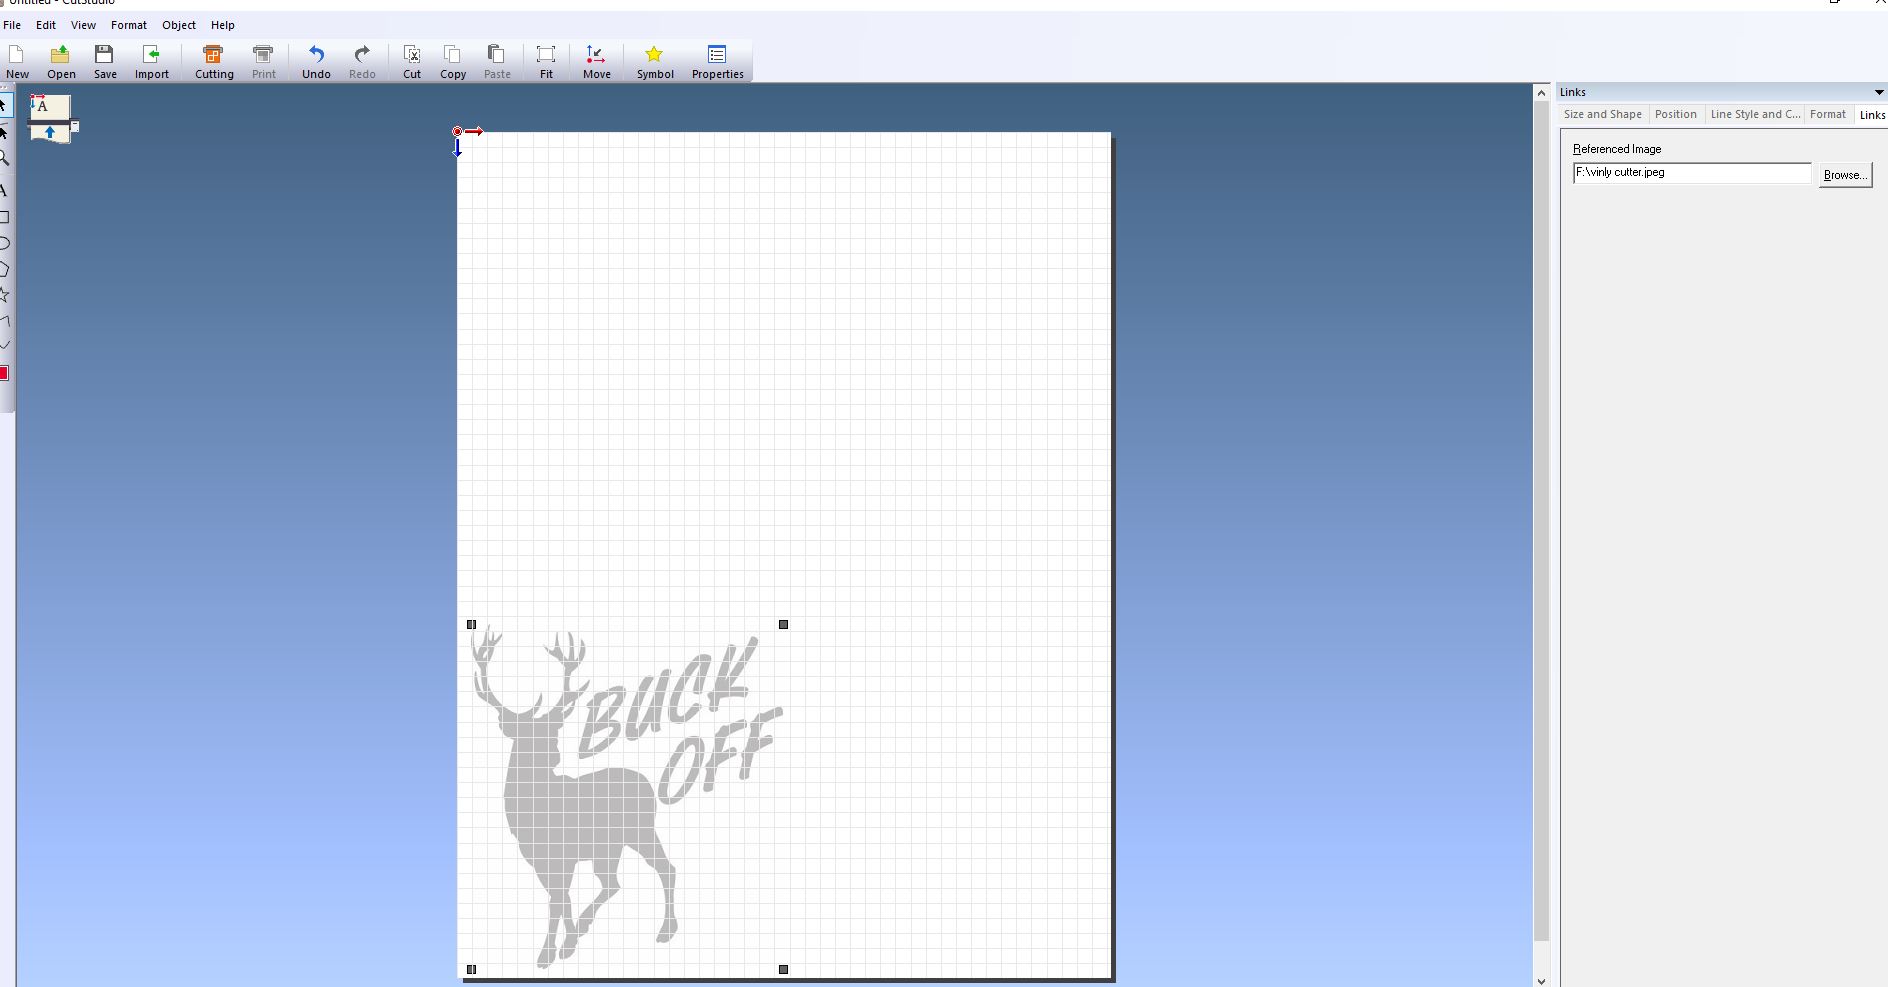
image outline
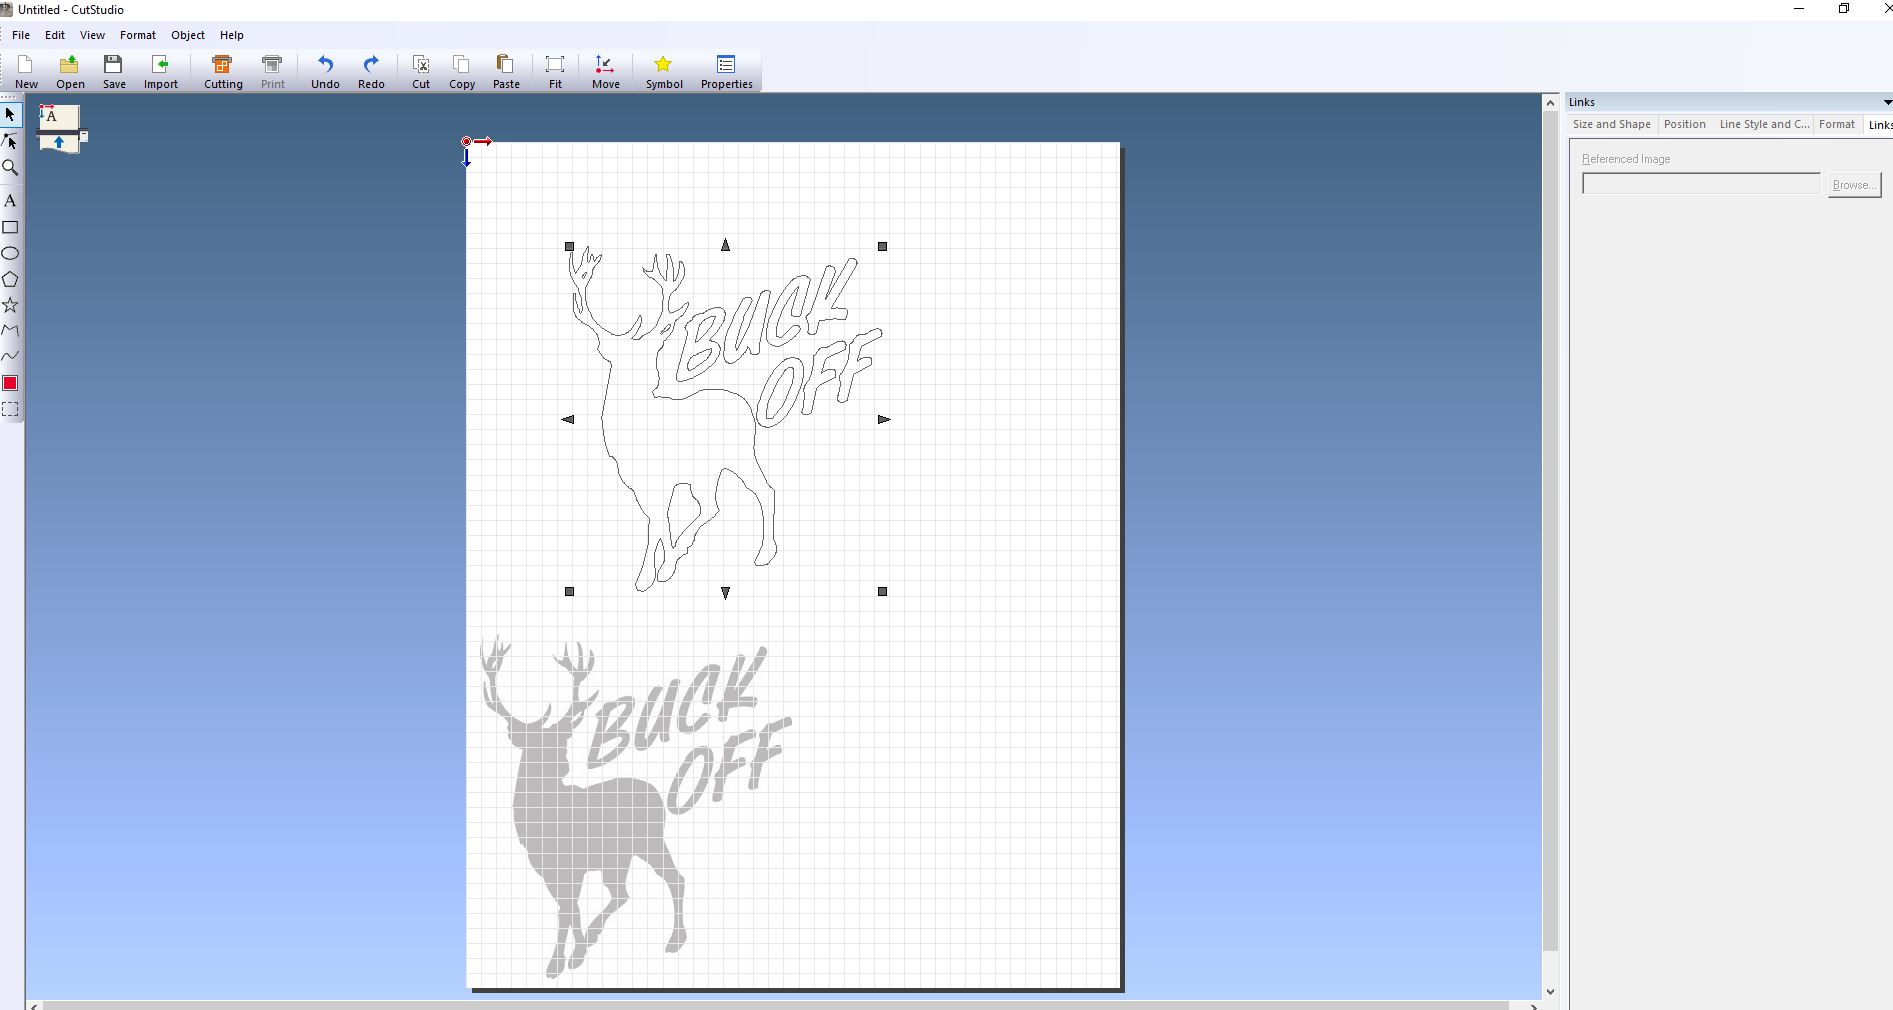 The image to be cutted
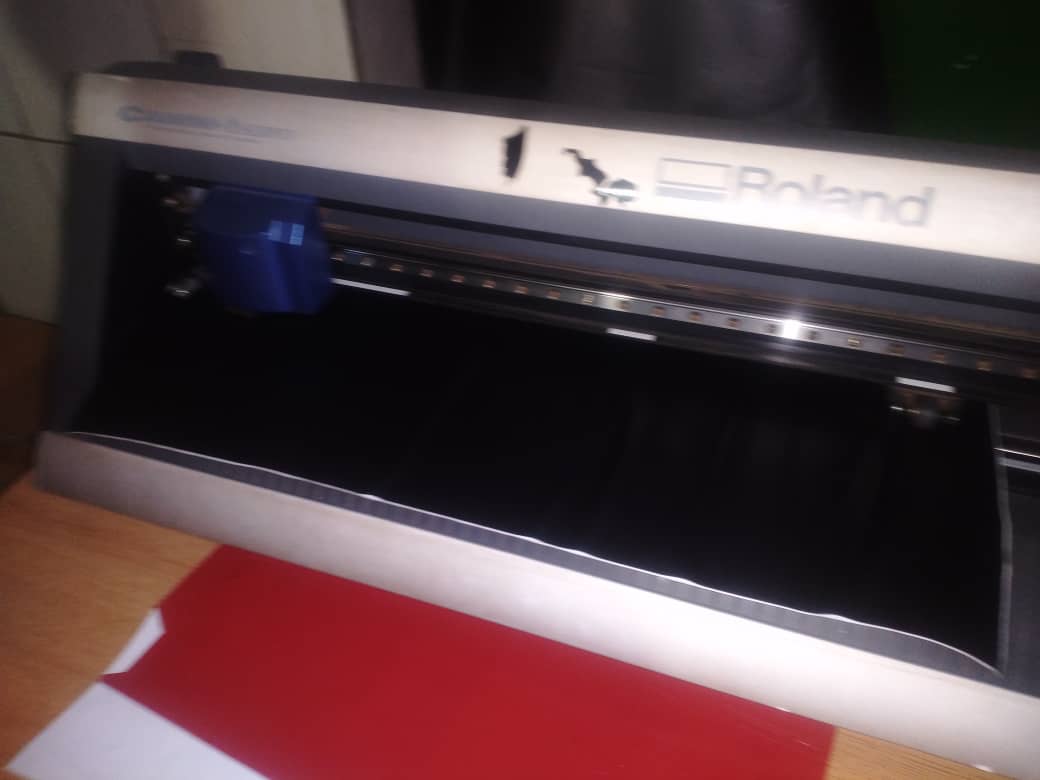
 loading the sticker paper to the vinlycutter machine
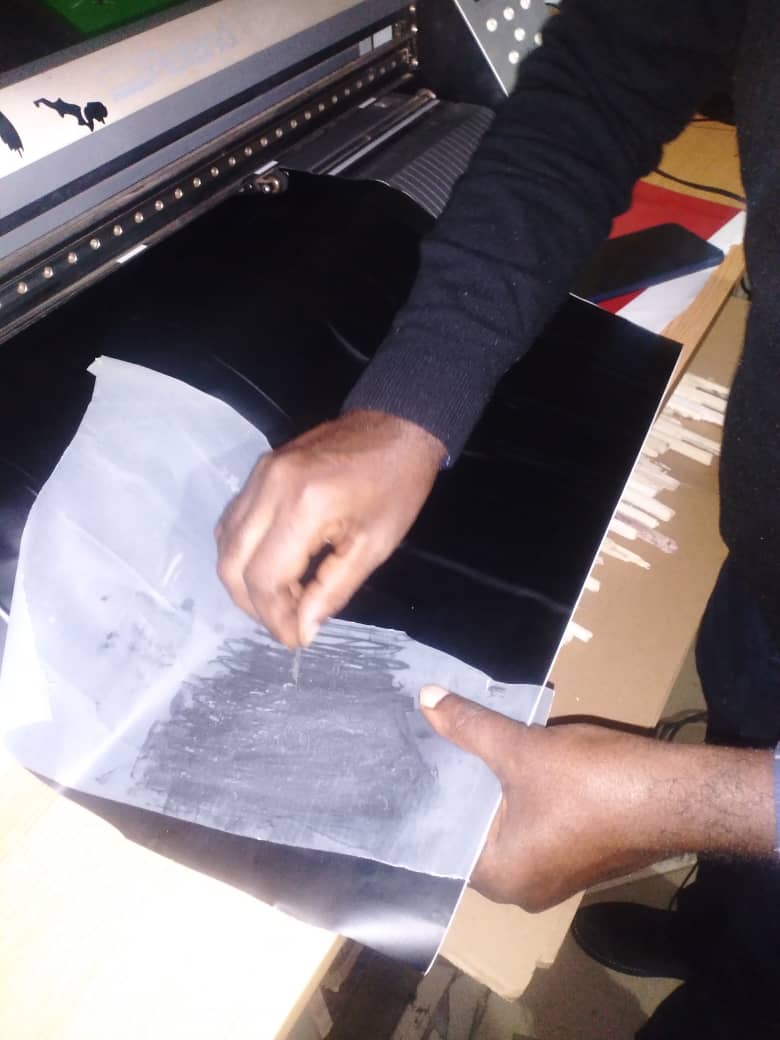
 to remove the sticker on material stickers
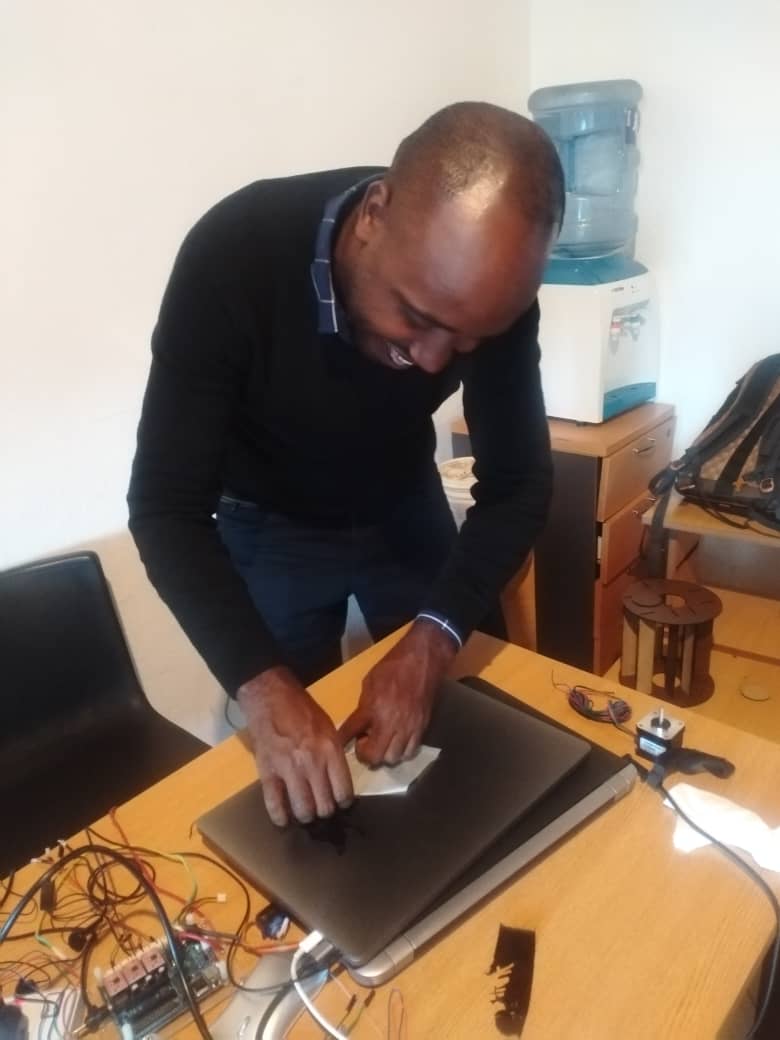
final result after cutting
DOWNLOAD file here