4. Computer controlled cutting
Group assignment:
characterize your lasercutter’s focus, power, speed, rate,
kerf, joint clearance and types
Research
The laser we have is CO2 Epilog mini 24 40W. The software we use to drive our machine is CorelDraw X6. We went through the manual and learned basic safety rules.
1.Never operate the laser system while unattended.
2.Always keep a properly maintained and inspected fire extinguisher on hand.
3.Always use the system’s Air Assist feature when vector cutting.
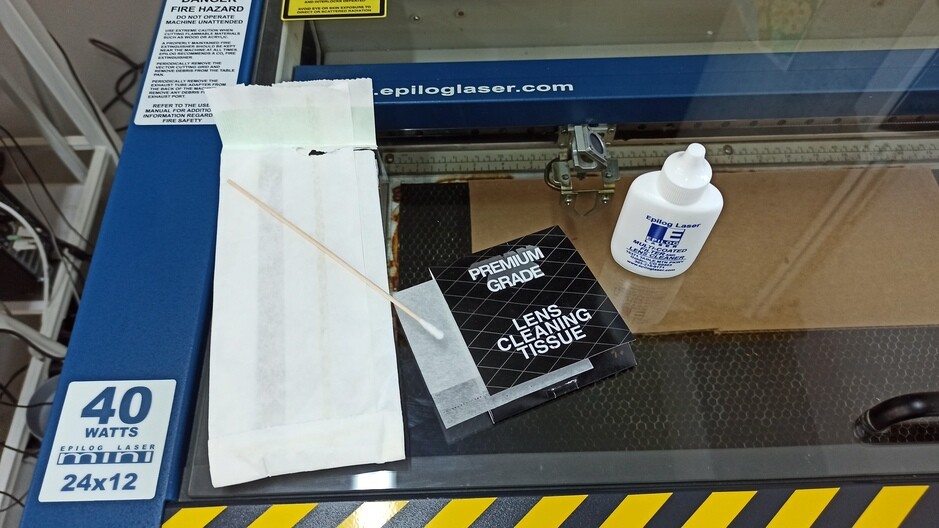
Maintanance
One of the most important parts of maintanace of the machine is to keep it clean, make sure the fume extractor has fresh filters and operates fine. Clean the lense every week with advised method described in the manual.
Focusing
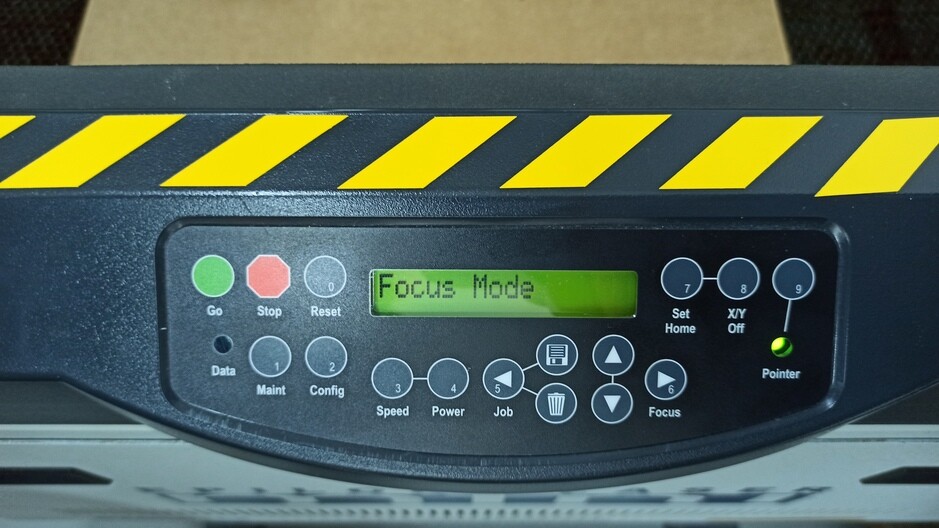
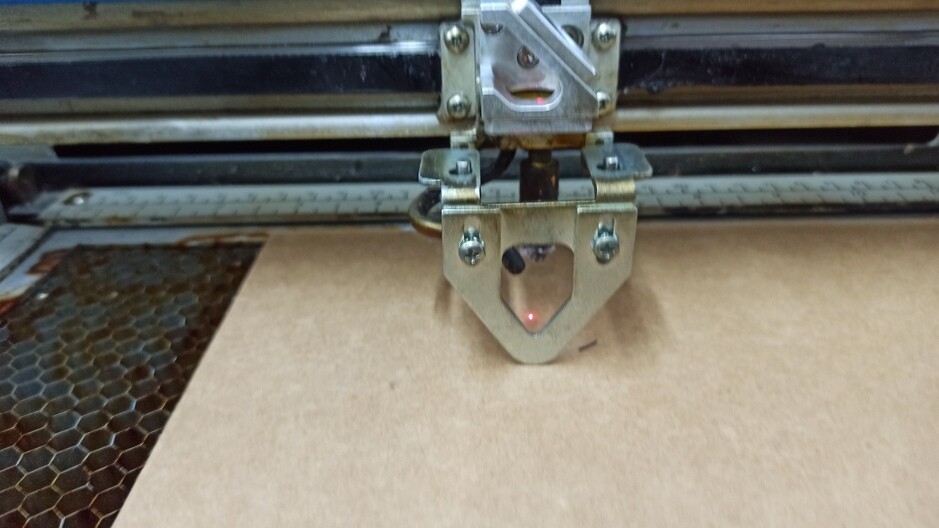
Lasers use a beam of light to engrave or cut directly on the surface of a variety of materials. The point when the beam is focused perfectly is called the focal point. The finer the focus the greater the power on spot. Beyond the focus point, the laser beam stays tiny for some time so that one can use it for Cutting thru material. Our laser has autofocus function and manual focus function. The following pictures show how to manually adjust focus since it’s much more accurate. Place the material you want to cut inside the lasercutter bed. Hit Focus button.
 Rotate the metal calibrator down (it holds in place with the help of mgnets).
 Using the arrows down and up adjust the height untill it tuches the calibrator’s tip.
 Rotate back the callibrator.
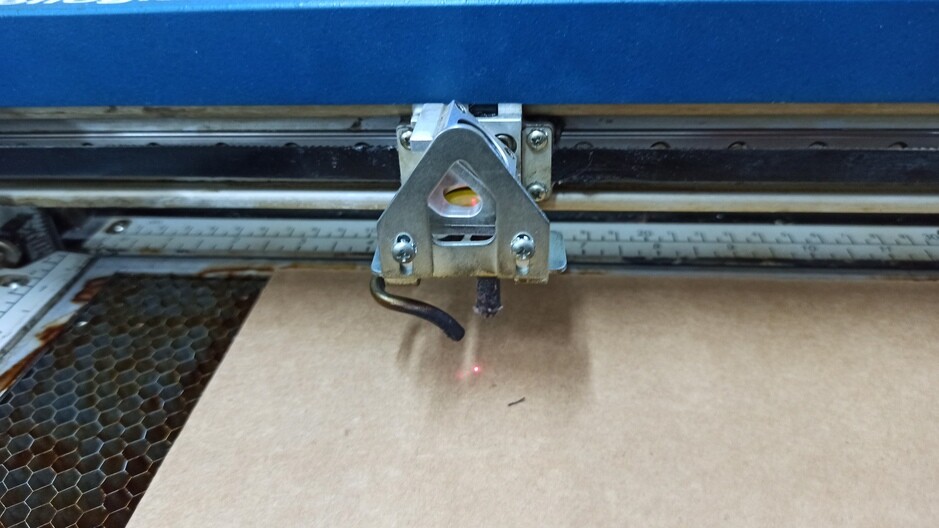 And you’re ready to cut!
Page size
Setting up the page size is the next important step. We measure the material we want to cut and enter those values in the cutting software as width and height of the page. Another way of doing this is to use lasecutter’s bed dimentions as page size in our case those are 24x12”. We tried the first method and changed the origin point to learn how to do that!
 In order to change origin point we hit X/Y off from the laser control panel then move the cariage by hand to the desired position and hit Set Home.
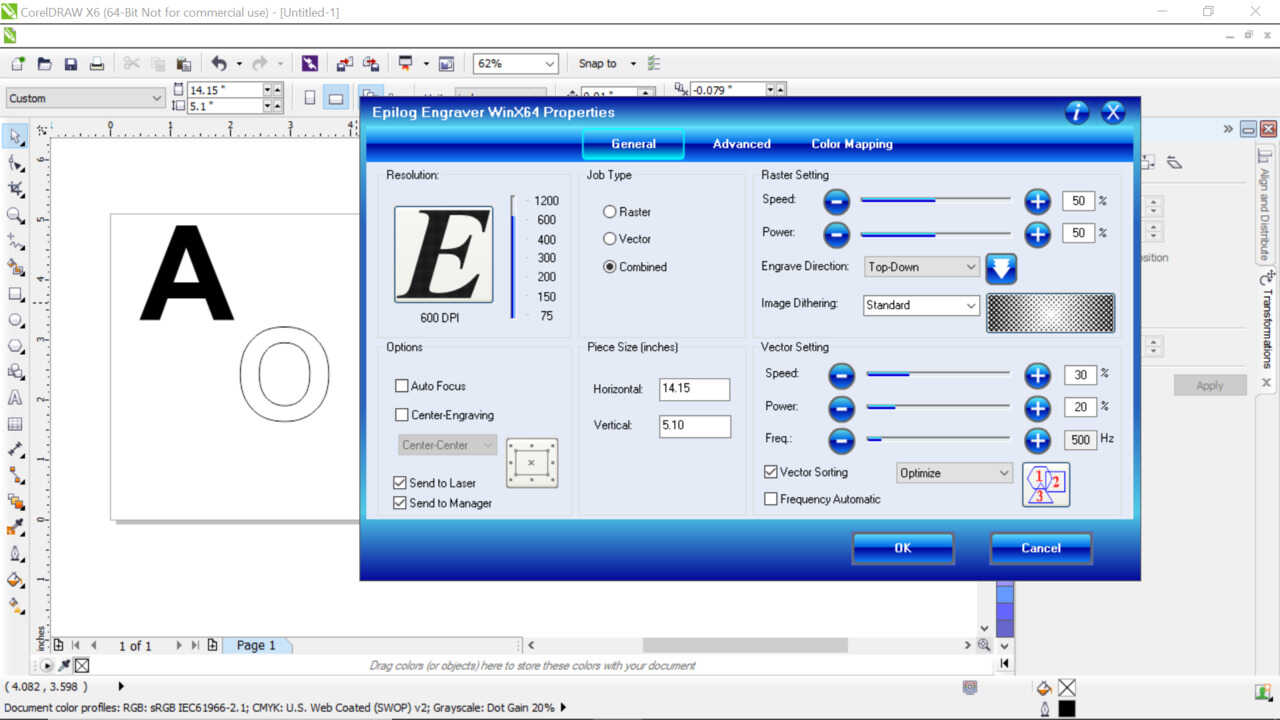
After this we prepaired a file using CorelDrawX7 we use it to print to the machine. We tried to print with Inkscape but unfortunately it’s not working with Inkscape.
In order to change origin point we hit X/Y off from the laser control panel then move the cariage by hand to the desired position and hit Set Home.
After this we prepaired a file using CorelDrawX7 we use it to print to the machine. We tried to print with Inkscape but unfortunately it’s not working with Inkscape.
Test cuts
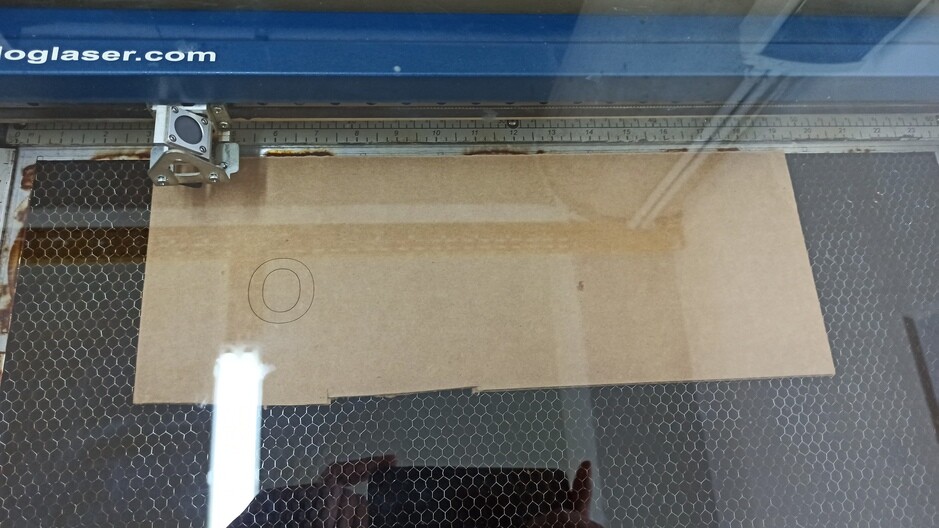
 We put first letter of our students A for Ashod and O for Onik. And tried engraving and cutting with different settings. After we wrote the values with marker.
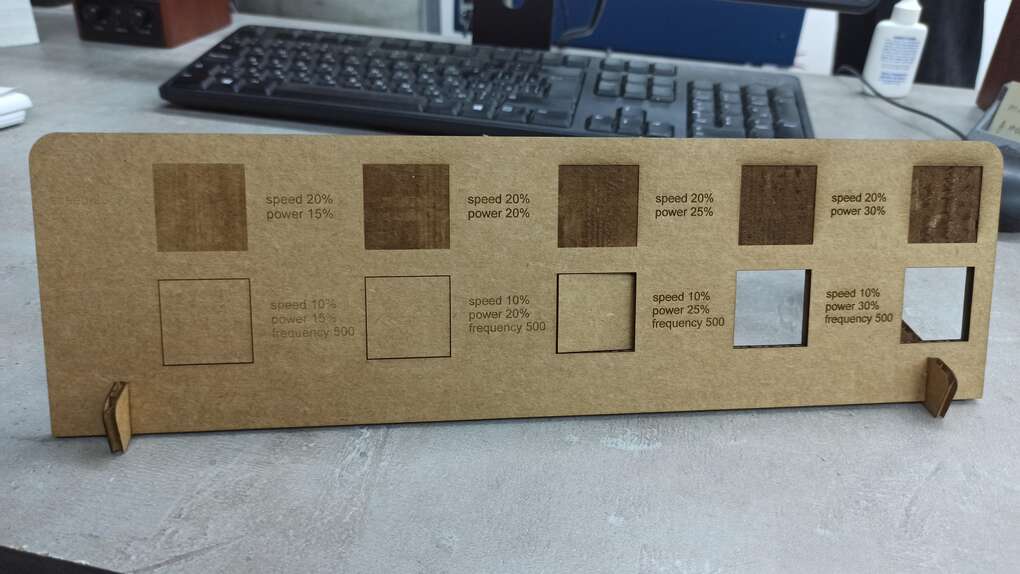
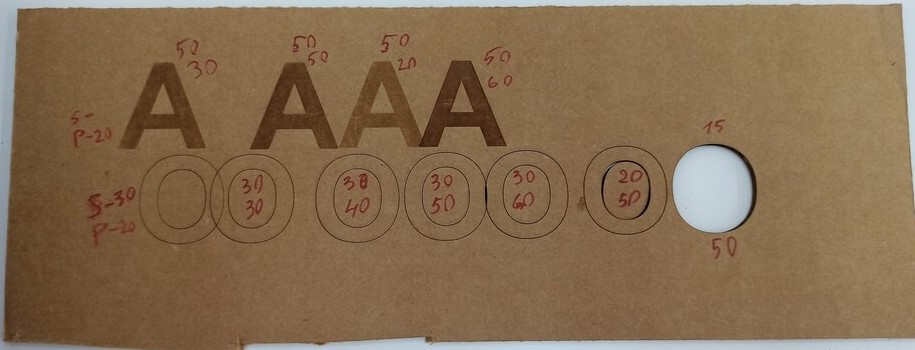 After this our instructor made a test board with different settings to have it next to lasercutter.
 Here is the result.
Measuring the kerf
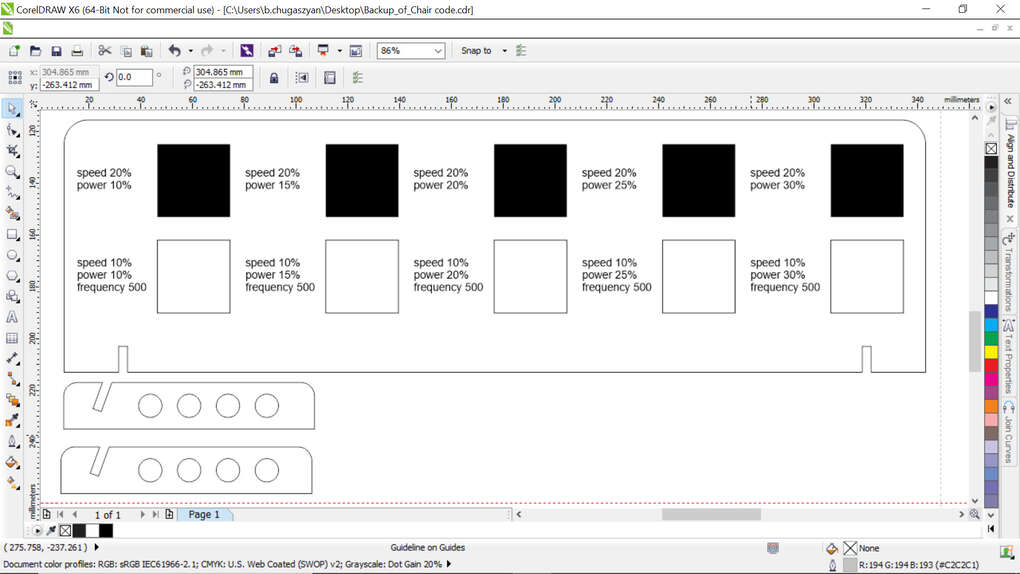
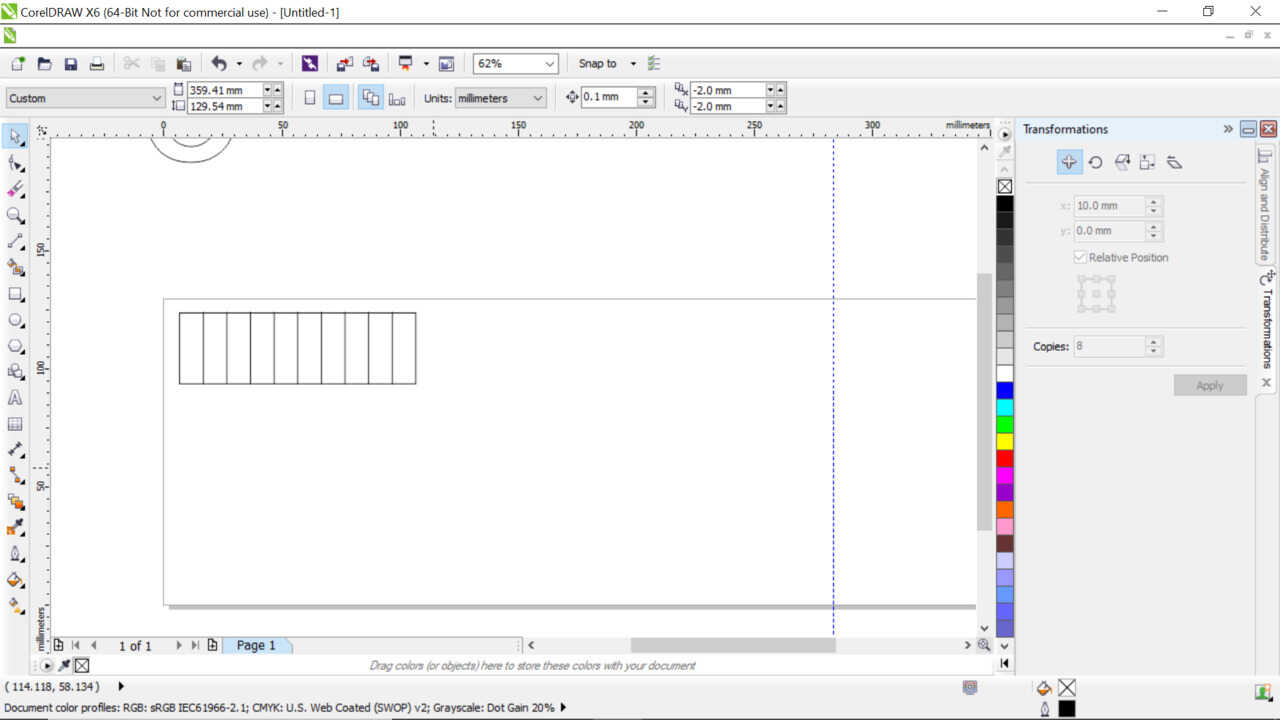
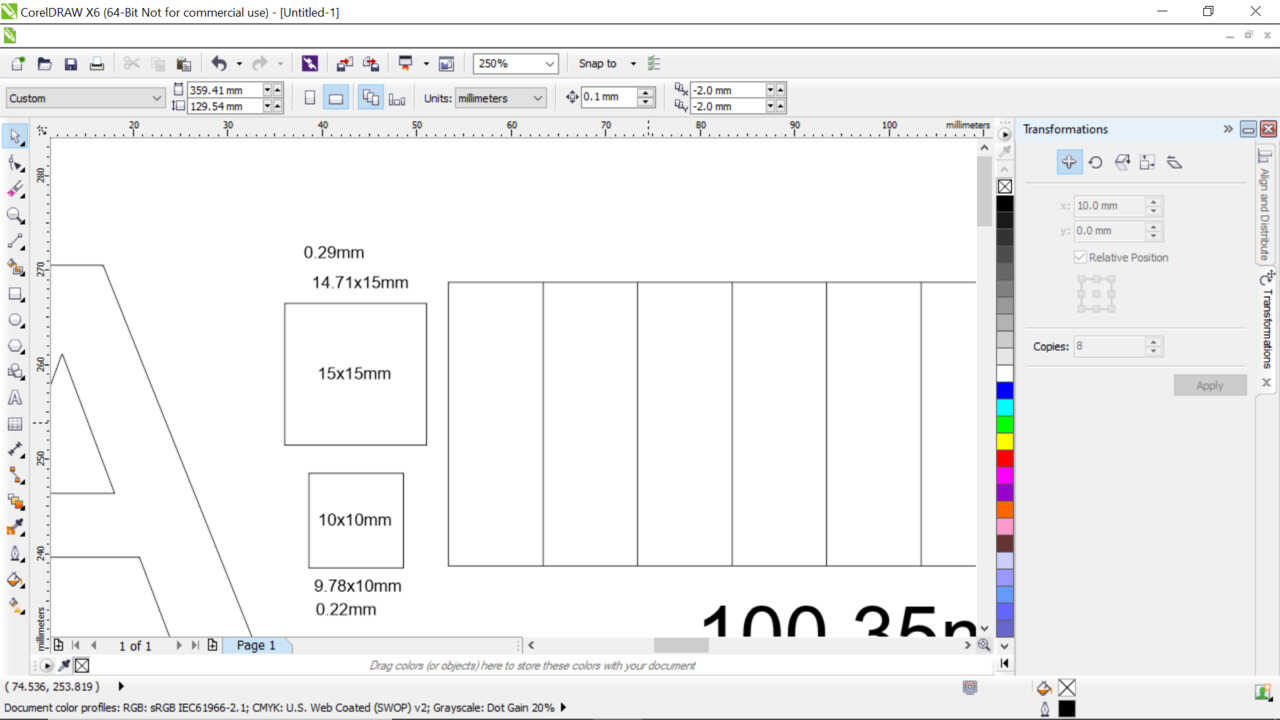
In order to measure the kerf we modelleled a rectangle 100mm wide that has 9 lines inside.
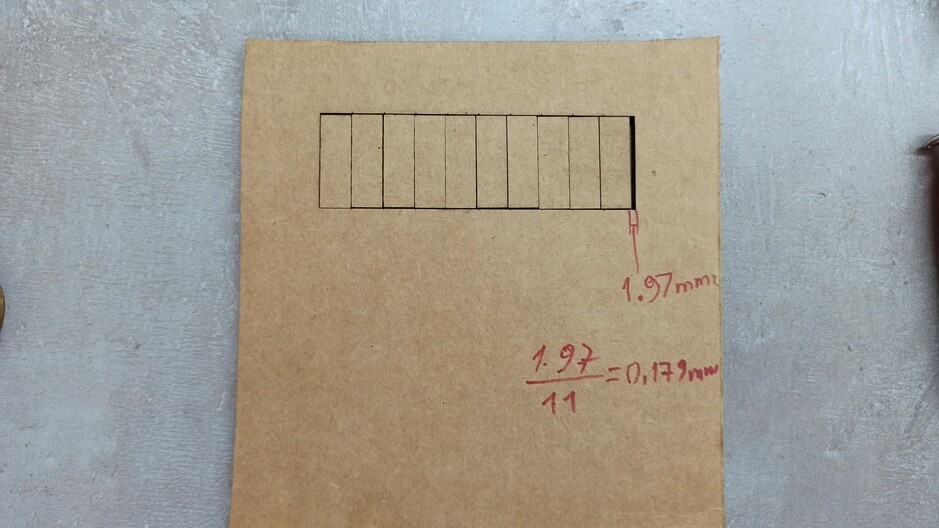
 After cutting we moved the cutted parts closer to each other and measured the reslting gap with caliper.
The gap was 1.97mm since we have 9 lines + 2 lines one from each side of rectangle we divide our gap width to 11 to get the kerf. 1.97/11=0.179mm.
After cutting we moved the cutted parts closer to each other and measured the reslting gap with caliper.
The gap was 1.97mm since we have 9 lines + 2 lines one from each side of rectangle we divide our gap width to 11 to get the kerf. 1.97/11=0.179mm.
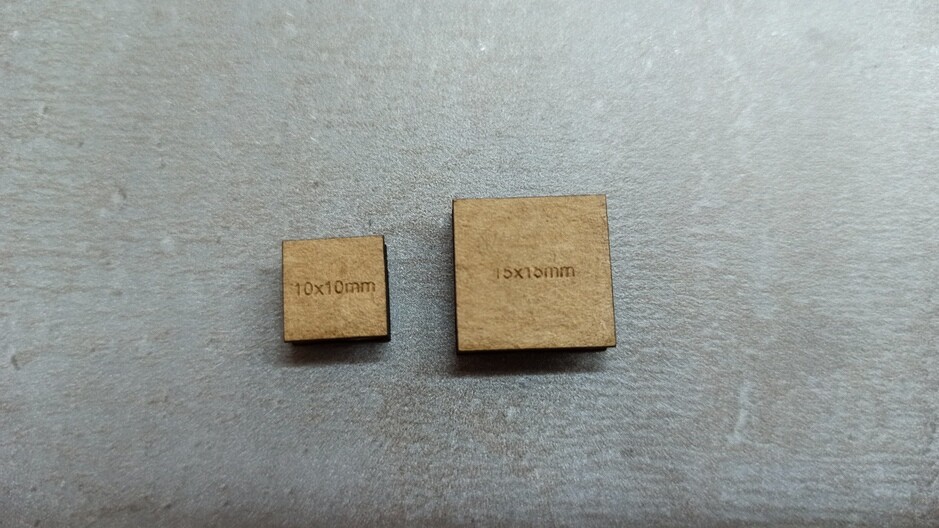
 After this test we tried another way we draw two rectangles 10x10mm and 15x15mm. And tried to do the previous test again.
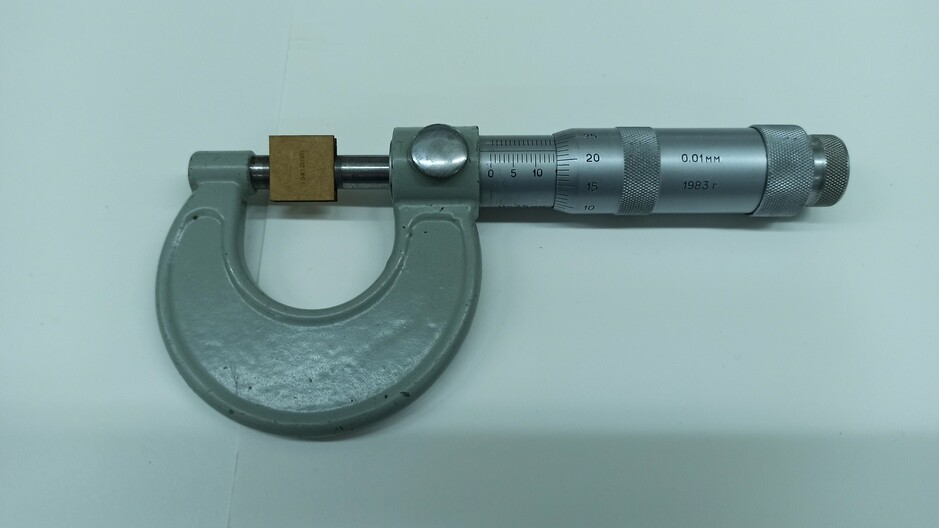
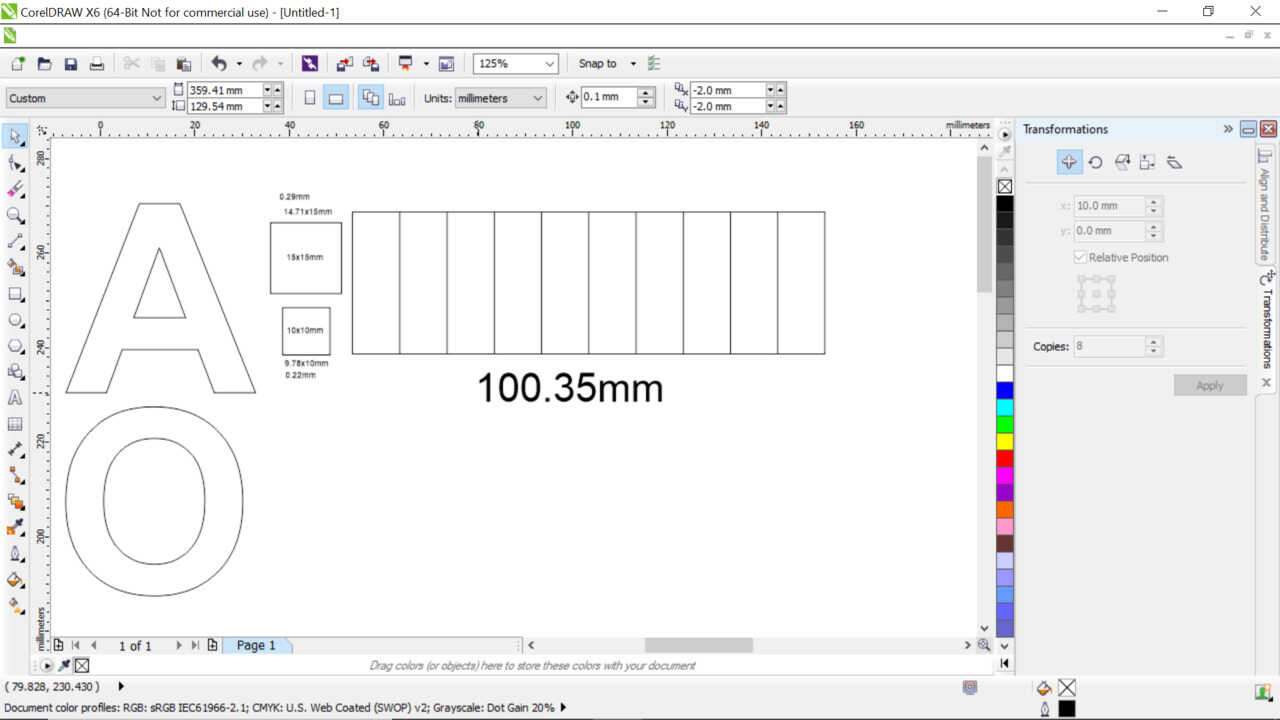 After performing the cuts we measured the rectangles with micrometer.
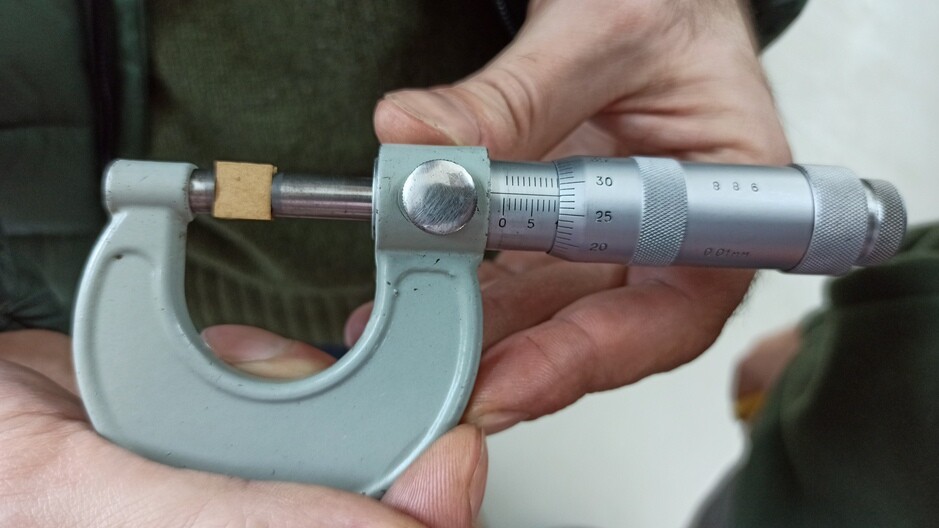
 And measured the resulting gap once again
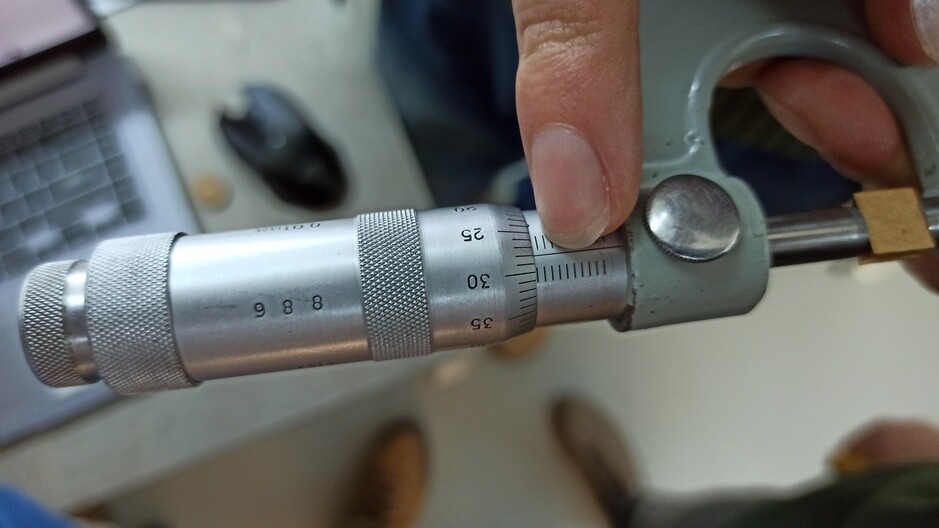 In th case of the 10mm sqaure the measurment was 9.78mm so the kerf is (10-9.78)/2=0.11mm
In the case of the 15mm square the measurment was 14.71mm so the kerf is (15-14.71)/2=0.14.5mm
In th case of the 10mm sqaure the measurment was 9.78mm so the kerf is (10-9.78)/2=0.11mm
In the case of the 15mm square the measurment was 14.71mm so the kerf is (15-14.71)/2=0.14.5mm
Settings
Resolution Settings:(Manual page 64)
75 – 200 DPI
These resolution values are typically used for non-production purposes where you want to experiment with image location, or if you want to quickly produce a rough draft. Low resolution setting are also useful when engraving products that you don’t want to remove too much material while engraving, such as fabric.
300 DPI
300 DPI is useful when engraving materials such as glass, marble, plastic and other items that don’t benefit from the engraved dots being close together.
400 DPI
This resolution value is ideal for many applications. It combines very good image quality with fast engraving times. Many users like 400 DPI for all of their work.
600 DPI
When really fine detail or overall excellent results are required, most users choose 600 DPI.
1200 DPI
This resolution is used for projects that require the best engraving quality possible, or if engraving extremely small fonts. Although it’s seldom used because, under normal circumstances, most people cannot visually discern the difference between 1200 and 600 DPI. There are some users that appreciate this high level of quality and are willing to take twice as long to produce an image at 1200 DPI as it would take them at 600 DPI.
Files
Laser settings map And Kerf measuring and experiments