Week 2: Computer-Aided Designs
Week two really seems like a heavy week with lots to do. We are required to try many softwares and experience with it to select the one we are confortable with. We were introduced to many softwares and we need to explore further by ourselves.
Instruction:
Model (raster, vector, 2D, 3D, render, animate, simulate, ...) a possible final project, compress your images and videos, and post a description with your design files on your class page
- To Do:
- Try to use few 2D design software
- Model final project sketch using 2D design software
- Demonstrate and describe the usage of 2D design software
- Try to use few 3D design software
- Model final project using 3D design software
- Demonstrate and describe the usage of 3D design software
- You have to put original file on your documentation page
- Compress your videos then explain about the process
- Compress your images then explain about the process
2D Designs
2 dimensional designs are those have just two coordinates of x and y, and if turns to the side becomes the line. 3D desin adds depth to the 2D design of z. This third dimension allows for rotation and visualization from multiple perspectives.
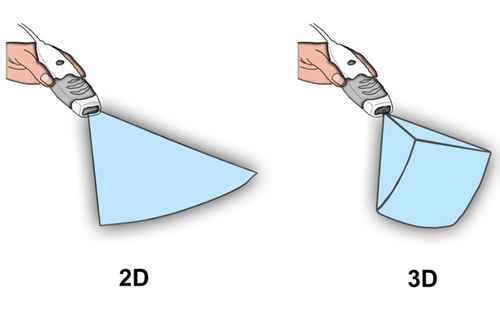
Image curtesy: Google
- And 2 D designs are of two types:
- Raster Designs
- Vector Designs
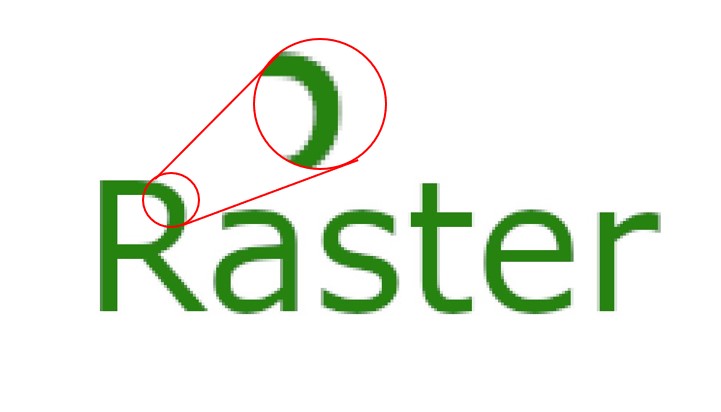
Raster designs are those made of pixels, or tiny dots that use color and tone to produce the image. Pixels appear like little squares on graph paper when the image is zoomed in or enlarged. Each image can only contain a fixed number of pixels. The amount of pixels determines the quality of the image and this is known as resolution.
Design softwares are:
~ Scan
~ GIMP BIMP pixels
~ Photoshop
~ pixlr
~ My Paint, etc...
File formats includes JPEG, BMP, Gif, EXIF, PSB, DCS, etc..
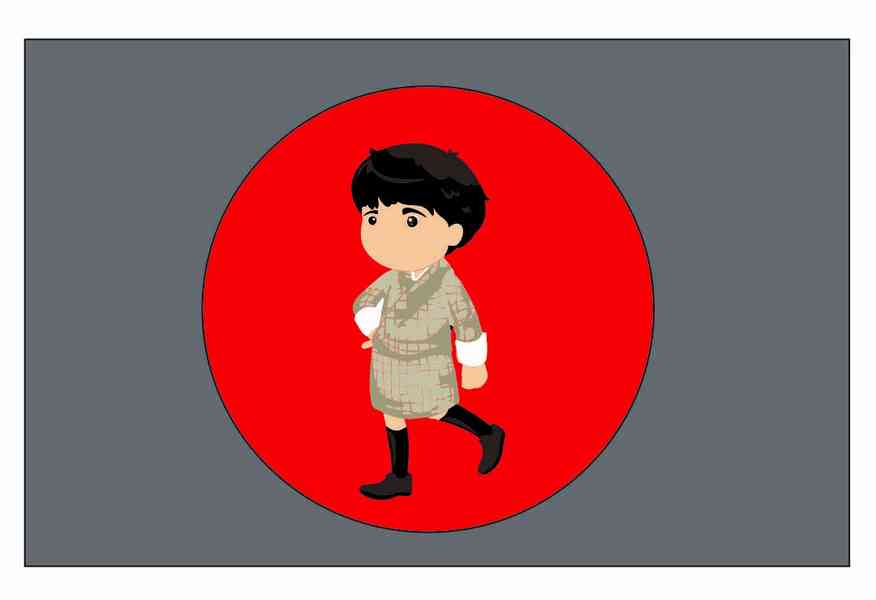
I wanted to add something Bhutanese artistic to my project. I though of the way to add walking man in Bhutanese dress when the sign for vehicle users turn red, like the image below.
I search through the internet to find something suitable for my project. I wanted a man or anime in gho walking, but as animation are not very old to my country, I couldn't find one satisfying. After a long search, i came across the below image and challenging thing is I need to make it a walking one.
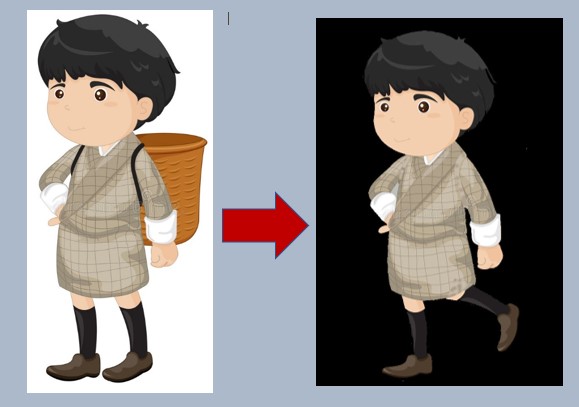
image courtesy: Google
For this, I compared the two designing softwares in order to get satisfying output.
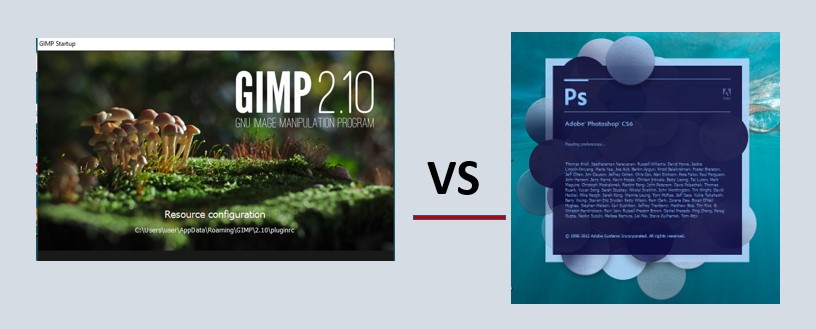
First thing I needed to do was to remove the background of the image. GIMP requires to select Add Alpha chanel on the layer. Similarly, Photoshop also requires to select Layer from Background on the layer. Background removal works really great on both using fuzzy tool and magic wand on GIMP and Photoshop respectively.
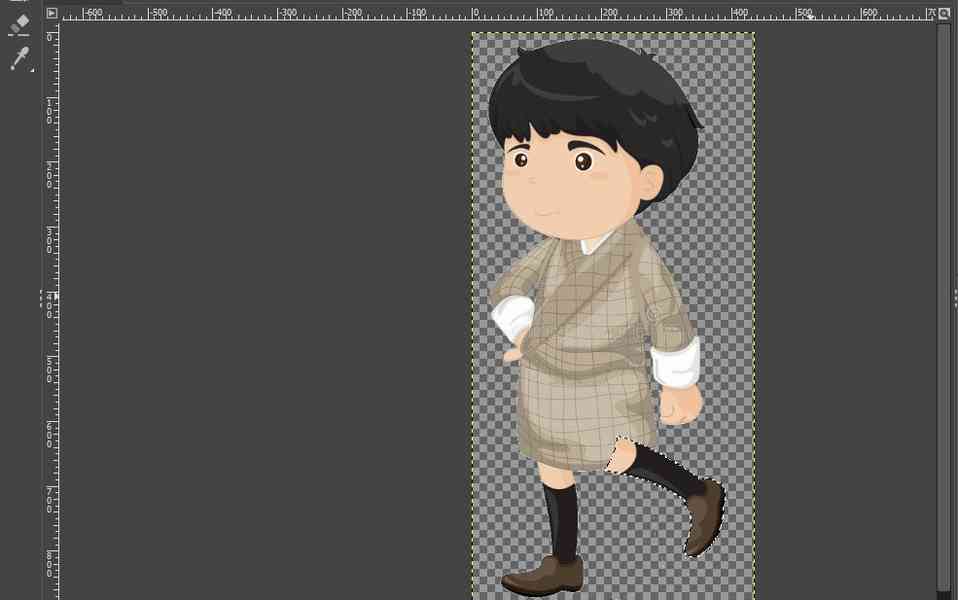
So, I selected the left leg to make it looks like walking. I needed to rotate little to back and translate to required position. But as seen in the image, a part of knee covers some part of dress which does not look good.
Issue: In order to remove the covering parts, I looked into the feature to send back in both softwares but I couldn't find. Maybe, I didn't know where to look or how to do. So, I resolved into selecting and deleting the extra part.
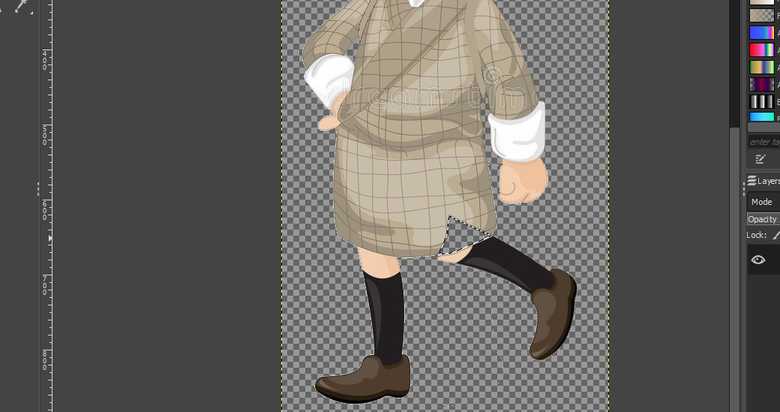
Issue comes here when i haven't realised that deleting the front selected part will also delet the layer behind it. So, the result is hilariously above one.
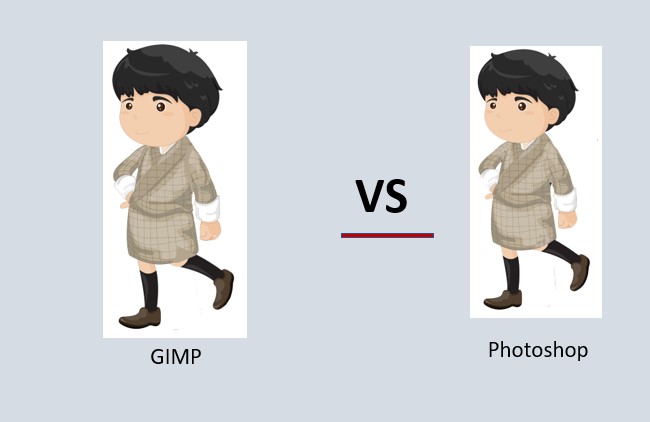
Using the color pickr tool and eye dropper tools on GIMP and Photshop respectively, I was able to pick the color of the dress and colored the deleted part using coloring tools. The results from both the softwares are almost same as both are having similar tools but just the names.
Find original files here:
Photoshop - click to download
GIMP - click to download
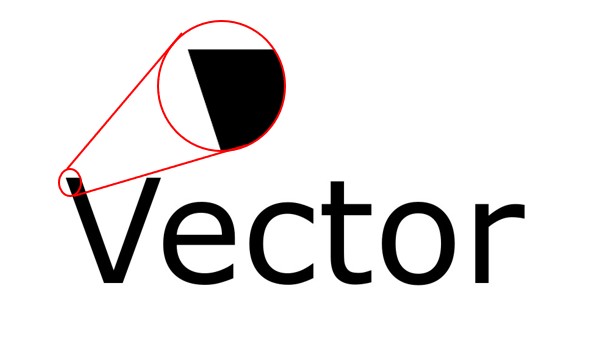
Vector designs are those consist of anchored dots and connected by lines and curves. As they are not based on pixels, they are also known as resolution independent, which makes them scalable and device independent.
Design softwares are:
~ Inkscape
~ CorelDraw
~ Illustrator
~ SketchPad
~ FreeCAD, etc...
File formats includes .ai, .eps, .pdf, .svg, etc..
For vector design, I prefered CorelDraw as I have some pre-experience in using it. I feel bit comfortable with it but not to leave behind the other softwares especially the Inkscape as it is one suggested by our Fab Instructor.
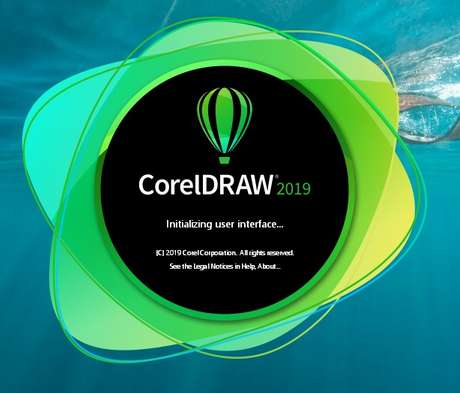
CorelDraw is sophisticated 2D vector design software. It is the commercially used software where we are required to pay in order to use.
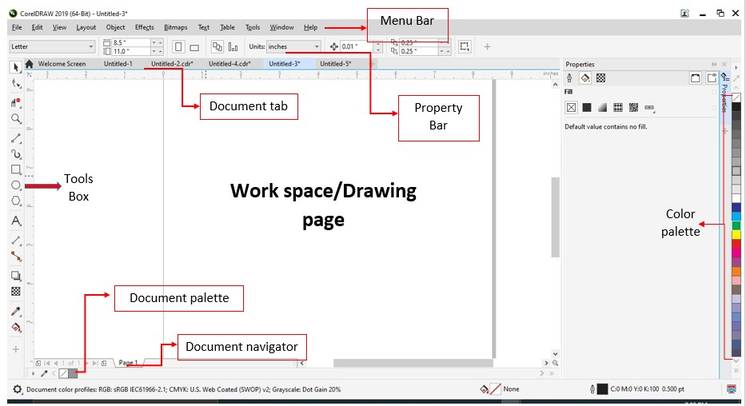
Menu bar: Contains pull-down menu option.
Property bar: A detachable bar with commands that relateto the active tools or objects.
Document tab: Lets you quickly move between open documents.
Tool Box: Provides tools for creating and modifying objects in theh drawing.
Work space/ Drawing Page: The printable area inside the drawing window.
Color Palette: A detachable bar that contains color swatches.
Document Palette: A detachable bar that contains color swatches for the current document.
Document Navigator: Provides control for managing pages.
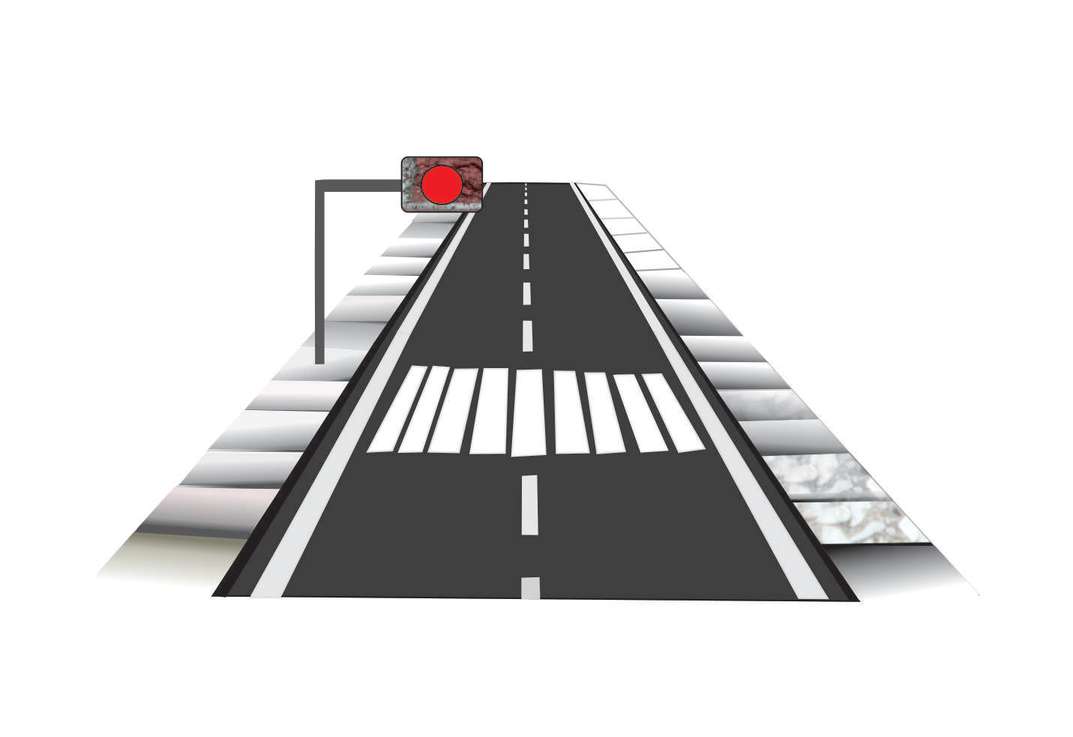
I wanted to model and show my project idea in 2D design. Since I am in learning stage, I couldn't do much without much of the experince with the software and it's feature. First I have to plan what shuld I put to the design. I wanted to give a try in designing a road and my sketch of project on the road side near zebra cross.
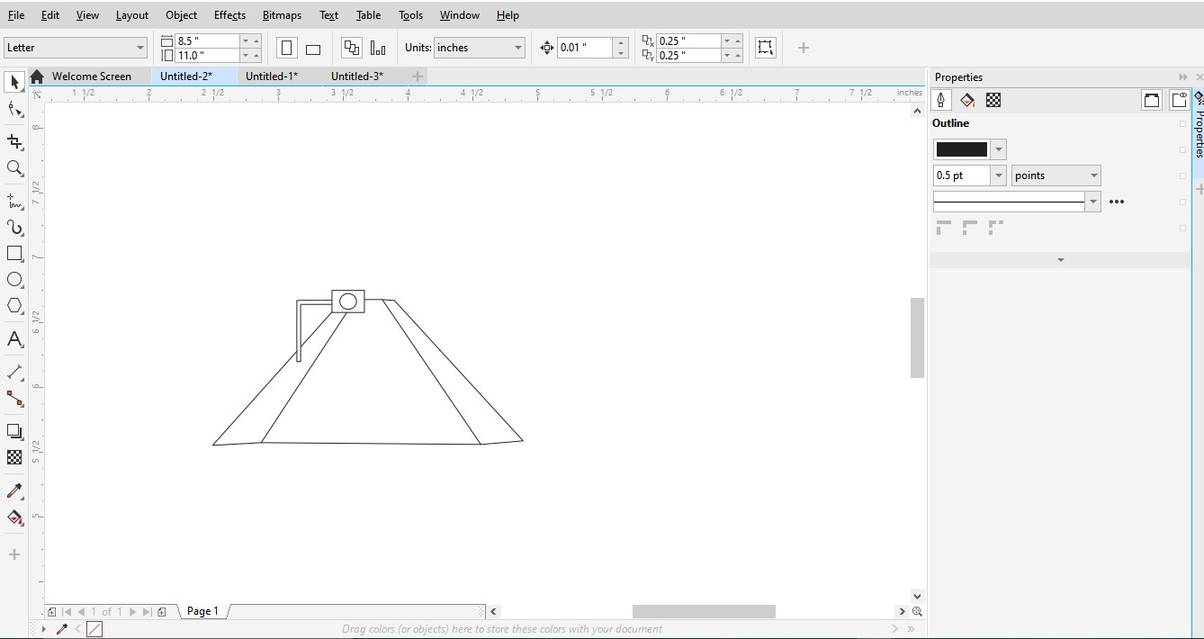
Issue: With a very little knowledge on the software, I faced a hard time to color the road with black. Non of the painting tools co-operate with me to color it. After a hard research and try, I found out that my road is actually lines without a proper join. I redrew the road and got painted. I also added zebra cross.
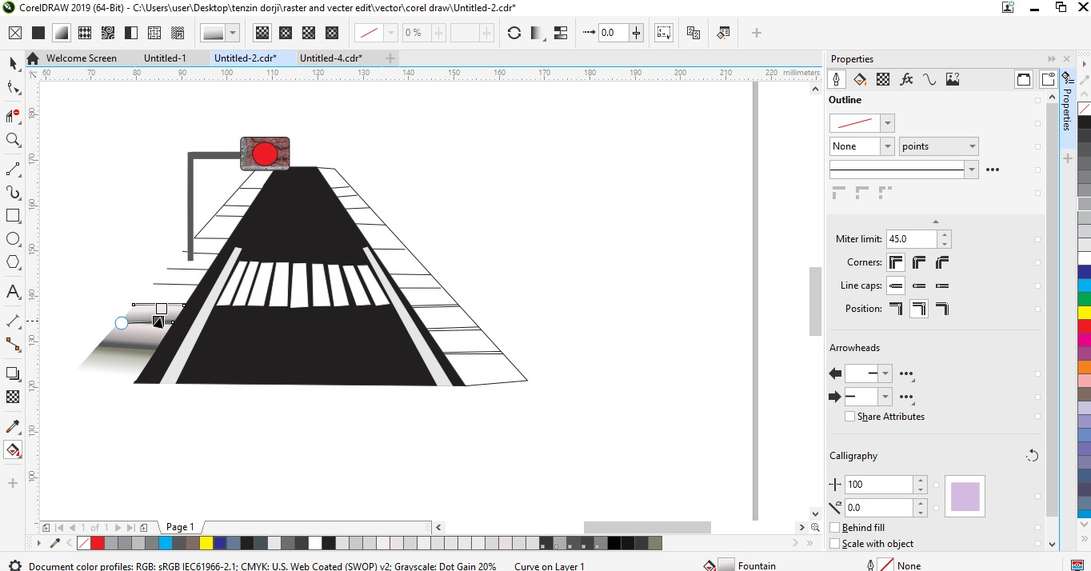
I also added some texture and colors to foot path in order to make it look more fancy. I used Interactive Fill Tool and gradient which are really nice in making it looks like tiles and holes. I also used Bitmap Pattern fill and vector pattern fill in order to make it better.
Challenge I faced are making tiles and coloring where I required to color tiles one by one with different angles to make it look bit real. Planing and sketch is never to mention in challenge when we have to do something with our own creativity.
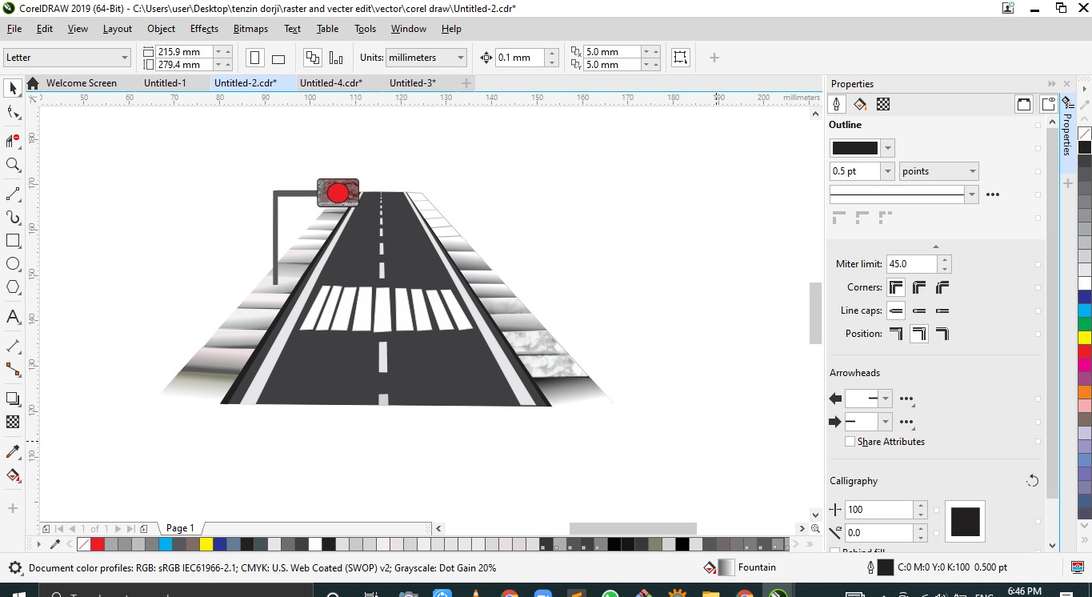
Finally I also added the road center line. And this is the result. I also tried to make environment around the road but it's time consuming and I left it for future work.
Find original files here:
- click to download
3D Design
SketchUp:
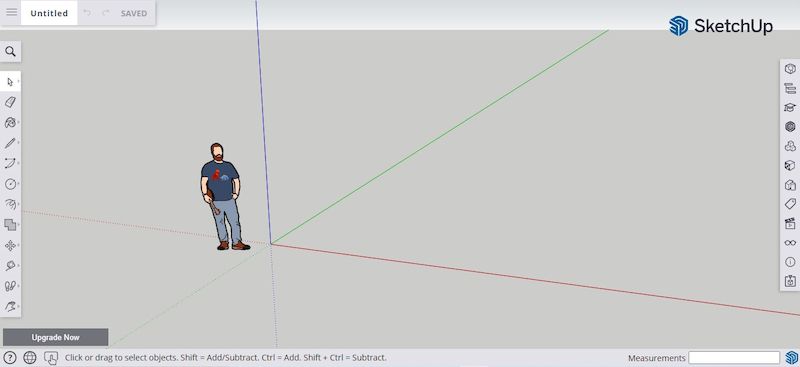 For 3D experience, I tried the sketchUp design as it is online software and we can get free signup without needing the license. Being an online designing software, it doesn't depend on the system that we are working on.
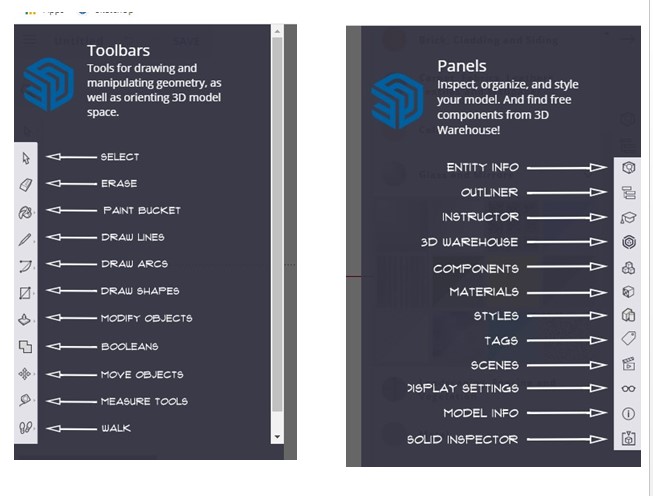
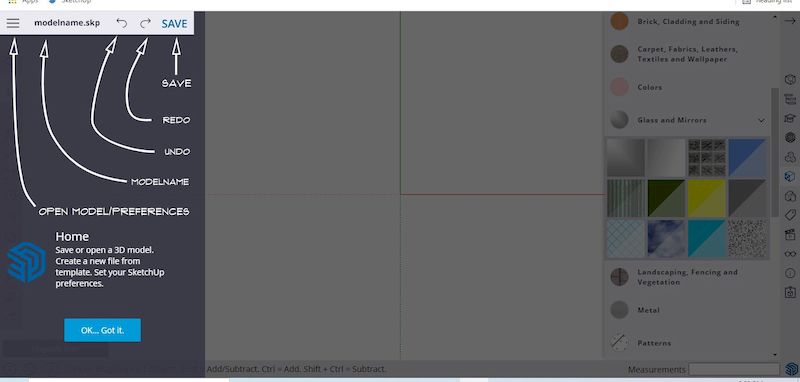
Usually this SkecthUp is having the comprehensive tools for architectural designing and environmental designing. This gives the designer the wide ranges of oportunity to put their idea into a 3D design.
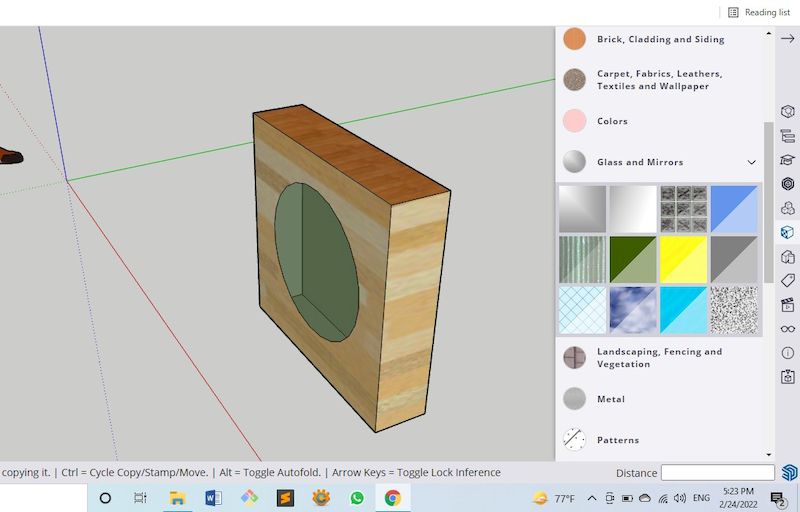
I tried designing Box for my project using SketchUp. Tools presented are easy and understandable to use for designing the model. It's wide range of colors and textures for many different elements are more realistic and handy for realistic 3D designings.
Despite of great features it have, I couldn't make great use of it as I don't have much experience on this. I struggled a lot to figure out even how rotate the design in order to have a back view. Later I lost the design while trying to view from different perspective and found out it was too small.
I am looking forward to learn more about this software not just for FabAcademy.
Fusion 360:
For 3D design, I used fusioon 360 as I got access to it's license through Fab Academy. Due to the low compatability of my Laptop, I really had a tough time and I couldn't put want I thought to the design.
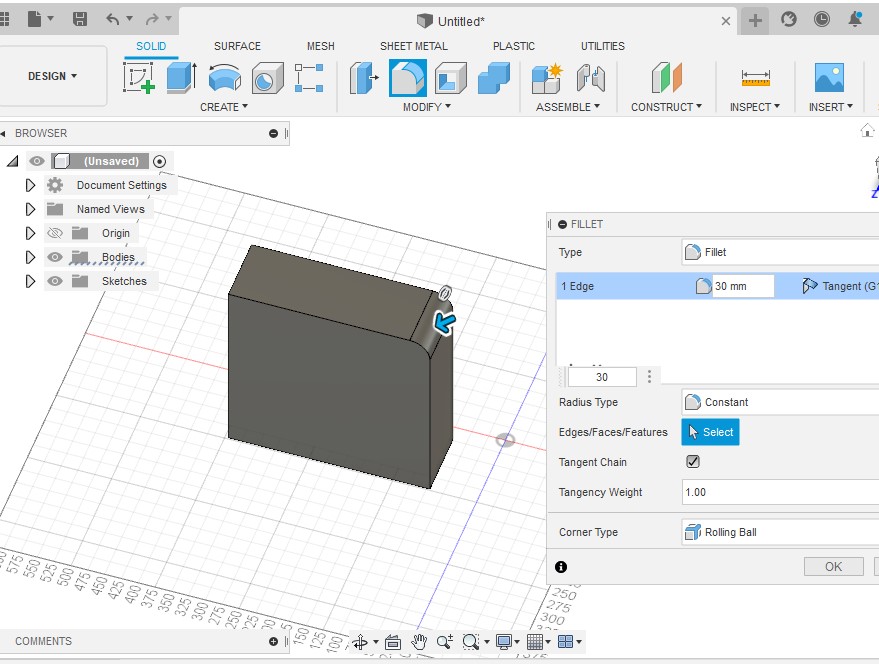
With the create option and rectangle, I created a box and extrude to form 3D design. Added a fillet feature in order to make the edge of the box rounded. You can find fillet option from modify tab or shortcut key is F.
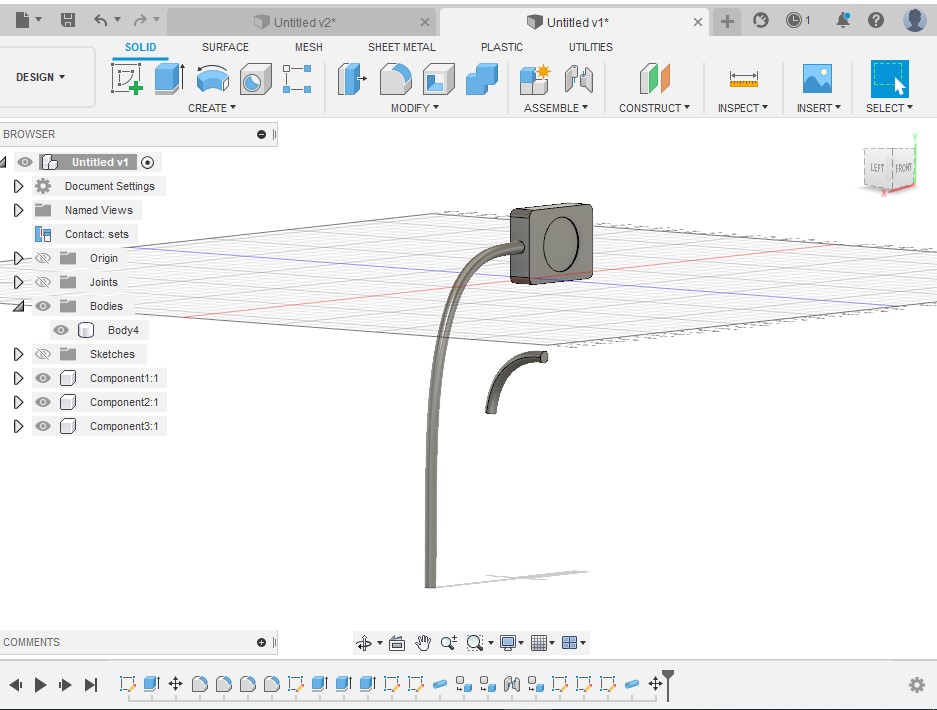
Later I try adding pole to my design using Line from Sketch tab and Pipeline from Create tab. So, I needed to add a branch pole on the main pole, and I tried joining it to main pole but I could't find the option or way to do that.
So, I needed to create a new pole from rectangle after erasing the earlier poles.

With the rectangular sketch, I was able to create a pole and it's branch pole too. As I require the round pole, I made it using fillet. On the branch pole, I created the signal for pedestrian and later I even tried to make road in order to check ,y design in the render but size of the file became too large and coukdn't open in render.
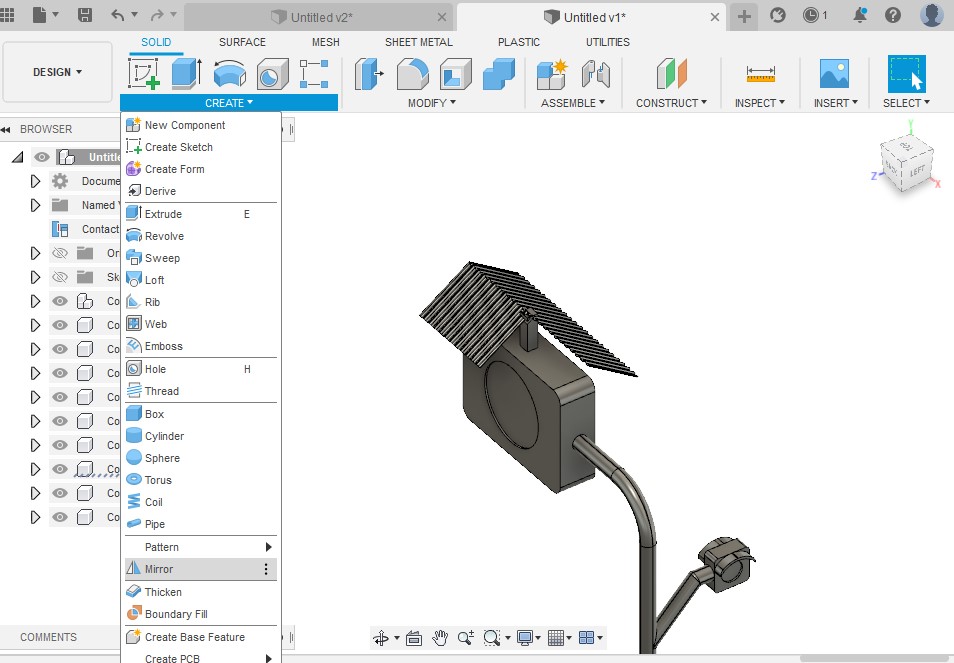
I also added the metal sheet to protect my system from rain and sun. It required me a huge lot of time in creating crest and trough of metal sheet despite the challenge given by low system.
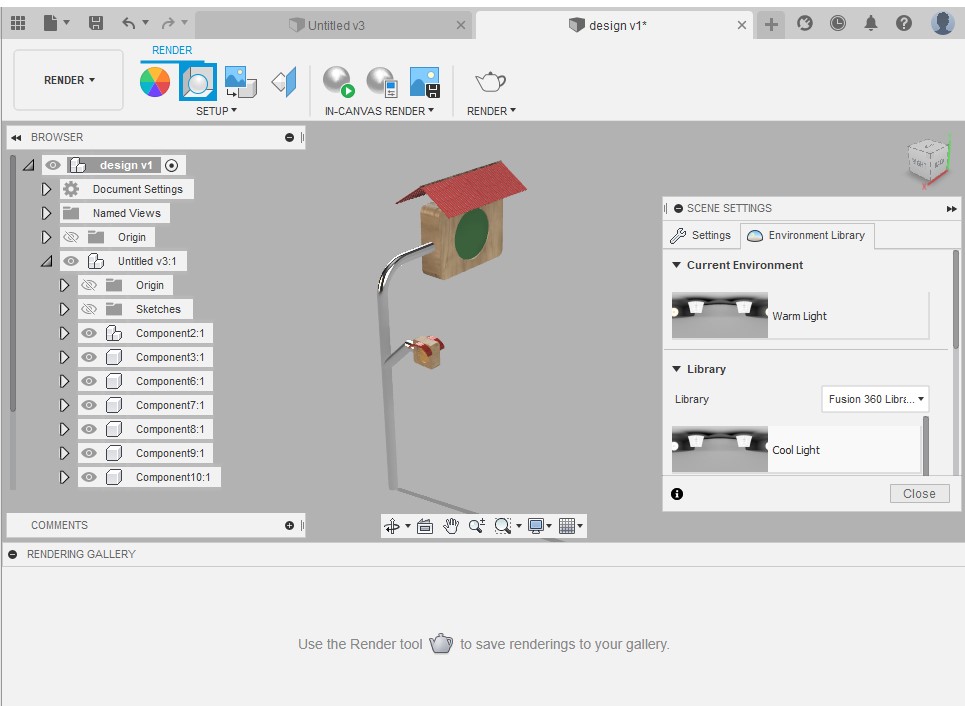
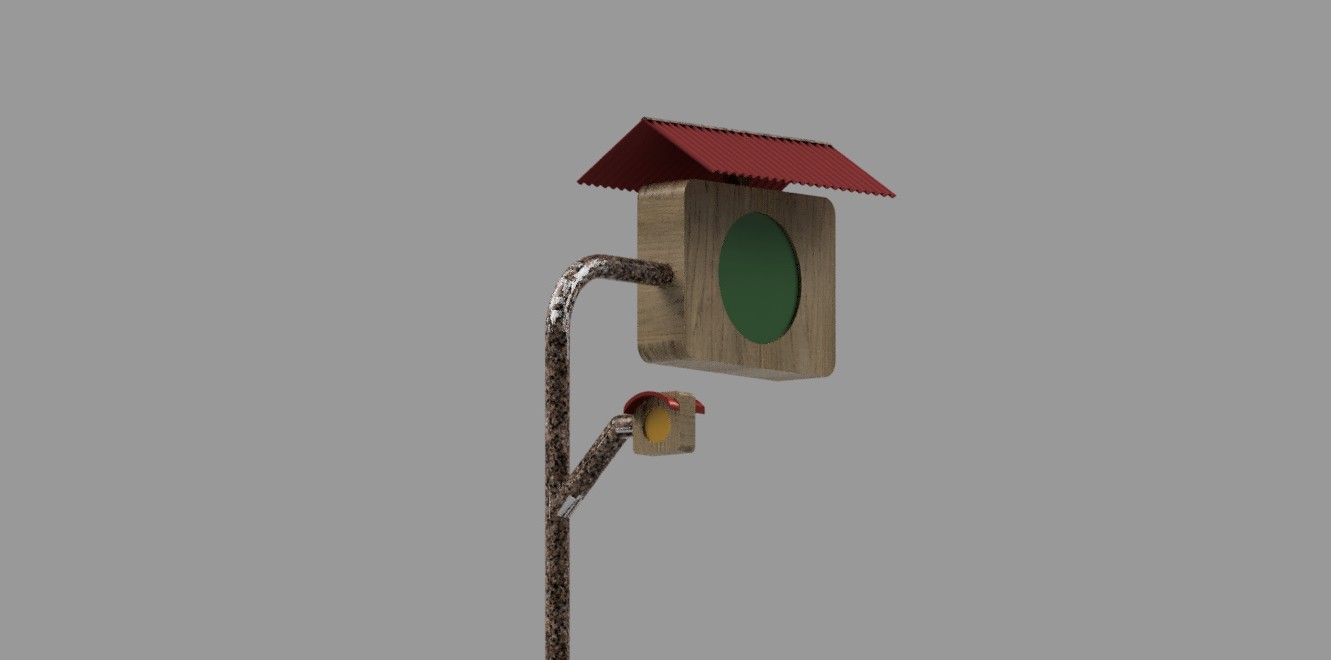
I tried to render the design I did trying to use environment and canvus rendering. The result of my rendering wasn't upto my expectation. The image on the right is the result of rendering.
Find original files here:
- click to download
Image Compression
Images and videos compression and downsizing are mandetory for Fab Academy as we have to push it to Git reprository. We will be able to push only around 10mb per push and we get limited size to push every week. So, we should be very careful about the sizes of our images and videos.
In this situation where we have to documents a lot with limited space to push every time, Lightshot is really handy. With PrtScr on the key board it gives easy access to take a shot of our desire and result of screenshot has really low size compare to normal screenshot and save image.
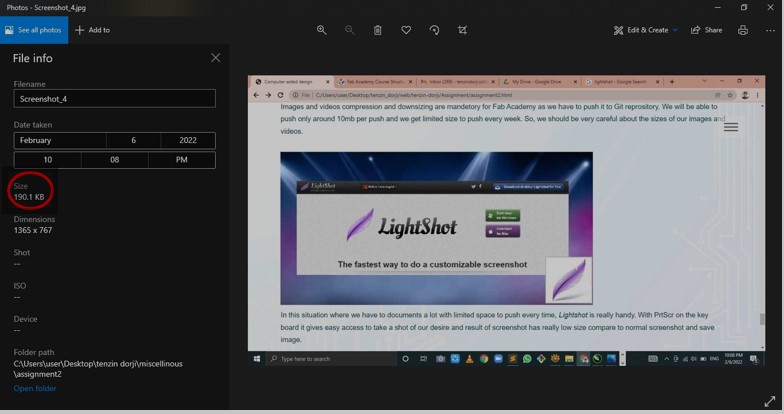
The full window screenshot of 15.6 inches results about the image size of only 190kbs which is really low compare to other. Other half screen or nearby size may take only around 40kbs to 50kbs of size. I would like to recommend to try this lightshort. Nevertheless, I use Xnconvert to compress my images.
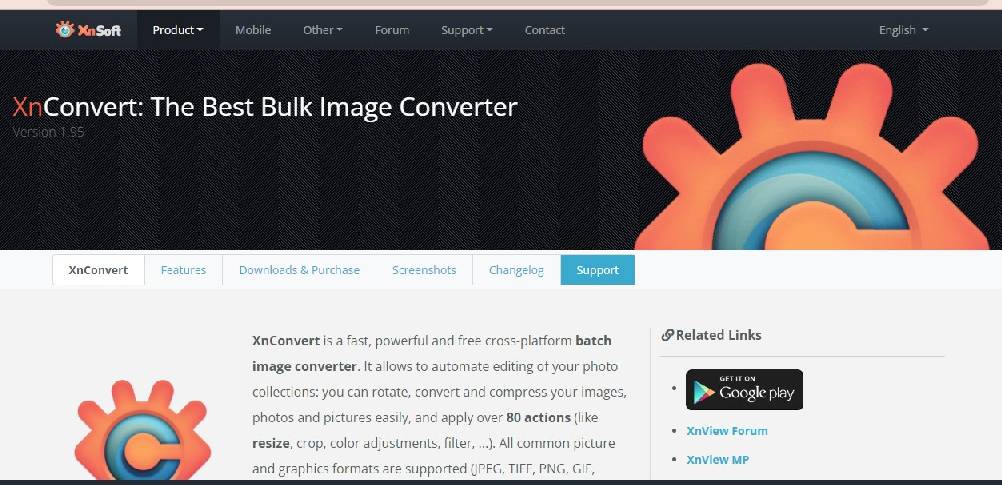
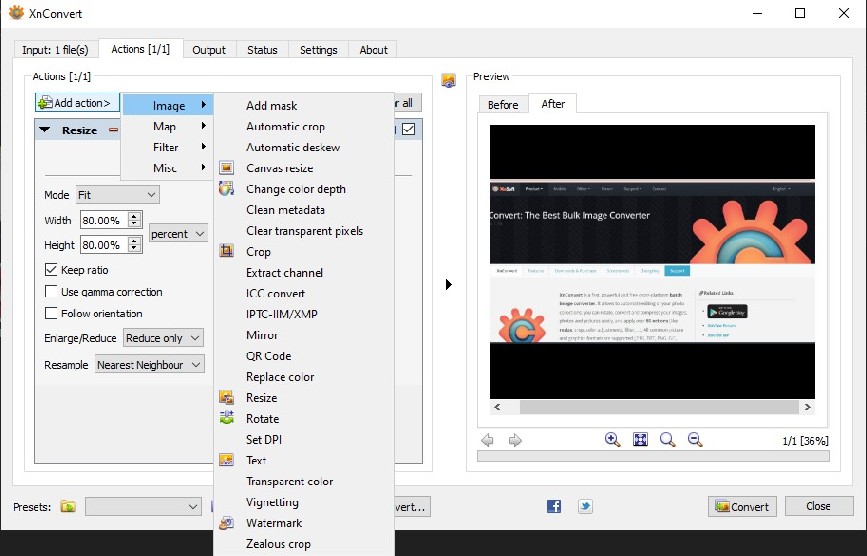
Despite the great ability to compress the image sizes, I like most about this application is that it allow us to choose action where we can even include the image crop while compressing. There are lots of option that we can add to the action during compression. It allow us to choose action and discard as and when we like. We can also view the expected result of compression after selecting actions and commandimg what to do. This is really a cool feature where we need not have to do trial and error basis.
Reference
- Image download https://www.dreamstime.com/royalty-free-stock-photography-bhutan-man-image10460977
- About Raster and Vector images: https://pavilion.dinfos.edu/vector-vs-raster-images-choosing-the-right-format/.
- About git: https://docs.github.com/en/get-started/using-git/about-git