Design and produce something with a digital fabrication process (incorporating computer-aided design and manufacturing) not covered in another assignment, documenting the requirements that your assignment meets, and including everything necessary to reproduce it.
Assignment Requirement
Status
Documented the workflow(s) and process(es) you used.
Completed
Described problems encountered (if any) and how you fixed them.
Completed
Included original design files and source code.
Completed
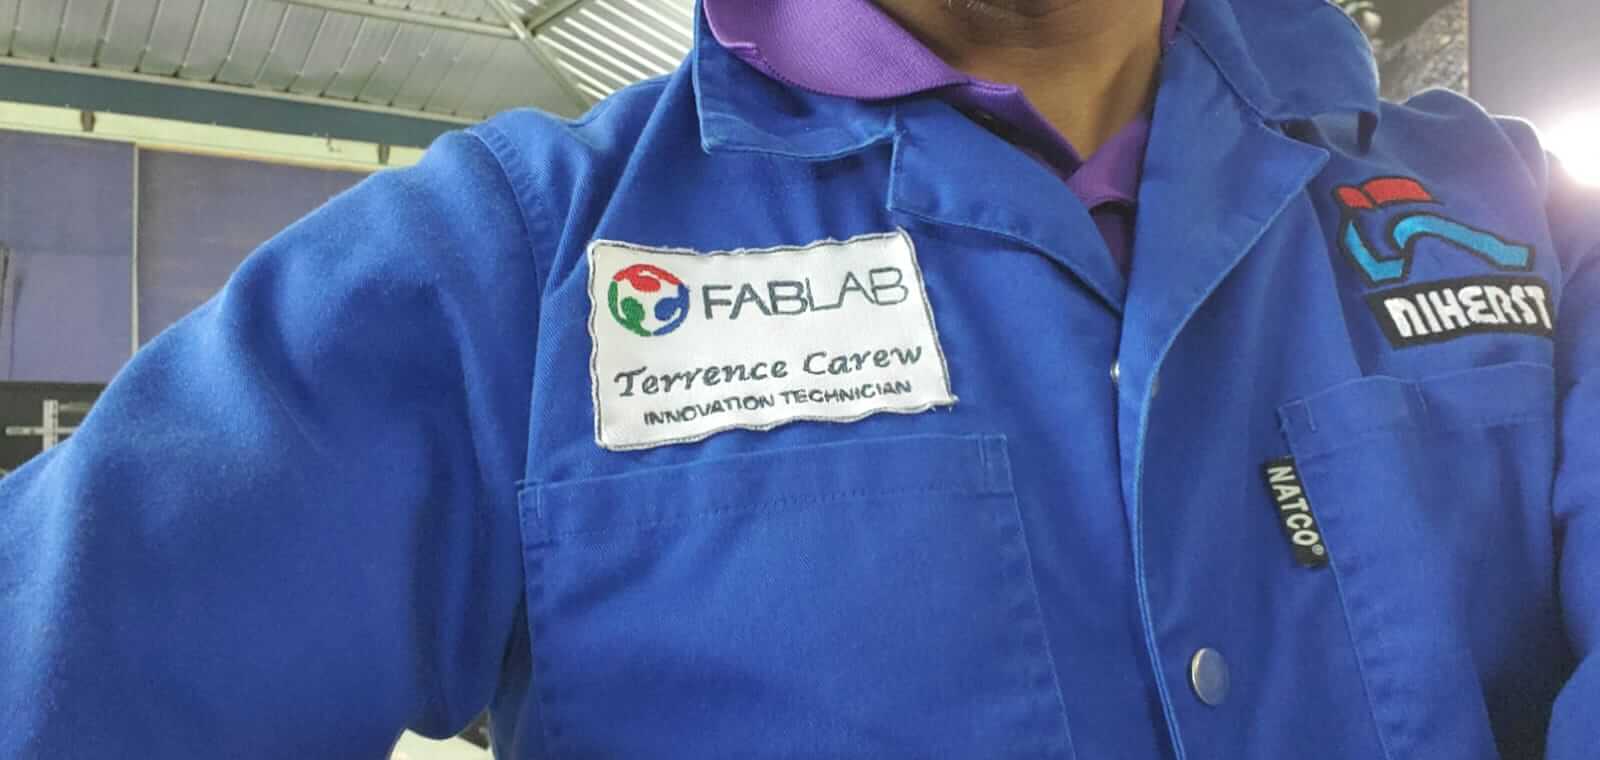
Included ‘hero shot’ of the result.
Completed
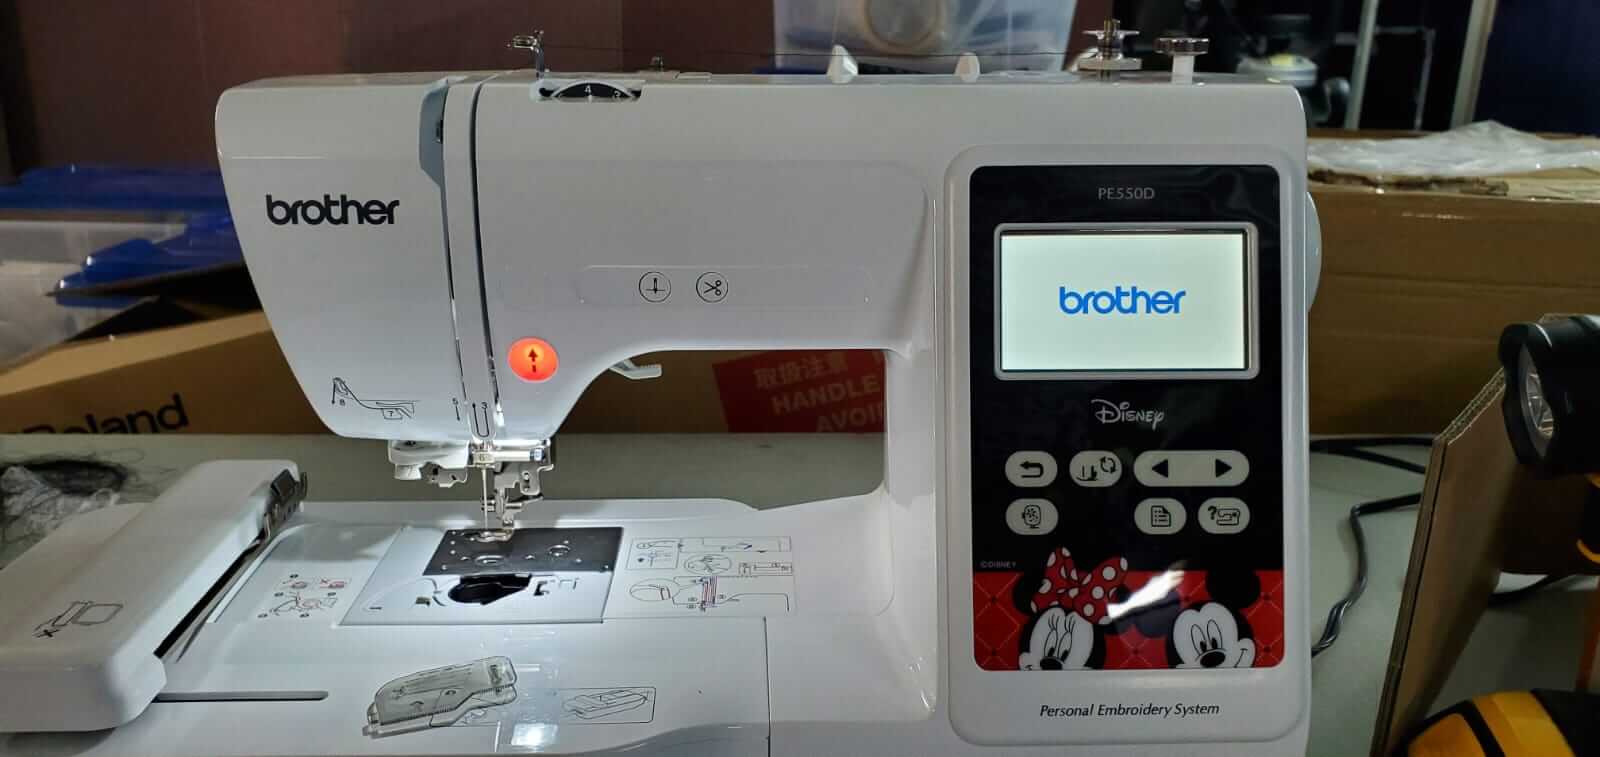
For this assignment I decided to try out digital embroidery. My FabLab has a Brother PE55OD Embroidery Machine.
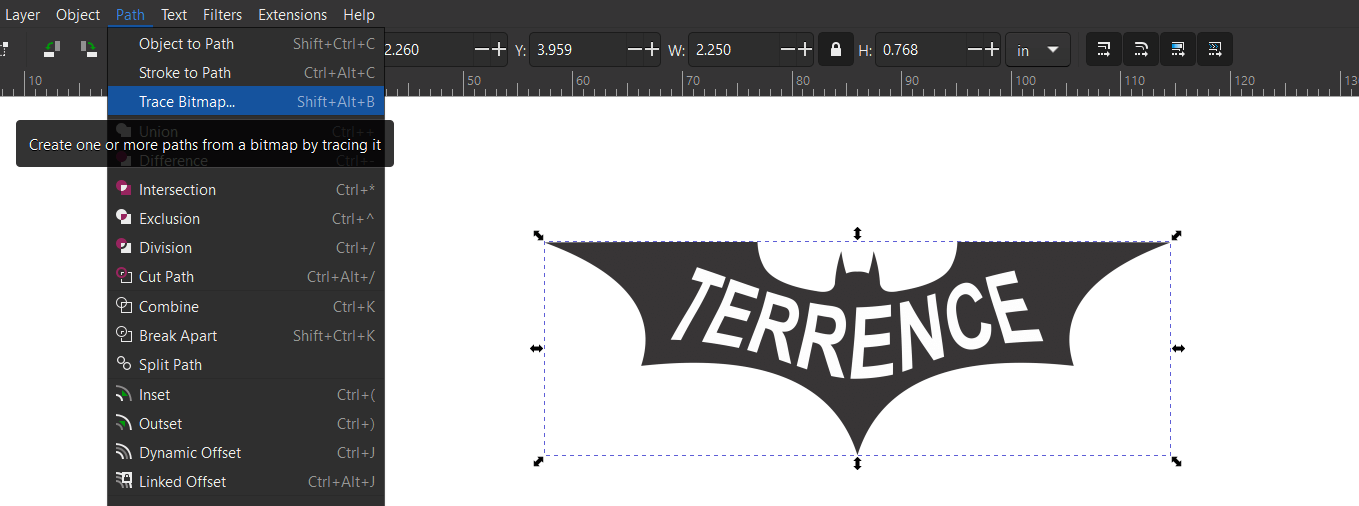
My intention was to make a multicolor name tag, however this machine uses one color at a time. This was no problem but first I tried out a single color tag. I used the Dark Knight symbol design I did for the week 3 Vinyl cut. To prep this file I used Inkscape which is a free vector illustration graphic software. In addition, I had to install the Inkstitch extension.
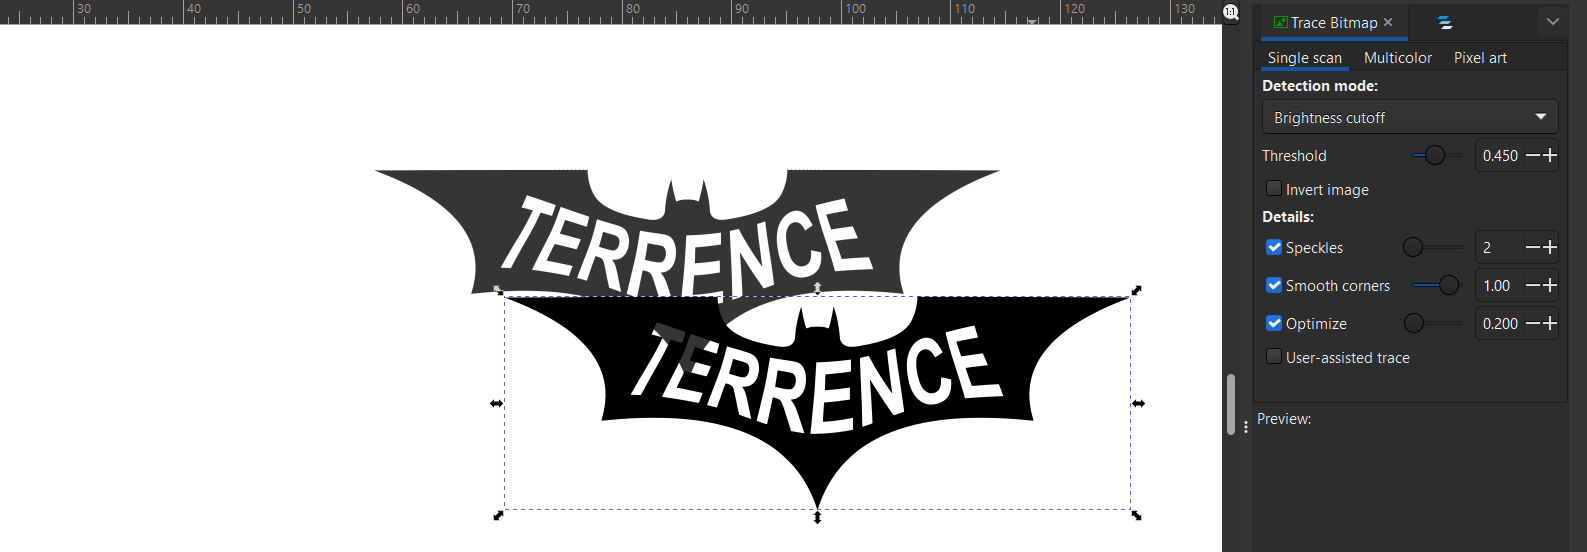
I imported the image into Inkscape, however because it was a photo image I had to convert to a vector image to proceed. To do this I clicked on Path from the menu tab at the top and selected Trace Bitmap.
This created a vector copy of the image.
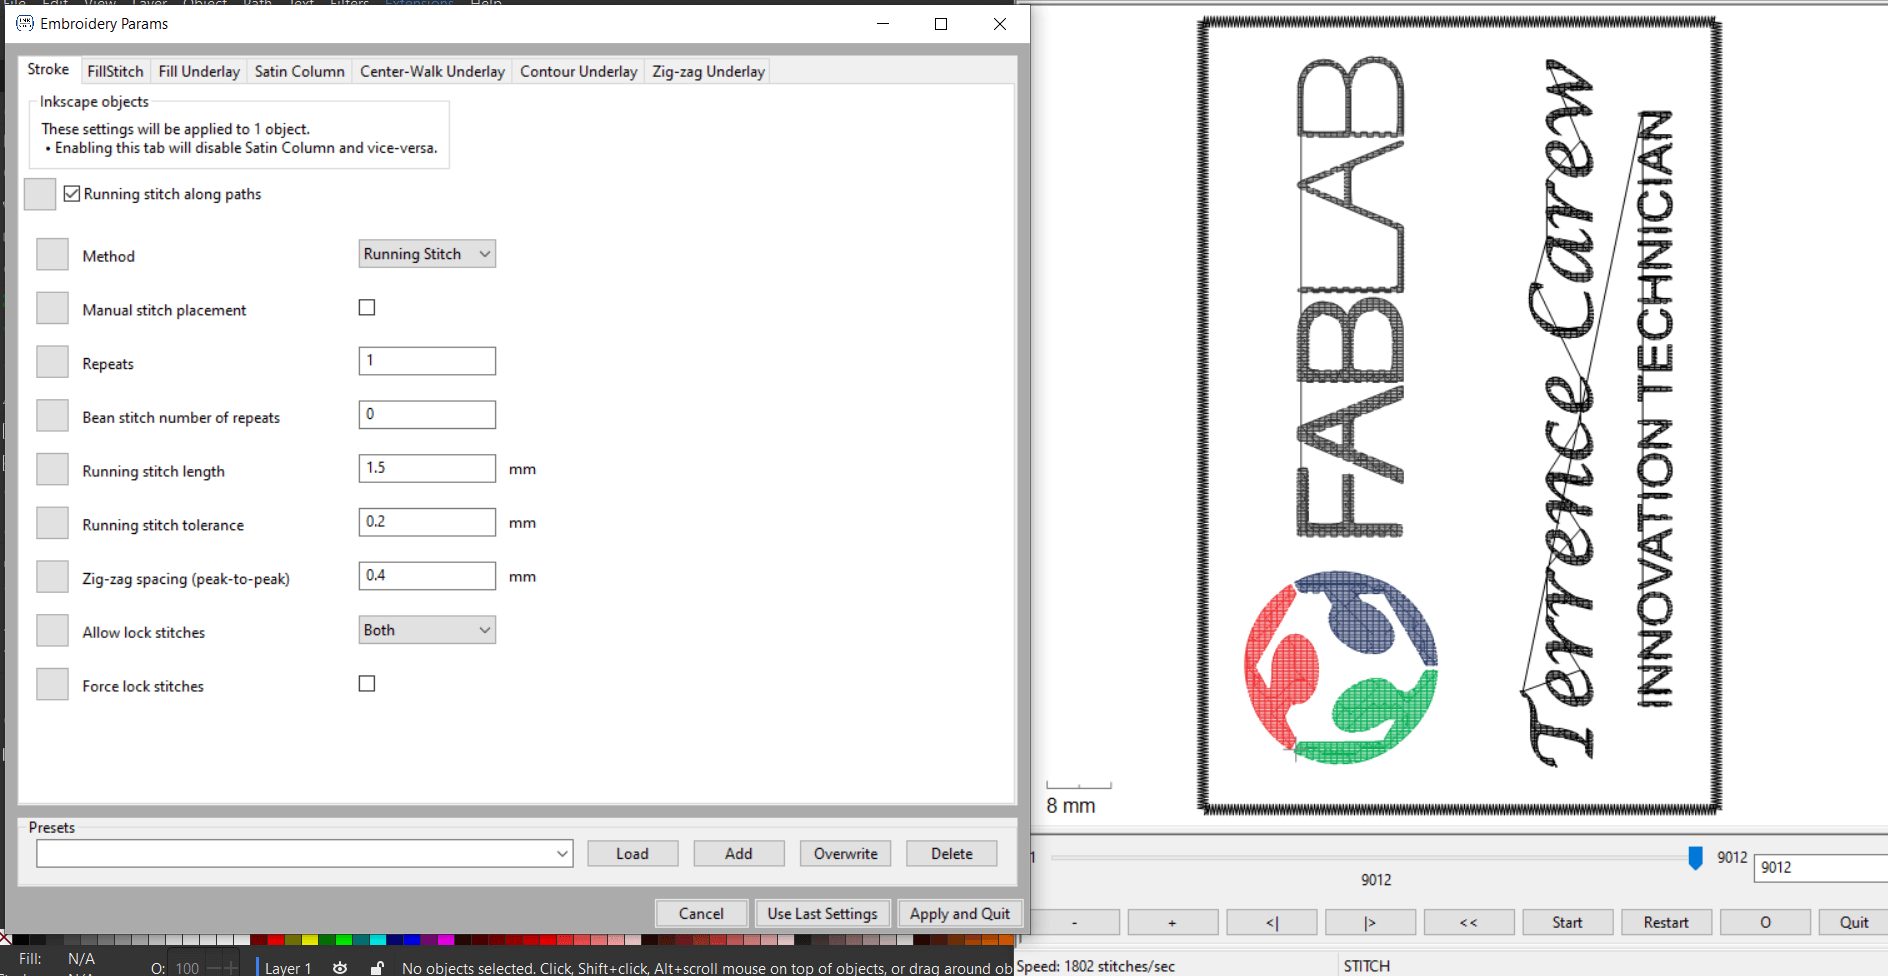
With the vector selected, I clicked on Extensions from the menu tab at the top and then I selected Inkstitch and from that drop down menu I selected Params.
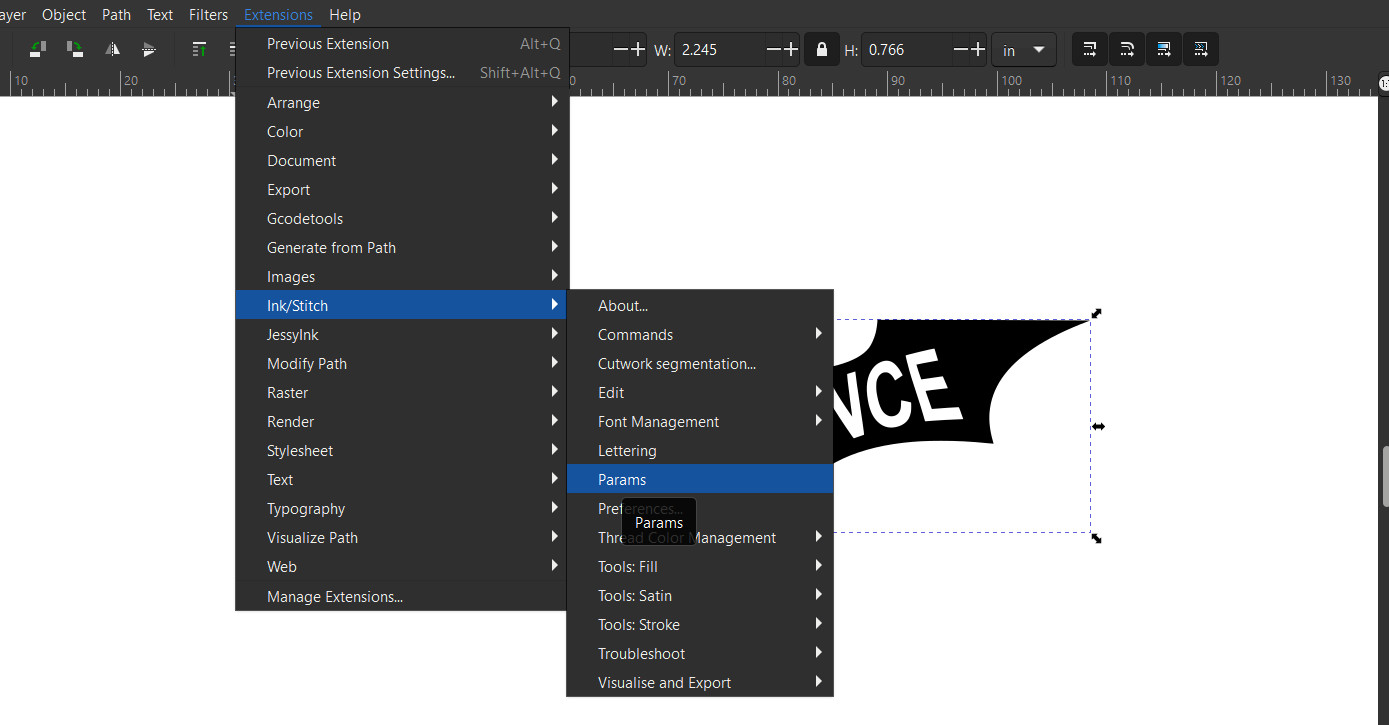
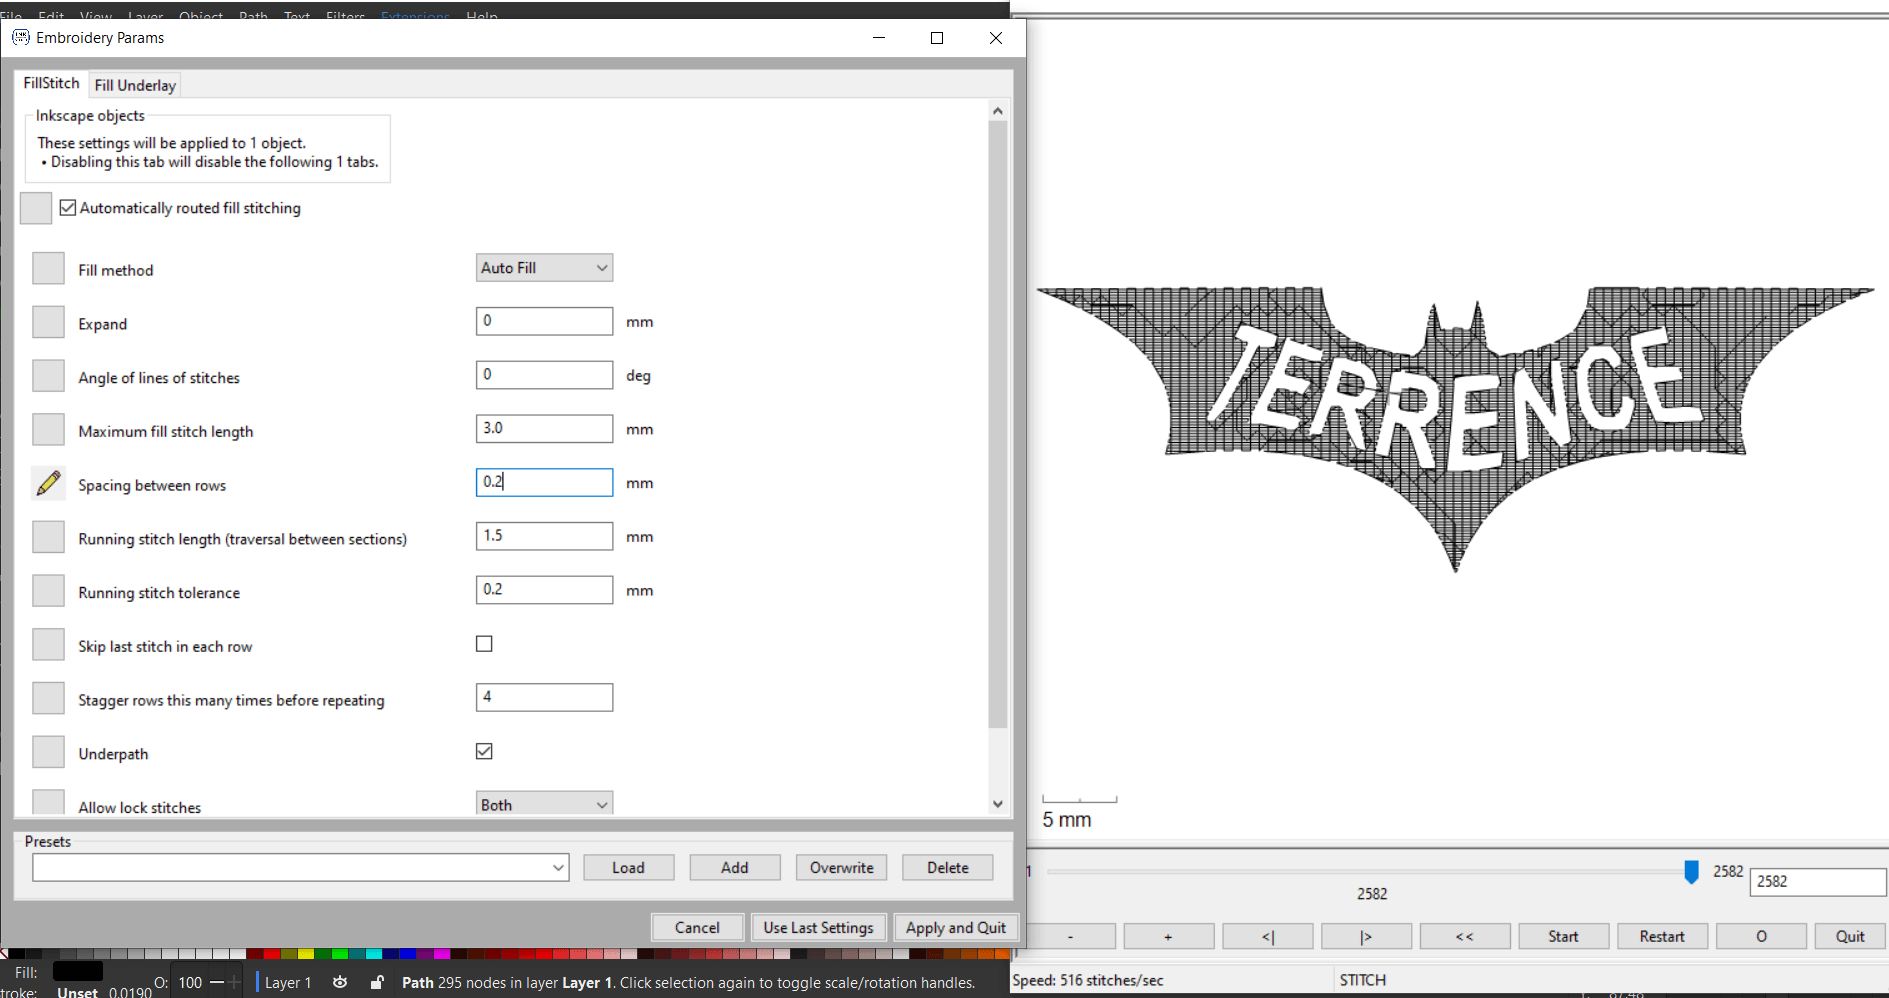
This opened the Embroidery Params window and a simulation window. The Embroidery Params window contains all the settings for the way the image will be embroided. The simulation preview looked ok, I just had to adjust the spacing between rows to 0.2mm. The file was then saved as a .pes file to be sent to the machine.
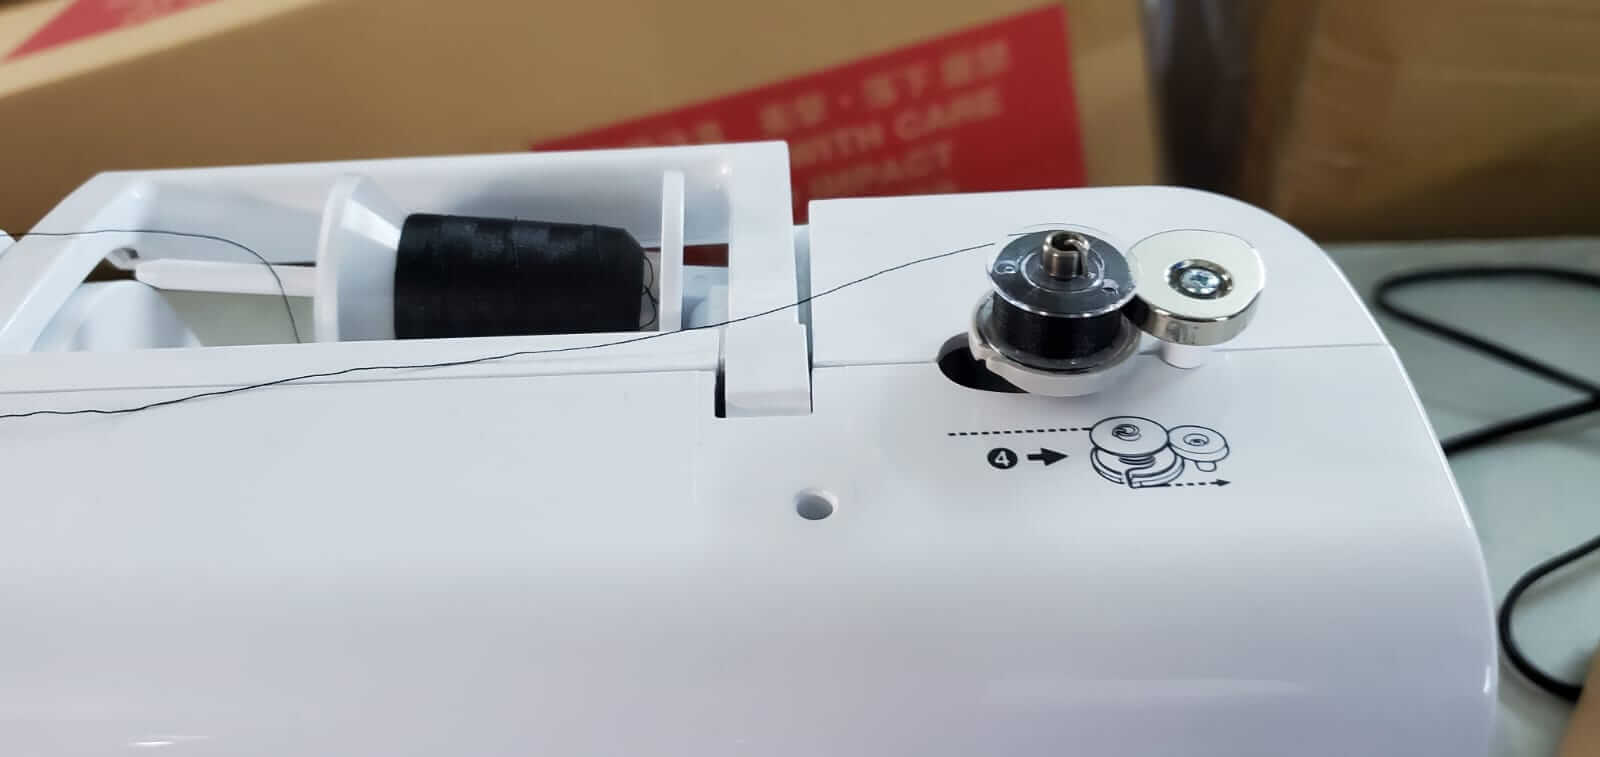
The machine first had to be threaded. A small bobbin was placed at the top of the machine as directed by the manual to be reeled. This small bobbin was to be placed in a compartment below the needle for the under stitch.
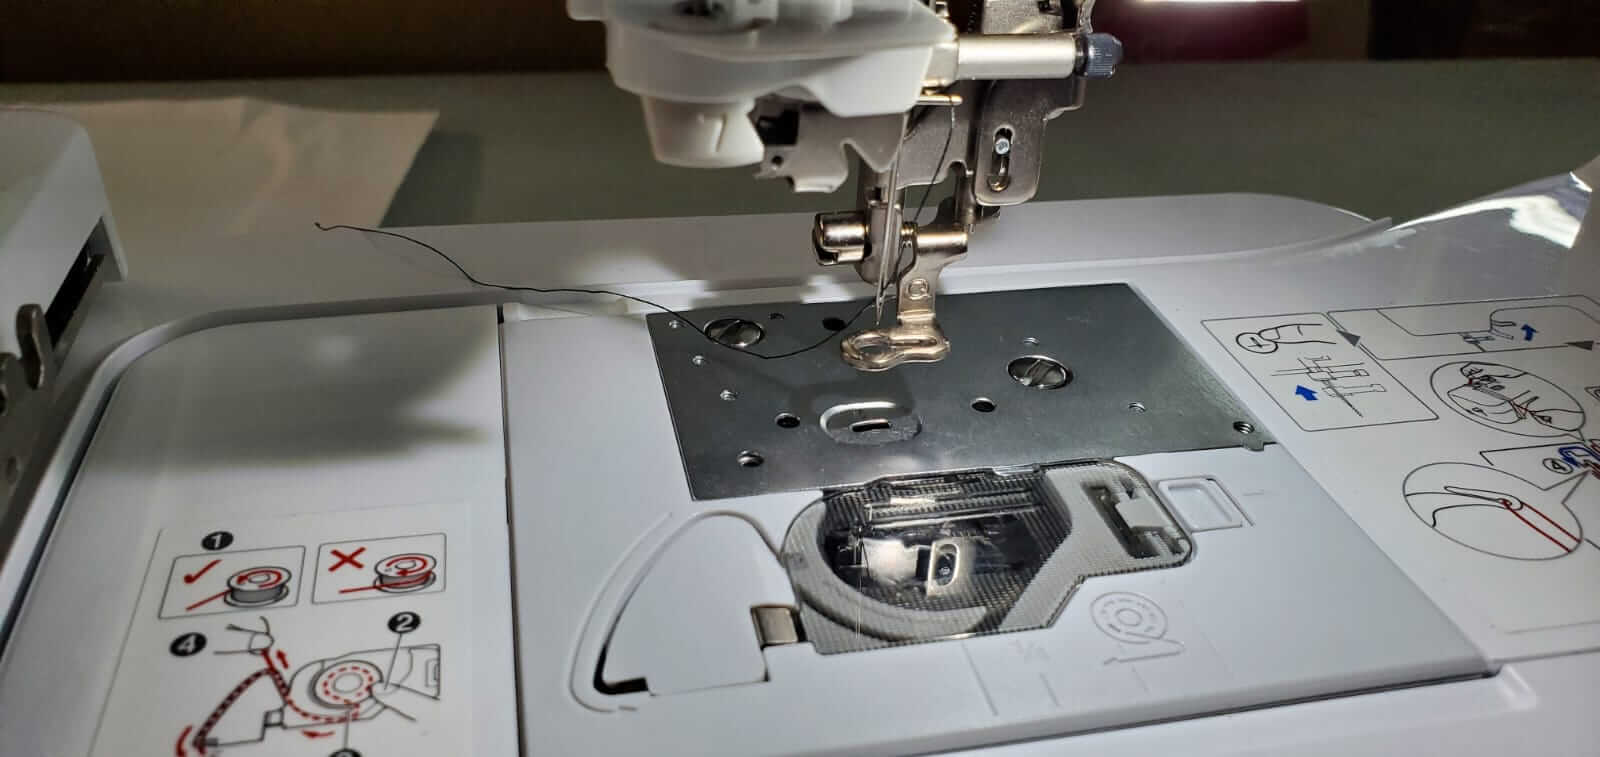
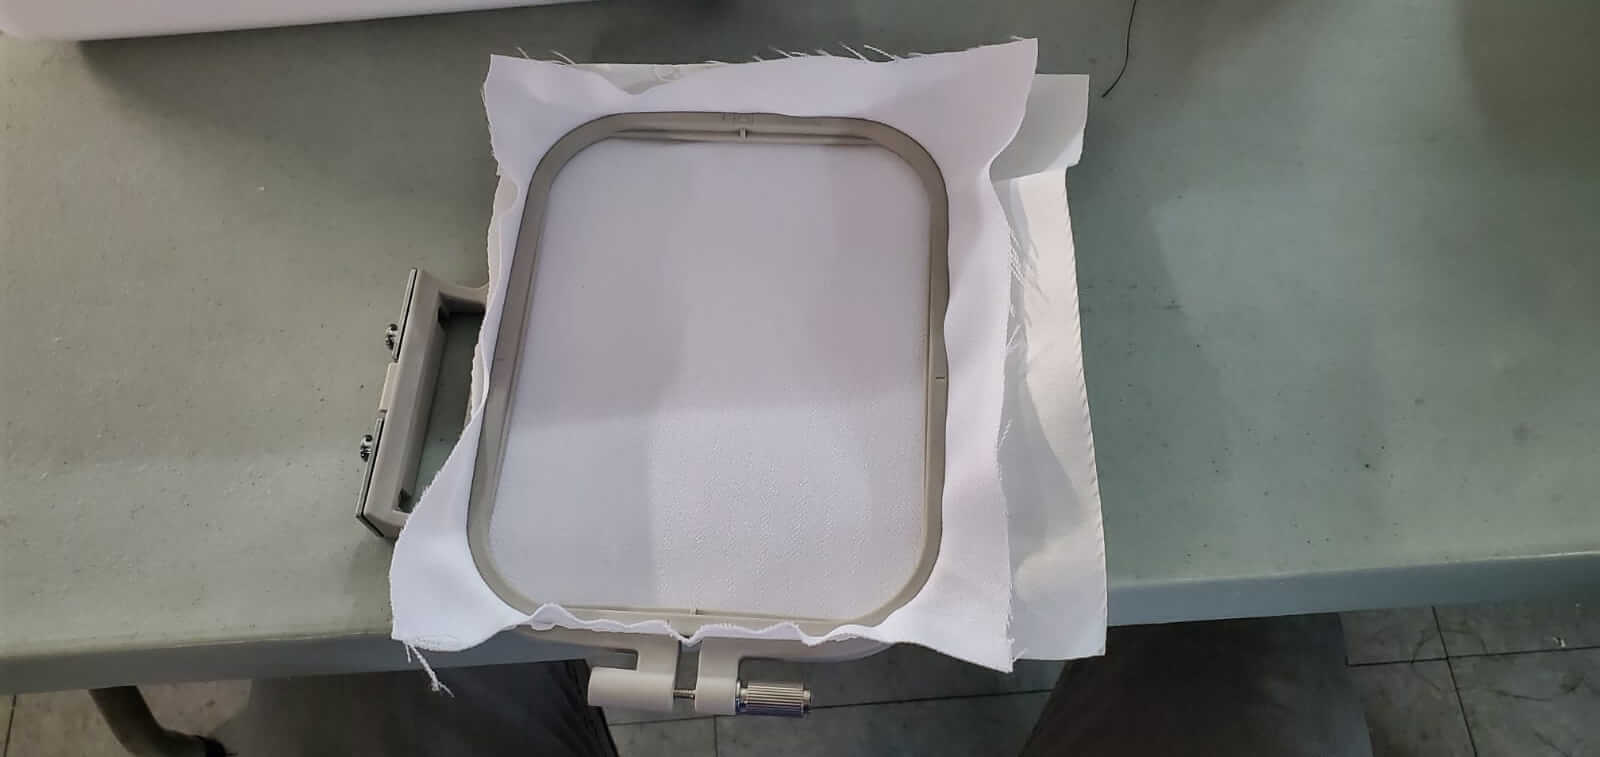
Backing paper was then placed under the cloth and then tightened in the holder.

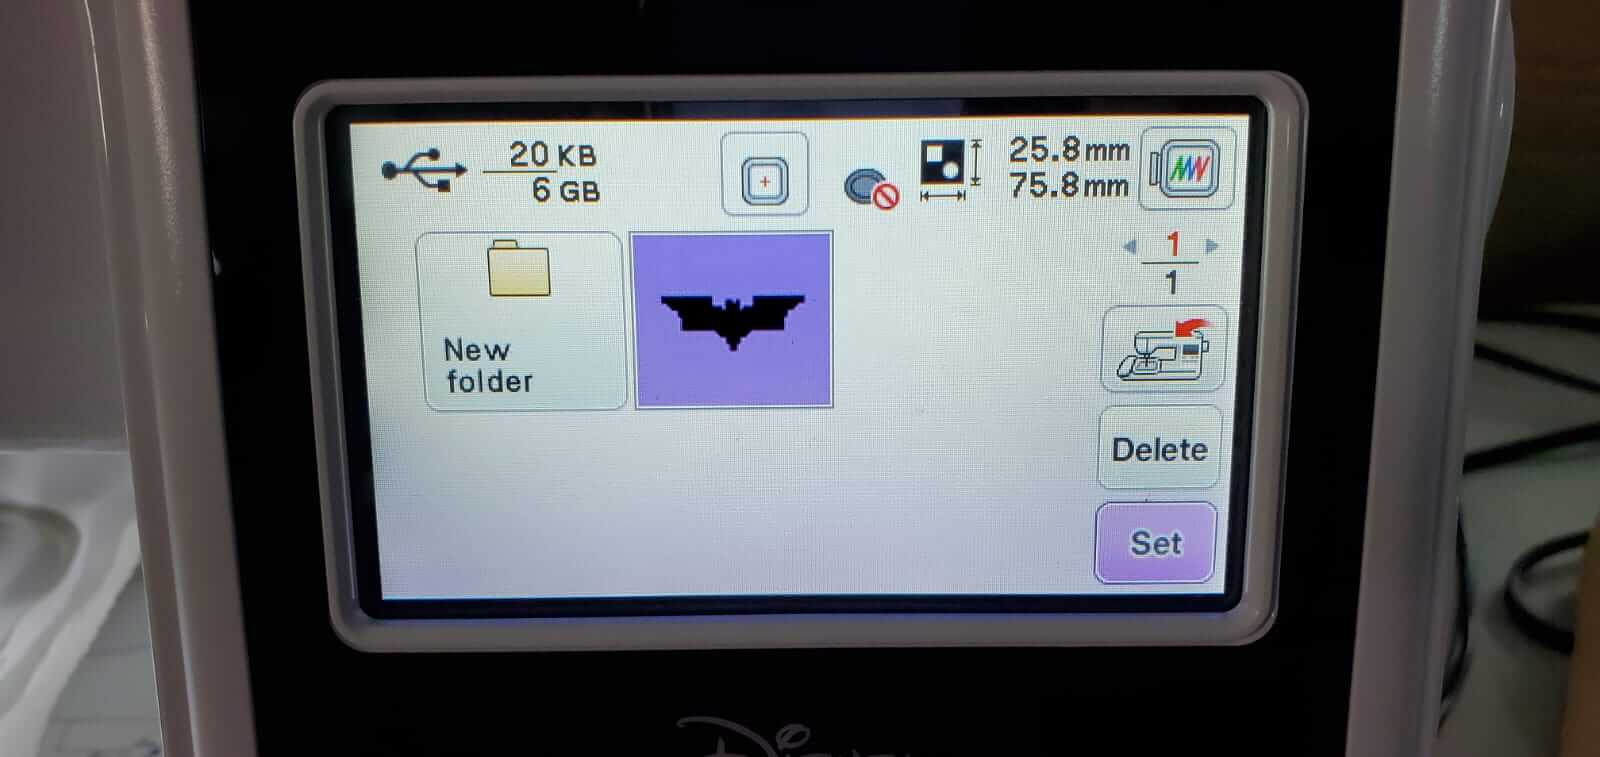
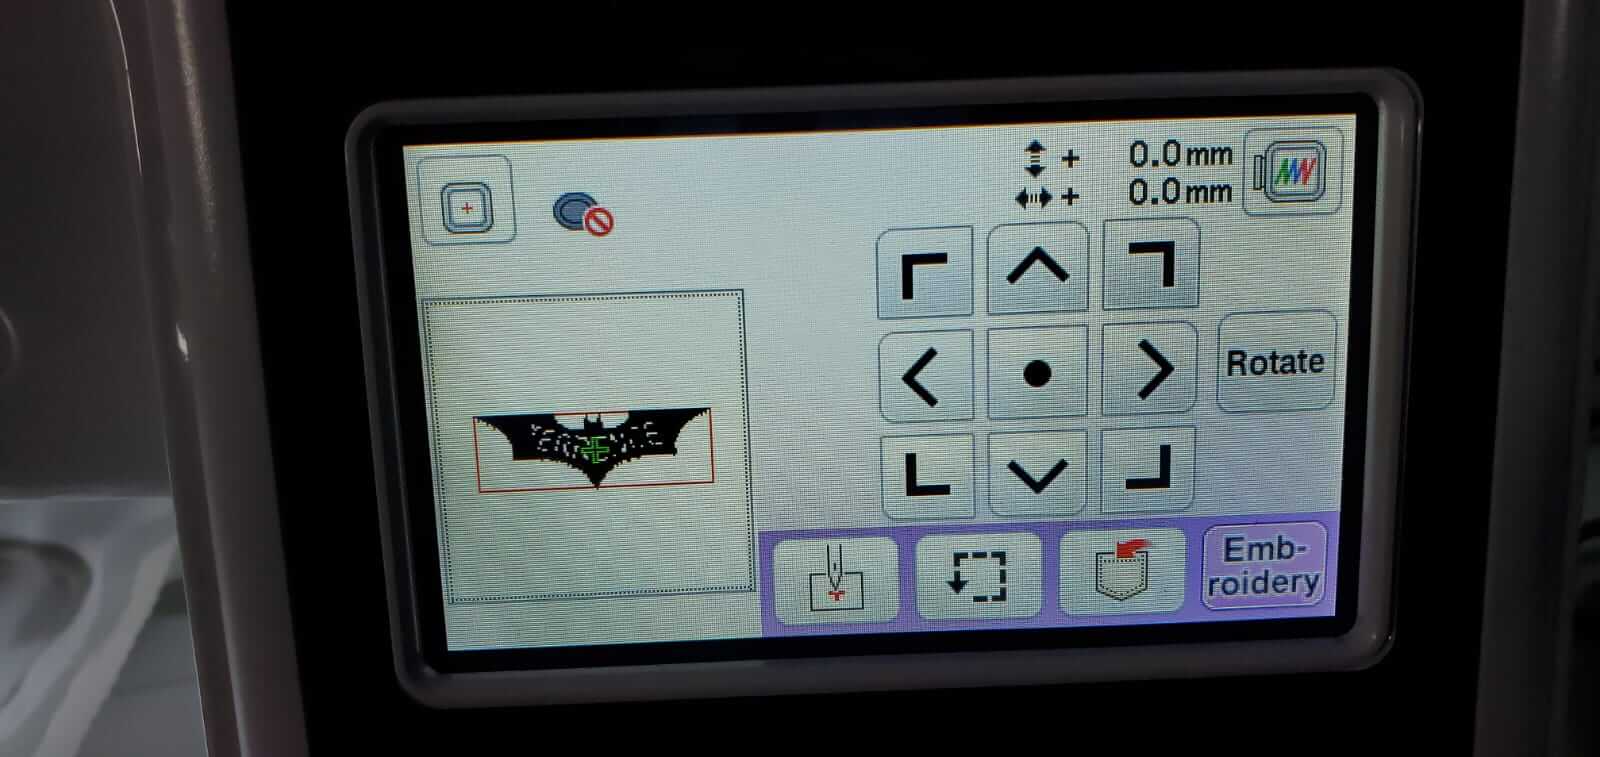
The file was then loaded unto the machine and I was given the option to edit the file like changing size or rotating, but I left it as is.
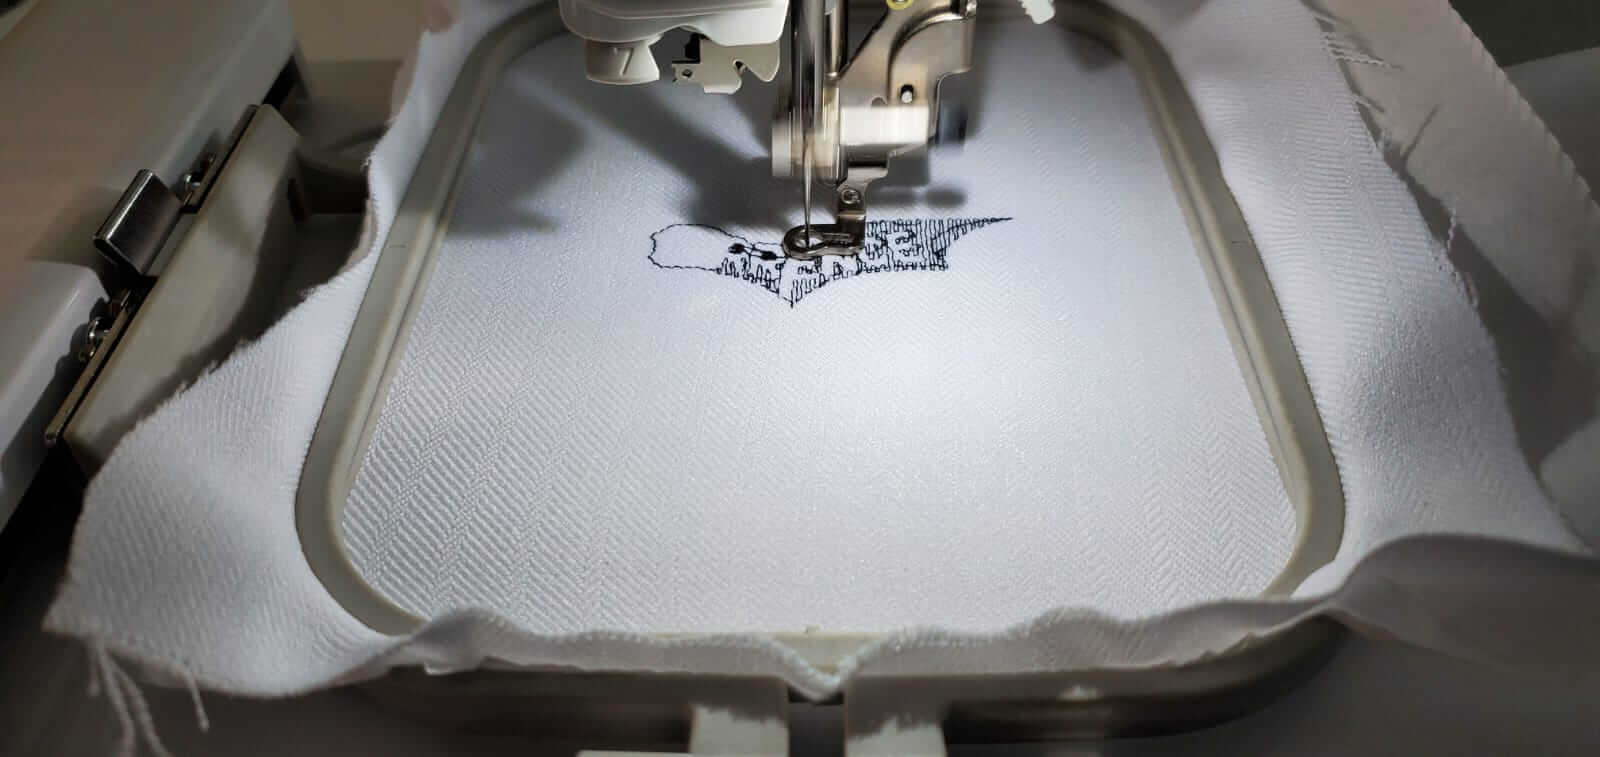
I then pushed the start button to begin the embroiding.


I then went on to prep my name tag design. I designed the image in CorelDraw and exported it as a vector image. Each element of the image was placed in its individual layer. I imported the image into Inkscape and you can see in the image below all the layers to the right in the layers panel.
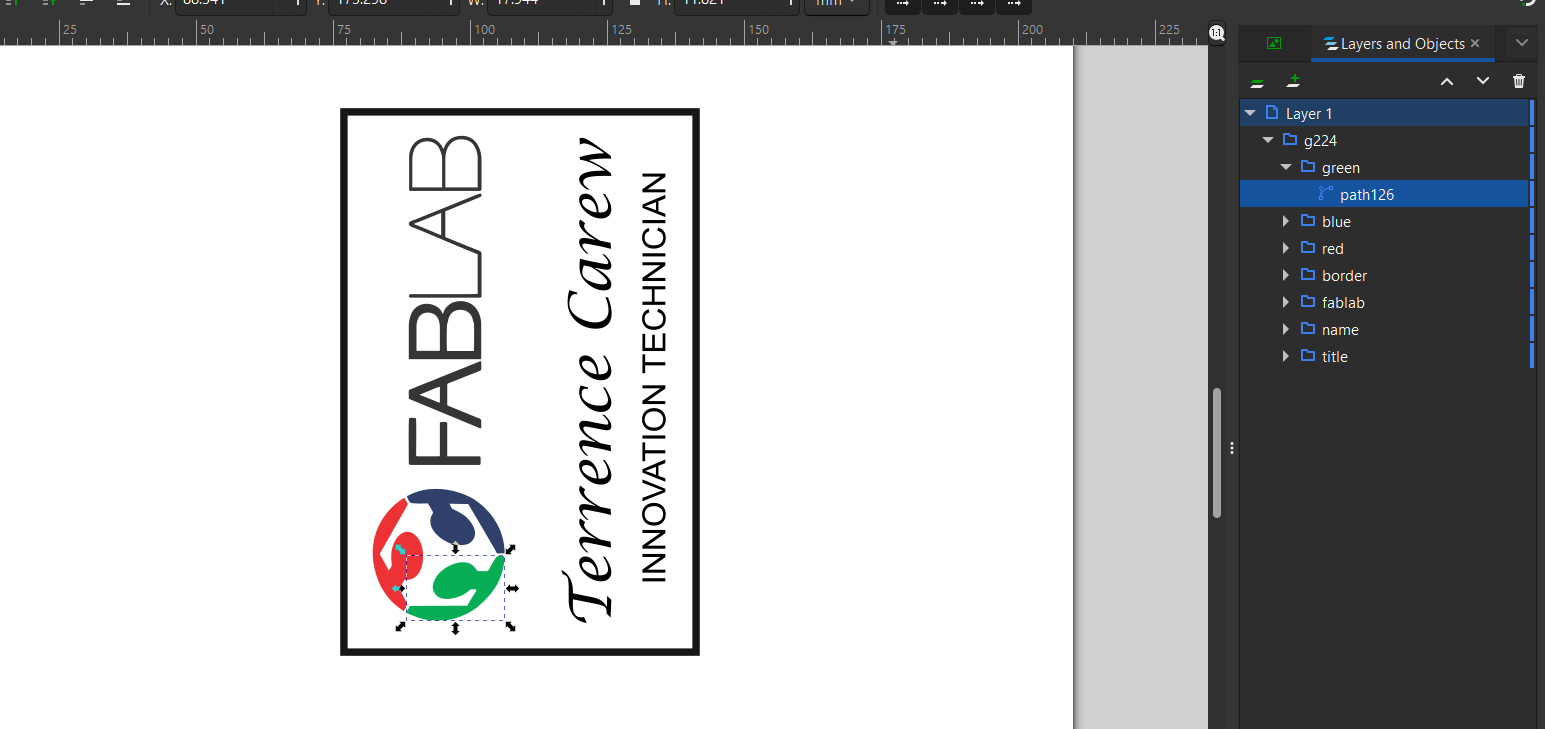
I repeated the steps from the previous design to prep this image. Inkstitch automatically assigned each layer as an individual stitch.
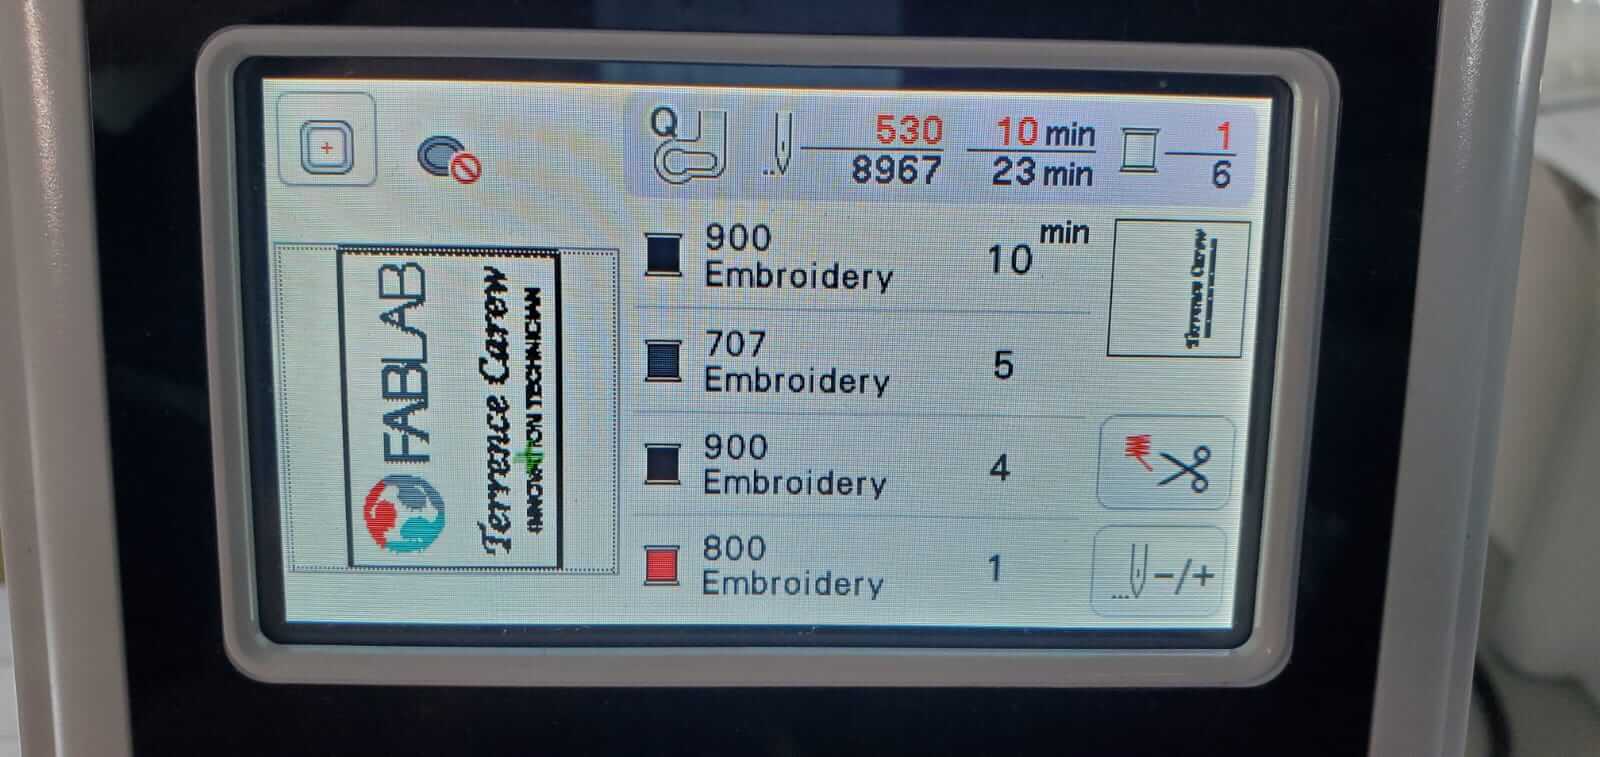
When I loaded the image unto the machine the layers appeared as their individual stitch. Now this made it easy for me because after each element was embroided, the machine would automatically pause, give me the chance to change the color thread.
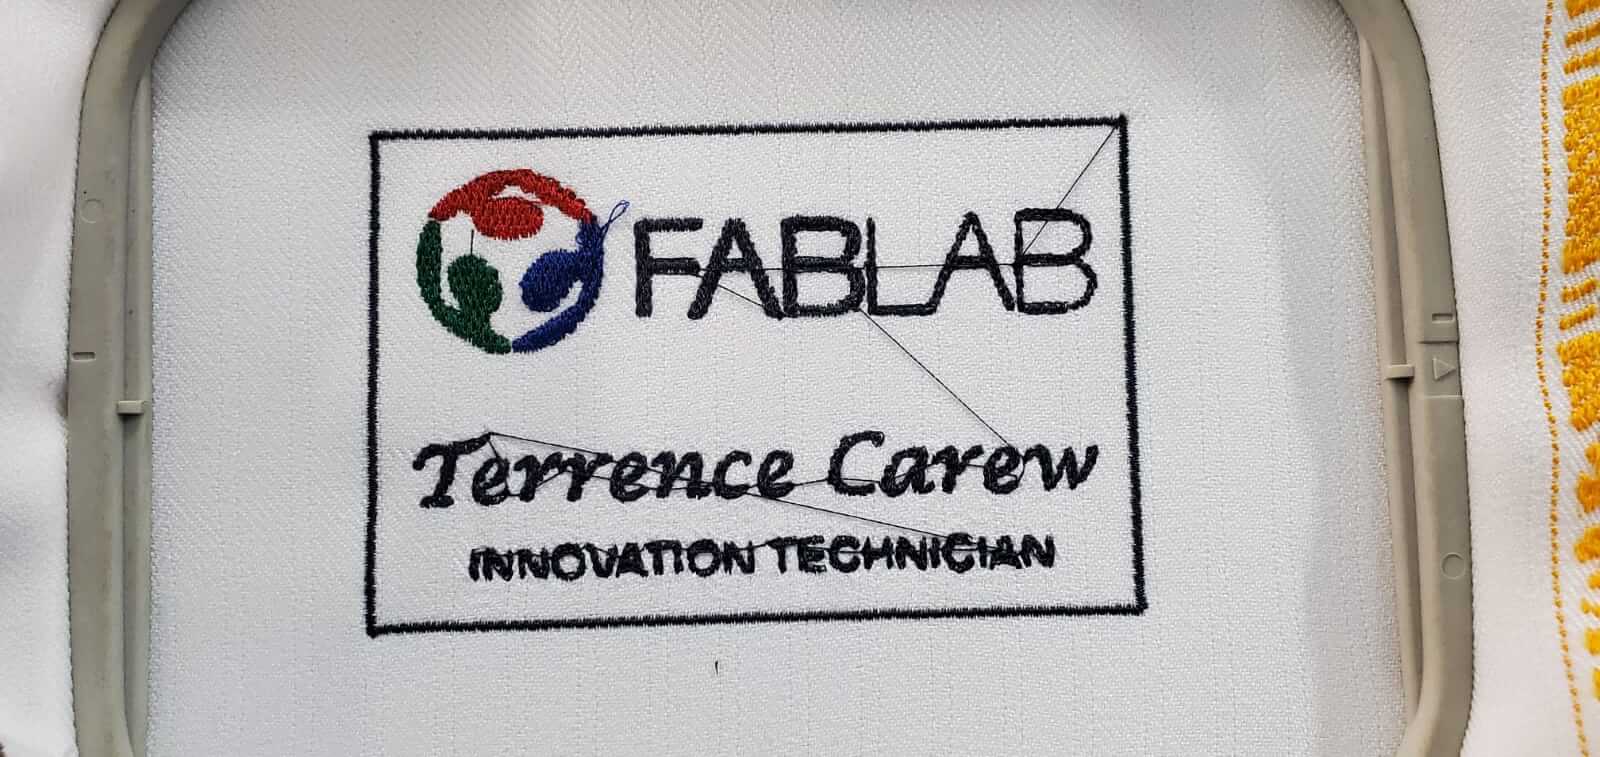
I know! I know! the sewing of the patch isn't great but the embroidery is still ok.