Compare as many tool options as possible.
Link to Group AssignmentWrite an application that interfaces a user with an input &/or output device that you made.
Assignment Requirement
Status
Linked to the group assignment page.
Completed
Documented your process.
Completed
Explained the GUI that you made and how you did it.
Completed
Explained how your application communicates with your MCU board.
Completed
Explained any problems you encountered and how you fixed them.
Completed
Included original source code (or a screenshot of the app code if that's not possible).
Completed
Included a ‘hero shot’ of your application running & communicating with your board.
Completed
For this assignment I was tasked with creating a software application to interface with my microcontroller development board. Before creating the app I first had to decide how am I communicating this app with my MCU. I decided I would go with serial communication and that I would use C# to code my app. This decision lead me to to use Visual Studio for my coding and I am also familiar with Visual Studio Code for my web design.
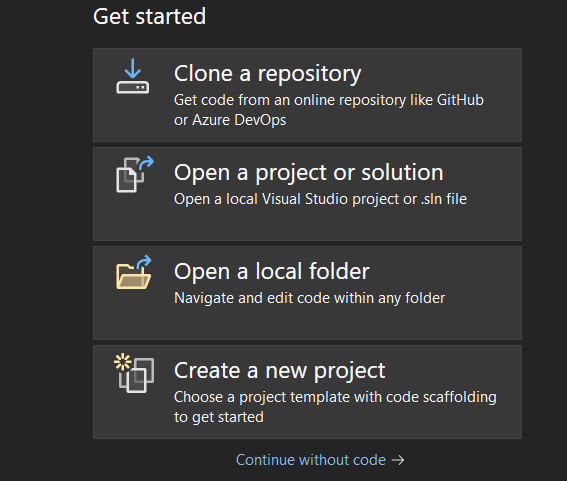
To get started I selected Create New Project.
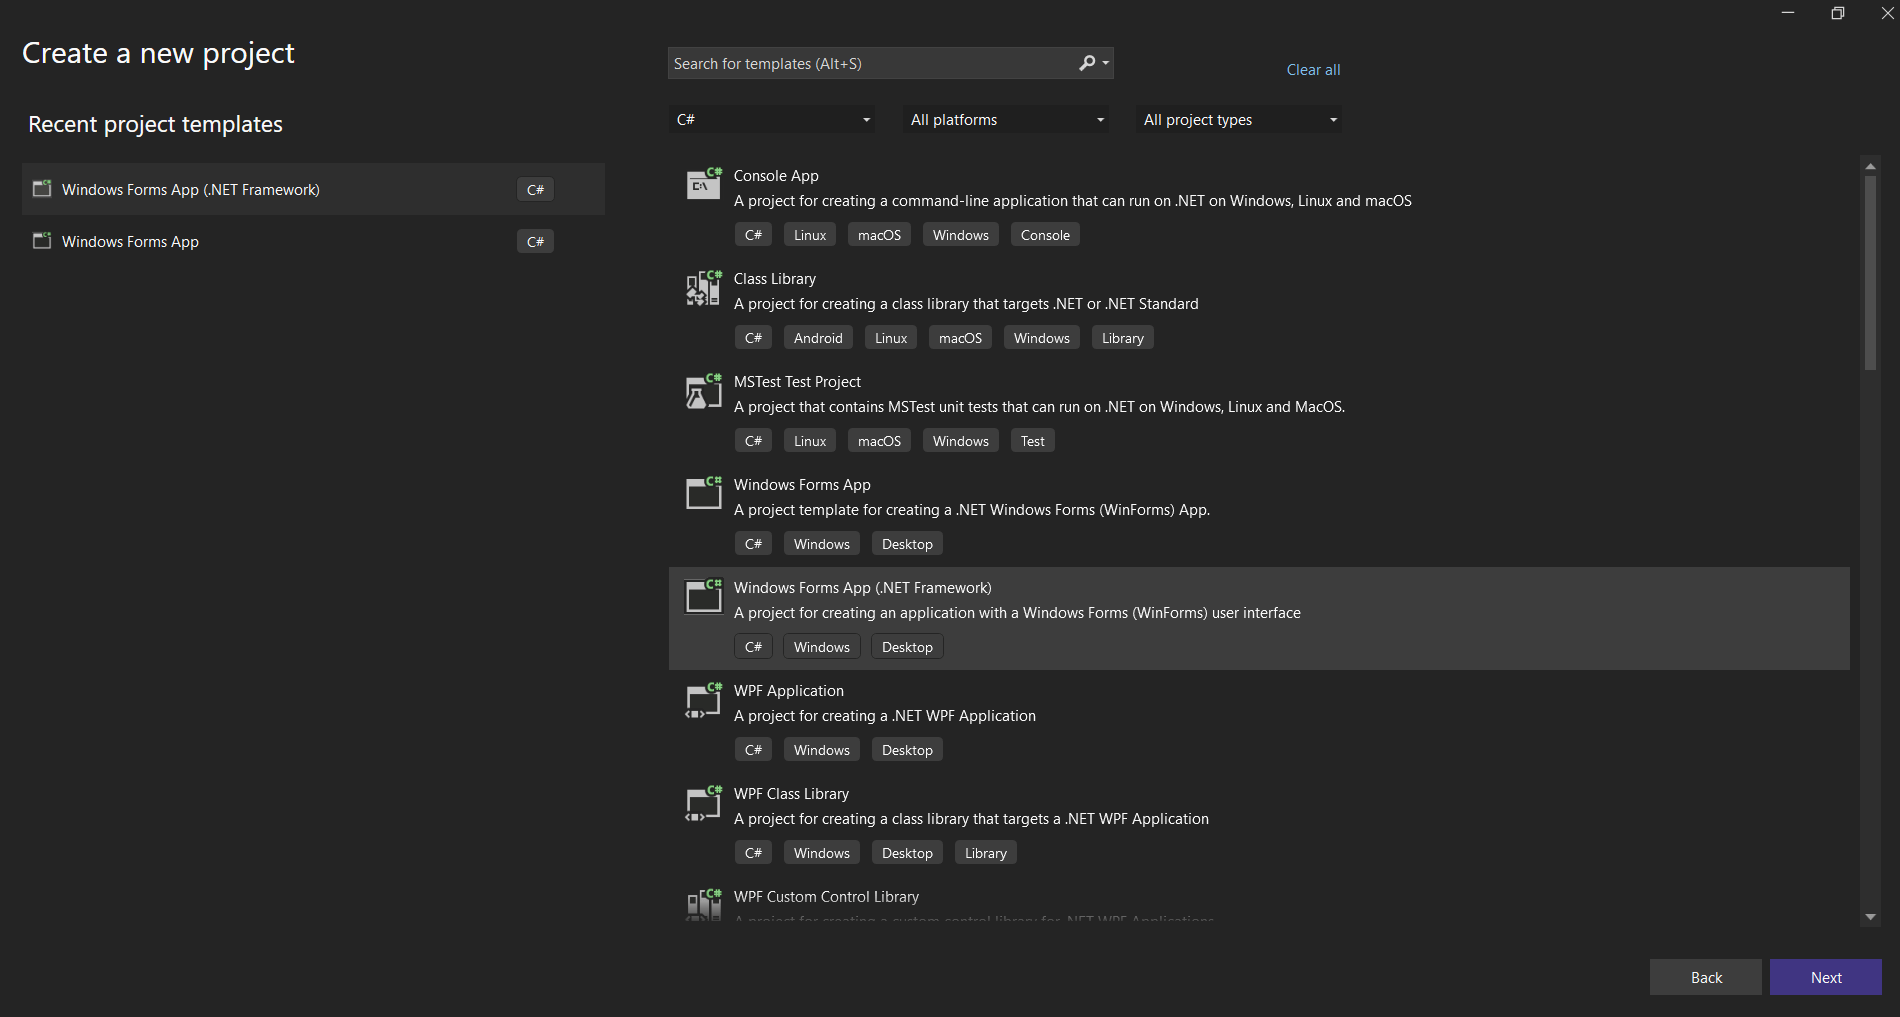
From the window I entered C# for the language and selected Windows Forms App (.net Framework). For details on the inclusion of .Net Framework I reviewed Microsoft's .Net Framework Overview which gave me better insight of its purpose of stabilization and support of windows applications. I created my project using .Net Framework 4.8 which is compatible for the latest apps and the latest version of Windows.
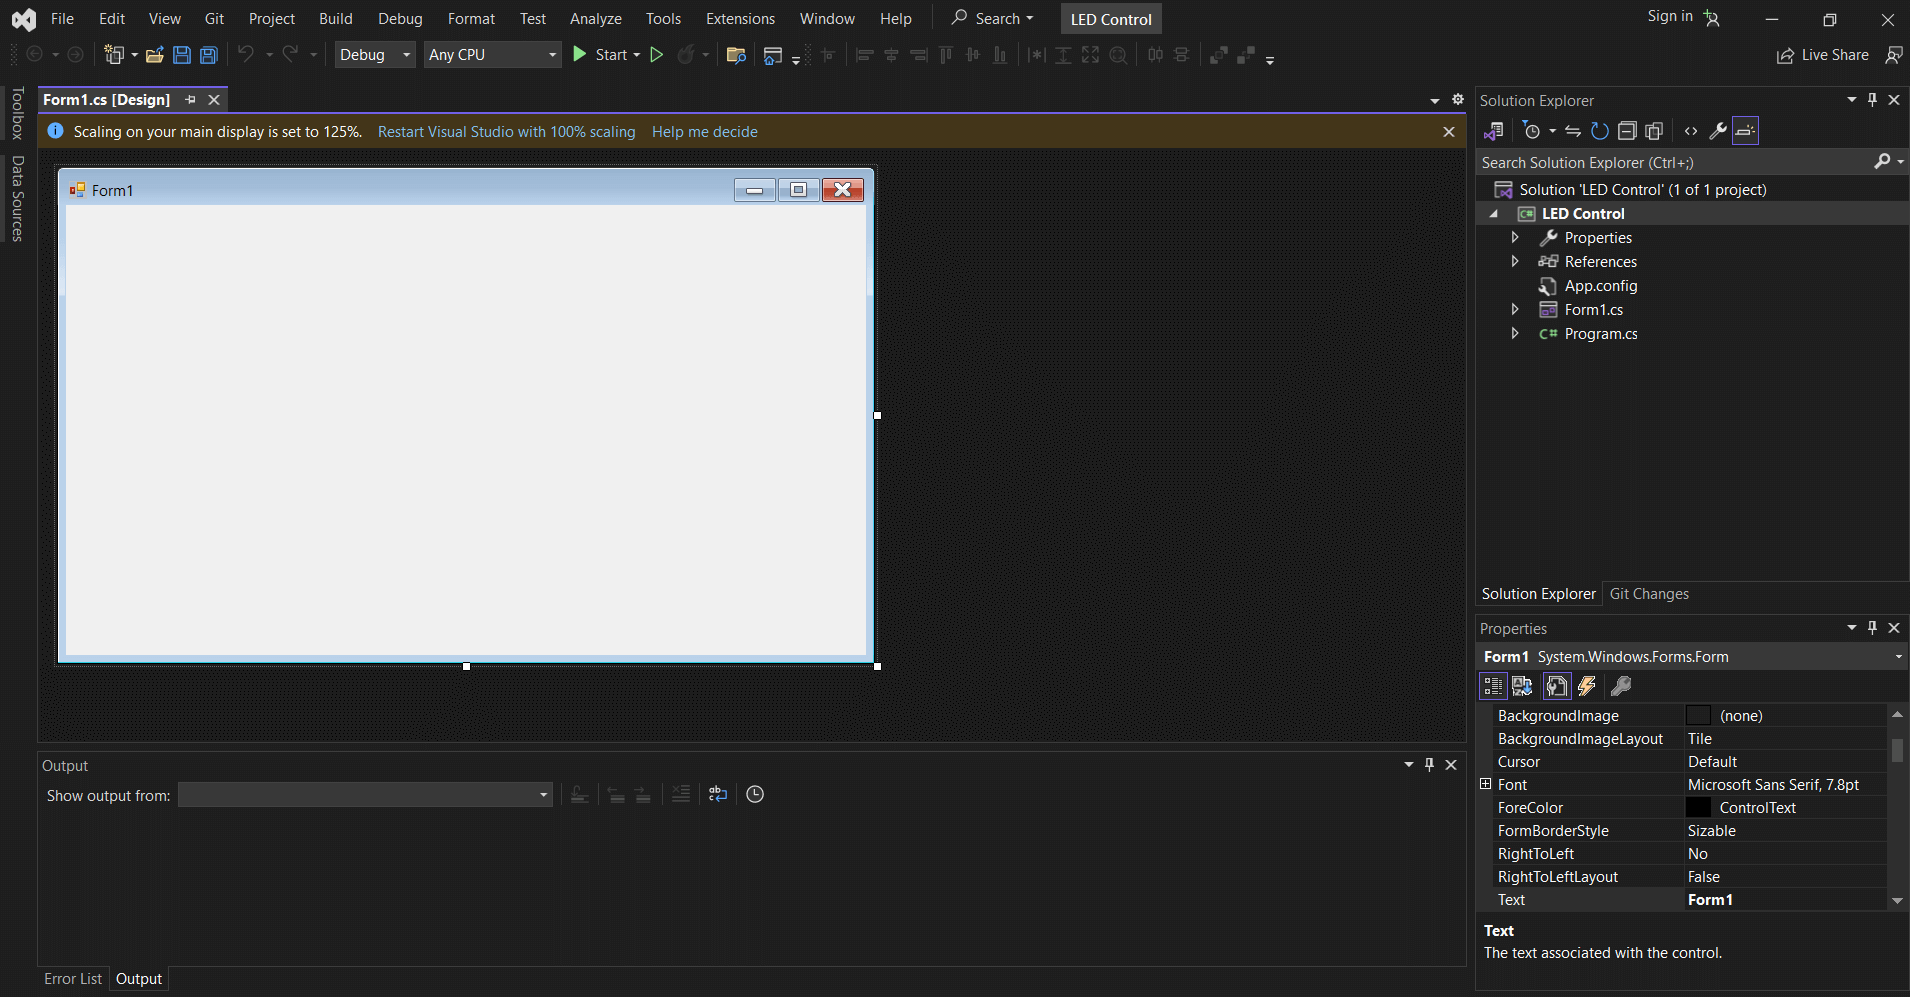
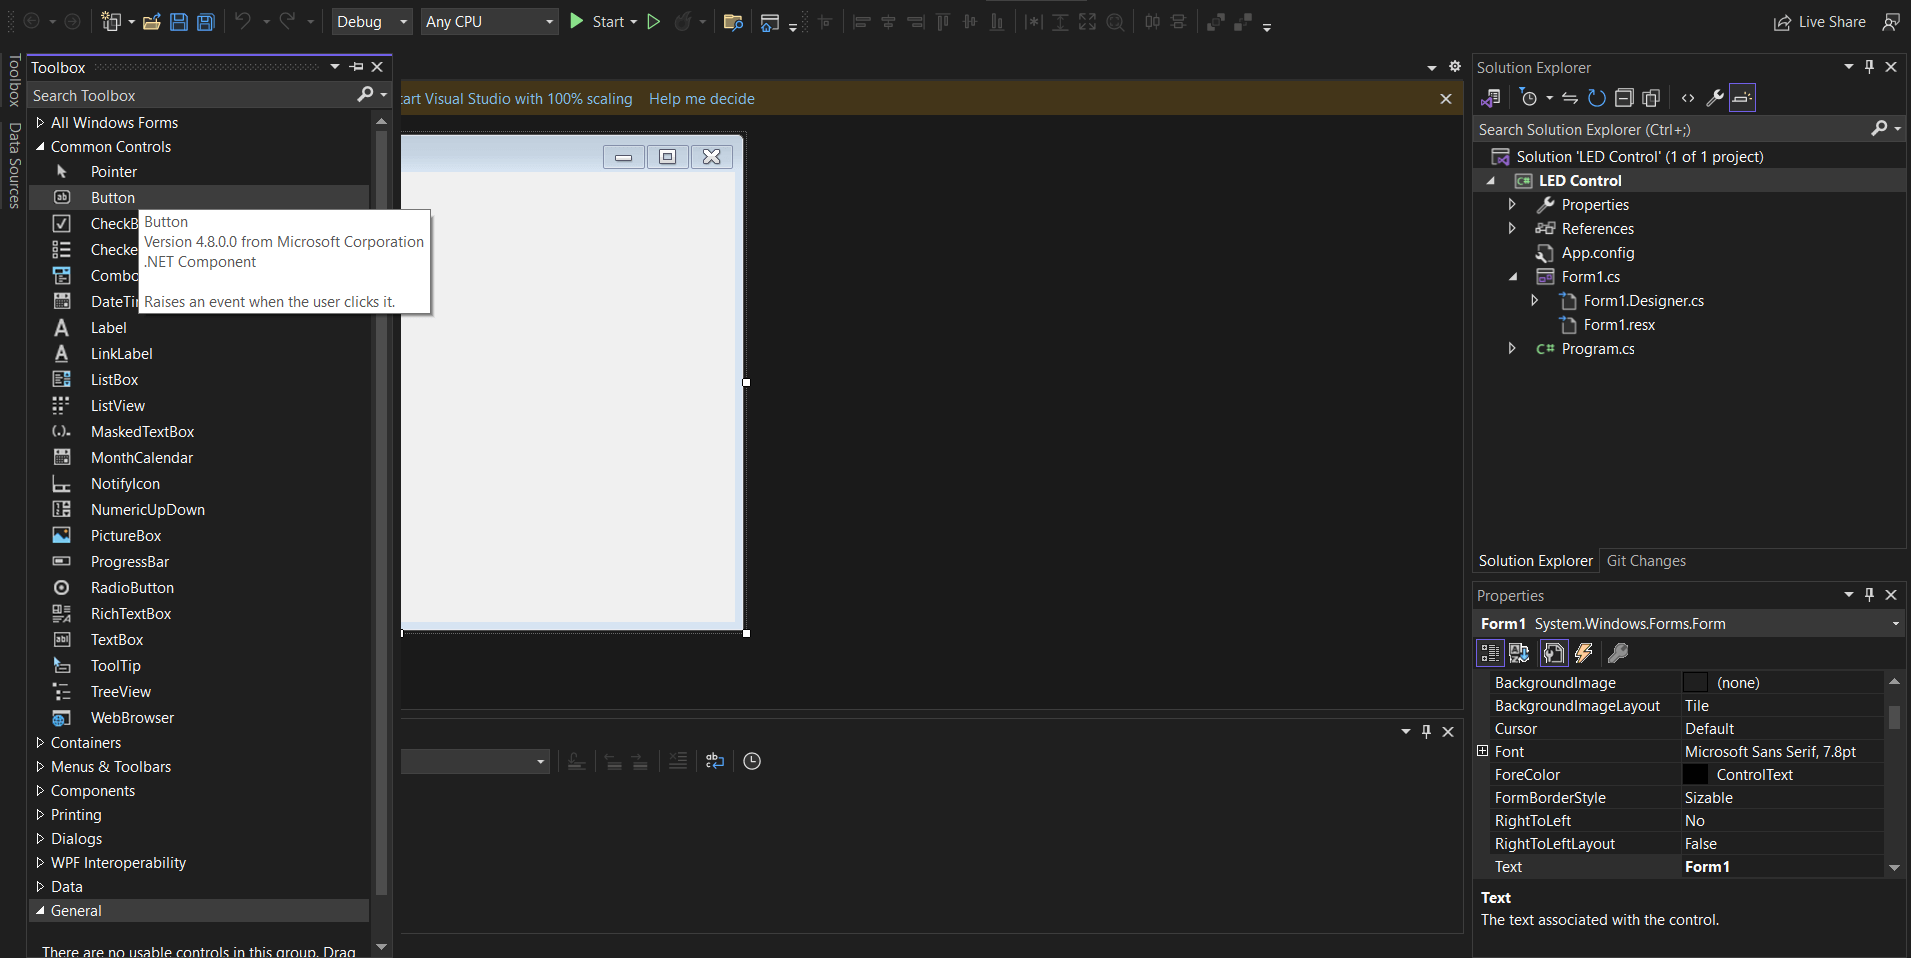
My project opened with a basic app window template. To the right is the Solution Explorer that contains the detailed contents of the project. At the bottom of the Solution Explorer is the properties panel.
My first test app I wanted to control my Batman Dual LEDs board. From the Toolbox on the left, I dragged a Button unto the app window.
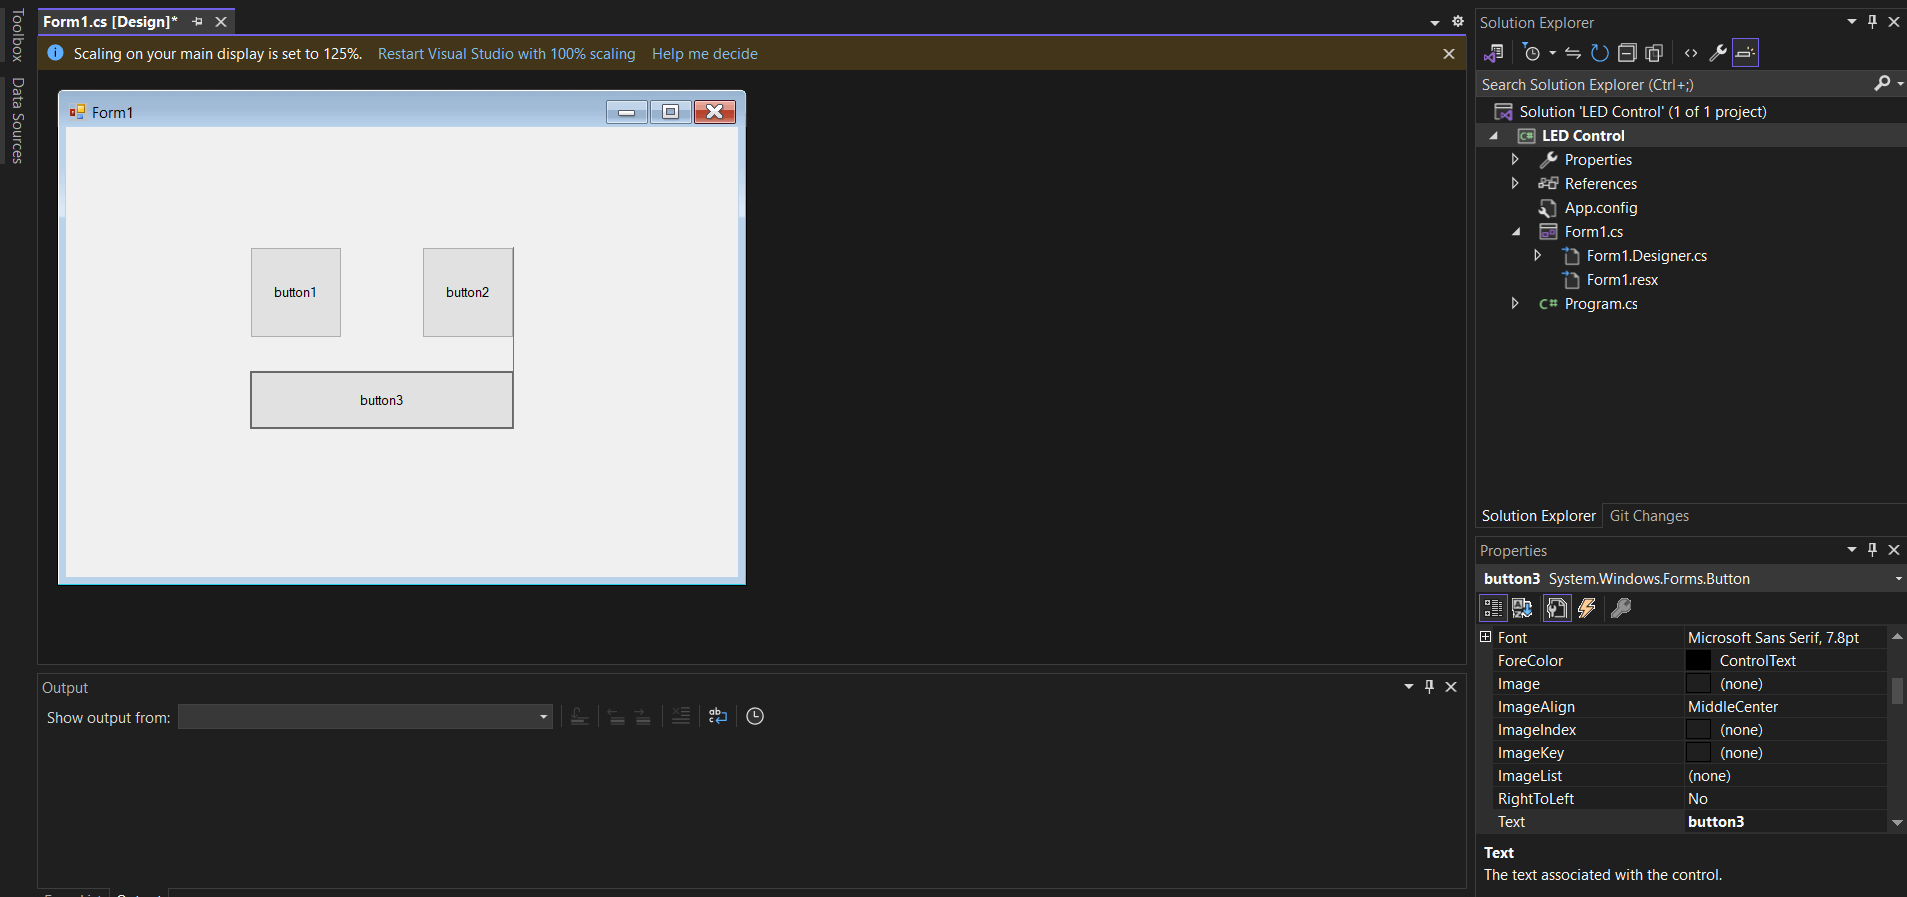
I made two duplicates of the Button and positioned and aligned them as seen below.
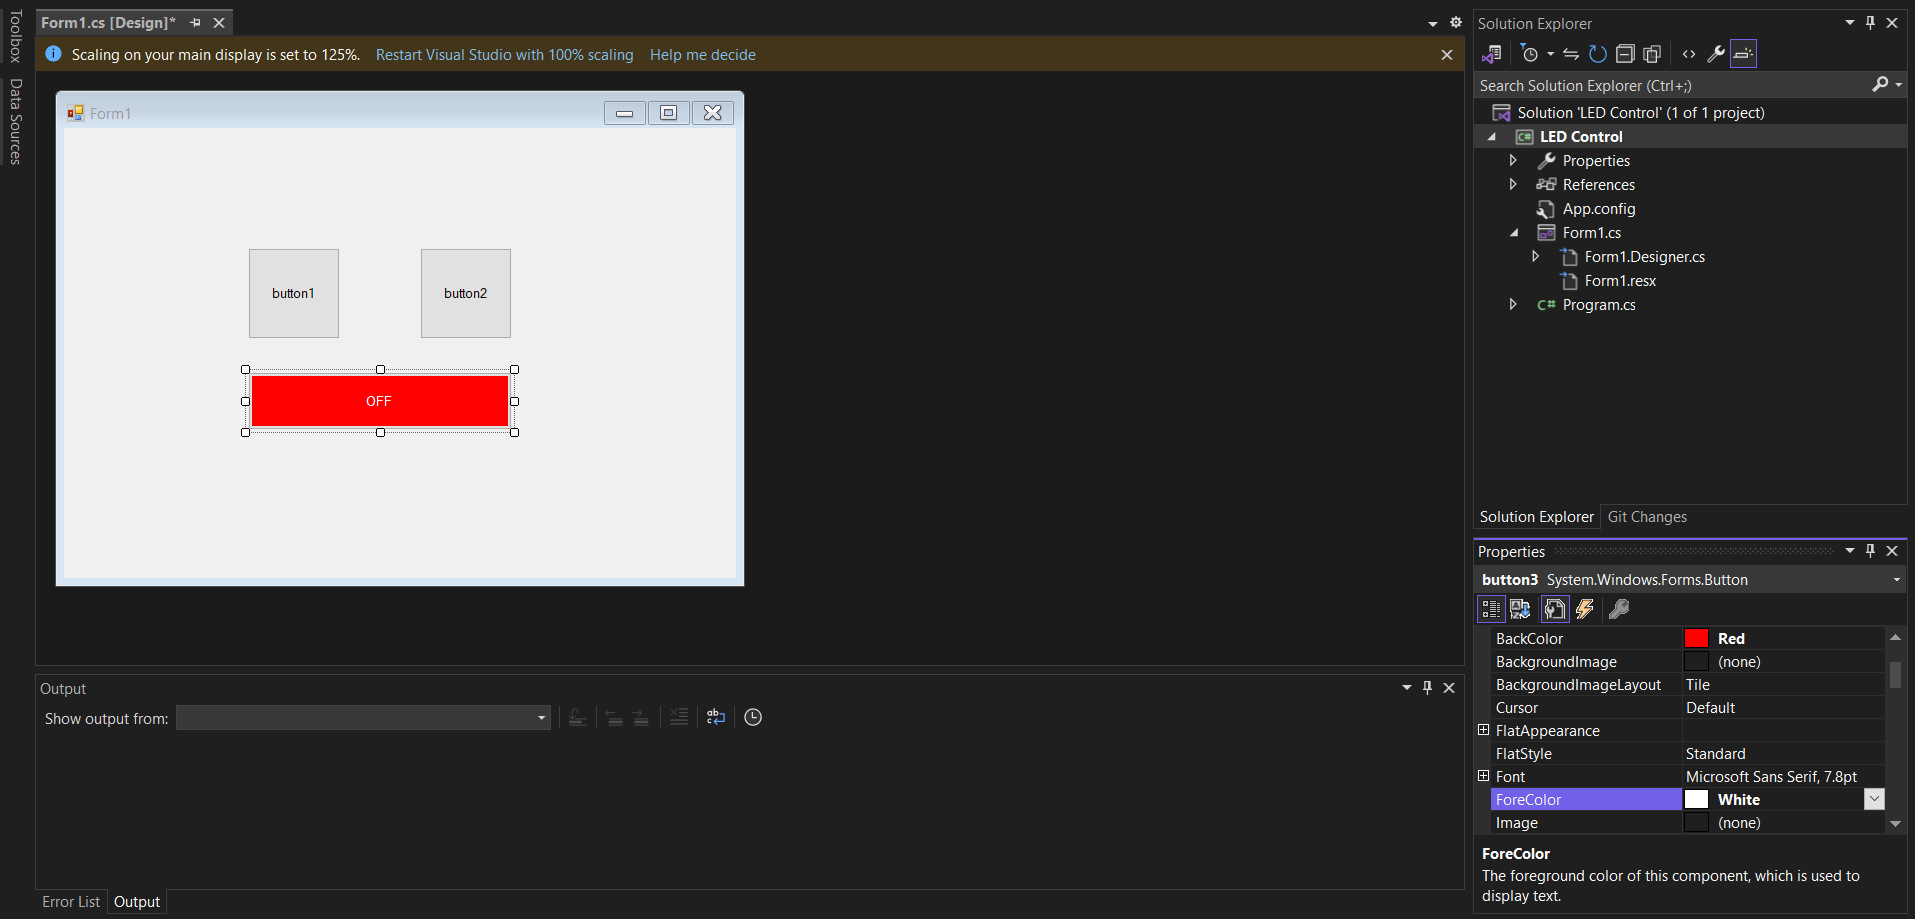
I selected one of the Buttons and its default properties were displayed in the properties panel. I changed the foreground color to red and changed the label to OFF.
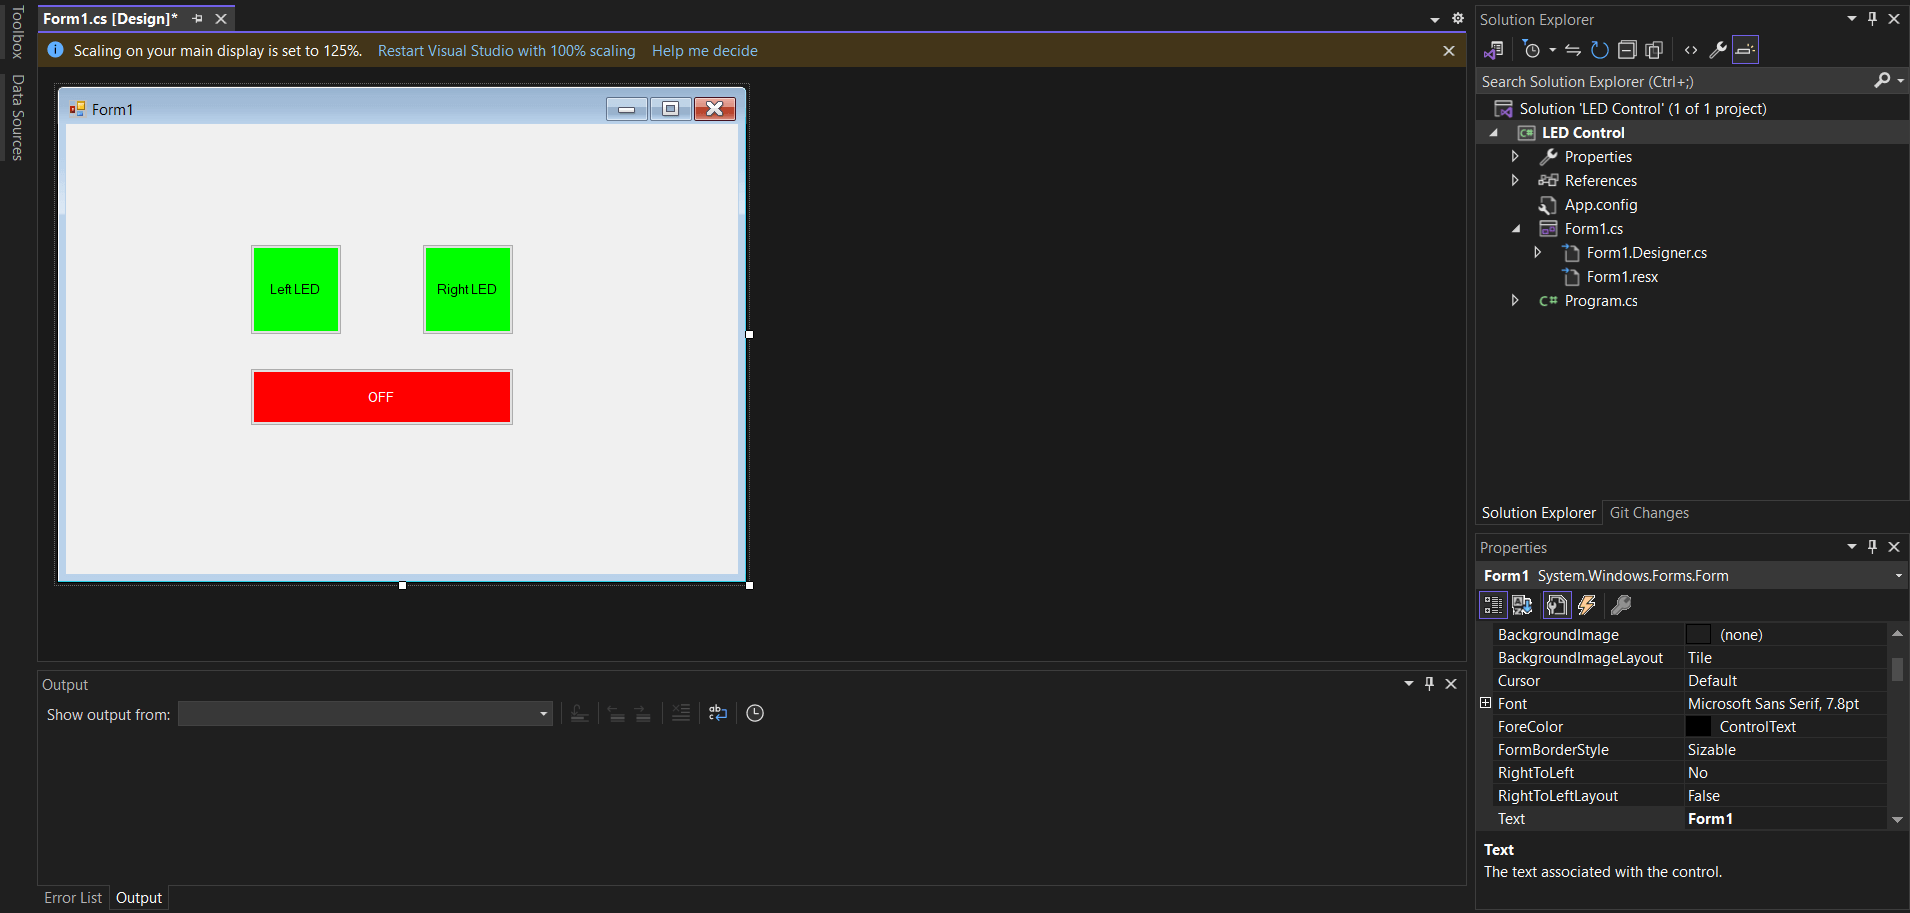
I repeated the step above and editted the properties for the other Buttons setting them green and labelling a Left LED and Right LED.
Now came the tricky part. I double clicked the first Button and this opened the coding page for the app.
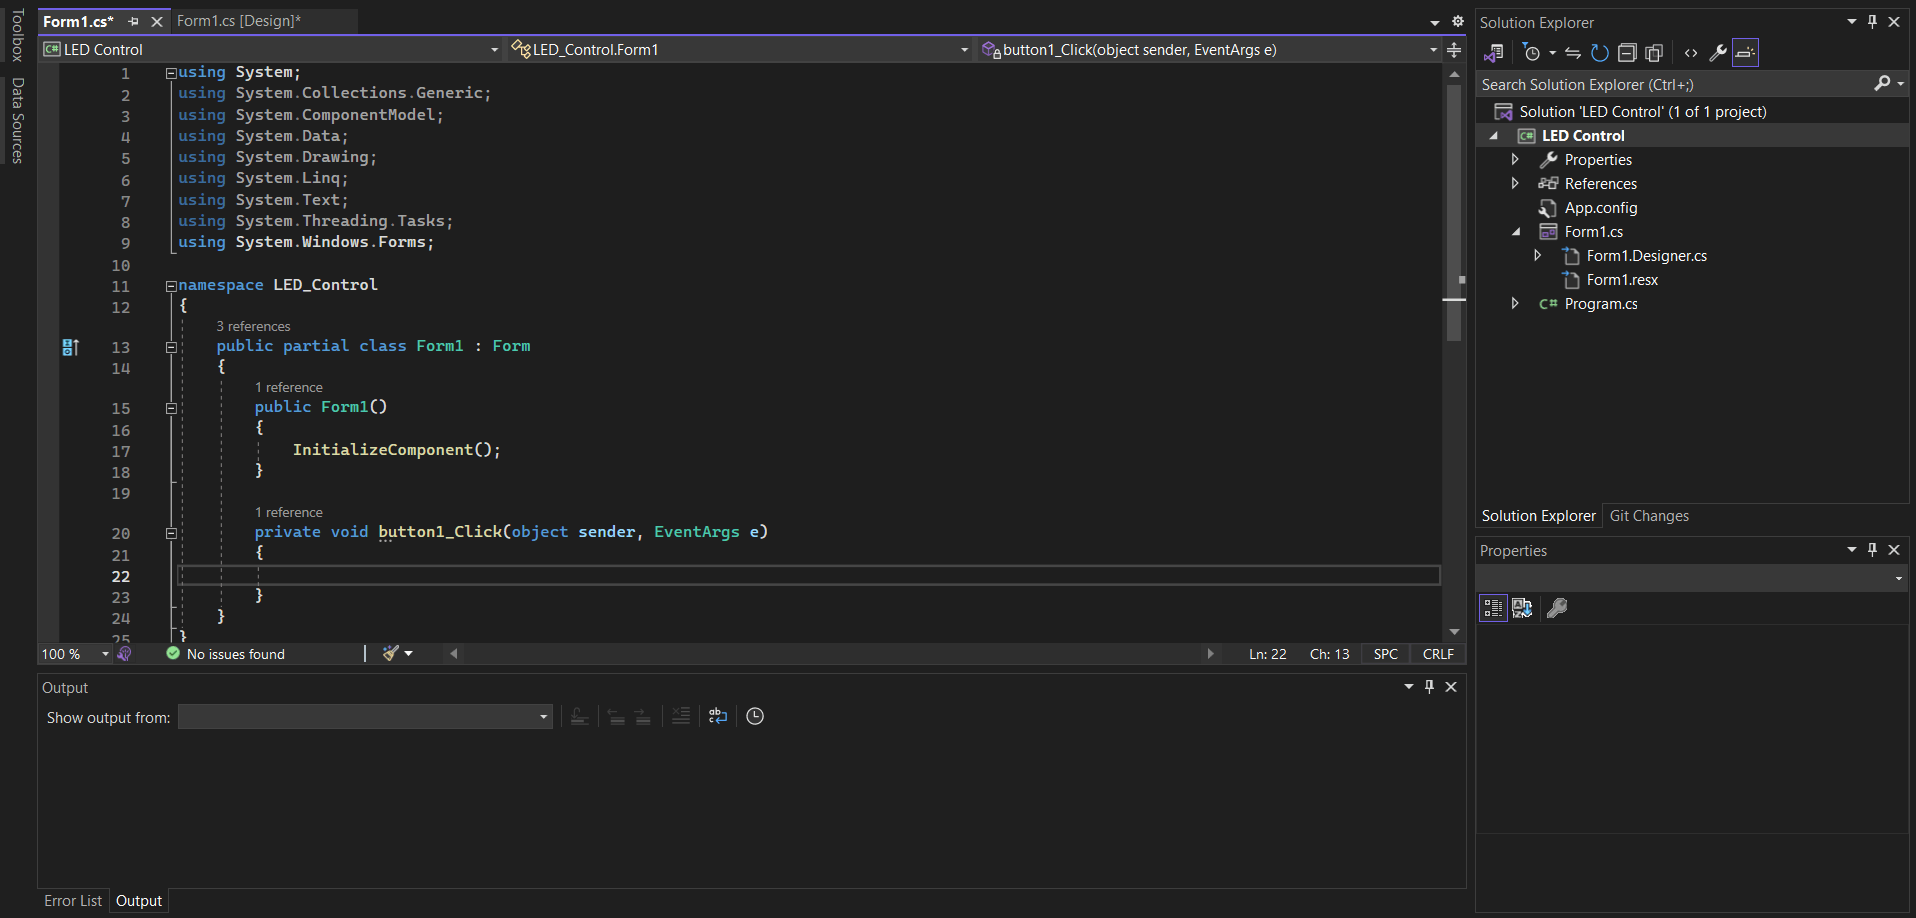
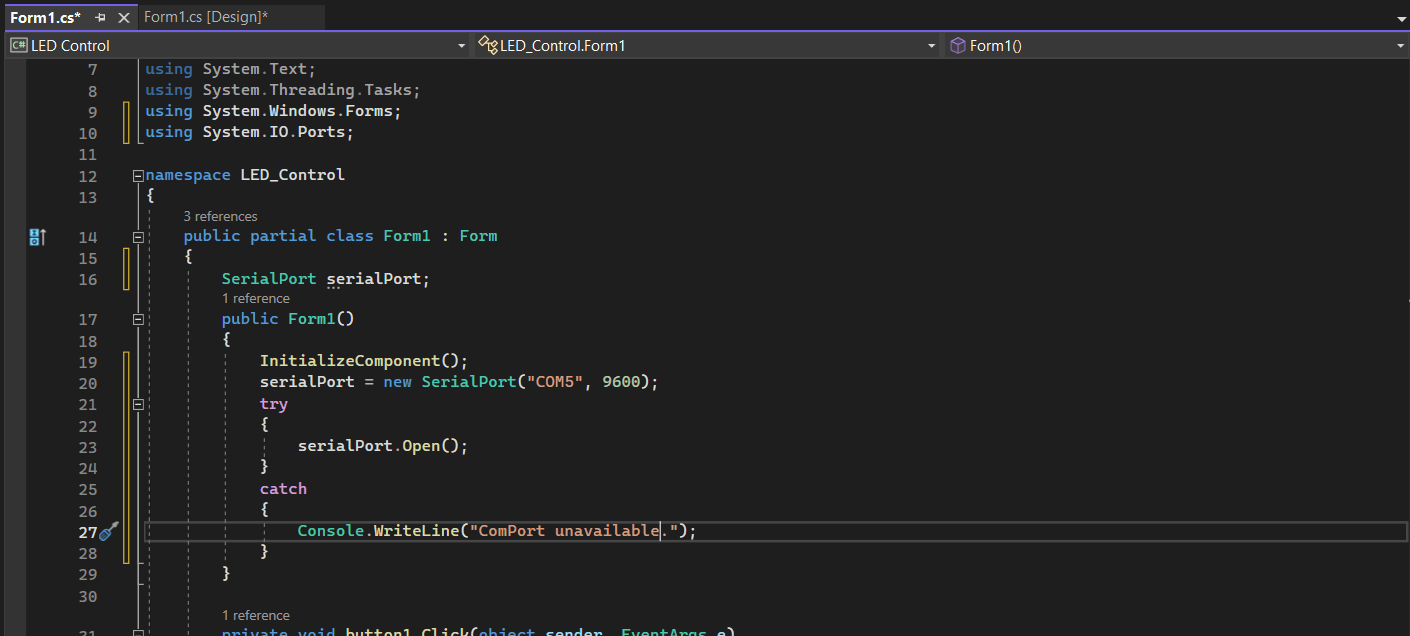
A default template opened wit a basic C# structure. Since I was using Serial Communication I needed to insert a serial port line in the program so that the app knows that is communicating via Serial. Also I had to include a com port that the computer will be using (in my case I used com5 for the Batman Dual LED board.) I also included a com port check in the program to identify if one is available.
Similar to Arduino IDE coding, there are libraries to be included. For Windows Forms we enter "using" followed by the library name. Now by default some libraries were inserted. I experienced some communication issues and thats where I learnt that I had to insert System.IO.Ports so that the app can communicate via a port.
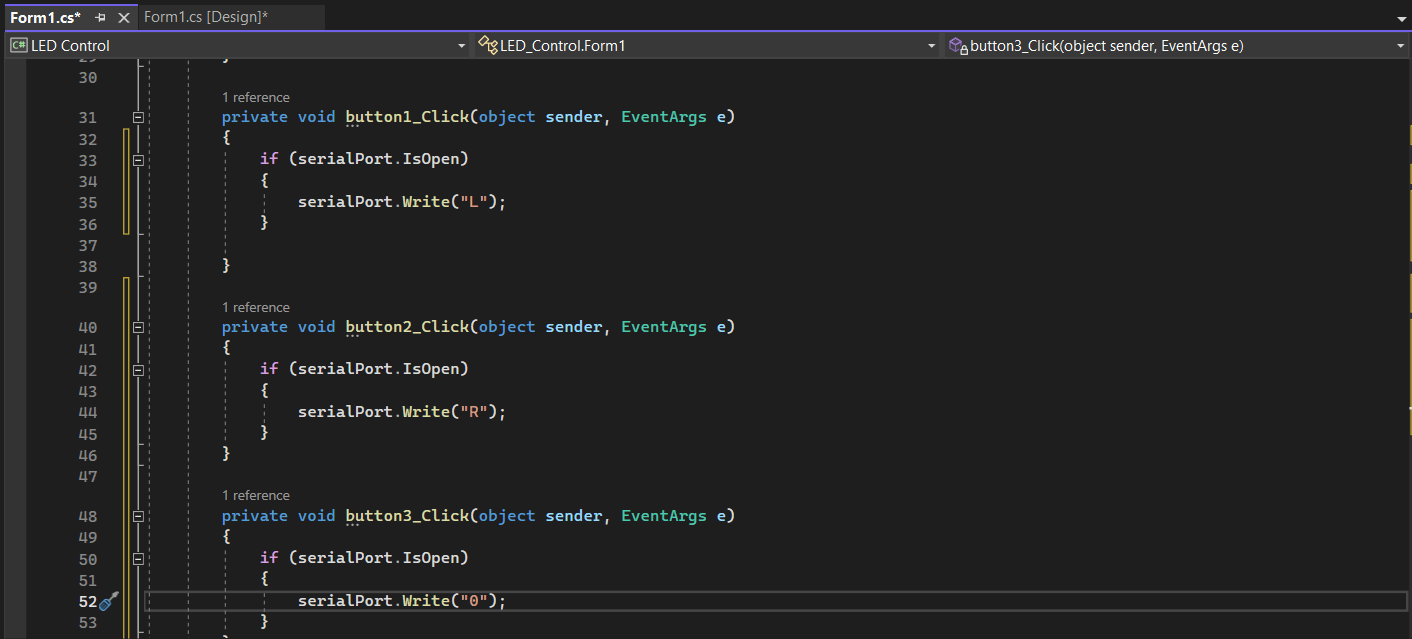
For each Button I inserted a serialPort.Write line and a message (in this case just a letter). This message will be sent to the MCU via the serial port.
            using System;
using System.Collections.Generic;
using System.ComponentModel;
using System.Data;
using System.Drawing;
using System.Linq;
using System.Text;
using System.Threading.Tasks;
using System.Windows.Forms;
using System.IO.Ports;

namespace LED_Control
{
    public partial class Form1 : Form
    {
        SerialPort serialPort; // initialise serial communication
        public Form1()
        {
            InitializeComponent();
            serialPort = new SerialPort("COM5", 9600); // assign communication port
            try
            {
                serialPort.Open();
            }
            catch
            {
                Console.WriteLine("ComPort unavailable."); // return message if port not connected
            }
        }

        private void button1_Click(object sender, EventArgs e) // button task
        {
            if (serialPort.IsOpen) // condition if device is connected
            {
                serialPort.Write("L");  // Message sent when button is pressed
            }

        }

        private void button2_Click(object sender, EventArgs e)
        {
            if (serialPort.IsOpen)
            {
                serialPort.Write("R");
            }
        }

        private void button3_Click(object sender, EventArgs e)
        {
            if (serialPort.IsOpen)
            {
                serialPort.Write("0");
            }
        }
    }
}
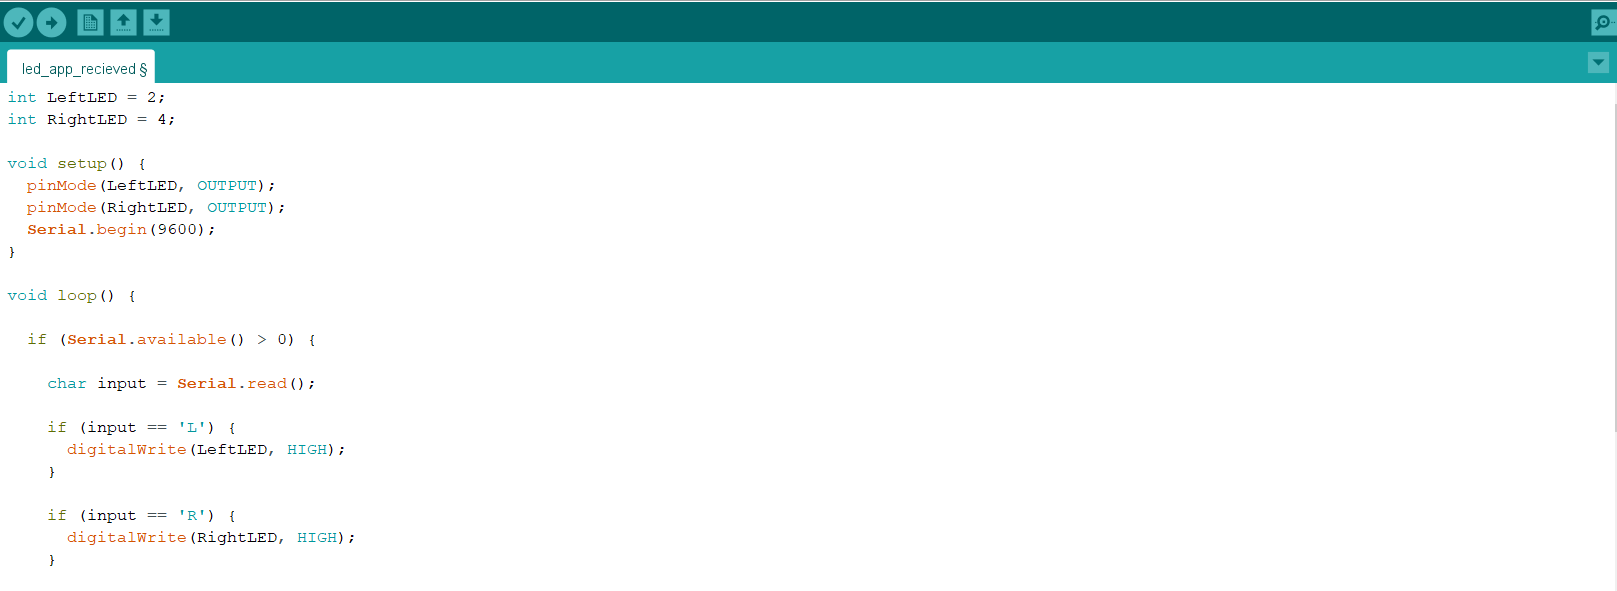
So now I had to program my board to communicate with the app. For this I inserted a Serial.Read since the app had a serialPort.Write. I added conditions for when the board recieves the messages from the app.
            //MCU Program

            int LeftLED = 2;
            int RightLED = 4;

            void setup() {
                pinMode(LeftLED, OUTPUT);
                pinMode(RightLED, OUTPUT);
                Serial.begin(9600);
            }

            void loop() {

                if (Serial.available() > 0) {

                char input = Serial.read(); // read from serial port

                if (input == 'L') {         // if message recieved
                digitalWrite(LeftLED, HIGH);
            }

                if (input == 'R') {
                digitalWrite(RightLED, HIGH);
            }

                if (input == '0') {
                digitalWrite(LeftLED, LOW);
                digitalWrite(RightLED, LOW);
            }

                delay(200);

            }
        }
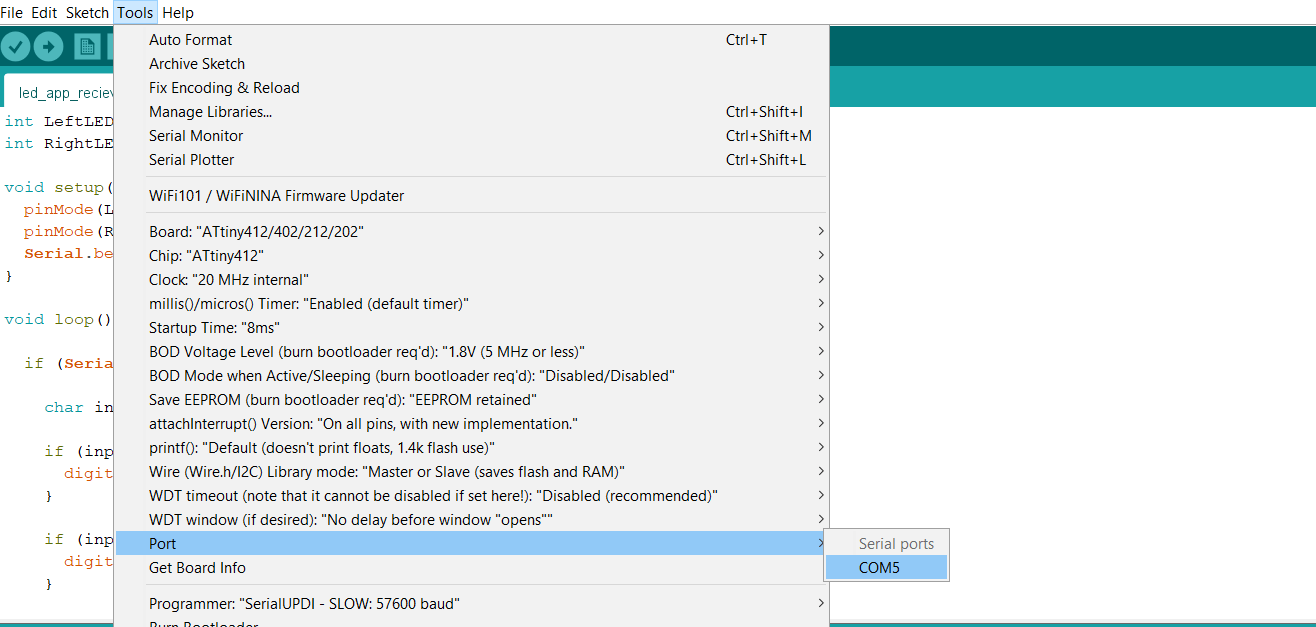
I selected the com5 port and uploaded the program to my board.
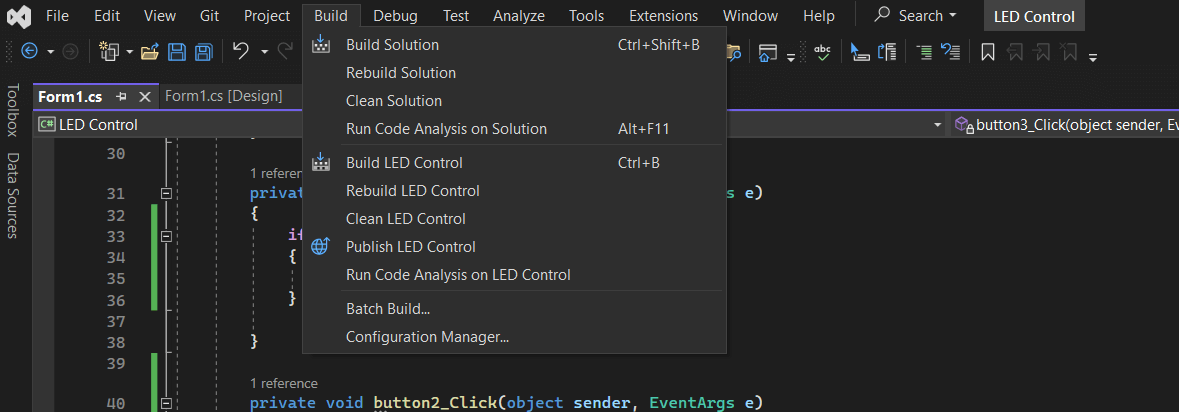
I opened Build from the main menu tab at the top and selected Build Solution to build and run the app.
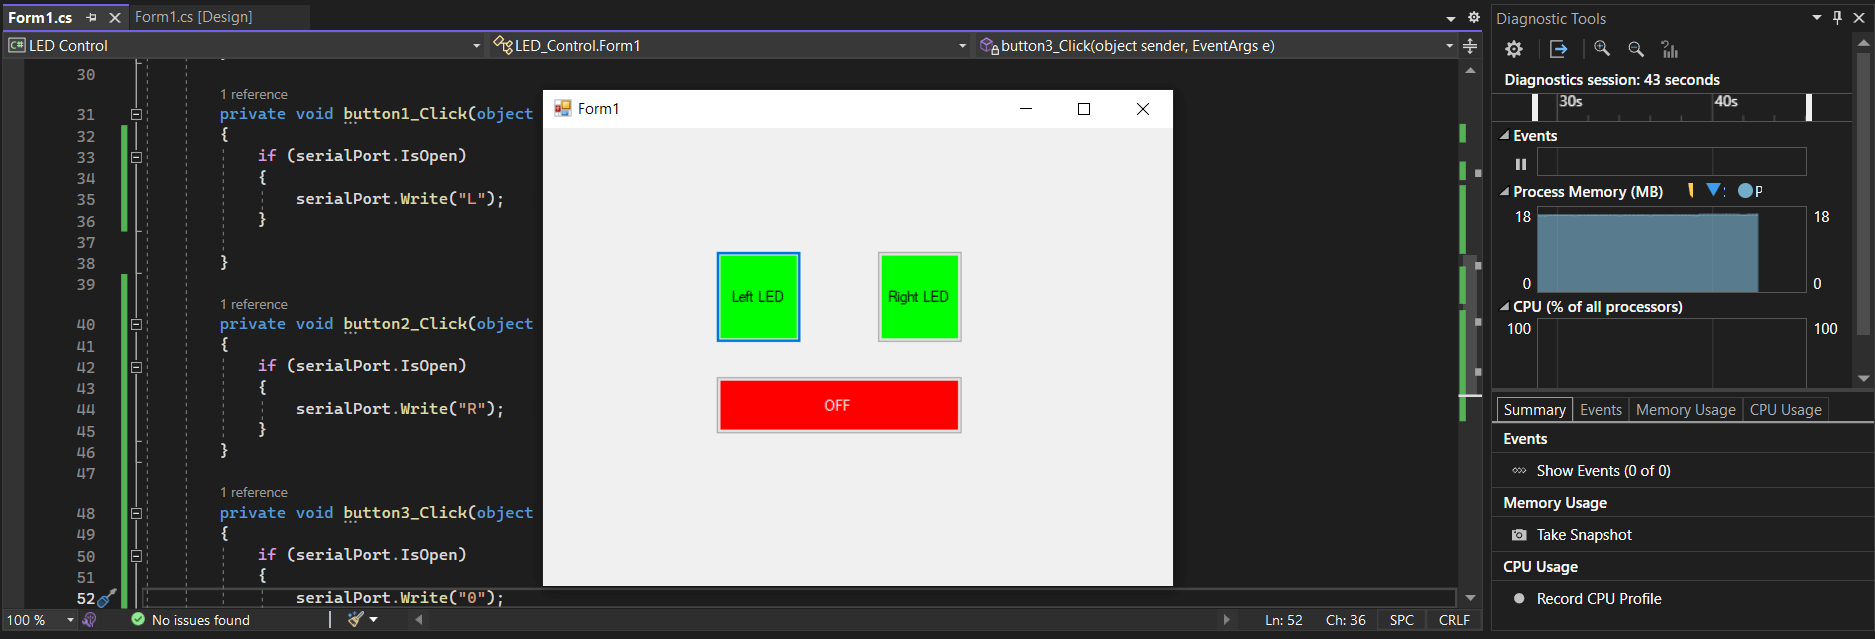
My app opened and communiction with the board was successful.
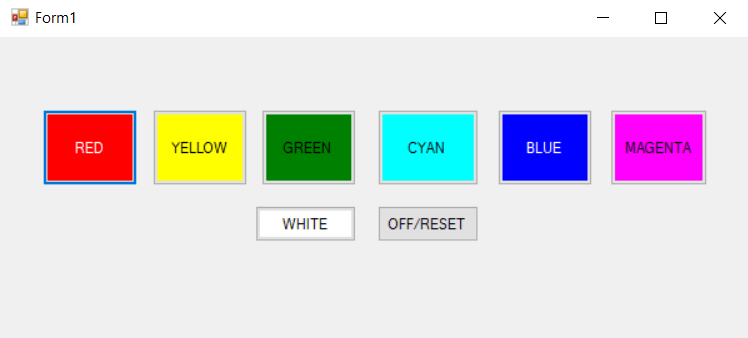
Now that I was a bit comfortable with the app building I build another app to control the RGB LED I used in Week 9 Output Devices.
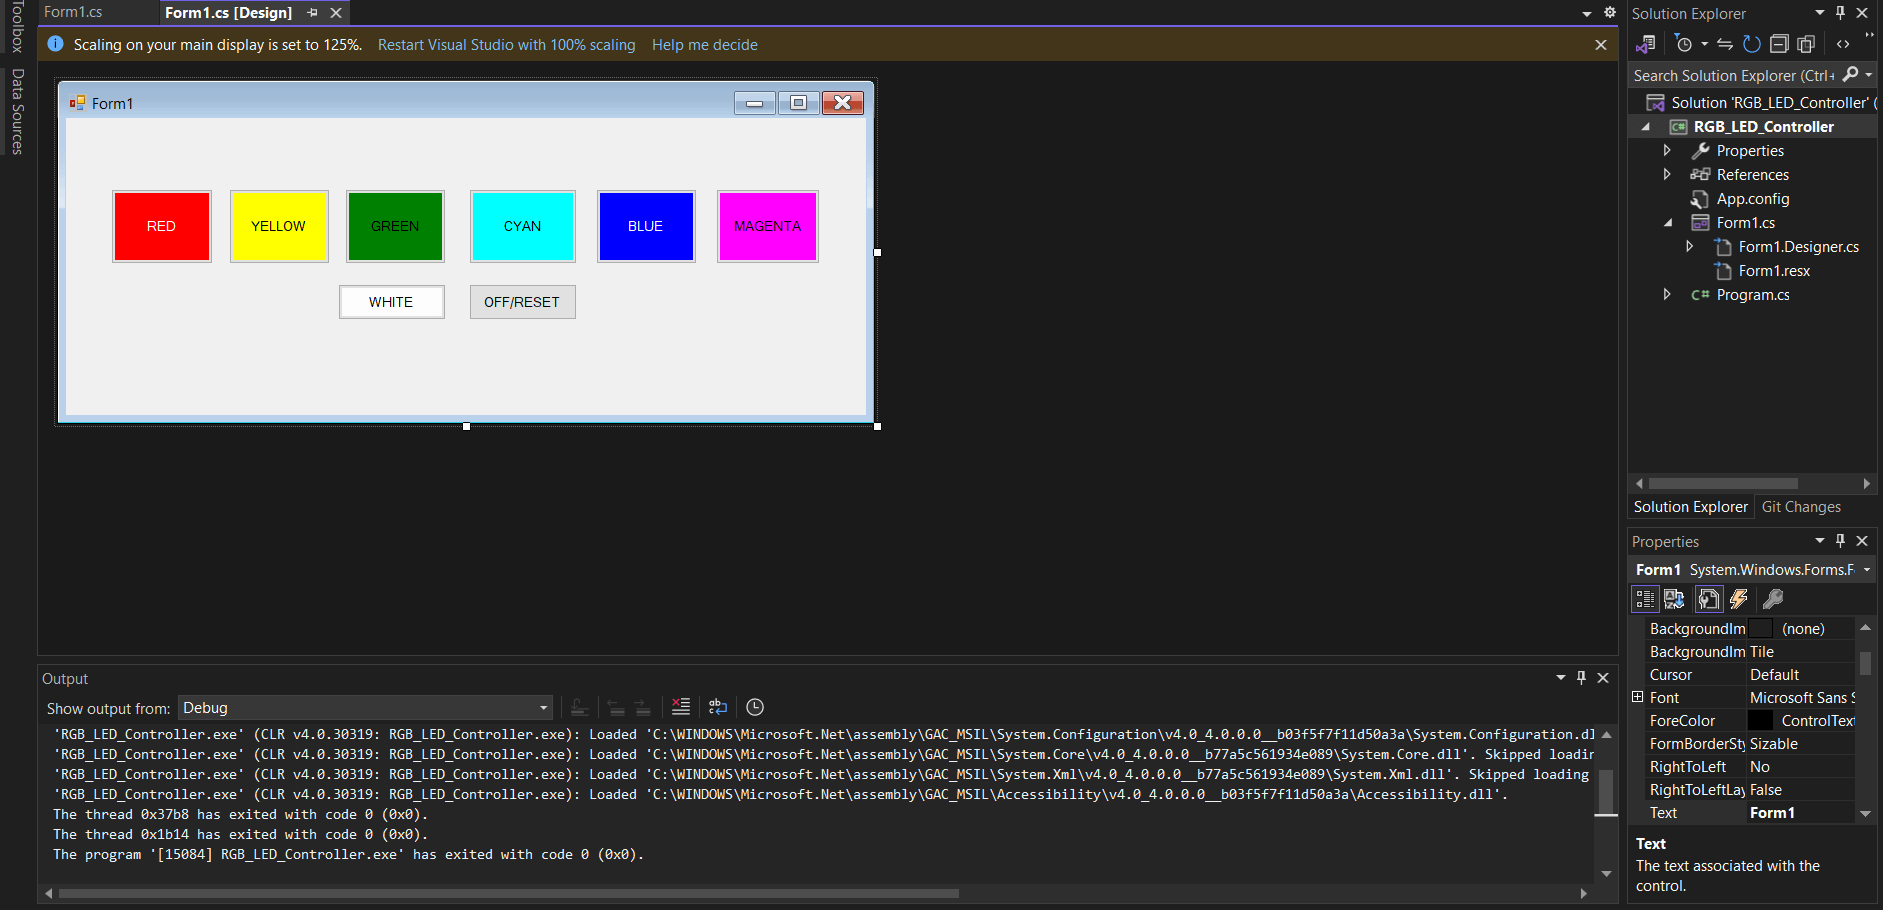
I added eight Buttons which included the three primary, three secondary, white and a reset.
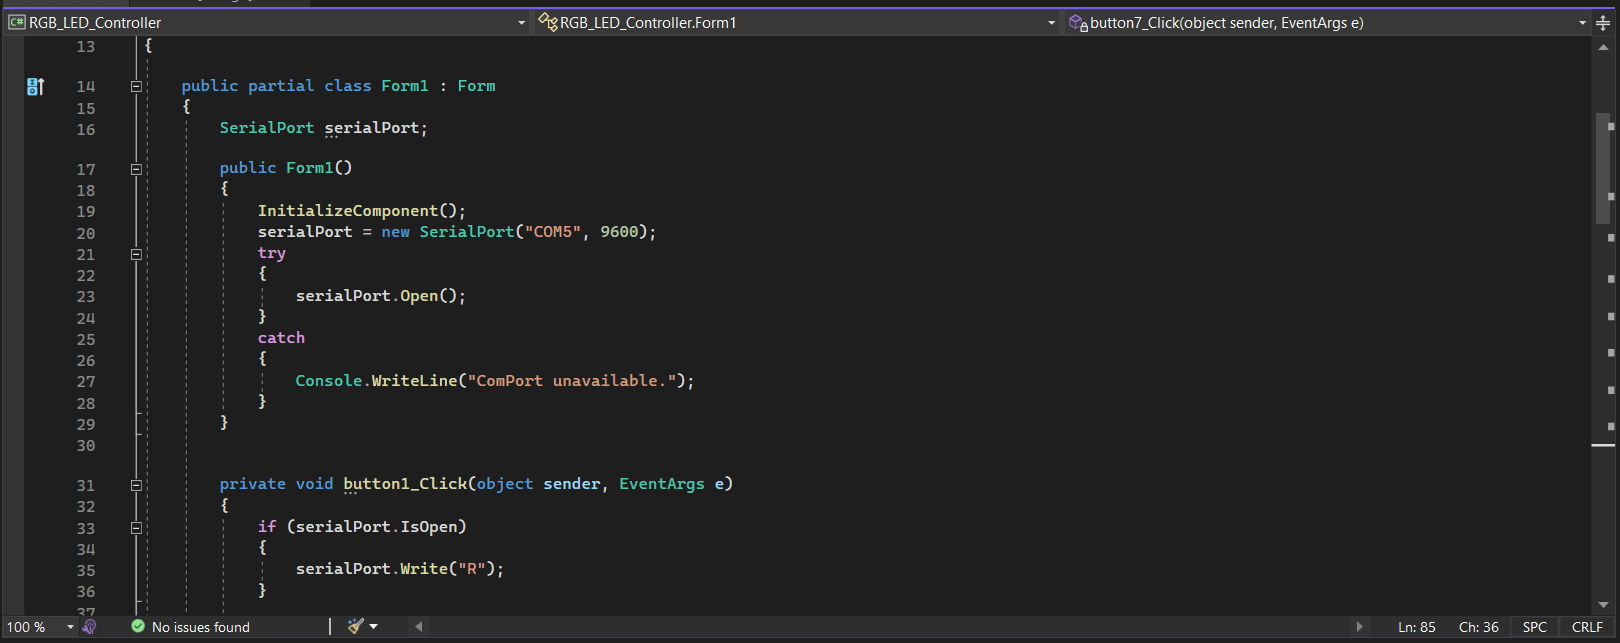
            using System;
using System.Collections.Generic;
using System.ComponentModel;
using System.Data;
using System.Drawing;
using System.Linq;
using System.Text;
using System.Threading.Tasks;
using System.Windows.Forms;
using System.IO.Ports;

namespace RGB_LED_Controller
{
    public partial class Form1 : Form
    {
        SerialPort serialPort;
        public Form1()
        {
            InitializeComponent();
            serialPort = new SerialPort("COM5", 9600);
            try
            {
                serialPort.Open();
            }
            catch
            {
                Console.WriteLine("ComPort unavailable.");
            }
        }

        private void button1_Click(object sender, EventArgs e)
        {
            if (serialPort.IsOpen)
            {
                serialPort.Write("R");
            }

        }

        private void button2_Click(object sender, EventArgs e)
        {
            if (serialPort.IsOpen)
            {
                serialPort.Write("Y");
            }

        }

        private void button3_Click(object sender, EventArgs e)
        {
            if (serialPort.IsOpen)
            {
                serialPort.Write("G");
            }
        }

        private void button4_Click(object sender, EventArgs e)
        {
            if (serialPort.IsOpen)
            {
                serialPort.Write("C");
            }
        }

        private void button5_Click(object sender, EventArgs e)
        {
            if (serialPort.IsOpen)
            {
                serialPort.Write("B");
            }
        }

        private void button6_Click(object sender, EventArgs e)
        {
            if (serialPort.IsOpen)
            {
                serialPort.Write("M");
            }
        }

        private void button7_Click(object sender, EventArgs e)
        {
            if (serialPort.IsOpen)
            {
                serialPort.Write("0");
            }
        }

        private void button8_Click(object sender, EventArgs e)
        {
            if (serialPort.IsOpen)
            {
                serialPort.Write("W");
            }

        }
    }
}
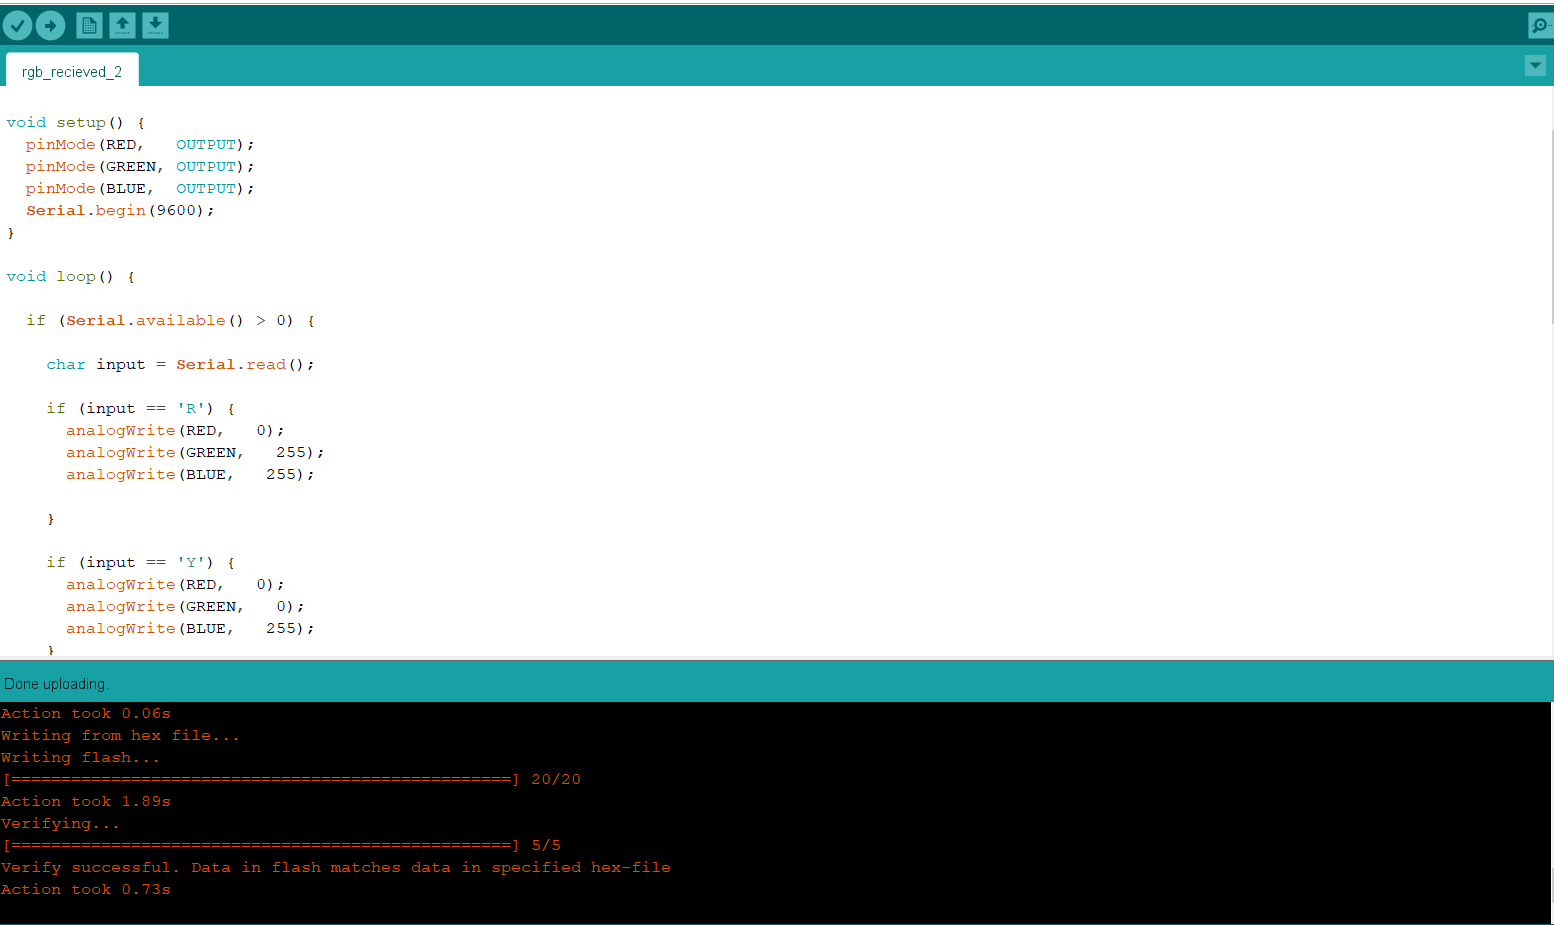
I then uploaded the RGB recieving program to my Terrenino board that I built in Week 9 Output Devices.
            const int RED   = A4;
const int GREEN = A5;
const int BLUE  = A3;

void setup() {
  pinMode(RED,   OUTPUT);
  pinMode(GREEN, OUTPUT);
  pinMode(BLUE,  OUTPUT);
  Serial.begin(9600);
}

void loop() {

  if (Serial.available() > 0) {

    char input = Serial.read();

    if (input == 'R') {
      analogWrite(RED,   0);
      analogWrite(GREEN,   255);
      analogWrite(BLUE,   255);

    }

    if (input == 'Y') {
      analogWrite(RED,   0);
      analogWrite(GREEN,   0);
      analogWrite(BLUE,   255);
    }

    if (input == 'G') {
      analogWrite(RED,   255);
      analogWrite(GREEN,   0);
      analogWrite(BLUE,   255);
    }

    if (input == 'C') {
      analogWrite(RED,   255);
      analogWrite(GREEN,   0);
      analogWrite(BLUE,   0);
    }

    if (input == 'B') {
      analogWrite(RED,   255);
      analogWrite(GREEN,   255);
      analogWrite(BLUE,   0);
    }

    if (input == 'M') {
      analogWrite(RED,   0);
      analogWrite(GREEN,   255);
      analogWrite(BLUE,   0);
    }
    if (input == 'W') {
      analogWrite(RED,   0);
      analogWrite(GREEN,   0);
      analogWrite(BLUE,   0);
    }

    if (input == '0') {
      analogWrite(RED,   255);
      analogWrite(GREEN, 255);
      analogWrite(BLUE,  255);
    }

    delay(200);

  }

}