Final Project Process:

Update Sunday, 31st Febreary 2021
To my final project I will design, create, program and improve a leg exoskeleton which might help people with some temporary or permanent disabilities to recover their health and movement. I will call this creation as "LEXO" and if you don't know why, I'll explain you. The "L" comes from Leg and "EXO" from Exoskeleton, a simple name for a helpful device. What do you think?
Why did I choose this topic?
Do you know how frustating would have a leg or both of them broken. Humans are bipeds, we need both of our legs to walk, jump and run, and is very dificult to us to keep balance of our body or just walk with a leg or, in the worst of cases, not to walk. Althought, there're some companies as ReWalk which are developing and improving some exoskeleton, not just for legs, to help people and, in others case, to improve our strenght or speed.
Where did this idea come?
I would like to say "It comes from the necesity of people whit disabilities" but I got this project in mind since I watched the third part of Nolan's Batman Trilogy, "Dark Knight Rises", where I some part of the begining Bruce Wayne use a very small device to support his left or right knee. This small device is utopic for us nowadays but I can emulate my own one and what is better than doing in a program like this.
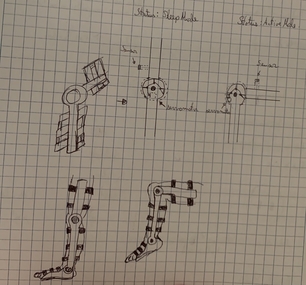
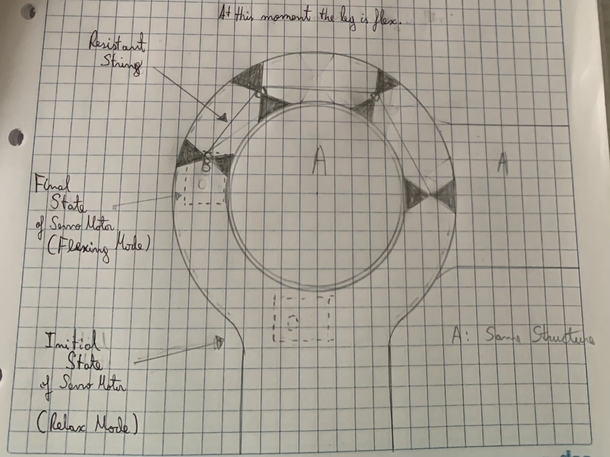
First Sketches
Next you will find my sketches of the machanism which may help this device works. I was thinking about develop a string circuit with the "Pull-Push". Then I asked for suggestions and/or advices to my Node and they recommend me using an alternative which consists using big screws and a phace electric motor to improve the strengh I will use
Update Sunday, 14th Febreary 2021
As an Advance of my 2nd week assignment and trying to design how my project will look, next is my 1st CAD representation of my "Prototype v1.00a".
Update Sunday, 14th March 2021
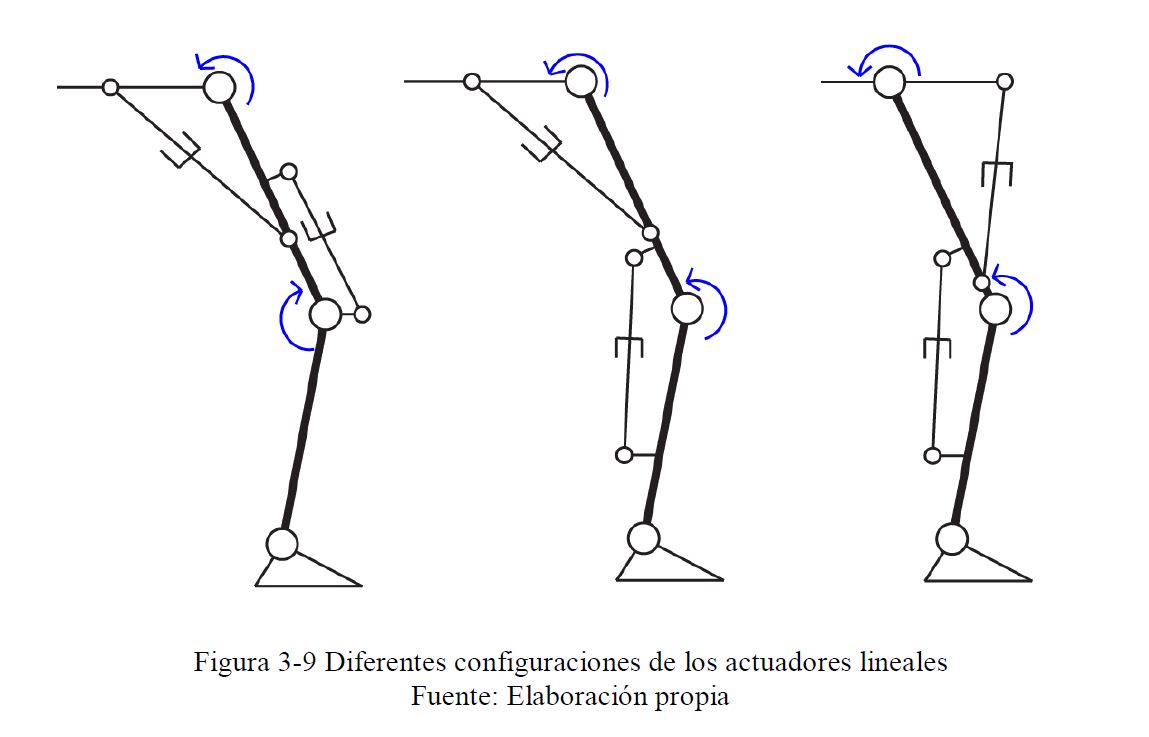
Researching for some information about exo-machines I found a Thesis about Exo-Leg made by a Chilean person, Link. There is well explained about different mechanisms and tests about forces.
I found really helpful this picture where he represented different positions of the actuators, he used Linear Electric Actuators.
Update Sunday, 16th May 2021
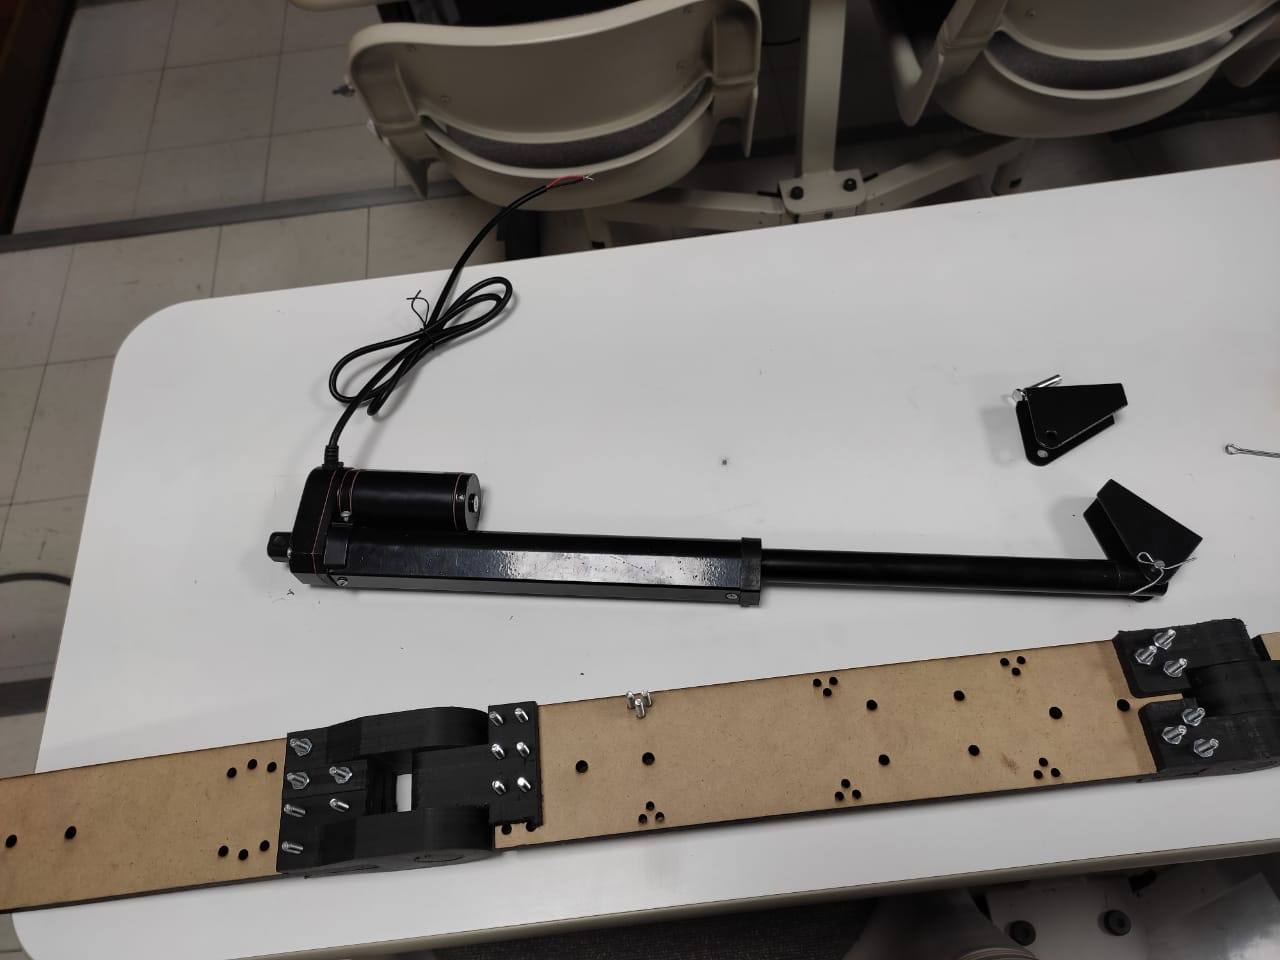
By this time I had received my electrical linear actuators so I spent time of my Wild Card to practice the connectivity and the a basic code for an Arduino Uno testing board before I test on my AtMegas boards
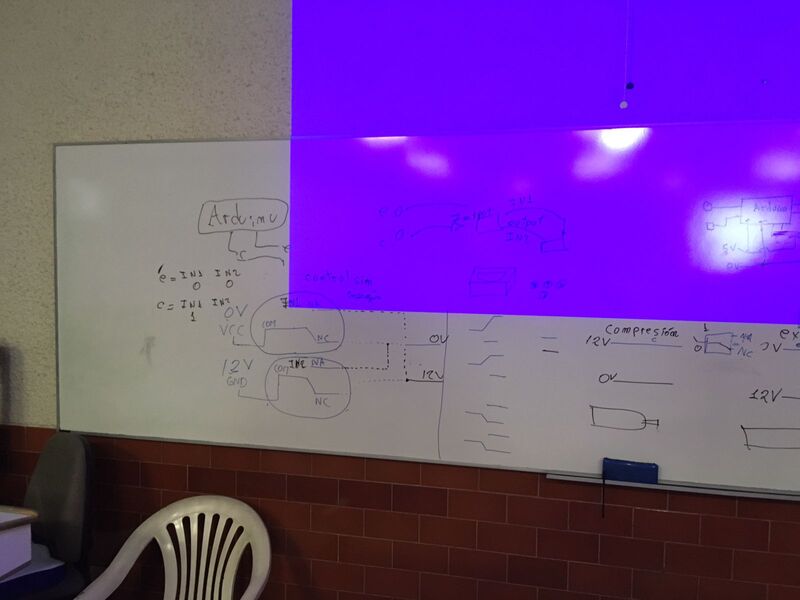
And now comes the Arduino IDE code sketching.
Now the real Arduino code I used.
int inp1=3;
int inp2=6;
int out1=8;
int out2=9;
int out3=10;
int out4=11;

void setup() {
  Serial.begin(9600);
  pinMode(inp1,INPUT);
 pinMode(inp2,INPUT);
  pinMode(out1,OUTPUT);
  pinMode(out2,OUTPUT);
  pinMode(out3,OUTPUT);
  pinMode(out4,OUTPUT);


}

void loop() {
  if(digitalRead(inp1)==1){
  digitalWrite(out1,HIGH);
    digitalWrite(out2,HIGH);
    digitalWrite(out3,HIGH);
    digitalWrite(out4,HIGH);
    }
    else if (digitalRead(inp2)==1){
      digitalWrite(out1,LOW);
    digitalWrite(out2,LOW);
    digitalWrite(out3,LOW);
    digitalWrite(out4,LOW);
    }
     }
Note: I attached this Arduino code below.
Here comes the video testing for what I used a Voltage Supplier, 2 2-Relay, a pre-produced button PCB for teaching purpose, an Arduino Uno, and some wires or cables.
Update Wednesday, 19th May 2021
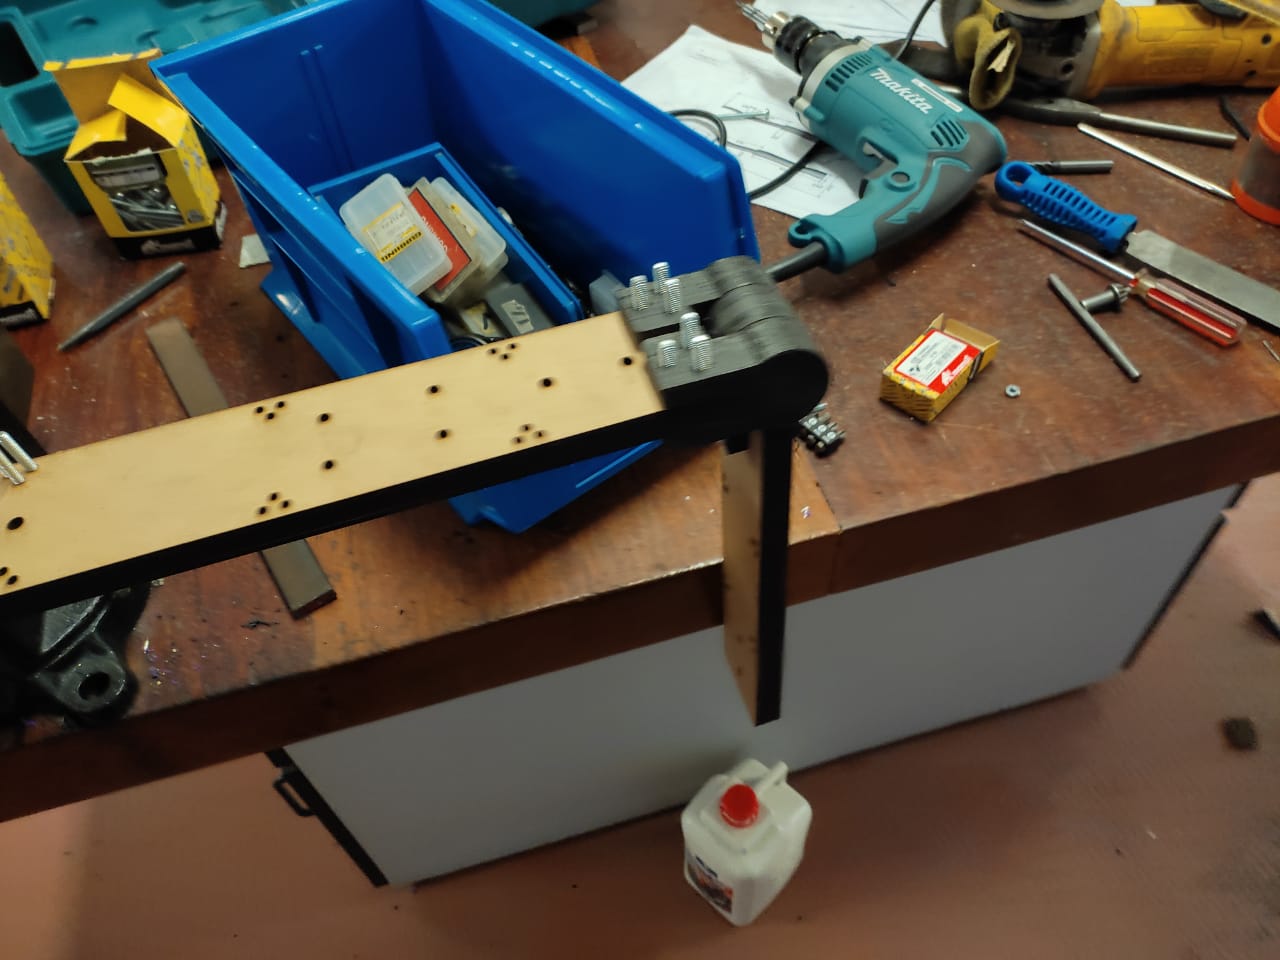
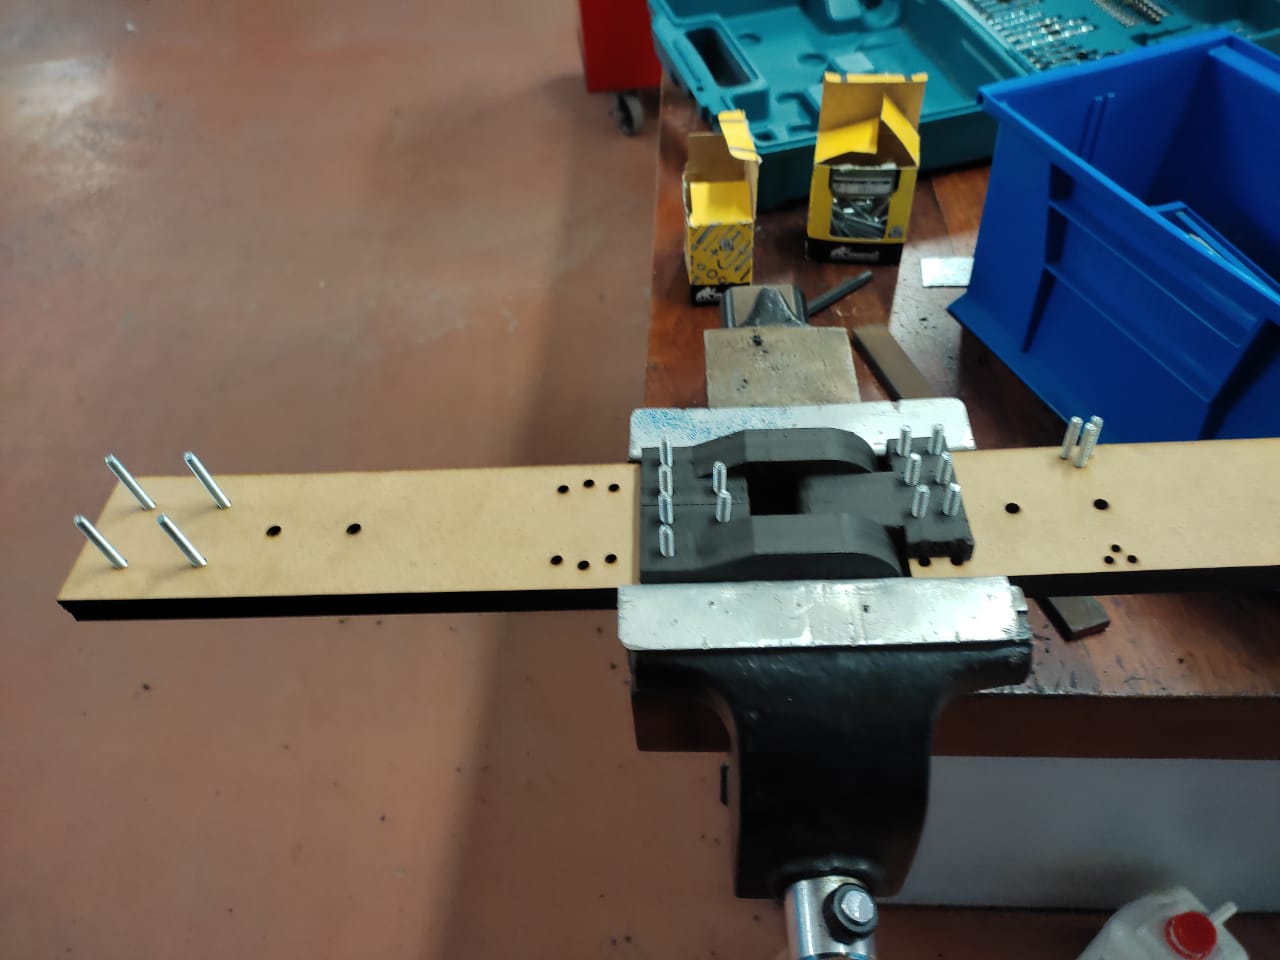
I tested someone Hinge design to decide if I have to buy some or I can produce them.
Note: This test made me realize this hinges are easy to disassemblied by some toque forces.
Note: And this performed better than the other.
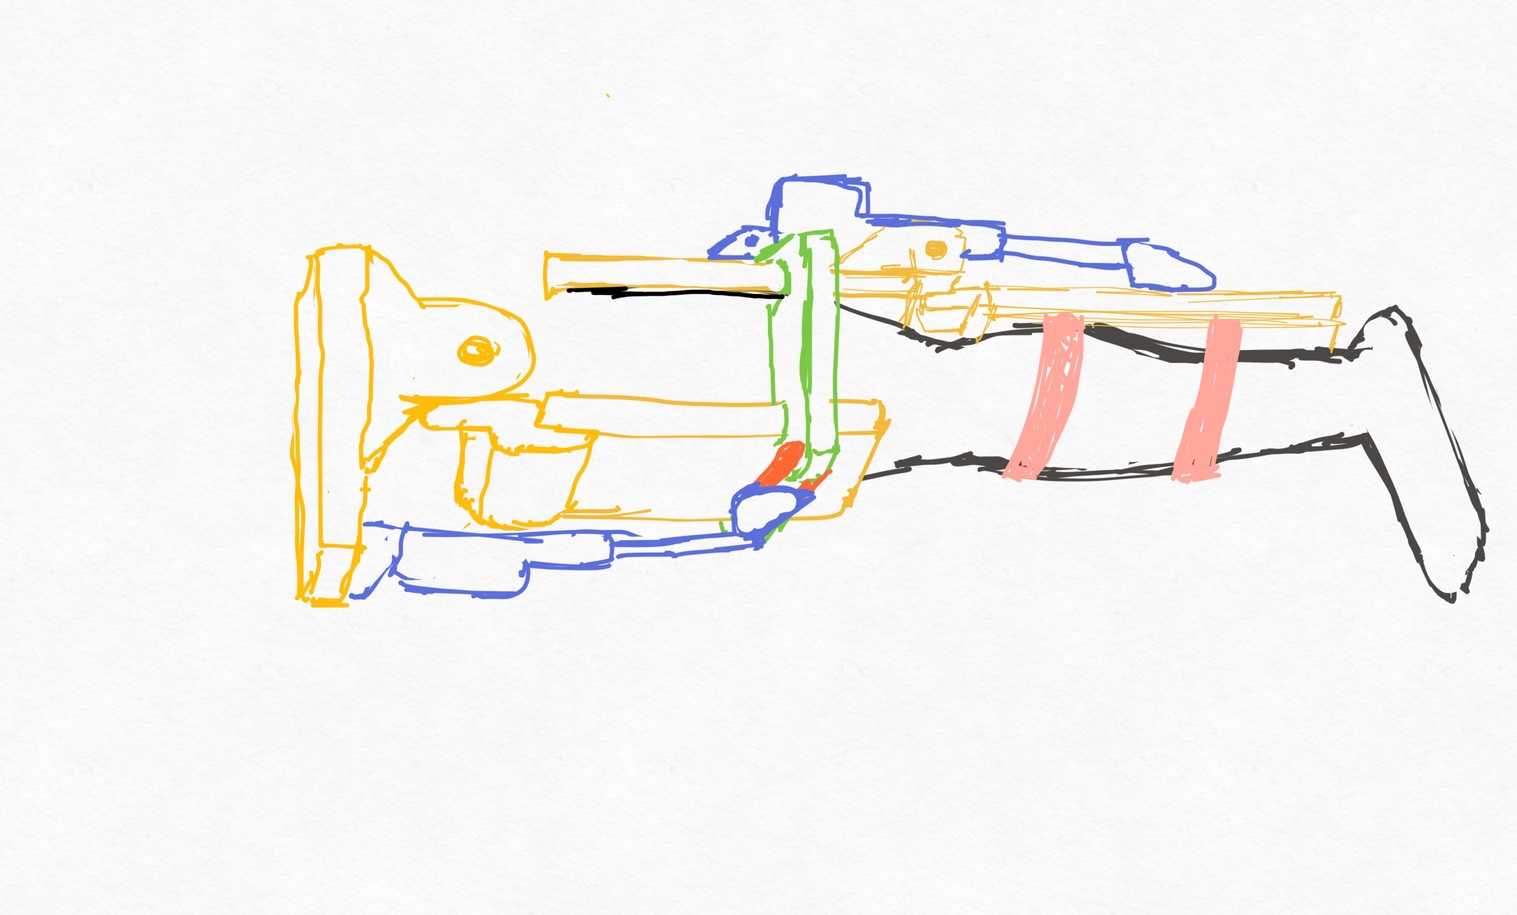
Then I made my last sketch of my project to identify how I will assembly and perform it.

Update Sunday, 30th May 2021
At this week I decided to start my project producing process, so let's take a look.
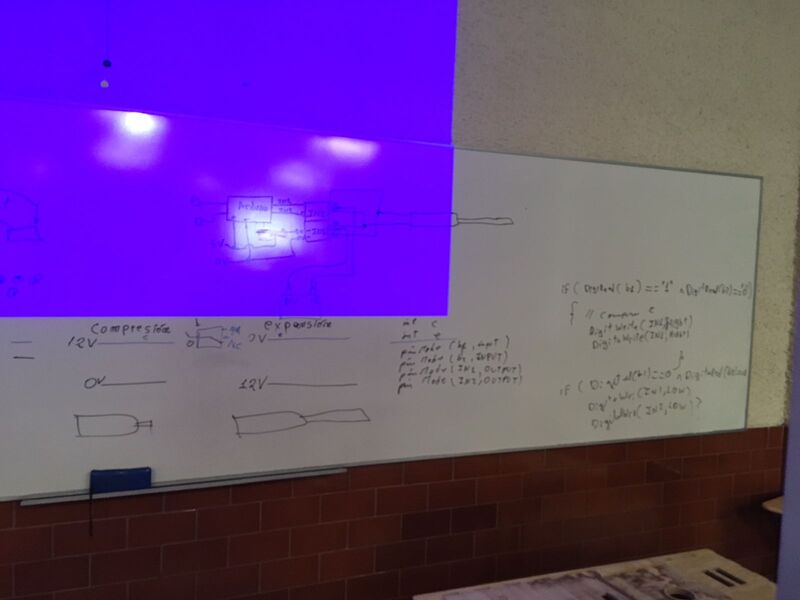
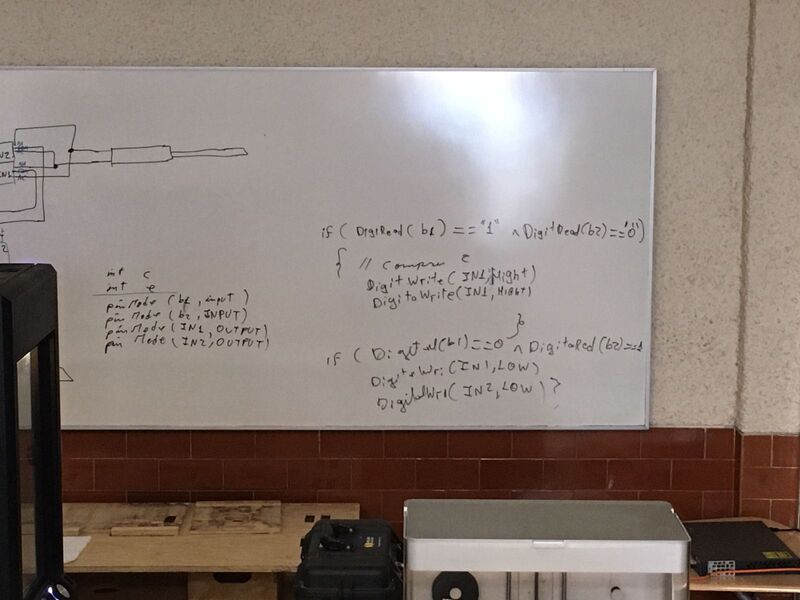
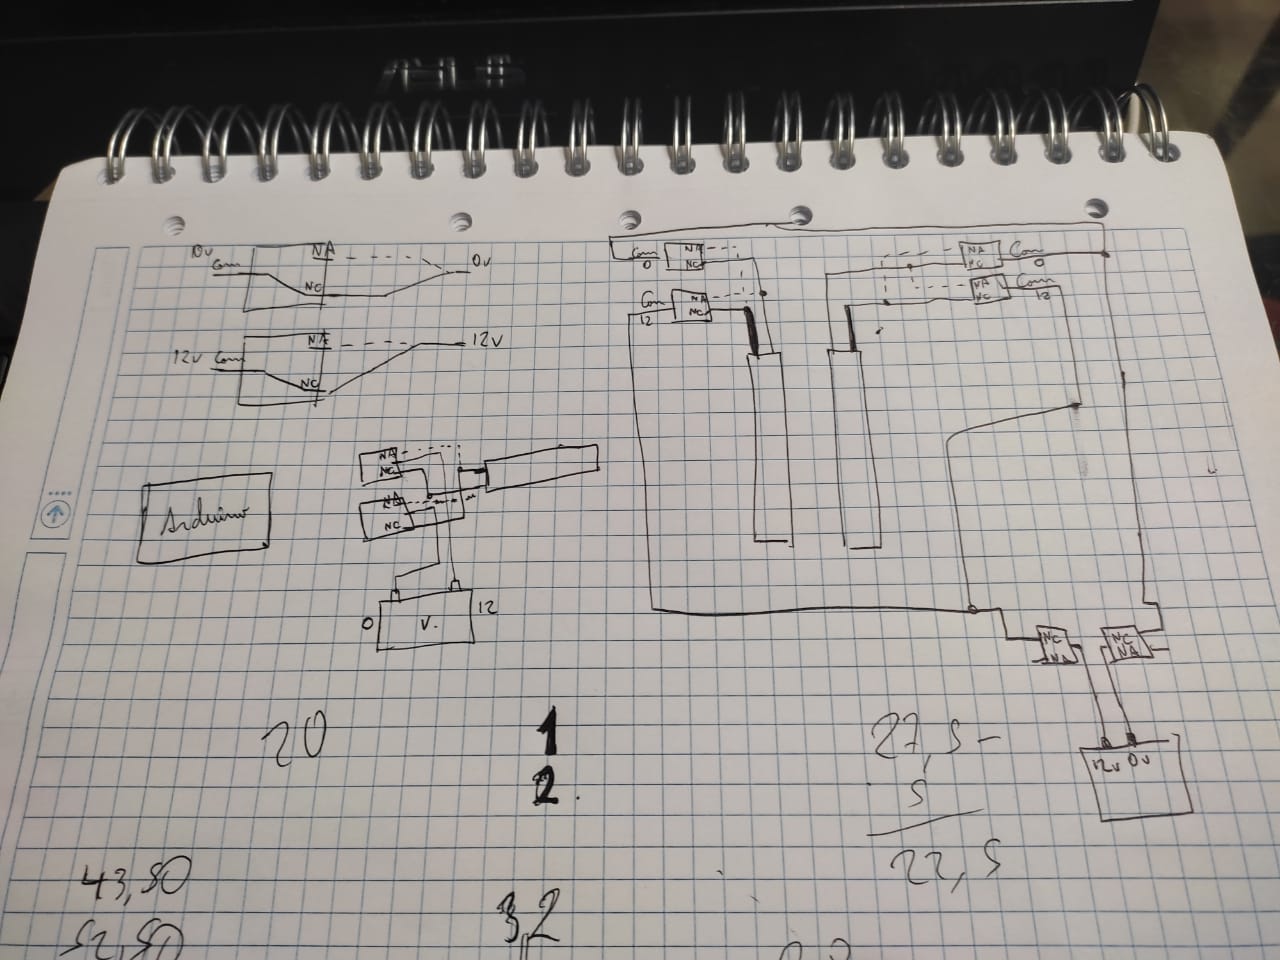
Having clarify how my actuators wil be connected I sketches the final electrical connection of my mechanism.

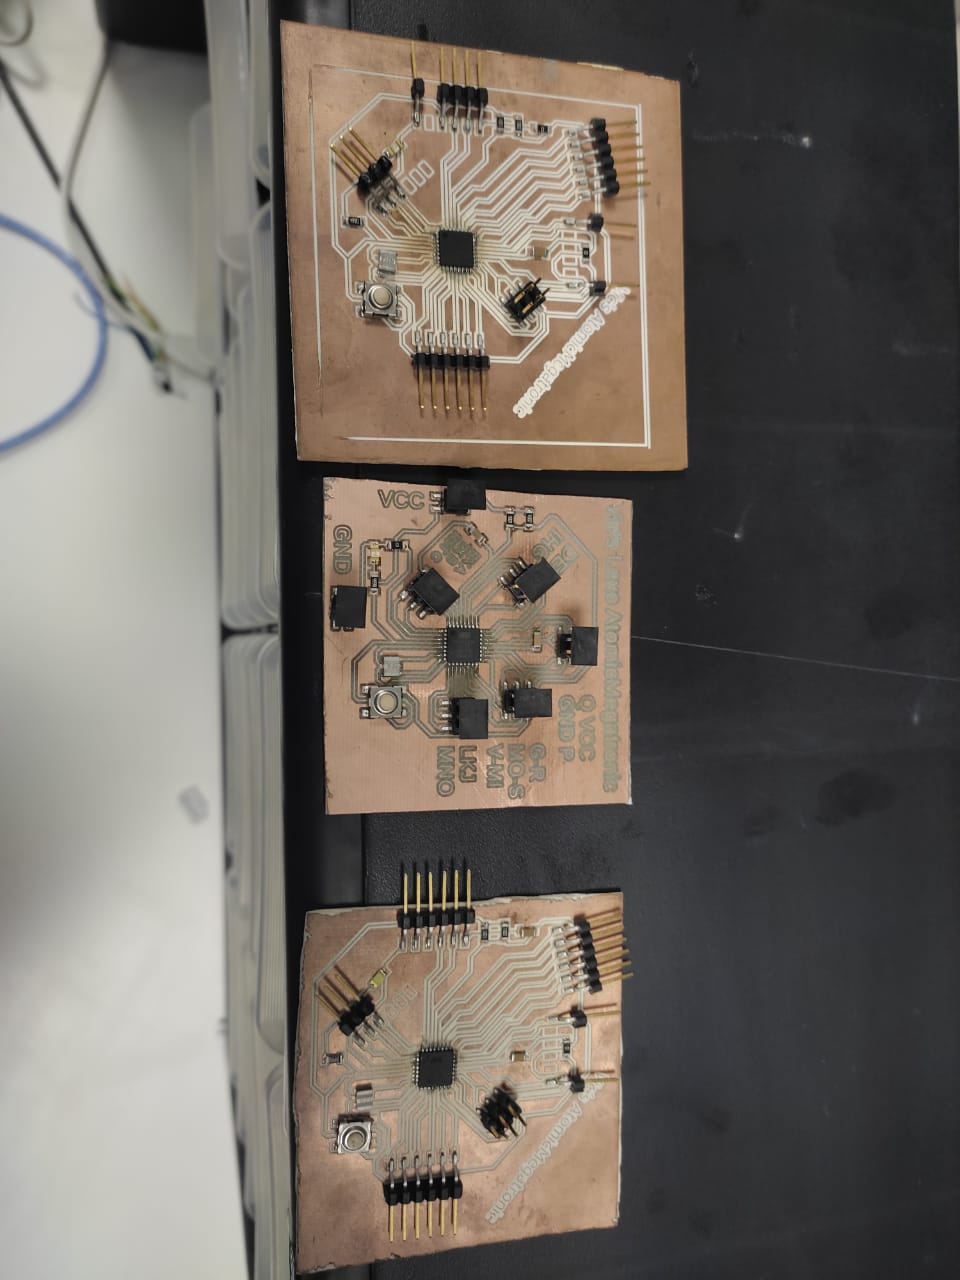
Then I started with the design, process and finish soldering my pcbs.
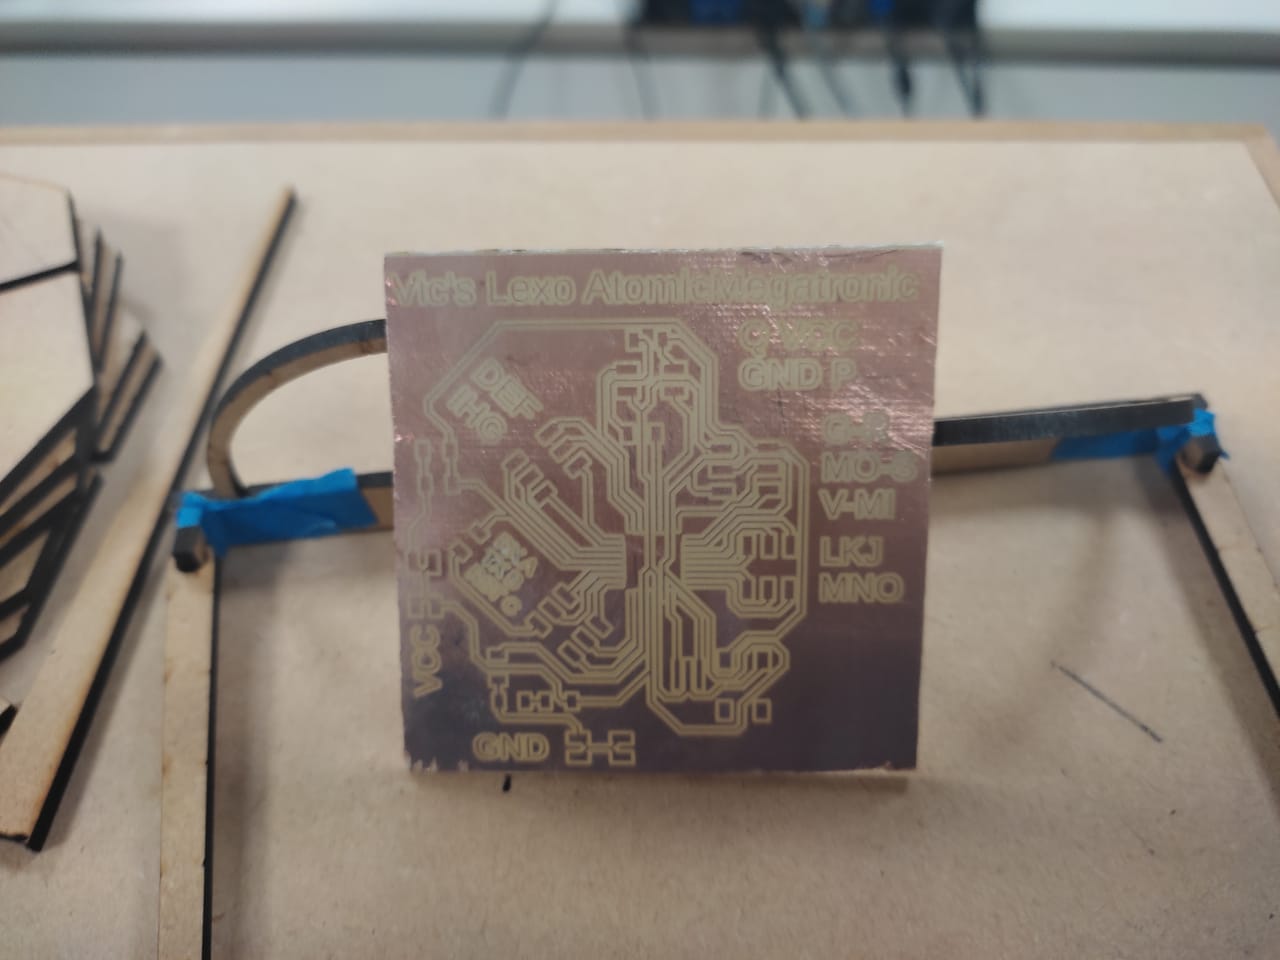

Here is with his older siblings.
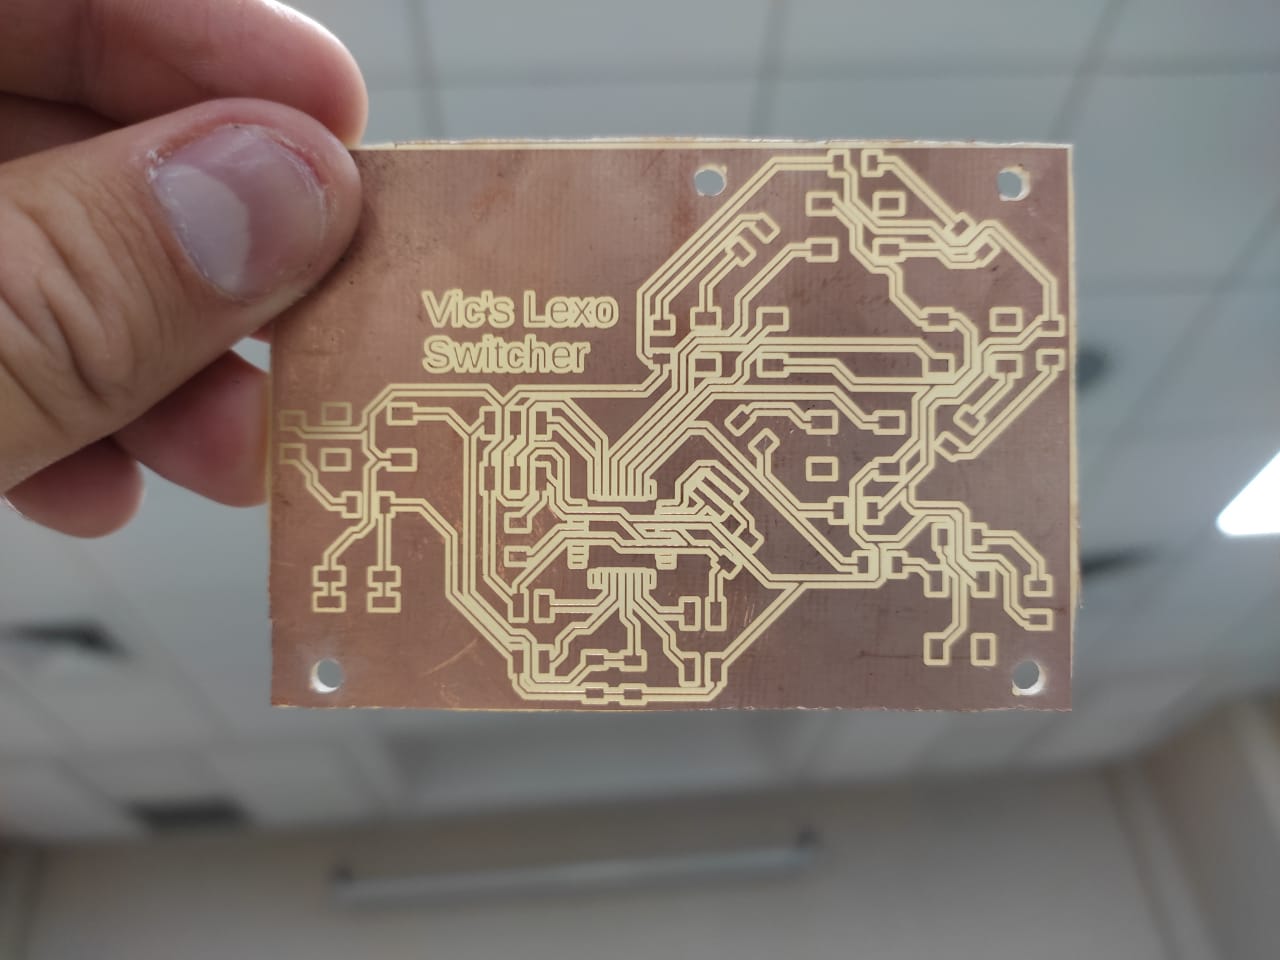
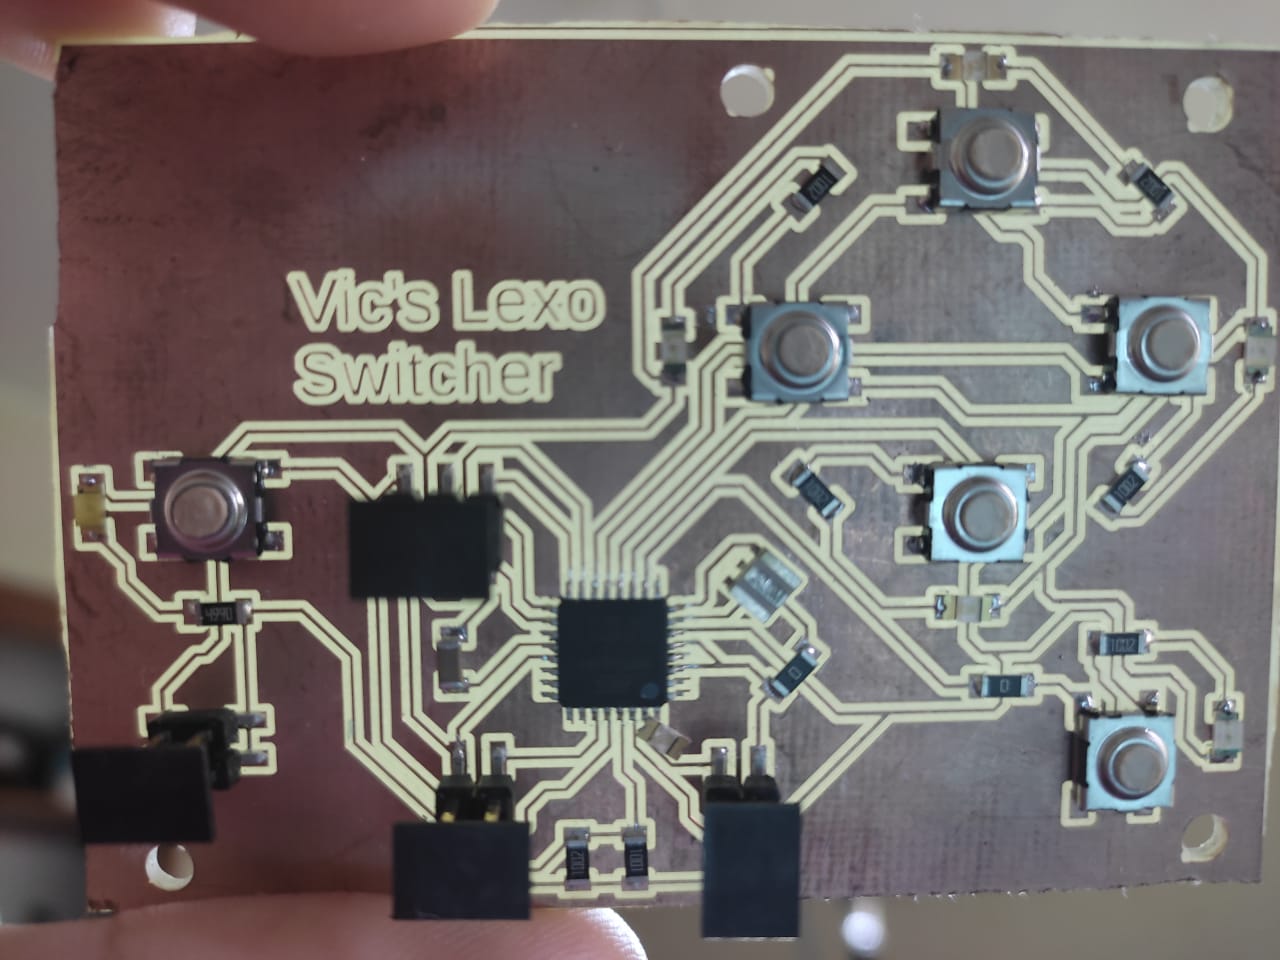
Here comes my switcher that I designed with enough inputs and outputs for my project.
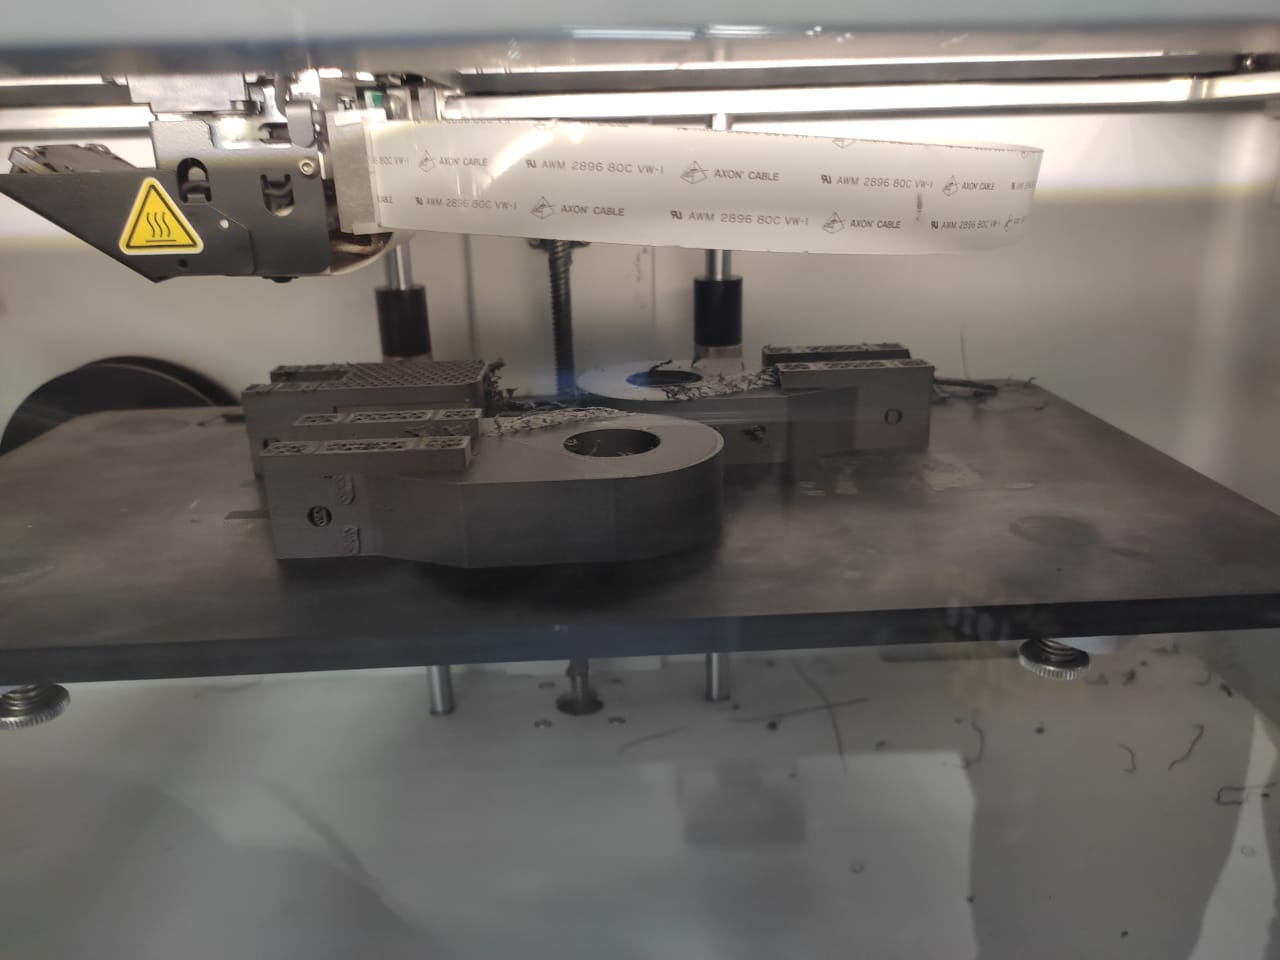
Printing process for my hinges was made in MarkForged which printOnyx structures and composites mixing with Kevlar.
1st. LEXO
2nd. Switcher
The compiling which not differ form the others.
Here comes videos of process until now.
Update Friday, 5th June 2021
I processed my Hinges, they took around 2 days to be ready.
After I processed and rectified my 3D printed Hinges I made an assembly.
Also I sketches my final electrical wiring.
E-mail: vhidalgoe15@gmail.com
Twitter: @vhidalgoe15