4. Computer controlled cutting
THIS WEEK CHECKLIST
- [✓] linked to the group assignment page
- [✓] Explained how you parametrically designed your files
- [✓] Documented how you made your press-fit kit
- [✓] Documented how you made your vinyl cutting
- [✓] Included your original design files
- [✓] Included your hero shots
Group assignment
This time, I work with German together to characterize our lasercutter’s focus, power, speed, rate, kerf, and joint clearance. CLICK HERE for the detailing of group assignment page.
Individual assignments
1. Design, lasercut, and document a parametric press-fit construction kit, which can be assembled in multiple ways. Account for the lasercutter kerf.
2. Cut something on the vinylcutter
Parametric Press-fit Construction Kit
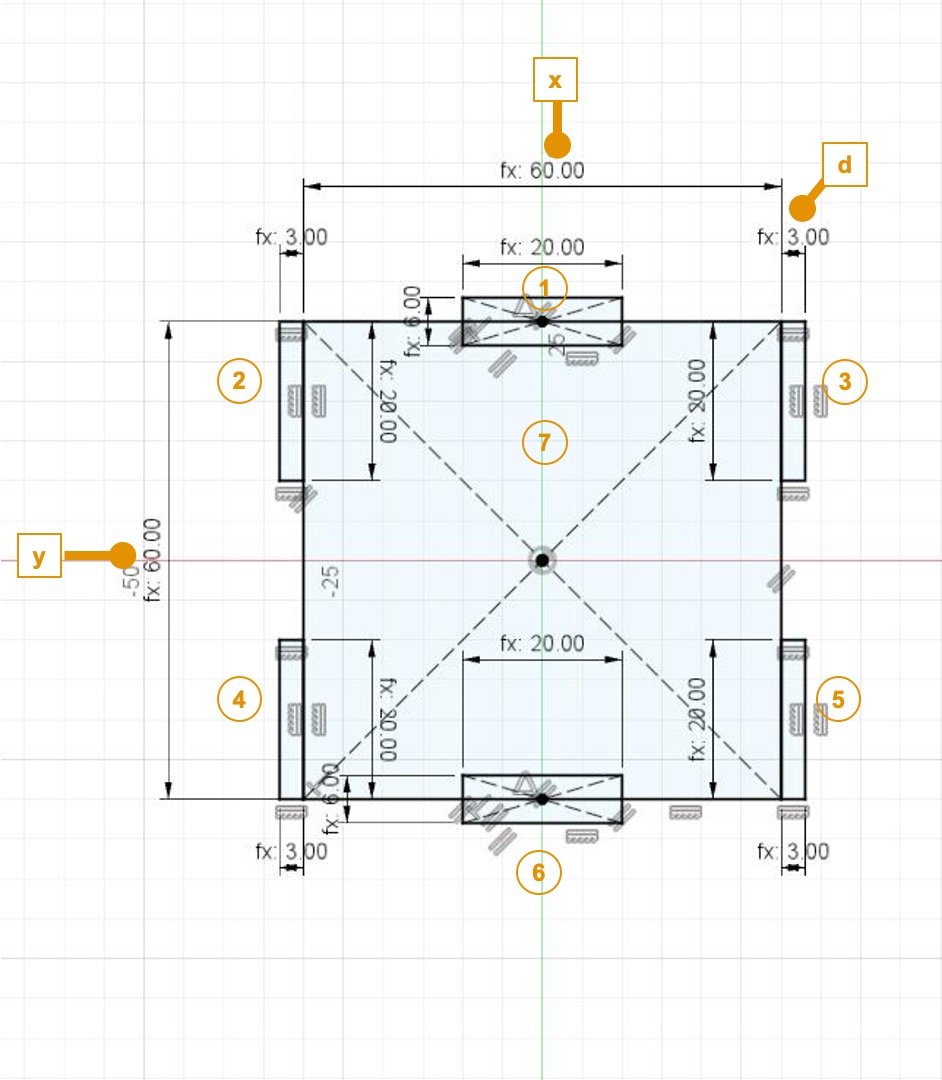
For my Press-fit Kit design, I decide to make an Universial Box. The idea of Universial Box is making a container box of our competition robot. Since our competition robot size requested in 18 inch x 18 inch, so this deisgn exercise help me for ording differrent materials container box, such as, wood box or aluminium box. I do not to draw a new design because of the materials different or thickness.
I only consider the inside box volume in 60mm x 60mm (x and y) since the robot size will be remain the same. The rim of box is (d) beacuse of the thickness or different materials.

Apply the idea into Fusion 360. Create 7 drafts in my first piece of my box.
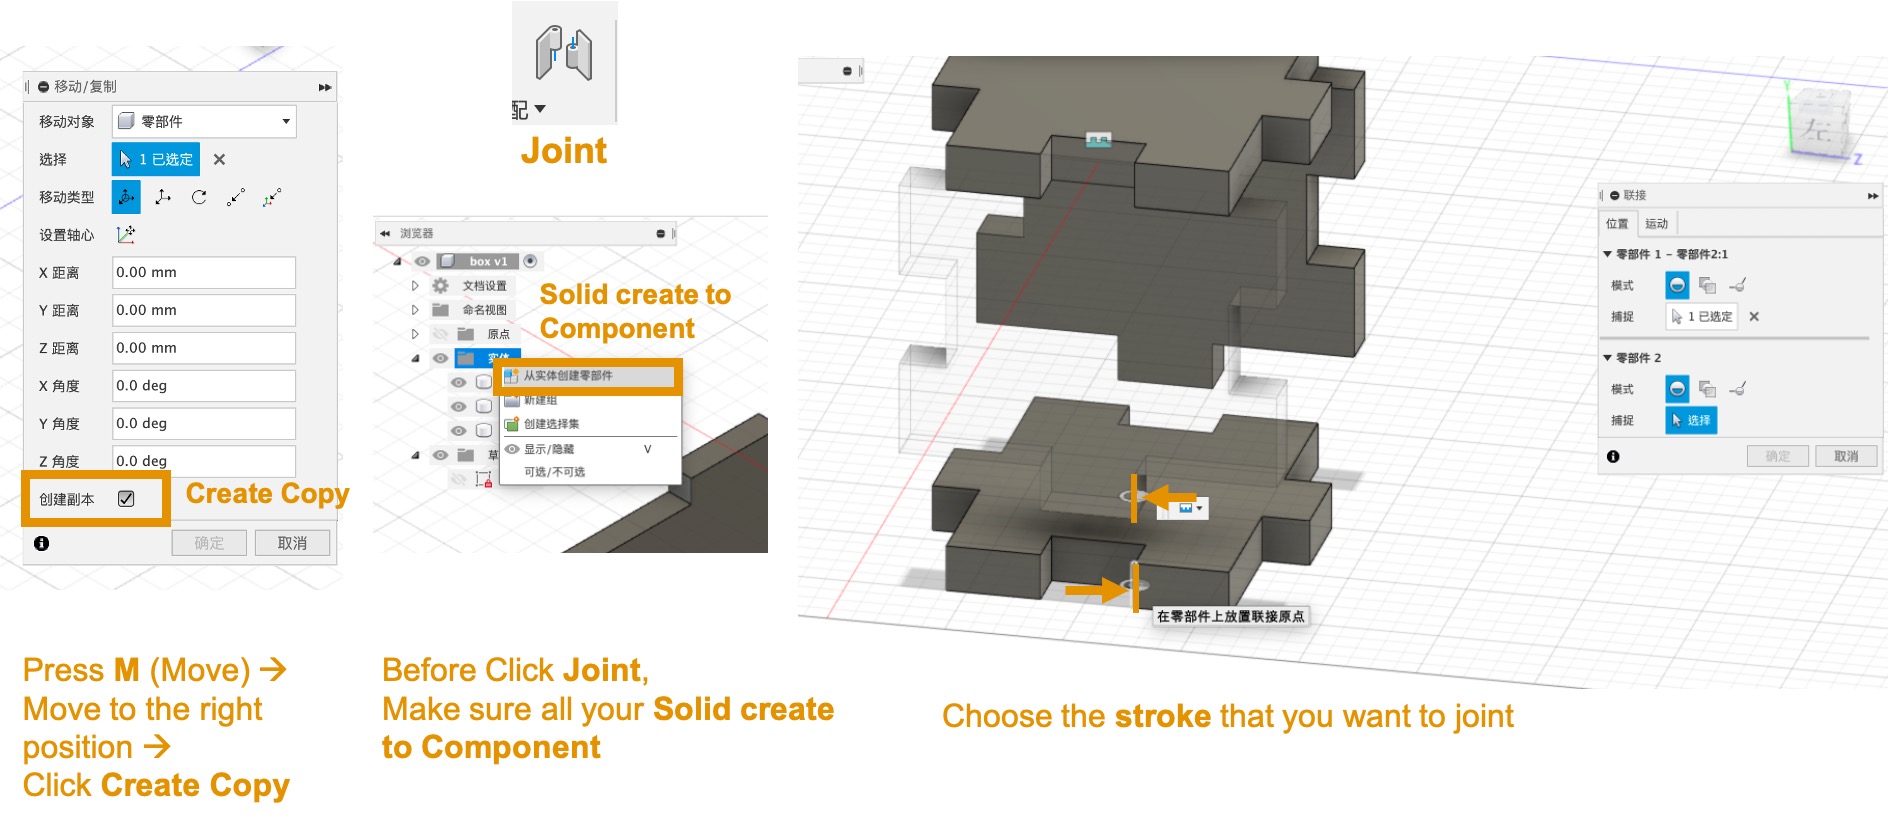
Since you create the first piece, you do not need to draw 5 more times. You just need to copy the first piece, change the position and joint. First, you Press M (Move) –> Move to the right position –>
Click Create Copy. Second, making sure all your Solid create to Component. Thrid, Click Joint. Finally, Choose the stroke that you want to joint.
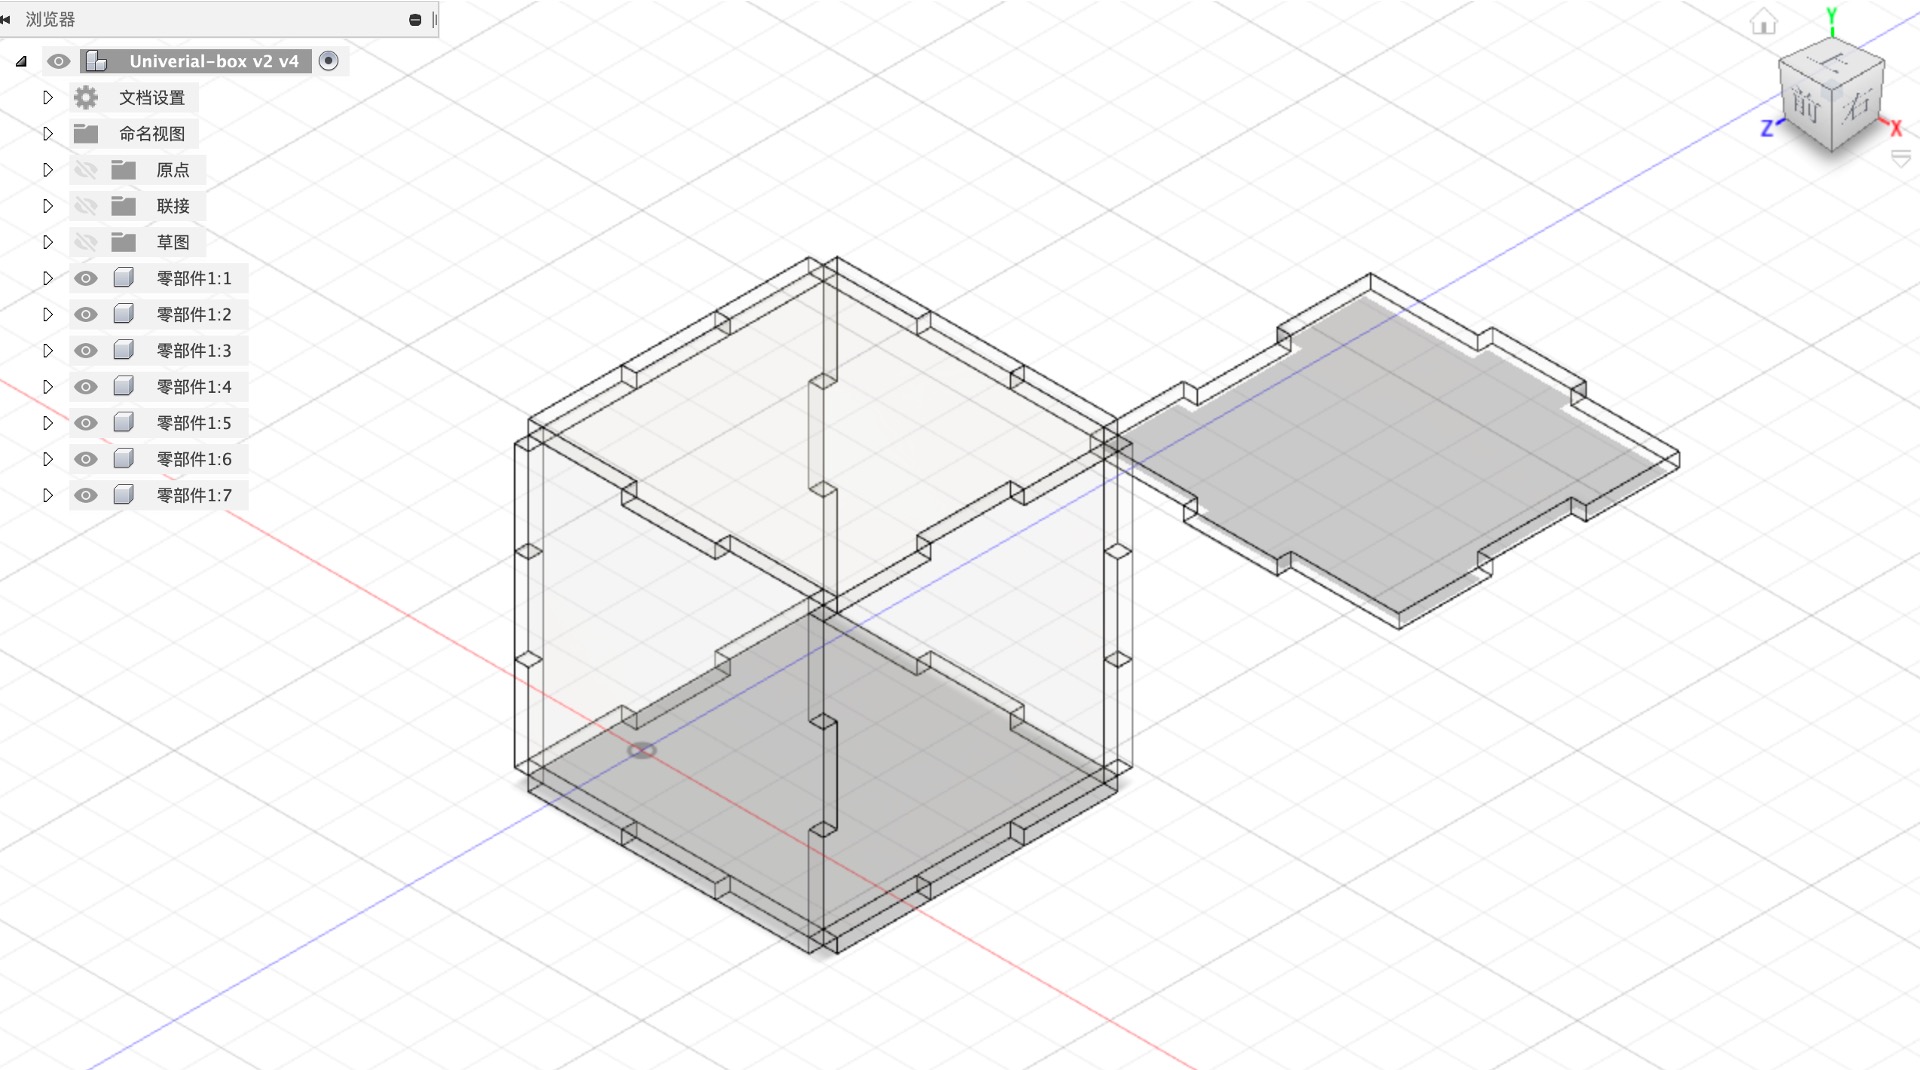
Here is the result.
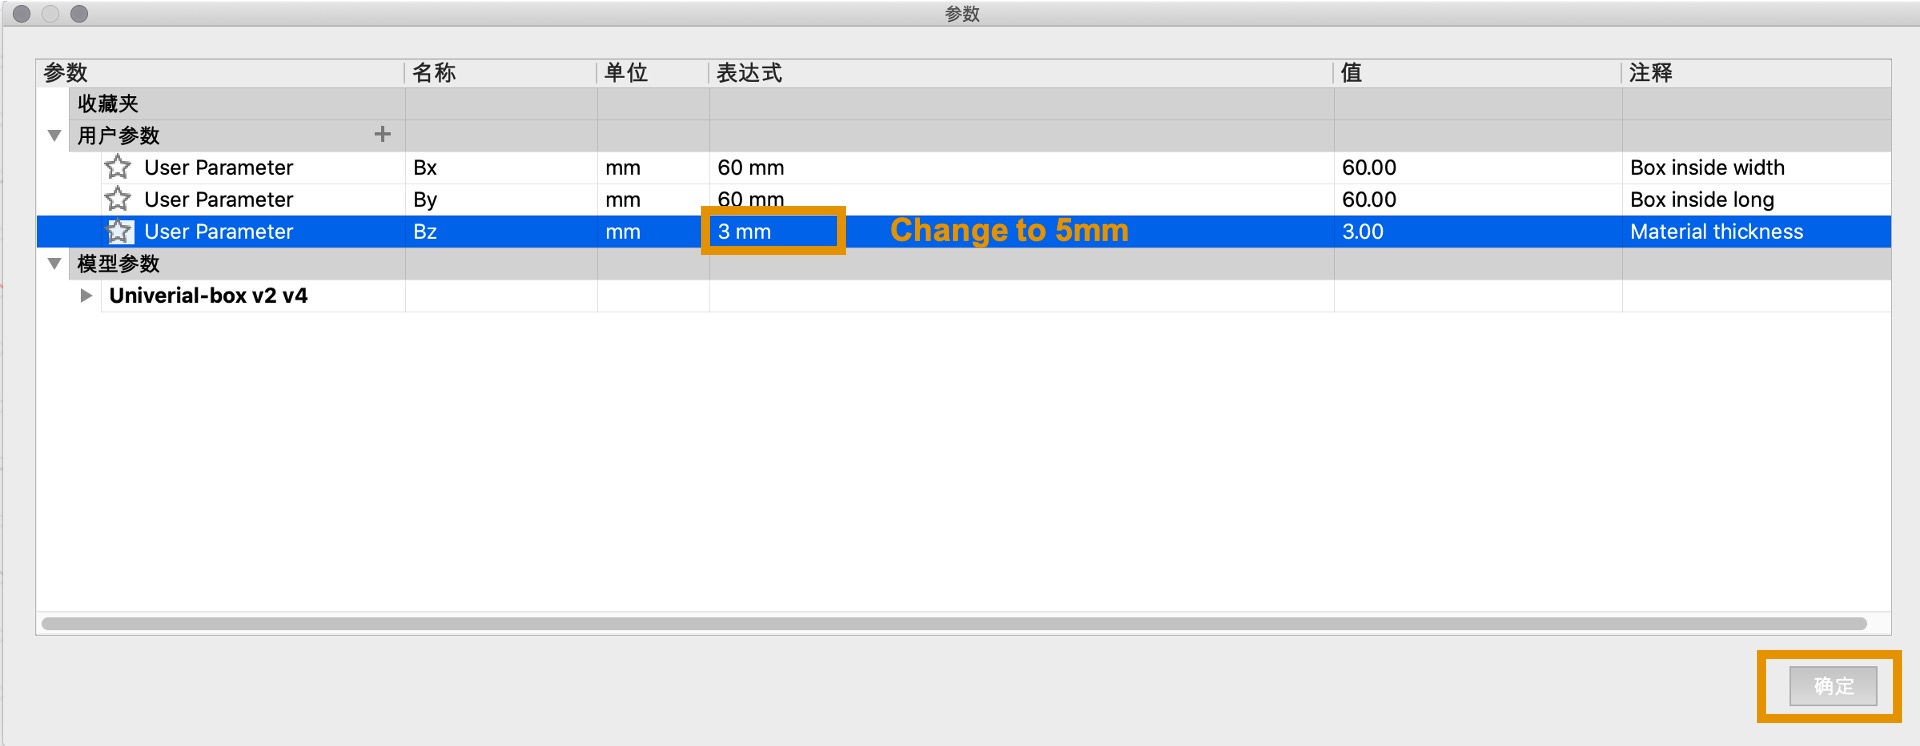
Click Modify –> Change parameter
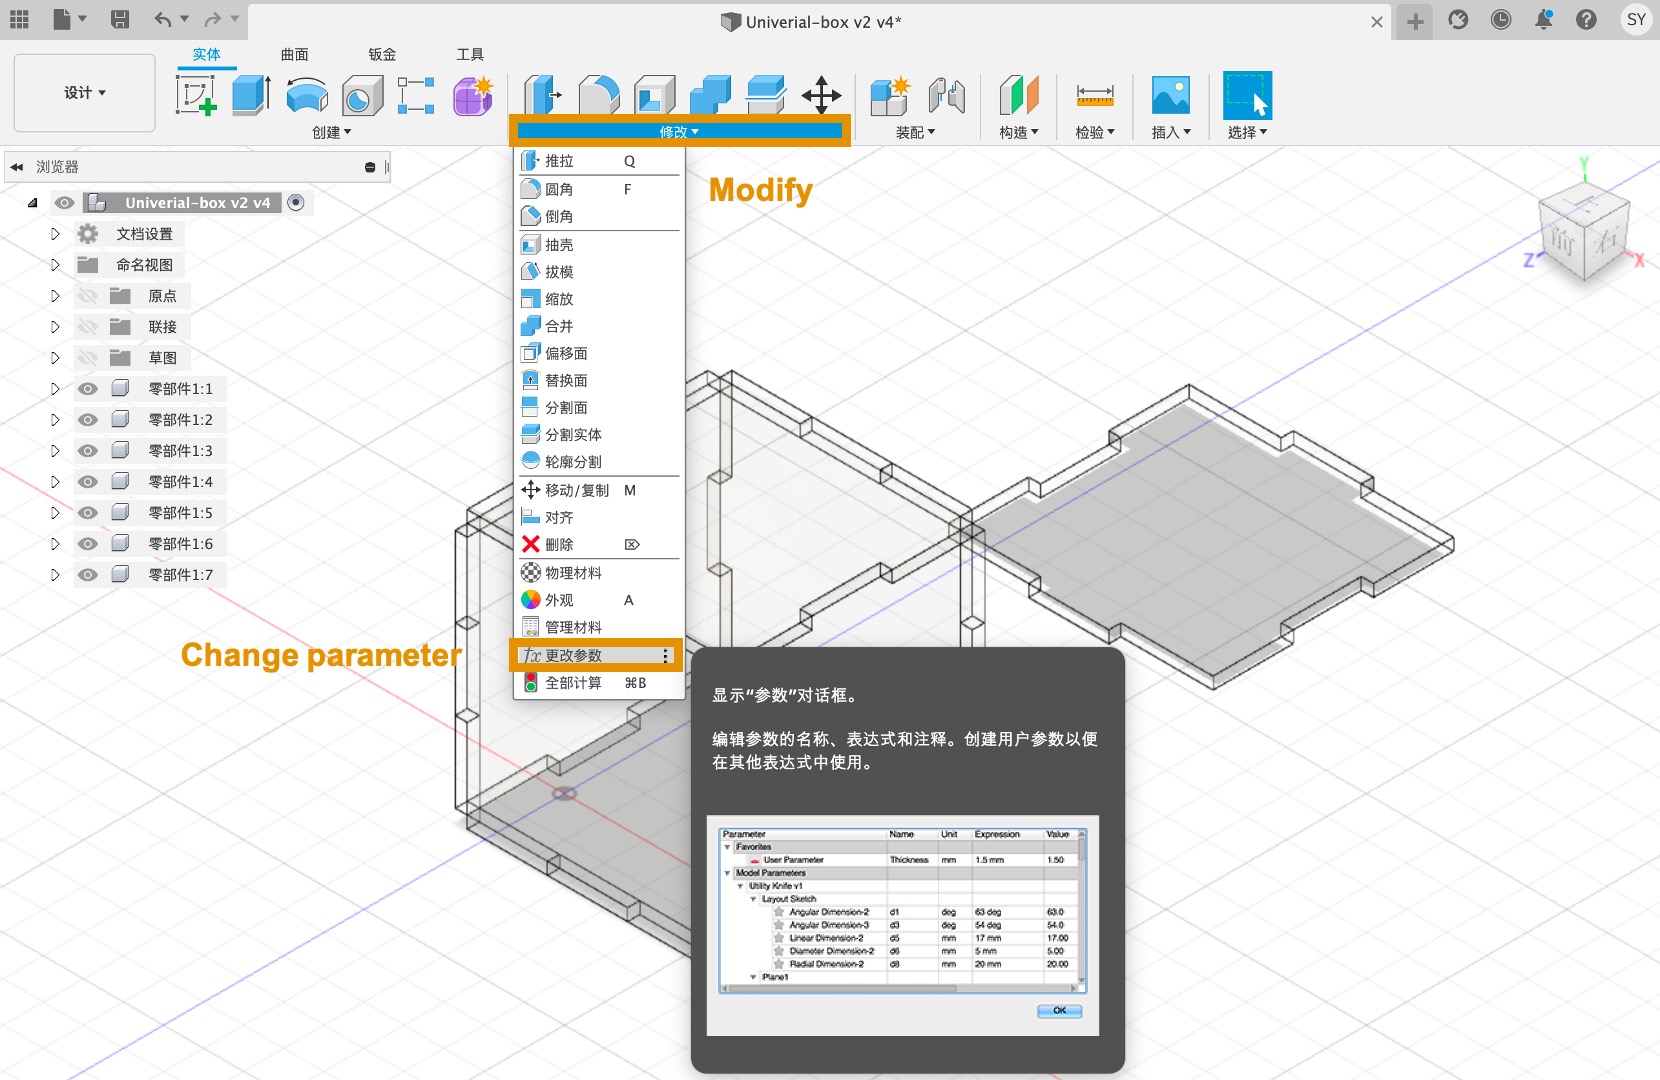
Change parameter base on the thickness of the materials. This time, I change 3mm to 5mm.
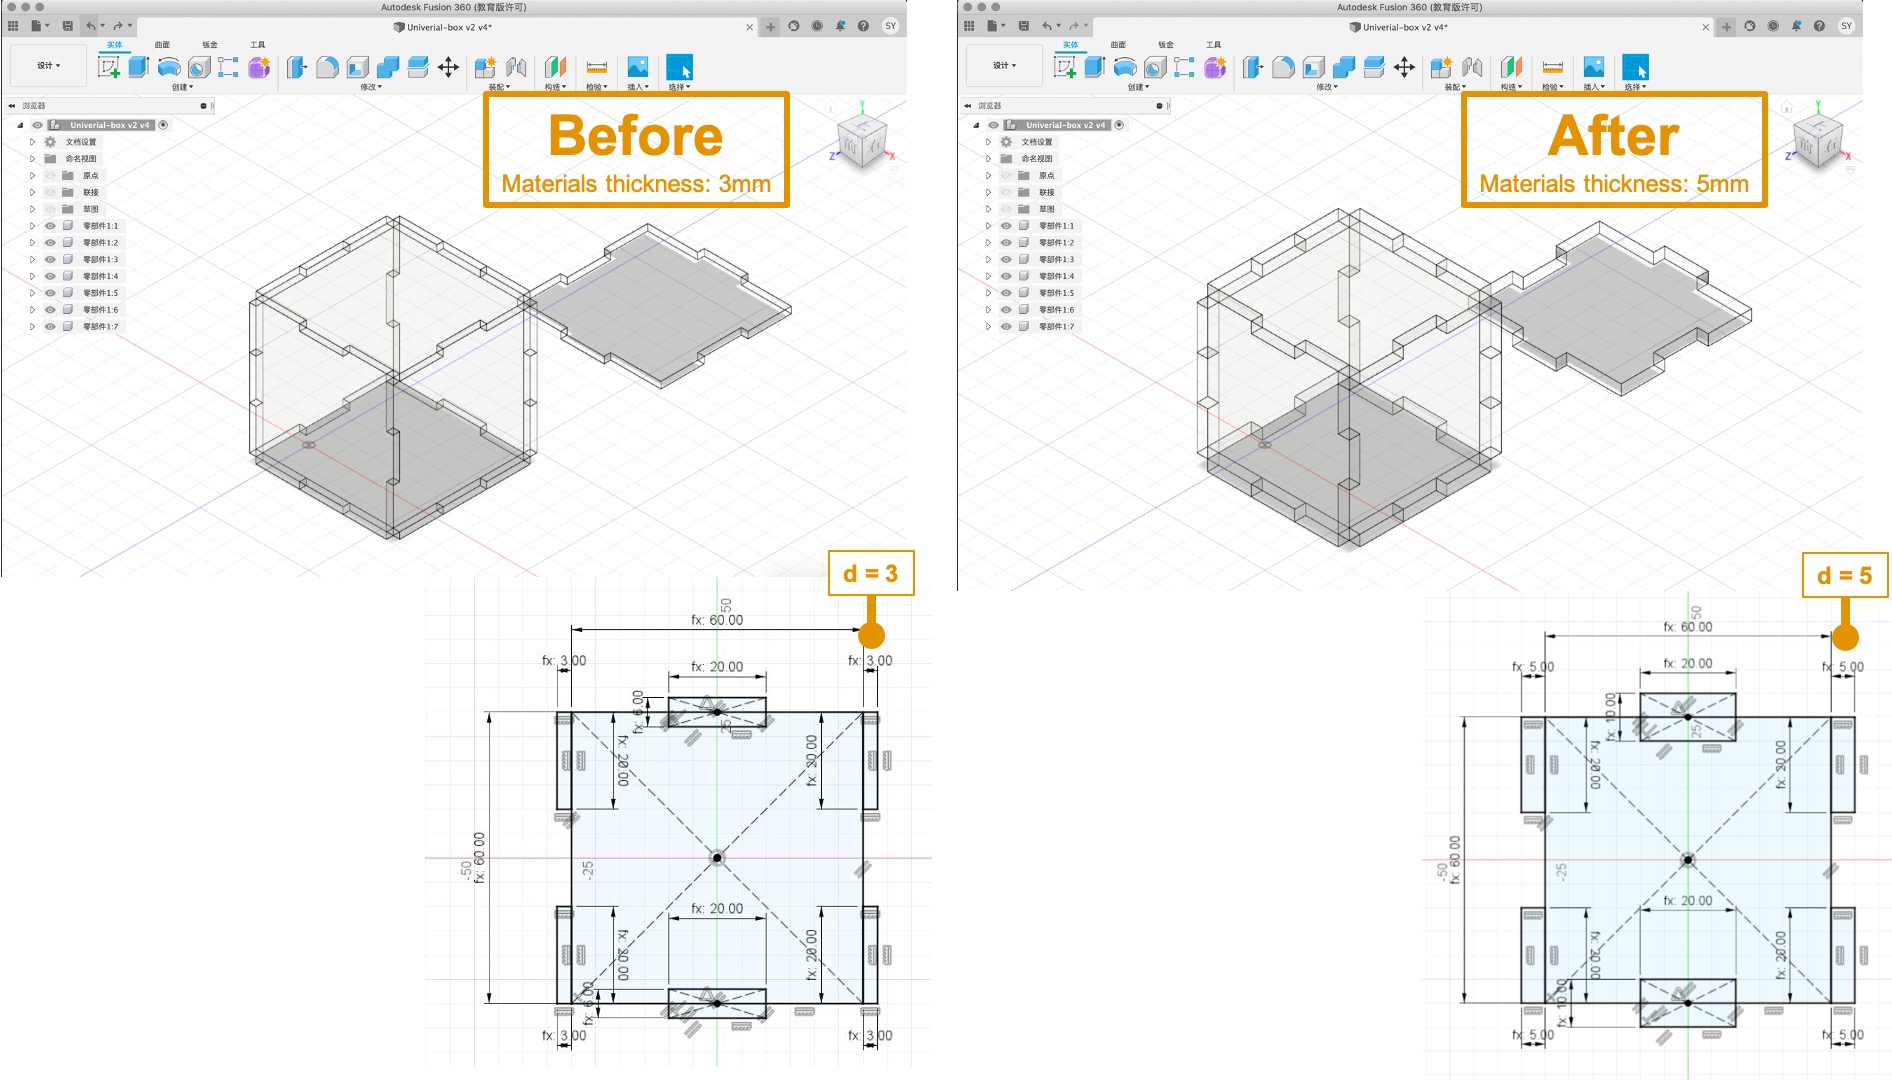
Here is the results of changing the material thickness. (d changes 3mm to 5mm and x and y remind the same.)
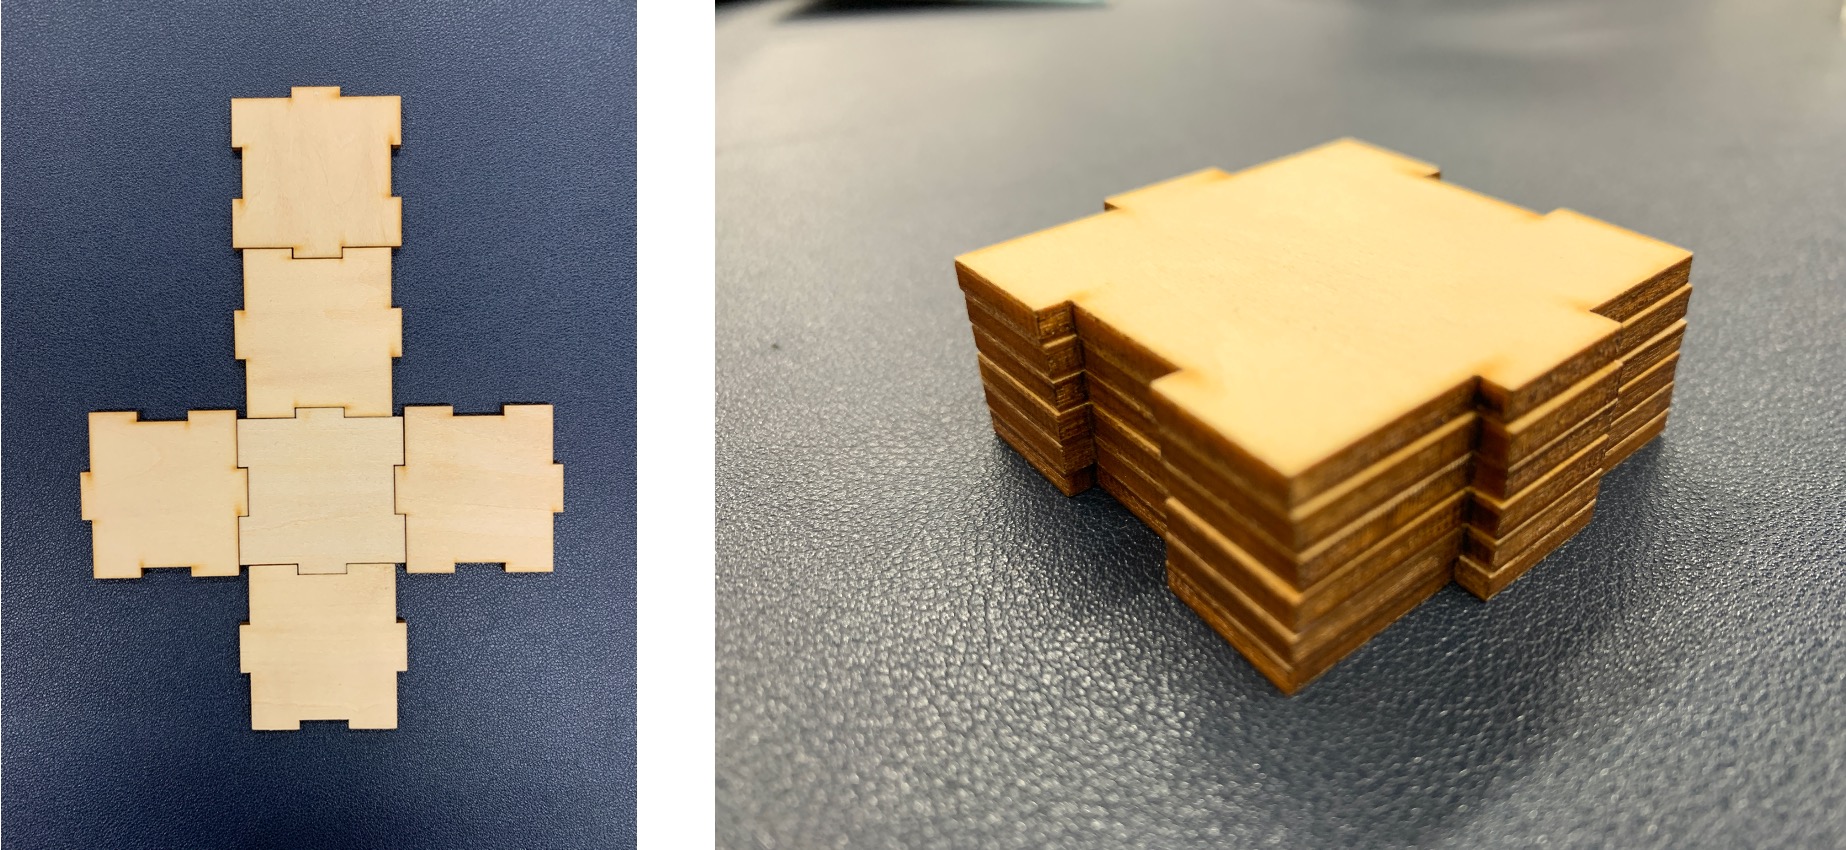
I use lasercutter to cutting Universial Box (Left Photo). As you can see, six pieces is same thickness (Right Photo).
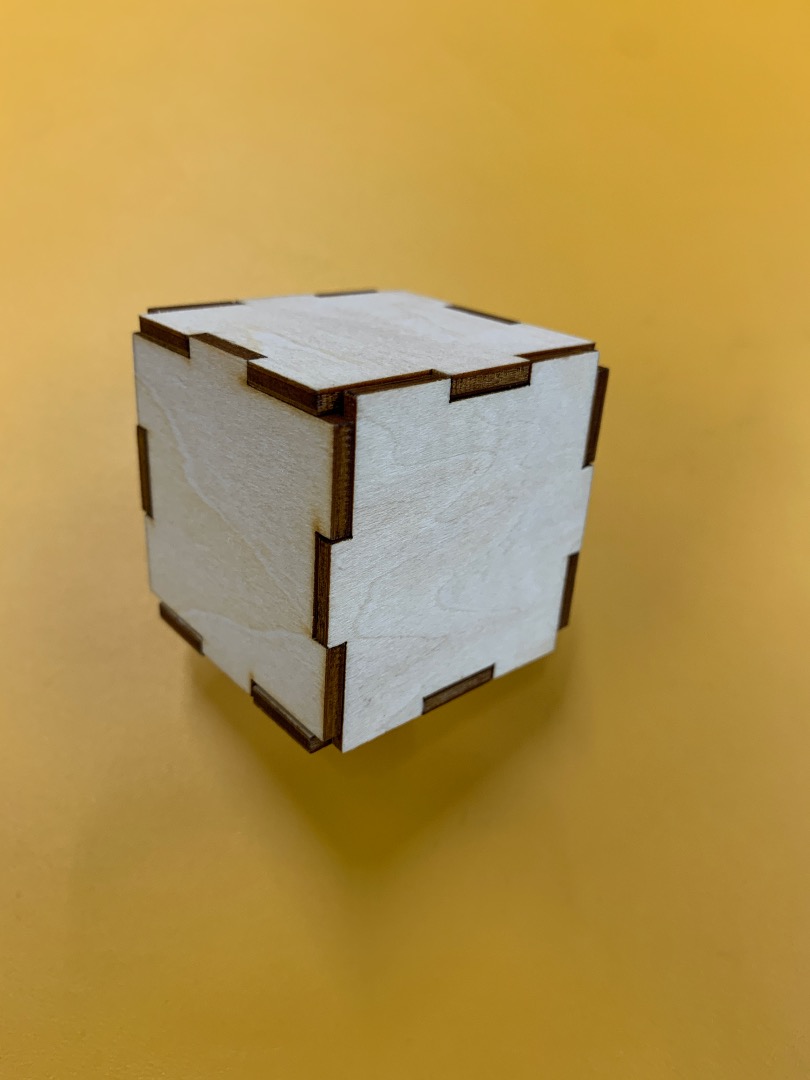
Here is the hero shots.
Vinyl Cutter
In our lab, the Vinyl Cutter is from Brother ScanNCut CM900. It is able to Scan-to-Cut, Direct-to-Cut, Fabric Cut and Pen Draw.
Beside using ScanNCut, it is better to work with CanvasWorkspace. You can create original cutting and drawing data for your ScanNCut machine. This platform is able to add SVG file into Canvas Workspace. You may download it or visit this website for working CanvasWorkspace.

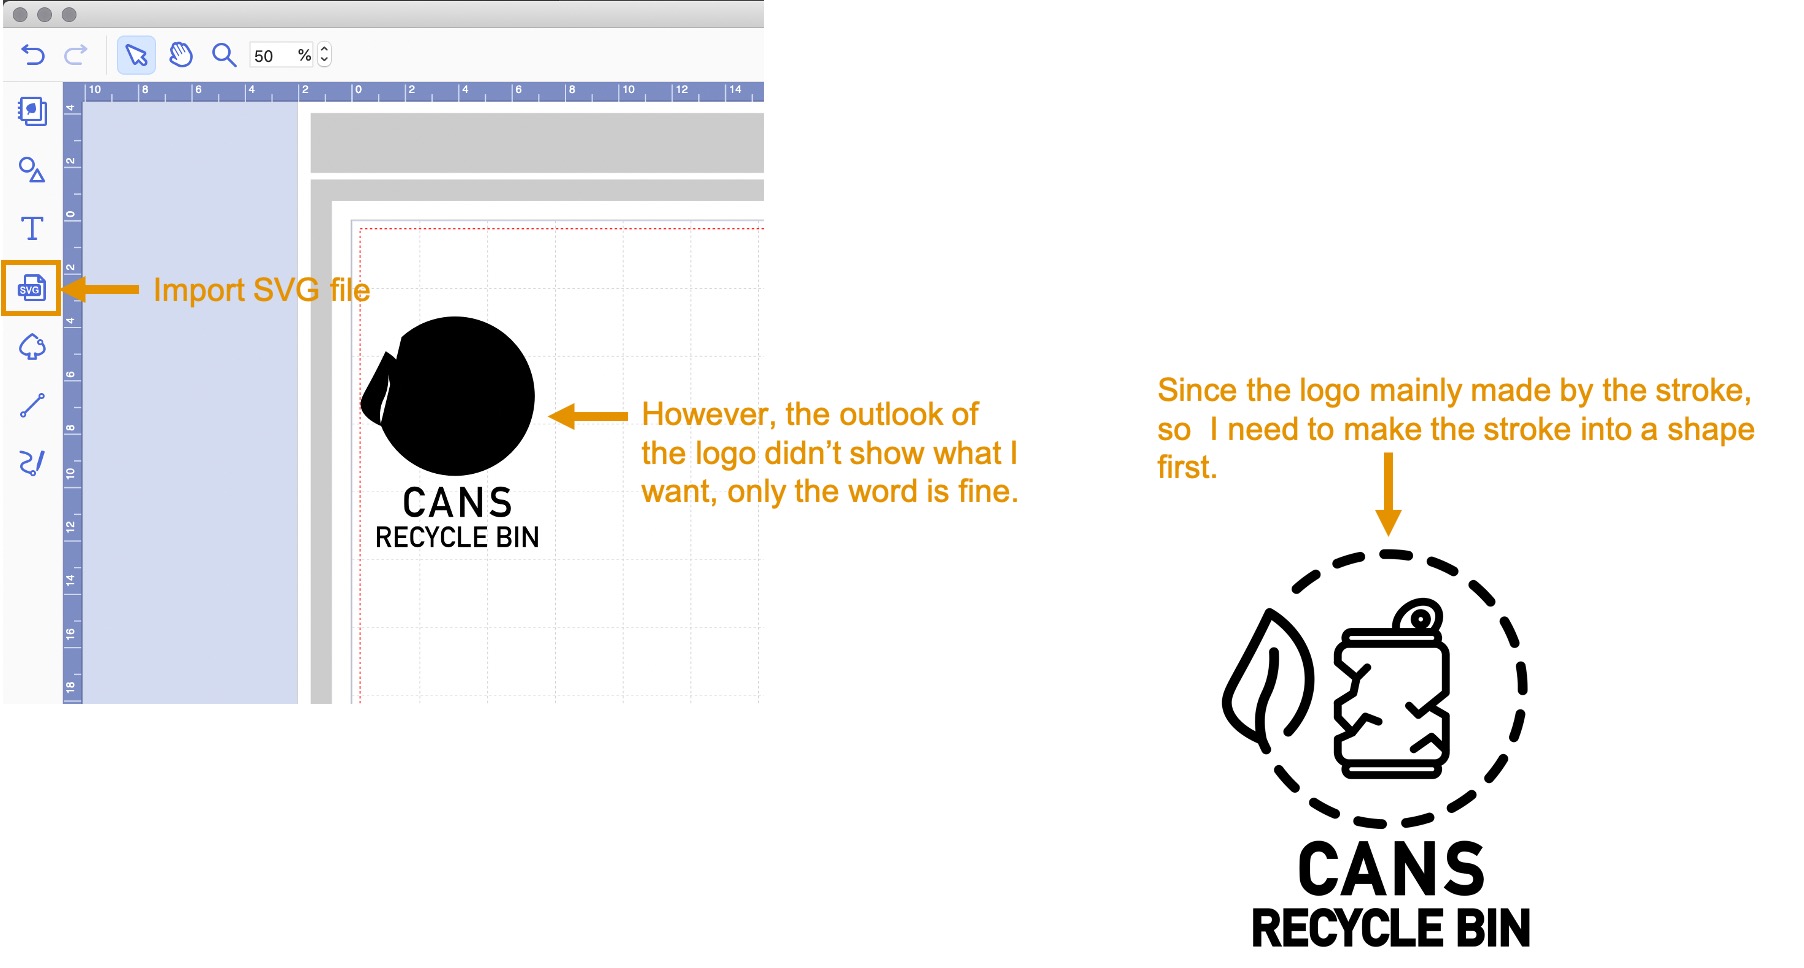
First, I import a SVG file into CanvasWorkspace. However, the outlook of the logo didn’t show what I want, only the word is fine. Since the logo mainly made by the stroke, so I need to make the stroke into a shape first.
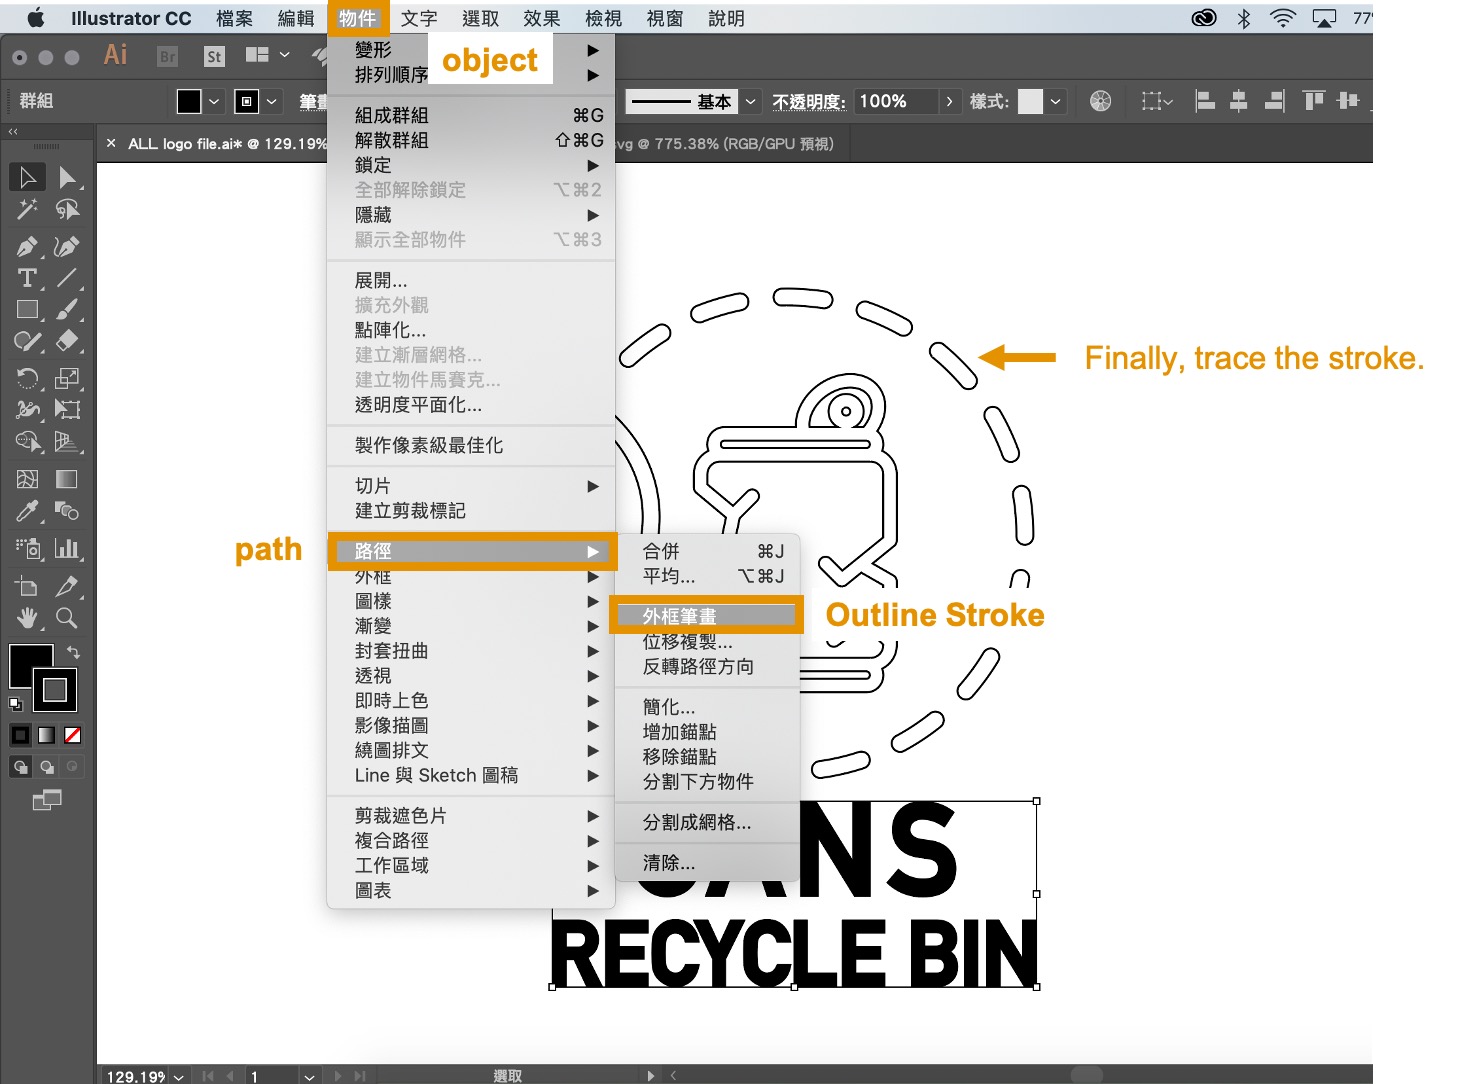
This is the way, how to trace the stroke. Choose Object > Path > Outline Stroke
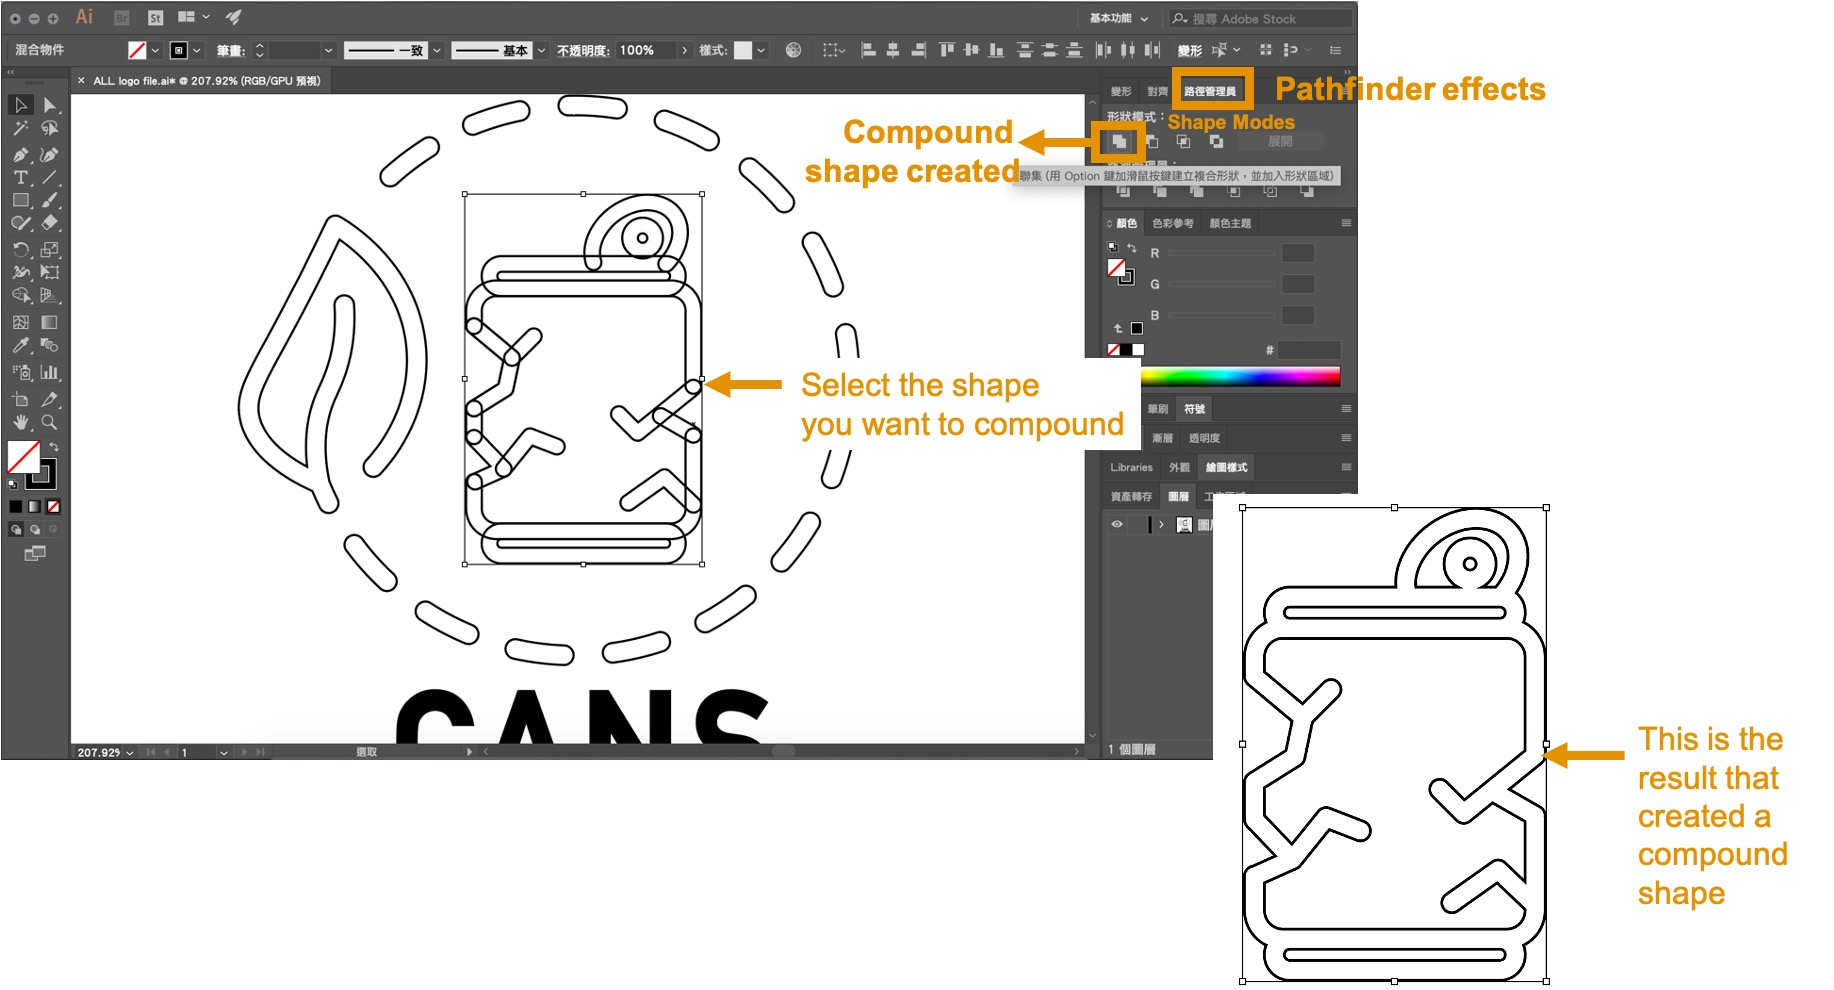
And the last is selecting the shape you want to compund and choosing Pathfinder effects > Compound shape created. Here are the steps and result showed below.
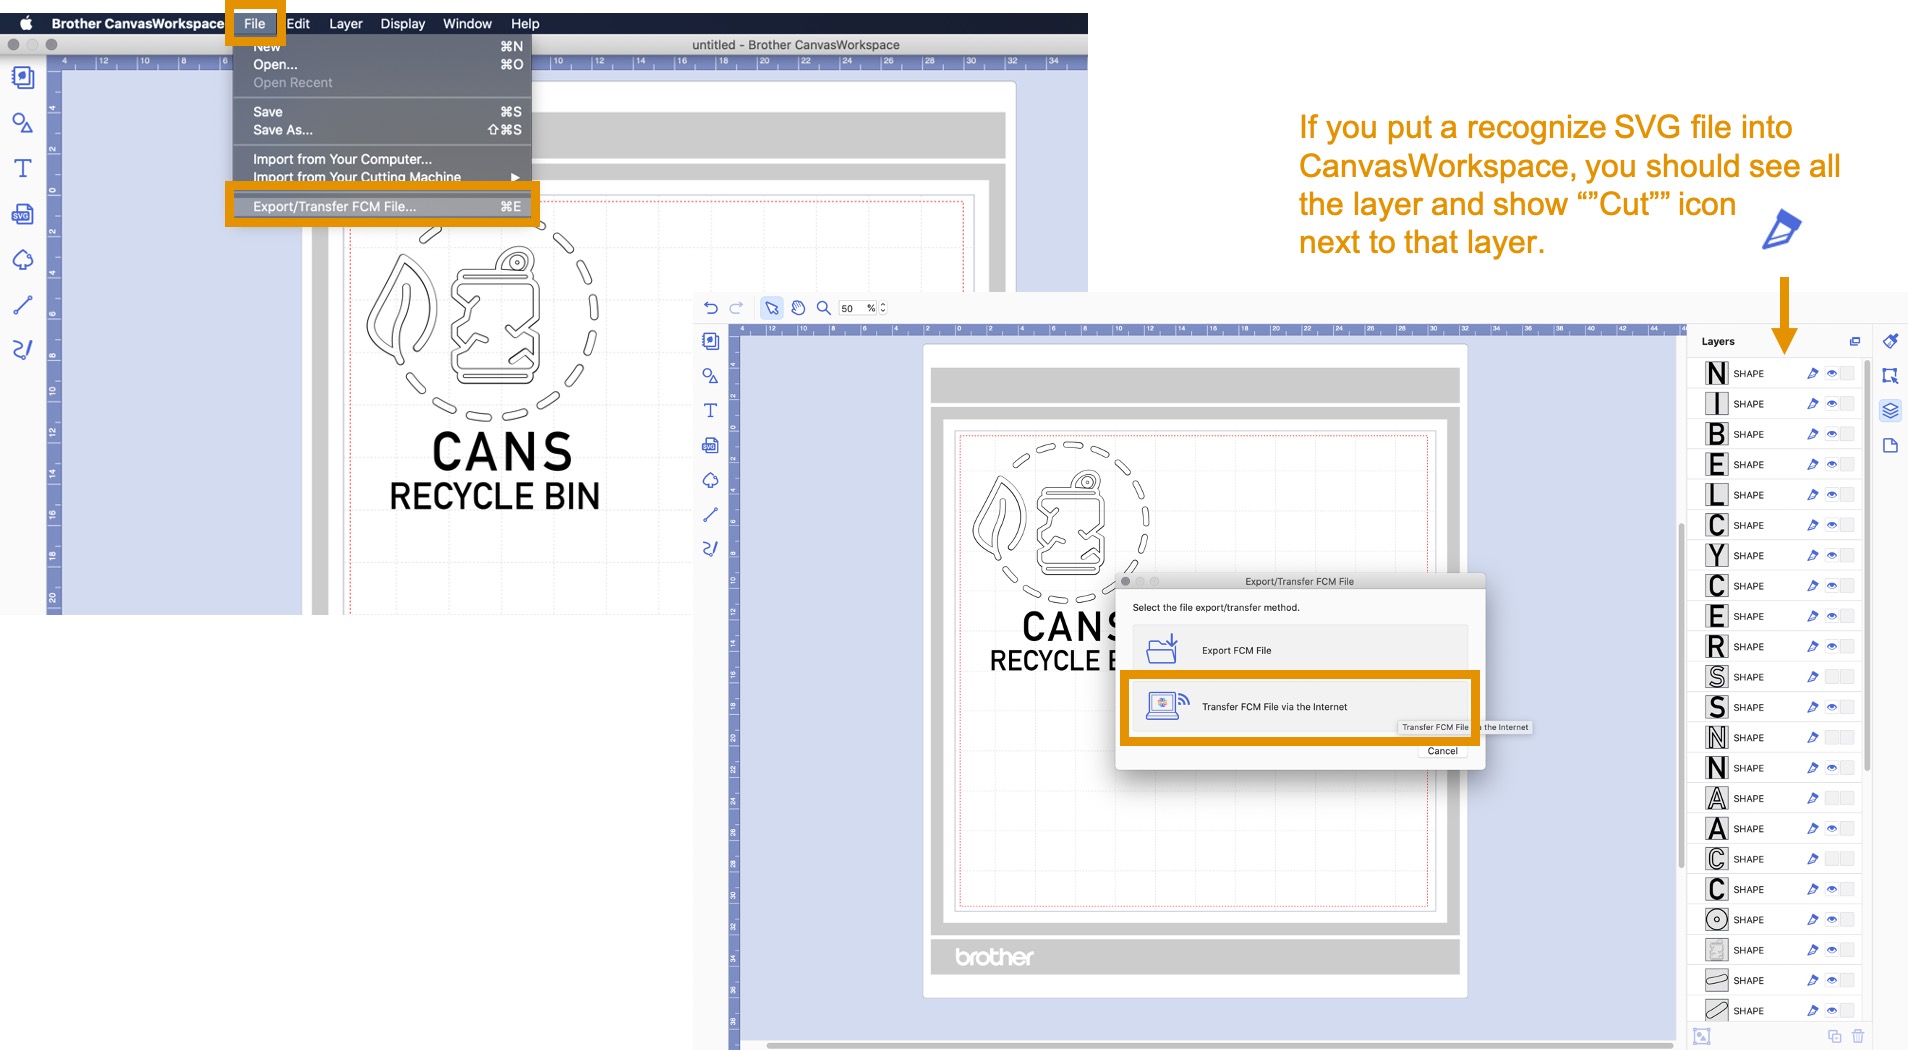
Now, you can import your SVG into CanvasWorkspace. If you put a recognize SVG file into CanvasWorkspace, you should see all the layer and show “Cut” icon next to that layer. After that, you choose File > Export/ Transfer Your FCM File. It pops up a window, you choose Transfer FCM File via the internet.
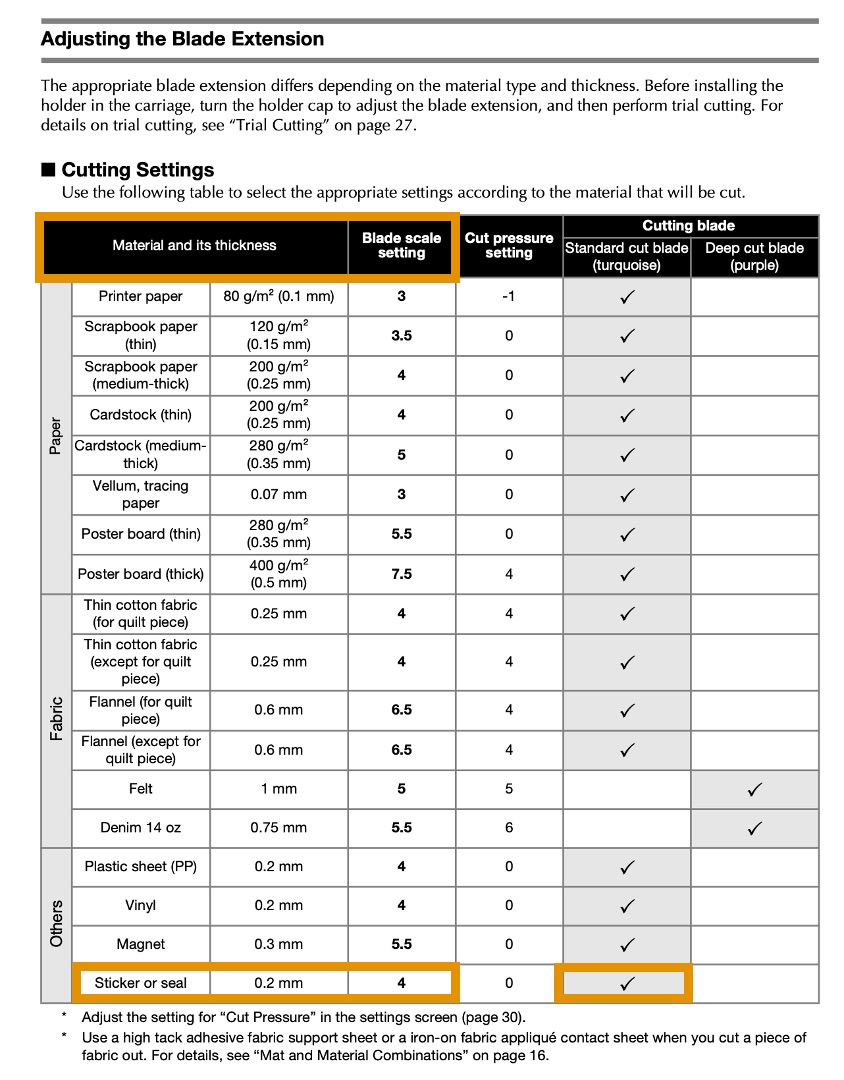
I put Sticker into ScanNCut for cutting a sticker for my final project notebook. According to the Operation Manual of Brother ScanNCut CM900, I set the blade scale into 4.
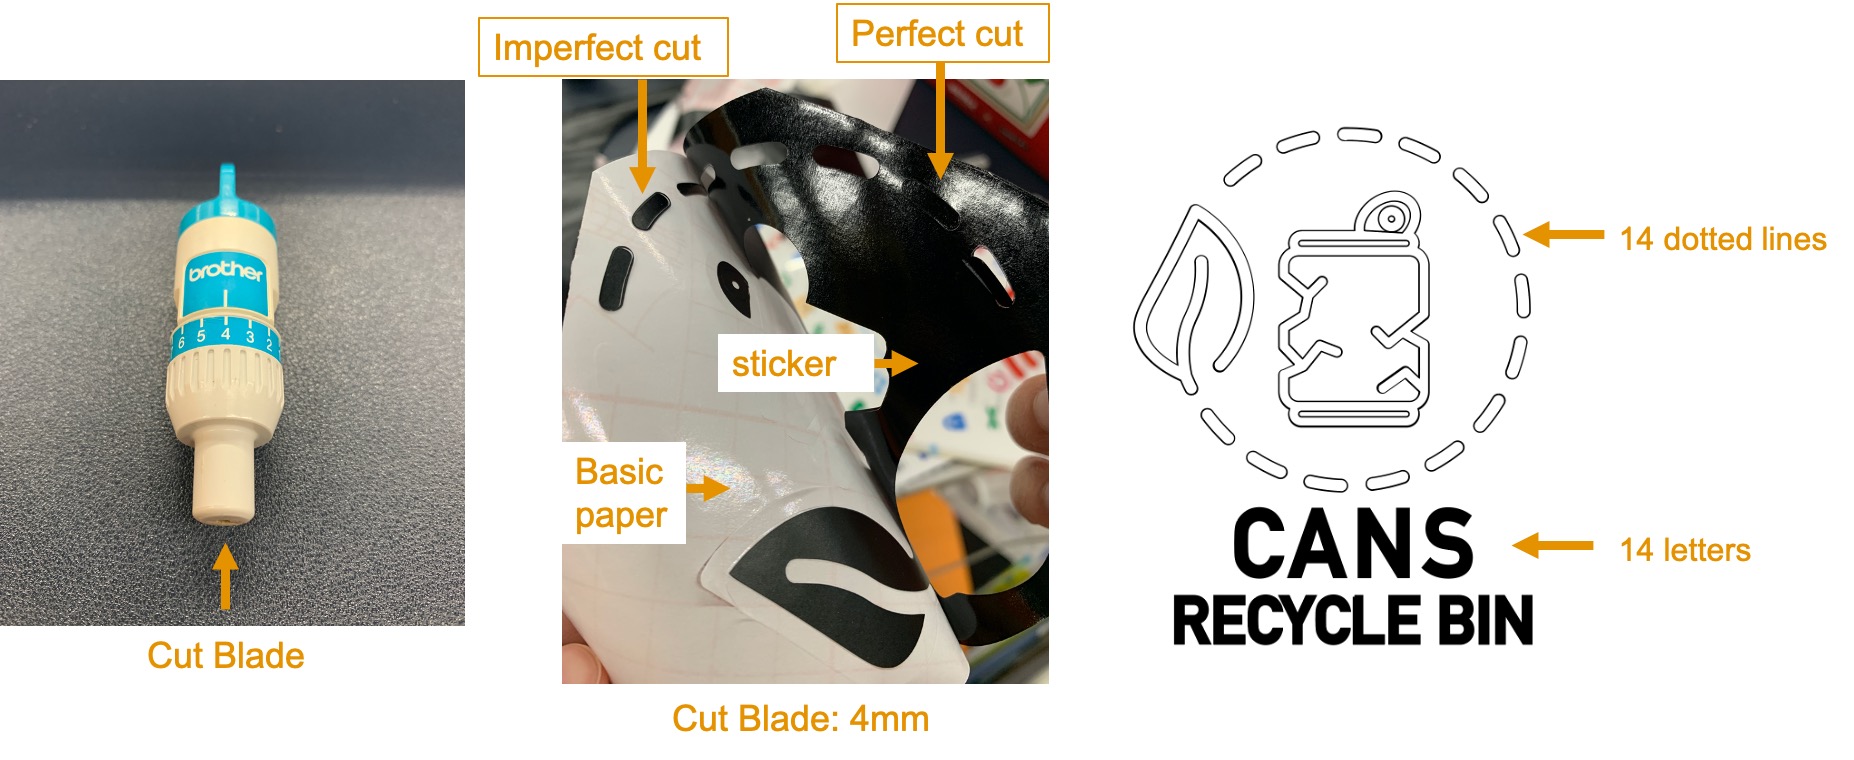
As you can see I set the blade scale into 4 (Shown at left photo) and here is the result (Show at middle photo). Some of them are perfect cut and imperfect cut. What is the definition of perfect cut? For my opinion, perfect cut is basicly cut out from the basic paper and remain in the sticker paper. Since my logo contains so many dotted lines and letters (Shown at right photo). It is hard to remain the orginal deisgn when I paste th etsicker on my notebook. Therefore, I adjust the blade scale into 3.5 for making sure do not totally cut our form the basic paper.
The process of cutting sticker from Brother ScanNcut CM900 and set blade scale down into 3.5
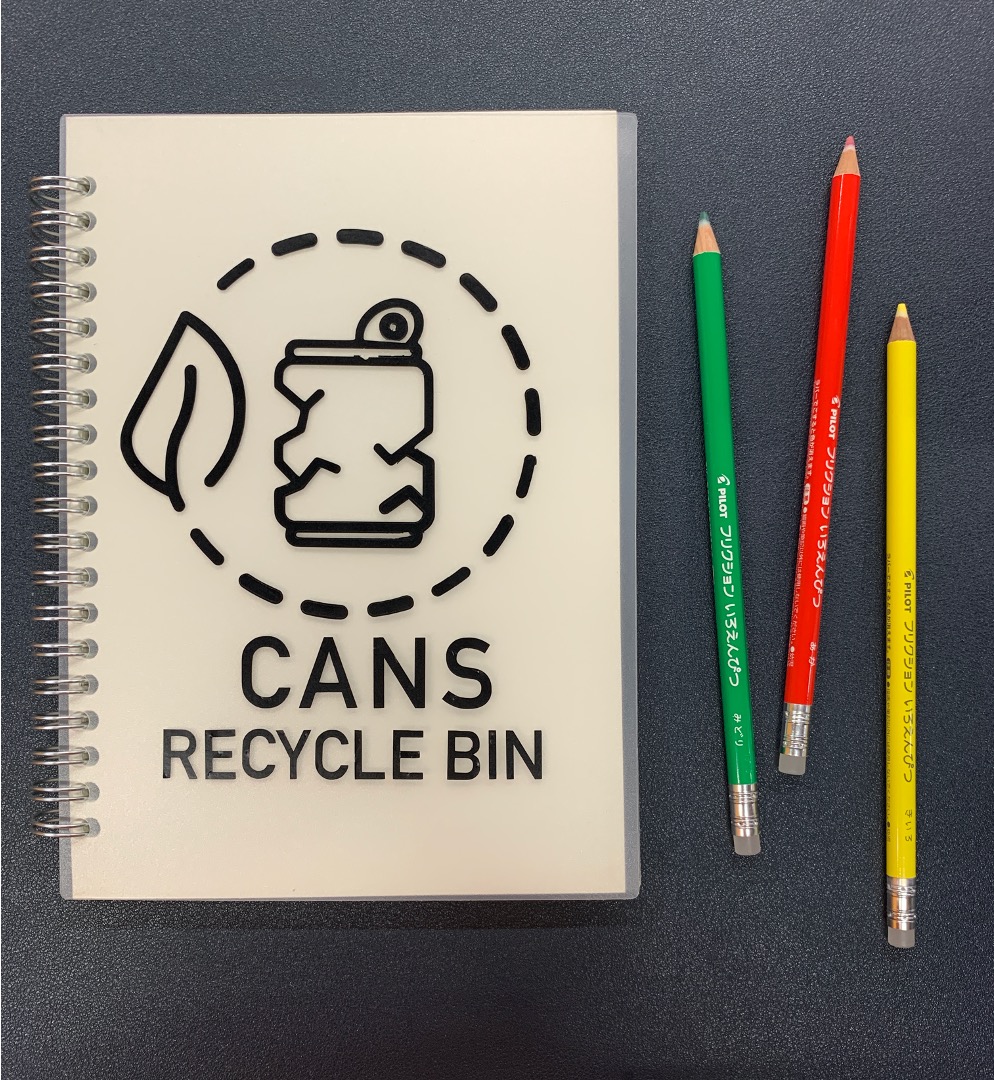
Applying Sticker in my Notebook Cover. Since setting blade scale into 3.5, all the components (include all the dotted lines, letters and crashed cans) fully cut from the basic paper and remain in the sticker paper. I can just paste the logo directly and slightly press components on my notebook. It help me do not need any extra tool, such as, transparency sheet for guiding me to paste and keep the logo shape original design.
Here is a result for pasting the sticker on my final project notebook.
File Download
Parametric Press-fit Construction Kit: Fusion360_Univerial_box_F3D
Vinyl Cutter: Adobe Illustrator ScanNCut_Logo_SVG