15. Interface and application programming
Assignment:
individual assignment: write an application that interfaces a user with an input &/or output device that you made group assignment: compare as many tool options as possible.

For this week we will use different user interfaces to communicate with an electronic card and send a signal. We'll work with the IoT-focused Particle Photon card, which has a Wi-Fi connection module. First we will configure the electronic card, user creation and the installation of the tokens so that we can access it. To communicate with the card we will do it through HTML code and then move on to a more complex exercise by making an interface in the Unity program using code.
Steps
1. Photon installation and configuration
2. Writing code on the device.
3. Proof of communication with the cdevice via HTML
4. Creating an interface in Unity that communicates with the deviced.
5. We will made a mini game that sent a signal to the device when an event occurs.
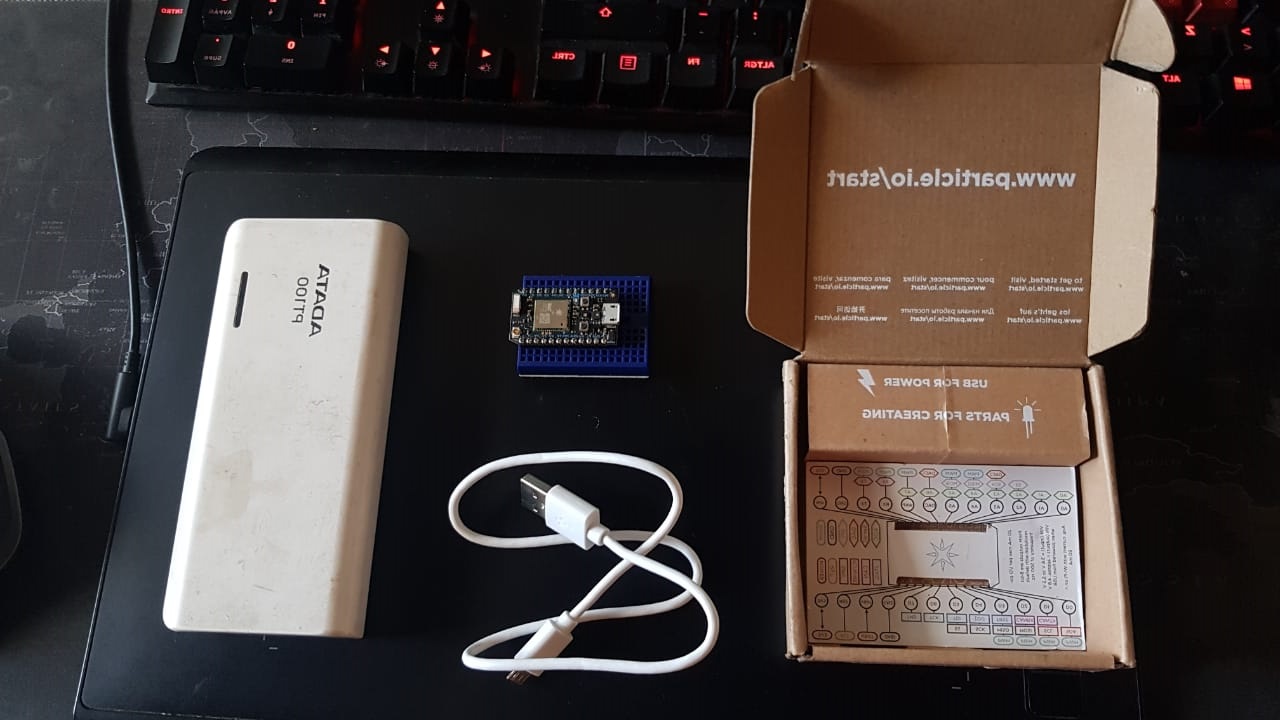
1. Installation and configuration Particle Photon.
To start with card setup, we must first create an account on the Particle www.particle.io. Once the account is created, we'll start setting up our Photon device. To do this, we must install some drivers that will allow us to make the initial Setup of the card. To start, we can access the website www.particle.io/start.
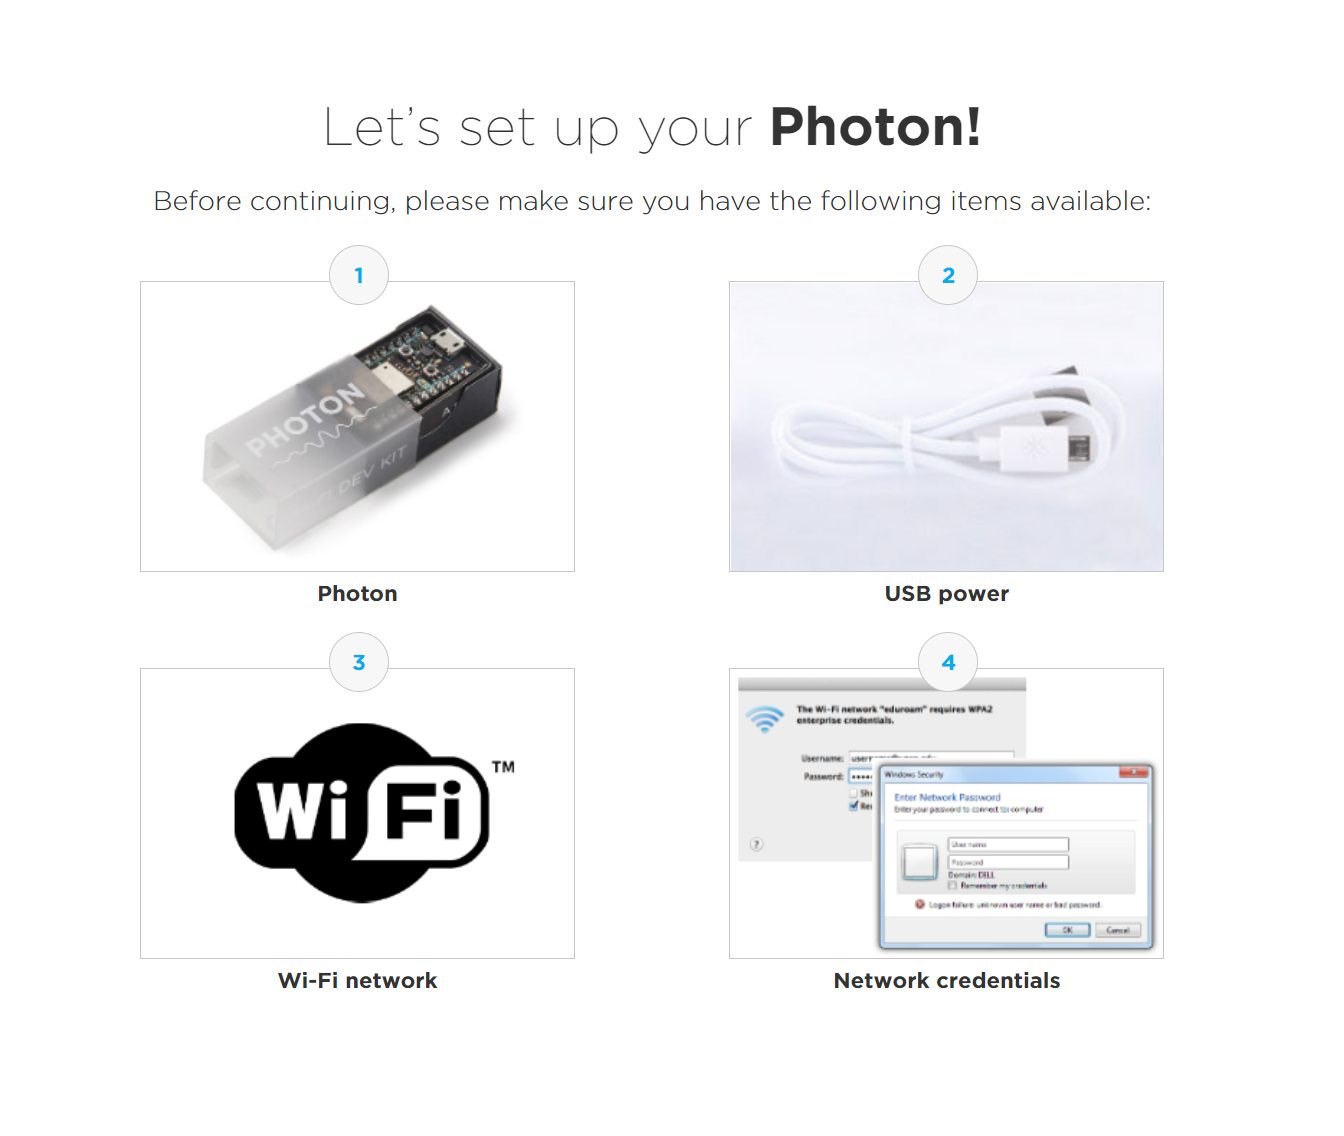
Once the card is set up and connected to the internet and we have our account, we will enter the console administration page of the card, where we can send you the code and program it. This is done via the internet, no direct usb connection is needed to the PC.
You can manually install the particle-cli Node.js package if you need the CLI installed in a different location or you need to install a specific version of the CLI. Make sure you have a recent LTS version of Node.js installed.
# check that you have node.js 10 or above. Check http://nodejs.org on how to update node.js$ node -v v10.15.1
# check that you have npm 6 or above
$ npm -v
6.4.1
Next, open a command prompt or terminal, and install by typing:
# how to install the particle-cli
$ npm install -g particle-cli
$ particle login

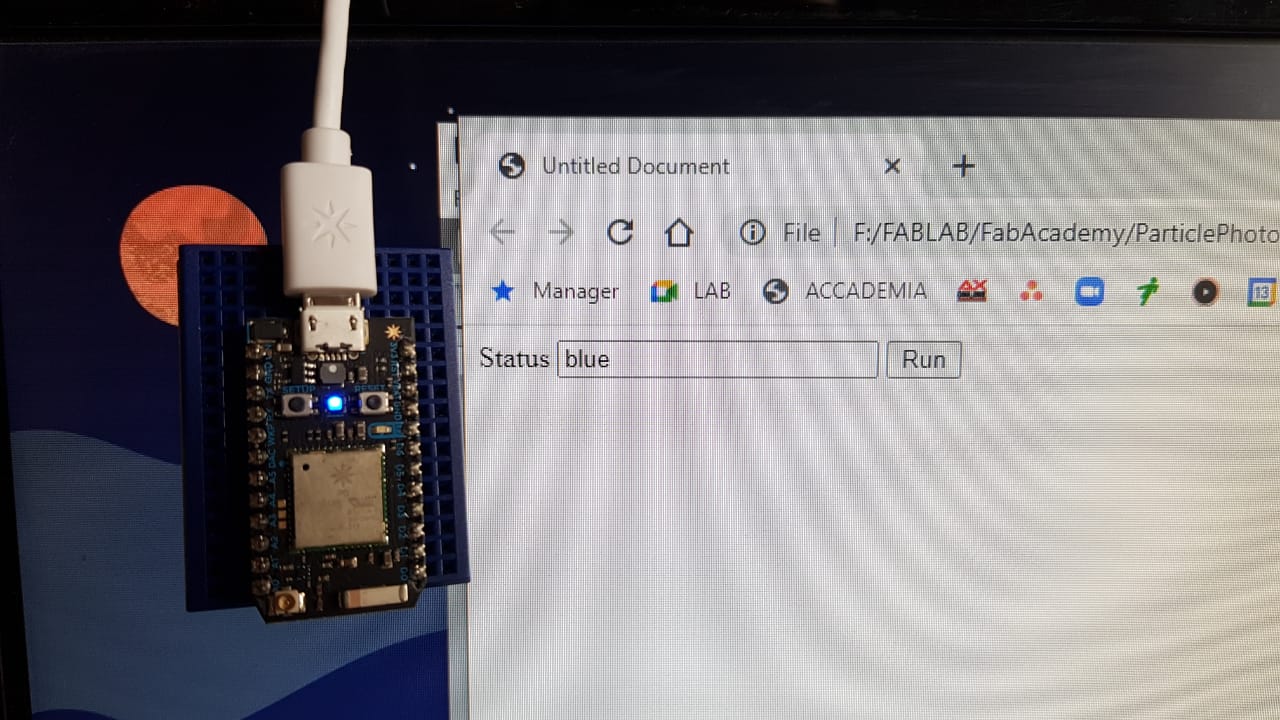
Once we are on the Web IDE, we will do quickly test with the LEDs to verify that the card is working well. We'll use some of the codes that are in the library.
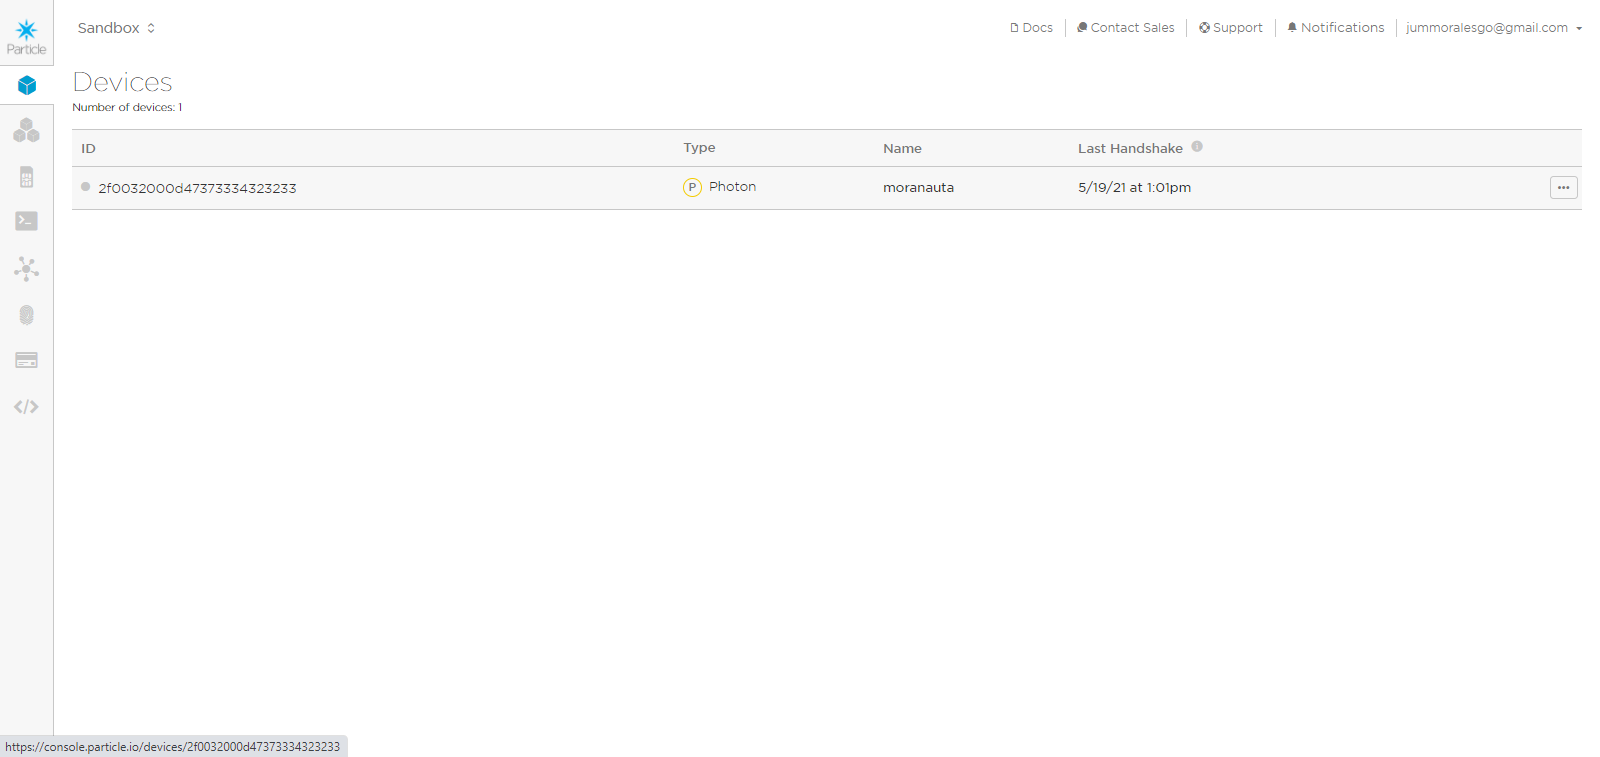
Dashboard for the Device.

Particle Web Console.
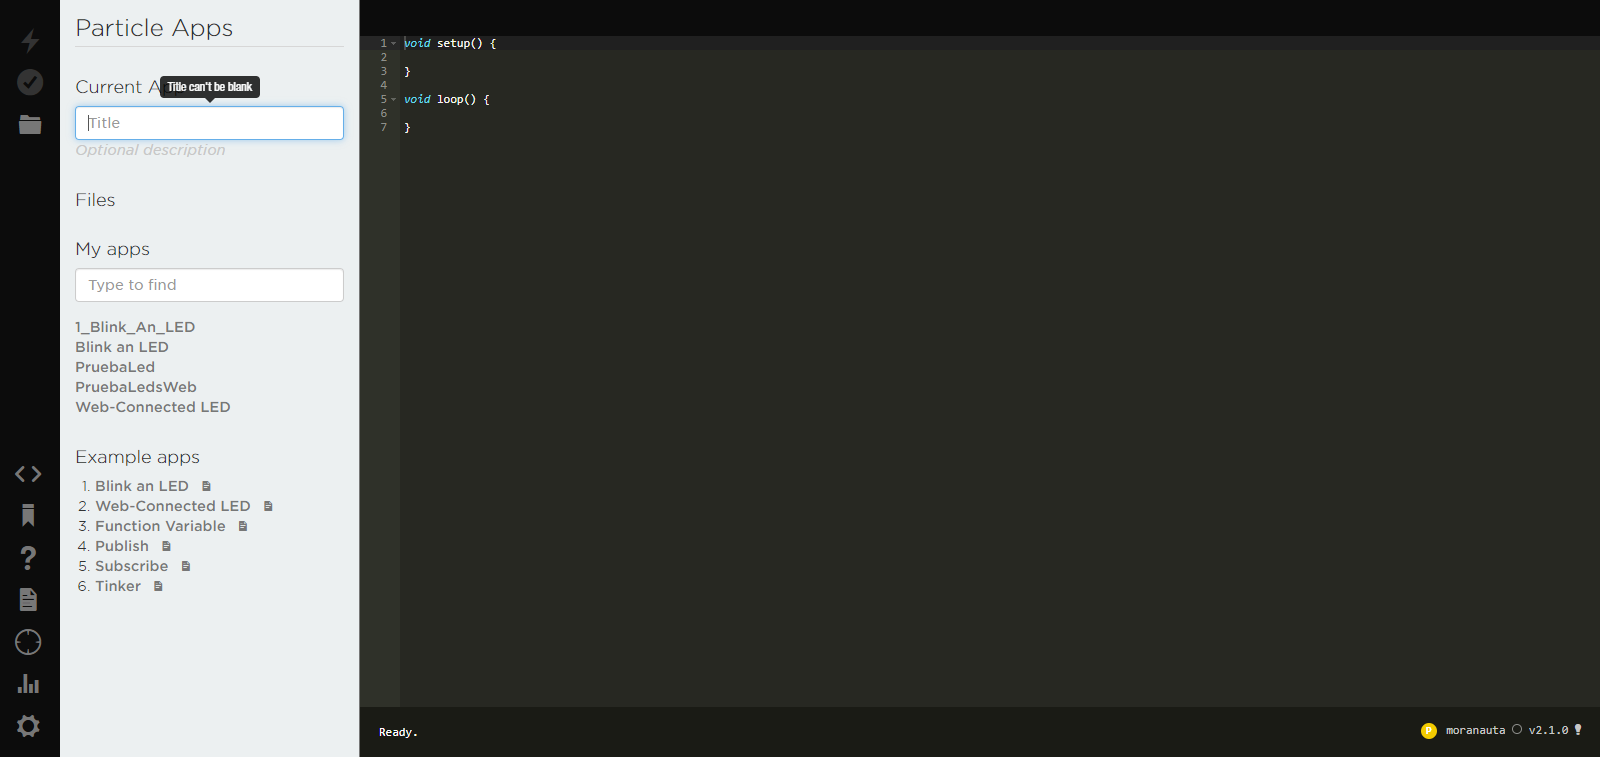
2. Writing code on the device.
We will make a simple code that allows us from commands, adjust the color of the RGB LED that the Photon card has and be able to communicate with the card through the publication of data to the card via the internet, so that we can then create our interface from an HTML code and send signals to the device and be able to change the colors of the RGB LED.
Particle uses Wiring, the same code framework as Arduino. That means that most Arduino code will run on a Particle board with no modifications. At the same time, you can always write code in C/C++ or even ARM assembly. An INO file is a software program created for use with Arduino, an open-source electronics prototyping platform. It contains source code written in the Arduino programming language. INO files are used to control Arduino circuit boards.
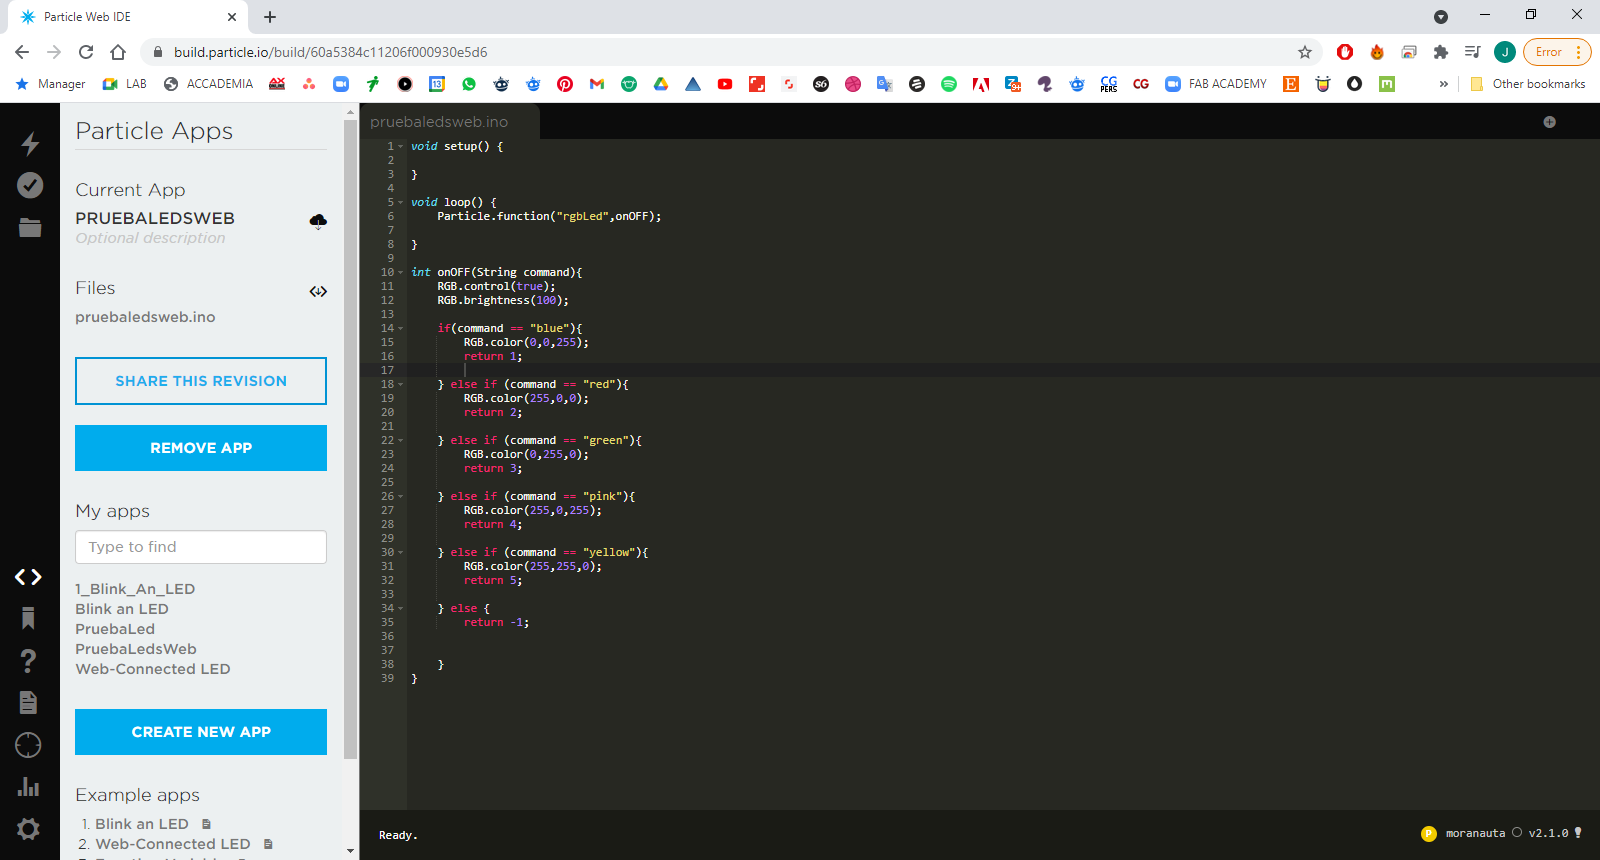
We will use a function that allows us from different formats, to change the color based on different conditionals. Once the code is ready, we proceed to verify it and then press flash to send the code to the device over the internet. In the interface, it will confirm that the code has been sent and the device will signal blue lights confirming that it has already received the code.
void setup() {
}
void loop() {
    Particle.function("rgbLed",onOFF);
}
int onOFF(String command){
    RGB.control(true);
    RGB.brightness(100);

    if(command == "blue"){
        RGB.color(0,0,255);
        return 1;

    } else if (command == "red"){
        RGB.color(255,0,0);
        return 2;

    } else if (command == "green"){
        RGB.color(0,255,0);
        return 3;

    } else if (command == "pink"){
        RGB.color(255,0,255);
        return 4;

    } else if (command == "yellow"){
        RGB.color(255,255,0);
        return 5;

    } else {
        return -1;
    }
}
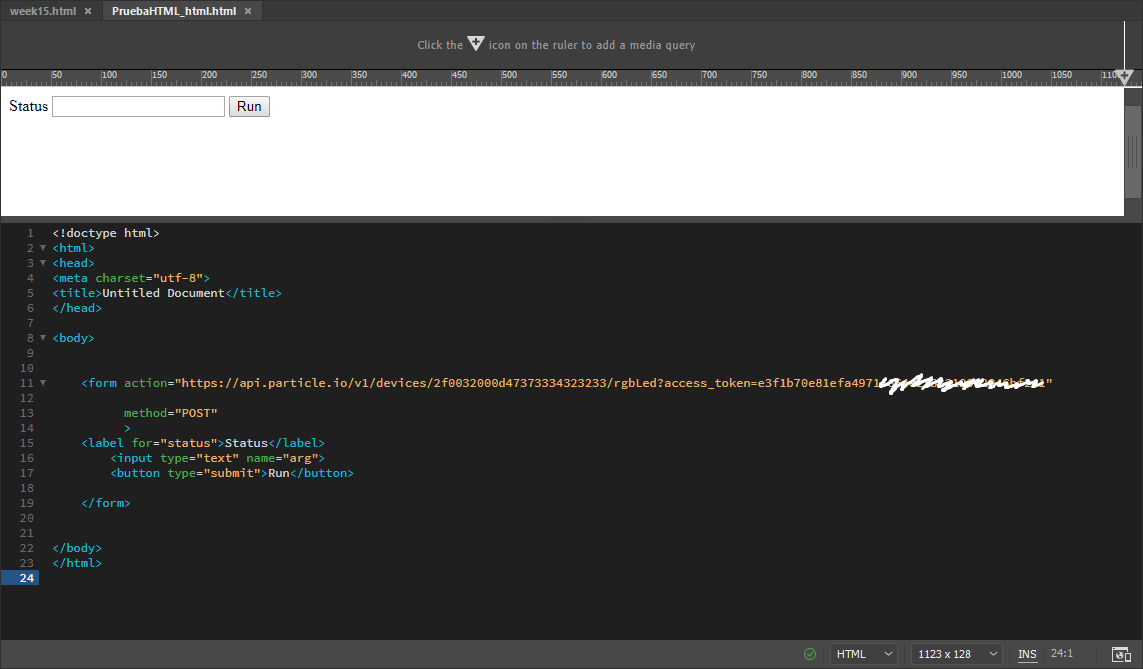
3. Communication test with the device via HTML
Particle uses Wiring, the same code framework as Arduino. That means that most Arduino code will run on a Particle board with no modifications. At the same time, you can always write code in C/C++ or even ARM assembly. An INO file is a software program created for use with Arduino, an open-source electronics prototyping platform. It contains source code written in the Arduino programming language. INO files are used to control Arduino circuit boards.
To send data to our Particle, we'll use HTML code and use the formataction attribute to send the data through a simple form. The formaction attribute specifies where to send the form-data when a form is submitted. This attribute overrides the form's action attribute. The formaction attribute is only used for inputs/buttons with type'"submit".
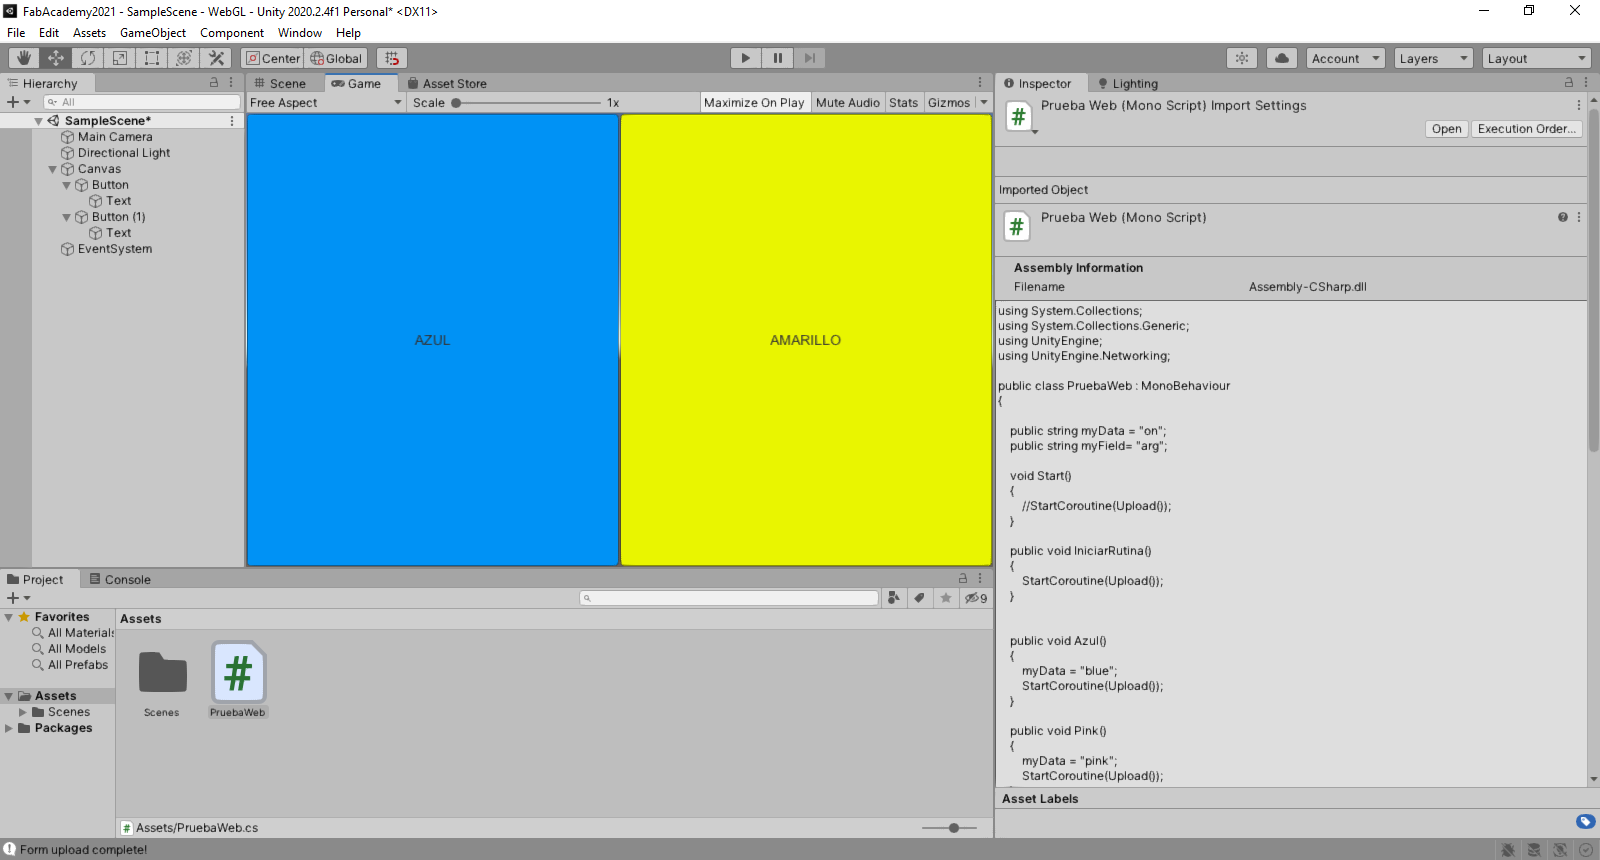
4. Creating an interface in Unity that communicates with the deviced.
Particle uses Wiring, the same code framework as Arduino. That means that most Arduino code will run on a Particle board with no modifications. At the same time, you can always write code in C/C++ or even ARM assembly.An INO file is a software program created for use with Arduino, an open-source electronics prototyping platform. It contains source code written in the Arduino programming language. INO files are used to control Arduino circuit boards.
We use the NCStudio program for the operation of the router. We tested the g code in .nc format, and after doing several tests without cutting material, there was no type of interruption and the path of the machine was correct.
using System.Collections;
using System.Collections.Generic;
using UnityEngine;
using UnityEngine.Networking;

public class PruebaWeb : MonoBehaviour
{

    public string myData = "on";
    public string myField= "arg";

    void Start()
    {
        //StartCoroutine(Upload());
    }

    public void IniciarRutina()
    {
        StartCoroutine(Upload());
    }


    public void Azul()
    {
        myData = "blue";
        StartCoroutine(Upload());
    }

    public void Pink()
    {
        myData = "pink";
        StartCoroutine(Upload());
    }

    public void Rojo()
    {
        myData = "red";
        StartCoroutine(Upload());
    }

    public void Amarillo()
    {
        myData = "yellow";
        StartCoroutine(Upload());
    }

    public void Verde()
    {
        myData = "green";
        StartCoroutine(Upload());
    }

    IEnumerator Upload()
    {
        WWWForm form = new WWWForm();
        form.AddField(myField, myData);


        UnityWebRequest www = UnityWebRequest.Post("https://api.particle.io/v1/
		devices/your_device_code/rgbLed?access_token=your_token", form);
        yield return www.SendWebRequest();

        if (www.result != UnityWebRequest.Result.Success)
        {
            Debug.Log(www.error);
        }
        else
        {
            Debug.Log("Form upload complete!");
        }
    }
}
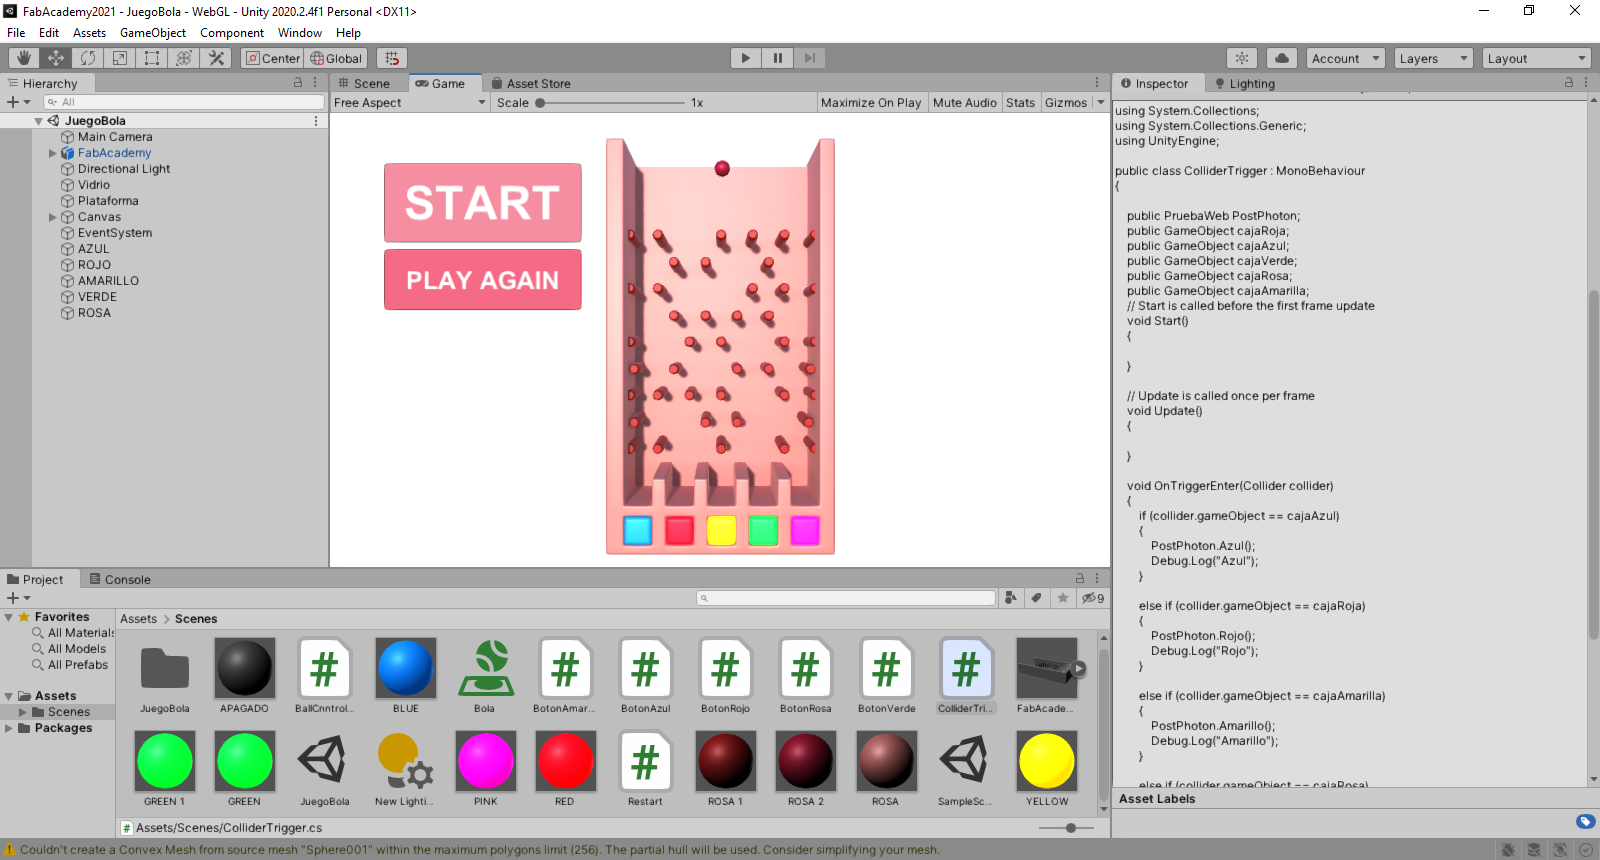
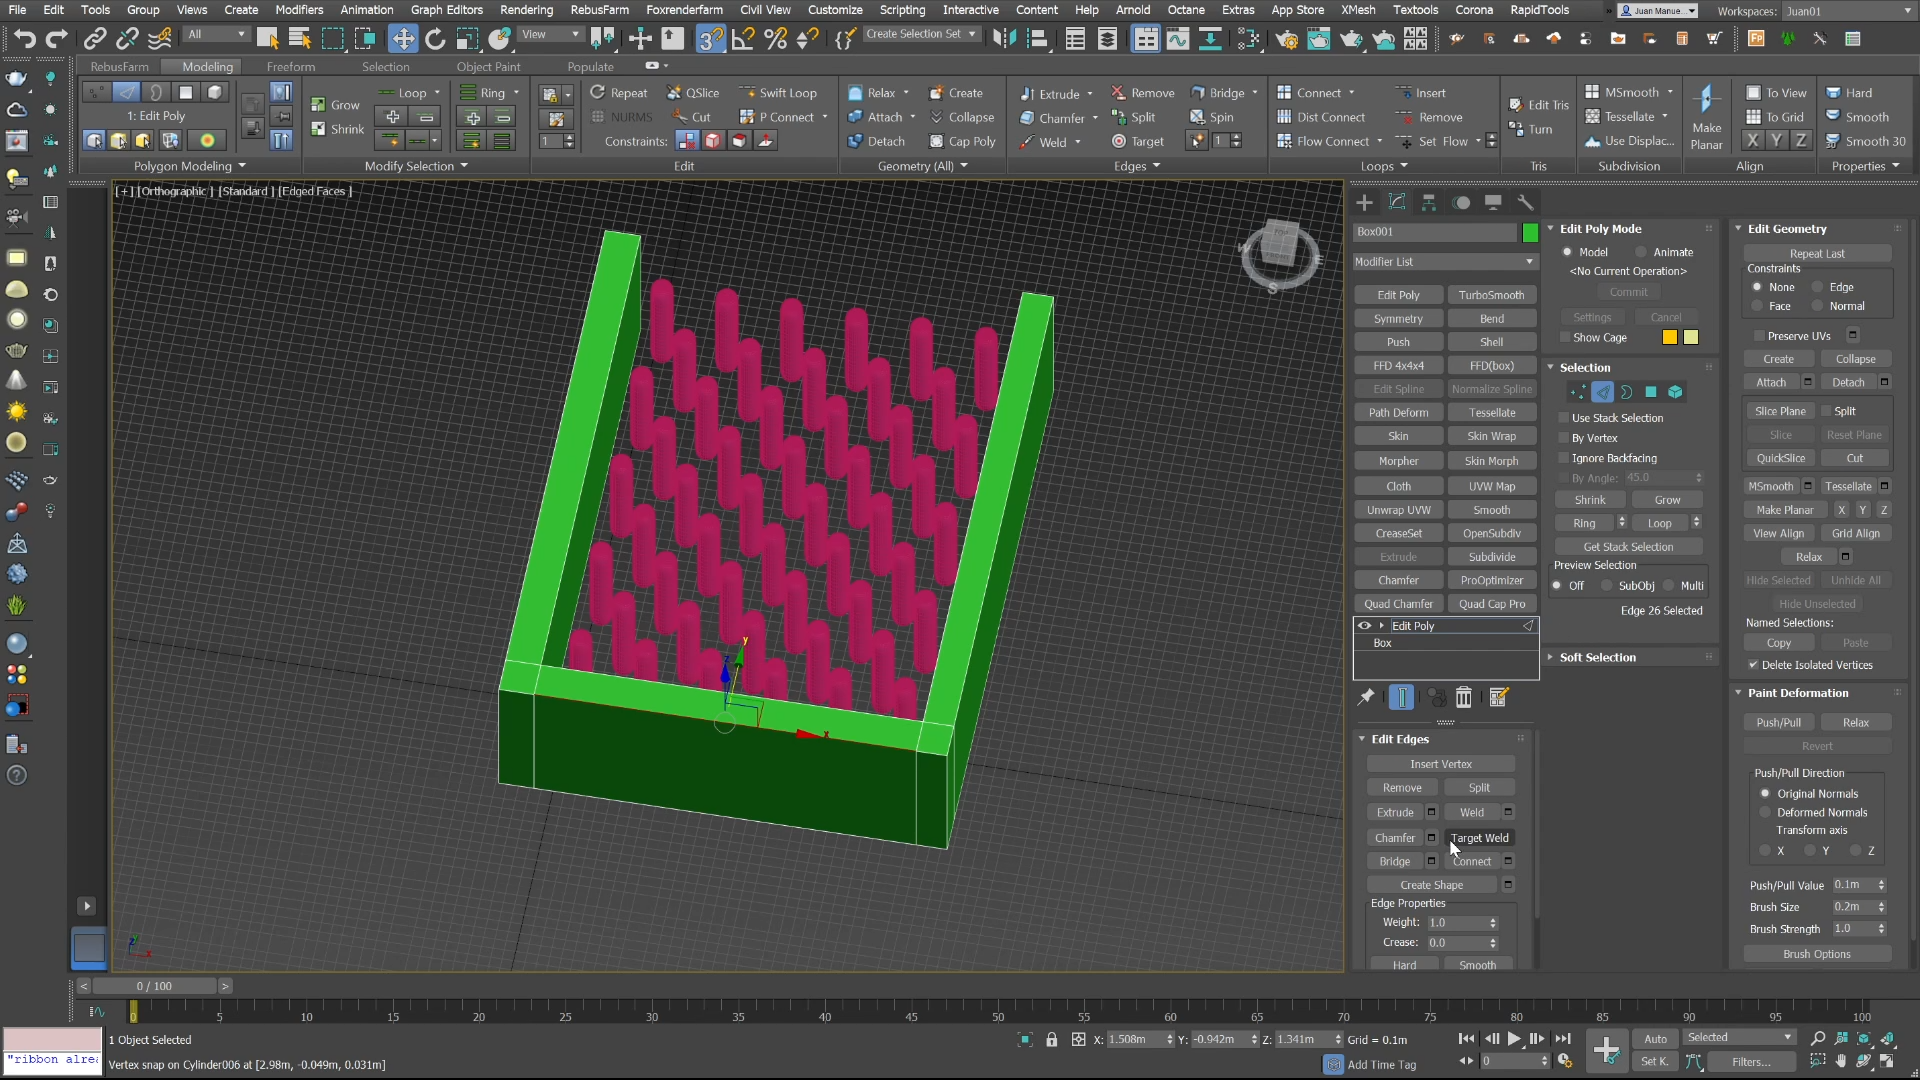
5. We will made a mini game that sent a signal to the device when an event occurs.
We use the NCStudio program for the operation of the router. We tested the g code in .nc format, and after doing several tests without cutting material, there was no type of interruption and the path of the machine was correct.
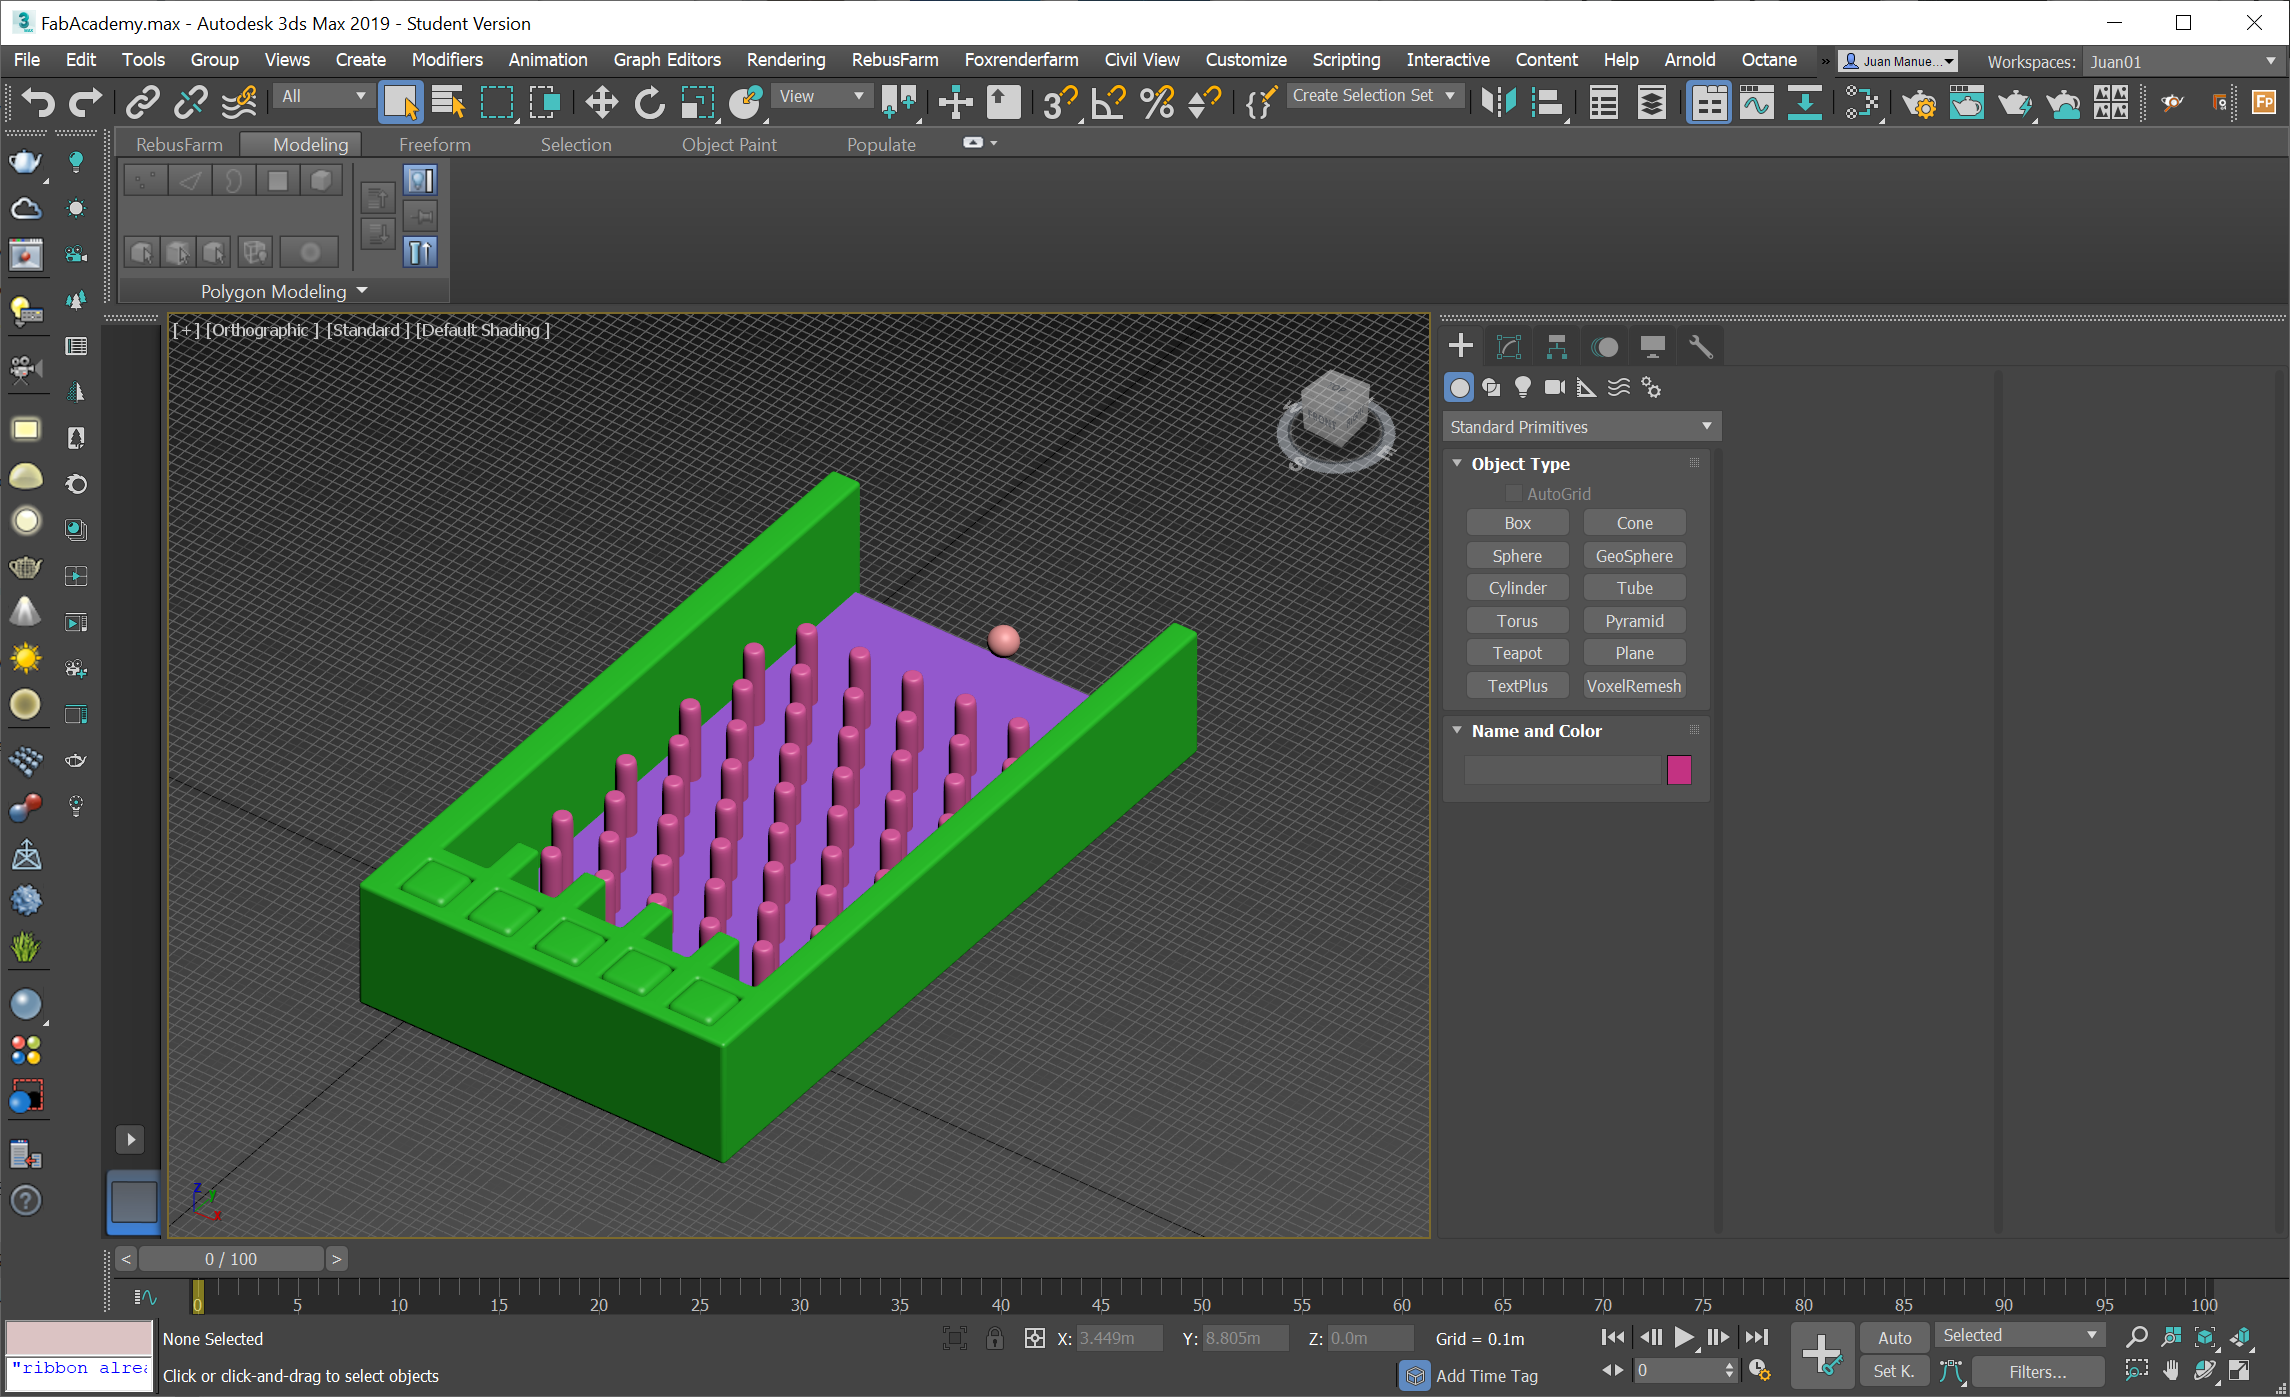
With the pieces already cut, we sand the pieces to polish them and have a better final finish before assembling them.
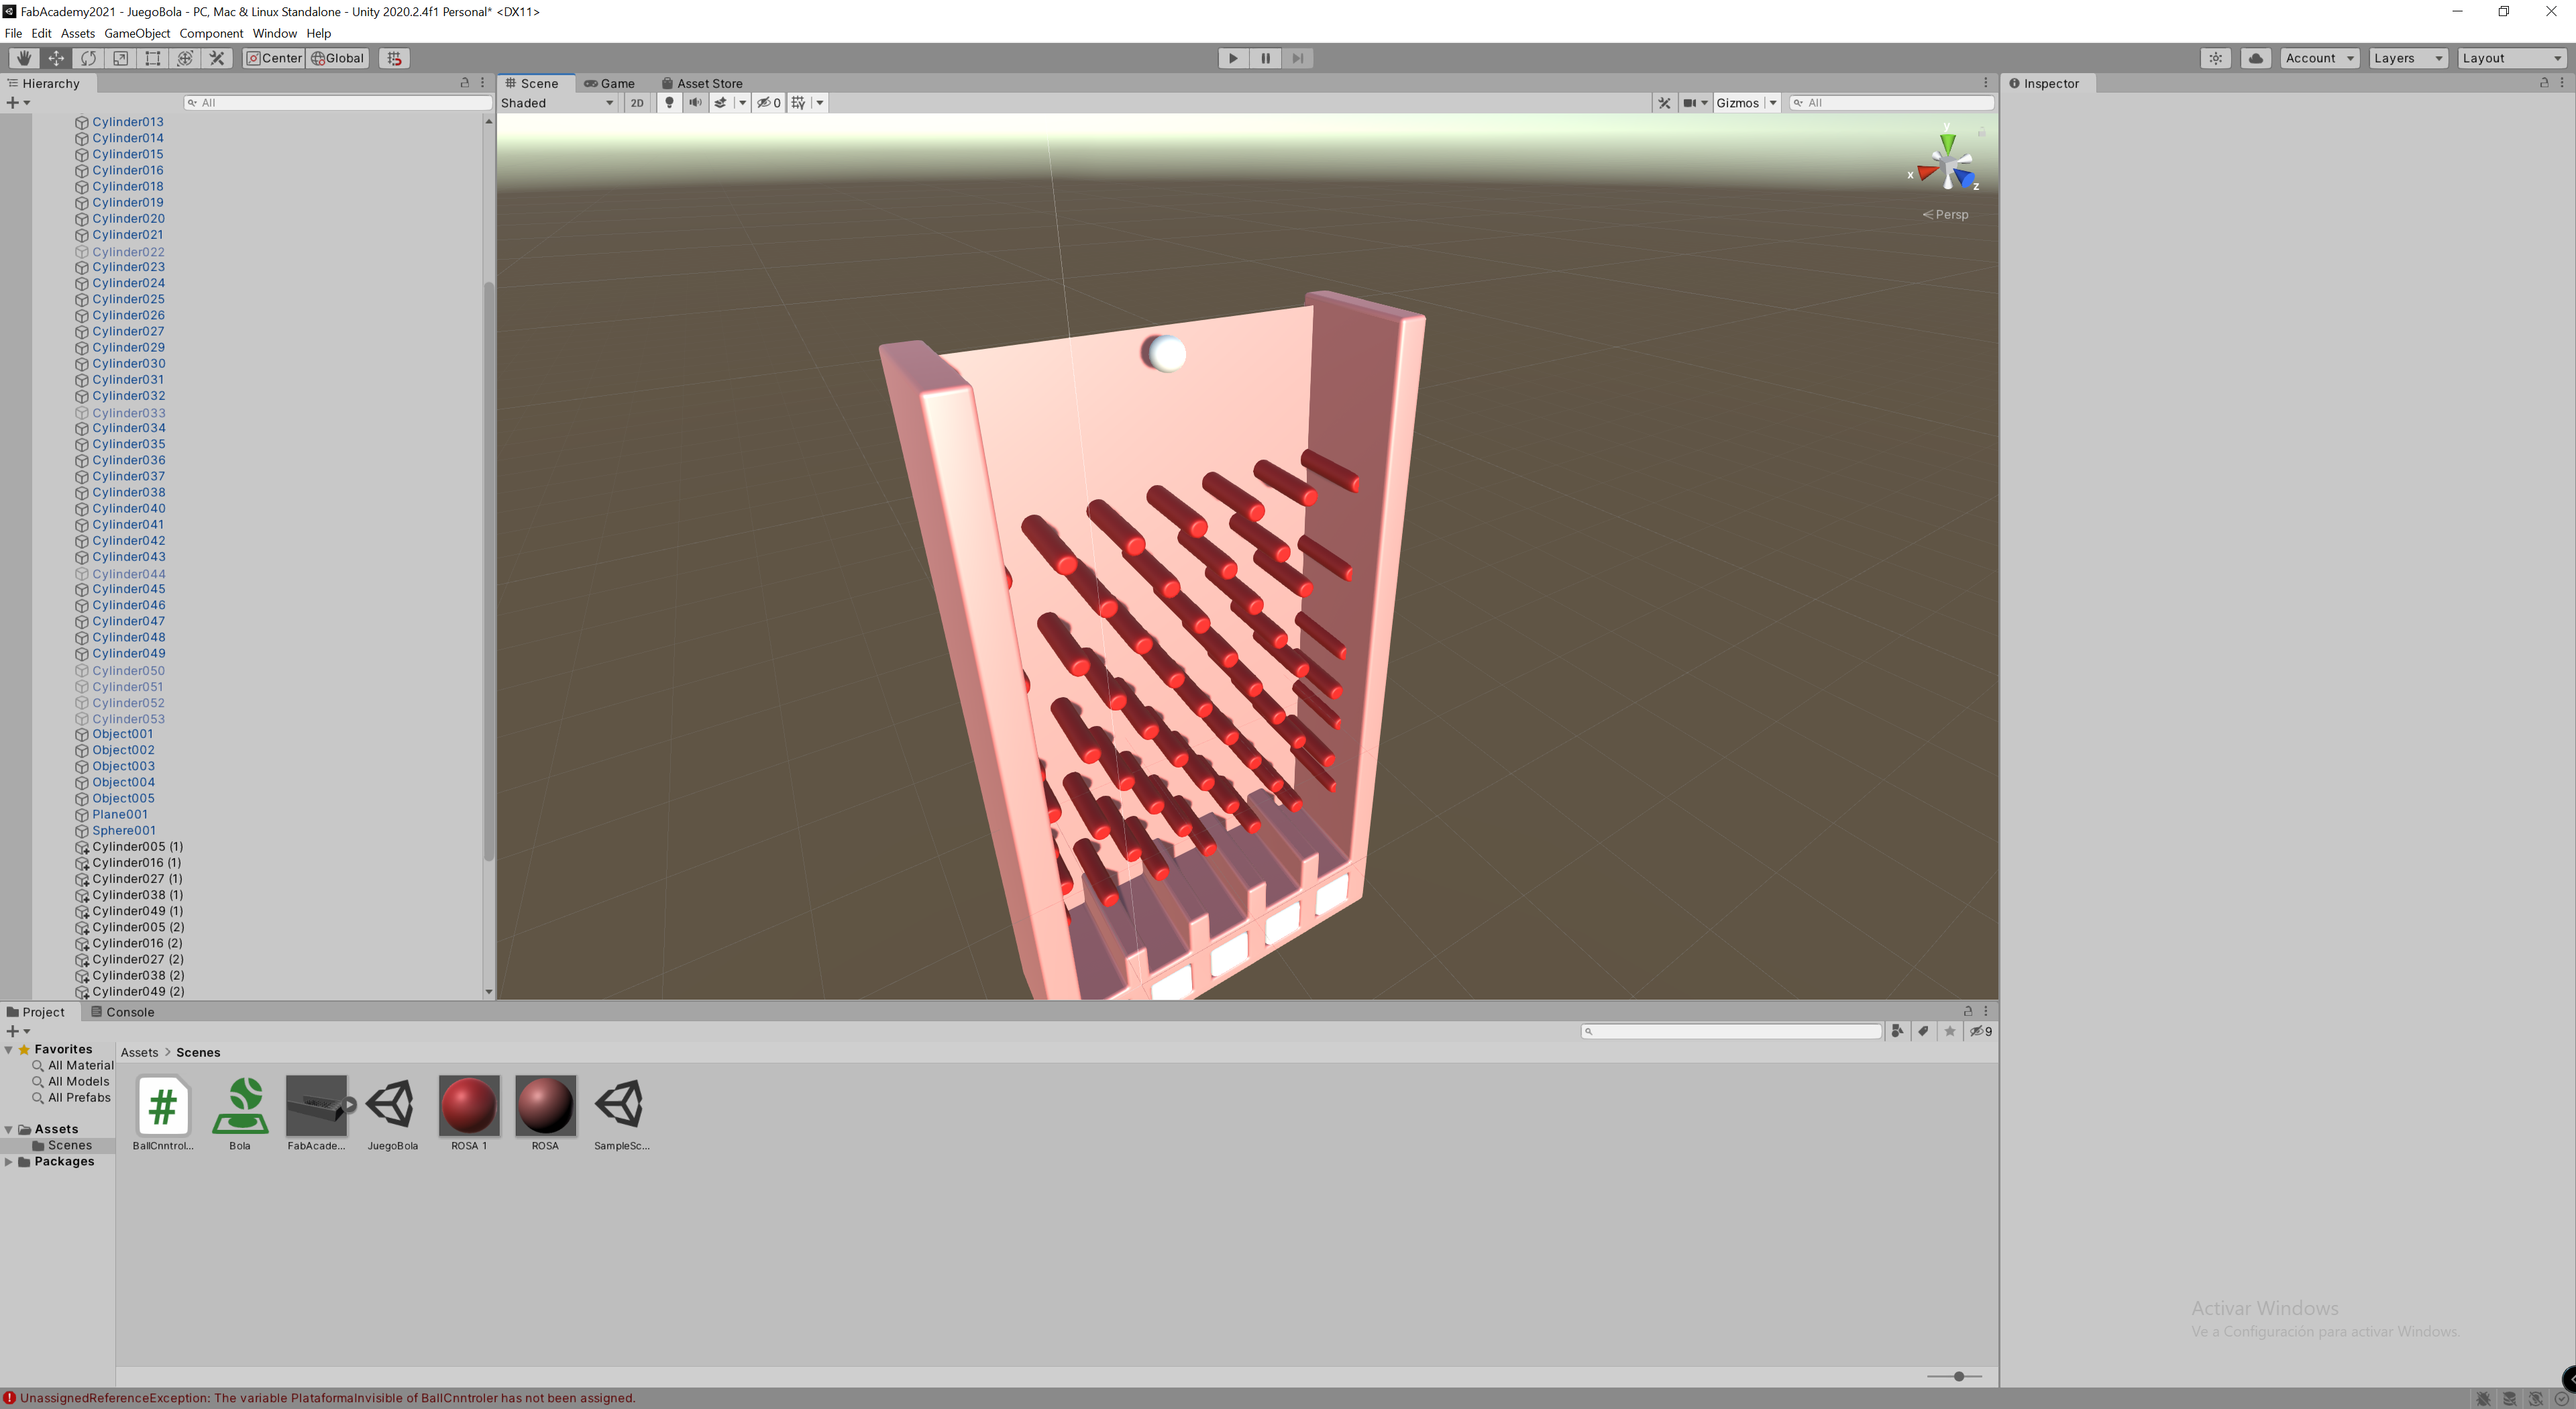
ColliderTrigge
using System.Collections;
using System.Collections.Generic;
using UnityEngine;

public class ColliderTrigger : MonoBehaviour
{

    public PruebaWeb PostPhoton;
    public GameObject cajaRoja;
    public GameObject cajaAzul;
    public GameObject cajaVerde;
    public GameObject cajaRosa;
    public GameObject cajaAmarilla;

    void OnTriggerEnter(Collider collider)
    {
        if (collider.gameObject == cajaAzul)
        {
            PostPhoton.Azul();
            Debug.Log("Azul");
        }

        else if (collider.gameObject == cajaRoja)
        {
            PostPhoton.Rojo();
            Debug.Log("Rojo");
        }

        else if (collider.gameObject == cajaAmarilla)
        {
            PostPhoton.Amarillo();
            Debug.Log("Amarillo");
        }

        else if (collider.gameObject == cajaRosa)
        {
            PostPhoton.Pink();
            Debug.Log("Rosa");
        }

        else if (collider.gameObject == cajaVerde)
        {
            PostPhoton.Verde();
            Debug.Log("Verde");
        }
    }
}
BallCnntroler
using System.Collections;
using System.Collections.Generic;
using UnityEngine;

public class BallCnntroler : MonoBehaviour
{
    public GameObject PlataformaInvisible;

    public void IniciarCaida()
    {
        PlataformaInvisible.SetActive(false);
    }
    void Update()
    {
        {

            if (Input.GetKey(KeyCode.LeftArrow))
            {
                this.transform.Translate(Vector3.left * Time.deltaTime);
            }

            if (Input.GetKey(KeyCode.RightArrow))
            {
                this.transform.Translate(Vector3.right * Time.deltaTime);
            }
        }
    }
}
BotonAmarillo
using System.Collections;
using System.Collections.Generic;
using UnityEngine;

public class BotonAmarillo : MonoBehaviour
{
    public PruebaWeb Photon;

    void OnMouseDown()
    {
        Photon.Amarillo();
    }
}