Assignments
Group Assignment- Measure the power consumption of an output device
- Add an output device to a microcontroller board you've designed, and program it to do something
Week 12

Figure 1. The 4x20 LCD (back and front)
To reduce the amount of wires and connections to the microcontroller, I2C communication method has been used by connecting the I2C LCD module with the pins of the LCD. On the I2C module, you will find a potentiometer that you can turn with a small screwdriver.
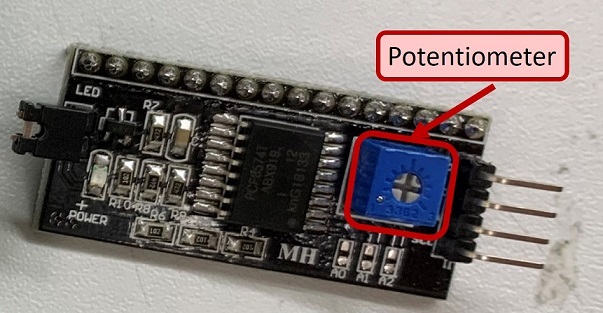
Figure 2. I2C module
An I2C LCD has only 4 pins that interface it to the outside world. The connections are as follows:
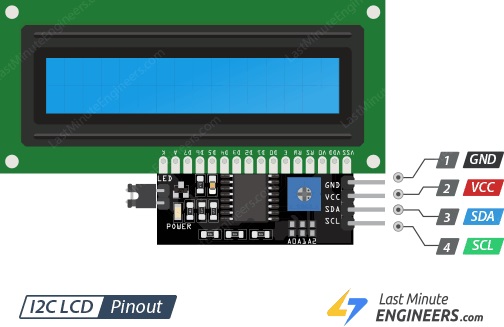
Figure 3. I2C LCD display Pinout
GND is a ground pin and should be connected to the ground of Arduino.VCC supplies power to the module and the LCD. Connect it to the 5V output of the Arduino or a separate power supply.
SDA is a Serial Data pin. This line is used for both transmit and receive. Connect to the SDA pin on the Arduino.
SCL is a Serial Clock pin. This is a timing signal supplied by the Bus Master device. Connect to the SCL pin on the Arduino.
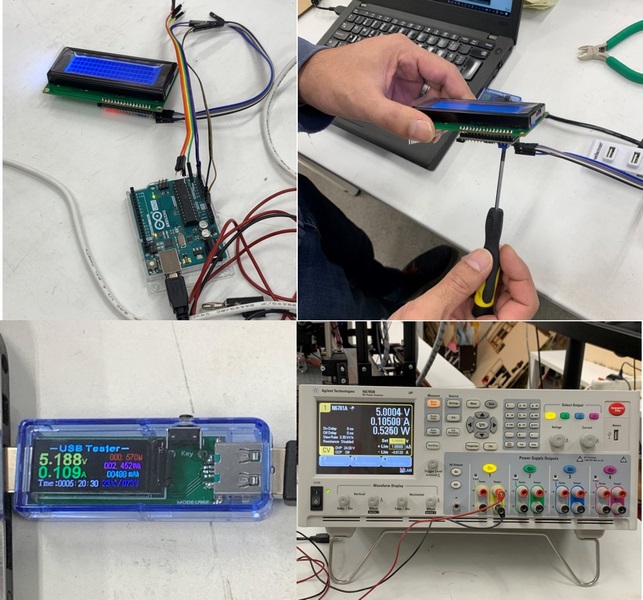
Figure 4. Our group work in summary
Figure 5. Soldered the I2C module to the LCD
Next, I decided to test the LCD with an Arduino Uno board similar to what we did in the group work. For this, I followed this nice tutorial about interface an I2C LCD with Arduino which explains the steps and the concepts behind very well.
Then, I plugged in the USB connector of the Arduino to power the LCD and the backlight light turned on. The steps of connections are presented in Figure 6.
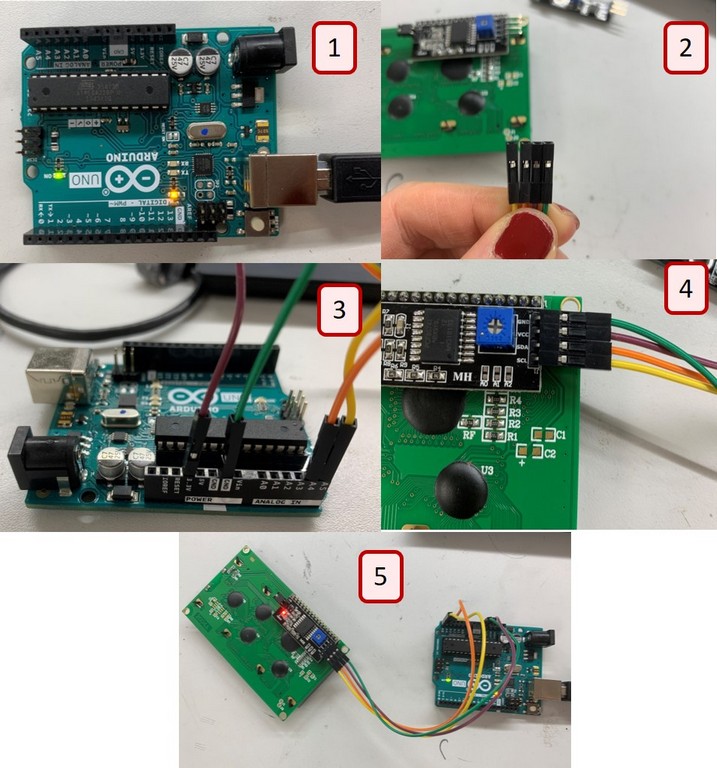
Figure 6. Connection steps for LCD and Arduino Uno board
Now, rotate the potentiometer until the first line of the rectangle appears.
Figure 7. Adjusting the contrast with the potentiometer
After that, I needed to install a new library called LiquidCrystal_I2C for programming. To install the library go to Sketch > Include Library > Manage Libraries… and wait for Library Manager to download libraries index and update list of installed libraries.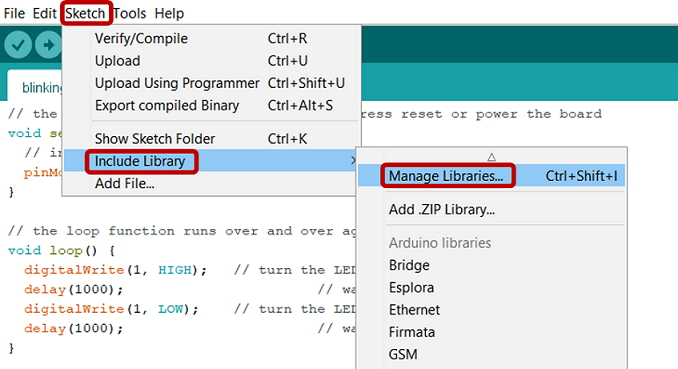
Figure 8. Adding I2C library in Arduino
Filter your search by typing ‘liquidcrystal’. There should be a couple entries. Look for LiquidCrystal I2C library by Frank de Brabander. Click on that entry, and then select Install.
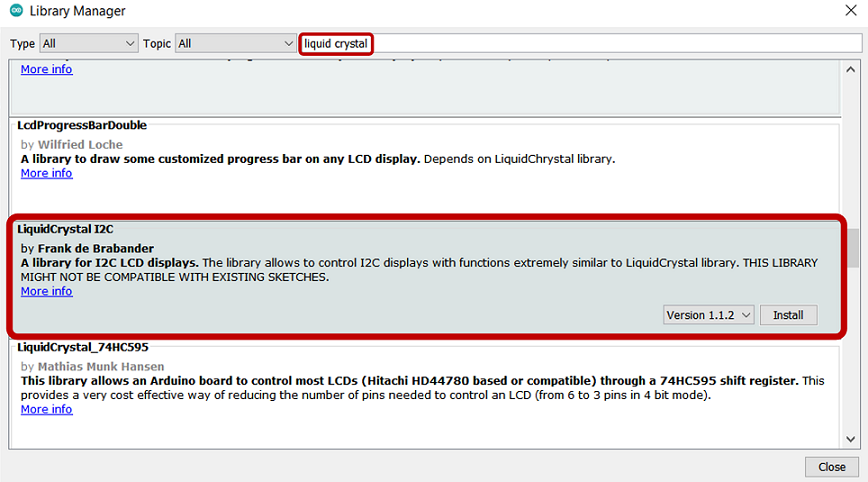
Figure 9. I2C library installation in Arduino
The I2C address of your LCD depends on the manufacturer, as mentioned earlier. If your LCD has a PCF8574 chip from Texas Instruments, its default I2C address is 0x27Hex. If your LCD has a PCF8574 chip from NXP semiconductors, its default I2C address is 0x3FHex. So your LCD probably has an I2C address 0x27Hex or 0x3FHex. It is recommended that you find out the actual I2C of the LCD before using. Luckily there is a simple way to do this, thanks to Nick Gammon‘s great work. He has written a simple I2C scanner sketch that scans your I2C bus and gives you back the address of each I2C device it finds.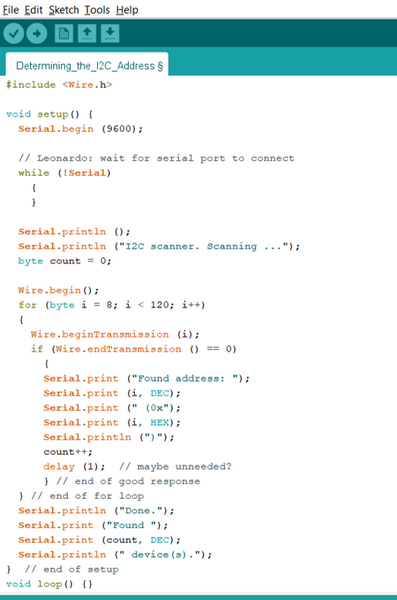
Figure 10. I2C scanner sketch to determine the I2C Address
I loaded this sketch into my Arduino then, I openned Serial Monitor . You’ll see the I2C address of your I2C LCD display which was 0x27Hex.
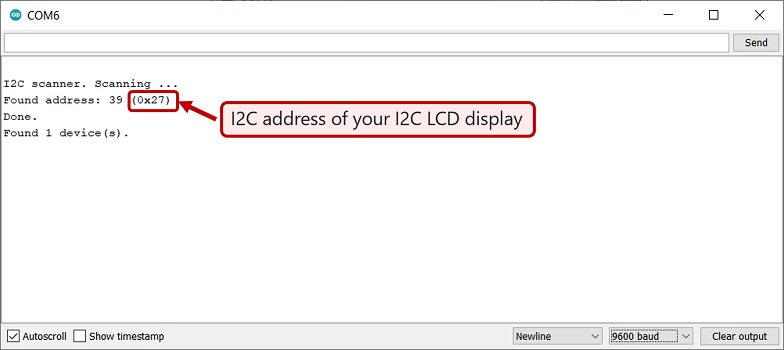
Figure 11. Finding the I2C address of your I2C LCD display from Serial Monitor
Remember to check the Baud rate as 9600 as it is defined in the code.
Before uploading the test skecth, I needed to modify it according the LCD and I2C module that I used. I changed the the I2C address of my LCD to 0x27 and also, modifed the dimensions of the display (columns and rows the display) to 20 & 4 since I was using 20×4 character LCD.

Figure 12. Entering the I2C address and the dimensions of the LCD
Next, I tried this skecth out which will print ‘Hello World!’ on the first line of the LCD, ‘LCD testing on the second line, ‘Output Devices!’ on the third line and ‘It's Mona!’ on the last line :
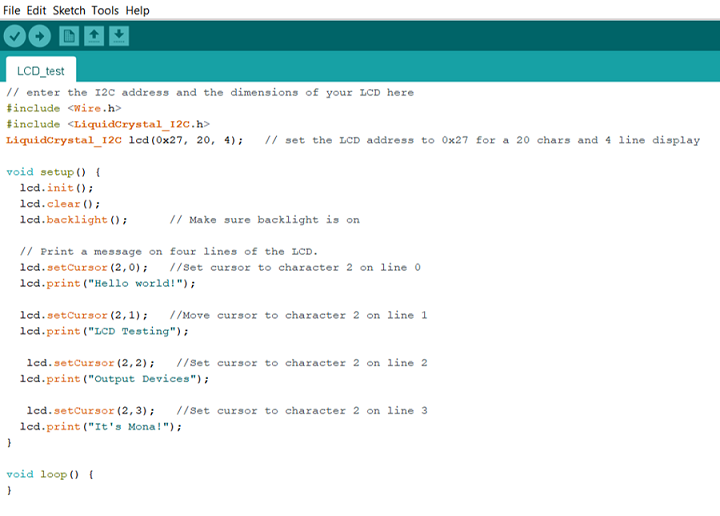
Figure 13. Basic Arduino sketch for the LCD
But after compling this sketch, I faced an error in Arduino which after dicussing the issue with this week instructor, Juha-Pekka, I found that it was because low quality of the soldering i2c to the LCD. So, I had to resolder it to solve the issue.
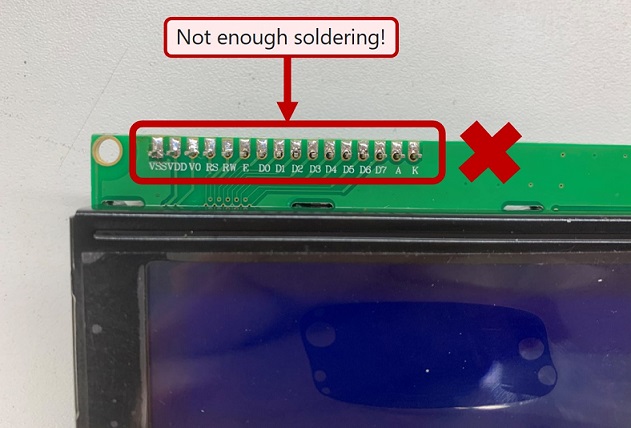
Figure 14. Entering the I2C address and the dimensions of the LCD
Then, I uploaded the sketch again and this time, it worked!
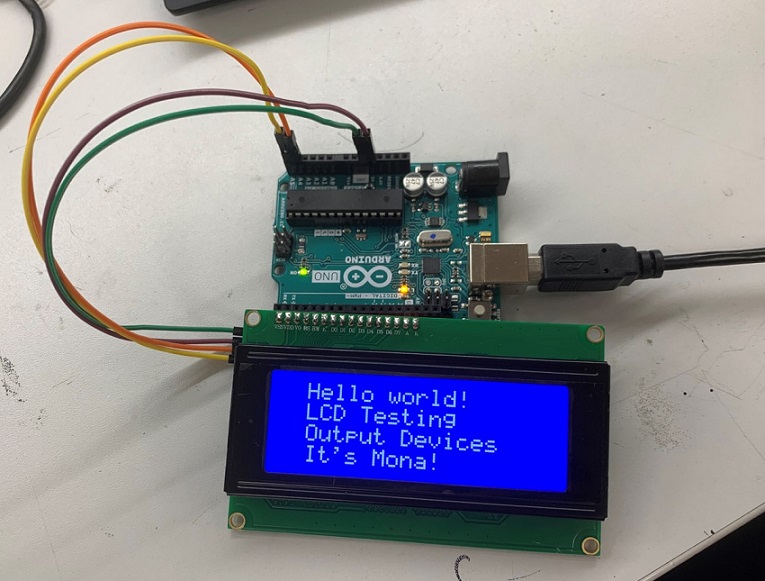
Figure 15. Testing LCD with I2C module and Arduino Uno board
For this week, I used the board I made during Input Devices week to connect to LCD module with I2C. For circuit connection, I checked ATtiny1614 pinout to learn about the right pins to connect to SDA and SCL in I2C.
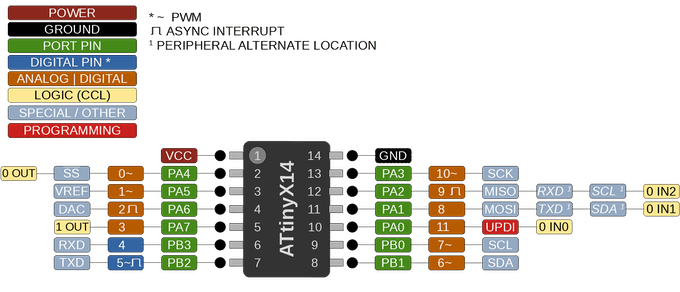
Figure 16. ATtiny1614 pinout [[ref.]
According to pinout, SDA goes to pin 8 which is pin 6 of the board jumper and SCL goes to pin 9 (pin 4)
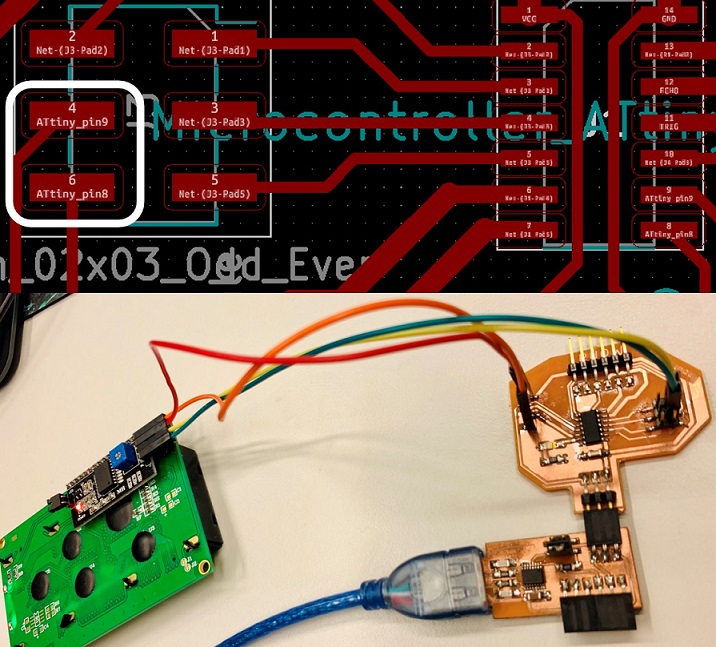
Then, I changed the board and port in Arduino and used the same code for this board.
This week, I learned how to transform electrical energy into another type of energy which for my test was light. I used my own board to function an LCD with I2C module.