5. 3D Scanning and printing
Behnaz Norouzi, Fab Academy 2018 alumni, gave us the local lecture about 3D scanning and printing. And Mikko Toivonen, Fab Academy 2018 alumni, gave us much support for daily 3D printing/scanning works and taught us how to build a 3D model in different tools.
1. Group assignment
Group assignment is linked here for the study of 3D printed samples.
Learning of this group work is that printing result is varied by the printer differences. Formlab makes much precise dimensions with details but long printing time and small size limitation. Also need to remove barrs. Stratasys is the industrial grade machine, with high perfomance and bigger size, but not so details as formlab.
1. Fablab Oulu 3D printers
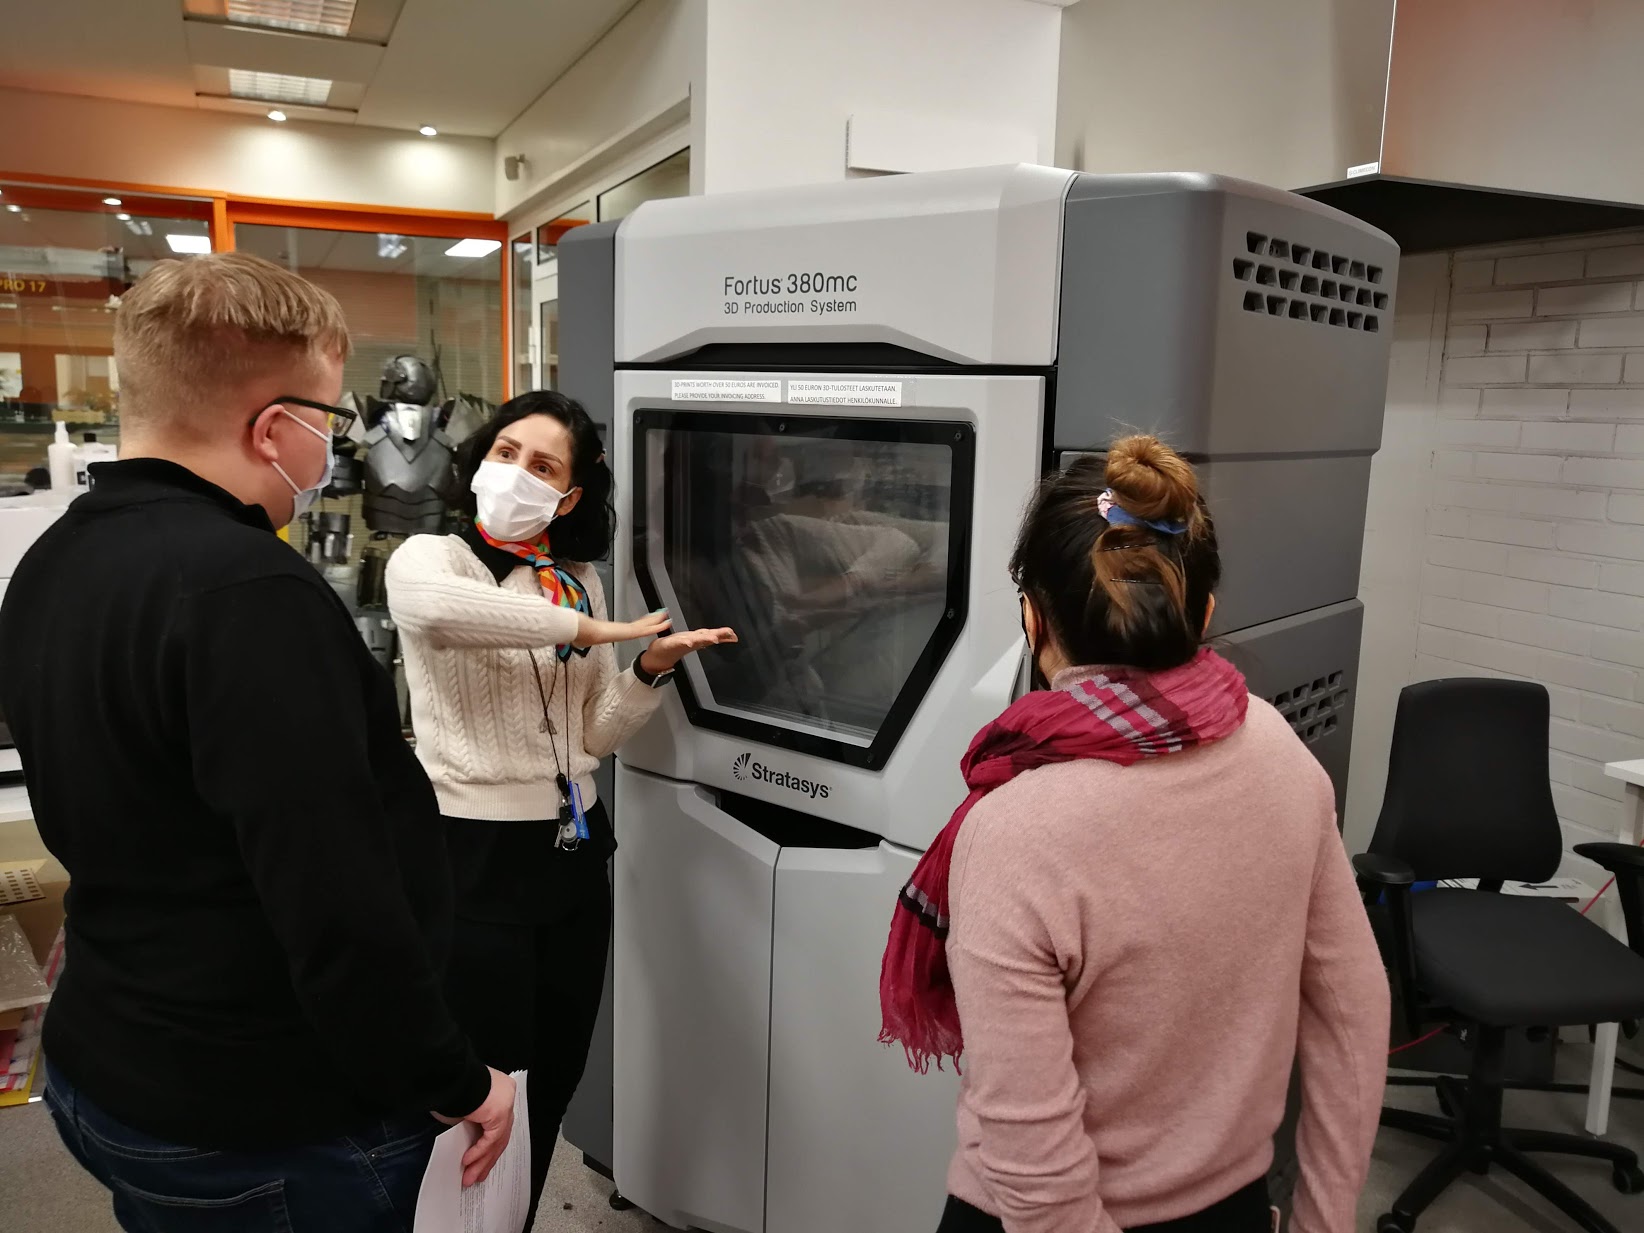
Stratasys Fortus 380mc: The technology used the Fused Deposition Modeling (FDM), additive manufacturing process printing from bottom to top, layer-by-layer.
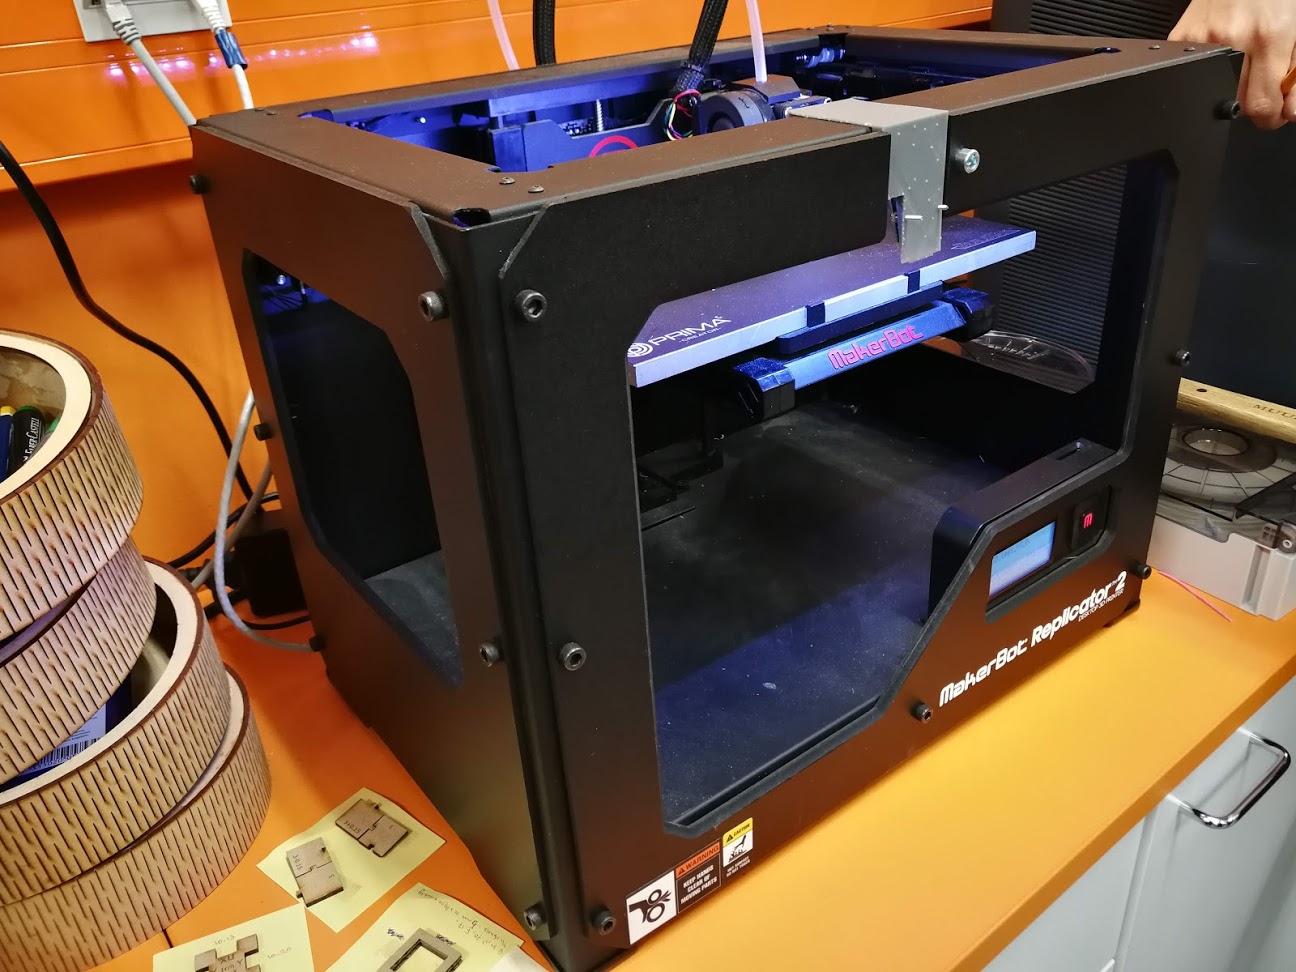
MakerBot Replicator 2: MakerBot Replicator 2 is a form of 3D printing technology with 100 microns resolution. MakerBot Replicator 2 is optimized only for PLA filament.
FormLabs Form 3: Formlabs is based on Stereolithography which manufacturing process by a laser beam builds up a model layer by layer from liquid polymer that hardens on contact with the laser light.

2. Fablab Oulu 3D scanners
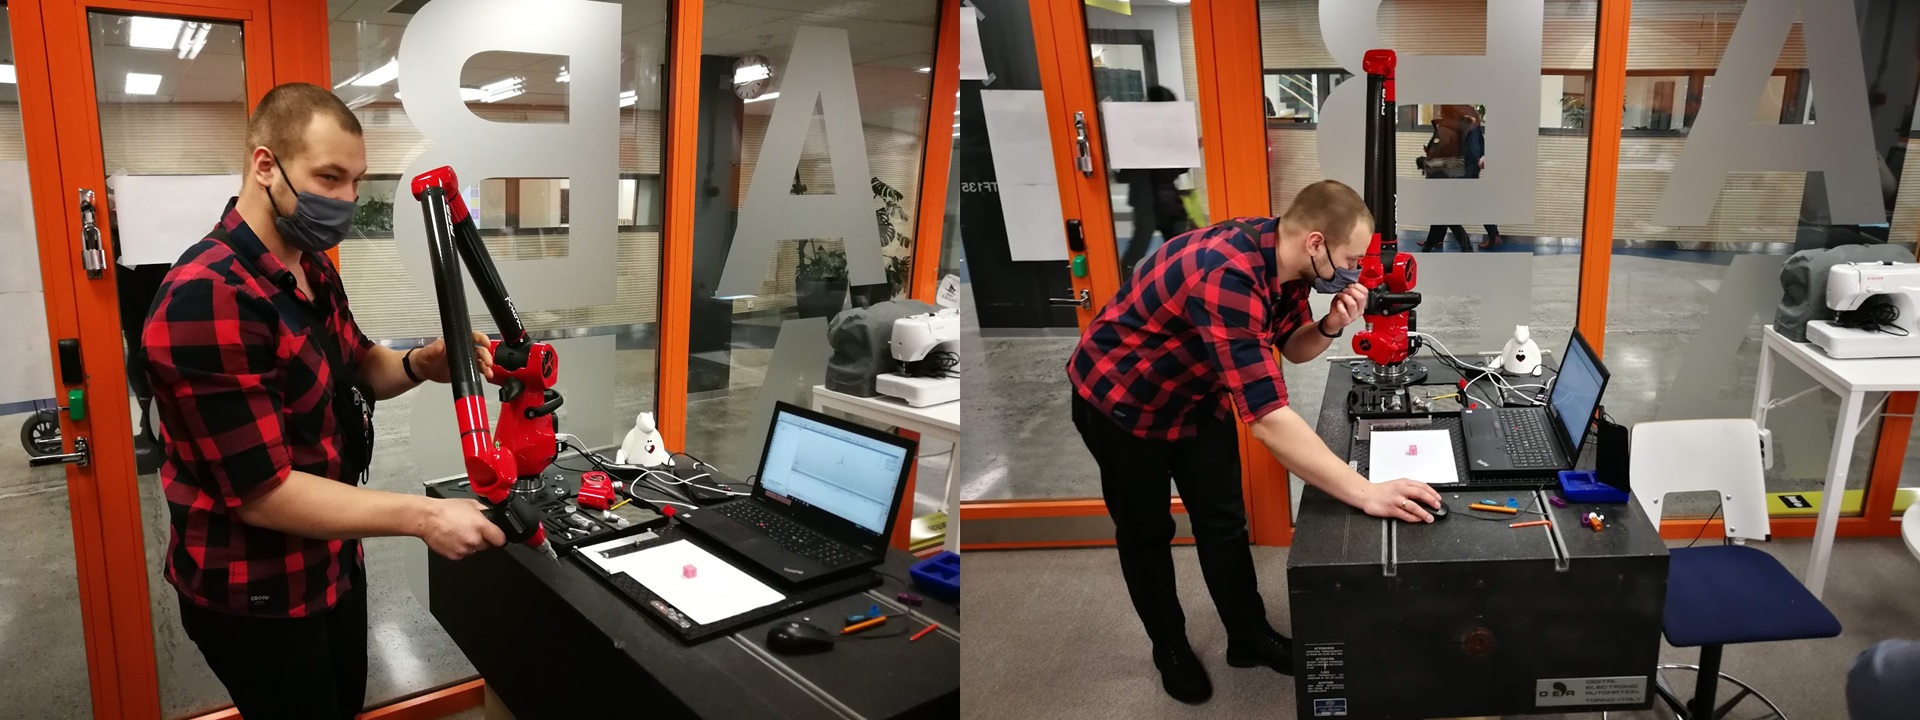
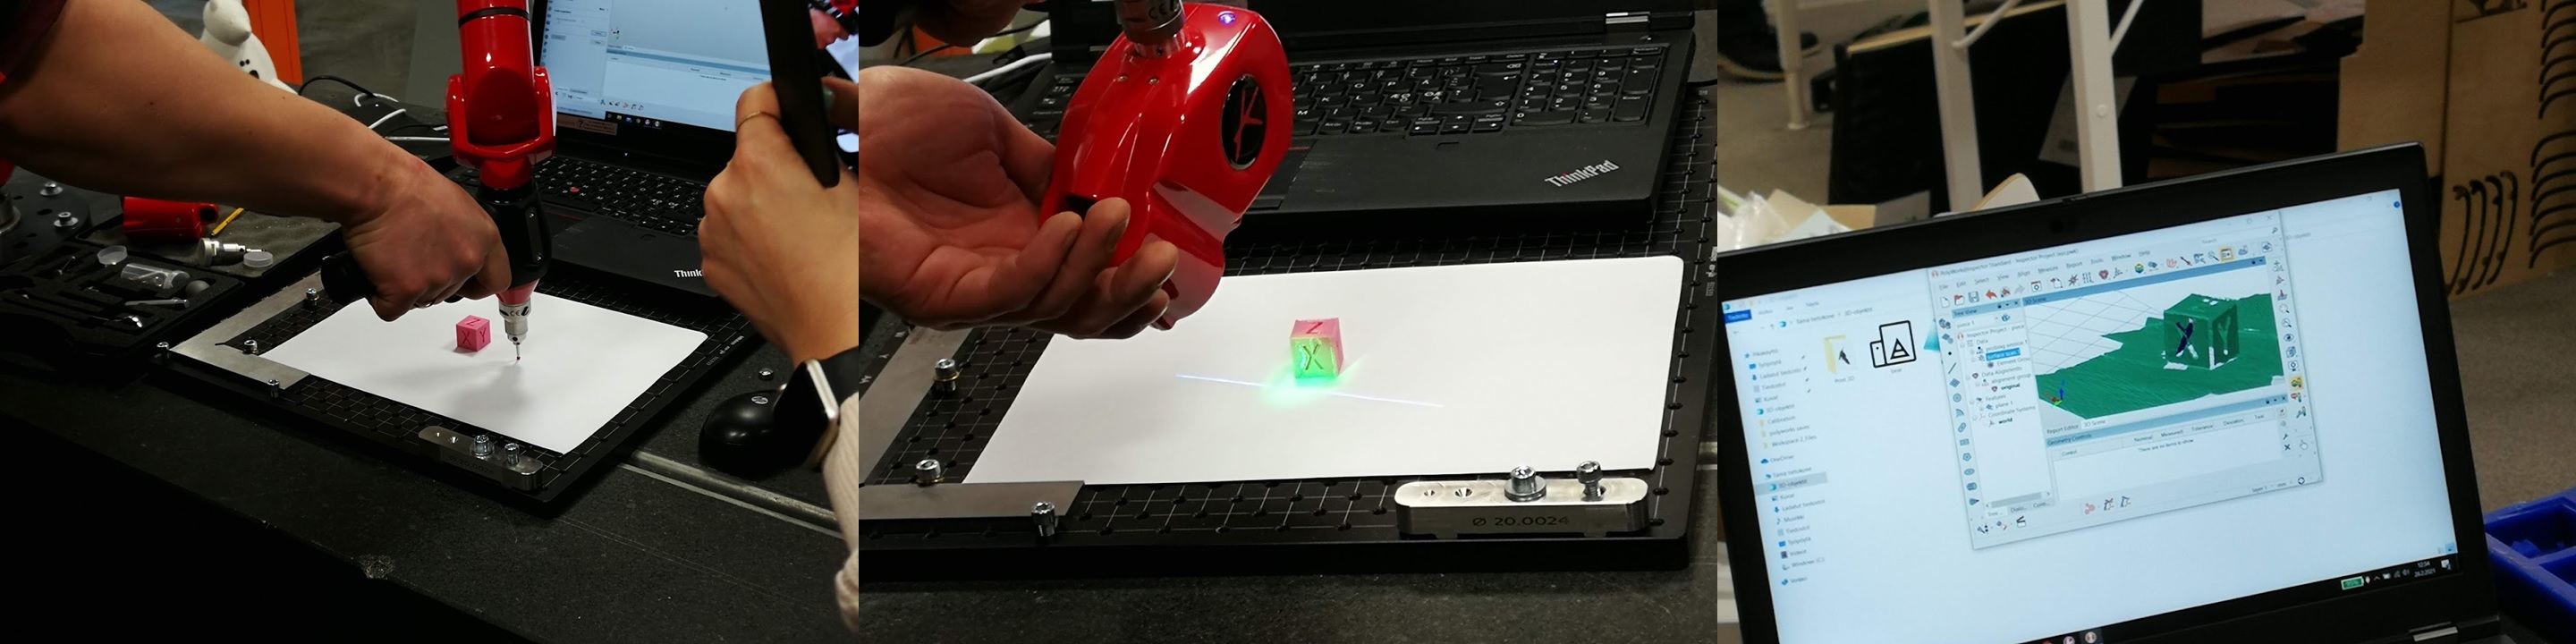
Fablab Oulu instructors showed many methods to scan the 3D objects from handy solution, home PC type of solution and industry precise solution.
Kreon Ace with Solano Blue scanning head
2. Individual assignment
1. 3D print exercise
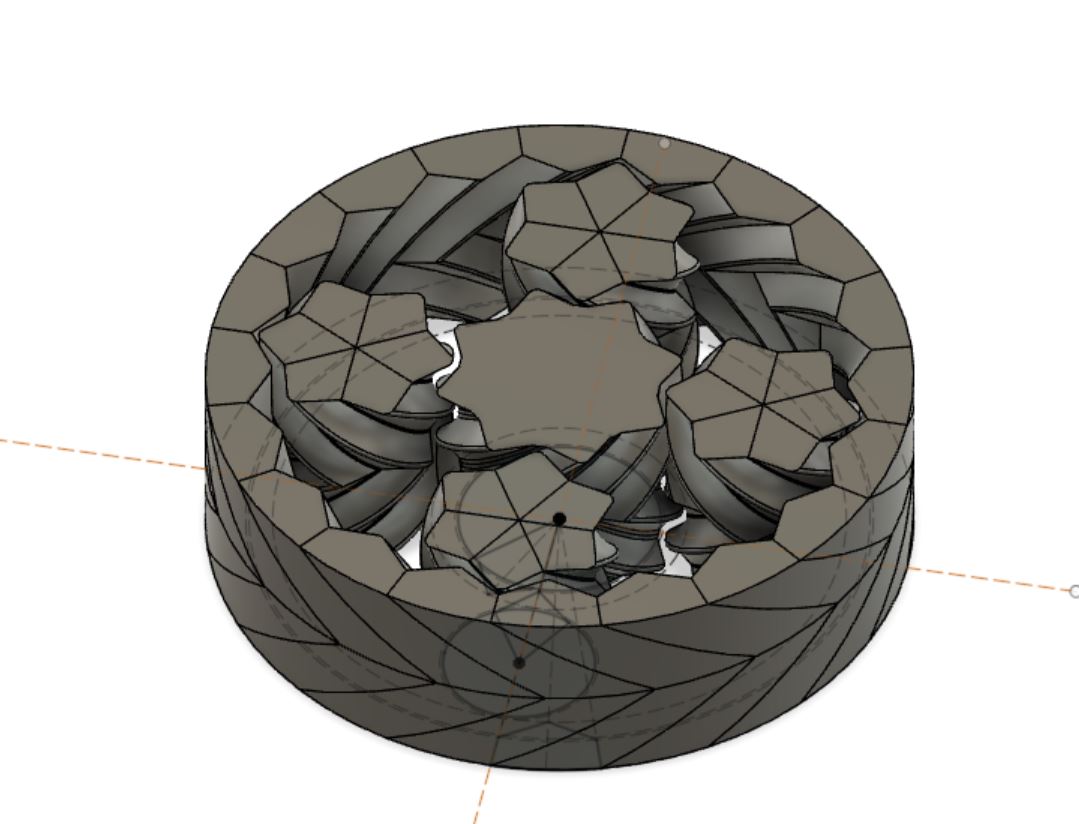
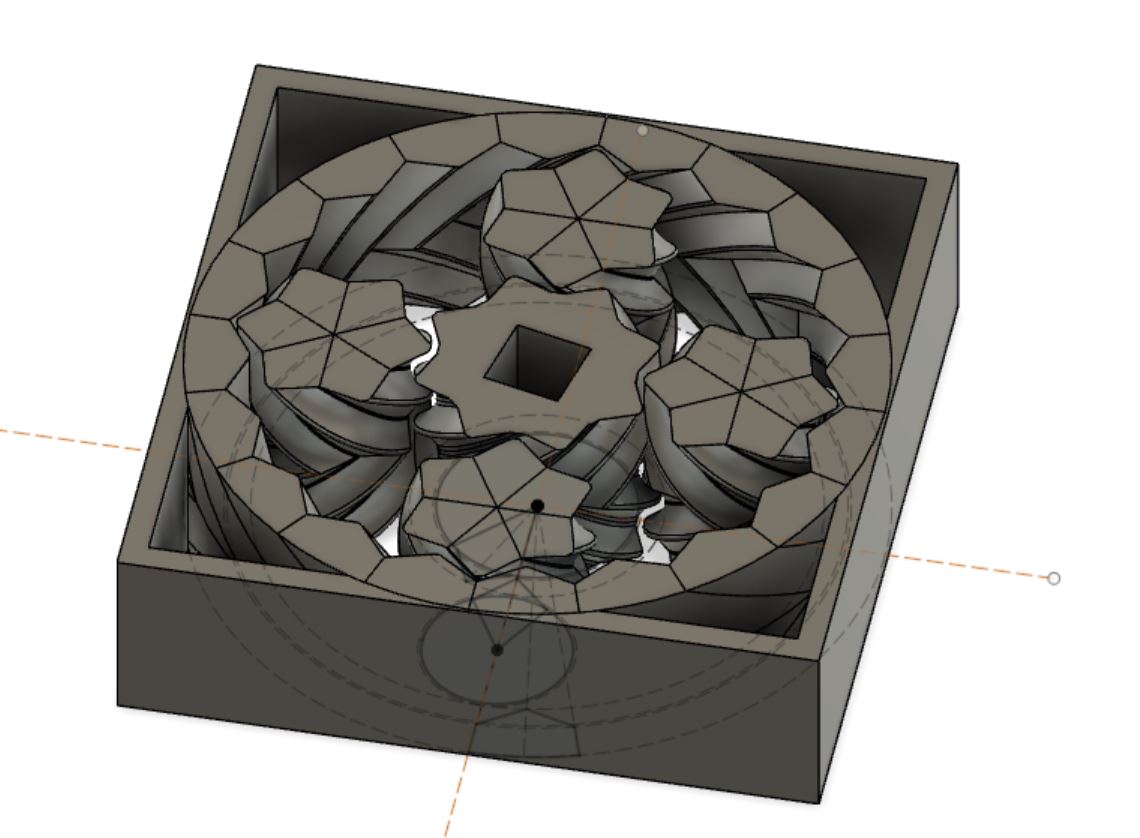
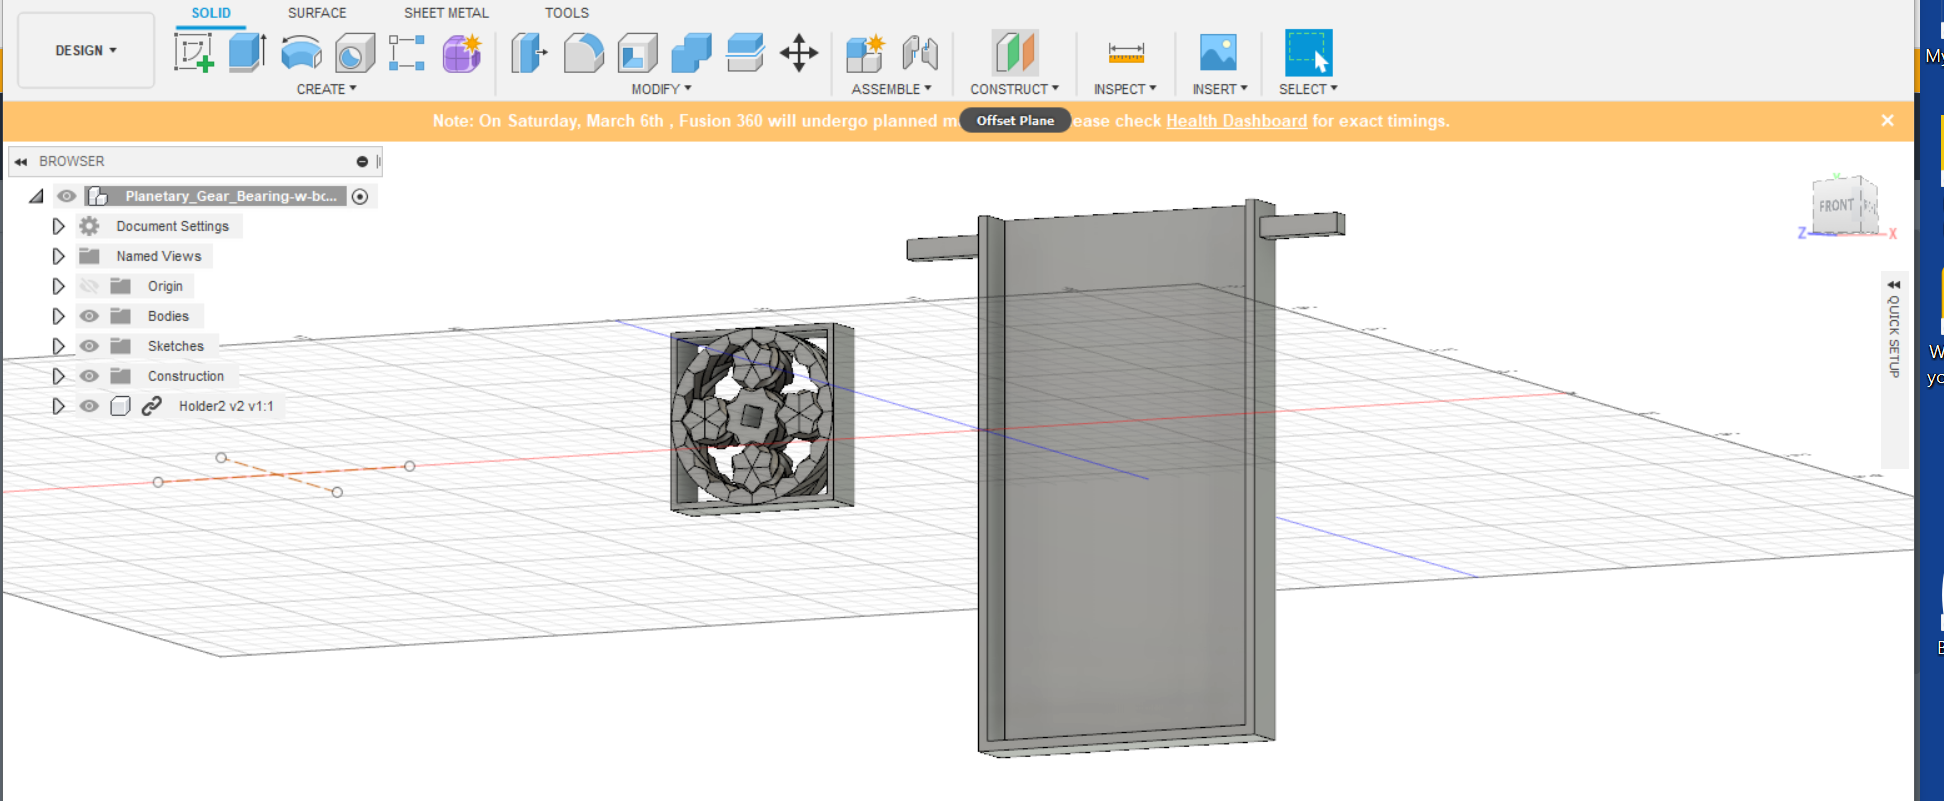
For 3D print exercise, I tried to make a bearing and mobile phone holder for final project trial. The idea of original final project was mobile phone rotation by servo motor. The mobile phone can be moved by pitch direction, it needs mobile phone holder and hold the axis bearing as 3D printer usage exercise.
The bearing model reference is from thingiverse. Then I added a hole for axis and holder structure for rigid mechanics. The rectangle hole was made by sketch on the center gear, then excluded for reverse way to remove the structure. and rectangle box enclosure is made from sketch and exclude.
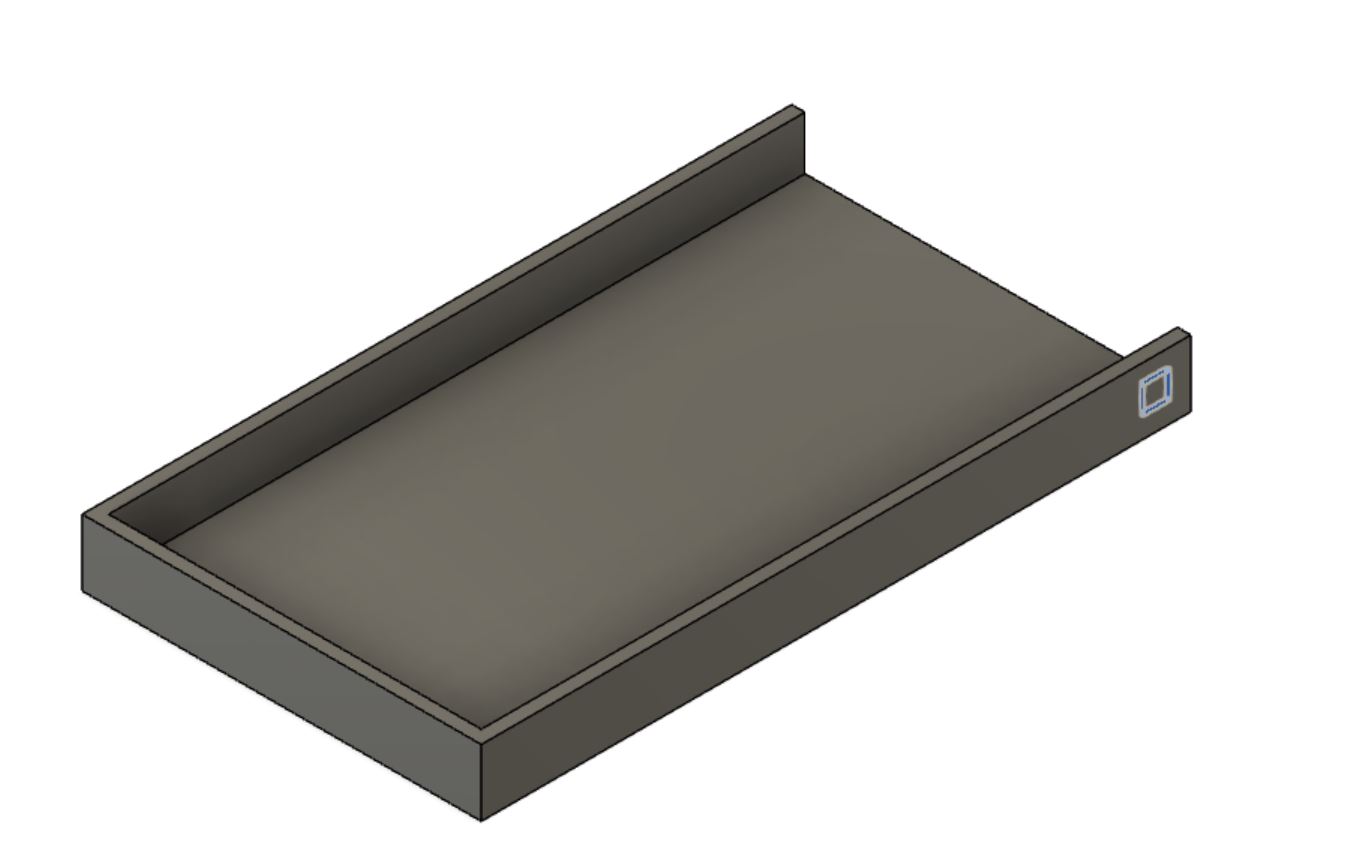
The holder is also same way, sketch -> exclude, make a box. Then sketch on the box side for axis bar, then exclude.
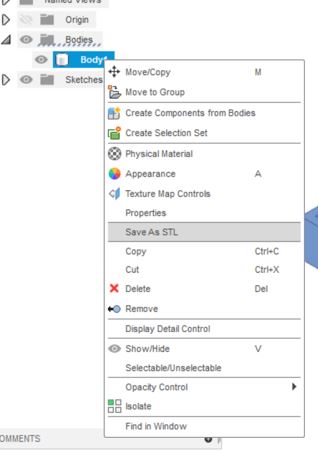
For 3D printing, it is needed to convert STL file. In Fusion 360, select Bodies -> Body -> Save as STL can export the model as STL.
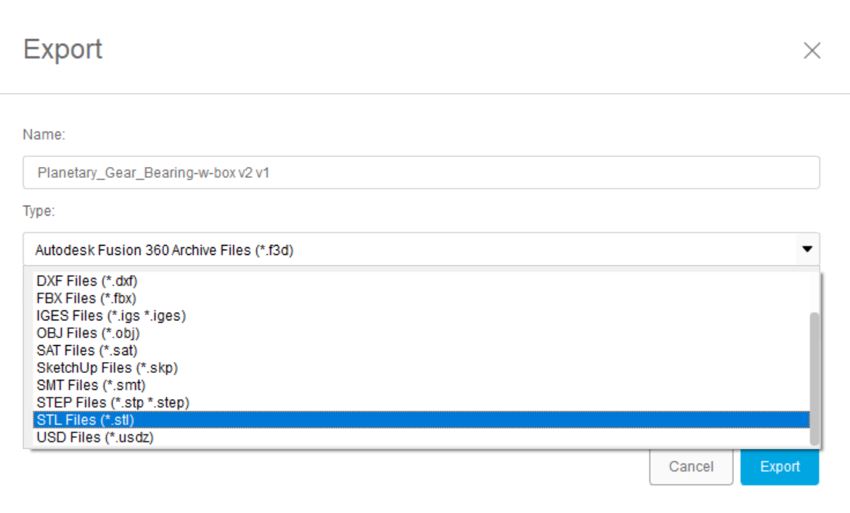
And the case of bearing which has multiple bodies in design, it should make STL file by File -> Export then choose the STL format. This produces the STL 3D file which has physical relation with multiple bodies.
Here is the print result.
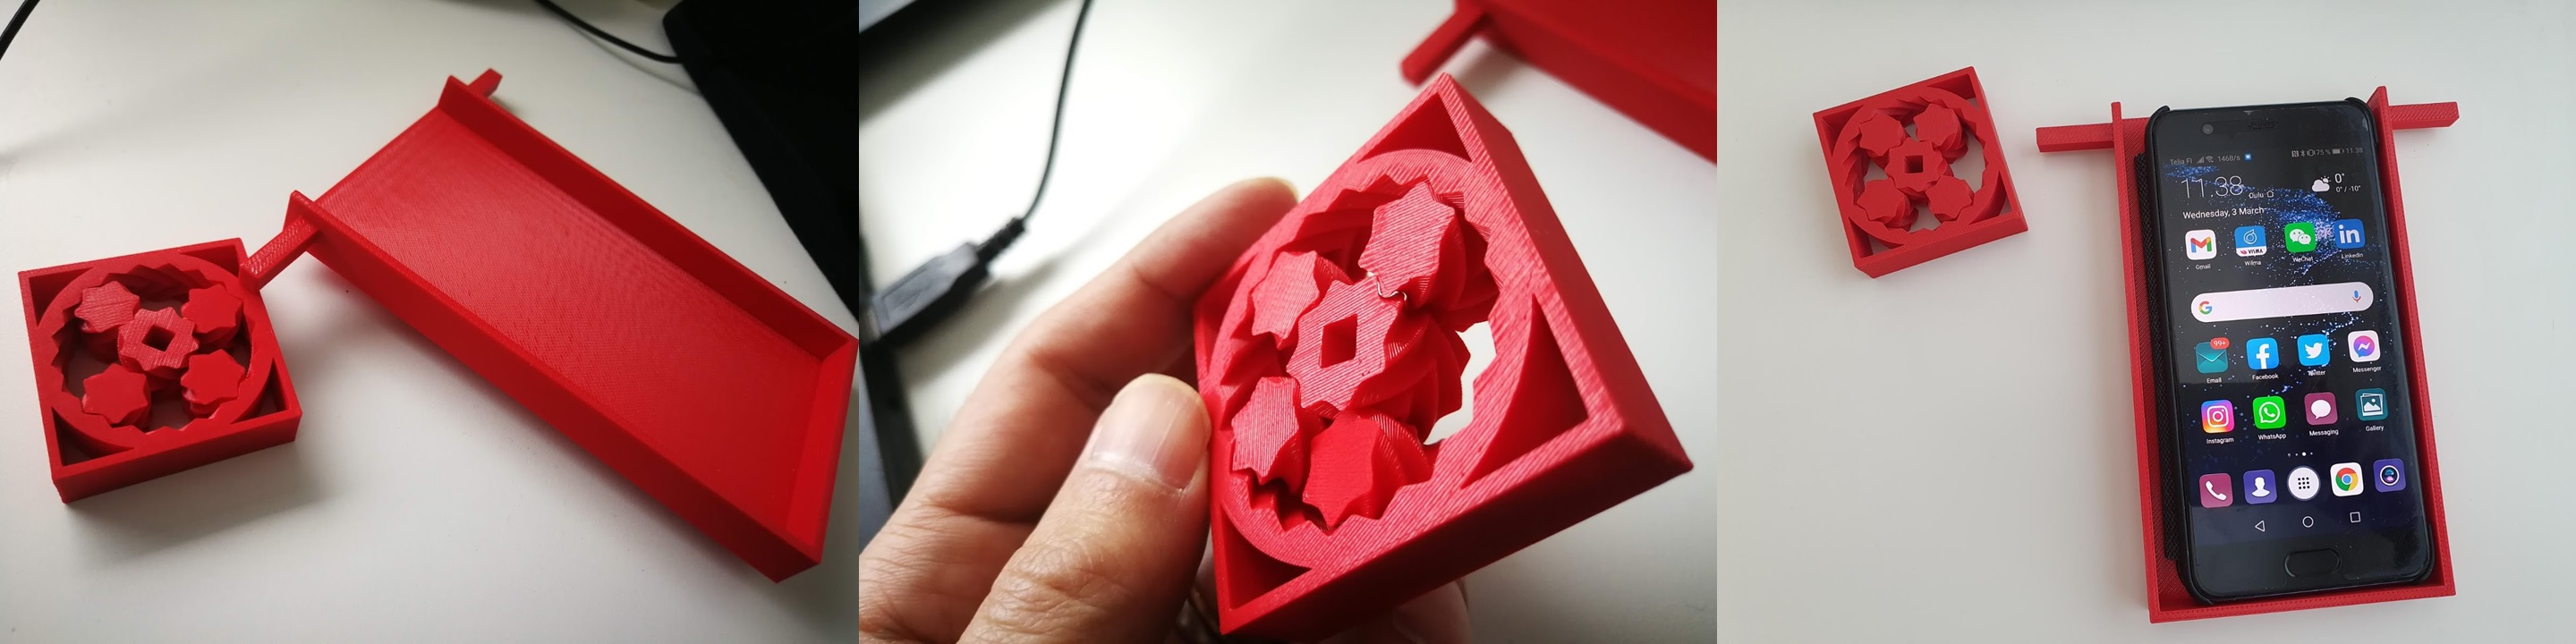
Bearing was made good shape, and smooth rotating as a bearing. However, a big problem was connection between bearing and phone holder axis… cannot connect because connection margine was not set for printing. I just printed as exact size for each connection interface part. And 3D printer Stratasys due to material and printing system, it produce a bit bigger than design as seen as group work. In case contacting to something, should make some margine by offset the faces, such 0.3mm - 0.5mm offset required.
2. GrabCAD / Stratasys Fortus 360mc
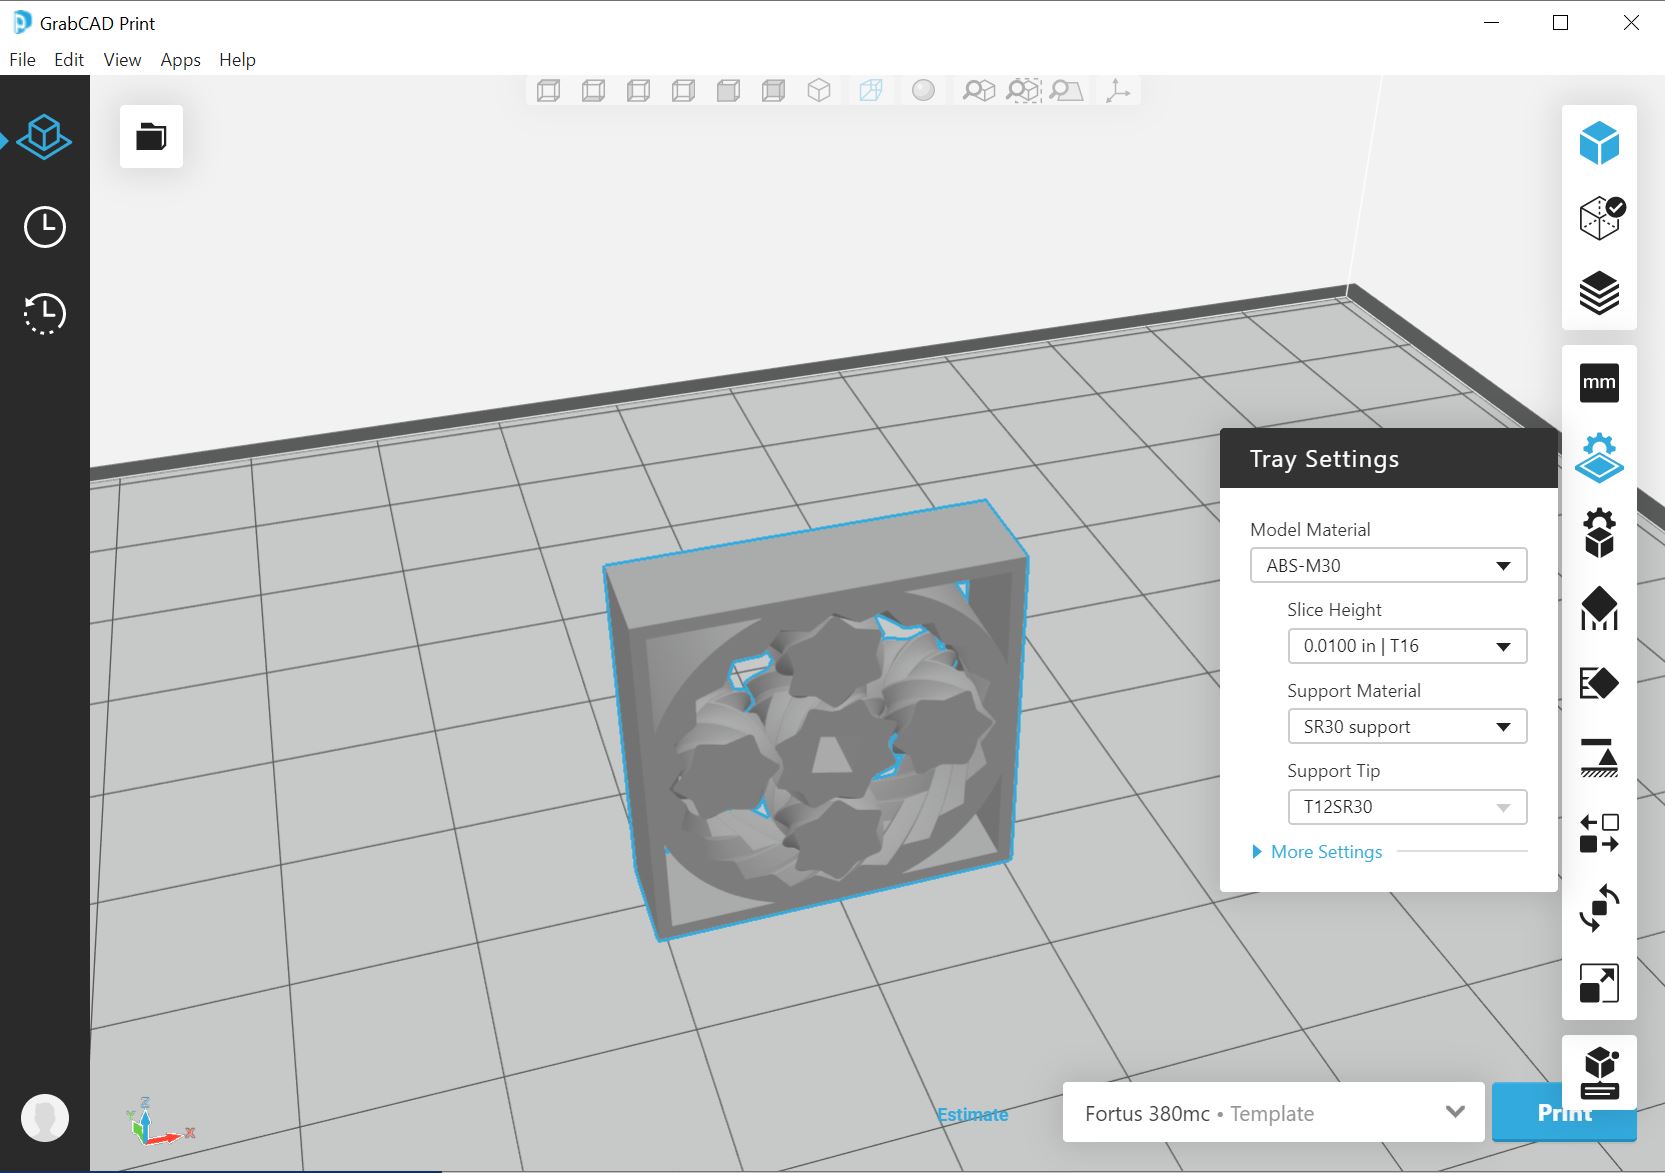
3D print by Stratasys is used by GrabCAD application for slicing the 3D model and printer settings.
First opened the file of 3D model, STL file.
And chose the 3D print materials.
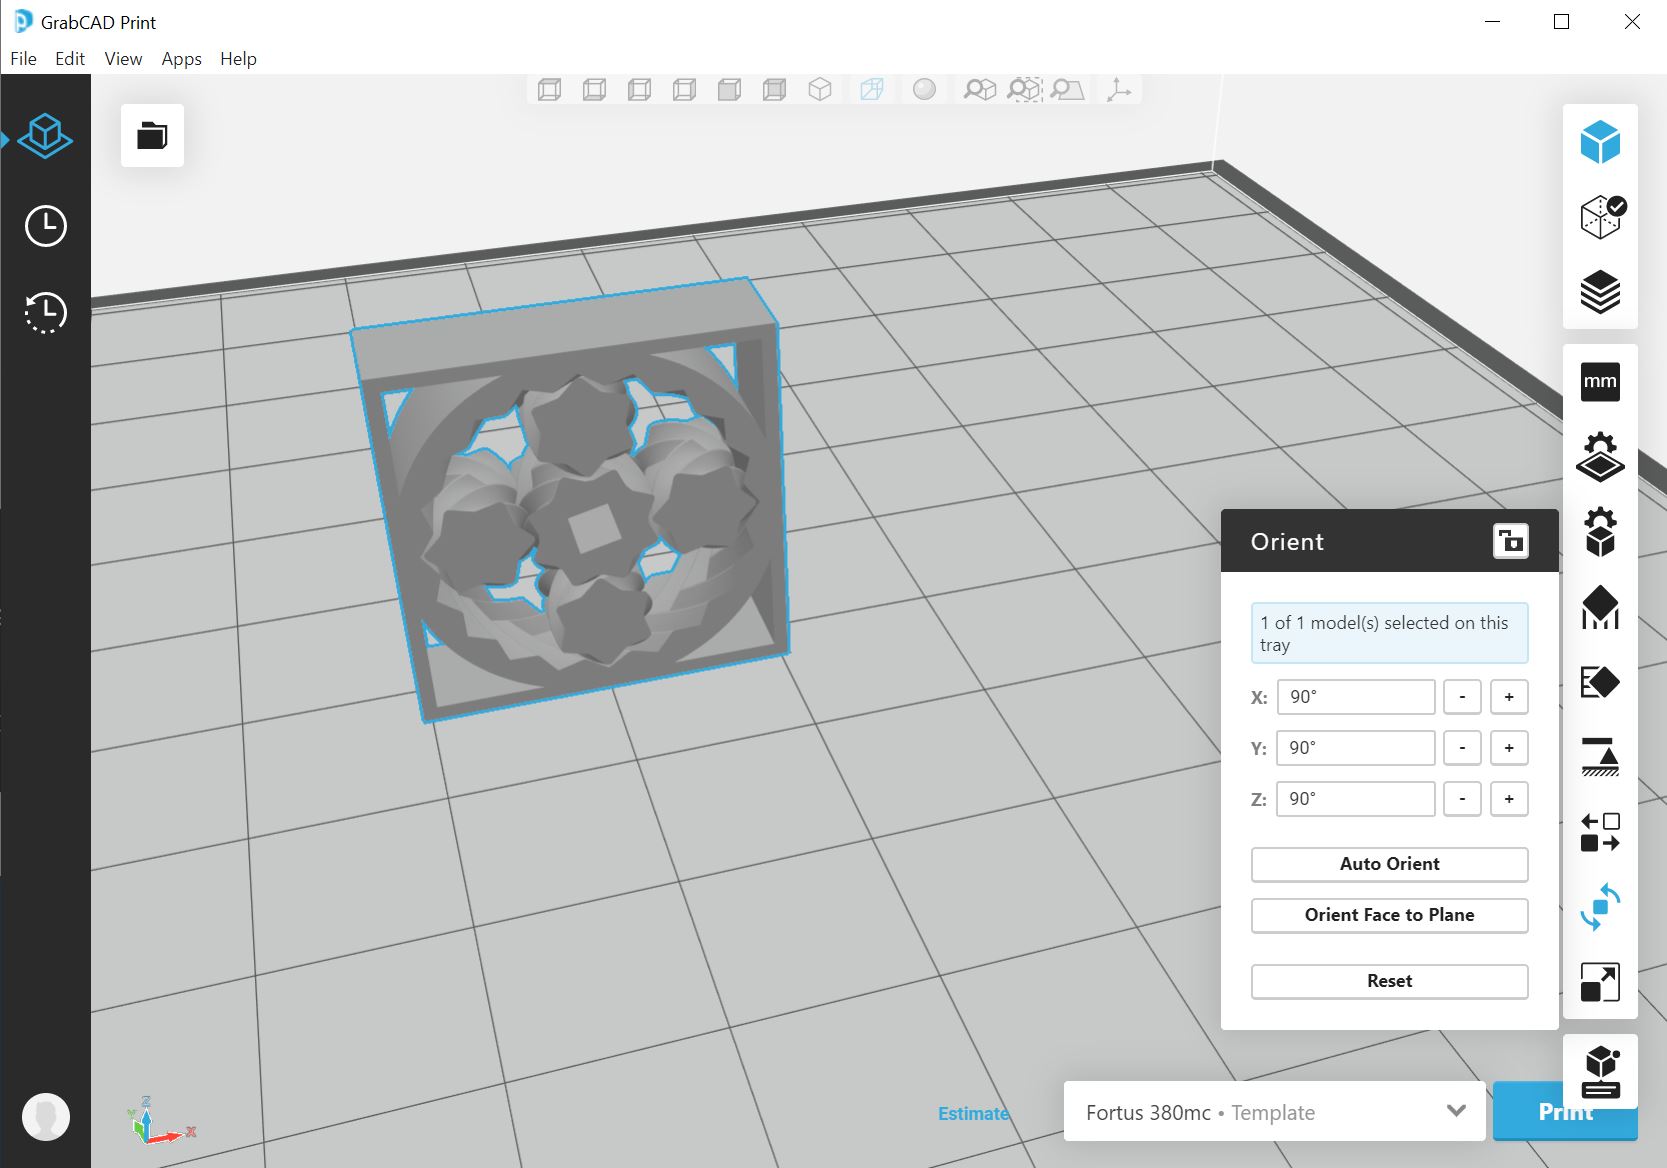
Chanced the orientation, this time put 90 degree in X axis to put the object flatly into the basement.
Chose how to set the support material printing. Set SMART is okay as default set.
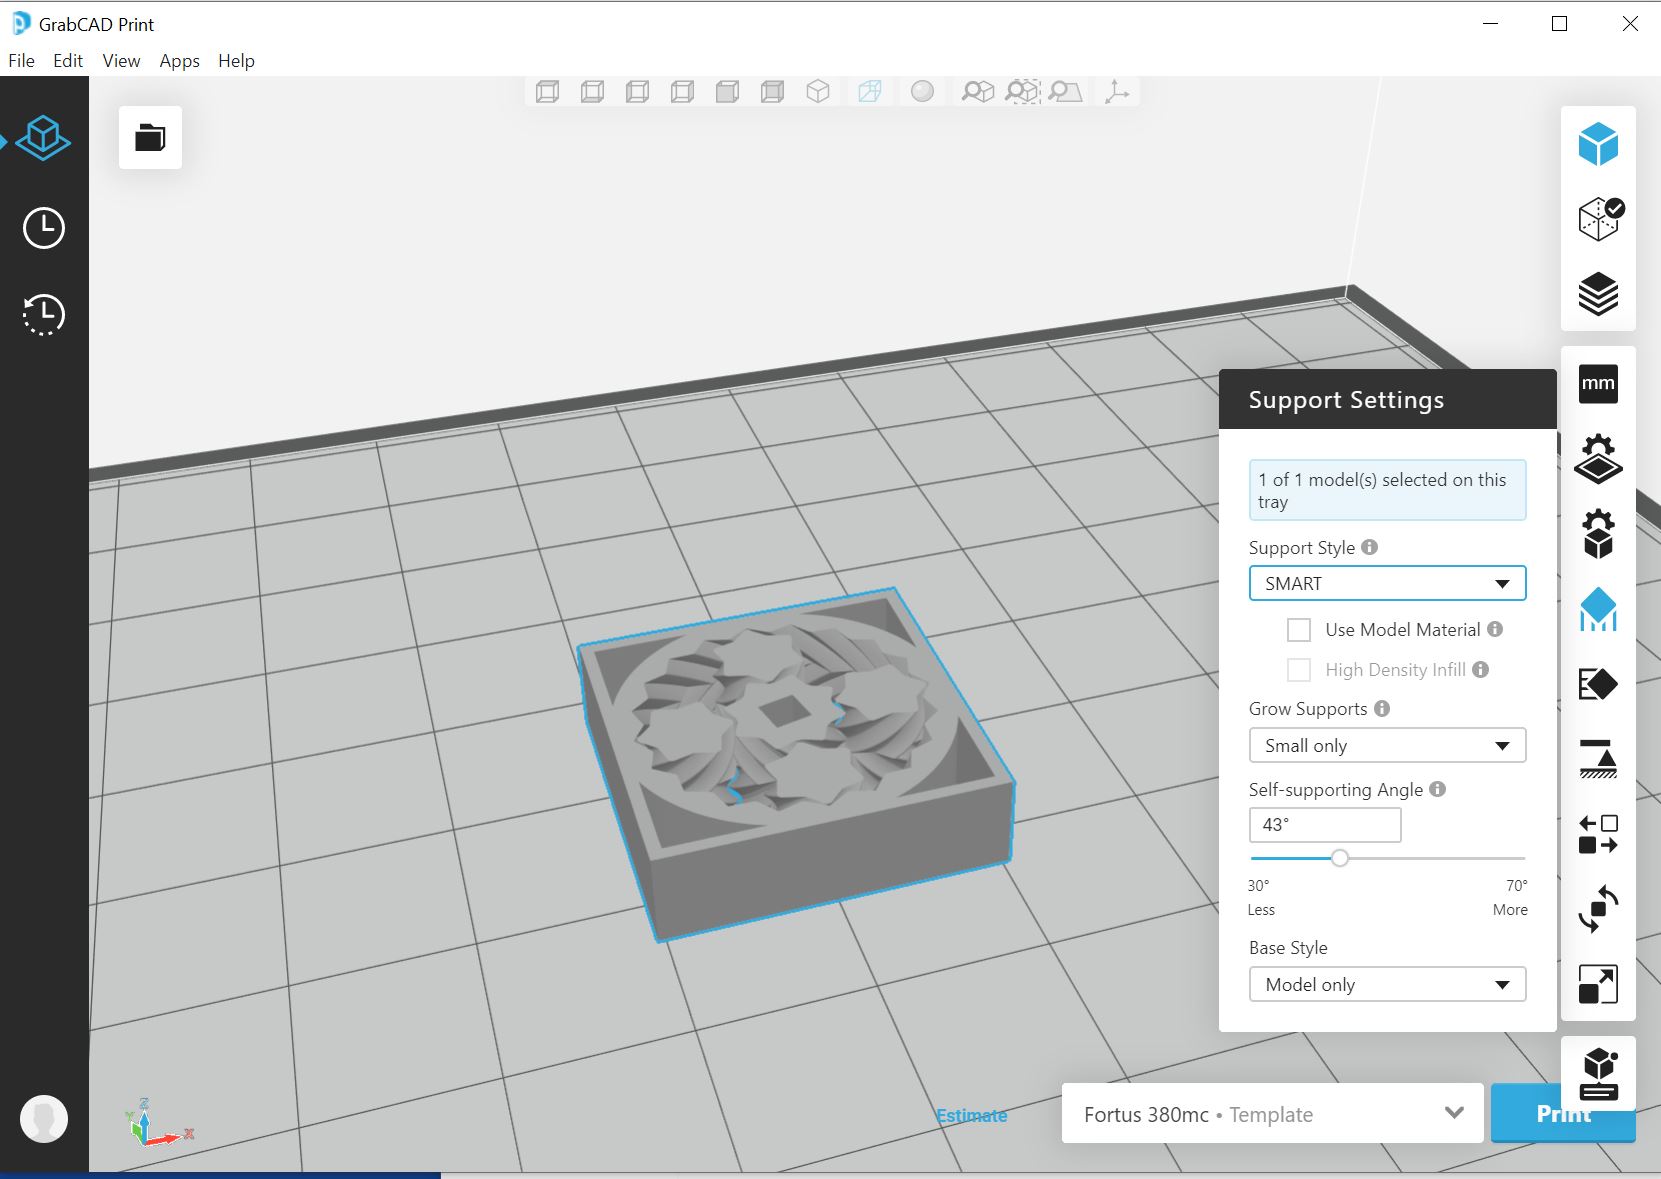
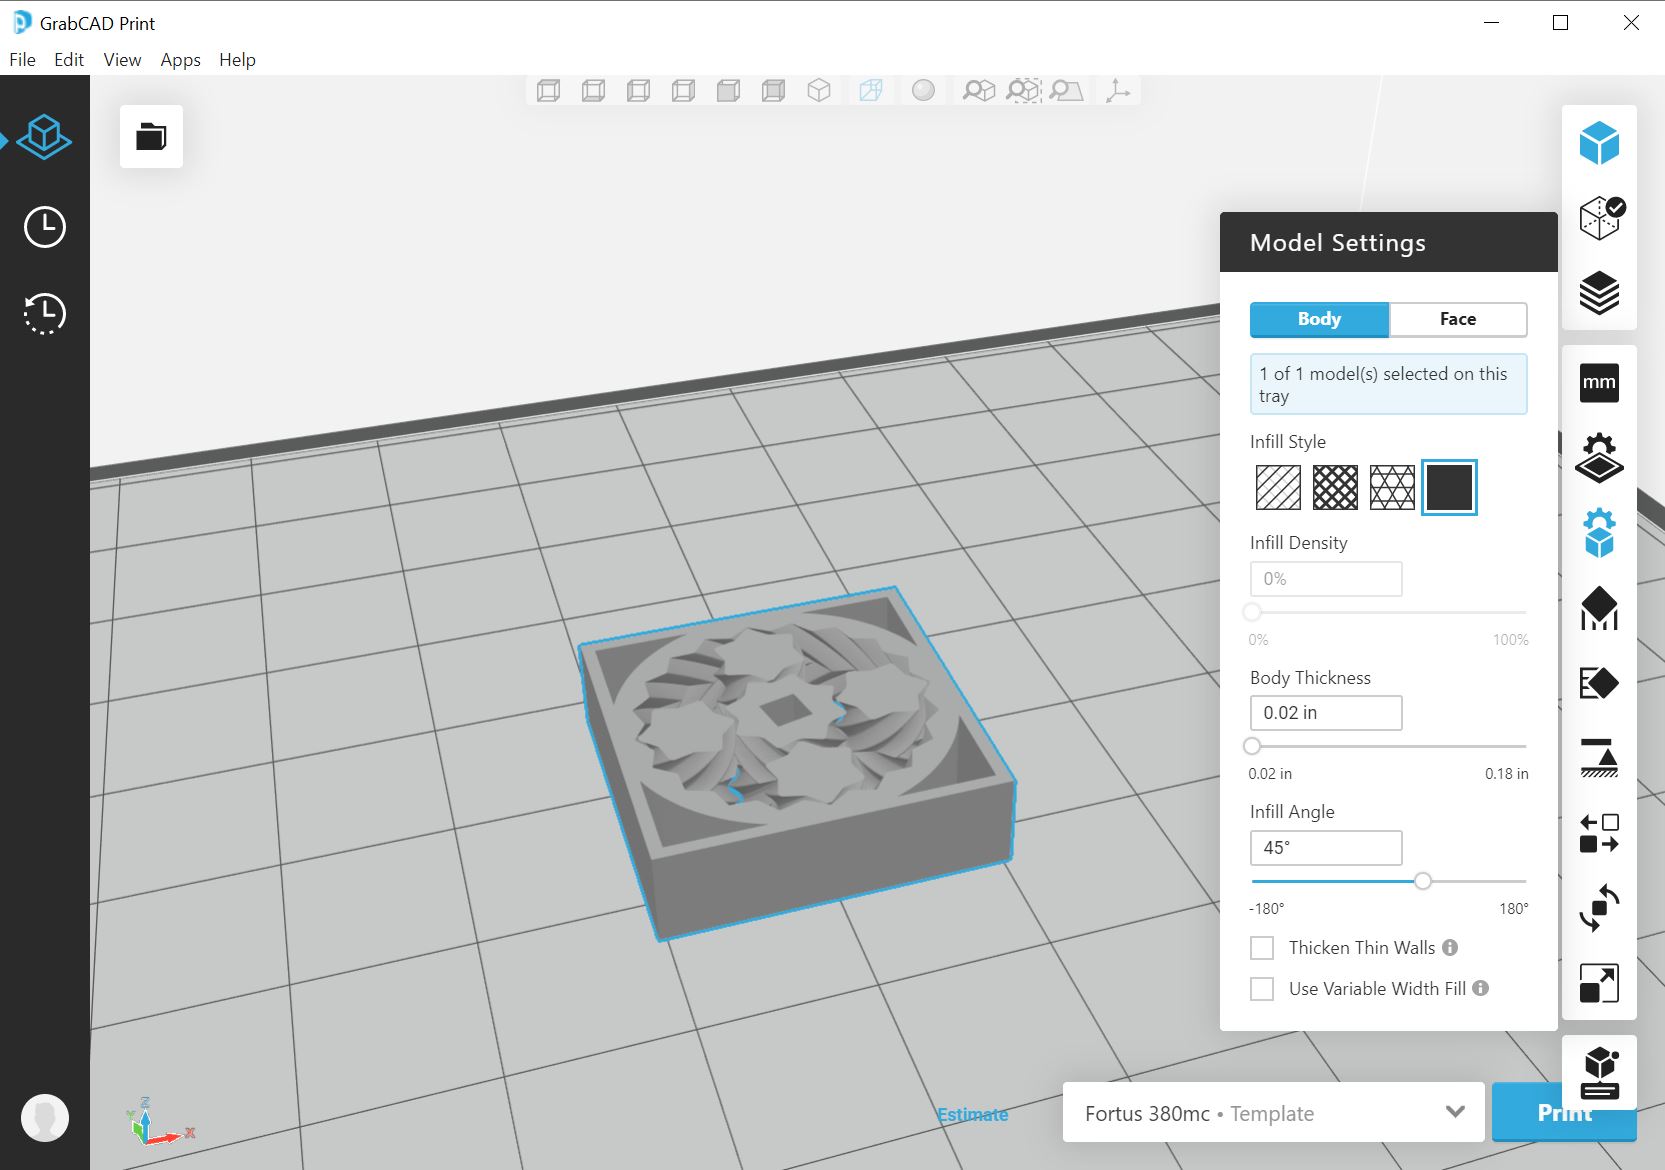
Set the model setting to Infill Style -> Solid this time. Sparse is also good to reduce the print material which benefits to reduce the cost and printing time.
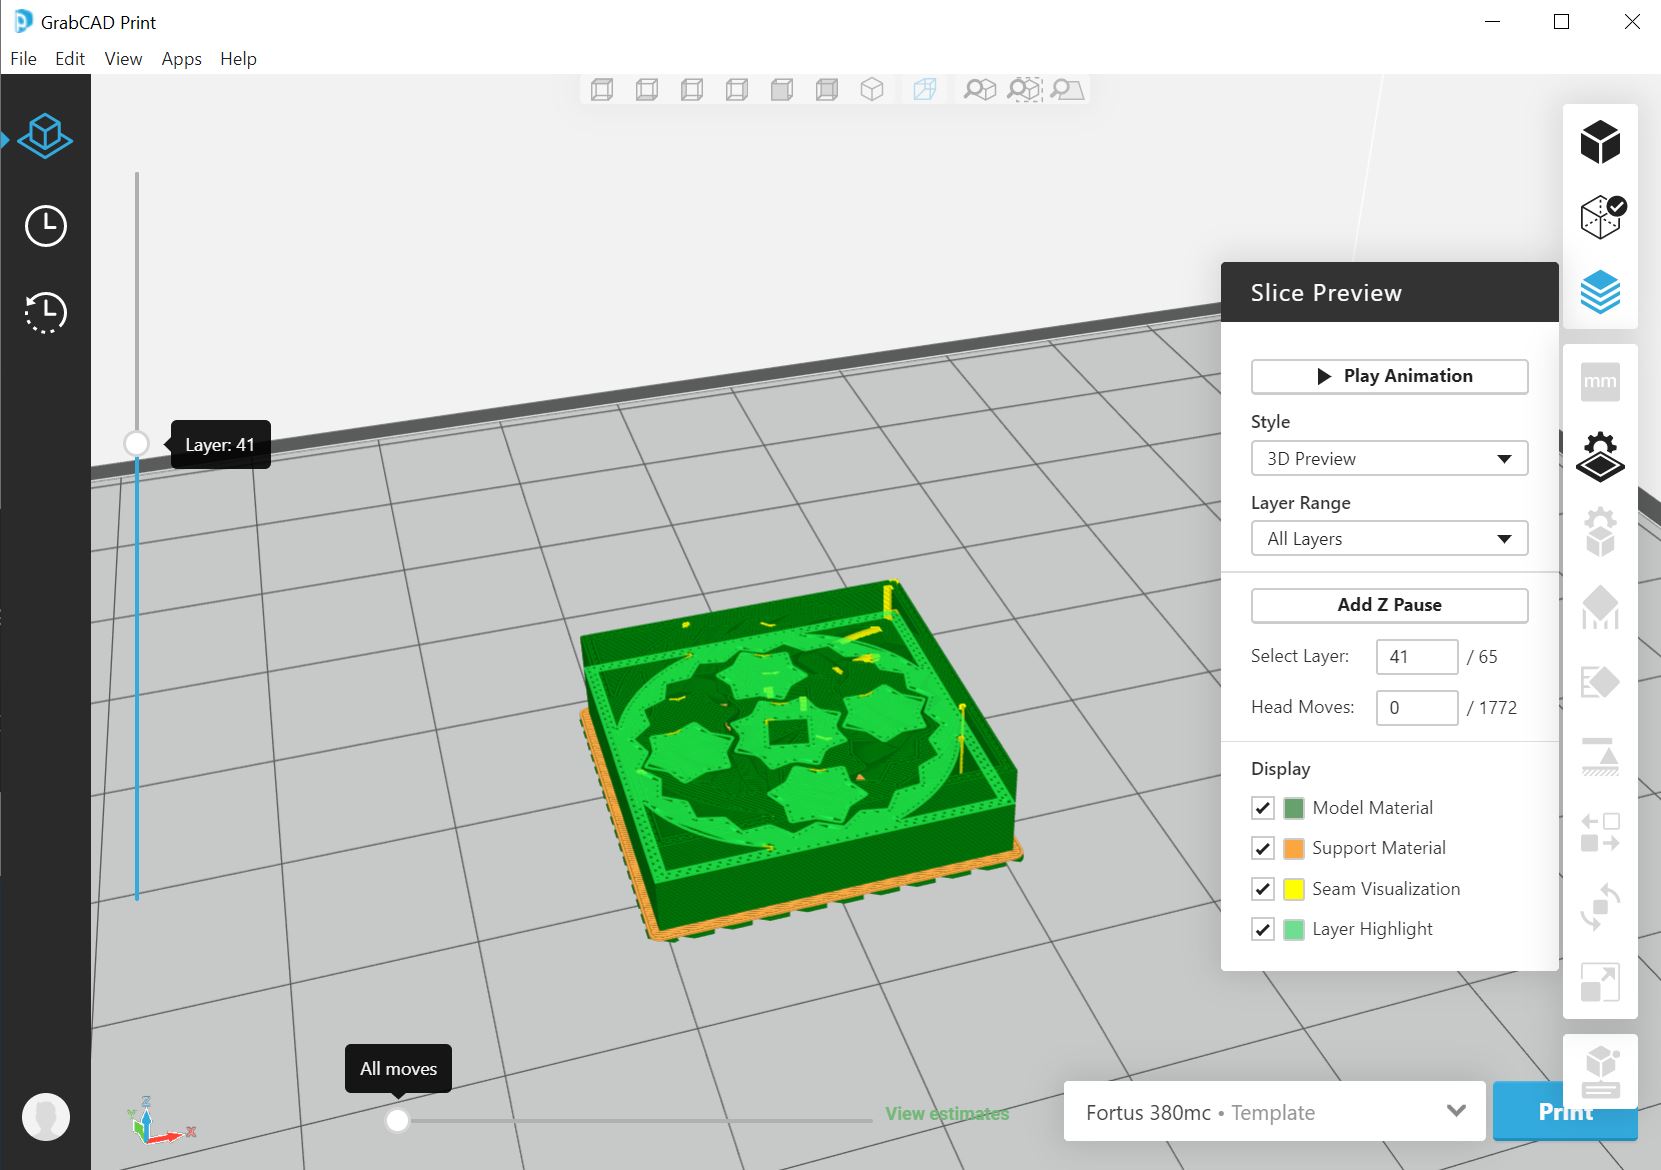
After setting is ready, click the slice button for slicing the model. After checking the slicing okay, push Print then the data transports to the printer.
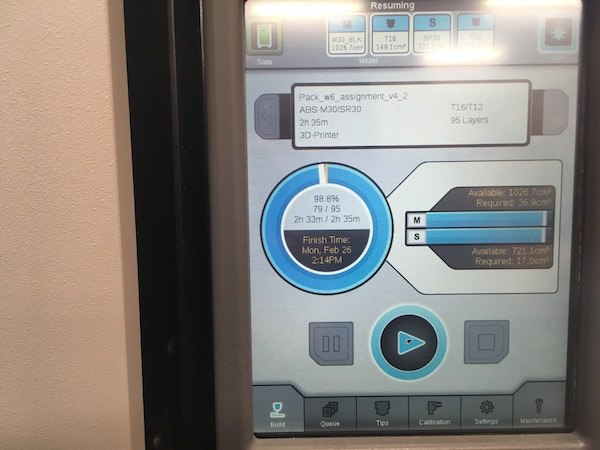
Check the Stratasys printer’s GUI, then the same file name appeared on the display, or select from the queue, start the button and print starts.
And this is the result of 3D print bearing, working smoothly!
3. 3D model design and print
And another exercise is to make the object cannot be made substractively.
The reason I needed 3D print for this is,
- 1/4 inch screw and nut integration as a camera tripod.
- Feeling someting future 6G new technology with organic type of design.
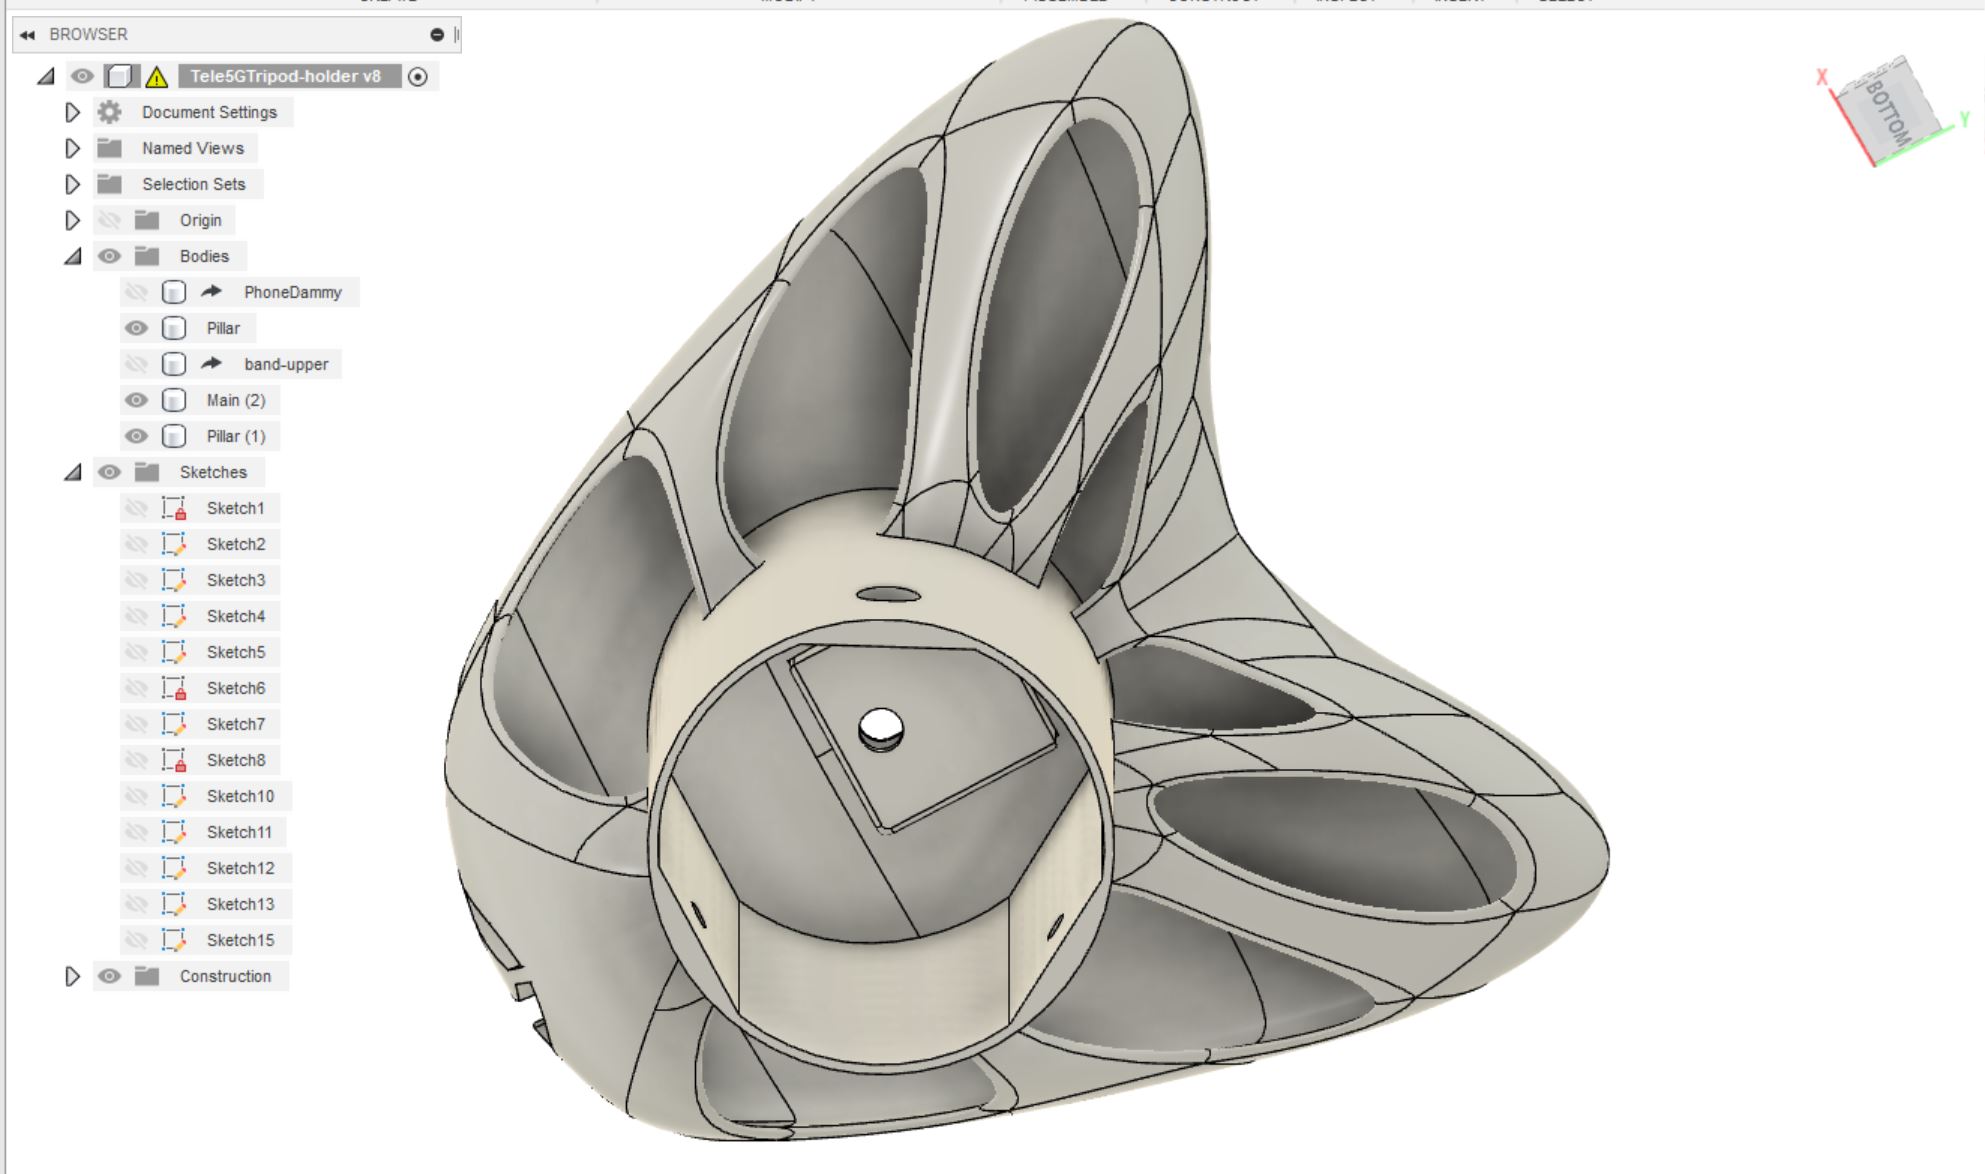
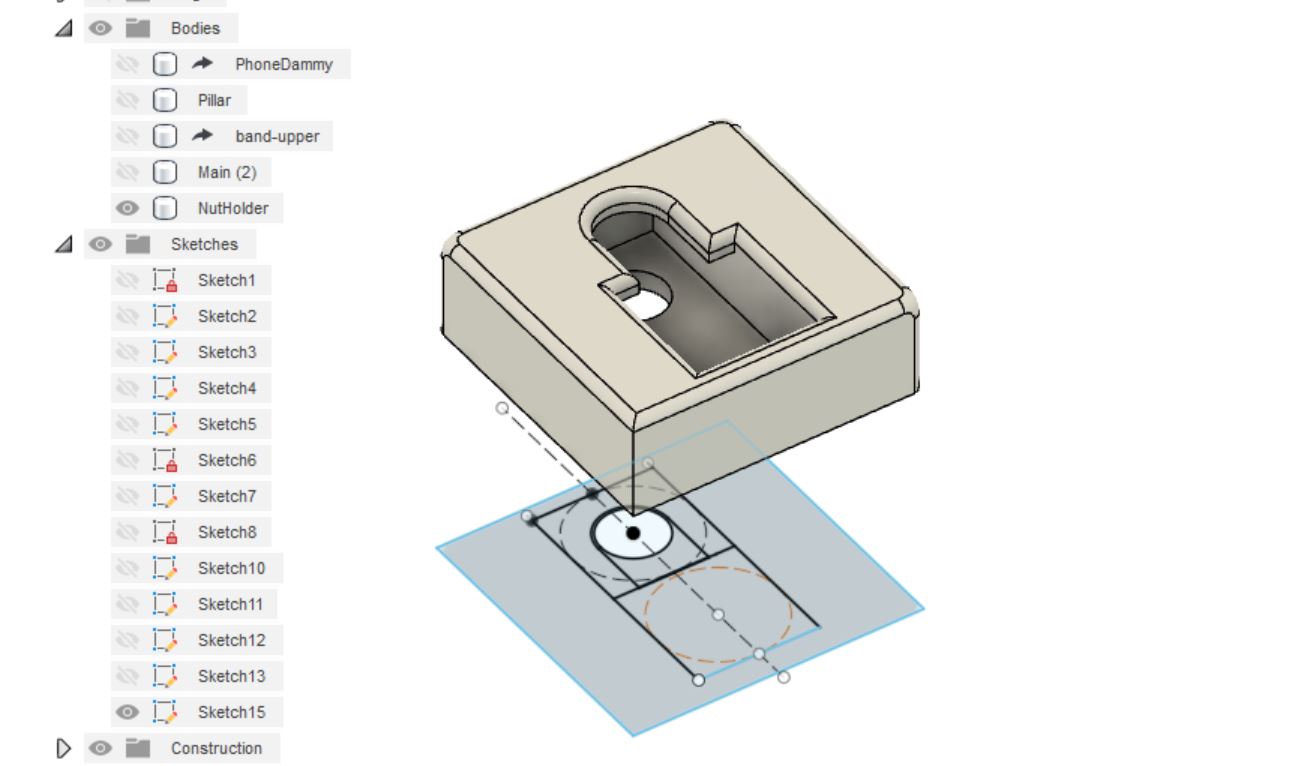
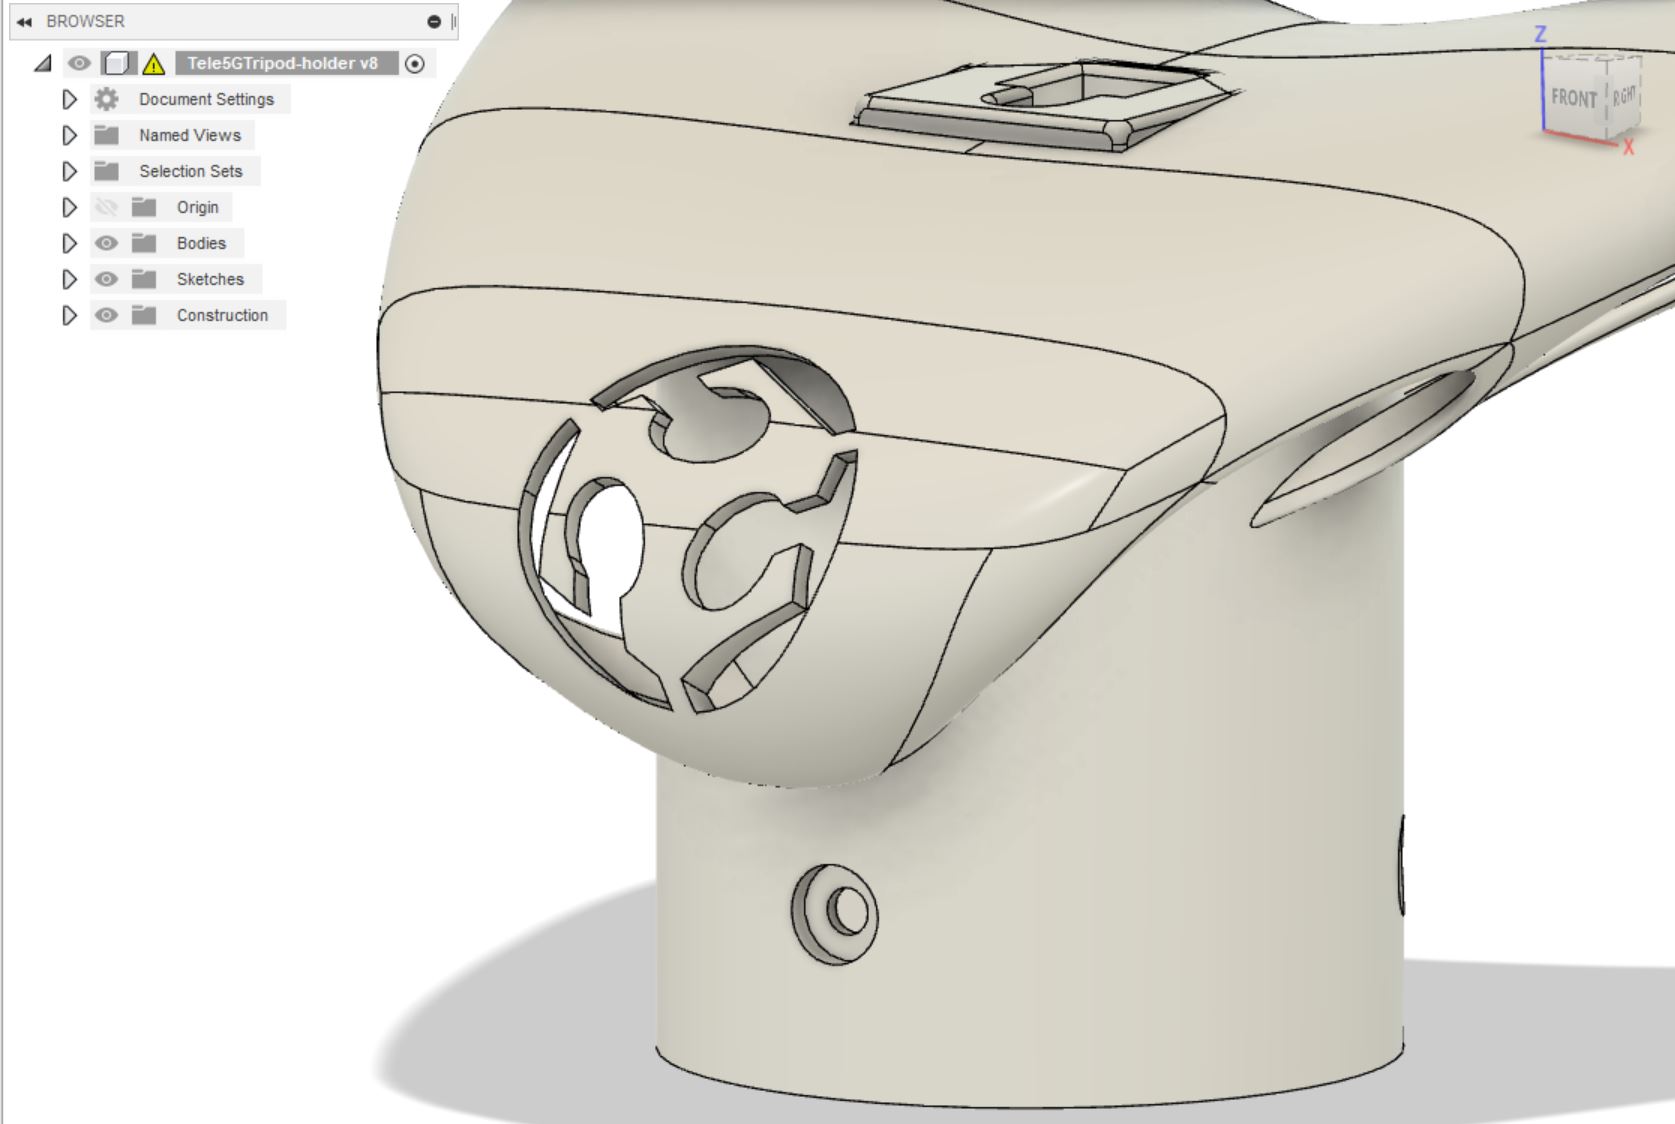
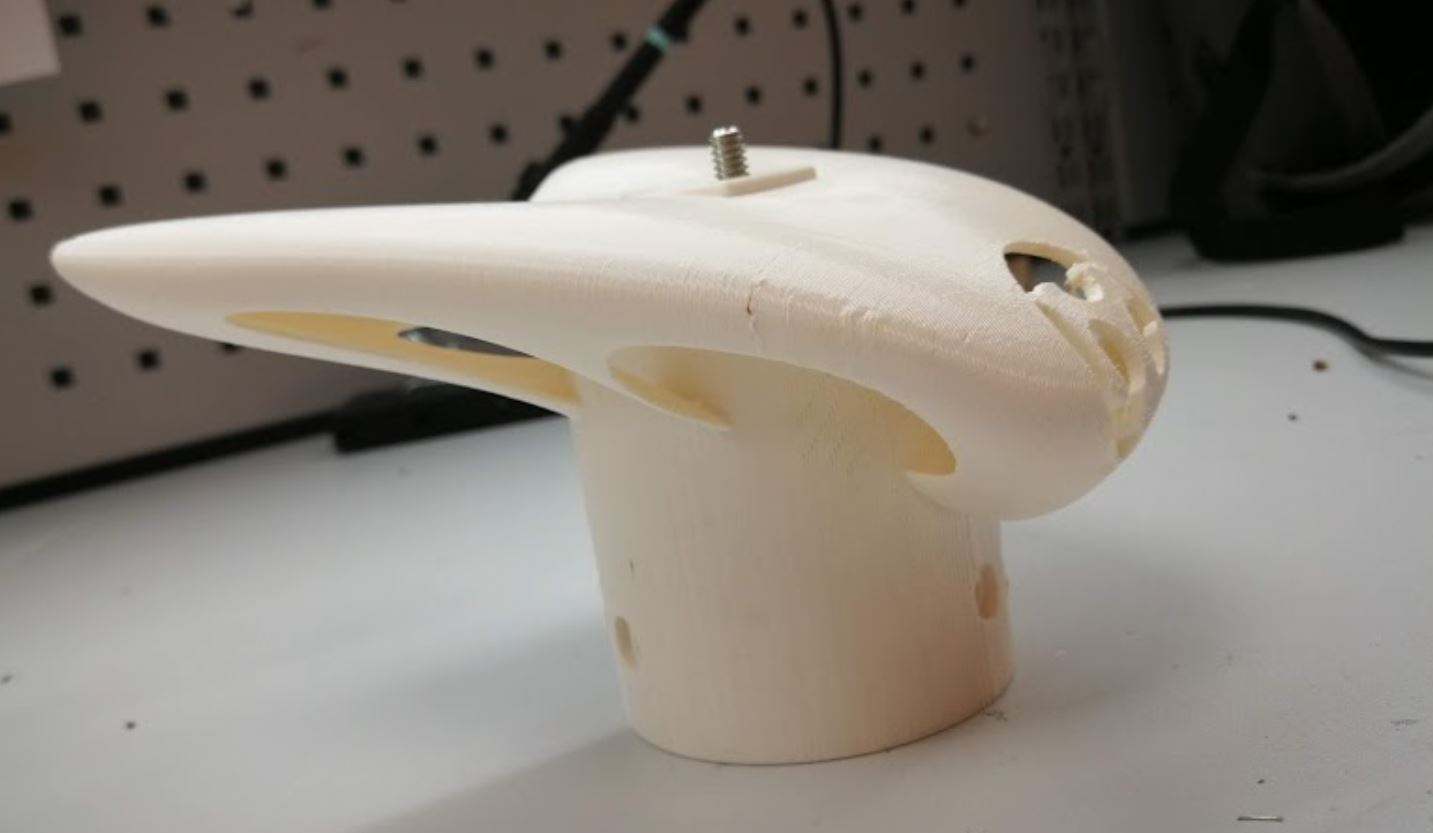
I report here separately in project sub task page about the 3D design steps and how it is printed.
4. 3D scan exercise
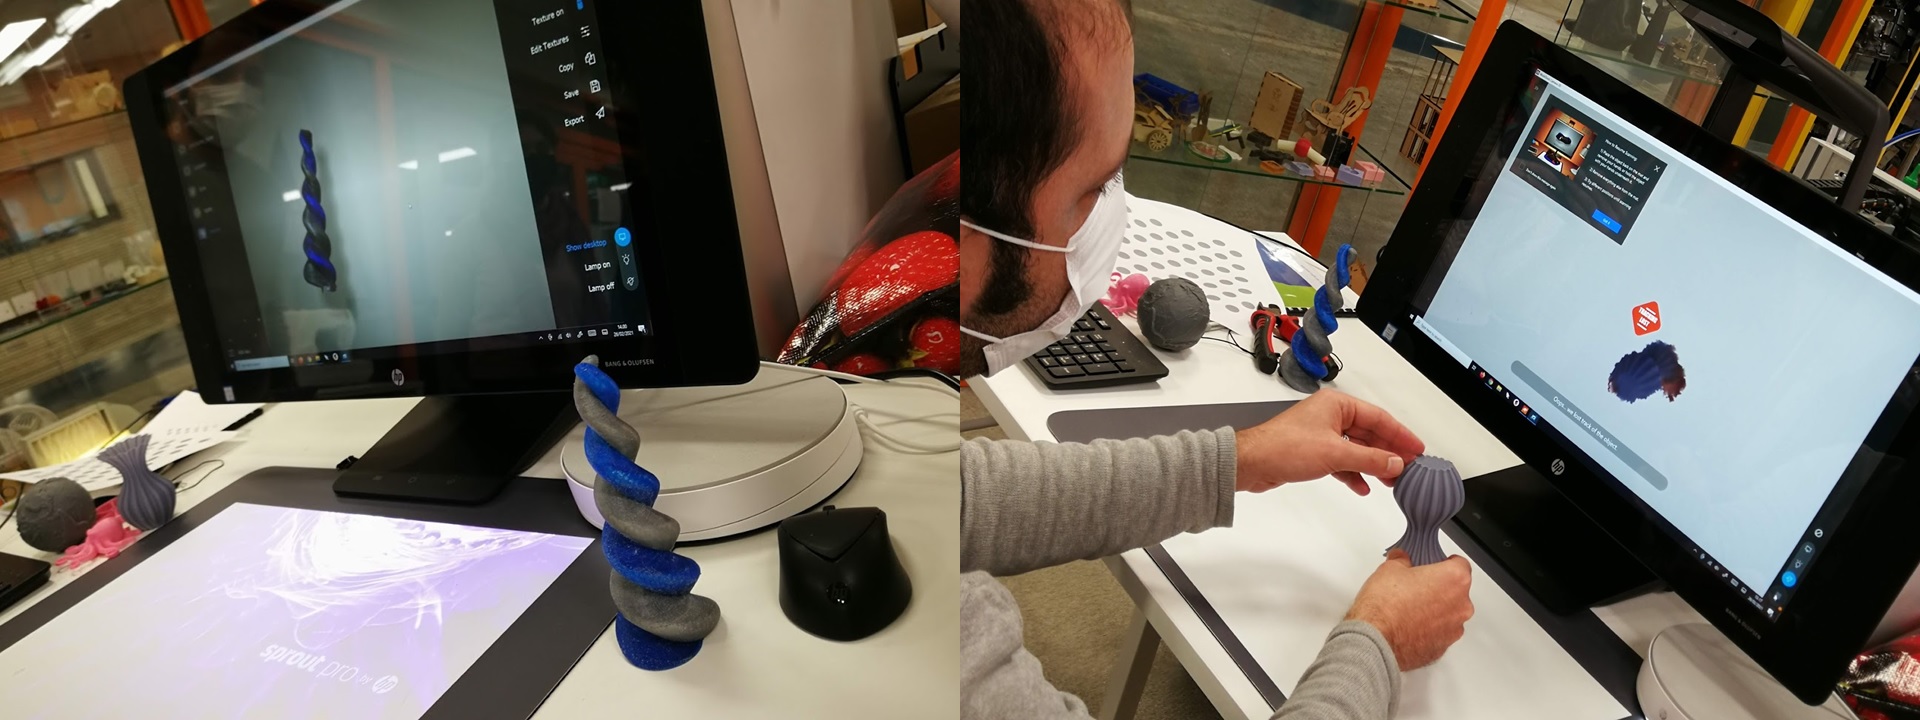
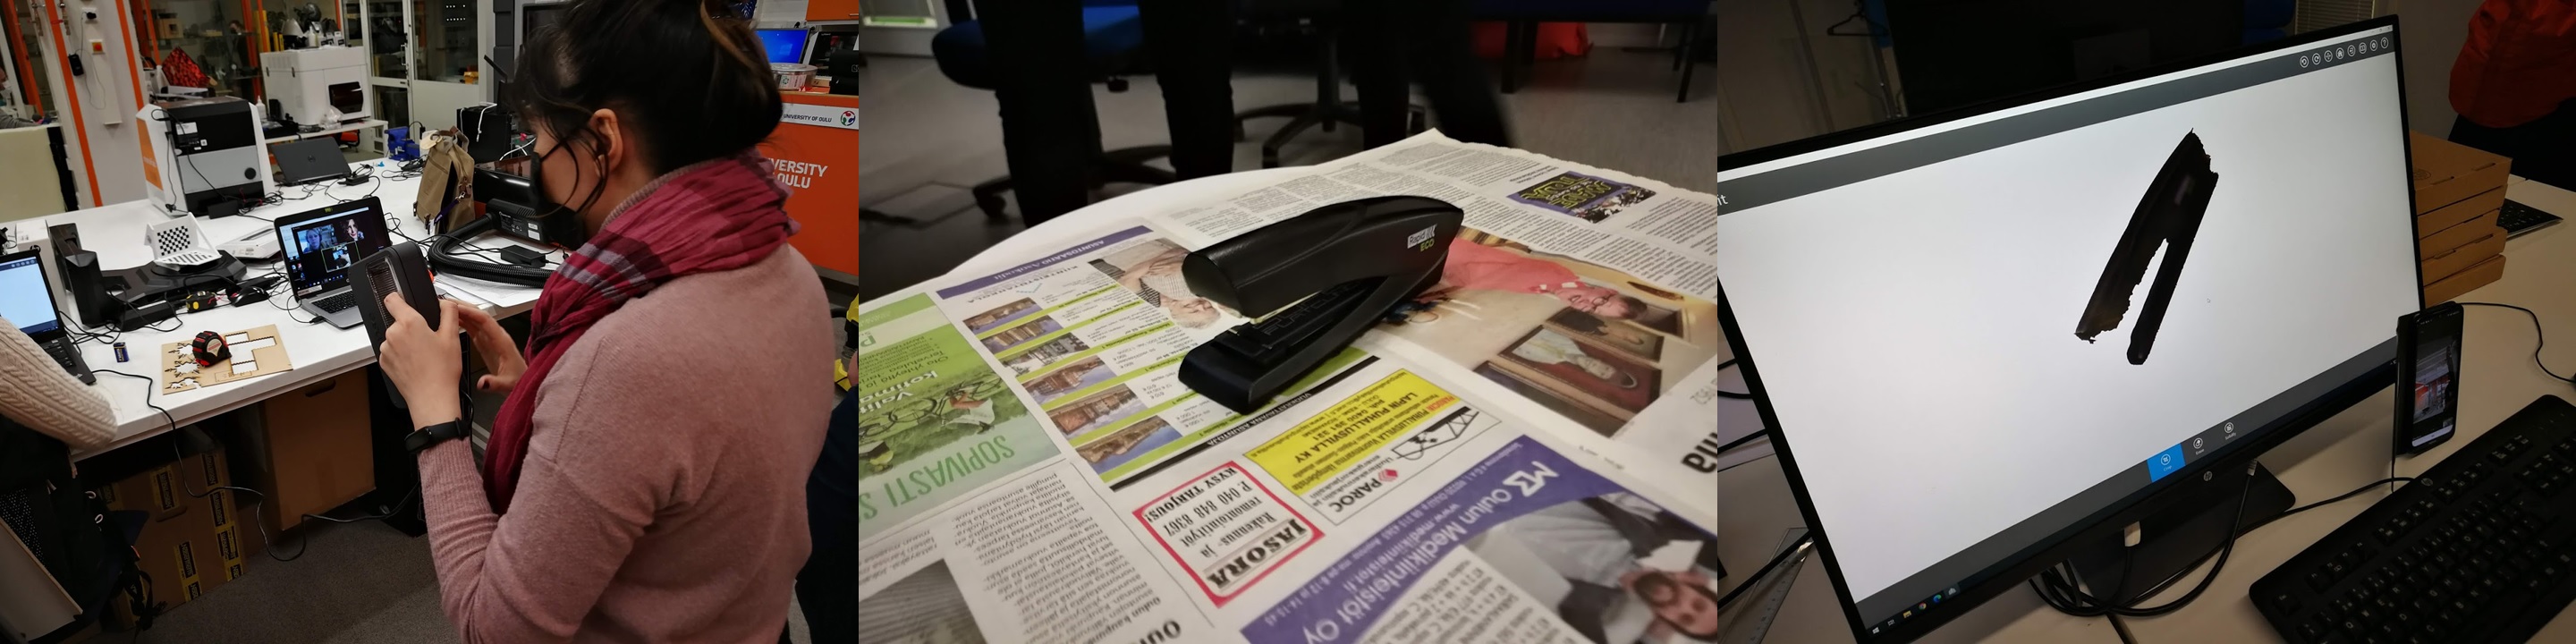
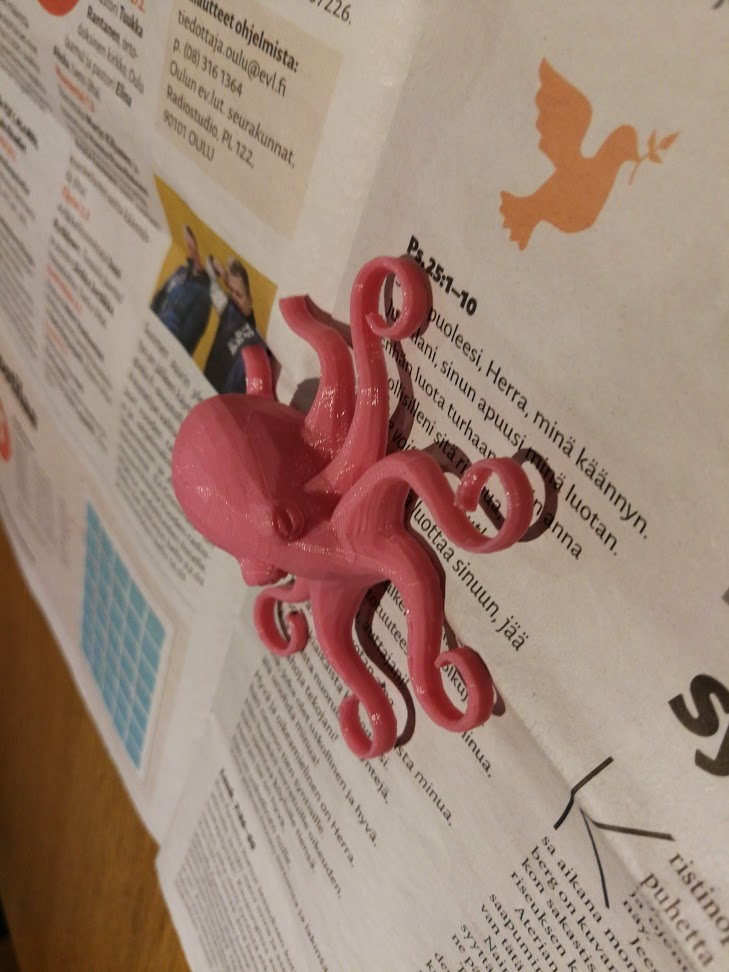
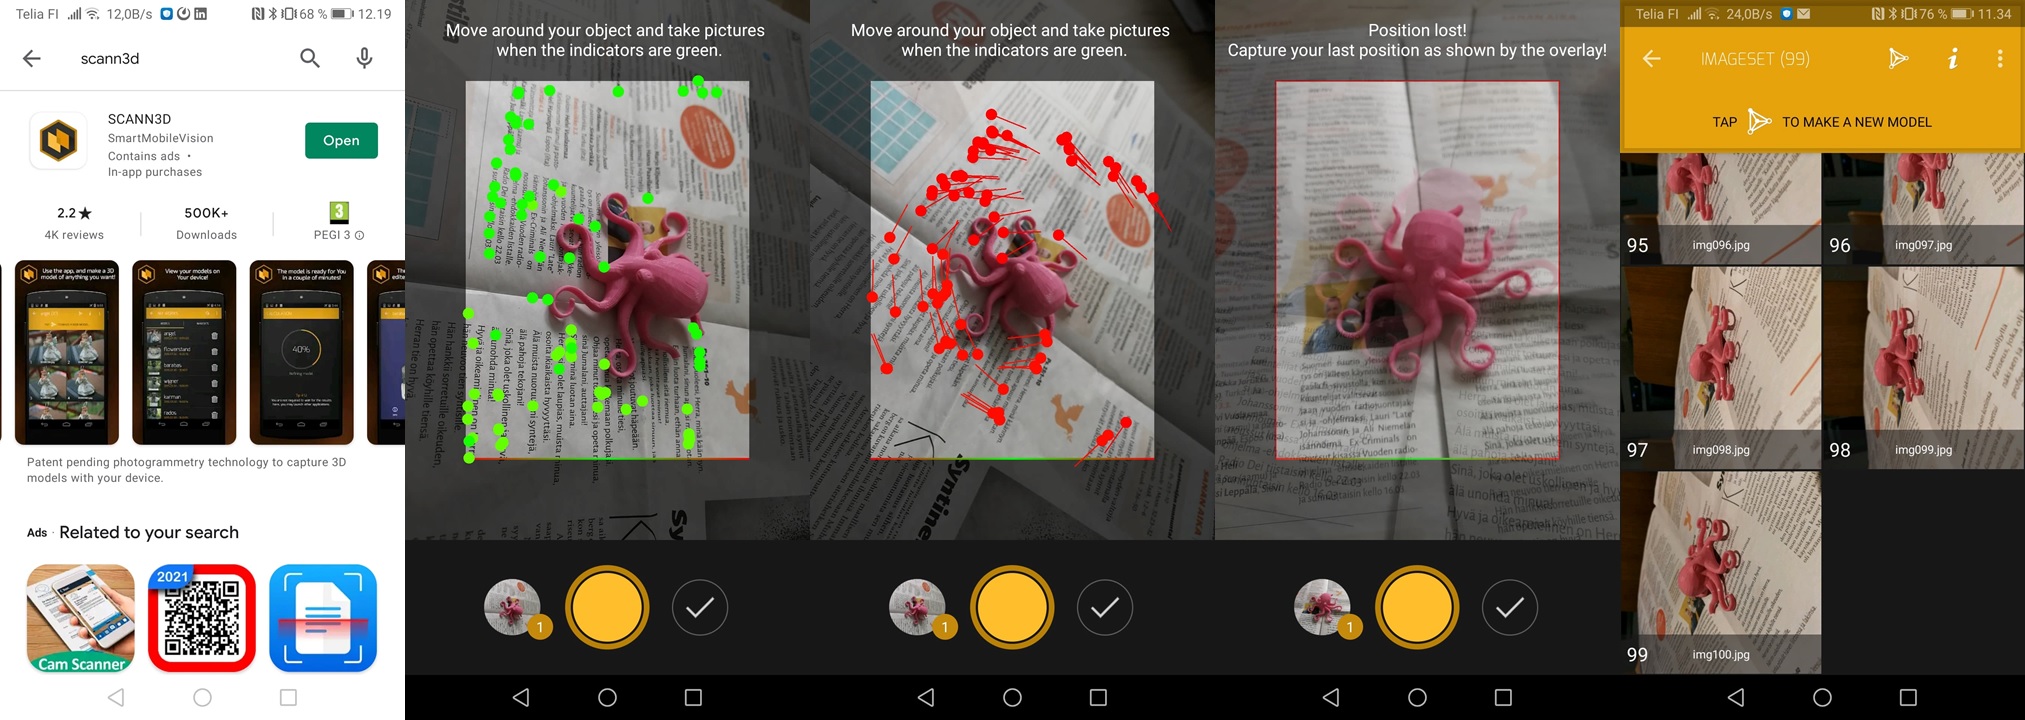
3D scan exercise, I use mobile phone APP of SCANN3D. This is handy APP using the mobile phone camera, and APP guides the instruction how to operate. I scanned this octopus 3D printed model in Fablab by 60 photos combined together.
5. Edit 3D model
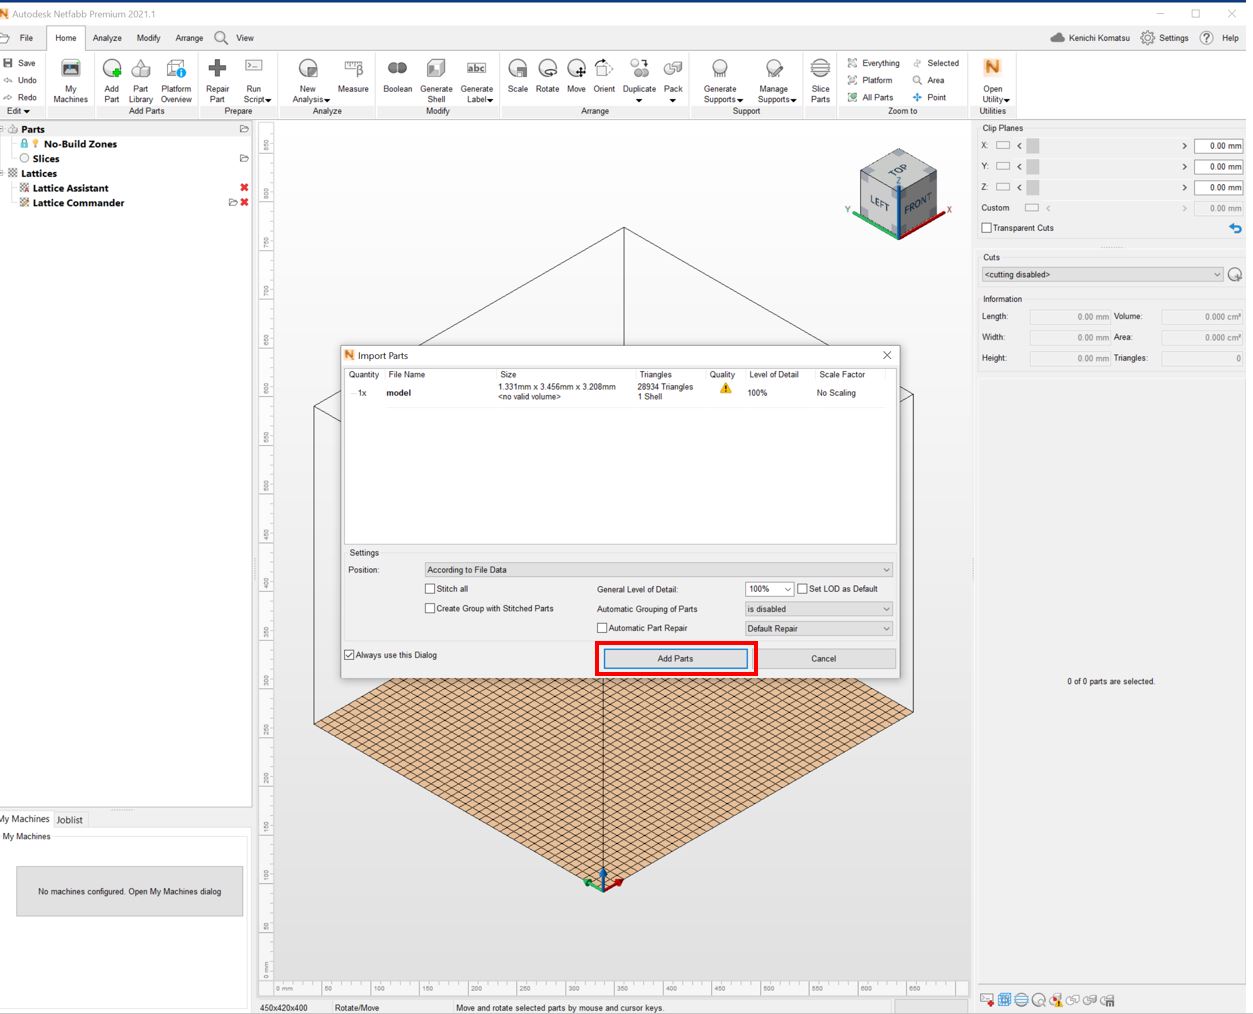
I used Autodesk NETFABB to modify the 3D model of my scan. First I download and install the application.
First import the file by add Parts.
The object is shown, change the orientation nicely.
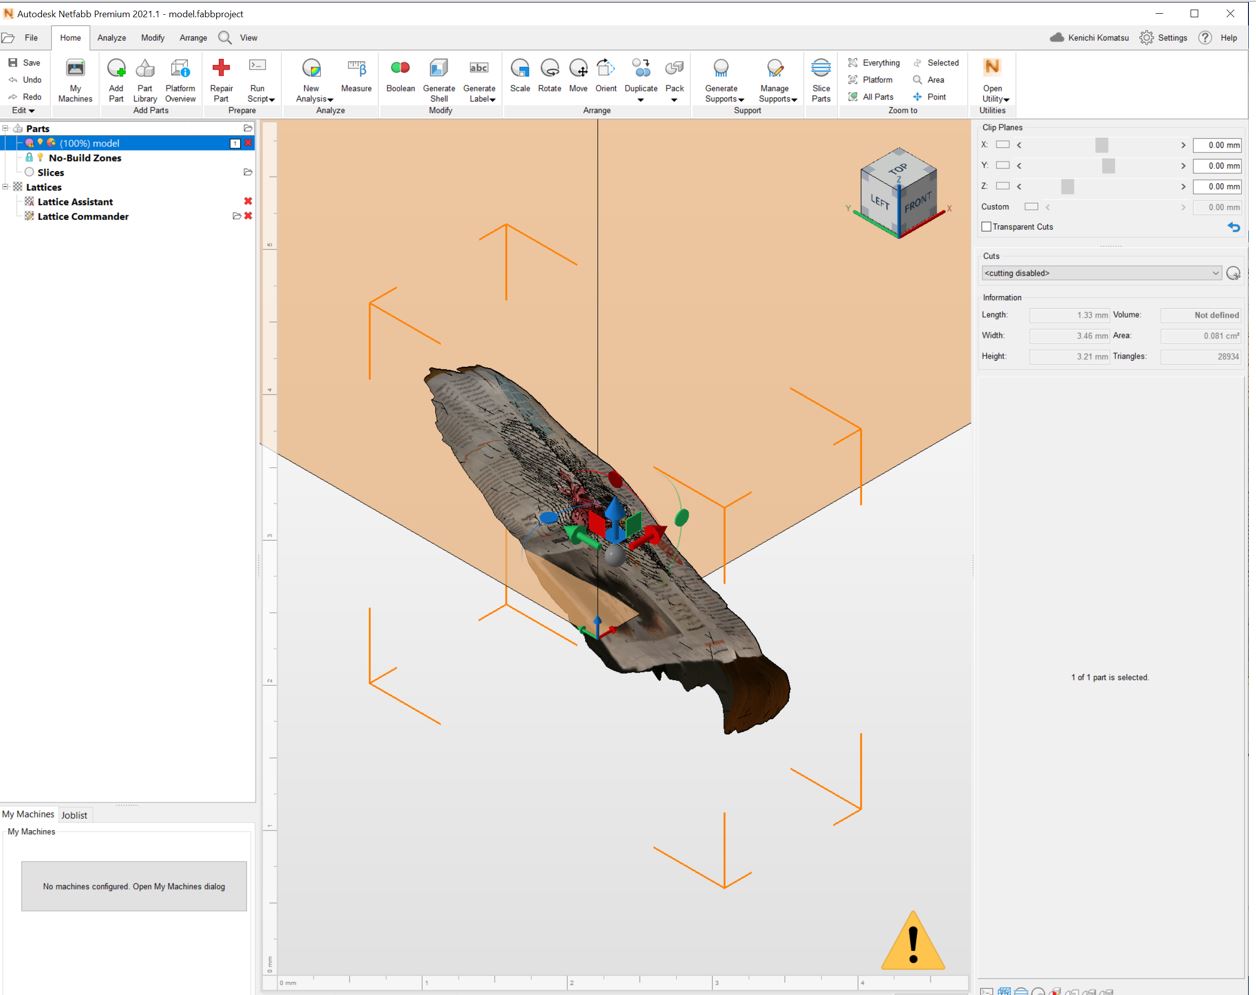
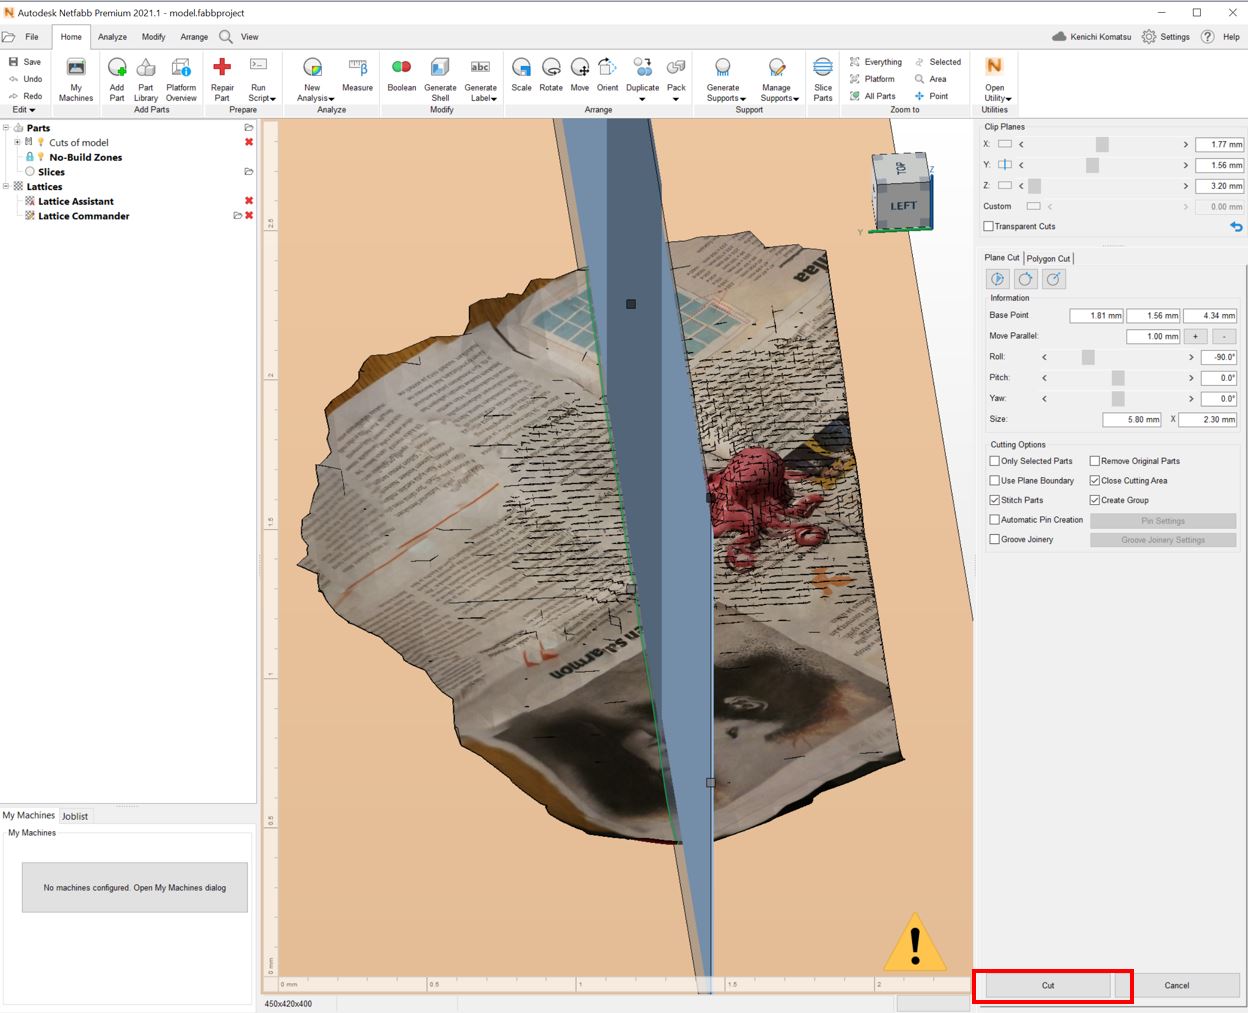
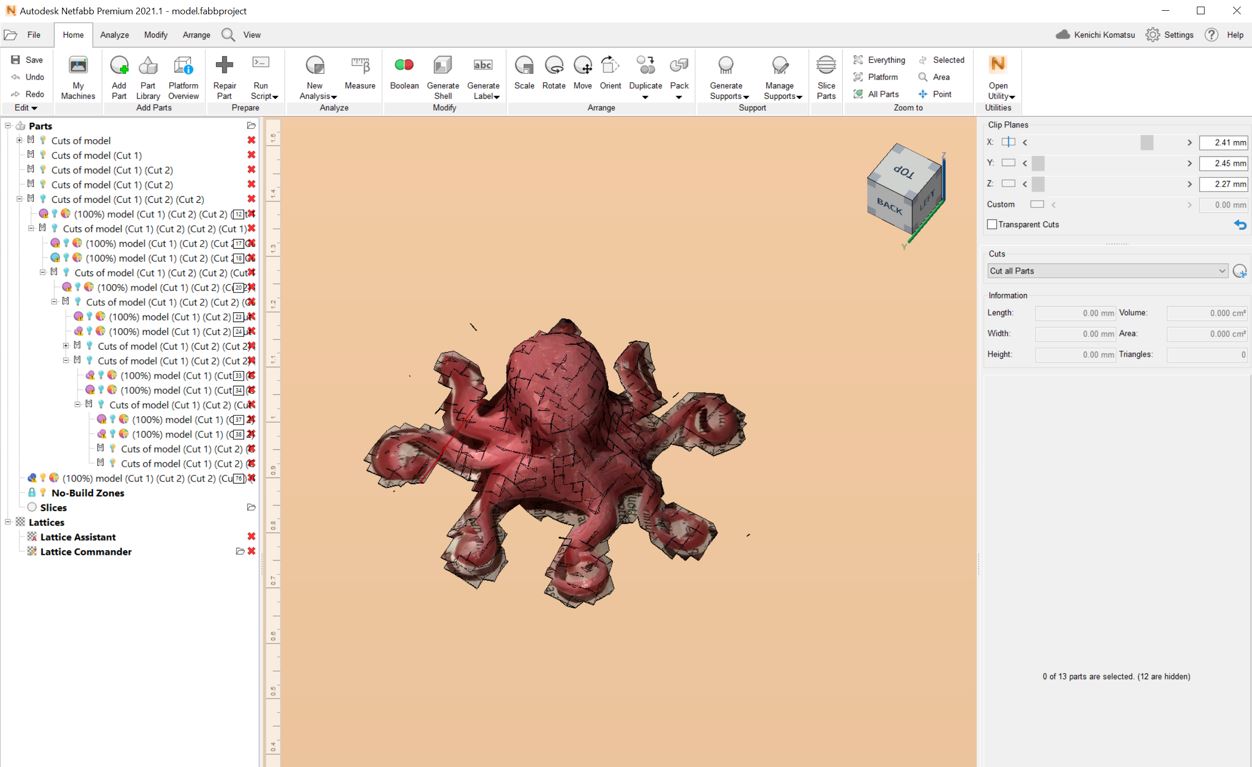
Right side window, Clip Planes can set easily the plane position of X,Y,Z. Then Cuts.

The cutting plane is shown and this cutting position is okay, then click Cut.
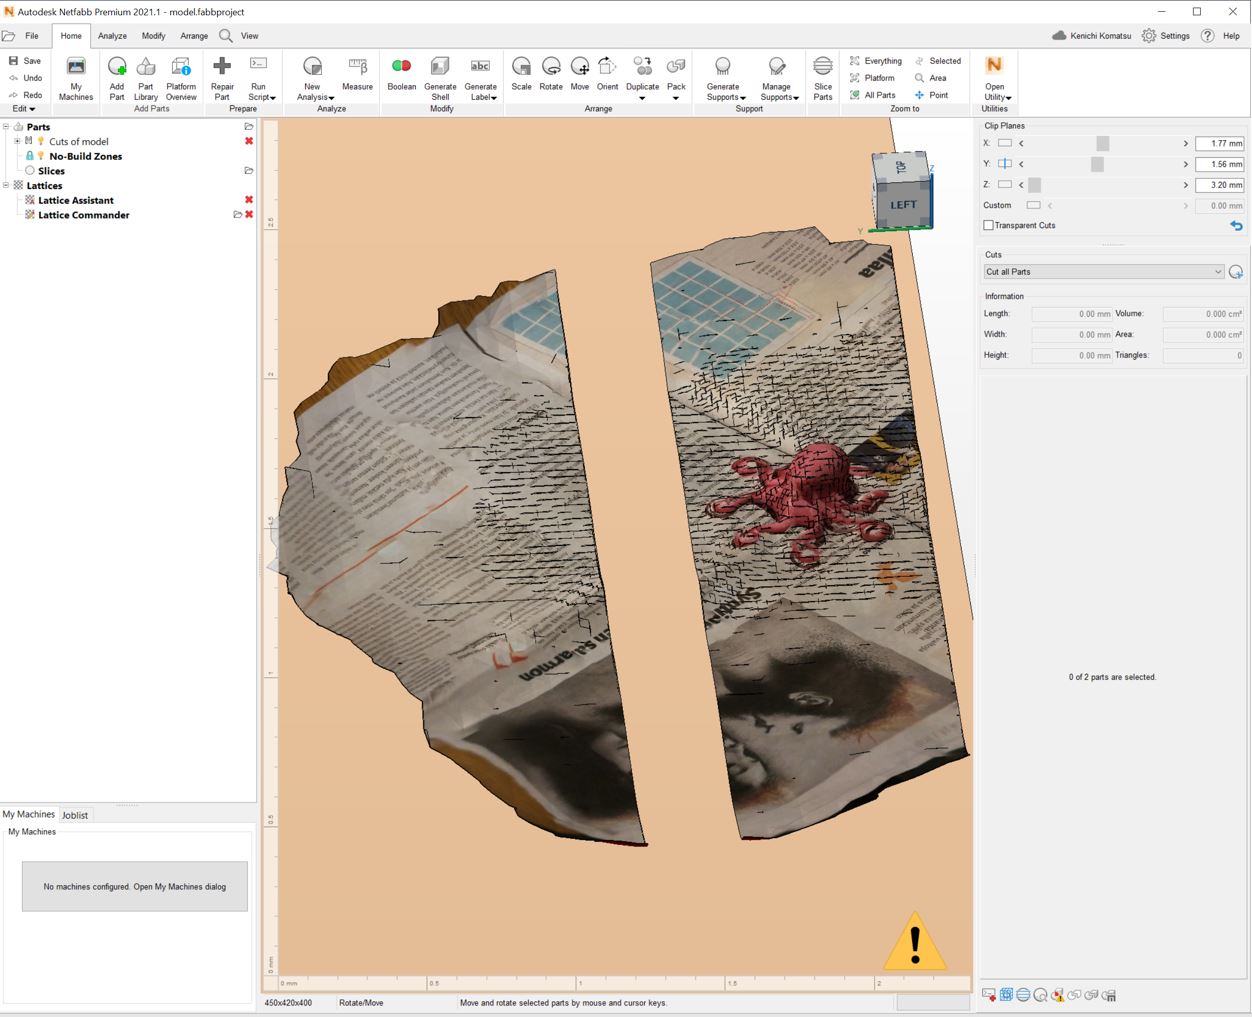
The object can be seperated, and the old original one also stay there, deleted old original one and no need part side.
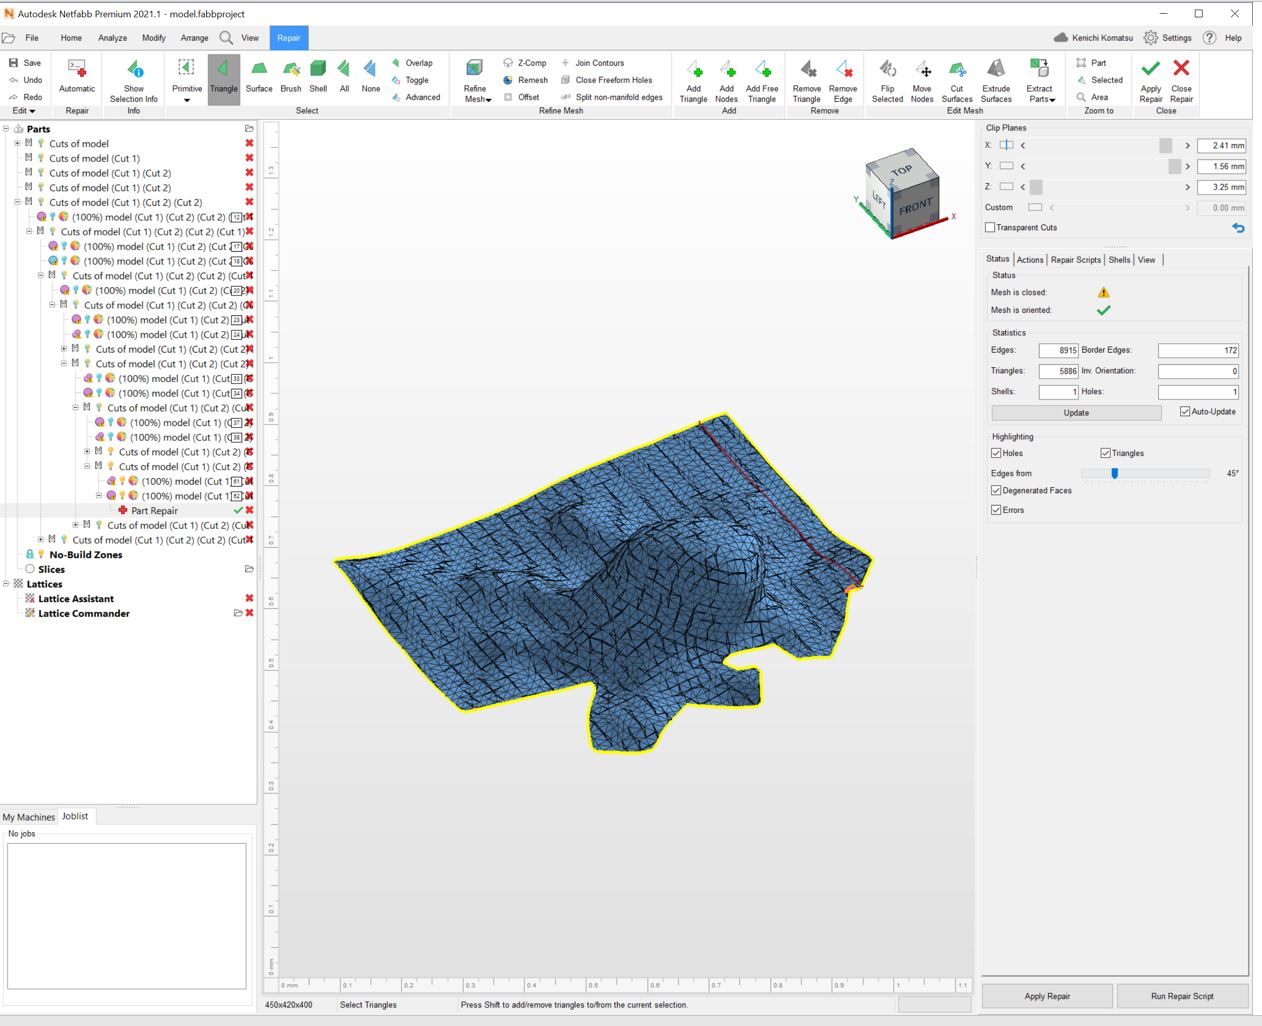
After made the rough cut of X,Y,Z plane, can modify the 3D model in details with mesh. Enter Repair part and shown blue triangles of model. How to delete the unnecessary part is, push Shift key down then choose the triangles and change the triangles green colour then Delete key on the keyboard.
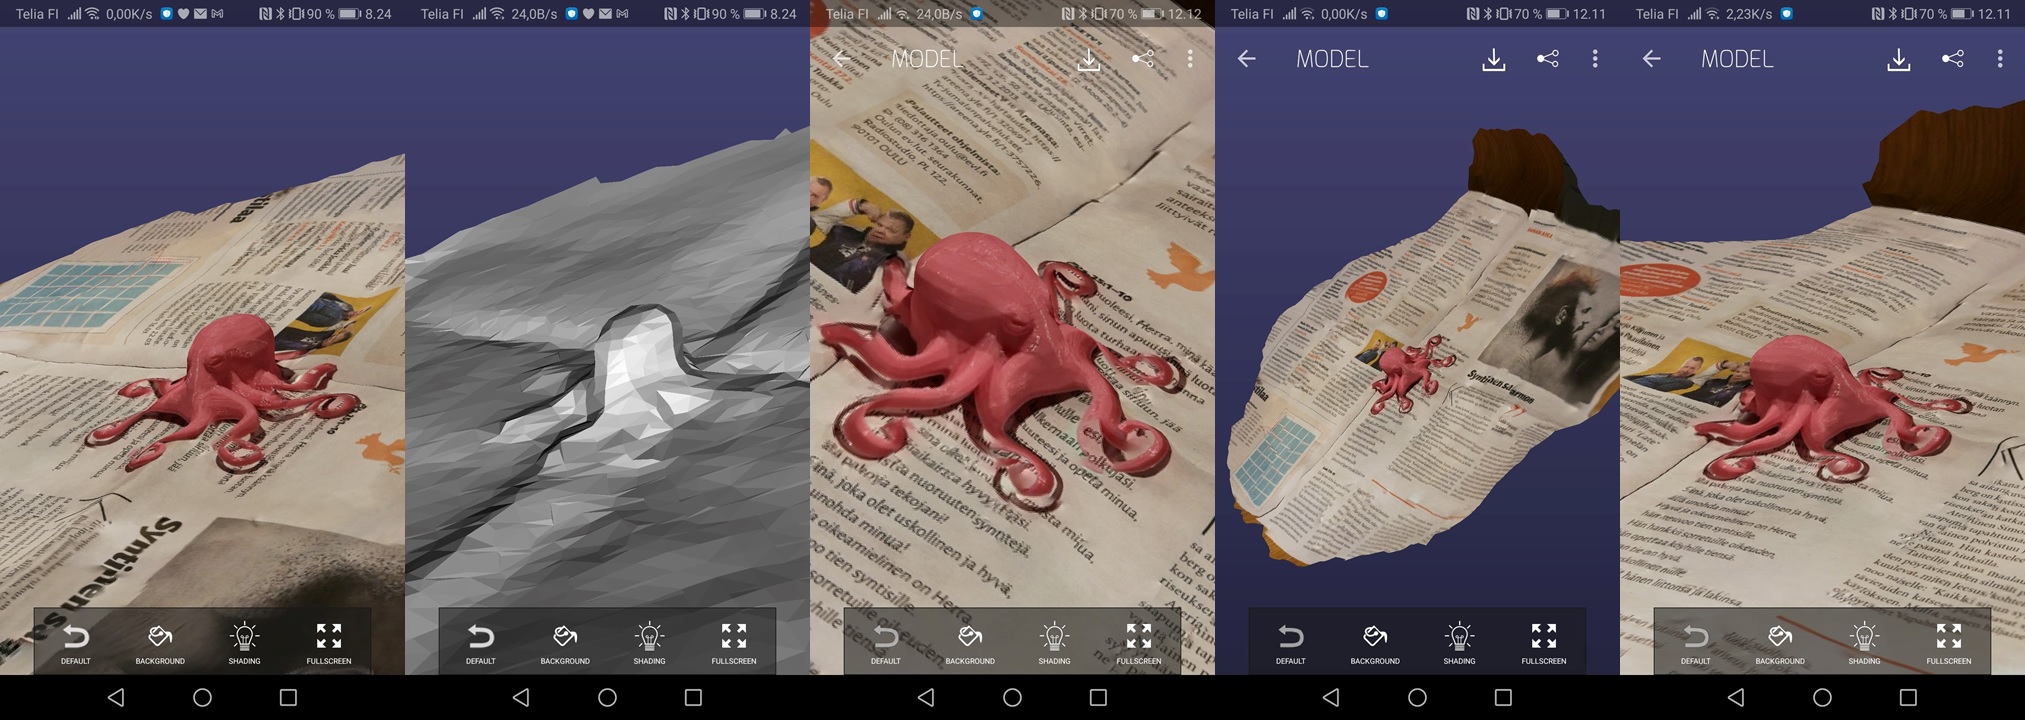
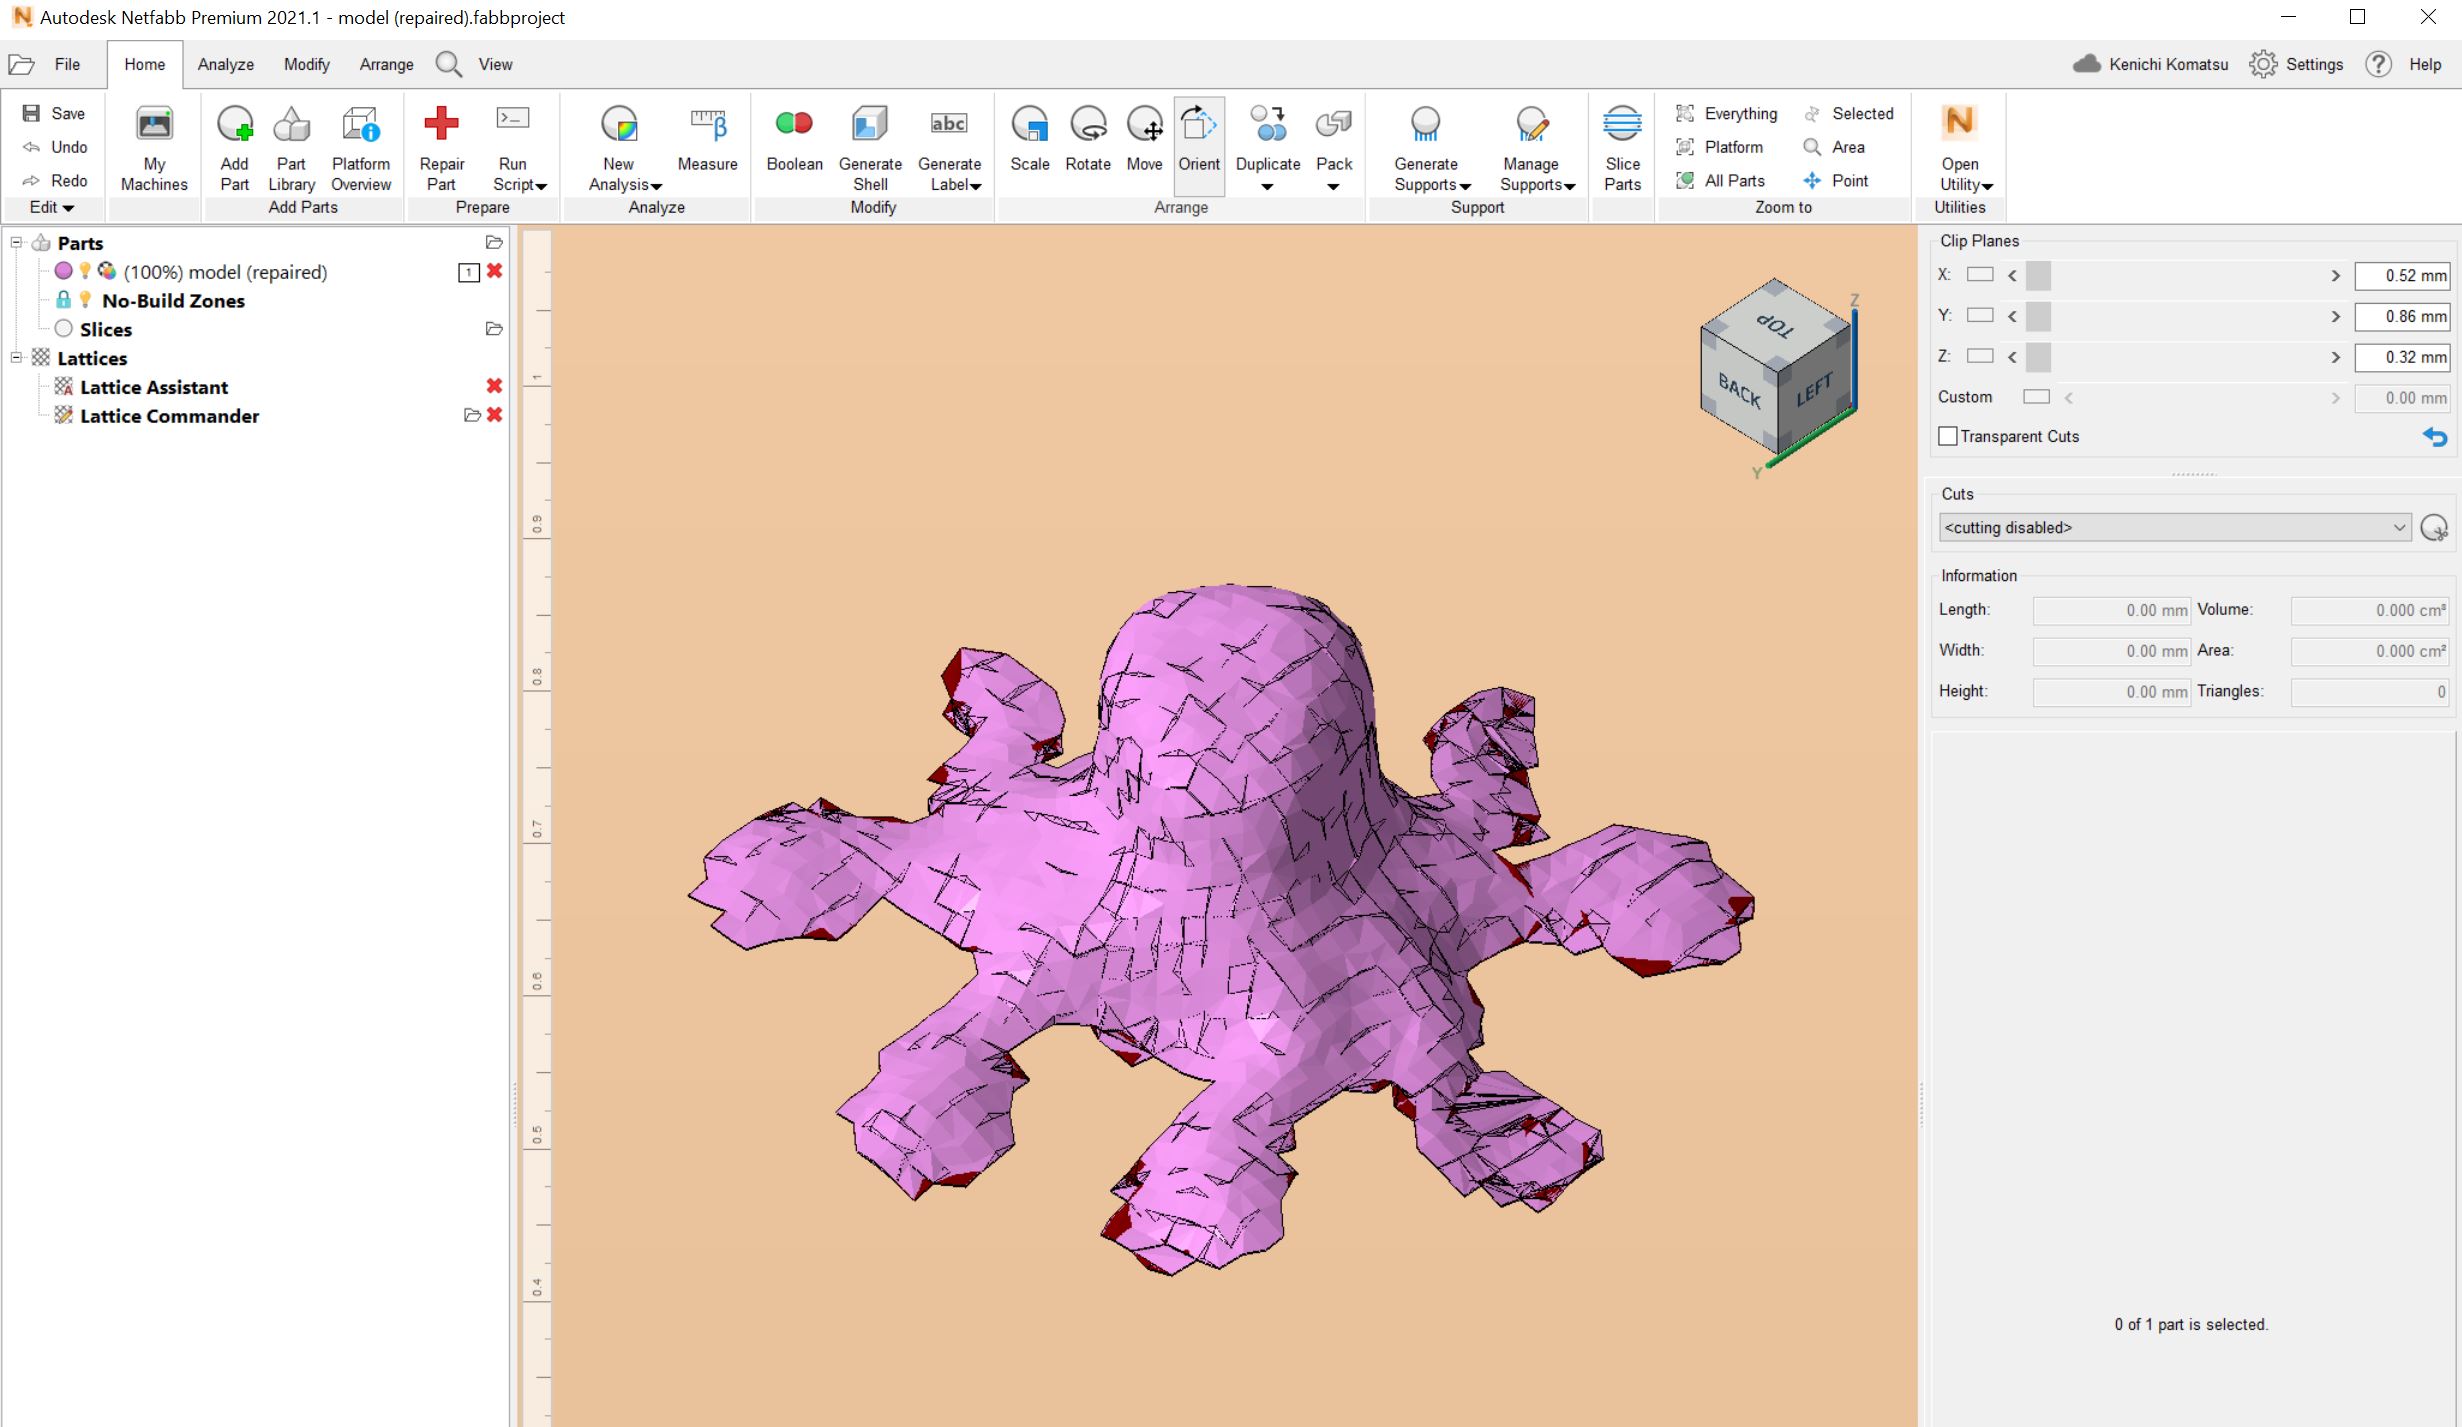
If want to see the texture of this model, in right side window’s tab View, check the Show Textures.
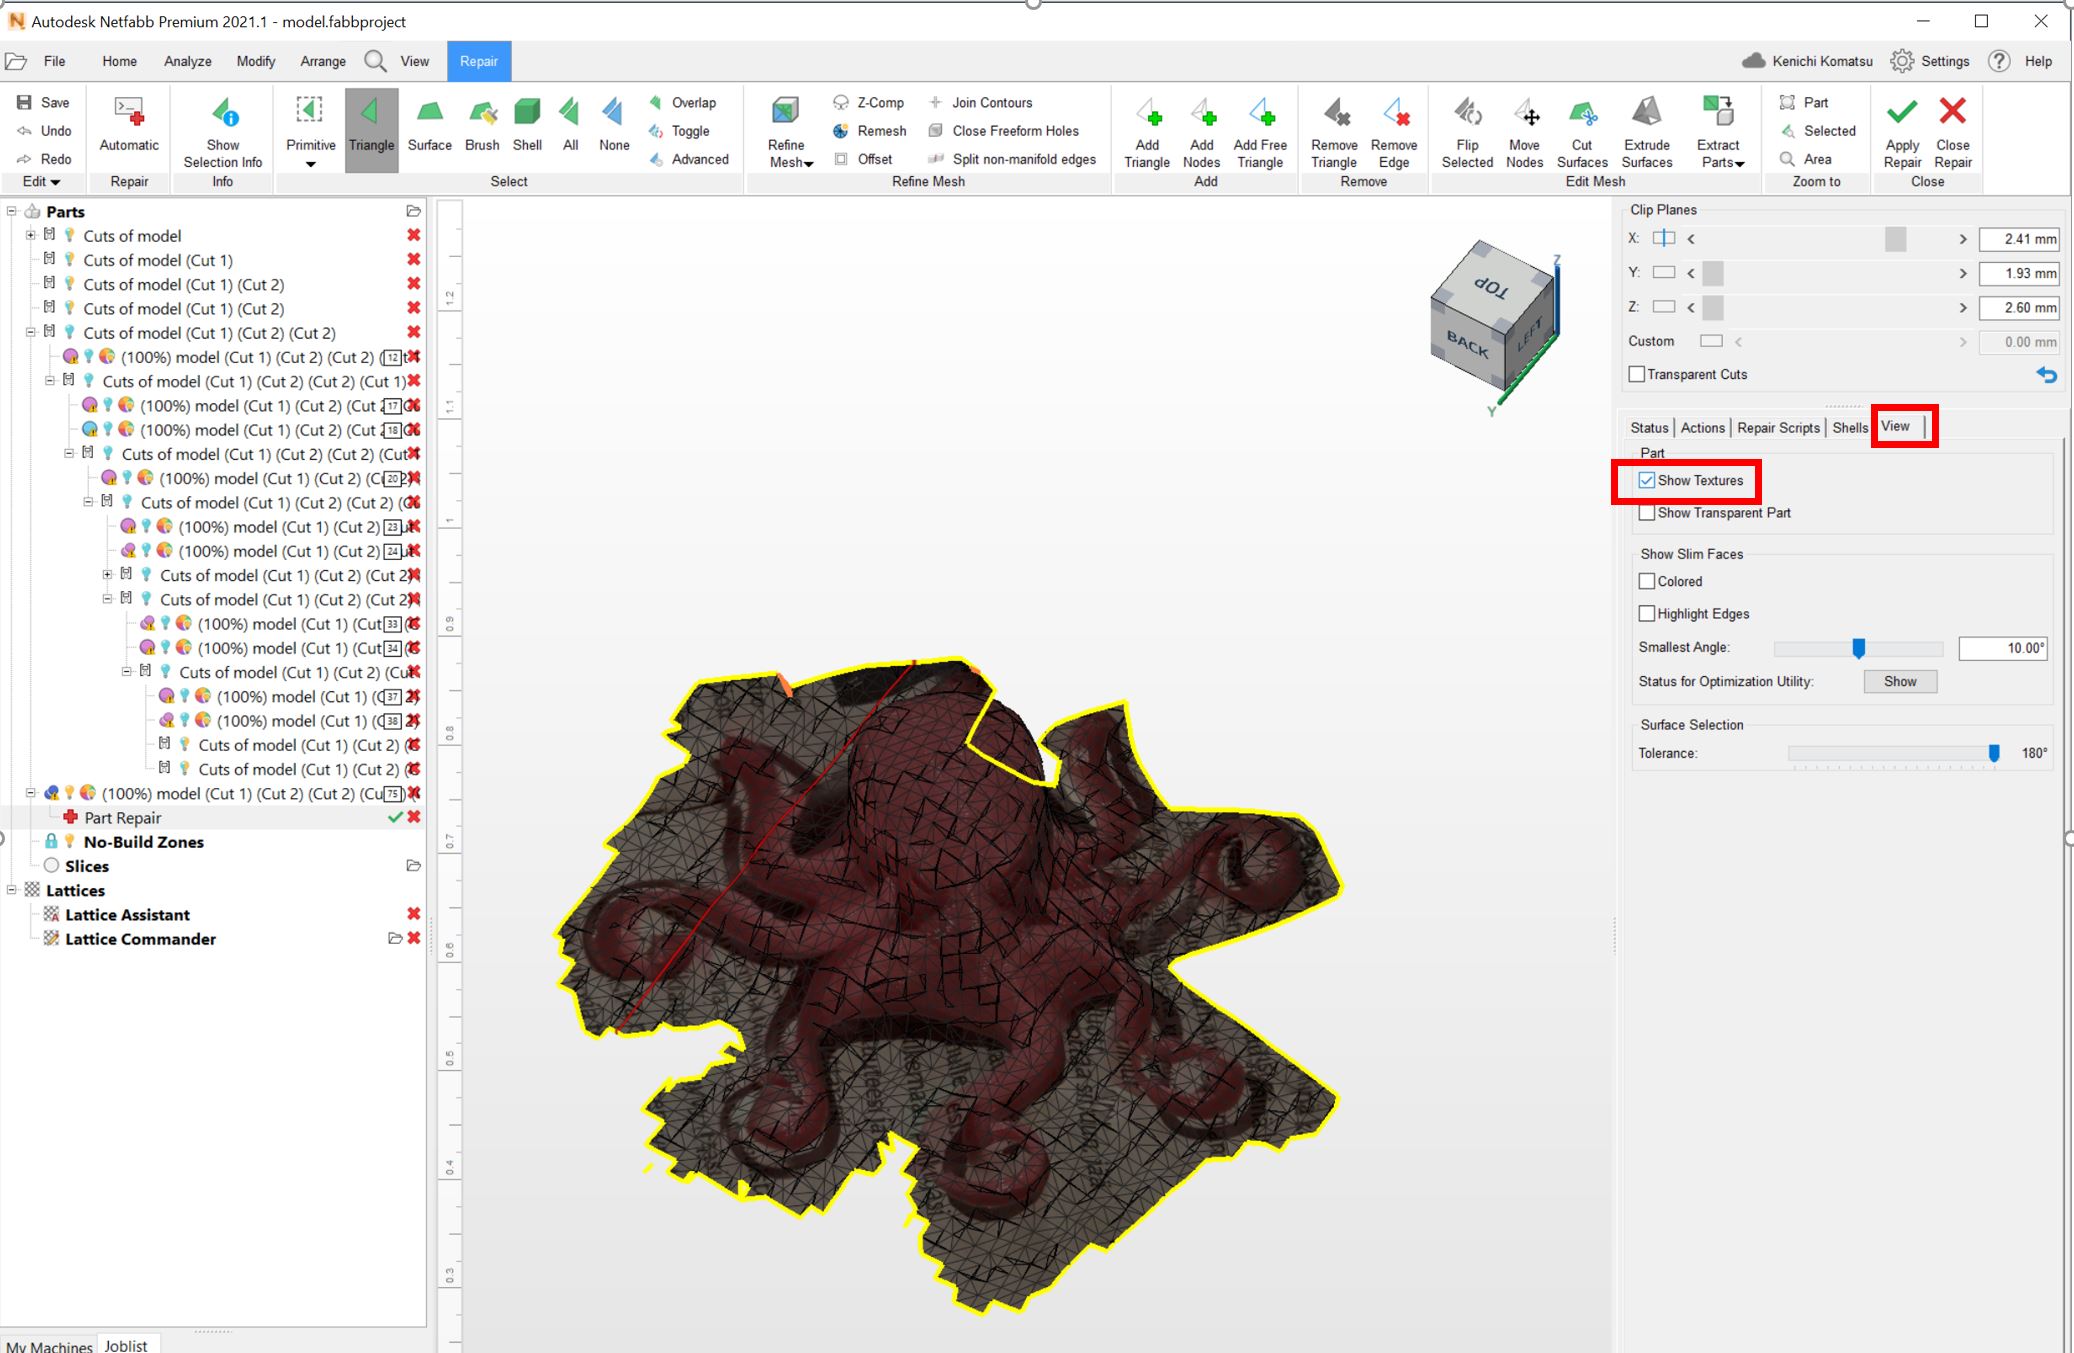
Then got the rough 3D shape of Octopus.
After Run Script -> Run repair script, the 3D model is repaired and can print for 3D printer.
Reflections
This was the first time to use 3D printer and 3D scan, it was good experience but need time to handle those tools. Especially in 3D print, if think about the mechanical structure, joint, connection, the produced real object is not exactly same one from the virtual 3D model design. Need to think about the margine, tolerance and many aspects in printing. It cannot make it by one time, it might need several iterations, this was good learning.
And another good learning is how difficult 3D scanning is… Scan technology is not yet matuared with several solutions. Even it could do the precise object scan that means producing a huge 3D data to modify… This was good experience how to manage the 3D model object from the reality, to the reality.
Used files
- 3D print STL files
- 3D print fusion 360 files
- 3D scanned files
- Modified 3D scan files
- Tripod head 3D design files