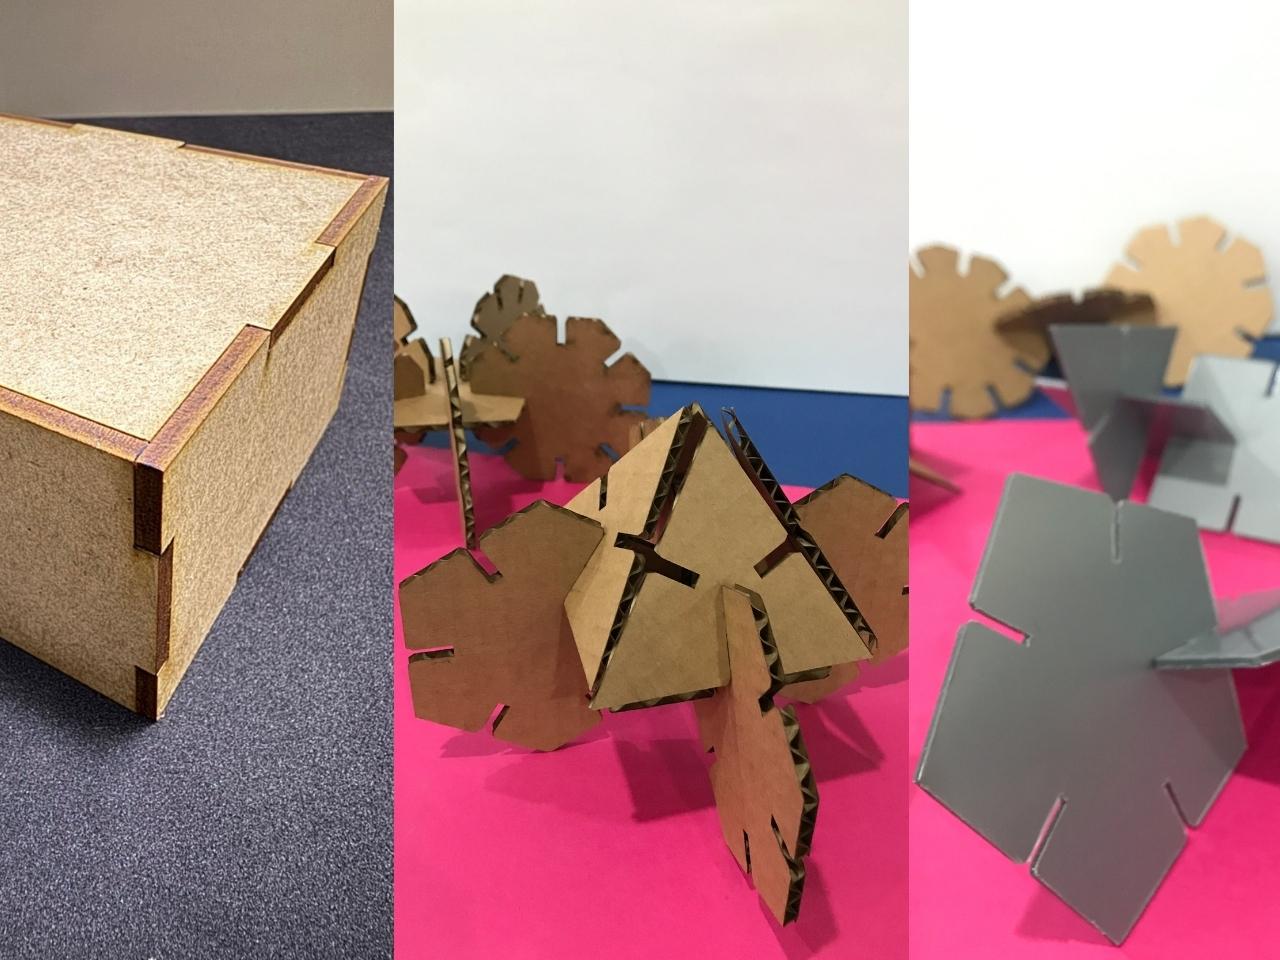
Computer-Controlled Cutting
Kid! Don't play with fire!Work with it!
I remember that warning adults used to tell me when I was still a kid about not playing with fire, and now I think it's so much fun to use a laser machine to cut and make prototypes come true, it's like "playing" with fire but for a thousand times. This week the #academychallenge is to learn all about computer controlled cutting and use the laser cutting machine and the vinyl cutting machine.
Both work under the same logic, we move the blade or the head of the machine on the x,y (z) axes which allows us to move along the entire path we want to cut or segment. Of course, as with any manufacturing process, it is preceded by a design process that must be carried out taking into account certain considerations for the cutting process to be successful.
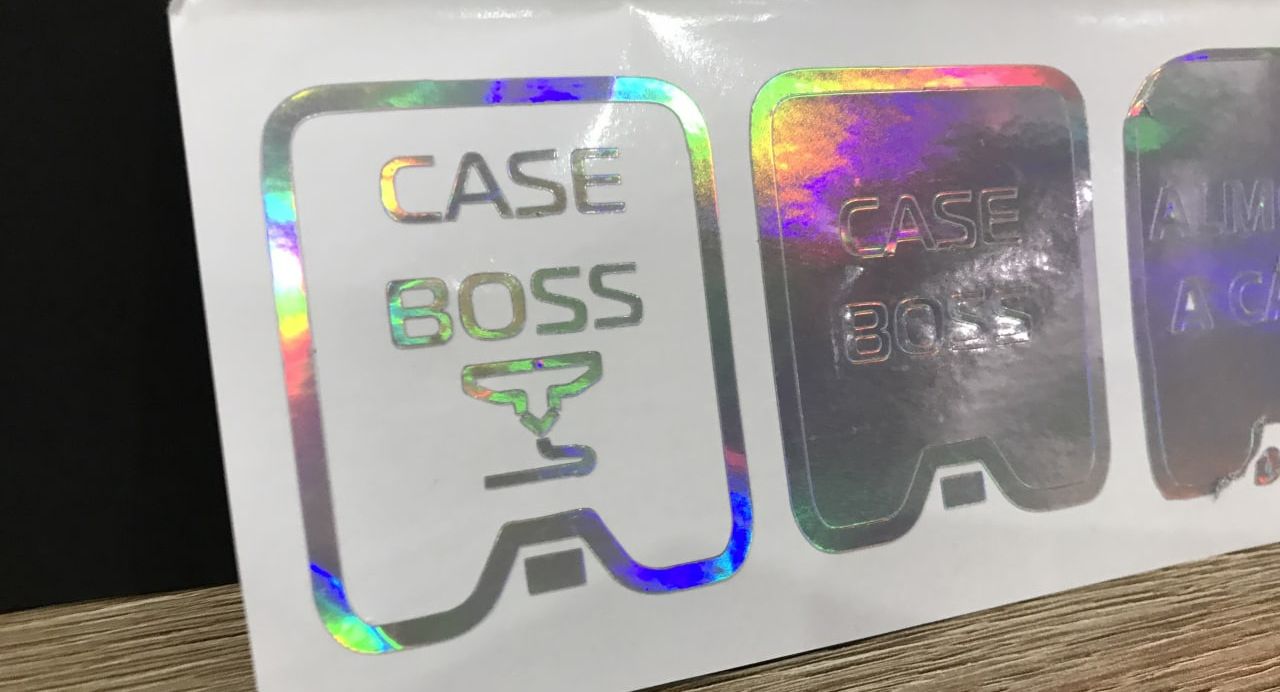
Holographic vinyl
Week 3 Assignment
📆 February
GroupTask
This week's group assignment is about learning, testing and verifying all the processes involved in computer-controlled cutting, for example, studying the parameters of the laser cutter or knowing how to set up our vector files so that they are ready for cutting. In this new round, with Fab Lab ESAN, we will look at the Trotec cutter and its functionalities.
The first group work we did was in Fab Lab Peru, access was very restricted. The documentation of that work is in 💻Mayra Ascencio's web page 💻. And for the second attempt, as always, the group work was developed with Mayra, and the documentation is here. This time we still did not have access to the ESAN lab, our node at that time, because of the confinement due to Covid-19, so it was developed remotely.
Laser cutting
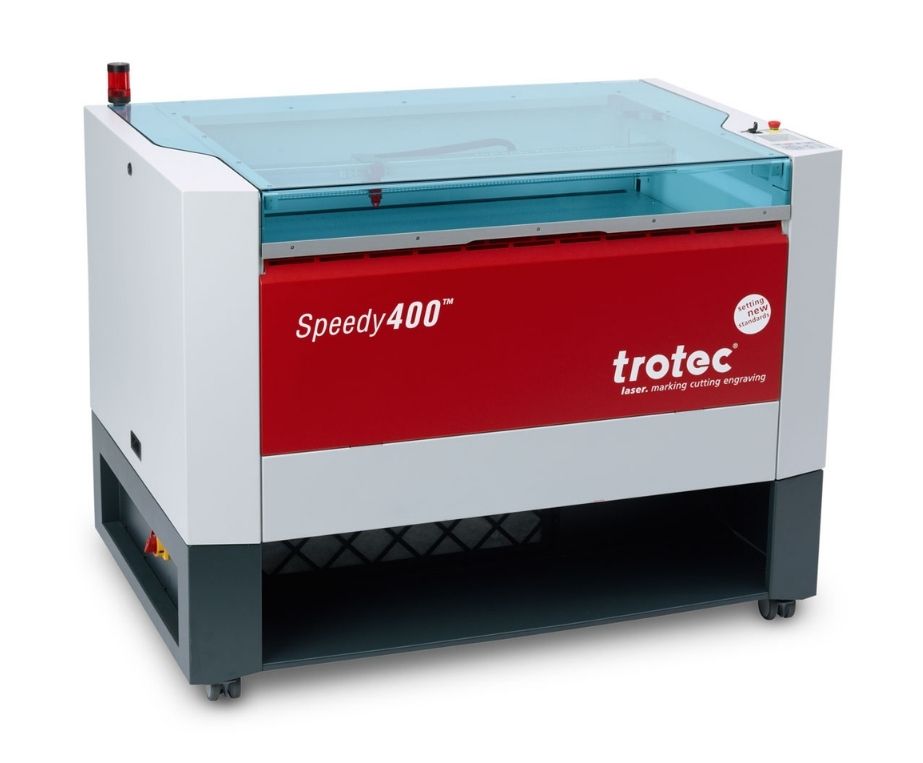
Trotec Laser 400
Technical Characteristics
Our node has the speedy 400 version of C02 and can cut/engrave the following materials:
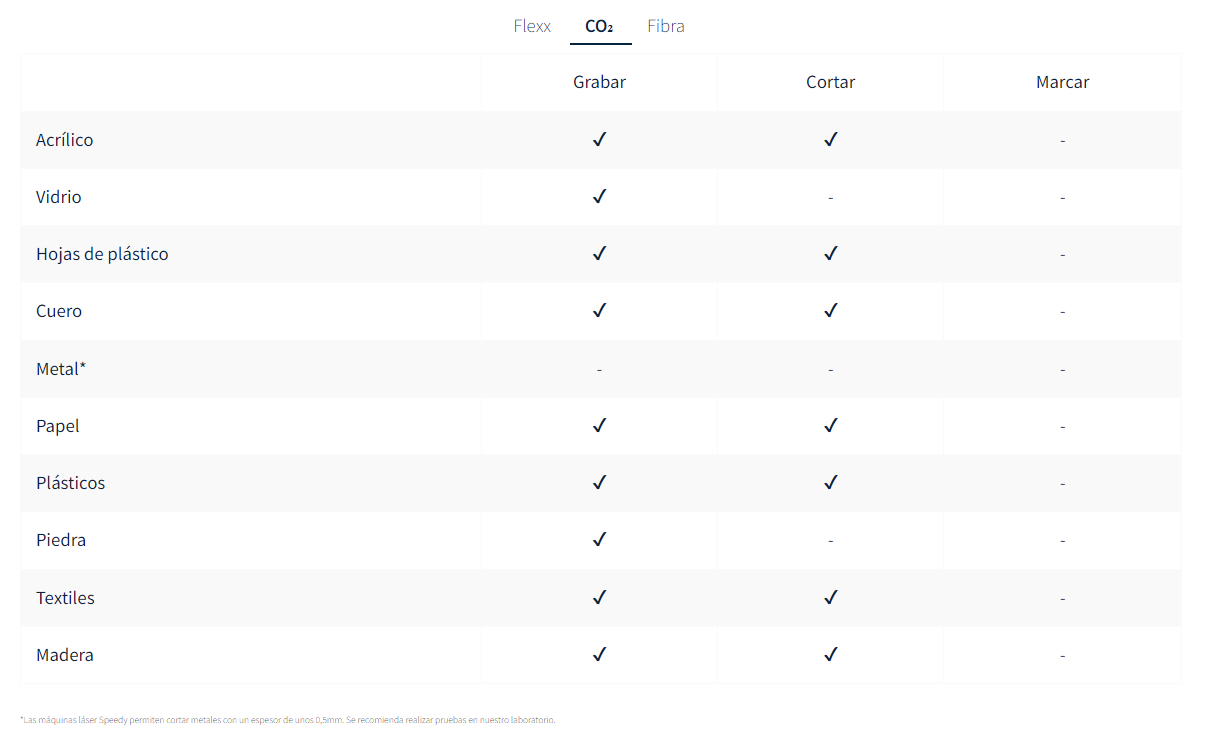
List of materials
Materials that cannot be cut:
Parameters
The parameters are those data that the machine needs to recognize when we send our files, these must be the correct ones to generate clean cuts and/or engraved correctly.
Technical ranges of Trotec Speedy 400Trotec Parameters
It is very important to make previous tests before sending our final cut since what we want is to make sure that our configuration will be the optimal one. We also do this as a precaution, if we choose the wrong parameters we could cause accidents or on the contrary not succeed with the execution of our work. Here we share an example, these are the steps we follow to generate cuts in a 3mm cardboard in 30x60cm format.
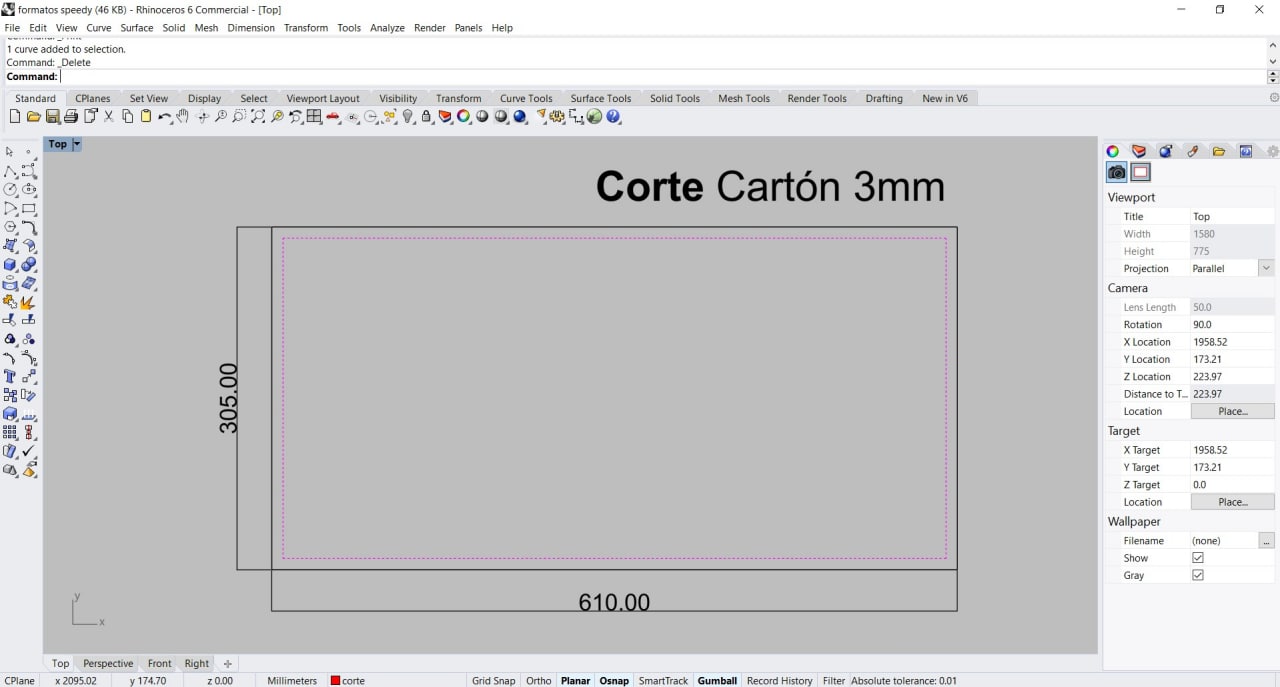
Draw the cutting format
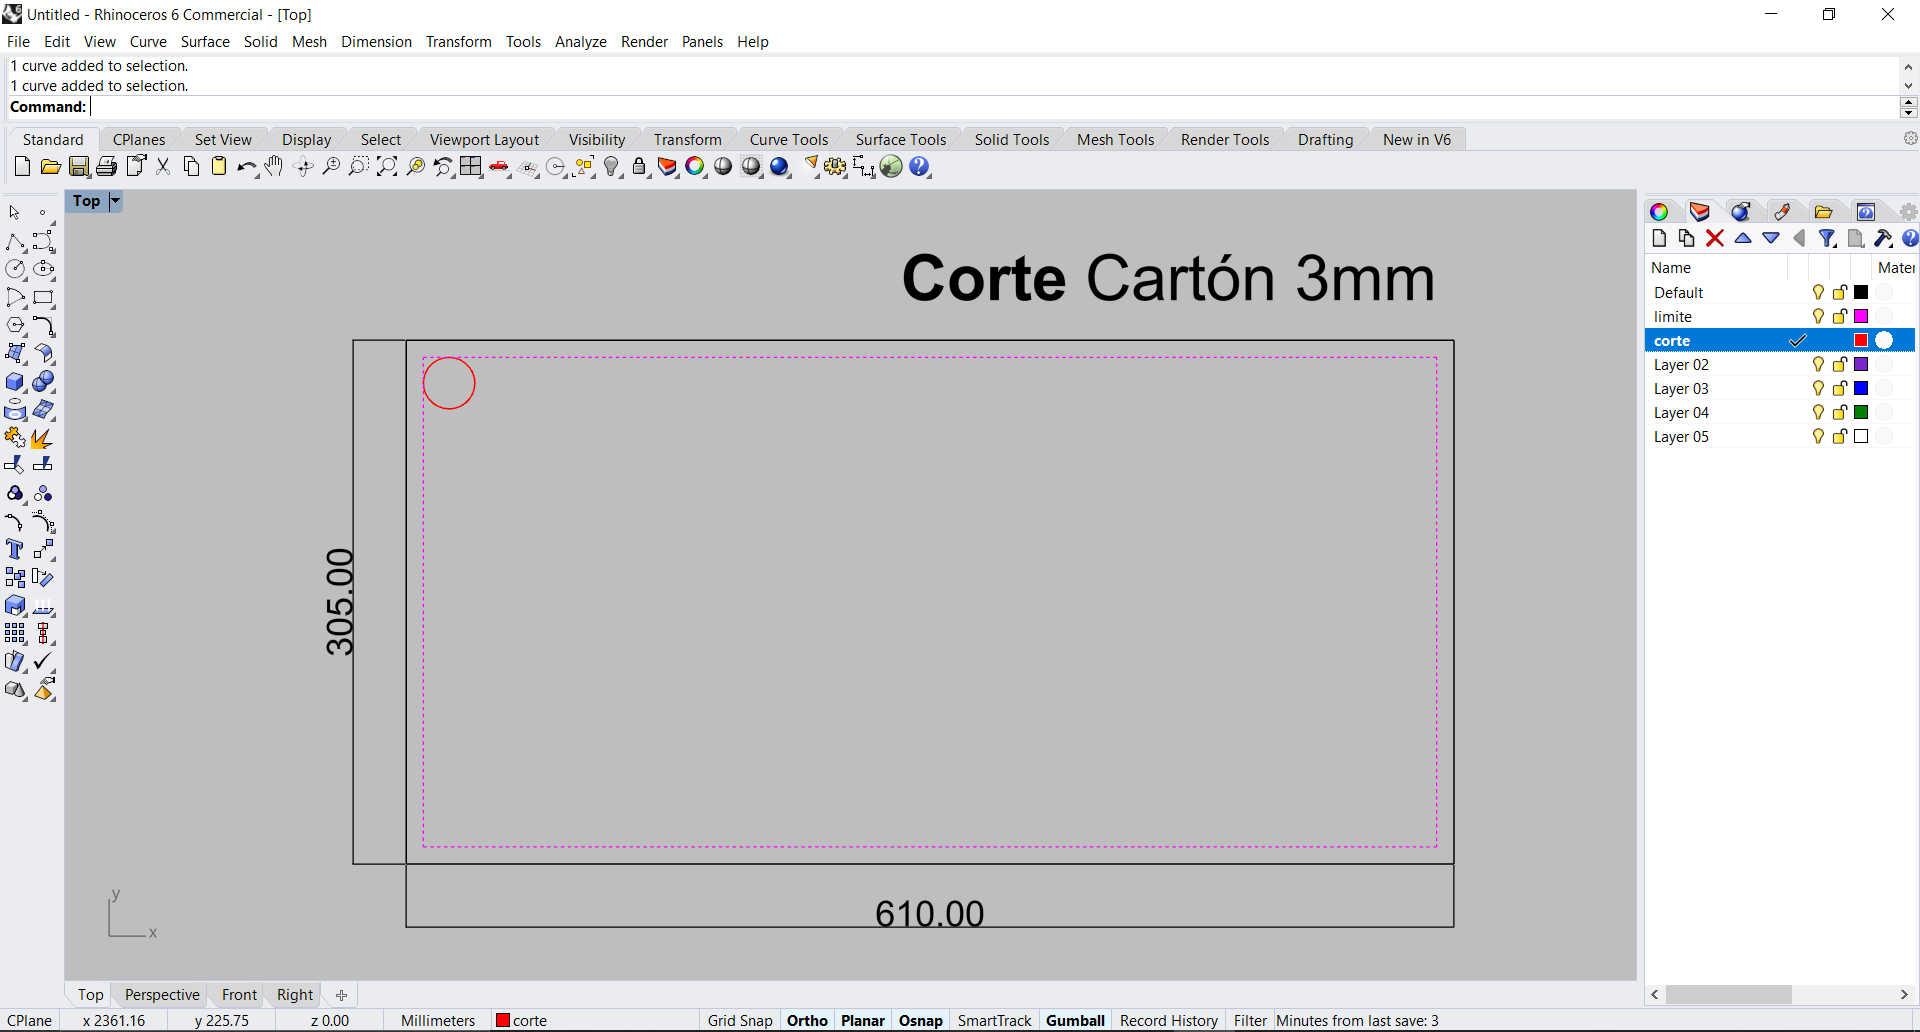
Drawing a circle
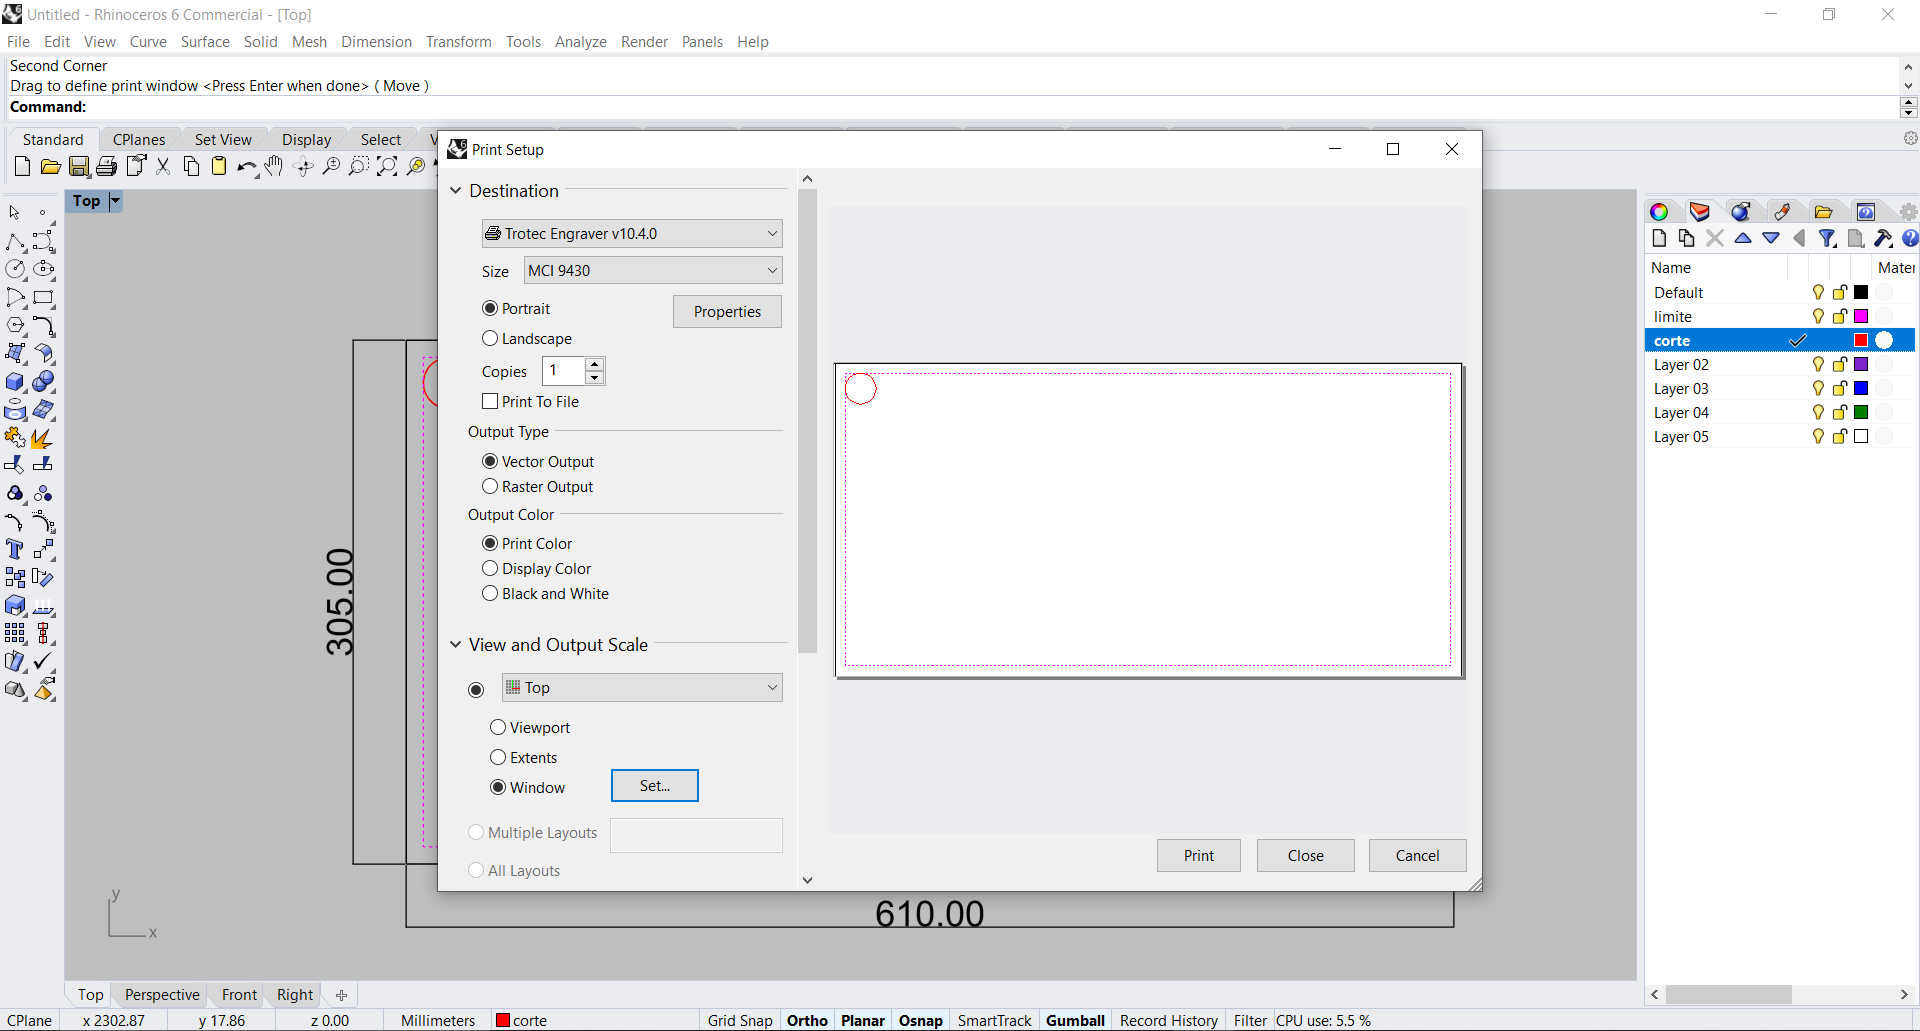
Print setup
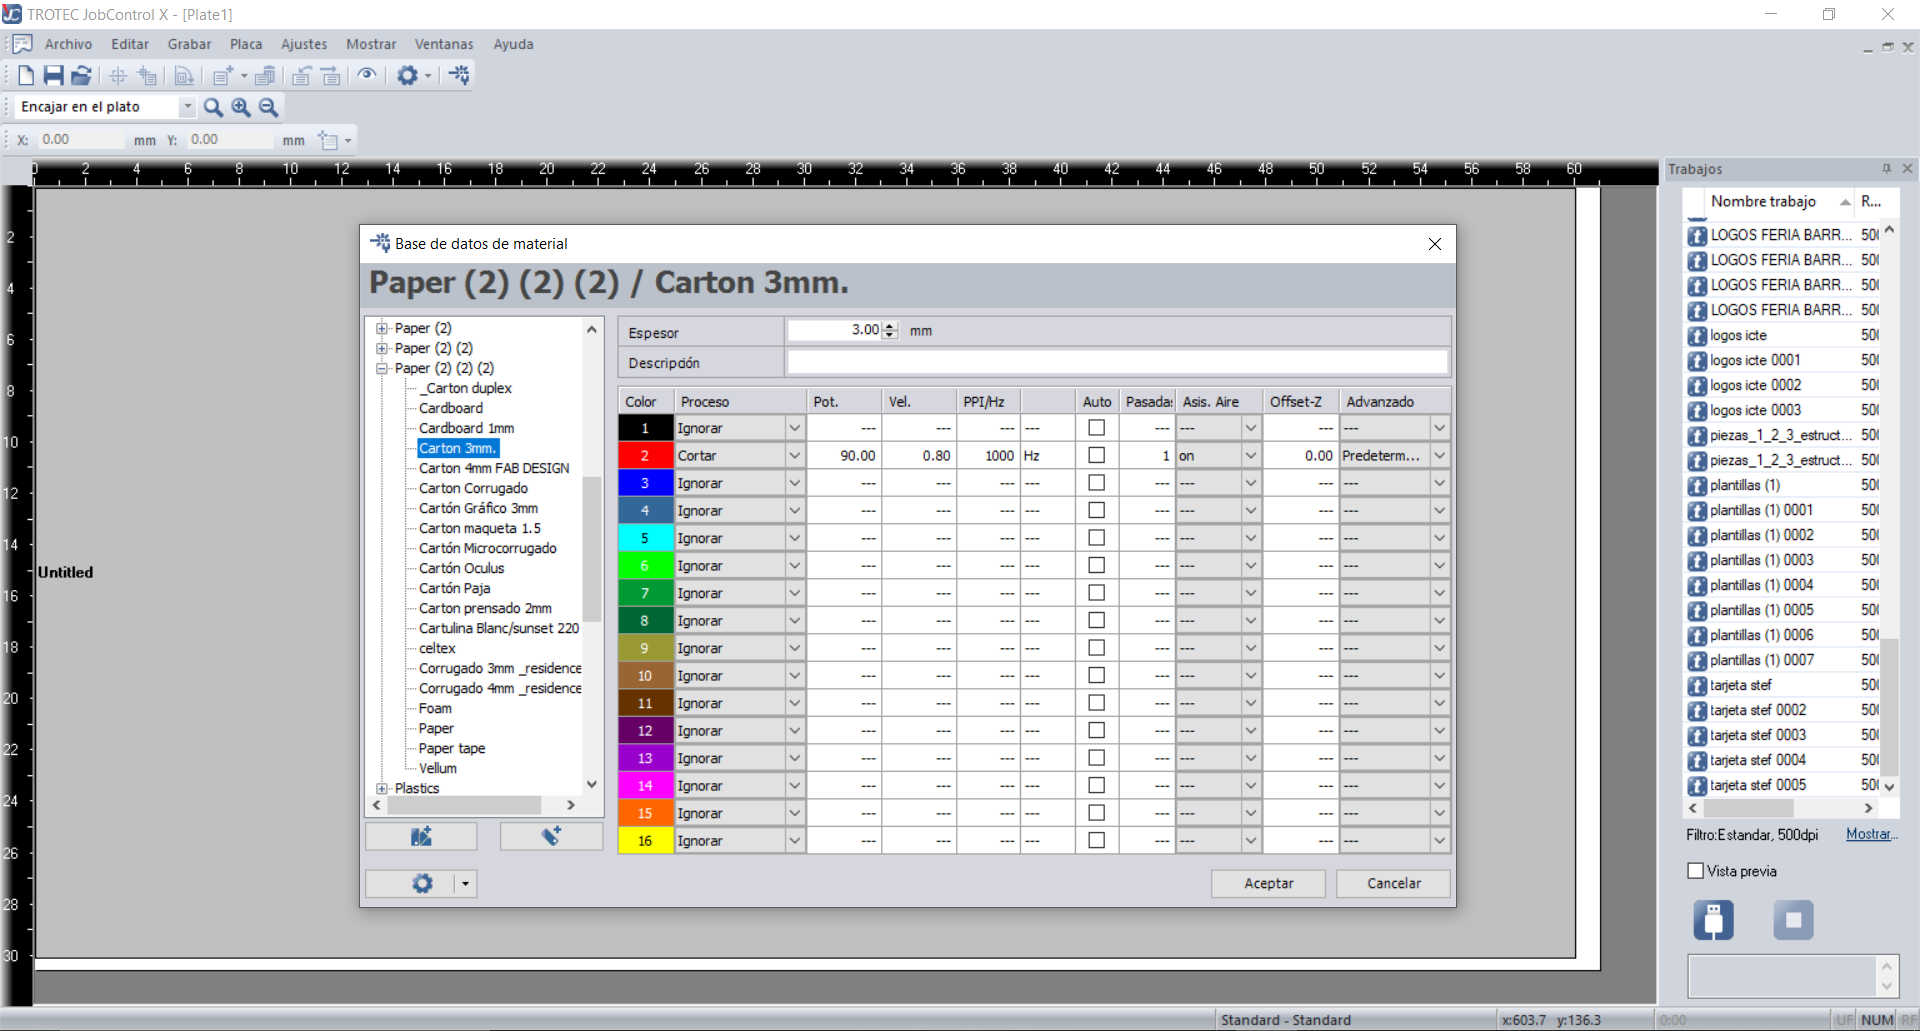
Configured according to the material
Software and operationof the laser machine:
Software JobControl
This program allows us to control our laser machine, it supports designs drawn in programs such as CorelDraw, Photoshop, AutoCAD, etc. Its operation is quite simple and fast. Below we briefly share the steps we followed to install this program on our PC.
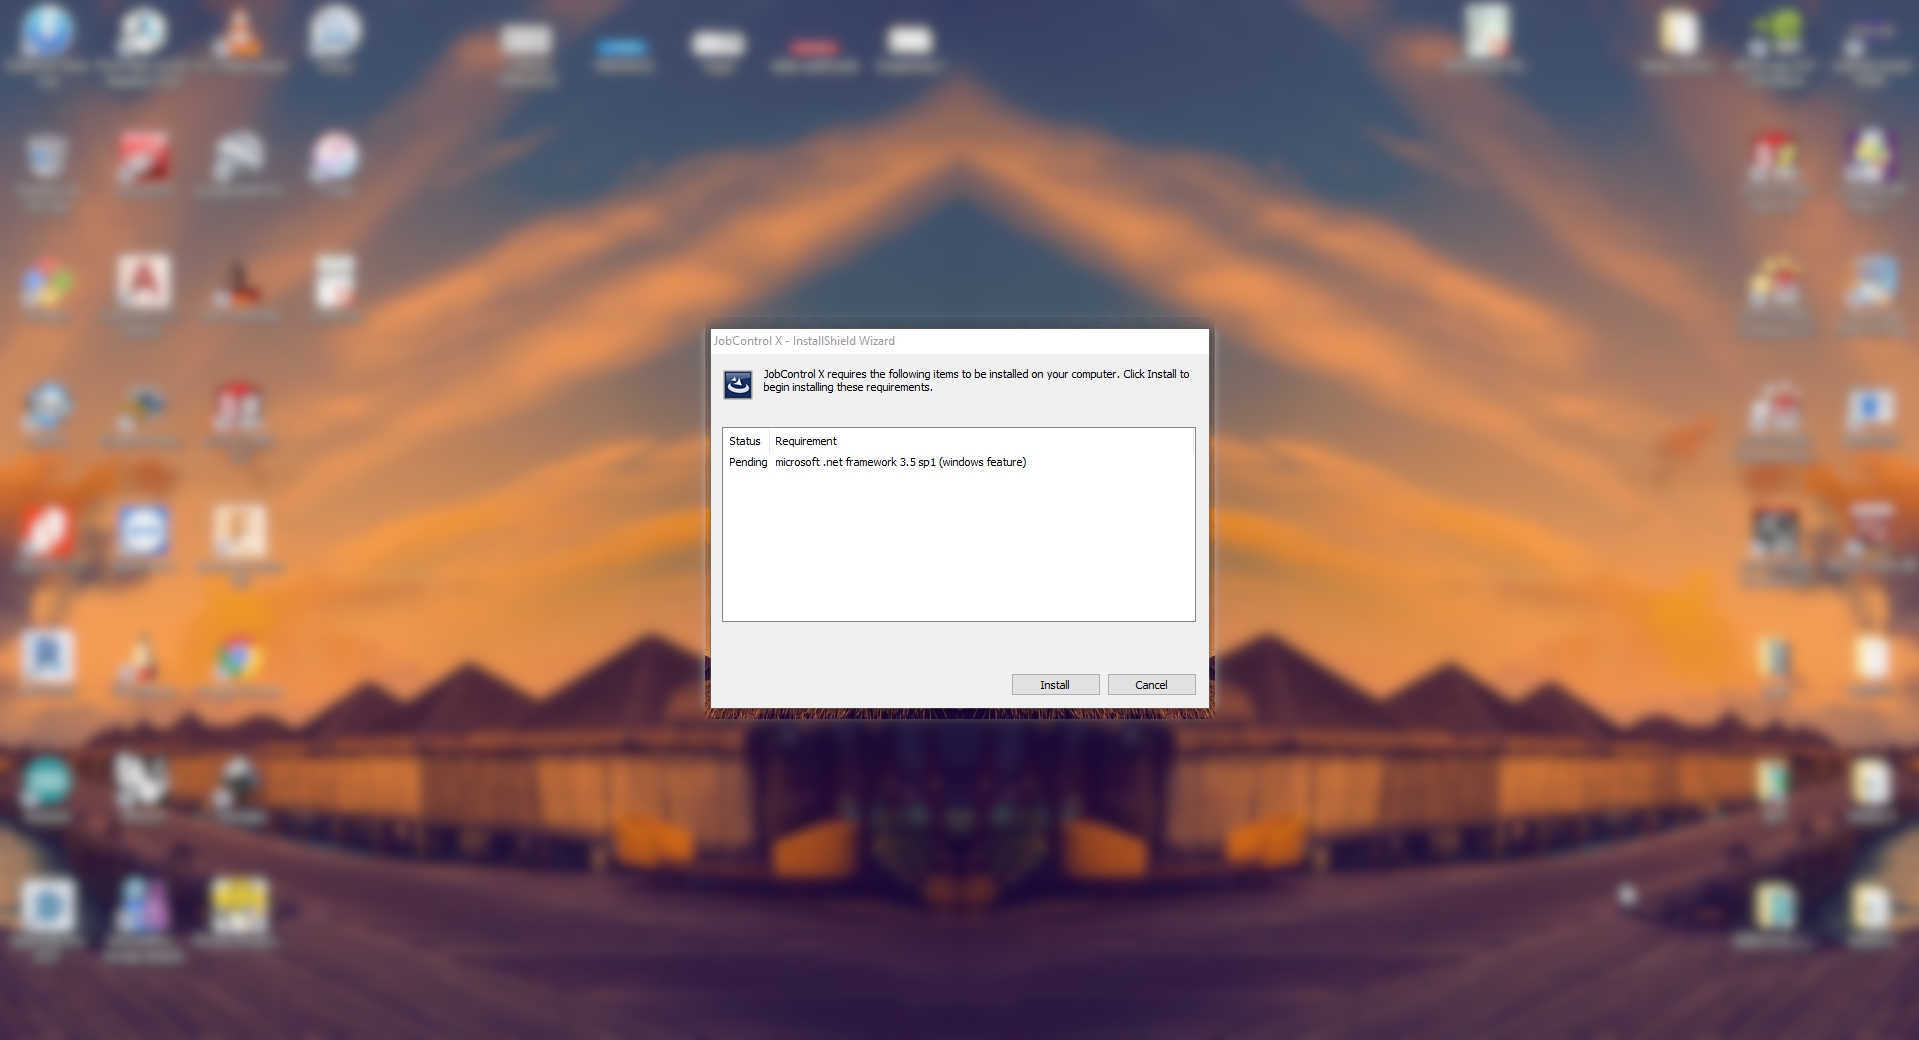
Step one
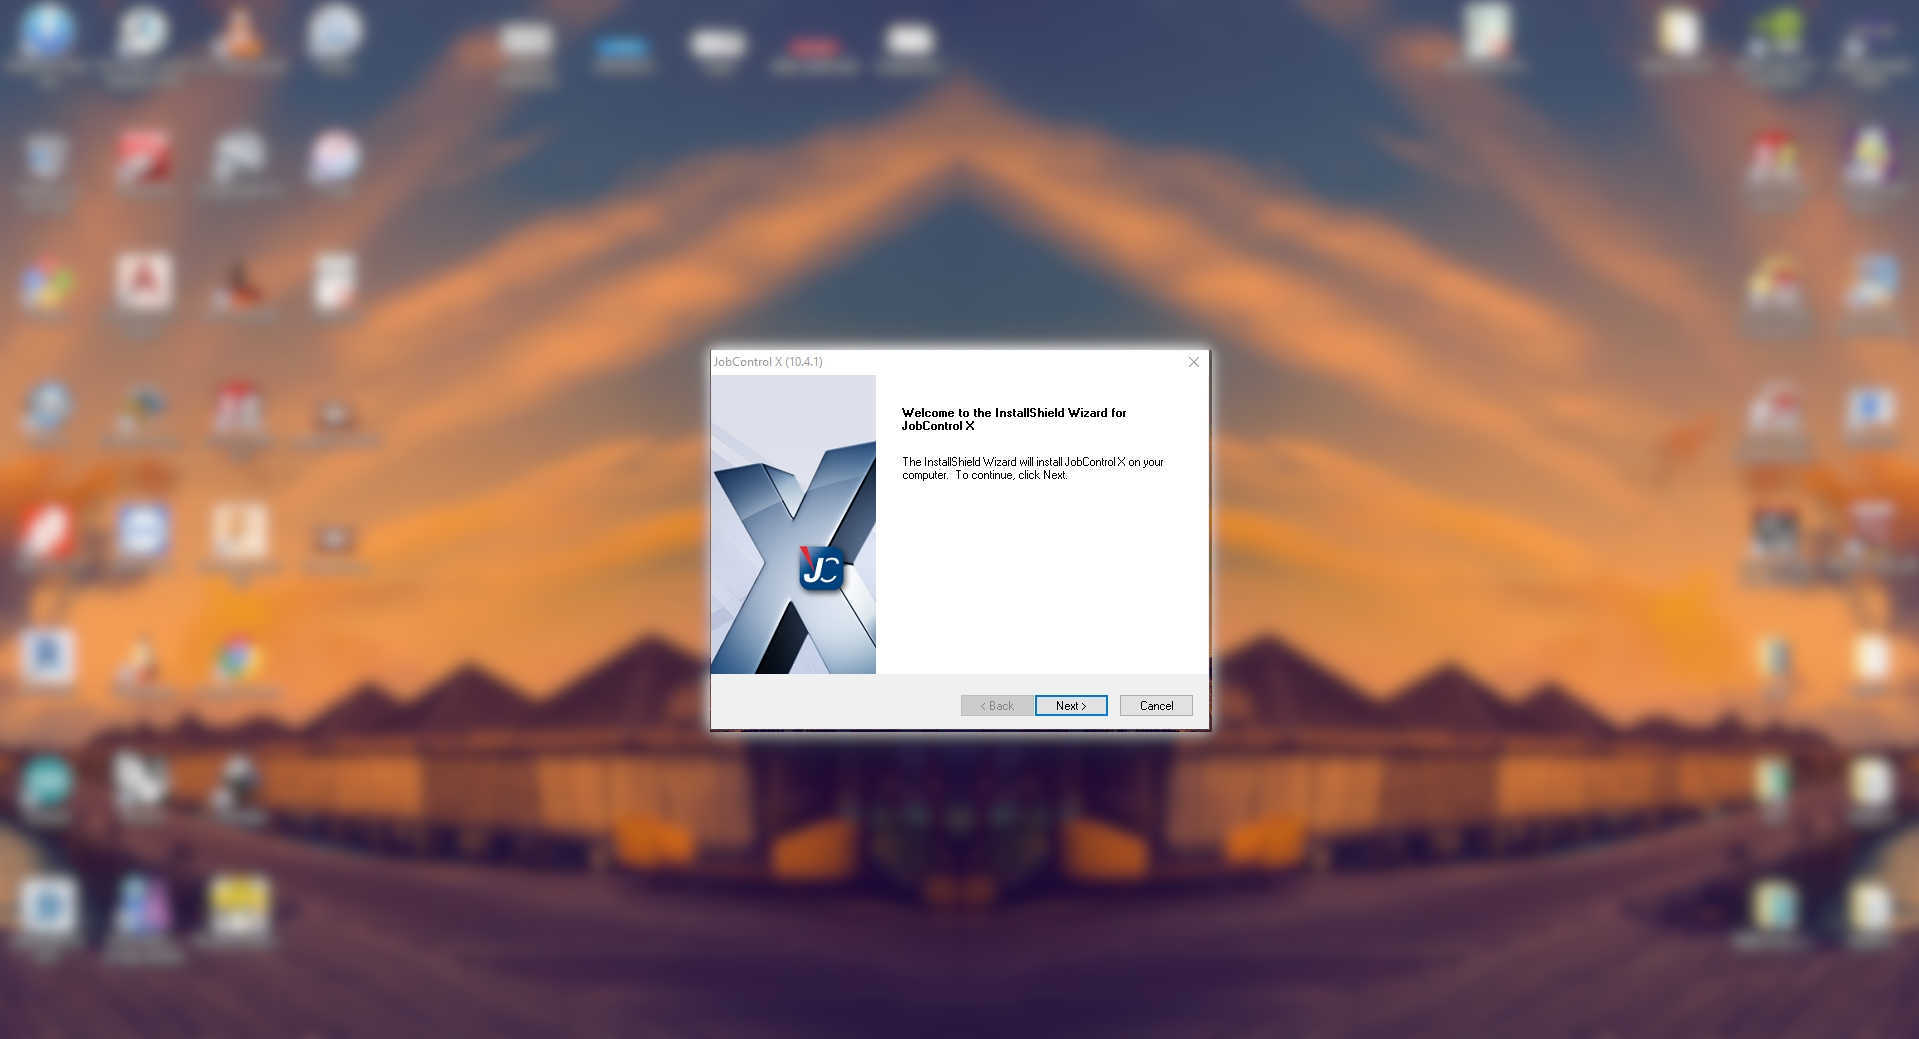
Step two
Step three
Step four
RGB Color
In JobControl, Trotec's software, we have 16 default colors that are the only ones we can use in our vector designs. That's why our team looked up the RGB code for each one and created a template with these colors to have on hand, the template allows us to assign the colors to the vectors of our designs if we want to configure them at the time of cutting with the laser machine.
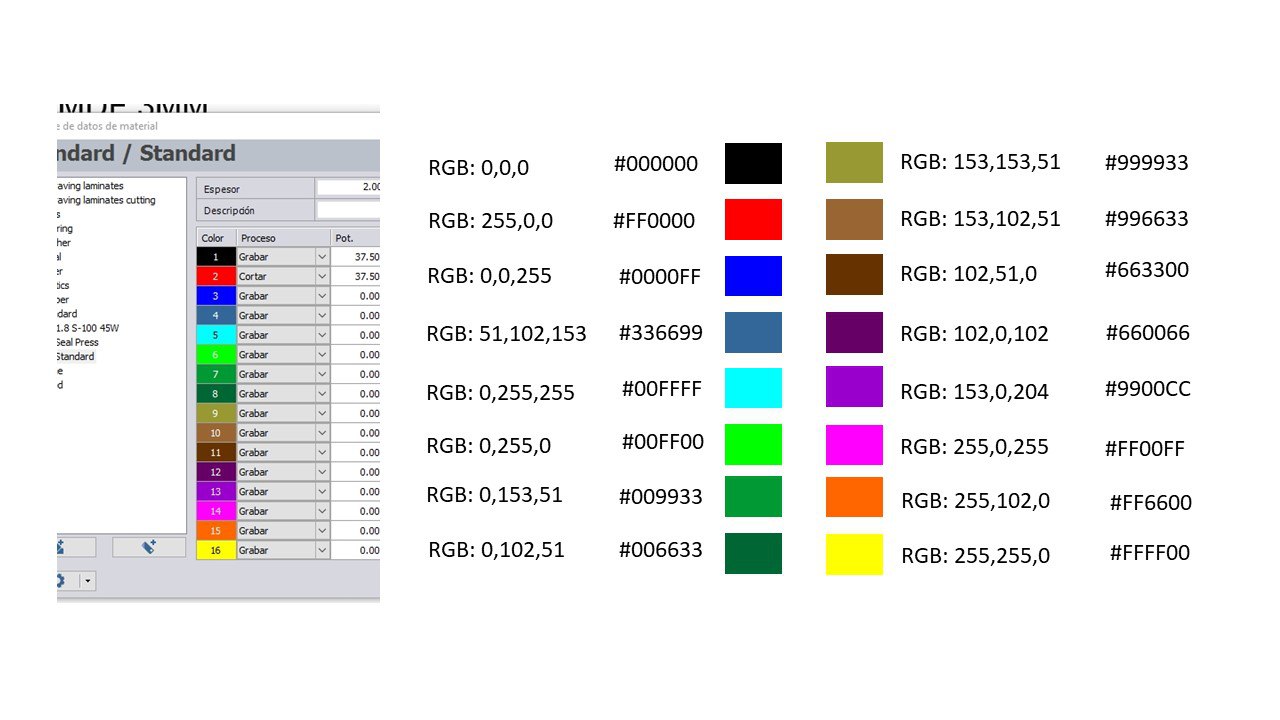
Template
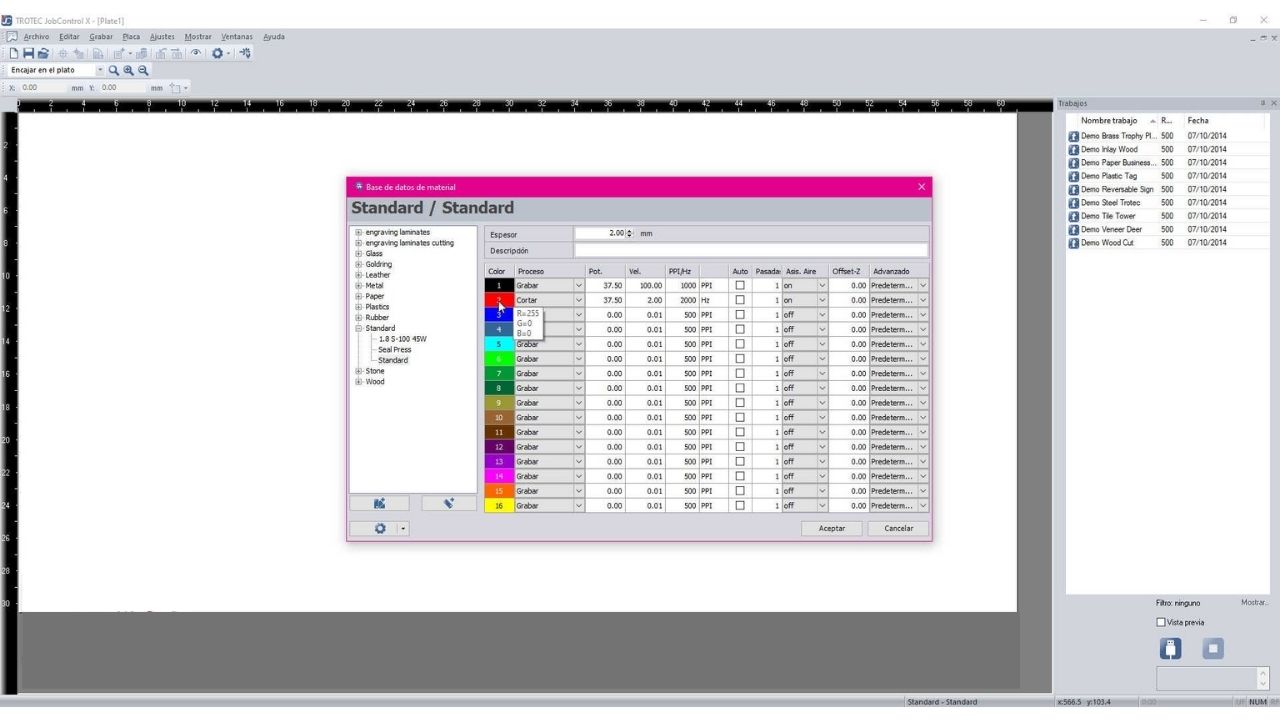
RGB Code
Operation
Most basic machine parts:
Lens and mirror
In principle the beam leaves the laser tube and travels straight to the focusing lens, bounces off the center of the mirrors and passes through the center of the lens. Lenses are used to focus the laser beam in CO2 laser machines.
Lens placement

One

Two
An extraction system helps filter dust and fumes from the work surface and activated carbon filters out all odors created during laser processing.

Inside view of the machine
A laser tube is responsible for emitting and transporting energy in the form of light to generate the laser beam used for engraving or cutting. It is an airtight container that contains mostly CO2, and other gases such as Nitrogen, Hydrogen or Helium.
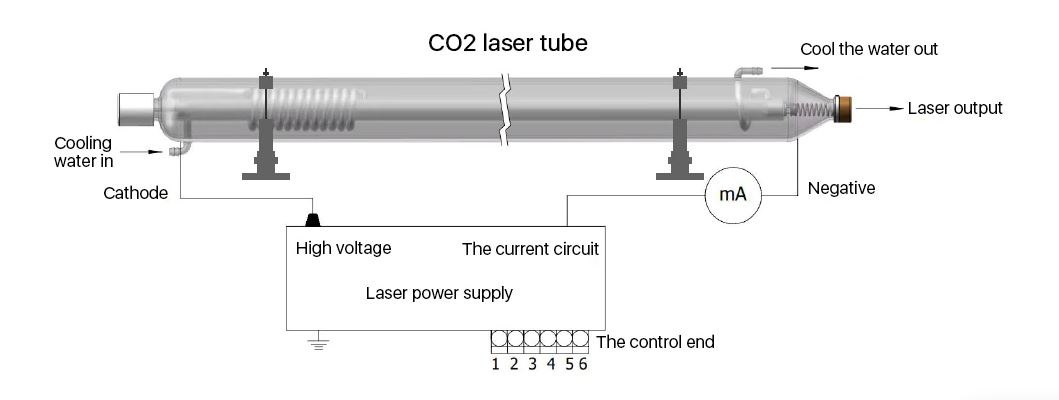
C02 tube diagram

One
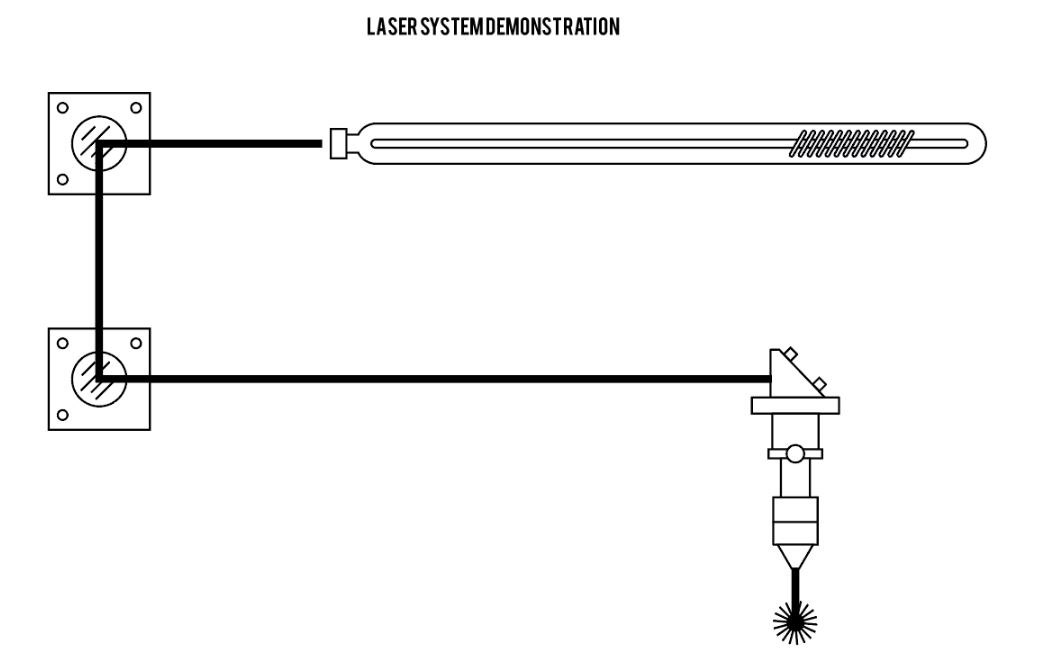
Two
Cutting, engraving and kerf
Design considerations for Test or any laser cutting
We in the group realized that when you design drawings or test catalogs you have to be very careful. It won't do any good to do a kerf test, or a fit test if you draw the measurements wrong or make a mistake in the scale, because when you cut it and go to verify the measurements with your calibration tool, you will not get the measurements you expected or you will never know the true variation of measurements between the file and the reality, because the file never had the measurements well done.
Therefore, the following is recommended:
A_If parametric software such as SolidWorks or Fusion 360 is used:
You can restrict the measurements so you can easily modify them if you made a mistake. And by clicking on each part you can know the measures you have placed.
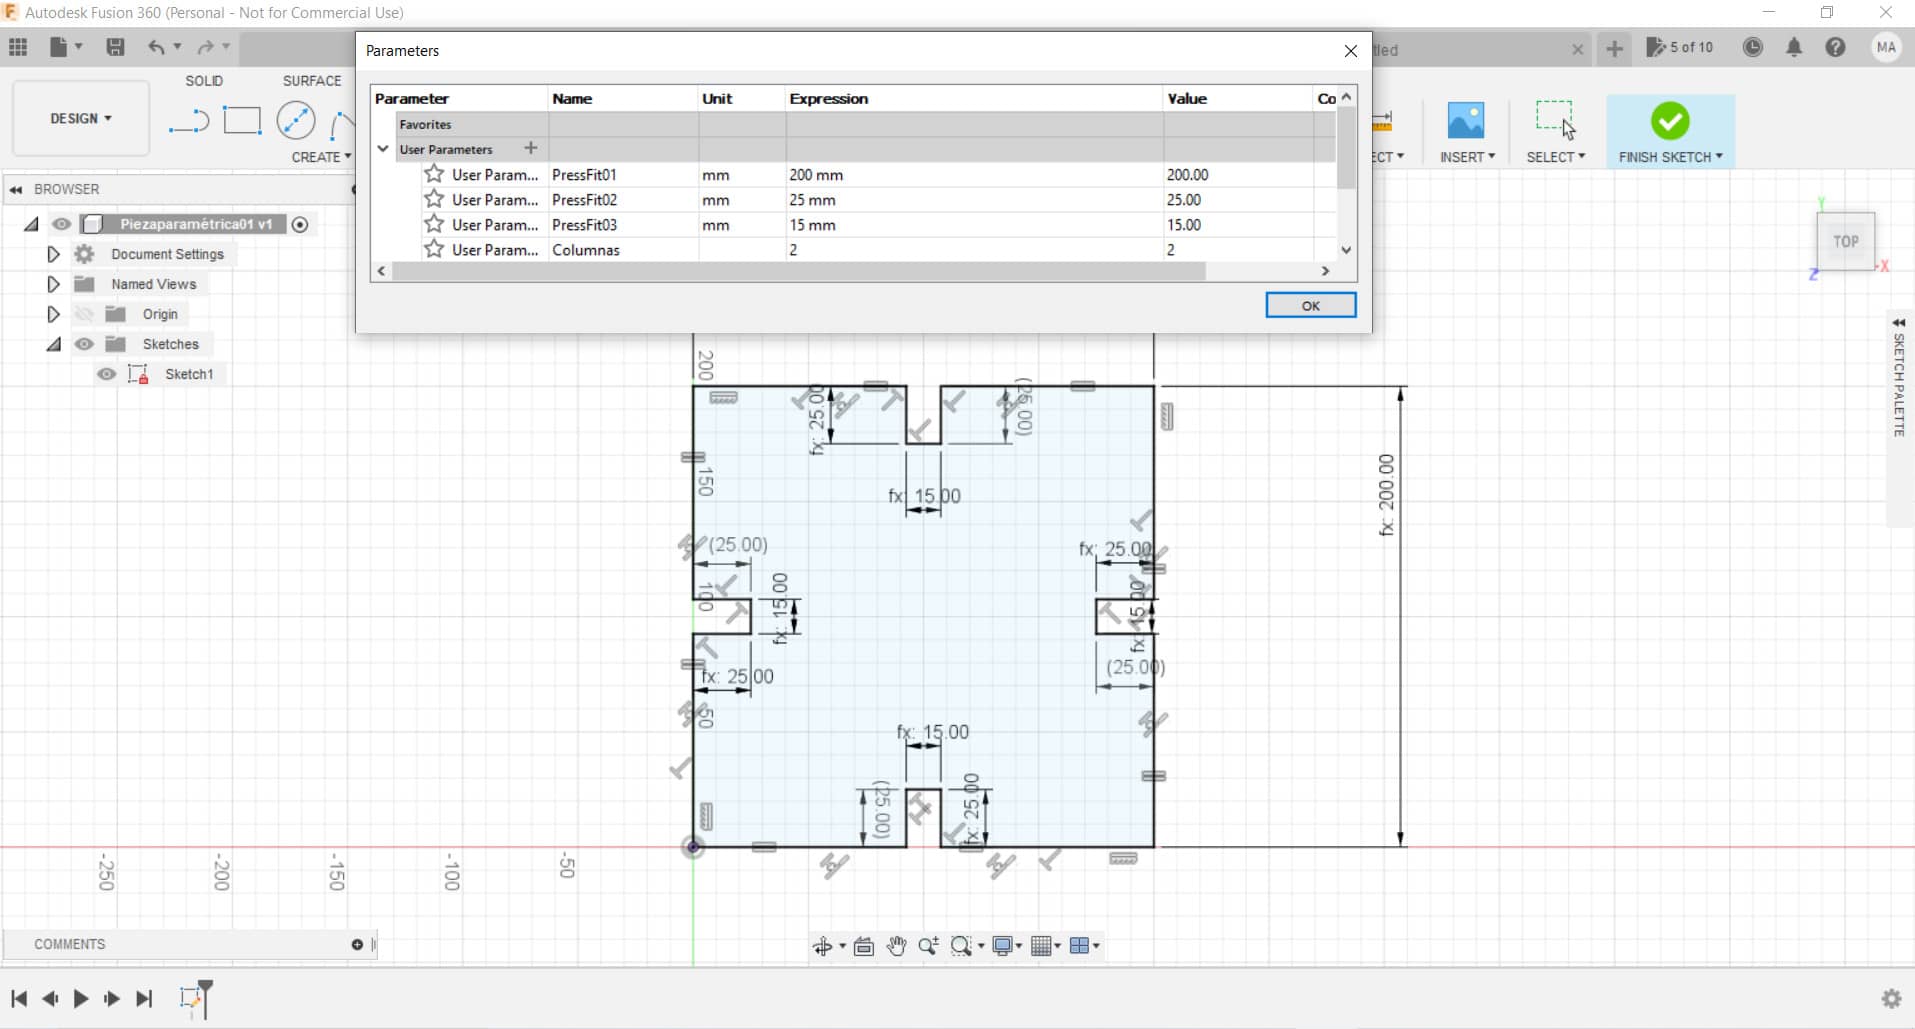
Fusion
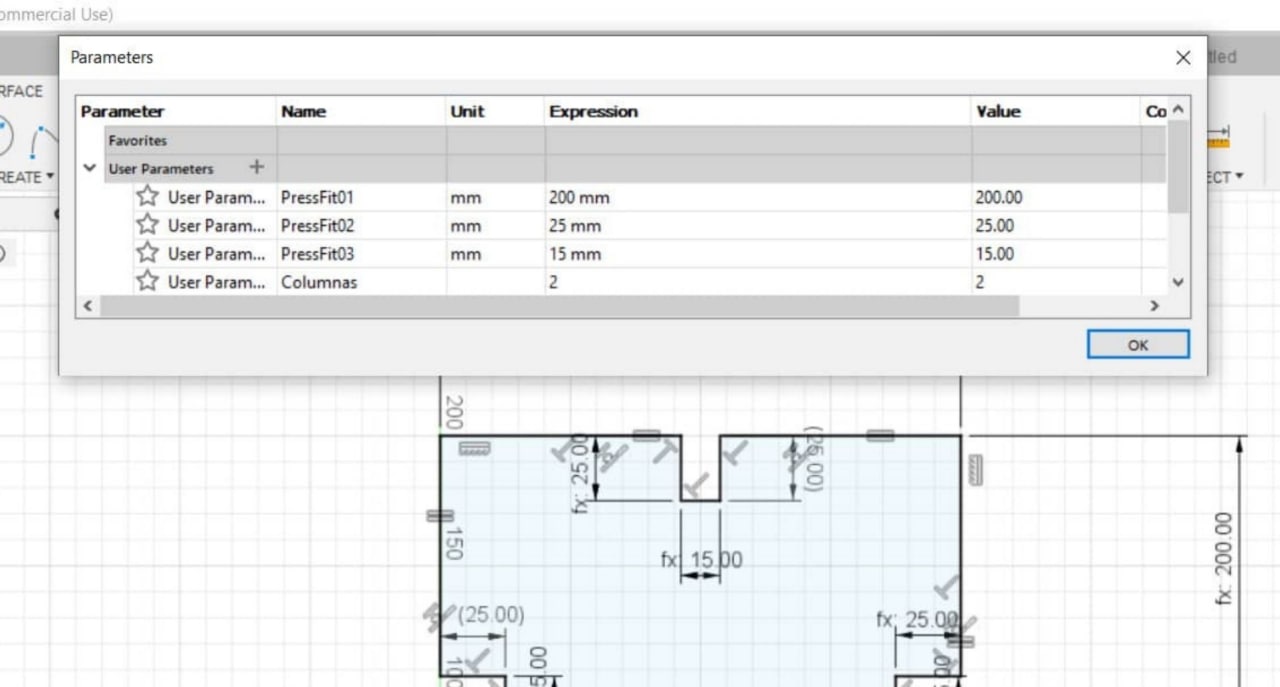
Value table
Zoom: Zoom in and see your closed lines.
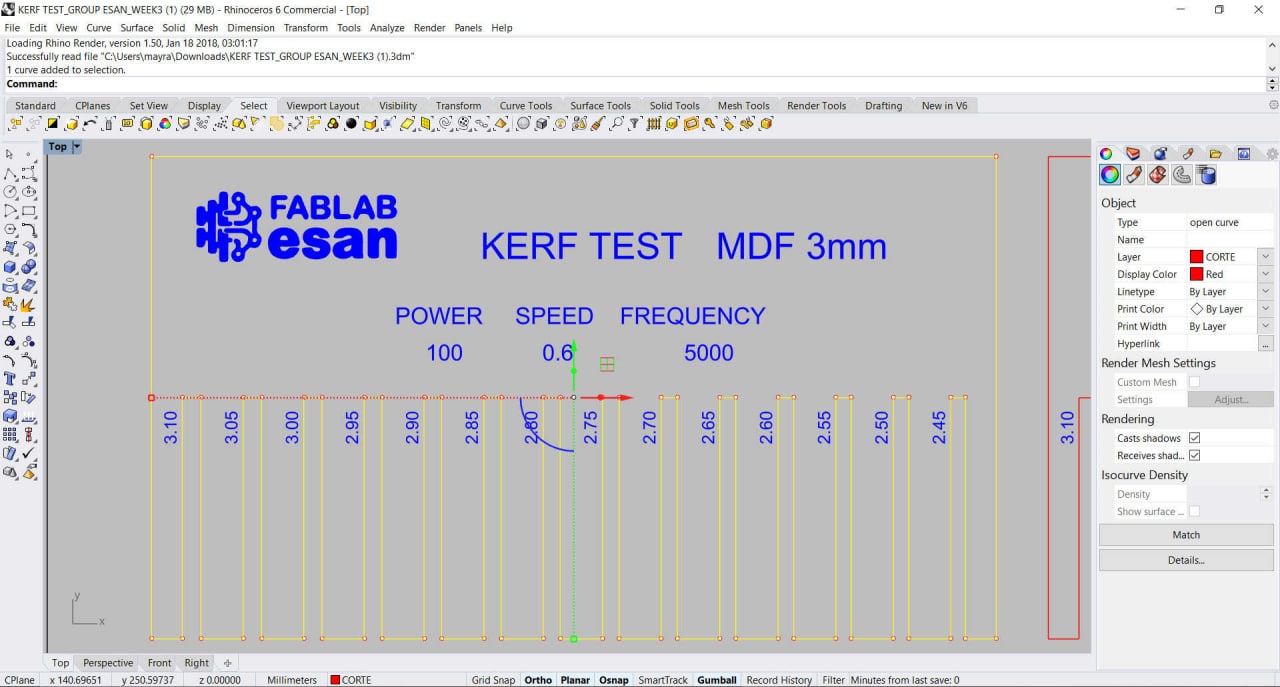
Closed lines
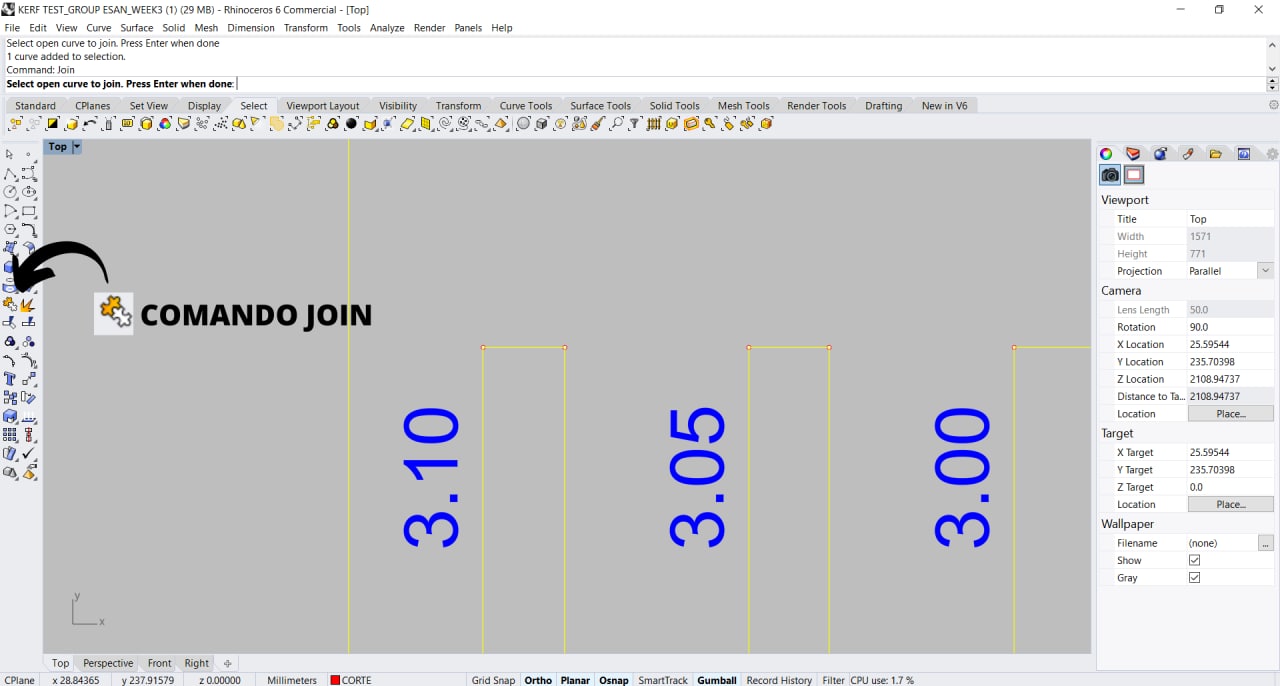
Join command
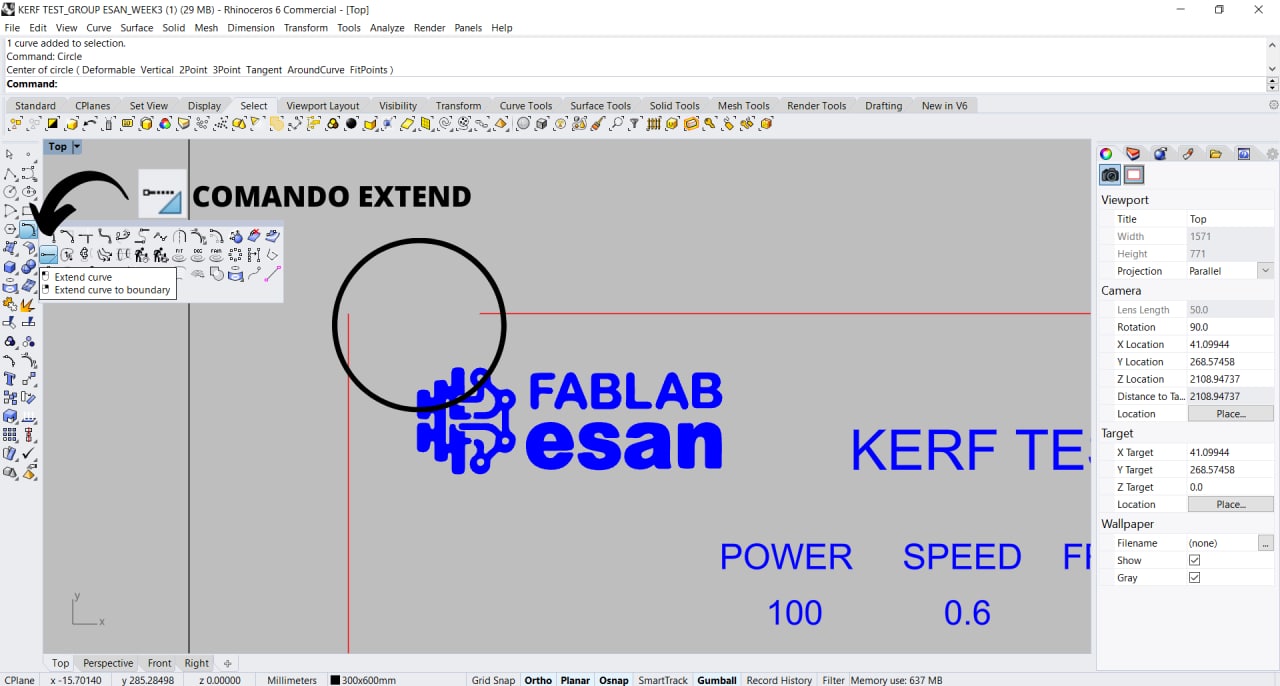
Extend command

Trim command
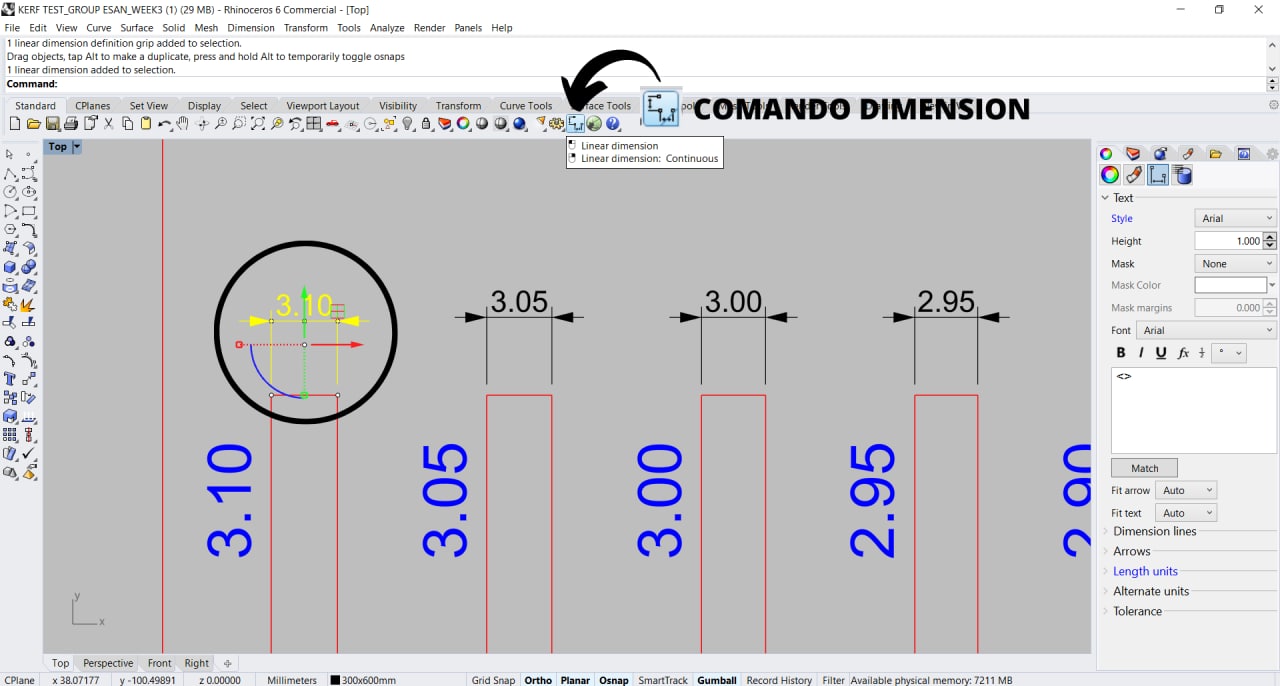
Dimension command
A_You can use the following command in Rhinoceros:
SelDup
This command only works in the perspective view and is used to identify and select duplicate lines or objects in our design. Once we select the lines for example, we just delete them and we will have a clean file of duplicate lines.
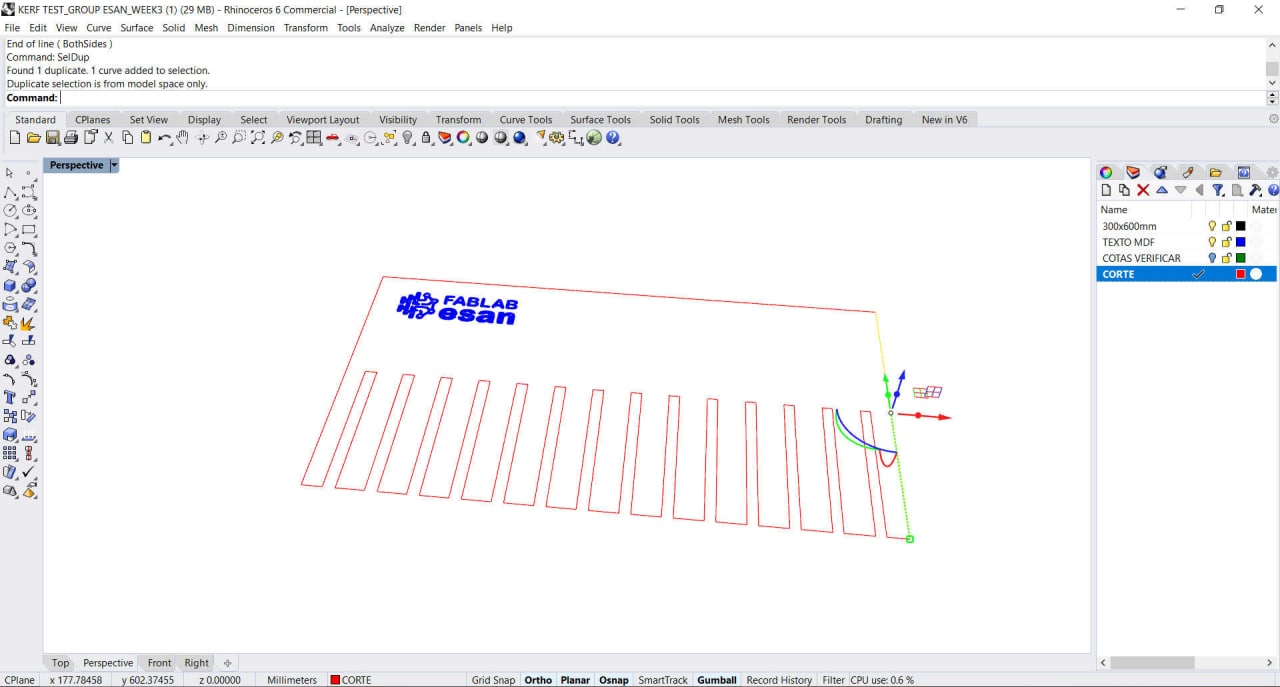
Seldup command
Remember that some laser cutting software has within its tools a command that allows us to detect duplicate lines.
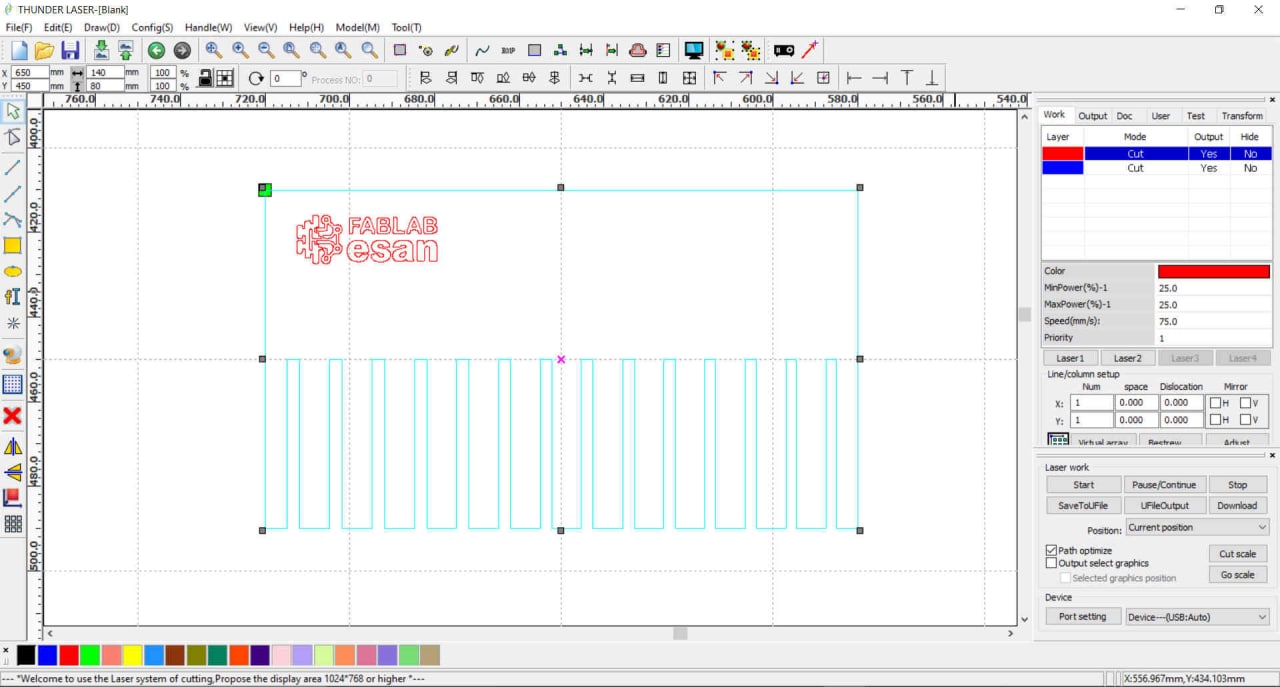
Imported file
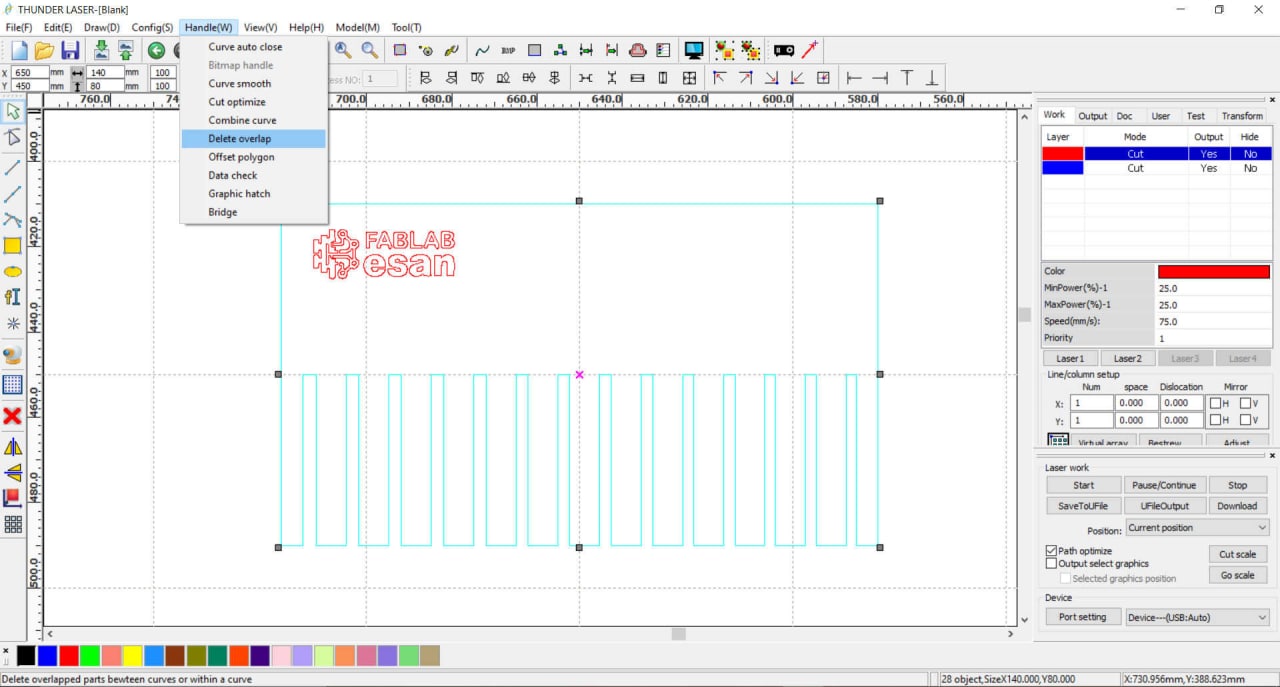
Detect overlapping lines
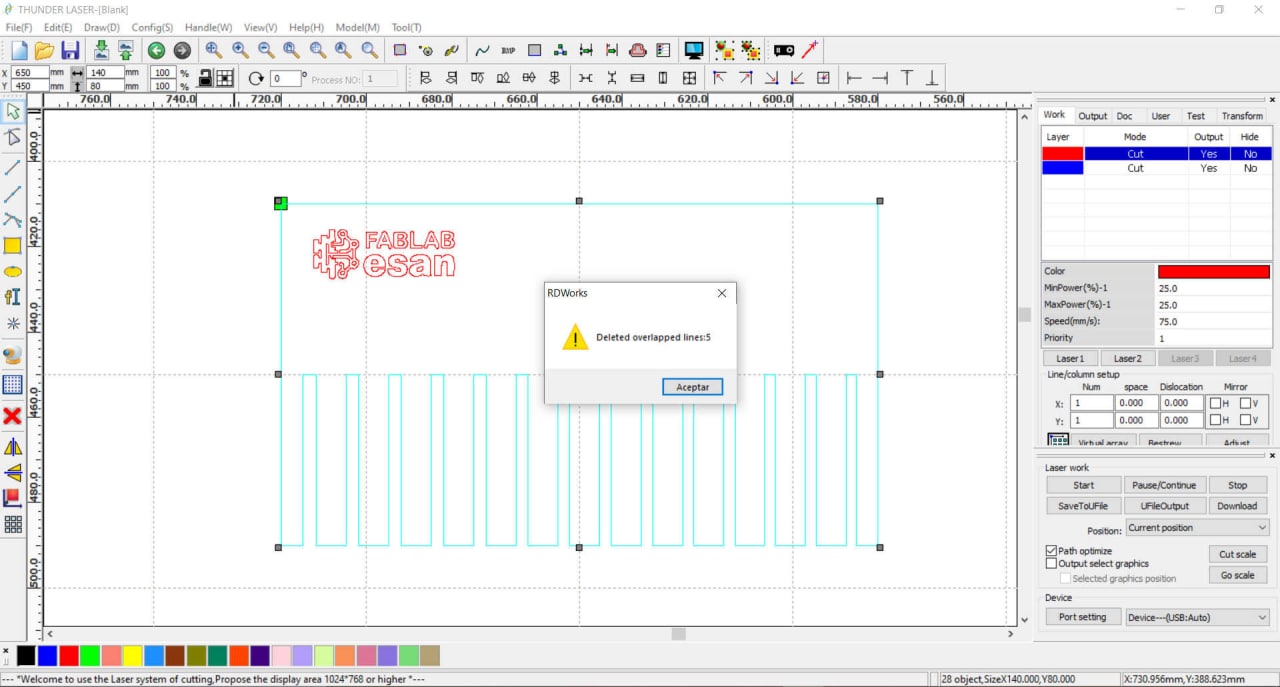
5 overlapping lines
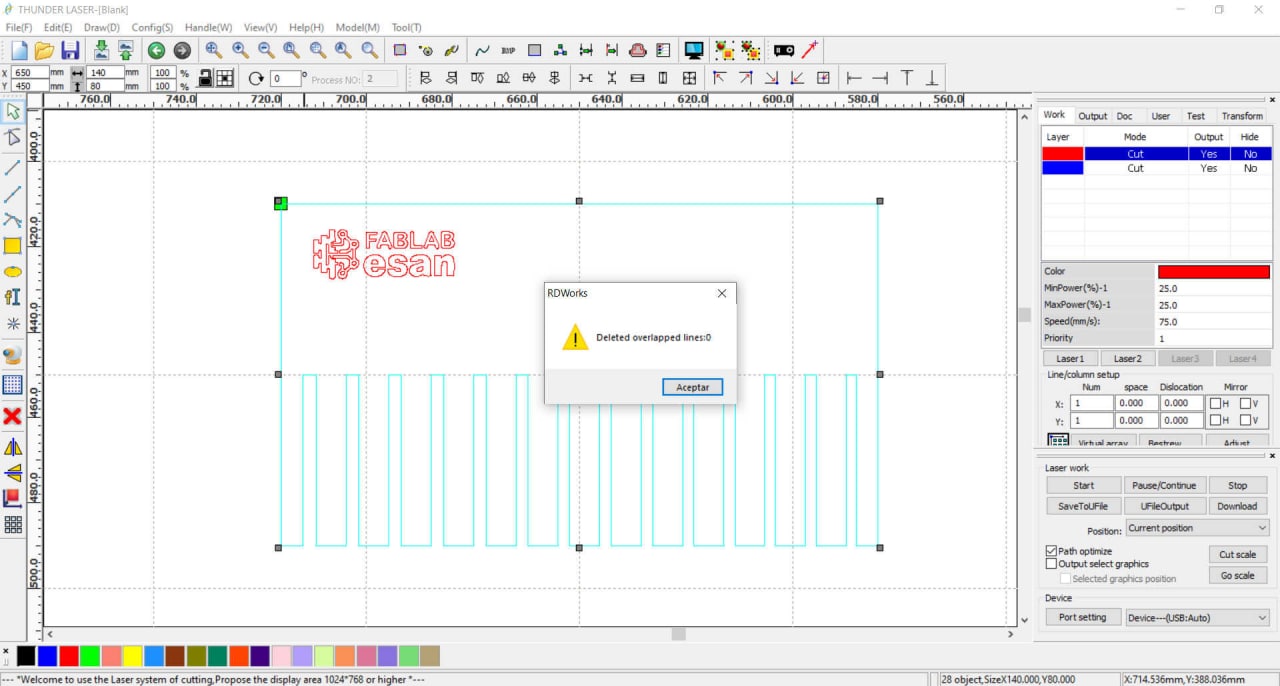
Clean drawing
List of parameters used
- Power:100
- Speed:0.6
- Frequency:5000
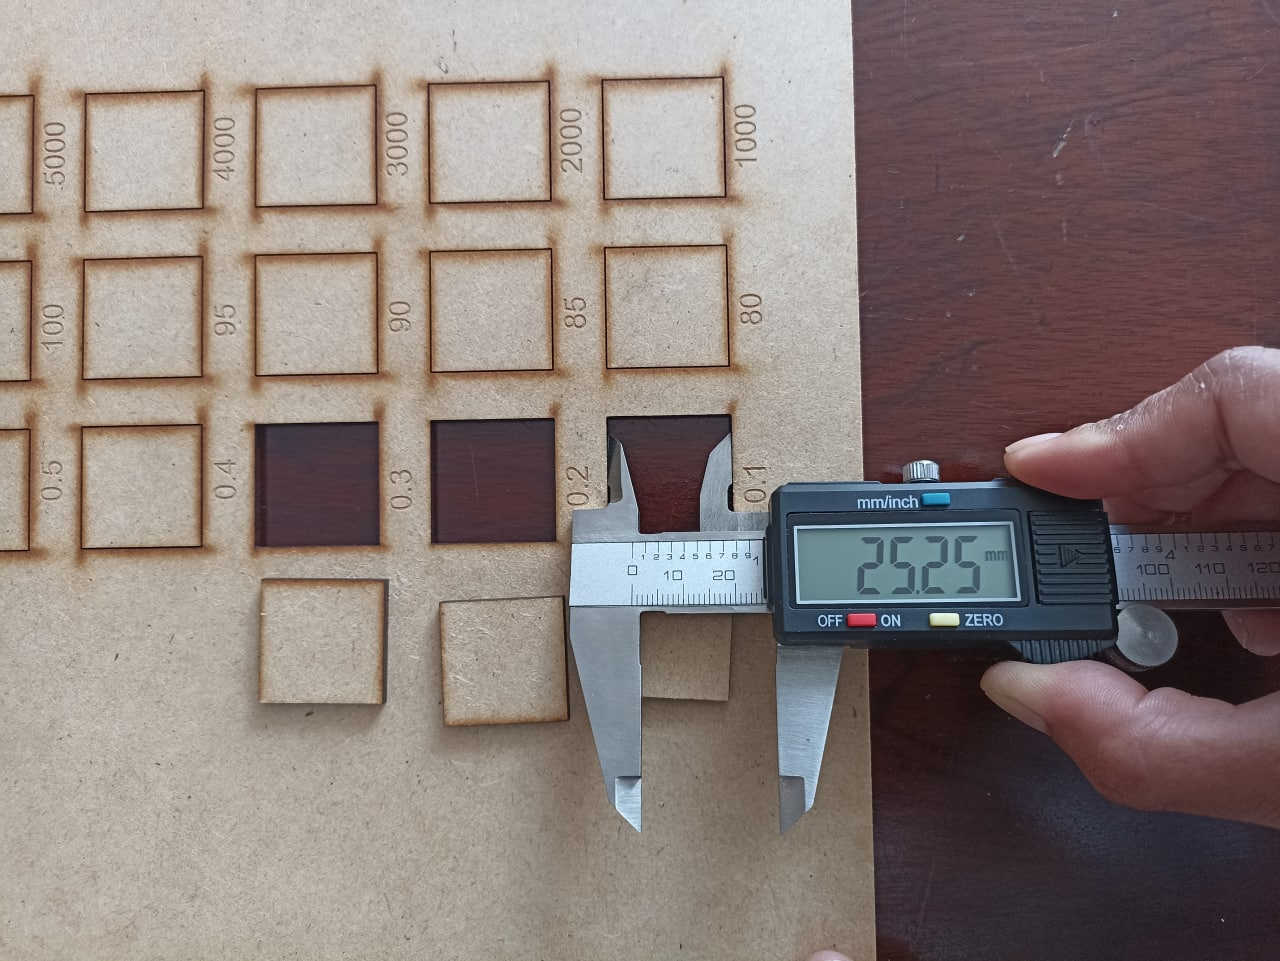
Horizontal measurement
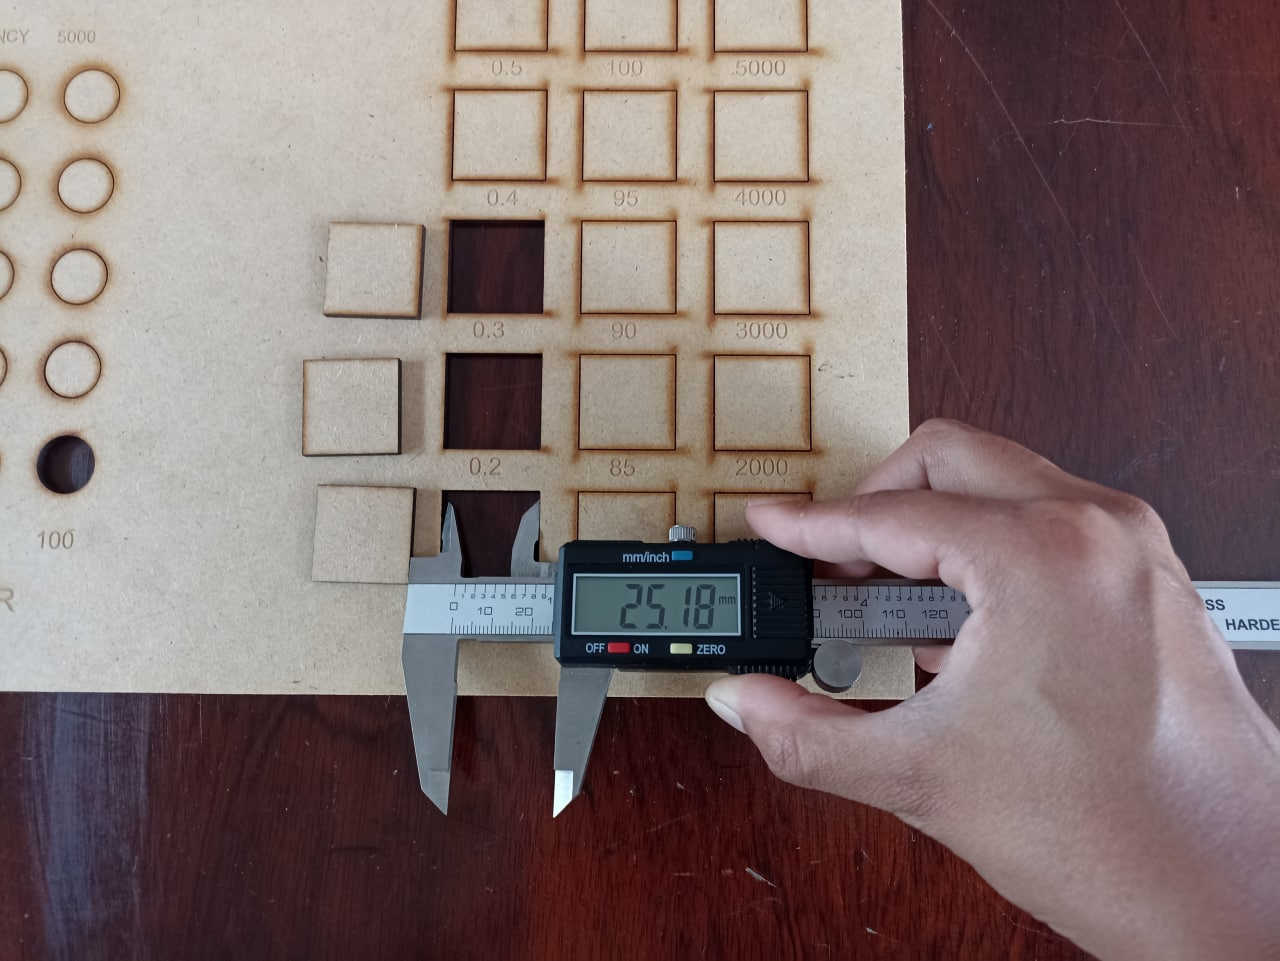
Vertical measurement

Design in Rhinoceros
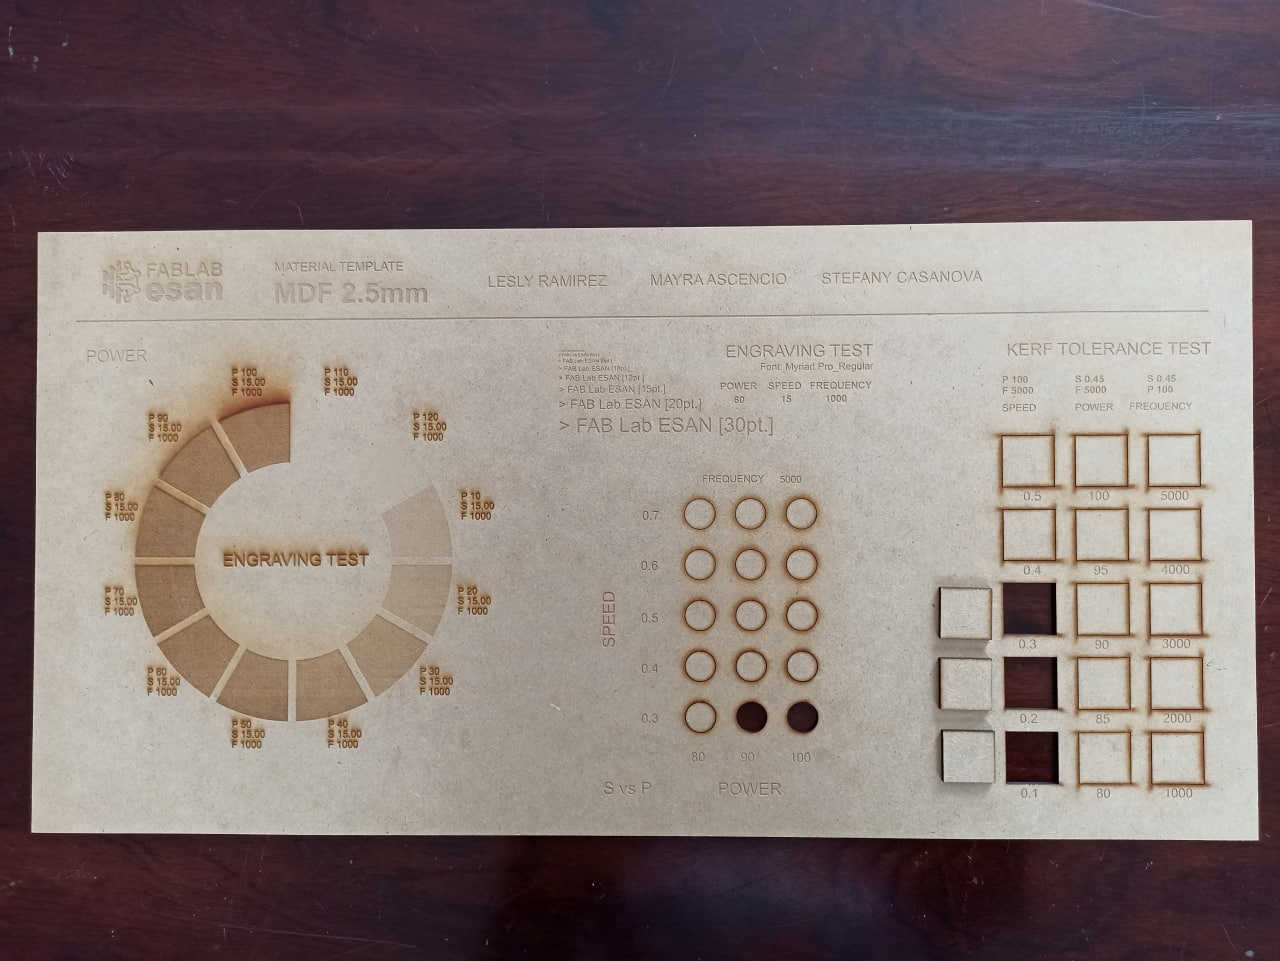
Complete format
List of parameters used
- Power:85
- Speed:1
- Frequency:5000
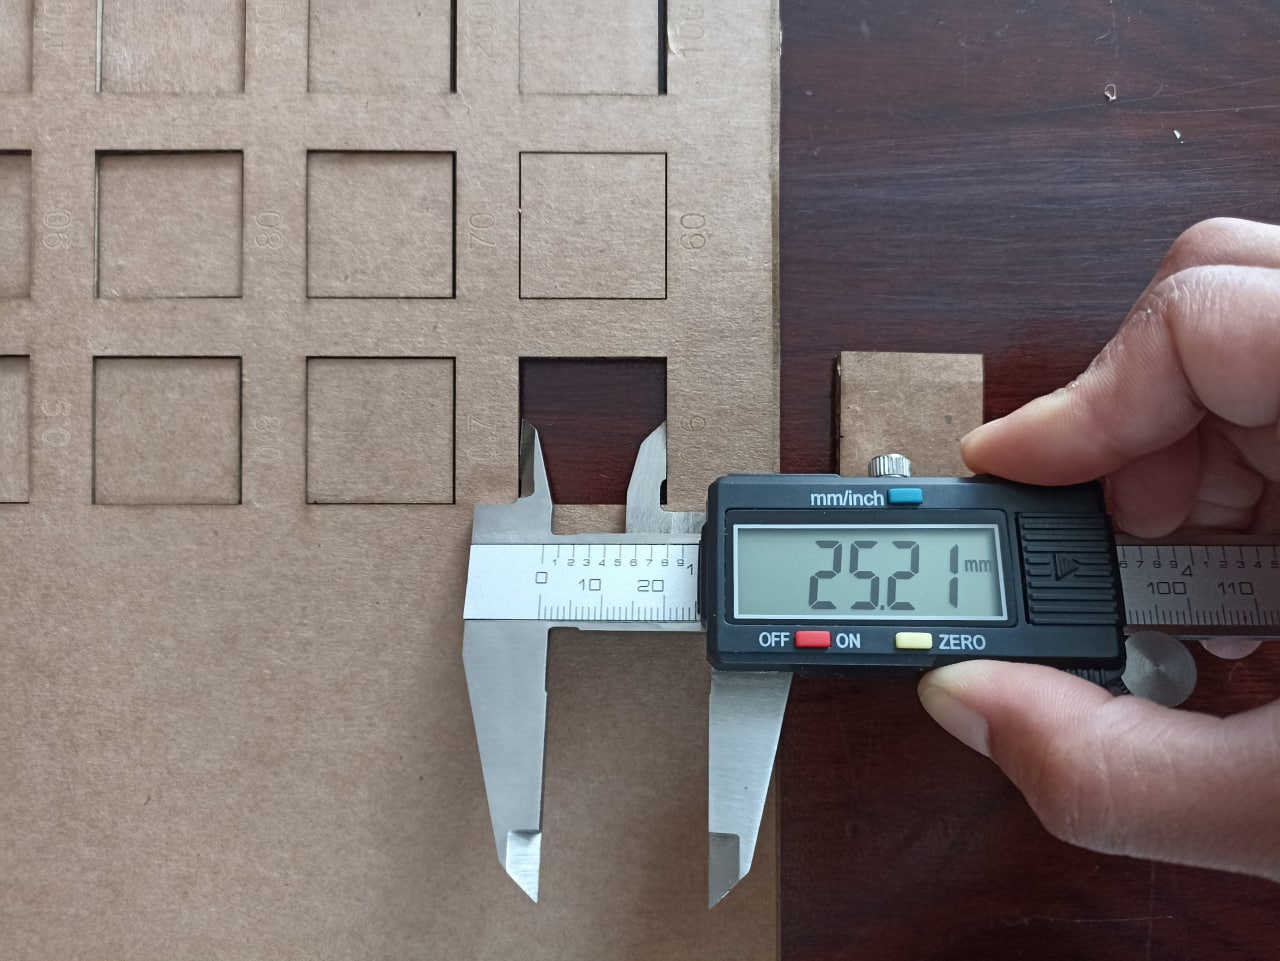
Horizontal measurement
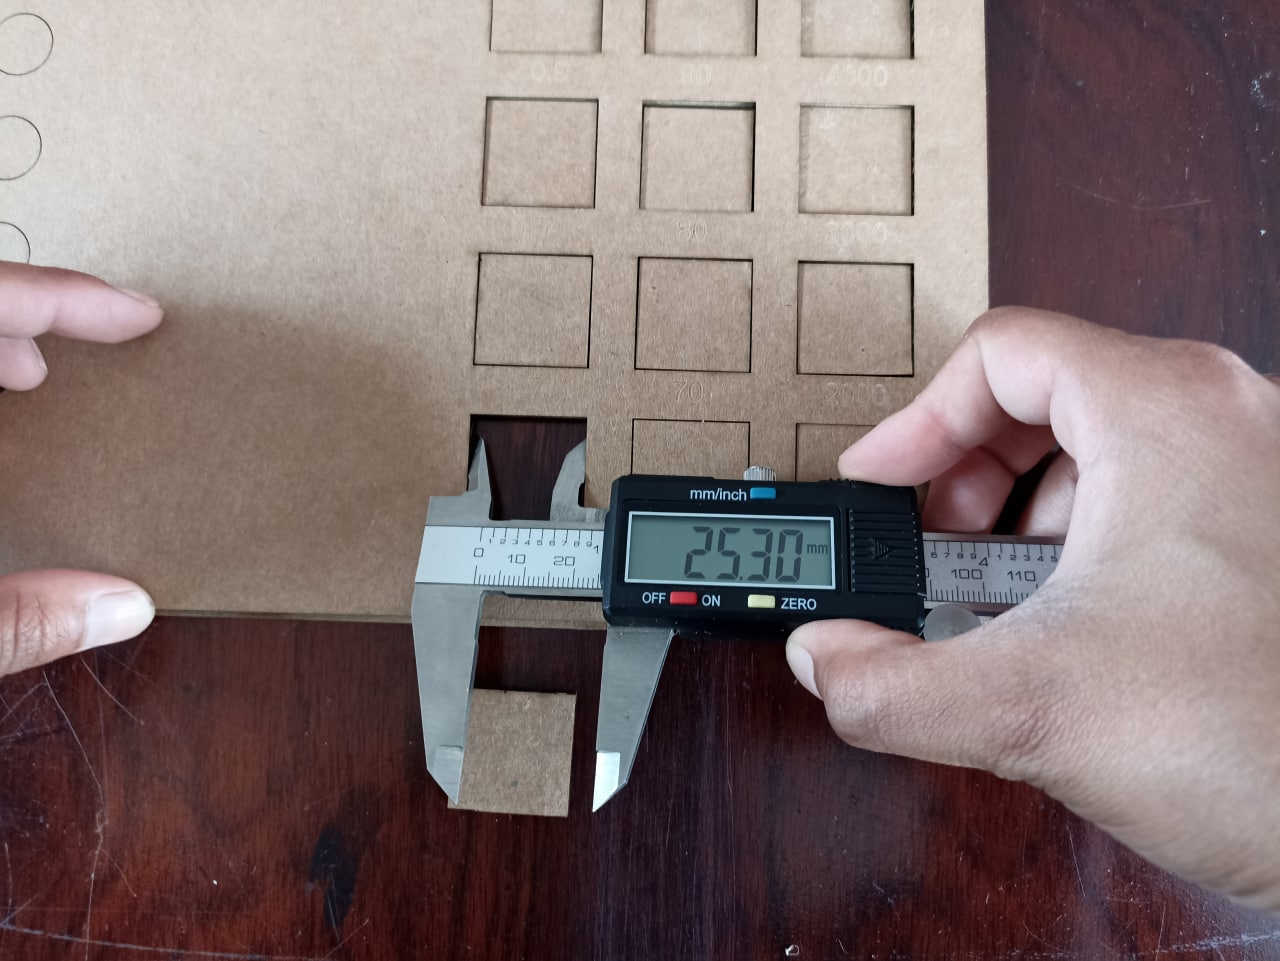
Vertical measurement

Design in Rhinoceros
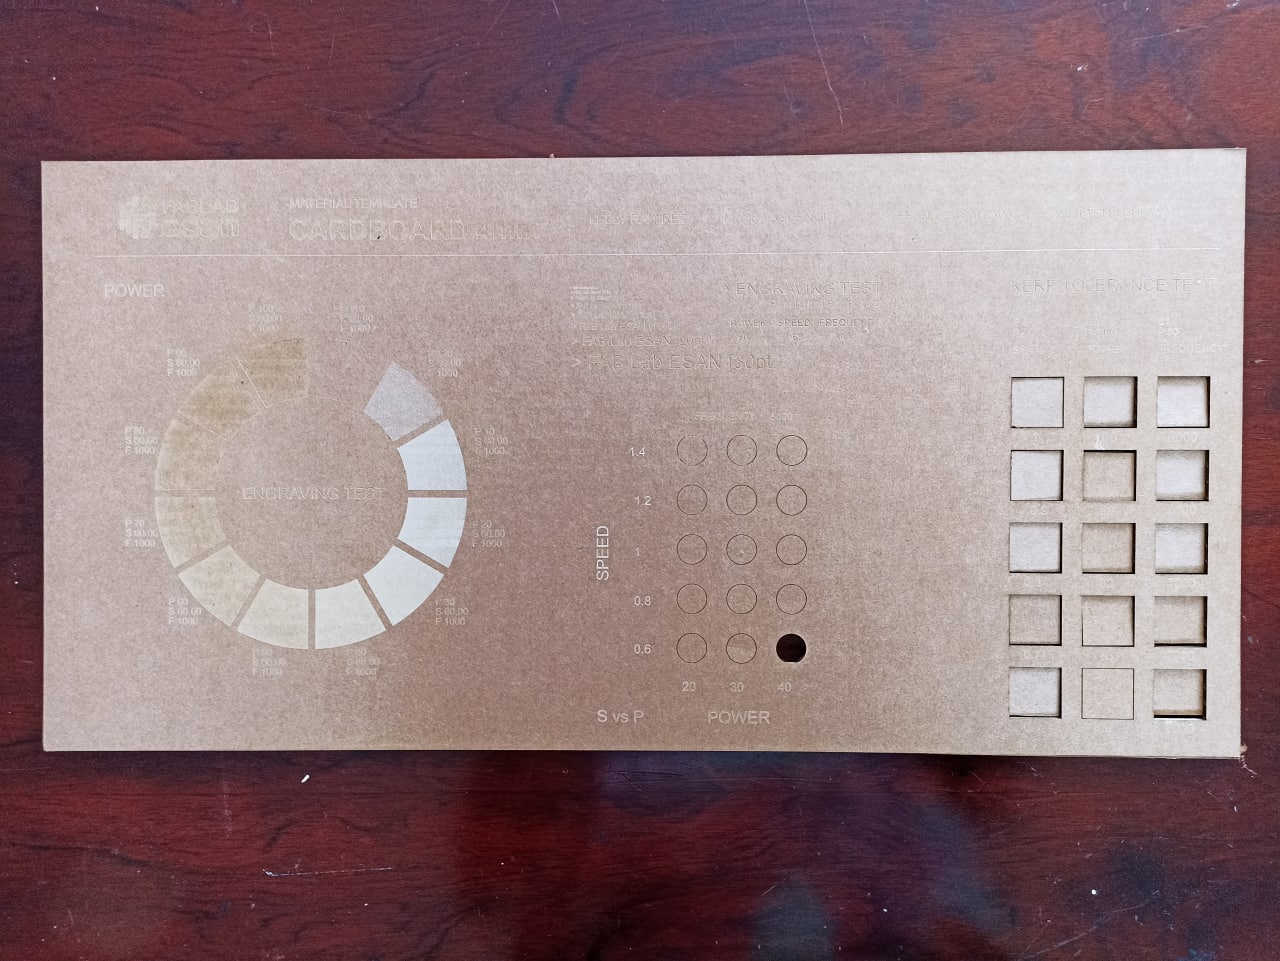
Complete format
List of parameters used
- Power: 98
- Speed: 0.45
- Frequency: 5000
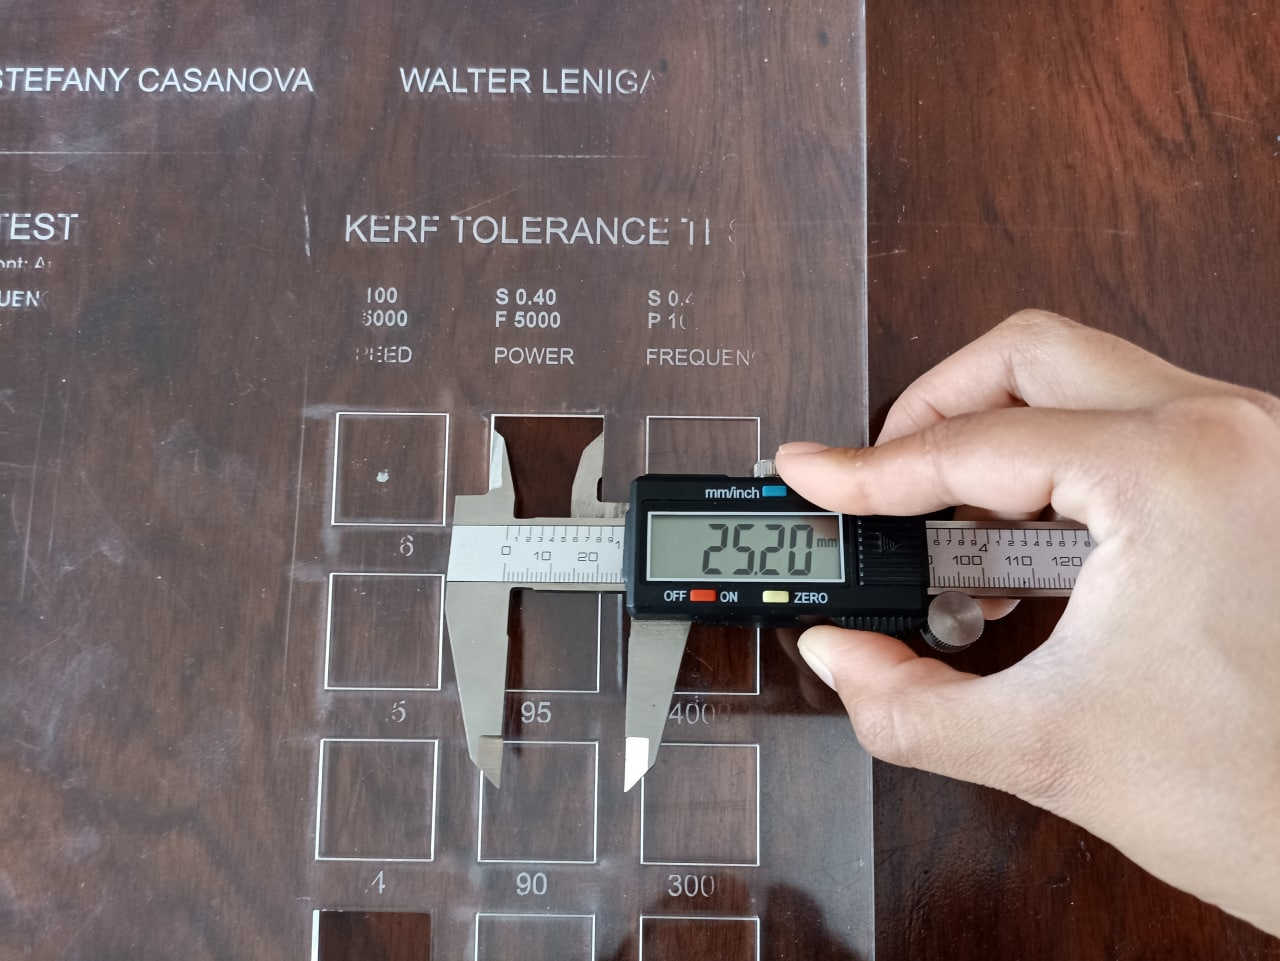
Horizontal measurement
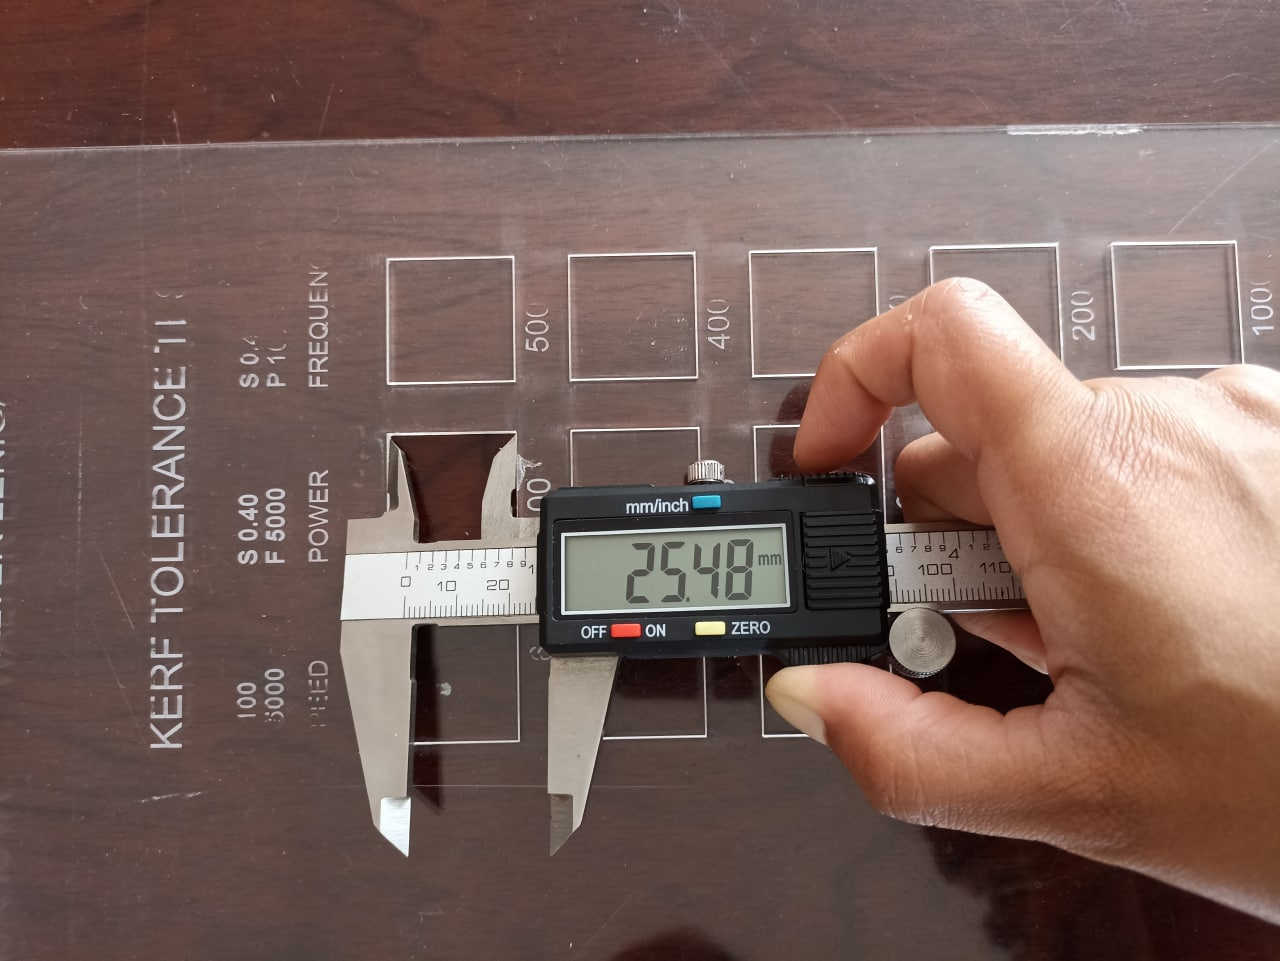
Vertical measurement

Design in Rhinoceros
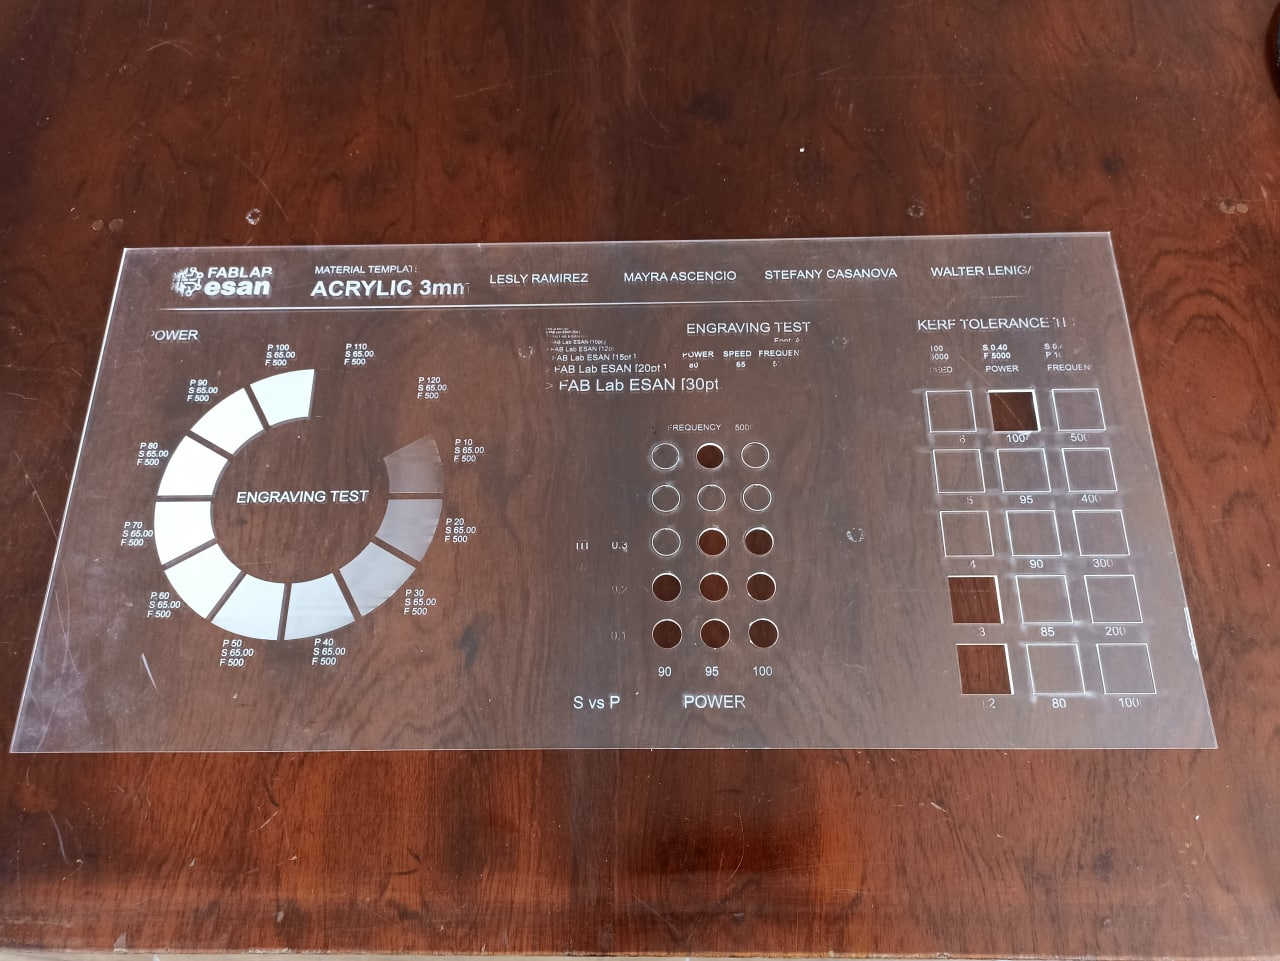
Complete format
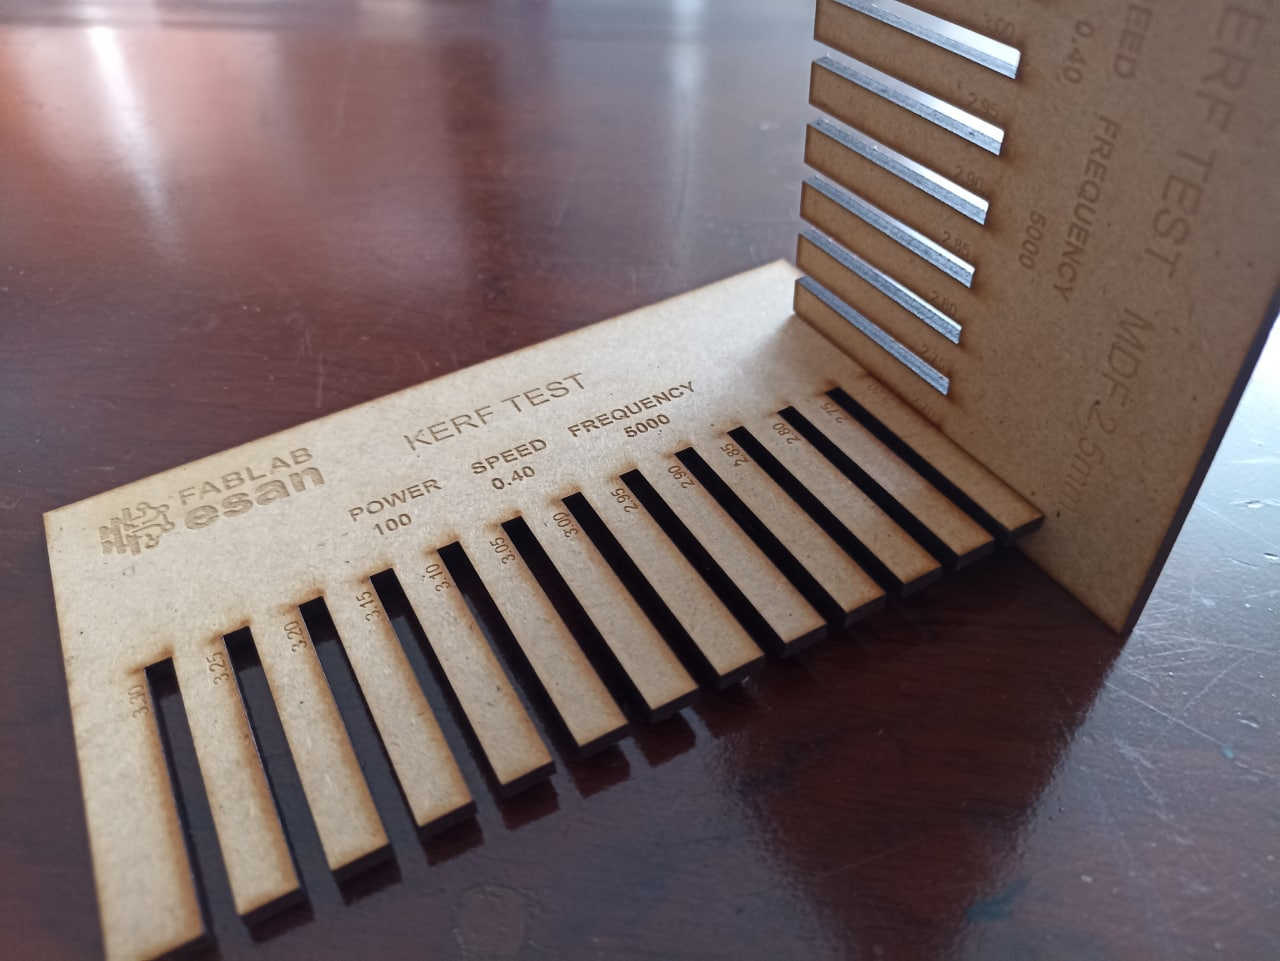
Test encastre-corte. Comb.
MDF
List of parameters used
- Power:100
- Speed:0.6
- Frequency:5000
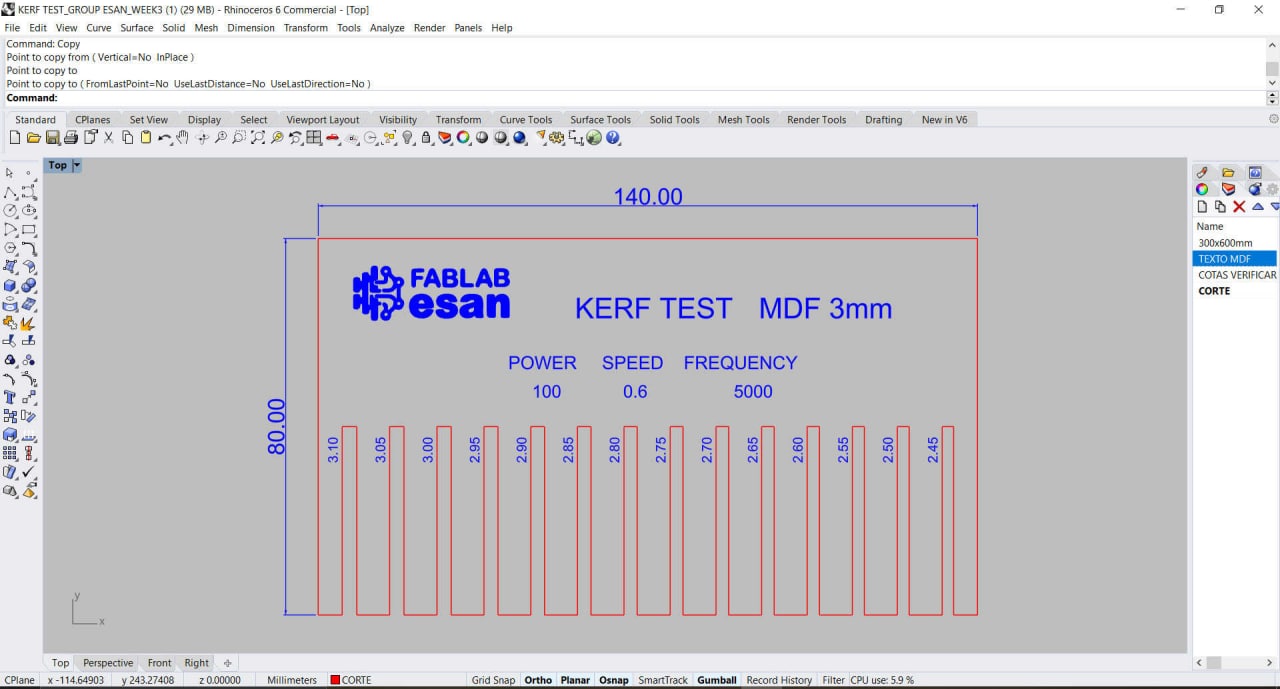
Kerf test MDF
- Final engraving test
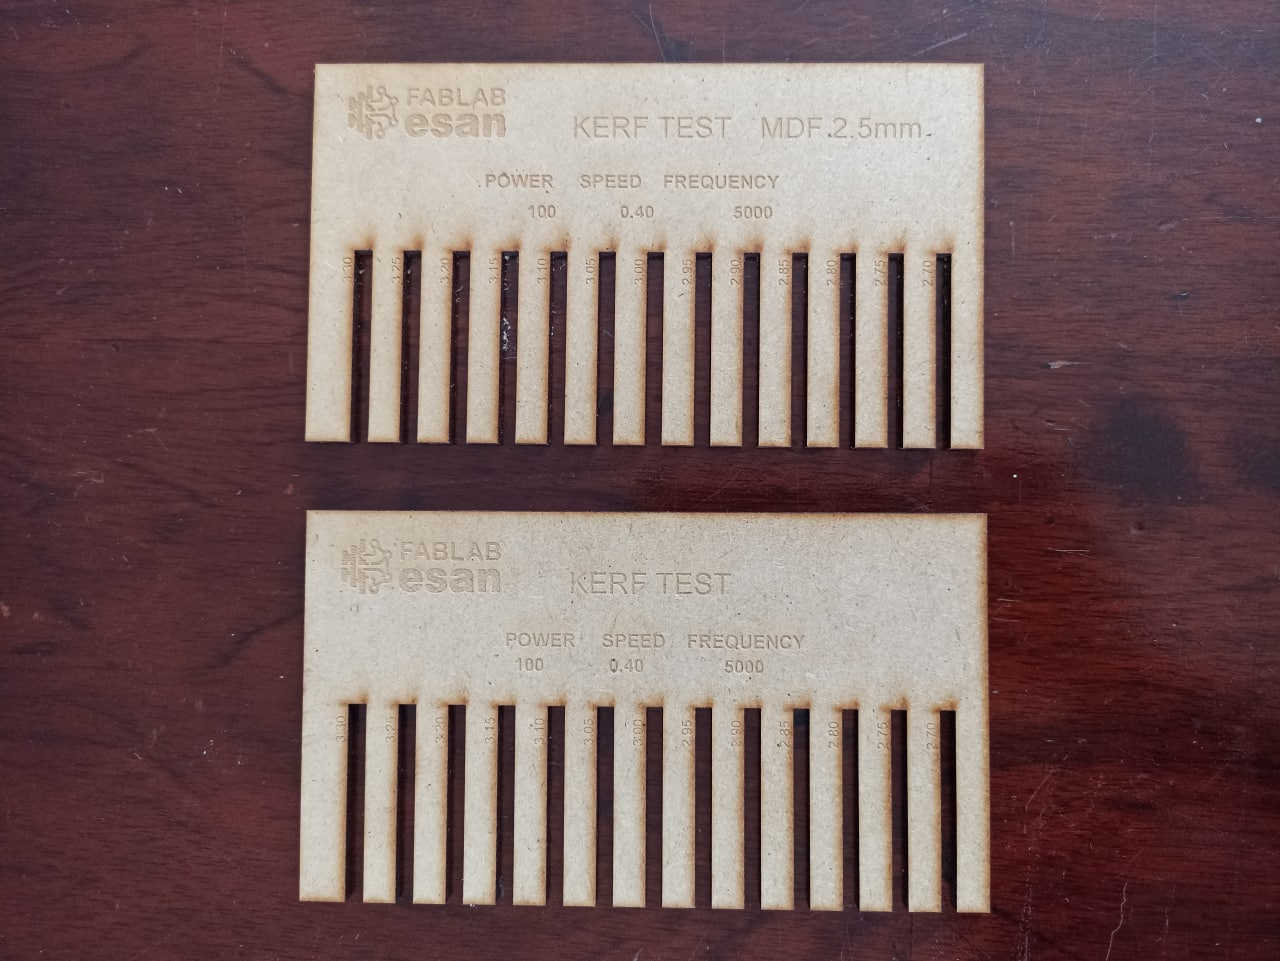
Two pieces
Fitted parts
List of parameters used
- Power:85
- Speed:1
- Frequency:5000
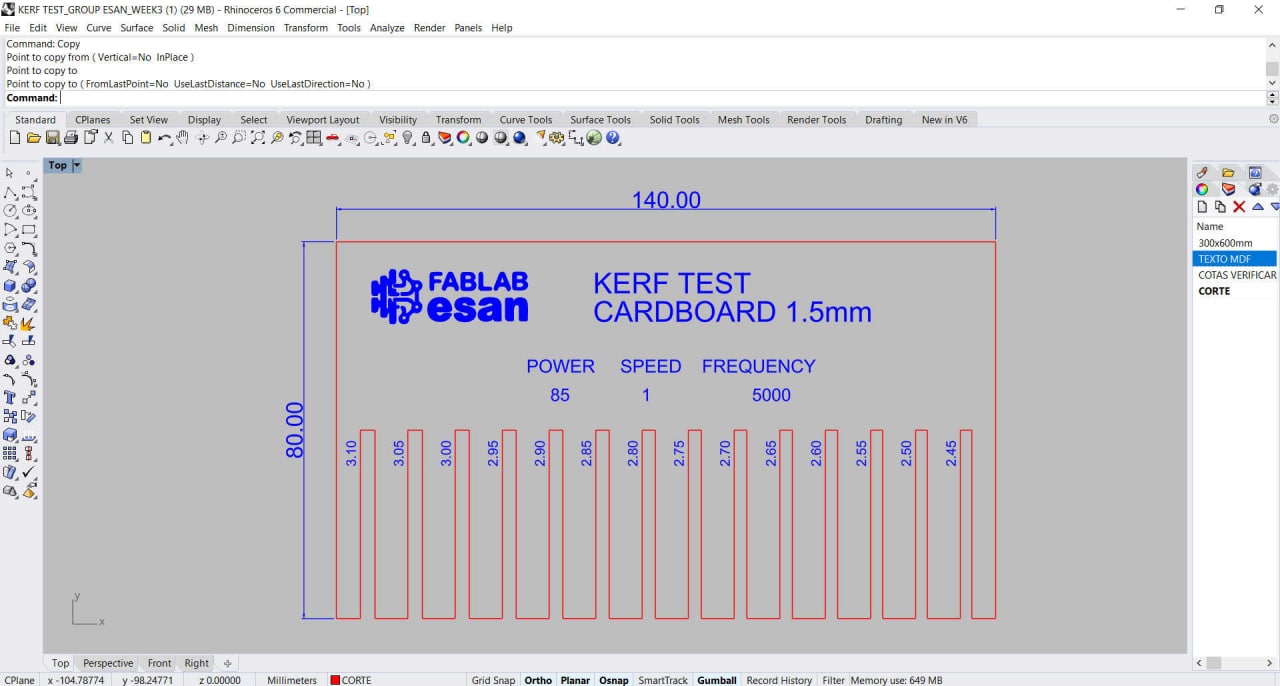
Kerf test Cardboard
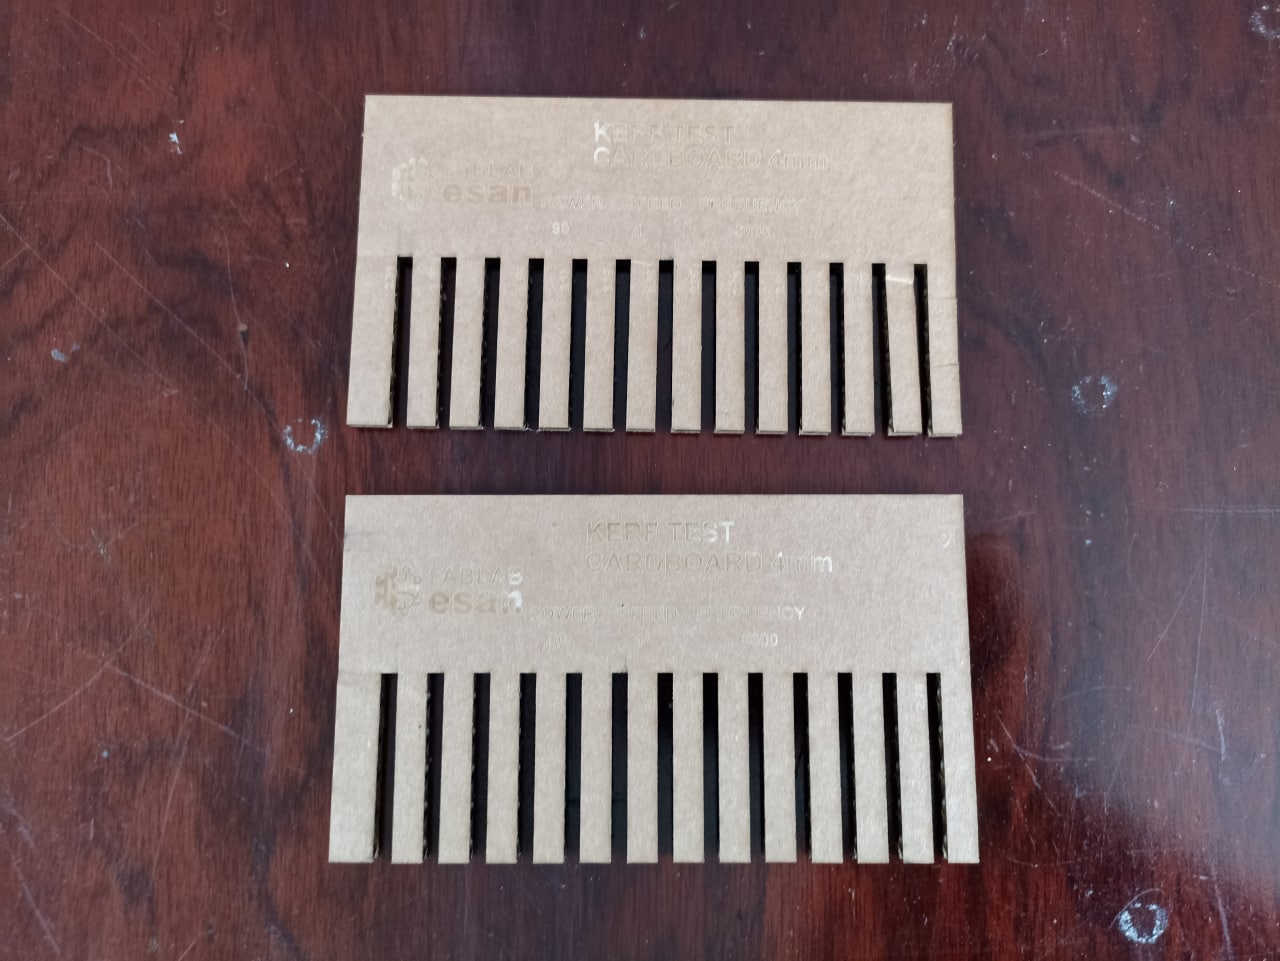
Two pieces
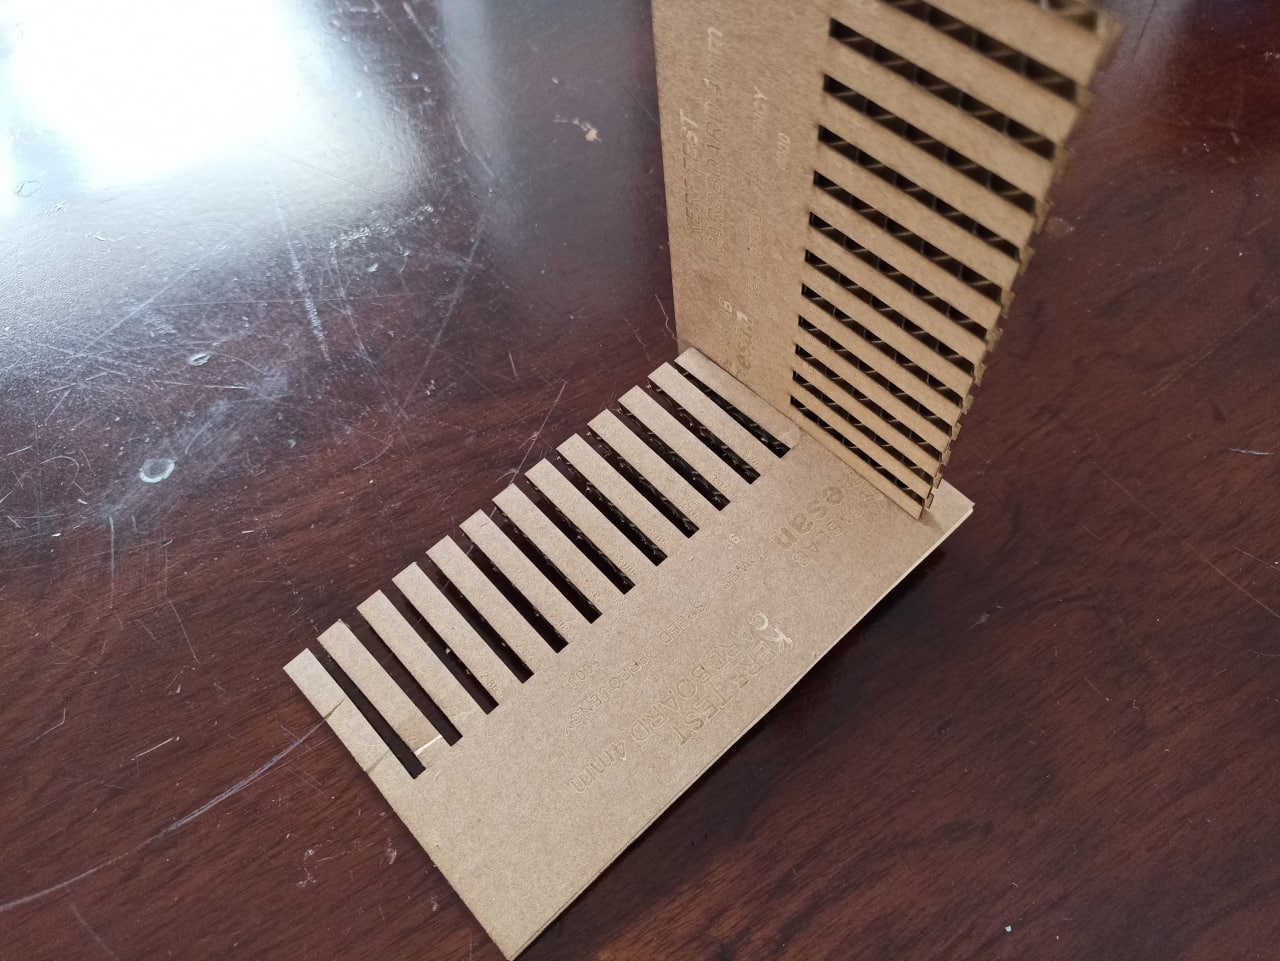
Fitted parts
List of parameters used
- Power: 98
- Speed: 0.45
- Frequency: 5000
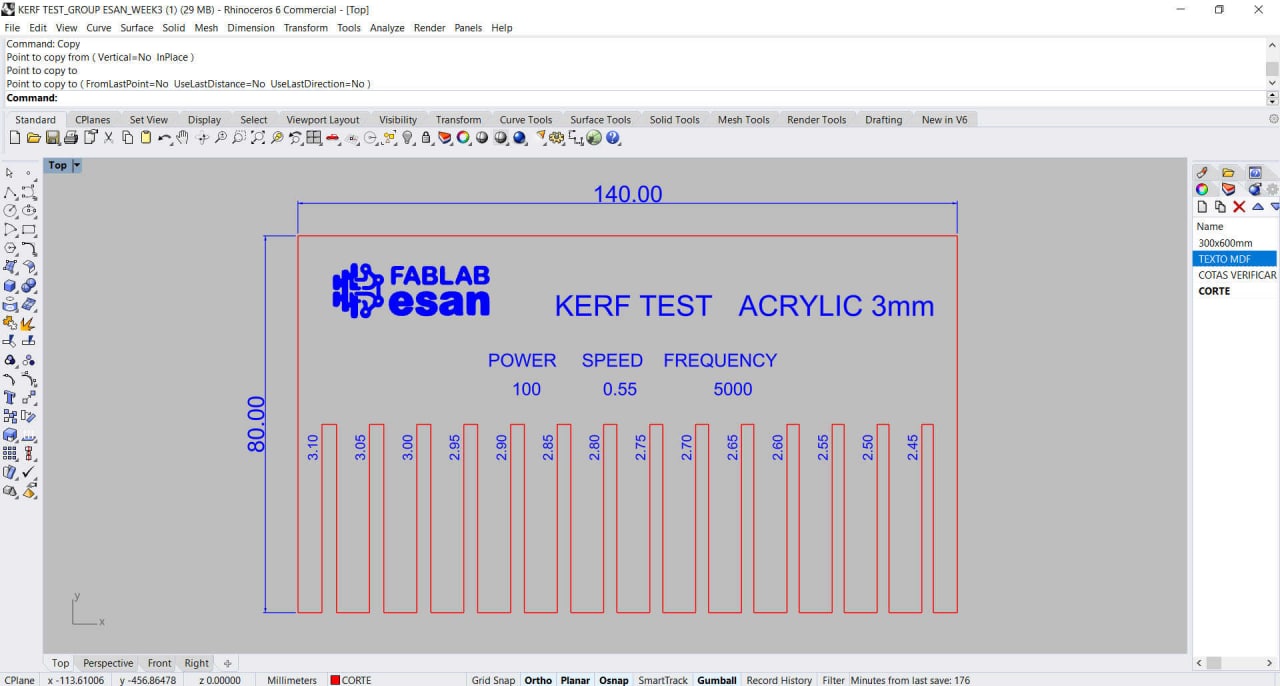
Kerf test Acrylic
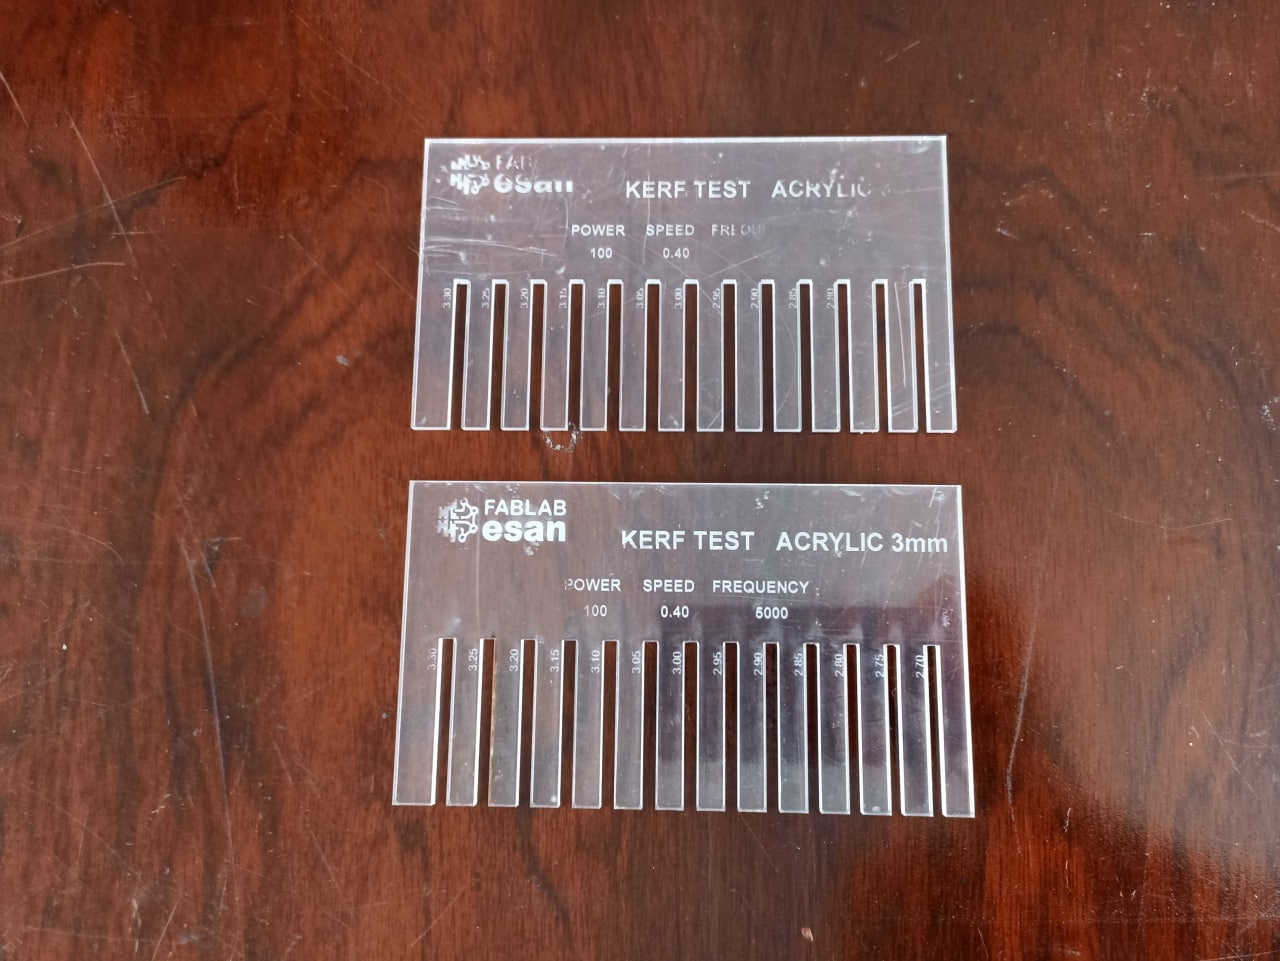
Two pieces
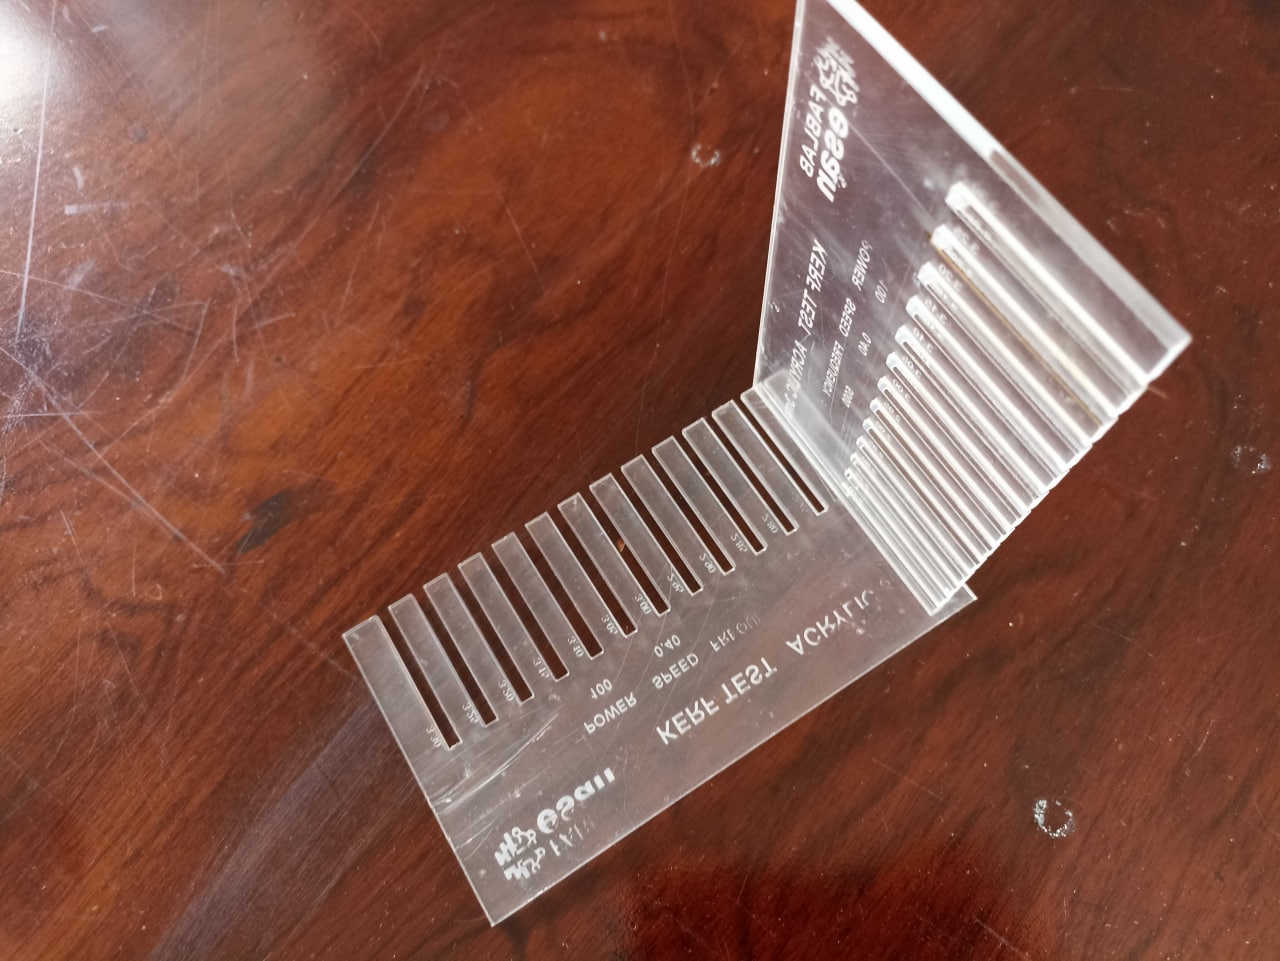
Fitted parts
List of parameters used
- Power:100
- Speed:0.6
- Frequency:5000
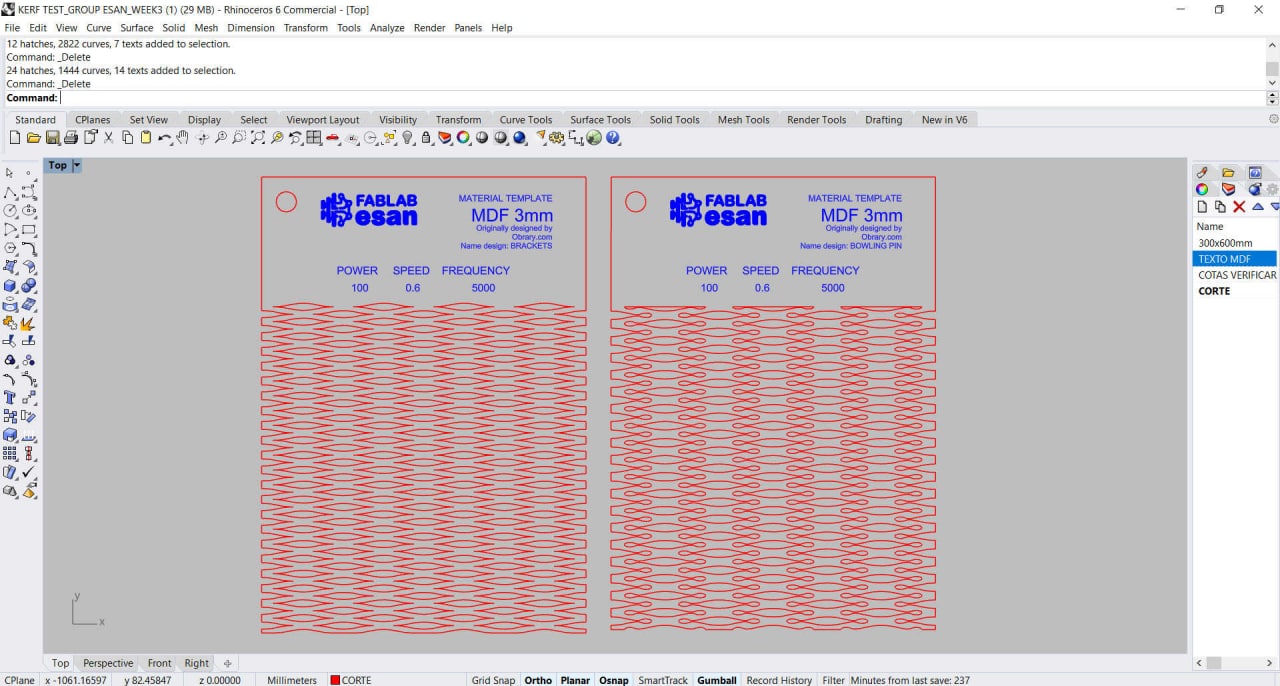
Digital archive
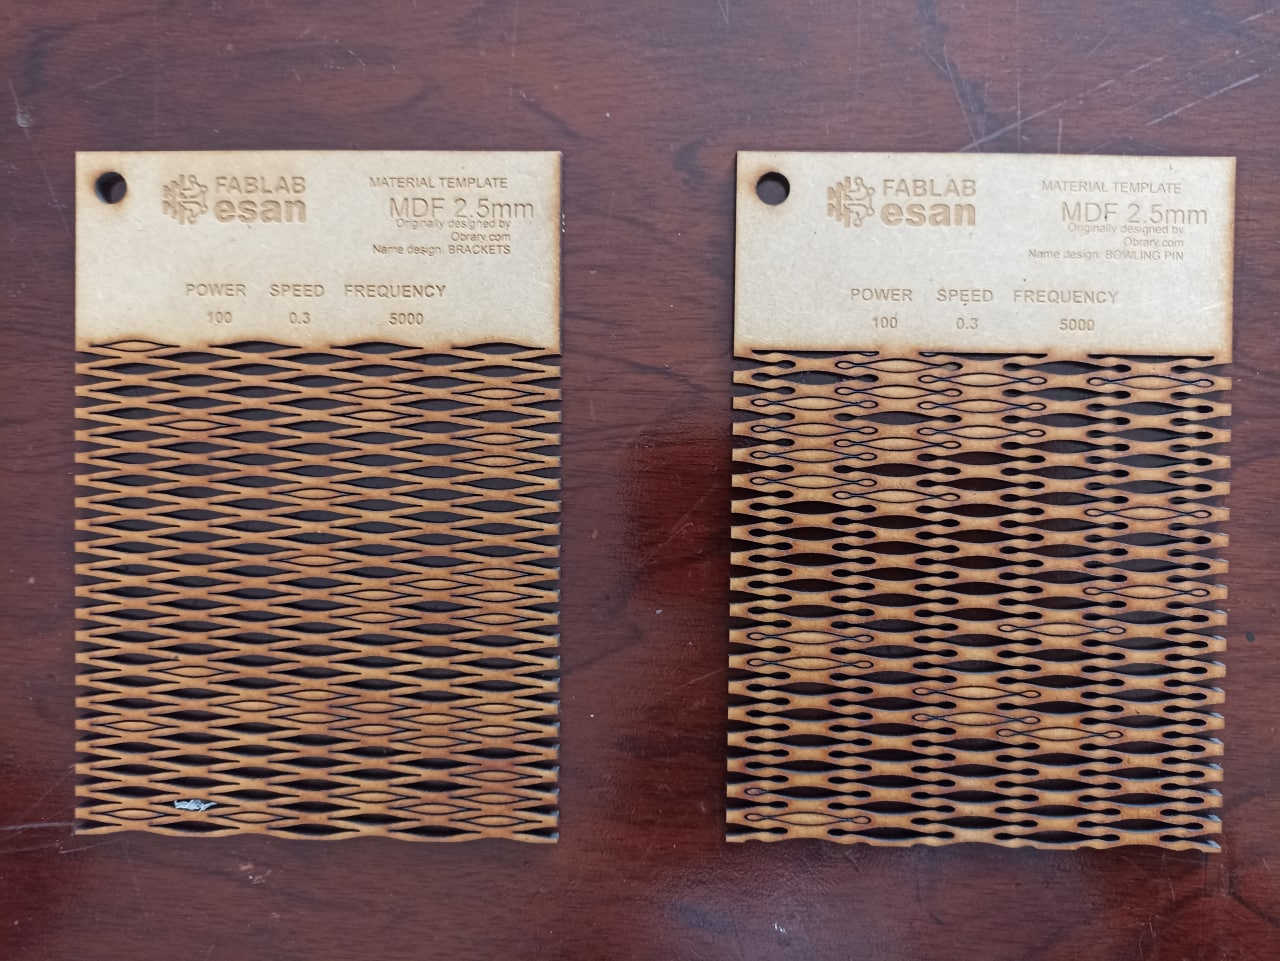
Two design types
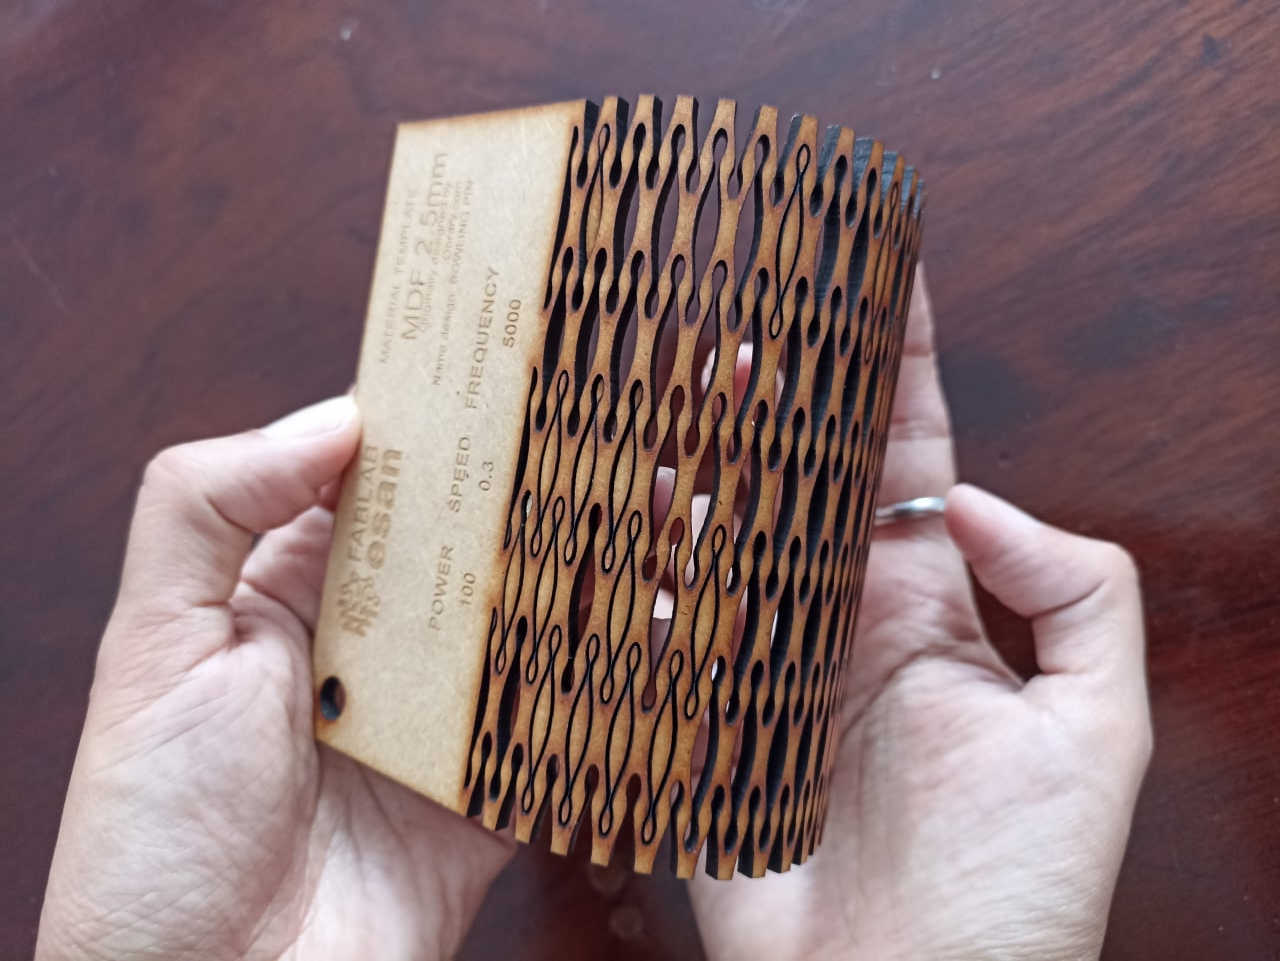
Fairly flexible
With the designed patterns we observed that MDF, despite being a rigid material, had the option of achieving flexibility with ease.
Cardboard
List of parameters used
- Power:85
- Speed:1
- Frequency:5000
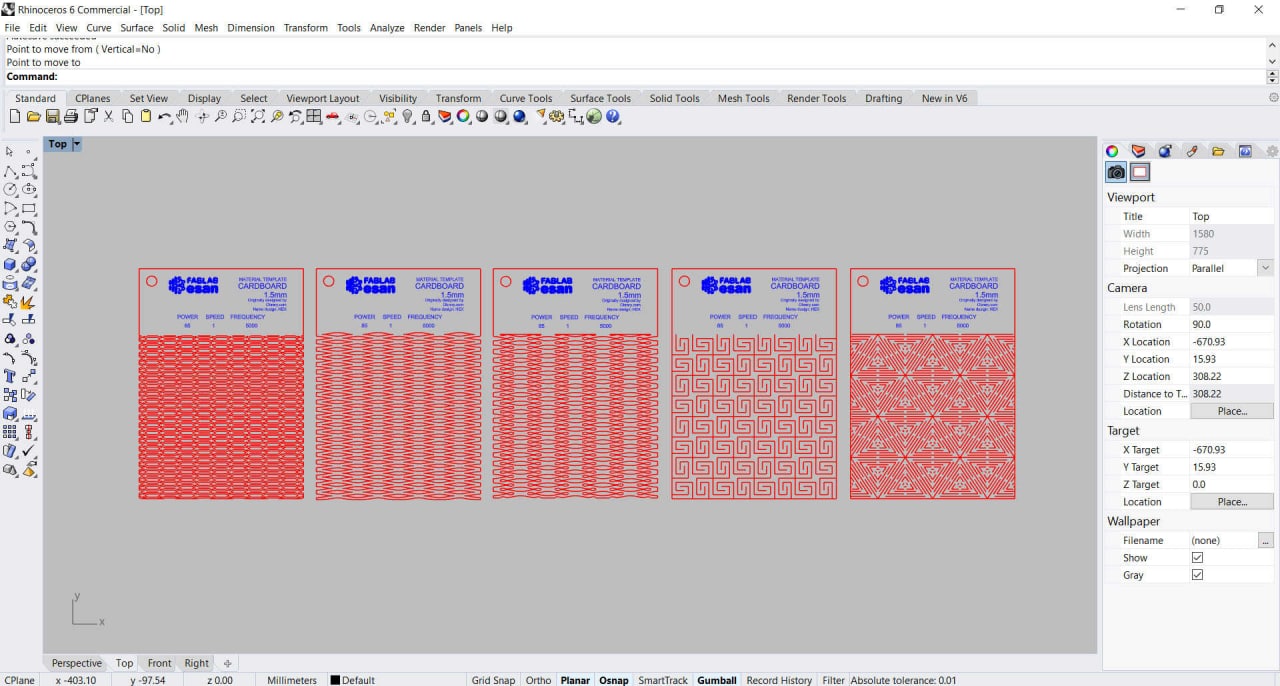
Digital archive
Conclusions:
Cardboard did not prove to be a very useful material to use for the patterns; when trying to cut it, it was destroyed.
Acrylic
List of parameters used
- Power: 98
- Speed: 0.45
- Frequency: 5000
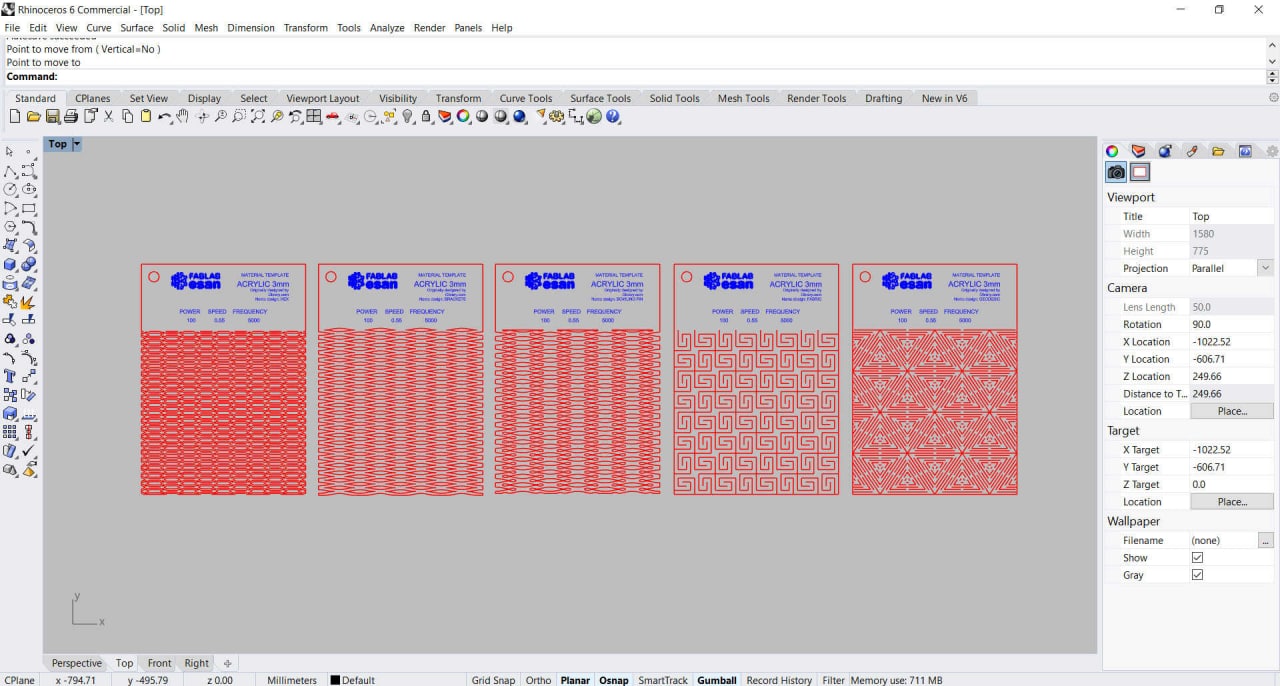
Digital archive
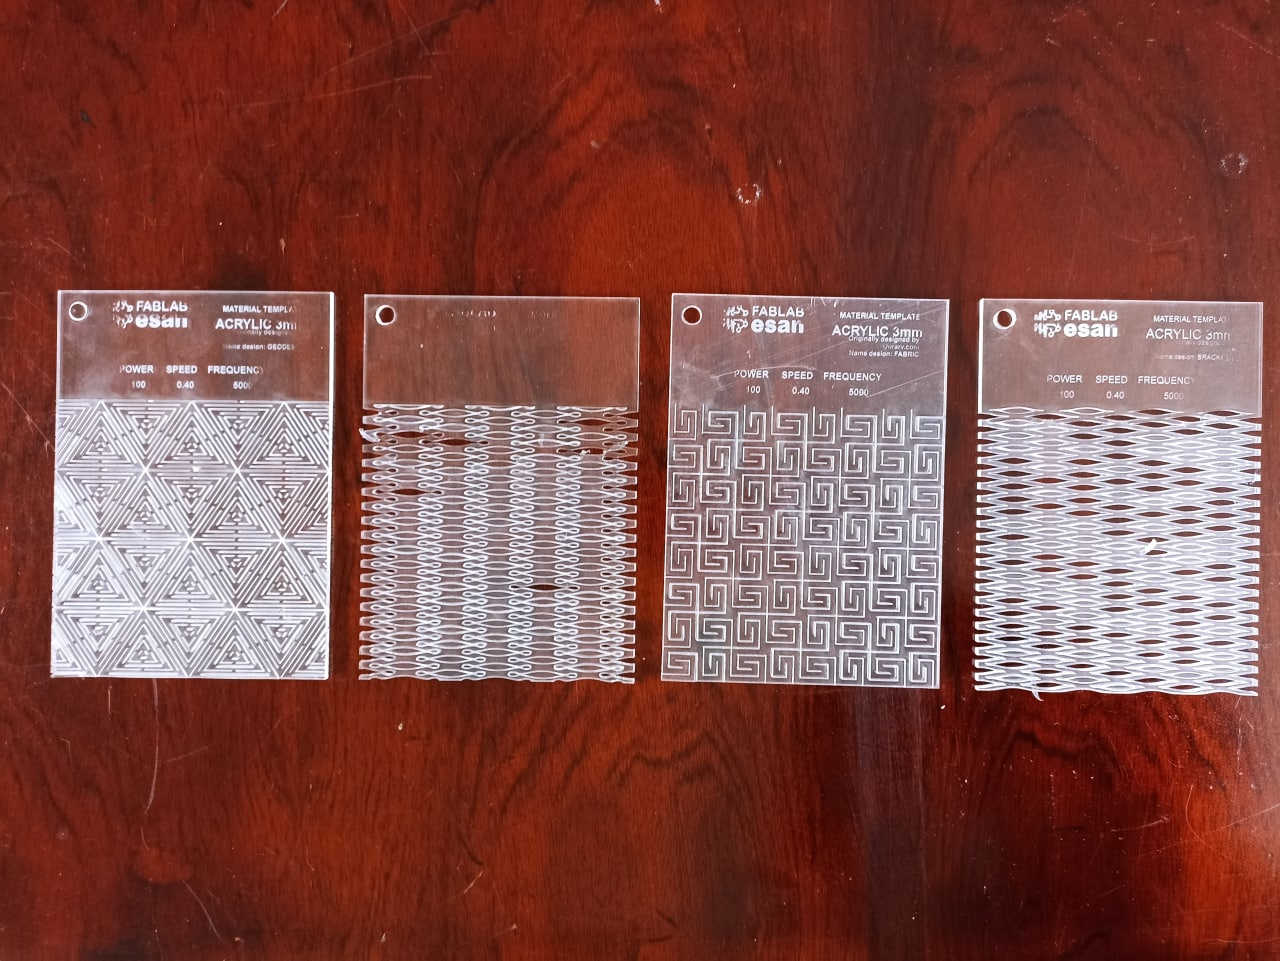
Four design types
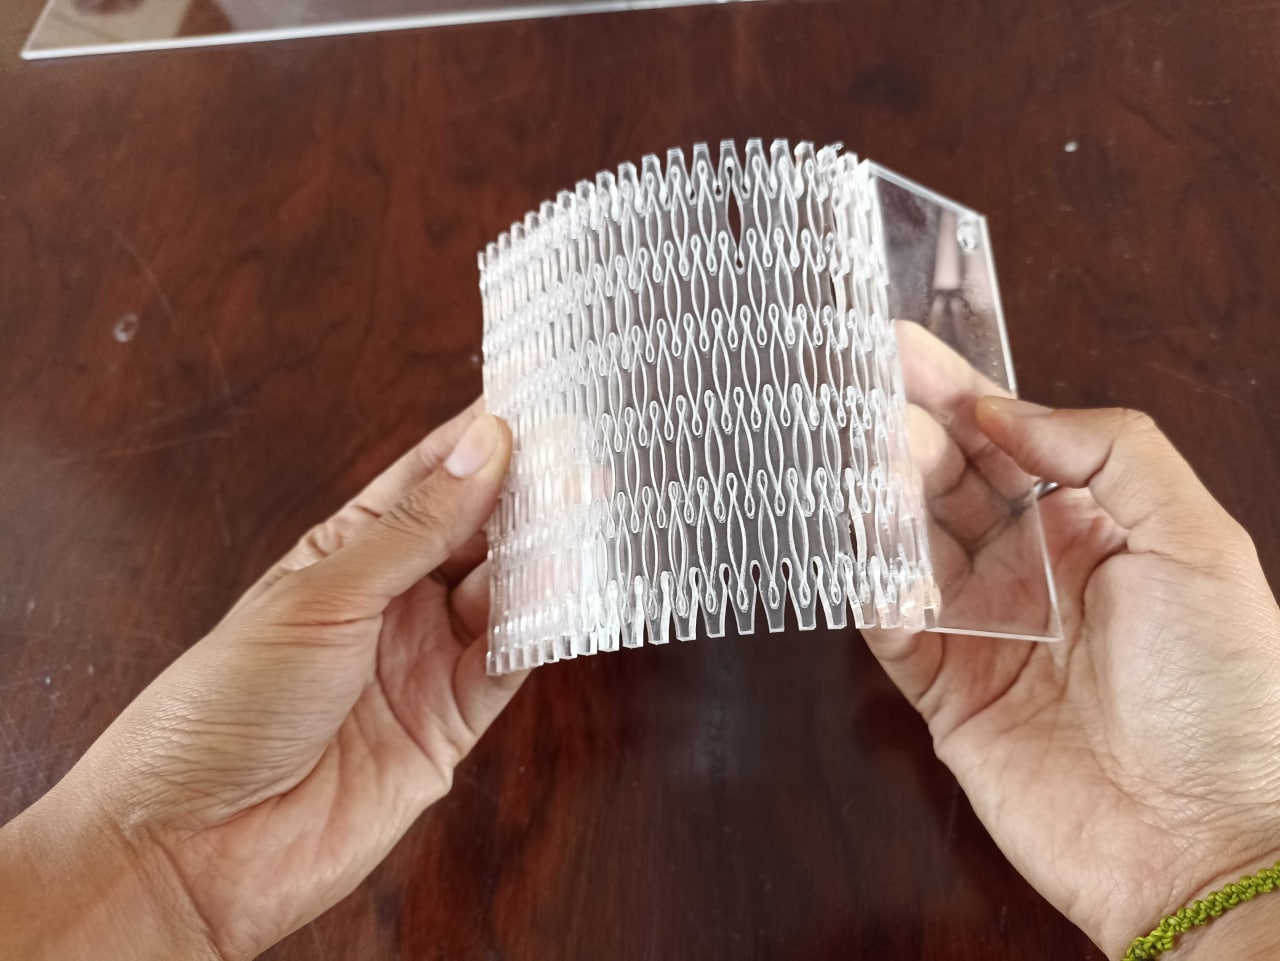
Fairly flexible
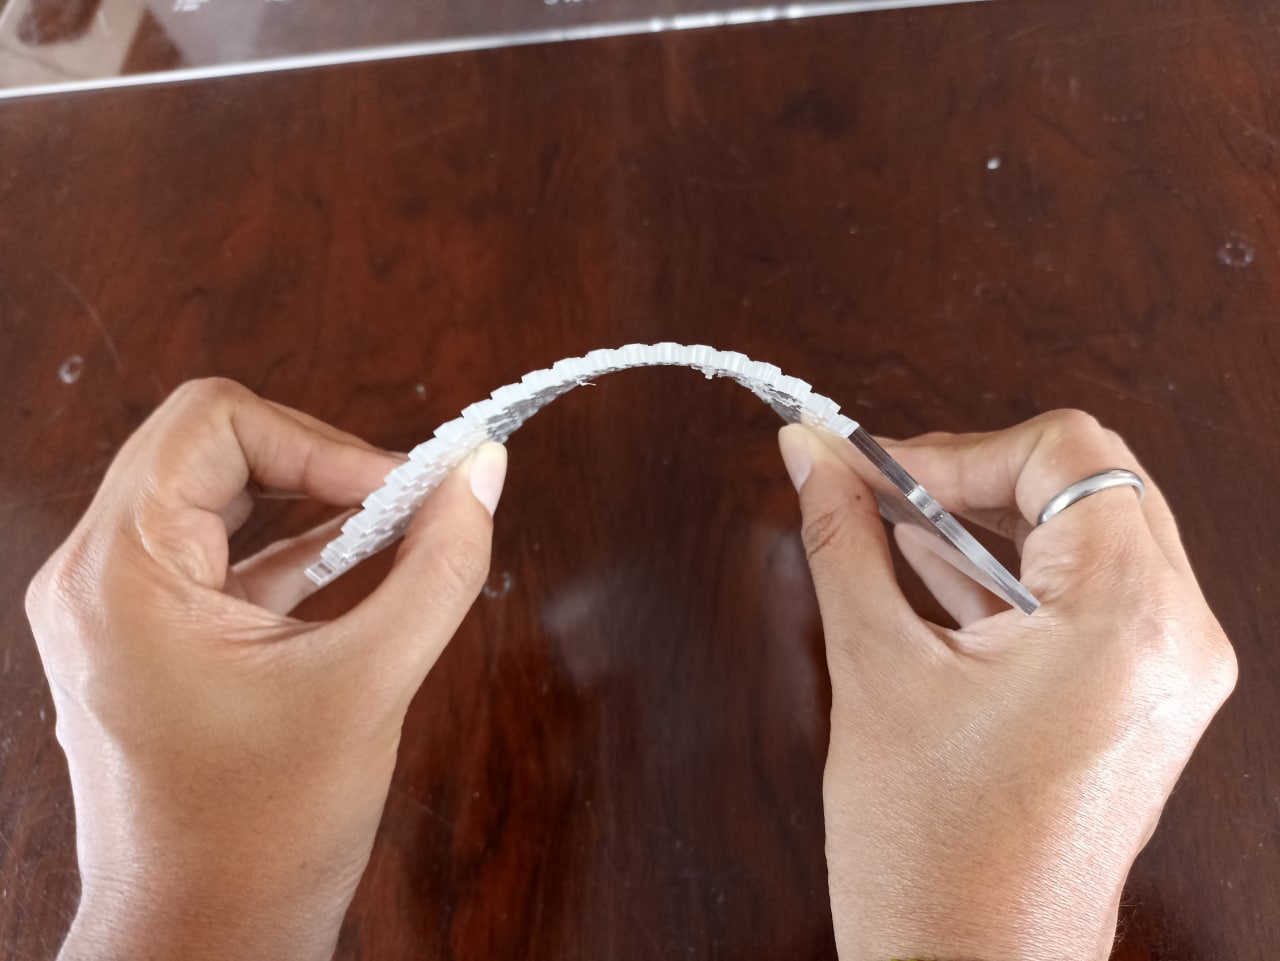
Fairly flexible
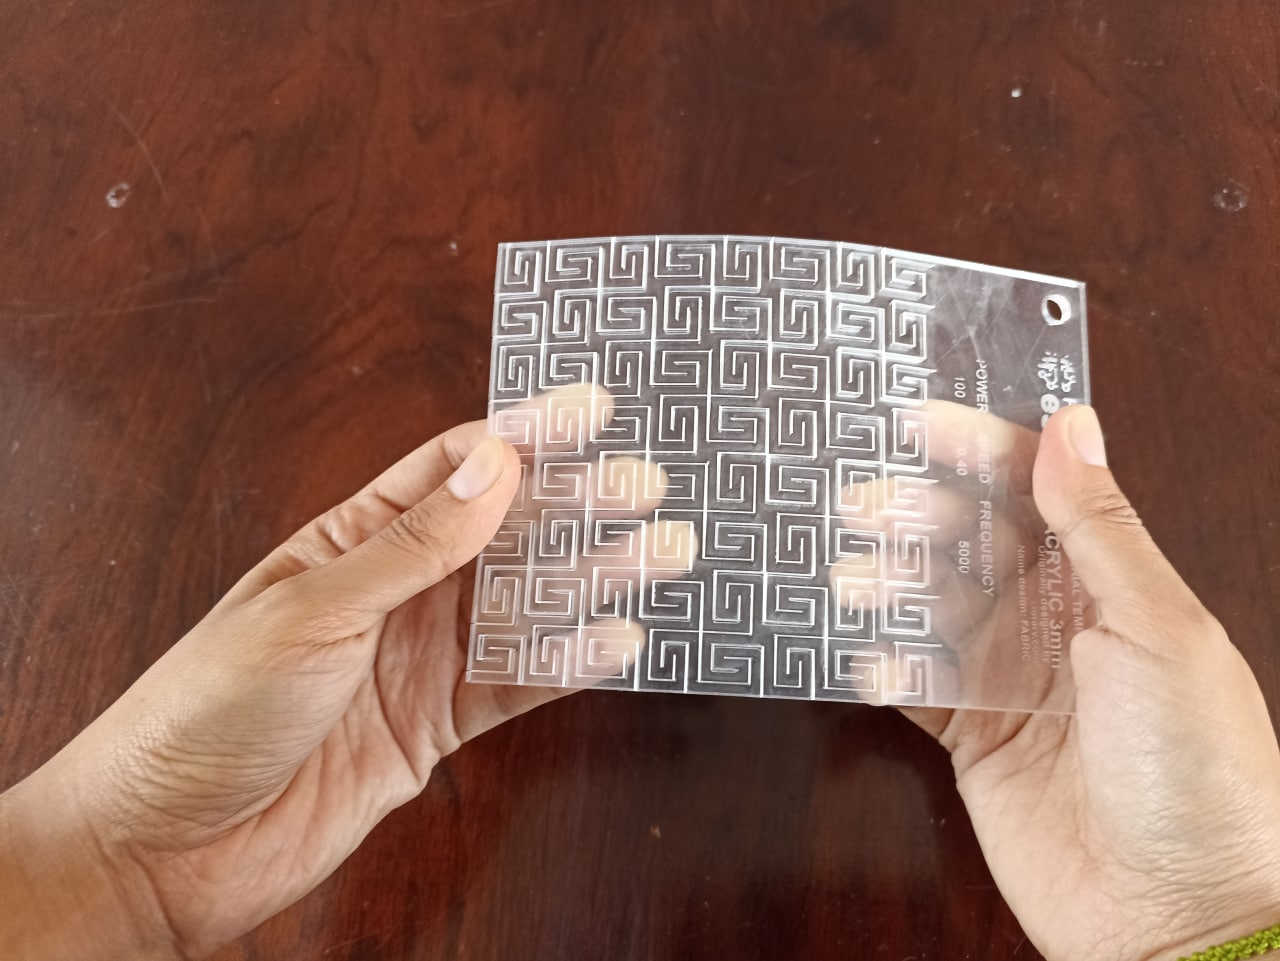
Somewhat flexible
Unlike the other materials, acrylic was more flexible when the patterns were more defined, in tests we found that some patterns worked and others did not.
Recommendations
Have design considerations while generating the file:Using a parametric program will help to make modifications quickly if there are any errors and having a unified geometry will help the job to be finished in less time, on the other hand, if we have loose lines, the laser cutting time would be double or more.
Danger of catching fire:
If we set the parameters out of range, we may set the material on fire.
Special fire extinguisher for laser machines: CO2 fire extinguishers
Mask use and how to take care of emissions health.
Always extract either with a filter or towards the window, to avoid intoxication by the gases generated by the laser cutting machine.
IndividualTask: Laser Cutting
It has been a journey to complete this assignment because in the middle of a work week my laptop burned up when I connected it to the laser machine. A complete mystery. My advice is to check that your lab has a good electrical system to avoid power surges.

The first try:The right one
As a first step, you should always calibrate the laser focus with the tool that comes with the laser cutter. Otherwise, the whole exercise could be inefficient.

Calibrate focus

Calibration
I designed parametric parts with Rhinocecros and Grasshopper. In this exercise I parameterized the insets and also the number of sides of the geometries, as well as the number of geometries in each row and column. You can have triangles, hexagons, octagons, etc.
Parametric design

Parametric design in Rhinoceros

Parametric design in Rhinoceros

First attempt in cardboard
Extraction error
After trying to cut for the first time, it was possible to obtain the cutting of the parametric pieces in cardboard and gray PET material, in order to obtain a set of assemblable pieces. The parameters used were:
Cardboard parameters- Power:85
- Speed:1
- Frequency:5000
laser cutting on cardboard

finished pieces
The secondtype of joint
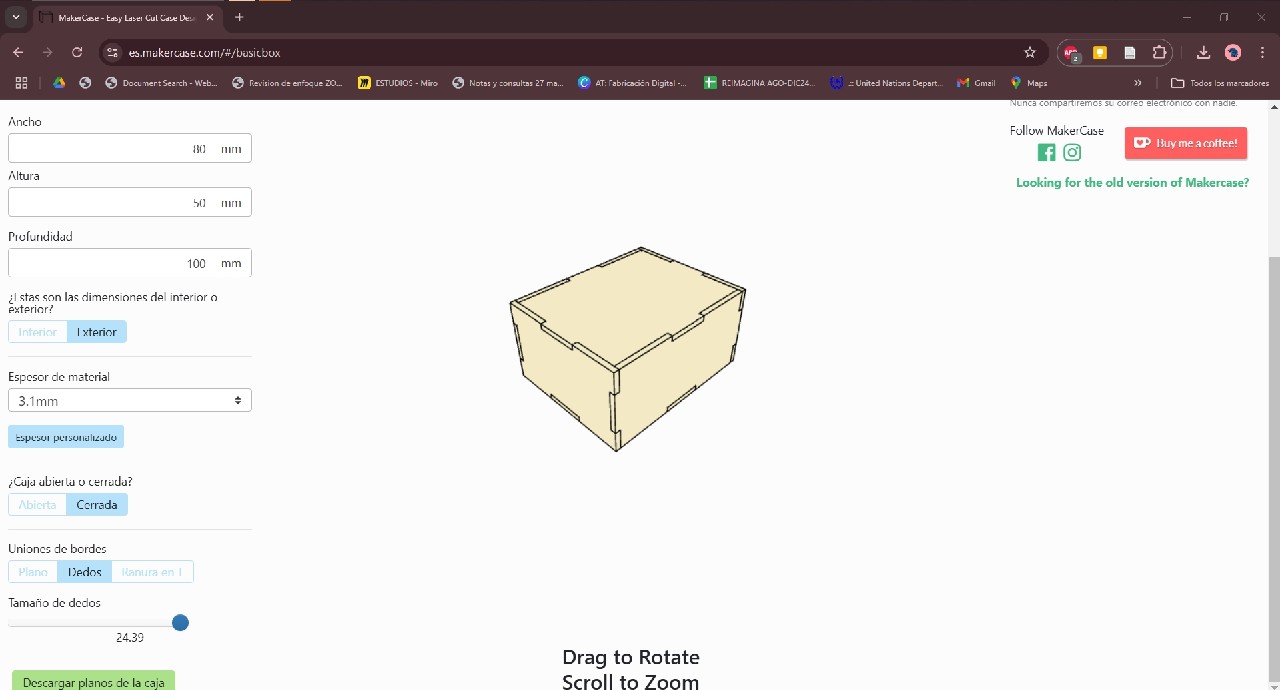
To test another type of joint this week I used a parametric design platform called makerspace, which is excellent for designing boxes for laser cutting. You can customize the dimensions, material thickness and the amount of joints you need on each edge of the object.
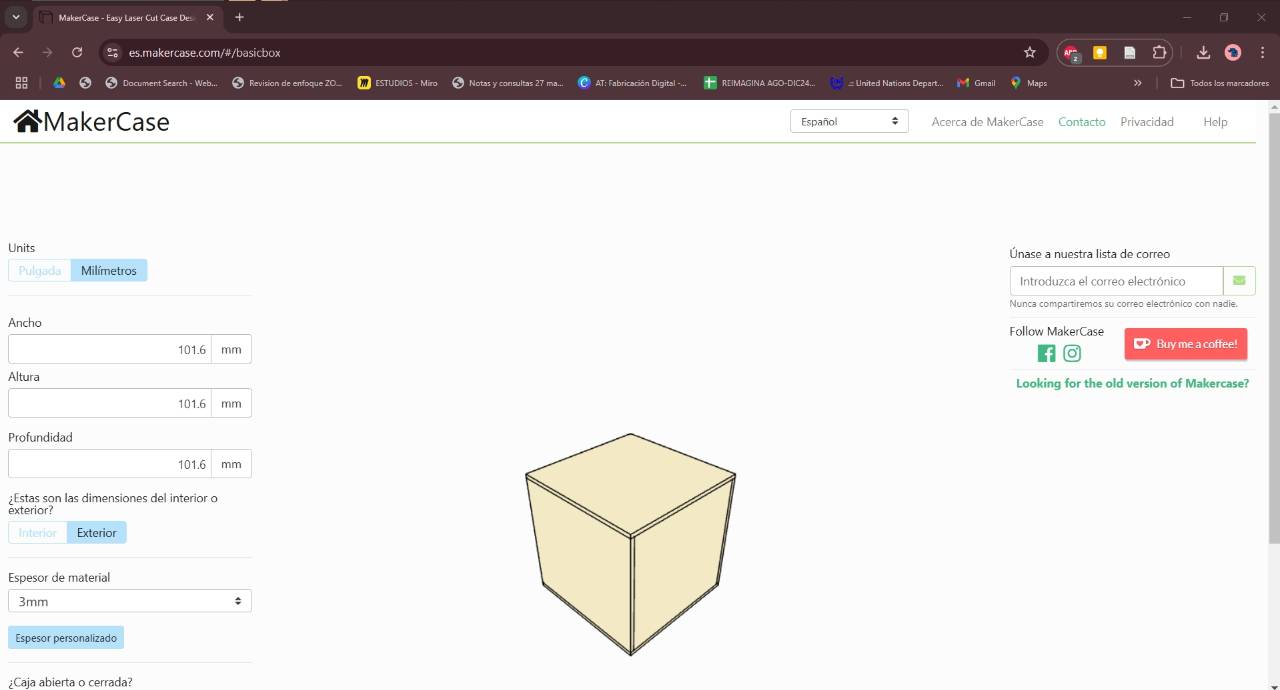
Makercase > milimeters
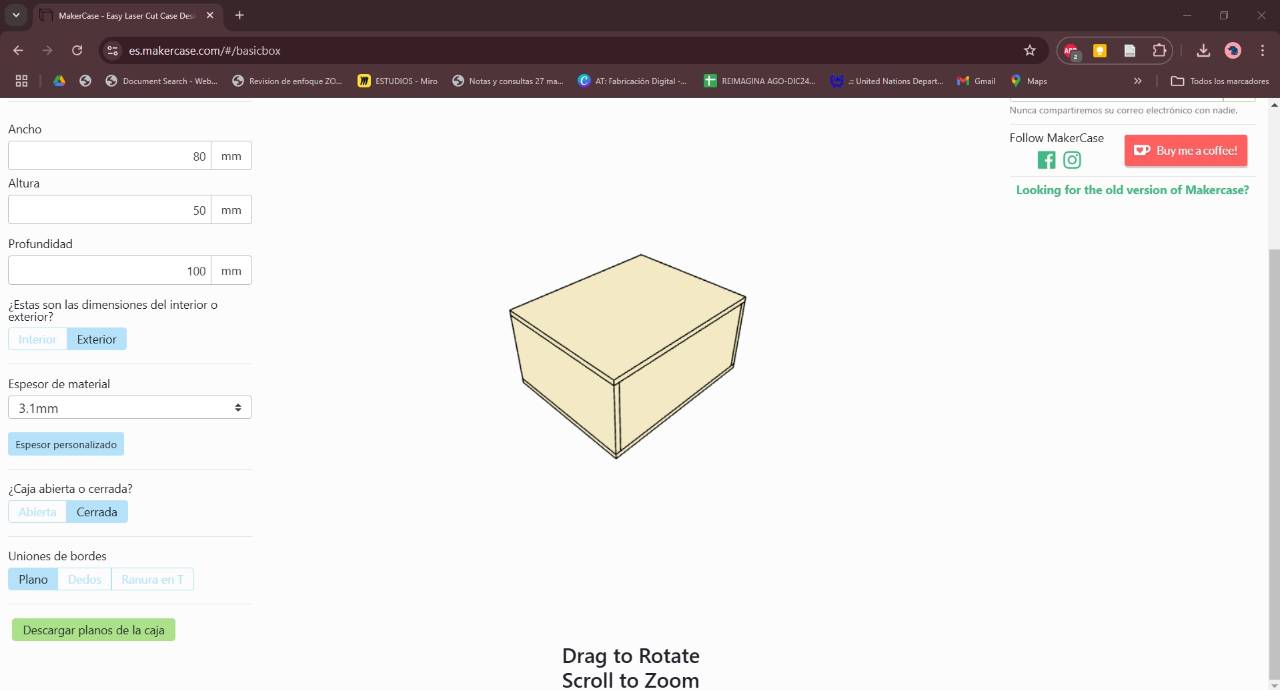
Measures
Material thickness
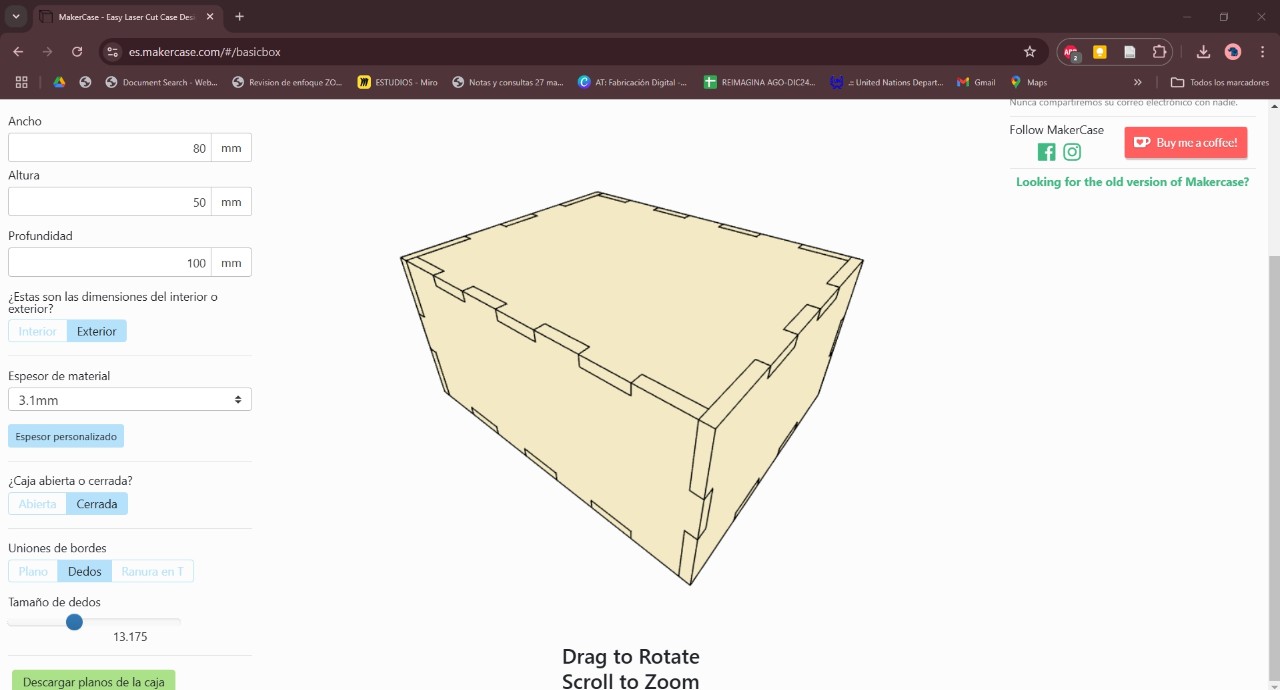
Type of joint: Fingers
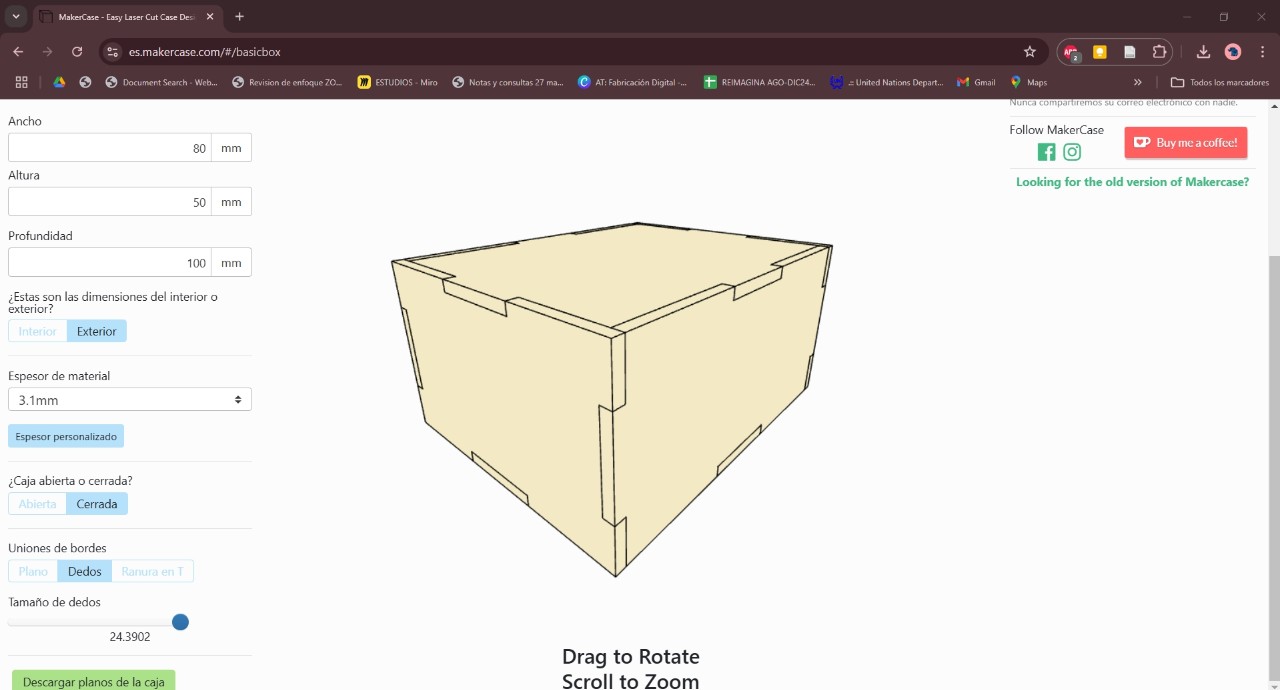
Joint measurement
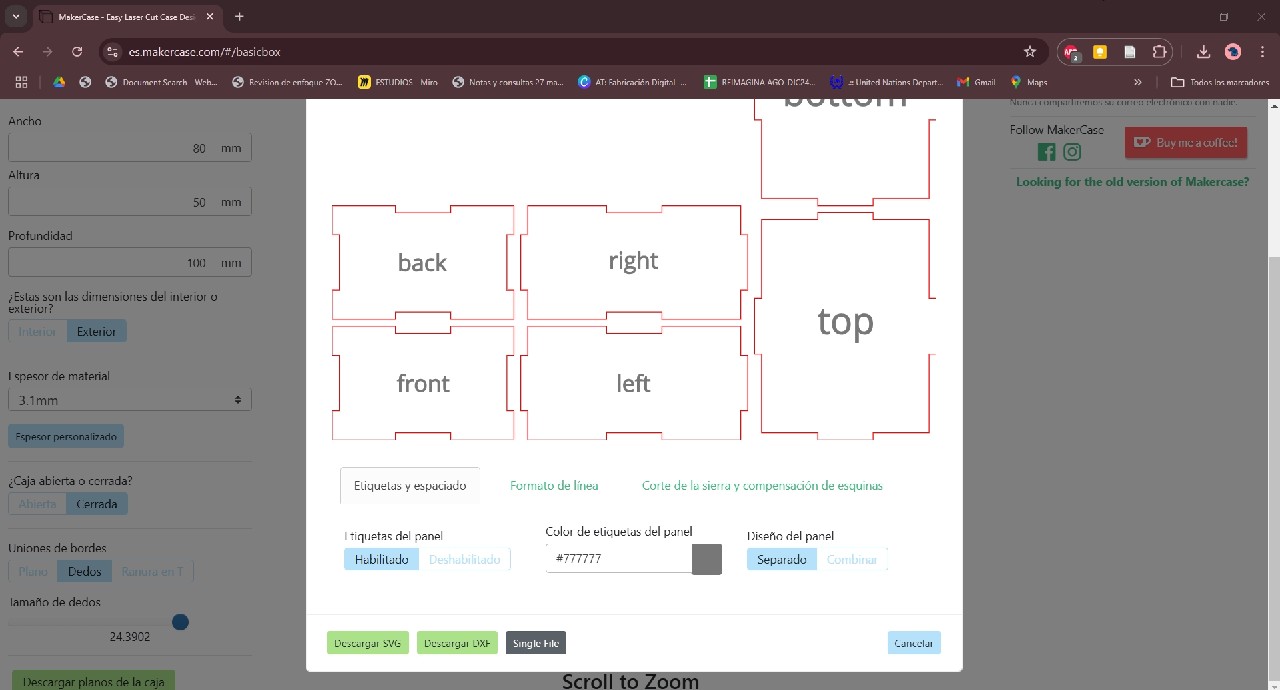
Download the drawings
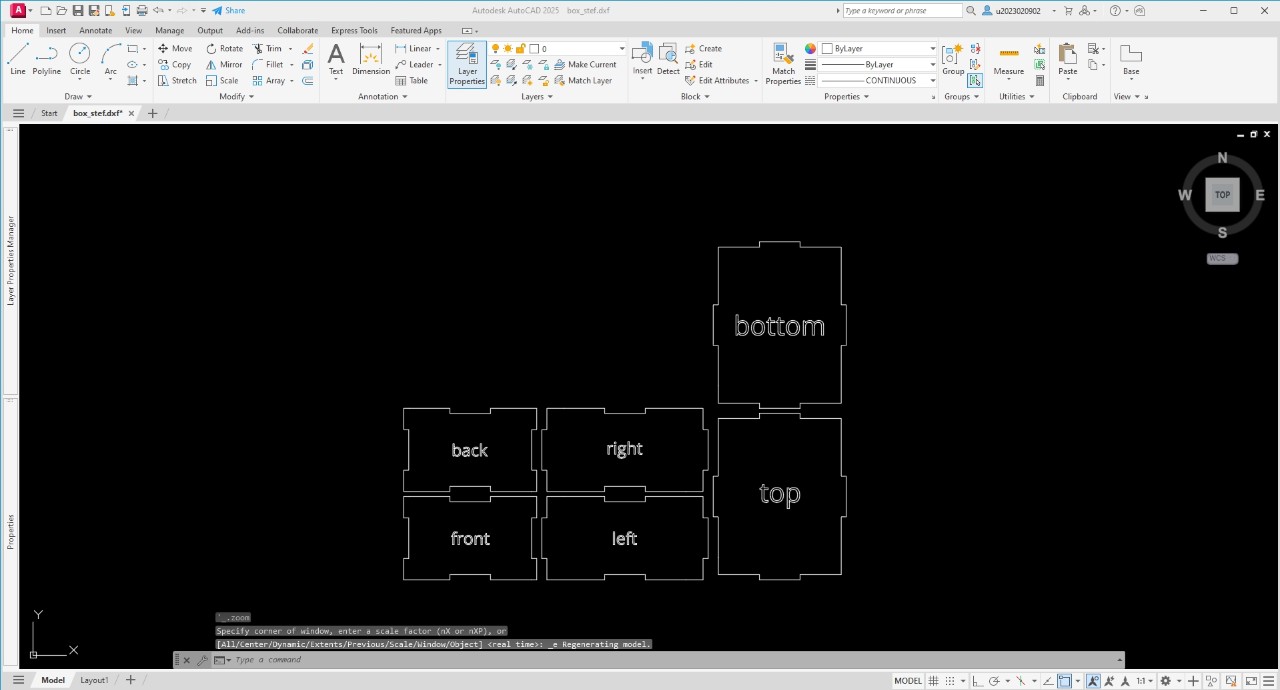
Export in .dxf format
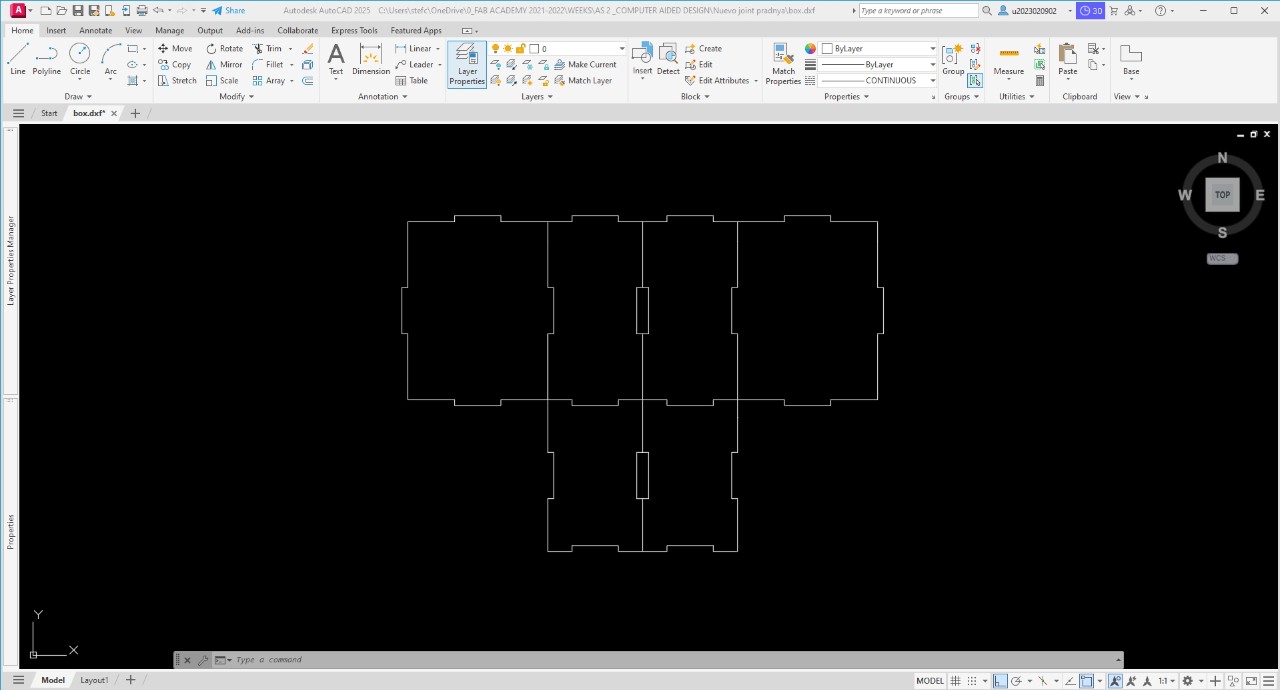
Optimization of parts for cutting
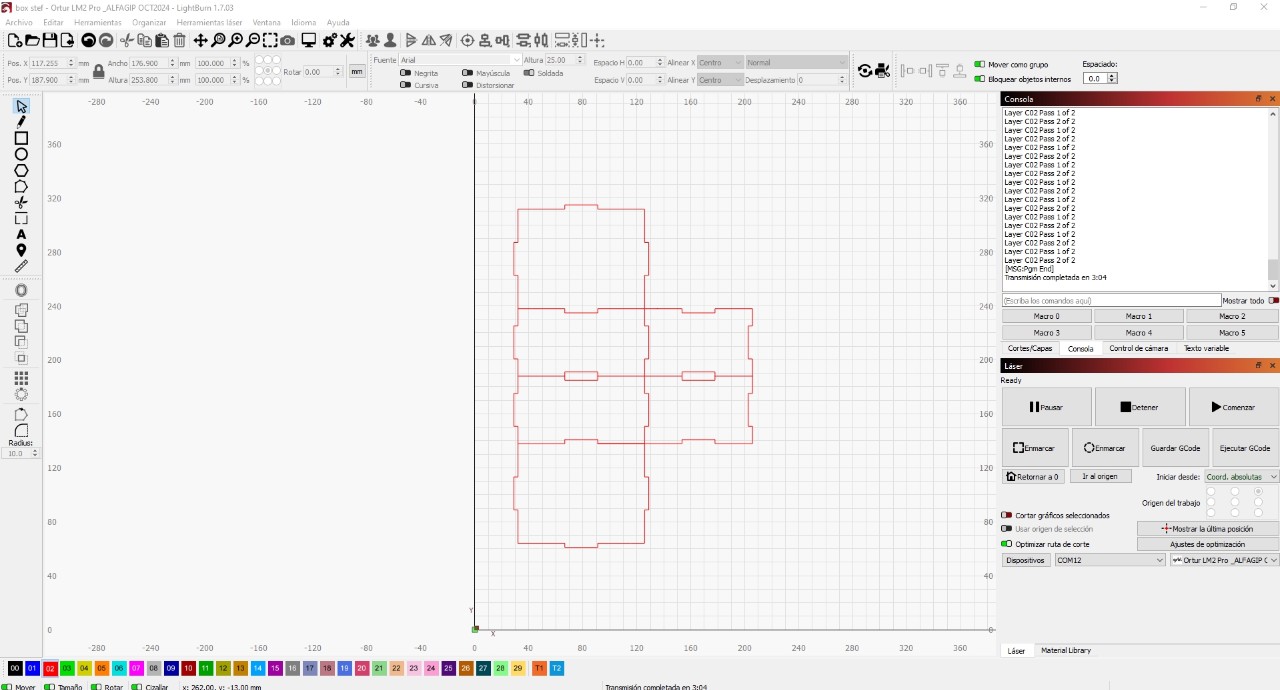
Import file to LightBurn
It's time for the fun part and that's manufacturing. Then I set everything up and the cutting began. I did some tests and then cut the optimized file to save time and resources.
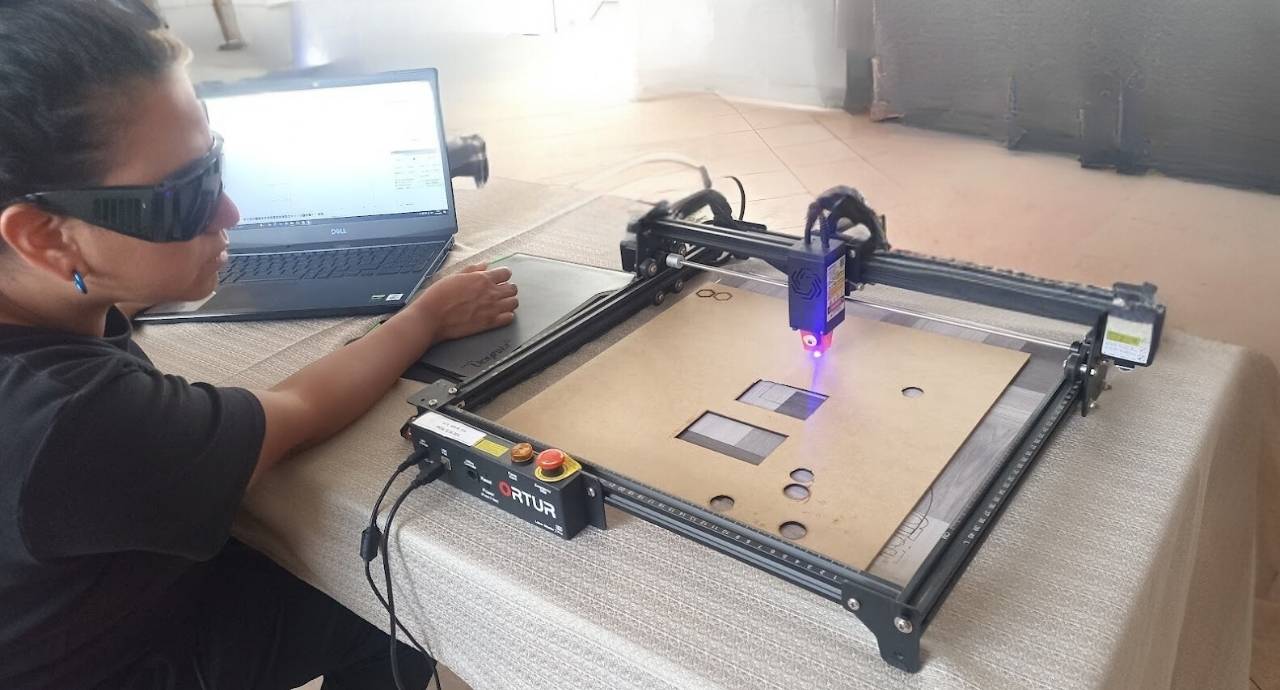
Cutting
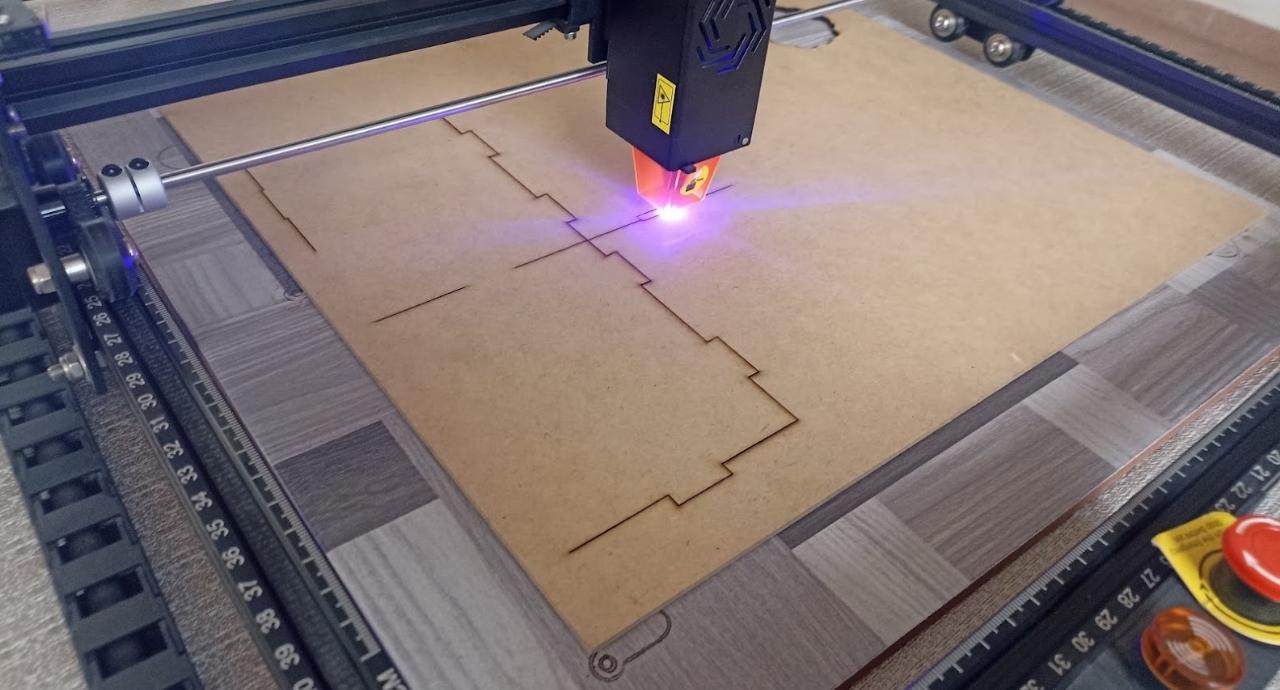
Cutting pieces
Laser cutting on mdf 3mm
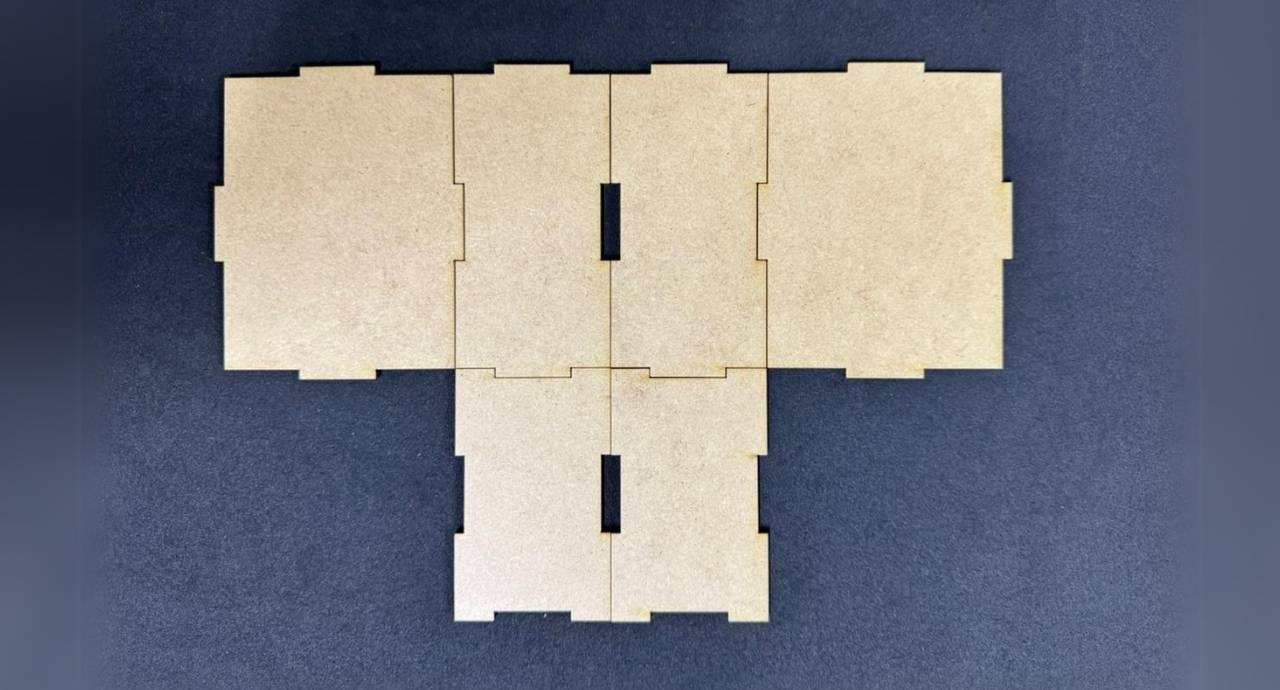
Cut pieces
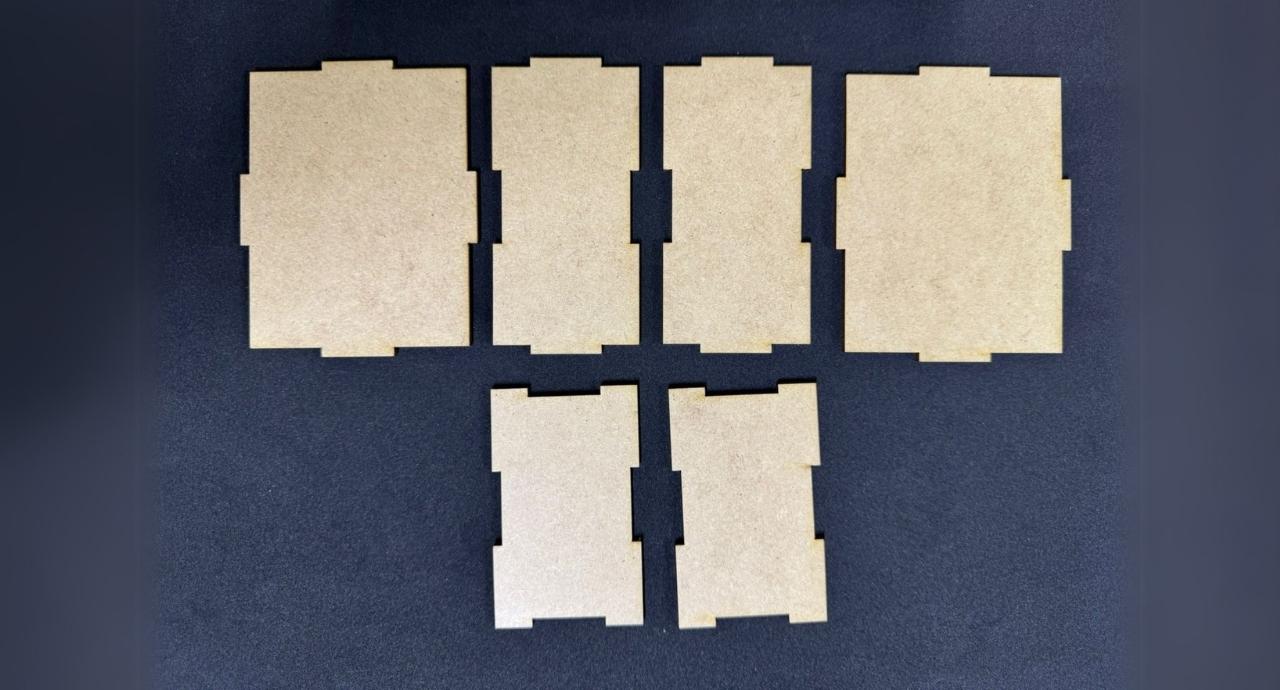
Cut pieces
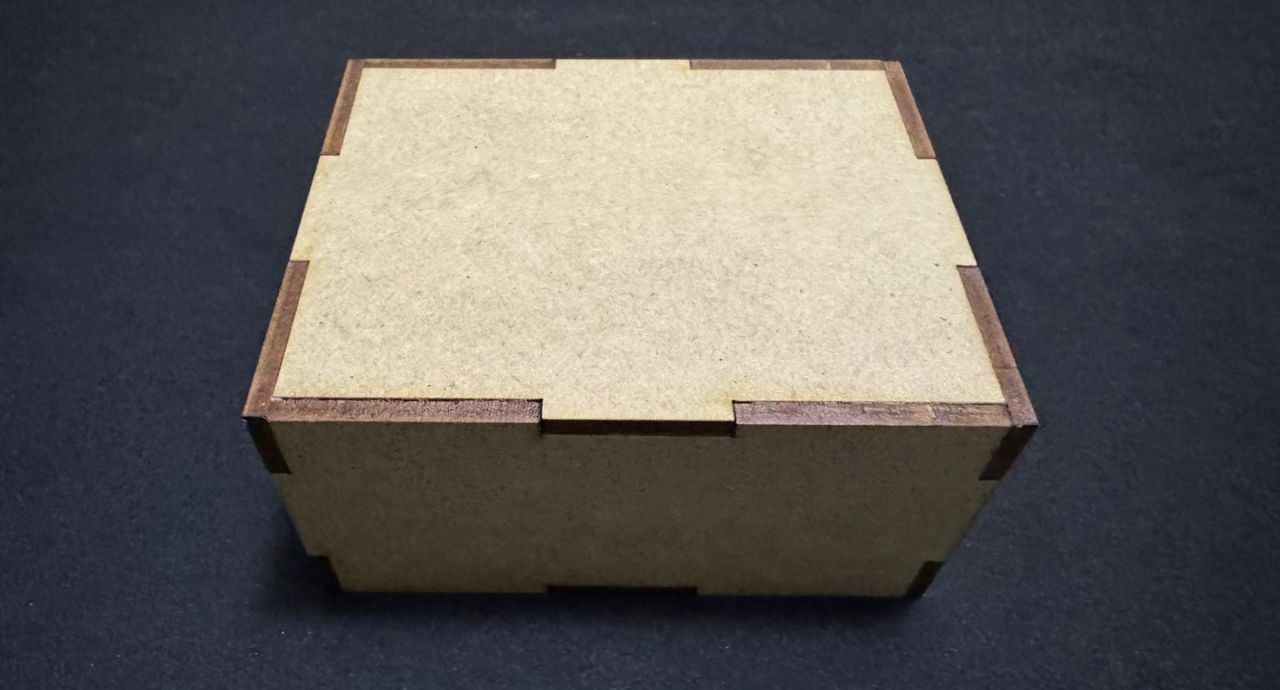
Finished box, complete Joint!
IndividualTask: Vinyl Cutting
Thanks to the Fab Lab team, each member was able to take the vinyl cutter home during the pandemic and confinement. We were able to practice with it in peace and quiet.

Testingoperation
As a first step I made a test of a small rectangle. And I activated the machine in cutting mode. Previously it was necessary to check the blade accessory to make sure it cut correctly. The first test was successful.

Configuration

activate the cut-off

Vinyl cut ready

Cutting letters

finished logo

holographic intent
The vinyl cutter works on the y, x, and y axes and with the correct blade can cut designs accurately. It is important that the vinyl to be cut is securely attached to the plate where it is adhered for cutting.
Cutter working

Challenge completed
AboutLearning
- Both the laser cutter and the vinyl cutter are computerized numerical control machines, so they must be designed precisely for optimal cutting.
- Also, always be careful with the electrical system where you are going to connect the laser cutter, to avoid power surges. Finally, the laser cutter emits emissions, while the vinyl cutter does not. The space should always be properly ventilated.
- It is not advisable to cut materials containing PVC, due to the toxic emissions it emits when cut.
My Verdictfrom what I learned
- Due to the pandemic, I was only able to have the vinyl cutter for a short time, I would have loved to cut more designs.
- Parametric design and grasshopper are highly powerful 3D digital design tools. For this exercise they were excellent allies.